120
www.novell.com/documentation ZENworks Linux Package Management Reference ZENworks® 11 Support Pack 2 March 2013

www.novell.com/documentation
ZENworks Linux Package Management ReferenceZENworks® 11 Support Pack 2
March 2013

Legal Notices
Novell, Inc. makes no representations or warranties with respect to the contents or use of this documentation, and specifically disclaims any express or implied warranties of merchantability or fitness for any particular purpose. Further, Novell, Inc. reserves the right to revise this publication and to make changes to its content, at any time, without obligation to notify any person or entity of such revisions or changes.
Further, Novell, Inc. makes no representations or warranties with respect to any software, and specifically disclaims any express or implied warranties of merchantability or fitness for any particular purpose. Further, Novell, Inc. reserves the right to make changes to any and all parts of Novell software, at any time, without any obligation to notify any person or entity of such changes.
Any products or technical information provided under this Agreement may be subject to U.S. export controls and the trade laws of other countries. You agree to comply with all export control regulations and to obtain any required licenses or classification to export, re-export or import deliverables. You agree not to export or re-export to entities on the current U.S. export exclusion lists or to any embargoed or terrorist countries as specified in the U.S. export laws. You agree to not use deliverables for prohibited nuclear, missile, or chemical biological weaponry end uses. See the Novell International Trade Services Web page (http://www.novell.com/info/exports/) for more information on exporting Novell software. Novell assumes no responsibility for your failure to obtain any necessary export approvals.
Copyright © 2007-2013 Novell, Inc. All rights reserved. No part of this publication may be reproduced, photocopied, stored on a retrieval system, or transmitted without the express written consent of the publisher.
Novell, Inc.1800 South Novell PlaceProvo, UT 84606U.S.A.www.novell.com
Online Documentation: To access the latest online documentation for this and other Novell products, see the Novell Documentation Web page (http://www.novell.com/documentation).
Novell Trademarks
For Novell trademarks, see the Novell Trademark and Service Mark list (http://www.novell.com/company/legal/trademarks/tmlist.html).
Third-Party Materials
All third-party trademarks are the property of their respective owners.

Contents
About This Guide 9
Part I Linux Package Management Overview 11
1 Understanding Linux Package Management 13
1.1 Using ZENworks Functionality to Patch Linux Devices . . . . . . . . . . . . . . . . . . . . . . . . . . . . . . . . . . . 131.1.1 Patch Management . . . . . . . . . . . . . . . . . . . . . . . . . . . . . . . . . . . . . . . . . . . . . . . . . . . . . . . 131.1.2 Linux Package Management . . . . . . . . . . . . . . . . . . . . . . . . . . . . . . . . . . . . . . . . . . . . . . . . 13
1.2 Using Linux Package Management . . . . . . . . . . . . . . . . . . . . . . . . . . . . . . . . . . . . . . . . . . . . . . . . . . 141.2.1 Managing and Resolving Package Dependencies . . . . . . . . . . . . . . . . . . . . . . . . . . . . . . . 141.2.2 Downloading the Delta RPM Packages to your Devices . . . . . . . . . . . . . . . . . . . . . . . . . . . 141.2.3 Setting Up a Subscription to the Repositories and Replicating Content to ZENworks
Primary Servers . . . . . . . . . . . . . . . . . . . . . . . . . . . . . . . . . . . . . . . . . . . . . . . . . . . . . . . . . . 141.3 Understanding RPM Packages . . . . . . . . . . . . . . . . . . . . . . . . . . . . . . . . . . . . . . . . . . . . . . . . . . . . . 151.4 Understanding the Repositories. . . . . . . . . . . . . . . . . . . . . . . . . . . . . . . . . . . . . . . . . . . . . . . . . . . . . 15
1.4.1 NU Repository . . . . . . . . . . . . . . . . . . . . . . . . . . . . . . . . . . . . . . . . . . . . . . . . . . . . . . . . . . . 161.4.2 RCE Repository . . . . . . . . . . . . . . . . . . . . . . . . . . . . . . . . . . . . . . . . . . . . . . . . . . . . . . . . . . 161.4.3 Red Hat Network . . . . . . . . . . . . . . . . . . . . . . . . . . . . . . . . . . . . . . . . . . . . . . . . . . . . . . . . . 161.4.4 YUM or RPM-MD Repository. . . . . . . . . . . . . . . . . . . . . . . . . . . . . . . . . . . . . . . . . . . . . . . . 161.4.5 ZENworks Linux Management Repository . . . . . . . . . . . . . . . . . . . . . . . . . . . . . . . . . . . . . 16
1.5 Patching the Client Systems . . . . . . . . . . . . . . . . . . . . . . . . . . . . . . . . . . . . . . . . . . . . . . . . . . . . . . . 161.6 Registering with the Novell Customer Center . . . . . . . . . . . . . . . . . . . . . . . . . . . . . . . . . . . . . . . . . . 16
1.6.1 Registering through ZENworks Control Center . . . . . . . . . . . . . . . . . . . . . . . . . . . . . . . . . . 171.6.2 Registering through the zman Command . . . . . . . . . . . . . . . . . . . . . . . . . . . . . . . . . . . . . . 171.6.3 Configuring the Novell Customer Center Proxy Settings. . . . . . . . . . . . . . . . . . . . . . . . . . . 18
Part II Subscriptions 19
2 Introduction 21
2.1 Understanding the Subscription Types . . . . . . . . . . . . . . . . . . . . . . . . . . . . . . . . . . . . . . . . . . . . . . . 212.2 Configuring the Subscription Settings . . . . . . . . . . . . . . . . . . . . . . . . . . . . . . . . . . . . . . . . . . . . . . . . 22
2.2.1 Subscription Replication Settings . . . . . . . . . . . . . . . . . . . . . . . . . . . . . . . . . . . . . . . . . . . . 222.2.2 Subscription Performance Settings . . . . . . . . . . . . . . . . . . . . . . . . . . . . . . . . . . . . . . . . . . . 22
2.3 Proxy Settings for Subscriptions . . . . . . . . . . . . . . . . . . . . . . . . . . . . . . . . . . . . . . . . . . . . . . . . . . . . 23
3 Creating Subscriptions 25
3.1 Prerequisites for Creating Subscriptions . . . . . . . . . . . . . . . . . . . . . . . . . . . . . . . . . . . . . . . . . . . . . . 253.2 Creating Subscriptions by Using ZENworks Control Center . . . . . . . . . . . . . . . . . . . . . . . . . . . . . . . 263.3 Creating a Red Hat Subscription by Using nu.novell.com . . . . . . . . . . . . . . . . . . . . . . . . . . . . . . . . . 293.4 Creating Subscriptions by Using the zman Command Line Utility . . . . . . . . . . . . . . . . . . . . . . . . . . . 30
4 Managing Subscriptions 33
4.1 Creating Folders. . . . . . . . . . . . . . . . . . . . . . . . . . . . . . . . . . . . . . . . . . . . . . . . . . . . . . . . . . . . . . . . . 334.2 Renaming, Copying, or Moving Subscriptions . . . . . . . . . . . . . . . . . . . . . . . . . . . . . . . . . . . . . . . . . . 344.3 Editing Subscriptions . . . . . . . . . . . . . . . . . . . . . . . . . . . . . . . . . . . . . . . . . . . . . . . . . . . . . . . . . . . . . 34
Contents 3

4 ZEN
4.4 Replicating Content . . . . . . . . . . . . . . . . . . . . . . . . . . . . . . . . . . . . . . . . . . . . . . . . . . . . . . . . . . . . . . 374.4.1 Starting a Replication. . . . . . . . . . . . . . . . . . . . . . . . . . . . . . . . . . . . . . . . . . . . . . . . . . . . . . 374.4.2 Canceling a Replication . . . . . . . . . . . . . . . . . . . . . . . . . . . . . . . . . . . . . . . . . . . . . . . . . . . . 384.4.3 Suspending a Replication . . . . . . . . . . . . . . . . . . . . . . . . . . . . . . . . . . . . . . . . . . . . . . . . . . 394.4.4 Resuming a Suspended Replication . . . . . . . . . . . . . . . . . . . . . . . . . . . . . . . . . . . . . . . . . . 40
4.5 Enabling or Disabling Subscriptions. . . . . . . . . . . . . . . . . . . . . . . . . . . . . . . . . . . . . . . . . . . . . . . . . . 404.5.1 Disabling Subscriptions . . . . . . . . . . . . . . . . . . . . . . . . . . . . . . . . . . . . . . . . . . . . . . . . . . . . 404.5.2 Enabling the Disabled Subscriptions . . . . . . . . . . . . . . . . . . . . . . . . . . . . . . . . . . . . . . . . . . 40
4.6 Deleting Subscriptions and Subscription Folders. . . . . . . . . . . . . . . . . . . . . . . . . . . . . . . . . . . . . . . . 41
5 Verifying the Remote Server Certificate 43
5.1 Importing the Untrusted Certificates by Using ZENworks Control Center . . . . . . . . . . . . . . . . . . . . . 435.2 Importing the Untrusted Certificates by Using the zman Command Line Utility. . . . . . . . . . . . . . . . . 445.3 Update the Existing Remote Server Certificate . . . . . . . . . . . . . . . . . . . . . . . . . . . . . . . . . . . . . . . . . 44
Part III Bundles for Linux Devices 45
6 Using Bundles for Linux Devices 47
6.1 Package and Bundle Flags . . . . . . . . . . . . . . . . . . . . . . . . . . . . . . . . . . . . . . . . . . . . . . . . . . . . . . . . 476.2 Creating Linux Bundles . . . . . . . . . . . . . . . . . . . . . . . . . . . . . . . . . . . . . . . . . . . . . . . . . . . . . . . . . . . 48
6.2.1 Using ZENworks Control Center to Create a Bundle. . . . . . . . . . . . . . . . . . . . . . . . . . . . . . 486.2.2 Mirroring Content from Repositories to Create a Bundle. . . . . . . . . . . . . . . . . . . . . . . . . . . 496.2.3 Using the zman Command to Create a Bundle . . . . . . . . . . . . . . . . . . . . . . . . . . . . . . . . . . 496.2.4 Adding Additional Targets to Packages in an Existing Linux Bundle. . . . . . . . . . . . . . . . . . 50
6.3 Creating Linux Dependency Bundles. . . . . . . . . . . . . . . . . . . . . . . . . . . . . . . . . . . . . . . . . . . . . . . . . 506.3.1 Mirroring Content From Repositories to Create Bundle. . . . . . . . . . . . . . . . . . . . . . . . . . . . 506.3.2 Using ZENworks Control Center to Create a Bundle. . . . . . . . . . . . . . . . . . . . . . . . . . . . . . 516.3.3 Using the zman Command to Create a Bundle . . . . . . . . . . . . . . . . . . . . . . . . . . . . . . . . . . 526.3.4 Adding Packages to an Existing Linux Dependency Bundle . . . . . . . . . . . . . . . . . . . . . . . . 53
6.4 Creating and Managing YUM Services for Bundles on Linux Devices. . . . . . . . . . . . . . . . . . . . . . . . 536.4.1 Creating a YUM Service . . . . . . . . . . . . . . . . . . . . . . . . . . . . . . . . . . . . . . . . . . . . . . . . . . . 536.4.2 Editing a YUM Service. . . . . . . . . . . . . . . . . . . . . . . . . . . . . . . . . . . . . . . . . . . . . . . . . . . . . 546.4.3 Removing a YUM Service . . . . . . . . . . . . . . . . . . . . . . . . . . . . . . . . . . . . . . . . . . . . . . . . . . 55
6.5 Managing Bundles for Linux Devices. . . . . . . . . . . . . . . . . . . . . . . . . . . . . . . . . . . . . . . . . . . . . . . . . 55
7 Actions 57
7.1 Adding Actions by Using ZENworks Control Center . . . . . . . . . . . . . . . . . . . . . . . . . . . . . . . . . . . . . 577.1.1 Action - Create / Delete Directory . . . . . . . . . . . . . . . . . . . . . . . . . . . . . . . . . . . . . . . . . . . . 587.1.2 Action - Display Message . . . . . . . . . . . . . . . . . . . . . . . . . . . . . . . . . . . . . . . . . . . . . . . . . . 587.1.3 Action - Edit Text File. . . . . . . . . . . . . . . . . . . . . . . . . . . . . . . . . . . . . . . . . . . . . . . . . . . . . . 597.1.4 Action - File Removal. . . . . . . . . . . . . . . . . . . . . . . . . . . . . . . . . . . . . . . . . . . . . . . . . . . . . . 597.1.5 Action - Install Bundle . . . . . . . . . . . . . . . . . . . . . . . . . . . . . . . . . . . . . . . . . . . . . . . . . . . . . 597.1.6 Action - Install Directory. . . . . . . . . . . . . . . . . . . . . . . . . . . . . . . . . . . . . . . . . . . . . . . . . . . . 597.1.7 Action - Install Files . . . . . . . . . . . . . . . . . . . . . . . . . . . . . . . . . . . . . . . . . . . . . . . . . . . . . . . 607.1.8 Action - Install RPMs . . . . . . . . . . . . . . . . . . . . . . . . . . . . . . . . . . . . . . . . . . . . . . . . . . . . . . 627.1.9 Action - Launch Bundle . . . . . . . . . . . . . . . . . . . . . . . . . . . . . . . . . . . . . . . . . . . . . . . . . . . . 647.1.10 Action - Launch Java Application. . . . . . . . . . . . . . . . . . . . . . . . . . . . . . . . . . . . . . . . . . . . . 647.1.11 Action - Launch Linux Executable . . . . . . . . . . . . . . . . . . . . . . . . . . . . . . . . . . . . . . . . . . . . 647.1.12 Action - Prompt User . . . . . . . . . . . . . . . . . . . . . . . . . . . . . . . . . . . . . . . . . . . . . . . . . . . . . . 657.1.13 Action - Reboot/Shutdown . . . . . . . . . . . . . . . . . . . . . . . . . . . . . . . . . . . . . . . . . . . . . . . . . . 657.1.14 Action - Run Script . . . . . . . . . . . . . . . . . . . . . . . . . . . . . . . . . . . . . . . . . . . . . . . . . . . . . . . . 657.1.15 Action - Start/Stop Service. . . . . . . . . . . . . . . . . . . . . . . . . . . . . . . . . . . . . . . . . . . . . . . . . . 667.1.16 Action - Uninstall Bundle . . . . . . . . . . . . . . . . . . . . . . . . . . . . . . . . . . . . . . . . . . . . . . . . . . . 667.1.17 Action - Uninstall RPMs . . . . . . . . . . . . . . . . . . . . . . . . . . . . . . . . . . . . . . . . . . . . . . . . . . . . 66
works 11 SP2 Linux Package Management Reference

7.2 Adding Actions by Using the zman Command. . . . . . . . . . . . . . . . . . . . . . . . . . . . . . . . . . . . . . . . . . 66
Part IV External Services 69
8 Subscribing to External Services 71
8.1 Subscribing to the External Services . . . . . . . . . . . . . . . . . . . . . . . . . . . . . . . . . . . . . . . . . . . . . . . . . 718.1.1 Using the zac Command . . . . . . . . . . . . . . . . . . . . . . . . . . . . . . . . . . . . . . . . . . . . . . . . . . . 718.1.2 Using the ZENworks Icon . . . . . . . . . . . . . . . . . . . . . . . . . . . . . . . . . . . . . . . . . . . . . . . . . . 71
8.2 Removing the External Services . . . . . . . . . . . . . . . . . . . . . . . . . . . . . . . . . . . . . . . . . . . . . . . . . . . . 728.2.1 Using the zac Command . . . . . . . . . . . . . . . . . . . . . . . . . . . . . . . . . . . . . . . . . . . . . . . . . . . 728.2.2 Using the ZENworks Icon . . . . . . . . . . . . . . . . . . . . . . . . . . . . . . . . . . . . . . . . . . . . . . . . . . 72
Part V Package Management Features on Managed Devices 73
9 Understanding the Package Management Features Available on a Managed Device 75
9.1 Installing the Packages . . . . . . . . . . . . . . . . . . . . . . . . . . . . . . . . . . . . . . . . . . . . . . . . . . . . . . . . . . . 759.1.1 Installing Patterns . . . . . . . . . . . . . . . . . . . . . . . . . . . . . . . . . . . . . . . . . . . . . . . . . . . . . . . . 76
9.2 Upgrading the Packages . . . . . . . . . . . . . . . . . . . . . . . . . . . . . . . . . . . . . . . . . . . . . . . . . . . . . . . . . . 769.3 Uninstalling the Packages . . . . . . . . . . . . . . . . . . . . . . . . . . . . . . . . . . . . . . . . . . . . . . . . . . . . . . . . . 779.4 Rolling Back to a Previously Installed Software Configuration State . . . . . . . . . . . . . . . . . . . . . . . . . 779.5 Adding or Removing Package Locks . . . . . . . . . . . . . . . . . . . . . . . . . . . . . . . . . . . . . . . . . . . . . . . . . 78
9.5.1 Adding a Package Lock . . . . . . . . . . . . . . . . . . . . . . . . . . . . . . . . . . . . . . . . . . . . . . . . . . . . 789.5.2 Removing a Package Lock . . . . . . . . . . . . . . . . . . . . . . . . . . . . . . . . . . . . . . . . . . . . . . . . . 79
9.6 Adding and Removing Bundle Locks . . . . . . . . . . . . . . . . . . . . . . . . . . . . . . . . . . . . . . . . . . . . . . . . . 799.6.1 Adding a Bundle Lock . . . . . . . . . . . . . . . . . . . . . . . . . . . . . . . . . . . . . . . . . . . . . . . . . . . . . 809.6.2 Removing a Bundle Lock. . . . . . . . . . . . . . . . . . . . . . . . . . . . . . . . . . . . . . . . . . . . . . . . . . . 809.6.3 Impact of a Bundle Lock on Bundle Operations . . . . . . . . . . . . . . . . . . . . . . . . . . . . . . . . . 80
9.7 Displaying Package Information. . . . . . . . . . . . . . . . . . . . . . . . . . . . . . . . . . . . . . . . . . . . . . . . . . . . . 819.8 Displaying the Package Transaction History . . . . . . . . . . . . . . . . . . . . . . . . . . . . . . . . . . . . . . . . . . . 819.9 Performing a Distribution Upgrade. . . . . . . . . . . . . . . . . . . . . . . . . . . . . . . . . . . . . . . . . . . . . . . . . . . 82
Part VI Reports 83
10 Reports 85
10.1 Predefined Reports . . . . . . . . . . . . . . . . . . . . . . . . . . . . . . . . . . . . . . . . . . . . . . . . . . . . . . . . . . . . . . 8510.2 Viewing a Predefined Report . . . . . . . . . . . . . . . . . . . . . . . . . . . . . . . . . . . . . . . . . . . . . . . . . . . . . . . 85
Part VII Appendixes 87
A Troubleshooting Linux Package Management 89
B Upgrading to OES 2 SP2 by Using a ZENworks 11 SP2 Server 93
B.1 Preparing the Environment . . . . . . . . . . . . . . . . . . . . . . . . . . . . . . . . . . . . . . . . . . . . . . . . . . . . . . . . 93B.2 Replicating the Channels to Your ZENworks 11 SP2 Server. . . . . . . . . . . . . . . . . . . . . . . . . . . . . . . 94B.3 Creating a Password Answer File . . . . . . . . . . . . . . . . . . . . . . . . . . . . . . . . . . . . . . . . . . . . . . . . . . . 94B.4 Preparing the Bundles for Upgrading. . . . . . . . . . . . . . . . . . . . . . . . . . . . . . . . . . . . . . . . . . . . . . . . . 95B.5 Preparing the OES 2 SP1 Servers for Upgrading . . . . . . . . . . . . . . . . . . . . . . . . . . . . . . . . . . . . . . . 95B.6 Assigning the Bundles and Scheduling the Upgrades . . . . . . . . . . . . . . . . . . . . . . . . . . . . . . . . . . . . 95
Contents 5
6 ZEN
C Upgrading to OES 2 SP3 by Using a ZENworks 11 SP2 Server 97
C.1 Preparing the Environment . . . . . . . . . . . . . . . . . . . . . . . . . . . . . . . . . . . . . . . . . . . . . . . . . . . . . . . . 97C.2 Replicating the Channels to Your ZENworks 11 SP2 Server. . . . . . . . . . . . . . . . . . . . . . . . . . . . . . . 98C.3 Creating a Password Answer File . . . . . . . . . . . . . . . . . . . . . . . . . . . . . . . . . . . . . . . . . . . . . . . . . . . 98C.4 Preparing the Bundles for Upgrading. . . . . . . . . . . . . . . . . . . . . . . . . . . . . . . . . . . . . . . . . . . . . . . . . 98C.5 Preparing the OES 2 SP2 Servers for Upgrading . . . . . . . . . . . . . . . . . . . . . . . . . . . . . . . . . . . . . . . 99C.6 Assigning the Bundles and Scheduling the Upgrades . . . . . . . . . . . . . . . . . . . . . . . . . . . . . . . . . . . . 99
D Upgrading to OES 11 SP1 by Using a ZENworks 11 SP2 Server 101
D.1 Preparing the Environment . . . . . . . . . . . . . . . . . . . . . . . . . . . . . . . . . . . . . . . . . . . . . . . . . . . . . . . 101D.2 Replicating the Channels to Your ZENworks 11 SP2 Server. . . . . . . . . . . . . . . . . . . . . . . . . . . . . . 101D.3 Preparing the Bundles for Upgrading. . . . . . . . . . . . . . . . . . . . . . . . . . . . . . . . . . . . . . . . . . . . . . . . 102D.4 Preparing the OES 11 Servers for Upgrading . . . . . . . . . . . . . . . . . . . . . . . . . . . . . . . . . . . . . . . . . 102D.5 Assigning the Bundles and Scheduling the Upgrades . . . . . . . . . . . . . . . . . . . . . . . . . . . . . . . . . . . 103
D.5.1 Assigning the SLES11-SP2-Core Bundle to the OES 11 Servers. . . . . . . . . . . . . . . . . . . 103D.5.2 Assigning the OES11-SP1-Pool Bundle to the OES 11 Servers . . . . . . . . . . . . . . . . . . . . 103D.5.3 Assigning the SLES11-SP2-Updates Bundle to the OES 11 Servers . . . . . . . . . . . . . . . . 103D.5.4 Assigning the OES11Upgrade Bundle to the OES 11 Servers . . . . . . . . . . . . . . . . . . . . . 104
D.6 Reconfiguring OES Services after Rebooting . . . . . . . . . . . . . . . . . . . . . . . . . . . . . . . . . . . . . . . . . 104
E Upgrading Base SLES10 SP3 to SLES10 SP4 for OES 2 SP3 By Using a ZENworks 11 SP2 Server 105
E.1 Preparing the Environment . . . . . . . . . . . . . . . . . . . . . . . . . . . . . . . . . . . . . . . . . . . . . . . . . . . . . . . 105E.2 Replicating the Channels to Your ZENworks 11 SP2 Server. . . . . . . . . . . . . . . . . . . . . . . . . . . . . . 106E.3 Preparing the Bundles for Upgrading. . . . . . . . . . . . . . . . . . . . . . . . . . . . . . . . . . . . . . . . . . . . . . . . 106E.4 Preparing the OES 2 SP3 (Base SLES 10 SP3) Servers for Upgrading . . . . . . . . . . . . . . . . . . . . . 106E.5 Assigning the Bundles and Scheduling the Upgrades . . . . . . . . . . . . . . . . . . . . . . . . . . . . . . . . . . . 106E.6 Assigning the SLES10-SP4-Updates Bundle to the Servers . . . . . . . . . . . . . . . . . . . . . . . . . . . . . . 107
F Using ZENworks 11 SP2 to Upgrade from SUSE Linux Enterprise Server 11 SP1 to SUSE Linux Enterprise Server 11 SP2 109
F.1 To upgrade from SLES 11 SP1 to SLES 11 SP2: . . . . . . . . . . . . . . . . . . . . . . . . . . . . . . . . . . . . . . 109
G Using a ZENworks 11 SP2 Server to Patch OES 11 111
G.1 Preparing the Environment . . . . . . . . . . . . . . . . . . . . . . . . . . . . . . . . . . . . . . . . . . . . . . . . . . . . . . . 111G.2 Replicating the Channels to Your ZENworks 11 SP2 Server. . . . . . . . . . . . . . . . . . . . . . . . . . . . . . 111G.3 Preparing the OES 11 Servers for Patching . . . . . . . . . . . . . . . . . . . . . . . . . . . . . . . . . . . . . . . . . . 112G.4 Assigning the Bundles and Scheduling the Patching. . . . . . . . . . . . . . . . . . . . . . . . . . . . . . . . . . . . 112
G.4.1 Assigning SLES11-SP1-Pool to the OES 11 Servers . . . . . . . . . . . . . . . . . . . . . . . . . . . . 112G.4.2 Assigning the OES11-Pool to the OES 11 Servers . . . . . . . . . . . . . . . . . . . . . . . . . . . . . . 112G.4.3 Assigning SLES11-SP1-Updates to the OES 11 Servers . . . . . . . . . . . . . . . . . . . . . . . . . 113G.4.4 Assigning OES11-Updates to the OES 11 Servers . . . . . . . . . . . . . . . . . . . . . . . . . . . . . . 113
H Using a ZENworks 11 SP2 Server to Patch OES 11 SP1 115
H.1 Preparing the Environment . . . . . . . . . . . . . . . . . . . . . . . . . . . . . . . . . . . . . . . . . . . . . . . . . . . . . . . 115H.2 Replicating the Channels to Your ZENworks 11 SP2 Server. . . . . . . . . . . . . . . . . . . . . . . . . . . . . . 115H.3 Preparing the OES 11 SP1 Servers for Patching. . . . . . . . . . . . . . . . . . . . . . . . . . . . . . . . . . . . . . . 116H.4 Assigning the Bundles and Scheduling the Patching. . . . . . . . . . . . . . . . . . . . . . . . . . . . . . . . . . . . 116
H.4.1 Assigning SLES11-SP1-Pool to the OES 11 SP1 Servers . . . . . . . . . . . . . . . . . . . . . . . . 116
works 11 SP2 Linux Package Management Reference
H.4.2 Assigning SLES11-SP2-Core to the OES 11 SP1 Servers . . . . . . . . . . . . . . . . . . . . . . . . 117H.4.3 Assigning the OES11-SP1-Pool to the OES 11 SP1 Servers . . . . . . . . . . . . . . . . . . . . . . 117H.4.4 Assigning SLES11-SP1-Updates to the OES 11 SP1 Servers . . . . . . . . . . . . . . . . . . . . . 117H.4.5 Assigning SLES11-SP2-Updates to the OES 11 SP1 Servers . . . . . . . . . . . . . . . . . . . . . 118H.4.6 Assigning OES11-SP1-Updates to the OES 11 SP1 Servers . . . . . . . . . . . . . . . . . . . . . . 118
I Documentation Updates 119
I.1 March 2013: Update to ZENworks 11 SP2 (11.2.3) . . . . . . . . . . . . . . . . . . . . . . . . . . . . . . . . . . . . . 119I.2 November 2012: Update to ZENworks 11 SP2 (11.2.2) . . . . . . . . . . . . . . . . . . . . . . . . . . . . . . . . . 119I.3 August 2012: Update for ZENworks 11 SP2 (11.2.1) . . . . . . . . . . . . . . . . . . . . . . . . . . . . . . . . . . . 120
Contents 7

8 ZENworks 11 SP2 Linux Package Management Reference

About This Guide
This Novell ZENworks 11 SP2 Configuration Management Linux Package Management Reference includes conceptual and task based information that makes it easy to manage the required software packages for Linux managed devices through the graphical user interface or the command line utility
The information in this guide is organized as follows:
Part I, “Linux Package Management Overview,” on page 11 Part II, “Subscriptions,” on page 19 Part III, “Bundles for Linux Devices,” on page 45 Part IV, “External Services,” on page 69 Part V, “Package Management Features on Managed Devices,” on page 73 Part VI, “Reports,” on page 83 Part VII, “Appendixes,” on page 87 Appendix I, “Documentation Updates,” on page 119
Audience
This guide is intended for ZENworks administrators.
Feedback
We want to hear your comments and suggestions about this manual and the other documentation included with this product. Please use the User Comments feature at the bottom of each page of the online documentation.
Additional Documentation
ZENworks 11 SP2 is supported by other documentation (in both PDF and HTML formats) that you can use to learn about and implement the product. For additional documentation, see the ZENworks 11 SP2 documentation Web site (http://www.novell.com/documentation/zenworks11/).
About This Guide 9

10 ZENworks 11 SP2 Linux Package Management Reference

I ILinux Package Management Overview
ZENworks 11 SP2 Configuration Management provides an integrated Linux Package Management system that helps you to easily manage the required software packages for Linux managed devices through a graphical user interface or a command line utility.
Linux Management makes it easy to adopt and extend Linux within your existing environment. It uses policy-driven automation to deploy, manage, and maintain Linux resources. The automated and intelligent policies allow you to provide centralized control across the life cycle of Linux systems for desktop lockdown, imaging, remote management, inventory management, and software management. The result is a comprehensive Linux management solution that eliminates IT effort by dramatically reducing the required overhead needed to manage Linux systems.
For more information, see the following section:
Chapter 1, “Understanding Linux Package Management,” on page 13.
Linux Package Management Overview 11

12 ZENworks 11 SP2 Linux Package Management Reference

1 1Understanding Linux Package Management
This chapter helps you to understand the different ways to patch your Linux devices and the different capabilities provided by Linux Package Management.
Section 1.1, “Using ZENworks Functionality to Patch Linux Devices,” on page 13 Section 1.2, “Using Linux Package Management,” on page 14 Section 1.3, “Understanding RPM Packages,” on page 15 Section 1.4, “Understanding the Repositories,” on page 15 Section 1.5, “Patching the Client Systems,” on page 16 Section 1.6, “Registering with the Novell Customer Center,” on page 16
1.1 Using ZENworks Functionality to Patch Linux DevicesZENworks provides two different ways to patch your Linux devices:
Section 1.1.1, “Patch Management,” on page 13 Section 1.1.2, “Linux Package Management,” on page 13
1.1.1 Patch Management
Patch Management is a fully integrated feature of Novell ZENworks 11 SP2 that provides an agent-based patch, a vulnerability patch, and a compliance management solution.
Patch Management provides the following capabilities:
It uses signatures to determine the required patches and reports them back for easy reporting. It implements mandatory baselines for certain patches to always be present on a device. It patches only the SLES and RHEL distributions.
For more information, see the ZENworks 11 SP2 Patch Management Reference.
1.1.2 Linux Package Management
Linux Package Management is intended to handle the package management functionality of ZENworks Configuration Management for Linux devices (servers and desktops).
Linux Package Management provides the following capabilities:
It provides single point management for patching, installing, and updating packages for large number of Linux devices at an enterprise level.
Understanding Linux Package Management 13

It mirrors updates and packages from the NU, RHN, RCE, and YUM repositories for patches and packages as ZENworks bundles. You can assign these bundles to Linux managed devices for package management.
It supports the download of delta RPMs on the managed devices whenever the delta RPMs are available and applicable, thereby reducing the bandwidth required when patching.
It allows you to choose the catalogs, packages, and bundles that you want to mirror. It allows you to patch OES servers.
1.2 Using Linux Package ManagementLinux Package Management in ZENworks Configuration Management provides the following functionalities:
Section 1.2.1, “Managing and Resolving Package Dependencies,” on page 14 Section 1.2.2, “Downloading the Delta RPM Packages to your Devices,” on page 14 Section 1.2.3, “Setting Up a Subscription to the Repositories and Replicating Content to
ZENworks Primary Servers,” on page 14
1.2.1 Managing and Resolving Package Dependencies
A package is a file that contains software metadata and all the files of the software. You can download the required packages or package updates from a remote repository by using subscriptions, and install them on your Linux devices by using the bundles created from subscriptions.
Packages can also depend on the functionality of other packages. Linux Package Management helps manage and resolve these dependencies automatically. You can use Linux bundles to store package updates and Linux Dependency bundles to provide dependent packages.
For more information on these bundles, see the Chapter 6, “Using Bundles for Linux Devices,” on page 47.
1.2.2 Downloading the Delta RPM Packages to your Devices
ZENworks 11 SP2 Configuration Management also lets you download delta RPM packages to your devices. Delta RPM packages contain the difference between an old and a new version of an RPM package. Applying a delta RPM on an older version of an RPM results in a new version of the RPM. It is not necessary to have a copy of the old RPM because a delta RPM can also work with an installed RPM. The delta RPM packages are smaller in size compared to the complete RPMs, which is an advantage when downloading package updates.
1.2.3 Setting Up a Subscription to the Repositories and Replicating Content to ZENworks Primary Servers
The Subscriptions feature in ZENworks 11 SP2 Configuration Management makes it easy to set up a subscription to the repositories such as Novell Update (NU), Red Carpet Enterprise (RCE), or to other external repositories such as Yellowdog Updater Modified (YUM, which is also called RPM-MD), so you can replicate content to the ZENworks Primary Servers. You can create Linux bundles or Linux Dependency bundles from these subscriptions and assign them to devices.
14 ZENworks 11 SP2 Linux Package Management Reference

1.3 Understanding RPM PackagesIn Linux Package Management, an RPM (RPM Package Manager) is used to manage software packages. You can use this package format to distribute the software packages either in the precompiled binary form or the source code form. The RPM packages are usually targeted at particular distributions. An RPM package file is identified with a .rpm extension.
You can install an RPM package either from an RPM file located on the local file system or from remote HTTP or FTP locations.
Each RPM package shares a list of binaries and libraries. These binaries and libraries might be required by other RPM packages during installation; if so, this creates a dependency. The RPM system cannot determine the packages that resolve such dependencies, so the ZENworks Management Daemon automatically searches for the packages in the repositories and downloads them to resolve the dependencies.
For example, if you request to install package A that depends on package B, and package B depends on package C, the ZENworks Management Daemon automatically finds the dependent packages B and C from the available repositories and installs them along with the requested package A.
The RPM Package Manager uses the following dependencies:
Requires: Lists packages and files that are required by the current package.
Provides: Lists packages and files that are provided by the current package.
Conflicts: Lists the packages that conflict with the current package.
Obsoletes: Lists the packages that the current package obsoletes.
You can download and install packages by using the rpm --install package_name and rpm --upgrade package_name commands. If you use these commands, you must manually find the package dependencies and install them.
1.4 Understanding the RepositoriesAn RPM repository, also known as a repo, is a storage location from which you can retrieve the software packages and install them on your device. You can also maintain these repositories on Internet servers.
For example, many Linux distributions use Advanced Package Management tools like YUM, ZYpper, or YaST to download and install the RPM packages from the repositories.
The following sections explain the different types of repositories and the distributions they are used in:
Section 1.4.1, “NU Repository,” on page 16 Section 1.4.2, “RCE Repository,” on page 16 Section 1.4.3, “Red Hat Network,” on page 16 Section 1.4.4, “YUM or RPM-MD Repository,” on page 16 Section 1.4.5, “ZENworks Linux Management Repository,” on page 16
Understanding Linux Package Management 15
1.4.1 NU Repository
The NU repository is a collection of YUM repositories. The NU repository hosts RPM packages and patches. It also contains several metadata files that contain all the required information about the packages and patches. This repository updates the distributions that are supported in ZENworks 11 SP2. For more information, see “Linux Managed Device Requirements” in the ZENworks 11 SP2 Server Installation Guide.
The NU repository is available at the Novell update (https://nu.novell.com/repo). This server requires authentication with your Novell account name and password.
1.4.2 RCE Repository
The RCE repository contains metadata files that contain the packages and patches along with their information. This repository updates the distributions that are supported in ZENworks 11 SP2. For more information, see “Linux Managed Device Requirements” in the ZENworks 11 SP2 Server Installation Guide.
This repository is available at Red Carpet Enterprise (https://update.novell.com/data). This server requires authentication with your Novell account name and password.
1.4.3 Red Hat Network
The Red Hat Network (RHN) repository contains metadata files that contain packages and patches. This repository updates the distributions that are supported in ZENworks 11 SP2. For more information, see “Linux Managed Device Requirements” in the ZENworks 11 SP2 Server Installation Guide:
1.4.4 YUM or RPM-MD Repository
The YUM repository, also referred to as the RPM-MD repository, is a collection of packages and metadata containing information about packages and patches. The metadata is hosted in the RPM-MD format that is used by the package management functionality.
1.4.5 ZENworks Linux Management Repository
You can use the ZENworks Linux Management repository to replicate content from the ZENworks 7.x Linux Management Server to the ZENworks Configuration Management Server.
1.5 Patching the Client SystemsThe best way to obtain updates is to periodically replicate the updates to the ZENworks Configuration Management server, and then assign the replicated bundle to the managed devices, which saves the Internet bandwidth.
1.6 Registering with the Novell Customer CenterNovell Customer Center is an online tool that makes it easier for you to manage your business and technical interactions with Novell. From one location, you can do the following:
Review the status of supported Novell products, subscriptions, and services
16 ZENworks 11 SP2 Linux Package Management Reference

Obtain support Get Linux updates and patches
ZENworks Configuration Management Server registers the zone with Novell Customer Center. The registration supplies the name and operating system information about each of the SUSE Linux devices (servers /agent) in the zone to Novell Customer Center so that from Novell Customer Center you can see the SUSE (servers/desktop) that are installed for licensing purposes.
For more information about Novell Customer Center, see the Novell Customer Center documentation (http://www.novell.com/documentation/ncc/index.html).
ZENworks Configuration Management helps you to register all SUSE Linux Enterprise Server (SLES) 10, SUSE Linux Enterprise Desktop (SLED) 10, SLES 11, and SLED 11 managed devices into Novell Customer Center at the same time. By integrating Novell Customer Center with the ZENworks Configuration Management server, you do not need to individually register each managed device with Novell Customer Center.
You can register with Novell Customer Center in any of the following ways:
Section 1.6.1, “Registering through ZENworks Control Center,” on page 17 Section 1.6.2, “Registering through the zman Command,” on page 17 Section 1.6.3, “Configuring the Novell Customer Center Proxy Settings,” on page 18
1.6.1 Registering through ZENworks Control Center
1 Log in to ZENworks Control Center, then click the Configuration tab.2 In Management Zone Settings, click Infrastructure Management > Novell Customer Center to display
the Novell Customer Center page.3 Configure the following settings to register the Linux devices and upload their basic hardware
inventory information to Novell Customer Center: In the Register field, select a server that you want to register with Novell Customer Center.
The drop-down list displays the Primary Servers in the Management Zone. Select the Enable link-up with Novell Customer Center option to enable the server to
periodically transmit information about itself and its devices to Novell Customer Center. The Recurring scheduling option lets you repeat the event at a specified interval. For more
information on the Recurring schedule type, see “Schedule Types” in the ZENworks 11 SP2 Primary Server and Satellite Reference.
4 Click Apply, then click OK.
1.6.2 Registering through the zman Command
You can use the following command to register your device with Novell Customer Center:
zman ncc-register e-mail_address registration_key Primary_Server_path --nccConfigXML --reRegister
email: The e-mail address to register the Primary Server with the Novell Customer Center Server.
registration-key: The registration key to register the Primary Server with the Novell Customer Center Server.
Primary Server path: The path of the Primary Server to register with the Novell Customer Center Server.
Understanding Linux Package Management 17

-i, --nccConfigXML= ncc-config.xml: The XML file that contains registration information such as the product, version, architecture, and release.
-r, --reRegister: Reregister the Primary Server with the Novell Customer Center Server.
Examples
To register the local Primary Server with the Novell Customer Center Server, run the following command:
zman ncc-register email reg-key
To register a specific Primary Server with the Novell Customer Center Server, run the following command:
zman ncc-register email reg-key server_path
To reregister the local Primary Server with the Novell Customer Center Server, run the following command:
zman ncc-register email reg-key --reRegister
To reregister a specific Primary Server with the Novell Customer Center Server, run the following command:
zman ncc-register email reg-key server_path --reRegister
1.6.3 Configuring the Novell Customer Center Proxy Settings
You can use the lpm-server.properties file to configure a proxy for both Novell Customer Center and for subscriptions.
If you do not want to use proxy settings for Novell Customer Center, set the value of the useNCCViaProxy key to False. This is the default setting.
If you want to use Novell Customer Center via a proxy, set the value of the useNCCViaProxy key to True.
If you want to use the same proxy for both subscriptions and Novell Customer Center, use subscription proxy key strings. If you want to use a separate proxy for Novell Customer Center, use ncc-proxy key strings.
The lpm-server.properties file is stored in the following locations:
On Windows: %ZENWORKS_HOME%\conf\lpm-server.properties
On Linux: /etc/opt/novell/zenworks/lpm-server.properties
18 ZENworks 11 SP2 Linux Package Management Reference

II IISubscriptions
The Subscriptions feature in ZENworks 11 SP2 Configuration Management makes it easy to set up a subscription to repositories such as Novell Update, Red Carpet Enterprise, or other external repositories, and replicate content to the ZENworks Primary Servers. The managed devices can obtain the updates directly from the ZENworks Server instead of obtaining them from the remote repositories. ZENworks 11 SP2 Configuration Management provides an easy-to-use graphical user interface to create these subscriptions. You can also specify a schedule to run the subscription replication.
Chapter 2, “Introduction,” on page 21 Chapter 3, “Creating Subscriptions,” on page 25 Chapter 4, “Managing Subscriptions,” on page 33 Chapter 5, “Verifying the Remote Server Certificate,” on page 43
Subscriptions 19

20 ZENworks 11 SP2 Linux Package Management Reference

2 2Introduction
ZENworks 11 SP2 Configuration Management lets you use subscriptions to replicate content from NU, RCE, RHN, YUM or RPM-MD (authenticated and unauthenticated), ZENworks Linux Management, and Static repositories.
Subscriptions help you to obtain most of the software you want to distribute to managed devices. You can create subscriptions to:
Select the targets for which to replicate the content and create bundles. Replicate content and create Linux bundles to deploy the software to managed devices. Replicate content and create Linux Dependency bundles to make the software packages
available to the managed devices to resolve package dependencies. Download the source RPMs from remote repositories and create monolithic Linux bundles. Replicate patches from remote update repositories to create Patch bundles. If you want to
replicate only the patches of a selected category, you can use category-based filters.
This section provides information about the various subscription types and the different subscription settings.
Section 2.1, “Understanding the Subscription Types,” on page 21 Section 2.2, “Configuring the Subscription Settings,” on page 22 Section 2.3, “Proxy Settings for Subscriptions,” on page 23
2.1 Understanding the Subscription TypesThe following types of subscriptions are available in Linux Package Management:
Novell Subscription: Allows you to select subscriptions that you are entitled to download from Novell Customer Center based on your credentials. By using this subscription, you can replicate updates for SUSE Linux Enterprise 10 Service Pack 1 or later distributions, all SUSE Linux Enterprise 11 distributions, and OES 2 distributions. You can create bundles in your Management Zone with the replicated content.
RCE Subscription: Allows you to select subscriptions that you are entitled to download from Novell Customer Center based on your credentials. By using this subscription, you can replicate updates for SUSE Linux Enterprise 10. You can also create bundles in your Management Zone with the replicated content.
RHN Subscription: Allows you to replicate content from the Red Hat network for Red Hat Enterprise Linux distributions.
RPM-MD Subscription: Allows you to replicate subscriptions and packages from both authenticated and unauthenticated RPM-MD (YUM) repositories.
Introduction 21

Static Subscription: Allows you to replicate content from the file system located on your local server and create bundles. You must have a static replication source available in the file system. You can create the static replication source by using the static replication option from any other subscription type.
ZLM Subscription: Allows you to select subscriptions that you are entitled to download from the ZENworks Linux Management server based on your credentials. You can use these subscriptions to create bundles in your Management Zone.
2.2 Configuring the Subscription SettingsTo download the package updates from a remote repository, you can configure the settings on the Subscription Settings page in ZENworks Control Center.
1 Log in to ZENworks Control Center.2 Click Configuration > Infrastructure Management > Subscription Settings.
You can configure the following subscription settings on the Subscription Settings page:
Subscription Replication Settings Subscription Performance Settings Proxy Settings for Subscriptions
2.2.1 Subscription Replication Settings
Throttling Rate (KBps): Specify the rate at which you want to download the updates. If no value is specified, the replication uses the entire available bandwidth.
For example, if you specify the throttling rate as 100, the package updates are downloaded from the remote repository at a rate of 100 kilobytes per second
Session Connection Timeout (secs): Specify the time after which you want to attempt reconnection to the remote repository, in case of a connection failure. The default value is 120 seconds.
2.2.2 Subscription Performance Settings
Maximum Replication Sessions: Specify how many subscription sessions can be run or replicated simultaneously. The default value is 2, and the maximum value is 5.
Subscription Cache: Select whether to enable or disable the subscription cache. The default value is Enabled.If this setting is enabled, the metadata information is read from the cache instead of downloading it from the repository which greatly reduces the response time when browsing for catalogs on the remote repository.
22 ZENworks 11 SP2 Linux Package Management Reference

2.3 Proxy Settings for SubscriptionsIf you have configured your network to use a proxy server, you must configure the proxy server subscriptions.
1 Use a text editor to open the lpm-server.properties file. This file is located in /etc/opt/novell/zenworks/ directory on Linux and in the Novell\ZENworks\conf directory on Windows.
2 Edit the file as follows: Set the value of subscription-proxyaddress to the IP address of the proxy server. Set the value of subscription-proxyport to the port number of the proxy server. Set the value of subscription-proxyuser to the name of the proxy user. Set the value of subscription-proxypassword to the password of the proxy username. Set the value of subscription-useNTLM to true if the proxy server uses an NTLM realm. By
default, the value is false.3 Save the file.
When you run a subscription, the subscription automatically uses these settings.
Introduction 23

24 ZENworks 11 SP2 Linux Package Management Reference
3 3Creating Subscriptions
You can select the platforms and update categories you want to subscribe to and then schedule the subscription to check for updates regularly. Additionally, Linux subscription management integrates with the bundle change management features of ZENworks 11 SP2 Configuration Management. This allows you to have new software from the subscriptions sources to be created as a sandbox where the changes can be tested before being published in the production environment.
Section 3.1, “Prerequisites for Creating Subscriptions,” on page 25 Section 3.2, “Creating Subscriptions by Using ZENworks Control Center,” on page 26 Section 3.3, “Creating a Red Hat Subscription by Using nu.novell.com,” on page 29 Section 3.4, “Creating Subscriptions by Using the zman Command Line Utility,” on page 30
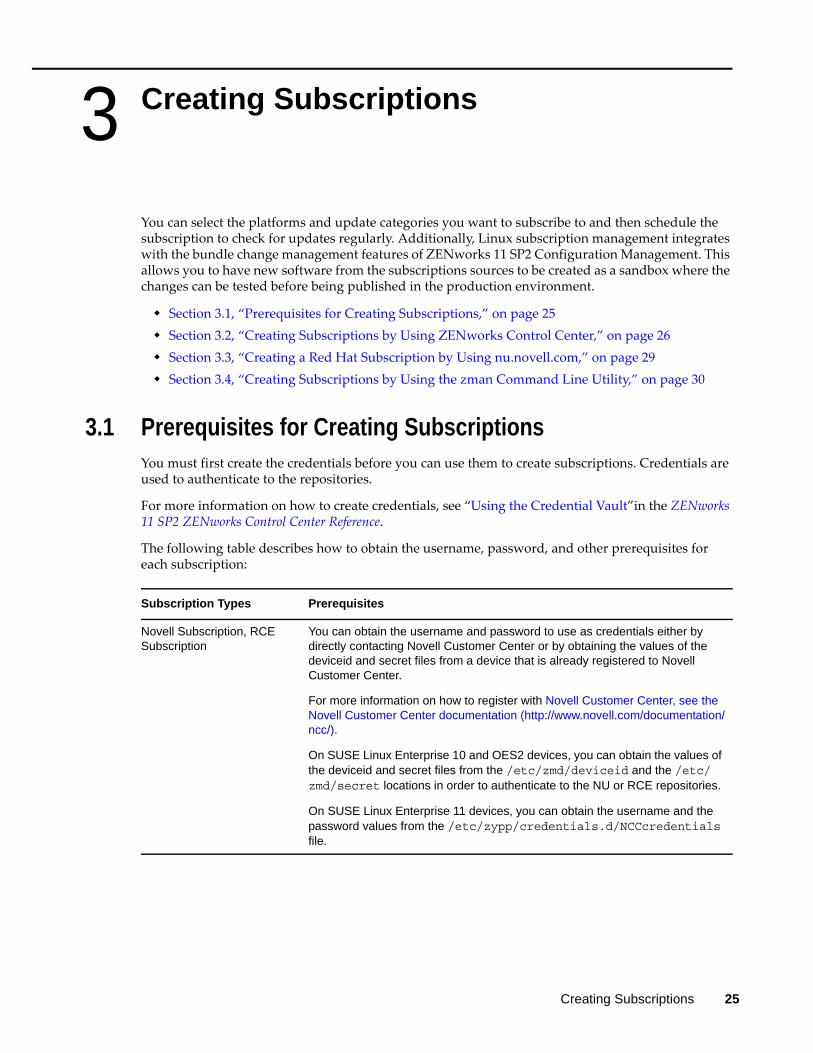
3.1 Prerequisites for Creating SubscriptionsYou must first create the credentials before you can use them to create subscriptions. Credentials are used to authenticate to the repositories.
For more information on how to create credentials, see “Using the Credential Vault”in the ZENworks 11 SP2 ZENworks Control Center Reference.
The following table describes how to obtain the username, password, and other prerequisites for each subscription:
Subscription Types Prerequisites
Novell Subscription, RCE Subscription
You can obtain the username and password to use as credentials either by directly contacting Novell Customer Center or by obtaining the values of the deviceid and secret files from a device that is already registered to Novell Customer Center.
For more information on how to register with Novell Customer Center, see the Novell Customer Center documentation (http://www.novell.com/documentation/ncc/).
On SUSE Linux Enterprise 10 and OES2 devices, you can obtain the values of the deviceid and secret files from the /etc/zmd/deviceid and the /etc/zmd/secret locations in order to authenticate to the NU or RCE repositories.
On SUSE Linux Enterprise 11 devices, you can obtain the username and the password values from the /etc/zypp/credentials.d/NCCcredentials file.
Creating Subscriptions 25

3.2 Creating Subscriptions by Using ZENworks Control Center1 In ZENworks Control Center, click Configuration > Subscriptions.2 In the Subscriptions list, click New, then click Subscription to display the Select Subscription Type
page.3 Select the subscription type that you want to create, then click Next to display the Define Details
page.4 Fill in the fields:
Subscription Name: Specify a unique name for the subscription.Folder: Type the name or browse to the folder that this subscription will be created in. By default, the subscription will be created in the /Subscriptions folder.Download to Folder: Browse to and select the destination folder where you want to download the subscriptions. The default folder is /Bundles.
NOTE: The specified folder is not applicable when you choose to create a Static Subscription. Irrespective of the folder you specify, the subscriptions are downloaded to the following folders: On Windows: %ZENWORKS_HOME%\work\cache\pkg-repo\Static_Subscriptions On Linux: /var/opt/novell/zenworks/cache/pkg-repo/Static_Subscriptions
Description: Provide a short description for the subscription. This description is displayed on the subscription’s Summary page.
5 Click Next to display the Define Remote Server Details page.Depending on the type of subscription you select, the following table describes the tasks you must perform on the Remote Server Details page:
ZLM Subscription You must obtain the IP address or the DNS name of the ZENworks Linux Management Server from which you want to replicate content. You must also obtain the deviceid and secret values of a device that is registered to the ZENworks Linux Management Server. By using these as credentials, you can replicate only the content that the device is entitled to.
On SUSE Linux Enterprise 10 devices or SUSE Linux Enterprise 11 devices, you can obtain the value of deviceid and secret from the /etc/zmd/deviceid and /etc/zmd/secret files respectively, or from the /etc/opt/novell/zenworks/zmd/deviceid and /etc/opt/novell/zenworks/zmd/secret files on any other registered devices.
YUM (RPM-MD) Obtain the URL of an available YUM (RPM-MD) repository. If the repository is authenticated, you must obtain the username and password to access the repository URL.
RHN Subscription 1. From an RHEL device, obtain the systemid file that is located in /etc/sysconfig/rhn/.
2. Use the systemid file as a credential to authenticate to the RHN repository.
Subscription Types Prerequisites
26 ZENworks 11 SP2 Linux Package Management Reference

Subscription Type Task Additional Details
Novell Subscription
1. In the Remote Server URL field, specify the URL of the NU repository you want to access.
2. Browse to and select the remote server credential from the Credential Lookup dialog box.
By default, the Remote Server URL field displays https://nu.novell.com/repo.
For more information, see Section 3.1, “Prerequisites for Creating Subscriptions,” on page 25.
RCE Subscription
1. In the Remote Server URL field, specify the URL of the RCE repository you want to access.
2. Browse to and select the remote server credential from the Credential Lookup dialog box.
By default, the Remote Server URL field displays https://update.novell.com/data.
RHN Subscription
1. In the Remote Server URL field, specify the URL of the RHN repository you want to access.
2. Browse to and select the systemid file from the Upload Content dialog box.
By default, the Remote Server URL field displays https://xmlrpc.rhn.redhat.com/XMLRPC.
RPM-MD Subscription
1. In the Remote Server URL field, specify the URL of the RPM-MD (YUM) repository you want to access.
2. Browse to and select the remote server credential from the Credential Lookup dialog box.
3. Select a platform from the drop-down list to download the subscriptions.
The following platforms are available:
SLES 10
SLED 10
SLES 11
SLED 11
RHEL 4
RHEL 5
Static Subscription
1. Specify the location of the file system from which to download the content.
2. Click Add Source to display the Select Source dialog box.
The Select Source dialog box displays all the available sources that are enabled for static replication.
3. Select the source from which to download the content, then click OK.
If you are replicating content from a ZENworks 11 SP2 Server, by default the static source location is /var/opt/novell/zenworks/cache/pkg-repo/Static_Subscriptions on Linux and %ZENWORKS_HOME%\work\cache\pkg-repo\Static_Subscriptions on Windows. However, if you have copied the static source to a specific location, you must specify that path to import the content.
Creating Subscriptions 27

6 Click Next to display the Certificate Details page, if the remote server certificate is not trusted.When you trust the remote server certificate, the certificate is stored in the database. When you try to connect to the same remote server, you won’t be prompted for the certificate again.
7 Click Next to display the Select Catalogs and Categories for Download page.Based on your credentials, the Select catalogs and categories for download page lists the catalogs that you are entitled to download. By default, all the catalogs are selected.
8 Select the catalogs that you want to replicate.9 For each of the selected catalogs, click the Catalog Name link to display the Edit Catalog dialog
box, then select the targets to download.By default, all the targets of a catalog are selected.
10 Deselect the targets and the categories that you do not want to download.
NOTE: The categories are not applicable for RHN and ZLM subscriptions.
11 (Optional) Specify a local name for the catalog in the Local Catalog Name field.12 Click OK to return to the Select catalogs and categories for download page.13 Click Next to display the Schedule Download page.14 Select a schedule from the drop-down list to assign to the subscription. The available schedule
types are No Schedule, Date Specific, and Recurring.For more information on schedules, see “Schedule Types” in the ZENworks 11 SP2 Primary Server and Satellite Reference.
15 In the Subscription Server field, type the name or browse for and select the server to which you want to replicate the catalogs.
16 Click Next to display the Summary page.Review the information, making any changes to the settings by using the Back button as necessary.
17 (Conditional) Select the Define Additional Properties check box to display the subscription’s Summary page after the wizard finishes.You can use the various tabs on the Summary page to edit the subscription information.
ZLM Subscription
1. Specify the ZENworks Linux Management server’s IP address from which you want to download the subscriptions as https:// ZLM_Server_Address.
2. Browse to and select the remote server credential from the Credential Lookup dialog box.
Before you can download the catalogs from the ZENworks Linux Management Server to your managed device, you must first assign the catalogs to the managed device.
Any managed device to which you want to download the subscriptions from the ZENworks Linux Management Server must be registered to the ZENworks Linux Management Server. The managed device must use its deviceid and secret as its username and password to gain access to the ZENworks Linux Management Server.
Subscription Type Task Additional Details
28 ZENworks 11 SP2 Linux Package Management Reference

For example, you can edit the description of the subscription and the base URL of the Remote Server, apply various options, and schedule the subscription.For more information on these additional properties, see Section 4.3, “Editing Subscriptions,” on page 34.
18 Click Finish to create the subscription.
3.3 Creating a Red Hat Subscription by Using nu.novell.comTo create a Red Hat Subscription by using nu.novell.com in ZENworks 11 SP2:
1 In ZENworks Control Center, click the Configuration tab.2 In the Credential Vault panel, create a credential that can download Red Hat patches from the
Novell Update server (nu.novell.com). For more information on the Credential Vault, see “Credential Vault” in the ZENworks 11 SP2 System Administration Reference“Using the Credential Vault”in the ZENworks 11 SP2 ZENworks Control Center Reference.
3 Click the Subscriptions tab.4 In the Subscriptions list, click New, then click Subscription to display the Select Subscription Type
page.5 Select the RPM-MD Subscription, then click Next to display the Define Details page.6 Specify the name of the subscription and provide a short description, then click Next to display
the Define Remote Server Details page.7 In the Remote Server URL field, specify one of the following URLs according to the distribution
for which you want to download the patches: RHEL 4 Server 32-bit: https://nu.novell.com/repo/$RCE/RES4/i386 RHEL 4 Server 64-bit: https://nu.novell.com/repo/$RCE/RES4/x86_64 RHEL 5 Server 32-bit: https://nu.novell.com/repo/$RCE/RES5/i386 RHEL 5 Server 64-bit: https://nu.novell.com/repo/$RCE/RES5/x86_64
8 In the Remote Server Credentials field, select the credential that can download Red Hat patches.9 From the drop-down list, select the platform to download the subscriptions, then click Next.
10 Click Next to display the Certificate Details page, if the remote server certificate is not trusted.When you trust the remote server certificate, the certificate is stored in the database. When you try to connect to the same remote server, you won’t be prompted for the certificate again.
11 Click Next to display the Select Catalogs and Categories for Download page.Based on your credentials, the Select Catalogs and Categories for Download page lists the catalogs that you are entitled to download.
12 Select the RPM-MD catalogs that you want to replicate.13 For each of the selected catalogs, click the Catalog Name link to display the Edit Catalog dialog
box, then select the targets to download.By default, all the targets of a catalog are selected.
14 Deselect the targets and the categories that you do not want to download.The categories are not applicable for RHN and ZLM subscriptions.
15 (Optional) Specify a local name for the catalog in the Local Catalog Name field.16 Click OK to return to the Select Catalogs and Categories for Download page.
Creating Subscriptions 29

17 Click Next to display the Schedule Download page.18 Select a schedule to assign to the subscription from the drop-down list. The available schedule
types are No Schedule, Date Specific, and Recurring.For more information on schedules, see “Schedule Types” in the ZENworks 11 SP2 System Administration Reference.
19 In the Subscription Server field, type the name or browse for and select the server to which you want to replicate the catalogs.
20 Click Next to display the Summary page.Review the information, making any changes to the settings by using the Back button as necessary.
21 (Conditional) Select the Define Additional Properties check box to display the subscription’s Summary page after the wizard finishes.You can use the various tabs on the Summary page to edit the subscription information.For example, you can edit the description of the subscription and the base URL of the Remote Server, apply various options, and schedule the subscription.For more information on these additional properties, see Section 4.3, “Editing Subscriptions,” on page 34.
22 Click Finish to create the subscription.
3.4 Creating Subscriptions by Using the zman Command Line UtilityZENworks Configuration Management allows you to create different types of subscriptions. Each subscription has its own set of data and configuration settings. Because it is difficult to pass the data as arguments in the command line, the zman utility requires XML files as an input to create subscriptions. To use the zman command line utility to create a subscription, you must have a subscription of the same type already created through ZENworks Control Center and export it to XML. You then use the exported XML file as a template to create subscriptions with zman.
For example, you can export a Novell Subscription already created through ZENworks Control Center in to an XML file, then use it to create another Novell Subscription with zman.
1 Create a subscription in ZENworks Control Center.For example, create a Novell Subscription called NU that accesses the Novell Updates (https://nu.novell.com/repo) repository.For more information on how to create subscriptions by using ZENworks Control Center, see Section 3.2, “Creating Subscriptions by Using ZENworks Control Center,” on page 26.
2 Export the subscription created in Step 1 to an XML file by using the following command:
zman subscription-export subscription_name subscription_data.xml
For example, export the NU subscription to NU.xml by using zman subscription-export NU NU.xml.If you want to create the subscription with new data, continue with Step 3. If you want to create the subscription with the same data as the NU subscription, skip to Step 4.
3 To create a subscription with new data, modify the XML file according to your requirements.For example, change the value of <Base> from https://nu.novell.com/repo to the URL of the repository you want to access in the <RemoteServer> section of the XML file as shown below:
30 ZENworks 11 SP2 Linux Package Management Reference

<RemoteServer><Base>https://nu.novell.com/repo</Base><CredentialName>>/Credentials/NU</CredentialName></RemoteServer>
4 To create a new subscription, with the same data as the template, use the following command:
zman subscription-create new_subscription_name subscription_xml_filename.xml
For example, to create NU1 subscription, run the zman subscripton-create NU1 NU.xml command.
Creating Subscriptions 31

32 ZENworks 11 SP2 Linux Package Management Reference

4 4Managing Subscriptions
The Subscriptions feature allows you to effectively manage the software content in your ZENworks system.
Section 4.1, “Creating Folders,” on page 33 Section 4.2, “Renaming, Copying, or Moving Subscriptions,” on page 34 Section 4.3, “Editing Subscriptions,” on page 34 Section 4.4, “Replicating Content,” on page 37 Section 4.5, “Enabling or Disabling Subscriptions,” on page 40 Section 4.6, “Deleting Subscriptions and Subscription Folders,” on page 41
4.1 Creating FoldersA folder is an organization object that is displayed in ZENworks Control Center. You can use folders to structure your subscriptions in a manageable hierarchy for your ZENworks system. For example, you might want a folder for each type of subscription (Novell Subscription, RCE Subscription, RHN Subscription, and so forth).
1 In ZENworks Control Center, click the Subscriptions tab.2 Click New > Folder.
The New Folder dialog box is displayed.3 Fill in the fields:
Name: Provide a unique name for the folder.Ensure that the name adheres to the naming conventions; not all characters are supported. For more information on naming conventions, see “Naming Objects in ZENworks Control Center”in the ZENworks 11 SP2 ZENworks Control Center Reference.Folder: Type the name or browse to the folder that contains this folder in the ZENworks Control Center interface.Description: Provide a short description of the folder's contents.
4 Click OK.
Managing Subscriptions 33

4.2 Renaming, Copying, or Moving SubscriptionsDepending on the type of object you select to edit, you can rename, copy, or move the object. For example, if you select a Subscription object, you can rename, copy, and move the subscription. If you select a Subscription folder, you can rename or move the folder, but not copy it. If an option is dimmed, that option is not available for the selected object type.
Some actions cannot be performed on multiple objects. For example, if you select multiple objects, the Rename option is not available from the Edit menu.
1 In ZENworks Control Center, click the Subscriptions tab.2 In the Subscriptions list, select the check box next to the subscription’s name or folder, then click
Edit.3 Select an option:
Rename: Click Rename, provide a new name for the folder, then click OK.Copy: Click Copy, provide a new name for the copy, then click OK.The copy option is useful to create a new subscription that is similar to an existing subscription. You can copy a subscription and then edit the new subscription's settings.Move: Click Move, choose a destination folder for the selected objects, then click OK.
4.3 Editing SubscriptionsYou can edit an existing subscription to add additional properties, to change its description, add or remove the subscription from a subscription folder, add or remove packages from the bundle, and more.
You can use ZENworks Control Center or the zman command line utility to edit subscriptions. The following procedure explains how to edit a subscription by using ZENworks Control Center. If you prefer the zman command line utility, see “Subscription Commands” in the ZENworks 11 SP2 Command Line Utilities Reference.
1 In ZENworks Control Center, click the Subscriptions tab.2 Click the subscription name you want to edit to display the Summary page.
Use the Summary page to view detailed information about the selected subscription. This page provides general information about the subscription, the remote server URL and its credentials, the options that can be additionally set for a subscription, and the schedule information such as the replication schedule and status, the last replication date, and the URL of the subscription server.You can also use this page to edit the subscription’s description, enable or disable the subscription, and change other configuration settings as described.
3 Make the configuration changes:3a Review the information in the General section, then make the desired changes. You can edit
only the Description, Download to Folder, and Enabled fields.Name: Displays the name of the subscription.Type: Displays the type of subscription. Created By: Displays who created the subscription.GUID: Displays the subscription’s GUID (global unique identifier), which is a randomly generated string that provides a unique identifier for the subscription.
34 ZENworks 11 SP2 Linux Package Management Reference

Description: Displays the subscription’s description if it was provided when the subscription was created. The description appears only in ZENworks Control Center. Click Edit to change the description, as necessary.Enabled: Displays Yes if the subscription is enabled, or displays No if the subscription is disabled. Click the link next to the field to enable or disable the subscription, as necessary.Download To Folder: Displays the folder to which to download the subscriptions. To change the folder, browse to and select a different folder.
NOTE: The specified folder is not applicable when you choose to create a Static Subscription. Irrespective of the folder you specify, the subscriptions are downloaded to the following folders: On Windows: %ZENWORKS_HOME%\work\cache\pkg-repo\Static_Subscriptions On Linux: /var/opt/novell/zenworks/cache/pkg-repo/Static_Subscriptions
Subscription Logs: Click the View Log link to display any warning or error messages for the subscription.
3b Review the information in the Remote Server section, then make the desired configuration changes:Base URL: Displays the URL of the repository that you want to access and the server credentials that you provided while configuring the remote server for the subscription.Click Edit to provide a different URL.Server Credentials: Displays the server credentials that you provided while configuring the remote server for the subscription. To change the credential, browse to and select a different credential.
3c Select the common options, Kernel Package Install type options and the bundle options that you want to additionally set for the subscription:Common Options: The following common options are available for the subscription. Dry Run: Select this option to perform a test to determine if the content can be
successfully downloaded. A successful dry run ensures that the content can be successfully downloaded to the server and the bundle can be successfully created.
Force Replication: Select this option to re-download the packages from the repository if they are corrupted on the ZENworks Server.
Create Sandbox: Select this option to replicate the bundle as a sandbox version. A sandbox version of a bundle enables you to test it on your device before you actually replicate it.
RollBack Installation of Bundles on Failure: Select this option to revert the transaction to its original state (before the bundles were installed). For more information on the rollback feature, see Section 9.4, “Rolling Back to a Previously Installed Software Configuration State,” on page 77.
Kernel Package Install type options: The following Kernel Package install type options are available for the subscription. The selected option will be set for Kernel Packages during replication. Install: Select this option to set the install type option for Kernel Packages as Install. Upgrade: Select this option to set the install type option for Kernel Packages as
Upgrade.
Managing Subscriptions 35

Bundle Options: The following bundle options are available for the subscription. Static Replication: Select this option to perform a static replication to download the
package updates from the remote repository to the file system on your local server. On Linux, the default location to download the content from is /var/opt/novell/zenworks/cache/package-repo/Static-Subscription, and on Windows, the default location is %ZENWORKS_HOME%\work\cache\pkg-repo\Static_Subscriptions. Monolithic Bundle: This option is selected by default for RCE, YUM, and Static
repositories. Monolithic bundles are applicable only for NU, RCE, YUM, and Static repositories.If you are replicating from a ZLM repository that has multiple bundles, selecting this option creates the same number of bundles as are in the ZLM catalog. If you are replicating content from a repository other than a ZLM repository, selecting this option creates a single bundle.
Source RPMs: Select this option to download the source RPMs, if they are available in the remote repository, to the monolithic bundle.
Patches: Select this option to download patches to the local file system. Patches are applicable only for NU, RCE, and YUM.A monolithic bundle is replicated along with patches. However, the monolithic bundle is skipped if all categories are not selected or the bundle filter is configured.
Retain Bundle GUID: This option is applicable only for ZLM Subscriptions and Static subscriptions created with the ZENworks Linux Management static source.Select this option to prevent the bundle from being reinstalled on managed devices that are migrated from ZENworks Linux Management to ZENworks Configuration Management.
Create Linux Bundle: This option is selected by default for NU and RCE repositories. Select this option to create a Linux bundle on the ZENworks server. Monolithic Bundle: This option is applicable only for NU, RCE, YUM, and Static
repositories and is selected by default.If you are replicating from a ZLM repository that has multiple bundles, selecting this option creates the same number of Linux bundles as are in the ZLM catalog. If you are replicating from a repository other than a ZLM repository, selecting this option creates a single Linux bundle.
Source RPMs: Select this option to download the source RPMs to the bundle. Patches: This option is applicable only for NU, RCE, YUM, and Static repositories
and is selected by default for the NU and RCE repositories. Select this option to create patch bundles and download the patches to these bundles. A monolithic bundle is replicated along with patches. However, the monolithic bundle is skipped if all categories are not selected or if the bundle filter is configured.
NOTE: Patch replication might not work for all YUM repositories.YUM, as an open format allows defining of repository patch metadata in different formats. As a result, the format of repositories published by different vendors for different distributions, varies. Subscription replication might not be able to handle all formats, because there is no consistent formatted patch metadata.
Create Category based Bundle Groups: Select this option to create different bundle groups for the replicated bundles based on their categories.
36 ZENworks 11 SP2 Linux Package Management Reference
Retain Bundle GUID: This option is applicable only for ZLM subscriptions and Static subscriptions created with the ZENworks Linux Management static source.Select this option to prevent the bundle from being reinstalled on managed devices that are migrated from ZENworks Linux Management to ZENworks Configuration Management.
Create Linux Dependency Bundle: Select this option to create a Linux Dependency bundle on your ZENworks server.If you are replicating from a ZLM repository that has multiple bundles, selecting this option creates the same number of Linux dependency bundles as are in the ZLM catalog. If you are replicating from a repository other than a ZLM repository, selecting this option creates a single Linux dependency bundle. Publish Packages: Select this option to allow the user on the ZENworks agent to
directly install the packages on the agent by using the zac command. If you do not select this option, the packages are used for dependency resolution in other Linux bundles.
3d Review the information in the Schedule section, then make the desired configuration changes:Status: Displays the subscription status.Click Run Now to begin the subscription immediately.Last Replication: Displays the date on which the content was last replicated.Subscription Server: Displays the complete path of the ZENworks Primary Server to which you are downloading the content. To change the server, browse to and select a different server.Replication Schedule: Displays the schedule type that you set up while creating the subscription. Select a different schedule type from the drop-down list or edit the existing one, as necessary.For more information on schedules, see “Schedule Types” in the ZENworks 11 SP2 Primary Server and Satellite Reference.
3e Click Apply to save any changes.
4.4 Replicating Content Section 4.4.1, “Starting a Replication,” on page 37 Section 4.4.2, “Canceling a Replication,” on page 38 Section 4.4.3, “Suspending a Replication,” on page 39 Section 4.4.4, “Resuming a Suspended Replication,” on page 40
4.4.1 Starting a Replication
You can start a replication in one of the following ways:
“Using ZENworks Control Center to Start a Replication” on page 38 “Using the zman Command to Start the Replication” on page 38
Managing Subscriptions 37

Using ZENworks Control Center to Start a Replication
To immediately start the replication:
1 Log in to ZENworks Control Center.2 Click Configuration > Subscriptions.3 Select the check box next to the subscription that you want to run.4 Click Quick Tasks in the menu, then click Run Now.
To schedule the replication:
1 In ZENworks Control Center, click Configuration > Subscriptions.2 Click the subscription link in the Name column to display the subscription’s Summary page.3 In the Schedule pane, select a schedule type to start the replication. The available schedule types
are No Schedule, Date Specific, and Recurring. If you select No Schedule, then click Run Now, the replication starts immediately.For more information on schedules, see “Schedule Types” in the ZENworks 11 SP2 Primary Server and Satellite Reference.
Using the zman Command to Start the Replication
You can use the following command to begin the replication:
zman subscription-replicate subscription_name destination_folder_path options
For more information on this command, see “Subscription Commands” in the ZENworks 11 SP2 Command Line Utilities Reference.
4.4.2 Canceling a Replication
You can cancel a replication that is in an InProgress or Suspended state. When you cancel a replication, the Status column for the subscription displays Canceled on the Subscription page.
The packages that are already downloaded to the cache are automatically deleted when you cancel the replication.
If you cancel a replication when a bundle creation is in progress, the replication is canceled only after the bundle is created.
You can cancel a replication in any of the following ways:
Using the Action Menu to Cancel a Replication Editing the Subscription to Cancel a Replication Using the zman command to Cancel a Replication
Using the Action Menu to Cancel a Replication
1 In ZENworks Control Center, click Configuration > Subscriptions.2 Select the check box next to the subscription that you want to cancel.3 Click Action > Cancel.
38 ZENworks 11 SP2 Linux Package Management Reference
Editing the Subscription to Cancel a Replication
1 In ZENworks Control Center, click Configuration > Subscriptions.2 In the Subscriptions list, click the subscription link of the subscription that you want to cancel.
The Subscription’s Summary page is displayed.3 If the replication status is In Progress or Suspended, click the View Log link in the General pane.
The Subscription Log Details dialog box is displayed.4 Click Cancel Replication to cancel the replication.
Using the zman command to Cancel a Replication
To cancel a replication, run the following command:
zman subscription-replication-status subscription_name --cancel
For more information on this command, see “Subscription Commands” in the ZENworks 11 SP2 Command Line Utilities Reference.
4.4.3 Suspending a Replication
You can suspend a replication to temporarily stop the replication that is in progress. The packages that are already downloaded to the cache are not deleted when you suspend the replication.
You can suspend a replication that is in an InProgress state. When you suspend a replication, the Status column for the suspended subscription displays Suspended on the Subscription page.
If you suspend a replication when a bundle creation is in progress, the replication is suspended only after the bundle is created.
You can suspend a replication in any of the following ways:
“Using the Action Menu to Suspend a Replication” on page 39 “Editing the Subscription to Suspend a Replication” on page 39 “Using the zman Command to Suspend a Replication” on page 40
Using the Action Menu to Suspend a Replication
1 In ZENworks Control Center, click Configuration > Subscriptions.2 Select the check box next to the subscription that you want to suspend.3 Click Action > Suspend.
Editing the Subscription to Suspend a Replication
1 In ZENworks Control Center, click Configuration > Subscriptions.2 In the Subscriptions list, click the subscription that you want to suspend.
The Subscription’s Summary page is displayed.3 If the replication status is In Progress, click the View Log link in the General pane.
The Subscription Log Details dialog box is displayed.4 Click Suspend Replication to suspend the replication.
Managing Subscriptions 39

Using the zman Command to Suspend a Replication
To suspend a replication, run the following command:
zman subscription-replication-status subscription_name --suspend
For more information on this command, see “Subscription Commands” in the ZENworks 11 SP2 Command Line Utilities Reference
4.4.4 Resuming a Suspended Replication
When you resume a replication, it proceeds from where it was stopped. If a schedule is attached to the subscription, the replication resumes based on the specified schedule.
1 In ZENworks Control Center, click Configuration > Subscriptions.2 Select the check box next to a suspended replication that you want to resume.3 Click Quick Tasks > Run Now.
To resume a replication, you can also use the Run Now link in the Schedule pane on the subscription’s Summary page
4.5 Enabling or Disabling SubscriptionsWhen you create a subscription in ZENworks Configuration Management, the subscription is enabled by default. You can, however, disable the subscriptions. If you disable a subscription, you cannot use it to replicate content until you enable it again.
Section 4.5.1, “Disabling Subscriptions,” on page 40 Section 4.5.2, “Enabling the Disabled Subscriptions,” on page 40
4.5.1 Disabling Subscriptions
1 In ZENworks Control Center, click the Subscriptions tab.2 Select the check box next to the subscriptions that you want to disable.3 Click Action > Disable Subscription.
In the Subscriptions list, the status for the selected subscriptions the Enabled column is changed to No.
4.5.2 Enabling the Disabled Subscriptions
1 In ZENworks Control Center, click the Subscriptions tab.2 Select the check box next to the subscriptions that you want to enable.3 Click Action > Enable Subscription.
In the Subscriptions list, the status for the selected subscriptions in the Enabled column is changed to Yes.
40 ZENworks 11 SP2 Linux Package Management Reference
4.6 Deleting Subscriptions and Subscription FoldersIf you delete a subscription, the subscription is removed and is not displayed on the Subscriptions page in ZENworks Control Center.
If you delete a folder that contains subscriptions, both the folder and its subscriptions are removed and are not displayed on the Subscriptions page in ZENworks Control Center.
To delete a subscription or a subscription folder:
1 In ZENworks Control Center, click the Subscriptions tab.2 In the Subscriptions list, select the check box next to the objects that you want to delete. 3 Click Delete.
The Delete Subscriptions dialog box is displayed.4 If you want to delete the bundles created by the subscription, select the Delete the bundles created
by the subscriptions check box.5 Click OK.
Managing Subscriptions 41

42 ZENworks 11 SP2 Linux Package Management Reference

5 5Verifying the Remote Server Certificate
The Subscriptions feature allows you to import the remote server certificate in your ZENworks system.
Section 5.1, “Importing the Untrusted Certificates by Using ZENworks Control Center,” on page 43
Section 5.2, “Importing the Untrusted Certificates by Using the zman Command Line Utility,” on page 44
Section 5.3, “Update the Existing Remote Server Certificate,” on page 44
5.1 Importing the Untrusted Certificates by Using ZENworks Control CenterWhile you are creating a subscription, if the connection to the remote server uses a secure connection but the remote server certificate is not trusted, you must use the remote server SSL certificate.
To import the untrusted certificate:
1 In ZENworks Control Center, click Configuration > Subscriptions.2 In the Subscriptions list, click New, then click Subscription to display the Select Subscription Type
page.3 Select the subscription type that you want to create, then click Next to display the Define Details
page.4 Specify the subscription details, then click Next.5 On the Define the Remote Server details page, specify a secure URL (HTTPS) that you want to
access, then click Next.If the remote server certificate is not trusted, then the Certificate Details page is displayed.NU and RCE subscriptions do not prompt you to trust the certificate details because the certificate is stored in the database.After you upgrade from ZENworks 11 to ZENworks 11 SP2, if the remote server certificate is not trusted for the RPM-MD, RHN, and ZLM subscriptions, subscription replication might fail.
6 If the Certificate Details page prompts you to trust the certificate, select to trust it, then click Next.The Select Catalogs and Categories for Download page lists the catalogs that you are entitled to download. By default, all the catalogs are selected.
7 Click Next to display the Schedule Download page.8 Select a schedule type from the drop-down list to assign to the subscription. The available
schedule types are No Schedule, Date Specific, and Recurring.For more information on schedules, see “Schedule Types” in the “Schedule Types” in the ZENworks 11 SP2 Primary Server and Satellite Reference.
Verifying the Remote Server Certificate 43

9 Click Next to display the Summary page.10 Review the information, then make any changes to the settings by using the Back button, as
necessary.11 Click Finish to create the subscription.
5.2 Importing the Untrusted Certificates by Using the zman Command Line Utility
1 To import the certificate while creating a subscription, run the following command:
zman src <subscription-name> <subscription-data.xml> --certFilePath=<remote-server-cert.cer>
5.3 Update the Existing Remote Server CertificateIf the remote server’s certificate is modified, you can add the modifications to the certificate that is in your system.
1 In ZENworks Control Center, click Configuration > Subscriptions.2 Click the subscription for which you want to update the existing trusted certificate of the remote
repository. The Summary page is displayed.
3 In the Remote Server panel, click the Update Certificate link in Base URL.The Certificate Details page is displayed if the remote server certificate is not trusted and needs to be updated.
4 Click Yes to accept the new certificate.
44 ZENworks 11 SP2 Linux Package Management Reference

III IIIBundles for Linux Devices
ZENworks 11 SP2 Configuration Management lets you efficiently deliver RPM-based software. Additionally, because Linux uses the bundle management framework in ZENworks Configuration Management, you can now perform additional configuration tasks, deploy additional files and directories, and execute scripts.
This section contains the following information:
Chapter 6, “Using Bundles for Linux Devices,” on page 47 Chapter 7, “Actions,” on page 57
Bundles for Linux Devices 45

46 ZENworks 11 SP2 Linux Package Management Reference

6 6Using Bundles for Linux Devices
A bundle consists of all the files, configuration settings, installation instructions, and other information required to deploy and manage the application or files and perform various management tasks on a device.
The Linux Package Management features lets you create the Linux bundles and the Linux Dependency bundles by using Subscriptions, by using the bundle wizard in ZENworks Control Center, or by using the zman command line utility.
The following sections contain instructions on how to create the Linux bundles from Subscriptions in ZENworks Control Center:
Section 6.1, “Package and Bundle Flags,” on page 47 Section 6.2, “Creating Linux Bundles,” on page 48 Section 6.3, “Creating Linux Dependency Bundles,” on page 50 Section 6.4, “Creating and Managing YUM Services for Bundles on Linux Devices,” on page 53 Section 6.5, “Managing Bundles for Linux Devices,” on page 55
6.1 Package and Bundle FlagsWhen you install or remove a Linux RPM Application bundle on a device, the nature of the package install or removal depends on various package and bundle flags.
Some of the important flags are described below:
Freshen: Packages for which this flag is set to true are installed or upgraded only if a lower version of the package is already installed on the device. If the flag is set to false, the packages are installed along with their dependent packages while installing the bundle.
If the version of the package that is installed on the device is later than the version of the package in the bundle, the installation of the package in the bundle is skipped during bundle installation.
Install Type: The Install Type flag allows Auto, Upgrade, or Install operations on a package in a bundle. The default value while creating Linux bundles is Auto. When the Install Type is set to Auto or Upgrade, the package is installed or upgraded. This operation is similar to the operation performed when you run the rpm --upgrade or rpm -U commands. When the Install Type is set to Install, the package installation operation is similar to the operation performed when you run the rpm --install or rpm -i commands. With rpm -i, multiple versions of the same package can be installed simultaneously. However, if there are conflicting packages, the rpm -i command displays an error, but ZENworks agent forcibly installs the package, similar to the rpm -i --force command.
When multiple versions of the package with conflicting files are installed, the RPM indicates that multiple versions are installed, but only the files of the package that was last installed are available on the device. Therefore, it is not advisable to set the Install Type to Install unless you are sure that multiple versions of the package can coexist. For example, two different versions of kernel packages or two different versions of Java packages can coexist with each other.
Using Bundles for Linux Devices 47

For most of the packages, multiple versions of the same package cannot coexist.
NOTE: For replicating packages by using subscriptions, the Install Type for kernel packages is set to Install by default.
Allow Removal of Conflicting Packages: This option is selected by default for the Install RPMs action. It allows the ZENworks agent to automatically remove any conflicting packages during the installation. If you do not select this check box, the conflicting packages are not removed, and the package installation fails.
Ignore Dependencies: If this flag is set to true, the RPMs are installed without checking for dependencies. This means that the dependent packages are not installed during package installation. This option is useful if you have already installed the dependent RPMs of a package before installing the package. For example, you can install the dependent packages by using the tar zip archive.
NOTE: You cannot choose to remove the conflicting packages and to ignore dependencies at the same time. This is because dependency resolution is necessary to effectively allow the removal of conflicting packages and the dependency resolution is not done while ignoring dependencies.
6.2 Creating Linux BundlesYou can use Linux bundles to install, upgrade, or remove RPM packages, install or remove files, or perform various management actions such as running scripts, editing files, or launching applications on the device. The various Linux bundles types can be created by using the zman utility or from ZENworks Control Center. You can also create Linux bundles with RPM packages from Subscriptions by downloading packages and patches from remote repositories.
You can create Linux bundles in any of the following ways:
Section 6.2.1, “Using ZENworks Control Center to Create a Bundle,” on page 48 Section 6.2.2, “Mirroring Content from Repositories to Create a Bundle,” on page 49 Section 6.2.3, “Using the zman Command to Create a Bundle,” on page 49 Section 6.2.4, “Adding Additional Targets to Packages in an Existing Linux Bundle,” on page 50
6.2.1 Using ZENworks Control Center to Create a Bundle
1 In ZENworks Control Center, click the Bundles tab to display the Bundles panel.2 Click New > Bundle to display the Create New Bundle Wizard.3 Select Linux Bundle, then click Next.4 Select the desired bundle category:
Empty bundle: A bundle with no initial tasks. This bundle category is useful to quickly create a bundle without performing all tasks in the Create New Bundle Wizard. After you create the empty bundle, you can edit its details to add actions, and so forth, at a later time.Create/Delete Directory: A bundle that creates or deletes a directory. This bundle is created with the Create/Delete Directory action. You can add other actions to this bundle or edit the already existing action.For more information on how to add or edit actions, see Chapter 7, “Actions,” on page 57.Install Directory: A bundle that installs a directory.Install Files: A bundle that installs the files in the bundle.
48 ZENworks 11 SP2 Linux Package Management Reference

RPM Application: A bundle with the Install RPMs action to install RPM packages on the device. 5 On the Define Details page, specify a name for the bundle, then click Next.
As you complete the wizard, if you need more information about any fields or options, click the Help button located in the upper right corner of ZENworks Control Center.
6 If you need to add actions to the bundle, continue with Chapter 7, “Actions,” on page 57.
6.2.2 Mirroring Content from Repositories to Create a Bundle
You can create a Linux bundle if you are mirroring content from the NU, RCE, YUM, and Static repositories.
1 In ZENworks Control Center, create a NU, RCE, RPM-MD or Static subscription.For more information on how to create subscriptions, see Section 3.2, “Creating Subscriptions by Using ZENworks Control Center,” on page 26.
2 Click the subscription name link on the Subscriptions page.The Subscription’s Summary page is displayed.
3 In the Options panel, select Create Linux Bundle in the Bundle Options group.The Monolithic Bundle option is selected by default. If you are replicating from a ZLM repository that has multiple bundles, selecting this option creates the same number of Linux bundles as are in the ZLM catalog. If you are replicating from a repository other than a ZLM repository, selecting this option creates a single Linux bundle.
4 Select Source RPMs to download the source RPMs, if they are available, in to the bundle.5 If you want to create patch bundles, select the Patches option to create patch bundles and
download the patches to these bundles. This option is selected by default for the NU and RCE repositories.
6 Select Create Category based Bundle Groups to create different bundle groups for the replicated bundles based on their categories.
7 Click the Run Now link in the Schedule pane or from the Quick Tasks menu on the Subscriptions page to begin the replication immediately.orSchedule when you want to replicate. For more information on schedules, see “Schedule Types” in the ZENworks 11 SP2 Primary Server and Satellite Reference.
If the replication is successful, the Linux bundle is created in a folder on the ZENworks server. The folder name is the catalog name that you chose to download while creating the subscription. You can see this folder in ZENworks Control Center > Bundles.
6.2.3 Using the zman Command to Create a Bundle
1 Run the zman bundle-create bundle_name path_of_bundle_xml_file command.You can obtain the sample bundle XML files from the following locations on the server:/opt/novell/zenworks/share/zman/samples/linuxbundles/Empty_LinuxBundle.xml
On Windows: %ZENWORKS_HOME%\share\zman\samples\linuxbundles/Empty_LinuxBundle.xml
Using Bundles for Linux Devices 49

2 Add packages to the Linux bundles:1. Create an action XML file for the local RPM packages by running the zman linux-export-
actions command.When you create the action XML file for Linux bundles, the action type argument should be Install RPM.
2. Add the packages to the bundle by running the zman bundle-add-actions command. The action XML file that was created should be used as an argument with this command.
For more information on the commands, see “Bundle Commands” in the ZENworks 11 SP2 Command Line Utilities Reference.
6.2.4 Adding Additional Targets to Packages in an Existing Linux Bundle
You can add a package with multiple targets to a Linux bundle. To add actions:
1 In ZENworks Control Center, click the Bundles tab.2 In the Name column, click a Linux bundle to display its Summary tab.3 Click the Actions tab.4 Click Install > Add > Install RPM(s).5 Select the packages whose target you want to change from default All to target, then select the
target which you want to associate with the selected packages, then click OK.6 Click Apply to save the created actions to the Linux bundle.
6.3 Creating Linux Dependency BundlesYou can create Linux Dependency bundles to store the dependency packages in order to resolve package dependencies on the managed device.
Linux Dependency bundles cannot be installed on a device by using the zac bundle-install command. However, on the agent, you can install packages from a Linux Dependency bundle by using the zac install command if the Publish Package flag is set to true for those packages. The agent command to list the packages of a bundle does not list any package for the Linux Dependency bundles unless the Publish Package flag is set to true for the package.
NOTE: You cannot assign any schedules while assigning Linux Dependency bundles to devices.
You can create Linux Dependency Bundles in any of the following ways:
Section 6.3.1, “Mirroring Content From Repositories to Create Bundle,” on page 50 Section 6.3.2, “Using ZENworks Control Center to Create a Bundle,” on page 51 Section 6.3.3, “Using the zman Command to Create a Bundle,” on page 52 Section 6.3.4, “Adding Packages to an Existing Linux Dependency Bundle,” on page 53
6.3.1 Mirroring Content From Repositories to Create Bundle
1 In the ZENworks Control Center, create a subscription.For more information on how to create subscriptions, see Section 3.2, “Creating Subscriptions by Using ZENworks Control Center,” on page 26.
2 Click the subscription name link on the Subscriptions page.
50 ZENworks 11 SP2 Linux Package Management Reference

The Subscription’s Summary page is displayed.3 In the Options panel, select Create Linux Dependency Bundle in the Bundle Options group.
If you are replicating from a ZLM repository that has multiple bundles, selecting this option creates the same number of Linux Dependency bundles as are in the ZLM catalog. If you are replicating from a repository other than a ZLM repository, selecting this option creates a single Linux dependency bundle.
4 Select the Publish Packages option to allow the user on the ZENworks agent to directly install the packages on the agent by using the zac command. If you do not select this option, the packages are used for dependency resolution in other Linux bundles.
5 Click the Run Now link in the Schedule pane or from the Quick Tasks menu on the Subscriptions page to begin the replication immediately.orSchedule when you want to replicate.For more information on schedules, see “Schedule Types” in the ZENworks 11 SP2 Primary Server and Satellite Reference.
If the replication is successful, the Linux Dependency bundle is created in a folder on the ZENworks server. The folder name is the catalog name that you chose to download while creating the subscription. You can see this folder in ZENworks Control Center > Bundles.
You can also create Linux Dependency bundles from the Bundles tab in ZENworks Control Center or by using the zman command line utility.
For more information on how to create Linux Dependency bundles from the Bundles tab in ZENworks control Center, see the ZENworks 11 SP2 Software Distribution Reference. For more information on how to create Linux Dependency bundles by using the zman command line utility, see “Bundle Commands” in the ZENworks 11 SP2 Command Line Utilities Reference.
6.3.2 Using ZENworks Control Center to Create a Bundle
1 In ZENworks Control Center, click the Bundles tab to display the Bundles panel.2 Click New > Bundle to display the Create New Bundle Wizard.3 Select Linux Dependency Bundle.4 On the Define Details page, specify a name for the bundles, then click Next.
As you complete the wizard, if you need more information about any fields or options, click the Help button located in the upper right corner of ZENworks Control Center.
5 On the Select .rpm Files page, perform any of the following tasks:
Task Steps
Add a file 1. Click Add to display the Upload Files dialog box.
2. Click Add, then select the files that you want to upload.
3. Click OK.
The Status field displays the status of the RPM files that you are uploading.
Using Bundles for Linux Devices 51

6 Click Next to display the Summary page.7 If you want to perform other configuration tasks after the bundle has been created, select the
Define Additional Properties check box.For example, you can make assignments to the bundle in the Relationships tab, view actions in the Actions tab, and so on.Select the Create As Sandbox check box to deploy the bundle as a sandbox version. A sandbox version of a bundle enables you to test it on your device before actually deploying it.
8 Review the configuration, then click one of the following: Back: Lets you make changes after reviewing the summary. Finish: Creates the Linux Dependency bundle according to the configured settings listed on
this Summary page.
6.3.3 Using the zman Command to Create a Bundle
1 Run the zman bundle-create bundle_name path_of_bundle_xml_file command.You can obtain the sample bundle XML files from the following locations on the server:/opt/novell/zenworks/share/zman/samples/linuxbundles/Empty_DependencyBundle.xml
2 Add packages to the Linux bundles:1. Create an action XML file for the local RPM packages by running the zman linux-export-
actions command.While creating the action XML file for Linux Dependency bundles, the action type argument should be Distribute RPM.
2. Add the packages to the bundle by running the zman bundle-add-actions command. The action XML file that was created should be used as an argument with this command.
For more information on these commands, see “Bundle Commands” in the ZENworks 11 SP2 Command Line Utilities Reference.
Edit a file 1. Select the check box next to the files that you want to edit.
2. Click Edit.
3. Select Set Publish Packages if you do not want certain packages to be automatically installed on the agent.
Select Set Publish Packages if you want to manually install the packages on the agent by using the zac command. If you select this option, the Publish Packages column displays Yes for the selected package.
Select Unset Publish Packages to install the packages on the agent while resolving dependencies only. The packages for which this option is selected are not visible on the agent. If you select this option, the Publish Packages column displays No for the selected package. By default, the Publish Packages column displays No.
Remove a file
1. Select the check box next to the files that you want to remove, then click Remove.
Select Targets
1. Select the packages whose target(s) you want to change from default All to target(s), then select the target(s) which you want to associate with the selected packages.
2. Click Apply to associate the selected target with the selected packages.
Task Steps
52 ZENworks 11 SP2 Linux Package Management Reference
6.3.4 Adding Packages to an Existing Linux Dependency Bundle
1 In ZENworks Control Center, click the Bundles tab.2 In the Name column, click a Linux Dependency bundle to display its Summary tab.3 Click the Packages tab.4 Click Add, then select whether you want to upload an RPM or import the file from a repository.5 Select the packages whose target you want to change from default All to targets, then select the
targets that you want to be associated with the selected packages.6 Click Apply to add the selected target.7 Click Apply to save the created actions to the Linux Dependency bundle.8 Click the View link under Targets to view the action created with packages selected with a
specified target.
6.4 Creating and Managing YUM Services for Bundles on Linux DevicesThe RPM packages in the ZENworks package repository are published in a format that can be used only by the ZENworks Agent. In other Linux distributions, some package management tools like YaST, ZYpper, and YUM cannot understand this package repository format of the ZENworks Server, so they cannot access the necessary packages. In order to make the ZENworks published packages available to these package management tools, you can export the packages in a bundle to a YUM repository and publish the YUM repository on any ZENworks Server. You can then add the YUM repository to YaST, ZYpper, or YUM, or to any tool that understands the format of the YUM repository, and make use of the packages on the ZENworks Server.
You can also create a YUM service for bundle groups. Each bundle in the group is created as a patch in the exported YUM service.
NOTE:
If you create a YUM repository from a bundle, this new YUM repository will contain only packages.
If you create a YUM repository from a bundle group, this new YUM repository will contain both packages and patches, with each patch corresponding to a member bundle of the bundle group.
YUM repositories created by ZENworks do not support patterns.
You can create a YUM service for a published version (not a sandbox version) of a Linux bundle or a Linux Dependency bundle.
Section 6.4.1, “Creating a YUM Service,” on page 53 Section 6.4.2, “Editing a YUM Service,” on page 54 Section 6.4.3, “Removing a YUM Service,” on page 55
6.4.1 Creating a YUM Service
1 In ZENworks Control Center, click Bundles in the left pane to display the Bundles panel.2 In the Name column, click a Linux bundle or a Linux Dependency bundle to display its Summary
tab.
Using Bundles for Linux Devices 53

3 In the General panel, click Create next to the YUM Service field.This opens the Bundle YUM Service Wizard.
4 In the Primary Servers panel, click Add.5 In the dialog box, browse for and select the servers on which you want to host the YUM service,
then click OK.6 Click Finish to create the YUM service on the bundle.
The bundle’s Summary page is displayed.The YUM Service field displays the relative path of the YUM repository.
The YUM service does not exist until the first YUM service is hosted on a Primary Server.
NOTE: If you are unable to use https for the YUM repository created by ZENworks 11 SP2, see TID 7007928 in the Novell Support Knowledgebase (http://www.novell.com/support/php/search.do?cmd=displayKC&docType=kc&externalId=7007928&sliceId=2&docTypeID=DT_TID_1_1&dialogID=207211650&stateId=0%200%20207215049)
6.4.2 Editing a YUM Service
You can edit a YUM service to add additional Primary Servers on which you want to host the YUM service or remove the Primary Servers on which you do not want the YUM service.
1 In ZENworks Control Center, click Bundles in the left pane to display the Bundles panel.2 In the Name column, click a Linux bundle or a Linux Dependency bundle to display its Summary
tab.3 In the General panel, click Edit next to the YUM Service field.
You can add or remove Primary Servers.4 In the Bundle YUM Service wizard that is displayed, add or remove the Primary Servers.
Tasks Steps
Adding a Primary Server 1. In the Primary Servers panel, click Add.
2. Browse for and select the servers on which you want to host the YUM service, then click OK.
3. Click Finish.
4. To remove a Primary Server on which you do not want the YUM service,
Removing a Primary Server
1. In the Primary Servers panel, select the check box next to the Primary Servers that you want to remove.
2. Click Finish.
54 ZENworks 11 SP2 Linux Package Management Reference
6.4.3 Removing a YUM Service
Removing a YUM service from a bundle removes it from all the Primary Servers on which the service is hosted.
1 In ZENworks Control Center, click Bundles in the left pane to display the Bundles panel.2 In the Name column, click a Linux bundle or a Linux Dependency bundle to display its Summary
tab.3 In the General panel, click Remove next to the YUM Service field.
NOTE: Click the Click here to Update YUM Service Now link in YUM Service Settings to effectively remove the YUM service immediately, or the YUM service is removed when the next YUM Services Refresh Schedule is configured.
6.5 Managing Bundles for Linux DevicesYou can effectively manage software and content in your Linux environment by managing bundles. You can also manage bundle groups and folders.
For more information on how to manage bundles, see the ZENworks 11 SP2 Software Distribution Reference.
Using Bundles for Linux Devices 55

56 ZENworks 11 SP2 Linux Package Management Reference

7 7Actions
The Actions panel displays the action sets available for the bundle. The action sets available for Linux Bundles are Distribute, Install, Launch, Verify, and Uninstall. The action set available for Linux Dependency Bundles is Distribute.
You can add an action to any of the available action sets. When you do so, that action is performed whenever the action set is applicable. For example, when you add an action to the Install action set, that action is performed whenever the bundle is installed.
You can add actions in any of the following ways:
Section 7.1, “Adding Actions by Using ZENworks Control Center,” on page 57 Section 7.2, “Adding Actions by Using the zman Command,” on page 66
7.1 Adding Actions by Using ZENworks Control CenterThe following sections contain information about the actions you can configure by using ZENworks Control Center:
Section 7.1.1, “Action - Create / Delete Directory,” on page 58 Section 7.1.2, “Action - Display Message,” on page 58 Section 7.1.3, “Action - Edit Text File,” on page 59 Section 7.1.4, “Action - File Removal,” on page 59 Section 7.1.5, “Action - Install Bundle,” on page 59 Section 7.1.6, “Action - Install Directory,” on page 59 Section 7.1.7, “Action - Install Files,” on page 60 Section 7.1.8, “Action - Install RPMs,” on page 62 Section 7.1.9, “Action - Launch Bundle,” on page 64 Section 7.1.10, “Action - Launch Java Application,” on page 64 Section 7.1.11, “Action - Launch Linux Executable,” on page 64 Section 7.1.12, “Action - Prompt User,” on page 65 Section 7.1.13, “Action - Reboot/Shutdown,” on page 65 Section 7.1.14, “Action - Run Script,” on page 65 Section 7.1.15, “Action - Start/Stop Service,” on page 66 Section 7.1.16, “Action - Uninstall Bundle,” on page 66 Section 7.1.17, “Action - Uninstall RPMs,” on page 66
Actions 57

7.1.1 Action - Create / Delete Directory
The Add Action - Create/Delete Directory dialog box lets you create or delete a directory on the managed device and define the specific requirements that a device must meet for the action to be executed on the device.
You can access this dialog box in any of the following ways in ZENworks Control Center:
As part of the process of creating a Create/Delete Directory Linux bundle by using the Create/Delete Directory bundle category. For more information, see Section 6.2.1, “Using ZENworks Control Center to Create a Bundle,” on page 48.
Click the Bundles tab, then click a Linux bundle in the Bundles list. Click Actions > Install > Add, then select Create/Delete Directory.The dialog box contains two tabs that allow you to specify options and requirements for the action.
“General Tab” on page 58 “Requirements Tab” on page 58
General Tab
The General page lets you specify the name, the action type, and the executable security level options.
1 Specify a name for the action in the Action Name field.2 Select the action type:
Create directory: Creates a directory on the managed device when the action is performed.Delete directory: Deletes a directory on the managed device when the action is performed.
3 Specify the complete path of the directory you want to create or delete on the managed device. This path must be resolved by the device on which the bundle is run.
4 Specify the executable security level options:Run as logged in user: The action is executed as the user logged in to the display :0 (zero) terminal. For example, if you select this option while creating a directory, the directory created is owned by the user logged in to display :0 at the time when the action is executed.Run as root: The action is executed as the root user.
5 Click OK to create the action.
Requirements Tab
You can specify the requirements that a device must meet for the action to be enforced on it. For information about the requirements, see “Adding System Requirements for a Bundle” in the ZENworks 11 SP2 Software Distribution Reference.
7.1.2 Action - Display Message
The Action - Display Message dialog box lets you specify a message to display on devices when the action is performed. For more information on this action, see the ZENworks 11 SP2 Software Distribution Reference.
58 ZENworks 11 SP2 Linux Package Management Reference

7.1.3 Action - Edit Text File
The Add Action - Edit Text File dialog box lets you specify a file and configure the list of changes to be performed on the file. For more information on this action, see ZENworks 11 SP2 Software Distribution Reference.
7.1.4 Action - File Removal
The Add Action - File Removal dialog box lets you specify files or directories to remove from the device. For more information on this action, see the ZENworks 11 SP2 Software Distribution Reference.
7.1.5 Action - Install Bundle
The Add Action - Install Bundle dialog box lets you browse to and select the bundle to install on the device. For more information on this action, see the ZENworks 11 SP2 Software Distribution Reference.
7.1.6 Action - Install Directory
The Add Action - Install Directory dialog box lets you browse to and select the directory to install on the device. For more information on this action, see the ZENworks 11 SP2 Software Distribution Reference.
You can access this dialog box in any of the following ways:
As part of the process of creating a Install Directory Linux bundle by using the Install Directory bundle category. For more information, see Section 6.2.1, “Using ZENworks Control Center to Create a Bundle,” on page 48.
Click the Bundles tab, then click a Linux bundle in the Bundles list. Click Actions > Install > Add, then select Install Directory.
The dialog box contains two tabs that allow you to specify options and requirements for the action.
“General Tab” on page 59 “Requirements Tab” on page 60
General Tab
The General page lets you specify the directory to be installed and its destination path, the permissions for the directory, the ownership, and the option to copy the directory. You can also use this page to install the Novell File Upload extension, which lets you browse for directories.
Installing a file or directory uploads the file or directory to the ZENworks content repository before it is distributed to assigned devices. When you install a file or directory, the file or directory is cached on the managed device.
Installing an executable file does not launch or execute the file. To launch or execute the file, you must add a launch executable action (Launch Linux Executable) to the bundle.
1 In the Source Directory field, click to browse to and select the directory you want to install on the device.If you have not installed the Novell File Upload extension on this device, you must do so before you can browse to and upload directories to be installed. For more information, see Novell File Upload Extension (../../resources/help/novell_file_upload_extension.html).
Actions 59

2 Specify the destination directory on the device where you want to install the directory.3 Configure the permissions and set the access for the directory that you have installed:
Mode: Select this option and enter a three-digit octal number to specify the permissions for owner, group, and others.Owner: Select this option and set the access for Owner, Group, and Others.
4 Select to whom to provide the ownership:Root: Select this option to provide ownership to the root user.User: Select this option to provide ownership to a particular user. You can also specify the group of the user.
5 Select a copy option from the list:Copy Always: Copies the directory regardless of whether the files currently exist on the workstation.Copy If Exists: Copies the directory only if the directory currently exists on the workstation.Copy If Does Not Exist: Copies the directory only if the files do not currently exist on the workstation.Copy If Newer: Copies the directory only if the modified date and time of the file is newer than the existing directory’s date and time, or if the files does not currently exist on the workstation.Copy If Newer and Exists: Copies the directory only if it already exists on the workstation and the existing directory has an older modification date or time.Copy if Newer Version: Copies the directory only if the internal version of the directory is newer than the existing directory’s version (if version information is present).Request Confirmation: Prompts the user to verify if the directory should be copied.Copy If Different: Copies the directory if the creation date, creation time, or size is different than the existing directory's date, time, or size.
6 Click OK to create the action.
Requirements Tab
You can specify the requirements that a device must meet for the action to be executed on the device. For information about the requirements, see “Adding System Requirements for a Bundle” in the ZENworks 11 SP2 Software Distribution Reference.
7.1.7 Action - Install Files
The Action - Install Files dialog box lets you specify the file to copy to the content server and from content server to the device, the destination directory and filename, and the copy options.
You can access this dialog box in any of the following ways:
As part of the process of creating a Install Files Linux bundle by using the Install Files bundle category. For more information, see Section 6.2.1, “Using ZENworks Control Center to Create a Bundle,” on page 48.
Click the Bundles tab, then click a Linux bundle in the Bundles list. Click Actions > Install > Add, then select Install Files.
60 ZENworks 11 SP2 Linux Package Management Reference

The dialog box contains two tabs that allow you to specify options and requirements for the action.
“General Tab” on page 61 “Requirements Tab” on page 62
General Tab
The General page lets you specify the file to copy to the content server and from the content server to the device, the destination directory and filename, and the copy options.
1 Click Add to display the Select Files dialog box.2 In the File panel, click Add, then click Browse to browse for and select the files you want to copy
to the device.If you want to select multiple files at a time, you must have installed the Novell File Upload extension on this device. For more information, see Novell File Upload Extension (../../resources/help/novell_file_upload_extension.html).The Packaging column displays how the content is packaged before it is distributed to assigned devices.If the Do not compress or encrypt uploaded content option in the Select Directory dialog box is not selected, the value of Packaging option is initially displayed as Auto as the content is in the process of being encrypted and compressed. After the content has been encrypted and compressed, the value of Packaging option changes to Compressed, Encrypted.If the Do not compress or encrypt uploaded content option in the Select Directory dialog box is selected, the value of Packaging option is displayed as None because the content is neither compressed nor encrypted.
3 Specify the complete path of the destination directory where you want to install the files.4 Specify the permissions to be applied to the files that you have installed:
Mode: Select this option and enter a three-digit octal number to specify the permissions for owner, group, and others. The standard file permission is 644.Owner: Select this option, then select the check box next to the permissions you want for Owner, Group, and Others.
5 Select an option to provide the ownership:Root: Select this option to provide ownership to the root user.User: Select this option to provide ownership to a particular user. You can also specify the group of the user.
6 Select the Unpack option to indicate that files that are compressed in gzip, bzip2 or zip formats should be decompressed and extracted to the device where you want to install them
7 Select a copy option from the list:Copy Always: Copies the directory regardless of whether the files currently exist on the workstation.Copy If Exists: Copies the directory only if the directory currently exists on the workstation.Copy If Does Not Exist: Copies the directory only if the files do not currently exist on the workstation.Copy If Newer: Copies the directory only if the modified date and time of the file is newer than the existing directory’s date and time, or if the files does not currently exist on the workstation.Copy If Newer and Exists: Copies the directory only if it already exists on the workstation and the existing directory has an older modification date or time.
Actions 61

Request Confirmation: Prompts the user to verify if the directory should be copied.Copy If Different: Copies the directory if the creation date, creation time, or size is different than the existing directory's date, time, or size.
8 Click OK to create the action.
Requirements Tab
You can specify the requirements that a device must meet for the action to be executed on the device. For information about the requirements, see “Adding System Requirements for a Bundle” in the ZENworks 11 SP2 Software Distribution Reference.
7.1.8 Action - Install RPMs
The Action - Install RPMs dialog box lets you enable the install options and add packages. You can also specify parameters such as Freshen and Install Type for the files.
You can access this dialog box in any of the following ways:
As part of the process of creating a Install RPMs bundle by using the RPM application bundle category. For more information, see Section 6.2.1, “Using ZENworks Control Center to Create a Bundle,” on page 48.
Click the Bundles tab, then click a Linux bundle in the Bundles list. Click Actions > Install > Add, then select Install RPMs.
The dialog box contains two tabs that allow you to specify options and requirements for the action.
“General Tab” on page 62 “Requirements Tab” on page 64
General Tab
The General page lets you roll back the device to its original state, enable install options, and list the default property values for packages.
1 Select the Rollback on Failure option to roll back the device to its original state (before the package was installed). The software package will be uninstalled, leaving the server as if the package had never been installed, except for any changes that might have been made to the server in using the installed application.By default, this option is not selected.
2 Select the Enable Install Options check box, then select the options you want: Allow Removal of Conflicting Packages: This check box is selected by default. Leave this check box selected to allow the ZENworks agent to automatically remove any conflicting packages while installing the packages of the action. If you do not select this check box and if there are installed packages that conflict with the packages of the action, the conflicting packages are not removed, and the package installation for the action fails.Ignore Dependencies: If you select this check box, the RPMs are installed without checking for dependencies. This means that the dependent packages are not installed while installing the package.This option is useful if you have already installed the dependent RPMs of a package before installing the package.
62 ZENworks 11 SP2 Linux Package Management Reference

3 In the Packages panel, do any of the following tasks:
Task Steps
Add a package
1. Click Add.
2. Select whether you want to upload an RPM or import the file from a repository.
If you select Upload RPM, the Upload File dialog box is displayed. Click Browse to browse for and select the file to be uploaded to the packages list.
If you select Import from Repository, the Package Import dialog box is displayed. Select the files that you want to import from the repository and add to the list.
Set an action
1. Select the check box next to the files for which you want to set actions.
2. Click Action.
3. Select an action.
The following actions are available:
Set Freshen: Checks if the previous version of the package is installed to upgrade the package to the newer version. Selecting this action displays Yes in the Freshen column of the selected package.
Unset Freshen: Installs the newer version of the package along with the dependent packages without checking for the older versions of the package. Selecting this action displays No in the Freshen column of the selected package.
NOTE: If the version of the package that is installed on the device is later than the version of the package in the bundle, the installation of the package in the bundle is skipped during bundle installation.
Set Auto Type: Installs or upgrades the package. This operation is similar to the operation performed when you run the rpm --upgrade or the rpm -U commands.
Set Install Type: Installs the package. The package installation operation is similar to the operation performed when you run the rpm --install or rpm -i commands. With rpm -i, multiple versions of the same package can be installed simultaneously. However, if there are conflicting packages, the rpm -i command displays an error, but the ZENworks agent forcibly installs the package, similar to the rpm -i --force command.
When multiple versions of the package with conflicting files are installed, the RPM indicates that multiple versions are installed, but only the files of the package that was last installed is available on the device. Therefore, it is not advisable to set the Install Type to Install unless you are sure that multiple versions of the package can coexist. For example, two different versions of kernel packages or two different versions of Java packages can coexist with each other.
For most of the packages, multiple versions of the same package cannot coexist.
Set Upgrade Type: Installs or upgrades the package. This operation is similar to the operation performed when you run the rpm --upgrade or the rpm -U commands.
NOTE: The Has Delta column displays Yes if the subscription has downloaded the delta packages. Click Yes to view the delta RPM details.
Remove a package
1. Select the check box next to the files that you want to remove, then click Remove.
Actions 63

Requirements Tab
You can specify the requirements that a device must meet for the action to be executed on the device. For information about the requirements, see “Adding System Requirements for a Bundle” in the ZENworks 11 SP2 Software Distribution Reference.
7.1.9 Action - Launch Bundle
The Action - Launch Bundle dialog box lets you specify the bundle to launch on the device. For more information on this action, see the ZENworks 11 SP2 Software Distribution Reference.
7.1.10 Action - Launch Java Application
The Action - Launch Java Application dialog box lets you configure a Java program to be executed on the managed device. For more information on this action, see the ZENworks 11 SP2 Software Distribution Reference.
7.1.11 Action - Launch Linux Executable
The Action - Launch Linux Executable dialog box lets you specify the filename, parameters to run, security level, and environment variables that are required to launch the Linux executable.
To access this dialog box, click the Bundles tab, then click a Linux bundle in the Bundles list. Click Actions > Install > Add, then select Launch Linux Executable.
The dialog box contains two tabs that allow you to specify options and requirements for the action.
“General Tab” on page 64 “Requirements Tab” on page 65
General Tab
The General page lets you specify the filename, parameters, security level, and environment variables.
1 Specify the absolute filename of the Linux executable.2 Specify the parameters that you want to run while launching the executable.3 Click Show Options to specify the Linux executable’s security level.
You can choose any of the following options and configure the executable:Run normal (as logged in user): If there is any user logged in to display :0, the executable is launched as that user.Run as root: The executable is launched in the ZENworks Management Daemon context irrespective of whether the root user is logged in or not. However, if the application is a graphical application, a user must be logged in to display :0 to successfully launch the executable.
4 Specify the wait time before proceeding to the next action after launching the Linux executable.No wait: Select this option to immediately perform the next action in the list.When action is complete: Select this option to perform the next action in the list after the launch action finishes.
64 ZENworks 11 SP2 Linux Package Management Reference

Wait for _ seconds: Select this option to proceed to the next action after the specified number of seconds.Terminate action if wait period is exceeded: This check box is enabled only if you select the Wait for _ seconds option. Select this check box to terminate the action if the action is not performed after the wait time exceeds the specified number of seconds.
5 In the Environment Variables panel, do any of the following tasks:
Requirements Tab
You can specify the requirements that a device must meet for the action to be executed on the device. For information about the requirements, see “Adding System Requirements for a Bundle” in the ZENworks 11 SP2 Software Distribution Reference.
7.1.12 Action - Prompt User
The Action - Prompt User dialog box lets you specify that a prompt displays on the device and lets you configure its settings. For more information on this action, see the ZENworks 11 SP2 Software Distribution Reference.
7.1.13 Action - Reboot/Shutdown
The Action - Reboot/Shutdown dialog box lets you specify the reboot or shutdown action for the device. For more information on this action, see the ZENworks 11 SP2 Software Distribution Reference.
7.1.14 Action - Run Script
The Action - Run Script dialog box lets you configure a script to be executed on the managed device. For more information on this action, see the ZENworks 11 SP2 Software Distribution Reference.
Task Steps
Add a variable 1. Click Add to display the Add Environment Variable dialog box.
2. Specify the name and value of the environment variable you want to add.
3. Select the Add to existing data check box to append or prepend the environment variable to the existing data.
Append: Adds the environment variable at the end of the existing data.
Prepend: Adds the environment variable at the beginning of the existing data.
Use Separator Character: Specify a character to separate the appended or prepended environment variable from the existing data.
Remove a variable 1. Select the check box next to the environment variables you want to remove, then click Remove.
Edit a variable 1. Select the environment variable you want to edit, then click Edit.
2. In the Edit Environment Variable dialog box, specify the new value for the variable.
Actions 65

NOTE: For Linux bundles, you can add Run Script actions in the Distribute action set. These Run Script actions are executed every time a bundle is installed, launched, or verified. While adding the Run Script actions in the Distribute action set, you should write scripts so that there are no errors even if the scripts are executed multiple times.
7.1.15 Action - Start/Stop Service
The Action - Start/Stop Service dialog box lets you specify the service that you want to start or stop. For more information on this action, see the ZENworks 11 SP2 Software Distribution Reference.
7.1.16 Action - Uninstall Bundle
The Action - Uninstall Bundle dialog box lets you select a bundle to remove from the device. For more information on this action, see the ZENworks 11 SP2 Software Distribution Reference.
7.1.17 Action - Uninstall RPMs
The Action - Uninstall RPM dialog box lets you select the RPM packages that you want to remove from the device.
To access this dialog box, click the Bundles tab, then click a Linux bundle in the Bundles list. Click Actions > Install > Add, then select Uninstall RPMs.
The dialog box contains two tabs that allow you to specify options and requirements for the action.
“General Tab” on page 66 “Requirements Tab” on page 66
General Tab
The General page lets you select an RPM to be removed from the device.
1 In the Packages panel, click Add to display the RPM Details window.2 Specify the details of the RPM that you want to remove, then click OK to list the RPM in the
Packages panel. 3 Select Remove Dependency Packages to remove any dependent packages of the RPM, then click
OK.
Requirements Tab
You can specify the requirements that a device must meet for the action to be executed on the device. For more information on this action, see the ZENworks 11 SP2 Software Distribution Reference.
7.2 Adding Actions by Using the zman CommandYou can add actions to Linux bundles or Linux Dependency bundles by using the zman commands.
1 Create an XML file to export the package metadata by using the following command:zman linux-export-actions (Action type) (Action XML file path) (content files location path) [...]
66 ZENworks 11 SP2 Linux Package Management Reference
An XML file for the action and its corresponding contentInfo XML file are generated in the specified locations.
2 Add the exported content to the server by using the following command:bundle-add-actions (baa) (bundle path) (action XML file) [...] [options]
By default, when you add an action, a sandbox version of the bundle is created. You can publish the bundle by using the zman bundle-sandbox-publish path_to_the_bundle command.
For more information on these commands, see the ZENworks 11 SP2 Command Line Utilities Reference.
Actions 67

68 ZENworks 11 SP2 Linux Package Management Reference

IV IVExternal Services
You can subscribe to external services such as YUM and ZYpp to resolve dependencies and install or upgrade the required packages from the repositories in these services. You can add the required properties to the services and register the services. You can also view the list of registered services.
This section contains the following information:
Chapter 8, “Subscribing to External Services,” on page 71
External Services 69

70 ZENworks 11 SP2 Linux Package Management Reference

8 8Subscribing to External Services
You can subscribe to external services by using either the zac command or by using the ZENworks Icon.
Section 8.1, “Subscribing to the External Services,” on page 71 Section 8.2, “Removing the External Services,” on page 72
8.1 Subscribing to the External Services Section 8.1.1, “Using the zac Command,” on page 71 Section 8.1.2, “Using the ZENworks Icon,” on page 71
8.1.1 Using the zac Command
You can subscribe to external services by using the following command:
zac external-service-add --type service_type properties service_URL service_name
Examples:
To subscribe to an authenticated YUM repository, run the following command:
zac external-service-add –-type YUM url_of_the_repository service_name -Dusername=username -Dpassword=password
To subscribe to a ZYpp service, run the following command:
zac external-service-add –-type ZYPP url_of_the_service service_name
For more information, see “External Service Commands” in the ZENworks 11 SP2 Command Line Utilities Reference.
8.1.2 Using the ZENworks Icon
The ZENworks Adaptive Agent provides information on how to register external services such as YUM, ZYpp, and Mount to resolve dependencies and to install or upgrade the required packages from the repositories in these services.
For more information on how to subscribe to external services by using ZENworks Icon, see “External Services” in the Novell ZENworks 11 SP2 Adaptive Agent Guide.
Subscribing to External Services 71
8.2 Removing the External Services Section 8.2.1, “Using the zac Command,” on page 72 Section 8.2.2, “Using the ZENworks Icon,” on page 72
8.2.1 Using the zac Command
You can remove the external services that you have subscribed to by using the following command:
zac external-service-delete option
If you want to delete a specific external service, specify any of the following options:
Index Name URL
If you want to delete all the external services to which you have subscribed to, then specify the --all option.
8.2.2 Using the ZENworks Icon
For more information on how to remove the registered external services by using ZENworks Icon, see “External Services” in the Novell ZENworks 11 SP2 Adaptive Agent Guide.
72 ZENworks 11 SP2 Linux Package Management Reference

V VPackage Management Features on Managed Devices
This chapter provides information about the features and procedures of Linux Package Management on managed devices.
Review the following section:
Chapter 9, “Understanding the Package Management Features Available on a Managed Device,” on page 75
Package Management Features on Managed Devices 73

74 ZENworks 11 SP2 Linux Package Management Reference

9 9Understanding the Package Management Features Available on a Managed Device
This section discusses how you can manage packages on a managed device by using the zac command.
Section 9.1, “Installing the Packages,” on page 75 Section 9.2, “Upgrading the Packages,” on page 76 Section 9.3, “Uninstalling the Packages,” on page 77 Section 9.4, “Rolling Back to a Previously Installed Software Configuration State,” on page 77 Section 9.5, “Adding or Removing Package Locks,” on page 78 Section 9.6, “Adding and Removing Bundle Locks,” on page 79 Section 9.7, “Displaying Package Information,” on page 81 Section 9.8, “Displaying the Package Transaction History,” on page 81 Section 9.9, “Performing a Distribution Upgrade,” on page 82
9.1 Installing the PackagesYou can install selective packages available from external repositories, or install the assigned packages by using Linux bundles or Linux Dependency bundles.
To install packages from the external repositories, you must have subscribed to those External Services. For more information on how to subscribe to External Services, see Chapter 8, “Subscribing to External Services,” on page 71.
To install packages by using Linux bundles or Linux Dependency bundles, you must create a Linux bundle with the Install RPM action or a Linux Dependency bundle with the Distribute RPM action, then assign the bundle to a managed device with a specific schedule. For more information on how to create these bundles, see Chapter 6, “Using Bundles for Linux Devices,” on page 47 and for more information on how to assign these bundles to the devices, see ZENworks 11 SP2 Software Distribution Reference.
1 Search for the packages that you want to install: To search for the packages in the external services, use the zac search --service
service_name command. To search for the packages by using the Linux bundles or Linux dependency bundles, run
the zac search --bundle bundle_name command.2 Install the packages of the bundle:
To install all the packages from a bundle, run the zac install –entire-bundle bundle_name command.
Understanding the Package Management Features Available on a Managed Device 75

To install selective packages of the bundle, run the zac install package_name [package_name...] --bundle bundle_name command.
To install packages from the external services, run the zac install package_name [package_name ...] --service service_name command.
NOTE: Packages that are available in Linux Dependency bundles can be installed only if the Publish Package option (ZENworks Control Center > Bundles > Click New > Select Linux Dependency Bundle > Click Next until you go to Step 3: Select .rpm File) for the package is set to True. If this option is set to False, the package is used for dependency resolution.
3 (Optional) Test the installation of the package by performing a dry run of the package before actually installing it on the device by running the following command:zac install package_name --dry-run
4 (Optional) Verify package installation by using the zac search package_name command. The status of the installed packages is displayed as i.
For more information on the commands, see the ZENworks 11 SP2 Command Line Utilities Reference.
9.1.1 Installing Patterns
ZENworks supports pattern install only when the ZYpp Source service of appropriate distribution is added to the agent either via the External Services policy or via the External Service on the agent.
To install patterns:
1 Search for the available patterns by using the zac search --pattern command.2 Install the patterns by using the zac install --pattern pattern_name command.
NOTE: Only the mandatory packages part of the pattern is installed. On SLE 10 devices, even if the Pattern checkbox is not selected the packages corresponding to the patterns are installed.
9.2 Upgrading the PackagesYou can upgrade packages from a bundle or an External Service.
To upgrade packages from the external services, you must have subscribed to the external services. For more information on how to subscribe to external services, see Chapter 8, “Subscribing to External Services,” on page 71.
To install packages by using Linux bundles or Linux Dependency bundles, you must create a Linux bundle with the Install RPM action or a Linux Dependency bundle with the Distribute RPM action, then assign the bundle to a managed device with a specific schedule. For more information on how to create these bundles, see Chapter 6, “Using Bundles for Linux Devices,” on page 47 and for more information on how to assign the bundles to the devices, see ZENworks 11 SP2 Software Distribution Reference.
1 List the available updates by using the zac list-update command. You can list the updates based on bundles or External Services that are available on the agent by using the zac bundle-list and zac external-service-list commands respectively.
2 Upgrade either all the available packages or packages from specific bundles or services. To upgrade all the available packages, run the zac update command.
76 ZENworks 11 SP2 Linux Package Management Reference

To upgrade packages available from a specific bundle, run the zac update bundle_name command.
To upgrade packages available from a specific service, run the zac update service_name command. Click Yes/Y to confirm the upgrade.
3 Test the package upgrade by performing a dry run of the package before actually upgrading it by running the following command:zac upgrade --dry-run
For more information on the commands, see the ZENworks 11 SP2 Command Line Utilities Reference.
9.3 Uninstalling the PackagesYou can uninstall selected packages that are installed on the managed devices, uninstall a package by specifying a package name, package version, or all the packages within a bundle. Once a bundle is uninstalled, the zac search command should not display the status of the removed packages as i.
To remove a package by specifying a package name, run the following command, then enter yes/y to confirm removal:
zac remove package_name To remove a package by specifying a package version, run the following command:
zac remove package_name-version Enter yes/y to confirm removal.For example, to remove a package named zmd with version 7.2.2-0.0.0, run the following command:zac remove zmd-7.2.2-0.0.0
To remove all the packages within a bundle, run the following command:
zac remove --entirebundle bundle_name
Enter yes/y to confirm removal.
For more information on the commands, see the ZENworks 11 SP2 Command Line Utilities Reference.
9.4 Rolling Back to a Previously Installed Software Configuration StateThe Rollback feature brings back the system to its previous state in case of any failure. The Rollback preference must be enabled to roll back package transactions to the time and date you specify. By default, this preference is disabled. To enable this preference, run the zac set rollback true command.
NOTE: If you clear the package history, you cannot roll back to the specified checkpoint.
If you want to roll back to a particular version of the package, that version of the package and its dependencies should be available as part of the service or the assigned bundle. If the version of the package or its dependencies is not available, the rollback fails.
To roll back to a previously installed software configuration state, run the following command:
zac rollback [options] [date | checkpoint]
Understanding the Package Management Features Available on a Managed Device 77

For more information, see the ZENworks 11 SP2 Command Line Utilities Reference.
An Example Use Case
The following procedure is a use case that helps you to understand how to enable the rollback preference, install a package, and then roll back to the previously installed configuration state. The package is automatically uninstalled.
1 Enable the Rollback preference by executing the zac set rollback true command.2 Create a checkpoint by using the zac checkpoint-add checkpoint_name command.3 Install a package by executing the zac install package_name command. For more
information on how to install a package, see Section 9.1, “Installing the Packages,” on page 75.4 Roll back to the previously installed configuration state by executing the zac rollback
command. orIf you have created a checkpoint in Step 2, then execute the zac rollback checkpoint_name command.For example: zac rollback "02/20/2009 15:55:56 PM"The date and time you specify must be from the time you enable the Rollback preference to the current time. If you do not specify the date, the current date is used. Specify the date in the mm/dd/yyyy format. The package installed in Step 3 is uninstalled.
5 To ensure that the package is uninstalled, execute the zac search command and verify that the status of the package is blank.
9.5 Adding or Removing Package LocksYou can configure package locks on managed devices to prevent the removal or upgrade of packages on the managed devices.
You can perform this action either by using the ZENworks Icon or from the command line utility. This section describes how to perform this action by using the command line utility.
For more information on how to lock or unlock packages by using the ZENworks Icon, see the Novell ZENworks 11 SP2 Adaptive Agent Guide.
Section 9.5.1, “Adding a Package Lock,” on page 78 Section 9.5.2, “Removing a Package Lock,” on page 79
9.5.1 Adding a Package Lock
1 List all the packages installed on the managed device by entering the zac search command. From the list, select the package you want to lock.
2 Lock the package by using the zac lock-add (name or pattern) [version] command.This command locks the specified packages. The packages that match the specified regular expression or string are not upgraded or removed. The package name can be specified individually, with wildcard patterns, or even with version number relations. The version number should be specified within single or double quotes.
78 ZENworks 11 SP2 Linux Package Management Reference

If you want to install a specific version of the package, the zac lock-add command first checks if the package version has been locked, then installs the package version only if it is not locked. For example, assume that all the later versions of the package “X 1.7” have been locked by using the zac lock-add X ‘>’ 1.7 command. If you try to install the X 1.9 package by using the zac install X (1.9) command, the installation fails.For more information on this command, see the ZENworks 11 SP2 Command Line Utilities Reference.
3 Ensure that the package is locked by using the zac lock-list command. This displays all the locked packages.
9.5.2 Removing a Package Lock
1 List all the packages that are locked on the managed device by using the zac lock-list command. This displays the package name and its lock number.
2 Select the package you want to unlock.3 Unlock the package by using the zac lock-delete lock_number command.
For more information on this command, see the ZENworks 11 SP2 Command Line Utilities Reference.
4 Ensure that the package is locked by entering the zac lock-list command. This displays only the locked packages.
9.6 Adding and Removing Bundle LocksYou can configure bundle locks for Linux and Patch bundles on the managed devices to prevent them from being installed.
You can add or remove bundle locks either by using the ZENworks Icon or from the command line utility.
--lock-install option locks the bundle and prevents the installation of the bundle that is specified in the lock. The Deny Install column of zac bundle-lock-list command displays the value of the configured lock-install option.
This section describes how to add or remove bundle locks by using the command line utility.
Relational Operator Functionality
= Locks only the specific package version.
< Locks all versions of the package older than the specified version, excluding the specified version.
> Locks all versions of the package later than the specified version, excluding the specified version.
<= Locks all versions of the package older than the specified version, as well as the specified version.
>= Locks all versions of the package later than the specified version, as well as the specified version.
Understanding the Package Management Features Available on a Managed Device 79
For more information on how to lock or unlock packages by using the ZENworks Icon, see the ZENworks 11 SP2 Command Line Utilities Reference.
Section 9.6.1, “Adding a Bundle Lock,” on page 80 Section 9.6.2, “Removing a Bundle Lock,” on page 80 Section 9.6.3, “Impact of a Bundle Lock on Bundle Operations,” on page 80
9.6.1 Adding a Bundle Lock
Bundle locks are applicable only for Install action set.
1 List all the bundles installed on the managed device by using the zac bundle-list command. From the list, select the bundle you want to lock.
2 Lock the bundle by using the zac bundle-lock-add [options] bundle_name command.The following regular expressions are supported:
For more information on this command, see the ZENworks 11 SP2 Command Line Utilities Reference.
3 Ensure that the bundle is locked by entering the zac bundle-lock-list command. This displays all the locked bundles except those that are locked on the server by the administrator.
9.6.2 Removing a Bundle Lock
1 List all the bundles that are locked on the managed device by using the zac bundle-lock-list command. This displays the bundle name and the bundle lock index.
2 Select the bundle that you want to unlock.3 Remove the bundle lock by using the zac bundle-lock-remove [options] bundle_index
command.For more information on this command, see the ZENworks 11 SP2 Command Line Utilities Reference.
4 Ensure that the lock for the bundle is removed by entering the zac bundle-lock-list command. This displays only the locked bundles.
9.6.3 Impact of a Bundle Lock on Bundle Operations
Depending on the value of the configured lock-install option and the status of the bundle, the following table describes the impact of bundle operations when you add a bundle lock:
Regular Expression Functionality
^abc Matches string starting with 'abc'.
[abc] Matches string containing 'a', 'b', or 'c'.
a*c Matches zero or more times 'a' followed by 'c', 'ac','aac','aaac',or 'c'.
80 ZENworks 11 SP2 Linux Package Management Reference

9.7 Displaying Package InformationYou can display information of the packages that are already installed and the information of the packages that are available for installation through External Services or bundles.
The following commands provide information on packages:
zac info
zac what-requires
zac what-provides
For more information on the commands, see the ZENworks 11 SP2 Command Line Utilities Reference.
9.8 Displaying the Package Transaction HistoryYou can list the history of the package transactions that are performed by ZENworks by using the zac packagehistory command. This command displays the package name, date, operation, version, and release.
NOTE: If you clear the package history, you cannot roll back to the specified checkpoint.
For more information on these commands, see the ZENworks 11 SP2 Command Line Utilities Reference.
Bundle Operations With lock-install Without lock-install
Install You cannot install or upgrade a new version of the bundle.
When you assign a bundle to an Agent, you can successfully install a bundle for the first time. You cannot upgrade to a new version of the bundle.
Launch If a bundle is already in the installed state when you add the bundle lock, then you can launch only the installed version of the bundle. If a bundle is not installed when you add the bundle lock, then you cannot launch the bundle.
If a bundle is already installed, you can launch the installed version of the bundle. If an earlier version of the bundle is already installed but a later version of the bundle is assigned, then you cannot launch the assigned new version of the bundle. If a bundle is not installed, then the assigned bundle is automatically installed before being launched.
Verify If a bundle is already in the installed state when you add the bundle lock, then you can verify the installed version of the bundle. If a bundle is not installed when you add the bundle lock, then you cannot verify the bundle.
If a bundle is not installed, then you can install the bundle. If a version of the bundle is already installed, then only the installed version of the bundle is verified.
Uninstall You cannot uninstall a bundle. You cannot uninstall a bundle.
Understanding the Package Management Features Available on a Managed Device 81
9.9 Performing a Distribution UpgradeYou can perform a distribution upgrade to update all packages with a special resolver algorithm which takes care of package architecture change, package splits, pattern and product updates, etc.
Make sure that you have added the ZYpper service with the appropriate distribution on the managed device or assigned the ZENworks bundles to the managed device. For example, you can replicate SLES11-SP1 Pool catalog from Novell repositories and assign the bundle to the managed device.
To perform a distribution upgrade:
1 List the updates available for the managed device by running the zac list-update command. The higher version of the packages that are available for upgrade is displayed.
2 Install the updates by running the zac dist-upgrade [options] [bundle name | service name] […] command.
If no arguments are provided, packages from all ZENworks bundles and External Services are considered for distribution upgrade.
For more information, see the ZENworks 11 SP2 Command Line Utilities Reference.
82 ZENworks 11 SP2 Linux Package Management Reference

VI VIReports
The following sections provide information on Novell ZENworks Linux Management reporting features:
Chapter 10, “Reports,” on page 85
Reports 83

84 ZENworks 11 SP2 Linux Package Management Reference

10 10Reports
You can use ZENworks Reporting Server to view the predefined Subscription reports.
The ZENworks Reporting Server is a powerful, flexible, and customizable reporting tool that is installed and configured separately from the ZENworks system (see the ZENworks 11 SP2 Reporting Server Installation Guide).
Review the following sections to understand the predefined reports and how to view them:
Section 10.1, “Predefined Reports,” on page 85 Section 10.2, “Viewing a Predefined Report,” on page 85
10.1 Predefined ReportsThe following predefined reports are included for Linux Package Management:
Linux Subscription Session Details: Displays the replication details of the Linux subscription replication session, such as the number of bundles, catalogs, and the packages that are downloaded in a particular session with each replication.
Linux Subscriptions: Displays the Linux subscription details, the repository and replication details.
10.2 Viewing a Predefined ReportThe ZENworks Reporting Server must be installed and configured before you can use the predefined reports. For information, see the ZENworks 11 SP2 Reporting Server Installation Guide.
1 In the ZENworks Control Center, click the Reports tab.2 In the ZENworks Reporting Server panel, click ZENworks Reporting Server InfoView.
The InfoView is the main interface for working with the ZENworks Reporting Server reports.3 Click Document List.4 Navigate to the All > Public Folders > Novell ZENworks Reports > Predefined Reports > ZENworks
System folder.5 Double-click the report to view it.
Reports 85

86 ZENworks 11 SP2 Linux Package Management Reference

VII VIIAppendixes
Appendix A, “Troubleshooting Linux Package Management,” on page 89 Appendix B, “Upgrading to OES 2 SP2 by Using a ZENworks 11 SP2 Server,” on page 93 Appendix C, “Upgrading to OES 2 SP3 by Using a ZENworks 11 SP2 Server,” on page 97 Appendix D, “Upgrading to OES 11 SP1 by Using a ZENworks 11 SP2 Server,” on page 101 Appendix E, “Upgrading Base SLES10 SP3 to SLES10 SP4 for OES 2 SP3 By Using a ZENworks
11 SP2 Server,” on page 105 Appendix F, “Using ZENworks 11 SP2 to Upgrade from SUSE Linux Enterprise Server 11 SP1 to
SUSE Linux Enterprise Server 11 SP2,” on page 109 Appendix G, “Using a ZENworks 11 SP2 Server to Patch OES 11,” on page 111 Appendix H, “Using a ZENworks 11 SP2 Server to Patch OES 11 SP1,” on page 115
Appendixes 87

88 ZENworks 11 SP2 Linux Package Management Reference

A ATroubleshooting Linux Package Management
The following sections provide solutions to the problems you might encounter while working with Linux Package Management:
“The zac bundle-list command displays the bundle status as Available even though the packages of the bundle are not installed” on page 89
“Unable to access the YUM URL from YUM clients if you change the ZENworks Server port after creating the YUM Service” on page 89
“Listing of the subscription channels by using the zman srcl command might result in the Java heap space exception” on page 90
“Using zac bundle install command to install a bundle on a device also installs other bundles assigned to the device” on page 90
“The actions listed in the Distribute action set of a bundle gets executed twice” on page 90 “Unable to view the selected targets of packages on Internet Explorer 8” on page 91
The zac bundle-list command displays the bundle status as Available even though the packages of the bundle are not installed
Source: ZENworks Configuration Management; Linux Package Management.
Possible Cause: This issue might occur if the Freshen flag is set for a package and the base version of the package is not installed.
Action: None.
Unable to access the YUM URL from YUM clients if you change the ZENworks Server port after creating the YUM Service
Source: ZENworks Configuration Management; Linux Package Management.
Action: On the YUM client, manually add the new HTTP port of the ZENworks Server to the YUM Service URL. The YUM Service URL is represented as http://ZENworks_Server_IP_address:port/zenworks-yumrepo/yum_service_name.
For example, if you have changed the HTTP port of the ZENworks Server to 81, modify the YUM Service URL to http://ZENworks_Server_IP_address:81/zenworks-yumrepo/SLES11Updates.
For more information on how to add the new HTTP port to the YUM client, see Chapter 8, “Subscribing to External Services,” on page 71.
Troubleshooting Linux Package Management 89
Listing of the subscription channels by using the zman srcl command might result in the Java heap space exception
Source: ZENworks Configuration Management; Linux Package Management.
Explanation: The following out-of-memory exception error might occur when you list the subscription channels by using the zman srcl command:
Exception in thread "Thread-1" java.lang.OutOfMemoryError: Java heap space
Action: Increase the zman memory size:
1 Open the /opt/novell/zenworks/bin/zman file in a text editor.2 Search for the MEM_OPTS variable, then change its value to -Xms64m -
Xmx256m or -Xms64m -Xmx512m.3 Save the /opt/novell/zenworks/bin/zman file.
Using zac bundle install command to install a bundle on a device also installs other bundles assigned to the device
Source: ZENworks Configuration Management; Linux Package Management.
Explanation: If you use the zac bundle-install command to install a bundle that contains characters such as underscore(_), dollar($), hash(#), or exclamation(!) followed by an alphanumeric value in its name, all the assigned bundles whose name contains the character followed by the alphanumeric value are also installed on the device.
Example 1: Consider five bundles named bundle_1, bundle_10, bundle_20, bundle_100, and bundle_200 are assigned to a device. Run the zac bundle-install bundle_1 command to install bundle_1 on the device. The bundles named bundles_10 and bundle_100 are also installed on the device.
Example 2: Consider four bundles named bundle#abc, bundle#abcd, bundle#def, and bundle#abcrt are assigned to a device. Run the zac bundle-install bundle#abc command to install bundle#abc on the device. The bundles named bundle#abcd and bundles#abcrt are also installed on the device
Action: To install such a bundle on the device, specify the bundle GUID instead of the bundle name in the command. To determine the bundle GUID, run the zac bundle-list --show-guid command.
The actions listed in the Distribute action set of a bundle gets executed twice
Source: ZENworks Configuration Management; Linux Package Management.
Explanation: Consider a bundle that is assigned to a device with the Distribution schedule set as Now and the Install Immediately after Distribution option selected. Both the Distribute and Install action set run on the device as a result of which the actions listed in the Distribute action set of the bundle gets executed twice.
Action: Perform the following steps in ZENworks Control Center:
1 Edit the bundle’s distribution schedule to set the distribution schedule type as Recurring and select the When a device is refreshed option.
90 ZENworks 11 SP2 Linux Package Management Reference

Ensure that the Install Immediately after Distribution option is selected.2 Click the Devices tab. Select the device to which you have assigned the
bundle, then click Quick Tasks > Refresh Device.
Unable to view the selected targets of packages on Internet Explorer 8
Source: ZENworks Configuration Management; Linux Package Management.
Possible Cause: This issue might occur if you use Internet Explorer 8.
Action: To view the selected targets of packages, you should use Mozilla Firefox or Internet Explorer 7.
Troubleshooting Linux Package Management 91

92 ZENworks 11 SP2 Linux Package Management Reference

B BUpgrading to OES 2 SP2 by Using a ZENworks 11 SP2 Server
The information and instructions in the following sections help you to perform an unattended, online upgrade from Open Enterprise Server (OES) 2 Service Pack (SP)1 to OES 2 SP2 by using ZENworks 11 SP2. After you complete the instructions in the following sections, your OES 2 SP1 servers are upgraded according to the schedule you set.
To ensure that your upgrade runs smoothly, we recommend that you read through the following sections before actually doing the work outlined in them.
Section B.1, “Preparing the Environment,” on page 93 Section B.2, “Replicating the Channels to Your ZENworks 11 SP2 Server,” on page 94 Section B.3, “Creating a Password Answer File,” on page 94 Section B.4, “Preparing the Bundles for Upgrading,” on page 95 Section B.5, “Preparing the OES 2 SP1 Servers for Upgrading,” on page 95 Section B.6, “Assigning the Bundles and Scheduling the Upgrades,” on page 95
B.1 Preparing the EnvironmentBefore you can use ZENworks 11 SP2 to upgrade OES 2 SP1 servers to OES 2 SP2, you must have the following:
A ZENworks 11 SP2 server installed and running in your network.
For more information, see the ZENworks 11 SP2 Server Installation Guide. The ZENworks 11 SP2 Agent installed on each OES 2 SP1 server that you plan to upgrade.
IMPORTANT: The agent included with OES only provides package-management capabilities via the ZENworks Management Daemon. Unless the full agent is installed, updates cannot be scheduled from the ZENworks 11 SP2 server.
Each OES 2 SP1 server registered with the ZENworks 11 SP2 server. Each OES 2 SP1 server updated with the latest OES 2 SP1 and SUSE Linux Enterprise Server
(SLES) 10 SP2 patches.It doesn’t matter which update method you use.
Upgrading to OES 2 SP2 by Using a ZENworks 11 SP2 Server 93

B.2 Replicating the Channels to Your ZENworks 11 SP2 ServerUse the instructions in this section to use subscriptions to replicate the catalog of the following OES 2 SP2 patch channels on your ZENworks 11 SP2 server:
SLES10-SP3-Pool OES2-SP2-Pool
For more information on creating and replicating subscriptions, see Part II, “Subscriptions,” on page 19.
After replication, assign the bundles to the OES 2 SP1 server.
B.3 Creating a Password Answer FileFor the upgrade process to run without user intervention, each SP1 server must have an eDirectory password answer file for the YaST install.
An answer file can only be created in two circumstances:
On an OES 2 SP2 server you have already installed or upgraded.
or Install the yast2-novell-common package by using the following command after assigning the
SLES10-SP3-Pool and OES2-SP2-Pool bundles mentioned in Section B.6, “Assigning the Bundles and Scheduling the Upgrades,” on page 95./opt/novell/zenworks/bin/zac install --no-confirm yast2-novell-common
The answer file creation software is not available through the OES 2 SP1 patch channel.
To create the answer file:
1 As root, open a terminal prompt.2 Enter the following command:
sudo yast2 ./create-answer-file password optional_DSFW_Domain_Admin_password
where password=the eDirectory Admin password and optional_DSFW_domain_admin_password=the Domain Services for Windows (DSfW) Domain Administrator’s password, if it is needed for any of the servers being upgraded. (The existence of a second password in the answer file doesn’t affect the upgrade process on servers that don’t have DSfW installed).
IMPORTANT: All uses of an exclamation mark (!) require that you escape the character by using a backslash (\). For example, the password novell! must be specified as novell\!.A dash (-) used at beginning of password also requires escaping. For example, -novell- must be specified as \-novell-.
3 Press Enter to close the confirmation message.4 Copy the resulting file named answer from your working directory to the server you will use to
prepare the bundles for upgrading in the next section, Section B.4, “Preparing the Bundles for Upgrading,” on page 95.
94 ZENworks 11 SP2 Linux Package Management Reference
During the upgrade process, the answer file is uploaded to the /opt/novell/oes-install directory on each upgraded SP1 server by the OES2-SP2-File Bundle script you create in the next section.
5 Continue with Section B.4, “Preparing the Bundles for Upgrading,” on page 95.
B.4 Preparing the Bundles for UpgradingBefore you can use the downloaded bundles to upgrade your servers, you must download the ZEN11_OES2Upgrade.zip file from the ZENworks 11 SP2 Download Web site (http://download.novell.com/Download?buildid=W0Eap_18vis), then follow the procedure to upgrade an OES 2 SP1 device to an OES 2 SP2 managed device in the Readme on the ZENworks 11 SP2 Download Web site (http://download.novell.com/Download?buildid=W0Eap_18vis).
B.5 Preparing the OES 2 SP1 Servers for UpgradingBefore your OES 2 SP1 servers are upgraded, make sure you complete the following steps.
If you plan to schedule immediate upgrades in Section B.6, “Assigning the Bundles and Scheduling the Upgrades,” on page 95, you should do the steps now.
If you plan to schedule the upgrades to happen later, you have the option to do the steps later. Just make sure that they are completed before the upgrade process begins.
1 Make sure there are no Mozilla applications running on the OES 2 SP1 servers you are upgrading.
2 On any servers that have the ZENworks Agent installed for the first time, check whether the SLES 10 SP2 and OES 2 SP1 installation sources are listed in YaST Control Center > Installation Source. If the sources are not listed, add them back before starting the upgrade. Otherwise, the upgrade pauses with a yast2 pop-up asking whether to continue, and manual intervention is required to complete the upgrade.
B.6 Assigning the Bundles and Scheduling the Upgrades
TIP: If you have a large-scale deployment, remember that you can set separate bundle deployment and installation schedules.
1 Assign the SLES10-SP3-Pool to the OES 2 SP1 servers with Distribution Schedule:1a In ZENworks Control Center, click Bundles.1b Click SLES10-SP3-Pool.1c In the left column, select the SLES10-SP3-Pool entry.1d Click Action > Assign to Device.1e Click Add, click the down-arrow by Servers, then select the servers you want to assign.1f Click OK > Next > Next > Finish > OK.
NOTE: In the Bundle Assignment wizard, do not select Install Immediately after Distribution or Launch Immediately after Installation.
Upgrading to OES 2 SP2 by Using a ZENworks 11 SP2 Server 95

2 Assign the OES2-SP2-Pool to the OES 2 SP1 servers with Distribution Schedule:2a In the ZENworks Control Center, click Bundles.2b Click OES2-SP2-Pool.2c In the left column, select the OES2-SP2-Pool catalog entry.2d Click Action > Assign to Device.2e Click Add, click the down-arrow by Servers, then select the servers you want to assign.2f Click OK > Next > Next > Finish > OK.
NOTE: In the Bundle Assignment wizard, do not select Install Immediately after Distribution or Launch Immediately after Installation.
3 Assign the OES2Upgrade Bundle to the OES 2 SP1 servers, and schedule the bundles to install appropriately:3a In the ZENworks Control Center, click Bundles.3b In the left column, select the OES2Upgrade entry.3c Click Action > Assign to Device.3d Click Add, click the down-arrow by Servers, then select the servers you want to assign.3e Click OK > Next.3f Schedule the bundles to install according to your organization’s policy.
3g Click Next > Finish > OK.
IMPORTANT: The servers you have selected in the preceding steps are now prepared to be upgraded to OES 2 SP2. The actual upgrade operations occur automatically as scheduled.
WARNING: Make sure that both the SLES10-SP3-Pool and the OES2-SP2-Pool bundles have been applied before applying OES2Upgrade bundle.
96 ZENworks 11 SP2 Linux Package Management Reference

C CUpgrading to OES 2 SP3 by Using a ZENworks 11 SP2 Server
The information and instructions in the following sections help you to perform an unattended, online upgrade from Open Enterprise Server (OES) 2 Service Pack (SP)2 to OES 2 SP3 by using ZENworks 11 SP2. After you complete the instructions in the following sections, your OES 2 SP2 servers are upgraded according to the schedule you set.
To ensure that your upgrade runs smoothly, we recommend that you read through the following sections before actually doing the work outlined in them.
Section C.1, “Preparing the Environment,” on page 97 Section C.2, “Replicating the Channels to Your ZENworks 11 SP2 Server,” on page 98 Section C.3, “Creating a Password Answer File,” on page 98 Section C.4, “Preparing the Bundles for Upgrading,” on page 98 Section C.5, “Preparing the OES 2 SP2 Servers for Upgrading,” on page 99 Section C.6, “Assigning the Bundles and Scheduling the Upgrades,” on page 99
C.1 Preparing the EnvironmentBefore you can use ZENworks 11 SP2 to upgrade OES 2 SP2 servers to OES 2 SP3, you must have the following:
A ZENworks 11 SP2 server installed and running in your network.
For more information, see the ZENworks 11 SP2 Server Installation Guide. The ZENworks 11 SP2 Agent installed on each OES 2 server that you plan to upgrade.
IMPORTANT: The agent included with OES only provides package-management capabilities via the ZENworks Management Daemon. Unless the full agent is installed, updates cannot be scheduled from the ZENworks 11 SP2 server.
Each OES 2 SP2 server registered with the ZENworks 11 SP2 server. Each OES 2 SP2 server updated with the latest OES 2 SP2 and SUSE Linux Enterprise Server
(SLES) 10 SP3 patches.It doesn’t matter which update method you use.
Upgrading to OES 2 SP3 by Using a ZENworks 11 SP2 Server 97

C.2 Replicating the Channels to Your ZENworks 11 SP2 ServerUse the instructions in this section to use subscriptions to replicate the catalog of the following OES 2 SP3 patch channels on your ZENworks 11 SP2 server:
SLES10-SP4-Pool OES2-SP3-Pool
For more information on creating and replicating subscriptions, see Part II, “Subscriptions,” on page 19.
After replication, assign the bundles to the OES 2 SP2 server.
C.3 Creating a Password Answer FileFor the upgrade process to run without user intervention, each SP2 server must have an eDirectory password answer file for the YaST install.
To create the answer file:
1 As root, open a terminal prompt.2 Enter the following command:
sudo yast2 ./create-answer-file password optional_DSFW_Domain_Admin_password
where password=the eDirectory Admin password and optional_DSFW_domain_admin_password=the Domain Services for Windows (DSfW) Domain Administrator’s password, if it is needed for any of the servers being upgraded. (The existence of a second password in the answer file doesn’t affect the upgrade process on servers that don’t have DSfW installed).
IMPORTANT: All uses of an exclamation mark (!) require that you escape the character by using a backslash (\). For example, the password novell! must be specified as novell\!.A dash (-) used at beginning of password also requires escaping. For example, -novell- must be specified as \-novell-.
3 Press Enter to close the confirmation message.4 Copy the resulting file named answer from your working directory to the server you will use to
prepare the bundles for upgrading in the next section, Section C.4, “Preparing the Bundles for Upgrading,” on page 98.During the upgrade process, the answer file is uploaded to the /opt/novell/oes-install directory on each upgraded SP2 server by the OES2-SP3-File Bundle script you create in the next section.
5 Continue with Section C.4, “Preparing the Bundles for Upgrading,” on page 98.
C.4 Preparing the Bundles for UpgradingBefore you can use the downloaded bundles to upgrade your servers, you must download the ZEN11_OES2Upgrade.zip file from the ZENworks 11SP2 Download Web site (http://download.novell.com/Download?buildid=W0Eap_18vis), then follow the procedure to upgrade an OES 2 SP2 device to an OES 2 SP3 managed device in the Readme on the ZENworks 11SP2 Download Web site (http://download.novell.com/Download?buildid=W0Eap_18vis).
98 ZENworks 11 SP2 Linux Package Management Reference

C.5 Preparing the OES 2 SP2 Servers for UpgradingBefore your OES 2 SP2 servers are upgraded, make sure you complete the following steps.
If you plan to schedule immediate upgrades in Section C.6, “Assigning the Bundles and Scheduling the Upgrades,” on page 99, you should do the steps now.
If you plan to schedule the upgrades to happen later, you have the option to do the steps later. Just make sure that they are completed before the upgrade process begins.
1 Make sure there are no Mozilla applications running on the OES 2 SP2 servers you are upgrading.
2 On any servers that have the ZENworks Agent installed for the first time, check whether the SLES 10 SP3 and OES 2 SP2 installation sources are listed in YaST Control Center > Installation Source. If the sources are not listed, add them back before starting the upgrade. Otherwise, the upgrade pauses with a yast2 pop-up asking whether to continue, and manual intervention is required to complete the upgrade.
C.6 Assigning the Bundles and Scheduling the Upgrades
TIP: If you have a large-scale deployment, remember that you can set separate bundle deployment and installation schedules.
1 Assign the SLES10-SP4-Pool to the OES 2 SP2 servers with Distribution Schedule:1a In the ZENworks Control Center, click Bundles.1b Click SLES 10-SP4-Pool.1c In the left column, select the SLES 10-SP4-Pool entry.1d Click Action > Assign to Device.1e Click Add, click the down-arrow by Servers, then select the servers you want to assign.1f Click OK > Next > Next > Finish > OK.
NOTE: In the Bundle Assignment wizard, do not select Install Immediately after Distribution or Launch Immediately after Installation.
2 Assign the OES2-SP3-Pool to the OES 2 SP2 servers with Distribution Schedule:2a In the ZENworks Control Center, click Bundles.2b Click OES2-SP3-Pool.2c In the left column, select the OES2-SP3-Pool catalog entry.2d Click Action > Assign to Device.2e Click Add, click the down-arrow by Servers, then select the servers you want to assign.2f Click OK > Next > Next > Finish >OK.
NOTE: In the Bundle Assignment wizard, do not select Install Immediately after Distribution or Launch Immediately after Installation.
Upgrading to OES 2 SP3 by Using a ZENworks 11 SP2 Server 99

3 Assign the OES2Upgrade Bundle to the OES 2 SP2 servers, and schedule the bundles to install appropriately:3a In the ZENworks Control Center click Bundles.3b In the left column, select the OES2Upgrade entry.3c Click Action > Assign to Device.3d Click Add, click the down-arrow by Servers, then select the servers you want to assign.3e Click OK > Next.3f Schedule the bundles to install according to your organization’s policy.
3g Click Next > Finish > OK.
IMPORTANT: The servers you have selected in the preceding steps are now prepared to be upgraded to OES 2 SP3. The actual upgrade operations occur automatically as scheduled.
WARNING: Make sure that both the SLES10-SP4-Pool and the OES2-SP3-Pool bundles have been applied before applying the OES2Upgrade bundle.
100 ZENworks 11 SP2 Linux Package Management Reference

D DUpgrading to OES 11 SP1 by Using a ZENworks 11 SP2 Server
The information and instructions in the following sections help you to perform an online upgrade from Open Enterprise Server (OES) 11 to OES 11 SP1 by using ZENworks 11 SP2. After you perform the steps in the following sections, your OES 11 servers will be upgraded based on the schedule you set.
To ensure that your upgrade runs smoothly, we recommend that you read the following sections before performing the work outlined in them.
Section D.1, “Preparing the Environment,” on page 101 Section D.2, “Replicating the Channels to Your ZENworks 11 SP2 Server,” on page 101 Section D.3, “Preparing the Bundles for Upgrading,” on page 102 Section D.4, “Preparing the OES 11 Servers for Upgrading,” on page 102 Section D.5, “Assigning the Bundles and Scheduling the Upgrades,” on page 103 Section D.6, “Reconfiguring OES Services after Rebooting,” on page 104
D.1 Preparing the EnvironmentBefore you can use ZENworks 11 SP2 to upgrade OES 11 servers to OES 11 SP1, you must have the following:
A ZENworks 11 SP2 server installed and running in your network.
For more information, see the ZENworks 11 SP2 Server Installation Guide The ZENworks 11 SP2 Agent installed on each OES 11 server that you plan to upgrade. Each OES 11 server registered with the ZENworks 11 SP2 server. Each OES 11 server updated with the latest OES 11 and SUSE Linux Enterprise Server (SLES) 11
SP1 patches. It does not matter which update method you use.
D.2 Replicating the Channels to Your ZENworks 11 SP2 ServerUse subscriptions to replicate the catalog of the following OES 11 patch channels on your ZENworks 11 SP2 server:
OES11-SP1-Pool SLES11-SP2-Core SLES11-SP2-Updates
Upgrading to OES 11 SP1 by Using a ZENworks 11 SP2 Server 101

For more information on creating and replicating subscriptions, see Part II, “Subscriptions,” on page 19.
After replication, assign the bundles to the OES 11 server.
D.3 Preparing the Bundles for UpgradingBefore you can use the downloaded bundles to upgrade your servers, you must create an empty OES11Upgrade bundle and add two actions.
1 In ZENworks Control Center, click Bundles.2 Click New and select Bundle.3 Select Linux Bundle and click Next.4 Select Empty Bundle and click Next.5 Type the bundle name as OES11Upgrade and click Next.6 Click Finish and complete the bundle creation process.7 Click the Action tab of the bundle you just created.8 Select the Install tab and click Add. 9 Select Run Script.
10 Specify the Action Name as Upgrade and select Define Your Own Script as the Script to Run.11 Next to the Script content option, click Edit.12 In the Edit - Script Content dialog box, paste the following script and click OK.
/bin/sleep 300
/opt/novell/zenworks/bin/zac dist-upgrade --no-confirm SLES11-SP2-Core-bundle OES11-SP1-Pool-bundle SLES11-SP2-Updates-bundle
if [ "$?" != "0" ] ; then
exit 1
fi
13 In the Wait before proceeding to next action section, select When Action is Complete.14 Click the Advanced tab and in the Executable security level section, select Run as root and then click
OK.15 Click the Install tab, click Add, then select Reboot/Shutdown from the drop-down list.16 Select Display a warning message before doing Reboot/Shutdown and click OK.17 Click Apply and publish the bundle.
D.4 Preparing the OES 11 Servers for UpgradingBefore your OES 11 servers are upgraded, make sure that no Mozilla applications are running on the OES 11 servers that you are patching.
102 ZENworks 11 SP2 Linux Package Management Reference

D.5 Assigning the Bundles and Scheduling the UpgradesComplete the following procedures to prepare your servers to be upgraded to OES 11 SP1. The actual upgrade operations occur automatically as scheduled.
D.5.1 Assigning the SLES11-SP2-Core Bundle to the OES 11 Servers
1 In ZENworks Control Center, click Bundles.2 Click SLES11-SP2-Core.3 In the left column, select the SLES11-SP2-Core-bundle entry.4 Click Action > Assign to Device.5 Click the down-arrow next to Servers, then select the servers you want to assign the bundle to.6 Click OK > Next.7 Select the Distribution Schedule and click Next.8 Select the Schedule type as Now and click Next.
IMPORTANT: Do not select Install Immediately after Distribution or Launch Immediately after Installation.
9 Select Next > Finish.
D.5.2 Assigning the OES11-SP1-Pool Bundle to the OES 11 Servers
1 In ZENworks Control Center, click Bundles.2 Click OES11-SP1-Pool.3 In the left column, select the OES11-SP1-Pool-bundle entry.4 Click Action > Assign to Device.5 Click the down-arrow next to Servers, then select the servers you want to assign the bundle to.6 Click OK > Next.7 Select the Distribution Schedule and click Next.8 Select the Schedule type as Now and click Next.
IMPORTANT: Do not select Install Immediately after Distribution or Launch Immediately after Installation.
9 Select Next > Finish.
D.5.3 Assigning the SLES11-SP2-Updates Bundle to the OES 11 Servers
1 In ZENworks Control Center, click Bundles.2 Click SLES11-SP2-Updates.3 In the left column, select the SLES11-SP2-Updates-bundle entry.4 Click Action > Assign to Device.5 Click the down-arrow next to Servers, then select the servers you want to assign.6 Click OK > Next.7 Select the Distribution Schedule and click Next.
Upgrading to OES 11 SP1 by Using a ZENworks 11 SP2 Server 103

8 Select the Schedule type as Now and click Next.
IMPORTANT: Do not select Install Immediately after Distribution or Launch Immediately after Installation.
9 Select Next > Finish.
D.5.4 Assigning the OES11Upgrade Bundle to the OES 11 Servers
1 In ZENworks Control Center, click Bundles.2 In the left column, select the OES11Upgrade entry.3 Click Action > Assign to Device.4 Click the down-arrow next to Servers, then select the servers you want to assign the bundle to.5 Click OK > Next.6 Select the Distribution Schedule and click Next.7 Select the appropriate distribution type and select Install Immediately after Distribution.8 Click Next > Finish.
IMPORTANT: The servers you selected in the preceding steps are now ready to be upgraded to OES 11 SP1. The actual upgrade operations occur automatically as scheduled.
WARNING: Make sure that the SLES11-SP2-Core, OES11-SP1-Pool and SLES11-SP2-Updates bundles have been applied before applying the OES11Upgrade bundle.
D.6 Reconfiguring OES Services after RebootingThe upgrade process includes an automatic server reboot. After the reboot, log in to the server and run yast2 channel-upgrade-oes to complete the OES services reconfiguration. You will be prompted for the eDirectory or Domain Services for Windows password. If the answer file has not been provided, supply the password and continue.
104 ZENworks 11 SP2 Linux Package Management Reference

E EUpgrading Base SLES10 SP3 to SLES10 SP4 for OES 2 SP3 By Using a ZENworks 11 SP2 Server
The information and instructions in the following sections help you to upgrade base SUSE Linux Enterprise Server (SLES) 10 SP3 to SLES 10 SP4 for OES 2 SP3 by using ZENworks 11 SP2. After you complete the instructions in the following sections, your base SLES 10 SP3 servers are upgraded according to the schedule you set.
To ensure that your upgrade runs smoothly, you should read the following sections before beginning the upgrade.
Section E.1, “Preparing the Environment,” on page 105 Section E.2, “Replicating the Channels to Your ZENworks 11 SP2 Server,” on page 106 Section E.3, “Preparing the Bundles for Upgrading,” on page 106 Section E.4, “Preparing the OES 2 SP3 (Base SLES 10 SP3) Servers for Upgrading,” on page 106 Section E.5, “Assigning the Bundles and Scheduling the Upgrades,” on page 106 Section E.6, “Assigning the SLES10-SP4-Updates Bundle to the Servers,” on page 107
E.1 Preparing the EnvironmentBefore you can use ZENworks 11 SP2 to upgrade OES 2 SP3 (base SLES 10 SP3) servers to OES 2 SP3 (base SLES 10 SP4), you must have the following prerequisites in place:
A ZENworks 11 SP2 server is installed and running in your network.
For more information, see the ZENworks 11 SP2 Server Installation Guide. The ZENworks 11 SP2 Agent is installed on each OES 2 SP3 server that you plan to upgrade.
IMPORTANT: The agent included with OES provides only package-management capabilities via the ZENworks Management Daemon. Unless the full agent is installed, updates cannot be scheduled from the ZENworks 11 SP2 server.
Each OES 2 SP3 (base SLES 10 SP3) server is registered with the ZENworks 11 SP2 server. The OES 2 SP3 (base SLES 10 SP3) server is updated with the latest OES 2 SP3 and SLES 10 SP3
patches.It doesn’t matter which update method you use.
Upgrading Base SLES10 SP3 to SLES10 SP4 for OES 2 SP3 By Using a ZENworks 11 SP2 Server 105

E.2 Replicating the Channels to Your ZENworks 11 SP2 ServerRefer to Part II, “Subscriptions,” on page 19 to use subscriptions to replicate the catalog of the following OES 2 SP3 patch channels on your ZENworks 11 SP2 server:
SLES10-SP4-Pool SLES10-SP4-Updates
E.3 Preparing the Bundles for UpgradingBefore you can use the downloaded bundles to upgrade your servers, you must edit the SLES10-SP4-Pool bundle to add the Reboot action after the bundle installation.
1 In ZENworks Control Center, click Bundles.2 Click SLES10-SP4-Pool.3 In the left column, select SLES10-SP4-Pool-bundle.4 Select the Actions tab, then select the Install tab.5 Click Add > Select Reboot/Shutdown > Apply.6 Click Publish to publish the new version of the bundle.
E.4 Preparing the OES 2 SP3 (Base SLES 10 SP3) Servers for UpgradingBefore your OES 2 SP3 (base SLES 10 SP3) servers are upgraded, ensure that there are no Mozilla applications running on the OES 2 SP3 servers you are upgrading.
E.5 Assigning the Bundles and Scheduling the Upgrades
TIP: If you have a large-scale deployment, remember that you can set separate bundle deployment and installation schedules.
Assign the SLES10-SP4-Pool bundle to the OES 2 SP3 servers and select a distribution schedule:
1 In ZENworks Control Center, click Bundles.2 Click SLES10-SP4-Pool.3 In the left column, select SLES10-SP4-Pool-bundle.4 Click Action > Assign to Device.5 In the Select Objects window, click the arrow next to Servers.6 From the list of servers, select the servers that you want to assign the bundle to.7 Click OK > Next.8 Select the distribution schedule and click Next.9 Select the distribution type.
10 Click Next > Finish.
106 ZENworks 11 SP2 Linux Package Management Reference

IMPORTANT: The servers you have selected in the preceding steps are now prepared for the OES 2 SP3 (SLES 10 SP4) upgrade. The actual upgrade operations occur automatically as scheduled and as servers are rebooted. After installing SLES10-SP4-Pool-bundle, install SLES10-SP4-Updates-bundle to list the appropriate SP version by SPident.
E.6 Assigning the SLES10-SP4-Updates Bundle to the ServersTo assign the SLES10-SP4-Updates bundle to the OES 2 SP3 (base SLES 10 SP4) servers and select a distribution schedule:
NOTE: Before applying SLES10-SP4-Updates-bundle, ensure that SLES10-SP4-Pool-bundle is successfully applied on the OES 2 SP3 server and the server is rebooted.
1 In ZENworks Control Center, click Bundles.2 Click SLES10-SP4-Updates.3 In the left column, select SLES10-SP4-Updates-bundle.4 Click Action > Assign to Device.5 In the Select Objects window, click the arrow next to Servers.6 From the list of servers, select the servers that you want to assign the bundle to.7 Click OK > Next.8 Select the distribution schedule and click Next.9 Select the distribution type.
10 Click Next> Finish.
IMPORTANT: If the NOT up to date message is displayed when you run the SPident (Service Pack Identification) tool, use the following commands to install the latest RPMs for fuse, libfuse2, and ruby:
zac in fuse
zac in libfuse2
zac in ruby
Upgrading Base SLES10 SP3 to SLES10 SP4 for OES 2 SP3 By Using a ZENworks 11 SP2 Server 107

108 ZENworks 11 SP2 Linux Package Management Reference

F FUsing ZENworks 11 SP2 to Upgrade from SUSE Linux Enterprise Server 11 SP1 to SUSE Linux Enterprise Server 11 SP2
This section helps you use ZENworks 11 SP2 to perform an unattended, online upgrade from SUSE Linux Enterprise Server (SLES) 11 SP1 to SLES 11 SP2. After you perform the steps in the following sections, your SLES 11 SP1 servers are upgraded based on the schedule you set. This involves replication of bundles from the Novell repository by using the Subscription feature, deploying to the agent on a certain schedule, then creating a bundle with a run script action to upgrade the service pack.
As an example, suppose that you need to upgrade a set of managed devices that have SLES 11 SP1 installed with the latest SLES 11 SP1 updates in the ZENworks 11 SP2 Management Zone.
Prerequisites:
A ZENworks 11SP2 server is installed and running in your network. For more information, see the ZENworks 11SP2 Installation Guide (http://www.novell.com/documentation/zenworks11/zen11_installation/data/bookinfo.html).
The ZENworks 11 SP2 Agent is installed on each SLES 11SP1 server that you plan to upgrade. Each SLES 11 SP1 server is registered with the ZENworks 11 SP2 server. (Optional) Each SLES 11 SP1 server is updated with the latest patches.
F.1 To upgrade from SLES 11 SP1 to SLES 11 SP2:1 Replicate the following catalogs, SLES11-SP1-Pool, SLES11-SP1-Updates, SLES11-SP2-Core and
SLES11-SP2-Updates by using the Subscription feature.For information on creating and replicating Subscriptions, see Subscription (http://www.novell.com/documentation/zenworks11/zen11_cm_linuxpkg_mgmt/data/br88762.html) in the Novell ZENworks 11 SP2 Linux Package Management Reference.
2 After you replicate the subscription, assign the bundles listed in step 1 to the SLES 11 SP1 server managed device.
IMPORTANT: Do not select the Install Immediately after Distribution or Launch Immediately after Installation options in the Bundle Assignment Wizard.
3 In ZENworks Control Center, click Bundles.4 Create a Linux SLE11SP2Upgrade bundle.5 Select Empty Bundle as the Bundle Category type.6 Follow the wizard to complete the bundle creation.
Using ZENworks 11 SP2 to Upgrade from SUSE Linux Enterprise Server 11 SP1 to SUSE Linux Enterprise Server 109
7 Select Actions > Install Actionset and add the Run Script action to the bundle.8 In the Run Script action menu, select Script to Run as Define your own script.9 In the Script content field copy the following code, then click OK.
/bin/sleep 180
/opt/novell/zenworks/bin/zac dist-upgrade SLES11-SP1-Pool-bundle SLES11-SP1-Updates-bundle SLES11-SP2-Core-bundle SLES11-SP2-Updates-bundle --no-confirm
if [ “$?” != “0” ] ; then
exit 1
fi
10 Select the When action is complete option in stead of the default No wait option and click Ok.11 Click Apply and then Publish the bundle.12 Assign the SLE11SP2 Upgrade Bundle to the SLES 11 SP1 managed devices, and schedule the
bundles to install appropriately.
IMPORTANT: Make sure that SLES11-SP1-Pool-bundle, SLES11-SP1-Updates-bundle, SLES11-SP2-Core-bundle and SLES11-SP2-Updates-bundle has been assigned before applying the SLE11SP2Upgrade bundle.
13 After the patching is successful, verify the following in the managed device: PATCHLEVELis updated from 1 to 2 under “/etc/SuSE-release”.
Similar steps can be performed by replicating the following catalogs, SLED11-SP1-Pool, SLED11-SP1-Updates, SLED11-SP2-Core and SLED11-SP2-Updates and then using it to upgrade a SLED 11 SP1 managed device to SLED 11 SP2.
110 ZENworks 11 SP2 Linux Package Management Reference

G GUsing a ZENworks 11 SP2 Server to Patch OES 11
The information and instructions in the following sections help you use ZENworks 11 SP2 to perform an unattended, online patching of Open Enterprise Server (OES) 11. After you complete the instructions in the following sections, your OES 11 servers are patched according to the schedule you set.
To ensure that the process runs smoothly, you should read the following sections before beginning the tasks.
Section G.1, “Preparing the Environment,” on page 111 Section G.2, “Replicating the Channels to Your ZENworks 11 SP2 Server,” on page 111 Section G.3, “Preparing the OES 11 Servers for Patching,” on page 112 Section G.4, “Assigning the Bundles and Scheduling the Patching,” on page 112
G.1 Preparing the EnvironmentBefore you can use ZENworks 11 SP2 to patch OES 11 servers, you must have the following prerequisites in place:
A ZENworks 11 SP2 server is installed and running in your network.
For more information, see the ZENworks 11 SP2 Server Installation Guide The ZENworks 11 SP2 Agent is installed on each OES 11 server that you plan to patch. Each OES 11 server is registered with the ZENworks 11 SP2 server.
G.2 Replicating the Channels to Your ZENworks 11 SP2 ServerRefer to Part II, “Subscriptions,” on page 19 to use subscriptions to replicate the catalog of the following OES 11 patch channels on your ZENworks 11 SP2 server:
SLES11-SP1-Pool SLES11-SP1-Updates OES11-Pool OES11-Updates
Using a ZENworks 11 SP2 Server to Patch OES 11 111

G.3 Preparing the OES 11 Servers for PatchingBefore your OES 11 servers are patched, ensure that you complete the following steps.
1 Ensure that there are no Mozilla applications running on the OES 11 servers you are patching.2 On any OES 11 servers that have the ZENworks Agent installed for the first time, verify that the
SLES 11 SP1 and OES 11 installation sources are available in the Installation Source. If the sources are not listed, add them before patching the servers.
G.4 Assigning the Bundles and Scheduling the PatchingAfter you complete the procedures in these sections, the servers you select are prepared to be patched with SLES 11 SP1 updates and OES 11 updates. The actual patching operations occur automatically as scheduled.
TIP: If you have a large-scale deployment, remember that you can set separate bundle deployment and installation schedules.
Section G.4.1, “Assigning SLES11-SP1-Pool to the OES 11 Servers,” on page 112 Section G.4.2, “Assigning the OES11-Pool to the OES 11 Servers,” on page 112 Section G.4.3, “Assigning SLES11-SP1-Updates to the OES 11 Servers,” on page 113 Section G.4.4, “Assigning OES11-Updates to the OES 11 Servers,” on page 113
G.4.1 Assigning SLES11-SP1-Pool to the OES 11 Servers
To assign the SLES11-SP1-Pool bundle to the OES 11 servers and select a distribution schedule:
1 In ZENworks Control Center, click Bundles.2 Click SLES11-SP1-Pool.3 In the left column, select SLES11-SP1-Pool-bundle.4 Click Action > Assign to Device.5 In the Select Objects window, click the arrow next to Servers.6 From the list of servers, select the servers that you want to assign the bundle to.7 Click OK > Next.8 Select the distribution schedule and click Next.9 Select the distribution type.
Do not select Install Immediately after Distribution or Launch Immediately after Installation.10 Click Next > Finish.
G.4.2 Assigning the OES11-Pool to the OES 11 Servers
To assign the OES11-Pool bundle to the OES 11 servers and select a distribution schedule:
1 In ZENworks Control Center, click Bundles.2 Click OES11-Pool.3 In the left column, select OES11-Pool-bundle.
112 ZENworks 11 SP2 Linux Package Management Reference
4 Click Action > Assign to Device.5 In the Select Objects window, click the arrow next to Servers.6 From the list of servers, select the servers that you want to assign the bundle to.7 Click OK > Next.8 Select the distribution schedule and click Next.9 Select the distribution type.
Do not select Install Immediately after Distribution or Launch Immediately after Installation.10 Click Next> Finish.
G.4.3 Assigning SLES11-SP1-Updates to the OES 11 Servers
To assign the SLES11-SP1-Updates bundle to the OES 11 servers and select a distribution schedule:
1 In ZENworks Control Center, click Bundles.2 Click SLES11-SP1-Updates.3 In the left column, select SLES11-SP1-Updates-bundle.4 Click Action > Assign to Device.5 In the Select Objects window, click the arrow next to Servers.6 From the list of servers, select the servers that you want to assign the bundle to.7 Click OK > Next.8 Select the distribution schedule and click Next.9 Select the appropriate distribution type and select Install Immediately after Distribution.
10 Click Next > Finish.
G.4.4 Assigning OES11-Updates to the OES 11 Servers
To assign the OES11-Updates bundle to the OES 11 servers and select a distribution schedule:
1 In ZENworks Control Center, click Bundles.2 Click OES11-Updates.3 In the left column, select OES11-Updates-bundle.4 Click Action > Assign to Device.5 In the Select Objects window, click the arrow next to Servers.6 From the list of servers, select the servers that you want to assign the bundle to.7 Click OK > Next.8 Select the distribution schedule and click Next.9 Select the appropriate distribution type and select Install Immediately after Distribution.
10 Click Next> Finish.
Using a ZENworks 11 SP2 Server to Patch OES 11 113

114 ZENworks 11 SP2 Linux Package Management Reference
H HUsing a ZENworks 11 SP2 Server to Patch OES 11 SP1
The information and instructions in the following sections help you use ZENworks 11 SP2 to perform an unattended, online patching of Open Enterprise Server (OES) 11 SP1. After you complete the instructions in the following sections, your OES 11 SP1 servers are patched according to the schedule you set.
To ensure that the process runs smoothly, you should read the following sections before beginning the tasks.
Section H.1, “Preparing the Environment,” on page 115 Section H.2, “Replicating the Channels to Your ZENworks 11 SP2 Server,” on page 115 Section H.3, “Preparing the OES 11 SP1 Servers for Patching,” on page 116 Section H.4, “Assigning the Bundles and Scheduling the Patching,” on page 116
H.1 Preparing the EnvironmentBefore you can use ZENworks 11 SP2 to patch OES 11 SP1 servers, you must have the following prerequisites in place:
A ZENworks 11 SP2 server is installed and running in your network.
For more information, see the ZENworks 11 SP2 Server Installation Guide The ZENworks 11 SP2 Agent is installed on each OES 11 SP1 server that you plan to patch. Each OES 11 SP1 server is registered with the ZENworks 11 SP2 server.
H.2 Replicating the Channels to Your ZENworks 11 SP2 ServerRefer to Part II, “Subscriptions,” on page 19 to use subscriptions to replicate the catalog of the following OES 11 SP1 patch channels on your ZENworks 11 SP2 server:
SLES11-SP1-Pool SLES11-SP1-Updates SLES11-SP2-Core SLES11-SP2-Updates OES11-SP1-Pool OES11-SP1-Updates
Using a ZENworks 11 SP2 Server to Patch OES 11 SP1 115

H.3 Preparing the OES 11 SP1 Servers for PatchingBefore your OES 11 SP1 servers are patched, ensure that you complete the following steps.
1 Ensure that there are no Mozilla applications running on the OES 11 SP1 servers you are patching.
2 On any OES 11 SP1 servers that have the ZENworks Agent installed for the first time, verify that the SLES 11 SP2 and OES 11 SP1 installation sources are available in the Installation Source. If the sources are not listed, add them before patching the servers.
H.4 Assigning the Bundles and Scheduling the PatchingAfter you complete the procedures in these sections, the servers you select are prepared to be patched with SLES 11 SP1 updates, SLES 11 SP2 updates and OES 11 SP1 updates. The actual patching operations occur automatically as scheduled.
TIP: If you have a large-scale deployment, remember that you can set separate bundle deployment and installation schedules.
Section H.4.1, “Assigning SLES11-SP1-Pool to the OES 11 SP1 Servers,” on page 116 Section H.4.2, “Assigning SLES11-SP2-Core to the OES 11 SP1 Servers,” on page 117 Section H.4.3, “Assigning the OES11-SP1-Pool to the OES 11 SP1 Servers,” on page 117 Section H.4.4, “Assigning SLES11-SP1-Updates to the OES 11 SP1 Servers,” on page 117 Section H.4.5, “Assigning SLES11-SP2-Updates to the OES 11 SP1 Servers,” on page 118 Section H.4.6, “Assigning OES11-SP1-Updates to the OES 11 SP1 Servers,” on page 118
H.4.1 Assigning SLES11-SP1-Pool to the OES 11 SP1 Servers
To assign the SLES11-SP1-Pool bundle to the OES 11 SP1 servers and select a distribution schedule:
1 In ZENworks Control Center, click Bundles.2 Click SLES11-SP1-Pool.3 In the left column, select SLES11-SP1-Pool-bundle.4 Click Action > Assign to Device.5 In the Select Objects window, click the arrow next to Servers.6 From the list of servers, select the servers that you want to assign the bundle to.7 Click OK > Next.8 Select the distribution schedule and click Next.9 Select the distribution type.
Do not select Install Immediately after Distribution or Launch Immediately after Installation.10 Click Next > Finish.
116 ZENworks 11 SP2 Linux Package Management Reference

H.4.2 Assigning SLES11-SP2-Core to the OES 11 SP1 Servers
To assign the SLES11-SP2-Core bundle to the OES 11 SP1 servers and select a distribution schedule:
1 In ZENworks Control Center, click Bundles.2 Click SLES11-SP2-Core.3 In the left column, select SLES11-SP2-Core-bundle.4 Click Action > Assign to Device.5 In the Select Objects window, click the arrow next to Servers.6 From the list of servers, select the servers that you want to assign the bundle to.7 Click OK > Next.8 Select the distribution schedule and click Next.9 Select the distribution type.
Do not select Install Immediately after Distribution or Launch Immediately after Installation.10 Click Next > Finish.
H.4.3 Assigning the OES11-SP1-Pool to the OES 11 SP1 Servers
To assign the OES11-SP1-Pool bundle to the OES 11 SP1 servers and select a distribution schedule:
1 In ZENworks Control Center, click Bundles.2 Click OES11-SP1-Pool.3 In the left column, select OES11-SP1-Pool-bundle.4 Click Action > Assign to Device.5 In the Select Objects window, click the arrow next to Servers.6 From the list of servers, select the servers that you want to assign the bundle to.7 Click OK > Next.8 Select the distribution schedule and click Next.9 Select the distribution type.
Do not select Install Immediately after Distribution or Launch Immediately after Installation.10 Click Next> Finish.
H.4.4 Assigning SLES11-SP1-Updates to the OES 11 SP1 Servers
To assign the SLES11-SP1-Updates bundle to the OES 11 SP1 servers and select a distribution schedule:
1 In ZENworks Control Center, click Bundles.2 Click SLES11-SP1-Updates.3 In the left column, select SLES11-SP1-Updates-bundle.4 Click Action > Assign to Device.5 In the Select Objects window, click the arrow next to Servers.6 From the list of servers, select the servers that you want to assign the bundle to.7 Click OK > Next.
Using a ZENworks 11 SP2 Server to Patch OES 11 SP1 117

8 Select the distribution schedule and click Next.9 Select the appropriate distribution type and select Install Immediately after Distribution.
10 Click Next > Finish.
H.4.5 Assigning SLES11-SP2-Updates to the OES 11 SP1 Servers
To assign the SLES11-SP2-Updates bundle to the OES 11 SP1 servers and select a distribution schedule:
1 In ZENworks Control Center, click Bundles.2 Click SLES11-SP2-Updates.3 In the left column, select SLES11-SP2-Updates-bundle.4 Click Action > Assign to Device.5 In the Select Objects window, click the arrow next to Servers.6 From the list of servers, select the servers that you want to assign the bundle to.7 Click OK > Next.8 Select the distribution schedule and click Next.9 Select the appropriate distribution type and select Install Immediately after Distribution.
10 Click Next > Finish.
H.4.6 Assigning OES11-SP1-Updates to the OES 11 SP1 Servers
To assign the OES11-SP1-Updates bundle to the OES 11 SP1 servers and select a distribution schedule:
1 In ZENworks Control Center, click Bundles.2 Click OES11-SP1-Updates.3 In the left column, select OES11-SP1-Updates-bundle.4 Click Action > Assign to Device.5 In the Select Objects window, click the arrow next to Servers.6 From the list of servers, select the servers that you want to assign the bundle to.7 Click OK > Next.8 Select the distribution schedule and click Next.9 Select the appropriate distribution type and select Install Immediately after Distribution.
10 Click Next> Finish.
118 ZENworks 11 SP2 Linux Package Management Reference
I IDocumentation Updates
This section contains information on documentation content changes that were made in this Linux Package Management Reference for Novell ZENworks 11 SP2. The information can help you to keep current on updates to the documentation.
The documentation for this product is provided on the Web in two formats: HTML and PDF. The HTML and PDF documentation are both kept up-to-date with the changes listed in this section.
If you need to know whether a copy of the PDF documentation that you are using is the most recent, the PDF document includes a publication date on the title page.
The documentation was updated on the following dates:
I.1 March 2013: Update to ZENworks 11 SP2 (11.2.3)
I.2 November 2012: Update to ZENworks 11 SP2 (11.2.2)
Location Change
Section 4.3, “Editing Subscriptions,” on page 34 Included a note in the following location:
“Patches:” on page 36.
Included the new options for the bug 798040:
“Kernel Package Install type options:” on page 35.
Location Change
Part VII, “Appendixes,” on page 87 The following sections was added:
Appendix H, “Using a ZENworks 11 SP2 Server to Patch OES 11 SP1,” on page 115
Documentation Updates 119

I.3 August 2012: Update for ZENworks 11 SP2 (11.2.1)
Location Change
Part VII, “Appendixes,” on page 87 The following sections were added:
Appendix D, “Upgrading to OES 11 SP1 by Using a ZENworks 11 SP2 Server,” on page 101
Appendix E, “Upgrading Base SLES10 SP3 to SLES10 SP4 for OES 2 SP3 By Using a ZENworks 11 SP2 Server,” on page 105
Appendix F, “Using ZENworks 11 SP2 to Upgrade from SUSE Linux Enterprise Server 11 SP1 to SUSE Linux Enterprise Server 11 SP2,” on page 109
Appendix G, “Using a ZENworks 11 SP2 Server to Patch OES 11,” on page 111
120 ZENworks 11 SP2 Linux Package Management Reference


