52
ZTE MF29A Wireless Router User Guide
1
ZTE MF29AWireless Router
User Guide

2
LEGAL INFORMATION
Copyright © 2012 ZTE CORPORATION.
All rights reserved.
No part of this publication may be excerpted, reproduced, translated or utilized in any form or by any means, electronic or mechanical, including photocopying and microfilm, without the prior written permission of ZTE Corporation.
The manual is published by ZTE Corporation. We reserve the right to make modifi-cations on print errors or update specifications without prior notice.
Version No. : R1.0
Edition Time: 2012-11
Manual No.: 079584505291

3
Getting StartedThe router operates on the HSUPA+/HSUPA/HSDPA/WCDMA networks and GSM/GPRS/EDGE networks and supports voice and data service.
Appearance

4
IndicatorsIndicator State Description
1 WAN signal strength indi-cation
OnSignal strength is very good or good (RSSI >= -90dBm)
BlinkingSignal strength is weak (-100dBm < RSSI < -90dBm)
Off No signal
2 Network mode indica-tion
Blue Registered to 3G network
Red Registered to 2G network
Off Not Registered
3 WAN con-nection status indication
On WAN connection established (PDP activated)
Blinking WAN connection establishing (PDP activating)
Off WAN connection not established (PDP not activated)
4 Phone sta-tus indication
Off PSTN not connected
Blinking Calling via PSTN
On PSTN connected
5 Phone sta-tus indication
Off Local phone hang up
BlinkingPhone picked up, ringing or network CS regis-tering
On In calling

5
Indicator State Description
6 Wi-Fi indication
Off WLAN shut down
Blinking WLAN working normally with data transmission
7 Power indication
On External power supply working normally.
OffExternal power supply disconnected or pow-ered off.
Interface Description1. Phone Standard RJ11 connector for Telephone
2. PSTN Standard RJ11 connector for PSTN
3. WAN/LAN Ethernet connector to Internet
4. LAN1~LAN3 Ethernet connector to computer
5. Reset Reset button
6. POWER Socket
Connector to the external power supply.
7. ON/OFF Turn the router ON or OFF.
8. ANT Connector to external antenna
9. PRESS ANT ON
This button is only used for external antenna. If you connect the external antenna, please press it. Otherwise the RSSI signal of the router will be poor, and your device may not access the Internet.
6
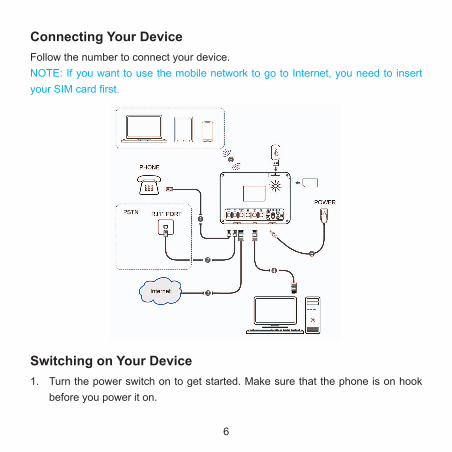
Connecting Your DeviceFollow the number to connect your device.NOTE: If you want to use the mobile network to go to Internet, you need to insert your SIM card first.
Switching on Your Device1. Turn the power switch on to get started. Make sure that the phone is on hook
before you power it on.

7
NOTE: Do not put anything on the top of the router. Do not lay routers to overlap each other during usage.2. Wait 1~2 minutes after turning the router on before you use the service. The
3G & POWER indicator should be lit on.NOTES:• When the router is turned off, an incoming caller will hear the prompt like “The
number you have dialed is currently unavailable.”• If the 3G LED is blinking constantly, try to move the router to another location.
The router takes 1~2 minutes to initialize, attach to the network and obtain an IP address.
Power SupplyFor normal operation, connect the router to the external power adapter. In case of power failure or when there is no available external power supply, the router will not work.
About (U)SIM CardAvoid handling the (U)SIM card unnecessarily. Hold the card by the edges to pre-vent static damage. Keep the (U)SIM card away from electrical and magnetic appli-ances.If you cannot get service, make sure that• You are in an area which has network coverage.• You are using the correct (U)SIM card.

8
Internet AccessConfiguring Your PCFollow the following steps and figures for Windows XP to configure the Internet Protocol for your connection.NOTES:• Wireless Network Connection is used for Wi-Fi connection.• Local Area Connection is used for Network Cable connection.1. Right-click My Network Places, and then select Properties.

9
2. Right-click the icon for Connection, and then select Properties.
3. Select Internet Protocol(TCP/IP), and then click Properties.
10
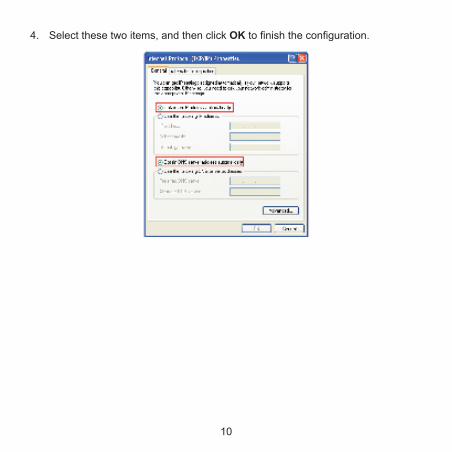
4. Select these two items, and then click OK to finish the configuration.

11
Wireless Connection (Optional)If you want to use Wi-Fi to connect your router, please refer to the following steps.1. Make sure that the WLAN works normal. Please check the Wi-Fi Setting on the
WebGUI Configuration page or check the Wi-Fi indicator .
2. Use your normal Wi-Fi application on the client to search for the available wire-less networks.

12
NOTE: Please set the client to obtain an IP address automatically, and the client will get an IP address like “192.168.0.100”.3. Select the SSID of your device, and then click Connect.
4. Input the password, and then click Connect.
NOTE: There may require the password for Wi-Fi connection. Please check the la-bel on your device to get the default.
13
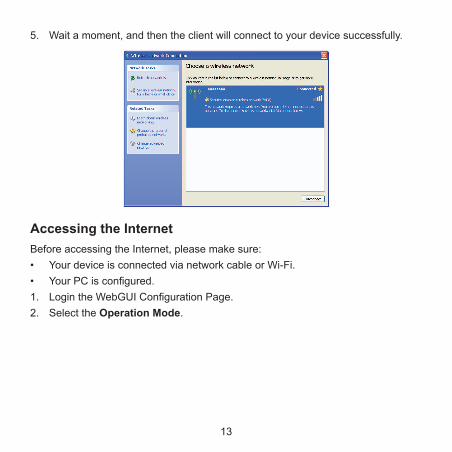
5. Wait a moment, and then the client will connect to your device successfully.
Accessing the InternetBefore accessing the Internet, please make sure:• Your device is connected via network cable or Wi-Fi.• Your PC is configured.1. Login the WebGUI Configuration Page.2. Select the Operation Mode.

14
NOTE:If you select the Bridge mode, you need to connect your clients to the LAN ports via Ethernet cable, and use normal methods to surf directly on your clients. If you want to use other operation mode after Bridge, you need to restore your device.3. Configure the WAN Connection. (Optional)NOTE: This step is used for Cable Broadband mode and 3G/4G Gateway mode.• For Cable Broadbandu Please select PPPoE, and input the User Name and Password.NOTE: Your service provider gives you the User Name and Password.

15
u Please select Static and input all the parameters.NOTE: Your service provider gives you the static address information.

16
u Please select DHCP.NOTE: Your service provider does not give you any parameters.
• For 3G Gateway
4. Begin to enjoy your Internet service.

17
VoiceMaking a CallYou have two ways to make a call:• Through (U)SIM card.• Through PSTN.To make a call:1. Pick up the handset.2. Key in the telephone number.3. You can either press # key on the telephone to send the call, or wait 4~8 sec-
onds for the call to be connected automatically.4. The call will be connected.NOTE: If there is no 3G indication, the RF signal is unavailable. Change the loca-tion of the router and make sure nothing is blocking it.
Answering a CallWhen the phone rings, pick up the handset to answer it. If the telephone has hands-free function you also can answer the call by pressing the Hands-free but-ton. Press the Hands-free button again to end the call.

18
WebGUI ConfigurationAccessing the Configuration Page1. Make sure the connection between your device and the client is correct.2. Launch the Internet browser and enter http://192.168.0.1 in the address bar.NOTE: It is recommended that you use IE (6.0 or later), Firefox (2.0 or later), Opera (10.0 or later), Safari (4.0 or later) or Chrome (5.0 or later).3. The login page appears as follows.
LoginIn the WebGUI Configuration page, select the desired language and input the pass-word (the default Password is admin).Click Login to log in the device.NOTE: If you check Save after type in password, the device will save it. Next time when you want to login the device with the same password, what you need to do is click Login.

19
When you login, the following interface appears.
The whole interface is divided into three parts. Related functions can be executed by operation in the related areas.• Index area: Show the configuration list for your device.• Content area: Show the detailed configuration.• System Information Area: Show the system status and different kinds of tips.
SMSThis function allows you to send or receive short messages. And you can use this function only in 3G Gateway mode. You need to login the WebGUI configuration page first.

20
Sending SMS1. Select SMS > New Message to access the following figure:
2. Enter the recipient’s phone number.3. Enter a message.4. Click Send to send the message.
21
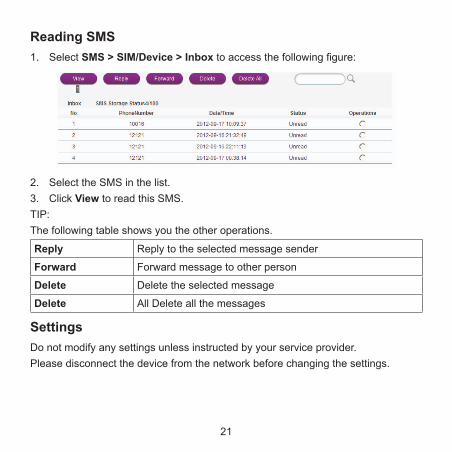
Reading SMS1. Select SMS > SIM/Device > Inbox to access the following figure:
2. Select the SMS in the list.3. Click View to read this SMS.TIP: The following table shows you the other operations.
Reply Reply to the selected message sender
Forward Forward message to other person
Delete Delete the selected message
Delete All Delete all the messages
SettingsDo not modify any settings unless instructed by your service provider.Please disconnect the device from the network before changing the settings.

22
3G SettingsBand SelectSelect Settings > 3G Settings > Band Select and the Band Selection Mode is shown in the following figure:
• Automatic: Device searches for available network.• 3G Only (All Bands): Device searches for WCDMA network only.• 2G Only (All Bands): Device searches for GSM network only.Click Apply to confirm your configuration.
Wi-Fi SettingsStation listSelect Settings > Wi-Fi Setting > Station List, the wireless network stations are shown in the following figure:

23
BasicSelect Settings > Wi-Fi Setting > Basic, the wireless network basic parameters are shown in the following figure:
24
• Wi-Fi On/Off: Enable or disable Wi-Fi.• Network Mode: If all of the wireless devices connect with this router in the
same transmission mode, performance will be improved by choosing the ap-propriate wireless mode.
• Network Name(SSID): Service Set Identifier (SSID). Enter a string less than 32 characters as the name for your wireless local area network (WLAN).
• Broadcast Network Name(SSID): Disable or Enable (Default) this function. If Enable is selected, the router broadcasts the SSID, and other devices can detect and connect to it. If Disable is selected, the other devices cannot detect the router. You can only connect to the router by manual setting.
• AP Isolation: When Enabled is selected, each of your wireless clients will not be able to communicate with each other. When Disable is selected, each of your wireless clients will be able to communicate with each other.
• BSSID: MAC address of the Wi-Fi.• Frequency(Channel): Choose the appropriate channel to optimize the perfor-
mance and coverage of your wireless network.• WDS Mode: WDS mode make the router to communicate with other APs, WDS
connection is two-way communication, APs should know each other’s wireless MAC address. And make sure that all APs share the same SSID and channel.
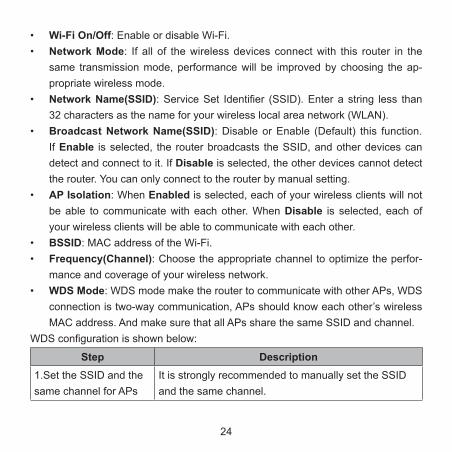
WDS configuration is shown below:
Step Description1.Set the SSID and the same channel for APs
It is strongly recommended to manually set the SSID and the same channel.

25
Step Description
2.Select WDS mode: Disable, Lazy Mode, Bridge Mode or Re-peater Mode
If you select Disable, WDS is disabled.If you select Lazy Mode, WDS is enabled, and set wireless MAC address only on the peer APs.If you select Bridge Mode, WDS is enabled, and set the peer APs wireless MAC address on router. When you set Bridge Mode, your PC can not search for SSID of AP after connected.If you select Repeater Mode, WDS is enabled, and set the peer APs wireless MAC address on router. When you set Repeater Mode, your PC can search for SSID of AP after connected.
3.Select Phy mode:CCK,OFDM, HTMIX or GREENFIELD
CCK: 802.11bOFDM: 802.11gHTMIX: 802.11b/g/n Mixed ModeGREENFIELD: 802.11b/g Mixed Mode
4.Select Encrypt Type:WEP, TKIP, AES
If you select NONE, all the data transmitted without encryption, and other station can access router.If you select the Encrypt Type, you should set all APs the same Encrypt type and password to make the data transfer.
5.Set peer AP's wireless MAC address on router
Only Repeater Mode and Bridge Mode need this.

26
The HT physical Mode parameters are shown below:• Operating Mode: In Mixed Mode, packets are transmitted with a preamble
compatible with the legacy 802.11a/g, the rest of the packet has a new format. In Green Field, high throughput packets are transmitted without a legacy com-patible part.
• Channel Bandwidth: Set the HT physical channel bandwidth.• Guard Interval: Guard interval is to introduce immunity to propagation delays,
echoes and reflections, to which digital data is normally very sensitive.• MCS: The Modulation and Coding Scheme (MCS) is a value that determines
the modulation, coding and number of spatial channels.• Reverse Direction Grant(RDG): Enable RDG or not.• Extension Channel: Set extension channel. Extension channel is also able to
send and receive data.• Aggregation MSDU(A-MSDU):To enable Hyper Throughput TX Aggregate
MAC Service Data Unit, select Enable.• Auto Block ACK: Select to block ACK (Acknowledge Number) or not during
data transferring. When you enable the WDS function, you should set to enable Auto block ACK to prevent the other effect during data transferring.
• Decline BA Request: Select to reject peer BA-Request or not.Click Apply to confirm your configuration.

27
AdvancedSelect Wi-Fi Setting > Advanced, the advanced wireless network parameters are shown in the following figure:
• Beacon Interval: The router broadcasts beacon message to announce that it has buffered frames to deliver. The default value is 100 (ms).Beacons are packets sent by an access point to synchronize a wireless network. It is recom-mended to specify a beacon interval value.
• Data Beacon Rate(DTIM): A Delivery Traffic Indication Message(DTIM) informs next clients to listen to broadcast and multicast messages.
28
• Fragment Threshold: This value should remain at its default value of 2346. If you experience a high packet error rate, you may slightly increase your frag-ment threshold. Setting the fragment threshold too low may result in poor per-formance.
• RTS Threshold: Request To Send (RTS) threshold should be remained as the value of 2347. If you encounter inconsistent data flow, only minor modifications are recommended.
• TX Power: Transmit power should be remained as the value of 100.• Short Preamble: The length of CRC block in the frames during the wireless
communication.• Shot Slot: To indicate that 802.11g is using a shot time slot because there is
no legacy station(802.11b) present.• Tx Burst: Tx burst allows router to deliver better throughput in the same period
and environment in order to increase speed.• Pkt_Aggregate: Increase efficiency by aggregating multiple application pack-
ets data into a single transmission frame. In this way, 802.11n networks can send multiple data packets with the fixed overhead cost in just a single frame.
Country Code: Select the region you live.The Wi-Fi multimedia parameters are shown below:• WMM Capable: When multimedia contents are transferred over wireless net-
work, this function enhances data transfer performance.• APSD Capable: Automatic Power Save Delivery (APSD),enable or disable
data flow using APSD during transmitting for power saving.Click Apply to confirm your configuration.

29
SecuritySelect Wi-Fi Setting > Security, the Security parameters are shown in the follow-ing figure:
Unless the encryption mode is selected, wireless transmissions to and from your wireless network can be easily intercepted and interpreted by unauthorized users.• WPA-PSK/WPA2-PSK: Apply both the WPA-PSK and WPA2-PSK scheme.• WPA Algorithm: TKIP, AES or AUTO.• Pass phrase: You can input hexadecimal digits up to 64 characters or input
ASCII characters choose a length of 63 characters or less.• Key Renewal Interval: Define how long the key should be renewed.You can set Wireless MAC Filtering:
Add MAC FilteringRule
Wireless Dis-able
If disabled, MAC address is not used to control network access.
Wireless AllowSet the MAC address that is allowed to access network.
Wireless RejectSet the MAC address that is not allowed to access network.
MAC Address Enter Mac Address
30
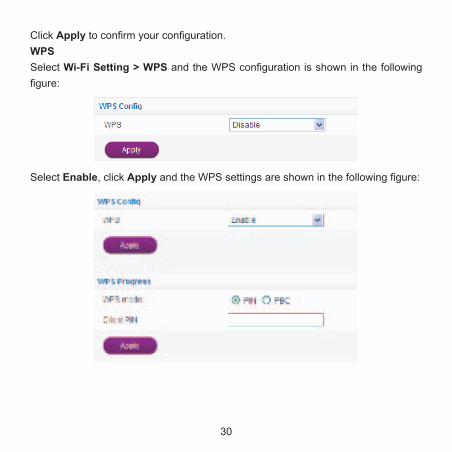
Click Apply to confirm your configuration.WPSSelect Wi-Fi Setting > WPS and the WPS configuration is shown in the following figure:
Select Enable, click Apply and the WPS settings are shown in the following figure:
31
To set WPS, select WPS mode, the two modes are described below:• PIN: Set the client's PIN code in Client PIN field.• PBC: Press the WPS button of the router or select PBC, and then click Apply.
Press the WPS button on the client wireless adapter within two minutes, and the negotiation process will be established.
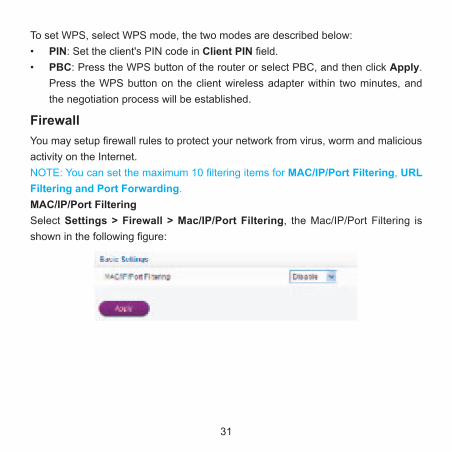
FirewallYou may setup firewall rules to protect your network from virus, worm and malicious activity on the Internet.NOTE: You can set the maximum 10 filtering items for MAC/IP/Port Filtering, URL Filtering and Port Forwarding.MAC/IP/Port FilteringSelect Settings > Firewall > Mac/IP/Port Filtering, the Mac/IP/Port Filtering is shown in the following figure:

32
If you select Enable, the filter settings will appear:
• Default Policy: Set how to handle the packet if none of the rules matches.• MAC address: Set the MAC address that will be filtered.• Dest IP Address: Set the destination IP address that will be filtered.• Source IP Address: Set the source IP address that will be filtered.• Protocol: Set which protocol will be used for filtering.• Dest Port Range: Set the destination port numbers that will be filtered• Source Port Range: Set the source port numbers that will be filtered.• Action: Set how to handle the packet if it matches with the rule.
33
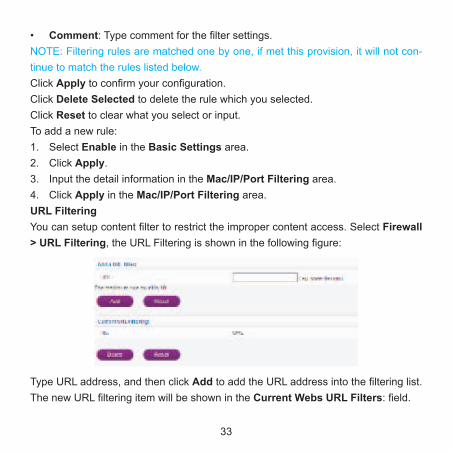
• Comment: Type comment for the filter settings.NOTE: Filtering rules are matched one by one, if met this provision, it will not con-tinue to match the rules listed below.Click Apply to confirm your configuration.Click Delete Selected to delete the rule which you selected.Click Reset to clear what you select or input.To add a new rule:1. Select Enable in the Basic Settings area.2. Click Apply.3. Input the detail information in the Mac/IP/Port Filtering area.4. Click Apply in the Mac/IP/Port Filtering area.URL FilteringYou can setup content filter to restrict the improper content access. Select Firewall > URL Filtering, the URL Filtering is shown in the following figure:
Type URL address, and then click Add to add the URL address into the filtering list. The new URL filtering item will be shown in the Current Webs URL Filters: field.
34
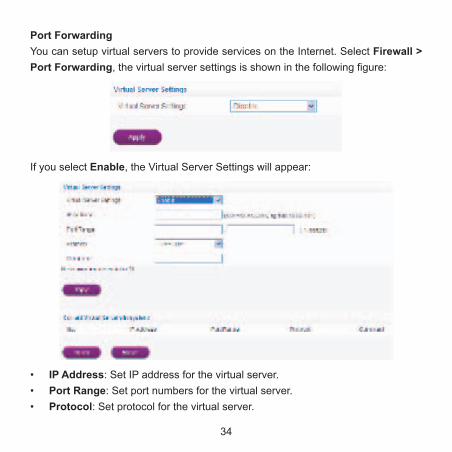
Port ForwardingYou can setup virtual servers to provide services on the Internet. Select Firewall > Port Forwarding, the virtual server settings is shown in the following figure:
If you select Enable, the Virtual Server Settings will appear:
• IP Address: Set IP address for the virtual server.• Port Range: Set port numbers for the virtual server.• Protocol: Set protocol for the virtual server.
35
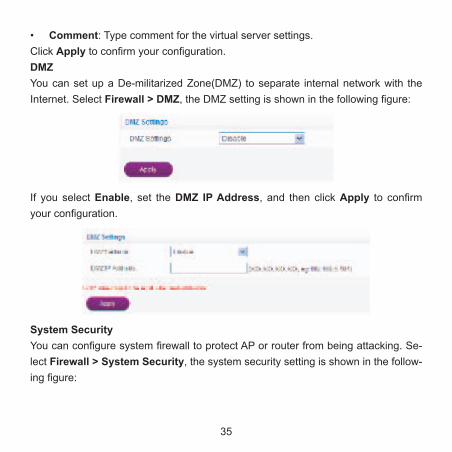
• Comment: Type comment for the virtual server settings.Click Apply to confirm your configuration.DMZYou can set up a De-militarized Zone(DMZ) to separate internal network with the Internet. Select Firewall > DMZ, the DMZ setting is shown in the following figure:
If you select Enable, set the DMZ IP Address, and then click Apply to confirm your configuration.
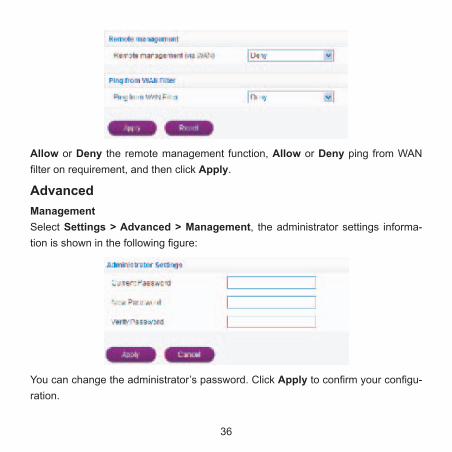
System SecurityYou can configure system firewall to protect AP or router from being attacking. Se-lect Firewall > System Security, the system security setting is shown in the follow-ing figure:
36
Allow or Deny the remote management function, Allow or Deny ping from WAN filter on requirement, and then click Apply.
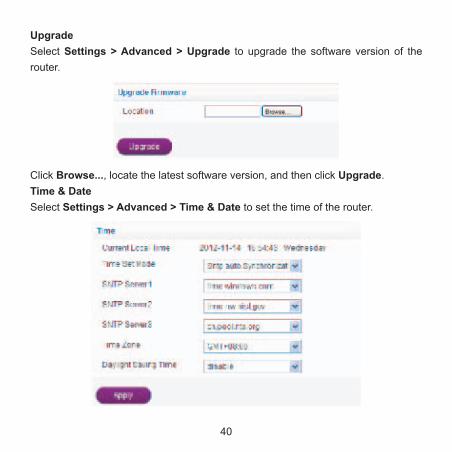
AdvancedManagementSelect Settings > Advanced > Management, the administrator settings informa-tion is shown in the following figure:
You can change the administrator’s password. Click Apply to confirm your configu-ration.

37
RestoreSelect Settings > Advanced > Restore, click Restore to set all the settings to their factory default values, and then the device will restart automatically.
PIN ManageNOTE: Pin Manage can be used in 3G Gateway mode.Select Settings > Advanced > PIN Manage, the PIN manage is shown in the fol-lowing figure:

38
If you select Modify, the modification parameters are shown in the following figure:
Type the old PIN code, and then type two times the new PIN code. Click Apply to confirm your configuration.NOTE: Three times consecutive wrong PIN code entries will block the (U)SIM card. To unlock it, you need the PUK code. The PIN code and PUK code may be offered together with the (U)SIM Card. If not, please contact with network operator.

39
RouterNOTE: Router can be used in 3G Gateway mode and Cable Broadband mode.Select Settings > Advanced > Router, the router information is shown in the fol-lowing figure:
• IP Address: IP address for LAN interface.• Subnet Mask: Subnet mask for the IP address.• MAC Address: MAC address for the LAN interface.• DHCP Server: Enable or disable DHCP Server function.• DHCP IP Pool: Allocate begin and end IP address for IP pool.• DHCP Lease Time: Define how long the leased IP address will be expired, and
will relocate new IP address.• UPNP: Enable or disable UPNP function.Click Apply to confirm your configuration.
40
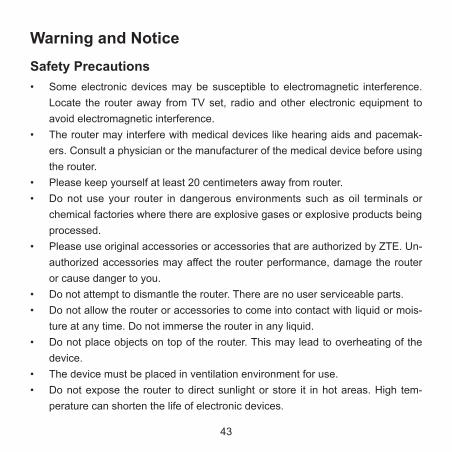
UpgradeSelect Settings > Advanced > Upgrade to upgrade the software version of the router.
Click Browse..., locate the latest software version, and then click Upgrade.Time & DateSelect Settings > Advanced > Time & Date to set the time of the router.

41
ConfigurationSelect Settings > Advanced > Configuration to access the following interface:
DHCP ListSelect Settings > Advanced > DHCP List to access the following interface:

42
StatusBasic StatusSelect Status > Basic Status to show the 3G information and system information.
Click Refresh to update the information.
Network StatusSelect Status > Network Status to show the WAN and WLAN related information.
43
Warning and NoticeSafety Precautions• Some electronic devices may be susceptible to electromagnetic interference.
Locate the router away from TV set, radio and other electronic equipment to avoid electromagnetic interference.
• The router may interfere with medical devices like hearing aids and pacemak-ers. Consult a physician or the manufacturer of the medical device before using the router.
• Please keep yourself at least 20 centimeters away from router.• Do not use your router in dangerous environments such as oil terminals or
chemical factories where there are explosive gases or explosive products being processed.
• Please use original accessories or accessories that are authorized by ZTE. Un-authorized accessories may affect the router performance, damage the router or cause danger to you.
• Do not attempt to dismantle the router. There are no user serviceable parts.• Do not allow the router or accessories to come into contact with liquid or mois-
ture at any time. Do not immerse the router in any liquid.• Do not place objects on top of the router. This may lead to overheating of the
device.• The device must be placed in ventilation environment for use.• Do not expose the router to direct sunlight or store it in hot areas. High tem-
perature can shorten the life of electronic devices.
44
• Do not allow children to play with the router or charger.• Keep the length of the cable between the router and the phone less than 10
meters.• The router is for indoor use only. Do not use the router outside. Do not connect
telephone extensions which run outside of the building. These can result in lightning damage to your unit.
Cleaning and Maintaining• Use an antistatic cloth to clean the router. Do not use chemical or abrasive
cleanser as these could damage the plastic case. Turn off your router before you clean it.
• Use the router within the temperature range of -10°C ~ +55°C , and the storage temperature range is -20°C ~ +65°C . The humidity range is 5%~95%.
• Do not use your router during a thunderstorm. Remove the mains power pack from the wall socket.
• Do not take out your (U)SIM card unnecessarily. The (U)SIM card may be eas-ily lost or it can be damaged by static electricity.
Limited Warranty• This warranty does not apply to defects or errors in the Product caused by:
i. Reasonable abrasion.ii. End User’s failure to follow ZTE’s installation, operation or maintenance
instructions or procedures.iii. End User’s mishandling, misuse, negligence, or improper installation, dis-
assembly, storage, servicing or operation of the Product.

45
iv. Modifications or repairs not made by ZTE or a ZTE-certified individual.v. Power failures, surges, fire, flood, accidents, actions of third parties or other
events outside ZTE’s reasonable control.vi. Usage of third-party products, or usage in conjunction with third-party prod-
ucts provided that such defects are due to the combined usage.vii. Any other cause beyond the range of normal usage intended for the Prod-
uct.End User shall have no right to reject or return the Product, or receive a refund for the Product from ZTE under the above-mentioned situations.• This warranty is End User’s sole remedy and ZTE’s sole liability for defective or
nonconforming items, and is in lieu of all other warranties, expressed, implied or statutory, including but not limited to the implied warranties of merchant-ability and fitness for a particular purpose, unless otherwise required under the mandatory provisions of the law.
Limitation of LiabilityZTE shall not be liable for any loss of profits or indirect, special, incidental or con-sequential damages resulting from or arising out of or in connection with using of this product, whether or not ZTE had been advised, knew or should have known of the possibility of such damages, including, but not limited to lost profits, interruption of business, cost of capital, cost of substitute facilities or product, or any downtimecost.
46
Radio Frequency (RF) Energy(Only for America)This model device meets the government’s requirements for exposure to radio waves.This device is designed and manufactured not to exceed the emission limits for exposure to radio frequency (RF) energy set by the Federal Communications Com-mission of the U.S. Government:The exposure standard for wireless devices employs a unit of measurement known as the Specific Absorption Rate, or SAR. The SAR limit set by the FCC is 1.6 W/kg. *Tests for SAR are conducted using standard operating positions accepted by the FCC with the device transmitting at its highest certified power level in all tested fre-quency bands. Although the SAR is determined at the highest certified power level, the actual SAR level of the device while operating can be well below the maximum value. This is because the device is designed to operate at multiple power levels so as to use only the position required to reach the network. In general, the closer you are to a wireless base station, the lower the power output.The highest SAR value for the model device as reported to the FCC when worn on the body, as described in this user guide, is 1.17 W/kg (Body-worn measurements differ among device models, depending upon available enhancements and FCC requirements.)While there may be differences between the SAR levels of various devices and at various positions, they all meet the government requirement.
47
The FCC has granted an Equipment Authorization for this model device with all reported SAR levels evaluated as in compliance with the FCC RF exposure guidelines. SAR information on this model device is on file with the FCC and can be found under the Display Grant section of http://www.fcc.gov/oet/ea/fccid/ after searching onFCC ID: Q78-ZTEMF29A.
FCC Compliance(Only for America)This device complies with part 15 of the FCC Rules. Operation is subject to the fol-lowing two conditions:(1) This device may not cause harmful interference, and (2) this device must accept any interference received, including interference that may cause undesired opera-tion.Caution: Changes or modifications not expressly approved by the manufacturer could void the user’s authority to operate the equipment.NOTE: This equipment has been tested and found to comply with the limits for a Class B digital device, pursuant to part 15 of the FCC Rules. These limits are de-signed to provide reasonable protection against harmful interference in a residential installation. This equipment generates, uses and can radiate radio frequency en-ergy and, if not installed and used in accordance with the instructions, may cause harmful interference to radio communications. However, there is no guarantee that interference will not occur in a particular installation. If this equipment does cause harmful interference to radio or television reception, which can be determined by
48
turning the equipment off and on, the user is encouraged to try to correct the inter-ference by one or more of the following measures:• Reorient or relocate the receiving antenna.• Increase the separation between the equipment and receiver.• Connect the equipment into an outlet on a circuit different from that to which
the receiver is connected.• Consult the dealer or an experienced radio/ TV technician for help.
Disposal of Your Old ApplianceWhen this crossed-out wheeled bin symbol is attached to a product, it means the product is covered by the European Directive 2002/96/EC. All electrical and electronic products should be disposed of sepa-rately from the municipal waste stream via designated collection facilities appointed by the government or the local authorities.The correct disposal of your old appliance will help prevent potential negative consequences for the environment and human health.
For this product’s recycling information based on WEEE directive, please send an e-mail to [email protected]
49
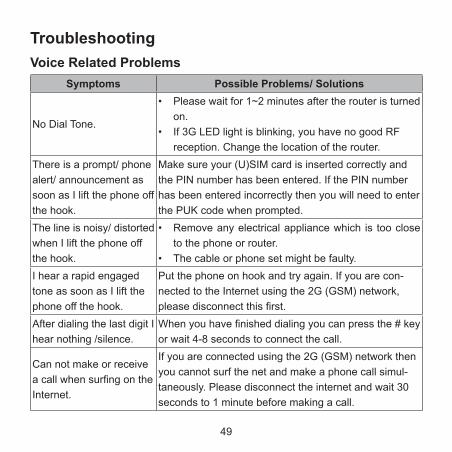
TroubleshootingVoice Related Problems
Symptoms Possible Problems/ Solutions
No Dial Tone.
• Please wait for 1~2 minutes after the router is turned on.
• If 3G LED light is blinking, you have no good RF reception. Change the location of the router.
There is a prompt/ phone alert/ announcement as soon as I lift the phone off the hook.
Make sure your (U)SIM card is inserted correctly and the PIN number has been entered. If the PIN number has been entered incorrectly then you will need to enter the PUK code when prompted.
The line is noisy/ distorted when I lift the phone off the hook.
• Remove any electrical appliance which is too close to the phone or router.
• The cable or phone set might be faulty.I hear a rapid engaged tone as soon as I lift the phone off the hook.
Put the phone on hook and try again. If you are con-nected to the Internet using the 2G (GSM) network, please disconnect this first.
After dialing the last digit I hear nothing /silence.
When you have finished dialing you can press the # key or wait 4-8 seconds to connect the call.
Can not make or receive a call when surfing on the Internet.
If you are connected using the 2G (GSM) network then you cannot surf the net and make a phone call simul-taneously. Please disconnect the internet and wait 30 seconds to 1 minute before making a call.

50
Internet Related ProblemsSymptoms Possible Problems/ Solutions
Can not access the Inter-net at all.
• Please check your configuration settings.• Please wait 1~2 minutes for the router to initialize.• Check your service indicator LED’s.
The download or upload speeds are very slow.
The speed is dependent on signal strength. Check your signal strength and network type.
Can not visit the webGUI configuration page
• Enter the correct address. The default address is http://192.168.0.1 or http://ufi.home.
• Only use one network adapter in your PC.• Do not use any proxy server.
Can not establish the Wi-Fi connection between your device and client
• Make sure the Wi-Fi function is active. Press the WPS button to enable Wi-Fi function.
• Refresh network list and select the correct SSID.• Check the IP address to make sure your client can
obtain an IP address automatically in the Internet protocol (TCP/IP) properties.
• Type the correct network key (Wi-Fi password) when you connect to the device.

51
OthersSymptoms Possible Problems/ Solutions
The RSSI signal indicator is always blinking or does not light.
• This indicates poor reception. Try moving the rout-er to another location near the window.
• Check the ANT button to see if you have press the ANT on but without connecting the external an-tenna.
About the password
• For the Wi-Fi connection password, please check the label on the device.
• The default password of the webGUI configuration page is admin.
• If you changed the password and forgot the new password, you need to restore the device to the factory default settings.
For more assistance, please:• Send E-mail to [email protected]• Visit http://www.zte.com.cn• Call Service Hotline: +86–755–26779999
52
ZTE CORPORATIONNO. 55, Hi-tech Road South, ShenZhen, P.R.ChinaPostcode: 518057 Tel: +86-755-26779999URL: http://www.zte.com.cn E-mail: [email protected]

![ZXV10 H108L Home Gateway User Manual - SetupRoutersetuprouter.com/router/zte/h220n/manual-923.pdfSelect[Network→WAN→WANConnection]toopentheWANConnectionpageas showninthefigurebelow.](https://static.documents.pub/doc/80x56/5accee557f8b9aad468d4666/zxv10-h108l-home-gateway-user-manual-se-networkwanwanconnectiontoopenthewanconnectionpageas.jpg)


