Theme Option phpFox is a white-labeled platform. It allows you to build your own community with your brand name, theme design, and logo. Therefore, your community is totally yours. You can easily change the theme with the available ones in our store, customize your own and upload your brand's logo to create the specific characteristics for your community. The theme is the design of your website, which frequently includes its layout. Changing your theme alters the appearance of your site on the front end, or what a visitor sees when they navigate to your site on the web. Following these steps below to create a unique look and feel for your community. *First, access to the AdminCP phpFox - A platform to build online community quickly Page 1
Transcript
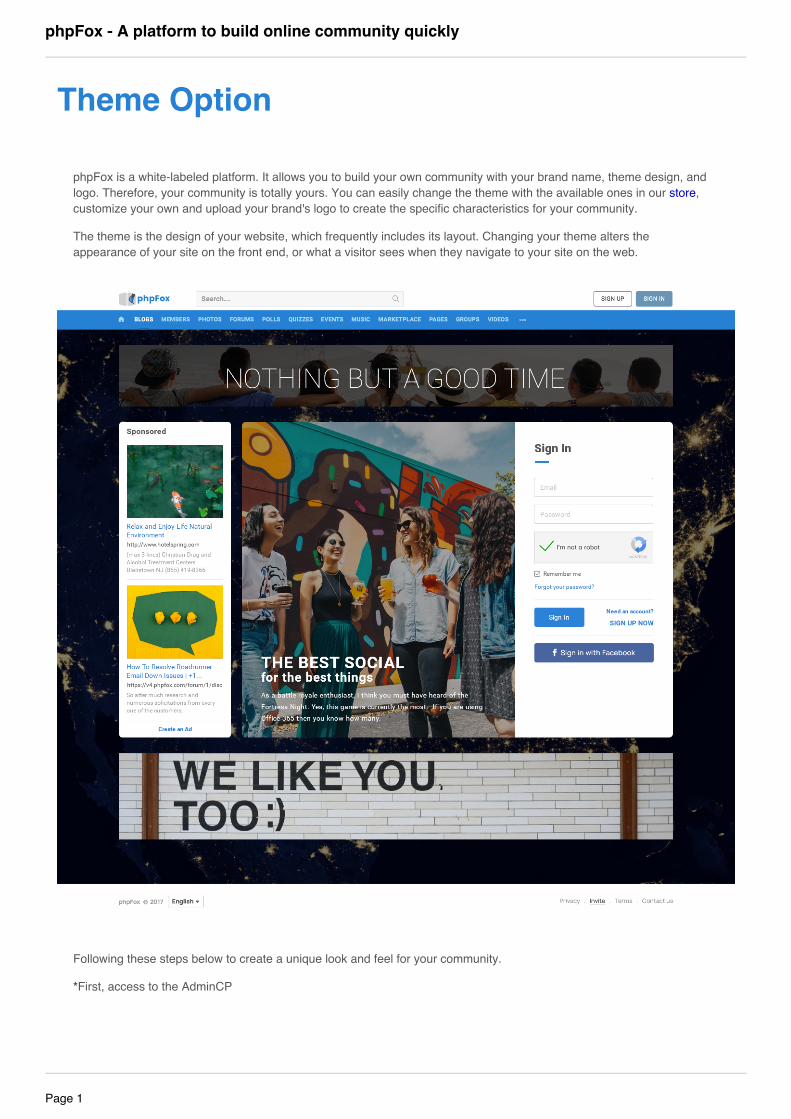
Theme Option
phpFox is a white-labeled platform. It allows you to build your own community with your brand name, theme design, andlogo. Therefore, your community is totally yours. You can easily change the theme with the available ones in our store,customize your own and upload your brand's logo to create the specific characteristics for your community.
The theme is the design of your website, which frequently includes its layout. Changing your theme alters theappearance of your site on the front end, or what a visitor sees when they navigate to your site on the web.
Following these steps below to create a unique look and feel for your community.
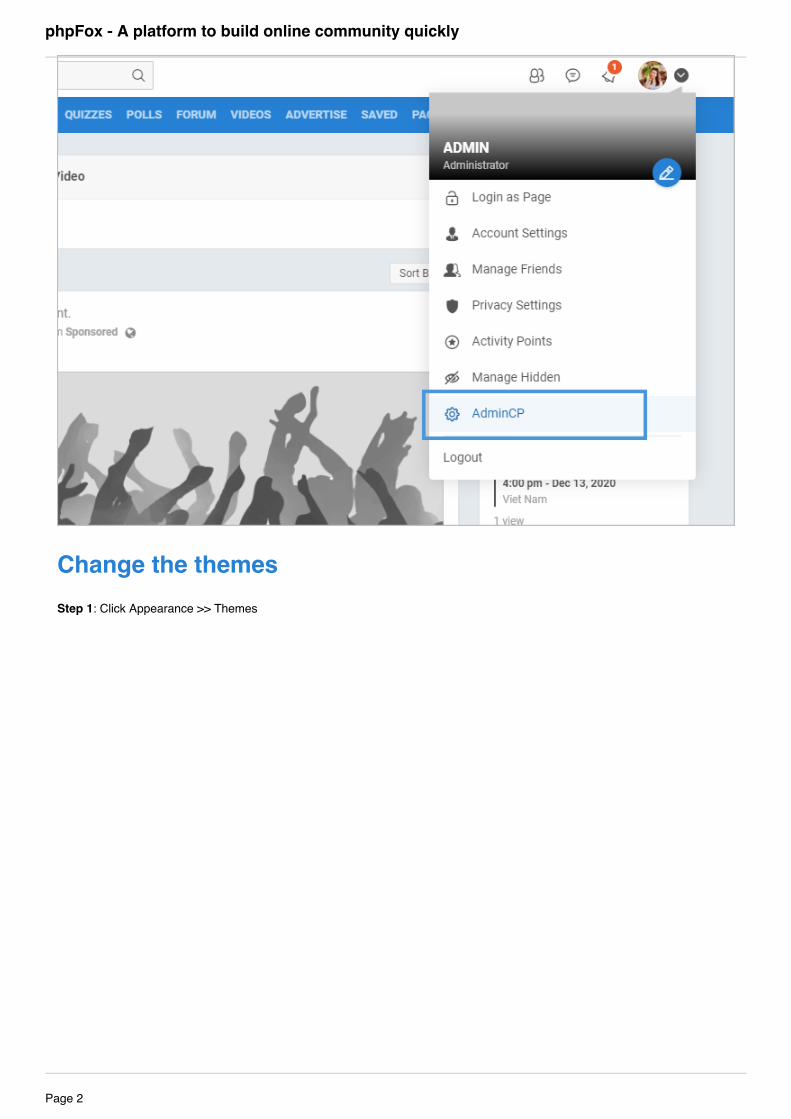
*First, access to the AdminCP
phpFox - A platform to build online community quickly
phpFox - A platform to build online community quickly
Page 2
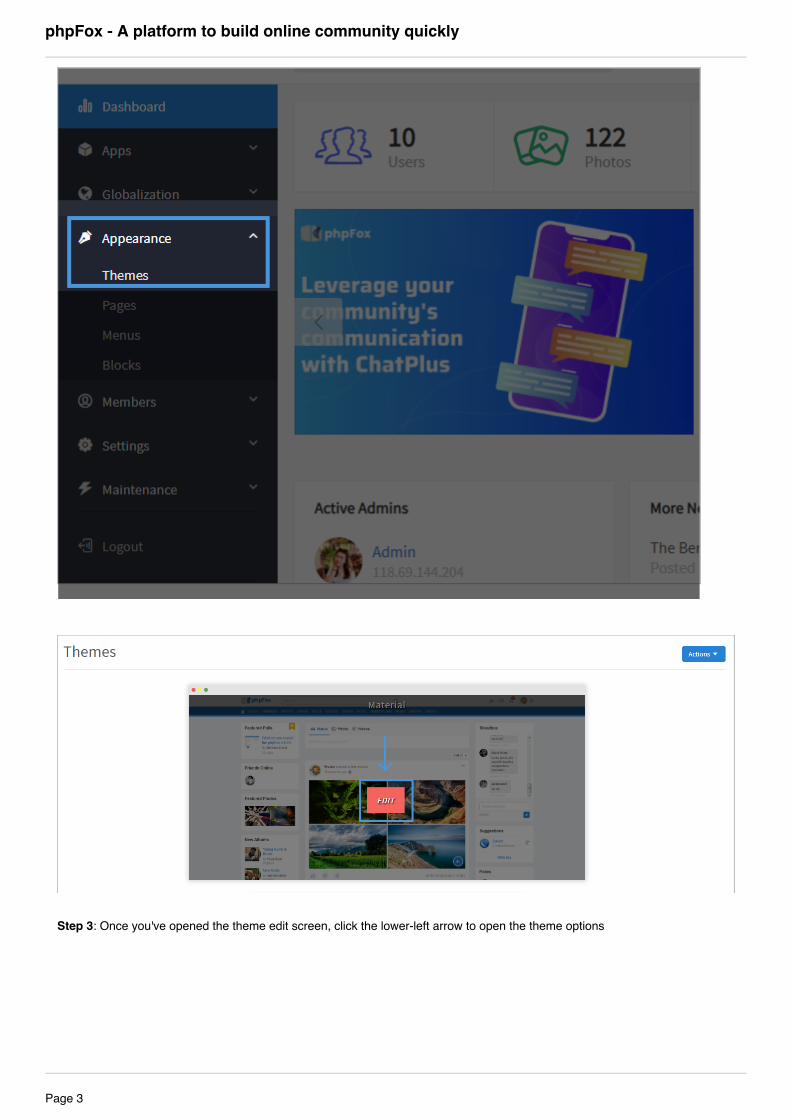
Step 3: Once you've opened the theme edit screen, click the lower-left arrow to open the theme options
phpFox - A platform to build online community quickly
Page 3
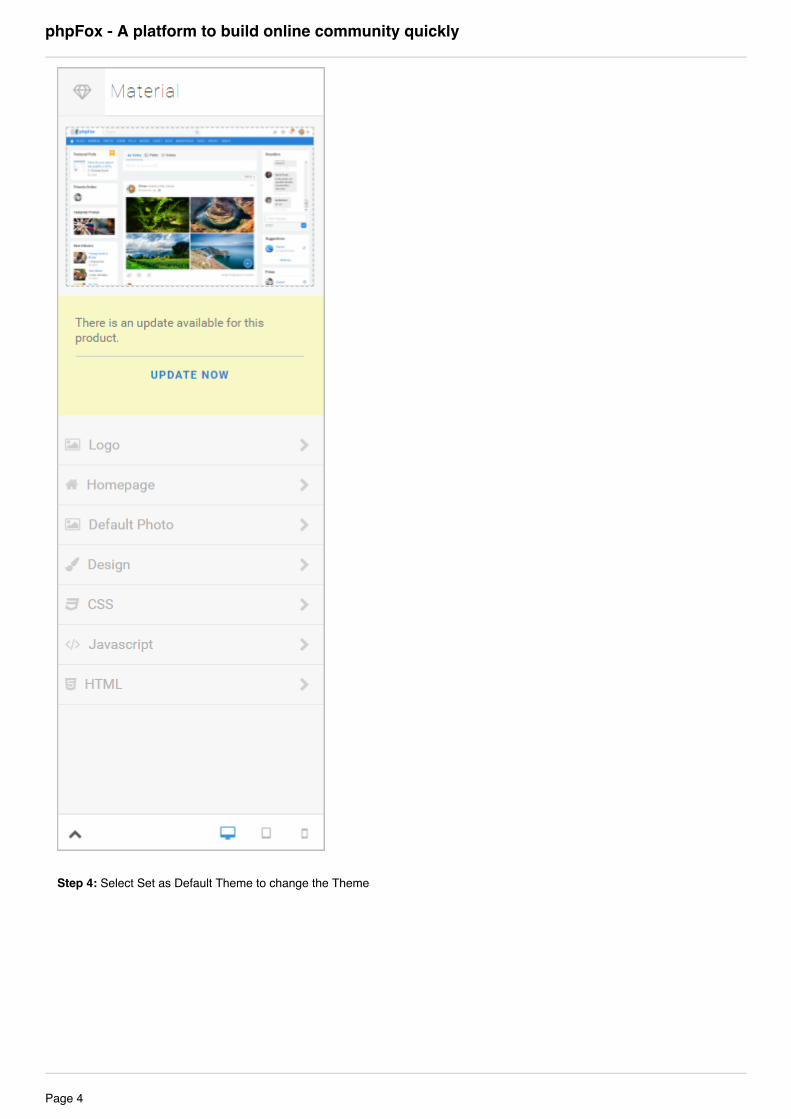
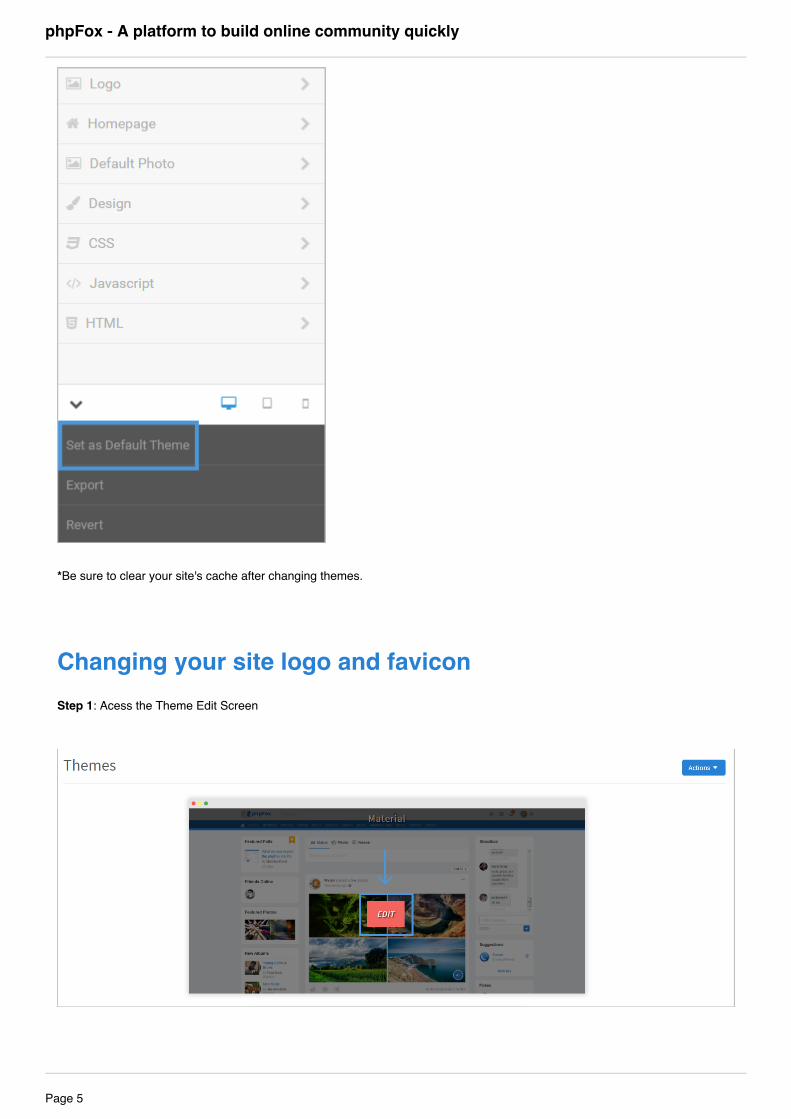
Step 4: Select Set as Default Theme to change the Theme
phpFox - A platform to build online community quickly
Page 4
*Be sure to clear your site's cache after changing themes.
Step 1: Acess the Theme Edit Screen
Changing your site logo and favicon
phpFox - A platform to build online community quickly
Page 5
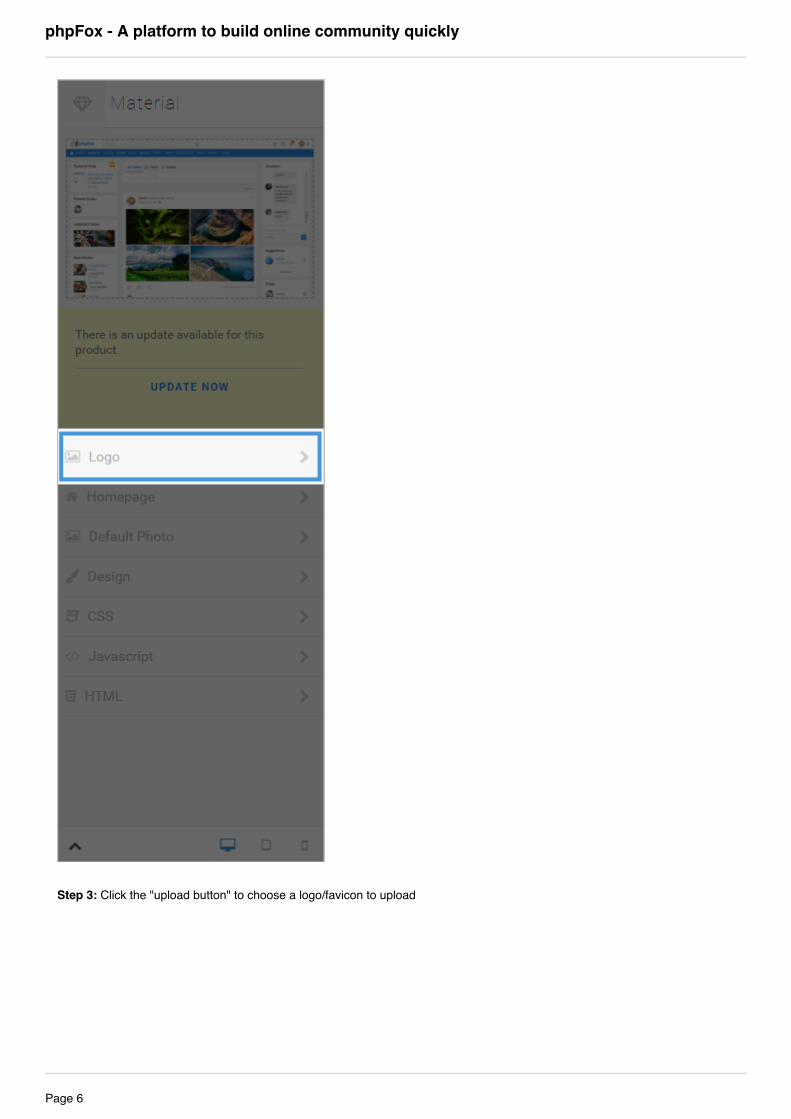
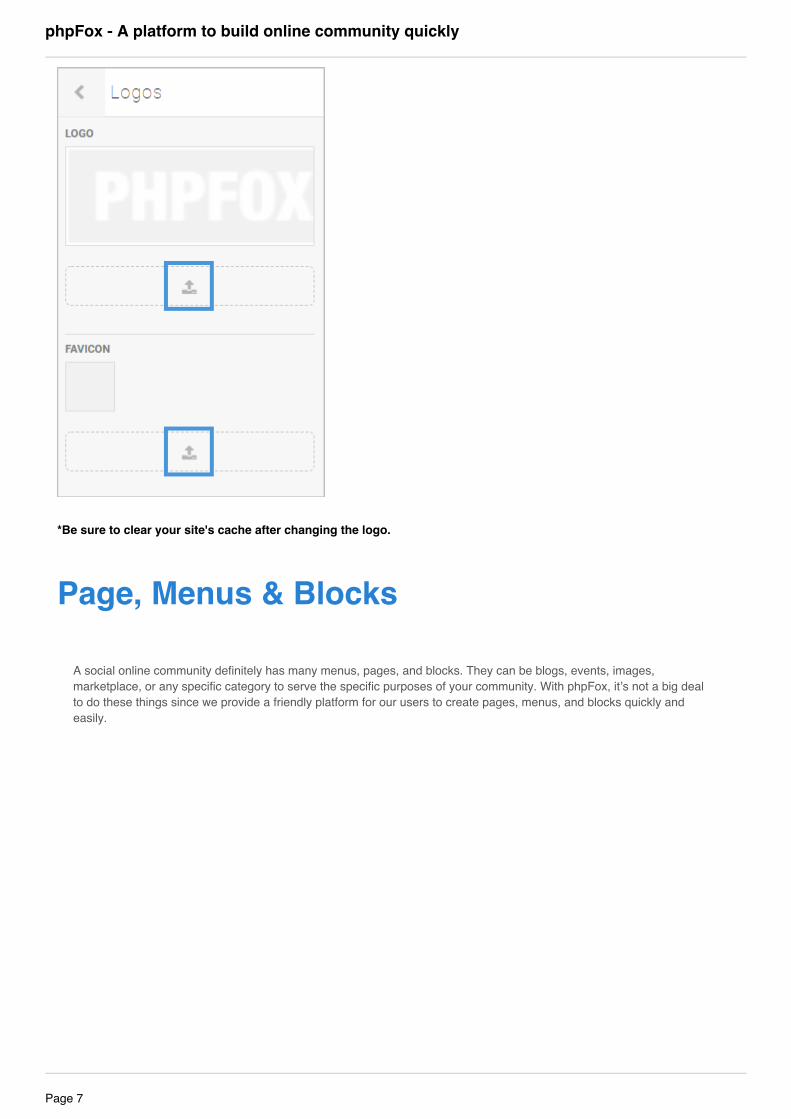
Step 3: Click the "upload button" to choose a logo/favicon to upload
phpFox - A platform to build online community quickly
Page 6
*Be sure to clear your site's cache after changing the logo.
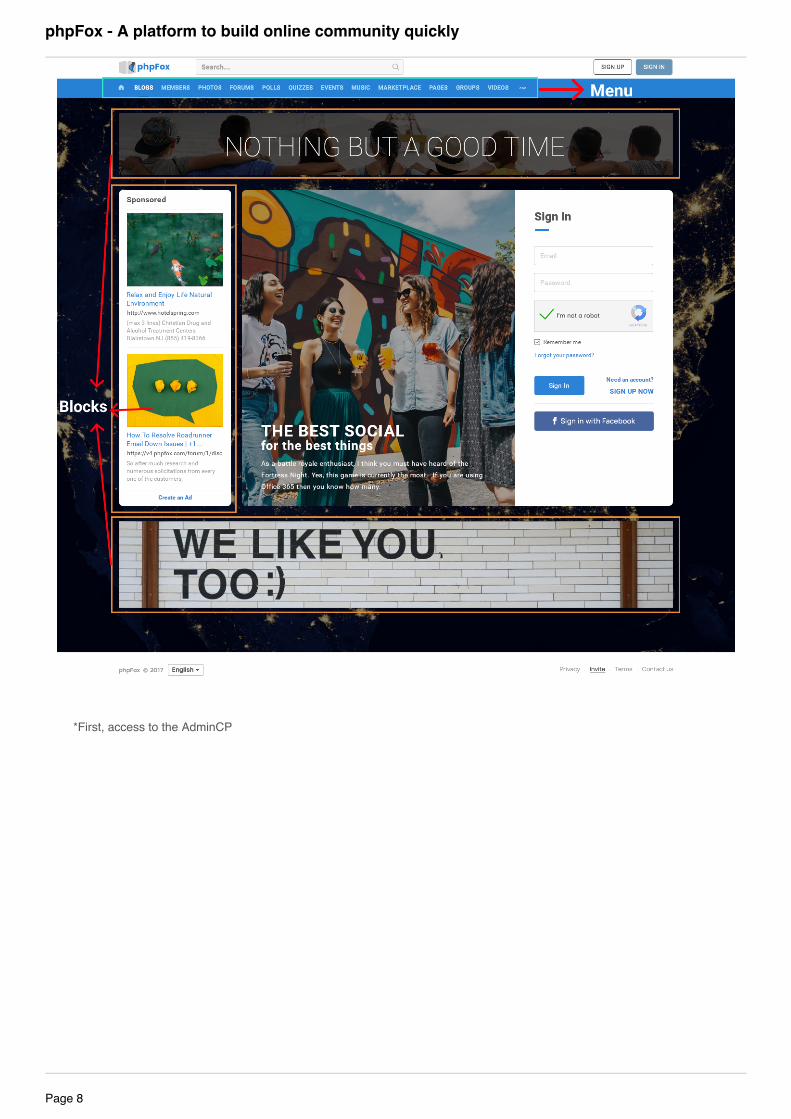
Page, Menus & Blocks
A social online community definitely has many menus, pages, and blocks. They can be blogs, events, images,marketplace, or any specific category to serve the specific purposes of your community. With phpFox, it’s not a big dealto do these things since we provide a friendly platform for our users to create pages, menus, and blocks quickly andeasily.
phpFox - A platform to build online community quickly
Page 7
*First, access to the AdminCP
phpFox - A platform to build online community quickly
Page 8
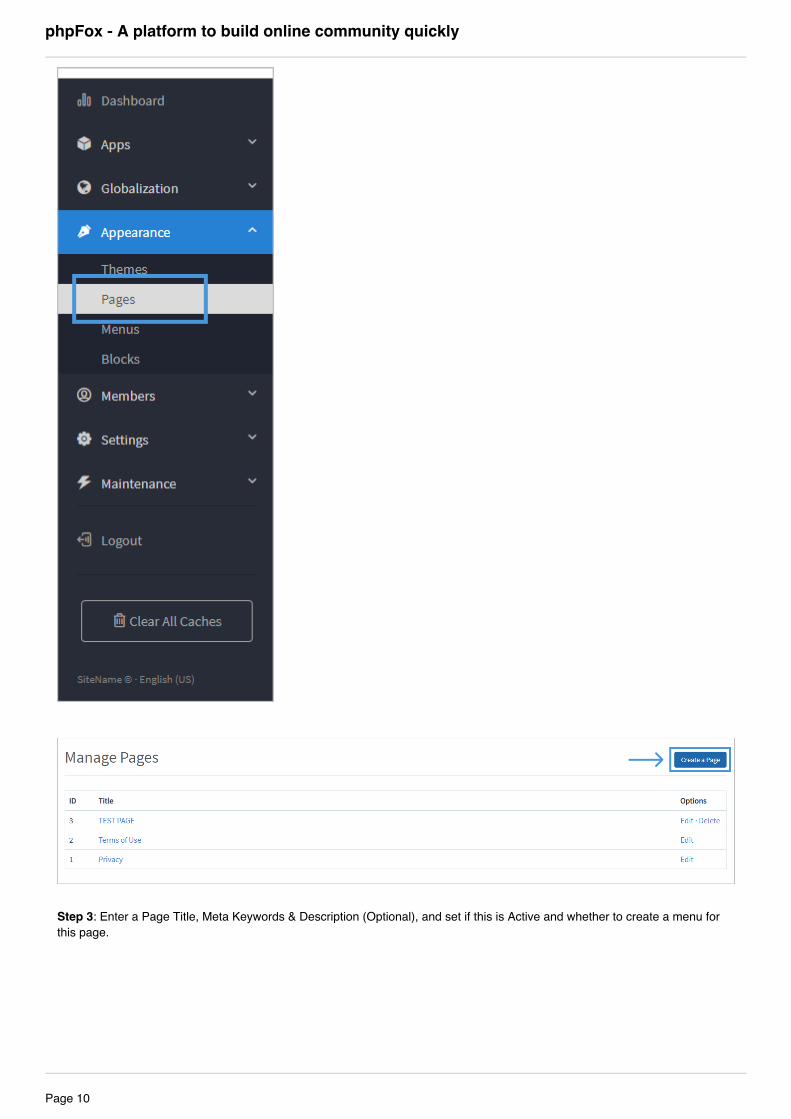
Step 1: Click Appearance >> Pages
Create Page
phpFox - A platform to build online community quickly
Page 9
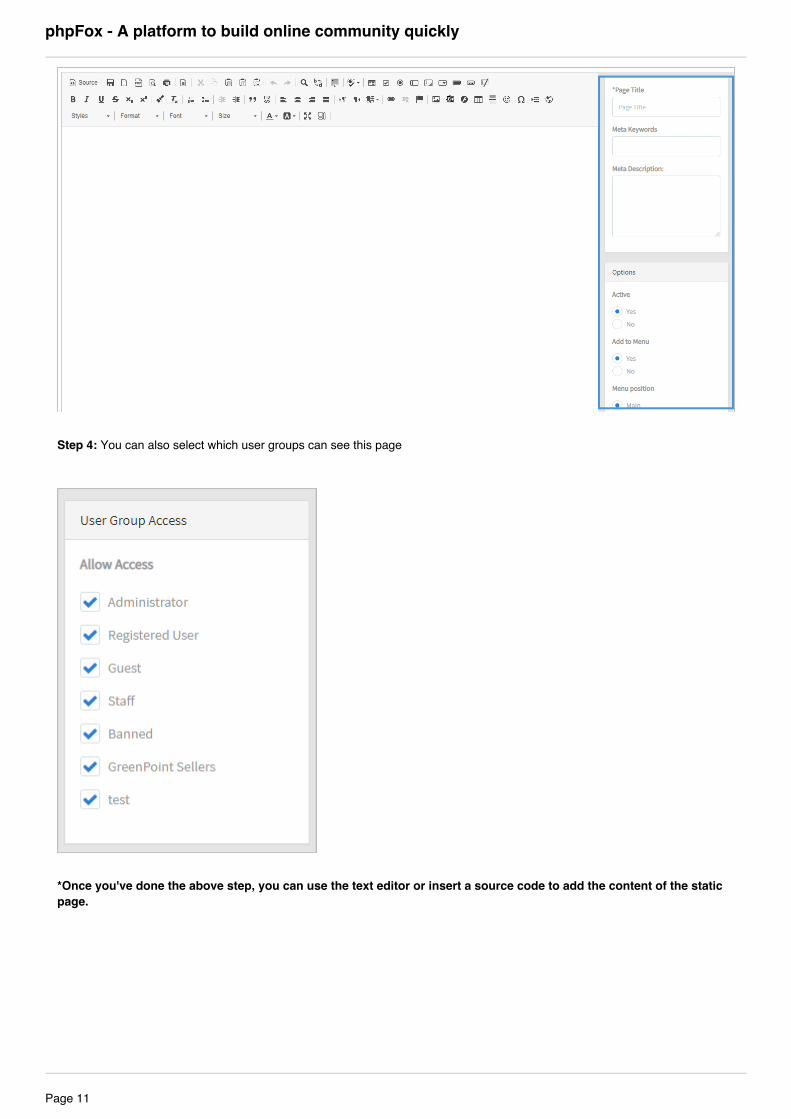
Step 3: Enter a Page Title, Meta Keywords & Description (Optional), and set if this is Active and whether to create a menu forthis page.
phpFox - A platform to build online community quickly
Page 10
Step 4: You can also select which user groups can see this page
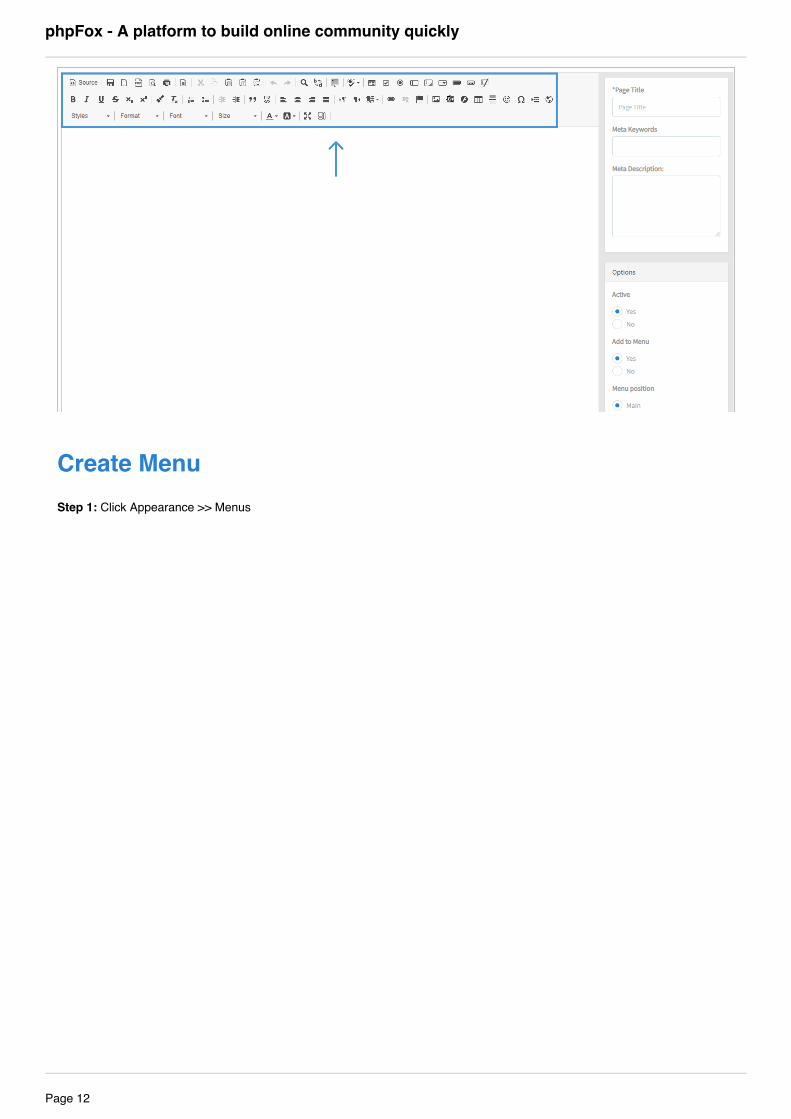
*Once you've done the above step, you can use the text editor or insert a source code to add the content of the static page.
phpFox - A platform to build online community quickly
Page 11
Step 1: Click Appearance >> Menus
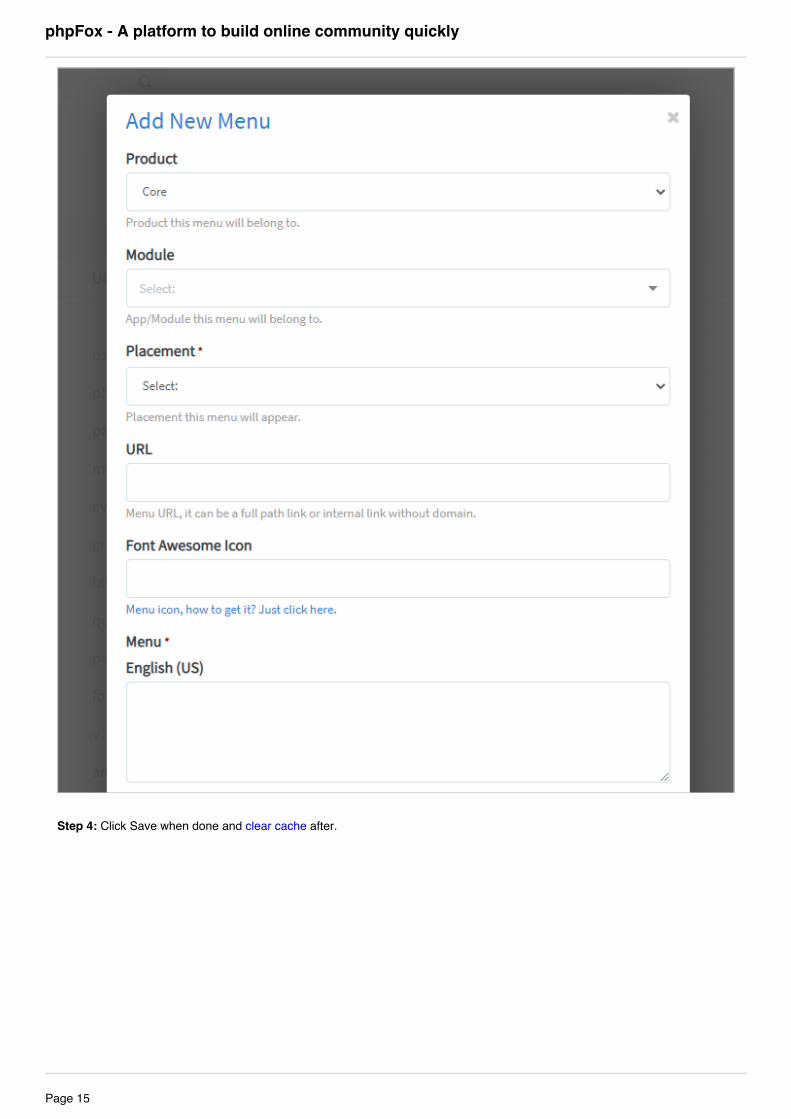
Create Menu
phpFox - A platform to build online community quickly
Page 12
Step 3: In the popup, select:
phpFox - A platform to build online community quickly
Page 13
1.Product: Choose the “Core”
2.Module: Select the app/module this module belongs to. Exp: Select the module Photos if you want to create a PhotosMenu
3.Placement: choose whether you want to place on the main menu or footer menu
4.URL:
External Url: put the full URL to the page you want this menu to go toInternal Url: put the internal link without your domain
5.Font awesome icon: if you want this menu to have an icon (for themes that offer this)
Access to the icons list page and select the icon you want.Click on the icon to get the class info. Example: fa-clock-o Remove the prefix "fa-" and input the remaining value to this field. Example: clock-o
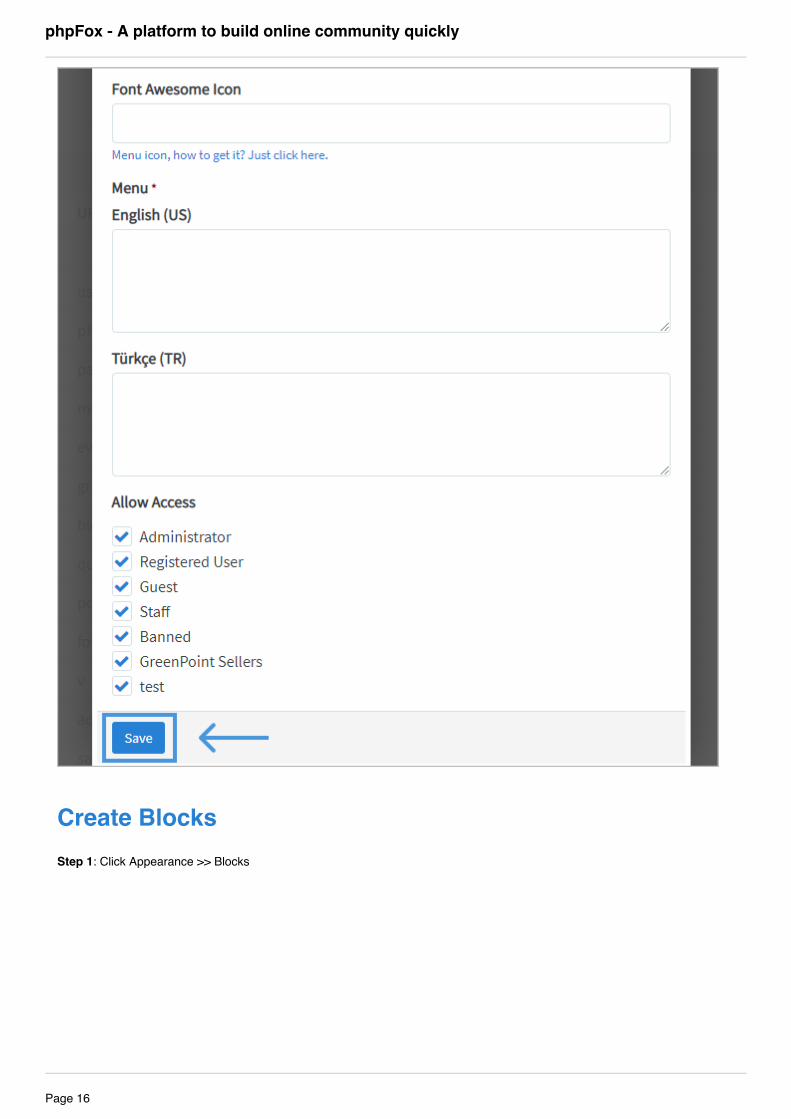
6.Next, our image shows we have several language packs and so we have to put a menu name for each one or our menuwill show up blank on the front end. Enter the name of your menu for each language you have installed.
phpFox - A platform to build online community quickly
phpFox - A platform to build online community quickly
Page 16
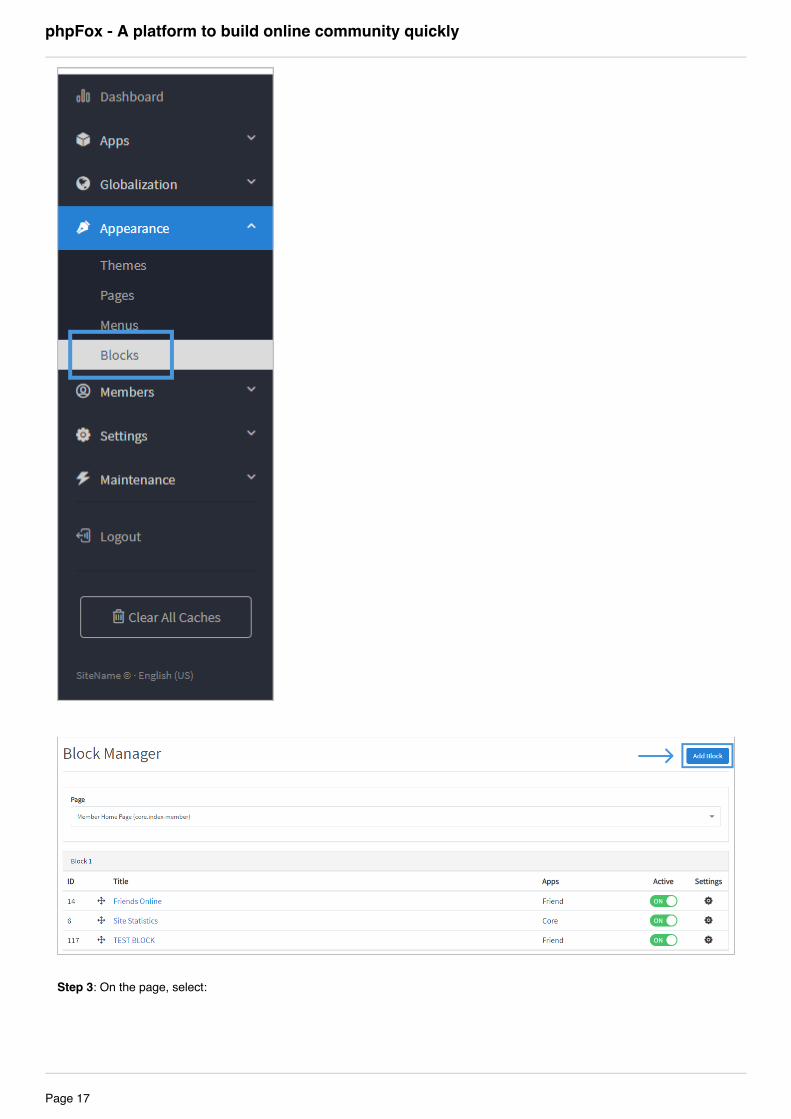
Step 3: On the page, select:
phpFox - A platform to build online community quickly
Page 17
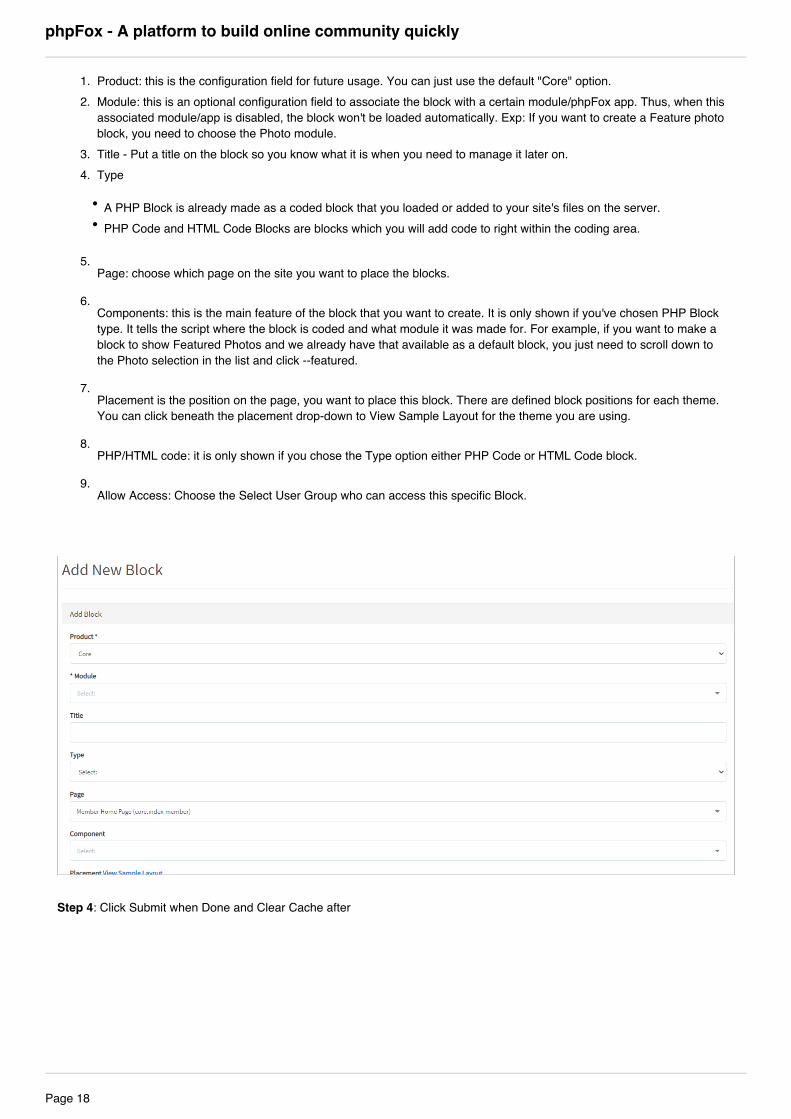
1. Product: this is the configuration field for future usage. You can just use the default "Core" option.2. Module: this is an optional configuration field to associate the block with a certain module/phpFox app. Thus, when this
associated module/app is disabled, the block won't be loaded automatically. Exp: If you want to create a Feature photoblock, you need to choose the Photo module.
3. Title - Put a title on the block so you know what it is when you need to manage it later on.4. Type
A PHP Block is already made as a coded block that you loaded or added to your site's files on the server. PHP Code and HTML Code Blocks are blocks which you will add code to right within the coding area.
5.Page: choose which page on the site you want to place the blocks.
6.Components: this is the main feature of the block that you want to create. It is only shown if you've chosen PHP Blocktype. It tells the script where the block is coded and what module it was made for. For example, if you want to make ablock to show Featured Photos and we already have that available as a default block, you just need to scroll down tothe Photo selection in the list and click --featured.
7.Placement is the position on the page, you want to place this block. There are defined block positions for each theme.You can click beneath the placement drop-down to View Sample Layout for the theme you are using.
8.PHP/HTML code: it is only shown if you chose the Type option either PHP Code or HTML Code block.
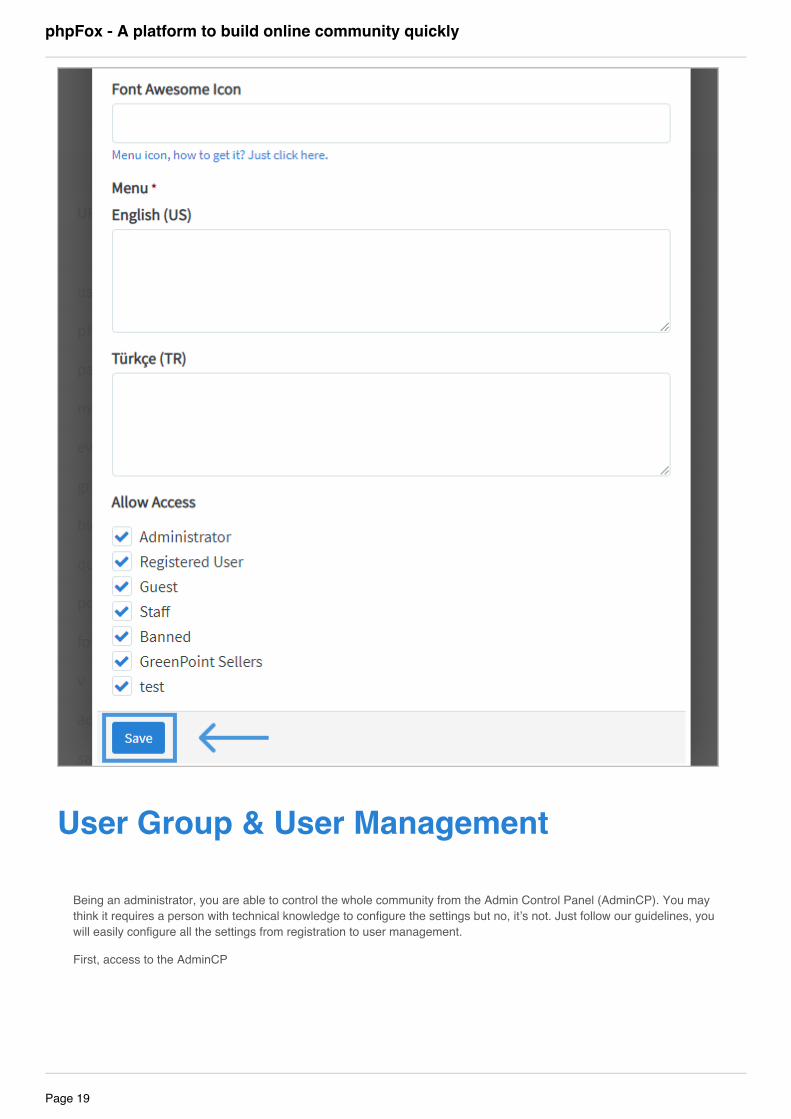
9.Allow Access: Choose the Select User Group who can access this specific Block.
Step 4: Click Submit when Done and Clear Cache after
phpFox - A platform to build online community quickly
Page 18
User Group & User Management
Being an administrator, you are able to control the whole community from the Admin Control Panel (AdminCP). You maythink it requires a person with technical knowledge to configure the settings but no, it’s not. Just follow our guidelines, youwill easily configure all the settings from registration to user management.
First, access to the AdminCP
phpFox - A platform to build online community quickly
Page 19
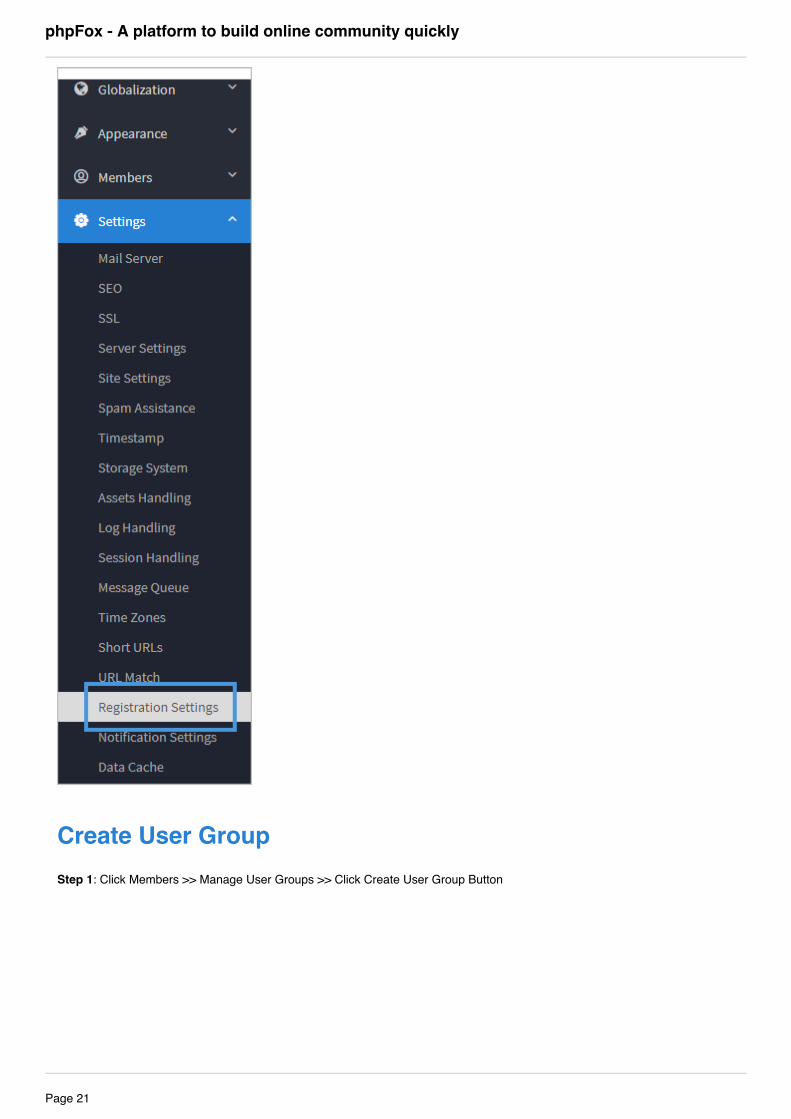
Click Settings >> Registration Settings
Registration Settings
phpFox - A platform to build online community quickly
Page 20
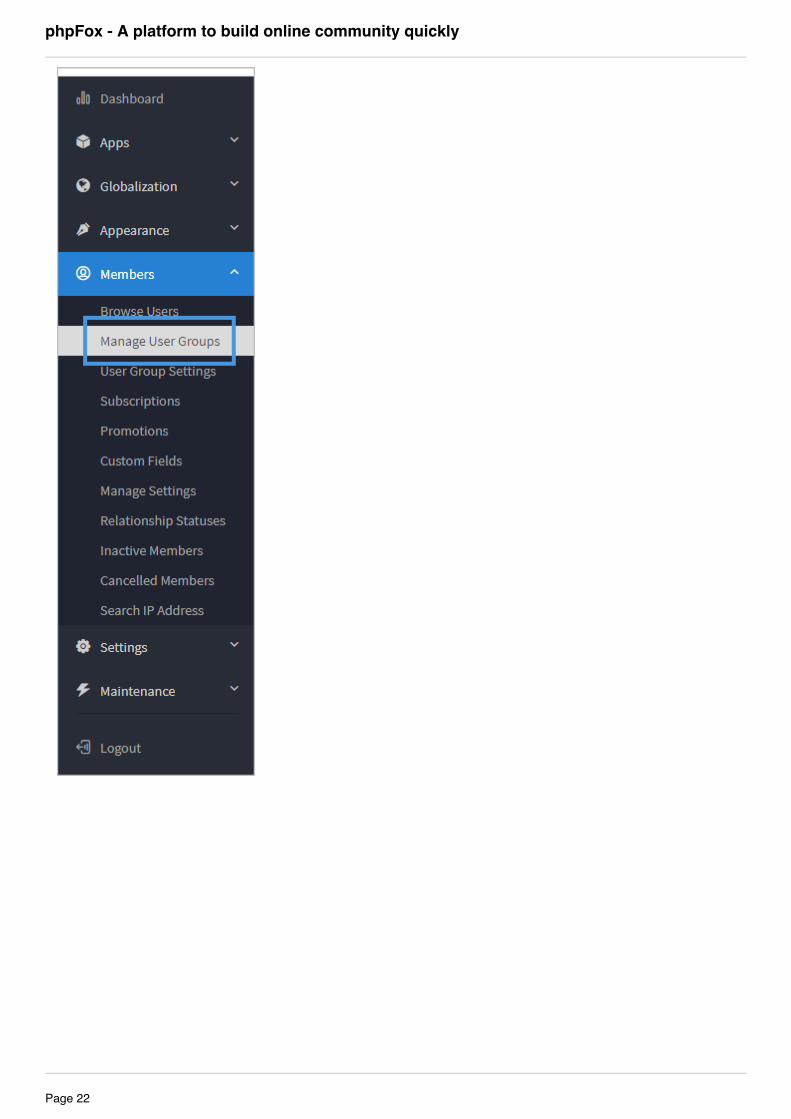
Step 1: Click Members >> Manage User Groups >> Click Create User Group Button
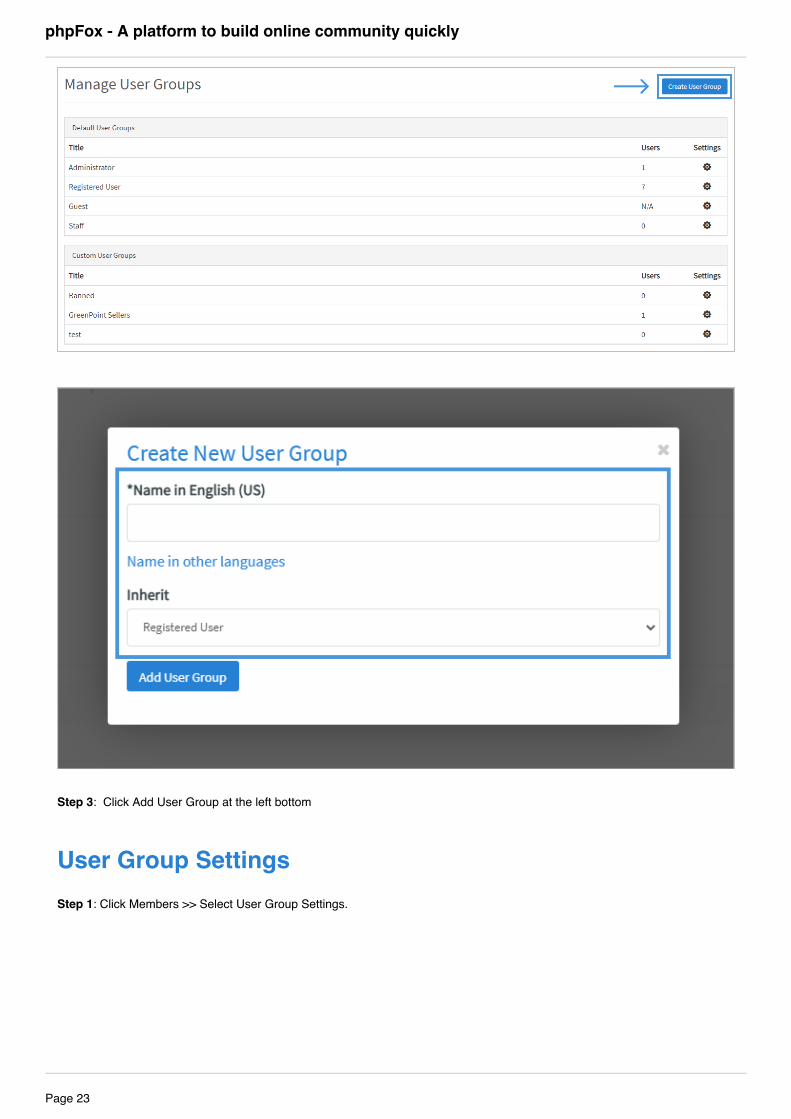
Create User Group
phpFox - A platform to build online community quickly
Page 21
phpFox - A platform to build online community quickly
Page 22
Step 3: Click Add User Group at the left bottom
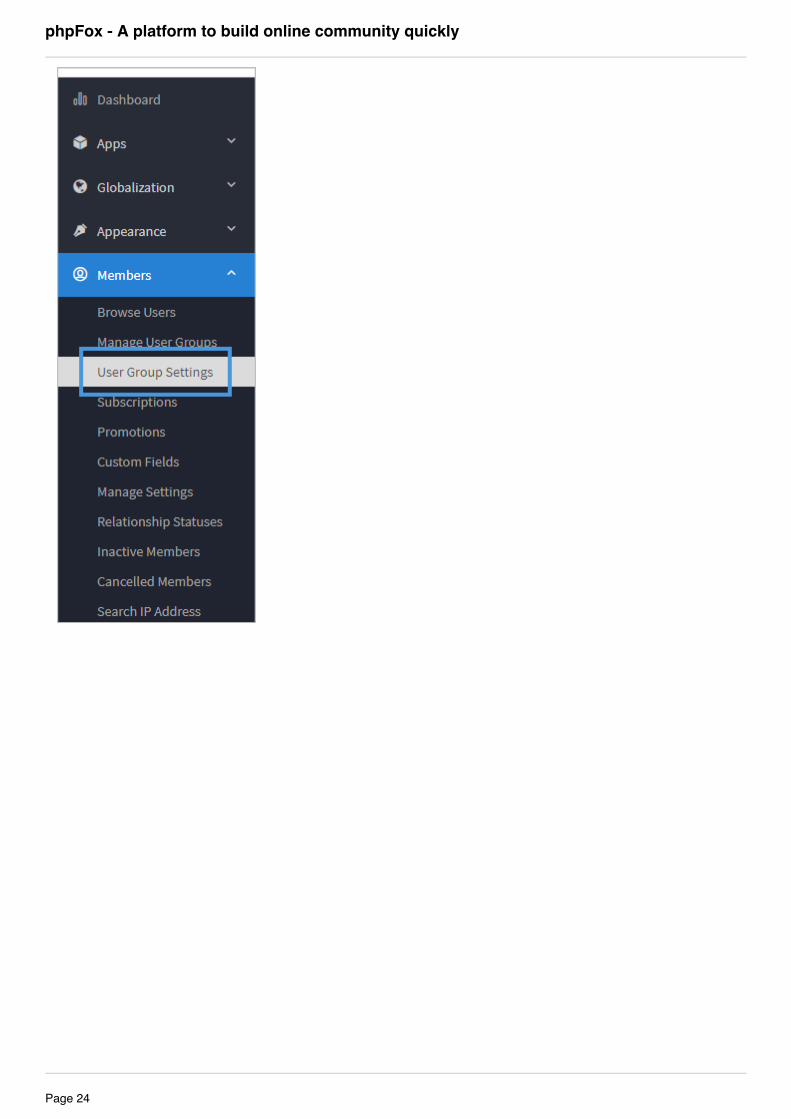
Step 1: Click Members >> Select User Group Settings.
User Group Settings
phpFox - A platform to build online community quickly
Page 23
phpFox - A platform to build online community quickly
Page 24
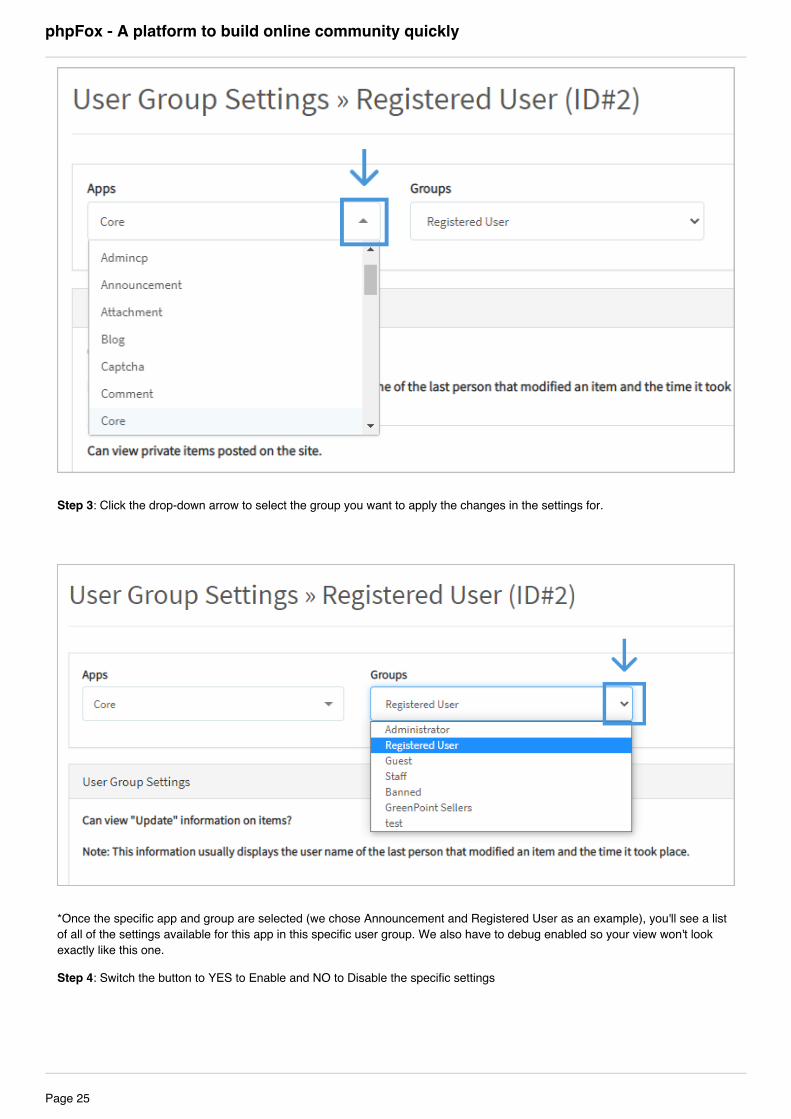
Step 3: Click the drop-down arrow to select the group you want to apply the changes in the settings for.
*Once the specific app and group are selected (we chose Announcement and Registered User as an example), you'll see a listof all of the settings available for this app in this specific user group. We also have to debug enabled so your view won't lookexactly like this one.
Step 4: Switch the button to YES to Enable and NO to Disable the specific settings
phpFox - A platform to build online community quickly
Page 25
Step 5: Click SAVE CHANGES when done.
Language
Don’t worry if you are not using English to build your community. We make phpFox well-equipped with multiplelanguages, scripts, and cultural conventions to help localize your communities.
First, access to the AdminCP
phpFox - A platform to build online community quickly
Page 26
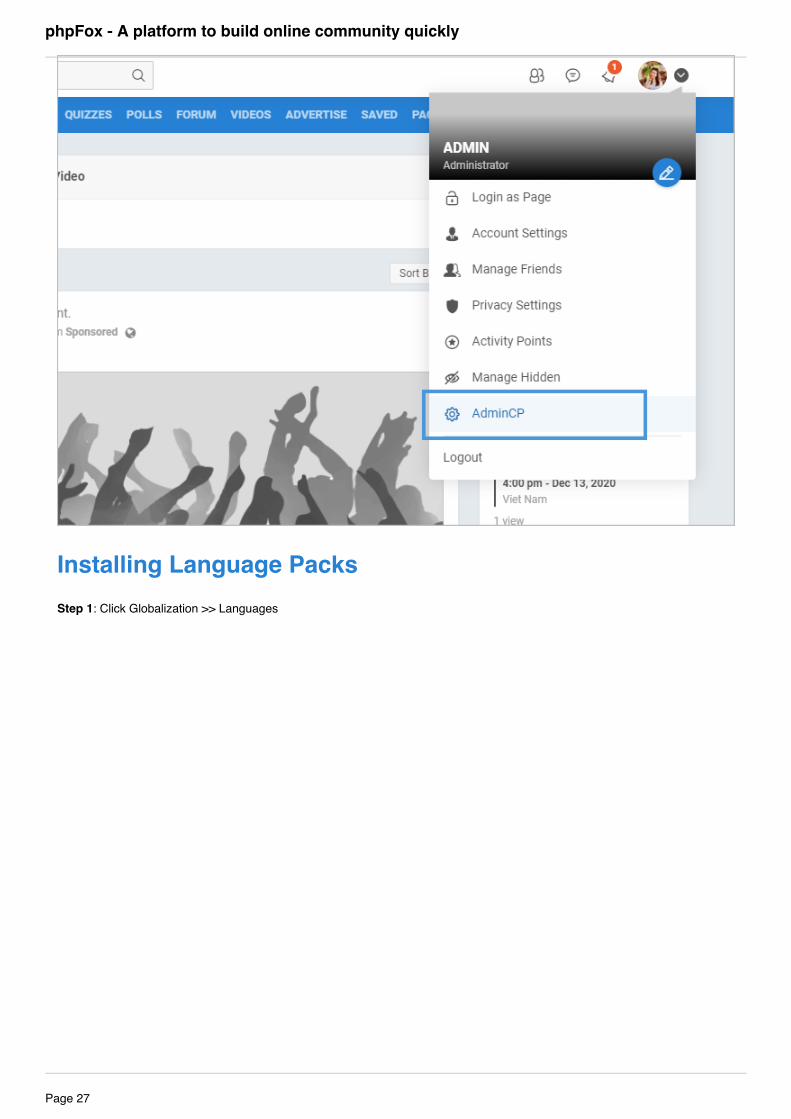
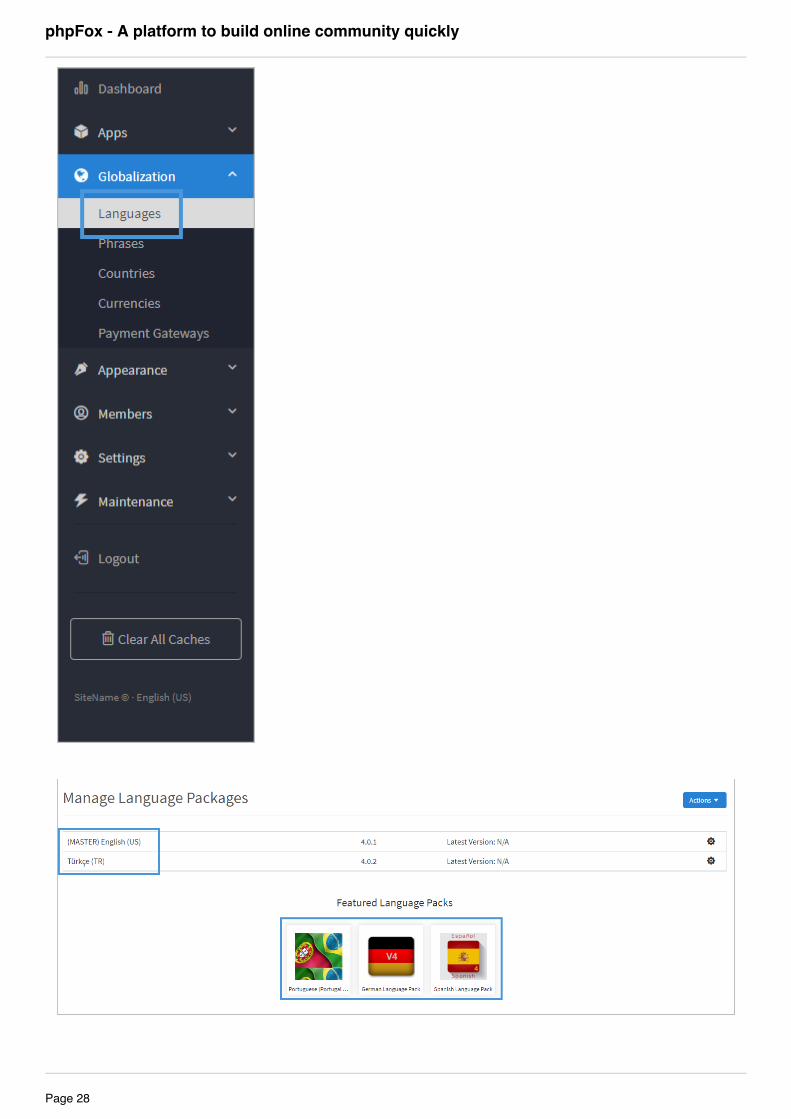
Step 1: Click Globalization >> Languages
Installing Language Packs
phpFox - A platform to build online community quickly
Page 27
phpFox - A platform to build online community quickly
Page 28
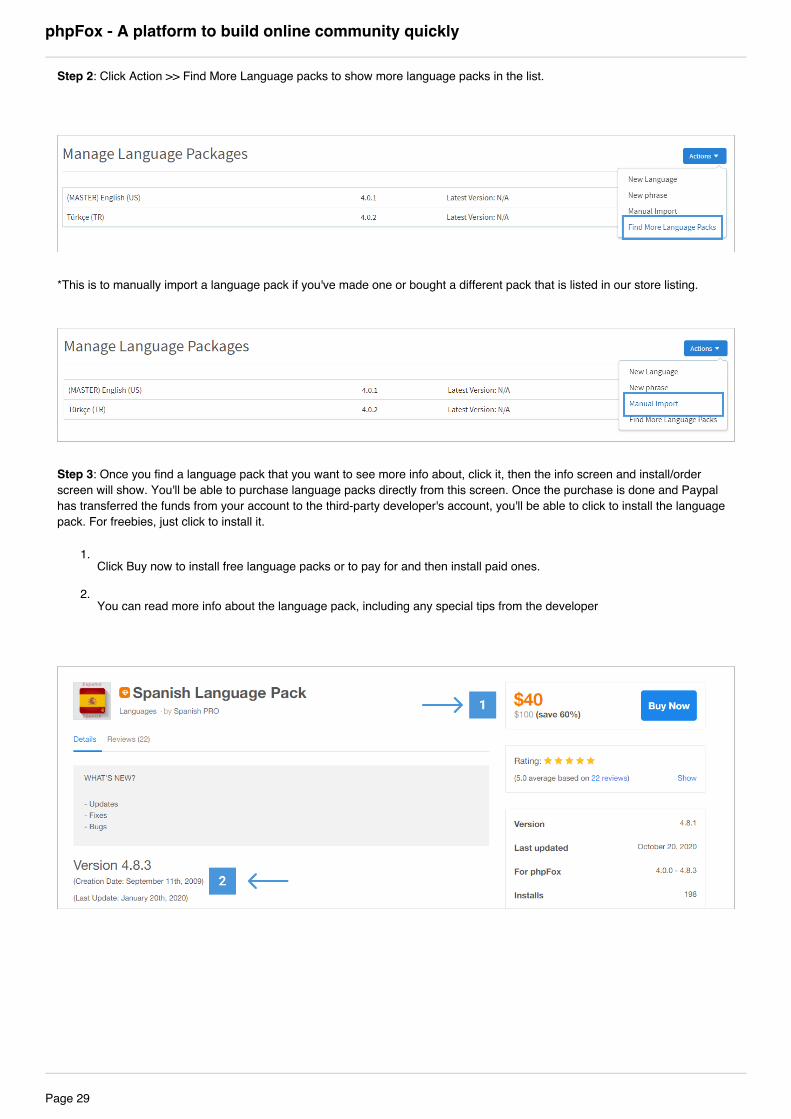
Step 2: Click Action >> Find More Language packs to show more language packs in the list.
*This is to manually import a language pack if you've made one or bought a different pack that is listed in our store listing.
Step 3: Once you find a language pack that you want to see more info about, click it, then the info screen and install/orderscreen will show. You'll be able to purchase language packs directly from this screen. Once the purchase is done and Paypalhas transferred the funds from your account to the third-party developer's account, you'll be able to click to install the languagepack. For freebies, just click to install it.
1.Click Buy now to install free language packs or to pay for and then install paid ones.
2.You can read more info about the language pack, including any special tips from the developer
phpFox - A platform to build online community quickly