

1:400 Scale Custom Airport (AD-Custom-400)
www.airport-diorama-designs.com 1
Thank you for purchasing the 1:400 Scale Custom Airport. I know you will be pleased with the final product. Before you get started, here is a list of what you’ll need:
• Paper. For best results I recommend using a High Quality Matte Photo Paper; the thicker the paper, the better
• X-Acto knife, with extra blades
• Cutting board
• Metal ruler
• Glue stick
• Handy Tak reusable adhesive (or equivalent – office supply store)
• Tape
• Extra capacity ink cartridge for printer
• Latest version of Adobe Reader (you can download it here: http://www.adobe.com/products/acrobat/readstep2.html)

1:400 Scale Custom Airport (AD-Custom-400)
www.airport-diorama-designs.com 2
This product consists of a set of pieces to build a Custom Airport Diorama. The pieces have been organized as follows:
Airplane Pads
There are two types of airplane pads: Large and Small. The large pads will accommodate a 747, 767, 777 A300, A340, A380, L-1011, DC-10, MD-11, or a Concorde-SST. The small pads will accommodate a 727, 737, 757, or an A320.
There are 9 different versions of the Large pads available, and 18 different versions of the Small pads. There is also one page with gate numbers that can be printed on a self adhesive paper, and the gate numbers can be cut and applied to the pads.
Runway Left
The Left side of the runway consist of an end piece (7 versions available with different numbers), and 8 tiles that comprise the landing left side.
There are also two types of taxiway entries to the runway, left side.
Runway Center
The Center runway tile can be printed as needed to achieve the desired runway length. These tiles will be located between the Left and Right side of the runway.
There are also three types of taxiway entries to the runway, center.
Runway Right
The Right side of the runway consist of an end piece (7 versions available with different numbers), and 8 tiles that comprise the landing right side.
There are also two types of taxiway entries to the runway, right side.
Runway Optional
A couple of optional tiles: Runway end piece (with or without lights), and Runway Hold with yellow line.
Services
These are the pieces for all types of airport services, such as: Cargo Complex, Fuel Depot, Commuter Terminal, Main Parking, Parking for Cars, Parking for cars & Trucks.

1:400 Scale Custom Airport (AD-Custom-400)
www.airport-diorama-designs.com 3
Tarmac
These are several tiles for creating the general Airport Tarmac. There are several tiles with road markings in different configurations, and center grassy islands.
Taxiway
These are a couple of optional taxiway hold markings, and a set of runway entrance markings to be cut and applied to the runway entries.
Yellow Line
These are a set of tiles with yellow line markings in different configurations.
There are enough runway tiles for the following runway configurations:
34-16, 34R-16L, 34L-16R, 16R-34L, 16L-34R
39-21, 39R-21L, 39L-21R, 21R-39L, 21L-39R
48-30, 48R-30L, 48L-30R, 30R-48L, 30L-48R
The completed diorama can be mounted on a standard sheet of plywood, or Styrofoam. The Styrofoam is sturdy enough, and a lot lighter. You can find Styrofoam sheets at your local home center store, in the insulation isle.

1:400 Scale Custom Airport (AD-Custom-400)
www.airport-diorama-designs.com 4
To print the tiles, use the following settings:
1. Click on Print, then click on the Properties button next to the printer name, and set the printer properties to match the type of paper to be used, and set the printing quality to the highest setting. NOTE: The resolution on the computer screen is not as good as the resolution of the printed material.
2. Set Page scaling to NONE.
1. VERY IMPORTANT: Click on the Advanced button and select “Print as image” on the Advanced Print Setup screen. You MUST do this to prevent the printing process from hanging when the printer tries to “flatten” the image.

1:400 Scale Custom Airport (AD-Custom-400)
www.airport-diorama-designs.com 5
After the tiles are printed, use the “crop marks” on each page to guide you in cutting the tiles. Do not cut all the way across the paper because you will lose the final crop mark. Instead, cut in between the marks, creating a sort of frame around the tile. The tile should just pop-out (see picture below).
Once you are happy with the layout, start gluing the tiles to the board using the glue stick. I recommend using the glue stick because, depending on the paper quality, liquid glue can be absorbed by the paper and create “bubbles”. If you want to try other type of glue, experiment on a single tile first.

1:400 Scale Custom Airport (AD-Custom-400)
www.airport-diorama-designs.com 6
TIP: To attach lamp posts, trees, etc. to the diorama, use the Handi Tak reusable adhesive. Take a
small piece, roll it into a small ball and stick it under the accessory, then press the accessory to the diorama (see below).
Handi Tak piece
I hope you enjoy your new Airport. If you have any questions or comments, please contact us at [email protected].
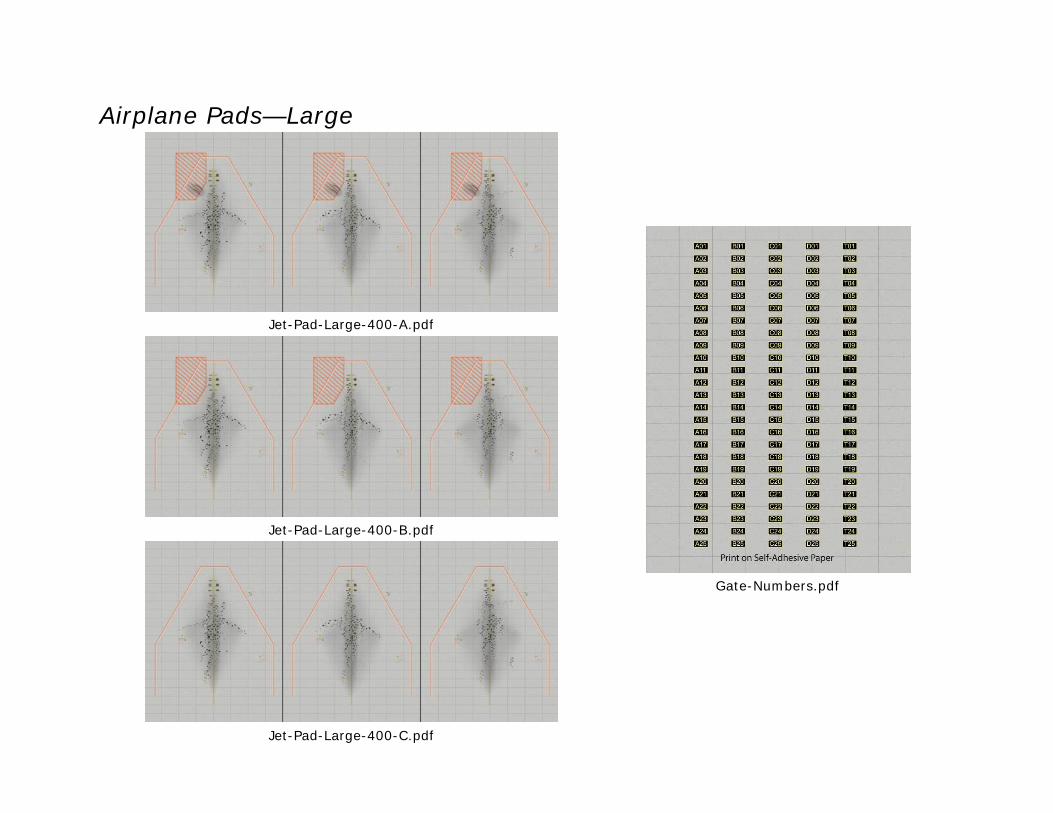
Airplane Pads—Large
Jet-Pad-Large-400-A.pdf
Jet-Pad-Large-400-B.pdf
Jet-Pad-Large-400-C.pdf
Gate-Numbers.pdf

Airplane Pads—Small
Jet-Pad-Small-400-A.pdf
Jet-Pad-Small-400-B.pdf
Jet-Pad-Small-400-C.pdf
Jet-Pad-Small-400-D.pdf
Jet-Pad-Small-400-E.pdf
Jet-Pad-Small-400-F.pdf

Taxiway-Enter-Runway-Left.pdf Taxiway-Enter-Runway-Left-45.pdf
Runway-400-Landing-Left.pdf
Runway-400_34L.pdf
Runway-400_34R.pdf
Runway-400_39L.pdf
Runway-400_39R.pdf Runway-400_48L.pdf
Runway-400_48R.pdf
Add any of these tiles to the left side of the runway landing strip
Runway landing strip, 8 tiles
Runway Left
Runway-400_34.pdf
Runway-400_39.pdf Runway-400_Left-end-clear.pdf
Runway-400_48.pdf

Runway-400-Center.pdf
Print as many of the center tiles as needed to complete runway
Runway Center
Taxiway-Enter-Runway-Center.pdf
Taxiway-Enter-Runway-Center-45.pdf
Taxiway-Enter-Small-Island.pdf
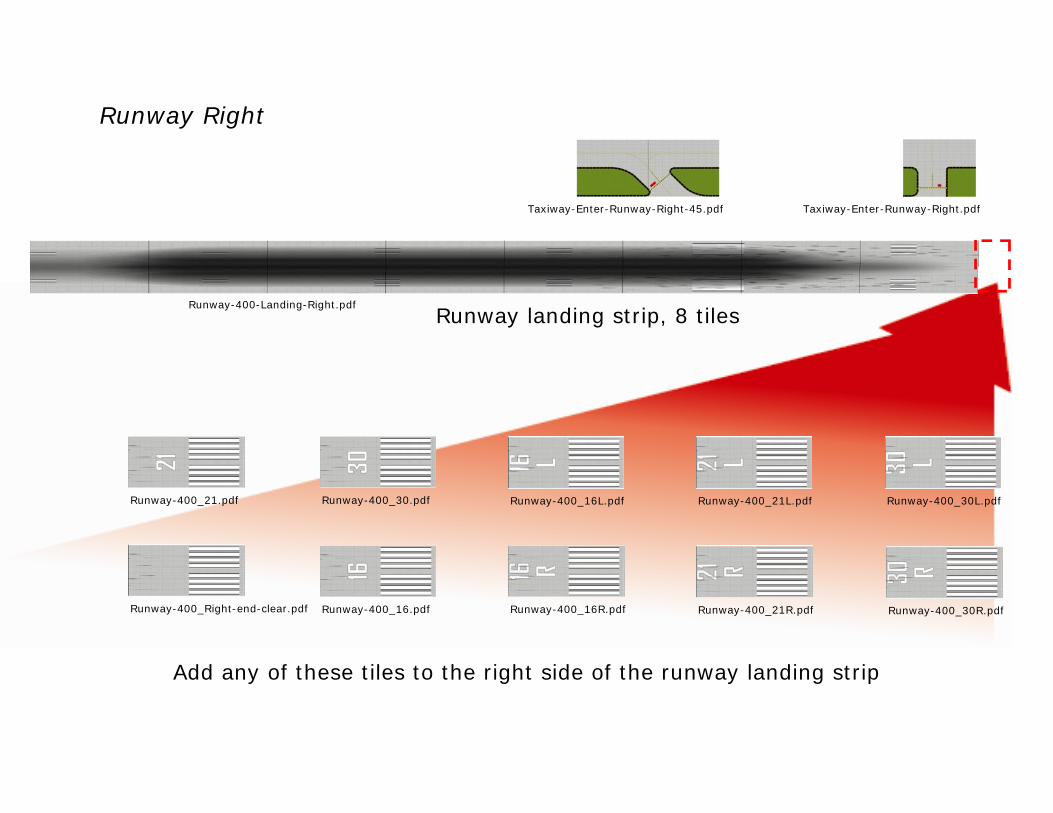
Taxiway-Enter-Runway-Right.pdf Taxiway-Enter-Runway-Right-45.pdf
Runway-400-Landing-Right.pdf
Runway-400_16L.pdf
Runway-400_16R.pdf
Runway-400_21L.pdf
Runway-400_21R.pdf Runway-400_30R.pdf
Runway-400_30L.pdf
Add any of these tiles to the right side of the runway landing strip
Runway landing strip, 8 tiles
Runway Right
Runway-400_21.pdf
Runway-400_Right-end-clear.pdf
Runway-400_30.pdf
Runway-400_16.pdf

Runway-End-Lights.pdf Runway-End-NoLights.pdf
Runway-Line-Hold-Horizontal.pdf
Runway Optional
Runway-Line-Hold-Vertical.pdf

Parking-Cars.pdf
Services
Cargo-Complex.pdf
Parking-Trucks.pdf Commuter-Terminal-400.pdf
Fuel-Depot.pdf Main-Parking.pdf

Tarmac
Tarmac-Road-3point-connector-
Tarmac-Road-3point-connector-Vertical.pdf
Tarmac-Road-Vertical.pdf Tarmac-Road-Curve-Small-45.pdf
Tarmac-Road-Curve-Large-90.pdf Tarmac-Road-Curve-Large-45.pdf
Tarmac-Road-4point-connector.pdf
Tarmac-Road-Curve-Small-90.pdf Tarmac-Road-Horizontal.pdf

Tarmac.pdf
Tarmac-Large-Island.pdf
Tarmac-Large-Island-45.pdf
Tarmac-Small-Island.pdf
Tarmac-Triangle-Island.pdf
Tarmac

Taxiway-Line-Hold-Vertical.pdf
Taxiway
Taxiway-Runway-Numbers.pdf
Taxiway-Line-Hold-Horizontal.pdf

Yellow Line
Yellow-4point-Connector-Horizontal.pdf
Tarmac-Yellow-Line-Curve-Large-45.pdf Tarmac-Yellow-Line-Curve-Small-90.pdf
Tarmac-Yellow-Line-Curve-Small-45.pdf
Yellow-3point-Connector-Horizontal.pdf
Tarmac-Yellow-Line-Curve-Large-90.pdf Yellow-3point-Connector-Vertical.pdf
Yellow-4point-Connector-Vertical.pdf

Tarmac-Yellow-Line-Vertical.pdf
Tarmac-Yellow-Line-Horizontal.pdf
Yellow Line


