
Coursera Berklee College of Music Introduction to Music Production Week 5
Eduardo Alejandro Motta Porras
Configuring an EQ in Logic Pro X “Hi! I am Eduardo Motta from Antigua, Guatemala, a small country in Central
America. I´m an electrical engineer and studying music production has always been my passion. This lesson is for week 5 of Introduction To Music Production at
Coursera.org. I will be teaching how to configure an EQ channel to function like a largo format mixing EQ section in Logic Pro X”
As we learned this week EQ is one of the most important elements in music production. In the following assignment I will demonstrate the configuring of an EQ plugin to function like a large format mixing console EQ section in Logic Pro X. I will work with the settings shown in the material.
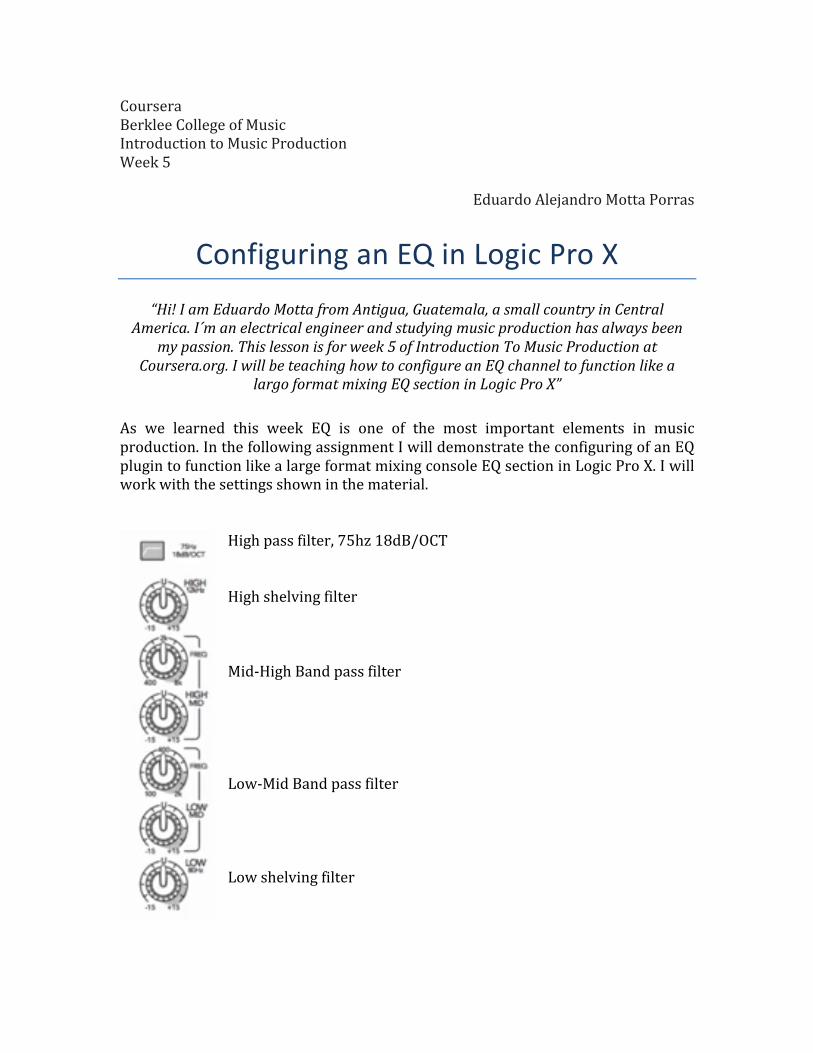
High pass filter, 75hz 18dB/OCT High shelving filter Mid-‐High Band pass filter
Low-‐Mid Band pass filter
Low shelving filter
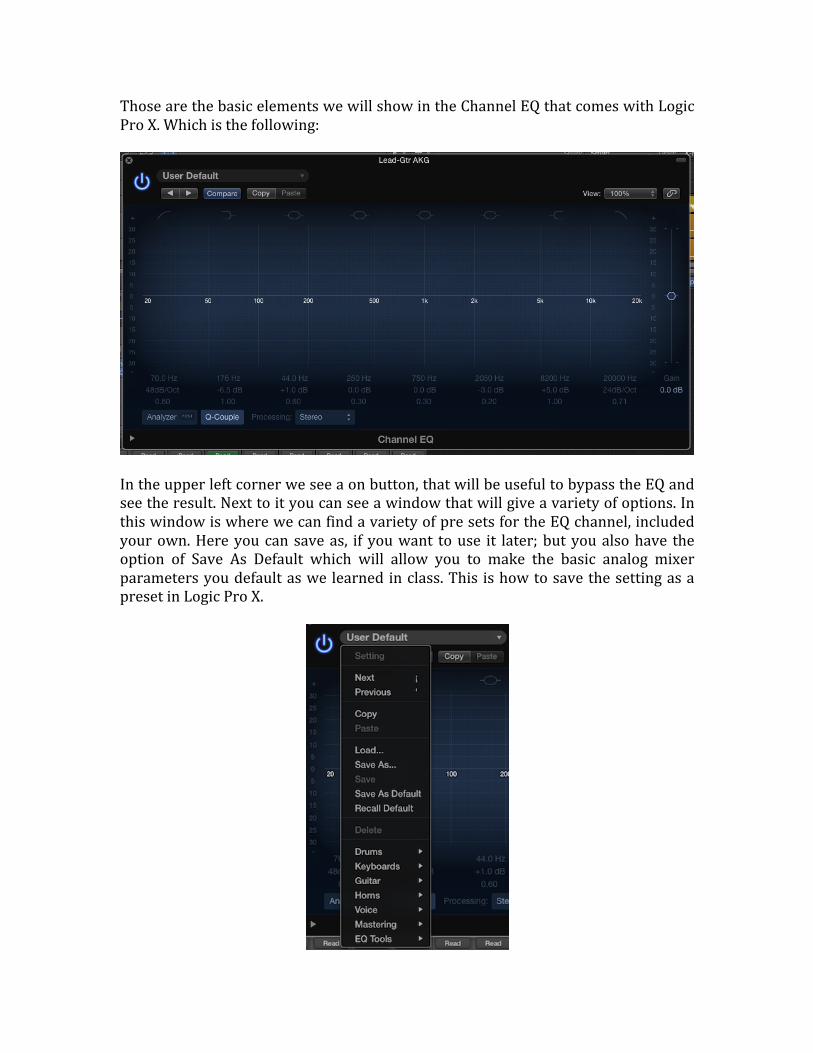
Those are the basic elements we will show in the Channel EQ that comes with Logic Pro X. Which is the following:
In the upper left corner we see a on button, that will be useful to bypass the EQ and see the result. Next to it you can see a window that will give a variety of options. In this window is where we can find a variety of pre sets for the EQ channel, included your own. Here you can save as, if you want to use it later; but you also have the option of Save As Default which will allow you to make the basic analog mixer parameters you default as we learned in class. This is how to save the setting as a preset in Logic Pro X.
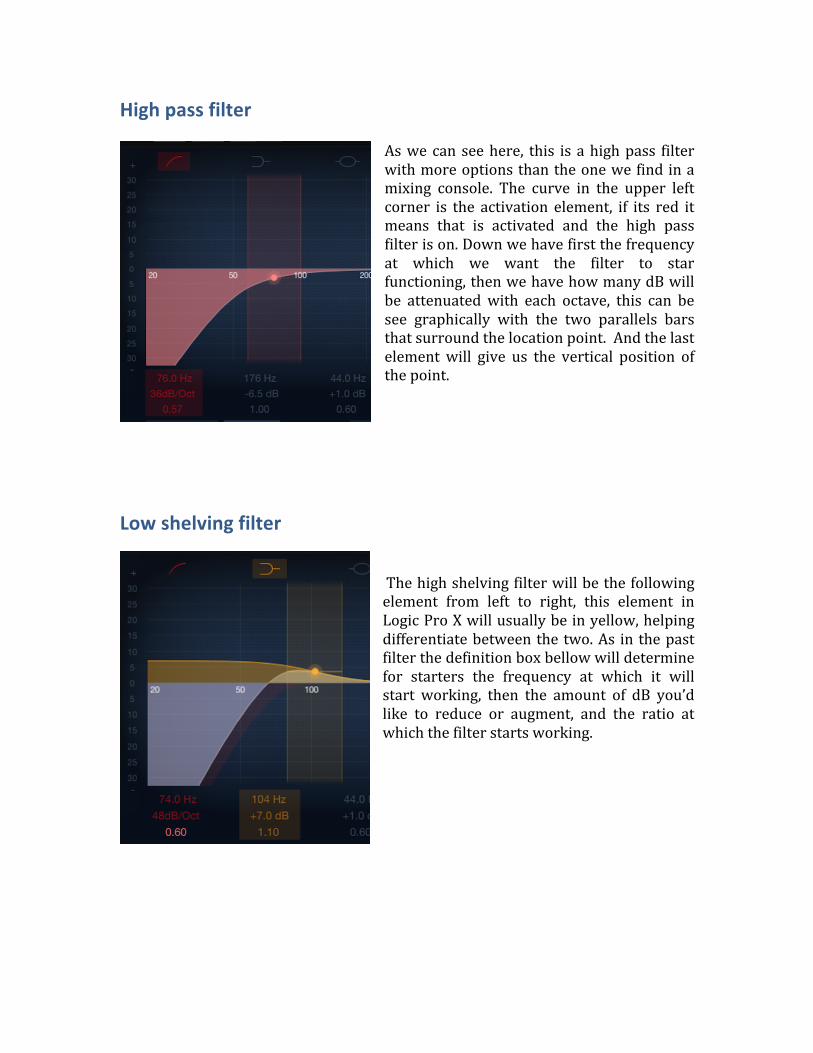
High pass filter As we can see here, this is a high pass filter with more options than the one we find in a mixing console. The curve in the upper left corner is the activation element, if its red it means that is activated and the high pass filter is on. Down we have first the frequency at which we want the filter to star functioning, then we have how many dB will be attenuated with each octave, this can be see graphically with the two parallels bars that surround the location point. And the last element will give us the vertical position of the point.
Low shelving filter The high shelving filter will be the following element from left to right, this element in Logic Pro X will usually be in yellow, helping differentiate between the two. As in the past filter the definition box bellow will determine for starters the frequency at which it will start working, then the amount of dB you’d like to reduce or augment, and the ratio at which the filter starts working.
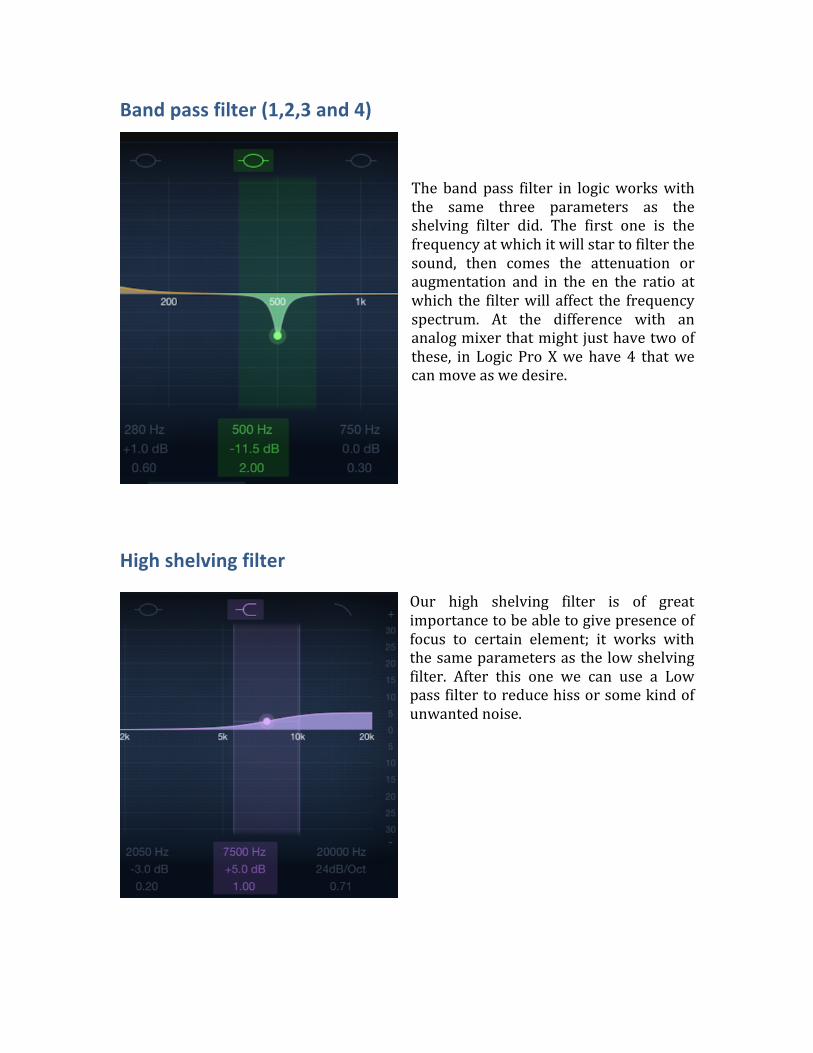
Band pass filter (1,2,3 and 4) The band pass filter in logic works with the same three parameters as the shelving filter did. The first one is the frequency at which it will star to filter the sound, then comes the attenuation or augmentation and in the en the ratio at which the filter will affect the frequency spectrum. At the difference with an analog mixer that might just have two of these, in Logic Pro X we have 4 that we can move as we desire.
High shelving filter Our high shelving filter is of great importance to be able to give presence of focus to certain element; it works with the same parameters as the low shelving filter. After this one we can use a Low pass filter to reduce hiss or some kind of unwanted noise.
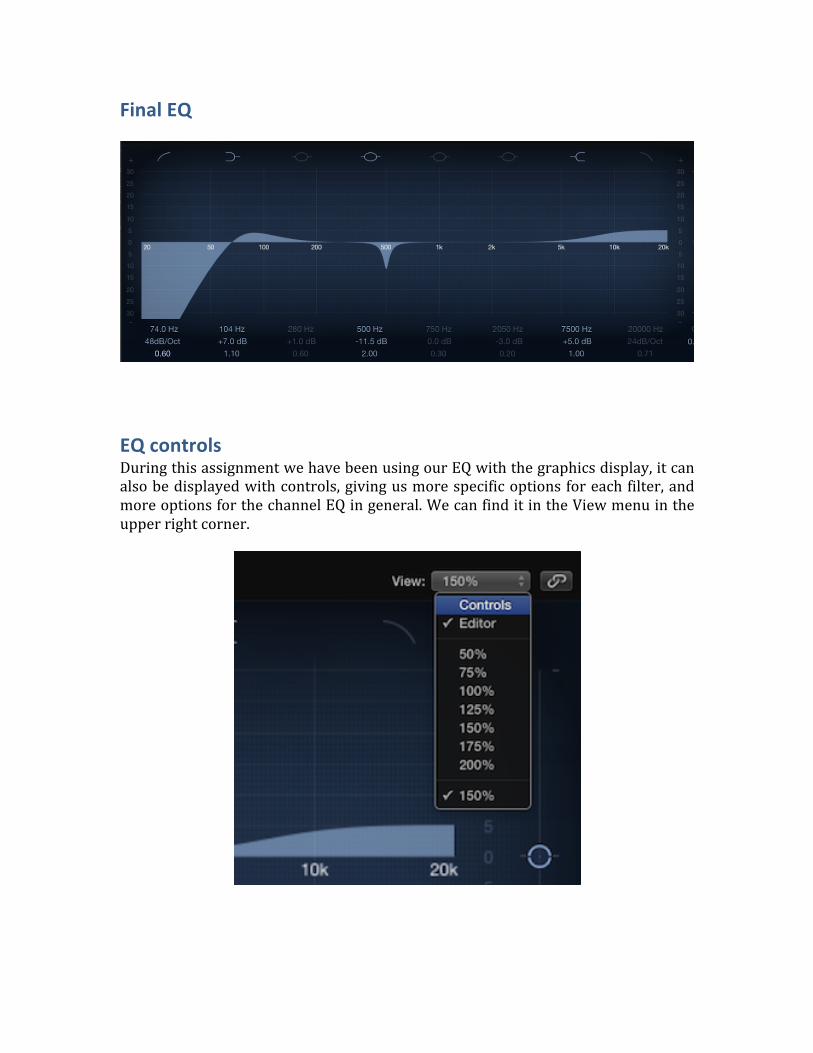
Final EQ
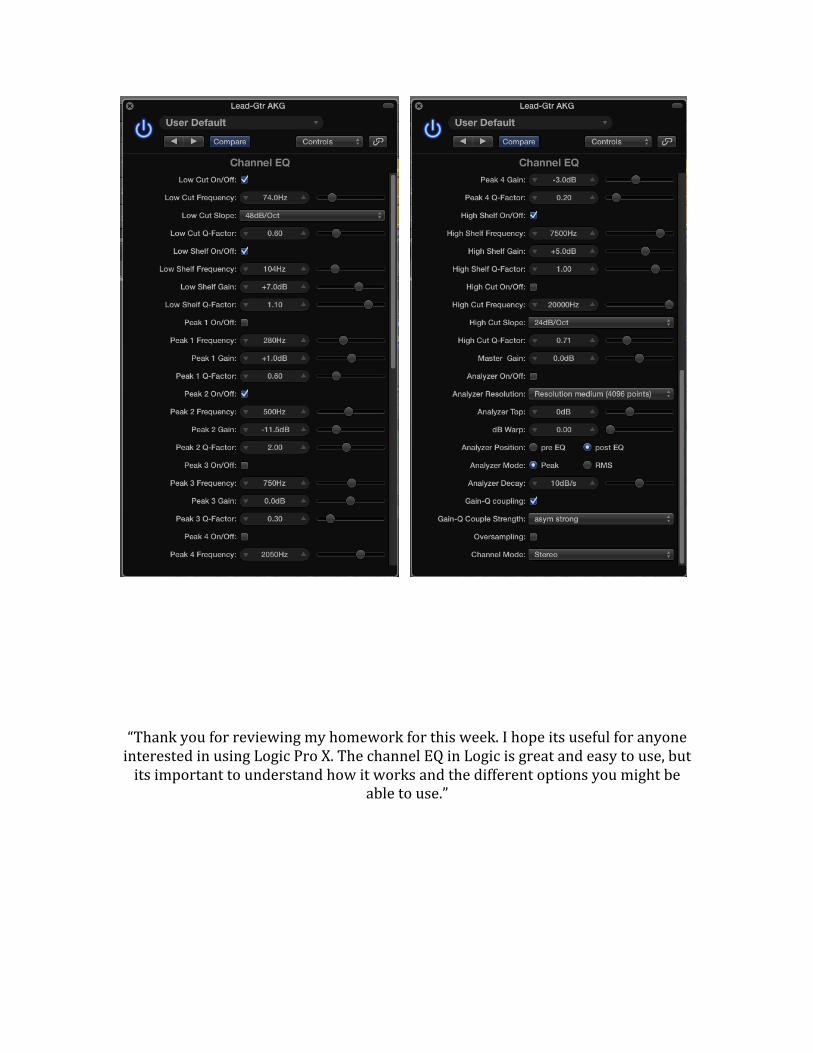
EQ controls During this assignment we have been using our EQ with the graphics display, it can also be displayed with controls, giving us more specific options for each filter, and more options for the channel EQ in general. We can find it in the View menu in the upper right corner.
“Thank you for reviewing my homework for this week. I hope its useful for anyone interested in using Logic Pro X. The channel EQ in Logic is great and easy to use, but its important to understand how it works and the different options you might be
able to use.”


