
Create A Briefcase Icon
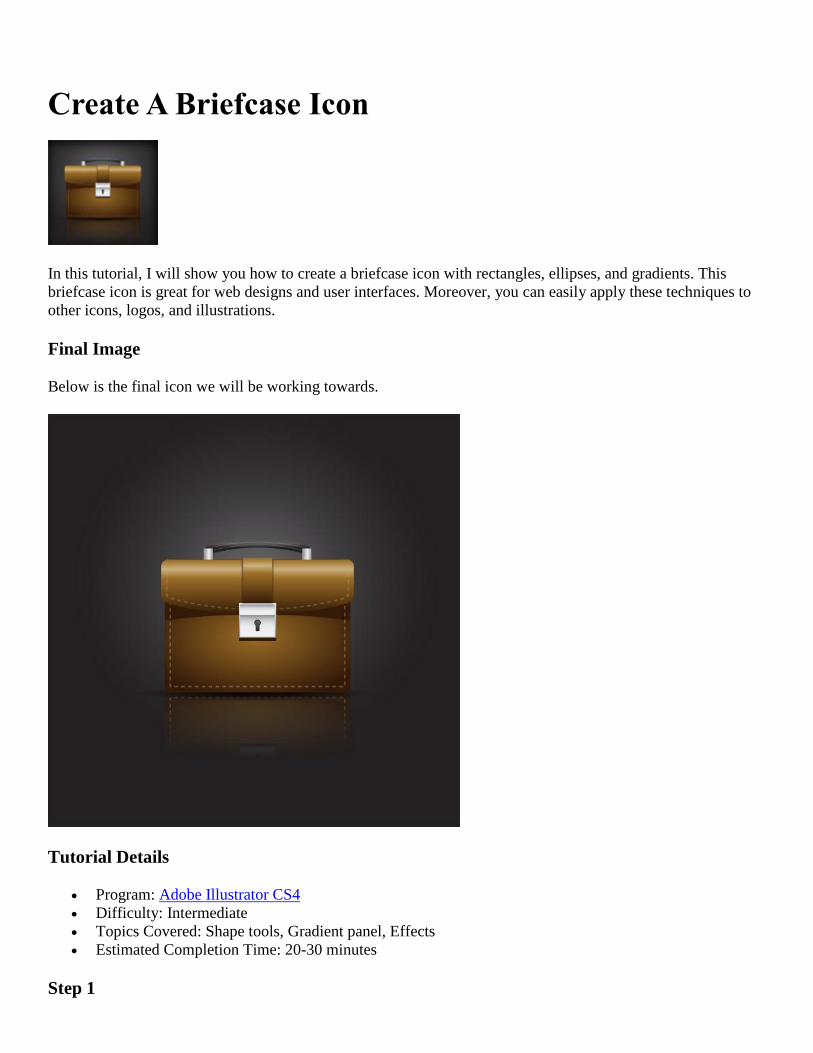
In this tutorial, I will show you how to create a briefcase icon with rectangles, ellipses, and gradients. This
briefcase icon is great for web designs and user interfaces. Moreover, you can easily apply these techniques to
other icons, logos, and illustrations.
Final Image
Below is the final icon we will be working towards.
Tutorial Details
Program: Adobe Illustrator CS4
Difficulty: Intermediate
Topics Covered: Shape tools, Gradient panel, Effects
Estimated Completion Time: 20-30 minutes
Step 1

Create a new document and with the Rectangle tool (M), create a rectangle for the main body shape of the
briefcase.
Step 2
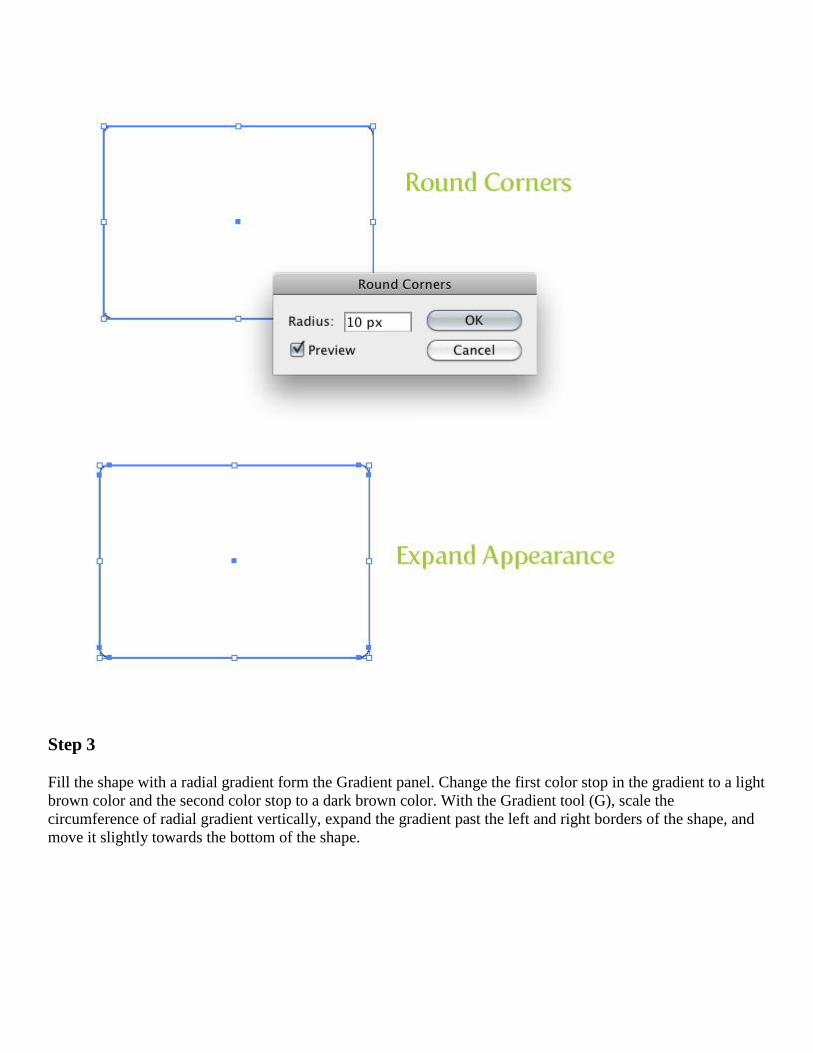
With the rectangle selected, go Effect > Stylize > Round Corners. In the Round Corners dialog, change the
Radius to 10 px. This value might be different depending on the size of your main rectangle. Next, go Object >
Expand Appearance.
Step 3
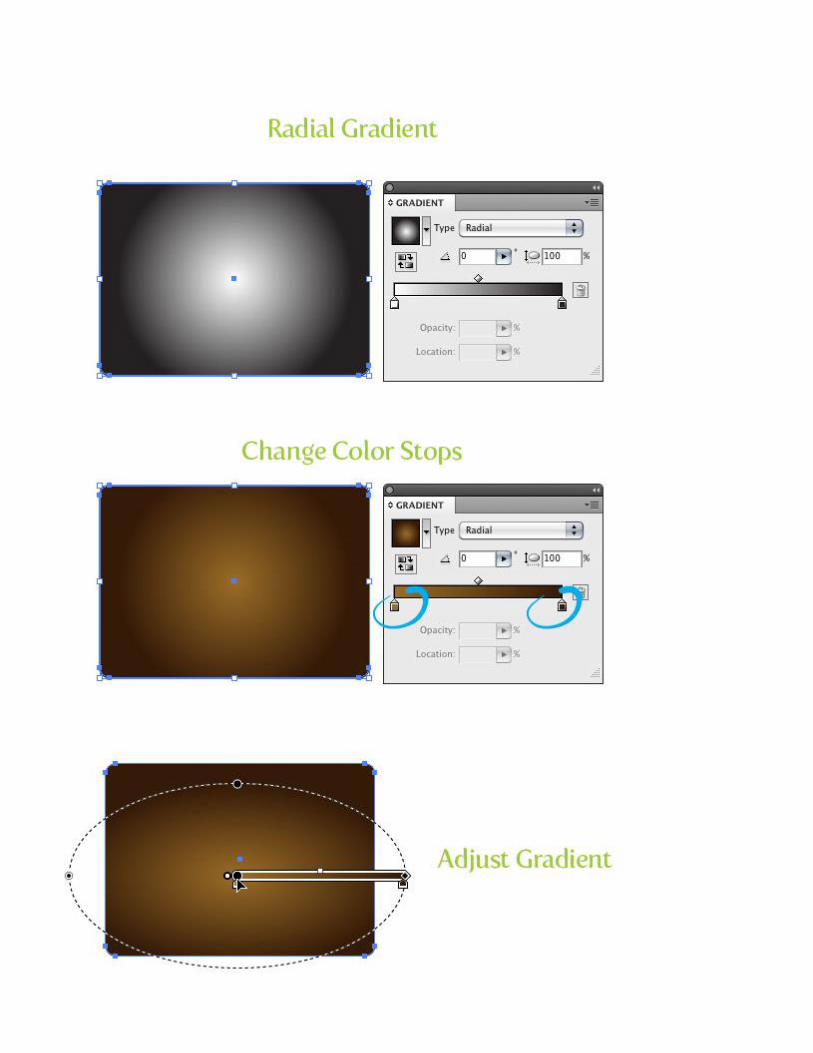
Fill the shape with a radial gradient form the Gradient panel. Change the first color stop in the gradient to a light
brown color and the second color stop to a dark brown color. With the Gradient tool (G), scale the
circumference of radial gradient vertically, expand the gradient past the left and right borders of the shape, and
move it slightly towards the bottom of the shape.

Step 4
With the Rectangle tool (M), create a rectangle about a third tall and slightly wider than the size of the main
shape. Place the new rectangle over the top part of the main body shape. This will be our flap.
Step 5
With the flap shape selected, go Effect > Stylize > Round Corners and change the Radius in the Round Corners
dialog to 10 px. Next go, Effect > Warp > Arc Lower. In the Warp Options dialog make sure Horizontal is
selected and change the Bend to 18. Now go Object > Expand Appearance.


Step 6
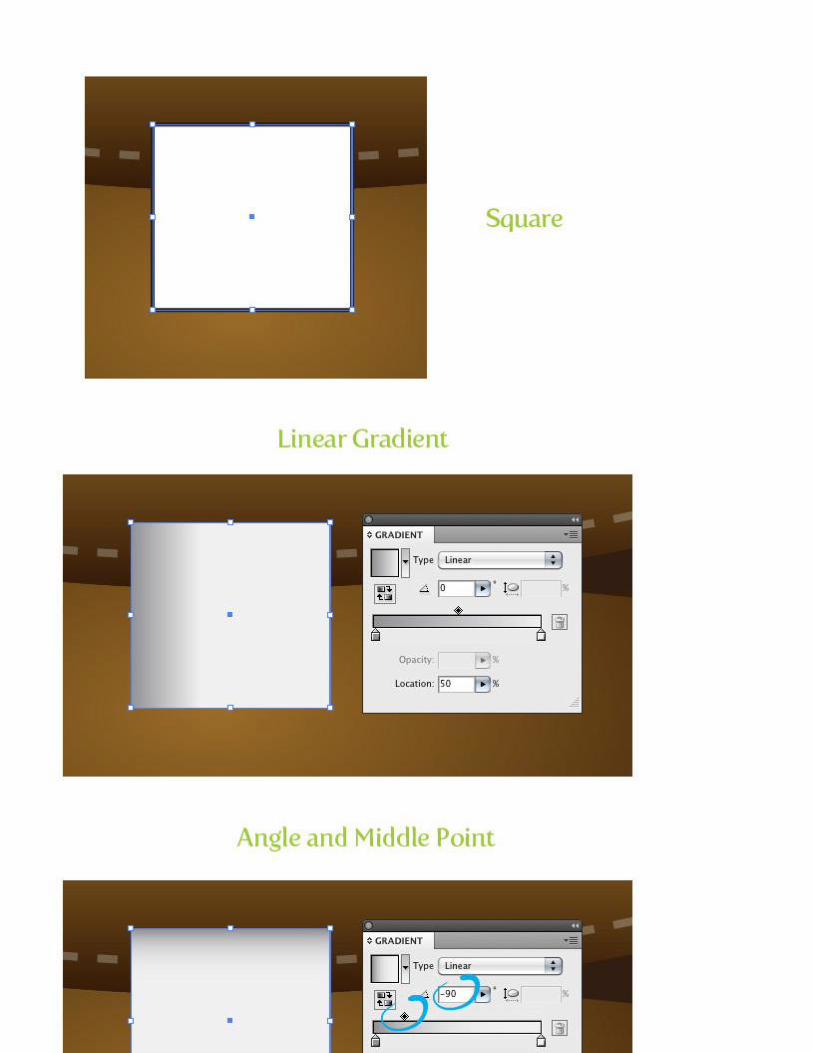
Fill the flap shape with a linear gradient from the Gradient panel. For this gradient we are going to add two
color stop giving us a total of four color stops in the gradient. To add the color stops, simply click just below the
Gradient Slider in the Gradient panel twice. Change the first color to a brown color, the second to a light brown
color, the third the same brown color as the first color stop, and the last one to a dark brown color. Select the
second color stop and change the Location from the Gradient panel to 16 and change the Location of the third
color stop to 34. Next, change the Angle of the gradient to -90.


Step 7
With the Rectangle tool (M), create a rectangle half the height and same width as the main shape. Go Effect >
Warp > Arc Lower. In the Warp Options dialog, make sure Horizontal is select and change the Bend to -9.
Expand the Appearance, fill the shape with your dark brown, and go Object > Arrange > Send Backward
(Command + [ ).


Step 8
Select the main shape and go Object > Path > Offset. In the dialog, change the Offset to -8 px. Take off any fill
and change the stroke color to white. From the Stroke panel, change the Weight to 2 pt and select a 5 pt Dashed
Line. From the Transparency panel, change the Opacity to 25. Next, go Object > Arrange > Bring Forward
(Command + ] ).


Step 9
Select the flap shape and go Object > Path > Offset and change the Offset to -8 px. With the new offset still
selected use the Eyedropper tool (I) and sample the dashed line you created in the first step. Next, with the
Direct Selection tool (A), select the top line in the new dashed line and delete it by pressing the Delete button.


Step 10
Create a small square with the Rectangle tool (M) and place it where the bottom of the flap shape arc. Fill the
square with a linear gradient with the first color stop a gray color and the second color stop white. In the
Gradient panel, change the Middle Point of the gradient to 18 and the Angle to -90.

Step 11
Offset to square by 2 px and press the Reverse Gradient button from the Gradient panel.
Step 12

Select the original square, Copy (Command + C), and Paste in Front (Command + F). With the Selection tool
(V), select the top of the square and scale it vertically down to about two thirds of its original size.
Step 13
Select the offset square, Copy (Command + C), Paste in Back (Command + B), and move down slightly with
the Selection tool (V). Next, change the fill to your dark brown color.


Step 14
Draw a small ellipse in the bottom half of the square shapes and draw a thin rectangle coming out of the bottom
of the circle. Select both shapes and press the Unite button in the Pathfinder panel.


Step 15
Fill the new shape with a linear gradient, change the first color stop a dark gray color, the second an even darker
gray color, and change the Angle to 90. With the shape still selected, Copy (Command + C), Paste in Back
(Command + B), move down slightly, and change the fill to white.


Step 16
Create a rectangle from the top of the buckle shapes to slightly above the flap shape. Use the Eyedropper tool
(I) and sample to flap linear gradient and change the Angle to -90.


Step 17
Select the new rectangle, Copy (Command + C), and Paste in Back (Command + B). With the Selection tool
(V), widen the shape slightly and make the top of the copy line up with the top of the flap. Change the copy to
your dark brown color and set the Opacity to 45 from the Transparency panel.


Step 18
Create a small rectangle on top of the flap shape. Fill the rectangle with a three color stop gradient. Change the
first color stop to a gray color, the second white, and the third to a gray color.
Step 19
Use the Selection tool (V), Hold down Alt/ Option, hold down Shift, and drag a copy of the rectangle to the
opposite side of the top flap.

Step 20
Use the Rounded Rectangle tool and create a thin rounded rectangle connecting the two small rectangles. With
the rounded rectangle selected, go Effect > Warp > Arc, make sure Horizontal is selected, and change the Bend
to 18. Next, go Object > Expand Appearance.


Step 21
Fill the arc shape with a linear gradient, change the first color stop to a dark gray color, the second color stop to
black, and change the Angle to -90.
Step 22
Offset the arc shape by -4 px and change the stroke color to a gray color. Select both arc shapes and send them
behind the smaller square shapes.

Step 23

Select all the artwork we have created so far, Copy (Command + C), and Paste in Front (Command + F). With
the copies still selected, go Object > Transform > Reflect. In the Reflect dialog change the Axis to Horizontal.
Next, move the reflected copies right under the original artwork.


Step 24
Create a rectangle over top half of the reflection. Fill the rectangle with a linear gradient, change the first color
stop to white, the second color stop to a rich black and change the Angle to -90.


Step 25
Select the reflection and gradient and choose Make Opacity Mask from the pop-up menu of the Transparency
panel. Next, change the opacity of the mask to 60.


Step 26
Create an ellipse bigger than the main briefcase artwork and fill it with a radial gradient. Scale the ellipse down
vertically to about an eight of its original size. Set the Blending Mode to Multiply from the Transparency panel
and place the ellipse over the bottom part of the briefcase. Select the ellipse and opacity mask and send them
behind all other artwork. All done! You can also place your icon on different color backgrounds. In my example
I placed the icon on a dark gray radial gradient background.


Final Image
Below is the final image again.


