

ECDL Module 3 WORKBOOK
Word Processing Microsoft Word 2003 Edition for ECDL Syllabus 4.5 (UK only)

PAGE 2 - ECDL MODULE 3 WORKBOOK (USING OFFICE 2003)
© 1995-2007 Cheltenham Courseware Ltd. All trademarks acknowledged. E&OE. No part of this document may be copied without written permission from Cheltenham Courseware unless produced under the terms of a courseware site license agreement with Cheltenham Courseware. All reasonable precautions have been taken in the preparation of this document, including both technical and non-technical proofing. Cheltenham Courseware and all staff assume no responsibility for any errors or omissions. No warranties are made, expressed or implied with regard to these notes. Cheltenham Courseware shall not be responsible for any direct, incidental or consequential damages arising from the use of any material contained in this document. If you find any errors in these training modules, please inform Cheltenham Courseware. Whilst every effort is made to eradicate typing or technical mistakes, we apologise for any errors you may detect. All courses are updated on a regular basis, so your feedback is both valued by us and will help us to maintain the highest possible standards. Sample versions of courseware from Cheltenham Courseware (Normally supplied in Adobe Acrobat format): If the version of courseware that you are viewing is marked as NOT FOR TRAINING, SAMPLE, or similar, then it cannot be used as part of a training course, and is made available purely for content and style review. This is to give you the opportunity to preview our courseware, prior to making a purchasing decision. Sample versions may not be re-sold to a third party. For current license information This document may only be used under the terms of the license agreement from Cheltenham Courseware. Cheltenham Courseware reserves the right to alter the licensing conditions at any time, without prior notice. Please see the site license agreement available at: www.cheltenhamcourseware.com.au/agreement Contact Information Australia / Asia Pacific / Europe (ex. UK) / Rest of the World Email: [email protected] Web: www.cheltenhamcourseware.com.au USA / Canada Email: [email protected] Web: www.cheltenhamcourseware.com UK Email: [email protected] Web: www.cctglobal.com
FOR USE AT THE LICENSED SITE(S) ONLY © Cheltenham Courseware Ltd. 1995-2007 www.cheltenhamcourseware.com

PAGE 3 - ECDL MODULE 3 WORKBOOK (USING OFFICE 2003)
ECDL Approved Courseware The ECDL Foundation has approved these training materials and requires that the following statement appears in all ECDL Foundation approved courseware. European Computer Driving Licence, ECDL, International Computer Driving Licence, ICDL, e-Citizen and related logos are trade marks of The European Computer Driving Licence Foundation Limited (“ECDL-F”) in Ireland and other countries. Cheltenham Courseware is an entity independent of ECDL-F and is not associated with ECDL-F in any manner. This courseware publication may be used to assist candidates to prepare for ECDL tests. Neither ECDL-F nor Cheltenham Courseware warrants that the use of this courseware publication will ensure passing of ECDL tests. This courseware publication has been independently reviewed and approved by ECDL-F as complying with the following standard: Technical compliance with the learning objectives of ECDL syllabus 4. Confirmation of this approval can be obtained by reviewing the Courseware Section of the website www.ecdl.com The material contained in this courseware publication has not been reviewed for technical accuracy and does not guarantee that candidates will pass ECDL tests. Any and all assessment items and/or performance-based exercises contained in this courseware publication relate solely to this publication and do not constitute or imply certification by ECDL-F in respect of ECDL tests or any other ECDL-F test. For details on sitting ECDL tests and other ECDL-F tests in your country, please contact your country's National ECDL/ICDL designated Licensee or visit ECDL-F’s web site at www.ecdl.com. Candidates using this courseware publication must be registered with the National Licensee, before undertaking ECDL tests. Without a valid registration, ECDL tests cannot be undertaken and no ECDL test certificate, nor any other form of recognition, can be given to a candidate. Registration should be undertaken with your country's National ECDL/ICDL designated Licensee at any Approved ECDL test certificate Test Centre. Syllabus 4 is the official syllabus of the ECDL certification programme at the date of approval of this courseware publication.
FOR USE AT THE LICENSED SITE(S) ONLY © Cheltenham Courseware Ltd. 1995-2007 www.cheltenhamcourseware.com

PAGE 4 - ECDL MODULE 3 WORKBOOK (USING OFFICE 2003)
WP2.1. USING THE APPLICATION ............................................................................................................. 6
WP2.1.1. FIRST STEPS WITH WORD PROCESSING ..................................................................................... 6 WP2.1.1.1. Opening and closing Microsoft Word ............................................................................. 6 WP2.1.1.2. Opening one or several documents ............................................................................... 6 WP2.1.1.3. Creating a new document based on the default or other templates.......................... 8 WP2.1.1.4. Saving a document to a location on a drive ................................................................ 10 WP2.1.1.5. Saving a document under another name .................................................................... 11 WP2.1.1.6. Saving a document in another file type ....................................................................... 11 WP2.1.1.7. Switching between open documents ........................................................................... 13 WP2.1.1.8. Using available Help functions ...................................................................................... 14 WP2.1.1.9. Closing a document ........................................................................................................ 15
WP2.1.2. ADJUSTING SETTINGS ................................................................................................................ 15 WP2.1.2.1. Changing between page view modes .......................................................................... 15 WP2.1.2.2. Using the Zoom tool ....................................................................................................... 16 WP2.1.2.3. Displaying or hiding toolbars ......................................................................................... 16 WP2.1.2.4. Displaying or hiding non-printing characters............................................................... 17 WP2.1.2.5. Modifying basic options.................................................................................................. 18
WP2.2. MAIN OPERATIONS ....................................................................................................................... 20 WP2.2.1. INSERTING DATA ........................................................................................................................ 20
WP2.2.1.1. Inserting text .................................................................................................................... 20 WP2.2.1.2. Inserting special characters and symbols ................................................................... 20
WP2.2.2. SELECTING DATA ....................................................................................................................... 21 WP2.2.2.1. Selecting a character, word, line, sentence, paragraph or the entire body text .... 21
WP2.2.3. EDITING DATA ............................................................................................................................ 23 WP2.2.3.1. Editing content by inserting new text within existing text or over-typing existing text 23 WP2.2.3.2. Using the Undo and Redo commands ......................................................................... 24
WP2.2.4. COPYING, MOVING AND DELETING ............................................................................................ 24 WP2.2.4.1. Copying text within a document or between open documents................................. 24 WP2.2.4.2. Moving text within a document or between open documents .................................. 25 WP2.2.4.3. Deleting text ..................................................................................................................... 26
WP2.2.5. SEARCH & REPLACE .................................................................................................................. 26 WP2.2.5.1. Using the search command for a specific word or phrase........................................ 27 WP2.2.5.2. Using a simple replace command for a specific word or phrase ............................. 27
WP2.3. FORMATTING .................................................................................................................................. 29 WP2.3.1. TEXT FORMATTING ..................................................................................................................... 29
WP2.3.1.1. Changing text appearance including font sizes or font types ................................... 29 WP2.3.1.2. Apply text formatting such as bold, italic, underline................................................... 29 WP2.3.1.3. Applying subscript or superscript to text...................................................................... 30 WP2.3.1.4. Applying case changes to text ...................................................................................... 30 WP2.3.1.5. Applying different colours to text................................................................................... 31 WP2.3.1.6. Copying formatting from a piece of text to another piece of text ............................. 32 WP2.3.1.7. Applying an existing style to a word, a line or a paragraph ...................................... 32 WP2.3.1.8. Using automatic hyphenation ........................................................................................ 33
WP2.3.2. PARAGRAPH FORMATTING ......................................................................................................... 34 WP2.3.2.1. Inserting or removing paragraph marks....................................................................... 34 WP2.3.2.2. Inserting and removing soft carriage return (line break) marks ............................... 34 WP2.3.2.3. Aligning text ..................................................................................................................... 34 WP2.3.2.4. Indenting paragraphs...................................................................................................... 35 WP2.3.2.5. Applying single or double line spacing within paragraphs ........................................ 35 WP2.3.2.6. Applying spacing above or below paragraphs ............................................................ 36 WP2.3.2.7. Setting, removing and using tabs ................................................................................. 36 WP2.3.2.8. Applying/removing bullets and numbering to a single level list ................................ 37 WP2.3.2.9. Changing the style of bullets or numbering in a single level list .............................. 37 WP2.3.2.10. Adding a top and bottom border or box border and shading to a paragraph ......... 38
WP2.3.3. DOCUMENT FORMATTING .......................................................................................................... 40
FOR USE AT THE LICENSED SITE(S) ONLY © Cheltenham Courseware Ltd. 1995-2007 www.cheltenhamcourseware.com
PAGE 5 - ECDL MODULE 3 WORKBOOK (USING OFFICE 2003)
WP2.3.3.1. Changing document orientation and page size .......................................................... 41 WP2.3.3.2. Changing the margins of entire document .................................................................. 42 WP2.3.3.3. Inserting and deleting a page break in a document................................................... 42 WP2.3.3.4. Adding and modifying text in Headers and Footers................................................... 42 WP2.3.3.5. Adding fields in Headers and Footers.......................................................................... 44 WP2.3.3.6. Applying automatic page numbering to a document ................................................. 45
WP2.4. OBJECTS.......................................................................................................................................... 47 WP2.4.1. TABLES ....................................................................................................................................... 47
WP2.4.1.1. Creating a table ready for text insertion....................................................................... 47 WP2.4.1.2. Inserting and editing data in a table ............................................................................. 47 WP2.4.1.3. Selecting rows, columns, cells or an entire table ....................................................... 48 WP2.4.1.4. Inserting and deleting rows and columns .................................................................... 48 WP2.4.1.5. Modifying column width or row height.......................................................................... 48 WP2.4.1.6. Modifying cell border width, style and colour .............................................................. 49 WP2.4.1.7. Adding shading to cells .................................................................................................. 51
WP2.4.2. PICTURES, IMAGES AND CHARTS............................................................................................... 52 WP2.4.2.1. Inserting a graphic into a document ............................................................................. 52 WP2.4.2.2. Selecting a graphic within a document ........................................................................ 56 WP2.4.2.3. Copying a graphic within a document or between open documents....................... 57 WP2.4.2.4. Moving a graphic within a document or to another document.................................. 57 WP2.4.2.5. Resizing a graphic .......................................................................................................... 58 WP2.4.2.6. Deleting a graphic ........................................................................................................... 58
WP2.5. MAIL MERGE ................................................................................................................................... 59 WP2.5.1. CONCEPT AND PRACTICE........................................................................................................... 59
WP2.5.1.1. Understanding mail merge concepts ........................................................................... 59 WP2.5.1.2. Opening and preparing a main document for a mail merge by inserting data fields 59 WP2.5.1.3. Opening and preparing a mailing list for use in a mail merge .................................. 67 WP2.5.1.4. Merging a mailing list with a letter or label document................................................ 68
WP2.6. PREPARING OUTPUTS ................................................................................................................. 79 WP2.6.1. PREPARATION ............................................................................................................................ 79
WP2.6.1.1. Understanding the importance of proofing your documents..................................... 79 WP2.6.1.2. Spell-checking a document ........................................................................................... 79 WP2.6.1.3. Adding words to a built-in custom dictionary .............................................................. 79 WP2.6.1.4. Previewing a document.................................................................................................. 80
WP2.6.2. PRINTING .................................................................................................................................... 80 WP2.6.2.1. Choosing print output options ....................................................................................... 80 WP2.6.2.2. Printing a document from an installed printer ............................................................. 81
FOR USE AT THE LICENSED SITE(S) ONLY © Cheltenham Courseware Ltd. 1995-2007 www.cheltenhamcourseware.com
PAGE 6 - ECDL MODULE 3 WORKBOOK (USING OFFICE 2003)
WP2.1. Using the Application
WP2.1.1. First Steps with Word Processing
WP2.1.1.1. Opening and closing Microsoft Word
Starting Word using the Windows Start menu • If necessary switch on your PC and enter the necessary ID and passwords, so
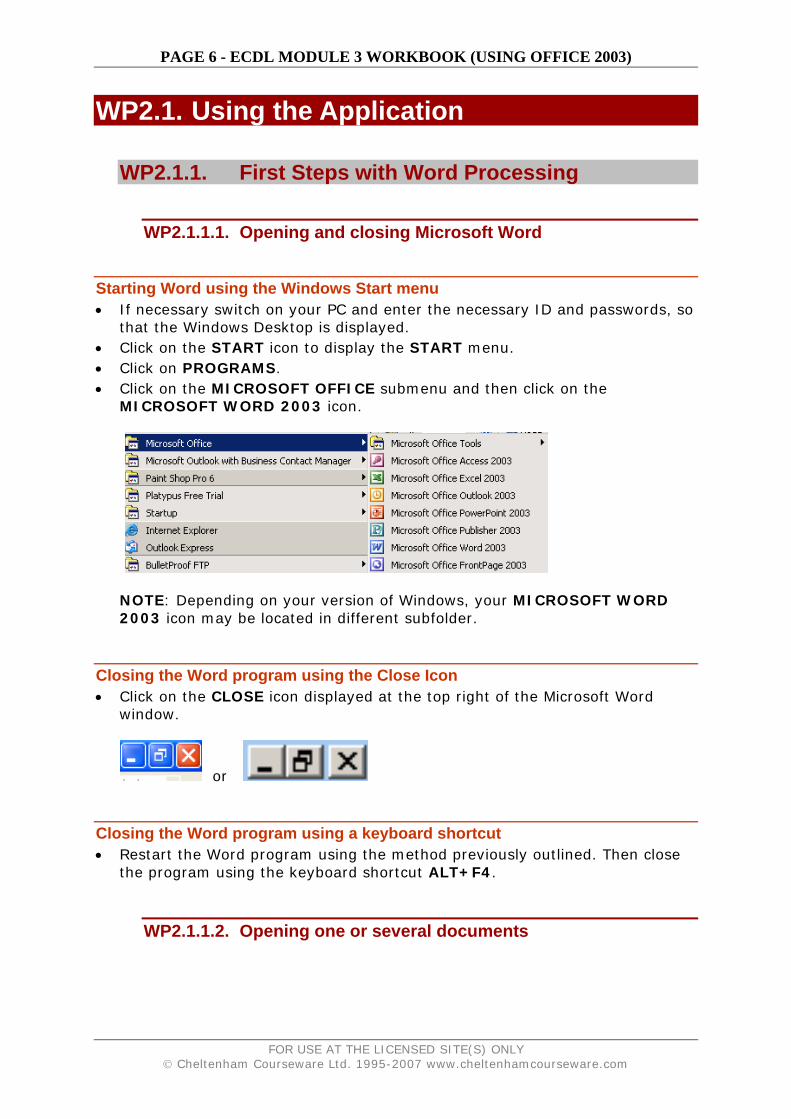
that the Windows Desktop is displayed. • Click on the START icon to display the START menu. • Click on PROGRAMS. • Click on the MICROSOFT OFFICE submenu and then click on the
MICROSOFT WORD 2003 icon.
NOTE: Depending on your version of Windows, your MICROSOFT WORD 2003 icon may be located in different subfolder.
Closing the Word program using the Close Icon • Click on the CLOSE icon displayed at the top right of the Microsoft Word
window.
or
Closing the Word program using a keyboard shortcut • Restart the Word program using the method previously outlined. Then close
the program using the keyboard shortcut ALT+F4.
WP2.1.1.2. Opening one or several documents
FOR USE AT THE LICENSED SITE(S) ONLY © Cheltenham Courseware Ltd. 1995-2007 www.cheltenhamcourseware.com

PAGE 7 - ECDL MODULE 3 WORKBOOK (USING OFFICE 2003)
Opening a file • Start the Word program and click on the OPEN icon and from the dialog box
displayed select a file called USING WORD and then double click on the file to open it.
Identifying the function of the icons within the Open dialog box. • Click on the OPEN icon. Make sure that you understand the function of each
of the following icons displayed along the top of the Open dialog box.
Selecting a continuous block of files to open • Click on the OPEN icon, which will display the Open dialog box. • Click on the first file of the block you wish to select, (in this case select the
first file displayed in the list) and then while depressing the SHIFT key, click on the last file of the required block (in this case click on the sixth file in the list). When you release the SHIFT key the entire block will remain selected.
• Click on the OPEN button and all the selected files will open. • Close all open files. To do this, hold down the SHIFT key whilst clicking on
the FILE drop down menu and then select the CLOSE ALL command.
Selecting multiple files (to open) which are not in a continuous block • Click on the OPEN icon, which will display the Open dialog box. • Click on the first file which you wish to select (in this case the first file on the
list) and while keeping the CTRL key depressed, click on the other files which you wish to select (click on a few at random to illustrated the principle).
FOR USE AT THE LICENSED SITE(S) ONLY © Cheltenham Courseware Ltd. 1995-2007 www.cheltenhamcourseware.com
PAGE 8 - ECDL MODULE 3 WORKBOOK (USING OFFICE 2003)
When you release the CTRL key, the selected files will continue to be highlighted.
• Click on the OPEN button and all the selected files will open. • Close all open files.
WP2.1.1.3. Creating a new document based on the default or other templates
Creating a new document based on the default template • Click on the NEW icon and a new blank document will be displayed on the
screen. This document will be based on the default template within Word.
• Type in your name. • To save the file click on the SAVE icon, enter a file name (in this case called
STARTING), and then click on the SAVE button. • Close the file.
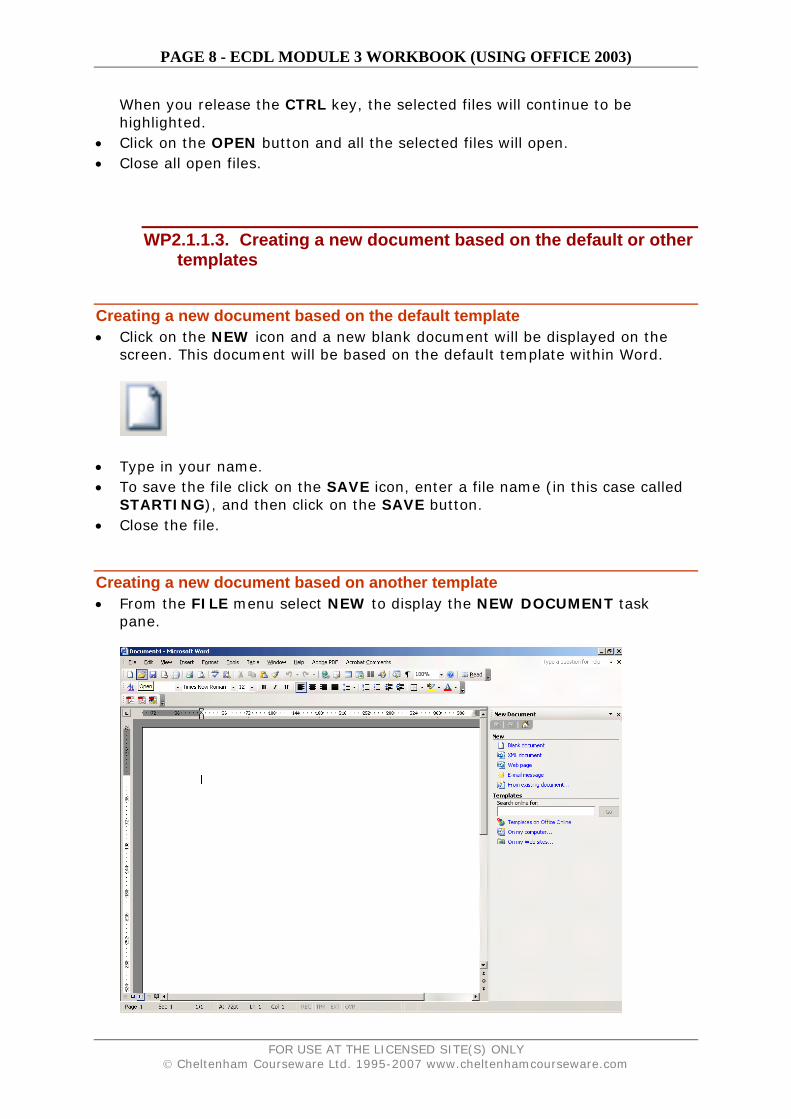
Creating a new document based on another template • From the FILE menu select NEW to display the NEW DOCUMENT task
pane.
FOR USE AT THE LICENSED SITE(S) ONLY © Cheltenham Courseware Ltd. 1995-2007 www.cheltenhamcourseware.com

PAGE 9 - ECDL MODULE 3 WORKBOOK (USING OFFICE 2003)
• You will see a range of options displayed within the Task Pane.
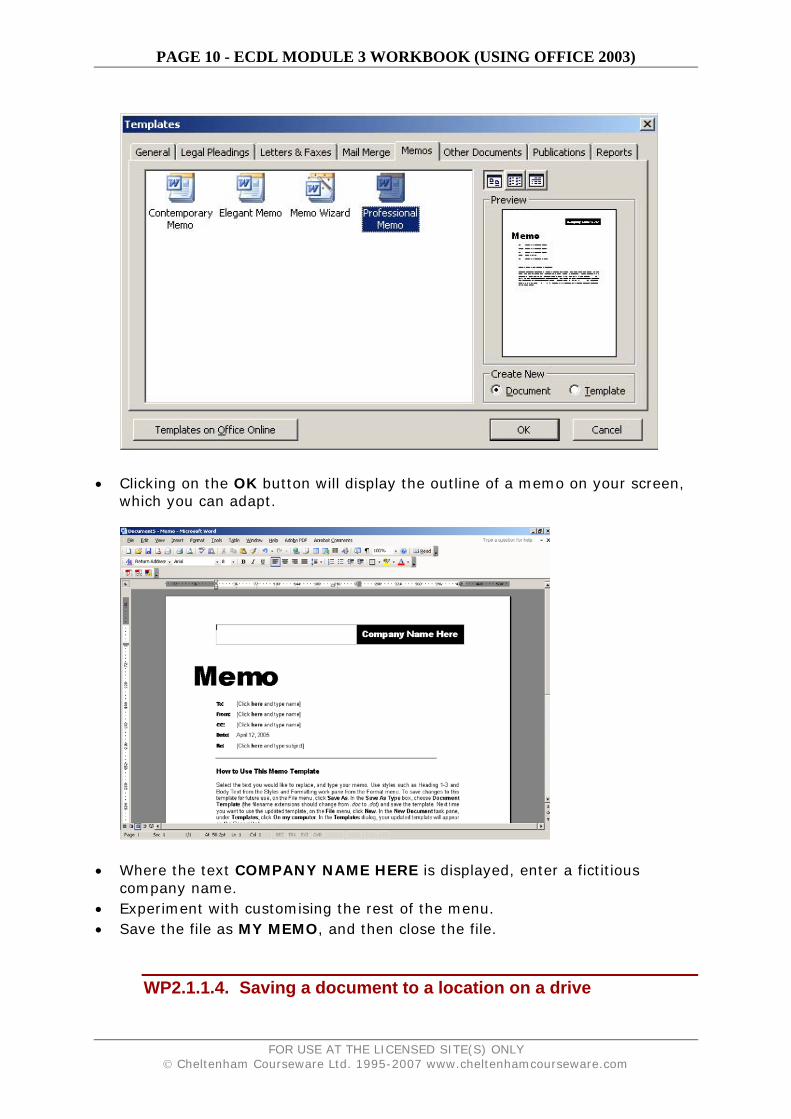
• In this case we want to create a professional looking memo. Within the NEW
FROM TEMPLATE section, click on GENERAL TEMPLATES and the following dialog will be displayed.
• Click on the MEMOS tab and select the PROFESSIONAL MEMO icon which displays the following.
FOR USE AT THE LICENSED SITE(S) ONLY © Cheltenham Courseware Ltd. 1995-2007 www.cheltenhamcourseware.com
PAGE 10 - ECDL MODULE 3 WORKBOOK (USING OFFICE 2003)
• Clicking on the OK button will display the outline of a memo on your screen,
which you can adapt.
• Where the text COMPANY NAME HERE is displayed, enter a fictitious company name.
• Experiment with customising the rest of the menu. • Save the file as MY MEMO, and then close the file.
WP2.1.1.4. Saving a document to a location on a drive
FOR USE AT THE LICENSED SITE(S) ONLY © Cheltenham Courseware Ltd. 1995-2007 www.cheltenhamcourseware.com

PAGE 11 - ECDL MODULE 3 WORKBOOK (USING OFFICE 2003)
Saving a file to a diskette • Open a file called USING WORD. Click on the FILE drop down menu and
select the SAVE AS command. A dialog box will be displayed. • Click on the down arrow to the right of the SAVE IN section of the dialog
box, which will display a drop down menu, as illustrated.
• Select the 3 1/2 FLOPPY (A:) icon. • Enter a file name (in this case MY MEMO 1) and then click on the SAVE
button.
Creating a new folder in which to save your document • Click on the FILE drop down menu and select the SAVE AS command. Word
will remember the last place you saved to (i.e. the floppy disk) and this location will be displayed in Save As dialog box.
• Click on the CREATE NEW FOLDER icon, displayed within the SAVE AS dialog box. This will display the NEW FOLDER dialog box.
• Enter the name of the new folder (in this case MY DATA), and then click on
the OK button. This folder will then be automatically displayed within the dialog box.
• Click on the SAVE button to save the file.
WP2.1.1.5. Saving a document under another name
Saving using "Save As" • From the FILE menu choose SAVE AS command and enter a new file name
(in this case MY MEMO 2) • Save the file.
WP2.1.1.6. Saving a document in another file type
FOR USE AT THE LICENSED SITE(S) ONLY © Cheltenham Courseware Ltd. 1995-2007 www.cheltenhamcourseware.com

PAGE 12 - ECDL MODULE 3 WORKBOOK (USING OFFICE 2003)
Saving a file in a format other than Microsoft Word format • From the FILE drop down menu, click on the SAVE AS command. • Click on the MY DOCUMENTS button to reset the default location to the My
Documents folder.
• Enter a file name, in this case name (in this case MY MEMO 3). • Click on the down arrow to the right of the SAVE AS TYPE: box, and select
the type of file format which you wish to save the file as (in this case RICH TEXT FORMAT).
• Click on the SAVE button to save it in the required format. • Experiment with saving the file in other formats such as:
- a text file - an HTML format - a template format - as a file formatted to be compatible with an earlier version or Word (such as Word 6) - as a file formatted for use with a completely different application, such as WordPerfect.
FOR USE AT THE LICENSED SITE(S) ONLY © Cheltenham Courseware Ltd. 1995-2007 www.cheltenhamcourseware.com

PAGE 13 - ECDL MODULE 3 WORKBOOK (USING OFFICE 2003)
Saving a file using a software specific file extension • In some cases you may wish to specify a file extension name. For instance,
you may want to save a database file, not as a text only file, which by default will have a file name extension of .TXT, but as a text file using a .CSV file name extension. To do this we will use the SAVE AS option, select the PLAIN TEXT option, and enter a name along with the file name extension, such as CONTACTS.CSV.
When you click on the SAVE option you may see a FILE CONVERSION dialog box, in which case select WINDOWS (DEFAULT) and then click on the OK button.
• Save any open files and close the Word program.
WP2.1.1.7. Switching between open documents
Switching from one open document to another one (using the Taskbar) • Start Microsoft Word. • Open any three files. • To change from one document to another, simply click on the required
document, as displayed within the Taskbar at the bottom of your Windows screen.
FOR USE AT THE LICENSED SITE(S) ONLY © Cheltenham Courseware Ltd. 1995-2007 www.cheltenhamcourseware.com
PAGE 14 - ECDL MODULE 3 WORKBOOK (USING OFFICE 2003)
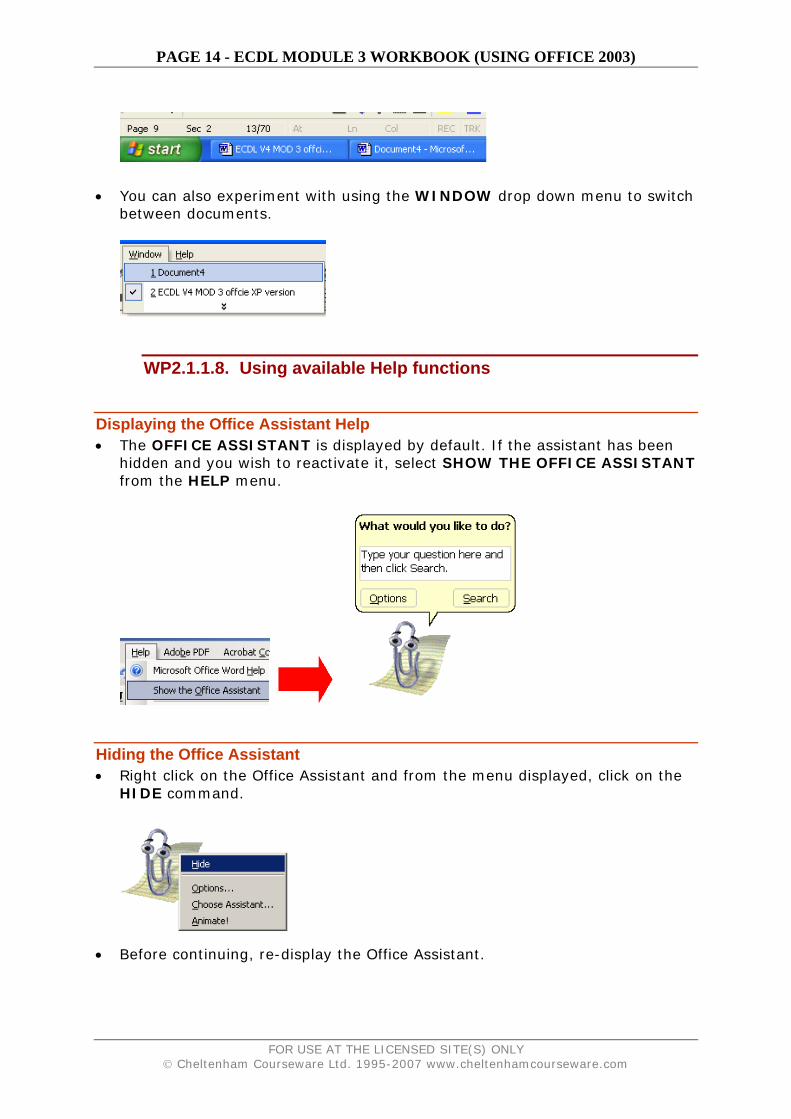
• You can also experiment with using the WINDOW drop down menu to switch
between documents.
WP2.1.1.8. Using available Help functions
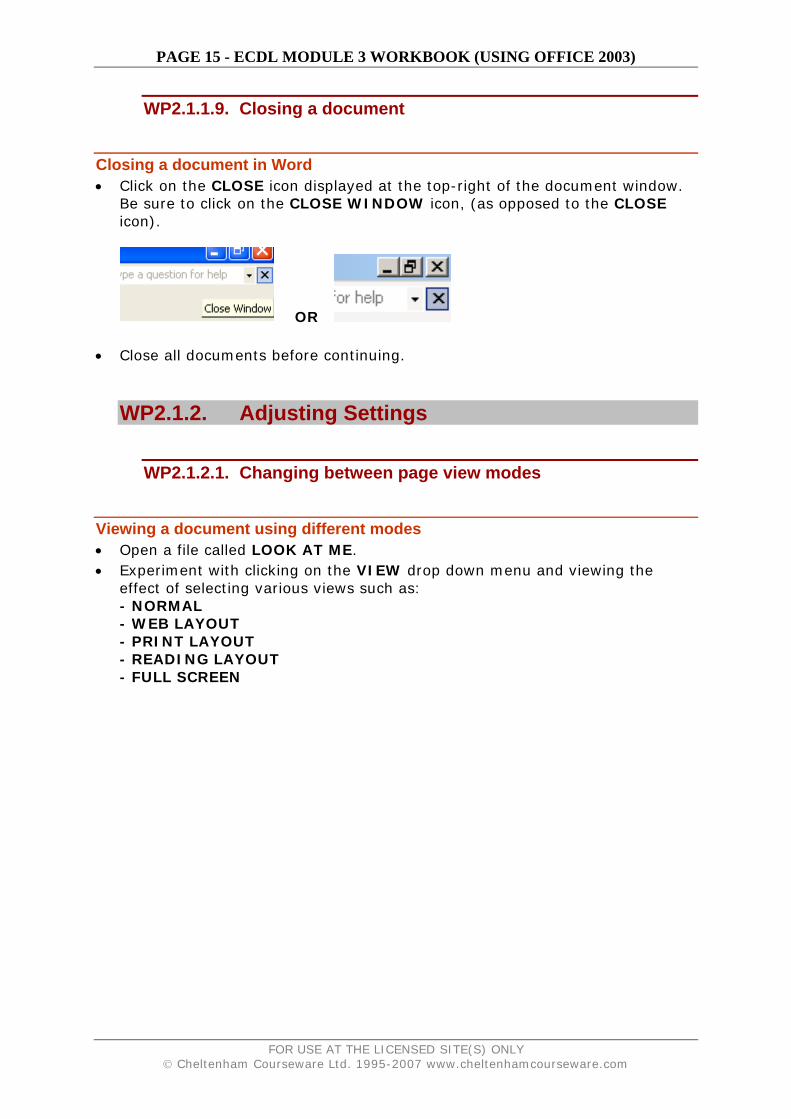
Displaying the Office Assistant Help • The OFFICE ASSISTANT is displayed by default. If the assistant has been
hidden and you wish to reactivate it, select SHOW THE OFFICE ASSISTANT from the HELP menu.
Hiding the Office Assistant • Right click on the Office Assistant and from the menu displayed, click on the
HIDE command.
• Before continuing, re-display the Office Assistant.
FOR USE AT THE LICENSED SITE(S) ONLY © Cheltenham Courseware Ltd. 1995-2007 www.cheltenhamcourseware.com
PAGE 15 - ECDL MODULE 3 WORKBOOK (USING OFFICE 2003)
WP2.1.1.9. Closing a document
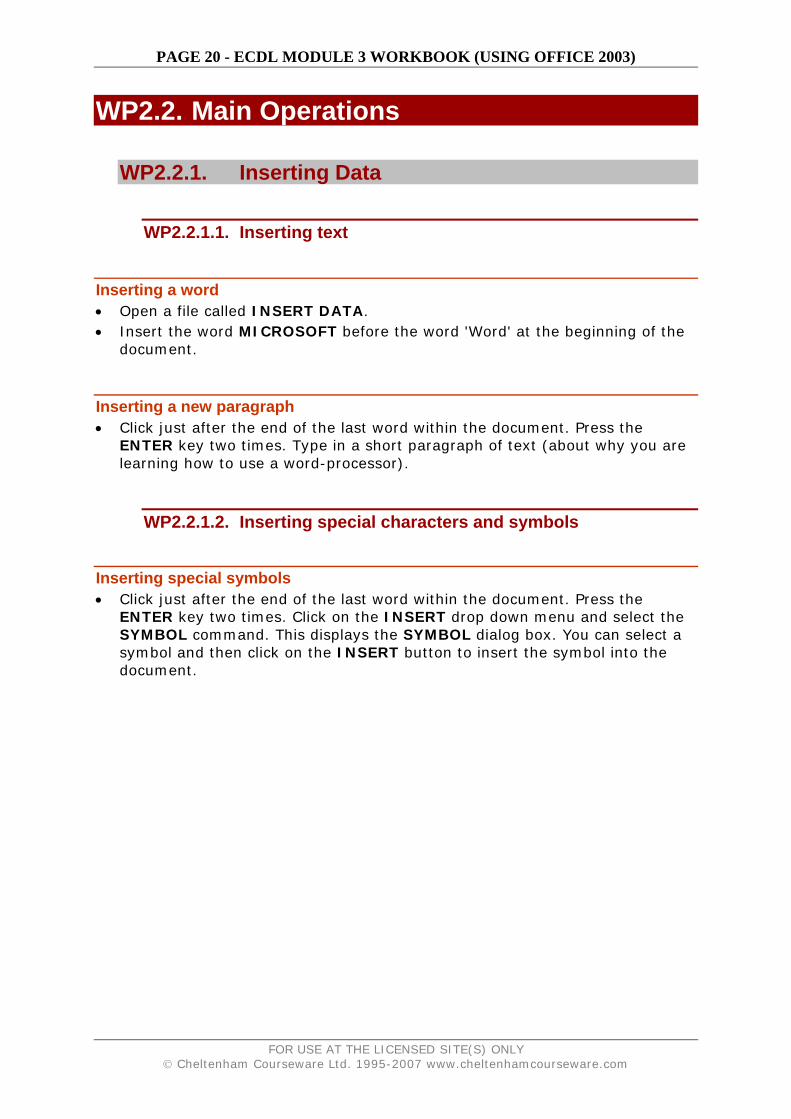
Closing a document in Word • Click on the CLOSE icon displayed at the top-right of the document window.
Be sure to click on the CLOSE WINDOW icon, (as opposed to the CLOSE icon).
OR
• Close all documents before continuing.
WP2.1.2. Adjusting Settings
WP2.1.2.1. Changing between page view modes
Viewing a document using different modes • Open a file called LOOK AT ME. • Experiment with clicking on the VIEW drop down menu and viewing the
effect of selecting various views such as: - NORMAL - WEB LAYOUT - PRINT LAYOUT - READING LAYOUT - FULL SCREEN
FOR USE AT THE LICENSED SITE(S) ONLY © Cheltenham Courseware Ltd. 1995-2007 www.cheltenhamcourseware.com

PAGE 16 - ECDL MODULE 3 WORKBOOK (USING OFFICE 2003)
• As you will see ‘Print Layout’ gives a good impression of how the printed page will look. The ‘Normal’ view can display very strange looking results!
• When you have finished re-view the document using the PRINT LAYOUT view.
WP2.1.2.2. Using the Zoom tool
Zooming a document using the Zoom icon • Use the ZOOM icon on the Standard toolbar to quickly zoom to certain
settings. Click on the down arrow next to the Zoom icon to display a drop down list of pre-set screen zoom values.
• Experiment using high and then low zooms. • When you have finished experimenting, reset the value to PAGE WIDTH
setting.
WP2.1.2.3. Displaying or hiding toolbars
FOR USE AT THE LICENSED SITE(S) ONLY © Cheltenham Courseware Ltd. 1995-2007 www.cheltenhamcourseware.com

PAGE 17 - ECDL MODULE 3 WORKBOOK (USING OFFICE 2003)
Displaying or hide a toolbar • To display a toolbar, select the TOOLBARS command from the VIEW menu
to display the TOOLBARS drop down menu. A list of toolbars is displayed which includes: Standard, Formatting, Borders, Database and Drawing. Choose the TOOLBAR you want to display or hide by clicking on it from the list. Experiment!
• Before continuing, make sure that only the STANDARD and FORMATTING toolbars are displayed.
WP2.1.2.4. Displaying or hiding non-printing characters
Displaying non-printing characters • Click on the SHOW/HIDE icon, located within the Standard Toolbar and view
the effect on the document.
• Before continuing, re-click on the SHOW/HIDE icon located within the
Standard Toolbar to hide the non-printing characters.
FOR USE AT THE LICENSED SITE(S) ONLY © Cheltenham Courseware Ltd. 1995-2007 www.cheltenhamcourseware.com

PAGE 18 - ECDL MODULE 3 WORKBOOK (USING OFFICE 2003)
WP2.1.2.5. Modifying basic options
Modifying preference options within Word • Click on the TOOLS drop down menu and select the OPTIONS command
which will display the OPTIONS dialog box. • TO EXAMINE THE USER INFORMATION: Click on the USER
INFORMATION tab within the dialog box, and see the sort of information which is stored here.
• EXAMINING THE DEFAULT FOLDER: Click on the FILE LOCATIONS tab
within the dialog box. Select DOCUMENTS in the FILE TYPES sections. Which folder is currently set as the default document folder? The default folder is the folder which will, by default, be displayed within the Open or Save dialog boxes in Word.
FOR USE AT THE LICENSED SITE(S) ONLY © Cheltenham Courseware Ltd. 1995-2007 www.cheltenhamcourseware.com

PAGE 19 - ECDL MODULE 3 WORKBOOK (USING OFFICE 2003)
• When you have finished examining the options available, close any open dialog boxes, without saving any changes which you may have made.
• Close Microsoft Word before continuing.
FOR USE AT THE LICENSED SITE(S) ONLY © Cheltenham Courseware Ltd. 1995-2007 www.cheltenhamcourseware.com
PAGE 20 - ECDL MODULE 3 WORKBOOK (USING OFFICE 2003)
WP2.2. Main Operations
WP2.2.1. Inserting Data
WP2.2.1.1. Inserting text
Inserting a word • Open a file called INSERT DATA. • Insert the word MICROSOFT before the word 'Word' at the beginning of the
document.
Inserting a new paragraph • Click just after the end of the last word within the document. Press the
ENTER key two times. Type in a short paragraph of text (about why you are learning how to use a word-processor).
WP2.2.1.2. Inserting special characters and symbols
Inserting special symbols • Click just after the end of the last word within the document. Press the
ENTER key two times. Click on the INSERT drop down menu and select the SYMBOL command. This displays the SYMBOL dialog box. You can select a symbol and then click on the INSERT button to insert the symbol into the document.
FOR USE AT THE LICENSED SITE(S) ONLY © Cheltenham Courseware Ltd. 1995-2007 www.cheltenhamcourseware.com

PAGE 21 - ECDL MODULE 3 WORKBOOK (USING OFFICE 2003)
• In this case insert the COPYRIGHT character.
• Click on the CLOSE button. • Next to this type in your full name. • Save the document and then close the document.
Using AutoCorrect to insert symbols • Open a file called AUTOCORRECT. • Try entering the following and see what happens …
(c) (r) (tm)
• Save the changes to your document and close the file.
WP2.2.2. Selecting Data
WP2.2.2.1. Selecting a character, word, line, sentence, paragraph or the entire body text
FOR USE AT THE LICENSED SITE(S) ONLY © Cheltenham Courseware Ltd. 1995-2007 www.cheltenhamcourseware.com
PAGE 22 - ECDL MODULE 3 WORKBOOK (USING OFFICE 2003)
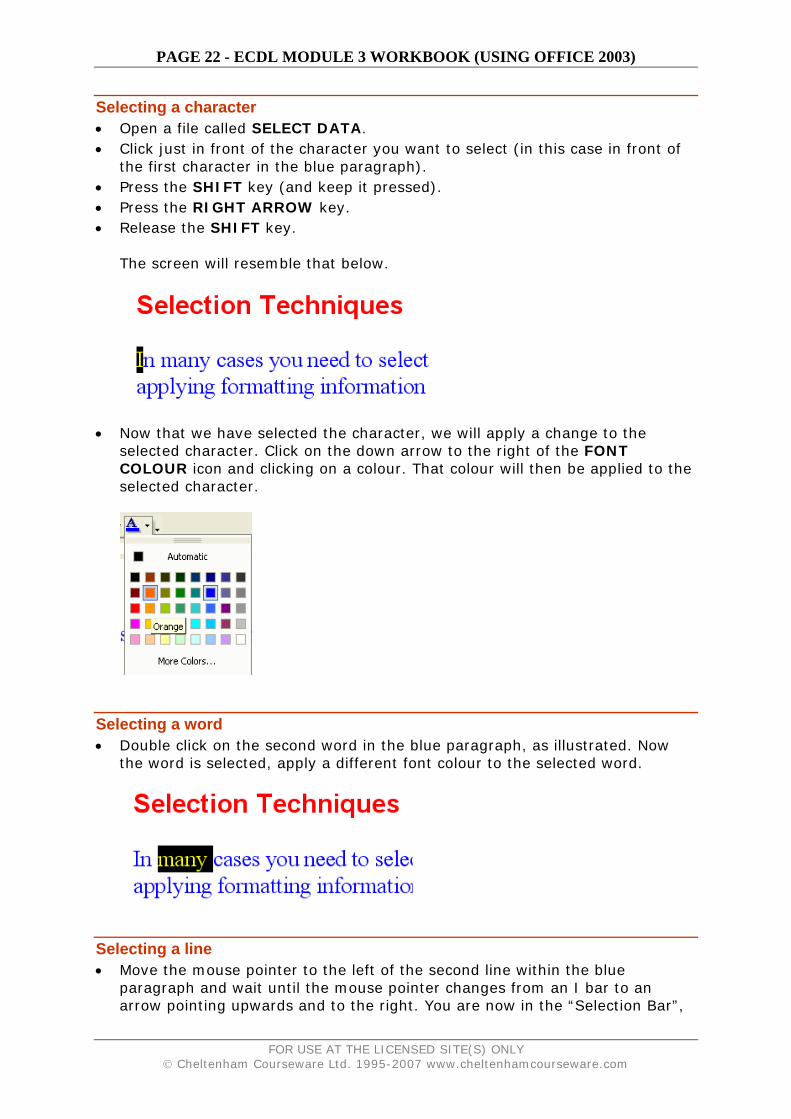
Selecting a character • Open a file called SELECT DATA. • Click just in front of the character you want to select (in this case in front of
the first character in the blue paragraph). • Press the SHIFT key (and keep it pressed). • Press the RIGHT ARROW key. • Release the SHIFT key.
The screen will resemble that below.
• Now that we have selected the character, we will apply a change to the selected character. Click on the down arrow to the right of the FONT COLOUR icon and clicking on a colour. That colour will then be applied to the selected character.
Selecting a word • Double click on the second word in the blue paragraph, as illustrated. Now
the word is selected, apply a different font colour to the selected word.
Selecting a line • Move the mouse pointer to the left of the second line within the blue
paragraph and wait until the mouse pointer changes from an I bar to an arrow pointing upwards and to the right. You are now in the “Selection Bar”,
FOR USE AT THE LICENSED SITE(S) ONLY © Cheltenham Courseware Ltd. 1995-2007 www.cheltenhamcourseware.com

PAGE 23 - ECDL MODULE 3 WORKBOOK (USING OFFICE 2003)
a hidden screen element. Click once with the mouse button to select the line, as illustrated.
• Now the line is selected, apply a different font colour to the selected line.
Selecting a sentence • Click within the second sentence of the second paragraph. Depress the CTRL
key and then click within the sentence, to select the sentence.
• Now the sentence is selected, apply a different font colour to the selected
sentence.
Selecting a paragraph • Click within the paragraph starting with the words ' TO SELECT A
CHARACTER '. • Click three times to select the paragraph, as illustrated.
• Now the paragraph is selected, apply a different font colour to the selected
paragraph.
Selecting all text • Experiment with selecting all the text within the document by pressing
CTRL+A. • Save and close the document.
WP2.2.3. Editing Data
WP2.2.3.1. Editing content by inserting new text within existing text or over-typing existing text
FOR USE AT THE LICENSED SITE(S) ONLY © Cheltenham Courseware Ltd. 1995-2007 www.cheltenhamcourseware.com
PAGE 24 - ECDL MODULE 3 WORKBOOK (USING OFFICE 2003)
Inserting text • Open a file called EDIT DATA. • Within the second line, click in front of the word STAR. • Type in the letter A. • Press the spacebar to insert a space. The sentence should now read
'THE SUN IS A STAR'. • Within the first line, click in front of the word 'WORD'. • Type in the word MICROSOFT. • Press the spacebar to insert a space. The sentence should now read 'A GOOD
EXAMPLE OF AN APPLICATION PROGRAM IS MICROSOFT WORD'.
Modifying existing text • Double click on the word DAVID in the last line (to select it). • Replace the selected name with your first name.
WP2.2.3.2. Using the Undo and Redo commands
Using Undo to reverse your last actions • Click on the UNDO button on the STANDARD toolbar. You should see the
name DAVID reappear!
Repeating a command, action, or typing • Click on the REDO button on the STANDARD toolbar. You should see your
name reappear.
• Save the file changes and then close the file.
WP2.2.4. Copying, Moving and Deleting
WP2.2.4.1. Copying text within a document or between open documents
FOR USE AT THE LICENSED SITE(S) ONLY © Cheltenham Courseware Ltd. 1995-2007 www.cheltenhamcourseware.com

PAGE 25 - ECDL MODULE 3 WORKBOOK (USING OFFICE 2003)
Copying text within a document • Open a file called DUPLICATE MOVE DELETE 01. • Click three times within the first paragraph to select it. • Click on the EDIT drop down menu and select the COPY command. • Move to the end of the document and click once. • Click on the EDIT drop down menu and select the PASTE command.
Copying text from one document to another • Click three times within the first paragraph to select it. • Click on the EDIT drop down menu and select the COPY command. • Open a second document called DUPLICATE MOVE DELETE 02. • Within this second document, click at the position within the document to
where you wish to copy the selected text. • Click on the EDIT drop down menu and select the PASTE command.
WP2.2.4.2. Moving text within a document or between open documents
Moving text within a document • Redisplay the first document called DUPLICATE MOVE DELETE 01 (by
clicking on its icon displayed along the bottom of your screen). • Select the paragraph formatted using Arial Bold text.
• Click on the EDIT drop down menu and select the CUT command. • Click at the end of the document. • Click on the EDIT drop down menu and select the PASTE command.
Moving text from one document to another • Select the paragraph formatted using Arial Bold text.
• Click on the EDIT drop down menu and select the CUT command. • Redisplay the second document called DUPLICATE MOVE DELETE 02 (by
clicking on its icon displayed along the bottom of your screen).
FOR USE AT THE LICENSED SITE(S) ONLY © Cheltenham Courseware Ltd. 1995-2007 www.cheltenhamcourseware.com

PAGE 26 - ECDL MODULE 3 WORKBOOK (USING OFFICE 2003)
• Click at the position within the document to where you wish to move the selected text.
• Click on the EDIT drop down menu and select the PASTE command. • Save your changes and close both files.
WP2.2.4.3. Deleting text
Deleting a character • Open a file called DELETE. • Place the insertion point to the left of the very first character within the
document and press DELETE.
Deleting a word • Double-click within the second word in the document and press the DELETE
key.
Deleting a line • Select a line within the paragraph explaining how to delete a line by moving
the mouse pointer in the left-hand margin and clicking once. • Press the DELETE key.
Deleting a sentence • Select a sentence within the paragraph explaining how to delete a sentence. • Depress the CTRL key and click once to select the sentence. • Press the DELETE key.
Deleting a paragraph • Select the paragraph explaining how to delete a paragraph (triple click to
select the paragraph). • Press the DELETE key.
Deleting a block of text • Experiment with selecting blocks of text within the last paragraph in the
document (by dragging the mouse pointer over the text with the left mouse button depressed). Once the text is selected press the DELETE key.
• Save your changes and close the file.
WP2.2.5. Search & Replace
FOR USE AT THE LICENSED SITE(S) ONLY © Cheltenham Courseware Ltd. 1995-2007 www.cheltenhamcourseware.com
PAGE 27 - ECDL MODULE 3 WORKBOOK (USING OFFICE 2003)
WP2.2.5.1. Using the search command for a specific word or phrase
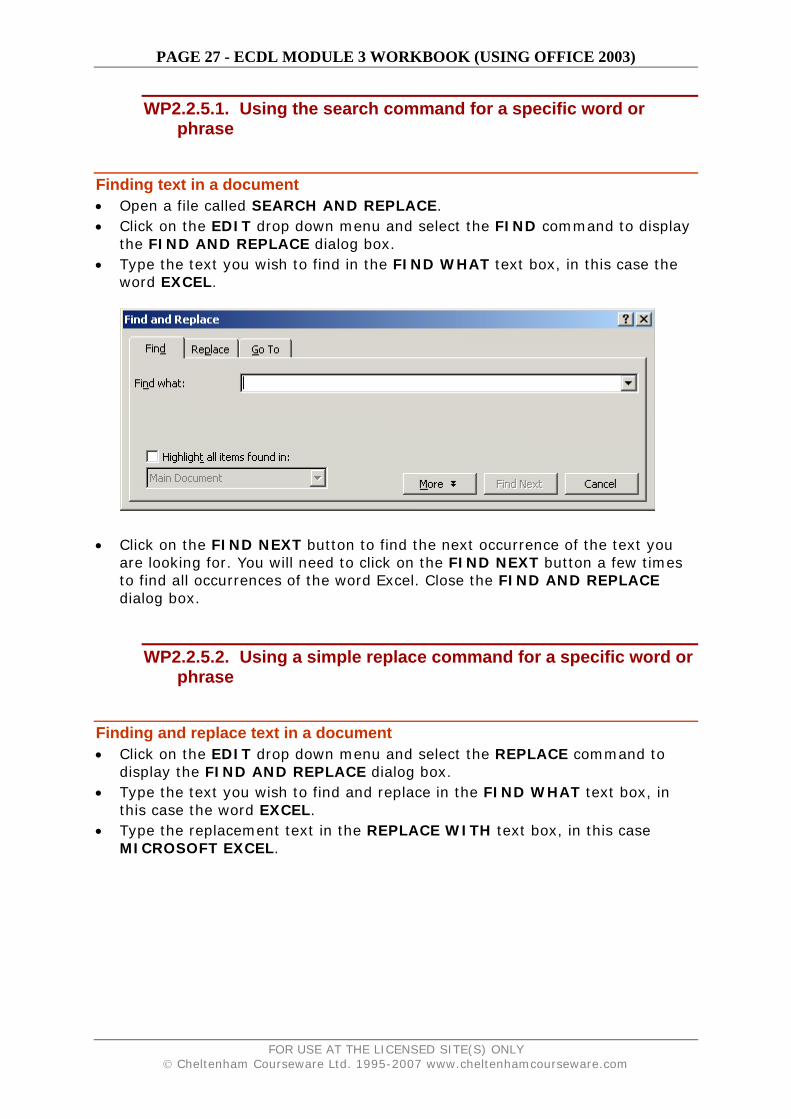
Finding text in a document • Open a file called SEARCH AND REPLACE. • Click on the EDIT drop down menu and select the FIND command to display
the FIND AND REPLACE dialog box. • Type the text you wish to find in the FIND WHAT text box, in this case the
word EXCEL.
• Click on the FIND NEXT button to find the next occurrence of the text you
are looking for. You will need to click on the FIND NEXT button a few times to find all occurrences of the word Excel. Close the FIND AND REPLACE dialog box.
WP2.2.5.2. Using a simple replace command for a specific word or phrase
Finding and replace text in a document • Click on the EDIT drop down menu and select the REPLACE command to
display the FIND AND REPLACE dialog box. • Type the text you wish to find and replace in the FIND WHAT text box, in
this case the word EXCEL. • Type the replacement text in the REPLACE WITH text box, in this case
MICROSOFT EXCEL.
FOR USE AT THE LICENSED SITE(S) ONLY © Cheltenham Courseware Ltd. 1995-2007 www.cheltenhamcourseware.com

PAGE 28 - ECDL MODULE 3 WORKBOOK (USING OFFICE 2003)
• Click on the REPLACE ALL button and this will replace all occurrences of the
word as specified. • Close the FIND AND REPLACE dialog box. • Save your changes and save the file.
FOR USE AT THE LICENSED SITE(S) ONLY © Cheltenham Courseware Ltd. 1995-2007 www.cheltenhamcourseware.com
PAGE 29 - ECDL MODULE 3 WORKBOOK (USING OFFICE 2003)
WP2.3. Formatting
WP2.3.1. Text Formatting
WP2.3.1.1. Changing text appearance including font sizes or font types
Changing the font size or type • Open a file called TEXT FORMATTING 01. • Select the first line of text, as illustrated.
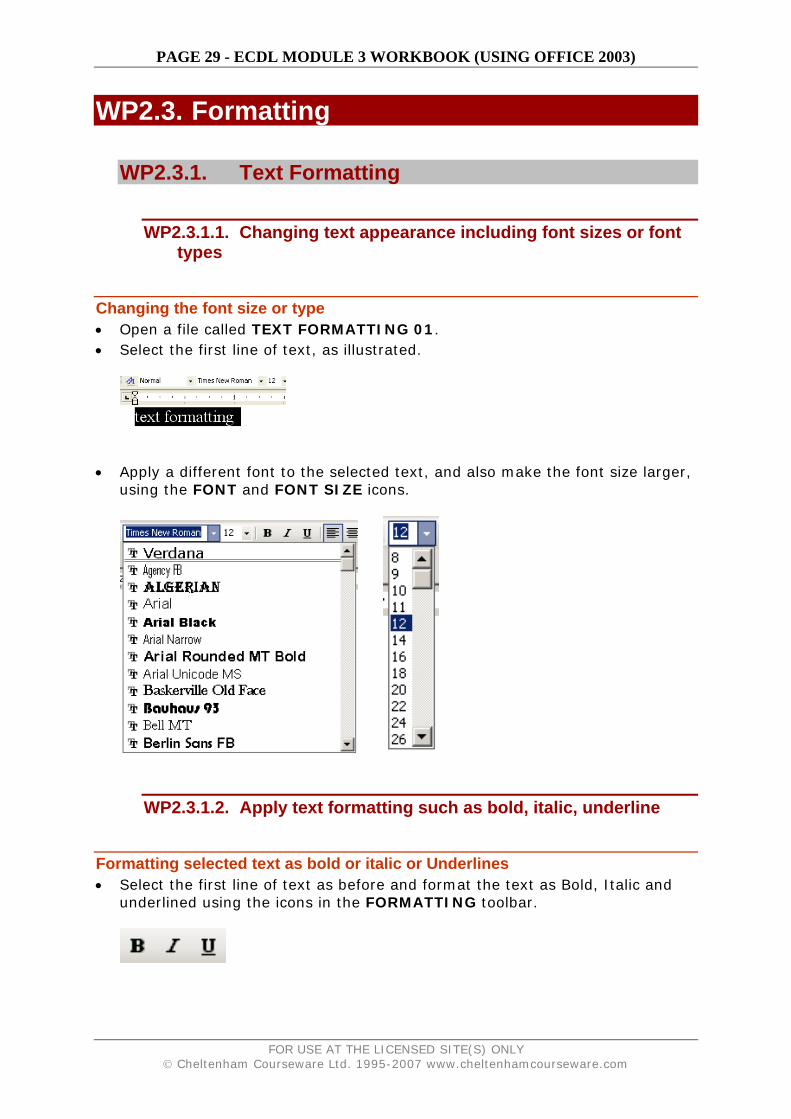
• Apply a different font to the selected text, and also make the font size larger,
using the FONT and FONT SIZE icons.
WP2.3.1.2. Apply text formatting such as bold, italic, underline
Formatting selected text as bold or italic or Underlines • Select the first line of text as before and format the text as Bold, Italic and
underlined using the icons in the FORMATTING toolbar.
FOR USE AT THE LICENSED SITE(S) ONLY © Cheltenham Courseware Ltd. 1995-2007 www.cheltenhamcourseware.com

PAGE 30 - ECDL MODULE 3 WORKBOOK (USING OFFICE 2003)
WP2.3.1.3. Applying subscript or superscript to text
Applying subscript or superscript formatting • Select the 2 in the line containing the equation E=MC2. • From the FORMAT menu, choose the FONT command. The FONT dialog box
is displayed. • From within the EFFECTS section of the dialog box, select the
SUPERSCRIPT command.
• Click on the OK button to close the FONT dialog box. • Select the 2 in the line containing the equation H2O. • From the FORMAT menu, choose the FONT command. The FONT dialog box
is displayed. • From within the EFFECTS section of the dialog box, select the SUBSCRIPT
command. • Click on the OK button to close the FONT dialog box. • The text should now look like this.
WP2.3.1.4. Applying case changes to text
Changing the text case • Select the first line of text. Click on the FORMAT drop down menu and select
the CHANGE CASE command. From the dialog box displayed, select the required case, (in this case UPPERCASE) and then click on the OK button.
FOR USE AT THE LICENSED SITE(S) ONLY © Cheltenham Courseware Ltd. 1995-2007 www.cheltenhamcourseware.com

PAGE 31 - ECDL MODULE 3 WORKBOOK (USING OFFICE 2003)
WP2.3.1.5. Applying different colours to text
Applying colours to selected text • Select the first line of text again. • Click on the down arrow next to the FONT COLOUR icon, which will display a
drop down dialog box. • Click on the colour you wish to apply (in this case RED). De-select the
selected text to see the effect of your formatting changes!
Applying different background colours to selected text • Select the last paragraph of text (by triple clicking within the paragraph). • Click on the FORMAT drop down menu, and select the BORDERS AND
SHADING command. • Within the dialog box displayed, select the SHADING tab. • Select the required colour (in this case choose a yellow colour) and then click
on the OK button.
FOR USE AT THE LICENSED SITE(S) ONLY © Cheltenham Courseware Ltd. 1995-2007 www.cheltenhamcourseware.com

PAGE 32 - ECDL MODULE 3 WORKBOOK (USING OFFICE 2003)
WP2.3.1.6. Copying formatting from a piece of text to another piece of text
Copying formatting using the Format Painter. • Select some text which has been previously formatted. • Click on the FORMAT PAINTER icon. You will notice that the mouse pointer
shape has changed to the shape of a small painting brush. • Select the text to which you wish to copy the formatting, and when you
release the mouse button (and de-select the newly selected text) you will see that the formatting applied to the first block of text has been copied to the newly selected text.
• Save your changes and close the file.
WP2.3.1.7. Applying an existing style to a word, a line or a paragraph
Applying a style • Open a file called TEXT FORMATTING 02. • If necessary change to ''Print Layout' view. • Follow the instructions within the document and apply different styles.
FOR USE AT THE LICENSED SITE(S) ONLY © Cheltenham Courseware Ltd. 1995-2007 www.cheltenhamcourseware.com

PAGE 33 - ECDL MODULE 3 WORKBOOK (USING OFFICE 2003)
To apply a style you click on the down arrow to the right of the Style box to display the STYLE LIST box, then select a style and it will be applied to the selected text.
WP2.3.1.8. Using automatic hyphenation
Setting automatic hyphenation • If necessary change to 'PRINT LAYOUT' view. • To see how hyphenation has been set on your PC, click on the TOOLS drop
down menu and select the LANGUAGE command. From the sub-menu displayed select the HYPHENATION command. This will display the HYPHENATION dialog box.
• To automatically hyphenate a document, click on the "AUTOMATICALLY
HYPHENATE DOCUMENT" check box. What changes do you see when you click on the OK button?
FOR USE AT THE LICENSED SITE(S) ONLY © Cheltenham Courseware Ltd. 1995-2007 www.cheltenhamcourseware.com
PAGE 34 - ECDL MODULE 3 WORKBOOK (USING OFFICE 2003)
• Close the dialog box and continue.
WP2.3.2. Paragraph Formatting
WP2.3.2.1. Inserting or removing paragraph marks
Inserting a paragraph mark • Click just below the line which talks about formatting using Heading 1. • Insert a few extra paragraph marks by pressing the RETURN (ENTER) key.
Removing a paragraph mark • Click just below the line which talks about formatting using Heading 2. • Remove the paragraph mark by pressing the DEL key. There should now be
no empty lines displayed between the last two lines in the document.
WP2.3.2.2. Inserting and removing soft carriage return (line break) marks
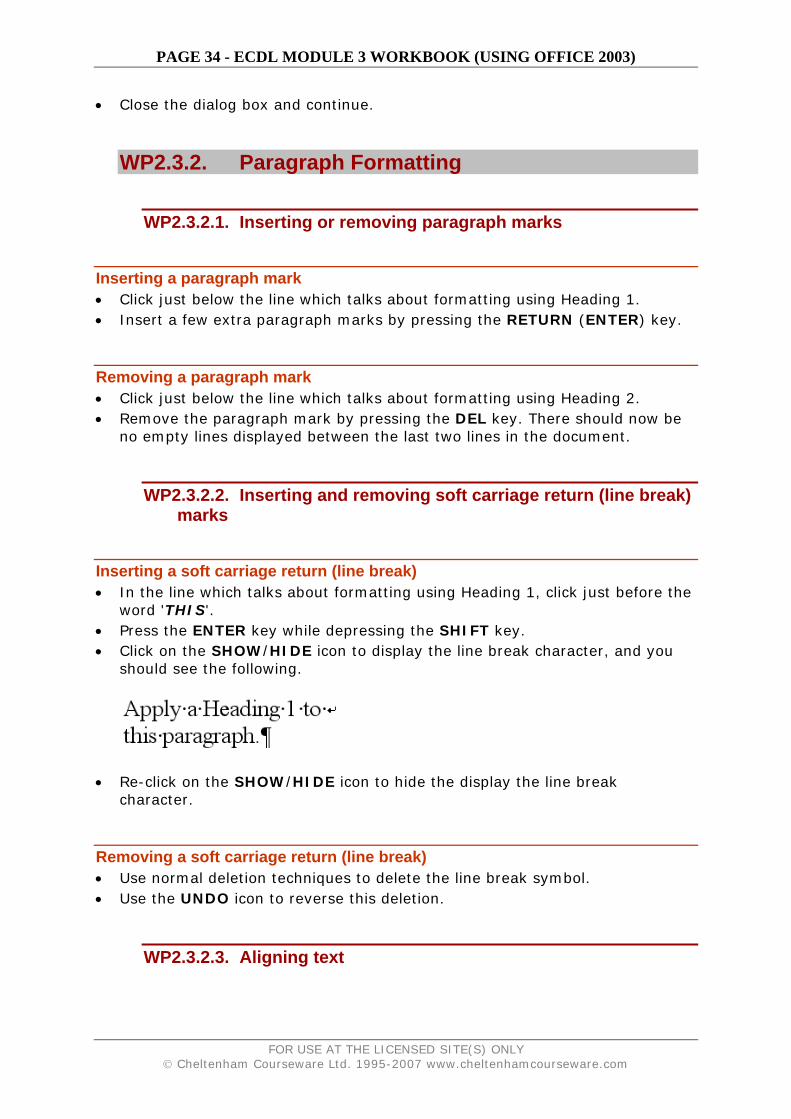
Inserting a soft carriage return (line break) • In the line which talks about formatting using Heading 1, click just before the
word 'THIS'. • Press the ENTER key while depressing the SHIFT key. • Click on the SHOW/HIDE icon to display the line break character, and you
should see the following.
• Re-click on the SHOW/HIDE icon to hide the display the line break
character.
Removing a soft carriage return (line break) • Use normal deletion techniques to delete the line break symbol. • Use the UNDO icon to reverse this deletion.
WP2.3.2.3. Aligning text
FOR USE AT THE LICENSED SITE(S) ONLY © Cheltenham Courseware Ltd. 1995-2007 www.cheltenhamcourseware.com

PAGE 35 - ECDL MODULE 3 WORKBOOK (USING OFFICE 2003)
Aligning text in a document • Click within the first line of text and centre the text using the alignment icons
located on the Formatting toolbar.
WP2.3.2.4. Indenting paragraphs
Using the Indent icons • Indent the first paragraph of text using the INCREASE INDENT icon on the
toolbar.
Indenting a hanging paragraph • Click with the second paragraph. From the FORMAT menu, select the
PARAGRAPH command to display the PARAGRAPH dialog box. • If not already displayed, select the INDENTS AND SPACING tab. You can
see the following options:
• Apply a hanging indent.
WP2.3.2.5. Applying single or double line spacing within paragraphs
Adjusting line spacing in a document • Click within the second paragraph. From the FORMAT menu, click on the
PARAGRAPH command to display the PARAGRAPH dialog box. • Within the LINE SPACING section of the dialog box, set the line spacing to
DOUBLE.
FOR USE AT THE LICENSED SITE(S) ONLY © Cheltenham Courseware Ltd. 1995-2007 www.cheltenhamcourseware.com

PAGE 36 - ECDL MODULE 3 WORKBOOK (USING OFFICE 2003)
• Examine the other options available.
• Click on the OK button to apply your changes. • Save your changes and close the file.
WP2.3.2.6. Applying spacing above or below paragraphs
Controlling spacing above and below paragraphs • Open a file called PARAGRAPH FORMATTING 01. • Click within the second paragraph. Click on the FORMAT drop down menu
and select the PARAGRAPH command. This will display the PARAGRAPH dialog box.
• Within the dialog box, change the SPACING section of the dialog box, modify the spacing BEFORE and AFTER, as required.
• Experiment for a while and observe the effects! • Save your changes and close the file.
WP2.3.2.7. Setting, removing and using tabs
Setting or change tabs using the Ruler • Open a file called TABS. • Click on the SHOW/HIDE icon so that you can see the tab stops displayed. • To move the tab stops select all the text and drag the Tab stops (as displayed
within the Word Ruler) to the left or right.
• Click at the end of the document and experiment with inserting tab spaces.
Experiment with entering text into these tab spaces. • Save your changes and close the file.
FOR USE AT THE LICENSED SITE(S) ONLY © Cheltenham Courseware Ltd. 1995-2007 www.cheltenhamcourseware.com
PAGE 37 - ECDL MODULE 3 WORKBOOK (USING OFFICE 2003)
WP2.3.2.8. Applying/removing bullets and numbering to a single level list
Applying bullets to a list using the Bullets icon • Open a file called PARAGRAPH FORMATTING 02. • Select the list of COUNTRIES. • Click on the BULLETS tool within the FORMATTING toolbar.
Removing bullet formatting from a list • Select the list of CITIES. • Click on the BULLETS icon on the FORMATTING toolbar.
Adding numbering to a list using the Numbering icon • Select the list of CONTINENTS. • Click on the NUMBERING icon from the FORMATTING toolbar.
WP2.3.2.9. Changing the style of bullets or numbering in a single level list
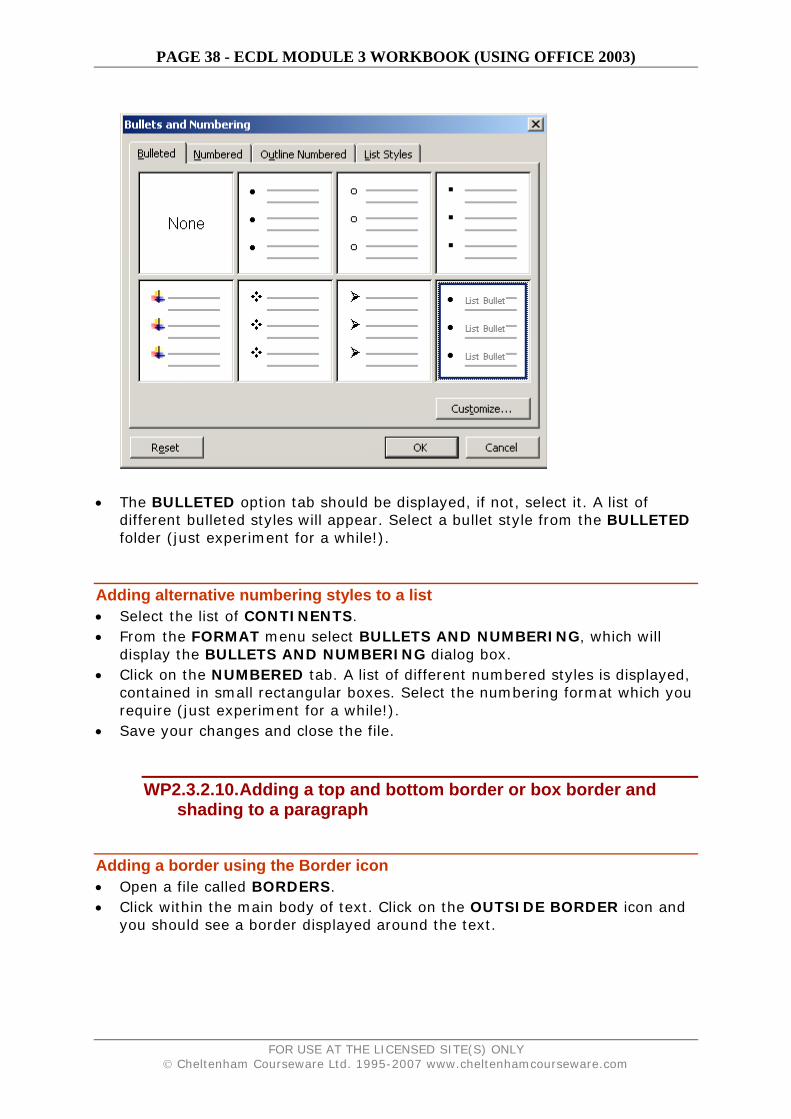
Applying alternate bullet formatting to a list • Select the list of COUNTRIES. • From the FORMAT menu select BULLETS AND NUMBERING, to display the
BULLETS AND NUMBERING dialog box.
FOR USE AT THE LICENSED SITE(S) ONLY © Cheltenham Courseware Ltd. 1995-2007 www.cheltenhamcourseware.com
PAGE 38 - ECDL MODULE 3 WORKBOOK (USING OFFICE 2003)
• The BULLETED option tab should be displayed, if not, select it. A list of
different bulleted styles will appear. Select a bullet style from the BULLETED folder (just experiment for a while!).
Adding alternative numbering styles to a list • Select the list of CONTINENTS. • From the FORMAT menu select BULLETS AND NUMBERING, which will
display the BULLETS AND NUMBERING dialog box. • Click on the NUMBERED tab. A list of different numbered styles is displayed,
contained in small rectangular boxes. Select the numbering format which you require (just experiment for a while!).
• Save your changes and close the file.
WP2.3.2.10. Adding a top and bottom border or box border and shading to a paragraph
Adding a border using the Border icon • Open a file called BORDERS. • Click within the main body of text. Click on the OUTSIDE BORDER icon and
you should see a border displayed around the text.
FOR USE AT THE LICENSED SITE(S) ONLY © Cheltenham Courseware Ltd. 1995-2007 www.cheltenhamcourseware.com

PAGE 39 - ECDL MODULE 3 WORKBOOK (USING OFFICE 2003)
Adding a Page Border • From the FORMAT menu, choose BORDERS AND SHADING. The
BORDERS AND SHADING dialog box appears with the BORDERS folder displayed. Select the PAGE BORDER tab and from the SETTING section of the dialog, select the required effect, i.e. BOX, SHADOW, 3-D etc.
You can select from a range of line STYLES. You can select from a range of COLOURS. You can select from a range of line WIDTHS. You may also select a range of ART effects.
• Experiment for a while! • Save your changes and close the file.
Adding shading • Open a file called SHADING. • Select the document title.
FOR USE AT THE LICENSED SITE(S) ONLY © Cheltenham Courseware Ltd. 1995-2007 www.cheltenhamcourseware.com

PAGE 40 - ECDL MODULE 3 WORKBOOK (USING OFFICE 2003)
• Select BORDERS AND SHADING from the FORMAT menu. The BORDERS AND SHADING dialog box is displayed. Select the SHADING tab.
• Experiment with applying different shading options to the selected text. • Save your changes and close the file.
WP2.3.3. Document Formatting
Document Formatting Options • Open a file called DOCUMENT FORMATTING. Most formatting options
within Word are found under the FORMAT drop down menu. The document setup options are located under the FILE drop down menu and accessed via the PAGE SETUP command. Take some time to examine the options available, but do not make any changes.
FOR USE AT THE LICENSED SITE(S) ONLY © Cheltenham Courseware Ltd. 1995-2007 www.cheltenhamcourseware.com

PAGE 41 - ECDL MODULE 3 WORKBOOK (USING OFFICE 2003)
WP2.3.3.1. Changing document orientation and page size
Setting the page orientation • To select the paper orientation, click on the PORTRAIT or LANDSCAPE
buttons in the ORIENTATION section. Change the page orientation to LANDSCAPE.
• View the document in by clicking on the PRINT PREVIEW icon.
FOR USE AT THE LICENSED SITE(S) ONLY © Cheltenham Courseware Ltd. 1995-2007 www.cheltenhamcourseware.com

PAGE 42 - ECDL MODULE 3 WORKBOOK (USING OFFICE 2003)
• Reset the page orientation back to PORTRAIT.
WP2.3.3.2. Changing the margins of entire document
Setting margins using the Page Setup command • From the FILE menu choose the PAGE SETUP command and the PAGE
SETUP dialog box is displayed. • If it is not already displayed, select the MARGINS tab.
• Double the size of the bottom margin.
WP2.3.3.3. Inserting and deleting a page break in a document
Inserting and deleting a hard (manual) page break • Click between the paragraphs dealing with Font and Paragraph formatting
and then press CTRL+ENTER to insert a page break. Change to NORMAL view (by clicking on the VIEW drop down menu and select the NORMAL view command) and the page break will be as illustrated below.
• To delete the page break place the insertion point below the hard page break
(the dotted line) and press BACKSPACE. • Click on the UNDO icon to put the page break back into the document. • Click on the VIEW drop down menu and select the PRINT LAYOUT view.
WP2.3.3.4. Adding and modifying text in Headers and Footers
Creating a header or footer • From the VIEW menu, select the HEADER AND FOOTER command and the
HEADER AND FOOTER toolbar is displayed, as illustrated.
FOR USE AT THE LICENSED SITE(S) ONLY © Cheltenham Courseware Ltd. 1995-2007 www.cheltenhamcourseware.com
PAGE 43 - ECDL MODULE 3 WORKBOOK (USING OFFICE 2003)
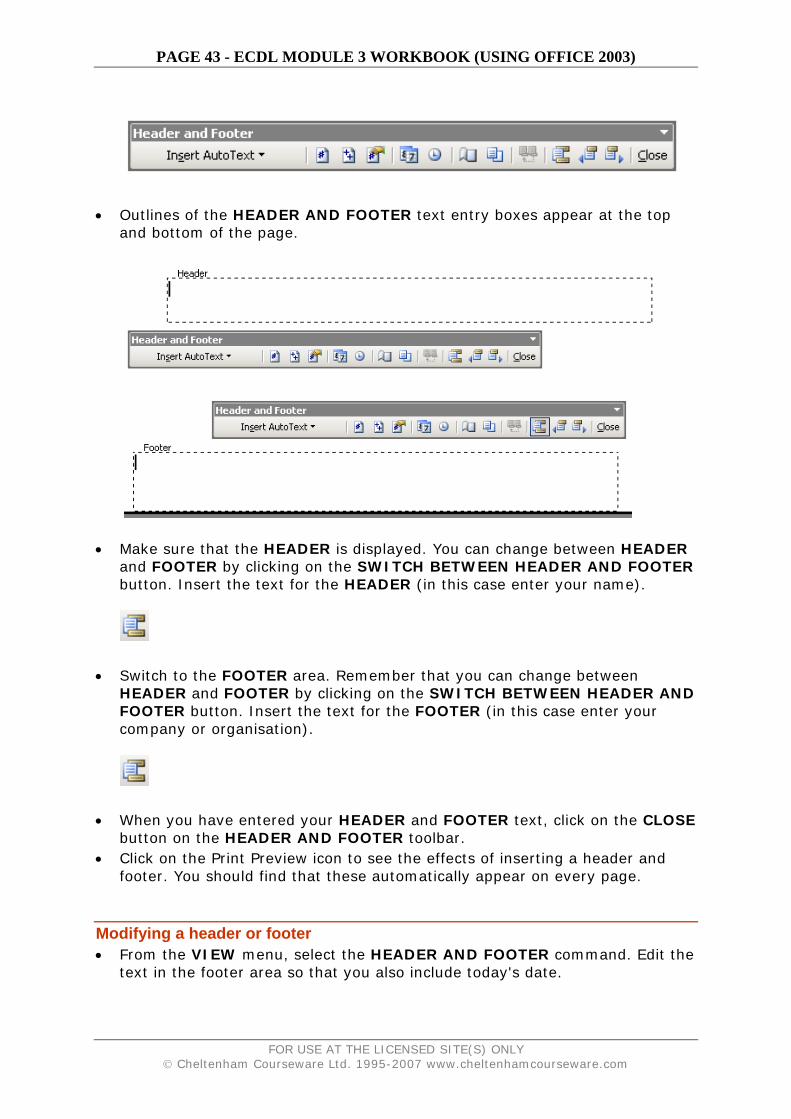
• Outlines of the HEADER AND FOOTER text entry boxes appear at the top
and bottom of the page.
• Make sure that the HEADER is displayed. You can change between HEADER and FOOTER by clicking on the SWITCH BETWEEN HEADER AND FOOTER button. Insert the text for the HEADER (in this case enter your name).
• Switch to the FOOTER area. Remember that you can change between
HEADER and FOOTER by clicking on the SWITCH BETWEEN HEADER AND FOOTER button. Insert the text for the FOOTER (in this case enter your company or organisation).
• When you have entered your HEADER and FOOTER text, click on the CLOSE
button on the HEADER AND FOOTER toolbar. • Click on the Print Preview icon to see the effects of inserting a header and
footer. You should find that these automatically appear on every page.
Modifying a header or footer • From the VIEW menu, select the HEADER AND FOOTER command. Edit the
text in the footer area so that you also include today's date.
FOR USE AT THE LICENSED SITE(S) ONLY © Cheltenham Courseware Ltd. 1995-2007 www.cheltenhamcourseware.com

PAGE 44 - ECDL MODULE 3 WORKBOOK (USING OFFICE 2003)
WP2.3.3.5. Adding fields in Headers and Footers
What is Word Fields? • Fields are codes which can be inserted into a Word document to automate
your work in some way, or make the use of Word more effective. For instance, you can use fields to automatically generate a table of contents at the start of a long document, or use different fields to insert the current time or date. In some cases you must consciously insert a field code, in other cases Word automatically inserts a field code into the document for you. You will often need to open the FIELD dialog box, to really get the best effect from using Fields. This is opened by selecting the FIELD command from the INSERT menu.
• Open this dialog box now and examine some of the options which are available. Make sure that you find out how you would insert the date, page numbering and file storage location information. Experiment for a while!
Using the Header and footer toolbar. • As well as inserting Word fields via the FIELD dialog box, remember that you
can also use the options contained with the HEADER AND FOOTER toolbar.
FOR USE AT THE LICENSED SITE(S) ONLY © Cheltenham Courseware Ltd. 1995-2007 www.cheltenhamcourseware.com
PAGE 45 - ECDL MODULE 3 WORKBOOK (USING OFFICE 2003)
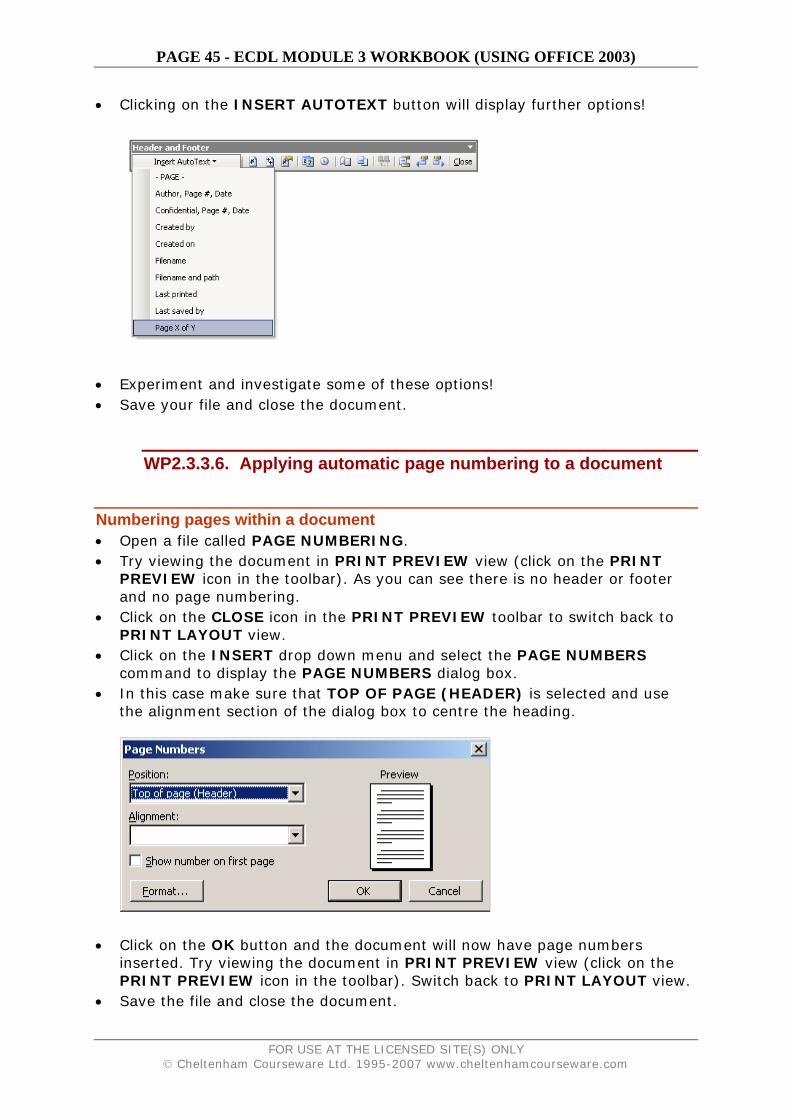
• Clicking on the INSERT AUTOTEXT button will display further options!
• Experiment and investigate some of these options! • Save your file and close the document.
WP2.3.3.6. Applying automatic page numbering to a document
Numbering pages within a document • Open a file called PAGE NUMBERING. • Try viewing the document in PRINT PREVIEW view (click on the PRINT
PREVIEW icon in the toolbar). As you can see there is no header or footer and no page numbering.
• Click on the CLOSE icon in the PRINT PREVIEW toolbar to switch back to PRINT LAYOUT view.
• Click on the INSERT drop down menu and select the PAGE NUMBERS command to display the PAGE NUMBERS dialog box.
• In this case make sure that TOP OF PAGE (HEADER) is selected and use the alignment section of the dialog box to centre the heading.
• Click on the OK button and the document will now have page numbers
inserted. Try viewing the document in PRINT PREVIEW view (click on the PRINT PREVIEW icon in the toolbar). Switch back to PRINT LAYOUT view.
• Save the file and close the document.
FOR USE AT THE LICENSED SITE(S) ONLY © Cheltenham Courseware Ltd. 1995-2007 www.cheltenhamcourseware.com

PAGE 46 - ECDL MODULE 3 WORKBOOK (USING OFFICE 2003)
FOR USE AT THE LICENSED SITE(S) ONLY © Cheltenham Courseware Ltd. 1995-2007 www.cheltenhamcourseware.com

PAGE 47 - ECDL MODULE 3 WORKBOOK (USING OFFICE 2003)
WP2.4. Objects
WP2.4.1. Tables
WP2.4.1.1. Creating a table ready for text insertion
Creating a table using the Insert Table icon • Open a document called TABLES. • As instructed within the document, click below the first line of text and create
a table 'WHICH CONTAINS 5 ROWS AND 3 COLUMNS' To do this click on the INSERT TABLE icon and drag the mouse over the grid to select the number of rows and columns you require.
• The screen will change as illustrated.
WP2.4.1.2. Inserting and editing data in a table
Entering data into a table • Click on the first cell within the table. • Enter your first name. Move to all the other cells in the table and enter a
different name in each cell. To move from cell to cell you can use the TAB key.
FOR USE AT THE LICENSED SITE(S) ONLY © Cheltenham Courseware Ltd. 1995-2007 www.cheltenhamcourseware.com

PAGE 48 - ECDL MODULE 3 WORKBOOK (USING OFFICE 2003)
WP2.4.1.3. Selecting rows, columns, cells or an entire table
Selecting parts within a table, using the Table drop down menu • Experiment with selecting rows, columns and the entire table. To do this click
on the TABLE menu, click on SELECT and from the submenu, select the required item, TABLE, COLUMN, ROW or CELL.
WP2.4.1.4. Inserting and deleting rows and columns
Inserting a column or row into the table • Select the second column within the table and from the TABLE menu, select
the INSERT COLUMNS command. Look at what happens and where the column is inserted.
• Select the second row within the table and from the TABLE menu, select the INSERT ROWS command. Look at what happens and where the row is inserted.
Deleting a column or row within a table • Delete the first row and first column within the table. To do this select the
row or column and then from the TABLE menu, choose DELETE COLUMNS or DELETE ROWS.
WP2.4.1.5. Modifying column width or row height
Specifying row height • Select the top row. • Click on the TABLE drop down menu and select the TABLE PROPERTIES
command. The ROW tab should be selected. Click on the SPECIFY HEIGHT check box, and enter a value next to this (experiment with different values). Click on the OK button to apply the change.
FOR USE AT THE LICENSED SITE(S) ONLY © Cheltenham Courseware Ltd. 1995-2007 www.cheltenhamcourseware.com

PAGE 49 - ECDL MODULE 3 WORKBOOK (USING OFFICE 2003)
Specifying column width (the long way) • Select the first column. • Click on the TABLE drop down menu and select the TABLE PROPERTIES
command. The COLUMN tab should be selected. Click on the PREFERRED WIDTH check box and enter a value next to this (experiment with different values). Click on the OK button to apply the change.
Specifying column width (the easy way) • Move the mouse pointer to the vertical border, to the right of the column of
which you wish to change the width. You will notice that the mouse pointer shape changes when you are pointing exactly at the vertical border. When the mouse shape changes, depress the mouse button and drag to the left or right to change the width of the column. When you release the mouse button the change will be applied (experiment with using this technique).
WP2.4.1.6. Modifying cell border width, style and colour
Adding a border to a table • Click once within your table. • Click on the TABLE drop down menu and then click on the SELECT
command. From the sub-menu displayed, click on TABLE. This will select the entire table for you.
• Once the table is selected click on the down arrow next to the BORDER icon
(on the Formatting toolbar) to select and apply border formats to your table. De-select your table to view the results. Experiment with adding a border of your choice.
Specifying a border width, style and colour. • Click on the FORMAT drop down menu and select the BORDERS AND
SHADING command.
FOR USE AT THE LICENSED SITE(S) ONLY © Cheltenham Courseware Ltd. 1995-2007 www.cheltenhamcourseware.com

PAGE 50 - ECDL MODULE 3 WORKBOOK (USING OFFICE 2003)
• If necessary, select the BORDERS tab of the dialog box.
• Select the style as required. You can use the scroll bars within this part of the
dialog box to display a wide range of options as illustrated.
• Select the width as required. You can use the scroll bars within this part of the dialog box to display a wide range of options as illustrated.
FOR USE AT THE LICENSED SITE(S) ONLY © Cheltenham Courseware Ltd. 1995-2007 www.cheltenhamcourseware.com

PAGE 51 - ECDL MODULE 3 WORKBOOK (USING OFFICE 2003)
• Select a colour as required from the COLOUR section of the dialog box. • Experiment and investigate the options available.
WP2.4.1.7. Adding shading to cells
Applying shading to cells within a table. • Select particular cells within a table, or select the entire table. • Click on the FORMAT drop down menu and select the BORDERS AND
SHADING command. • If necessary, select the SHADING tab of the dialog box.
FOR USE AT THE LICENSED SITE(S) ONLY © Cheltenham Courseware Ltd. 1995-2007 www.cheltenhamcourseware.com

PAGE 52 - ECDL MODULE 3 WORKBOOK (USING OFFICE 2003)
• Select the required colour, and then click on the OK button. • Experiment with adding a colour of your choice (but make sure that the text
is still readable!) • Save the file and then close the document.
WP2.4.2. Pictures, Images and Charts
WP2.4.2.1. Inserting a graphic into a document
Inserting Clipart • Open a document called PICTURES IMAGES CHARTS 01. • If necessary change to 'PRINT LAYOUT' view. • Make sure that the DRAWING toolbar is displayed. If it is not, then click on
the DRAWING icon displayed within the Standard toolbar.
• Click at the location where you wish to insert the clipart picture (in this case
click below the line of text as instructed within the document). • Click on the INSERT CLIP ART icon, located in the DRAWING toolbar.
FOR USE AT THE LICENSED SITE(S) ONLY © Cheltenham Courseware Ltd. 1995-2007 www.cheltenhamcourseware.com
PAGE 53 - ECDL MODULE 3 WORKBOOK (USING OFFICE 2003)
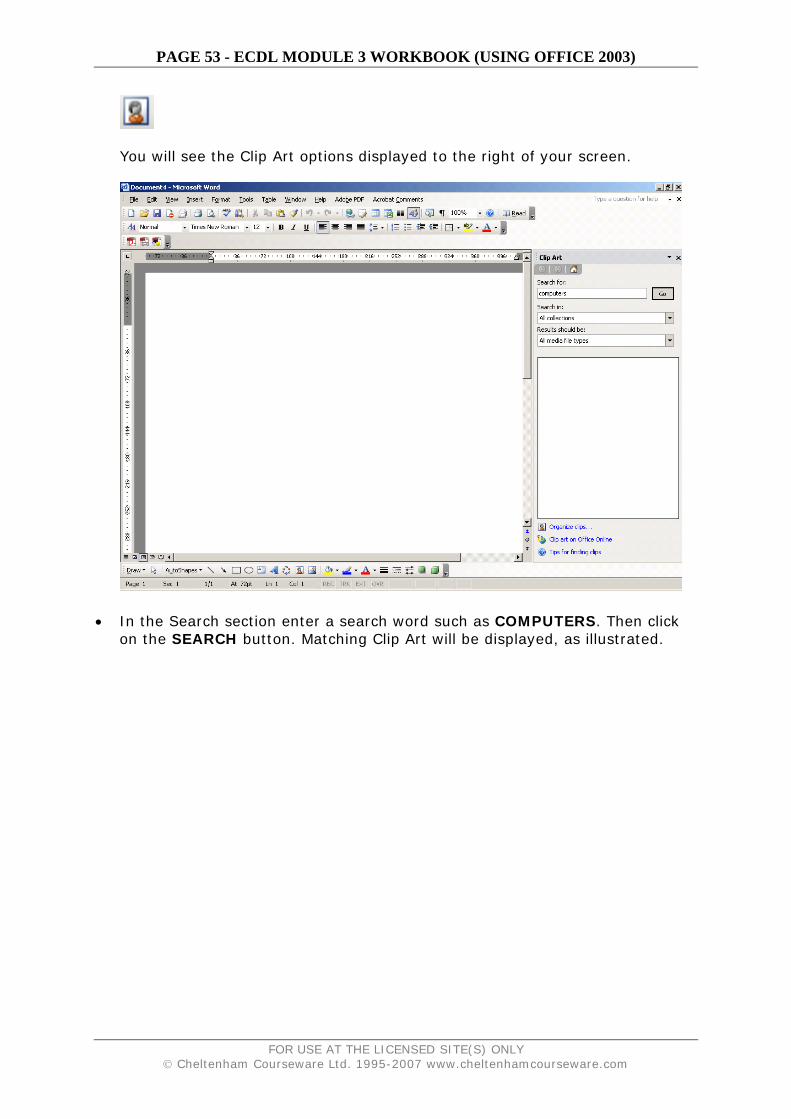
You will see the Clip Art options displayed to the right of your screen.
• In the Search section enter a search word such as COMPUTERS. Then click on the SEARCH button. Matching Clip Art will be displayed, as illustrated.
FOR USE AT THE LICENSED SITE(S) ONLY © Cheltenham Courseware Ltd. 1995-2007 www.cheltenhamcourseware.com

PAGE 54 - ECDL MODULE 3 WORKBOOK (USING OFFICE 2003)
• If necessary use the scroll bars to display the required picture and then click
on the picture which you wish to insert.
FOR USE AT THE LICENSED SITE(S) ONLY © Cheltenham Courseware Ltd. 1995-2007 www.cheltenhamcourseware.com
PAGE 55 - ECDL MODULE 3 WORKBOOK (USING OFFICE 2003)
• Try this now!
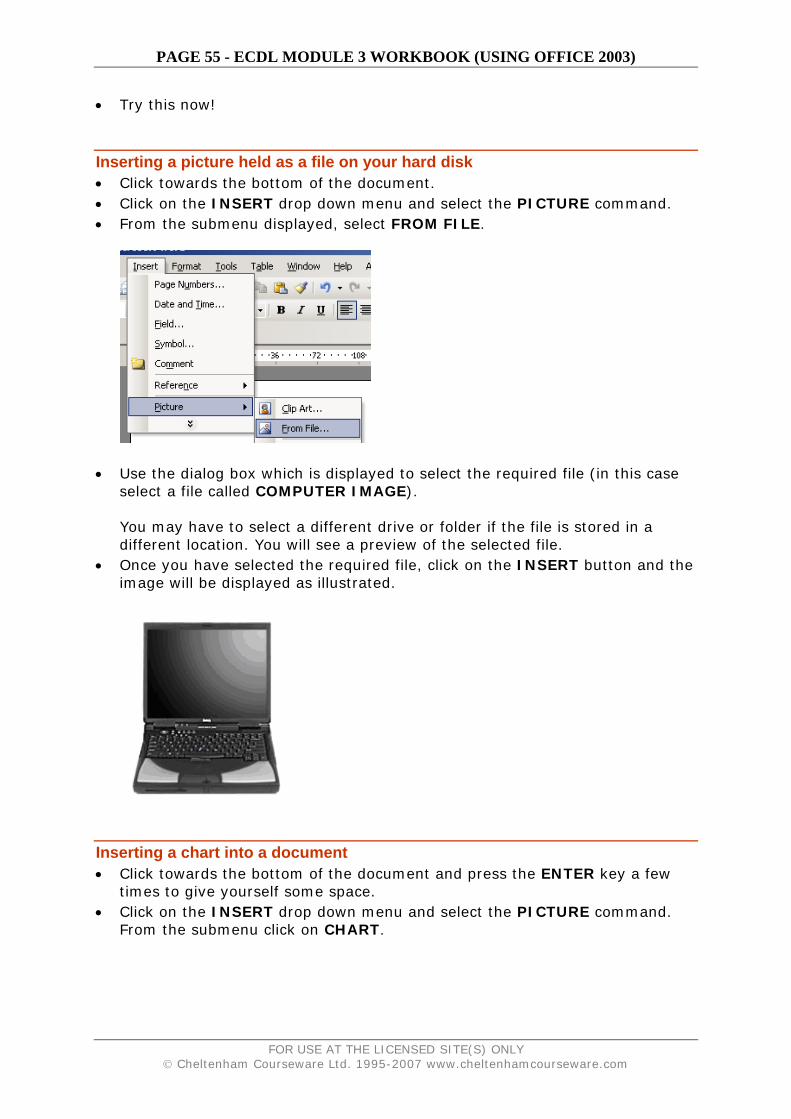
Inserting a picture held as a file on your hard disk • Click towards the bottom of the document. • Click on the INSERT drop down menu and select the PICTURE command. • From the submenu displayed, select FROM FILE.
• Use the dialog box which is displayed to select the required file (in this case select a file called COMPUTER IMAGE). You may have to select a different drive or folder if the file is stored in a different location. You will see a preview of the selected file.
• Once you have selected the required file, click on the INSERT button and the image will be displayed as illustrated.
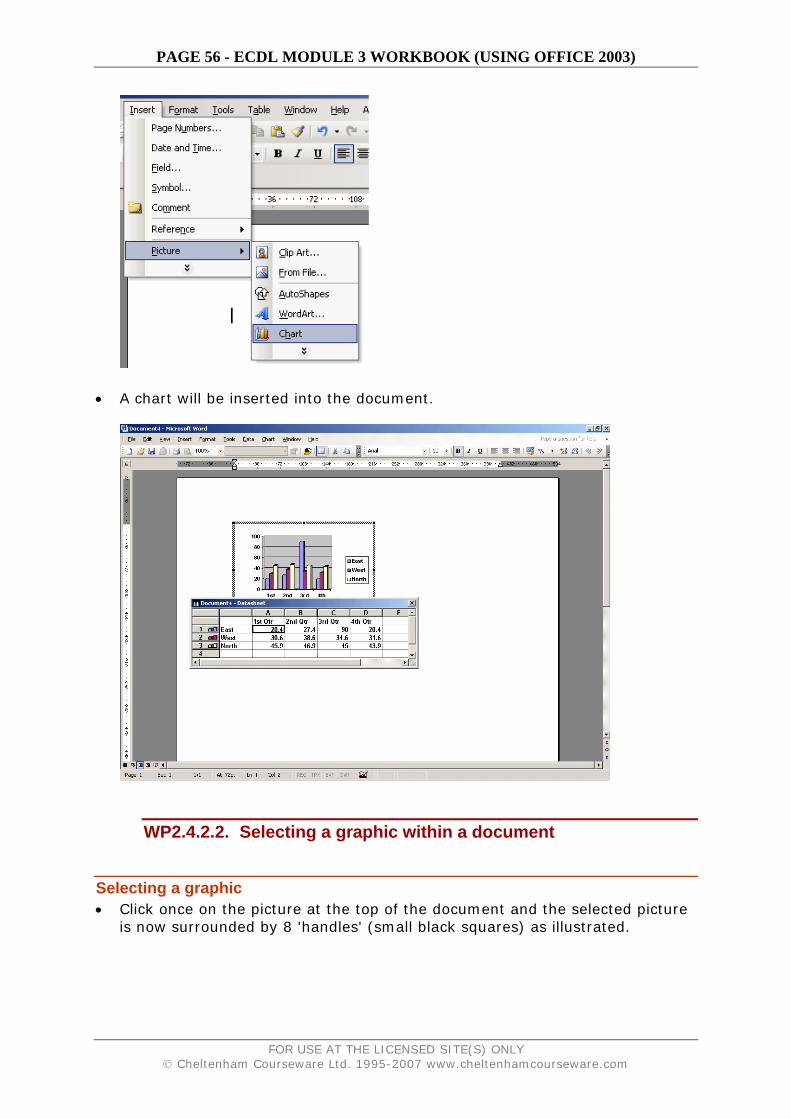
Inserting a chart into a document • Click towards the bottom of the document and press the ENTER key a few
times to give yourself some space. • Click on the INSERT drop down menu and select the PICTURE command.
From the submenu click on CHART.
FOR USE AT THE LICENSED SITE(S) ONLY © Cheltenham Courseware Ltd. 1995-2007 www.cheltenhamcourseware.com
PAGE 56 - ECDL MODULE 3 WORKBOOK (USING OFFICE 2003)
• A chart will be inserted into the document.
WP2.4.2.2. Selecting a graphic within a document
Selecting a graphic • Click once on the picture at the top of the document and the selected picture
is now surrounded by 8 'handles' (small black squares) as illustrated.
FOR USE AT THE LICENSED SITE(S) ONLY © Cheltenham Courseware Ltd. 1995-2007 www.cheltenhamcourseware.com
PAGE 57 - ECDL MODULE 3 WORKBOOK (USING OFFICE 2003)
WP2.4.2.3. Copying a graphic within a document or between open documents
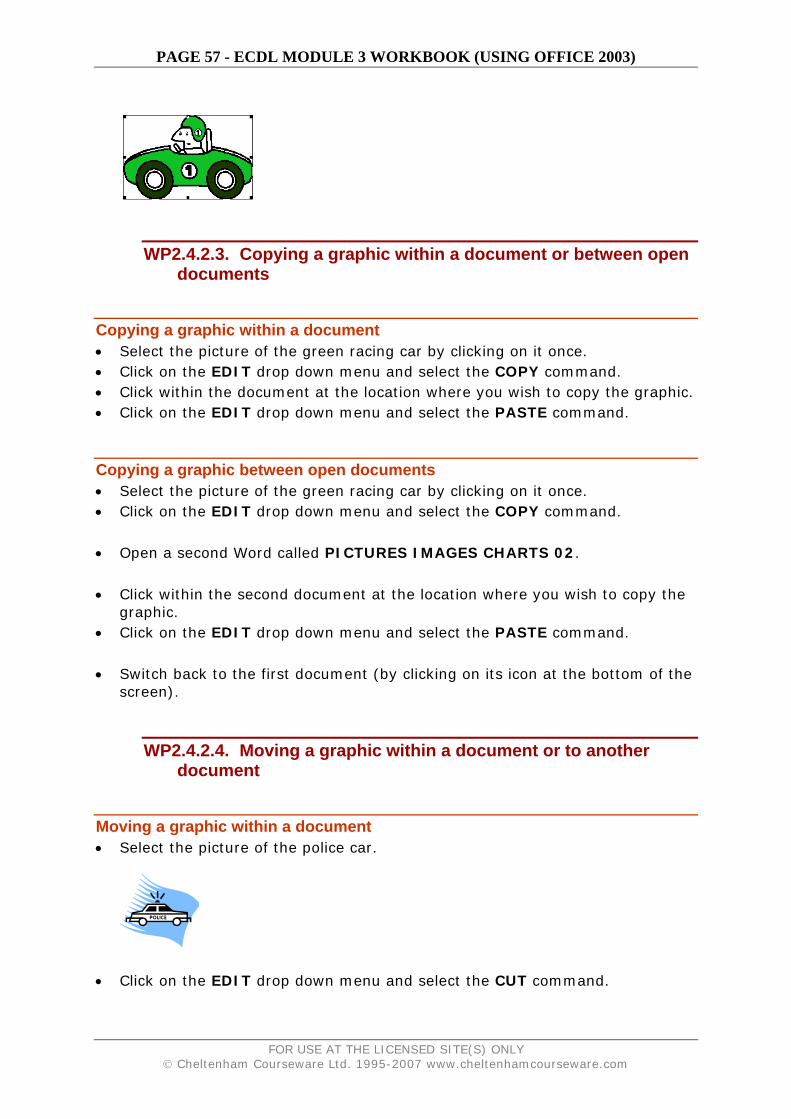
Copying a graphic within a document • Select the picture of the green racing car by clicking on it once. • Click on the EDIT drop down menu and select the COPY command. • Click within the document at the location where you wish to copy the graphic. • Click on the EDIT drop down menu and select the PASTE command.
Copying a graphic between open documents • Select the picture of the green racing car by clicking on it once. • Click on the EDIT drop down menu and select the COPY command. • Open a second Word called PICTURES IMAGES CHARTS 02. • Click within the second document at the location where you wish to copy the
graphic. • Click on the EDIT drop down menu and select the PASTE command. • Switch back to the first document (by clicking on its icon at the bottom of the
screen).
WP2.4.2.4. Moving a graphic within a document or to another document
Moving a graphic within a document • Select the picture of the police car.
• Click on the EDIT drop down menu and select the CUT command.
FOR USE AT THE LICENSED SITE(S) ONLY © Cheltenham Courseware Ltd. 1995-2007 www.cheltenhamcourseware.com
PAGE 58 - ECDL MODULE 3 WORKBOOK (USING OFFICE 2003)
• Click within the document at the location where you wish to move the graphic.
• Click on the EDIT drop down menu and select the PASTE command.
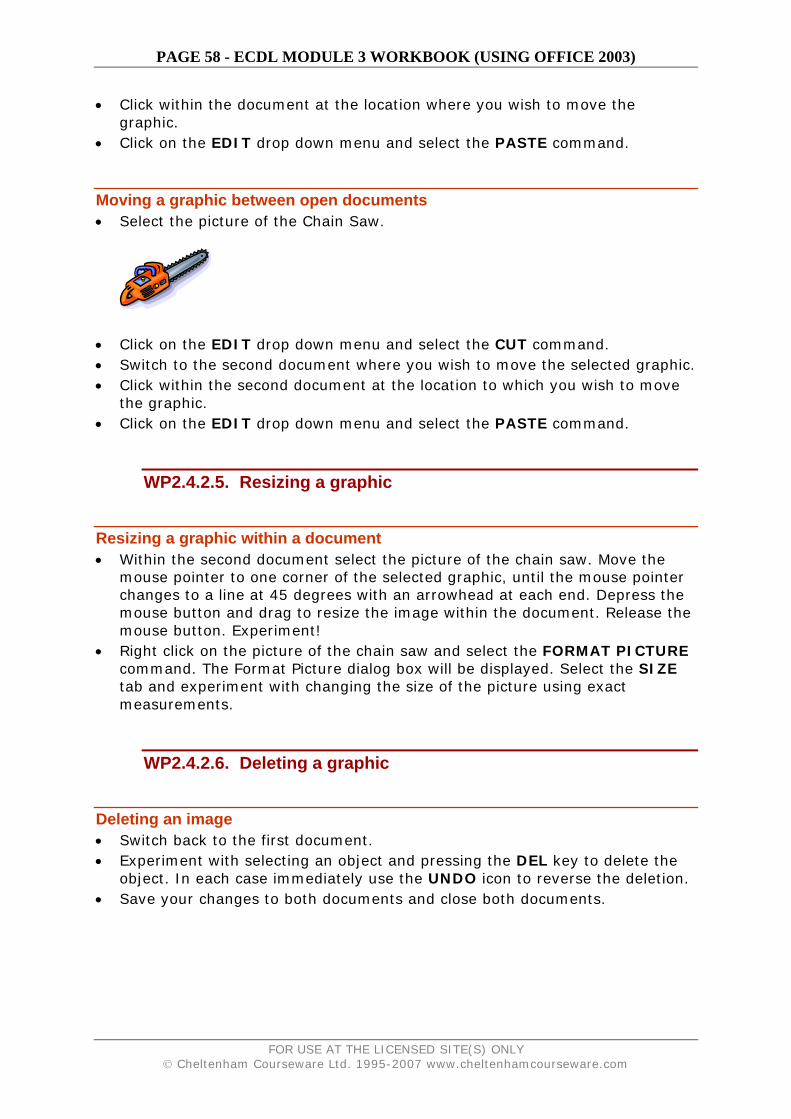
Moving a graphic between open documents • Select the picture of the Chain Saw.
• Click on the EDIT drop down menu and select the CUT command. • Switch to the second document where you wish to move the selected graphic. • Click within the second document at the location to which you wish to move
the graphic. • Click on the EDIT drop down menu and select the PASTE command.
WP2.4.2.5. Resizing a graphic
Resizing a graphic within a document • Within the second document select the picture of the chain saw. Move the
mouse pointer to one corner of the selected graphic, until the mouse pointer changes to a line at 45 degrees with an arrowhead at each end. Depress the mouse button and drag to resize the image within the document. Release the mouse button. Experiment!
• Right click on the picture of the chain saw and select the FORMAT PICTURE command. The Format Picture dialog box will be displayed. Select the SIZE tab and experiment with changing the size of the picture using exact measurements.
WP2.4.2.6. Deleting a graphic
Deleting an image • Switch back to the first document. • Experiment with selecting an object and pressing the DEL key to delete the
object. In each case immediately use the UNDO icon to reverse the deletion. • Save your changes to both documents and close both documents.
FOR USE AT THE LICENSED SITE(S) ONLY © Cheltenham Courseware Ltd. 1995-2007 www.cheltenhamcourseware.com

PAGE 59 - ECDL MODULE 3 WORKBOOK (USING OFFICE 2003)
WP2.5. Mail Merge
WP2.5.1. Concept and Practice
WP2.5.1.1. Understanding mail merge concepts
What is Mail Merging? • The Mail Merge feature is used to insert variable data into a fixed format by
combining two files into one file. Two files need to be created before you can merge them, these are the data file and the main document file. The variable information, such as names and addresses, is stored in the data file ready to merge into the main document file. The information which remains constant and the field names are stored in the main document file, where each field name relates to a field name in the data file. The data in the two files is merged as a series of personalised letters or envelopes.
WP2.5.1.2. Opening and preparing a main document for a mail merge by inserting data fields
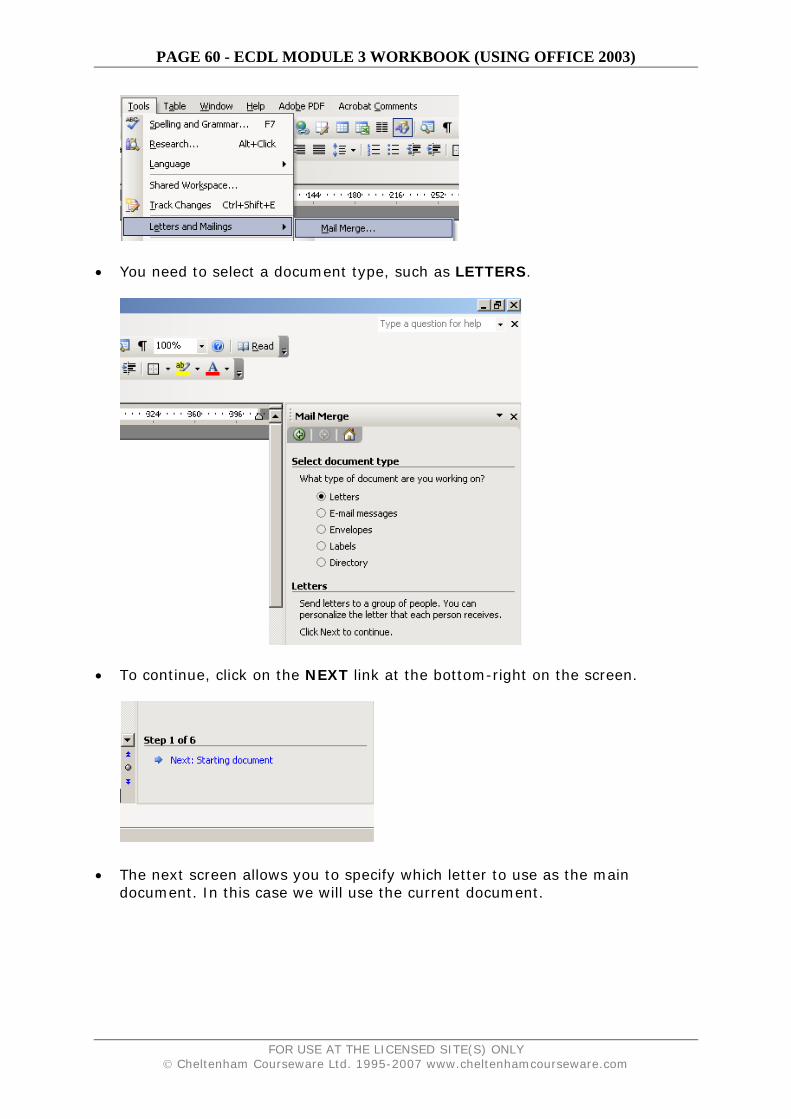
Creating a new main document and merging to a personalised letter • Click on the NEW icon to create a new document. • Click on the TOOLS drop down menu and select the LETTERS AND
MAILING command. • From the submenu select MAIL MERGE.
FOR USE AT THE LICENSED SITE(S) ONLY © Cheltenham Courseware Ltd. 1995-2007 www.cheltenhamcourseware.com
PAGE 60 - ECDL MODULE 3 WORKBOOK (USING OFFICE 2003)
• You need to select a document type, such as LETTERS.
• To continue, click on the NEXT link at the bottom-right on the screen.
• The next screen allows you to specify which letter to use as the main
document. In this case we will use the current document.
FOR USE AT THE LICENSED SITE(S) ONLY © Cheltenham Courseware Ltd. 1995-2007 www.cheltenhamcourseware.com
PAGE 61 - ECDL MODULE 3 WORKBOOK (USING OFFICE 2003)
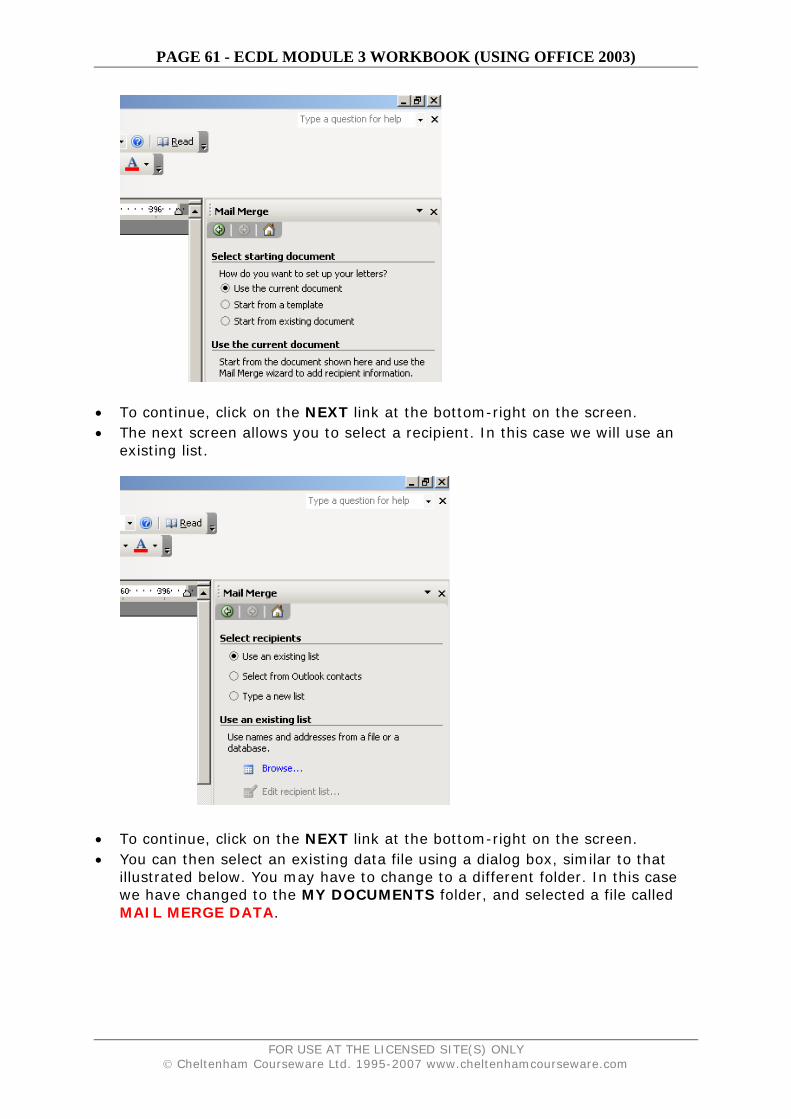
• To continue, click on the NEXT link at the bottom-right on the screen. • The next screen allows you to select a recipient. In this case we will use an
existing list.
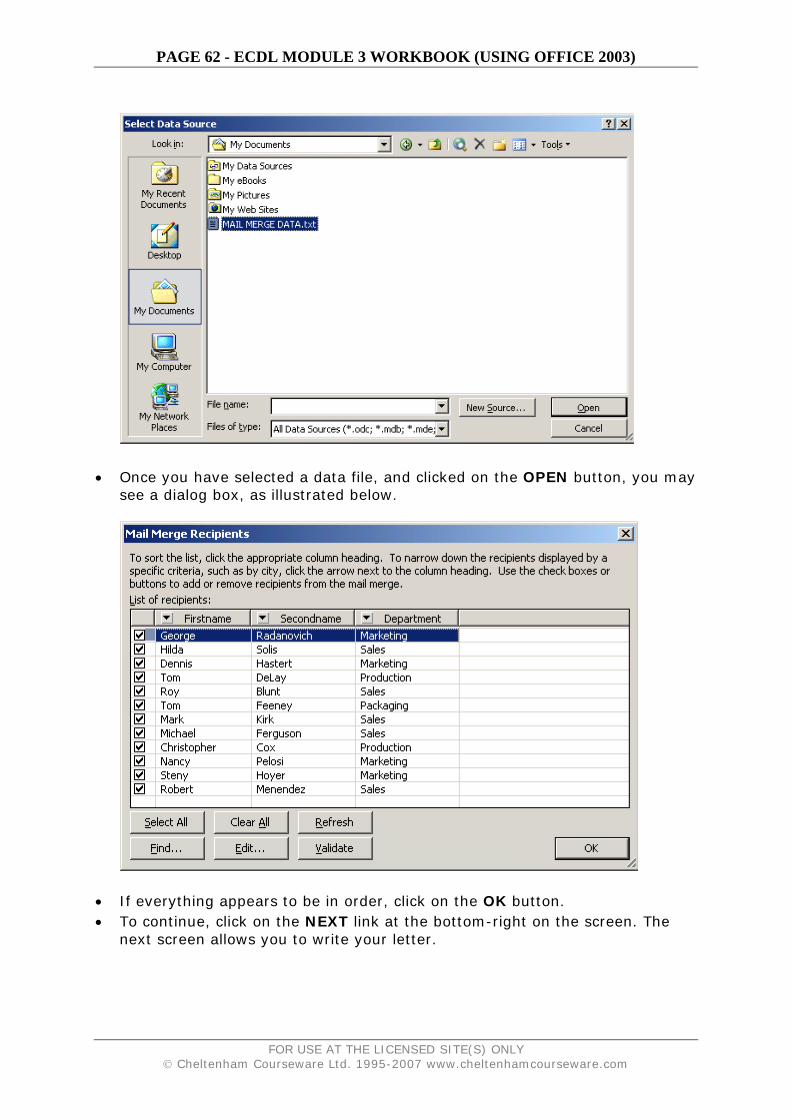
• To continue, click on the NEXT link at the bottom-right on the screen. • You can then select an existing data file using a dialog box, similar to that
illustrated below. You may have to change to a different folder. In this case we have changed to the MY DOCUMENTS folder, and selected a file called MAIL MERGE DATA.
FOR USE AT THE LICENSED SITE(S) ONLY © Cheltenham Courseware Ltd. 1995-2007 www.cheltenhamcourseware.com
PAGE 62 - ECDL MODULE 3 WORKBOOK (USING OFFICE 2003)
• Once you have selected a data file, and clicked on the OPEN button, you may
see a dialog box, as illustrated below.
• If everything appears to be in order, click on the OK button. • To continue, click on the NEXT link at the bottom-right on the screen. The
next screen allows you to write your letter.
FOR USE AT THE LICENSED SITE(S) ONLY © Cheltenham Courseware Ltd. 1995-2007 www.cheltenhamcourseware.com

PAGE 63 - ECDL MODULE 3 WORKBOOK (USING OFFICE 2003)
• First we will insert the fields which will personalise the document. Click at the
top of the document at the location you would wish to insert the name and contact details of the person to whom the document will be sent. If you look at the right of the screen you will see the following.
• Click on MORE ITEMS and you will see the following dialog box displayed
(the information in this dialog box comes from our Data file).
FOR USE AT THE LICENSED SITE(S) ONLY © Cheltenham Courseware Ltd. 1995-2007 www.cheltenhamcourseware.com

PAGE 64 - ECDL MODULE 3 WORKBOOK (USING OFFICE 2003)
• Click on FIRSTNAME and then click on the INSERT button. Click on the CLOSE button.
• Press the SPACEBAR (to insert a space). • Click on MORE ITEMS once again. • Click on SECONDNAME and then click on the INSERT button. Click on the
CLOSE button. • Press the RETURN key (to insert a paragraph space). • Click on MORE ITEMS once again. • Click on DEPARTMENT and then click on the INSERT button. Click on the
CLOSE button. • Press the RETURN key (to insert a paragraph space) and the document
should now look like this.
FOR USE AT THE LICENSED SITE(S) ONLY © Cheltenham Courseware Ltd. 1995-2007 www.cheltenhamcourseware.com
PAGE 65 - ECDL MODULE 3 WORKBOOK (USING OFFICE 2003)
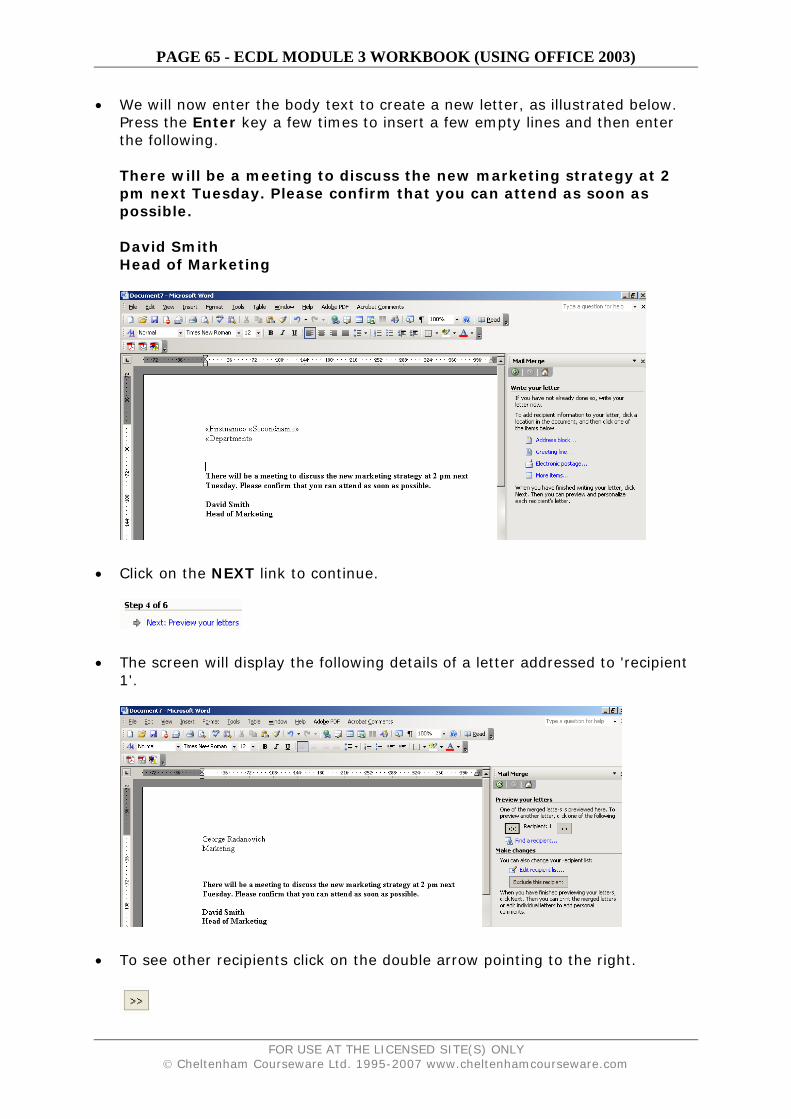
• We will now enter the body text to create a new letter, as illustrated below. Press the Enter key a few times to insert a few empty lines and then enter the following. There will be a meeting to discuss the new marketing strategy at 2 pm next Tuesday. Please confirm that you can attend as soon as possible. David Smith Head of Marketing
• Click on the NEXT link to continue.
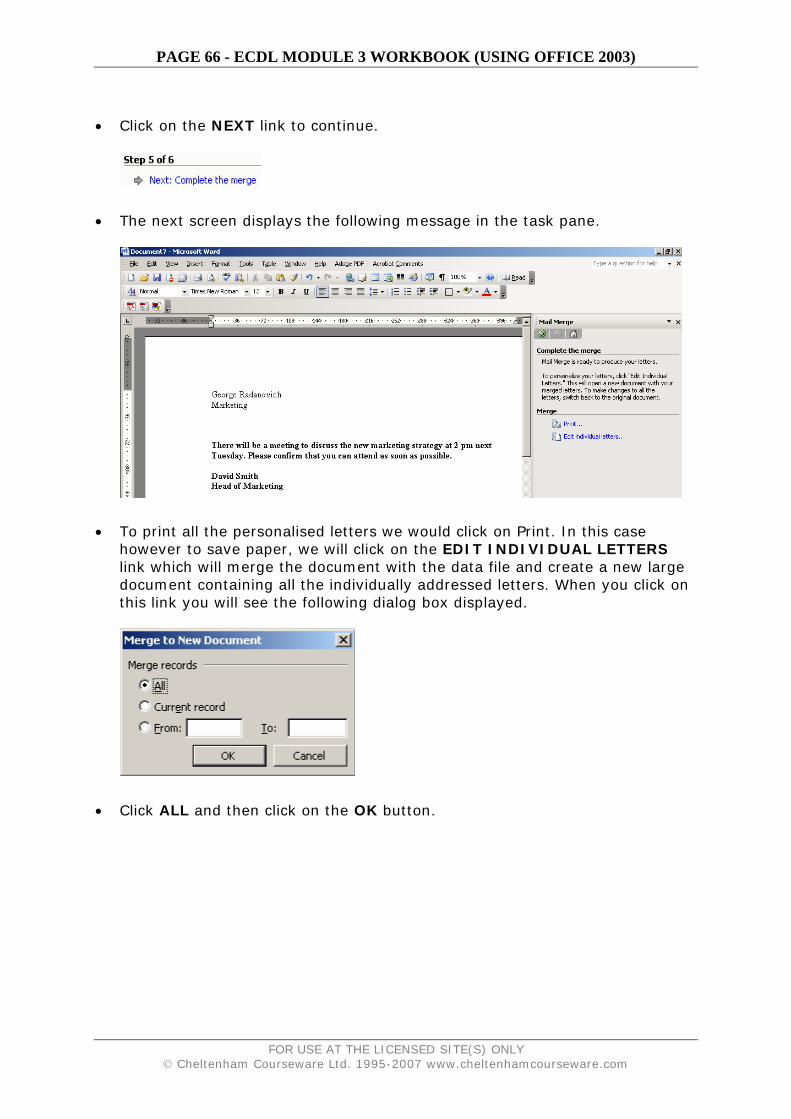
• The screen will display the following details of a letter addressed to 'recipient
1'.
• To see other recipients click on the double arrow pointing to the right.
FOR USE AT THE LICENSED SITE(S) ONLY © Cheltenham Courseware Ltd. 1995-2007 www.cheltenhamcourseware.com
PAGE 66 - ECDL MODULE 3 WORKBOOK (USING OFFICE 2003)
• Click on the NEXT link to continue.
• The next screen displays the following message in the task pane.
• To print all the personalised letters we would click on Print. In this case
however to save paper, we will click on the EDIT INDIVIDUAL LETTERS link which will merge the document with the data file and create a new large document containing all the individually addressed letters. When you click on this link you will see the following dialog box displayed.
• Click ALL and then click on the OK button.
FOR USE AT THE LICENSED SITE(S) ONLY © Cheltenham Courseware Ltd. 1995-2007 www.cheltenhamcourseware.com

PAGE 67 - ECDL MODULE 3 WORKBOOK (USING OFFICE 2003)
• You will then see the following. A new document containing all the letters.
• If you scroll through this document you will see it is made up of many pages,
each addressed to a different person. • Save this new document in the using the filename MY MERGED LETTER. • Close all open documents without saving your changes.
WP2.5.1.3. Opening and preparing a mailing list for use in a mail merge
Creating a mailing list, data file. • Create a new document • Insert a table containing 4 columns and 7 rows Use the INSERT TABLE
icon).
• Enter the following data into the table.
Firstname Secondname Department Barbara Boxer Marketing Sam Brownback Marketing Maria Cantwell Sales Jim DeMint Production Tim Johnson Marketing Patrick Leahy Production Richard Lugar Sales Mitch McConnell Marketing Lisa Murkowski Production Barack Obama Marketing
FOR USE AT THE LICENSED SITE(S) ONLY © Cheltenham Courseware Ltd. 1995-2007 www.cheltenhamcourseware.com
PAGE 68 - ECDL MODULE 3 WORKBOOK (USING OFFICE 2003)
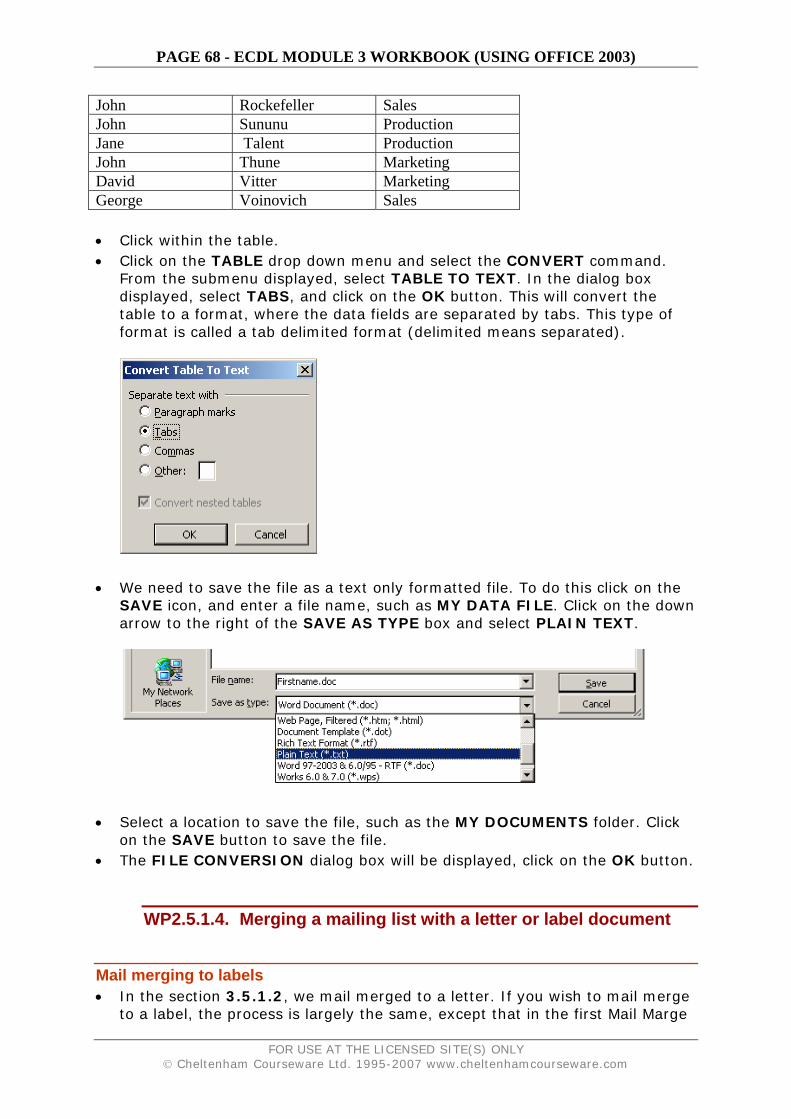
John Rockefeller Sales John Sununu Production Jane Talent Production John Thune Marketing David Vitter Marketing George Voinovich Sales • Click within the table. • Click on the TABLE drop down menu and select the CONVERT command.
From the submenu displayed, select TABLE TO TEXT. In the dialog box displayed, select TABS, and click on the OK button. This will convert the table to a format, where the data fields are separated by tabs. This type of format is called a tab delimited format (delimited means separated).
• We need to save the file as a text only formatted file. To do this click on the
SAVE icon, and enter a file name, such as MY DATA FILE. Click on the down arrow to the right of the SAVE AS TYPE box and select PLAIN TEXT.
• Select a location to save the file, such as the MY DOCUMENTS folder. Click
on the SAVE button to save the file. • The FILE CONVERSION dialog box will be displayed, click on the OK button.
WP2.5.1.4. Merging a mailing list with a letter or label document
Mail merging to labels • In the section 3.5.1.2, we mail merged to a letter. If you wish to mail merge
to a label, the process is largely the same, except that in the first Mail Marge
FOR USE AT THE LICENSED SITE(S) ONLY © Cheltenham Courseware Ltd. 1995-2007 www.cheltenhamcourseware.com

PAGE 69 - ECDL MODULE 3 WORKBOOK (USING OFFICE 2003)
Helper screen, you need to select MAILING LABELS, rather than FORM LETTERS. Later in the merge process you will be asked to select the type of label required, as illustrated. For practice we will perform this mail merge step-by-step.
• Close any documents which may be open. • Click on the NEW icon to create a new document. • Click on the TOOLS drop down menu and select the LETTERS AND
MAILINGS command. • From the submenu select MAIL MERGE.
• MAIL MERGE STEP 1 OF 6: - SELECT DOCUMENT TYPE
You need to select a document type, such as Labels.
• To continue, click on the NEXT link at the bottom-right on the screen.
• MAIL MERGE STEP 2 OF 6: - SELECT STARTING DOCUMENT
The next screen allows you to specify the starting document. In this case we will use the current document by selecting the CHANGE DOCUMENT LAYOUT option.
FOR USE AT THE LICENSED SITE(S) ONLY © Cheltenham Courseware Ltd. 1995-2007 www.cheltenhamcourseware.com

PAGE 70 - ECDL MODULE 3 WORKBOOK (USING OFFICE 2003)
• MAIL MERGE STEP 2 OF 6: - CHANGE DOCUMENT LAYOUT
In the CHANGE DOCUMENT LAYOUT section of the Task Pane, click on the LABEL OPTIONS link. This will display the Label Options dialog box.
• In the LABEL PRODUCTS section use the drop down arrow to the right to select the manufacturer of the labels which you are using.
FOR USE AT THE LICENSED SITE(S) ONLY © Cheltenham Courseware Ltd. 1995-2007 www.cheltenhamcourseware.com
PAGE 71 - ECDL MODULE 3 WORKBOOK (USING OFFICE 2003)
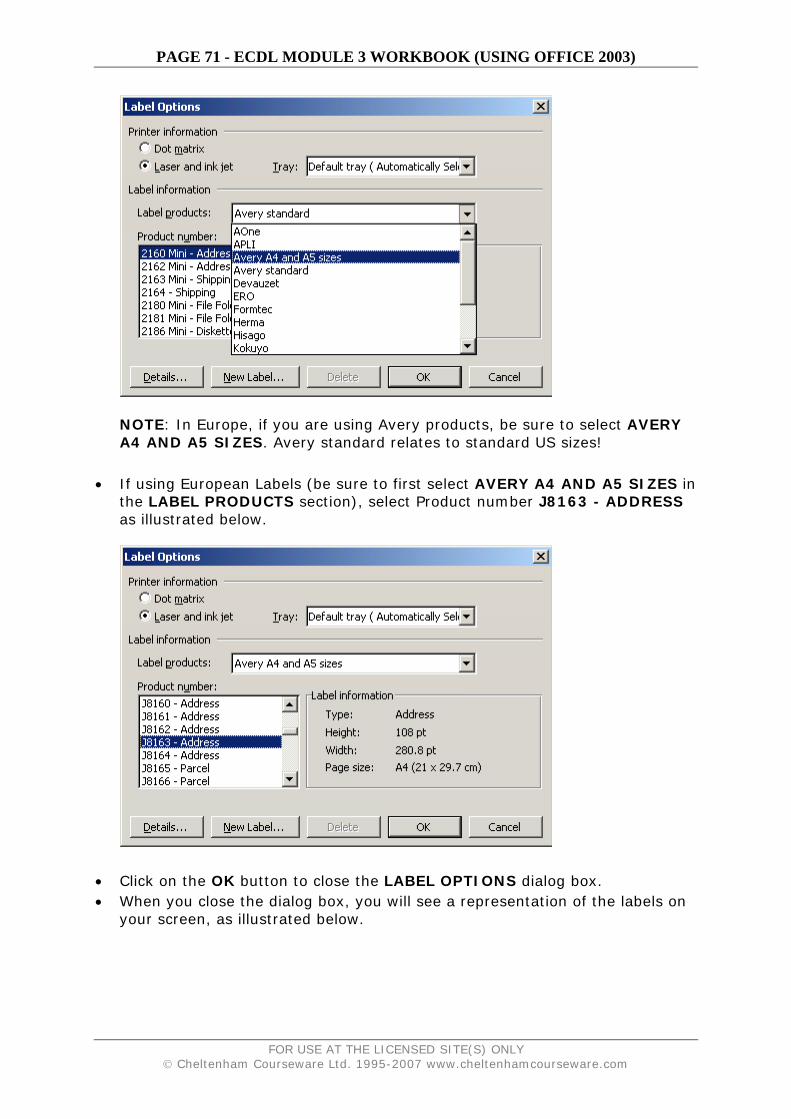
NOTE: In Europe, if you are using Avery products, be sure to select AVERY A4 AND A5 SIZES. Avery standard relates to standard US sizes!
• If using European Labels (be sure to first select AVERY A4 AND A5 SIZES in
the LABEL PRODUCTS section), select Product number J8163 - ADDRESS as illustrated below.
• Click on the OK button to close the LABEL OPTIONS dialog box. • When you close the dialog box, you will see a representation of the labels on
your screen, as illustrated below.
FOR USE AT THE LICENSED SITE(S) ONLY © Cheltenham Courseware Ltd. 1995-2007 www.cheltenhamcourseware.com
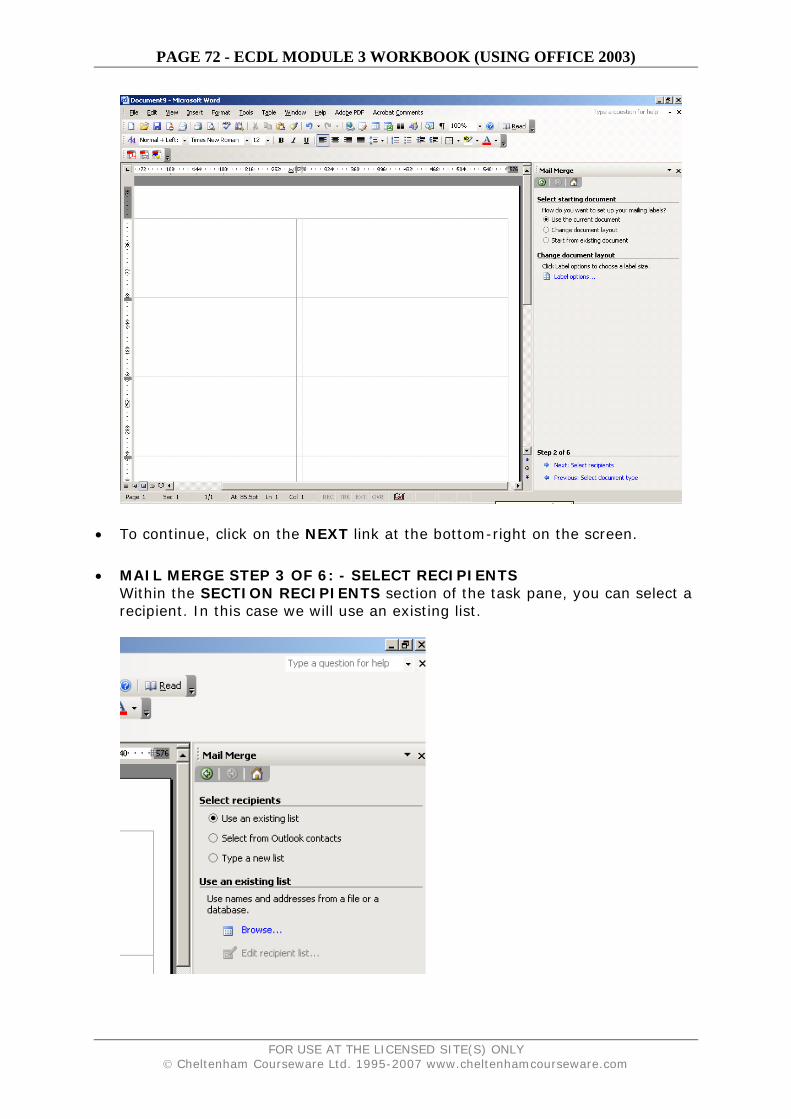
PAGE 72 - ECDL MODULE 3 WORKBOOK (USING OFFICE 2003)
• To continue, click on the NEXT link at the bottom-right on the screen. • MAIL MERGE STEP 3 OF 6: - SELECT RECIPIENTS
Within the SECTION RECIPIENTS section of the task pane, you can select a recipient. In this case we will use an existing list.
FOR USE AT THE LICENSED SITE(S) ONLY © Cheltenham Courseware Ltd. 1995-2007 www.cheltenhamcourseware.com

PAGE 73 - ECDL MODULE 3 WORKBOOK (USING OFFICE 2003)
• MAIL MERGE STEP 3 OF 6: - USE AN EXISTING LIST Within the USE AN EXISTING LIST section of the task pane, click on the BROWSE icon which will display a dialog box. In this case select a file called MAIL MERGE DATA, as illustrated.
• Click on the OPEN button and a new dialog box will be displayed as
illustrated below.
• In this case click on the OK button to continue.
FOR USE AT THE LICENSED SITE(S) ONLY © Cheltenham Courseware Ltd. 1995-2007 www.cheltenhamcourseware.com

PAGE 74 - ECDL MODULE 3 WORKBOOK (USING OFFICE 2003)
• To continue, click on the NEXT link at the bottom-right on the screen. • MAIL MERGE STEP 4 OF 6: - ARRANGE YOUR LABELS
You will see the following displayed in the Task Pane.
• Click on the MORE ITEMS links to enable you to insert items relating to the
particular database you are using as your data source. This will display a dialog box as illustrated,
FOR USE AT THE LICENSED SITE(S) ONLY © Cheltenham Courseware Ltd. 1995-2007 www.cheltenhamcourseware.com
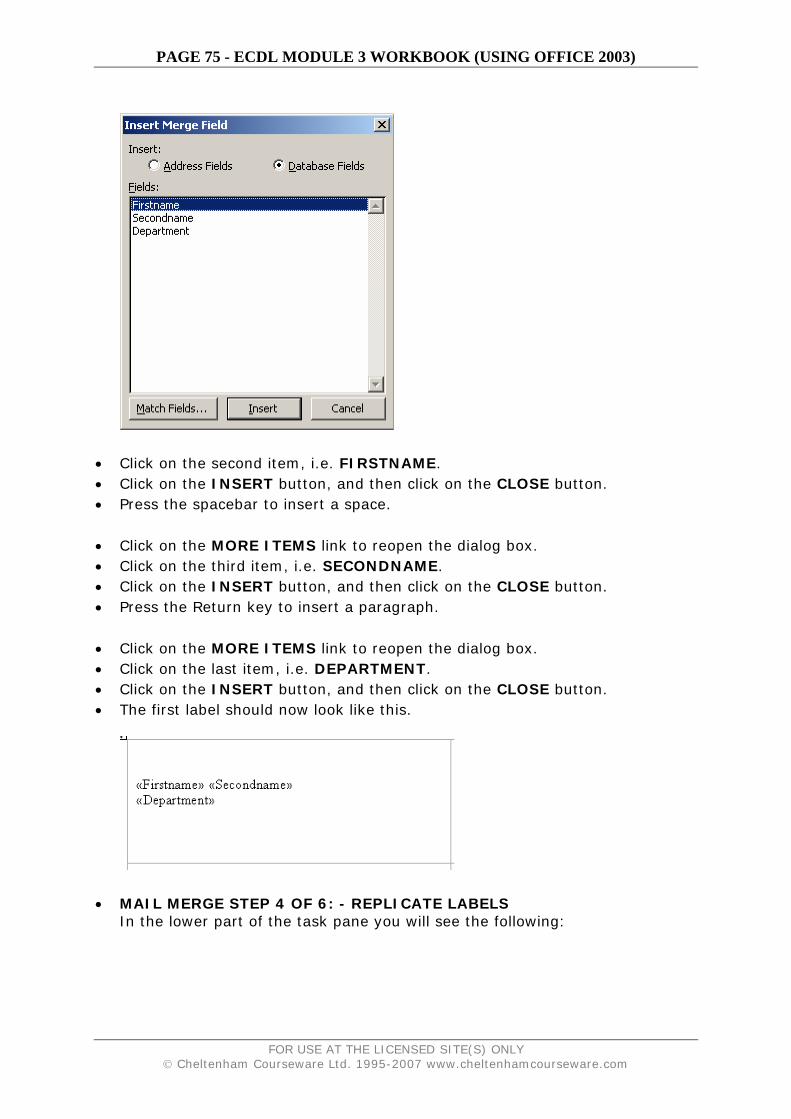
PAGE 75 - ECDL MODULE 3 WORKBOOK (USING OFFICE 2003)
• Click on the second item, i.e. FIRSTNAME. • Click on the INSERT button, and then click on the CLOSE button. • Press the spacebar to insert a space. • Click on the MORE ITEMS link to reopen the dialog box. • Click on the third item, i.e. SECONDNAME. • Click on the INSERT button, and then click on the CLOSE button. • Press the Return key to insert a paragraph. • Click on the MORE ITEMS link to reopen the dialog box. • Click on the last item, i.e. DEPARTMENT. • Click on the INSERT button, and then click on the CLOSE button. • The first label should now look like this.
• MAIL MERGE STEP 4 OF 6: - REPLICATE LABELS
In the lower part of the task pane you will see the following:
FOR USE AT THE LICENSED SITE(S) ONLY © Cheltenham Courseware Ltd. 1995-2007 www.cheltenhamcourseware.com

PAGE 76 - ECDL MODULE 3 WORKBOOK (USING OFFICE 2003)
• Click on the UPDATE ALL LABELS button and you will see the following.
• To continue, click on the NEXT link at the bottom-right on the screen. • MAIL MERGE STEP 5 OF 6: - PREVIEW YOUR LABELS
You will following displayed within the task pane.
FOR USE AT THE LICENSED SITE(S) ONLY © Cheltenham Courseware Ltd. 1995-2007 www.cheltenhamcourseware.com

PAGE 77 - ECDL MODULE 3 WORKBOOK (USING OFFICE 2003)
• You can click on the right pointing arrow to preview the labels. In this case we will click on the NEXT link to continue.
• MAIL MERGE STEP 6 OF 6: - PREVIEW YOUR LABELS
You will see the following displayed within the Task Pane.
• If you wanted to print directly to a printer you would click on the PRINT link. In this case we will output the merged information to a new document (which could be printed later), by clicking on the EDIT INDIVIDUAL LABELS link. A dialog box will be displayed, click on the OK button.
FOR USE AT THE LICENSED SITE(S) ONLY © Cheltenham Courseware Ltd. 1995-2007 www.cheltenhamcourseware.com
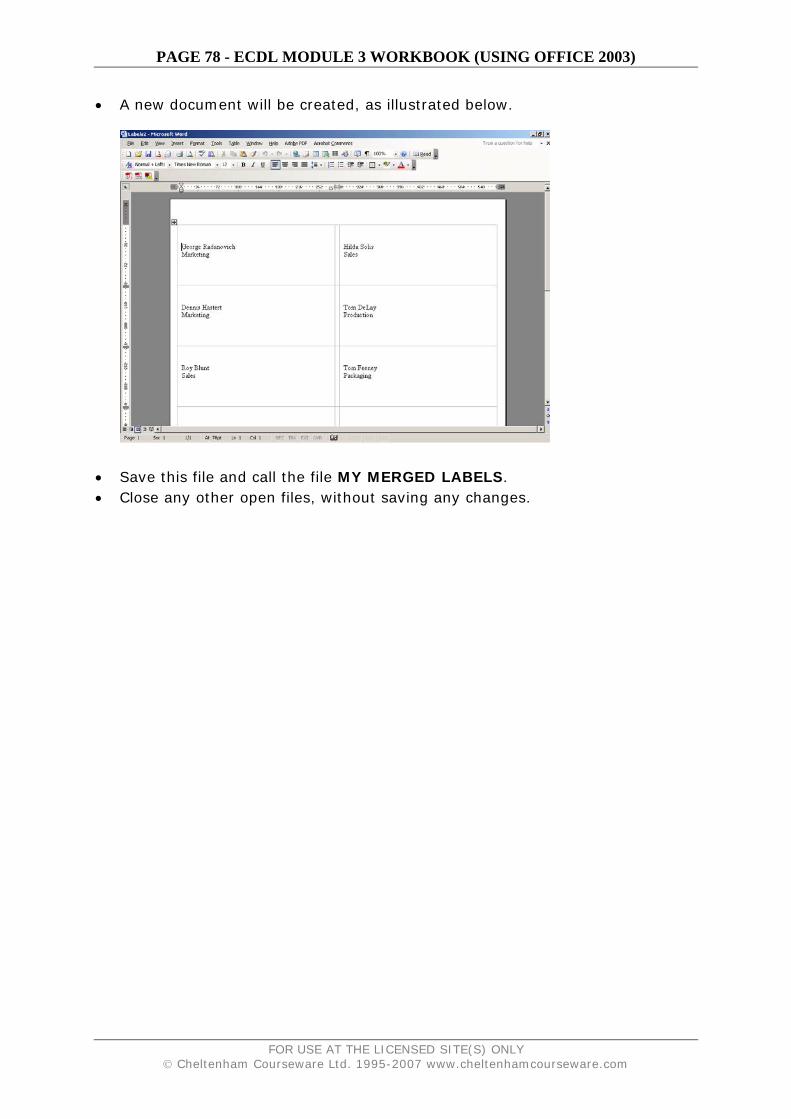
PAGE 78 - ECDL MODULE 3 WORKBOOK (USING OFFICE 2003)
• A new document will be created, as illustrated below.
• Save this file and call the file MY MERGED LABELS. • Close any other open files, without saving any changes.
FOR USE AT THE LICENSED SITE(S) ONLY © Cheltenham Courseware Ltd. 1995-2007 www.cheltenhamcourseware.com
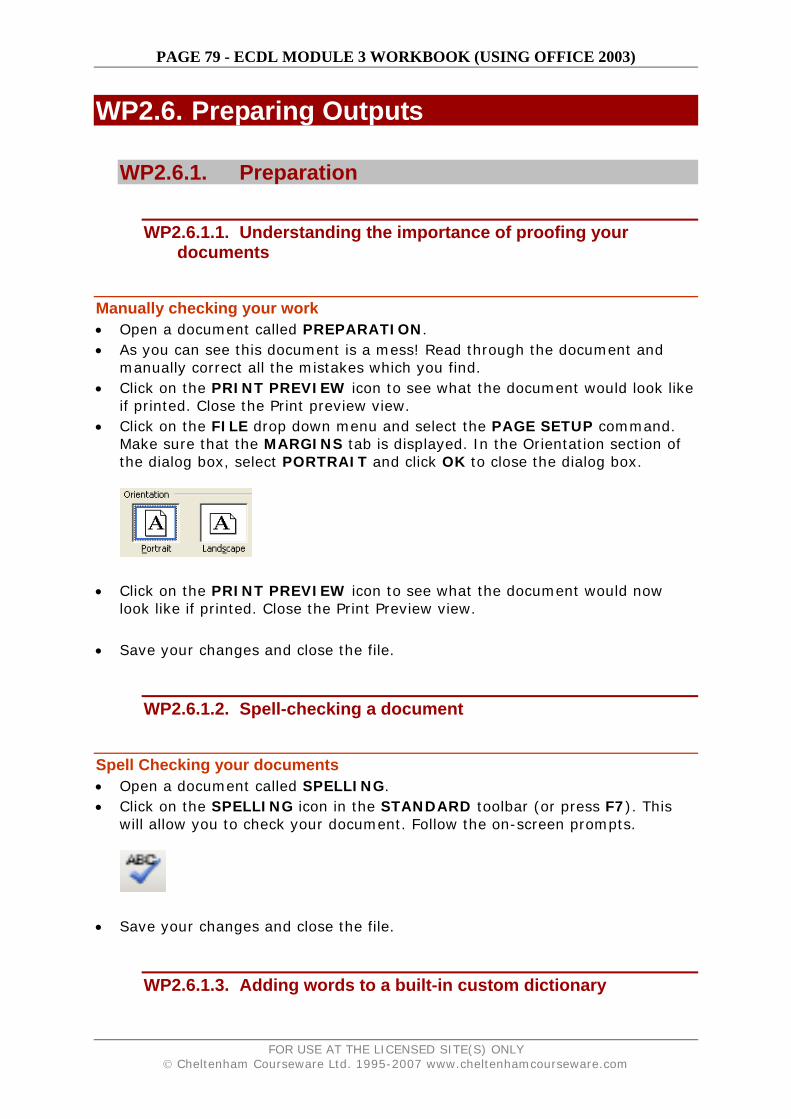
PAGE 79 - ECDL MODULE 3 WORKBOOK (USING OFFICE 2003)
WP2.6. Preparing Outputs
WP2.6.1. Preparation
WP2.6.1.1. Understanding the importance of proofing your documents
Manually checking your work • Open a document called PREPARATION. • As you can see this document is a mess! Read through the document and
manually correct all the mistakes which you find. • Click on the PRINT PREVIEW icon to see what the document would look like
if printed. Close the Print preview view. • Click on the FILE drop down menu and select the PAGE SETUP command.
Make sure that the MARGINS tab is displayed. In the Orientation section of the dialog box, select PORTRAIT and click OK to close the dialog box.
• Click on the PRINT PREVIEW icon to see what the document would now
look like if printed. Close the Print Preview view. • Save your changes and close the file.
WP2.6.1.2. Spell-checking a document
Spell Checking your documents • Open a document called SPELLING. • Click on the SPELLING icon in the STANDARD toolbar (or press F7). This
will allow you to check your document. Follow the on-screen prompts.
• Save your changes and close the file.
WP2.6.1.3. Adding words to a built-in custom dictionary
FOR USE AT THE LICENSED SITE(S) ONLY © Cheltenham Courseware Ltd. 1995-2007 www.cheltenhamcourseware.com

PAGE 80 - ECDL MODULE 3 WORKBOOK (USING OFFICE 2003)
Adding a word to the custom dictionary • Open a document called UNKNOWN. • Press F7 to start the spell checker program. It will highlight the company
name at the end of the letter. If this were your company's name, then you could add this to the computers list of correctly spelt words, so that in future, this word would not be highlighted as unrecognised by the spell checker. In this case DO NOT click on the ADD TO DICTIONARY button to add the word to the dictionary.
• Save your changes and close the file.
WP2.6.1.4. Previewing a document
Previewing a document • Open a document called PRINTING. • Click on the PRINT PREVIEW icon. The Print Preview screen appears. • Click once in the document and the mouse cursor will change to a ZOOM
tool. • Click on the document again to view it more closely and click again to zoom
back out.
• View all the pages within the document. • Close the PRINT PREVIEW view.
WP2.6.2. Printing
WP2.6.2.1. Choosing print output options
Specify what to print • Click on the FILE drop down menu and select the PRINT command.
FOR USE AT THE LICENSED SITE(S) ONLY © Cheltenham Courseware Ltd. 1995-2007 www.cheltenhamcourseware.com
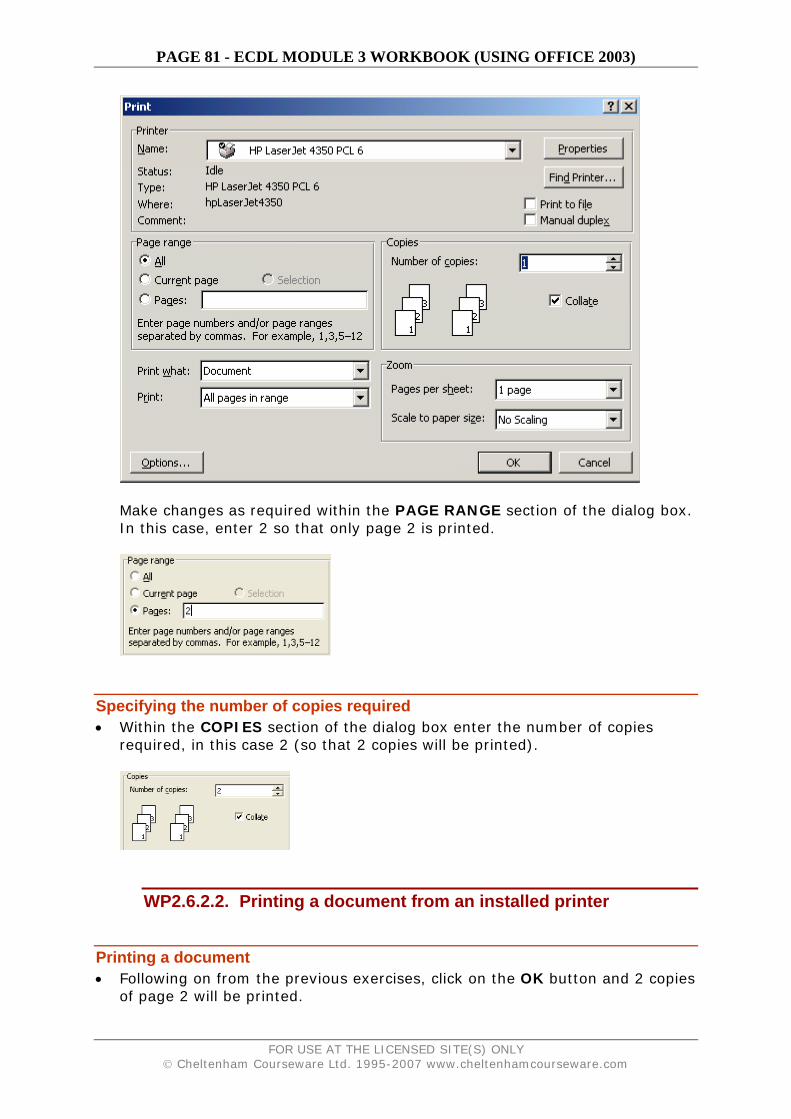
PAGE 81 - ECDL MODULE 3 WORKBOOK (USING OFFICE 2003)
Make changes as required within the PAGE RANGE section of the dialog box. In this case, enter 2 so that only page 2 is printed.
Specifying the number of copies required • Within the COPIES section of the dialog box enter the number of copies
required, in this case 2 (so that 2 copies will be printed).
WP2.6.2.2. Printing a document from an installed printer
Printing a document • Following on from the previous exercises, click on the OK button and 2 copies
of page 2 will be printed.
FOR USE AT THE LICENSED SITE(S) ONLY © Cheltenham Courseware Ltd. 1995-2007 www.cheltenhamcourseware.com
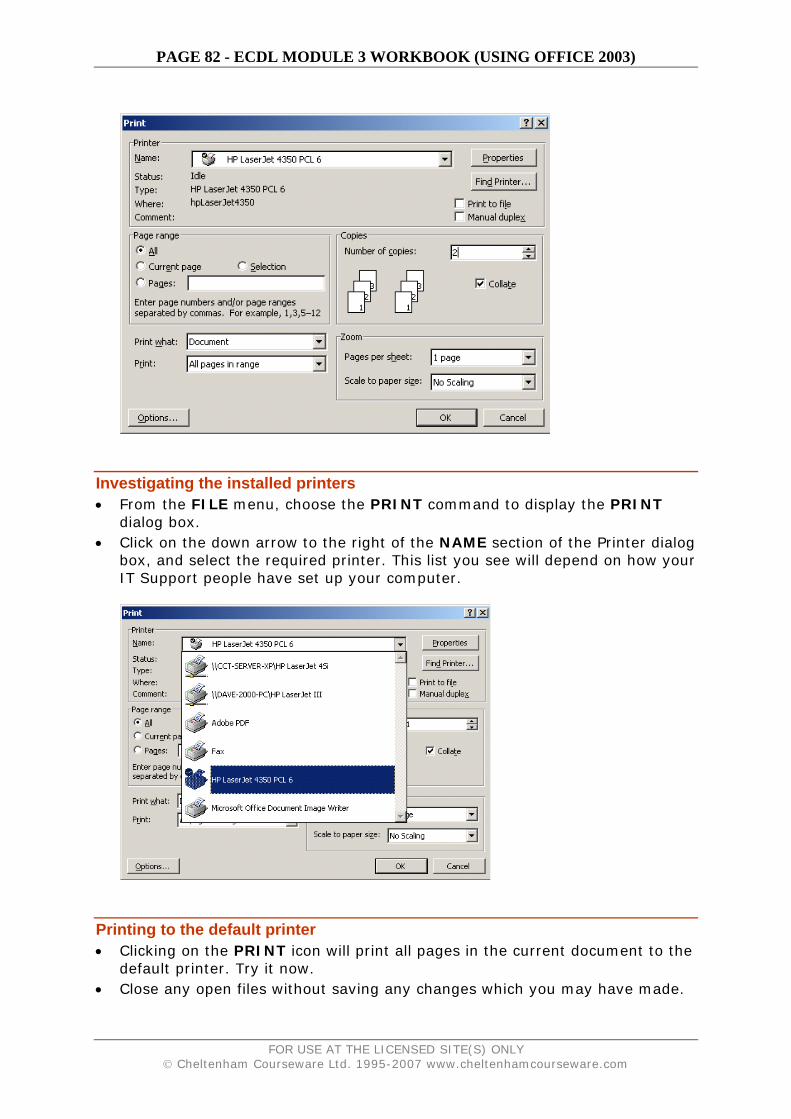
PAGE 82 - ECDL MODULE 3 WORKBOOK (USING OFFICE 2003)
Investigating the installed printers • From the FILE menu, choose the PRINT command to display the PRINT
dialog box. • Click on the down arrow to the right of the NAME section of the Printer dialog
box, and select the required printer. This list you see will depend on how your IT Support people have set up your computer.
Printing to the default printer • Clicking on the PRINT icon will print all pages in the current document to the
default printer. Try it now. • Close any open files without saving any changes which you may have made.
FOR USE AT THE LICENSED SITE(S) ONLY © Cheltenham Courseware Ltd. 1995-2007 www.cheltenhamcourseware.com


![ECDL v5 Module 2[1] - itresources2000.files.wordpress.com · ECDL Syllabus 5 Courseware Module 2 1 OPERATING SYSTEM Starting the Computer You will now start your computer system:](https://static.documents.pub/doc/80x56/5b3ff9a97f8b9a3a138cbe1c/ecdl-v5-module-21-ecdl-syllabus-5-courseware-module-2-1-operating-system.jpg)