

February 4, 2021
EEnnddppooiinntt SSeeccuurriittyy
User Guide
Version R95
English

Copyright Agreement
The purchase and use of all Software and Services is subject to the Agreement as defined in Kaseya’s “Click-Accept” EULATOS as updated from time to time by Kaseya at http://www.kaseya.com/legal.aspx. If Customer does not agree with the Agreement, please do not install, use or purchase any Software and Services from Kaseya as continued use of the Software or Services indicates Customer’s acceptance of the Agreement.”
©2019 Kaseya. All rights reserved. | www.kaseya.com

i
Contents


Security Overview
1
Contents
Security Overview ........................................................................................................................................ i
Endpoint Security Module Minimum Requirements ............................................................................... iii
Protection .................................................................................................................................................... iii
Dashboard ........................................................................................................................................... iii
Security Status .................................................................................................................................... iv
Enable/Disable Resident Shield by Agent Procedure ............................................................ vii
Manual Update .................................................................................................................................. viii
Schedule Scan .................................................................................................................................... ix
View Threats ......................................................................................................................................... x
View Logs ........................................................................................................................................... xii
License ...................................................................................................................................................... xiii
Extend/Return ................................................................................................................................... xiii
Notify .................................................................................................................................................. xiv
Configure .................................................................................................................................................... xv
Installations ........................................................................................................................................ xv
Installing or Upgrading an Endpoint ..................................................................................... xviii
Installation Options .................................................................................................................. xix
Define Profile ...................................................................................................................................... xx
Assign Profile .................................................................................................................................. xxvi
Log Settings ................................................................................................................................... xxvii
MS Exchange ........................................................................................................................................ xxviii
Exchange Status ........................................................................................................................... xxviii
Security Alarms ...................................................................................................................................... xxix
Define Alarm Sets ........................................................................................................................... xxix
Apply Alarm Sets ............................................................................................................................. xxx
Security Reporting ................................................................................................................................ xxxii
Executive Summary - Endpoint Security ................................................................................... xxxiii
Security - Configuration ............................................................................................................... xxxiv
Security - Security ........................................................................................................................ xxxiv
Security - Historical Threats ........................................................................................................ xxxiv
Security - KES Log ........................................................................................................................ xxxv
Index ........................................................................................................................................................... 37


i
Security Overview Endpoint Security (KES) provides security protection for managed machines, using fully integrated anti-malware technology from AVG Technologies. The term malware encompasses viruses, spyware, adware and other types of unwanted programs. Endpoint Security automatically cleans or removes infected files and other threats such as trojans, worms and spyware. Endpoint Security continuously monitors the security status of all Windows servers, workstations and notebooks installed with security protection. Alarms can be triggered by security protection events and can include sending email notifications, running procedures, and creating job tickets.
Centrally managed security profiles are defined and deployed to machines using the VSA console interface. Changes to a security profile automatically update all machines using that profile. Endpoint Security comes with a pre-defined standard security profile and enables you to create customized security profiles.
All security protection events are logged within the system and available for executive summary and detailed management reporting. Once deployed, updates are handled automatically on a scheduled basis without the need for user interaction.
Anti-Virus Protection
Based on the security profile, Endpoint Security removes infected files or blocks access to them:
Scans the system registry for suspicious entries, temporary internet files, tracking cookies, and other types of unwanted objects.
Detects computer viruses by:
Scanning - Performs both on-access and on-demand scanning.
Heuristic Analysis - Dynamically emulates a scanned object’s instructions within a virtual computing environment.
Generic Detection - Detects instructions characteristic of a virus or group of viruses.
Known Virus Detection - Searches for character strings characteristic of a virus.
Scans Email - Checks incoming and outgoing email by using plug-ins designed for the most frequently used email programs. Once detected, viruses are cleaned or quarantined. Some email clients may support messages with text certifying that sent and received email has been scanned for viruses. In addition, for an increased level of security when working with email, an attachment filter can be set by defining undesirable or suspect files.
Memory-Resident Protection - Scans files as they are copied, opened or saved. If a virus is discovered, file access is stopped and the virus is not allowed to activate itself. Memory resident protection is loaded into the memory of the computer during system startup and provides vital protection for the system areas of the computer.
On Demand Scans - Scans can be run on-demand or scheduled to run periodically at convenient times.
Scans MS Exchange Servers - Scans inbound and outbound email messages and mailbox folders on MS Exchange Servers against virus/spyware/malware threats and deletes them immediately before email recipients of the MS Exchange Server are infected.
Scans Websites and Downloads - Scans websites and website links. Also scans files you download to your computer. Provides a safety rating for links returned by popular search engines.
ID Protection - Prevents targeted theft of passwords, bank account details, credit card numbers, and other digital valuables using "behavioral analysis" to spot suspicious activity on a machine.
Anti-Spyware
Spyware is software that gathers information from a computer without the user's knowledge or consent. Some spyware applications may also be secretly installed and often contain advertisements, window pop-ups or different types of unpleasant software. Currently, the most common source of

ii Contents
ii
infection is websites with potentially dangerous content. Other methods of transmission include email or transmission by worms and viruses. The most important protection against spyware is using a memory resident shield, such as the cutting edge Endpoint Security spyware component. A memory resident shield scans applications in the background as they run. Endpoint Security anti-spyware protection detects spyware, adware, DLL-trojans, keyloggers, malware hidden in data streams, archives, spyware entries in the Windows registry and other types of unwanted objects.
Note: See Endpoint Security System Requirements.
Endpoint Security Licensing
Note: With the release of 9.1 licensing now sets the expiration date of the license to one year from the
day it is purchased, irrespective of the day it is installed. The expiration dates of existing licenses are
not affected by this change.
Each MSE KES seat license allows the Customer to install and use an MSE KES agent perpetually and also to receive Updates for a Subscription Term of 365 consecutive days. The update Subscription Term runs independently for each seat and begins upon the date of purchase of the MSE KES agent on a machine and allows the Seat to receive the KES Updates released during the Subscription Term. All Updates released during the Subscription Term are also licensed on a perpetual basis; provided that once the Subscription Term terminates or is not renewed the right to receive new KES Updates terminates.
Issuing a new Seat License to a machine with an existing Subscription Term causes the Terms to merge and thereby adds 365 days to the time otherwise remaining on the seat’s Subscription Term. Any transfer of such a merged Term to a new machine will cause all remaining days for both previous seats to be transferred.
The appropriate KES seat license must be obtained for each machine and/or Exchange Mailbox protected. The Customer may only deploy MSE KES on a machine that has a valid VSA license. MSE KES licenses can be centrally managed using Kaseya’s Web User Interface. Licensing is enforced and a license is needed for every mailbox in use.
Note: KES licenses are allocated to group IDs using System > License Manager
(http://help.kaseya.com/webhelp/EN/VSA/9050000/index.asp#2924.htm).
Functions Description
Dashboard (page iii) Provides a dashboard view of the status of machines installed with Endpoint Security.
Security Status (page
ix) Displays the current security status of machine IDs.
Manual Update (page
viii) Schedules updates of the latest version of security protection definition files.
Schedule Scan (page
ix) Schedules security protection scans of machine IDs.
View Threats (page x) Lists files that have been placed in quarantine due to a suspicious or confirmed threat.
View Logs (page xii) Displays the security protection event log of machine IDs.
Extend/Return (page
xiii) Extends the annual license count for selected machines IDs or returns annual licenses from selected machine IDs.
Notify (page xiv) Provides automatic notification of the expiration of Endpoint Security licenses.
Installations (page xv) Installs or removes security protection for machine IDs.
Define Profile (page xx) Manages security profiles. Each security profile represents

iii
a different set of of enabled or disabled security options.
Assign Profile (page
xxvi) Assigns security profiles to machine IDs.
Log Settings (page
xxvii) Specifies the number of days to keep security protection log data.
Exchange Status (page
xxviii) Displays the status of email protection on MS Exchange servers that have Endpoint Security installed on them.
Define Alarm Sets (page xxix)
Defines sets of alert conditions used to trigger alerts using the Apply Alarm Sets page.
Apply Alarm Sets (page
xxx) Creates alarms in response to security protections events.
Endpoint Security Module Minimum
Requirements Kaseya Server
The Endpoint Security R95 module requires VSA R95.
Access to http://download.avg.com
Requirements for Each Managed Machine
256 MB of RAM
60 MB of free disk space
Any Kaseya supported Windows agent operating system can be used. See Agent Requirements (http://help.kaseya.com/WebHelp/EN/VSA/9050000/reqs/index.asp#home.htm).
Note: See general System Requirements
(http://help.kaseya.com/WebHelp/EN/VSA/9050000/reqs/index.asp#home.htm).
Protection
Dashboard Security > Dashboard
Similar information is provided by Info Center > Reporting > Reports > Security.
The Dashboard page provides a dashboard view of the status of machines installed with Endpoint Security.
Endpoint Security Statistics
License Status
License Count
Top Machines with Threats
Top Threats Discovered

iv Contents
iv
Note: The list of machine IDs displayed depends on the Machine ID / Group ID filter and machine groups
the user is authorized to see using System > User Security > Scopes.
Endpoint Security Statistics
The Endpoint Security Statistics section provides various statistics about the security status of endpoints and the status of security definitions.
<N> Endpoints Need Reboot
<N> Signature versions older than '<version>'
<N> Endpoints with older version of Endpoint Security
<N> Endpoints not having a scan completed this week
<N> Endpoints currently running a scan
<N> Endpoints with Resident Shield disabled
Click any of these hyperlinked statistics to see a tabbed dialog showing each member belonging to that statistic.
License Status
A pie chart displays the percentage of machines that have expired licenses or will have expired licenses in 30, 60, 90 or 91+ days. Click any slice of the pie chart or any label of the pie chart to display a list of individual machines belonging to that slice.
License Count
Note: As of version 9.1 licensing sets the expiration date of the license to one year from the day it is
purchased, irrespective of the day it is installed. The expiration dates of existing licenses are not
affected by this change.
Lists license counts for the following:
Purchased Licenses
Full Available Licenses (Purchased not allocated or installed or expired)
Allocated Licenses (Scheduled for install, but install not yet complete)
Applied Licenses (Active license applied to a machine)
Partial Available Licenses (Formerly assigned to a machine but returned to pool before expiration)
Partial Allocated Licenses (Partial Available that has been scheduled for install, but install not yet complete)
Total Licenses (Purchase licenses minus expired)
Expired Licenses
Top Machines with Threats
Lists the machines with the greatest number of current threats. The number of threats in the virus vault are also listed. Clicking a hyperlinked machine ID displays the threats belonging to that machine ID in the View Threats (page x) page.
Top Threats Discovered
A pie chart displays which threats have been found on the greatest percentage of machines. Click any slice of the pie chart or any label of the pie chart to display a list of individual machines belonging to that slice in the View Threats page.
v
Security Status Security > Security Status
Similar information is provided by Info Center > Reporting > Reports > Security (page xxxiv).
The Security Status page displays the current security status of each machine ID licensed to use Endpoint Security. The list of machine IDs displayed depends on the Machine ID / Group ID filter and machine groups the user is authorized to see using System > User Security > Scopes. To display on this page, machine IDs must have the Endpoint Security client software installed on the managed machine using the Security > Installation (page xv) page.
Indicators include resident shield protection, mail protection, the number of unresolved threats detected, the number of threats in the virus vault and the version of security protection installed on each machine ID.
Actions
Enable Resident Shield - Click to enable resident memory anti-malware protection on selected machines IDs.
Disable Resident Shield - Click to disable resident memory anti-malware protection on selected machines IDs.
Note: In some cases, security protection must be disabled to install or configure software on a
managed machine.
Note: You can also Enable/Disable Resident Shield by Agent Procedure (page vii).
Enable Email - Click to enable email protection on selected machines IDs.
Disable Email - Click to disable email protection on selected machines IDs.
Empty Vault - Click to empty the virus vault of all quarantined malware IDs.
Reboot Now - Reboots selected machines IDs. Some security updates require a reboot to install the update. If a reboot is pending, a reboot icon displays alongside the pre-update version number and the machine is still protected.
Header Information
Current Available Signature Version - The latest version of security protection available. You can update one or more machine IDs with the Current Available Version using Security > Manual Updates (page xxx).
Current Installer Version - The version number of the AVG installer to be used on new installations.
Tables Columns
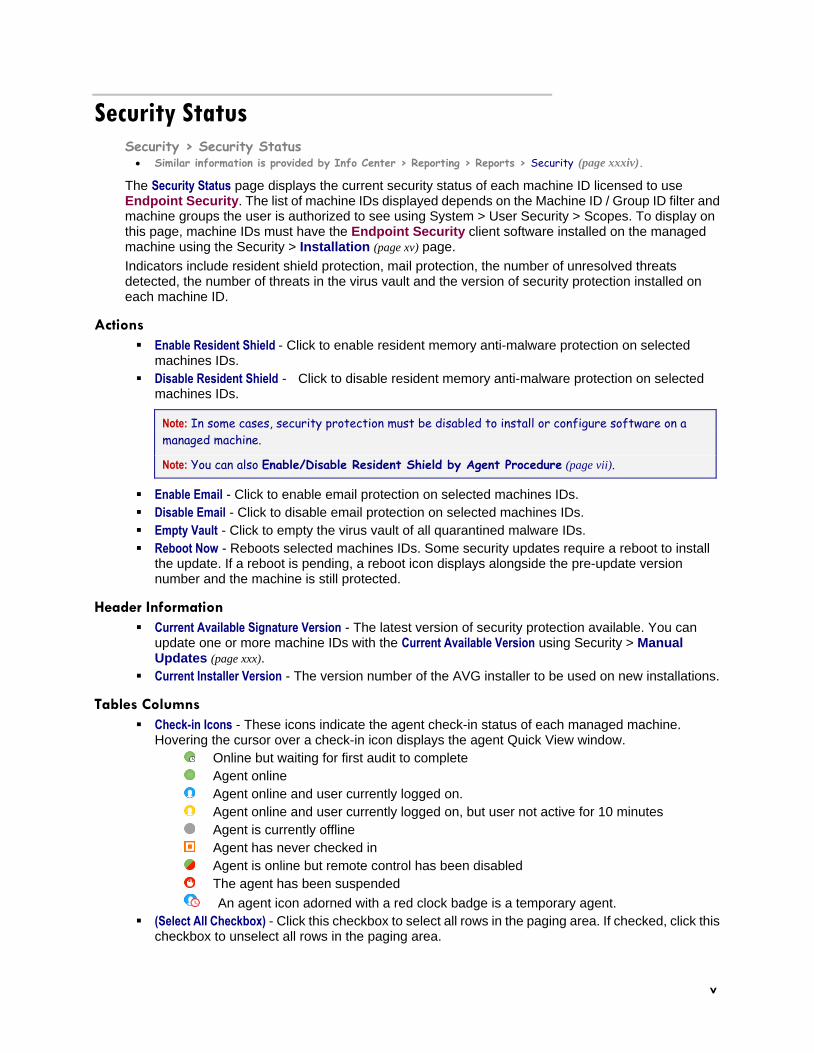
Check-in Icons - These icons indicate the agent check-in status of each managed machine. Hovering the cursor over a check-in icon displays the agent Quick View window.
Online but waiting for first audit to complete
Agent online
Agent online and user currently logged on.
Agent online and user currently logged on, but user not active for 10 minutes
Agent is currently offline
Agent has never checked in
Agent is online but remote control has been disabled
The agent has been suspended
An agent icon adorned with a red clock badge is a temporary agent.
(Select All Checkbox) - Click this checkbox to select all rows in the paging area. If checked, click this checkbox to unselect all rows in the paging area.

vi Contents
vi
Machine.Group ID - A unique machine ID / group ID / organization ID name for a machine in the VSA.
Profile Name - The security profile assigned to the machine ID.
Status - The current state of security protection for a machine ID is indicated by the set of status icons displayed in the Status column. Possible status icons include:
Resident Shield On
Resident Shield Off
Resident Shield Partial
Resident Shield Enable/Disable Pending
Email Scanner On
Email Scanner Off
Email Scanner Partial
Email Scanner Enable/Disable Pending
Link Scanner On
Link Scanner Off
Link Scanner Partial
Link Scanner Enable/Disable Pending
Web Shield On
Web Shield Off
Web Shield Partial
Web Shield Enable/Disable Pending
Threats - The number of unhealed threats detected on the machine ID. These are current threats that need user attention. You can click the hyperlinked number in any row to display these threats in the Current Threats tab of the View Threats (page x) page.
Virus Vault - The number of threats stored in the virus vault of the machine ID. These items are safely quarantined and will be automatically deleted, if profile settings apply. You can click the hyperlinked number in any row to display these threats in the Virus Vault tab of the View Threats (page x) > page.

vii
Version - The version of security protection currently used by this machine ID. For example: 8.5.322 270.12.6/2084
8.5.322 - The version of AVG program installed.
270.12.6/2084 - The full virus database version. 270.12.6 represents the definition
version and 2084 is the signature version. Displays in red text if the signature version is older
than the last 5 signature versions available or if the definition version is older than the last 2 definition versions available and the agent is active.
Note: If a machine ID's version is outdated you can update machine IDs manually using Security >
Manual Update (page viii).
Note: Some security updates require a reboot to install the update. If a reboot is pending, a reboot
icon displays alongside the pre-update version number and the machine is still protected.
Enable/Disable Resident Shield by Agent Procedure You can disable/enable Resident Shield using the following executeShellCommand() in an agent procedure. In the agent working directory (http://help.kaseya.com/webhelp/EN/VSA/9050000/index.asp#368.htm), run:
C:\kworking\kes>KasAVCmd -setFileMonitorEnable 0 ;disables Resident Shield C:\kworking\kes>KasAVCmd -setFileMonitorEnable 1 ;enables Resident Shield
Script Name: KES_Enable Resident Shield Script Description: Enables Resident Shield temporarily (until next scan or reboot...unless it is enabled by default and is being re-enabled after being temporarily disabled) IF True THEN Get Variable Parameter 1 : 10 Parameter 2 : Parameter 3 : agenttemp OS Type : 0 Execute File Parameter 1 : #agenttemp#\kes\KasAVCmd.exe Parameter 2 : -setFileMonitorEnable 1 Parameter 3 : 3 OS Type : 0 ELSE

viii Contents
viii
Script Name: KES_Disable Resident Shield Script Description: Disables Resident Shield temporarily (until next scan or reboot) IF True THEN Get Variable Parameter 1 : 10 Parameter 2 : Parameter 3 : agenttemp OS Type : 0 Execute File Parameter 1 : #agenttemp#\kes\KasAVCmd.exe Parameter 2 : -setFileMonitorEnable 0 Parameter 3 : 3 OS Type : 0 ELSE
Manual Update Security > Manual Update
The Manual Updates page controls the updating of machine IDs licensed to use Endpoint Security with the latest version of security protection available. Updates are scheduled automatically by default. You can disable and re-enable automatic updating by machine. Typically this function is only used to review the update status of agents or to force an immediate update check if needed.
The list of machine IDs you can select depends on the machine ID / group ID filter and the scope you are using. To display on this page, machine IDs must have the Endpoint Security client software installed on the managed machine using the Security > Installation (page xv) page.
Actions
Update - Click to schedule a virus definition update on selected machine IDs using the update options previously selected.
Cancel Update - Click to clear a scheduled update.
Enable Automatic Updates - Enables virus definition updates.
Disable Automatic Updates - Disables virus definition updates. This prevents virus definition updates from slowing down the network during peak working hours. In a future release you will be able to schedule when to update virus definitions. If automatic updates are disabled, then a red-cross
icon displays in the Scheduled Time column, even if a manual update is scheduled.
Header Information
Current Available Version - The latest version of security protection available. Check the version column on this page to determine if any machine IDs are missing the latest version of security protection or the latest Endpoint Security client software available.
Current KES Client Version - The latest KES client software available.
Schedule Settings
Immediate - Check to schedule this task immediately.
Date/Time - Enter the year, month, day, hour, and minute to schedule this task.

ix
Stagger by - You can distribute the load on your network by staggering this task. If you set this parameter to 5 minutes, then the task on each machine ID is staggered by 5 minutes. For example, machine 1 runs at 10:00, machine 2 runs at 10:05, machine 3 runs at 10:10, ...
Skip if Machine Offline - If a checkmark displays and the machine is offline, skip and run the next scheduled period and time. If no checkmark displays, perform this task as soon as the machine connects after the scheduled time.
Update from KServer (Override file source) - If checked, updates are downloaded from the Kaseya Server. If blank, updates are downloaded using the method specified in Patch Management > File Source (http://help.kaseya.com/webhelp/EN/VSA/9050000/index.asp#366.htm).
Table Columns
Check-in Status - These icons indicate the agent check-in status of each managed machine. Hovering the cursor over a check-in icon displays the agent Quick View window.
Online but waiting for first audit to complete
Agent online
Agent online and user currently logged on.
Agent online and user currently logged on, but user not active for 10 minutes
Agent is currently offline
Agent has never checked in
Agent is online but remote control has been disabled
The agent has been suspended
An agent icon adorned with a red clock badge is a temporary agent.
(Select All Checkbox) - Click this checkbox to select all rows in the paging area. If checked, click this checkbox to unselect all rows in the paging area.
Machine.Group ID - A unique machine ID / group ID / organization ID name for a machine in the VSA.
Source - If a file source is defined using Patch Management > File Source, then updates are sourced from this location. Otherwise, updates are sourced from the internet. If the option Download from Internet if machine is unable to connect to the file server is selected in Patch Management>File Source:
During a Endpoint Security v2.x endpoint install, if the files source is down or credentials invalid, the installer is downloaded from the Kaseya Server and completes the endpoint install.
During a Endpoint Security v2.x manual update, if the files source is down or credentials invalid, the update is downloaded from the internet.
In both cases above, the View Logs (page xii) page displays an error message stating why the file source failed and that it is trying to download from the internet.
Last Update - This timestamp shows when a machine ID was last updated. When this date changes, a new update is available to use.
Version - The version of security protection currently used by this machine ID. For example: 8.5.322 270.12.6/2084
8.5.322 - The version of AVG program installed.
270.12.6/2084 - The full virus database version. 270.12.6 represents the definition
version and 2084 is the signature version. Displays in red text if the signature version is older
than the last 5 signature versions available or if the definition version is older than the last 2 definition versions available and the agent is active.
[KES 2.1.0.87] - The version of Endpoint Security client software.
Scheduled Time - Timestamp showing the next scheduled update, if one is scheduled either manually or automatically. For a selected machine:

x Contents
x
If automatic updates are enabled for a selected machine and KES detects an AVG update, a time stamp displays. When multiple machines are scheduled, the timestamps will differ because automatic updates uses a staggered schedule.
If automatic updates are enabled but no AVG update is detected, the table cell is blank, unless a manual update is also scheduled.
If automatic updates are disabled, then a red-cross icon displays, even if a manual update is scheduled.
If a manual update is scheduled, a time stamp displays.
Schedule Scan Security > Schedule Scan
The Schedule Scan page schedules security protection scans of selected machine IDs licensed to use Endpoint Security. The list of machine IDs you can select depends on the machine ID / group ID filter and the scope you are using. To display on this page, machine IDs must have the Endpoint Security client software installed on the managed machine using the Security > Installation (page xv) page.
Actions
Scan - Click to schedule a scan of selected machine IDs using the scan options previously selected.
Cancel - Click to clear a scheduled scan.
Schedule Settings
Immediate - Check to schedule this task immediately.
Date/Time - Enter the year, month, day, hour, and minute to schedule this task.
Stagger by - You can distribute the load on your network by staggering this task. If you set this parameter to 5 minutes, then the task on each machine ID is staggered by 5 minutes. For example, machine 1 runs at 10:00, machine 2 runs at 10:05, machine 3 runs at 10:10, ...
Skip if Machine Offline - If a checkmark displays and the machine is offline, skip and run the next scheduled period and time. If no checkmark displays, perform this task as soon as the machine connects after the scheduled time.
Every N Periods - Check the box to make this task a recurring task. Enter the number of periods to wait before running this task again.
Table Columns
Check-in Status - These icons indicate the agent check-in status of each managed machine. Hovering the cursor over a check-in icon displays the agent Quick View window.
Online but waiting for first audit to complete
Agent online
Agent online and user currently logged on.
Agent online and user currently logged on, but user not active for 10 minutes
Agent is currently offline
Agent has never checked in
Agent is online but remote control has been disabled
The agent has been suspended
An agent icon adorned with a red clock badge is a temporary agent.
(Select All Checkbox) - Click this checkbox to select all rows in the paging area. If checked, click this checkbox to unselect all rows in the paging area.

xi
Machine.Group ID - A unique machine ID / group ID / organization ID name for a machine in the VSA.
Last Scan - This timestamp shows when the last scan occurred. When this date changes, new scan data is available to view.
Next Scan / Schedule - This timestamp shows the next scheduled scan. Overdue date/time stamps
display as red text with yellow highlight. A green checkmark indicates the scan is recurring.
View Threats Security > View Threats
Similar information is provided by Info Center > Reporting > Reports > Security (page xxxiv).
The View Threats page displays threats you can take action on. Threats are grouped by their status on two different tabs:
Current Threats - Lists discovered threats on machines that could not be automatically healed. Each unhealed threat remains unchanged on the machine, requiring user action. Deleting a threat on the Current Threats tab deletes the file immediately, without moving the file to the Virus Vault.
Note: When a machine is scanned, all of its current threats are cleared out and marked as resolved.
If a threat continues to exist, it is rediscovered and added back to the current threats list.
Virus Vault - Threats are discovered by scan or resident shield. Healing the threat replaces the original file with a healed copy. The original, unhealed file is moved to a hidden partition on the computer hard drive called the Virus Vault. In effect, the Virus Vault acts as a kind of "recycle bin" for threats, allowing you to recover them before deleting them permanently from machines.
Healing
Healing involves the following steps:
1. An attempt is made to clean the file.
2. If that fails, an attempt is made to move the file to the Virus Vault.
3. If that fails, an attempt is made to delete the file.
4. If that fails, the file remains unchanged on the machine and is listed in the Current Threats tab of the View Threats page.
MS Exchange Server Threats
Any malware detected by MS Exchange Server email protection is immediately deleted from the MS Exchange Server and displays only on the Virus Vault tab.
Current Threats tab
Actions
Heal - Attempts to heal a file without deleting it. Healed threats are removed from the Current Threats tab and display in the Virus Vault tab.
Delete - Attempts to delete a file. Deleted threats are deleted from the computer immediately.
Note: If both healing and deletion fail, it may mean the file is open. Kill any processes keeping the
file open and try to delete the file again.
Remove from this List - Removes the threat from the View Threats page without performing any other action.
Cancel Pending Operation - Cancels any of the other actions, if they have not yet been completed.

xii Contents
xii
Add to PUP Exclusion List - A threat is identified as a potential unwanted program, or PUP, by displaying a (P) next to the name of the threat on the View Threats page. PUP threats can be
added to the exclusion list for the profile assigned to the machine they were found on. Exclusion means the file is no longer scanned as a potential threat on all machines assigned this profile. Only perform this action if you're certain the file is safe to use. The entire PUP Exclusion List is maintained using the Define Profile (page xx) > PUP Exclusions tab.
Note: Non-PUP threats cannot be added to the PUP Exclusion List.
Virus Vault tab
Actions
Restore - Restores the original file identified as a threat. Only perform this action if you're certain the file is safe to use.
Delete - Deletes the original file identified as a threat from the Virus Vault.
Note: You cannot recover a file deleted from the Virus Vault.
Remove from this List - Removes the threat from the View Threats page without performing any other action.
Cancel Pending Operation - Cancels any of the other actions, if they have not yet been completed.
Add to PUP Exclusion List - A threat is identified as a potential unwanted program, or PUP, by displaying a (P) next to the name of the threat on the View Threats page. PUP threats can be
added to the exclusion list for the profile assigned to the machine they were found on. Exclusion means the file is no longer scanned as a potential threat on all machines assigned this profile. Only perform this action if you're certain the file is safe to use. The entire PUP Exclusion List is maintained using the Define Profile (page xx) > PUP Exclusions tab.
Note: Non-PUP threats cannot be added to the PUP Exclusion List.
Apply Filter / Reset Filter
Click Apply Filter to filter the rows displayed by the text entered in the Machine.Group, Threat Path or Threat Name fields. Time filtering and Action sorting occurs immediately. Click Reset Filter to display all rows of data.
Filter Columns
Filter the display of threats using text fields, a date range and/or drop-down lists. Include an asterisk (*) wildcard with the text you enter to match multiple records.
Machine.Group - Filter by the machine ID.group ID of the managed machines reporting threats.
Threat Path - Filter by pathname location of files on managed machines with reported threats.
Time - Filter by a range of dates and times the threats were last detected. Time filtering occurs immediately.
Threat Name - Filter by the name of the threat, as designated by the anti-malware definitions used to detect a threat.
Action - Filter by pending or completed actions taken against view threat records. Select All OFF
or All ON to enable or disable actions. Action sorting occurs immediately.
View Logs Security > View Logs
Similar information is provided by Info Center > Reporting > Reports > Security (page xxxiv).

xiii
The View Logs page displays the security protection event log of each machine ID licensed to use Endpoint Security. The list of machine IDs displayed depends on the Machine ID / Group ID filter and machine groups the user is authorized to see using System > User Security > Scopes. To display on this page, machine IDs must have the Endpoint Security client software installed on the managed machine using the Security > Installation (page xv) page.
Click a machine ID.group ID to display an event log. Each event displays the Time, an event Code, and in most cases a Message containing additional information. Security protection event codes describe one of three types of log entry:
Errors
Events
Commands
Apply Filter / Reset Filter
Click Apply Filter to filter the rows by the date range entered in the Time fields and/or the text entered in the Message field. Click Reset Filter to display all rows of data.
Filter Columns
Filter the display of threats using text fields, a date range and/or drop-down lists. Include an asterisk (*) wildcard with the text you enter to match multiple records. Paging rows can be sorted by clicking column heading links.
Time, Min, Max - Filter by a range of dates and times.
Code - Filter by the category of log event reported. Select All OFF or All ON to enable or disable
all categories.
Message - Filter by message text.
License
Extend/Return Security > Extend/Return
The Extend/Return page extends the annual license count for selected machines IDs or returns annual licenses from selected machine IDs. A annual license can be returned from one machine ID and be applied to another machine ID. Each machine ID can be allocated multiple years of security protection. Endpoint Security licenses are allocated to group IDs using System > License Manager (http://help.kaseya.com/webhelp/EN/VSA/9050000/index.asp#2924.htm).
Note: See Endpoint Security Licensing in the Security Overview (page i) topic.
The list of machine IDs you can select depends on the machine ID / group ID filter and the scope you are using. To display on this page, machine IDs must have the Endpoint Security client software installed on the managed machine using the Security > Installation (page xv) page.
Actions
Extend - Extends the annual license count for selected machines IDs.
Return - Returns annual licenses from selected machine IDs.
Auto Extend - Enables automatic allocation of a new license the day the old license expires for selected machine IDs. Only full licenses are allocated using Auto Extend. If no additional licenses exist, allocation fails and security protection expires for the endpoint. Enabled by default.

xiv Contents
xiv
Remove Auto Extend - Disables auto extend for selected machine IDs.
License Count - Displays a popup window of the following license counts:
Purchased Licenses
Full Available Licenses (Purchased not allocated or installed or expired)
Allocated Licenses (Scheduled for install, but install not yet complete)
Applied Licenses (Active license applied to a machine)
Partial Available Licenses (Formerly assigned to a machine but returned to pool before expiration)
Partial Allocated Licenses (Partial Available that has been scheduled for install, but install not yet complete)
Total Licenses (Purchase licenses minus expired)
Expired Licenses
Note: As of version 9.1 licensing sets the expiration date of the license to one year from the day it
is purchased, irrespective of the day it is installed. The expiration dates of existing licenses are
not affected by this change.
Show only licenses expiring within 30 days - Limits the display of licenses in the paging area to those expiring within 30 days.
Table Columns
(Check-in Status) - These icons indicate the agent check-in status of each managed machine. Hovering the cursor over a check-in icon displays the agent Quick View window.
Online but waiting for first audit to complete
Agent online
Agent online and user currently logged on.
Agent online and user currently logged on, but user not active for 10 minutes
Agent is currently offline
Agent has never checked in
Agent is online but remote control has been disabled
The agent has been suspended
An agent icon adorned with a red clock badge is a temporary agent.
(Select All Checkbox) - Click this checkbox to select all rows in the paging area. If checked, click this checkbox to unselect all rows in the paging area.
Machine.Group ID - A unique machine ID / group ID / organization ID name for a machine in the VSA.
Returnable - The number of annual licenses returnable from a machine ID. A machine ID with only one annual license cannot return any additional annual licenses.
Expires On - The date a machine ID's security protection expires, based on the number of annual licenses it has.
Warning: The Kaseya license expiration date and the AVG license expiration date frequently do not
match each other. On the Kaseya side, the expiration date for endpoint licensing is set to the
install date of the Endpoint Security client plus one year. On the AVG side the license expiration date frequently displays an earlier license expiration date that should be ignored. Endpoint
Security uses the Kaseya expiration date to determine license expirations.
Auto Extend - If checked, auto extend is enabled for this machine ID.
At Limit - If the maximum number of annual licenses available to a group ID are being used, then each licensed machine ID in that group ID displays a Yes in the At Limit column. This alerts the
user that more annual licenses may be required for that group ID. Endpoint Security licenses

xv
are allocated to group IDs using System > License Manager (http://help.kaseya.com/webhelp/EN/VSA/9050000/index.asp#2924.htm).
Notify Security > Notify
The Notify page provides automatic notification of the expiration of Endpoint Security licenses. Customers, VSA users and machine users can be notified a specified number of days before Endpoint Security licenses expire. Endpoint Security licenses are allocated to group IDs using System > License Manager (http://help.kaseya.com/webhelp/EN/VSA/9050000/index.asp#2924.htm).
Note: See Endpoint Security Licensing in the Security Overview (page i) topic.
The list of machine IDs you can select depends on the machine ID / group ID filter and the scope you are using. To display on this page, machine IDs must have the Endpoint Security client software installed on the managed machine using the Security > Installation (page xv) page.
Actions
Send notification when license will expire in N days - Enter the number of days before the expiration date of an Endpoint Security license to notify customers, users and users.
Email Recipients (Comma separate multiple addresses) - Specify email addresses to send notification messages. Multiple email addresses must be separated by commas.
Apply - Click to apply parameters to selected machine IDs. Confirm the parameters have been applied correctly in the machine ID list.
Clear - Click to remove all parameter settings from selected machine IDs.
Table Columns
(Check-in Status) - These icons indicate the agent check-in status of each managed machine. Hovering the cursor over a check-in icon displays the agent Quick View window.
Online but waiting for first audit to complete
Agent online
Agent online and user currently logged on.
Agent online and user currently logged on, but user not active for 10 minutes
Agent is currently offline
Agent has never checked in
Agent is online but remote control has been disabled
The agent has been suspended
An agent icon adorned with a red clock badge is a temporary agent.
Select All/Unselect All - Click the Select All link to check all rows on the page. Click the Unselect All link to uncheck all rows on the page.
Machine.Group ID - A unique machine ID / group ID / organization ID name for a machine in the VSA.
Days - Shows the number of days before the license expiration date that notification will be sent.
Email Address List - Lists the email addresses notifications will be sent to.
Notify - If checked, email recipients will be forewarned that this machine ID's security license is about to expire. If blank, notification will not be sent.

xvi Contents
xvi
Configure
Installations Security > Installation
The Installations page installs or removes security protection for selected machine IDs.
The list of machine IDs displayed depends on the Machine ID / Group ID filter and machine groups the user is authorized to see using System > User Security > Scopes.
User Access Control (UAC) must be disabled prior to install or upgrade of endpoint clients.
After Endpoint Security is installed on the VSA, endpoint installers are downloaded from AVG.
New Endpoint Security endpoint installers are based on AVG 2013 but Endpoint Security continues to support existing AVG 2012 and AVG 9 endpoints.
Endpoint installers are based on workstation, server and CPU type: 32bit vs 64bit. The appropriate installer is selected when installing to an endpoint.
The server endpoint installer contains Exchange installation components.
The time to download endpoint installers from AVG may vary, based on an approximate 500 MB delivery package.
A conditional reboot of VSA may be necessary.
AVG 2013 registers itself in the Windows Security Center but AVG 2012 and AVG 9 does not.
Endpoint Security licenses are allocated to group IDs using System > License Manager (http://help.kaseya.com/webhelp/EN/VSA/9050000/index.asp#2924.htm).
Rebooting the Endpoint During Installs and Upgrades
Installing AVG 2013 may reboot the endpoint after the install. Upgrading AVG 2013 will reboot the endpoint after the uninstall of the previous Endpoint Security client software, then again after the install of AVG 2013.
Note: Installing and upgrading to AVG 2013 is recommended during off hours to avoid interrupting the
user. An option exists to ask the end-user to proceed with the install or upgrade, before continuing with
the install.
AVG 8 Not Supported
Warning: AVG 8 endpoints are not supported in Endpoint Security. Users are strongly recommended to
either upgrade endpoints to AVG 9 before upgrading to Endpoint Security, or uninstalling AVG 8
endpoints entirely, then reinstalling these same endpoints to AVG 2013 endpoints after installing
Endpoint Security.
Install Option Guidelines
Installing the following options on servers is not recommended.
Email Scanner
On servers installed with Exchange the following options are not recommended.
Web Shield
Link Scanner
Identity Protection
For both servers and workstations AVG Firewall is not supported for AVG 2013 and AVG 2012 endpoints but still supported for AVG 9 endpoints.

xvii
Actions
This page provides the following actions:
Install - Install Endpoint Security on selected machine IDs. See Installing or Upgrading an Endpoint (page xviii).
Warning: Uninstall all anti-virus/spyware/malware software on the managed machine before
installing Endpoint Security client software.
Upgrade - Upgrades AVG 9 and AVG 2012 endpoint clients to AVG 2013. The Install Status column identifies endpoints that are eligible for an upgrade. See Installing or Upgrading an Endpoint (page xviii).
Connect Client - Installs only the Endpoint Security client service on the endpoint. This allows you to:
Verify if a supported AVG engine exists on the endpoint.
Upgrade or reinstall just the Endpoint Security client service, without affecting the AVG component. This may be required if the Endpoint Security client service is outdated or has become corrupted.
Remove - Remove Endpoint Security on selected machine IDs.
Cancel Pending Operation - Cancel any of the first three actions, if they have not yet been completed.
Edit User Prompts - Edit the warning prompt displayed to users, if a warning prompt is displayed. You can also specify the number of minutes the user is allowed to postpone installation.
Installation Options - Sets module-level or default installation options (page xix) for installs or upgrades.
Reboot - Reboots the selected computer. Periodically AVG releases an update that requires a reboot. Reboot Required displays in the Version column.
License Counts - Licensing sets the expiration date for all KAV, KAM, and KES client licenses purchased equal to the VSA maintenance expiration date. Lists Endpoint Security license counts for servers and workstations. Endpoint Security license counts also display on the Administration > Manage > License Manage (http://help.kaseya.com/webhelp/EN/VSA/9050000/index.asp#2924.htm) page.
Purchased Licenses
Full Available Licenses - Purchased not not allocated or installed or expired.
Allocated Licenses - Scheduled for install, but install not yet complete.
Applied Licenses - Active license applied to a machine.
Total Licenses - Purchased licenses minus expired.
License Expiry Date
Table Columns
(Check-in Status) - These icons indicate the agent check-in status of each managed machine. Hovering the cursor over a check-in icon displays the agent Quick View window.
Online but waiting for first audit to complete
Agent online
Agent online and user currently logged on.
Agent online and user currently logged on, but user not active for 10 minutes
Agent is currently offline
Agent has never checked in
Agent is online but remote control has been disabled
The agent has been suspended
An agent icon adorned with a red clock badge is a temporary agent.

xviii Contents
xviii
(Select All Checkbox) - Click this checkbox to select all rows in the paging area. If checked, click this checkbox to unselect all rows in the paging area.
Machine.Group ID - A unique machine ID / group ID / organization ID name for a machine in the VSA.
Install Status - Types of messages include:
(blank) - Endpoint Security client software is not installed on the machine ID. There are no prerequisites preventing you from installing the client on this machine.
Application Conflict <product name> - A antivirus product is already installed on this
machine and it conflicts with the install of Endpoint Security.
Requires Agent Update - The agent software is earlier than 4.7.1. Use the Agent > Update
Agent (http://help.kaseya.com/webhelp/EN/VSA/9050000/index.asp#250.htm) page to update this agent.
Install Pending <date/time> - The install is scheduled for a specified date/time. Overdue
date/time stamps display as red text with yellow highlight.
Waiting for Service - The service used by the agent to communicate with the AVG engine
has started the install. This message displays until the install is complete.
- The install has completed. You can display the installation options applied to a machine ID by clicking this icon.
FAILED at <time/date and error message> - Displays install failure details, if available,
reported by the AVG client software.
AVG Removed by User - The machine user has removed the AVG client manually.
Install Source - If a file source is defined using Patch Management > File Source (http://help.kaseya.com/webhelp/EN/VSA/9050000/index.asp#366.htm), then installs are sourced from this location. Otherwise, installs are sourced from the internet. If the option Download from Internet if machine is unable to connect to the file server is selected in Patch Management>File Source:
During a Endpoint Security endpoint install, if the files source is down or credentials invalid, the installer is downloaded from the Kaseya Server and completes the endpoint install.
During a Endpoint Security manual update, if the files source is down or credentials invalid, the update is downloaded from the internet.
In both cases above, the View Logs (page xii) page displays an error message stating why the file source failed and that it is trying to download from the internet.
Installed On - The date Endpoint Security client software was installed on the machine ID.
Version - The version of security protection currently used by this machine ID. For example: 8.5.322 270.12.6/2084
8.5.322 - The version of AVG program installed.
270.12.6/2084 - The full virus database version. 270.12.6 represents the definition
version and 2084 is the signature version. Displays in red text if the signature version is older
than the last 5 signature versions available or if the definition version is older than the last 2 definition versions available and the agent is active.
[KES 2.1.0.87] - The version of Endpoint Security client software.
Installing or Upgrading an Endpoint Security > Installation > Install or Update
Set the following options after clicking the Install or Upgrade buttons. Default settings are configured using the Installation Options (page xix) button. After the Endpoint Security client is installed on a machine ID, the installation options applied to that machine ID can be viewed by clicking the green check mark in the Install Status column.

xix
Profile Selection
Select Profile - Selects the profile to use during an install.
Installer Options
Install/Upgrade from KServer (override file source) - If checked, installs are downloaded from the Kaseya Server. If blank, installs are downloaded using the method specified in Patch Management > File Source (http://help.kaseya.com/webhelp/EN/VSA/9050000/index.asp#366.htm).
Prompt user before install / Force install without warning user - Installation requires a reboot of the managed machine. If Prompt user before install is selected, the user is given the option of postponing the installation for a specified number of minutes. Otherwise Force install without warning user causes the software to be installed at the scheduled time without warning the user.
Note: Click Edit User Prompts to specify the number of minutes the user is allowed to postpone the
installation.
Schedule
Immediate - Check the Immediate box to begin the install as soon as Install is clicked.
Date/Time - Enter the year, month, day, hour, and minute to schedule this task.
Stagger by - You can distribute the load on your network by staggering this task. If you set this parameter to 5 minutes, then the task on each machine ID is staggered by 5 minutes. For example, machine 1 runs at 10:00, machine 2 runs at 10:05, machine 3 runs at 10:10, ...
Skip if Machine Offline - Check to perform this task only at the scheduled time. If the machine is offline, skip and run the next scheduled period and time. Uncheck to perform this task as soon as the machine connects after the scheduled time.
Components
Workstation Components
Link Scanner - Blocks dangerous websites and checks links returned by the most popular search engines. Does not install to browsers running on Windows Server O/S.
Active Safe Search - Scans a link displayed in a web page, before you click it.
Search-Shield - Identifies the safety rating for a search link listed in Google, Yahoo and MSN search lists.
Web-Shield - Scans downloaded files and files exchanged using instant messaging.
Email Scanner - If checked, installation detects the default email client on a machine and automatically installs the respective email scanning plug-in.
ID Protection - If checked, AVG's Identity Protection option is enabled. Prevents targeted theft of passwords, bank account details, credit card numbers, and other digital valuables using "behavioral analysis" to spot suspicious activity on a machine.
Firewall (Not managed by Kaseya) - If checked, AVG's firewall option is enabled. Blocks unauthorized access while permitting authorized communications. The Endpoint Security client cannot be used to maintain the blacklists and whitelists required by this option.
Server Components
Sharepoint Server Add-in - If checked, installs Endpoint Security protection for Sharepoint Server documents.
Exchange Server Plug-in - If checked, installs Endpoint Security email protection to MS Exchange Servers. This setting is ignored when the Endpoint Security client is installed to a non-MS Exchange Server machine.

xx Contents
xx
Installing
Licensing exceptions are indicated in messages area of the dialog.
Installation Options Security > Installation > Installation Options
Certain Installation Options serve as defaults that can be overridden when installing or upgrading an endpoint (page xviii).
Other Installation Options serve as module-level settings that are typically applied to all installs. Module-level settings cannot be overridden for a specific install or upgrade, but apply to any installation you subsequently perform.
Install Options
User Name - module-level - If checked, enter a name associated with this install of Endpoint Security.
Company Name - module-level - If checked, enter the name of the company associated with this install of Endpoint Security.
Target Directory - module-level - If checked, enter a target directory. If blank, the default install directory is used.
Select Profile - Selects the profile to use during an install.
Kill all running applications that prevent installation - module-level - If checked, stops all running applications that might prevent successful installation.
Disable Windows Defender - module-level - Running Windows Defender significantly degrades the performance of Endpoint Security and should be disabled by default using this option.
Enable end user directory scans - module-level - Adds a right-click option to Windows Explorer, enabling the user to scan an individual file or directory immediately.
Agent Procedure Options
Agent Procedure to run before install - module-level - Select an agent procedure.
Agent Procedure to run after install - module-level - Select an agent procedure.
Components
Workstation Components
Link Scanner - Blocks dangerous websites and checks links returned by the most popular search engines. Does not install to browsers running on Windows Server O/S.
Active Safe Search - Scans a link displayed in a web page, before you click it.
Search-Shield - Identifies the safety rating for a search link listed in Google, Yahoo and MSN search lists.
Web-Shield - Scans downloaded files and files exchanged using instant messaging.
Email Scanner - If checked, installation detects the default email client on a machine and automatically installs the respective email scanning plug-in.
ID Protection - If checked, AVG's Identity Protection option is enabled. Prevents targeted theft of passwords, bank account details, credit card numbers, and other digital valuables using "behavioral analysis" to spot suspicious activity on a machine.
Server Components
Sharepoint Server Add-in - If checked, installs Endpoint Security protection for Sharepoint Server documents.

xxi
Exchange Server Plug-in - If checked, installs Endpoint Security email protection to MS Exchange Servers. This setting is ignored when the Endpoint Security client is installed to a non-MS Exchange Server machine.
Define Profile Security > Define Profile
The Define Profile page manages security profiles. Each security profile represents a different set of enabled or disabled security options. Changes to a security profile affect all machine IDs assigned that security profile. A security profile is assigned to machine IDs using Security > Assign Profile (page
xxvi). Typically different types of machines or networks require different security profiles. A sample profile is provided for you. You can't change the sample profile, but you can save it under a new name and make changes to the copy. The same profile can be used to manage AVG 9, AVG 2012 and AVG 2013 endpoints.
This page provides you with the following actions:
Save - Saves changes to a security profile.
Save As - Creates a new security profile by saving it using a different name.
Delete - Deletes an existing security profile.
Share - Shares a private security profile. Other users cannot see private security profiles. Sharing a private security profile makes it a public security profile. Share rights are assigned by object. There are three sharing checkbox options. The first two checkboxes are mutually exclusive and determine what share rights are assigned. If neither of the first two checkboxes are checked, the shared object can only be seen by the users given share access, but the object cannot be used nor edited. The Shared and Not Shared list boxes and the third checkbox determine who can see the object.
Allow other administrators to modify - If checked, share rights to the object includes being able to use it, view its details and edit it.
Other administrators may use but may not view or edit - If checked, share rights to the object only allows using it.
Make public (seen by all administrators) - If checked, ensures that all current and future VSA users can see the object. If blank, only selected user roles and users can see the shared object. If blank, and new users or user roles are added later, you have to return to this dialog to enable them to see the specific object.
Take Ownership - Takes ownership (http://help.kaseya.com/webhelp/EN/VSA/9050000/index.asp#5537.htm) of any public security profile.
To Define or Maintain a Security Profile
1. Select a security profile from the Select Profile drop-down list.
2. Set options on security profile tabs:
General
Resident Shield
Email Scanner
Full Scan
Exchange
Exclude Dirs
Exclude PUPs
Updates
3. Click the Save or Save As button to save the security profile.

xxii Contents
xxii
General
AVG Desktop GUI Password
Password protect AVG Desktop GUI - If a password is entered, the user is forced to enter that same password to hide the AVG desktop, tray icon and start menu shortcuts. If blank, the user is not required to enter a password to perform this task.
Virus Vault
Limit Size of the Vault - If checked, limits the size of the vault as specified using the following options:
Maximum Size of the Vault: <N>% of Local Disk - Enter the maximum percentage of disk space to allocate for the storage of quarantined threats.
Minimum Available Space to Remain on Local Disk - Enter the minimum number of megabytes to allocate on the disk to the storage of quarantined threats.
Automatic File Deletion - If checked, deletes files automatically as specified by the following options:
Delete Files Older than <N> Days - Enter the number of days to store quarantined threats before they are automatically deleted.
Maximum Number of files to Store - Enter the maximum number of quarantined threats to store.
System Tray Notifications
Display system tray notifications - If checked, the following system tray notifications can be optionally enabled. All notification messages display on the managed machine next to the system tray.
Display tray notifications about update - If checked, displays a notification message that the Endpoint Security software is being updated.
Display tray notifications about scanning - If checked, displays a notification message that the machine is being scanned.
Display Resident Shield related tray notifications (automatic action) - If checked, displays a notification message that Resident Shield has taken action against a threat.
Display components state change notification - If checked, displays a notification message that the state of one of the Endpoint Security components has changed.
Display Email Scanner related notifications - If checked, displays a notification message that email scanning has taken action against an email threat.
Agent Icon Menu
Display option to Enable/Disable Resident Shield in Agent Icon Menu - If checked:
Enable Security and Cancel Scan options display in the agent task menu of the managed machine.
The user can click the Enable Security option on the agent menu to turn security protection on or off.
The user can click the Cancel Scan option on the agent menu to cancel an ongoing security protection scan.
Note: The user can also enable/disable security protection remotely using Security > Security
Status (page iv).
Resident Shield
Resident shield is a memory-resident feature.
Enable Resident Shield - If checked, the following types of files are scanned as they are copied, opened or saved. If blank, no other Resident Shield options are evaluated.

xxiii
Note: You can also Enable/Disable Resident Shield by Agent Procedure (page vii).
File Types
Scan all files - If selected, all files on the managed machine are scanned.
Scan Infectible files and Selected Document Types - If selected, specifies the additional file extensions of programs and documents to include or exclude using the following options:
Exclude files with the following extensions from the scan - Specifies the file extensions of programs and documents to exclude from a scan. Excluded extensions have precedence over included extensions. Enter each extension separated by a semi-colon (;) character.
Always scan files with the following extensions - Specifies the file extensions of programs and documents to include in a scan. Enter each extension separated by a semi-colon (;) character. Resident Shield scans the following file extensions without you having to specify them: 386; ASP; BAT; BIN; BMP; BOO; CHM; CLA; CLASS; CMD; CNM; COM; CPL; DEV; DLL; DO*; DRV; EML; EXE; GIF; HLP; HT*; INI; JPEG*; JPG; JS*; LNK; MD*; MSG; NWS; OCX; OV*; PCX; PGM; PHP*; PIF; PL*; PNG; POT; PP*; SCR; SHS; SMM; SYS; TIF; VBE; VBS; VBX; VXD; WMF; XL*; XML; ZL*;
Scan files without an extension - If checked, the scan includes files without an extension.
Additional Options
Scan for Tracking Cookies - If checked, the scan includes internet browser tracking cookies. Found tracking cookies are deleted immediately and not moved to the virus vault.
Scan Potentially Unwanted Programs and Spyware threats - If checked, the scan detects executable applications or DLL libraries that could be potentially unwanted programs. Some programs, especially free ones, include adware and may be detected and reported by Endpoint Security as a Potentially Unwanted Program.
Scan files on close - If checked, files are scanned as they are closed.
Scan boot sector of removable media - If checked, the scan includes the boot sector of removable media.
Use Heuristics - If checked, scanning includes heuristic analysis. Heuristic analysis performs a dynamic emulation of a scanned object’s instructions within a virtual computing environment.
Email Scanner
Enable Email Scanner - If checked, inbound and outbound email and attachments are scanned for viruses. If blank, no other Email Protection options are evaluated.
Note: Email Scanner is not recommended for servers. See the Exchange tab below.
Email Scanning
Check Incoming Email - If checked, incoming email is scanned.
Certification: Some email clients support appending text to email messages certifying that the email
has been scanned for viruses.
Do Not Certify Email - If selected, incoming email is not certified.
Certify all Email - If selected, all incoming email is certified.
Only Certify Email with Attachments - If selected, only incoming email with attachments are certified.
Incoming Email Certification - Certification text appended to incoming email.
Check Outgoing Email - If checked, outgoing email is scanned.
Do Not Certify Email - If selected, outgoing email is not certified.

xxiv Contents
xxiv
Certify all Email - If selected, all outgoing email is certified.
Only Certify Email with Attachments - If selected, only outgoing email with attachments are certified.
Outgoing Email Certification - Certification text appended to outgoing email.
Modify Subject for Messages Marked as Virus - Adds prefix text to the subject of a message that contains a virus.
Scanning Properties
Use Heuristics - Applies to an email message. If checked, scanning includes heuristic analysis. Heuristic analysis performs a dynamic emulation of a scanned object’s instructions within a virtual computing environment.
Scan Potentially Unwanted Programs and Spyware threats - If checked, email scanning includes scanning for spyware, adware, and potentially unwanted programs.
Scan inside archives (RAR, RAR 3.0, ZIP, ARJ, CAB) - If checked, email archives are scanned.
Email Attachments Reporting (as a threat)
Report Password Protected Archives - If checked, reports password-protected archive attachments (zip, rar, etc) in email as threats.
Report Password Protected Documents - If checked, reports password-protected document attachments in email as threats.
Report Files containing macro - If checked, reports files containing macros attached to email as threats.
Report hidden extensions - If checked, reports files that use a hidden extension. Some viruses hide themselves by doubling their file extension. For example, the VBS/Iloveyou virus attaches a file,
ILOVEYOU.TXT.VBS, to emails. The default Windows setting is to hide known extensions, so the
file looks like ILOVEYOU.TXT. When you open it you do not open a .TXT text file but instead
execute a .VBS procedure file.
Move reported attachments to Virus Vault (incoming email only) - If checked, reported email attachments are moved to the virus vault. They display in the Virus Vault tab of the View Threats (page iv) page instead of in the Current Threats tab.
Full Scan
Scan Settings
Scan Potentially Unwanted Programs and Spyware threats - If checked, the scan detects executable applications or DLL libraries that could be potentially unwanted programs. Some programs, especially free ones, include adware and may be detected and reported by Endpoint Security as a Potentially Unwanted Program.
Scan for Tracking Cookies - If checked, the scan includes internet browser tracking cookies. Found tracking cookies are deleted immediately and not moved to the virus vault.
Scan Inside Archives - If checked, scanning includes archive files—such as ZIP and RAR files.
Use Heuristics - If checked, scanning includes heuristic analysis. Heuristic analysis performs a dynamic emulation of a scanned object’s instructions within a virtual computing environment.
Scan system environment - If checked, system areas are scanned before the full scan is started.
Scan infectible files only - If checked, "infectible" files are scanned based on their contents regardless of their file extensions. For example, an EXE file could be renamed but still be infected. The following types of files are considered 'infectible' files:
EXE type - COM; DRV; EXE; OV?; PGM; SYS; BIN; CMD; DEV; 386; SMM; VXD; DLL; OCX; BOO; SCR; ESL; CLA; CLASS; BAT; VBS; VBE; WSH; HTA; HTM; HTML; ?HTML; CHM; INI; HTT; INF; JS; JSE; HLP; SHS; PRC; PDB; PIF; PHP; ZL?; ASP; LNK; EML; NWS; CPL; WMF

xxv
DOC type - DO?; XL?; VBX; RTF; PP?; POT; MDA; MDB; XML; DOC?; DOT?; XLS?; XLT?; XLAM; PPT?; POT?; PPS?; SLD?; PPAM; THMX
Performance
Select System Priority for Scan - Defines how fast the scan runs and how much system resources the scan uses. You can set the scan to run as fast as possible while slowing down a computer noticeably, or you can choose that you wish the scan to run using as little system resources as possible, while prolonging the scan's run time.
Exchange
Enable AVG for Exchange Server - Enable or disable email scanning for assigned MS Exchange Servers.
Note: If you install email protection on one or more MS Exchange Servers, create a unique profile
for MS Exchange Servers and only apply this profile to these MS Exchange Servers. The Define
Profile > Exchange tab settings should only be enabled and applied to MS Exchange Servers.
Mail Certification
Enable - If checked, adds a certification note to scanned email on MS Exchange Servers. Customize the certification note in the text field.
Performance
Run scans in background - Enable or disable background scanning. Background scanning is one of the features of the VSAPI 2.0/2.5 application interface. It provides threaded scanning of the Exchange Messaging Databases. Whenever an item that has not been scanned before is encountered in users’ mailbox folders, it is submitted to AVG for Exchange 2000/2003 Server to be scanned. Scanning and searching for unexamined objects runs in parallel. A specific low priority thread is used for each database, which guarantees other tasks, for example email messages storage in the Microsoft Exchange database, are always carried out preferentially.
Scan Proactively - Enable or disable VSAPI 2.0/2.5 proactive scanning. Proactive scanning involves dynamical priority management of items in the scanning queue. Lower priority items are not scanned unless all higher priority ones have been scanned. An item’s priority rises if a client tries to use it, so an items’ precedence changes dynamically according to user activity.
Scan RTF Files - Specify whether RTF files should be scanned or not.
Scanning Threads - The scanning process is threaded by default to increase the overall scanning performance by a certain level of parallelism. The default number of threads is computed as 2 times the ‘number_ of_processors’ + 1.
Scan Timeout - The maximum continuous interval, in seconds, for one thread to access the message that is being scanned.
Exclude Dirs
Exclude Directories
Warning: Do not exclude directories unless the contents of the directories are known to be threat-free.
Add new record - Adds directories excluded from a scan. Some directories may be threat-free but contain files that are erroneously interpreted as malware.
Filename - Enter the name of the directory.

xxvi Contents
xxvi
Exclude Resident Shield Files
Exclude Resident Shield Files (Available Only on AVG2013 Resident Shield, ignored on AVG9)
Warning: Do not exclude files unless the contents of the files are known to be threat-free.
Use this tab to exclude specific files manually. This exclusion list is only active with the Resident Shield Active scan.
Add new record - Adds PUP files to exclude from a scan. Some files may be threat-free but be erroneously interpreted as potentially unwanted programs (PUPs).
Filename - Enter the name of the file.
Exclude PUPs
Exclude Potentially Unwanted Programs
Warning: Do not exclude files unless the contents of the files are known to be threat-free.
Use this tab to exclude potentially unwanted programs, or PUPs, manually. Non-PUP threats cannot be added to the PUP Exclusion List. The View Threats page provides a quicker method of identifying and excluding PUPs.
Add new record - Adds PUP files to exclude from a scan. Some files may be threat-free but be erroneously interpreted as potentially unwanted programs (PUPs).
Filename - Enter the name of the file.
Checksum - Enter the checksum value of the file. To determine the checksum value, open the AVG UI on a machine that contains the file. Select Tools > Advanced Settings. Select the PUP Exceptions property sheet. Click the Add exception button. Select the file by browsing the machine's local directory. The corresponding checksum value is displayed. Copy and paste the checksum value from the AVG UI into the Add new record dialog box of the Exclude Pups tab of Security > Define Profile.
File Size - Enter the file size in bytes. To determine the file size, right-click the file in Windows Explorer and check the Size value in bytes.
Updates
Use this tab to configure how AVG updates are downloaded.
Proxy Settings
Enables/disables using a proxy server to download AVG updates.
Don't use proxy - Disables proxy settings.
Use proxy - Enables proxy settings.
Try connection using proxy, and if it fails, connect directly - Enables proxy settings. If proxy fails, connects directly.
The Manual and Auto settings apply if a proxy option above is selected.
Manual - Sets proxy settings manually.
Server - Enter a valid proxy server name or IP address.
Port - Enter a port number.
Use PROXY authentication - If checked, proxy authentication is required.
Username - If Use PROXY authentication is checked, enter a valid username.
Password - If Use PROXY authentication is checked, enter a valid password.
Auto - Sets proxy settings automatically.

xxvii
From browser - Select a default browser from the drop-down menu to set proxy settings.
From script - Enter the full path of a script that specifies the proxy server address.
Auto detect - Attempts to get the settings from the proxy server directly.
Update URL
AVG provides a default URL to download updates. You can preferentially download updates from a custom URL.
Use Custom Update URL - Select this option to preferentially download updates from a custom URL.
Name - Enter the name of the custom update URL.
URL - Enter the URL.
Assign Profile Security > Assign Profile
The Assign Profile page assigns security profiles to machine IDs licensed to use Endpoint Security. Security profiles are defined using Security > Define Profile (page xx).
The list of machine IDs you can select depends on the machine ID / group ID filter and the scope you are using. To display on this page, machine IDs must have the Endpoint Security client software installed on the managed machine using the Security > Installation (page xv) page.
Actions
Apply Configuration - Click Apply Configuration to apply the security profile displayed in the Select Profile drop-down box to selected machine IDs.
Select Profile - Select a security profile to apply to selected machine IDs.
Only display machines with the selected profile - If checked, filters the paging area by the selected security profile.
Table Columns
Check-in Status - These icons indicate the agent check-in status of each managed machine. Hovering the cursor over a check-in icon displays the agent Quick View window.
Online but waiting for first audit to complete
Agent online
Agent online and user currently logged on.
Agent online and user currently logged on, but user not active for 10 minutes
Agent is currently offline
Agent has never checked in
Agent is online but remote control has been disabled
The agent has been suspended
An agent icon adorned with a red clock badge is a temporary agent.
(Select All Checkbox) - Click this checkbox to select all rows in the paging area. If checked, click this checkbox to unselect all rows in the paging area.
Machine.Group ID - A unique machine ID / group ID / organization ID name for a machine in the VSA.
Profile Name - Displays the security profile assigned to a machine ID. Displays the status of the machine ID if there is a problem.

xxviii Contents
xxviii
Log Settings Security > Log Settings
The Log Settings page specifies the number of days to keep security protection log data for machine IDs licensed to use Endpoint Security. Certain machines, such as web servers, may warrant maintaining a longer history of virus attacks then other types of machines.
The list of machine IDs you can select depends on the machine ID / group ID filter and the scope you are using. To display on this page, machine IDs must have the Endpoint Security client software installed on the managed machine using the Security > Installation (page xv) page.
Actions
Apply Configuration - Click Apply Configuration to apply the number of days specified in the <N> days to keep log entries field to selected machine IDs.
<N> days to keep log entries - Enter the number of days to maintain security protection log data.
Table Columns
Check-in Status - These icons indicate the agent check-in status of each managed machine. Hovering the cursor over a check-in icon displays the agent Quick View window.
Online but waiting for first audit to complete
Agent online
Agent online and user currently logged on.
Agent online and user currently logged on, but user not active for 10 minutes
Agent is currently offline
Agent has never checked in
Agent is online but remote control has been disabled
The agent has been suspended
An agent icon adorned with a red clock badge is a temporary agent.
(Select All Checkbox) - Click this checkbox to select all rows in the paging area. If checked, click this checkbox to unselect all rows in the paging area.
Machine.Group ID - A unique machine ID / group ID / organization ID name for a machine in the VSA.
Log Days Before Expiration - Shows the number of days security protection log data is maintained for a machine ID.
MS Exchange
Exchange Status Security > Exchange Status
The Exchange Status page displays the status of email protection on MS Exchange servers that have Endpoint Security installed on them. During the install of Endpoint Security on a machine, if MS Exchange is detected, the plugin for MS Exchange email protection is automatically installed. Servers with Exchange can be excluded from using Exchange mailbox protection using the Define Profile (page xx) page.
Note: Any malware detected by MS Exchange Server email protection is immediately deleted from the
MS Exchange Server and displays only on the Virus Vault tab of the View Threats (page x) page.

xxix
The list of machine IDs you can select depends on the machine ID / group ID filter and the scope you are using. Also, the machine ID must have MS Exchange Server installed on the machine.
Mailboxes Protected / Mailbox Licenses
Displays both the number of Exchange Server mailboxes protected and the number of mailbox licenses used and available. Licensing is enforced and a license is needed for every mailbox in use.
Note: See Endpoint Security Licensing in the Security Overview (page i) topic.
Actions
Remove - Uninstalls the Exchange installation.
Cancel Pending Action - Cancels the removal of Exchange protection.
Table Columns
Check-in Status - These icons indicate the agent check-in status of each managed machine. Hovering the cursor over a check-in icon displays the agent Quick View window.
Online but waiting for first audit to complete
Agent online
Agent online and user currently logged on.
Agent online and user currently logged on, but user not active for 10 minutes
Agent is currently offline
Agent has never checked in
Agent is online but remote control has been disabled
The agent has been suspended
An agent icon adorned with a red clock badge is a temporary agent.
(Select All Checkbox) - Click this checkbox to select all rows in the paging area. If checked, click this checkbox to unselect all rows in the paging area.
Machine.Group ID - A unique machine ID / group ID / organization ID name for a machine in the VSA.
Install Status - If checked, Endpoint Security client software is installed on the machine ID. If the agent software is earlier than 4.7.1, the message Requires Agent Update displays. If blank,
Endpoint Security client software is not installed on the machine ID.
Install Source - If a file source is defined using Patch Management > File Source (http://help.kaseya.com/webhelp/EN/VSA/9050000/index.asp#366.htm), then installs are sourced from this location. Otherwise, installs are sourced from the internet. If the option Download from Internet if machine is unable to connect to the file server is selected in Patch Management>File Source:
During a Endpoint Security v2.x endpoint install, if the files source is down or credentials invalid, the installer is downloaded from the Kaseya Server and completes the endpoint install.
During a Endpoint Security v2.x manual update, if the files source is down or credentials invalid, the update is downloaded from the internet.
In both cases above, the View Logs (page xii) page displays an error message stating why the file source failed and that it is trying to download from the internet.
Mailboxes - The number of email accounts on the MS Exchange Server.
Installed On - The date MS Exchange Server email protection was installed on the machine ID.

xxx Contents
xxx
Security Alarms
Define Alarm Sets Security > Define Alarm Sets
The Define Alarm Sets page defines sets of alarm conditions used to trigger alarms using the Apply Alarm Sets (page xxx) page.
Actions
Save - Save the alarm set.
Save As - Save an alarm set to a new name.
Delete - Delete an alarm set.
Share - Displays if you own a selected alarm set. Share this alarm set with users, user roles or to make public for all users. Share rights are assigned by object. There are three sharing checkbox options. The first two checkboxes are mutually exclusive and determine what share rights are assigned. If neither of the first two checkboxes are checked, the shared object can only be seen by the users given share access, but the object cannot be used nor edited. The Shared and Not Shared list boxes and the third checkbox determine who can see the object.
Allow other administrators to modify - If checked, share rights to the object includes being able to use it, view its details and edit it.
Other administrators may use but may not view or edit - If checked, share rights to the object only allows using it.
Make public (seen by all administrators) - If checked, ensures that all current and future VSA users can see the object. If blank, only selected user roles and users can see the shared object. If blank, and new users or user roles are added later, you have to return to this dialog to enable them to see the specific object.
Take Ownership - Displays if you do not own a selected public alarm set. Click to take ownership (http://help.kaseya.com/webhelp/EN/VSA/9050000/index.asp#5537.htm) and make changes to the alarm set.
To Create a New Alarm Set
1. Select <No Alarm Sets Saved> in the Select Profile drop-down list. Alternatively you can select an
existing alarm set and click Save As.
2. Check one or more alert condition checkboxes.
3. Use the Ignore additional alarms for <N> <periods> to specify the number of minutes to ignore the same set of alert conditions. Set to 0 to trigger an alarm each time an alert condition occurs.
4. Click Save to save the alarm set.
To Delete an Alarm Set
1. Select an alarm set from the Select Profile drop-down list.
2. Click Delete to delete the alarm set.
Ignore additional alarms <N> <periods>
Specify the number of periods you want the same type of alarm to be ignored after the first alarm is triggered.
Alarm Conditions
Check any of the following types of alarm conditions to include it in a Endpoint Security alarm set.
Threat Detected and Not Healed - A threat has been added to the Current Threats tab of the View Threats (page x) page that could not be automatically healed

xxxi
Protection Disabled - Security protection has been disabled.
Definition Updated - Security protection has been updated with the latest version of Endpoint Security.
Scheduled Scan Completed - A security protection scan has been completed.
Reboot Required - A reboot is required.
Protection Enabled - Security protection has been enabled.
Service Error - The Endpoint Security service has stopped.
Definition Not Updated in <N> Days - Security protection has not been updated for the specified number of days.
Scheduled Scan Did Not Complete - A scheduled security protection scan did not complete.
AVG Removed by User - A machine user has uninstalled the AVG client from the managed machine.
Apply Alarm Sets Security > Apply Alarm Sets
The Apply Alarm Sets page creates alerts in response to security protection alert conditions defined using Define Alarm Sets (page xxix). The alarms sets are applied to selected machine IDs licensed to use Endpoint Security.
The list of machine IDs you can select depends on the machine ID / group ID filter and the scope you are using. To display on this page, machine IDs must have the Endpoint Security client software installed on the managed machine using the Security > Installation (page xv) page.
The page provides you with four actions:
Apply - Apply a selected alarm set to selected machine IDs.
Remove - Remove a selected alarm set from selected machine IDs.
Remove All - Remove all alarm sets assigned to selected machine IDs.
To Create an Alert
1. Check any of these checkboxes to perform their corresponding actions when an alert condition is encountered:
Create Alarm
Create Ticket
Run Script
Email Recipients
2. Set additional email parameters.
3. Select an alarm set.
4. Check the machine IDs to apply the alarm set to.
5. Click Apply to assign the alarm set to selected machine IDs.
To Cancel an Alert
1. Select machine ID checkboxes.
2. Click Remove to remove the assigned alarm set from selected machine IDs.
Options
Create Alarm - If checked and an alert condition is encountered, an alarm is created. Alarms are displayed in Monitor > Dashboard List, Monitor > Alarm Summary and Info Center > Reporting > Reports > Logs > Alarm Log.
Create Ticket - If checked and an alert condition is encountered, a ticket is created.

xxxii Contents
xxxii
Run Script after alert - If checked and an alert condition is encountered, an agent procedure is run. You must click the select agent procedure link to choose an agent procedure to run. You can optionally direct the agent procedure to run on a specified range of machine IDs by clicking this machine ID link. These specified machine IDs do not have to match the machine ID that encountered the alert condition.
Email Recipients - If checked and an alert condition is encountered, emails are sent to the specified email addresses. Email is sent directly from the VSA to the email address specified in the alert. Set the From Address using System > Outbound Email.
Select an Alarm Set - Select an alarm set to apply to selected machine IDs.
Table Columns
(Check-in Status) - These icons indicate the agent check-in status of each managed machine. Hovering the cursor over a check-in icon displays the agent Quick View window.
Online but waiting for first audit to complete
Agent online
Agent online and user currently logged on.
Agent online and user currently logged on, but user not active for 10 minutes
Agent is currently offline
Agent has never checked in
Agent is online but remote control has been disabled
The agent has been suspended
An agent icon adorned with a red clock badge is a temporary agent.
(Select All Checkbox) - Click this checkbox to select all rows in the paging area. If checked, click this checkbox to unselect all rows in the paging area.
Machine.Group ID - A unique machine ID / group ID / organization ID name for a machine in the VSA.
Alarm Set - Lists the alarm sets assigned to each machine ID.
ATSE - The ATSE response code assigned to machine IDs or SNMP devices:
A = Create Alarm
T = Create Ticket
S = Run Agent Procedure
E = Email Recipients
Email Address - A comma separated list of email addresses where notifications are sent.
Security Reporting The following data sets are available to support the creation of custom Endpoint Security report definitions and report templates. They are located in the Info Center > Configure & Design > Report Parts.
KES Alarm Set
KES Alarm Set Assignment
KES Event Log
KES Exchange Status
KES Machine Status
KES Threats
KES Threat Statistics
In addition, the following legacy "fixed format" report definitions are provided.
Security Overview ........................................................................................................................................ i

xxxiii
Endpoint Security Module Minimum Requirements ............................................................................... iii
Protection .................................................................................................................................................... iii
Dashboard ........................................................................................................................................... iii
Security Status .................................................................................................................................... iv
Enable/Disable Resident Shield by Agent Procedure ............................................................ vii
Manual Update .................................................................................................................................. viii
Schedule Scan .................................................................................................................................... ix
View Threats ......................................................................................................................................... x
View Logs ........................................................................................................................................... xii
License ...................................................................................................................................................... xiii
Extend/Return ................................................................................................................................... xiii
Notify .................................................................................................................................................. xiv
Configure .................................................................................................................................................... xv
Installations ........................................................................................................................................ xv
Installing or Upgrading an Endpoint ..................................................................................... xviii
Installation Options .................................................................................................................. xix
Define Profile ...................................................................................................................................... xx
Assign Profile .................................................................................................................................. xxvi
Log Settings ................................................................................................................................... xxvii
MS Exchange ........................................................................................................................................ xxviii
Exchange Status ........................................................................................................................... xxviii
Security Alarms ...................................................................................................................................... xxix
Define Alarm Sets ........................................................................................................................... xxix
Apply Alarm Sets ............................................................................................................................. xxx
Security Reporting ................................................................................................................................ xxxii
Executive Summary - Endpoint Security ................................................................................... xxxiii
Security - Configuration ............................................................................................................... xxxiv
Security - Security ........................................................................................................................ xxxiv
Security - Historical Threats ........................................................................................................ xxxiv
Security - KES Log ........................................................................................................................ xxxv
Index ........................................................................................................................................................... 37
In This Section
Executive Summary - Endpoint Security xxxiii Security - Configuration xxxiv Security - Security xxxiv Security - Historical Threats xxxiv Security - KES Log xxxv
Executive Summary - Endpoint Security
Executive Summary
The Info Center > Reporting > Reports > Executive Summary report includes a section called Endpoint Security Last N Days. It includes the following statistics.

xxxiv Contents
xxxiv
Total threats detected
Current Active Threats
Current Threats in Vaults
Threats Resolved
Scans Completed
Updates Performed
Machines with KES installed
The Network Health Score of the Executive Summary includes an Endpoint Score category. Untreated threats are the threats that are listed on the Current Threats tab of the Security > View Threats (page x) page. Untreated threats represent potential system problems. The number of untreated threats generated by each machine over the specified period of time is scored as follows:
0 untreated threats 100%
1 to 4 untreated threats 75%
5 to 10 untreated threats 50%
more than 10 untreated threats 25%
You can adjust how heavily each category effects the total Network Health Score by adjusting the weight value for each category. Weights range from 0 to 100. Set the weight to zero to turn off that category.
Security - Configuration Info Center > Reporting > Reports > Security > Configuration
Displays only if the Security add-on module is installed.
Similar information is provided using Security > Security Status (page iv), View Logs (page xii), and View Threats
(page x).
The Security - Configuration report definition generates reports for the following types of security data maintained by the VSA.
Install Time
Installer
Version
License Expiration
Assigned Profile
Profile Details
Alarm Settings
Security - Security Info Center > Reporting > Reports > Security > Current Threats
Displays only if the Security add-on module is installed.
Similar information is provided using Security > Security Status (page iv), View Logs (page xii), and View Threats
(page x).
The Security - Current Threats report definition generates reports for the following types of security data maintained by the VSA.
Summary
Threat Category Summary
Current Threats

xxxv
Time Range
Select the Time Range Type - Filters by a fixed type of date range.
Number Of Days - Applies only if Last N Days is selected time range type.
Custom Start DateTime - Applies only if Fixed Range is select time range type.
Custom End DateTime - Applies only if Fixed Range is select time range type.
Security - Historical Threats Info Center > Reporting > Reports > Security > Historical Threats
Displays only if the Security add-on module is installed.
Similar information is provided using Security > Security Status (page iv), View Logs (page xii), and View Threats
(page x).
The Security - Historical Threats report definition generates reports for the following types of security data maintained by the VSA.
Summary
Threat Category Summary
Current Threats
Time Range
Select the Time Range Type - Filters by a fixed type of date range.
Number Of Days - Applies only if Last N Days is selected time range type.
Custom Start DateTime - Applies only if Fixed Range is select time range type.
Custom End DateTime - Applies only if Fixed Range is select time range type.
Security - KES Log Info Center > Reporting > Reports > Security - KES Log
Displays only if the Security add-on module is installed.
Agent > Agent Logs displays log entries by log type and machine ID.
The KES Log report definition generates a report of Endpoint Security log entries by machine ID.
Configure your report definition using the following parameters:
Number of days to query log* - Number of days back from the current date/time to include in the report.
Show entries matching the following description (use * for wildcards) - Enter a string to filter entries by their description. Include an asterisk (*) wildcard with the text you enter to match multiple records.
Ignore machines without data - Check this box to only display machine IDs that have data matching the other filter parameters.


Index
37
Index A
Apply Alarm Sets • xxxi Assign Profile • xxvii
C
Configure • xvi
D
Dashboard • iii Define Alarm Sets • xxx Define Profile • xxi
E
Enable/Disable Resident Shield by Agent Procedure • vii
Endpoint Security Module Minimum Requirements • iii Exchange Status • xxviii Executive Summary - Endpoint Security • xxxiii Extend/Return • xiii
I
Installation Options • xx Installations • xvi Installing or Upgrading an Endpoint • xviii
L
License • xiii Log Settings • xxviii
M
Manual Update • viii MS Exchange • xxviii
N
Notify • xv
P
Protection • iii
S
Schedule Scan • x Security - Configuration • xxxiv Security - Historical Threats • xxxv Security - KES Log • xxxv Security - Security • xxxiv Security Alarms • xxx Security Overview • i Security Reporting • xxxii Security Status • v
V
View Logs • xii View Threats • xi


