

7/27/2019 Goblin Slayer 3 Player
http://slidepdf.com/reader/full/goblin-slayer-3-player 1/6
Goblin Slayer is copyright Digital Eel. No infringement intended
GOBLIN SLAYER -Advanced Rules
This document sets out some advanced rules for Goblin Slayer. It allows the
Goblin Player to field a much wider array of monsters against the intrepid
heroes – that’s right, heroes plural.
The great advantages given to the Goblin Player from an extended bestiary are
balanced by the Hero Player having control of 2 heroes chosen from a
selection of Dwarf, Barbarian, Elf and Wizard! You can even have 2 players
control the heroes against a single Goblin player for a 3 player experience.
Note that the Dwarf also gains an extra skill and Hero Stones are also boosted
in power in order to help balance the game. Ogres have been downgraded in
power, and their regenerative skills give to the Troll Special Monster. Even
with this, they still remain a formidable foe!
SET UP
The Hero Player chooses 2 heroes to enter the caverns – he can choose 2 of the
same type of hero (2 Wizards for example), though it is recommended that he
take two different types of hero, as this will increase his options in the game
and help him combat certain monsters that are best suited to that particular
heroes skills.
The heroes start outside the dungeon
and spend 1 movement to enter the red
hex, and a second movement to enter any of the yellow hexes as outlined in
this diagram:
The Hero Player chooses which hero acts first in any given phase – So in the
“Hero Moves” phase, he might move his Wizard first then his Barbarian, but
does not need to stick to this pattern on subsequent phases or turns.
Variant-Rules V1.1

7/27/2019 Goblin Slayer 3 Player
http://slidepdf.com/reader/full/goblin-slayer-3-player 2/6
DWARF PLAYER
Movement: The Dwarf can move 0, 1 or 2 hexes.
However, if the Dwarf moves more than one hex he
cannot make an attack during this turn.
Sweep Attack: Roll 1 die and divide the result by 2. so a result of 1-2 is 1
wound, 3-4 is 2 wounds and 5-6 is 3 wounds.
Lunge: Rather than using his sweep attack, the Dwarf Player selects one
Goblin or other small monster adjacent to the Dwarf. The monster is
automatically killed and the Dwarf is immediately moved into its hex.
Tough: If the Dwarf is wounded (in any way) the dice must be rerolled. If
another wound is caused by the second result, the Dwarf is dead (unless he can
spend a Hero Stone to avoid the wound). However, if the second roll fails to
wound the Dwarf, the Dwarf does not die and instead counts as stunned. This
means that he misses his next “Hero Moves” or “Hero Attacks” phase(whichever comes first).
Small: A Dwarf counts as small for calculating line of sight.
BARBARIAN PLAYER
Movement: The Barbarian can move 0, 1 or 2 hexes.
Sweep Attack: Roll 2 dice and divide the highest of the two rolls by 2 (see
Savage skill) so a result of 1-2 is 1 wound, 3-4 is 2 wounds and 5-6 is 3 wounds.
Lunge: Rather than using his sweep attack, the Barbarian Player selects one
Goblin or other small monster adjacent to the Barbarian. The monster is
automatically killed and the Barbarian is immediately moved into its hex.
Savage: The Barbarian rolls two dice when attacking and may choose the
higher result. However, if the roll results in doubles, then the Barbarian
counts as frenzied – in the next turns “Hero Moves” phase, the Barbarian must
move adjacent to a monster if there is a monster within range (The BarbarianPlayer chooses if more than one monster is available). At the end of the “Hero
Moves” phase, the frenzy passes (until another double is rolled!).
ELF PLAYER
Movement: The Elf can move 0, 1 or 2 hexes. However,
when attacking, deduct 1 from the Elf’s dice roll if the Elf
has moved. So if the Elf moves two hexes and the attack
roll is 1, the result is 0 and no monsters are removed.
Sweep Attack: Roll 1 die and divide the result by 2 after deductions (see Elf
movement) so a result of 1-2 is 1 wound, 3-4 is 2 wounds and 5-6 is 3 wounds.
Elven Bow: If the Elf has no monsters adjacent to him during his “Hero
Moves” phase, he may choose to fire an arrow at a monster rather than move a
hex. The monster must be within line of sight as shown in the following
diagram:

7/27/2019 Goblin Slayer 3 Player
http://slidepdf.com/reader/full/goblin-slayer-3-player 3/6
With his movement allowance of 2 he could move/move, move/fire, fire/move
or fire/fire. Note that firing arrows also counts as an action, so the Elf ’s sweep
attack would still be at -1 if he had fired arrows rather than moved 2 hexes.
Along the rows of hexes that the Elf can see directly down, (the black arrows),
simply count the number of hexes between the Elf and the monster (including
the monsters hex) and that is the number you must roll equal or above to kill
it. The Elf can also fire across rows (the white arrows), but can only hit the
hexes that are in a line with his own.
You can see that firing upwards in the diagram, the Elf can hit for 2, 4 and 6 in
that line. There’s a pesky Goblin hiding very close, but he can’t be targeted,
giving the Goblin Player a few tactical options to avoid dying and to creep up
on the Elf.
Cave walls block line of sight if a wall forms part of the row (along the black
arrows) or if the cave wall crosses both hexes along the white arrow
Line of sight is blocked by walls or any monsters that are not small (For
example, Goblins count as small). Small monsters only block line of sight to
other small targets or empty hexes (for the purposes of the Wizard ’s fireball
spell – See the Wizard Player section).
Remember that the Elf cannot fire if there is a monster in an adjacent hex. If
the Elf starts his “heroes move” phase next to a monster, he could move 1 hex
away and then fire with his other action.
Monsters with 2 wounds, (such as Trolls or Zombies for example) have to be
hit twice by a long range attack in a single action to kill them. If the Elf
targets a monster with 2 wounds, he must use his entire movement allowance
for that “Hero Moves” phase and roll both dice together. Both dice must hit
the monster - If just one die result misses, then the monster ignores the other
wound and the Elf has wasted both of his actions
Dodge: The Elf has an additional move he can use during the “Monsters
Attack” phase. He may move one hex after any adjacent monsters have
attacked. He can dodge to any adjacent unoccupied hex. Note that the Elf can
do this even when he has not been attacked.
WIZARD PLAYER
Movement: The Wizard can move 0, 1 or 2 hexes.
However, when attacking, deduct 1 from the Wizard ’s
dice roll for each hex moved by the Wizard. So if the
Wizard moves two hexes and the attack roll is 2, the
result is 0 and no monsters are removed.
Sweep Attack: Roll 1 die and divide the result by 3 after deductions (see
Wizard Movement) so a result of 1-3 is 1 wound, and 4-6 is 2 wounds.
Magic: The Wizard may cast one of three spells in the “Hero Moves” phase
for free. He can cast spells even if there are monsters in an adjacent hex. The
Wizard must follow line of sight rules as shown in the following diagram:

7/27/2019 Goblin Slayer 3 Player
http://slidepdf.com/reader/full/goblin-slayer-3-player 4/6
Fireball: The Wizard can nominate a single hex to cast a fireball at. The hex
must be in line of sight following the same rules as the elven bow (including
the range restriction of 6 spaces). However, no die roll is required to hit the
hex – so long as the Wizard has line of sight, his attack automatically hits. The
Wizard can even target an empty hex. Roll a die. This is the number of points
of damage that can be distributed between the hex that has been nominated
(the orange hex) and any adjacent hexes (red hexes). The first point of damage
must be assigned to the nominated (orange) hex, even if that hex is empty.Any other damage must be assigned by the Goblin Player to monsters in the
area affected - they cannot assign damage to an empty hex.
For example, the Wizard fires the fireball along the white arrow in the
diagram. He rolls the die and gets a result of 2. He must spend 1 point of
damage in the orange space and the second point eliminates one of the two
Goblins in the adjacent hexes. If he fired along the black arrow with the same
result of 2, the Ogre takes one hit (for being on the orange hex) which is
rerolled, as the Ogre is Tough (see Ogre). The Goblin Player then assigns the
other point of damage to the Goblin.
Lightning: The Wizard can fire a lightning bolt along any straight row of hexes
from the hex he is on (the black arrows on the Elf line of sight diagram). He
rolls one die and must cause that much damage along the row that he has
nominated. He must spend 1 point of damage to move through an empty hex.
For example, the Wizard fires along the blue corridor of hexes as shown in the
diagram. He rolls 5, so spends 1 point to enter the empty space, another 2 to
kill the Ogre and then another to enter the empty space behind him. He has
one point left, so kills the Goblin behind the Ogre before the power runs out.
If a hero (including the Wizard himself) is in or adjacent to the hex that a
fireball is aimed at or is hit by lightning, he must roll a die to see if he has been
killed – if the die roll is less than or equal to the roll made by the Wizard to
determine the spells strength, the hero is killed.
Ghost Walking: The Wizard can move through solid walls or even through
monsters and other obstacles. However, he cannot end the “Hero Moves”
phase on a solid wall hex or a hex that contains a monster/obstacle.
SPECIAL MONSTERS
The Goblin Player starts with an active pool of 12 Goblins. These Goblins are
the most basic kind of monster and also act as the Goblin Player s “currency”
for buying stronger Special Monster types. The Goblin Player can only place
monsters (Special or Goblins) into play (that is onto the board) from the active
pool.
All other Special Monsters are placed in the staging pool. You will need:
3 Goblin Archers 3 Goblin Netters
3 Orcs 2 Orc Archers
2 Trolls 2 Ogres
3 Zombies 2 Ghouls
2 Death Knights 2 Dark Elves
3 Were-Rats
Before play starts, the Goblin Player must choose no more than 4 of the above
monster types as his available special monsters, which are placed in the staging
pool. The Goblin Player starts with 12 goblins in his active pool, but can “buy”
these monsters during the game using his basic supply of Goblins. He moves a
set number of Goblins from the active pool into the staging pool in order to
replace them with a Special Monster from the staging pool.
For example, to buy an Ogre costs 3 Goblins. The Goblin Player removes 3
Goblins from his active pool and places them in the staging pool. He then
moves the Ogre from the staging pool to the active pool. This action is carried
out at the end of the “Monsters Appear” phase.
When a Special Monster is killed, it is placed in a third discard pool, and can
only be bought back into play by discarding a Goblin permanently. Dead
Goblins are unique in that they return to the staging pool instead of the
discard pool.
The Goblin Player can never have more than 6 Goblins in the staging pool at
any one time. He can trade in any of the Special Monsters in his active pool
for their Goblin value (e.g. regain 3 Goblins to the active pool from the staging
pool by trading in an Ogre). They can only be traded in:
7/27/2019 Goblin Slayer 3 Player
http://slidepdf.com/reader/full/goblin-slayer-3-player 5/6
A: when the Special Monster is killed – you must return the appropriate
number of Goblins back into your active pool from the staging pool. The
Special Monster is placed in the discard pool.
B: when removing the Special Monster from the board by having it re-enter a
tunnel. Rather than putting the monster back into the active pool, the Goblin
Player may choose to trade them in for their Goblin value. Place the correct
number of Goblins from the staging pool back into the active pool instead and
the Special Monster back into the staging pool.
The Goblin Player can only retrieve Special Monsters from the discard pool by
permanently adding one Goblin to the discard pool. Once a Goblin has been
placed in the discard pool, it cannot be retrieved and the Goblin Players total
pool of Goblins is reduced by 1. The Goblin Player can buy back all Special
Monsters of the same type from the discard pool for each Goblin permanently
discarded.
Example 1: The Goblin Player has played both Orc Archers into the battle, but
both have been killed and are now in the discard pool. He has also played and
lost an Ogre. The Goblin Player can discard 1 Goblin to return both Orc
Archers to the staging pool, or the Ogre. He could discard 2 Goblins to buy
back both archers and the Ogre. However, should he spend those 2 Goblins,
he will be reduced to a maximum of 10 Goblins worth of monsters to field into
the battle at any one time.
Example 2: The Goblin Player has played his three Goblin Archers into thebattle, but two have been killed and are now in the discard pool. The third
Goblin Archer is still in play. The Goblin Player can discard 1 Goblin to
return both Goblin Archers to the staging pool, or he might wish to wait until
all 3 Archers are in the discard pool, as the price for retrieving all 3 will be the
same as for the 2 already in the discard pool.
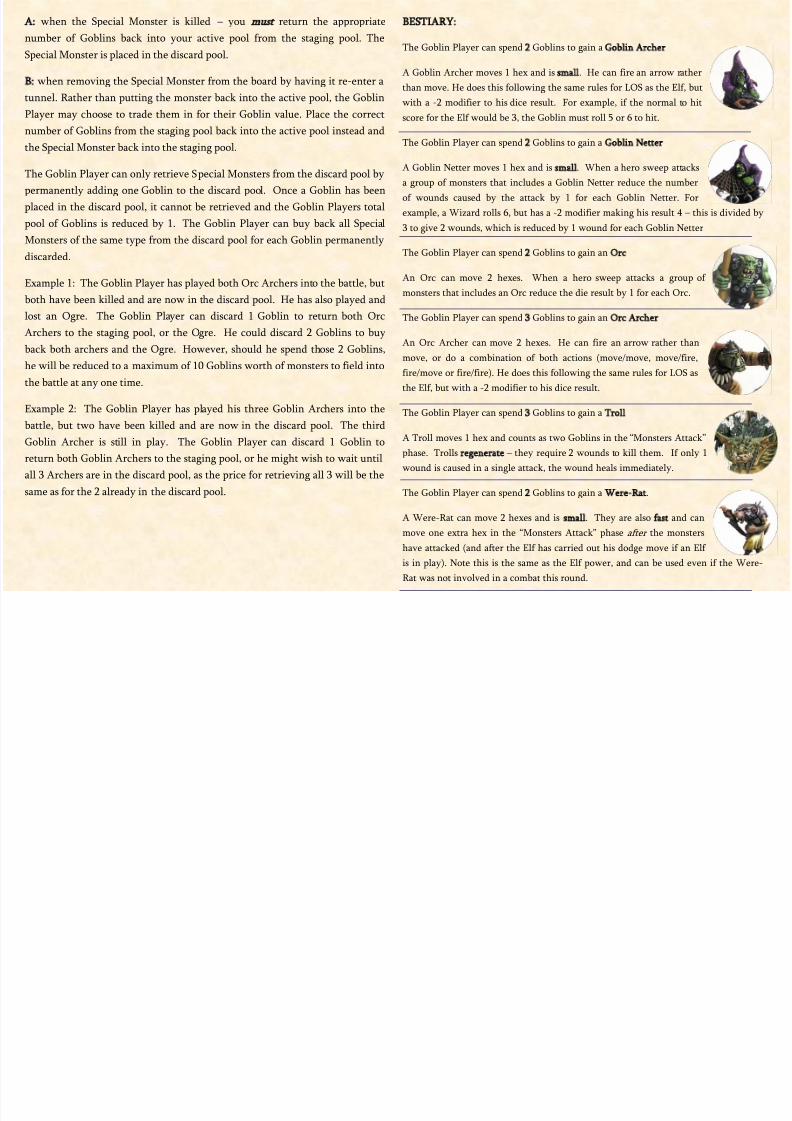
BESTIARY:
The Goblin Player can spend 2 Goblins to gain a Goblin Archer
A Goblin Archer moves 1 hex and is small. He can fire an arrow rather
than move. He does this following the same rules for LOS as the Elf, but
with a -2 modifier to his dice result. For example, if the normal to hit
score for the Elf would be 3, the Goblin must roll 5 or 6 to hit.
The Goblin Player can spend 2 Goblins to gain a Goblin Netter
A Goblin Netter moves 1 hex and is small. When a hero sweep attacks
a group of monsters that includes a Goblin Netter reduce the number
of wounds caused by the attack by 1 for each Goblin Netter. For
example, a Wizard rolls 6, but has a -2 modifier making his result 4 – this is divided by
3 to give 2 wounds, which is reduced by 1 wound for each Goblin Netter
The Goblin Player can spend 2 Goblins to gain an Orc
An Orc can move 2 hexes. When a hero sweep attacks a group of
monsters that includes an Orc reduce the die result by 1 for each Orc.
The Goblin Player can spend 3 Goblins to gain an Orc Archer
An Orc Archer can move 2 hexes. He can fire an arrow rather than
move, or do a combination of both actions (move/move, move/fire,
fire/move or fire/fire). He does this following the same rules for LOS as
the Elf, but with a -2 modifier to his dice result.
The Goblin Player can spend 3 Goblins to gain a Troll
A Troll moves 1 hex and counts as two Goblins in the “Monsters Attack”
phase. Trolls regenerate – they require 2 wounds to kill them. If only 1
wound is caused in a single attack, the wound heals immediately.
The Goblin Player can spend 2 Goblins to gain a Were-Rat.
A Were-Rat can move 2 hexes and is small. They are also fast and can
move one extra hex in the “Monsters Attack” phase after the monsters
have attacked (and after the Elf has carried out his dodge move if an Elf is in play). Note this is the same as the Elf power, and can be used even if the Were-
Rat was not involved in a combat this round.

7/27/2019 Goblin Slayer 3 Player
http://slidepdf.com/reader/full/goblin-slayer-3-player 6/6
The Goblin Player can spend 2 Goblins to buy a Zombie.
A Zombie moves 1 hex. Zombies require 2 wounds to kill them and
regenerate (see Troll), but are stunned if hit for 1 wound – a stunned
monster misses its next “Monsters Attack” AND “Monsters Move”
phase, but can then move and attack as normal.
When a Zombie is killed, place a Zombie Marker on the board on the hex the Zombie
was killed. A Zombie Marker reanimates if there is a hero within 2 hexes distance at
the start of the “Monsters Move” phase. Replace the marker with a Zombie if there is
one available in the active pool. Zombie markers do not block movement or los.
The Goblin Player can spend 3 Goblins to buy a Death Knight.
A Death Knight can move 2 hexes and counts as two Goblins in the
“Monsters Attack” phase. Death Knights are Armoured – if a wound
is caused, reroll the die. If the second result is equal or higher to the
first roll, then the Death Knight is killed, but if it is less then the Death Knight
survives. If two Death Knights are hit in a single action, both roll again separately.
The Goblin Player can spend 3 Goblins to gain a Ghoul .
The Ghoul can move 2 hexes. Ghouls require 2 wounds to kill them
and regenerate (see Troll), but are stunned if hit for 1 wound – (see
Zombie). A ghoul’s attack is poisoned. Roll a separate dice in combat
– If the result is less than or equal to the number of monsters with the poisoned ability
in the combat, the hero is poisoned (give the hero a poisoned marker). Reduce any
combat dice roll results (including Elven Bow/Wizard ’s magic) made by the hero by 1.
The Goblin Player can spend 3 Goblins to gain an Ogre.
The Ogre can move 2 hexes and counts as two Goblins in the
“Monsters Attack” phase. Ogres are tough – if a wound is caused, reroll
the die. If the second result is equal or higher to the first roll, then the
Ogre is killed, but if it is less then the Ogre is merely stunned – (see Zombie). If two
Ogres are hit in a single action, both roll again separately.
The Goblin Player can spend 3 Goblins to gain a Dark Elf.
The Dark Elf can move 2 hexes. Dark Elves are tough (see Ogre). They
are also fast (see Were-Rat ) and have a poisoned attack (see Ghoul ).
HERO STONES
To help the heroes fight against the more dangerous hordes the advanced rules
introduce, the Hero Stones powers are boosted in the following ways:
Vorpal Axe – The value of any dice rolled in a sweep attack is not divided.
The Elf can also double a single die result when shooting arrows. The Wizard
can also double his result when rolling for fireball or lightning. For example,
an Elf’s sweep attack roll is 4. The Elf moved 1 hex in the “hero Moves” phase,
so the result is reduced by 1 to give 3 wounds.
Note the hero can choose to use this power after rolling the dice.
Quickening – The hero can repeat the “Hero Moves” phase as soon as they
have completed it. Any movement taken in the first phase is ignored for the
purposes of calculating subsequent combats - So the Dwarf could move 2
hexes, and then use the quickening power to repeat his “Hero Moves” phase.
In the second phase, he could move just one hex and would still be able toattack, despite having moved 3 hexes in total – only his actions in the second
phase affect his combat ability. Similarly, the Elf could move 1 hex, fire his
bow and then use the Quickening power. He could then move a further 2
hexes and then sweep attack at only -1 to his die roll, even though he has
carried out 4 actions (move/fire/move/move).
Invulnerable Shield – Use a Hero Stone to avoid any wound.
Healing – Use a Hero Stone to remove a poison effect.
The Power of the Hero Stones. If a Hero holds more than 1 Hero Stone, he
gets +1 to all of his combat dice roll results (including the Elf’s ranged attack
and the Wizard’s Fireball and Lightning spells).
Hero Stones are held by the Hero that picks them up – they cannot be traded
between Heroes. Each Hero starts with 1 Hero Stone.
These rules were created by Leigh Shepherd – you can find me on Boardgamegeek.com. They
have been lightly playtested - All comments and suggestions welcome!


