
High-Speed Plasmid Mini Kit For research use only Sample : 1-4 ml of cultured bacterial cells
Yield : up to 30 µg of plasmid/cosmid DNA
Format : spin column
Operation time: within 30 minutes
Elution volume: 50-100 µl
Revised: 3/14/09
Introduction The High-Speed Plasmid Mini Kit was designed for rapid isolation of plasmid or cosmid DNA from 1-4 ml of cultured
bacterial cells. Modified Alkaline Lysis method (1) and RNase treatment are used to obtain clear cell lysate with
minimal genomic DNA and RNA contaminants. In the presence of chaotropic salt, plasmid DNA in the lysate binds to
the glass fiber matrix of the spin column (2). Contaminants are removed with a Wash Buffer (containing ethanol) and
the purified plasmid DNA is eluted by a low salt Elution Buffer or TE. Typical yields are 20-30 µg for high-copy
number plasmid or 3-10 µg for low-copy number plasmid from 4 ml of cultured bacterial cells. DNA phenol extraction
or alcohol precipitation is not required and the entire procedure can be completed within 30 minutes. The purified
plasmid DNA is ready for use in Restriction Enzyme Digestion, Ligation, PCR, and sequencing reactions.
Quality Control The quality of the High-Speed Plasmid Mini Kit is tested on a lot-to-lot basis, by isolating plasmid DNA from a 4 ml
overnight E. coli (DH5α) culture, containing plasmid pBluescript (A600 > 2 U/ml). Following the purification process,
a yield of more than 20 µg is expected and the ratio of A260/A280 is between 1.7-1.9. The purified plasmid (1 µg) is
used in EcoR I digestion, and checked by electrophoresis.
Kit Contents Order I nformation
*Add provided RNase A to the PD1 Buffer and store at 4ºC.
**If precipitates have formed in the PD2 Buffer, warm the buffer in a 37ºC water bath, followed by gentle shaking to dissolve.
***Add absolute ethanol to the Wash Buffer prior to initial use (see the bottle label for volume).
Caution PD3 Buffer and W1 Buffer contain guanidine hydrochloride which is a harmful irritant. During the procedure, always
wear a lab coat, disposable gloves, and protective goggles.
References (1) Birnboim, H. C., and Doly, J. (1979) Nucleic Acids Res. 7, 1513. (2) Vogelstein, B., and Gillespie, D. (1979) Proc. Natl. Acad. Sci. USA 76, 615.
www.ibisci.com
1
High-Speed Plasmid Mini Kit Protocol � Add provided RNase A to the PD1 Buffer and store at 4ºC.
� If precipitates have formed in the PD2 Buffer, warm the buffer in a 37ºC water bath, followed by gentle shaking to dissolve.
� Add absolute ethanol to the Wash Buffer prior to initial use (see the bottle label for volume).
� Additional requirements: microcentrifuge tubes.
Troubleshooting
Problem Possible Reasons/Solution
Low Yield Bacterial cells were not lysed completely
If more than 10 OD600 units of bacterial culture are used, dilute into multiple tubes.
Following PD3 Buffer addition, pipetting or inverting will help to ensure the sample is homologous.
Incorrect DNA Elution Step
Ensure that Elution Buffer is added into the center of the PD Column matrix and is completely absorbed.
Incomplete DNA Elution
If plasmid DNA are larger than 10 Kb, use preheated Elution Buffer (60~70ºC) in the Elution step.
Eluted DNA
does not perform
well in
downstream
applications
Residual ethanol contamination
Following the Wash step, dry the PD Column with additional microcentrifugation for 5 minutes.
RNA contamination
Prior to using PD1 Buffer, be sure RNase A is added.
Genomic DNA contamination
Do not use overgrown bacterial cultures.
During PD2 and PD3 Buffer addition, mix gently to prevent genomic DNA shearing.
Nuclease contamination
Following the DNA Binding step, add 400 µl of W1 Buffer into the PD Column and Incubate for 2 minutes at room
temperature. Microcentrifuge the PD Column for 30 seconds and proceed with the standard Wash step.
Step1
Harvesting
Transfer 1.5 ml of cultured bacterial cells to a microcentrifuge tube.
Microcentrifuge for 1 minute and discard the supernatant. If more than 1.5 ml of cultured bacterial cells is used, repeat the Harvesting
Step.
Step 2
Re-suspension
Add 200 µl of PD1 Buffer (RNase A added) to the tube and resuspend the cell pellet by vortex or pipetting.
Step 3
Lysis
Add 200 µl of PD2 Buffer and mix gently by inverting the tube 10 times. Do not vortex to avoid shearing the genomic DNA.
Let stand at room temperature for 2 minutes or until the lysate is homologous.
Step 4
Neutralization
Add 300 µl of PD3 Buffer and mix immediately by inverting the tube 10 times. Do not vortex.
Microcentrifuge for 3 minutes.
Step 5
DNA Binding
Place a PD Column in a 2 ml Collection Tube . Add the supernatant from Step 4 to the PD Column and microcentrifuge for 30
seconds.
Discard the flow-through and place the PD Column back in the 2 ml Collection Tube .
Step 6
Wash
Add 400 µl of W1 Buffer into the PD Column . Microcentrifuge for 30 seconds. Discard the flow-through and place the PD Column back in the 2 ml Collection
Tube . Add 600 µl of Wash Buffer (ethanol added) into the PD Column . Microcentrifuge for 30 seconds. Discard the flow through and place the PD Column back in the 2 ml Collection
Tube . Microcentrifuge again for 3 minutes to dry the column matrix.
Step 7
DNA Elution
Transfer the dried PD Column to a new microcentrifuge tube. Add 50 µl of Elution Buffer or TE into the center of the column matrix. Let stand for 2 minutes or until the Elution Buffer or TE is absorbed by the
matrix. Microcentrifuge for 2 minutes to elute the DNA.
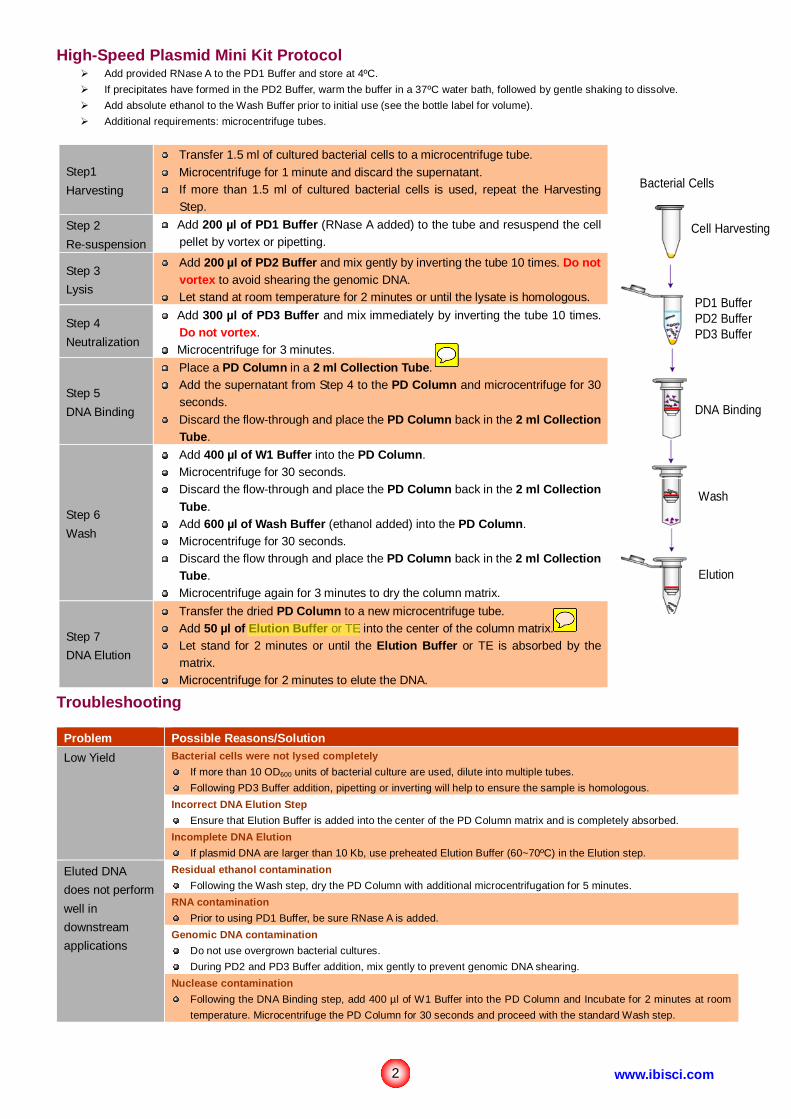
Bacterial Cells
Cell Harvesting
PD1 BufferPD2 BufferPD3 Buffer
DNA Binding
Wash
Elution
2 www.ibisci.com


