

1
How to Connect SSTP VPN from Windows Server 2008/Vista to
Vigor2950
Requirements Windows Server 2008, or Windows Vista SP1
Local Certificate (a online CA server on the Internet is required for some situation which may be described below)
Vigor 2950 Series (acted as SSTP server)
Configure Vigor Router Settings This section introduces how to configure the Vigor router as an SSTP VPN server.
1. Make sure the router has obtained the right time. Otherwise there might be troubled in certificate authentication.
2
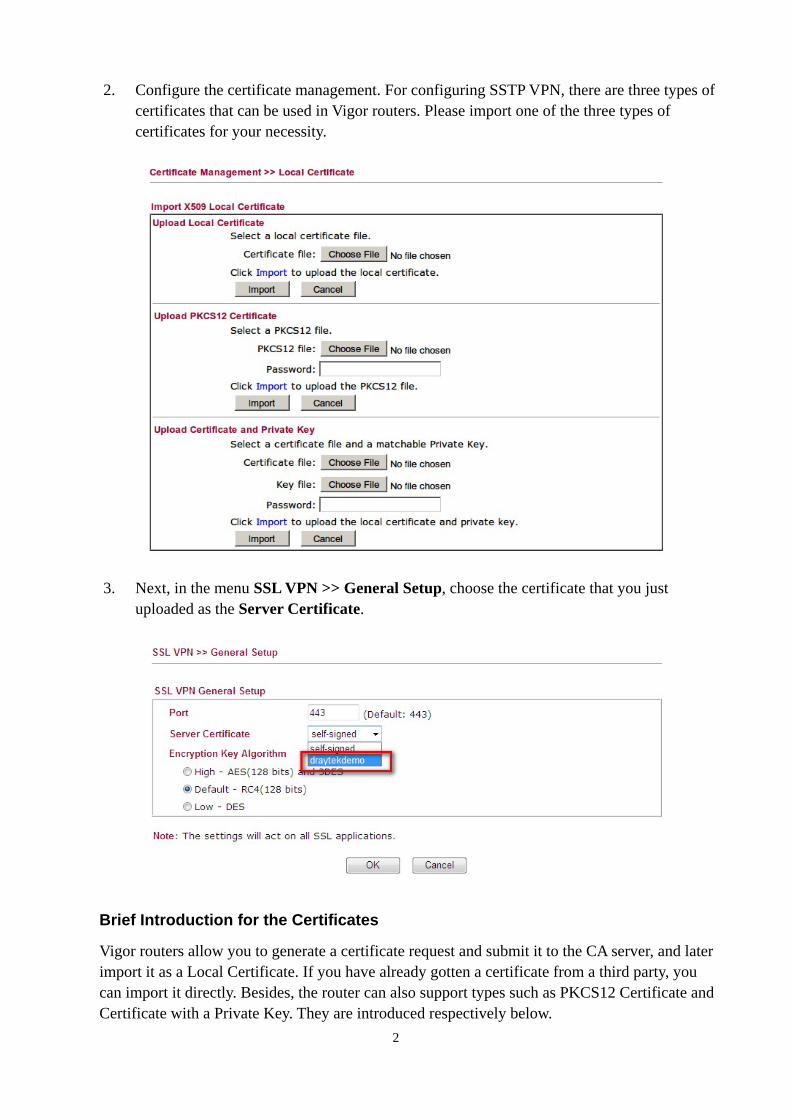
2. Configure the certificate management. For configuring SSTP VPN, there are three types of certificates that can be used in Vigor routers. Please import one of the three types of certificates for your necessity.
3. Next, in the menu SSL VPN >> General Setup, choose the certificate that you just uploaded as the Server Certificate.
Brief Introduction for the Certificates
Vigor routers allow you to generate a certificate request and submit it to the CA server, and later import it as a Local Certificate. If you have already gotten a certificate from a third party, you can import it directly. Besides, the router can also support types such as PKCS12 Certificate and Certificate with a Private Key. They are introduced respectively below.
3
Local Certificate - In this section, we mainly discuss how to generate a certificate request by the Vigor router, and how to submit it to the CA server, get a newly issued certificate and import it to the router.
Request a new certificate
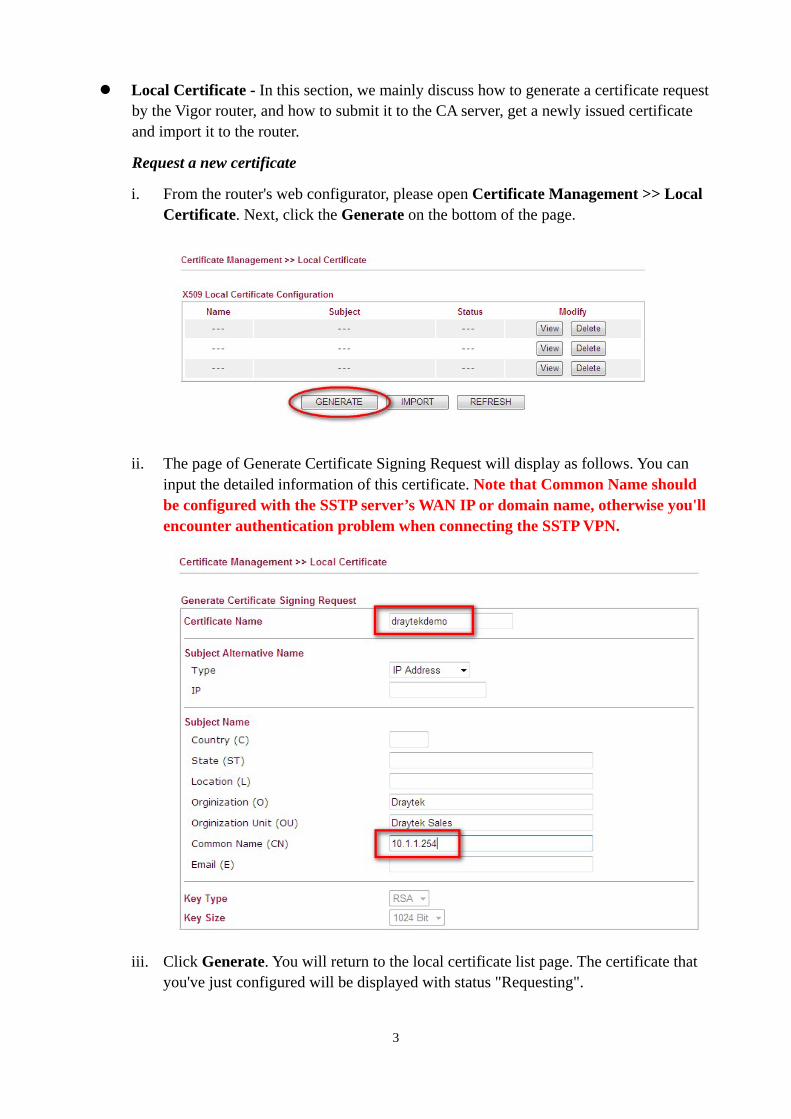
i. From the router's web configurator, please open Certificate Management >> Local Certificate. Next, click the Generate on the bottom of the page.
ii. The page of Generate Certificate Signing Request will display as follows. You can input the detailed information of this certificate. Note that Common Name should be configured with the SSTP server’s WAN IP or domain name, otherwise you'll encounter authentication problem when connecting the SSTP VPN.
iii. Click Generate. You will return to the local certificate list page. The certificate that you've just configured will be displayed with status "Requesting".

4
iv. Click View. Copy the certificate request information from the window.
v. Access your CA server and enter the page of certificate request. Copy the information to it and submit a request. Then, a new certificate will be issued to you by the CA server. Please save it properly.
5
Import the certificate
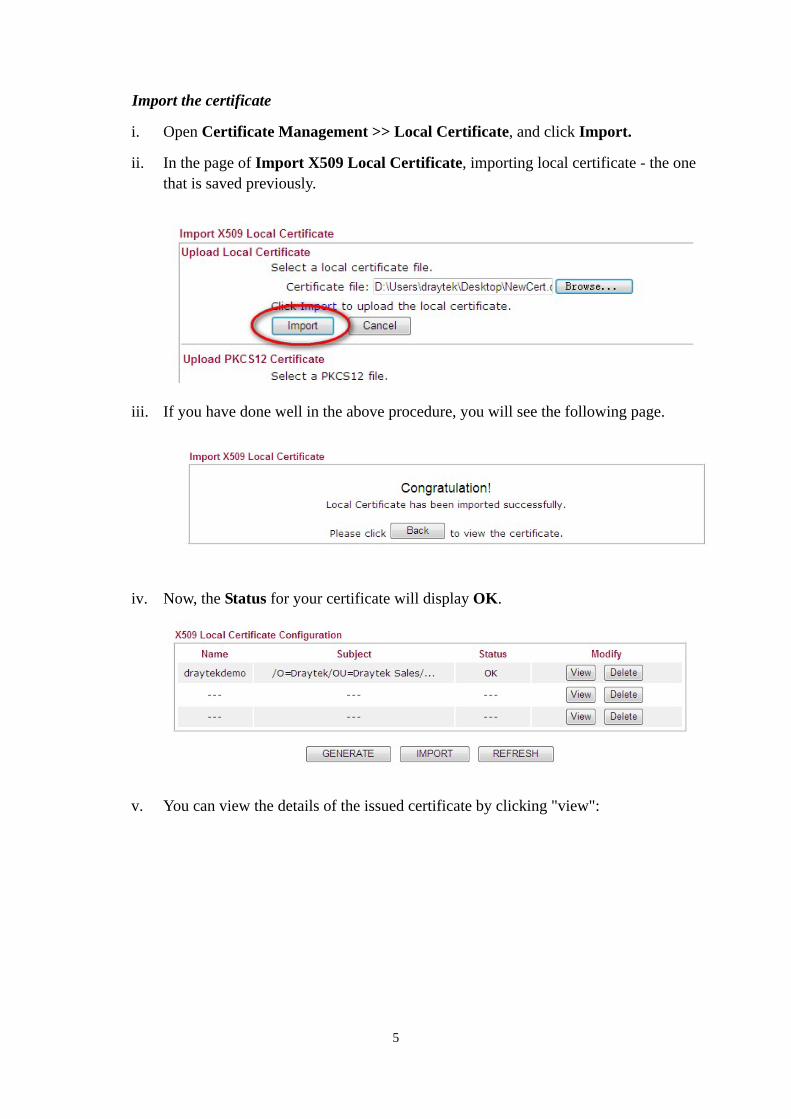
i. Open Certificate Management >> Local Certificate, and click Import.
ii. In the page of Import X509 Local Certificate, importing local certificate - the one that is saved previously.
iii. If you have done well in the above procedure, you will see the following page.
iv. Now, the Status for your certificate will display OK.
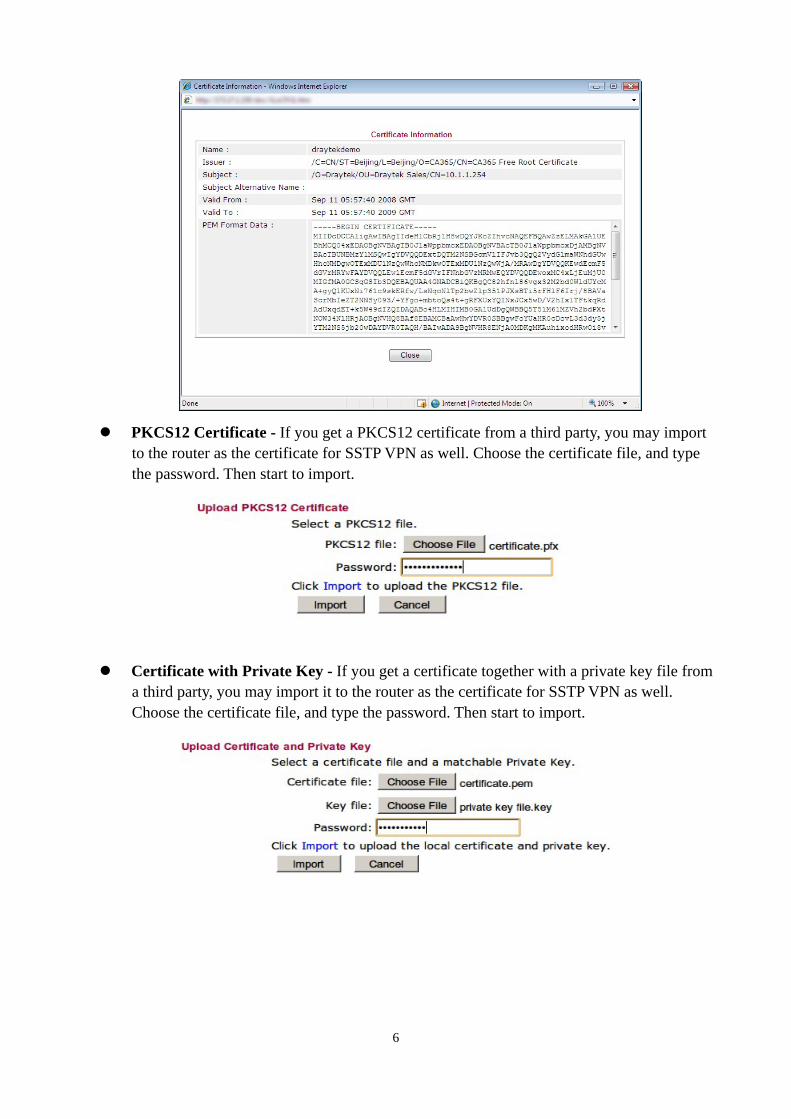
v. You can view the details of the issued certificate by clicking "view":
6
PKCS12 Certificate - If you get a PKCS12 certificate from a third party, you may import to the router as the certificate for SSTP VPN as well. Choose the certificate file, and type the password. Then start to import.
Certificate with Private Key - If you get a certificate together with a private key file from a third party, you may import it to the router as the certificate for SSTP VPN as well. Choose the certificate file, and type the password. Then start to import.

7
Configure Client settings This section introduces how to configure settings for the client with Windows Server 2008/Vista SP1 to connect the SSTP VPN server as a remote dial-in user.
A. Add Trusted Root Certificate
Such step can make the authentication procedure being completed successfully when connects to VPN server via SSTP.
Note: First, get the "Trusted Root Certificate" ready. If you have generated the certificate request via the Vigor router and submitted it to a CA server, please download and save the Root Certificate from the CA server; or if you have imported a third-party certificate, you must have a Root Certificate together with that.
Make sure you have the Trusted Root Certificate in your computer, and do the following:
1. Enter the Console of the Windows System:
2. Different from the method above, you can also click "Start" and then "Run", and input "mmc.exe" and press Enter to get the Console window.

8
3. In the Console window, click File menu and choose to "Add or Remove Snap-ins". Select "Certificate" and add it.
4. Beware to choose Computer account but not a My user account. Otherwise it might cause problems in SSTP certificate authentication.
9
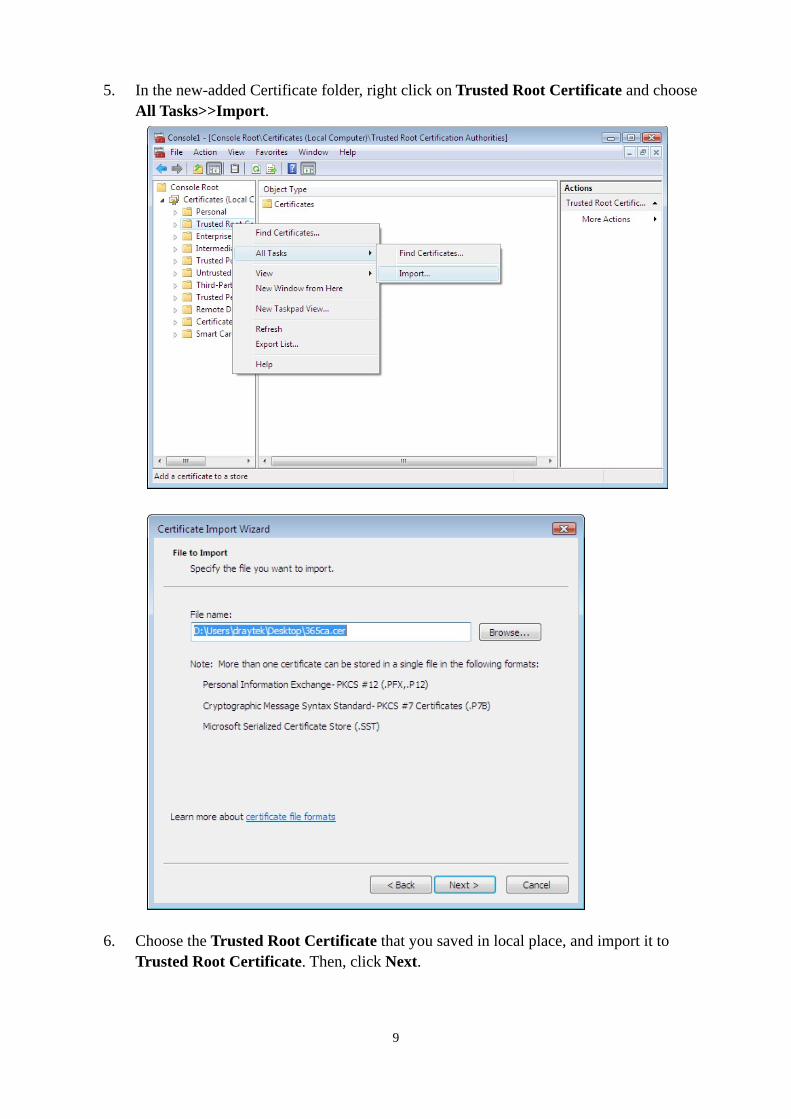
5. In the new-added Certificate folder, right click on Trusted Root Certificate and choose All Tasks>>Import.
6. Choose the Trusted Root Certificate that you saved in local place, and import it to Trusted Root Certificate. Then, click Next.
10
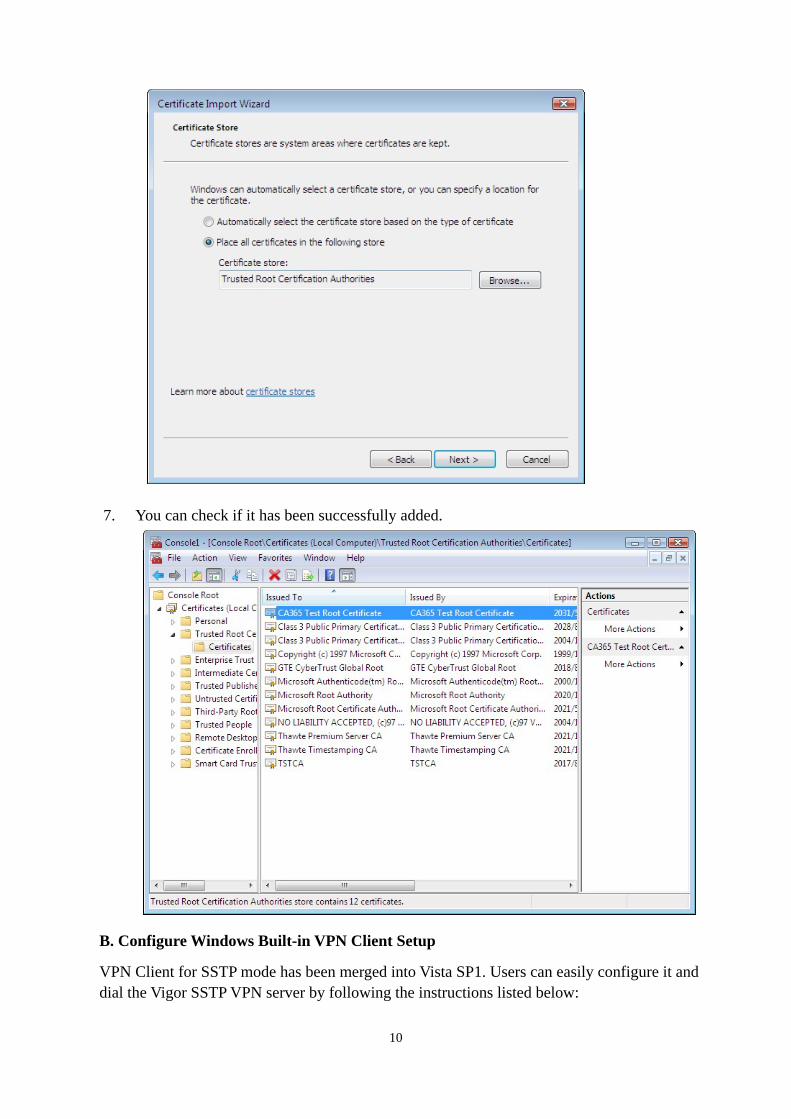
7. You can check if it has been successfully added.
B. Configure Windows Built-in VPN Client Setup
VPN Client for SSTP mode has been merged into Vista SP1. Users can easily configure it and dial the Vigor SSTP VPN server by following the instructions listed below:
11
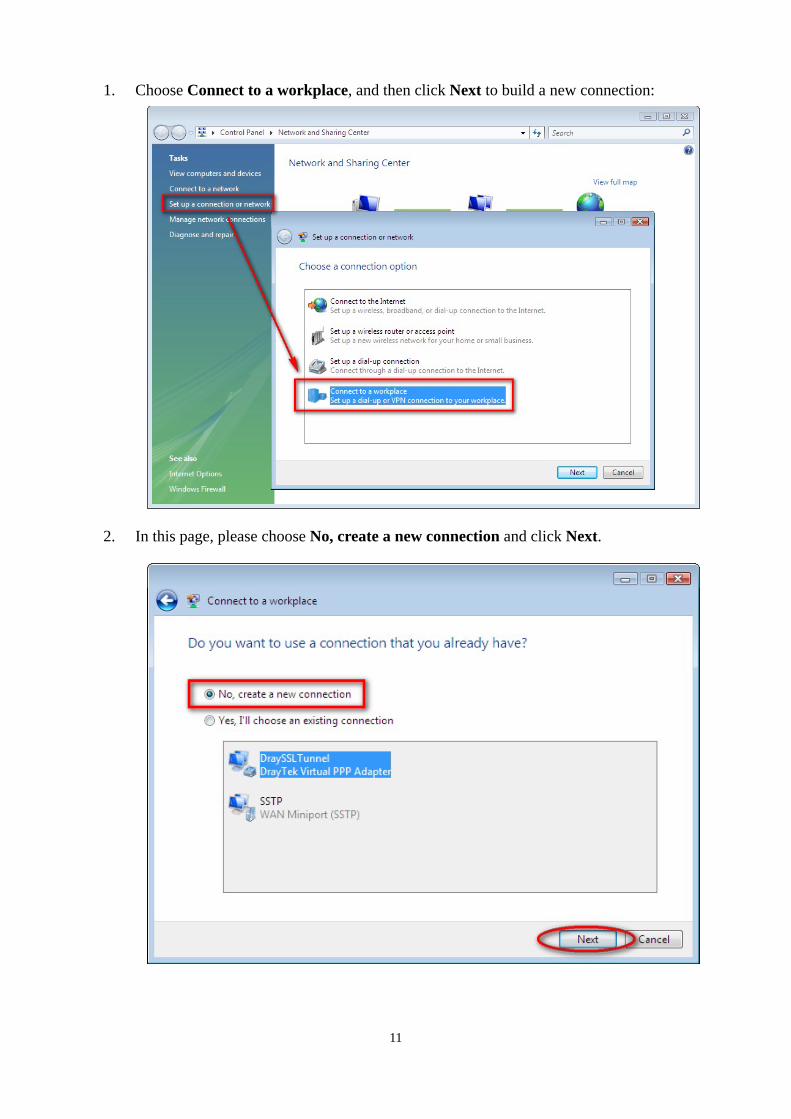
1. Choose Connect to a workplace, and then click Next to build a new connection:
2. In this page, please choose No, create a new connection and click Next.

12
3. In the following page, click Use my Internet connection (VPN).
4. On the following page, type the Internet Address of the VPN server (IP Address or domain name) and destination name. Select Don't connect now…… and click Next.
5. Type the username and password, and click Create.
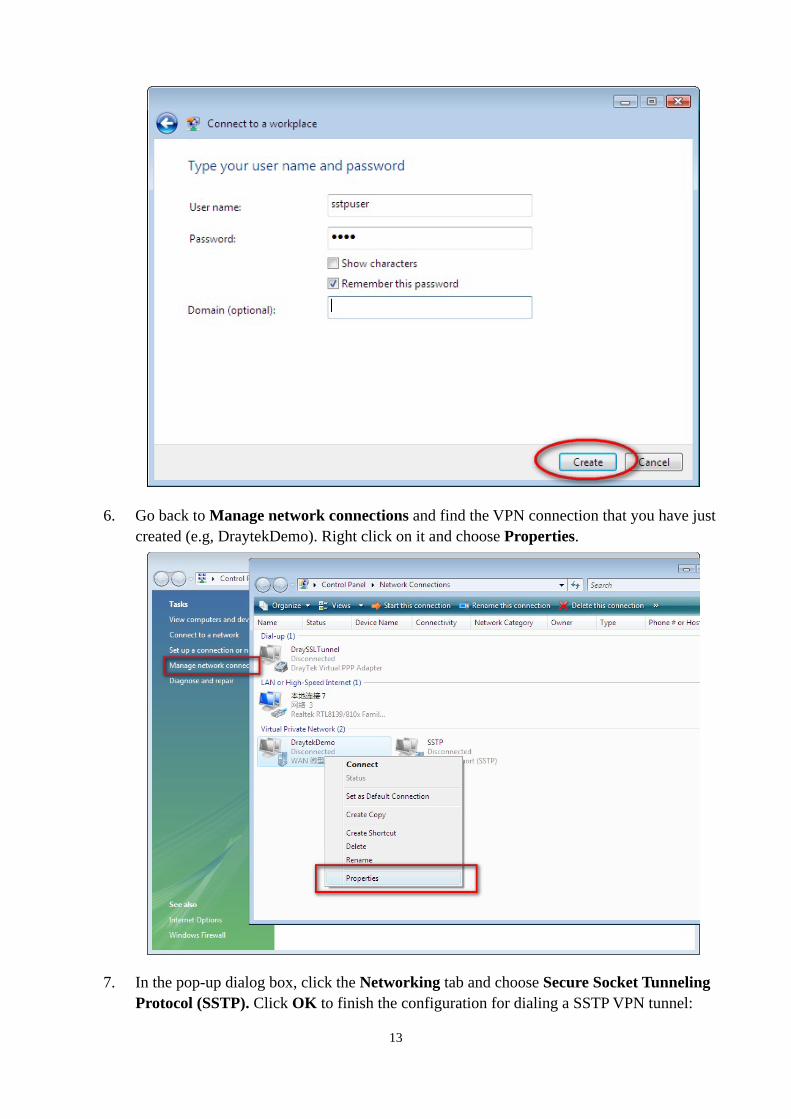
13
6. Go back to Manage network connections and find the VPN connection that you have just created (e.g, DraytekDemo). Right click on it and choose Properties.
7. In the pop-up dialog box, click the Networking tab and choose Secure Socket Tunneling Protocol (SSTP). Click OK to finish the configuration for dialing a SSTP VPN tunnel:
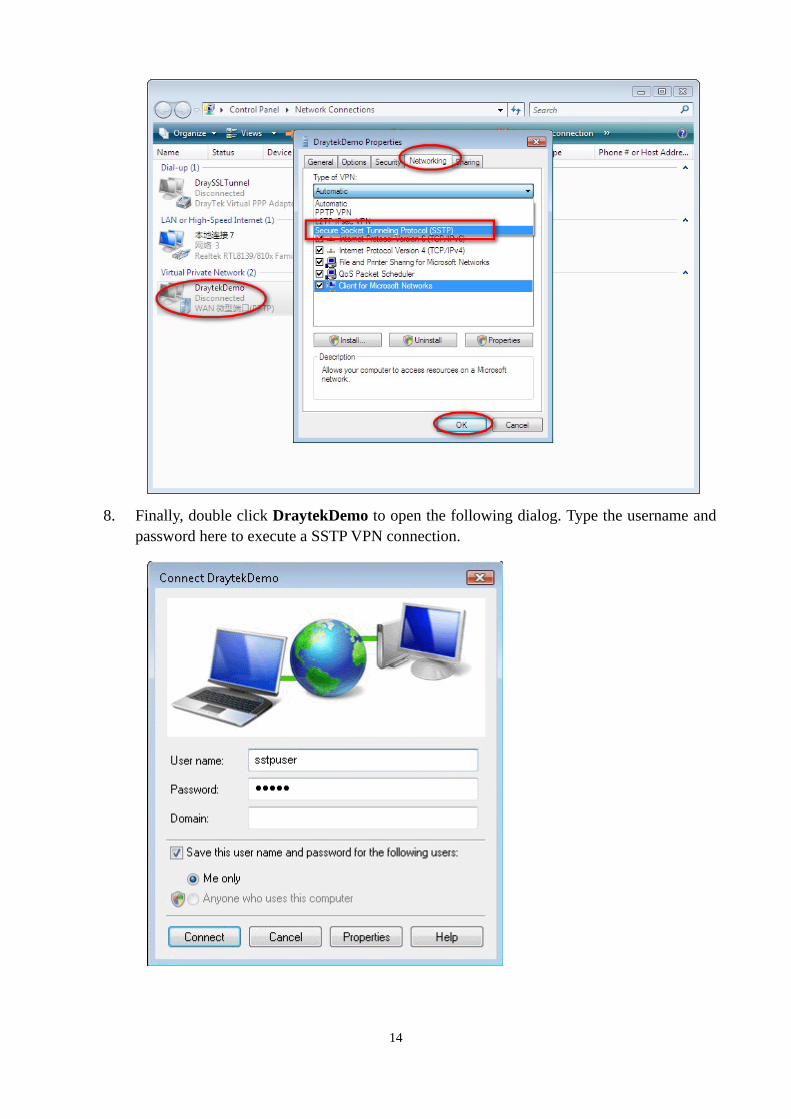
14
8. Finally, double click DraytekDemo to open the following dialog. Type the username and password here to execute a SSTP VPN connection.


