
© 2014 BERNINA of America Visit bernina.com: Projects ● Webinars ● Promotions Page 1 of 7
Ideas and inspiration for
refashioning, repurposing,
and upcycling textile items.
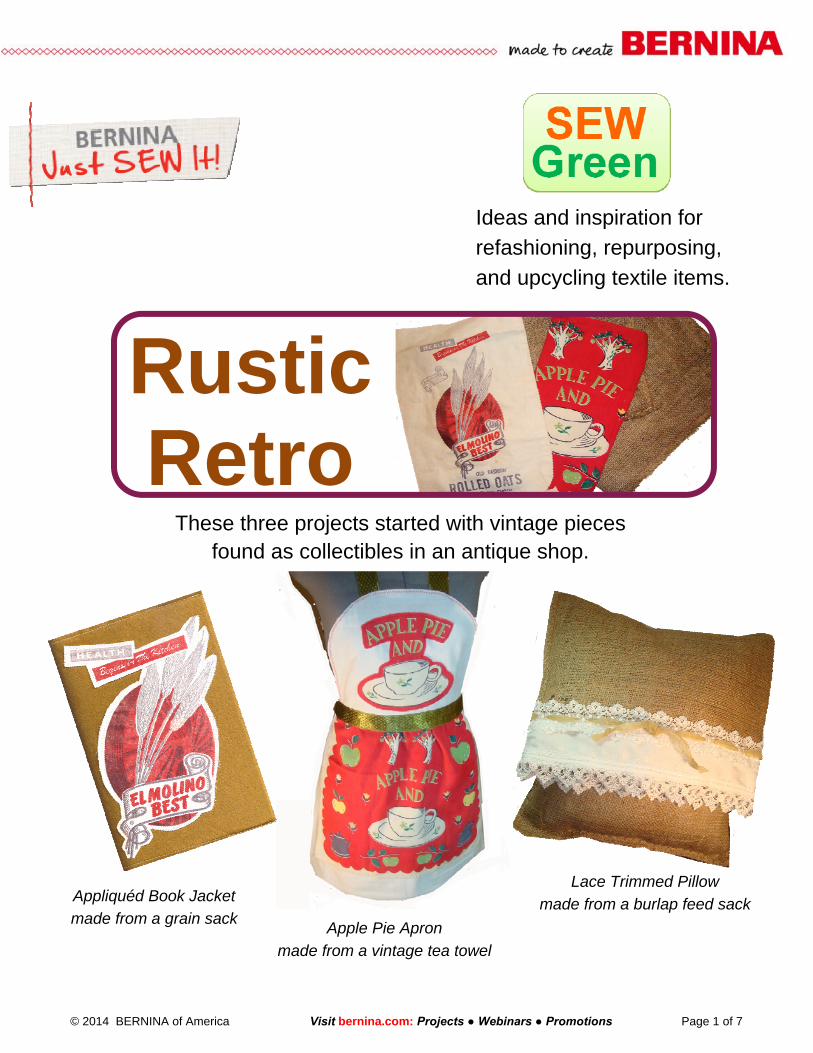
Rustic Retro
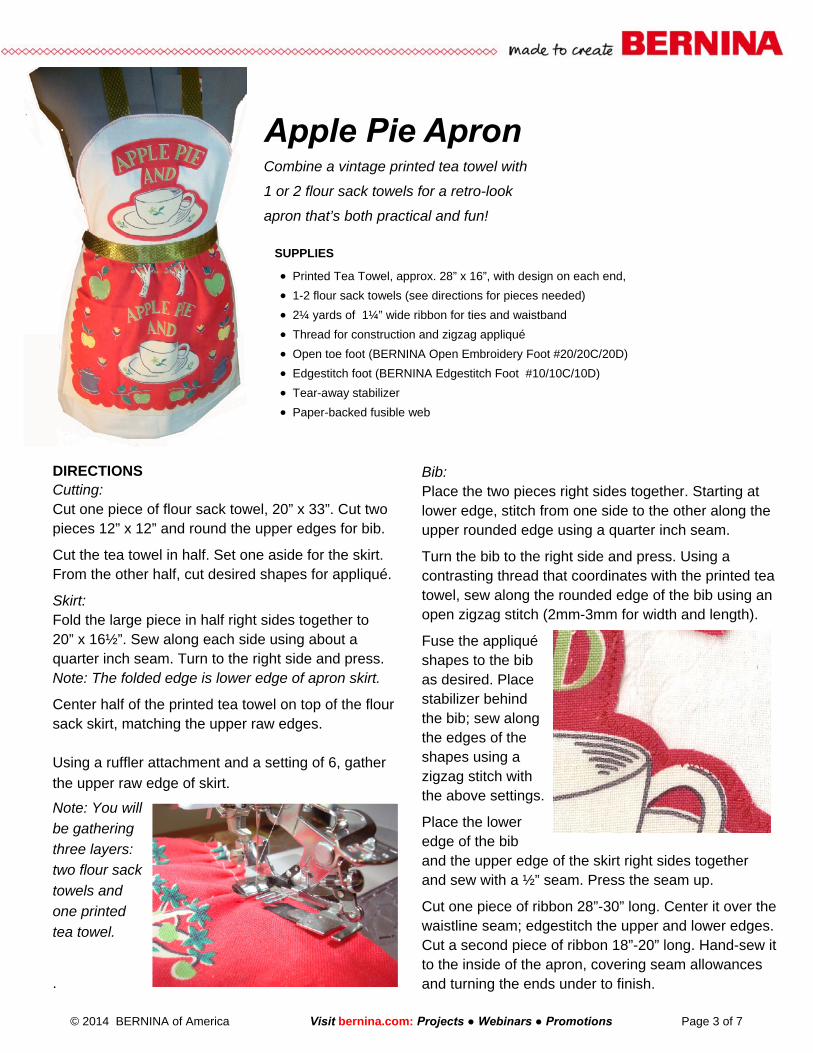
Apple Pie Apron
made from a vintage tea towel
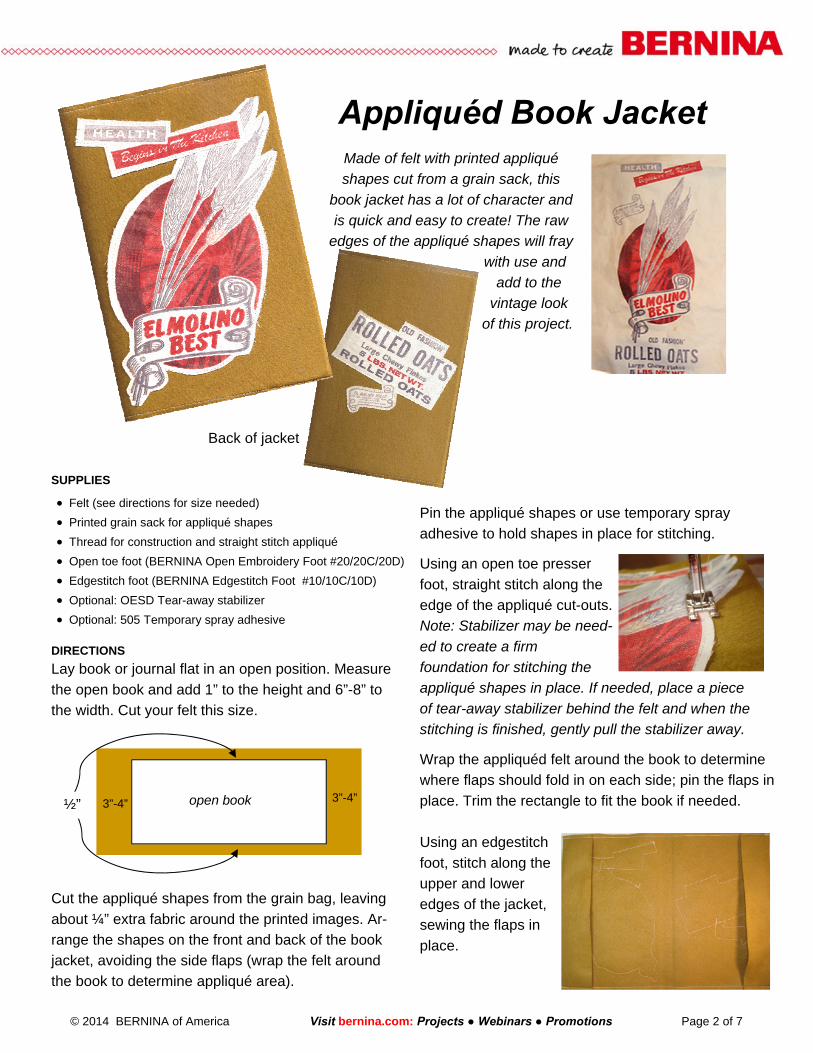
Appliquéd Book Jacket
made from a grain sack
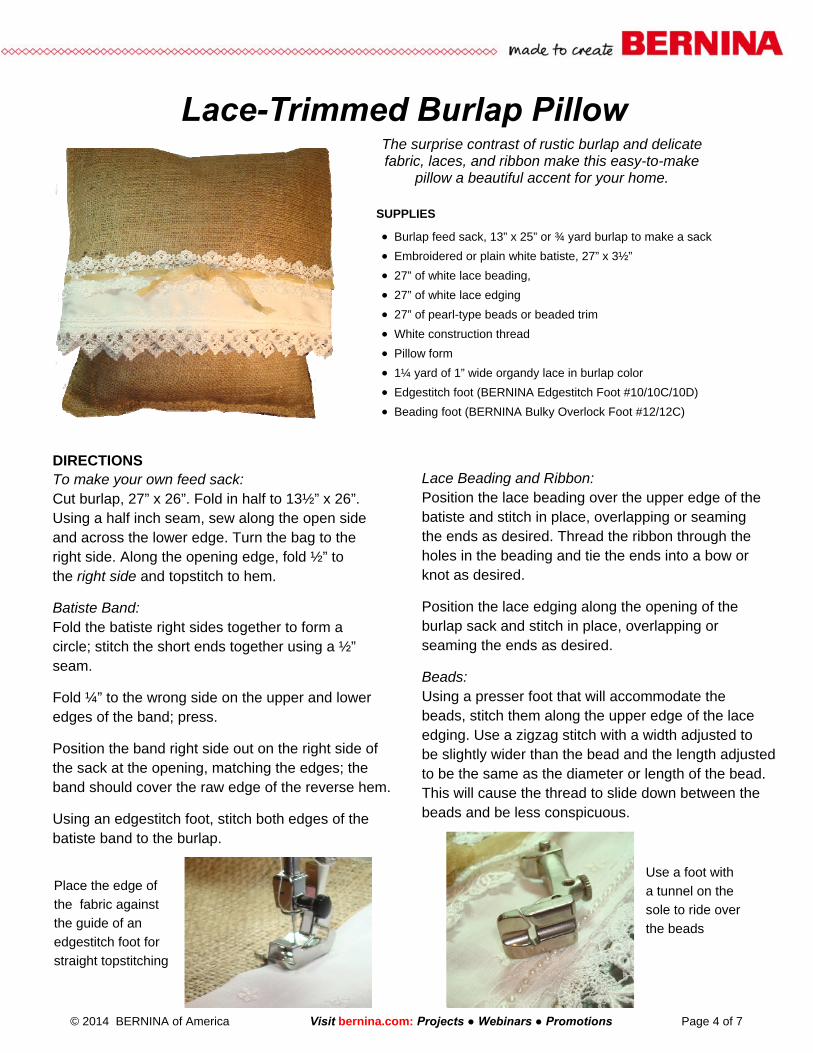
Lace Trimmed Pillow
made from a burlap feed sack
These three projects started with vintage pieces found as collectibles in an antique shop.
© 2014 BERNINA of America Visit bernina.com: Projects ● Webinars ● Promotions Page 2 of 7
DIRECTIONS
Lay book or journal flat in an open position. Measure
the open book and add 1” to the height and 6”-8” to
the width. Cut your felt this size.
Cut the appliqué shapes from the grain bag, leaving
about ¼” extra fabric around the printed images. Ar-
range the shapes on the front and back of the book
jacket, avoiding the side flaps (wrap the felt around
the book to determine appliqué area).
Made of felt with printed appliqué
shapes cut from a grain sack, this
book jacket has a lot of character and
is quick and easy to create! The raw
edges of the appliqué shapes will fray
with use and
add to the
vintage look
of this project.
Appliquéd Book Jacket
Back of jacket
Pin the appliqué shapes or use temporary spray
adhesive to hold shapes in place for stitching.
Using an open toe presser
foot, straight stitch along the
edge of the appliqué cut-outs.
Note: Stabilizer may be need-
ed to create a firm
foundation for stitching the
appliqué shapes in place. If needed, place a piece
of tear-away stabilizer behind the felt and when the
stitching is finished, gently pull the stabilizer away.
Wrap the appliquéd felt around the book to determine
where flaps should fold in on each side; pin the flaps in
place. Trim the rectangle to fit the book if needed.
Using an edgestitch
foot, stitch along the
upper and lower
edges of the jacket,
sewing the flaps in
place.
SUPPLIES
Felt (see directions for size needed)
Printed grain sack for appliqué shapes
Thread for construction and straight stitch appliqué
Open toe foot (BERNINA Open Embroidery Foot #20/20C/20D)
Edgestitch foot (BERNINA Edgestitch Foot #10/10C/10D)
Optional: OESD Tear-away stabilizer
Optional: 505 Temporary spray adhesive
open book 3”-4” 3”-4” ½”
© 2014 BERNINA of America Visit bernina.com: Projects ● Webinars ● Promotions Page 3 of 7
DIRECTIONS Cutting: Cut one piece of flour sack towel, 20” x 33”. Cut two pieces 12” x 12” and round the upper edges for bib.
Cut the tea towel in half. Set one aside for the skirt. From the other half, cut desired shapes for appliqué.
Skirt: Fold the large piece in half right sides together to 20” x 16½”. Sew along each side using about a quarter inch seam. Turn to the right side and press. Note: The folded edge is lower edge of apron skirt.
Center half of the printed tea towel on top of the flour sack skirt, matching the upper raw edges. Using a ruffler attachment and a setting of 6, gather
the upper raw edge of skirt.
Note: You will
be gathering
three layers:
two flour sack
towels and
one printed
tea towel.
.
Bib: Place the two pieces right sides together. Starting at lower edge, stitch from one side to the other along the upper rounded edge using a quarter inch seam.
Turn the bib to the right side and press. Using a contrasting thread that coordinates with the printed tea towel, sew along the rounded edge of the bib using an open zigzag stitch (2mm-3mm for width and length).
Fuse the appliqué shapes to the bib as desired. Place stabilizer behind the bib; sew along the edges of the shapes using a zigzag stitch with the above settings.
Place the lower edge of the bib and the upper edge of the skirt right sides together and sew with a ½” seam. Press the seam up.
Cut one piece of ribbon 28”-30” long. Center it over the waistline seam; edgestitch the upper and lower edges. Cut a second piece of ribbon 18”-20” long. Hand-sew it to the inside of the apron, covering seam allowances and turning the ends under to finish.
SUPPLIES
Printed Tea Towel, approx. 28” x 16”, with design on each end,
1-2 flour sack towels (see directions for pieces needed)
2¼ yards of 1¼” wide ribbon for ties and waistband
Thread for construction and zigzag appliqué
Open toe foot (BERNINA Open Embroidery Foot #20/20C/20D)
Edgestitch foot (BERNINA Edgestitch Foot #10/10C/10D)
Tear-away stabilizer
Paper-backed fusible web
Apple Pie Apron Combine a vintage printed tea towel with
1 or 2 flour sack towels for a retro-look
apron that’s both practical and fun!
© 2014 BERNINA of America Visit bernina.com: Projects ● Webinars ● Promotions Page 4 of 7
DIRECTIONS To make your own feed sack: Cut burlap, 27” x 26”. Fold in half to 13½” x 26”. Using a half inch seam, sew along the open side and across the lower edge. Turn the bag to the right side. Along the opening edge, fold ½” to the right side and topstitch to hem.
Batiste Band: Fold the batiste right sides together to form a circle; stitch the short ends together using a ½” seam.
Fold ¼” to the wrong side on the upper and lower edges of the band; press.
Position the band right side out on the right side of the sack at the opening, matching the edges; the band should cover the raw edge of the reverse hem.
Using an edgestitch foot, stitch both edges of the batiste band to the burlap.
Lace Beading and Ribbon: Position the lace beading over the upper edge of the batiste and stitch in place, overlapping or seaming the ends as desired. Thread the ribbon through the holes in the beading and tie the ends into a bow or knot as desired.
Position the lace edging along the opening of the burlap sack and stitch in place, overlapping or seaming the ends as desired.
Beads: Using a presser foot that will accommodate the beads, stitch them along the upper edge of the lace edging. Use a zigzag stitch with a width adjusted to be slightly wider than the bead and the length adjusted to be the same as the diameter or length of the bead. This will cause the thread to slide down between the beads and be less conspicuous.
SUPPLIES
Burlap feed sack, 13” x 25” or ¾ yard burlap to make a sack
Embroidered or plain white batiste, 27” x 3½”
27” of white lace beading,
27” of white lace edging
27” of pearl-type beads or beaded trim
White construction thread
Pillow form
1¼ yard of 1” wide organdy lace in burlap color
Edgestitch foot (BERNINA Edgestitch Foot #10/10C/10D)
Beading foot (BERNINA Bulky Overlock Foot #12/12C)
Lace-Trimmed Burlap Pillow
Use a foot with
a tunnel on the
sole to ride over
the beads
Place the edge of
the fabric against
the guide of an
edgestitch foot for
straight topstitching
The surprise contrast of rustic burlap and delicate fabric, laces, and ribbon make this easy-to-make
pillow a beautiful accent for your home.

© 2014 BERNINA of America Visit bernina.com: Projects ● Webinars ● Promotions Page 5 of 7
Frugal Finds
Ideas and inspiration for
refashioning, repurposing,
and upcycling textile items.
These 13” napkins were found on the clearance table for 20¢ each! A length of webbing and some orphan buttons turned three of the napkins into a purse for less than a dollar!
© 2014 BERNINA of America Visit bernina.com: Projects ● Webinars ● Promotions Page 6 of 7
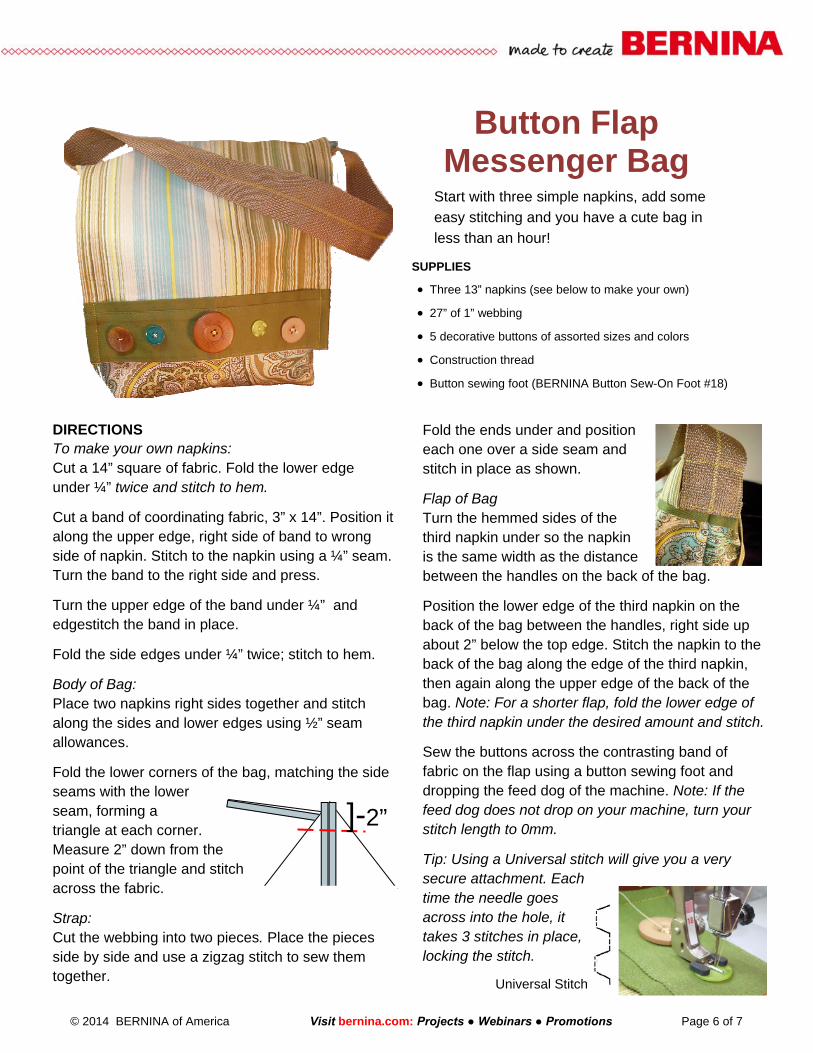
Start with three simple napkins, add some
easy stitching and you have a cute bag in
less than an hour!
Button Flap Messenger Bag
SUPPLIES
Three 13” napkins (see below to make your own)
27” of 1” webbing
5 decorative buttons of assorted sizes and colors
Construction thread
Button sewing foot (BERNINA Button Sew-On Foot #18)
DIRECTIONS To make your own napkins: Cut a 14” square of fabric. Fold the lower edge under ¼” twice and stitch to hem.
Cut a band of coordinating fabric, 3” x 14”. Position it along the upper edge, right side of band to wrong side of napkin. Stitch to the napkin using a ¼” seam. Turn the band to the right side and press.
Turn the upper edge of the band under ¼” and edgestitch the band in place.
Fold the side edges under ¼” twice; stitch to hem.
Body of Bag: Place two napkins right sides together and stitch along the sides and lower edges using ½” seam allowances.
Fold the lower corners of the bag, matching the side seams with the lower seam, forming a triangle at each corner. Measure 2” down from the point of the triangle and stitch across the fabric.
Strap: Cut the webbing into two pieces. Place the pieces side by side and use a zigzag stitch to sew them together.
Fold the ends under and position each one over a side seam and stitch in place as shown.
Flap of Bag Turn the hemmed sides of the third napkin under so the napkin is the same width as the distance between the handles on the back of the bag.
Position the lower edge of the third napkin on the back of the bag between the handles, right side up about 2” below the top edge. Stitch the napkin to the back of the bag along the edge of the third napkin, then again along the upper edge of the back of the bag. Note: For a shorter flap, fold the lower edge of the third napkin under the desired amount and stitch.
Sew the buttons across the contrasting band of fabric on the flap using a button sewing foot and dropping the feed dog of the machine. Note: If the feed dog does not drop on your machine, turn your stitch length to 0mm.
Tip: Using a Universal stitch will give you a very secure attachment. Each time the needle goes across into the hole, it takes 3 stitches in place, locking the stitch.
Universal Stitch
]-2”
© 2014 BERNINA of America Visit bernina.com: Projects ● Webinars ● Promotions Page 7 of 7
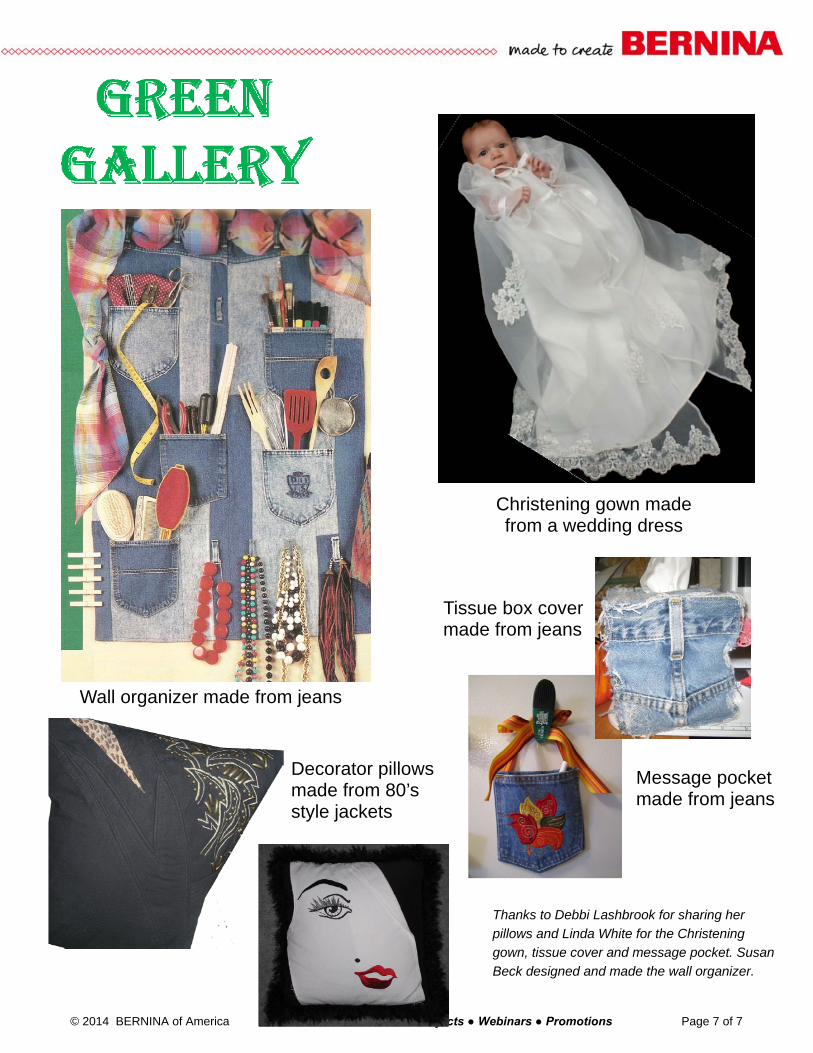
Christening gown made from a wedding dress
Tissue box cover made from jeans
Message pocket made from jeans
Wall organizer made from jeans
Thanks to Debbi Lashbrook for sharing her
pillows and Linda White for the Christening
gown, tissue cover and message pocket. Susan
Beck designed and made the wall organizer.
Decorator pillows made from 80’s style jackets


