
Linux+ Guide to Linux Certification, Second Edition
Chapter 6Linux Filesystem
Administration

Linux+ Guide to Linux Certification, 2e 2
Objectives
• Identify the structure and types of device files in the /dev directory
• Understand common filesystem types and their features
• Mount and unmount floppy disks to and from the Linux directory tree
• Mount and unmount CD-ROMs to and from the Linux directory tree
• Create hard disk partitions

Linux+ Guide to Linux Certification, 2e 3
Objectives (continued)
• Mount and unmount hard disk partitions to and from the Linux directory tree
• Monitor free space on mounted filesystems
• Check filesystems for errors
• Use hard disk quotas to limit user space usage
Linux+ Guide to Linux Certification, 2e 4
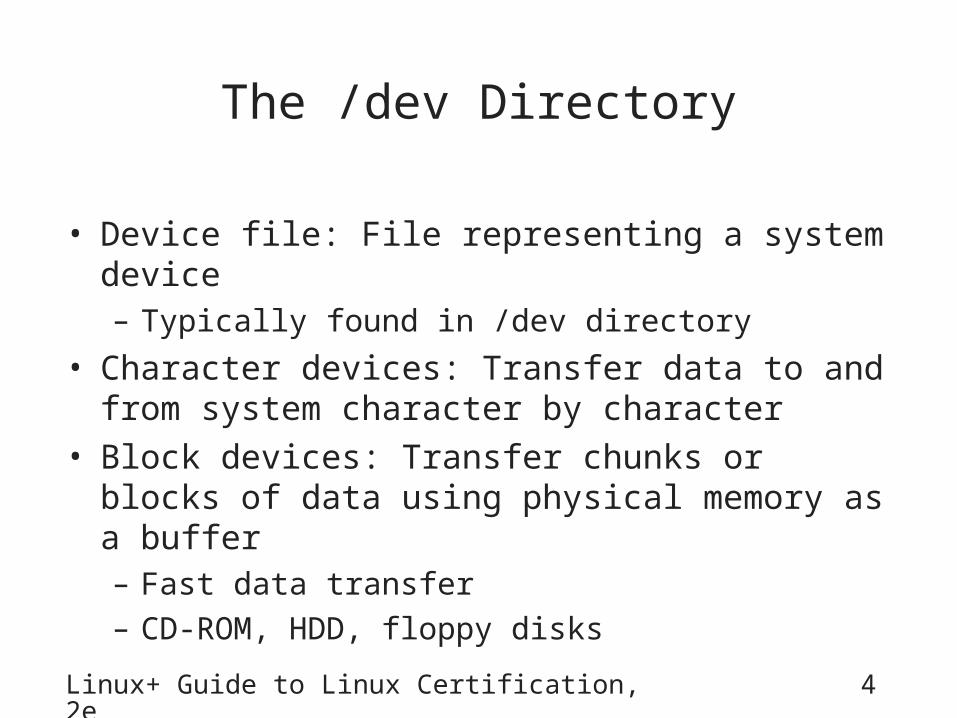
The /dev Directory
• Device file: File representing a system device– Typically found in /dev directory
• Character devices: Transfer data to and from system character by character
• Block devices: Transfer chunks or blocks of data using physical memory as a buffer– Fast data transfer– CD-ROM, HDD, floppy disks

Linux+ Guide to Linux Certification, 2e 5
The /dev Directory (continued)
Table 6-1: Common device files

Linux+ Guide to Linux Certification, 2e 6
The /dev Directory (continued)
Table 6-1 (continued): Common device files

Linux+ Guide to Linux Certification, 2e 7
The /dev Directory (continued)
• Major number: Points to the device’s driver in the Linux kernel
• Minor number: Indicates the particular device
• Device file type (block or character), major number, and minor number make up a device file’s unique characteristics
• mknod command: Can be used to re-create a corrupted device file– Must know file type, major, and minor numbers

Linux+ Guide to Linux Certification, 2e 8
Filesystems
• Filesystem: Organization imposed on physical storage media
• Formatting: Creating a filesystem on a device

Linux+ Guide to Linux Certification, 2e 9
Filesystem Types
Table 6-2: Common Linux filesystems
Linux+ Guide to Linux Certification, 2e 10
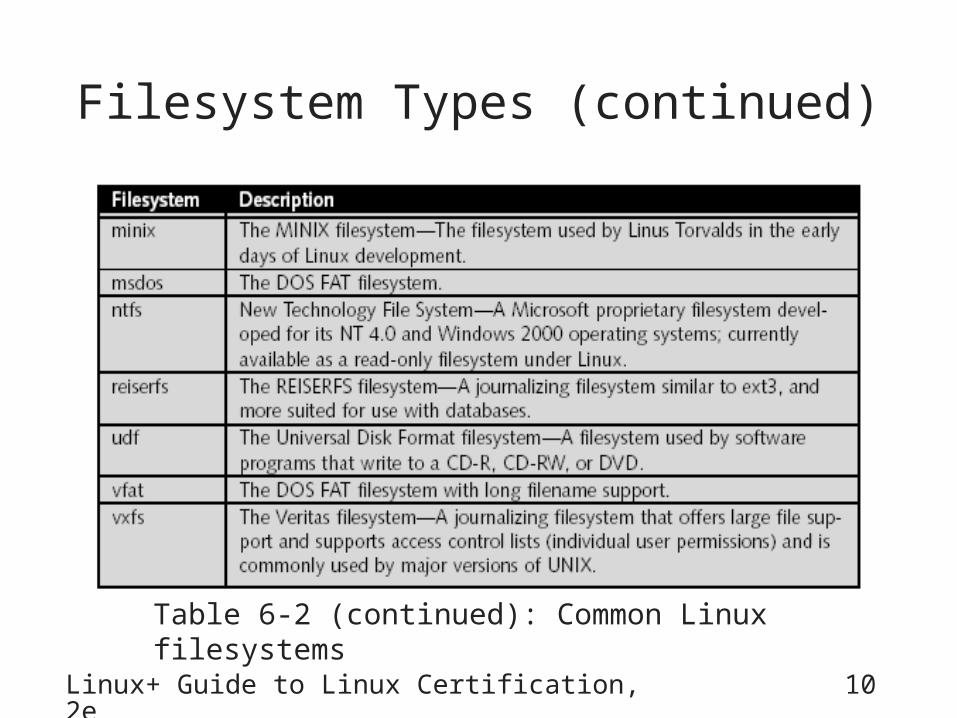
Filesystem Types (continued)
Table 6-2 (continued): Common Linux filesystems

Linux+ Guide to Linux Certification, 2e 11
Mounting
• Mounting: Making a device accessible to users via the logical directory tree
• Mount point: Directory to which a device is attached– Any existing directory can be a mount point
• Root filesystem: When Linux filesystem first turned on, a filesystem on the hard drive is mounted to the / directory– Contains most OS files

Linux+ Guide to Linux Certification, 2e 12
Mounting (continued)
Figure 6-1: The directory structure prior to mounting
Linux+ Guide to Linux Certification, 2e 13
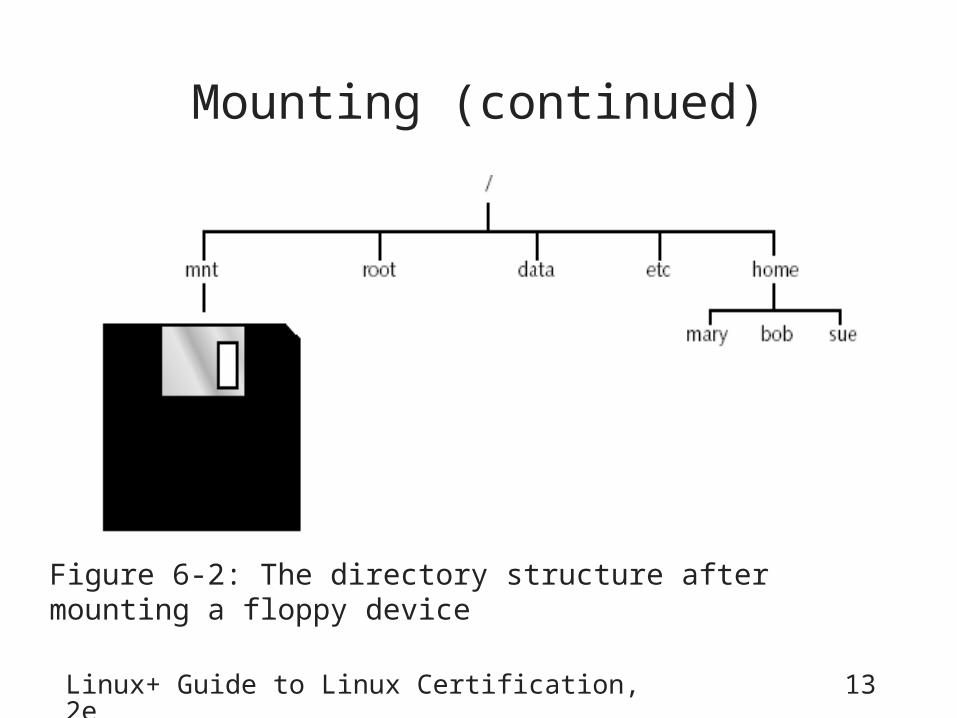
Mounting (continued)
Figure 6-2: The directory structure after mounting a floppy device

Linux+ Guide to Linux Certification, 2e 14
Mounting (continued)
• mount command: Used to mount devices to mount point directories– With no options or arguments, lists currently
mounted filesystems
• umount command: Used to unmount devices from mount point directories

Linux+ Guide to Linux Certification, 2e 15
Working with Floppy Disks
• Floppy disks must be prepared before use – Formatted with a filesystem
• mkfs (make filesystem) command: Used to format a disk device with a filesystem– –t option: Specifies filesystem type– Default is ext2 filesystem
• To mount or unmount floppies, must ensure that no user is currently using the mount point directory
• fuser command: With the –u option, lists users using a directory

Linux+ Guide to Linux Certification, 2e 16
Working with Floppy Disks (continued)
Table 6-3: Commands used to create filesystems

Linux+ Guide to Linux Certification, 2e 17
Working with Floppy Disks (continued)
• /etc/fstab file: Used to mount devices at boot time– Also consulted when users do not specify enough
mount command arguments
– Six fields: Device to mount, mount point, type, mount options, dump#, fsck#

Linux+ Guide to Linux Certification, 2e 18
Working with Floppy Disks (continued)
Table 6-4: Useful commands when mounting and unmounting filesystems

Linux+ Guide to Linux Certification, 2e 19
Working with Floppy Disks (continued)
Figure 6-3: Mounting a floppy device using a GUI environment

Linux+ Guide to Linux Certification, 2e 20
Working with Floppy Disks (continued)
Figure 6-4: Accessing filesystem devices in the KDE desktop

Linux+ Guide to Linux Certification, 2e 21
Working with CD-ROMs
• Most Linux systems have ATAPI-compliant IDE CD-ROM drive– Acts as a normal IDE hard disk– Must configure in one of the following:
• Primary master (/dev/hda)
• Primary slave (/dev/hdb)
• Secondary master (/dev/hdc)
• Secondary slave (/dev/hdd)

Linux+ Guide to Linux Certification, 2e 22
Working with CD-ROMs (continued)
• Typically use iso9660 filesystem type and are not writable– Mount with –r (read-only) option
• Cannot be ejected until properly unmounted

Linux+ Guide to Linux Certification, 2e 23
Working with Hard Disks
• IDE HDDs must be configured in one of the following:– Primary master (/dev/hda)– Primary slave (/dev/hdb)– Secondary master (/dev/hdc)– Secondary slave (/dev/hdd)
• Different device file for each

Linux+ Guide to Linux Certification, 2e 24
Working with Hard Disks (continued)
• SCSI hard disks well-suited to Linux servers– Faster access speed– Multiple hard drives can be attached to a controller
• Associated with different device files– First SCSI HDD (/dev/sda)– Second SCSI HDD (/dev/sdb)– Third SCSI HDD (/dev/sdc)– And so on

Linux+ Guide to Linux Certification, 2e 25
Hard Disk Partitioning• As disk size increases, organization becomes more
difficult and chance of error increases
• Partition: A physical division of an HDD; can have own filesystem
• Good practice to use more than two partitions – Segregate different types of data
– Allow for use of multiple filesystem types on one HDD
– Reduce chance that filesystem corruption will render a system unusable
– Speeds up access to stored data; keep filesystems small

Linux+ Guide to Linux Certification, 2e 26
Hard Disk Partitioning (continued)
• Track: Areas on a hard disk that form a concentric circle of sectors
• Sector: Smallest unit of data storage on a hard disk
• Block: Combination of sectors; commonly used by filesystem commands
• Cylinder: Series consisting of the same concentric track on all of the metal platters inside a HDD
• Partition definitions stored in first readable sector of the hard disk– Master Boot Record (MBR) or master boot block
(MBB)

Linux+ Guide to Linux Certification, 2e 27
Hard Disk Partitioning (continued)
Figure 6-5: The physical areas of a hard disk

Linux+ Guide to Linux Certification, 2e 28
Hard Disk Partitioning (continued)
Table 6-5: Common hard disk partition device files for /dev/hda and /dev/sda

Linux+ Guide to Linux Certification, 2e 29
Hard Disk Partitioning (continued)
Table 6-5 (continued): Common hard disk partition device files for /dev/hda and /dev/sda

Linux+ Guide to Linux Certification, 2e 30
Hard Disk Partitioning (continued)
Figure 6-6: A sample Linux partitioning strategy

Linux+ Guide to Linux Certification, 2e 31
Hard Disk Partitioning (continued)
Figure 6-7: A sample dual-boot Linux partitioning strategy

Linux+ Guide to Linux Certification, 2e 32
Working with Hard Disk Partitions
• fdisk command: Create partitions after installation– Specify hard disk partition as an argument
• tune2fs command: Create a journal file on the filesystem– Convert ext2 to ext3
• Edit /etc/fstab file to allow system to mount new filesystems automatically at boot time

Linux+ Guide to Linux Certification, 2e 33
Monitoring Filesystems
• Check mounted filesystems periodically– Errors– Disk Space usage– Inode usage

Linux+ Guide to Linux Certification, 2e 34
Disk Usage
• Using more filesystems typically results in less hard disk space per filesystem– Errors when filesystems fill up with data
• e.g., free space on / filesystem falls below 10%
• df (disk free space) command: Monitor free space used by mounted filesystems– –h option: More user friendly

Linux+ Guide to Linux Certification, 2e 35
Disk Usage (continued)
• du (directory usage) command: View size of a directory and contents in Kilobytes– –s option: Summarizes output
• dumpe2fs command: View total number of inodes and free inodes for ext2 or ext3 filesystem– Use –h option

Linux+ Guide to Linux Certification, 2e 36
Checking Filesystems for Errors
• Filesystem corruption: Errors in filesystem structure preventing retrieval of data– Commonly occurs due to improper system shutdown
• Syncing: Process of writing data stored in RAM to the HDD
• Bad blocks: Unusable areas of a disk – Cannot hold a magnetic charge

Linux+ Guide to Linux Certification, 2e 37
Checking Filesystems for Errors (continued)
• fsck (filesystem check) command: Check a filesystem for errors– Filesystem must be unmounted– –f option used to perform full check
• e2fsck command: Check ext2 and ext3 filesystems
• Reiserfsck: Check reiserfs filesystems

Linux+ Guide to Linux Certification, 2e 38
Checking Filesystems for Errors (continued)
Table 6-6: Common options to the fsck command
Linux+ Guide to Linux Certification, 2e 39
Hard Disk Quotas
• If several users on a system, must be enough hard disk space for each user’s files
• Hard disk quotas: User limits on filesystem usage– Restrict number of files/directories or total disk space
usage
• Soft limit: User may exceed quota briefly
• Hard limit: Limit cannot be exceeded

Linux+ Guide to Linux Certification, 2e 40
Hard Disk Quotas (continued)
• quotaon and quotaoff commands: Toggle quotas on and off
• edquota command: Edit user quotas
• repquota command: Report user quotas
• quota command: Allows regular users to view quotas and current usage

Linux+ Guide to Linux Certification, 2e 41
Summary
• Disk devices are represented by device files that reside in the /dev directory
• Each disk drive must contain a filesystem, which is then mounted to the Linux directory tree for usage using the mount command
• Hard disks must be partitioned into distinct sections before filesystems are created on those partitions

Linux+ Guide to Linux Certification, 2e 42
Summary (continued)
• Many different filesystems available to Linux
• Important to monitor disk usage using the df, du, and dumpe2fs commands to avoid running out of storage space
• If hard disk space is limited, you can use hard disk quotas to limit the space that each user has on filesystems


