

M-Print® PRO eCAD
CAE-Interface as AddOn in Eplan Electric P8
Short Guide
21.11.2015 M-Print PRO eCAD Short Guide Page 2
Overview
• Installation
• Start up and configuration
• Preparation in Eplan Electric P8
• Parts Management: Component – Marker - Connection
• Window- / Symbolmacro creation
• Project generating
• Labeling scheme creation
• Preparation in M-Print® PRO
• Sample import
• Creation of import script files
• Execution of M-Print® PRO eCAD • Exporting printing data
• Completeness check
• Data transfer
• Summary
21.11.2015
Definition of preconditions
• Eplan Electric P8 ≥ v2.4
Eplan P8 Professional
Eplan P8 Compact
Eplan P8 Select
• M-Print® PRO ≥ v6.5
• Operating systems
64 bit versions of Microsoft Windows 7, Windows 8 / 8.1 and Windows 10.
M-Print® PRO eCAD: Installation
M-Print PRO eCAD Short Guide Page 3
21.11.2015 M-Print PRO eCAD Short Guide Page 4
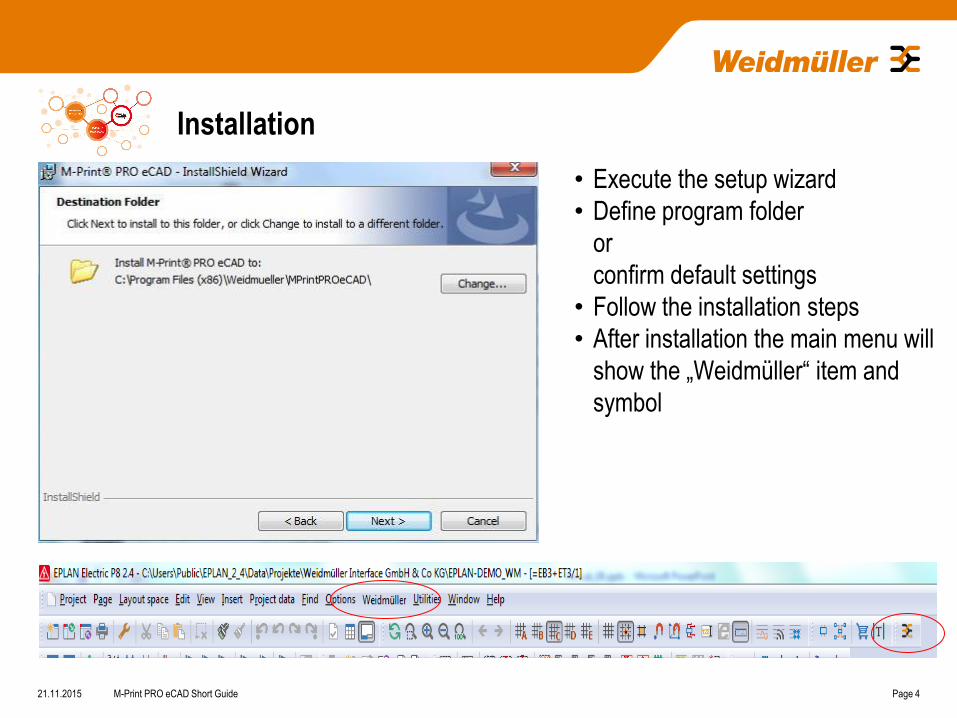
Installation
• Execute the setup wizard
• Define program folder
or
confirm default settings
• Follow the installation steps
• After installation the main menu will
show the „Weidmüller“ item and
symbol

21.11.2015 M-Print PRO eCAD Short Guide Page 5
Implementing
Configuration • Edit the configuration files from directory
C:\Users\Public\EPLAN\M-Print_PRO_eCAD\ConfigurationFiles
• Check the paths to your labeling schemes, import scripts and the path to run your M-Print® PRO.
Adjust them, if necessary
M-Print® PRO maybe is installed in different directories for planning and production departments (not relevant for network
installation). Therefore different paths to mprintpro.exe have to be defined as follows:
Planning: localConfiguration: PathToMPrintPro
Production: globalConfiguration: PathToMPrintProExport

21.11.2015 M-Print PRO eCAD Short Guide Page 6
Preparation for data export
• Parts Management: Component – Marker - Connection • Window- / Symbolmacro creation • Project generating • Labeling report definition
21.11.2015 M-Print PRO eCAD Short Guide Page 7
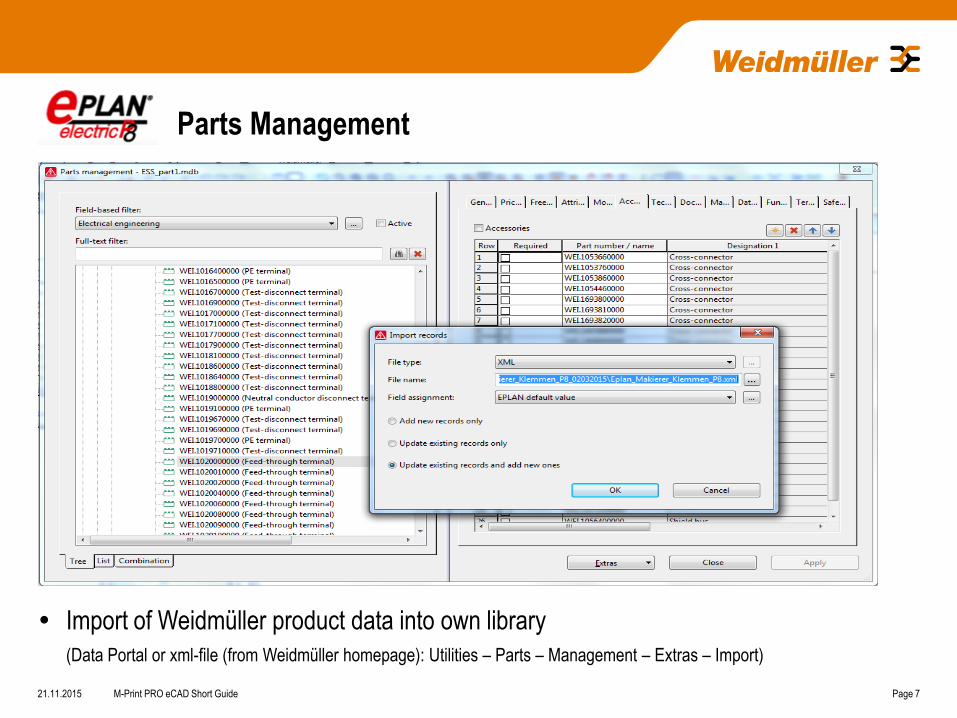
Parts Management
Import of Weidmüller product data into own library
(Data Portal or xml-file (from Weidmüller homepage): Utilities – Parts – Management – Extras – Import)
M-Print PRO eCAD Short Guide Seite 8 21.11.2015
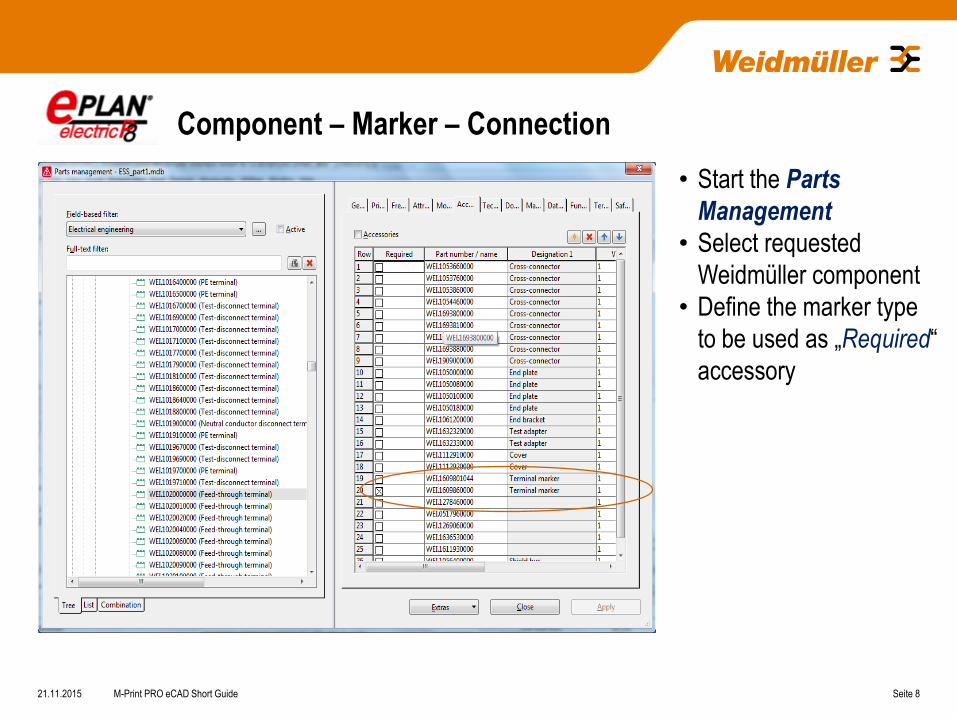
Component – Marker – Connection
• Start the Parts
Management
• Select requested
Weidmüller component
• Define the marker type
to be used as „Required“
accessory

M-Print PRO eCAD Short Guide Seite 9 21.11.2015
Component – Marker – Connection
• Run the properties of
the component
• Execute „Device
selection“
• Select the required
accessory
M-Print PRO eCAD Short Guide Seite 10 21.11.2015
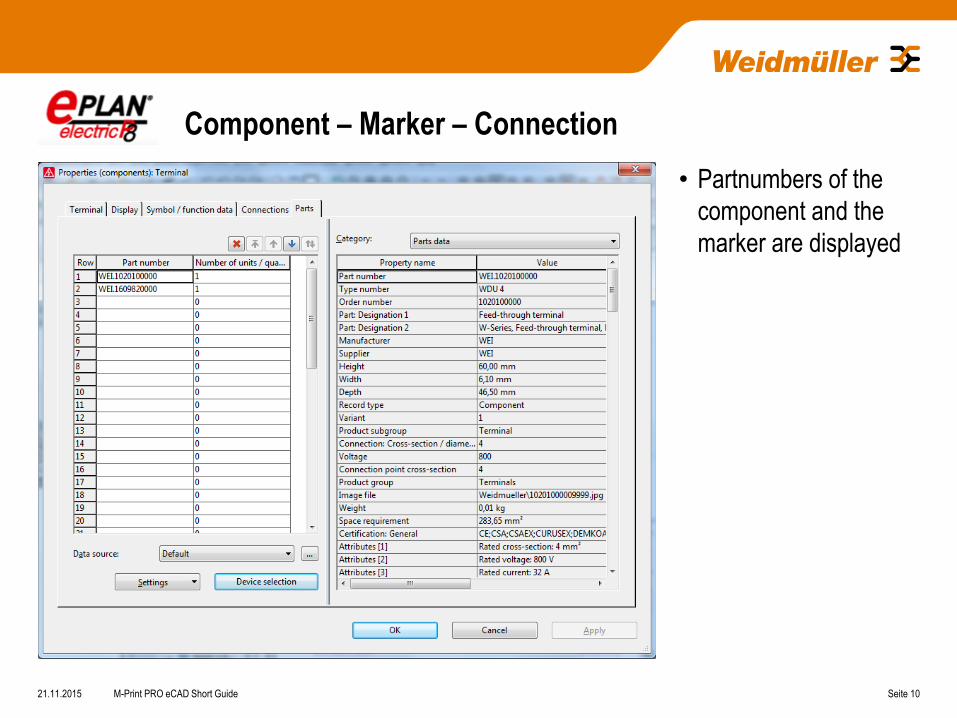
Component – Marker – Connection
• Partnumbers of the
component and the
marker are displayed

M-Print PRO eCAD Short Guide Seite 11 21.11.2015
Window- / Symbolmacro creation
• Create component
including marker as
window / symbol macro
M-Print PRO eCAD Short Guide Seite 12 21.11.2015
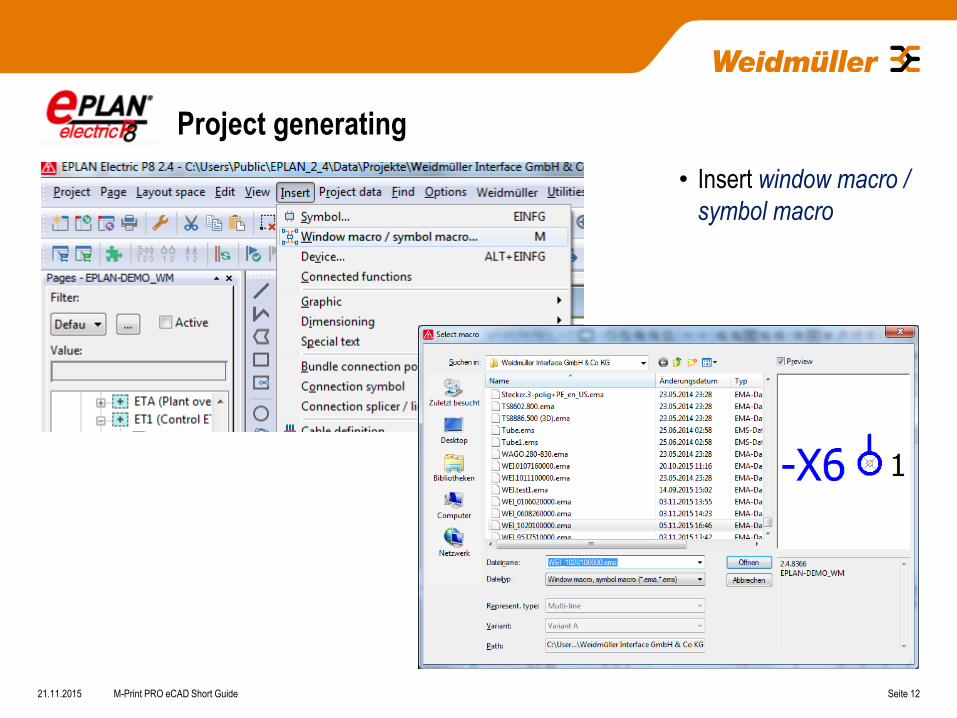
Project generating
• Insert window macro /
symbol macro

21.11.2015 M-Print PRO eCAD Short Guide Page 13
Labeling scheme creation
• Select the report type
from the provided table
• Define name and
description
• Create label with required
format elements

21.11.2015 M-Print PRO eCAD Short Guide Page 14
Labeling scheme creation
• Export target file
21.11.2015 M-Print PRO eCAD Short Guide Page 15
Preparation in M-Print® PRO
• Sample import • Creation of import script files

21.11.2015 M-Print PRO eCAD Short Guide Page 16
Sample import and creation of import script files
• Run M-Print® PRO
• Import target file from
labeling scheme
• Select suitable filter
according to type of
source file
e.g.: VK-Filter
(references to defined
marker type)
21.11.2015 M-Print PRO eCAD Short Guide Page 17
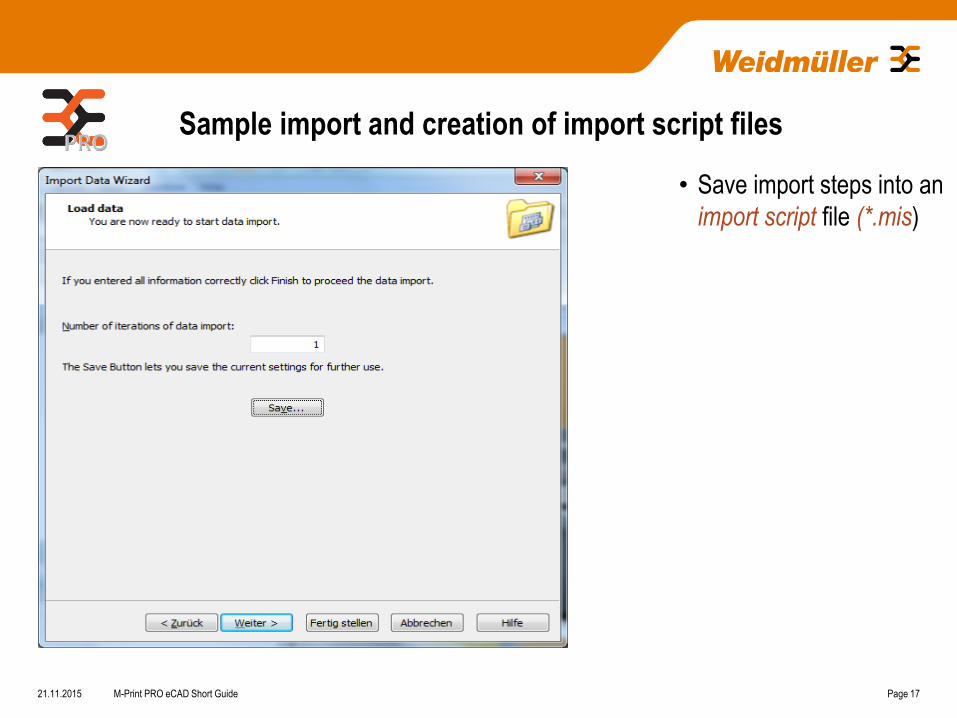
Sample import and creation of import script files
• Save import steps into an
import script file (*.mis)
21.11.2015 M-Print PRO eCAD Short Guide Page 18
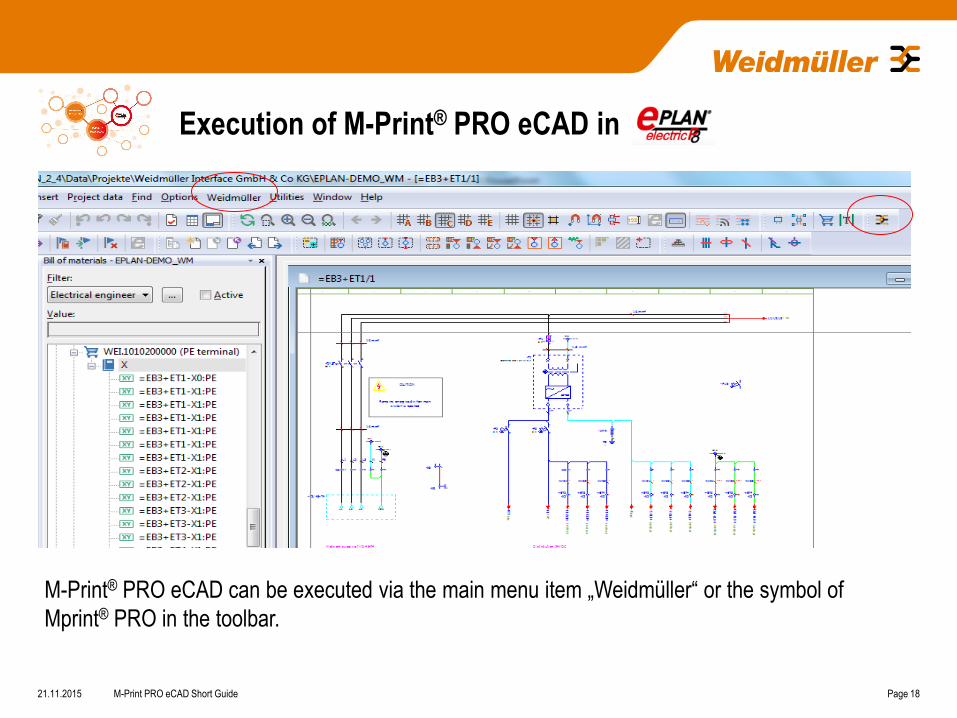
M-Print® PRO eCAD can be executed via the main menu item „Weidmüller“ or the symbol of
Mprint® PRO in the toolbar.
Execution of M-Print® PRO eCAD in
21.11.2015 M-Print PRO eCAD Short Guide Page 19
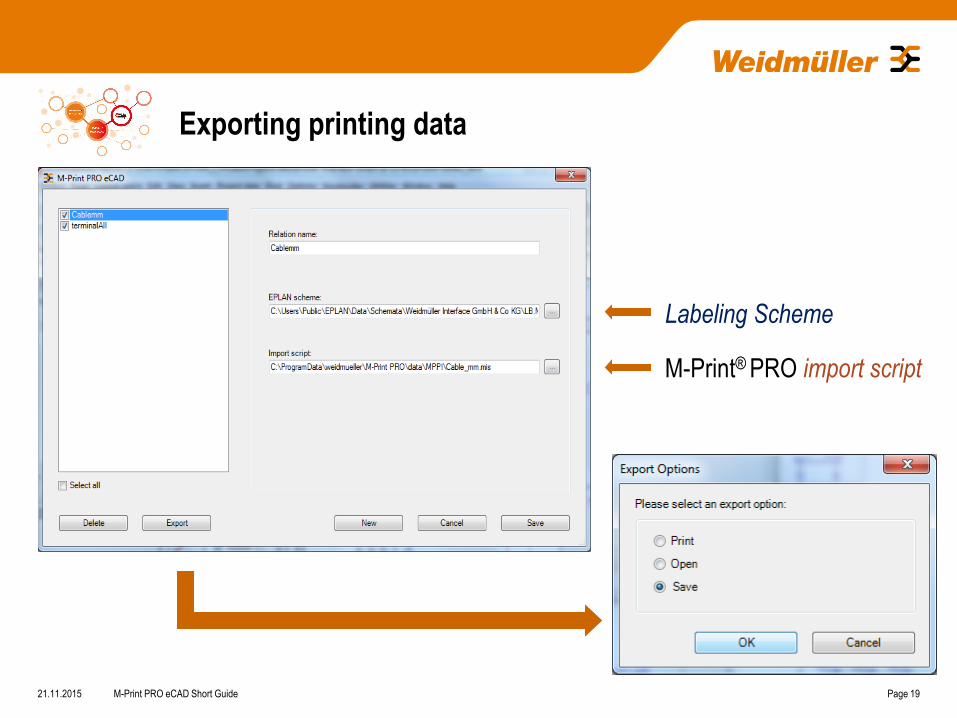
Labeling Scheme
M-Print® PRO import script
Exporting printing data

21.11.2015 M-Print PRO eCAD Short Guide Page 20
Project check
• Completeness check
• Missing marking
accessory can be
maintained

M-Print PRO eCAD Short Guide Seite 21 21.11.2015
Data transfer in M-Print® PRO
• Suitable marker types
dependend of component
• Different marker types in
one project
21.11.2015
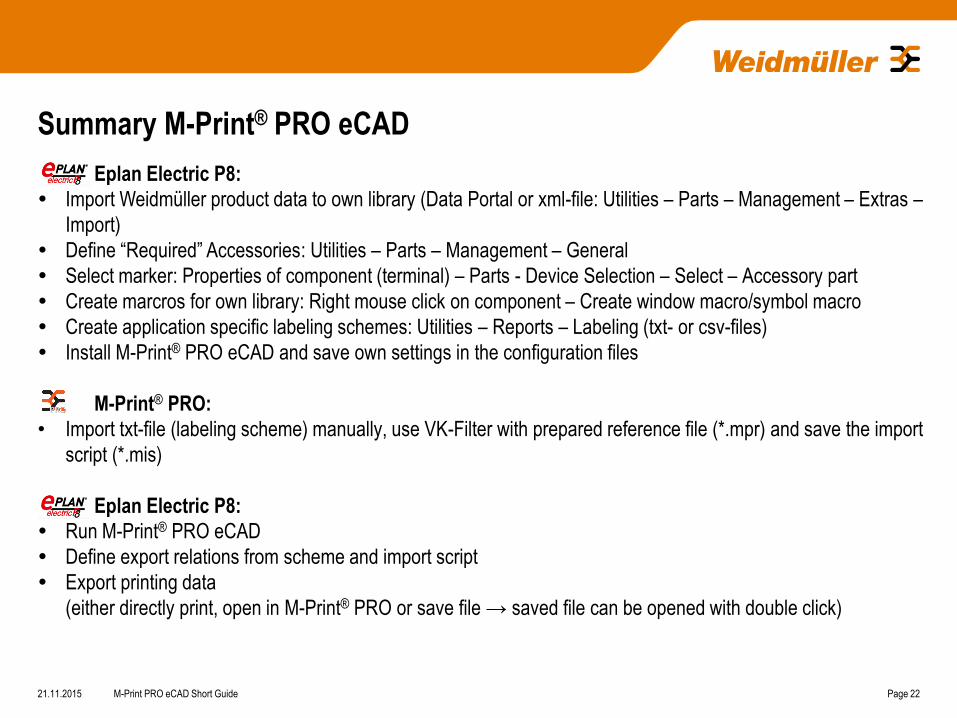
Summary M-Print® PRO eCAD
Eplan Electric P8:
Import Weidmüller product data to own library (Data Portal or xml-file: Utilities – Parts – Management – Extras –
Import)
Define “Required” Accessories: Utilities – Parts – Management – General
Select marker: Properties of component (terminal) – Parts - Device Selection – Select – Accessory part
Create marcros for own library: Right mouse click on component – Create window macro/symbol macro
Create application specific labeling schemes: Utilities – Reports – Labeling (txt- or csv-files)
Install M-Print® PRO eCAD and save own settings in the configuration files
M-Print® PRO:
• Import txt-file (labeling scheme) manually, use VK-Filter with prepared reference file (*.mpr) and save the import
script (*.mis)
Eplan Electric P8:
Run M-Print® PRO eCAD
Define export relations from scheme and import script
Export printing data
(either directly print, open in M-Print® PRO or save file → saved file can be opened with double click)
M-Print PRO eCAD Short Guide Page 22


