

Showing newest posts with label Organization Structure in SAP Show older posts
Showing newest posts with label Organization Structure in SAP Show older posts
Organization Structure
Organization Structure
Note - 1 Sales Org + 1 Distribution Channel + 1 Division = Sales Area
Client It is a logical unit or independent unit which is used for to organize a
specific organization data
IMPLEMENTATION PROCESS
First we have to prepare documentation about the client business (like turnover
vendors customers payments materials production marketing etc)
The implementer company made two teams (1) Steering team (2) Steering
community
Steering team (SAP functional consultants) prepares a detailed documentation
about the client with the help of core team (client company team) amp this study is
known as Feasibility Study After that the steering team handed over this
documentation to Steering community (Project manager Sr software engineer
and other higher authorities)
Steering community prepares the BBP (Business Blue Print) BBP Prepares in MS-
Word
bull ASAP - Accelerated System Application Product in Data Processing
bull Business Process - ASAP Methodology
1 Project Preparation
2 BBP (Business Blue Print)
3 Realization
4 Final Preparation
5 Go live amp Support
bull Project Preparation -It consists of identifying team members amp development strategy as how to go
AS ndash IS (Existing Process followed requirements)
TO ndash BE (Requirement analysis and best process recommended)
Difference between (AS ndash IS) amp (TO - BE) is called GAP Analysis
bull Business Blue Print (BPP) -It is a legal documentation between client amp the company (implementer
service provider) We have to understand the current business process of client
amp analyzing the business amp prepare documentation It is a detailed
documentation for the client
bull Realization -This Phase is used to Implement or migrate the entire business of client from
Non-SAP environment to SAP environment
bull Final Preparation -This phase is used for testing amp end user training After successfully completion
of this phase client is ready to run business in SAP R3
bull Go live amp Support -In this phase we deliver the project end date amp end user training at client site
General Terms (Basics)bull Client setup is done by BASIS (Business Administration System Integrated
Software)
It is a logical unit or independent unit which is used to organize a specific
organization data
Company Company Code amp Controlling Area are created by SAP FICO
consultant
bull Sales Part is done by SAP SD consultant
1 Sales Org + 1 Distribution Channel + 1 Division = Sales Area
bull Rest is done by SAP MM consultant (Plant Storage location Pur Org Ref Pur
Org)
bull IDES - Internet Demonstration Evaluated System (Complete SAP System used
for educational purpose)
bull IMG - Implementation guide (Customizing purpose)
bull Maximum number of screen or sessions can be opened is 6
Transaction Code - N (TCode) Closes the current session amp opens the new
session
Transaction Code - O (TCode) Minimizes the current screen amp opens new
session
bull Difference between SAP 47 amp ECC 50 ECC 60
ECC 50 amp ECC 60 has its own database SAP DB MAX DB
Path of SPRO
SAP EASY ACCESS --gt TOOLS --gt CUSTOMIZING --gt IMG --gt SPRO
Next Issue (Customize settings of Company Company Code How to create
Plant Purchasing Org Purchasing Group Storage Location etc)
ITEM CATEGORY (I) ACCOUNT ASSIGNMENT CATEGORY (A)
ITEM CATEGORY (I)
In terms of MM ndash PUR -An identifier indicating the characteristics of an item
The item category determines whether the following are mandatory or
permitted for an item
Material Number Account assignment Inventory Management in the SAP
system Goods Receipt amp Invoice Receipt
In terms Advertising Management (IS-M-AM)
Characteristics that defines sales relevant features of document items including
planning pricing production billing etc
Item category plans a vital role in MM It is a key which determines how the
procurement of the material amp services is to be controlled for the particular
item
Depending upon the item categories the scenario of purchasing documents
varies changes
Document types of item category -
1 Standard
2 L ndash Sub contracting
3 K ndash Consignment
4 B ndash Limit
5 U ndash Stock Transfer
6 D ndash Services
7 T ndash Text
8 S ndash Third Party
Account Assignment Category (A) -
It determines which AC Assignment data is necessary or required for the
particular item
Different Types -
1 1 - Third Party
2 P - Projects
3 K ndash Cost Center
4 A - Asset
5 C - Sales order
6 U - Unknown etc
Material Master Related Important Terms (Part 2)
Controlling (CO) An organizational unit in Accounting that reflects a
management-oriented structure of the organization for the purpose of internal
control
Operating results for profit centers can be analyzed using either the cost of
sales approach or the period accounting approach
By analyzing the fixed capital as well you can expand your profit centers for use
as investment centers
Profit Center
Key that uniquely identifies the profit center in the current controlling area
Valuation Category
Determines whether stocks of the material are valuated together or separately
Dependencies
In the case of split valuation this indicator also determines which valuation
types are allowed that is the criteria by which stocks can be valuated
Valuation type
Invoice Verification (MM-IV)
A subdivision of a valuation category in split valuation
Example An enterprise manages its stocks of a material using the valuation
category Quality comprising the following valuation types
bull High quality Average quality Inferior
Hazardous material number
Number that identifies the material as a hazardous material or as dangerous
goods and assigns hazardous material data or dangerous goods data to it
Use The hazardous material number indicates that the material is dangerous
making special precautions necessary for its storage and shipment
Valuation Class
Assignment of a material to a group of GL accounts
With other factors the valuation class determines the GL accounts that are
updated as a result of a valuation-relevant transaction or event such as a goods
movement
The valuation class makes it possible to
bull Post the stock values of materials of the same material type to different GL
accounts
bull Post the stock values of materials of different material types to the same GL
account
Default value for the valuation class for valuated stocks of this material
Use The valuation class has the following functions
bull Allows the stock values of materials of the same material type to be posted to
different GL accounts
bull Allows the stock values of materials of different material types to be posted to
the same GL account
bull Determines together with other factors the GL accounts updated for a
valuation-relevant transaction (such as a goods movement
Material Master Related Important Terms (Part 1)
Material Group
Key that you use to group together several materials or services with the same
attributes and to assign them to a particular material group
Use You can use material groups to
bull Restrict the scope of analyses
bull Search specifically for material master records via search helps
Purchasing Group
Key for a buyer or a group of buyers who isare responsible for certain
purchasing activities
Use
bull Internally the purchasing group is responsible for the procurement of a
material or a class of materials
bull Externally it is the medium through which contacts with the vendor are
maintained
Purchasing Value Key
Key defining the reminder days and tolerance limits valid as well as the
shipping instructions and order acknowledgment requirement of the material for
Purchasing
Procedure If you have chosen a purchasing value key the system enters the
values defined in Customizing (for Purchasing) in the fields
Batch Batches (LO-BM)
A subset of the total quantity of a material in stock managed separately from
other subsets of the same material
Example Different production lots (such as paints dyes wallpapers and
pharmaceutical products) delivery lots quality grades of a material
Batch management requirement indicator Specifies whether the material is
managed in batches
Use
This indicator can be set in the material master record manually or if batches
are valuated individually it is set automatically for the plants concerned in
which case it cannot be changed
The indicator cannot be changed if stocks exist in either the current period or in
the previous period The reason for checking the previous period is because
stocks can be posted to this period when goods movements are entered
AUOTOMATIC ACCOUNT DETERMINATION OR ASSIGNMENT
AUOTOMATIC ACCOUNT DETERMINATION OR ASSIGNMENT Whenever there is goods movement accounting documents financial accounts
updated automatically so we do some settings in customization is called
automatic account assignment
It works with three important factors -
bull Chart of accounts
bull Material type
bull Valuation grouping code
Chart of accounts - It is a group of accounts (GL Accounts) which is assigned
to our company code One company code is assigned to one chart of account
but one chart of account can be maintained for n number of company codes
Valuation grouping code valuation modification - It is a 4-digit code
which is assigned to company code along with valuation area (Plant)
Account category reference - It is a 4-digit code that establishes relationship
between material types and valuation class One account cat ref assigned to n
number of material type and valuation class
Transaction Event key - It is an internal processing key that facilitates the
automatic account determination for the various material and invoice posting
Use - Key to determine the account in which a posting line is generated (at
least two transaction event keys are involved in each posting)
Value String - It indicates the posting rule that always contain same account
assignment char to certain transaction event key
Account Modifier - It is a subdivision of transaction event key in which GL
account is linked during the process of automatic account determination
Valuation class and material type is assigned to it
Steps -
1 Activate valuation Group code
2 Assign Valuation area to valuation grouping code
3 Create Account Cat Ref and valuation class
4 Assign valuation class to Account Cat Ref
5 Assign Account Cat Ref to Material type
6 Assign account grouping to movement types
7 Configure Automatic posting
Customize settings -
SPRO 1048774 IMG 1048774 MM 1048774 Valuation Class and Account Assignment 1048774 Account
Determination 1048774 Account determination without wizard
1 Define valuation control T Code OMWM
2 Group together valuation areas T Code OMWD
3 Define valuation class T Code OMSK
bull Account category reference
bull Valuation class
bull Material type Account Cat Ref
4 Define Account grouping for movement type T Code OMWN
5 Configure automatic posting T Code OMWB
Transaction Event Keyrsquos
BSX - Stock Posting Inventory Posting
PRD - Price difference
GBB - Offsetting entry for stock posting
WRX - GRIR Clearing
FRI - Freight Clearing
Automatic PURCHASE ORDER (PO) How Automatic PO raised
How Automatic PO raised
At fixed time say 1230 AM automatic scheduler runs and checks whether the
stock is less than or equal to the replenishment point If stock is less than or
equal to Repli Point than PR raised automatically to Purchasing Deptt
bull Activate the option automatic PO in purchasing view in material master record
bull Activate the option automatic PO in purchasing data view in vendor master
record
bull Maintain Source List amp select fixed vendor
bull PR crated automatically
bull Automatic creation of PO from PR ndash ME59
Enter the Purchasing group purchasing organization Vendor Plant and
Purchasing Requisition Document Number 1048774 Execute
Material Master Related Important Terms (Part 1)
Material Group
Key that you use to group together several materials or services with the same
attributes and to assign them to a particular material group
Use You can use material groups to
bull Restrict the scope of analyses
bull Search specifically for material master records via search helps
Purchasing Group
Key for a buyer or a group of buyers who isare responsible for certain
purchasing activities
Use
bull Internally the purchasing group is responsible for the procurement of a
material or a class of materials
bull Externally it is the medium through which contacts with the vendor are
maintained
Purchasing Value Key
Key defining the reminder days and tolerance limits valid as well as the
shipping instructions and order acknowledgment requirement of the material for
Purchasing
Procedure If you have chosen a purchasing value key the system enters the
values defined in Customizing (for Purchasing) in the fields
Batch Batches (LO-BM)
A subset of the total quantity of a material in stock managed separately from
other subsets of the same material
Example Different production lots (such as paints dyes wallpapers and
pharmaceutical products) delivery lots quality grades of a material
Batch management requirement indicator Specifies whether the material is
managed in batches
Use
This indicator can be set in the material master record manually or if batches
are valuated individually it is set automatically for the plants concerned in
which case it cannot be changed
The indicator cannot be changed if stocks exist in either the current period or in
the previous period The reason for checking the previous period is because
stocks can be posted to this period when goods movements are entered
CIN - Country India Version ~ Volume 1
PurposeCountry Version India (CIN) contains a number of enhancements to standard
Sales and Distribution (SD) functions that allow you to handle local
requirements in particular excise duty
Features
In Country Version India (CIN) this component handles sales processes as
found in India In addition to the generic functions it allows you to
Handle CENVAT in your sales processes
The system calculates excise on your sales and creates excise invoices as
required and makes the appropriate postings to your CENVAT accounts
It covers sales from factories sales from depots and offers functions for other
types of goods movements it also covers sales to export-oriented units and
export sales
Record concessional and exemption forms sent to you by your customers
Make adjustment postings to your CENVAT accounts
Excise Invoice (Outgoing)
Definition
The document that acts as the proof of payment of excise duty and is required
for the customer to take CENVAT credit on the item
Use
In the SAP System there are three different procedures for creating excise
invoices
Sales direct from the factory
This procedure is for when you sell manufactured goods straight from the
factory at which they were produced in which case you levy excise duty when
the goods leave the factory on their way to the customer
If when you send the goods to the customer you enclose the commercial
invoice you create the excise invoice with reference to the commercial invoice
If you want to send the commercial invoice after you have dispatched the goods
however you create the excise invoice with reference to a pro forma
commercial invoice For more information about these procedures see Sales
from Factories
As well as creating excise invoices individually you can also create them in
batches (see Creation of Excise Invoices in Batches)
Sales from depots
A depot is a site at which the goods are stored away from the factory at which
they were produced In this procedure you have to levy the excise duty when
you transfer the goods from the factory to the depot and then make sure this is
passed on to the customer when it makes a purchase For more information see
Sales from Depots
Sales (other goods movements)
Some other goods movements may also require you to create an excise invoice
with reference to other documents The SAP System offers separate functions
for these purposes (see Excise Invoices (Outgoing) for Other Movements)
StructureNumbering of Excise Invoices
Outgoing excise invoices have two numbers an internal document number
which is assigned immediately you create an excise invoice and an excise
invoice number which is not assigned until you have verified and posted it
As far as the excise invoice number is concerned you have to number your
outgoing excise invoices in sequential order starting each year on 1 April You
must notify the excise authority of the jurisdiction of the invoicing location The
serial number must be printed on each page of the excise invoice
Each number range is governed by a series group You must create at least one
series group in order to be able to number the excise invoices If you need more
than one number range you must create the corresponding number of series
groups You do so in the CIN Implementation Guide (IMG) by choosing Global
Settings reg Series Groups
Number of Line Items Per Excise Invoice
Some states allow you to include only a limited number of items for each page
of an excise invoice (for example if the excise invoices are to be printed on
prenumbered forms) You can customize the system so that it prints the excise
invoice accordingly in the CIN IMG by choosing Global Settings reg Excise
Registration IDs
Customer Master (Excise Data) Definition
The part of the customer master record that contains information relating to
Indian excise duty
Use
In conjunction with other data this data is used to calculate excise duty on
various transactions
To maintain the data from the SAP Easy Access screen choose Indirect Taxes reg
Master Data reg Excise Rate Maintenance and then select the following options
described below
Structure
The excise part of the customer master contains the following information
Customer Excise Details
On this screen you enter your customers tax registration numbers which are
used for various forms of correspondence and reports
1 Excise registration number (and the range division and collectorate in which
this is located)
2 Central sales tax (CST) number
3 Local sales tax (LST) registration number
4 Permanent account number (PAN)
In order for the system to be able to calculate which rate of excise duty to apply
on sales to the customer you must also assign it a customer excise duty status
(for more information about how this works see Determination of Excise Duty
Rates)
Excise Indicator for Plant and Customer
On this screen you define the final excise duty indicator (for more information
about how this works see Determination of Excise Duty Rates)
Determination of Excise Duty Use
When you execute a business transaction involving materials that are subject to
excise duty the system automatically calculates the duty for you
Prerequisites
In order for the system to be able to determine which rate of excise duty to
apply you must have maintained all the data on the Excise Rate Maintenance
screen which you can access from the SAP Easy Access screen by choosing
Indirect Taxes reg Master Data reg Excise Rate Maintenance
You maintain the following types of data
Plant master data
You assign each of your plants an excise duty indicator You can use the same
indicator for all the plants with the same excise status from a legal point of view
such as all those that are in an exempt zone
See also the information about manufacturers that are only entitled to deduct a
certain portion of the duty (see Partial CENVAT Credit)
Vendor master data
For each of your vendors with the same excise status from a legal perspective
you define an excise duty indicator You must also specify the vendor type ndash for
example whether the vendor is a manufacturer a depot or a first-stage dealer
You must also stipulate if the vendor qualifies as a small-scale industry
For each permutation of plant indicator and vendor indicator you then create a
final excise duty indicator
Customer master data
Similarly you assign the same excise duty indicator to each of your customers
that share the same legal excise status
Again for each permutation of plant indicator and customer indicator you then
create a final excise duty indicator
Material master data
Each material is assigned a chapter ID
Excise tax rate
For every chapter ID and final excise duty indicator you maintain the rate of
excise duty
If your business only qualifies for partial CENVAT credit you must customize
your system accordingly
Activities
Let us consider an example to illustrate how the system determines which rate
of excise duty to apply to a material Assume you are posting a sale of ball
bearings to a customer The system automatically determines the rate of excise
duty as follows
Looks up the customer master data to see what status you have assigned the
customer
Lets assume youve assigned the customer status 3
Looks up the plant master data to see what status you have assigned the plant
Similarly your plant has status 2
The system looks up the table under Excise Indicator for Plant and Customer to
see what the final excise duty indictor is for customer status 3 and plant status
2 It is 7
The system determines the chapter ID of the ball bearing for the plant
Letrsquos assume the chapter ID at plant for the ball bearings is 100001
Finally the system looks up the table under Excise Tax Rate to see what rate of
duty applies to chapter ID 100001 under status 7
Plant Master (Excise Data) Definition
The part of the plant master record that contains information relating to Indian
excise duty
Use
In conjunction with other data this data is used to calculate excise duty on
various transactions
To maintain the data from the SAP Easy Access screen choose Indirect Taxes reg
Master Data reg Excise Rate Maintenance and then select the following options
described below
Structure
The excise part of the plant master is divided into the following screens
Excise Indicator for Plant
On this screen you enter your plants tax registration numbers which are used
for various forms of correspondence and reports
1 Central sales tax (CST) number
2 Local sales tax (LST) registration number
3 Permanent account number (PAN)
In order for the system to be able to calculate which rate of excise duty to apply
on purchases for this plant you must also assign it a plant excise duty status
(for more information about how this works see Determination of Excise Duty
Rates)
Excise Indicator for Plant and Vendor
On this screen you define the final excise duty indicator (for more information
about how this works see Determination of Excise Duty Rates)
Excise Indicator for Plant and Customer
On this screen you define the final excise duty indicator (for more information
about how this works see Determination of Excise Duty Rates)
Automatic Creation of Excise Invoices Use
The SAP System can automatically create an outgoing excise invoice for you
immediately you post a commercial invoice (or a pro forma invoice) for a
customer sale This function applies to excise invoices for sales from factories
only
Prerequisites
To activate this function in the Country Version India (CIN) Implementation
Guide (IMG) make the following settings
1 Under Global Settings reg Excise Groups select Create EI
This activates the automatic creation function
2 Under Sales and Distribution reg Utilization Determination
Here you specify which CENVAT accounts the system is to post the different
types of excise duty to
3 Under Sales and Distribution reg Excise GroupndashSeries Group Determination
Here you specify which excise group and series group the excise invoices are to
be created for
Features
When you post an invoice the system creates an excise invoice All the
information that it needs to create the excise invoice is provided either by the
invoice or by the Customizing settings that you have made in Sales and
Distribution It also determines the excise invoice type automatically by means
of a user exit
Creating Excise Invoices for Stock Transfers 1 From the SAP Easy Access screen choose Indirect Taxes reg Procurement reg
Excise Invoice reg For Depot reg CreateChangeDisplay
2 In the Material document field enter the goods receipt number and choose
The system displays the information from the goods receipt for example the
sending plant the excise registration the range the division and the
collectorate
3 Choose Details
The system copies the items from the goods receipt document In the depot it is
possible to have a separate excise invoice at line item level
4 Enter the internal document number of the excise invoice sent by the factory
5 Choose More documents to go the excise invoice details screen
6 Enter the internal document number of the excise invoice from the factory
The system copies the information to the line item (for example the excise
invoice number the excise invoice date the item number the chapter ID the
excise invoice quantity the amount of excise duty paid the excise base value
and the serial number of the Part II register entry with which the excise was
paid)
You can change the receipt quantity to match the actual quantity received at
the depot if necessary The system automatically adjusts the excise
accordingly
7 Go back to the item details screen
8 Save the excise invoice
Creating Excise Invoices for Direct Purchases 1 From the SAP Easy Access screen choose Indirect Taxes reg Procurement reg
Excise Invoice reg For Depot reg CreateChangeDisplay
2 In the Material document field enter the goods receipt number and choose
The system displays the information from the goods receipt for example the
sending plant the excise registration the range the division and the
collectorate
You can also maintain the excise registration details for the ship-from party as
for with the vendor The ship-from can be different from the vendor code (The
delivering plant can be maintained as a ship-from in the system When a valid
ship-from is entered the excise registration details copied from the vendor will
be overwritten by the ship-from excise registration details)
The ship-from registration details displayed can also be overwritten manually
The dealers commercial invoice number can be stored in the vendor excise
invoice number as in this case the dealer himself will not have an excise
invoice
3 Choose Details
The system copies the items from the goods receipt document It also copies the
vendors excise invoice number and the serial numbers of the entries in the RG
23A RG 23C and personal ledger account (PLA) registers
4 Enter the internal document number of the excise invoice sent by the factory
5 Select an item and choose More documents to go the excise invoice details
screen
In the case of direct purchases there will not be any excise invoice in the
system so leave the internal document field blank The vendors invoice will
show the details of the excise invoices through which excise has been paid for
the item that is being dispatched You can enter these details here
6 For each item the chapter ID excise base value and excise duty amounts
are defaulted from the purchase order You can change them if there is any
difference Enter the excise amount paid and the receipt quantity You also
enter the Part II register serial numbers with which the excise duty was paid and
the excise registration information from the original excise invoice
7 Go back to the item details screen
8 Save the excise invoice
The system creates an entry in register RG 23D You can change the excise
invoice as long as it has not been used in any sales
Assigning Excise Invoices to a Delivery Use
You follow this procedure to specify which excise invoices are to be assigned to
a delivery from a depot (or other material document)
You can also automate this procedure using the batch selection program
(J_1IJCHK) by making the appropriate Customizing settings in the Country
Version India (CIN) Implementation Guide (IMG)
Procedure
1 From the SAP Easy Access screen choose Indirect Taxes reg SalesOutbound
Movements reg Excise Invoice reg For Depot reg CreateChangeDisplay reg Delivery
or Material Document reg RG 23D Selection
2 Enter the delivery document number or the material number and choose
3 Select the excise invoice you want
4 Choose
5 Choose Excise invoice
A list of excise invoices appears These are the excise invoices at the depot with
a balance quantity
The system also shows a list of the A certificates that can be used You can pick
up any of the A certificates but they must be for the same excise invoice You
can only pick up an A certificate in its entirety You cannot select part of an A
certificate
6 Select the excise invoices that are relevant to the delivery
7 Specify what quantity to be used from each excise invoice
The system recalculates the excise accordingly
8 Go back to the item details screen
9 Save the data
Result
The system creates an entry in register RG 23D and generates the depot excise
invoice numbers
If you selected any A certificates the system also generates additional entries in
the RG 23D register The system marks the original A certificates as updated so
that they cannot be used for any other removals
CIN - Country India Version ~ Vol 2
Continue Volume 1
Creating Excise Invoices
Use
This is the procedure that you follow to create an excise invoice for the less
common types of goods movement
Procedure
1 From the SAP Easy Access screen choose Indirect Taxes reg SalesOutbound
Movements reg Excise Invoice reg For Other Movements reg CreateChangeDisplay
reg
2 On the selection screen enter data as required including
(i)Reference
group box
Specify which document you want to create the excise invoice for and which
excise group it is for
(ii)Details
group box
Specify the vendor or customer that you are sending the invoice to
3 Choose
If you entered an internal document number the system copies the item details
from it
4 Choose
5 Enter line items for each of the materials to be included in the excise invoice
For each item enter the following data
(i)Material
(ii)Quantity
(iii)Unit of measure
(iv)Base value
(v)Excise duty
6 To pick the rate and amount from a specific excise invoice choose Get excise
invoice
7 Save the excise invoice
If you are using the one-step procedure the system creates and posts an excise
invoice Otherwise the system saves the information but does not make any
postings it now has to be verified
Verifying and Posting Excise Invoices
Use
You follow this procedure to verify that the information in an excise invoice that
has already been created and to post it once you are satisfied
Procedure
From the SAP Easy Access screen choose Indirect Taxes reg SalesOutbound
Movements reg Excise Invoice reg For Other Movements reg Posting
1 Enter the internal document number of the excise invoice
2 Choose Release to accounting
The system displays the excise invoice The excise duty that is to be posted is
displayed at the foot of the screen which you can change if necessary
3 To access the balance utilization choose
4 To display the balance available on the CENVAT accounts choose Account
balances
5 Save the excise invoice
The system generates the accounting documents
6 To print the excise invoice choose
Making a Transfer Posting
Use
In this procedure you make a transfer posting for the goods ordered by another
plant For more information about this function see Entering the Removal from
Storage at the Issuing Plant
Procedure
1 From the SAP Easy Access screen choose Logistics reg Materials Management
reg Inventory Management reg Goods Movement reg Transfer Posting
2 Choose Movement type reg Transfer posting reg Plant to plant reg To stock in
transit
3 Enter the number of the issuing plant and storage location
4 Choose To purchase order
5 In the dialog box enter the number of the stock transport order that the
receiving plant created and choose
6 Check the data
7 Save the transfer posting
Transaction Codes for India
Transaction Action
J1I2 Prepare a sales tax register
J1I3 Create outgoing excise invoices in batches
J1I5
Update the RG 1 and Part I registers
J1I8
Post the challan used to remit TDS
J1IC194C
Create annual return under section 194 C (Classic TDS)
J1IC194D
Create annual return under section 194 D (Classic TDS)
J1IC194I
Create annual return under section 194 I (Classic TDS)
J1IC194J
Create annual return under section 194 J (Classic TDS)
J1IEX
Incoming Excise Invoices (central transaction)
J1IEX_C
Capture an incoming excise invoice (excise clerk)
J1IEX_P
Post an incoming excise invoice (excise supervisor)
J1INBANK
Post a bank challan
J1INCANC
Cancel a vendor withholding tax certificate
J1INCERT
Print a vendor withholding tax certificate
J1INCHLN
Create a remittance challan
J1INCUST
Post a customer withholding tax certificate
J1INHC
Withholding Tax Migration Health Check Program
J1INMIG
Withholding Tax Data Migration Tool
JI1NCHLC
Create a remittance challan for customers
J1INCC
Print customer withholding tax certificates
J1INMIS
Withholding Tax Information System
JI1NAR
Prepare annual returns (Extended Withholding Tax)
J1IF01
Create a subcontracting challan
J1IF11
Change a subcontracting challan
J1IF12
Display a subcontracting challan
J1IF13
Complete reverse or recredit a subcontracting challan
J1IFQ
Reconcile quantities for subcontracting challans
J1IFR
List subcontracting challans
J1IH
Make a CENVAT adjustment posting
J1IIN
Create an outgoing excise invoice
J1IJ
Assign excise invoices to a delivery for sales from depots
J1INJV
Adjust withholding tax Item
J1INREP
Reprint a vendor withholding tax certificate
J1INREV
Reverse a remittance challan
J1INPR
Calculate withholding tax on clearing accounts
J1INUT
Clear withholding tax on clearing accounts
J1IR
Download register data
J1IS
Process an excise invoice (outgoing) for other movements
J1IU
Process exemption forms
J1IW
Verify and post an incoming excise invoice
J1IX
Create an incoming excise invoice (without reference to purchase order)
J2I8
Transfer excise duty to CENVAT account
J2ID
Archive tax deducted at source (TDS) documents
J2IE
Locate tax deducted at source documents in archive
J2IU
Remit excise duty fortnightly
J2I9
Monthly CENVAT return
J1IG
Excise invoice entry at depot
J1IGA
Create additional excise entry at depot
J2I5
Extract data for excise registers
J2I6
Print excise registers
Sales from Factories
Purpose
This process describes how the SAP System handles the sales process allowing
for the creation of excise invoices which you have to send with each delivery
that is subject to excise duty There are two scenarios depending on whether
you want to send the commercial invoice along with the delivery or at a later
date
Prerequisites
In order for the system to be able to copy the information from document to
document you must have set up the copying control procedures in Customizing
for Sales and Distribution (SD) This differs according to when you want to send
the commercial invoice
1 Along with the delivery
In this case the document flow would be OR (standard sales order type) ndash LF
(standard delivery type) ndash F2 (invoice)
2 At a later date
The document flow would be OR ndash JF (delivery type a copy of LF) ndash JEX (pro
forma billing document type a copy of document type F8) ndash F2
In addition you must also have maintained the settings in the Country Version
India (CIN) Implementation Guide (IMG) by choosing Global Settings reg Assign
Excise Invoice Billing Type to Delivery Type
A sample pricing procedure JFACT is provided for this sales procedure
Process Flow
1 The sales clerk creates a sales order following the
(i)standard procedure
There are special procedures for
(i)Customers in possession of exemption forms
(ii)Exports
2 The shipping clerk creates a delivery again following the
standard procedure
On the initial screen you set the appropriate delivery type (see above)
3 In the warehouse the storeperson issues the goods
The system only allows users to create a pro forma excise invoice if the delivery
is complete so as to prevent them from creating multiple pro forma excise
invoices
4 What you do at this stage depends on whether you want to send the
commercial invoice along with the delivery or whether you want to invoice the
customer later
(A) If the invoice is to be shipped with delivery the shipping clerk
(i)Creates an invoice following the standard procedure
(ii)Creates an excise invoice from the invoice
(B) If the invoice is to be sent on at a later date the shipping clerk
(i)Creates the pro forma excise invoice
The pro forma excise invoice is only required for technical purposes and is not
sent to the customer The system does not make any accounting postings at this
stage
(ii)Creates
an excise invoice from the pro forma excise invoice
In both these cases the system creates an accounting document to post the
excise duty to a clearing account
Instead of creating excise invoices manually you can also have the system
create them automatically Alternatively you can create them in batches
5 You ship the goods
6 When the time comes to invoice the customer you create the invoice
following the standard procedure
Irrespective of the number of excise invoices that you have issued you can
combine the delivery items in a single invoice (if the standard requirements are
met)
Sales from Depots
Purpose
You may sell finished goods directly from the place of manufacture as described
under Sales from Factories or you may first ship them to a separate location for
storage (a depot) from where you will sell them The second procedure is
described here
Sales from depots are handled differently from sales from factories because of
excise law Excise duty is payable when you send the goods from the factory to
the depot but it is not levied again when you sell the goods
Sometimes when you make a final sale of goods from a depot price escalations
could have happened with retrospective effect In such scenarios you need to
pay the extra excise duty at the factory using an A Certificate You need to
register the A certificate details in the RG 23D register and the excise recovered
from the customer
Prerequisites
You have customized
1 Stock transport processing in Customizing for Materials Management (MM)
by choosing Purchasing reg Purchase Order reg Set Up Stock Transport Order
2 The copying control for copying stock transport order NL to excise invoice JEX
You make this setting in the Country Version India (CIN) Implementation Guide
(IMG) by choosing Sales and Distribution reg Assign Excise Invoice Billing Type to
Delivery Type
3 The item category NLN (standard transport order) so that it is relevant for
billing
You do this in the standard IMG in Customizing for Sales and Distribution (SD)
by choosing Sales reg Sales Documents reg Sales Document Item
Process Flow
1 You create the sales order following the
standard procedure
The standard pricing procedure for depot sales is JDEPOT
2 You create the delivery again following the
standard procedure
3 You
assign excise invoices to the delivery or material document
4 You
verify that you have selected the correct excise invoices and post them
Alternatively if you have selected the wrong excise invoices you can cancel the
assignment
5 You create the invoice following the standard procedure
SPECIAL STOCKS amp SPECIAL PROCUREMENT TYPES
Special Stocks are those stocks which are not belongs to our company code
These are not placed in our storage locations amp no physical inventory is
performed and treated as special stocks for the reason of ownership
Different types are of Special Stocks are as follows
1 Subcontracting
2 Consignment
3 Pipeline
4 Stock transfer
5 Third party
6 Returnable transport packaging
7 Sales order stock
8 Project stock
SUBCONTRACTING
In subcontracting process we create subcontracting PO to supply or issue
subcomponents to vendor in order to get final product The price maintained in
subcontracting PO is a service charge paid to vendor
Steps to perform subcontracting
1 Create subcontracting inforecord (Optional)
2 Create subcontracting PO with item category L
There are to ways to supply subcomponents to vendor
bull Manually maintain the subcomponents in the subcontracting
PO though explode BOM
bull Through BOM (Bill of material) T Code CS01 CS02 amp CS03
3 Create Transfer Posting with Movement Type 541 to issue the subcomponents
to the vendor
4 Goods Reciept
5 Invoice Reciept
Path ME21N ---gt Enter Item Category L --gt Material (End Product) PO
Quantity Delivery Date Net Price Plant --gt Click on Item Details --gt Tab
Material Data -- gtComponents select Explode BOM --gt Click on Components
button --gt Enter the subcomponents --gt Go back amp Save
Create Transfer Posting with movement type 541 amp T Code MB1B
GR MIGO
IR MIRO
CONSIGNMENT - (No Concept of Invoice)
In consignment process we will not create Purchasing document for the vendor
vendor himself send the material to our plant though the material is available
to our plant the responsibility amp ownership of the material is of vendor Aliability
only arises when the material withdrawal (Consumption) is posted in the system
from consignment stock
Steps
1 Create Consignment info record (mandatory)
2 Create Consignment purchase order with item category lsquoKrsquo amp maintain Info
record number
3 Create GR Movement type lsquo101Krsquo
4 Create GI Movement Type lsquo201Krsquo
5 Consignment settlement T Code MRKO
Path --gtME11 --gt In info record --gt Purchasing Org Data 1 views of info record
enter the tax code and save it
--gt Create Consignment Purchase Order ME21N (Price option is grayed out with
price zero)
--gt Create GR with movement type 101K
--gt Create Goods Issue (GI) T Code MB1A amp Movement Type 201K Enter Cost
center vendor
--gt Consignment Settlement T Code MRKO Click Activate Consignment Activate
Settle Execute
--gt Display the Document Number ie Invoice receipt T Code FB03
PIPELINE PROCESS (No Concept of Invoice)
In pipeline handling your company does not need to order or store the material
concerned It is ready available to you as and when required via pipeline (eg oil
or water) or some other type of cable (eg electricity) Consumption of the
material is settled with the vendor on a regular basis
Steps
1 Create a Material master record with material type PIPE
2 Create Pipeline info record
3 Create GI with movement type 201P
4 Pipeline settlement T Code MRKO
RETURNABLE TRANSPORT PACKAGING (RTP)
When company orders goods from a vendor the goods are delivered with
returnable transport packaging (pallets containers) that belongs to the vendor
and is stored on our premises until you return it to the vendor
Steps
1 Create Material master record with material type LEIH
2 Create PO
3 Create GR by maintaining RTP material by selecting the option transport
equipments with movement type 501M
4 IR
STOCK TRANSFER
In stock transfer processing goods are procured and supplied within a company
One plant orders the goods internally to another plant (receiving plantissuing
plant) The goods are procured with a special type of purchase order the stock
transport order
Steps
1 Create a Material master in both supplying and receiving plant
2 Create stock transport order (STO) with item category lsquoUrsquo
3 Create transfer posting with movement type 351 amp T Code MB1B (Go to
MMBE stock overview the stock will decrease in supplying plant and it will not
update stock of receiving plant it will be under stock in transit)
4 Create GR stock will update in receiving plant
This scenario is under one company code between two plants
Material Master Related Important Terms (Part 2)
Controlling (CO) An organizational unit in Accounting that reflects a
management-oriented structure of the organization for the purpose of internal
control
Operating results for profit centers can be analyzed using either the cost of
sales approach or the period accounting approach
By analyzing the fixed capital as well you can expand your profit centers for use
as investment centers
Profit Center
Key that uniquely identifies the profit center in the current controlling area
Valuation Category
Determines whether stocks of the material are valuated together or separately
Dependencies
In the case of split valuation this indicator also determines which valuation
types are allowed that is the criteria by which stocks can be valuated
Valuation type
Invoice Verification (MM-IV)
A subdivision of a valuation category in split valuation
Example An enterprise manages its stocks of a material using the valuation
category Quality comprising the following valuation types
bull High quality Average quality Inferior
Hazardous material number
Number that identifies the material as a hazardous material or as dangerous
goods and assigns hazardous material data or dangerous goods data to it
Use The hazardous material number indicates that the material is dangerous
making special precautions necessary for its storage and shipment
Valuation Class
Assignment of a material to a group of GL accounts
With other factors the valuation class determines the GL accounts that are
updated as a result of a valuation-relevant transaction or event such as a goods
movement
The valuation class makes it possible to
bull Post the stock values of materials of the same material type to different GL
accounts
bull Post the stock values of materials of different material types to the same GL
account
Default value for the valuation class for valuated stocks of this material
Use The valuation class has the following functions
bull Allows the stock values of materials of the same material type to be posted to
different GL accounts
bull Allows the stock values of materials of different material types to be posted to
the same GL account
bull Determines together with other factors the GL accounts updated for a
valuation-relevant transaction (such as a goods movement
CIN - Country India Version ~ Volume 1
PurposeCountry Version India (CIN) contains a number of enhancements to standard
Sales and Distribution (SD) functions that allow you to handle local
requirements in particular excise duty
Features
In Country Version India (CIN) this component handles sales processes as
found in India In addition to the generic functions it allows you to
Handle CENVAT in your sales processes
The system calculates excise on your sales and creates excise invoices as
required and makes the appropriate postings to your CENVAT accounts
It covers sales from factories sales from depots and offers functions for other
types of goods movements it also covers sales to export-oriented units and
export sales
Record concessional and exemption forms sent to you by your customers
Make adjustment postings to your CENVAT accounts
Excise Invoice (Outgoing)
Definition
The document that acts as the proof of payment of excise duty and is required
for the customer to take CENVAT credit on the item
Use
In the SAP System there are three different procedures for creating excise
invoices
Sales direct from the factory
This procedure is for when you sell manufactured goods straight from the
factory at which they were produced in which case you levy excise duty when
the goods leave the factory on their way to the customer
If when you send the goods to the customer you enclose the commercial
invoice you create the excise invoice with reference to the commercial invoice
If you want to send the commercial invoice after you have dispatched the goods
however you create the excise invoice with reference to a pro forma
commercial invoice For more information about these procedures see Sales
from Factories
As well as creating excise invoices individually you can also create them in
batches (see Creation of Excise Invoices in Batches)
Sales from depots
A depot is a site at which the goods are stored away from the factory at which
they were produced In this procedure you have to levy the excise duty when
you transfer the goods from the factory to the depot and then make sure this is
passed on to the customer when it makes a purchase For more information see
Sales from Depots
Sales (other goods movements)
Some other goods movements may also require you to create an excise invoice
with reference to other documents The SAP System offers separate functions
for these purposes (see Excise Invoices (Outgoing) for Other Movements)
StructureNumbering of Excise Invoices
Outgoing excise invoices have two numbers an internal document number
which is assigned immediately you create an excise invoice and an excise
invoice number which is not assigned until you have verified and posted it
As far as the excise invoice number is concerned you have to number your
outgoing excise invoices in sequential order starting each year on 1 April You
must notify the excise authority of the jurisdiction of the invoicing location The
serial number must be printed on each page of the excise invoice
Each number range is governed by a series group You must create at least one
series group in order to be able to number the excise invoices If you need more
than one number range you must create the corresponding number of series
groups You do so in the CIN Implementation Guide (IMG) by choosing Global
Settings reg Series Groups
Number of Line Items Per Excise Invoice
Some states allow you to include only a limited number of items for each page
of an excise invoice (for example if the excise invoices are to be printed on
prenumbered forms) You can customize the system so that it prints the excise
invoice accordingly in the CIN IMG by choosing Global Settings reg Excise
Registration IDs
Customer Master (Excise Data) Definition
The part of the customer master record that contains information relating to
Indian excise duty
Use
In conjunction with other data this data is used to calculate excise duty on
various transactions
To maintain the data from the SAP Easy Access screen choose Indirect Taxes reg
Master Data reg Excise Rate Maintenance and then select the following options
described below
Structure
The excise part of the customer master contains the following information
Customer Excise Details
On this screen you enter your customers tax registration numbers which are
used for various forms of correspondence and reports
1 Excise registration number (and the range division and collectorate in which
this is located)
2 Central sales tax (CST) number
3 Local sales tax (LST) registration number
4 Permanent account number (PAN)
In order for the system to be able to calculate which rate of excise duty to apply
on sales to the customer you must also assign it a customer excise duty status
(for more information about how this works see Determination of Excise Duty
Rates)
Excise Indicator for Plant and Customer
On this screen you define the final excise duty indicator (for more information
about how this works see Determination of Excise Duty Rates)
Determination of Excise Duty Use
When you execute a business transaction involving materials that are subject to
excise duty the system automatically calculates the duty for you
Prerequisites
In order for the system to be able to determine which rate of excise duty to
apply you must have maintained all the data on the Excise Rate Maintenance
screen which you can access from the SAP Easy Access screen by choosing
Indirect Taxes reg Master Data reg Excise Rate Maintenance
You maintain the following types of data
Plant master data
You assign each of your plants an excise duty indicator You can use the same
indicator for all the plants with the same excise status from a legal point of view
such as all those that are in an exempt zone
See also the information about manufacturers that are only entitled to deduct a
certain portion of the duty (see Partial CENVAT Credit)
Vendor master data
For each of your vendors with the same excise status from a legal perspective
you define an excise duty indicator You must also specify the vendor type ndash for
example whether the vendor is a manufacturer a depot or a first-stage dealer
You must also stipulate if the vendor qualifies as a small-scale industry
For each permutation of plant indicator and vendor indicator you then create a
final excise duty indicator
Customer master data
Similarly you assign the same excise duty indicator to each of your customers
that share the same legal excise status
Again for each permutation of plant indicator and customer indicator you then
create a final excise duty indicator
Material master data
Each material is assigned a chapter ID
Excise tax rate
For every chapter ID and final excise duty indicator you maintain the rate of
excise duty
If your business only qualifies for partial CENVAT credit you must customize
your system accordingly
Activities
Let us consider an example to illustrate how the system determines which rate
of excise duty to apply to a material Assume you are posting a sale of ball
bearings to a customer The system automatically determines the rate of excise
duty as follows
Looks up the customer master data to see what status you have assigned the
customer
Lets assume youve assigned the customer status 3
Looks up the plant master data to see what status you have assigned the plant
Similarly your plant has status 2
The system looks up the table under Excise Indicator for Plant and Customer to
see what the final excise duty indictor is for customer status 3 and plant status
2 It is 7
The system determines the chapter ID of the ball bearing for the plant
Letrsquos assume the chapter ID at plant for the ball bearings is 100001
Finally the system looks up the table under Excise Tax Rate to see what rate of
duty applies to chapter ID 100001 under status 7
Plant Master (Excise Data) Definition
The part of the plant master record that contains information relating to Indian
excise duty
Use
In conjunction with other data this data is used to calculate excise duty on
various transactions
To maintain the data from the SAP Easy Access screen choose Indirect Taxes reg
Master Data reg Excise Rate Maintenance and then select the following options
described below
Structure
The excise part of the plant master is divided into the following screens
Excise Indicator for Plant
On this screen you enter your plants tax registration numbers which are used
for various forms of correspondence and reports
1 Central sales tax (CST) number
2 Local sales tax (LST) registration number
3 Permanent account number (PAN)
In order for the system to be able to calculate which rate of excise duty to apply
on purchases for this plant you must also assign it a plant excise duty status
(for more information about how this works see Determination of Excise Duty
Rates)
Excise Indicator for Plant and Vendor
On this screen you define the final excise duty indicator (for more information
about how this works see Determination of Excise Duty Rates)
Excise Indicator for Plant and Customer
On this screen you define the final excise duty indicator (for more information
about how this works see Determination of Excise Duty Rates)
Automatic Creation of Excise Invoices Use
The SAP System can automatically create an outgoing excise invoice for you
immediately you post a commercial invoice (or a pro forma invoice) for a
customer sale This function applies to excise invoices for sales from factories
only
Prerequisites
To activate this function in the Country Version India (CIN) Implementation
Guide (IMG) make the following settings
1 Under Global Settings reg Excise Groups select Create EI
This activates the automatic creation function
2 Under Sales and Distribution reg Utilization Determination
Here you specify which CENVAT accounts the system is to post the different
types of excise duty to
3 Under Sales and Distribution reg Excise GroupndashSeries Group Determination
Here you specify which excise group and series group the excise invoices are to
be created for
Features
When you post an invoice the system creates an excise invoice All the
information that it needs to create the excise invoice is provided either by the
invoice or by the Customizing settings that you have made in Sales and
Distribution It also determines the excise invoice type automatically by means
of a user exit
Creating Excise Invoices for Stock Transfers 1 From the SAP Easy Access screen choose Indirect Taxes reg Procurement reg
Excise Invoice reg For Depot reg CreateChangeDisplay
2 In the Material document field enter the goods receipt number and choose
The system displays the information from the goods receipt for example the
sending plant the excise registration the range the division and the
collectorate
3 Choose Details
The system copies the items from the goods receipt document In the depot it is
possible to have a separate excise invoice at line item level
4 Enter the internal document number of the excise invoice sent by the factory
5 Choose More documents to go the excise invoice details screen
6 Enter the internal document number of the excise invoice from the factory
The system copies the information to the line item (for example the excise
invoice number the excise invoice date the item number the chapter ID the
excise invoice quantity the amount of excise duty paid the excise base value
and the serial number of the Part II register entry with which the excise was
paid)
You can change the receipt quantity to match the actual quantity received at
the depot if necessary The system automatically adjusts the excise
accordingly
7 Go back to the item details screen
8 Save the excise invoice
Creating Excise Invoices for Direct Purchases 1 From the SAP Easy Access screen choose Indirect Taxes reg Procurement reg
Excise Invoice reg For Depot reg CreateChangeDisplay
2 In the Material document field enter the goods receipt number and choose
The system displays the information from the goods receipt for example the
sending plant the excise registration the range the division and the
collectorate
You can also maintain the excise registration details for the ship-from party as
for with the vendor The ship-from can be different from the vendor code (The
delivering plant can be maintained as a ship-from in the system When a valid
ship-from is entered the excise registration details copied from the vendor will
be overwritten by the ship-from excise registration details)
The ship-from registration details displayed can also be overwritten manually
The dealers commercial invoice number can be stored in the vendor excise
invoice number as in this case the dealer himself will not have an excise
invoice
3 Choose Details
The system copies the items from the goods receipt document It also copies the
vendors excise invoice number and the serial numbers of the entries in the RG
23A RG 23C and personal ledger account (PLA) registers
4 Enter the internal document number of the excise invoice sent by the factory
5 Select an item and choose More documents to go the excise invoice details
screen
In the case of direct purchases there will not be any excise invoice in the
system so leave the internal document field blank The vendors invoice will
show the details of the excise invoices through which excise has been paid for
the item that is being dispatched You can enter these details here
6 For each item the chapter ID excise base value and excise duty amounts
are defaulted from the purchase order You can change them if there is any
difference Enter the excise amount paid and the receipt quantity You also
enter the Part II register serial numbers with which the excise duty was paid and
the excise registration information from the original excise invoice
7 Go back to the item details screen
8 Save the excise invoice
The system creates an entry in register RG 23D You can change the excise
invoice as long as it has not been used in any sales
Assigning Excise Invoices to a Delivery Use
You follow this procedure to specify which excise invoices are to be assigned to
a delivery from a depot (or other material document)
You can also automate this procedure using the batch selection program
(J_1IJCHK) by making the appropriate Customizing settings in the Country
Version India (CIN) Implementation Guide (IMG)
Procedure
1 From the SAP Easy Access screen choose Indirect Taxes reg SalesOutbound
Movements reg Excise Invoice reg For Depot reg CreateChangeDisplay reg Delivery
or Material Document reg RG 23D Selection
2 Enter the delivery document number or the material number and choose
3 Select the excise invoice you want
4 Choose
5 Choose Excise invoice
A list of excise invoices appears These are the excise invoices at the depot with
a balance quantity
The system also shows a list of the A certificates that can be used You can pick
up any of the A certificates but they must be for the same excise invoice You
can only pick up an A certificate in its entirety You cannot select part of an A
certificate
6 Select the excise invoices that are relevant to the delivery
7 Specify what quantity to be used from each excise invoice
The system recalculates the excise accordingly
8 Go back to the item details screen
9 Save the data
Result
The system creates an entry in register RG 23D and generates the depot excise
invoice numbers
If you selected any A certificates the system also generates additional entries in
the RG 23D register The system marks the original A certificates as updated so
that they cannot be used for any other removals
Continue see Volume 2 (Next post)
EXTERNAL SERVICE MASTER
EXTERNAL SERVICE MASTER ESM
We procure the different type of services from vendors they are-
1048774 Hardware amp software services
1048774 Construction amp transportation services
1048774 Machinery services
1048774 Annual maintenance services
1048774 Present to and breakdown service Etc
Service Procurement Cycle -
1048774 Requirement identification
1048774 Source determination
1048774 Source selection
1048774 Service master
1048774 Service PO
1048774 Service entry sheet acceptance
1048774 Invoice with respect to service entry sheet
Steps to perform services -
1 Create service master (AC03)
2 Create Service PO (ME21N) with AC Assignment category lsquoKrsquo amp Item
Category lsquoDrsquo
3 Create service entry sheet (ML81N)
4 Invoice with respect to Service Entry sheet
Customize settings
(For service category Number Ranges amp organization status for service
category)
SPRO 1048774 IMG 1048774 MM 1048774 ESM 1048774 Service Master
1048774 Define organization Status for service Categories
1048774 Define Service Category
1048774 Define Number Ranges
Define organization Status for service Categories
bull Click on New Entries
bull Org service Category
bull BDS (Basic data service is stored in service master record under this service
category)
bull CNST 1048774 Controlling Status
bull PUST 1048774 Purchasing data Status
bull SDST 1048774 Sales amp Distributed Status
bull Org status description service category 1048774 Press Enter amp Save
Define Service Category
bull Same path as above
bull Select Standard
bull Click on Copy as
bull AC reference 1048774 always takes as 0006
bull Enter amp Save
Define Number Ranges
Click on groups 1048774 Groups 1048774 Insert 1048774 select enter Number Ranges
Select the service category
Click on Element
Select Group amp Click on Element Group
Save
Create Service Master - (AC03)
Click on Create New Services
Service Number (any number) Service Category
Basic unit of measure (Hours lsquoHrsquo)
Enter
Basic Data 1048774 Master Service Group 1048774 007
Valuation class 1048774 3200 1048774 Enter 1048774 Save
To See the Service list 1048774 AC06
Create Service PO (ME21N)
AC assignment category lsquoKrsquo Item Category lsquoDrsquo
Enter the Short text Quantity Delivery date Net Price Material group Plant
Storage Location
Enter service number in Service Tab (Item Details) quantity price Enter
Account Assignment 1048774 GL Account Number eg400000
Cost Center eg 9999
Press Enter amp Save
Create Service Entry Sheet - ML81N
Select other purchase order (enter PO number) 1048774 Enter 1048774 Click on Create1048774 Enter
Short Text 1048774 Enter 1048774 Service Number 1048774 Enter ndashClick on Flag button 1048774 Save
Take Service entry Sheet Number
Go to Invoice MIRO 1048774 Enter company code 1048774 Select Service Sheet Option 1048774 Enter
Service Entry Sheet Number 1048774 save it
Physical Inventory and Inventory Management
Physical inventory Process - 1 Create Physical inventory document
T Code MI01 ndash Create single inventory document
T Code MI31 ndash Create multiple physical inventory documents
I Enter the desired fields ie material material type site storage location and
Maximum number items Documents ndash 100 etc 1048774 Press Enter
II Click on Process Session
III Select the line items and click on the process
IV System displays a dialog box select Background and click on process
Inventory document is created
2 Print Inventory Document and handed over to responsible person say
Manager
3 Enter Physical Inventory count
T Code MI04
i Enter the physical inventory document number Fiscal year count date 1048774 Press
enter
ii Enter the Material Quantity and click on post
4 Listing of difference
T Code MI20
Enter the physical inventory document number and execute system displays a
screen wherein we will be able to view the differences
5 Post the differences
T Code MI07 amp Mov Type 701 amp 702
Enter the physical inventory document number year posting date enter the
difference and post
INVENTORY MANAGEMENT Maintaining stock by value or by quantity is called inventory The total inventory
management deals with the goods movement of the material
Goods movement -
It is a process in which transaction resulting change in stocks It is further sub-
divided into three categories
1 Goods Receipt (GR)
2 Goods Issue (GI)
3 Transfer Posting (TP)
Goods Receipt (GR) - It is a goods movement in which receipt of goods is
posted for vendor or for production A GR posted in the system will leads to
increase in stock No Concept of Price or value
Goods Issue (GI) - It is goods movement in which material withdrawal is
posted for consumption or for customer A GI posted in system will leads to
decrease in stock
Stock Transfer (ST) - It is method of removal of material from one location
and transferring it to another location This process is performed between two
plants and two storage locations
Transfer Posting (TP) - It is a general term of stock transfer that changes the
stock type or stock categories The difference between transfer posting and
stock transfer is -
TP is logical stock transfer and ST is a physical stock transfer
Movement Type - It is a three-digit code which plays a role of important
control function in inventory management It acts as a central role in automatic
account determination It determines which stock account or consumption
account is updated in financial accounting
Reservation - It stores requisition created from particular cost center to
particular department for issuing the material reservation posted in the system
It leads to decrease in stock
Stock Types - The different stock types are
1 Unrestricted use stock
2 Quality inspection stock
3 Blocked stock
4 Warehouse stock
Transaction code -
1 To Create GR - MIGO
2 To Create GI - MB1A
3 For Transfer Posting - MB1B
4 To display MaterialGR document ndash MB03
5 To create reservations - MB21 MB22 MB23
6 To See Stock Overview - MMBE
7 To enter Other GR - MB1C
When GR is posted in the system
1 Material document is created - MB03
2 Accounting Document is generated - MB03
3 MMR updated - MM02 MM03
4 PO history updated - ME23N
Movement Typersquos
Movement Types under GR - 101 331333335501503505551553555
561351 (For all Mov Typersquos there is a reversal eg 101 has 102 Note No
reversal for 121)
Movement Typersquos under GI - 201 331333335551553555
Transfer Posting It is performed in three ways
1 TP BW Plant to Plant
2 TP BW Storage Location to Storage Location
3 TP BW Stock to Stock
Movement Types under TP BW Plant to Plant
301 - 1 step
303 amp 305 - 2 step
Movement Type under TP BW Storage location to Storage Location
311 - 1 step
313 amp 315 - 2 step
Movement Type under TP BW stock to stock
321 323 325 343349
To Cancel the GR Movement type 102
Return delivery to vendor movement type 122 amp T Code MIGO
Transfer Posting Stock to Stock
From Blocked stock to Quality Inspection
T Code MB1B amp Movement Type 349
From Blocked stock to Unrestricted Stock
T Code MB1B amp Movement Type 343
From Quality Inspection to Unrestricted Stock
T Code MB1B amp Movement Type 321
Transfer Posting from Plant to Plant
For One Step Movement Type 301
For Two Steps Movement Type 303 amp 305
After posting stock will display in Stock in Transit (Plant)
To receive material by receiving Plant Movement Type 305
Transfer Posting BW Storage Location to Storage Location
Under One Plant BW two Storage Locationrsquos Movement Type 311
Back to Parent storage Location Movement Type 313 (It Show stock in transfer)
use Movement type 315 at Parent storage location
To create Goods Issue (GI) T Code MB1A amp Movement Type 201
To Create Reservations T Code MB21 MB22 amp MB23
Creation of GI wrt Reservations
T Code MB1A amp Movement Type 201
Click on Reservation Enter Reservation Number 1048774 Click on Adopt + Details
GR wrt Reservations T Code MIGO amp Select as Reservation instead of GR
GR without PO Movement type 501 amp T Code MB1C Select others instead of
Purchase order Enter Material Quantity Plant Storage Location 1048774 Press Enter
Partner Option will be visible (Vendor) 1048774 Save it
Invoice - Invoice is a document which is issued to a buyer (Company) from the
supplier (vendor) for the payment The following information is maintained in
invoice
Invoice date Posting date Invoice ref number tax amount amount tax code
terms of payments vendor address banking accounting information etc
When invoice document is posted in the system
bull Invoice document created
bull Accounting document is generated (MIR4)
bull PO history updated (ME23N)
bull FI document created (FB03)
PRICE DETERMINATION PROCESS or PRICING PROCEDURE
CONDITIONS OR PRICING PROCEDURE or PRICE DETERMINATION PROCESSWe deal with the Pricing Procedure for vendors
PB00 Gross Price (info record contract scheduled Agreement)
PBXX Gross Price (PO)
FRA1 Freight
RA00 Discount on net
RA01 Discount on Gross
ZA00 Surcharge on net
SKT0 Surcharge discount
ZPB0 Rebates
MWVS Input Tax
MWAS Output Tax
BASB Base Amount
RM0000 Calculation Schema or Pricing Procedure
(PB00 amp PBXX)
RM0002 Calculation Schema or Pricing Procedure
(PB00)
PB00 --gt AB00
Copy the Standard one and create new one (ours)
RM0000 contains all the condition types
Pricing Procedure (PP)
We define the pricing procedure to define condition supplement for the material
price The condition supplement specifies the discount surcharge freight etc
that we want a system every time to access material price condition records
The total value of the material is calculated or based on all addition and
subtraction ie discounts surcharge tax freight etc
Condition Table
It is a table which defines the structure of condition record key
Condition Record
It is a data record used to store conditions or condition supplements ie
condition like discount freight and surcharge Tax etc
Condition Type
It is used for different functions In Pricing the condition types leads you to
differentiate different types of discounts in output determination batch
determination difference between two output types such as delivery note or
order confirmation between different strategy types
Access Sequence
It specifies the order in which system searches or access the condition records
from condition table
Difference between PB00 amp PBXX
1 Condition maintained in PB00 is time dependent whereas PBXX is time
independent
2 Condition type PB00 ndash used for IR RFQ Contract Schedule Agreement
Condition type PBXX ndash used for PO
Calculation Schema
The main function of calculation schema is to provide framework of steps for the
price determination process to specify the discounts surcharge freight rebate
etc
It also determines the sequence of conditions that are to be followed and in
which sequence
Schema Group Vendor
The main function of it is to identify or to pick the right process and conditions
for a particular vendor
Schema Group Purchasing Organization
Key that determines which calculation schema (pricing procedure) is to be used
in purchasing documents assigned to the relevant purchasing organization
Schema Group
It allows to group together the purchasing organizations which uses the same
calculation schema
Steps -
1 Create Access sequence
2 Create condition types
3 Create pricing procedure or calculation schema
4 Link pricing procedure amp access sequence to condition type
5 Create schema group for vendor
6 Create schema group for purchase organization
7 Assign schema group vendor-to-vendor master record in purchasing data
view
8 Assign schema group purchase organization to our purchase organization
9 In inforecord purchase organization data enter condition types and pricing or
calculation procedure
CUSTOMIZE SETTINGS -
SPRO --gt IMG--gtMM--gtPUR--gtConditions --gtDefine price determination Process
1 Define access sequence
2 Define Condition type
3 Define cal Schema
4 Define schema group
o Schema group vendor
o Schema group purchasing group
5 Assignment of schema group to PUR org
6 Define schema determination agrave determine cal schema for standard PO
PURCHASE ORDER
PURCHASE ORDER
PO is an external document created for the procurement of materials and
services from vendor The document of PO is also divided into 4 parts as PR -
1 Document Overview
2 Header (DeliveryInvoice Conditions Address Partners Org data status)
3 Item Overview (AC assign cat Item Category Material Plant Del date SL)
4 Item Details (Material data Confirmations condition control delivery delivery
Schedule Quantitiesweights invoice)
A procurement type is defined for each of the document items The following
procurement types exist
1048774 Standard
1048774 Subcontracting
1048774 Consignment
1048774 Stock transfer
1048774 External service
bull There are different ways to create PO -
1 Directly through transaction code ME21N
2 With reference to PR
3 With reference to RFQ
4 With reference to info records
5 With reference to Contracts
6 With reference to Cost Centre GL Account (cost element) for consumable
items or not stock items with account assignment category lsquoKrsquo (K= cost centre)
(For non stock and consumables)
0 COMMENTS L INKS TO THIS POST
LABELS PO PURCHASE ORDER
Reaction
s
PURCHASE REQUISITION T CODE ME51 or ME51N
Purchasing Requisition -
It is a request or instruction from particular department (Cost Centre) to
purchasing department to procure certain quantity of material and services It is
only one internal document in SAP-MM
Purchasing Requisition document is divided into four parts -
bull Document Overview
bull Header
bull Item Overview
bull Item Details
Document Overview -
It displays the list of purchasing documents which are created previously
according to our requirement
Header -
Any text message or information is maintained
Item Overview -
In this we enter material plant delivery date quantity storage location
purchasing group AC assignment category Item category etc
Item Details -
It displays the detailed information about item overview (like Master data
valuation source of supply contact person delivery address status etc)
0 COMMENTS L INKS TO THIS POST
LABELS PR PURCHASE PURCHASE ORDER PURCHASE REQUIS IT ION SALES ORDER
Reaction
s
Automatic PURCHASE ORDER (PO) How Automatic PO raised
How Automatic PO raised
At fixed time say 1230 AM automatic scheduler runs and checks whether the
stock is less than or equal to the replenishment point If stock is less than or
equal to Repli Point than PR raised automatically to Purchasing Deptt
bull Activate the option automatic PO in purchasing view in material master record
bull Activate the option automatic PO in purchasing data view in vendor master
record
bull Maintain Source List amp select fixed vendor
bull PR crated automatically
bull Automatic creation of PO from PR ndash ME59
Enter the Purchasing group purchasing organization Vendor Plant and
Purchasing Requisition Document Number 1048774 Execute
RELEASE PROCEDURE Release strategyThe main function of Release procedure is to determine the approval process
or the release process for the procurement of material amp services rather than
relying for manual signatures The release procedure contains release strategy
Release Strategy (RS)
A plan defining the release codes with which a purchase requisition item a
complete purchase requisition or a complete external purchasing document
must
be released (that is approved) and the sequence in which release is to be
effected
using these codes It is a unique set of conditions sequence and level of release
It is a 2 digit code eg S1 S2 S3etc
The Release Strategy contains the following -
bull Release Group
bull Release Codes
bull Release Indicators
bull Release Prerequisite
Release Group -
It is a 2-digit code which is assigned with a class (Class contains group of
characteristics) It contains one or more release strategies
Release Codes -
It is a 2digit code which identifies the department or responsible person for
the approval process amp release process
Eg AA - Manager
BB - Sr Manager
CC - Vice President
DD - Managing Director
Release Indicator -
It is a Code that represents the release status If the proper approval
process is performed that the release Strategy has to be release if it is not
performed than the Release Strategy is blocked
R ndash Release
B ndash Blocked
Release Conditions -
It determines the type of the release strategy
For eg
bull If the price ranges from 1 to 1000 It is approved by AA BB and CC
bull If the ranges from1001 to 1lac then it is approved by AA BB CC and DD
- 80 -
Release Prerequisite
It will informs the system which RS has to be take place in the PO CEKKO is
a communication structure where it displays the field names amp field lengths to
create characteristics ie we maintain characteristics in customizing by
selecting
the field names from this communication structure for all external documents
CEBAN is used for the purchasing requisition
Characteristics -
1 Net value of PO --- GNETW (GSWRT for PR)
2 Plant --- WERKS
3 Purchasing organization -- EKORG
4 Purchasing Group --- EKGRP
5Material group ndashMATKL
CUSTOMIZE SETTINGSSPRO--gtIMG--gt MM--gt Purchasing--gtPO--gt Release Procedure for PO
1 Edit Characteristics T Code CT04
2 Edit Class T Code CL02
3 Define Release Procedure for PO
4 Check Release Strategy
Edit Characteristics -
Characteristics - eg NET VALUE OF VALUE
Click or Create Button
Under Basic Data
Description - Value for PO
Status - Release
Data Type - Currency Format
No Of Characters - 15
Currency - EUR
Activate multiple values amp Internal Values Allowed
Additional Data
Table name - CEKKO
Field Name - GNETW
Values
Activate Additional Values
Save the document
Create another Characteristic for Plant -
Plant date Create ndash Description Status
Data Type Characteristic Format
Number of Characteristics 4
Activate Multiple Values
Additional data-
Table Name - CEKKO
Field Name - WERKS
Values
Activate Additional Values
For Purchasing Organization Name - EKORG
For purchasing Group EKGRP
Edit Class
Class - SAPMM
Class Type - 032 Release Strategies
Click on Create button
Basic Data
Description - Class for PO
Status - Released
Valid From _____ Valid to _____
Click on Characteristic
Characteristic
Enter all the Characteristics Created amp Save it
Define Release Procedure for PO-
bull Release Group
bull Release Codes
bull Release Indicators
bull Release Strategies
bull Workflow
Release Group - New Entries Release Group Class and Description
Press Enter amp Save
Release Code - New Entries
Group Codes Description
99 AA Manager
99 BB Sr Manager
99 CC Vice President
99 DD Managing Director
Press Enter amp Save
Release Indicator - (B ndash Blocked R - Release)
New Entries
Release Indicators Description
B Blocked
R Released
Release Strategies -
New Entries
Release Group 99
Release Strategy S1
Release Codes AA BB CC and DD
Click on Release Prerequisites
Release Status -
Continue
Classification
Enter the Value (Same Price)
Plant (9999)
Go Back amp Save it
Release Simulation - Simulate Release
Create a PO -
There are two ways to release the PO
Individual releaseME28
Collective release ME29N
How to delete procedure
Delete Release GP
Create Release RG
Delete R Strategies
Delete R Code
Delete R Group
SAP R3 SYSTEM LANDSCAPE
System LandscapeThe system landscape contains all the SAP Systems that you have installed It
can consist of several system groups whorsquos SAP Systems are linked by transport
routes
After you decide which clients you need and which roles you want them to have
you need to decide how to distribute them amongst the different SAP Systems
You can set up multiple clients independently of one another in a single SAP
System However when you configure the data you must remember that cross-
client Customizing settings and Repository objects are identical for all clients in
a single SAP System Changes made in one client apply immediately to all
clients in the system
Three-System Landscape
SAP recommends a three-system landscape in which each of the central clients
has its own SAP System
This consists of a development system DEV a quality assurance system QAS
and a production system PRD The development system contains the
Customizing client CUST the quality assurance system contains the quality
assurance client QTST and the production system contains the production client
PROD Make all changes to Customizing data and Repository objects in the
Customizing client When you release the corresponding change requests they
are transported into the quality assurance client This means that changes to
cross-client data only appear in the quality assurance client after the transport
In the quality assurance client you can test whether the transports are
complete or whether any linked changes are missing and are still in unreleased
change requests If the test is successful the change requests are transported
into the production client The production client is completely separate from the
other clients as regards cross-client data
SPECIAL STOCKS amp SPECIAL PROCUREMENT TYPES
Special Stocks are those stocks which are not belongs to our company code
These are not placed in our storage locations amp no physical inventory is
performed and treated as special stocks for the reason of ownership
Different types are of Special Stocks are as follows
1 Subcontracting
2 Consignment
3 Pipeline
4 Stock transfer
5 Third party
6 Returnable transport packaging
7 Sales order stock
8 Project stock
SUBCONTRACTING
In subcontracting process we create subcontracting PO to supply or issue
subcomponents to vendor in order to get final product The price maintained in
subcontracting PO is a service charge paid to vendor
Steps to perform subcontracting
1 Create subcontracting inforecord (Optional)
2 Create subcontracting PO with item category L
There are to ways to supply subcomponents to vendor
bull Manually maintain the subcomponents in the subcontracting
PO though explode BOM
bull Through BOM (Bill of material) T Code CS01 CS02 amp CS03
3 Create Transfer Posting with Movement Type 541 to issue the subcomponents
to the vendor
4 Goods Reciept
5 Invoice Reciept
Path ME21N ---gt Enter Item Category L --gt Material (End Product) PO
Quantity Delivery Date Net Price Plant --gt Click on Item Details --gt Tab
Material Data -- gtComponents select Explode BOM --gt Click on Components
button --gt Enter the subcomponents --gt Go back amp Save
Create Transfer Posting with movement type 541 amp T Code MB1B
GR MIGO
IR MIRO
CONSIGNMENT - (No Concept of Invoice)
In consignment process we will not create Purchasing document for the vendor
vendor himself send the material to our plant though the material is available
to our plant the responsibility amp ownership of the material is of vendor Aliability
only arises when the material withdrawal (Consumption) is posted in the system
from consignment stock
Steps
1 Create Consignment info record (mandatory)
2 Create Consignment purchase order with item category lsquoKrsquo amp maintain Info
record number
3 Create GR Movement type lsquo101Krsquo
4 Create GI Movement Type lsquo201Krsquo
5 Consignment settlement T Code MRKO
Path --gtME11 --gt In info record --gt Purchasing Org Data 1 views of info record
enter the tax code and save it
--gt Create Consignment Purchase Order ME21N (Price option is grayed out with
price zero)
--gt Create GR with movement type 101K
--gt Create Goods Issue (GI) T Code MB1A amp Movement Type 201K Enter Cost
center vendor
--gt Consignment Settlement T Code MRKO Click Activate Consignment Activate
Settle Execute
--gt Display the Document Number ie Invoice receipt T Code FB03
PIPELINE PROCESS (No Concept of Invoice)
In pipeline handling your company does not need to order or store the material
concerned It is ready available to you as and when required via pipeline (eg oil
or water) or some other type of cable (eg electricity) Consumption of the
material is settled with the vendor on a regular basis
Steps
1 Create a Material master record with material type PIPE
2 Create Pipeline info record
3 Create GI with movement type 201P
4 Pipeline settlement T Code MRKO
RETURNABLE TRANSPORT PACKAGING (RTP)
When company orders goods from a vendor the goods are delivered with
returnable transport packaging (pallets containers) that belongs to the vendor
and is stored on our premises until you return it to the vendor
Steps
1 Create Material master record with material type LEIH
2 Create PO
3 Create GR by maintaining RTP material by selecting the option transport
equipments with movement type 501M
4 IR
STOCK TRANSFER
In stock transfer processing goods are procured and supplied within a company
One plant orders the goods internally to another plant (receiving plantissuing
plant) The goods are procured with a special type of purchase order the stock
transport order
Steps
1 Create a Material master in both supplying and receiving plant
2 Create stock transport order (STO) with item category lsquoUrsquo
3 Create transfer posting with movement type 351 amp T Code MB1B (Go to
MMBE stock overview the stock will decrease in supplying plant and it will not
update stock of receiving plant it will be under stock in transit)
4 Create GR stock will update in receiving plant
This scenario is under one company code between two plants
SAP IMPLEMENTATION PROCESS End to End Inplementation of SAP
First we have to prepare documentation about the client business (like turnover
vendors customers payments materials production marketing etc)
The implementer company made two teams (1) Steering team (2) Steering
community
Steering team (SAP functional consultants) prepares a detailed
documentation about the client with the help of core team (client company
team)
amp this study is known as Feasibility Study After that the steering team handed
over this documentation to Steering community (Project manager Sr software
engineer and other higher authorities)
Steering community prepares the BBP (Business Blue Print) BBP
Prepares in MS-Word
10487741048774 ASAP - Accelerated System Application Product in Data Processing
10487741048774 Business Process - ASAP Methodology
1 Project Preparation
2 BBP (Business Blue Print)
3 Realization
4 Final Preparation
5 Go live amp Support
10487741048774 Project Preparation -
It consists of identifying team members amp development strategy as
how to go
AS ndash IS (Existing Process followed requirements)
TO ndash BE (Requirement analysis and best process recommended)
Difference between (AS ndash IS) amp (TO - BE) is called GAP Analysis
10487741048774 Business Blue Print (BPP) -
It is a legal documentation between client amp the company
(implementer service provider) We have to understand the current business
process of client amp analyzing the business amp prepare documentation It is a
detailed documentation for the client
10487741048774 Realization -
This Phase is used to Implement or migrate the entire business of
client from Non-SAP environment to SAP environment
10487741048774 Final Preparation -
This phase is used for testing amp end user training After successfully
completion of this phase client is ready to run business in SAP R3
10487741048774 Go live amp Support -
In this phase we deliver the project end date amp end user training at
client site
THIRD - PARTY PROCESSING
THIRD - PARTY PROCESSING
In third party processing your company passes on a sales order to an external
vendor who sends the goods directly to the customer The sales order is not
processed by your company but by the vendor Third-party items can be
entered in purchase requisitions purchase orders and sales orders Third party
processing is integrated with Sales and Distribution If the sales order contains
third-party items the system creates a purchase requisition from the order
Steps
1 Create MMR with sales views and maintain Division Distribution channel
sales org item category group and general item category group ndash BANS (Third
party item) amp Account group Sold to party
2 Create Customer master record T Code XD01 XD02 XD03
3 Create sales order T Code VA01 VA02 VA03 (PR generated automatically)
4 PO - T Code ME21N
5 GR ndash T Code MIGO
6 IR ndash T Code MIRO
7 Sales Billing Billing Document T Code VF01 VF02 VF03

Difference between (AS ndash IS) amp (TO - BE) is called GAP Analysis
bull Business Blue Print (BPP) -It is a legal documentation between client amp the company (implementer
service provider) We have to understand the current business process of client
amp analyzing the business amp prepare documentation It is a detailed
documentation for the client
bull Realization -This Phase is used to Implement or migrate the entire business of client from
Non-SAP environment to SAP environment
bull Final Preparation -This phase is used for testing amp end user training After successfully completion
of this phase client is ready to run business in SAP R3
bull Go live amp Support -In this phase we deliver the project end date amp end user training at client site
General Terms (Basics)bull Client setup is done by BASIS (Business Administration System Integrated
Software)
It is a logical unit or independent unit which is used to organize a specific
organization data
Company Company Code amp Controlling Area are created by SAP FICO
consultant
bull Sales Part is done by SAP SD consultant
1 Sales Org + 1 Distribution Channel + 1 Division = Sales Area
bull Rest is done by SAP MM consultant (Plant Storage location Pur Org Ref Pur
Org)
bull IDES - Internet Demonstration Evaluated System (Complete SAP System used
for educational purpose)
bull IMG - Implementation guide (Customizing purpose)
bull Maximum number of screen or sessions can be opened is 6
Transaction Code - N (TCode) Closes the current session amp opens the new
session
Transaction Code - O (TCode) Minimizes the current screen amp opens new
session
bull Difference between SAP 47 amp ECC 50 ECC 60
ECC 50 amp ECC 60 has its own database SAP DB MAX DB
Path of SPRO
SAP EASY ACCESS --gt TOOLS --gt CUSTOMIZING --gt IMG --gt SPRO
Next Issue (Customize settings of Company Company Code How to create
Plant Purchasing Org Purchasing Group Storage Location etc)
ITEM CATEGORY (I) ACCOUNT ASSIGNMENT CATEGORY (A)
ITEM CATEGORY (I)
In terms of MM ndash PUR -An identifier indicating the characteristics of an item
The item category determines whether the following are mandatory or
permitted for an item
Material Number Account assignment Inventory Management in the SAP
system Goods Receipt amp Invoice Receipt
In terms Advertising Management (IS-M-AM)
Characteristics that defines sales relevant features of document items including
planning pricing production billing etc
Item category plans a vital role in MM It is a key which determines how the
procurement of the material amp services is to be controlled for the particular
item
Depending upon the item categories the scenario of purchasing documents
varies changes
Document types of item category -
1 Standard
2 L ndash Sub contracting
3 K ndash Consignment
4 B ndash Limit
5 U ndash Stock Transfer
6 D ndash Services
7 T ndash Text
8 S ndash Third Party
Account Assignment Category (A) -
It determines which AC Assignment data is necessary or required for the
particular item
Different Types -
1 1 - Third Party
2 P - Projects
3 K ndash Cost Center
4 A - Asset
5 C - Sales order
6 U - Unknown etc
Material Master Related Important Terms (Part 2)
Controlling (CO) An organizational unit in Accounting that reflects a
management-oriented structure of the organization for the purpose of internal
control
Operating results for profit centers can be analyzed using either the cost of
sales approach or the period accounting approach
By analyzing the fixed capital as well you can expand your profit centers for use
as investment centers
Profit Center
Key that uniquely identifies the profit center in the current controlling area
Valuation Category
Determines whether stocks of the material are valuated together or separately
Dependencies
In the case of split valuation this indicator also determines which valuation
types are allowed that is the criteria by which stocks can be valuated
Valuation type
Invoice Verification (MM-IV)
A subdivision of a valuation category in split valuation
Example An enterprise manages its stocks of a material using the valuation
category Quality comprising the following valuation types
bull High quality Average quality Inferior
Hazardous material number
Number that identifies the material as a hazardous material or as dangerous
goods and assigns hazardous material data or dangerous goods data to it
Use The hazardous material number indicates that the material is dangerous
making special precautions necessary for its storage and shipment
Valuation Class
Assignment of a material to a group of GL accounts
With other factors the valuation class determines the GL accounts that are
updated as a result of a valuation-relevant transaction or event such as a goods
movement
The valuation class makes it possible to
bull Post the stock values of materials of the same material type to different GL
accounts
bull Post the stock values of materials of different material types to the same GL
account
Default value for the valuation class for valuated stocks of this material
Use The valuation class has the following functions
bull Allows the stock values of materials of the same material type to be posted to
different GL accounts
bull Allows the stock values of materials of different material types to be posted to
the same GL account
bull Determines together with other factors the GL accounts updated for a
valuation-relevant transaction (such as a goods movement
Material Master Related Important Terms (Part 1)
Material Group
Key that you use to group together several materials or services with the same
attributes and to assign them to a particular material group
Use You can use material groups to
bull Restrict the scope of analyses
bull Search specifically for material master records via search helps
Purchasing Group
Key for a buyer or a group of buyers who isare responsible for certain
purchasing activities
Use
bull Internally the purchasing group is responsible for the procurement of a
material or a class of materials
bull Externally it is the medium through which contacts with the vendor are
maintained
Purchasing Value Key
Key defining the reminder days and tolerance limits valid as well as the
shipping instructions and order acknowledgment requirement of the material for
Purchasing
Procedure If you have chosen a purchasing value key the system enters the
values defined in Customizing (for Purchasing) in the fields
Batch Batches (LO-BM)
A subset of the total quantity of a material in stock managed separately from
other subsets of the same material
Example Different production lots (such as paints dyes wallpapers and
pharmaceutical products) delivery lots quality grades of a material
Batch management requirement indicator Specifies whether the material is
managed in batches
Use
This indicator can be set in the material master record manually or if batches
are valuated individually it is set automatically for the plants concerned in
which case it cannot be changed
The indicator cannot be changed if stocks exist in either the current period or in
the previous period The reason for checking the previous period is because
stocks can be posted to this period when goods movements are entered
AUOTOMATIC ACCOUNT DETERMINATION OR ASSIGNMENT
AUOTOMATIC ACCOUNT DETERMINATION OR ASSIGNMENT Whenever there is goods movement accounting documents financial accounts
updated automatically so we do some settings in customization is called
automatic account assignment
It works with three important factors -
bull Chart of accounts
bull Material type
bull Valuation grouping code
Chart of accounts - It is a group of accounts (GL Accounts) which is assigned
to our company code One company code is assigned to one chart of account
but one chart of account can be maintained for n number of company codes
Valuation grouping code valuation modification - It is a 4-digit code
which is assigned to company code along with valuation area (Plant)
Account category reference - It is a 4-digit code that establishes relationship
between material types and valuation class One account cat ref assigned to n
number of material type and valuation class
Transaction Event key - It is an internal processing key that facilitates the
automatic account determination for the various material and invoice posting
Use - Key to determine the account in which a posting line is generated (at
least two transaction event keys are involved in each posting)
Value String - It indicates the posting rule that always contain same account
assignment char to certain transaction event key
Account Modifier - It is a subdivision of transaction event key in which GL
account is linked during the process of automatic account determination
Valuation class and material type is assigned to it
Steps -
1 Activate valuation Group code
2 Assign Valuation area to valuation grouping code
3 Create Account Cat Ref and valuation class
4 Assign valuation class to Account Cat Ref
5 Assign Account Cat Ref to Material type
6 Assign account grouping to movement types
7 Configure Automatic posting
Customize settings -
SPRO 1048774 IMG 1048774 MM 1048774 Valuation Class and Account Assignment 1048774 Account
Determination 1048774 Account determination without wizard
1 Define valuation control T Code OMWM
2 Group together valuation areas T Code OMWD
3 Define valuation class T Code OMSK
bull Account category reference
bull Valuation class
bull Material type Account Cat Ref
4 Define Account grouping for movement type T Code OMWN
5 Configure automatic posting T Code OMWB
Transaction Event Keyrsquos
BSX - Stock Posting Inventory Posting
PRD - Price difference
GBB - Offsetting entry for stock posting
WRX - GRIR Clearing
FRI - Freight Clearing
Automatic PURCHASE ORDER (PO) How Automatic PO raised
How Automatic PO raised
At fixed time say 1230 AM automatic scheduler runs and checks whether the
stock is less than or equal to the replenishment point If stock is less than or
equal to Repli Point than PR raised automatically to Purchasing Deptt
bull Activate the option automatic PO in purchasing view in material master record
bull Activate the option automatic PO in purchasing data view in vendor master
record
bull Maintain Source List amp select fixed vendor
bull PR crated automatically
bull Automatic creation of PO from PR ndash ME59
Enter the Purchasing group purchasing organization Vendor Plant and
Purchasing Requisition Document Number 1048774 Execute
Material Master Related Important Terms (Part 1)
Material Group
Key that you use to group together several materials or services with the same
attributes and to assign them to a particular material group
Use You can use material groups to
bull Restrict the scope of analyses
bull Search specifically for material master records via search helps
Purchasing Group
Key for a buyer or a group of buyers who isare responsible for certain
purchasing activities
Use
bull Internally the purchasing group is responsible for the procurement of a
material or a class of materials
bull Externally it is the medium through which contacts with the vendor are
maintained
Purchasing Value Key
Key defining the reminder days and tolerance limits valid as well as the
shipping instructions and order acknowledgment requirement of the material for
Purchasing
Procedure If you have chosen a purchasing value key the system enters the
values defined in Customizing (for Purchasing) in the fields
Batch Batches (LO-BM)
A subset of the total quantity of a material in stock managed separately from
other subsets of the same material
Example Different production lots (such as paints dyes wallpapers and
pharmaceutical products) delivery lots quality grades of a material
Batch management requirement indicator Specifies whether the material is
managed in batches
Use
This indicator can be set in the material master record manually or if batches
are valuated individually it is set automatically for the plants concerned in
which case it cannot be changed
The indicator cannot be changed if stocks exist in either the current period or in
the previous period The reason for checking the previous period is because
stocks can be posted to this period when goods movements are entered
CIN - Country India Version ~ Volume 1
PurposeCountry Version India (CIN) contains a number of enhancements to standard
Sales and Distribution (SD) functions that allow you to handle local
requirements in particular excise duty
Features
In Country Version India (CIN) this component handles sales processes as
found in India In addition to the generic functions it allows you to
Handle CENVAT in your sales processes
The system calculates excise on your sales and creates excise invoices as
required and makes the appropriate postings to your CENVAT accounts
It covers sales from factories sales from depots and offers functions for other
types of goods movements it also covers sales to export-oriented units and
export sales
Record concessional and exemption forms sent to you by your customers
Make adjustment postings to your CENVAT accounts
Excise Invoice (Outgoing)
Definition
The document that acts as the proof of payment of excise duty and is required
for the customer to take CENVAT credit on the item
Use
In the SAP System there are three different procedures for creating excise
invoices
Sales direct from the factory
This procedure is for when you sell manufactured goods straight from the
factory at which they were produced in which case you levy excise duty when
the goods leave the factory on their way to the customer
If when you send the goods to the customer you enclose the commercial
invoice you create the excise invoice with reference to the commercial invoice
If you want to send the commercial invoice after you have dispatched the goods
however you create the excise invoice with reference to a pro forma
commercial invoice For more information about these procedures see Sales
from Factories
As well as creating excise invoices individually you can also create them in
batches (see Creation of Excise Invoices in Batches)
Sales from depots
A depot is a site at which the goods are stored away from the factory at which
they were produced In this procedure you have to levy the excise duty when
you transfer the goods from the factory to the depot and then make sure this is
passed on to the customer when it makes a purchase For more information see
Sales from Depots
Sales (other goods movements)
Some other goods movements may also require you to create an excise invoice
with reference to other documents The SAP System offers separate functions
for these purposes (see Excise Invoices (Outgoing) for Other Movements)
StructureNumbering of Excise Invoices
Outgoing excise invoices have two numbers an internal document number
which is assigned immediately you create an excise invoice and an excise
invoice number which is not assigned until you have verified and posted it
As far as the excise invoice number is concerned you have to number your
outgoing excise invoices in sequential order starting each year on 1 April You
must notify the excise authority of the jurisdiction of the invoicing location The
serial number must be printed on each page of the excise invoice
Each number range is governed by a series group You must create at least one
series group in order to be able to number the excise invoices If you need more
than one number range you must create the corresponding number of series
groups You do so in the CIN Implementation Guide (IMG) by choosing Global
Settings reg Series Groups
Number of Line Items Per Excise Invoice
Some states allow you to include only a limited number of items for each page
of an excise invoice (for example if the excise invoices are to be printed on
prenumbered forms) You can customize the system so that it prints the excise
invoice accordingly in the CIN IMG by choosing Global Settings reg Excise
Registration IDs
Customer Master (Excise Data) Definition
The part of the customer master record that contains information relating to
Indian excise duty
Use
In conjunction with other data this data is used to calculate excise duty on
various transactions
To maintain the data from the SAP Easy Access screen choose Indirect Taxes reg
Master Data reg Excise Rate Maintenance and then select the following options
described below
Structure
The excise part of the customer master contains the following information
Customer Excise Details
On this screen you enter your customers tax registration numbers which are
used for various forms of correspondence and reports
1 Excise registration number (and the range division and collectorate in which
this is located)
2 Central sales tax (CST) number
3 Local sales tax (LST) registration number
4 Permanent account number (PAN)
In order for the system to be able to calculate which rate of excise duty to apply
on sales to the customer you must also assign it a customer excise duty status
(for more information about how this works see Determination of Excise Duty
Rates)
Excise Indicator for Plant and Customer
On this screen you define the final excise duty indicator (for more information
about how this works see Determination of Excise Duty Rates)
Determination of Excise Duty Use
When you execute a business transaction involving materials that are subject to
excise duty the system automatically calculates the duty for you
Prerequisites
In order for the system to be able to determine which rate of excise duty to
apply you must have maintained all the data on the Excise Rate Maintenance
screen which you can access from the SAP Easy Access screen by choosing
Indirect Taxes reg Master Data reg Excise Rate Maintenance
You maintain the following types of data
Plant master data
You assign each of your plants an excise duty indicator You can use the same
indicator for all the plants with the same excise status from a legal point of view
such as all those that are in an exempt zone
See also the information about manufacturers that are only entitled to deduct a
certain portion of the duty (see Partial CENVAT Credit)
Vendor master data
For each of your vendors with the same excise status from a legal perspective
you define an excise duty indicator You must also specify the vendor type ndash for
example whether the vendor is a manufacturer a depot or a first-stage dealer
You must also stipulate if the vendor qualifies as a small-scale industry
For each permutation of plant indicator and vendor indicator you then create a
final excise duty indicator
Customer master data
Similarly you assign the same excise duty indicator to each of your customers
that share the same legal excise status
Again for each permutation of plant indicator and customer indicator you then
create a final excise duty indicator
Material master data
Each material is assigned a chapter ID
Excise tax rate
For every chapter ID and final excise duty indicator you maintain the rate of
excise duty
If your business only qualifies for partial CENVAT credit you must customize
your system accordingly
Activities
Let us consider an example to illustrate how the system determines which rate
of excise duty to apply to a material Assume you are posting a sale of ball
bearings to a customer The system automatically determines the rate of excise
duty as follows
Looks up the customer master data to see what status you have assigned the
customer
Lets assume youve assigned the customer status 3
Looks up the plant master data to see what status you have assigned the plant
Similarly your plant has status 2
The system looks up the table under Excise Indicator for Plant and Customer to
see what the final excise duty indictor is for customer status 3 and plant status
2 It is 7
The system determines the chapter ID of the ball bearing for the plant
Letrsquos assume the chapter ID at plant for the ball bearings is 100001
Finally the system looks up the table under Excise Tax Rate to see what rate of
duty applies to chapter ID 100001 under status 7
Plant Master (Excise Data) Definition
The part of the plant master record that contains information relating to Indian
excise duty
Use
In conjunction with other data this data is used to calculate excise duty on
various transactions
To maintain the data from the SAP Easy Access screen choose Indirect Taxes reg
Master Data reg Excise Rate Maintenance and then select the following options
described below
Structure
The excise part of the plant master is divided into the following screens
Excise Indicator for Plant
On this screen you enter your plants tax registration numbers which are used
for various forms of correspondence and reports
1 Central sales tax (CST) number
2 Local sales tax (LST) registration number
3 Permanent account number (PAN)
In order for the system to be able to calculate which rate of excise duty to apply
on purchases for this plant you must also assign it a plant excise duty status
(for more information about how this works see Determination of Excise Duty
Rates)
Excise Indicator for Plant and Vendor
On this screen you define the final excise duty indicator (for more information
about how this works see Determination of Excise Duty Rates)
Excise Indicator for Plant and Customer
On this screen you define the final excise duty indicator (for more information
about how this works see Determination of Excise Duty Rates)
Automatic Creation of Excise Invoices Use
The SAP System can automatically create an outgoing excise invoice for you
immediately you post a commercial invoice (or a pro forma invoice) for a
customer sale This function applies to excise invoices for sales from factories
only
Prerequisites
To activate this function in the Country Version India (CIN) Implementation
Guide (IMG) make the following settings
1 Under Global Settings reg Excise Groups select Create EI
This activates the automatic creation function
2 Under Sales and Distribution reg Utilization Determination
Here you specify which CENVAT accounts the system is to post the different
types of excise duty to
3 Under Sales and Distribution reg Excise GroupndashSeries Group Determination
Here you specify which excise group and series group the excise invoices are to
be created for
Features
When you post an invoice the system creates an excise invoice All the
information that it needs to create the excise invoice is provided either by the
invoice or by the Customizing settings that you have made in Sales and
Distribution It also determines the excise invoice type automatically by means
of a user exit
Creating Excise Invoices for Stock Transfers 1 From the SAP Easy Access screen choose Indirect Taxes reg Procurement reg
Excise Invoice reg For Depot reg CreateChangeDisplay
2 In the Material document field enter the goods receipt number and choose
The system displays the information from the goods receipt for example the
sending plant the excise registration the range the division and the
collectorate
3 Choose Details
The system copies the items from the goods receipt document In the depot it is
possible to have a separate excise invoice at line item level
4 Enter the internal document number of the excise invoice sent by the factory
5 Choose More documents to go the excise invoice details screen
6 Enter the internal document number of the excise invoice from the factory
The system copies the information to the line item (for example the excise
invoice number the excise invoice date the item number the chapter ID the
excise invoice quantity the amount of excise duty paid the excise base value
and the serial number of the Part II register entry with which the excise was
paid)
You can change the receipt quantity to match the actual quantity received at
the depot if necessary The system automatically adjusts the excise
accordingly
7 Go back to the item details screen
8 Save the excise invoice
Creating Excise Invoices for Direct Purchases 1 From the SAP Easy Access screen choose Indirect Taxes reg Procurement reg
Excise Invoice reg For Depot reg CreateChangeDisplay
2 In the Material document field enter the goods receipt number and choose
The system displays the information from the goods receipt for example the
sending plant the excise registration the range the division and the
collectorate
You can also maintain the excise registration details for the ship-from party as
for with the vendor The ship-from can be different from the vendor code (The
delivering plant can be maintained as a ship-from in the system When a valid
ship-from is entered the excise registration details copied from the vendor will
be overwritten by the ship-from excise registration details)
The ship-from registration details displayed can also be overwritten manually
The dealers commercial invoice number can be stored in the vendor excise
invoice number as in this case the dealer himself will not have an excise
invoice
3 Choose Details
The system copies the items from the goods receipt document It also copies the
vendors excise invoice number and the serial numbers of the entries in the RG
23A RG 23C and personal ledger account (PLA) registers
4 Enter the internal document number of the excise invoice sent by the factory
5 Select an item and choose More documents to go the excise invoice details
screen
In the case of direct purchases there will not be any excise invoice in the
system so leave the internal document field blank The vendors invoice will
show the details of the excise invoices through which excise has been paid for
the item that is being dispatched You can enter these details here
6 For each item the chapter ID excise base value and excise duty amounts
are defaulted from the purchase order You can change them if there is any
difference Enter the excise amount paid and the receipt quantity You also
enter the Part II register serial numbers with which the excise duty was paid and
the excise registration information from the original excise invoice
7 Go back to the item details screen
8 Save the excise invoice
The system creates an entry in register RG 23D You can change the excise
invoice as long as it has not been used in any sales
Assigning Excise Invoices to a Delivery Use
You follow this procedure to specify which excise invoices are to be assigned to
a delivery from a depot (or other material document)
You can also automate this procedure using the batch selection program
(J_1IJCHK) by making the appropriate Customizing settings in the Country
Version India (CIN) Implementation Guide (IMG)
Procedure
1 From the SAP Easy Access screen choose Indirect Taxes reg SalesOutbound
Movements reg Excise Invoice reg For Depot reg CreateChangeDisplay reg Delivery
or Material Document reg RG 23D Selection
2 Enter the delivery document number or the material number and choose
3 Select the excise invoice you want
4 Choose
5 Choose Excise invoice
A list of excise invoices appears These are the excise invoices at the depot with
a balance quantity
The system also shows a list of the A certificates that can be used You can pick
up any of the A certificates but they must be for the same excise invoice You
can only pick up an A certificate in its entirety You cannot select part of an A
certificate
6 Select the excise invoices that are relevant to the delivery
7 Specify what quantity to be used from each excise invoice
The system recalculates the excise accordingly
8 Go back to the item details screen
9 Save the data
Result
The system creates an entry in register RG 23D and generates the depot excise
invoice numbers
If you selected any A certificates the system also generates additional entries in
the RG 23D register The system marks the original A certificates as updated so
that they cannot be used for any other removals
CIN - Country India Version ~ Vol 2
Continue Volume 1
Creating Excise Invoices
Use
This is the procedure that you follow to create an excise invoice for the less
common types of goods movement
Procedure
1 From the SAP Easy Access screen choose Indirect Taxes reg SalesOutbound
Movements reg Excise Invoice reg For Other Movements reg CreateChangeDisplay
reg
2 On the selection screen enter data as required including
(i)Reference
group box
Specify which document you want to create the excise invoice for and which
excise group it is for
(ii)Details
group box
Specify the vendor or customer that you are sending the invoice to
3 Choose
If you entered an internal document number the system copies the item details
from it
4 Choose
5 Enter line items for each of the materials to be included in the excise invoice
For each item enter the following data
(i)Material
(ii)Quantity
(iii)Unit of measure
(iv)Base value
(v)Excise duty
6 To pick the rate and amount from a specific excise invoice choose Get excise
invoice
7 Save the excise invoice
If you are using the one-step procedure the system creates and posts an excise
invoice Otherwise the system saves the information but does not make any
postings it now has to be verified
Verifying and Posting Excise Invoices
Use
You follow this procedure to verify that the information in an excise invoice that
has already been created and to post it once you are satisfied
Procedure
From the SAP Easy Access screen choose Indirect Taxes reg SalesOutbound
Movements reg Excise Invoice reg For Other Movements reg Posting
1 Enter the internal document number of the excise invoice
2 Choose Release to accounting
The system displays the excise invoice The excise duty that is to be posted is
displayed at the foot of the screen which you can change if necessary
3 To access the balance utilization choose
4 To display the balance available on the CENVAT accounts choose Account
balances
5 Save the excise invoice
The system generates the accounting documents
6 To print the excise invoice choose
Making a Transfer Posting
Use
In this procedure you make a transfer posting for the goods ordered by another
plant For more information about this function see Entering the Removal from
Storage at the Issuing Plant
Procedure
1 From the SAP Easy Access screen choose Logistics reg Materials Management
reg Inventory Management reg Goods Movement reg Transfer Posting
2 Choose Movement type reg Transfer posting reg Plant to plant reg To stock in
transit
3 Enter the number of the issuing plant and storage location
4 Choose To purchase order
5 In the dialog box enter the number of the stock transport order that the
receiving plant created and choose
6 Check the data
7 Save the transfer posting
Transaction Codes for India
Transaction Action
J1I2 Prepare a sales tax register
J1I3 Create outgoing excise invoices in batches
J1I5
Update the RG 1 and Part I registers
J1I8
Post the challan used to remit TDS
J1IC194C
Create annual return under section 194 C (Classic TDS)
J1IC194D
Create annual return under section 194 D (Classic TDS)
J1IC194I
Create annual return under section 194 I (Classic TDS)
J1IC194J
Create annual return under section 194 J (Classic TDS)
J1IEX
Incoming Excise Invoices (central transaction)
J1IEX_C
Capture an incoming excise invoice (excise clerk)
J1IEX_P
Post an incoming excise invoice (excise supervisor)
J1INBANK
Post a bank challan
J1INCANC
Cancel a vendor withholding tax certificate
J1INCERT
Print a vendor withholding tax certificate
J1INCHLN
Create a remittance challan
J1INCUST
Post a customer withholding tax certificate
J1INHC
Withholding Tax Migration Health Check Program
J1INMIG
Withholding Tax Data Migration Tool
JI1NCHLC
Create a remittance challan for customers
J1INCC
Print customer withholding tax certificates
J1INMIS
Withholding Tax Information System
JI1NAR
Prepare annual returns (Extended Withholding Tax)
J1IF01
Create a subcontracting challan
J1IF11
Change a subcontracting challan
J1IF12
Display a subcontracting challan
J1IF13
Complete reverse or recredit a subcontracting challan
J1IFQ
Reconcile quantities for subcontracting challans
J1IFR
List subcontracting challans
J1IH
Make a CENVAT adjustment posting
J1IIN
Create an outgoing excise invoice
J1IJ
Assign excise invoices to a delivery for sales from depots
J1INJV
Adjust withholding tax Item
J1INREP
Reprint a vendor withholding tax certificate
J1INREV
Reverse a remittance challan
J1INPR
Calculate withholding tax on clearing accounts
J1INUT
Clear withholding tax on clearing accounts
J1IR
Download register data
J1IS
Process an excise invoice (outgoing) for other movements
J1IU
Process exemption forms
J1IW
Verify and post an incoming excise invoice
J1IX
Create an incoming excise invoice (without reference to purchase order)
J2I8
Transfer excise duty to CENVAT account
J2ID
Archive tax deducted at source (TDS) documents
J2IE
Locate tax deducted at source documents in archive
J2IU
Remit excise duty fortnightly
J2I9
Monthly CENVAT return
J1IG
Excise invoice entry at depot
J1IGA
Create additional excise entry at depot
J2I5
Extract data for excise registers
J2I6
Print excise registers
Sales from Factories
Purpose
This process describes how the SAP System handles the sales process allowing
for the creation of excise invoices which you have to send with each delivery
that is subject to excise duty There are two scenarios depending on whether
you want to send the commercial invoice along with the delivery or at a later
date
Prerequisites
In order for the system to be able to copy the information from document to
document you must have set up the copying control procedures in Customizing
for Sales and Distribution (SD) This differs according to when you want to send
the commercial invoice
1 Along with the delivery
In this case the document flow would be OR (standard sales order type) ndash LF
(standard delivery type) ndash F2 (invoice)
2 At a later date
The document flow would be OR ndash JF (delivery type a copy of LF) ndash JEX (pro
forma billing document type a copy of document type F8) ndash F2
In addition you must also have maintained the settings in the Country Version
India (CIN) Implementation Guide (IMG) by choosing Global Settings reg Assign
Excise Invoice Billing Type to Delivery Type
A sample pricing procedure JFACT is provided for this sales procedure
Process Flow
1 The sales clerk creates a sales order following the
(i)standard procedure
There are special procedures for
(i)Customers in possession of exemption forms
(ii)Exports
2 The shipping clerk creates a delivery again following the
standard procedure
On the initial screen you set the appropriate delivery type (see above)
3 In the warehouse the storeperson issues the goods
The system only allows users to create a pro forma excise invoice if the delivery
is complete so as to prevent them from creating multiple pro forma excise
invoices
4 What you do at this stage depends on whether you want to send the
commercial invoice along with the delivery or whether you want to invoice the
customer later
(A) If the invoice is to be shipped with delivery the shipping clerk
(i)Creates an invoice following the standard procedure
(ii)Creates an excise invoice from the invoice
(B) If the invoice is to be sent on at a later date the shipping clerk
(i)Creates the pro forma excise invoice
The pro forma excise invoice is only required for technical purposes and is not
sent to the customer The system does not make any accounting postings at this
stage
(ii)Creates
an excise invoice from the pro forma excise invoice
In both these cases the system creates an accounting document to post the
excise duty to a clearing account
Instead of creating excise invoices manually you can also have the system
create them automatically Alternatively you can create them in batches
5 You ship the goods
6 When the time comes to invoice the customer you create the invoice
following the standard procedure
Irrespective of the number of excise invoices that you have issued you can
combine the delivery items in a single invoice (if the standard requirements are
met)
Sales from Depots
Purpose
You may sell finished goods directly from the place of manufacture as described
under Sales from Factories or you may first ship them to a separate location for
storage (a depot) from where you will sell them The second procedure is
described here
Sales from depots are handled differently from sales from factories because of
excise law Excise duty is payable when you send the goods from the factory to
the depot but it is not levied again when you sell the goods
Sometimes when you make a final sale of goods from a depot price escalations
could have happened with retrospective effect In such scenarios you need to
pay the extra excise duty at the factory using an A Certificate You need to
register the A certificate details in the RG 23D register and the excise recovered
from the customer
Prerequisites
You have customized
1 Stock transport processing in Customizing for Materials Management (MM)
by choosing Purchasing reg Purchase Order reg Set Up Stock Transport Order
2 The copying control for copying stock transport order NL to excise invoice JEX
You make this setting in the Country Version India (CIN) Implementation Guide
(IMG) by choosing Sales and Distribution reg Assign Excise Invoice Billing Type to
Delivery Type
3 The item category NLN (standard transport order) so that it is relevant for
billing
You do this in the standard IMG in Customizing for Sales and Distribution (SD)
by choosing Sales reg Sales Documents reg Sales Document Item
Process Flow
1 You create the sales order following the
standard procedure
The standard pricing procedure for depot sales is JDEPOT
2 You create the delivery again following the
standard procedure
3 You
assign excise invoices to the delivery or material document
4 You
verify that you have selected the correct excise invoices and post them
Alternatively if you have selected the wrong excise invoices you can cancel the
assignment
5 You create the invoice following the standard procedure
SPECIAL STOCKS amp SPECIAL PROCUREMENT TYPES
Special Stocks are those stocks which are not belongs to our company code
These are not placed in our storage locations amp no physical inventory is
performed and treated as special stocks for the reason of ownership
Different types are of Special Stocks are as follows
1 Subcontracting
2 Consignment
3 Pipeline
4 Stock transfer
5 Third party
6 Returnable transport packaging
7 Sales order stock
8 Project stock
SUBCONTRACTING
In subcontracting process we create subcontracting PO to supply or issue
subcomponents to vendor in order to get final product The price maintained in
subcontracting PO is a service charge paid to vendor
Steps to perform subcontracting
1 Create subcontracting inforecord (Optional)
2 Create subcontracting PO with item category L
There are to ways to supply subcomponents to vendor
bull Manually maintain the subcomponents in the subcontracting
PO though explode BOM
bull Through BOM (Bill of material) T Code CS01 CS02 amp CS03
3 Create Transfer Posting with Movement Type 541 to issue the subcomponents
to the vendor
4 Goods Reciept
5 Invoice Reciept
Path ME21N ---gt Enter Item Category L --gt Material (End Product) PO
Quantity Delivery Date Net Price Plant --gt Click on Item Details --gt Tab
Material Data -- gtComponents select Explode BOM --gt Click on Components
button --gt Enter the subcomponents --gt Go back amp Save
Create Transfer Posting with movement type 541 amp T Code MB1B
GR MIGO
IR MIRO
CONSIGNMENT - (No Concept of Invoice)
In consignment process we will not create Purchasing document for the vendor
vendor himself send the material to our plant though the material is available
to our plant the responsibility amp ownership of the material is of vendor Aliability
only arises when the material withdrawal (Consumption) is posted in the system
from consignment stock
Steps
1 Create Consignment info record (mandatory)
2 Create Consignment purchase order with item category lsquoKrsquo amp maintain Info
record number
3 Create GR Movement type lsquo101Krsquo
4 Create GI Movement Type lsquo201Krsquo
5 Consignment settlement T Code MRKO
Path --gtME11 --gt In info record --gt Purchasing Org Data 1 views of info record
enter the tax code and save it
--gt Create Consignment Purchase Order ME21N (Price option is grayed out with
price zero)
--gt Create GR with movement type 101K
--gt Create Goods Issue (GI) T Code MB1A amp Movement Type 201K Enter Cost
center vendor
--gt Consignment Settlement T Code MRKO Click Activate Consignment Activate
Settle Execute
--gt Display the Document Number ie Invoice receipt T Code FB03
PIPELINE PROCESS (No Concept of Invoice)
In pipeline handling your company does not need to order or store the material
concerned It is ready available to you as and when required via pipeline (eg oil
or water) or some other type of cable (eg electricity) Consumption of the
material is settled with the vendor on a regular basis
Steps
1 Create a Material master record with material type PIPE
2 Create Pipeline info record
3 Create GI with movement type 201P
4 Pipeline settlement T Code MRKO
RETURNABLE TRANSPORT PACKAGING (RTP)
When company orders goods from a vendor the goods are delivered with
returnable transport packaging (pallets containers) that belongs to the vendor
and is stored on our premises until you return it to the vendor
Steps
1 Create Material master record with material type LEIH
2 Create PO
3 Create GR by maintaining RTP material by selecting the option transport
equipments with movement type 501M
4 IR
STOCK TRANSFER
In stock transfer processing goods are procured and supplied within a company
One plant orders the goods internally to another plant (receiving plantissuing
plant) The goods are procured with a special type of purchase order the stock
transport order
Steps
1 Create a Material master in both supplying and receiving plant
2 Create stock transport order (STO) with item category lsquoUrsquo
3 Create transfer posting with movement type 351 amp T Code MB1B (Go to
MMBE stock overview the stock will decrease in supplying plant and it will not
update stock of receiving plant it will be under stock in transit)
4 Create GR stock will update in receiving plant
This scenario is under one company code between two plants
Material Master Related Important Terms (Part 2)
Controlling (CO) An organizational unit in Accounting that reflects a
management-oriented structure of the organization for the purpose of internal
control
Operating results for profit centers can be analyzed using either the cost of
sales approach or the period accounting approach
By analyzing the fixed capital as well you can expand your profit centers for use
as investment centers
Profit Center
Key that uniquely identifies the profit center in the current controlling area
Valuation Category
Determines whether stocks of the material are valuated together or separately
Dependencies
In the case of split valuation this indicator also determines which valuation
types are allowed that is the criteria by which stocks can be valuated
Valuation type
Invoice Verification (MM-IV)
A subdivision of a valuation category in split valuation
Example An enterprise manages its stocks of a material using the valuation
category Quality comprising the following valuation types
bull High quality Average quality Inferior
Hazardous material number
Number that identifies the material as a hazardous material or as dangerous
goods and assigns hazardous material data or dangerous goods data to it
Use The hazardous material number indicates that the material is dangerous
making special precautions necessary for its storage and shipment
Valuation Class
Assignment of a material to a group of GL accounts
With other factors the valuation class determines the GL accounts that are
updated as a result of a valuation-relevant transaction or event such as a goods
movement
The valuation class makes it possible to
bull Post the stock values of materials of the same material type to different GL
accounts
bull Post the stock values of materials of different material types to the same GL
account
Default value for the valuation class for valuated stocks of this material
Use The valuation class has the following functions
bull Allows the stock values of materials of the same material type to be posted to
different GL accounts
bull Allows the stock values of materials of different material types to be posted to
the same GL account
bull Determines together with other factors the GL accounts updated for a
valuation-relevant transaction (such as a goods movement
CIN - Country India Version ~ Volume 1
PurposeCountry Version India (CIN) contains a number of enhancements to standard
Sales and Distribution (SD) functions that allow you to handle local
requirements in particular excise duty
Features
In Country Version India (CIN) this component handles sales processes as
found in India In addition to the generic functions it allows you to
Handle CENVAT in your sales processes
The system calculates excise on your sales and creates excise invoices as
required and makes the appropriate postings to your CENVAT accounts
It covers sales from factories sales from depots and offers functions for other
types of goods movements it also covers sales to export-oriented units and
export sales
Record concessional and exemption forms sent to you by your customers
Make adjustment postings to your CENVAT accounts
Excise Invoice (Outgoing)
Definition
The document that acts as the proof of payment of excise duty and is required
for the customer to take CENVAT credit on the item
Use
In the SAP System there are three different procedures for creating excise
invoices
Sales direct from the factory
This procedure is for when you sell manufactured goods straight from the
factory at which they were produced in which case you levy excise duty when
the goods leave the factory on their way to the customer
If when you send the goods to the customer you enclose the commercial
invoice you create the excise invoice with reference to the commercial invoice
If you want to send the commercial invoice after you have dispatched the goods
however you create the excise invoice with reference to a pro forma
commercial invoice For more information about these procedures see Sales
from Factories
As well as creating excise invoices individually you can also create them in
batches (see Creation of Excise Invoices in Batches)
Sales from depots
A depot is a site at which the goods are stored away from the factory at which
they were produced In this procedure you have to levy the excise duty when
you transfer the goods from the factory to the depot and then make sure this is
passed on to the customer when it makes a purchase For more information see
Sales from Depots
Sales (other goods movements)
Some other goods movements may also require you to create an excise invoice
with reference to other documents The SAP System offers separate functions
for these purposes (see Excise Invoices (Outgoing) for Other Movements)
StructureNumbering of Excise Invoices
Outgoing excise invoices have two numbers an internal document number
which is assigned immediately you create an excise invoice and an excise
invoice number which is not assigned until you have verified and posted it
As far as the excise invoice number is concerned you have to number your
outgoing excise invoices in sequential order starting each year on 1 April You
must notify the excise authority of the jurisdiction of the invoicing location The
serial number must be printed on each page of the excise invoice
Each number range is governed by a series group You must create at least one
series group in order to be able to number the excise invoices If you need more
than one number range you must create the corresponding number of series
groups You do so in the CIN Implementation Guide (IMG) by choosing Global
Settings reg Series Groups
Number of Line Items Per Excise Invoice
Some states allow you to include only a limited number of items for each page
of an excise invoice (for example if the excise invoices are to be printed on
prenumbered forms) You can customize the system so that it prints the excise
invoice accordingly in the CIN IMG by choosing Global Settings reg Excise
Registration IDs
Customer Master (Excise Data) Definition
The part of the customer master record that contains information relating to
Indian excise duty
Use
In conjunction with other data this data is used to calculate excise duty on
various transactions
To maintain the data from the SAP Easy Access screen choose Indirect Taxes reg
Master Data reg Excise Rate Maintenance and then select the following options
described below
Structure
The excise part of the customer master contains the following information
Customer Excise Details
On this screen you enter your customers tax registration numbers which are
used for various forms of correspondence and reports
1 Excise registration number (and the range division and collectorate in which
this is located)
2 Central sales tax (CST) number
3 Local sales tax (LST) registration number
4 Permanent account number (PAN)
In order for the system to be able to calculate which rate of excise duty to apply
on sales to the customer you must also assign it a customer excise duty status
(for more information about how this works see Determination of Excise Duty
Rates)
Excise Indicator for Plant and Customer
On this screen you define the final excise duty indicator (for more information
about how this works see Determination of Excise Duty Rates)
Determination of Excise Duty Use
When you execute a business transaction involving materials that are subject to
excise duty the system automatically calculates the duty for you
Prerequisites
In order for the system to be able to determine which rate of excise duty to
apply you must have maintained all the data on the Excise Rate Maintenance
screen which you can access from the SAP Easy Access screen by choosing
Indirect Taxes reg Master Data reg Excise Rate Maintenance
You maintain the following types of data
Plant master data
You assign each of your plants an excise duty indicator You can use the same
indicator for all the plants with the same excise status from a legal point of view
such as all those that are in an exempt zone
See also the information about manufacturers that are only entitled to deduct a
certain portion of the duty (see Partial CENVAT Credit)
Vendor master data
For each of your vendors with the same excise status from a legal perspective
you define an excise duty indicator You must also specify the vendor type ndash for
example whether the vendor is a manufacturer a depot or a first-stage dealer
You must also stipulate if the vendor qualifies as a small-scale industry
For each permutation of plant indicator and vendor indicator you then create a
final excise duty indicator
Customer master data
Similarly you assign the same excise duty indicator to each of your customers
that share the same legal excise status
Again for each permutation of plant indicator and customer indicator you then
create a final excise duty indicator
Material master data
Each material is assigned a chapter ID
Excise tax rate
For every chapter ID and final excise duty indicator you maintain the rate of
excise duty
If your business only qualifies for partial CENVAT credit you must customize
your system accordingly
Activities
Let us consider an example to illustrate how the system determines which rate
of excise duty to apply to a material Assume you are posting a sale of ball
bearings to a customer The system automatically determines the rate of excise
duty as follows
Looks up the customer master data to see what status you have assigned the
customer
Lets assume youve assigned the customer status 3
Looks up the plant master data to see what status you have assigned the plant
Similarly your plant has status 2
The system looks up the table under Excise Indicator for Plant and Customer to
see what the final excise duty indictor is for customer status 3 and plant status
2 It is 7
The system determines the chapter ID of the ball bearing for the plant
Letrsquos assume the chapter ID at plant for the ball bearings is 100001
Finally the system looks up the table under Excise Tax Rate to see what rate of
duty applies to chapter ID 100001 under status 7
Plant Master (Excise Data) Definition
The part of the plant master record that contains information relating to Indian
excise duty
Use
In conjunction with other data this data is used to calculate excise duty on
various transactions
To maintain the data from the SAP Easy Access screen choose Indirect Taxes reg
Master Data reg Excise Rate Maintenance and then select the following options
described below
Structure
The excise part of the plant master is divided into the following screens
Excise Indicator for Plant
On this screen you enter your plants tax registration numbers which are used
for various forms of correspondence and reports
1 Central sales tax (CST) number
2 Local sales tax (LST) registration number
3 Permanent account number (PAN)
In order for the system to be able to calculate which rate of excise duty to apply
on purchases for this plant you must also assign it a plant excise duty status
(for more information about how this works see Determination of Excise Duty
Rates)
Excise Indicator for Plant and Vendor
On this screen you define the final excise duty indicator (for more information
about how this works see Determination of Excise Duty Rates)
Excise Indicator for Plant and Customer
On this screen you define the final excise duty indicator (for more information
about how this works see Determination of Excise Duty Rates)
Automatic Creation of Excise Invoices Use
The SAP System can automatically create an outgoing excise invoice for you
immediately you post a commercial invoice (or a pro forma invoice) for a
customer sale This function applies to excise invoices for sales from factories
only
Prerequisites
To activate this function in the Country Version India (CIN) Implementation
Guide (IMG) make the following settings
1 Under Global Settings reg Excise Groups select Create EI
This activates the automatic creation function
2 Under Sales and Distribution reg Utilization Determination
Here you specify which CENVAT accounts the system is to post the different
types of excise duty to
3 Under Sales and Distribution reg Excise GroupndashSeries Group Determination
Here you specify which excise group and series group the excise invoices are to
be created for
Features
When you post an invoice the system creates an excise invoice All the
information that it needs to create the excise invoice is provided either by the
invoice or by the Customizing settings that you have made in Sales and
Distribution It also determines the excise invoice type automatically by means
of a user exit
Creating Excise Invoices for Stock Transfers 1 From the SAP Easy Access screen choose Indirect Taxes reg Procurement reg
Excise Invoice reg For Depot reg CreateChangeDisplay
2 In the Material document field enter the goods receipt number and choose
The system displays the information from the goods receipt for example the
sending plant the excise registration the range the division and the
collectorate
3 Choose Details
The system copies the items from the goods receipt document In the depot it is
possible to have a separate excise invoice at line item level
4 Enter the internal document number of the excise invoice sent by the factory
5 Choose More documents to go the excise invoice details screen
6 Enter the internal document number of the excise invoice from the factory
The system copies the information to the line item (for example the excise
invoice number the excise invoice date the item number the chapter ID the
excise invoice quantity the amount of excise duty paid the excise base value
and the serial number of the Part II register entry with which the excise was
paid)
You can change the receipt quantity to match the actual quantity received at
the depot if necessary The system automatically adjusts the excise
accordingly
7 Go back to the item details screen
8 Save the excise invoice
Creating Excise Invoices for Direct Purchases 1 From the SAP Easy Access screen choose Indirect Taxes reg Procurement reg
Excise Invoice reg For Depot reg CreateChangeDisplay
2 In the Material document field enter the goods receipt number and choose
The system displays the information from the goods receipt for example the
sending plant the excise registration the range the division and the
collectorate
You can also maintain the excise registration details for the ship-from party as
for with the vendor The ship-from can be different from the vendor code (The
delivering plant can be maintained as a ship-from in the system When a valid
ship-from is entered the excise registration details copied from the vendor will
be overwritten by the ship-from excise registration details)
The ship-from registration details displayed can also be overwritten manually
The dealers commercial invoice number can be stored in the vendor excise
invoice number as in this case the dealer himself will not have an excise
invoice
3 Choose Details
The system copies the items from the goods receipt document It also copies the
vendors excise invoice number and the serial numbers of the entries in the RG
23A RG 23C and personal ledger account (PLA) registers
4 Enter the internal document number of the excise invoice sent by the factory
5 Select an item and choose More documents to go the excise invoice details
screen
In the case of direct purchases there will not be any excise invoice in the
system so leave the internal document field blank The vendors invoice will
show the details of the excise invoices through which excise has been paid for
the item that is being dispatched You can enter these details here
6 For each item the chapter ID excise base value and excise duty amounts
are defaulted from the purchase order You can change them if there is any
difference Enter the excise amount paid and the receipt quantity You also
enter the Part II register serial numbers with which the excise duty was paid and
the excise registration information from the original excise invoice
7 Go back to the item details screen
8 Save the excise invoice
The system creates an entry in register RG 23D You can change the excise
invoice as long as it has not been used in any sales
Assigning Excise Invoices to a Delivery Use
You follow this procedure to specify which excise invoices are to be assigned to
a delivery from a depot (or other material document)
You can also automate this procedure using the batch selection program
(J_1IJCHK) by making the appropriate Customizing settings in the Country
Version India (CIN) Implementation Guide (IMG)
Procedure
1 From the SAP Easy Access screen choose Indirect Taxes reg SalesOutbound
Movements reg Excise Invoice reg For Depot reg CreateChangeDisplay reg Delivery
or Material Document reg RG 23D Selection
2 Enter the delivery document number or the material number and choose
3 Select the excise invoice you want
4 Choose
5 Choose Excise invoice
A list of excise invoices appears These are the excise invoices at the depot with
a balance quantity
The system also shows a list of the A certificates that can be used You can pick
up any of the A certificates but they must be for the same excise invoice You
can only pick up an A certificate in its entirety You cannot select part of an A
certificate
6 Select the excise invoices that are relevant to the delivery
7 Specify what quantity to be used from each excise invoice
The system recalculates the excise accordingly
8 Go back to the item details screen
9 Save the data
Result
The system creates an entry in register RG 23D and generates the depot excise
invoice numbers
If you selected any A certificates the system also generates additional entries in
the RG 23D register The system marks the original A certificates as updated so
that they cannot be used for any other removals
Continue see Volume 2 (Next post)
EXTERNAL SERVICE MASTER
EXTERNAL SERVICE MASTER ESM
We procure the different type of services from vendors they are-
1048774 Hardware amp software services
1048774 Construction amp transportation services
1048774 Machinery services
1048774 Annual maintenance services
1048774 Present to and breakdown service Etc
Service Procurement Cycle -
1048774 Requirement identification
1048774 Source determination
1048774 Source selection
1048774 Service master
1048774 Service PO
1048774 Service entry sheet acceptance
1048774 Invoice with respect to service entry sheet
Steps to perform services -
1 Create service master (AC03)
2 Create Service PO (ME21N) with AC Assignment category lsquoKrsquo amp Item
Category lsquoDrsquo
3 Create service entry sheet (ML81N)
4 Invoice with respect to Service Entry sheet
Customize settings
(For service category Number Ranges amp organization status for service
category)
SPRO 1048774 IMG 1048774 MM 1048774 ESM 1048774 Service Master
1048774 Define organization Status for service Categories
1048774 Define Service Category
1048774 Define Number Ranges
Define organization Status for service Categories
bull Click on New Entries
bull Org service Category
bull BDS (Basic data service is stored in service master record under this service
category)
bull CNST 1048774 Controlling Status
bull PUST 1048774 Purchasing data Status
bull SDST 1048774 Sales amp Distributed Status
bull Org status description service category 1048774 Press Enter amp Save
Define Service Category
bull Same path as above
bull Select Standard
bull Click on Copy as
bull AC reference 1048774 always takes as 0006
bull Enter amp Save
Define Number Ranges
Click on groups 1048774 Groups 1048774 Insert 1048774 select enter Number Ranges
Select the service category
Click on Element
Select Group amp Click on Element Group
Save
Create Service Master - (AC03)
Click on Create New Services
Service Number (any number) Service Category
Basic unit of measure (Hours lsquoHrsquo)
Enter
Basic Data 1048774 Master Service Group 1048774 007
Valuation class 1048774 3200 1048774 Enter 1048774 Save
To See the Service list 1048774 AC06
Create Service PO (ME21N)
AC assignment category lsquoKrsquo Item Category lsquoDrsquo
Enter the Short text Quantity Delivery date Net Price Material group Plant
Storage Location
Enter service number in Service Tab (Item Details) quantity price Enter
Account Assignment 1048774 GL Account Number eg400000
Cost Center eg 9999
Press Enter amp Save
Create Service Entry Sheet - ML81N
Select other purchase order (enter PO number) 1048774 Enter 1048774 Click on Create1048774 Enter
Short Text 1048774 Enter 1048774 Service Number 1048774 Enter ndashClick on Flag button 1048774 Save
Take Service entry Sheet Number
Go to Invoice MIRO 1048774 Enter company code 1048774 Select Service Sheet Option 1048774 Enter
Service Entry Sheet Number 1048774 save it
Physical Inventory and Inventory Management
Physical inventory Process - 1 Create Physical inventory document
T Code MI01 ndash Create single inventory document
T Code MI31 ndash Create multiple physical inventory documents
I Enter the desired fields ie material material type site storage location and
Maximum number items Documents ndash 100 etc 1048774 Press Enter
II Click on Process Session
III Select the line items and click on the process
IV System displays a dialog box select Background and click on process
Inventory document is created
2 Print Inventory Document and handed over to responsible person say
Manager
3 Enter Physical Inventory count
T Code MI04
i Enter the physical inventory document number Fiscal year count date 1048774 Press
enter
ii Enter the Material Quantity and click on post
4 Listing of difference
T Code MI20
Enter the physical inventory document number and execute system displays a
screen wherein we will be able to view the differences
5 Post the differences
T Code MI07 amp Mov Type 701 amp 702
Enter the physical inventory document number year posting date enter the
difference and post
INVENTORY MANAGEMENT Maintaining stock by value or by quantity is called inventory The total inventory
management deals with the goods movement of the material
Goods movement -
It is a process in which transaction resulting change in stocks It is further sub-
divided into three categories
1 Goods Receipt (GR)
2 Goods Issue (GI)
3 Transfer Posting (TP)
Goods Receipt (GR) - It is a goods movement in which receipt of goods is
posted for vendor or for production A GR posted in the system will leads to
increase in stock No Concept of Price or value
Goods Issue (GI) - It is goods movement in which material withdrawal is
posted for consumption or for customer A GI posted in system will leads to
decrease in stock
Stock Transfer (ST) - It is method of removal of material from one location
and transferring it to another location This process is performed between two
plants and two storage locations
Transfer Posting (TP) - It is a general term of stock transfer that changes the
stock type or stock categories The difference between transfer posting and
stock transfer is -
TP is logical stock transfer and ST is a physical stock transfer
Movement Type - It is a three-digit code which plays a role of important
control function in inventory management It acts as a central role in automatic
account determination It determines which stock account or consumption
account is updated in financial accounting
Reservation - It stores requisition created from particular cost center to
particular department for issuing the material reservation posted in the system
It leads to decrease in stock
Stock Types - The different stock types are
1 Unrestricted use stock
2 Quality inspection stock
3 Blocked stock
4 Warehouse stock
Transaction code -
1 To Create GR - MIGO
2 To Create GI - MB1A
3 For Transfer Posting - MB1B
4 To display MaterialGR document ndash MB03
5 To create reservations - MB21 MB22 MB23
6 To See Stock Overview - MMBE
7 To enter Other GR - MB1C
When GR is posted in the system
1 Material document is created - MB03
2 Accounting Document is generated - MB03
3 MMR updated - MM02 MM03
4 PO history updated - ME23N
Movement Typersquos
Movement Types under GR - 101 331333335501503505551553555
561351 (For all Mov Typersquos there is a reversal eg 101 has 102 Note No
reversal for 121)
Movement Typersquos under GI - 201 331333335551553555
Transfer Posting It is performed in three ways
1 TP BW Plant to Plant
2 TP BW Storage Location to Storage Location
3 TP BW Stock to Stock
Movement Types under TP BW Plant to Plant
301 - 1 step
303 amp 305 - 2 step
Movement Type under TP BW Storage location to Storage Location
311 - 1 step
313 amp 315 - 2 step
Movement Type under TP BW stock to stock
321 323 325 343349
To Cancel the GR Movement type 102
Return delivery to vendor movement type 122 amp T Code MIGO
Transfer Posting Stock to Stock
From Blocked stock to Quality Inspection
T Code MB1B amp Movement Type 349
From Blocked stock to Unrestricted Stock
T Code MB1B amp Movement Type 343
From Quality Inspection to Unrestricted Stock
T Code MB1B amp Movement Type 321
Transfer Posting from Plant to Plant
For One Step Movement Type 301
For Two Steps Movement Type 303 amp 305
After posting stock will display in Stock in Transit (Plant)
To receive material by receiving Plant Movement Type 305
Transfer Posting BW Storage Location to Storage Location
Under One Plant BW two Storage Locationrsquos Movement Type 311
Back to Parent storage Location Movement Type 313 (It Show stock in transfer)
use Movement type 315 at Parent storage location
To create Goods Issue (GI) T Code MB1A amp Movement Type 201
To Create Reservations T Code MB21 MB22 amp MB23
Creation of GI wrt Reservations
T Code MB1A amp Movement Type 201
Click on Reservation Enter Reservation Number 1048774 Click on Adopt + Details
GR wrt Reservations T Code MIGO amp Select as Reservation instead of GR
GR without PO Movement type 501 amp T Code MB1C Select others instead of
Purchase order Enter Material Quantity Plant Storage Location 1048774 Press Enter
Partner Option will be visible (Vendor) 1048774 Save it
Invoice - Invoice is a document which is issued to a buyer (Company) from the
supplier (vendor) for the payment The following information is maintained in
invoice
Invoice date Posting date Invoice ref number tax amount amount tax code
terms of payments vendor address banking accounting information etc
When invoice document is posted in the system
bull Invoice document created
bull Accounting document is generated (MIR4)
bull PO history updated (ME23N)
bull FI document created (FB03)
PRICE DETERMINATION PROCESS or PRICING PROCEDURE
CONDITIONS OR PRICING PROCEDURE or PRICE DETERMINATION PROCESSWe deal with the Pricing Procedure for vendors
PB00 Gross Price (info record contract scheduled Agreement)
PBXX Gross Price (PO)
FRA1 Freight
RA00 Discount on net
RA01 Discount on Gross
ZA00 Surcharge on net
SKT0 Surcharge discount
ZPB0 Rebates
MWVS Input Tax
MWAS Output Tax
BASB Base Amount
RM0000 Calculation Schema or Pricing Procedure
(PB00 amp PBXX)
RM0002 Calculation Schema or Pricing Procedure
(PB00)
PB00 --gt AB00
Copy the Standard one and create new one (ours)
RM0000 contains all the condition types
Pricing Procedure (PP)
We define the pricing procedure to define condition supplement for the material
price The condition supplement specifies the discount surcharge freight etc
that we want a system every time to access material price condition records
The total value of the material is calculated or based on all addition and
subtraction ie discounts surcharge tax freight etc
Condition Table
It is a table which defines the structure of condition record key
Condition Record
It is a data record used to store conditions or condition supplements ie
condition like discount freight and surcharge Tax etc
Condition Type
It is used for different functions In Pricing the condition types leads you to
differentiate different types of discounts in output determination batch
determination difference between two output types such as delivery note or
order confirmation between different strategy types
Access Sequence
It specifies the order in which system searches or access the condition records
from condition table
Difference between PB00 amp PBXX
1 Condition maintained in PB00 is time dependent whereas PBXX is time
independent
2 Condition type PB00 ndash used for IR RFQ Contract Schedule Agreement
Condition type PBXX ndash used for PO
Calculation Schema
The main function of calculation schema is to provide framework of steps for the
price determination process to specify the discounts surcharge freight rebate
etc
It also determines the sequence of conditions that are to be followed and in
which sequence
Schema Group Vendor
The main function of it is to identify or to pick the right process and conditions
for a particular vendor
Schema Group Purchasing Organization
Key that determines which calculation schema (pricing procedure) is to be used
in purchasing documents assigned to the relevant purchasing organization
Schema Group
It allows to group together the purchasing organizations which uses the same
calculation schema
Steps -
1 Create Access sequence
2 Create condition types
3 Create pricing procedure or calculation schema
4 Link pricing procedure amp access sequence to condition type
5 Create schema group for vendor
6 Create schema group for purchase organization
7 Assign schema group vendor-to-vendor master record in purchasing data
view
8 Assign schema group purchase organization to our purchase organization
9 In inforecord purchase organization data enter condition types and pricing or
calculation procedure
CUSTOMIZE SETTINGS -
SPRO --gt IMG--gtMM--gtPUR--gtConditions --gtDefine price determination Process
1 Define access sequence
2 Define Condition type
3 Define cal Schema
4 Define schema group
o Schema group vendor
o Schema group purchasing group
5 Assignment of schema group to PUR org
6 Define schema determination agrave determine cal schema for standard PO
PURCHASE ORDER
PURCHASE ORDER
PO is an external document created for the procurement of materials and
services from vendor The document of PO is also divided into 4 parts as PR -
1 Document Overview
2 Header (DeliveryInvoice Conditions Address Partners Org data status)
3 Item Overview (AC assign cat Item Category Material Plant Del date SL)
4 Item Details (Material data Confirmations condition control delivery delivery
Schedule Quantitiesweights invoice)
A procurement type is defined for each of the document items The following
procurement types exist
1048774 Standard
1048774 Subcontracting
1048774 Consignment
1048774 Stock transfer
1048774 External service
bull There are different ways to create PO -
1 Directly through transaction code ME21N
2 With reference to PR
3 With reference to RFQ
4 With reference to info records
5 With reference to Contracts
6 With reference to Cost Centre GL Account (cost element) for consumable
items or not stock items with account assignment category lsquoKrsquo (K= cost centre)
(For non stock and consumables)
0 COMMENTS L INKS TO THIS POST
LABELS PO PURCHASE ORDER
Reaction
s
PURCHASE REQUISITION T CODE ME51 or ME51N
Purchasing Requisition -
It is a request or instruction from particular department (Cost Centre) to
purchasing department to procure certain quantity of material and services It is
only one internal document in SAP-MM
Purchasing Requisition document is divided into four parts -
bull Document Overview
bull Header
bull Item Overview
bull Item Details
Document Overview -
It displays the list of purchasing documents which are created previously
according to our requirement
Header -
Any text message or information is maintained
Item Overview -
In this we enter material plant delivery date quantity storage location
purchasing group AC assignment category Item category etc
Item Details -
It displays the detailed information about item overview (like Master data
valuation source of supply contact person delivery address status etc)
0 COMMENTS L INKS TO THIS POST
LABELS PR PURCHASE PURCHASE ORDER PURCHASE REQUIS IT ION SALES ORDER
Reaction
s
Automatic PURCHASE ORDER (PO) How Automatic PO raised
How Automatic PO raised
At fixed time say 1230 AM automatic scheduler runs and checks whether the
stock is less than or equal to the replenishment point If stock is less than or
equal to Repli Point than PR raised automatically to Purchasing Deptt
bull Activate the option automatic PO in purchasing view in material master record
bull Activate the option automatic PO in purchasing data view in vendor master
record
bull Maintain Source List amp select fixed vendor
bull PR crated automatically
bull Automatic creation of PO from PR ndash ME59
Enter the Purchasing group purchasing organization Vendor Plant and
Purchasing Requisition Document Number 1048774 Execute
RELEASE PROCEDURE Release strategyThe main function of Release procedure is to determine the approval process
or the release process for the procurement of material amp services rather than
relying for manual signatures The release procedure contains release strategy
Release Strategy (RS)
A plan defining the release codes with which a purchase requisition item a
complete purchase requisition or a complete external purchasing document
must
be released (that is approved) and the sequence in which release is to be
effected
using these codes It is a unique set of conditions sequence and level of release
It is a 2 digit code eg S1 S2 S3etc
The Release Strategy contains the following -
bull Release Group
bull Release Codes
bull Release Indicators
bull Release Prerequisite
Release Group -
It is a 2-digit code which is assigned with a class (Class contains group of
characteristics) It contains one or more release strategies
Release Codes -
It is a 2digit code which identifies the department or responsible person for
the approval process amp release process
Eg AA - Manager
BB - Sr Manager
CC - Vice President
DD - Managing Director
Release Indicator -
It is a Code that represents the release status If the proper approval
process is performed that the release Strategy has to be release if it is not
performed than the Release Strategy is blocked
R ndash Release
B ndash Blocked
Release Conditions -
It determines the type of the release strategy
For eg
bull If the price ranges from 1 to 1000 It is approved by AA BB and CC
bull If the ranges from1001 to 1lac then it is approved by AA BB CC and DD
- 80 -
Release Prerequisite
It will informs the system which RS has to be take place in the PO CEKKO is
a communication structure where it displays the field names amp field lengths to
create characteristics ie we maintain characteristics in customizing by
selecting
the field names from this communication structure for all external documents
CEBAN is used for the purchasing requisition
Characteristics -
1 Net value of PO --- GNETW (GSWRT for PR)
2 Plant --- WERKS
3 Purchasing organization -- EKORG
4 Purchasing Group --- EKGRP
5Material group ndashMATKL
CUSTOMIZE SETTINGSSPRO--gtIMG--gt MM--gt Purchasing--gtPO--gt Release Procedure for PO
1 Edit Characteristics T Code CT04
2 Edit Class T Code CL02
3 Define Release Procedure for PO
4 Check Release Strategy
Edit Characteristics -
Characteristics - eg NET VALUE OF VALUE
Click or Create Button
Under Basic Data
Description - Value for PO
Status - Release
Data Type - Currency Format
No Of Characters - 15
Currency - EUR
Activate multiple values amp Internal Values Allowed
Additional Data
Table name - CEKKO
Field Name - GNETW
Values
Activate Additional Values
Save the document
Create another Characteristic for Plant -
Plant date Create ndash Description Status
Data Type Characteristic Format
Number of Characteristics 4
Activate Multiple Values
Additional data-
Table Name - CEKKO
Field Name - WERKS
Values
Activate Additional Values
For Purchasing Organization Name - EKORG
For purchasing Group EKGRP
Edit Class
Class - SAPMM
Class Type - 032 Release Strategies
Click on Create button
Basic Data
Description - Class for PO
Status - Released
Valid From _____ Valid to _____
Click on Characteristic
Characteristic
Enter all the Characteristics Created amp Save it
Define Release Procedure for PO-
bull Release Group
bull Release Codes
bull Release Indicators
bull Release Strategies
bull Workflow
Release Group - New Entries Release Group Class and Description
Press Enter amp Save
Release Code - New Entries
Group Codes Description
99 AA Manager
99 BB Sr Manager
99 CC Vice President
99 DD Managing Director
Press Enter amp Save
Release Indicator - (B ndash Blocked R - Release)
New Entries
Release Indicators Description
B Blocked
R Released
Release Strategies -
New Entries
Release Group 99
Release Strategy S1
Release Codes AA BB CC and DD
Click on Release Prerequisites
Release Status -
Continue
Classification
Enter the Value (Same Price)
Plant (9999)
Go Back amp Save it
Release Simulation - Simulate Release
Create a PO -
There are two ways to release the PO
Individual releaseME28
Collective release ME29N
How to delete procedure
Delete Release GP
Create Release RG
Delete R Strategies
Delete R Code
Delete R Group
SAP R3 SYSTEM LANDSCAPE
System LandscapeThe system landscape contains all the SAP Systems that you have installed It
can consist of several system groups whorsquos SAP Systems are linked by transport
routes
After you decide which clients you need and which roles you want them to have
you need to decide how to distribute them amongst the different SAP Systems
You can set up multiple clients independently of one another in a single SAP
System However when you configure the data you must remember that cross-
client Customizing settings and Repository objects are identical for all clients in
a single SAP System Changes made in one client apply immediately to all
clients in the system
Three-System Landscape
SAP recommends a three-system landscape in which each of the central clients
has its own SAP System
This consists of a development system DEV a quality assurance system QAS
and a production system PRD The development system contains the
Customizing client CUST the quality assurance system contains the quality
assurance client QTST and the production system contains the production client
PROD Make all changes to Customizing data and Repository objects in the
Customizing client When you release the corresponding change requests they
are transported into the quality assurance client This means that changes to
cross-client data only appear in the quality assurance client after the transport
In the quality assurance client you can test whether the transports are
complete or whether any linked changes are missing and are still in unreleased
change requests If the test is successful the change requests are transported
into the production client The production client is completely separate from the
other clients as regards cross-client data
SPECIAL STOCKS amp SPECIAL PROCUREMENT TYPES
Special Stocks are those stocks which are not belongs to our company code
These are not placed in our storage locations amp no physical inventory is
performed and treated as special stocks for the reason of ownership
Different types are of Special Stocks are as follows
1 Subcontracting
2 Consignment
3 Pipeline
4 Stock transfer
5 Third party
6 Returnable transport packaging
7 Sales order stock
8 Project stock
SUBCONTRACTING
In subcontracting process we create subcontracting PO to supply or issue
subcomponents to vendor in order to get final product The price maintained in
subcontracting PO is a service charge paid to vendor
Steps to perform subcontracting
1 Create subcontracting inforecord (Optional)
2 Create subcontracting PO with item category L
There are to ways to supply subcomponents to vendor
bull Manually maintain the subcomponents in the subcontracting
PO though explode BOM
bull Through BOM (Bill of material) T Code CS01 CS02 amp CS03
3 Create Transfer Posting with Movement Type 541 to issue the subcomponents
to the vendor
4 Goods Reciept
5 Invoice Reciept
Path ME21N ---gt Enter Item Category L --gt Material (End Product) PO
Quantity Delivery Date Net Price Plant --gt Click on Item Details --gt Tab
Material Data -- gtComponents select Explode BOM --gt Click on Components
button --gt Enter the subcomponents --gt Go back amp Save
Create Transfer Posting with movement type 541 amp T Code MB1B
GR MIGO
IR MIRO
CONSIGNMENT - (No Concept of Invoice)
In consignment process we will not create Purchasing document for the vendor
vendor himself send the material to our plant though the material is available
to our plant the responsibility amp ownership of the material is of vendor Aliability
only arises when the material withdrawal (Consumption) is posted in the system
from consignment stock
Steps
1 Create Consignment info record (mandatory)
2 Create Consignment purchase order with item category lsquoKrsquo amp maintain Info
record number
3 Create GR Movement type lsquo101Krsquo
4 Create GI Movement Type lsquo201Krsquo
5 Consignment settlement T Code MRKO
Path --gtME11 --gt In info record --gt Purchasing Org Data 1 views of info record
enter the tax code and save it
--gt Create Consignment Purchase Order ME21N (Price option is grayed out with
price zero)
--gt Create GR with movement type 101K
--gt Create Goods Issue (GI) T Code MB1A amp Movement Type 201K Enter Cost
center vendor
--gt Consignment Settlement T Code MRKO Click Activate Consignment Activate
Settle Execute
--gt Display the Document Number ie Invoice receipt T Code FB03
PIPELINE PROCESS (No Concept of Invoice)
In pipeline handling your company does not need to order or store the material
concerned It is ready available to you as and when required via pipeline (eg oil
or water) or some other type of cable (eg electricity) Consumption of the
material is settled with the vendor on a regular basis
Steps
1 Create a Material master record with material type PIPE
2 Create Pipeline info record
3 Create GI with movement type 201P
4 Pipeline settlement T Code MRKO
RETURNABLE TRANSPORT PACKAGING (RTP)
When company orders goods from a vendor the goods are delivered with
returnable transport packaging (pallets containers) that belongs to the vendor
and is stored on our premises until you return it to the vendor
Steps
1 Create Material master record with material type LEIH
2 Create PO
3 Create GR by maintaining RTP material by selecting the option transport
equipments with movement type 501M
4 IR
STOCK TRANSFER
In stock transfer processing goods are procured and supplied within a company
One plant orders the goods internally to another plant (receiving plantissuing
plant) The goods are procured with a special type of purchase order the stock
transport order
Steps
1 Create a Material master in both supplying and receiving plant
2 Create stock transport order (STO) with item category lsquoUrsquo
3 Create transfer posting with movement type 351 amp T Code MB1B (Go to
MMBE stock overview the stock will decrease in supplying plant and it will not
update stock of receiving plant it will be under stock in transit)
4 Create GR stock will update in receiving plant
This scenario is under one company code between two plants
SAP IMPLEMENTATION PROCESS End to End Inplementation of SAP
First we have to prepare documentation about the client business (like turnover
vendors customers payments materials production marketing etc)
The implementer company made two teams (1) Steering team (2) Steering
community
Steering team (SAP functional consultants) prepares a detailed
documentation about the client with the help of core team (client company
team)
amp this study is known as Feasibility Study After that the steering team handed
over this documentation to Steering community (Project manager Sr software
engineer and other higher authorities)
Steering community prepares the BBP (Business Blue Print) BBP
Prepares in MS-Word
10487741048774 ASAP - Accelerated System Application Product in Data Processing
10487741048774 Business Process - ASAP Methodology
1 Project Preparation
2 BBP (Business Blue Print)
3 Realization
4 Final Preparation
5 Go live amp Support
10487741048774 Project Preparation -
It consists of identifying team members amp development strategy as
how to go
AS ndash IS (Existing Process followed requirements)
TO ndash BE (Requirement analysis and best process recommended)
Difference between (AS ndash IS) amp (TO - BE) is called GAP Analysis
10487741048774 Business Blue Print (BPP) -
It is a legal documentation between client amp the company
(implementer service provider) We have to understand the current business
process of client amp analyzing the business amp prepare documentation It is a
detailed documentation for the client
10487741048774 Realization -
This Phase is used to Implement or migrate the entire business of
client from Non-SAP environment to SAP environment
10487741048774 Final Preparation -
This phase is used for testing amp end user training After successfully
completion of this phase client is ready to run business in SAP R3
10487741048774 Go live amp Support -
In this phase we deliver the project end date amp end user training at
client site
THIRD - PARTY PROCESSING
THIRD - PARTY PROCESSING
In third party processing your company passes on a sales order to an external
vendor who sends the goods directly to the customer The sales order is not
processed by your company but by the vendor Third-party items can be
entered in purchase requisitions purchase orders and sales orders Third party
processing is integrated with Sales and Distribution If the sales order contains
third-party items the system creates a purchase requisition from the order
Steps
1 Create MMR with sales views and maintain Division Distribution channel
sales org item category group and general item category group ndash BANS (Third
party item) amp Account group Sold to party
2 Create Customer master record T Code XD01 XD02 XD03
3 Create sales order T Code VA01 VA02 VA03 (PR generated automatically)
4 PO - T Code ME21N
5 GR ndash T Code MIGO
6 IR ndash T Code MIRO
7 Sales Billing Billing Document T Code VF01 VF02 VF03

sales approach or the period accounting approach
By analyzing the fixed capital as well you can expand your profit centers for use
as investment centers
Profit Center
Key that uniquely identifies the profit center in the current controlling area
Valuation Category
Determines whether stocks of the material are valuated together or separately
Dependencies
In the case of split valuation this indicator also determines which valuation
types are allowed that is the criteria by which stocks can be valuated
Valuation type
Invoice Verification (MM-IV)
A subdivision of a valuation category in split valuation
Example An enterprise manages its stocks of a material using the valuation
category Quality comprising the following valuation types
bull High quality Average quality Inferior
Hazardous material number
Number that identifies the material as a hazardous material or as dangerous
goods and assigns hazardous material data or dangerous goods data to it
Use The hazardous material number indicates that the material is dangerous
making special precautions necessary for its storage and shipment
Valuation Class
Assignment of a material to a group of GL accounts
With other factors the valuation class determines the GL accounts that are
updated as a result of a valuation-relevant transaction or event such as a goods
movement
The valuation class makes it possible to
bull Post the stock values of materials of the same material type to different GL
accounts
bull Post the stock values of materials of different material types to the same GL
account
Default value for the valuation class for valuated stocks of this material
Use The valuation class has the following functions
bull Allows the stock values of materials of the same material type to be posted to
different GL accounts
bull Allows the stock values of materials of different material types to be posted to
the same GL account
bull Determines together with other factors the GL accounts updated for a
valuation-relevant transaction (such as a goods movement
Material Master Related Important Terms (Part 1)
Material Group
Key that you use to group together several materials or services with the same
attributes and to assign them to a particular material group
Use You can use material groups to
bull Restrict the scope of analyses
bull Search specifically for material master records via search helps
Purchasing Group
Key for a buyer or a group of buyers who isare responsible for certain
purchasing activities
Use
bull Internally the purchasing group is responsible for the procurement of a
material or a class of materials
bull Externally it is the medium through which contacts with the vendor are
maintained
Purchasing Value Key
Key defining the reminder days and tolerance limits valid as well as the
shipping instructions and order acknowledgment requirement of the material for
Purchasing
Procedure If you have chosen a purchasing value key the system enters the
values defined in Customizing (for Purchasing) in the fields
Batch Batches (LO-BM)
A subset of the total quantity of a material in stock managed separately from
other subsets of the same material
Example Different production lots (such as paints dyes wallpapers and
pharmaceutical products) delivery lots quality grades of a material
Batch management requirement indicator Specifies whether the material is
managed in batches
Use
This indicator can be set in the material master record manually or if batches
are valuated individually it is set automatically for the plants concerned in
which case it cannot be changed
The indicator cannot be changed if stocks exist in either the current period or in
the previous period The reason for checking the previous period is because
stocks can be posted to this period when goods movements are entered
AUOTOMATIC ACCOUNT DETERMINATION OR ASSIGNMENT
AUOTOMATIC ACCOUNT DETERMINATION OR ASSIGNMENT Whenever there is goods movement accounting documents financial accounts
updated automatically so we do some settings in customization is called
automatic account assignment
It works with three important factors -
bull Chart of accounts
bull Material type
bull Valuation grouping code
Chart of accounts - It is a group of accounts (GL Accounts) which is assigned
to our company code One company code is assigned to one chart of account
but one chart of account can be maintained for n number of company codes
Valuation grouping code valuation modification - It is a 4-digit code
which is assigned to company code along with valuation area (Plant)
Account category reference - It is a 4-digit code that establishes relationship
between material types and valuation class One account cat ref assigned to n
number of material type and valuation class
Transaction Event key - It is an internal processing key that facilitates the
automatic account determination for the various material and invoice posting
Use - Key to determine the account in which a posting line is generated (at
least two transaction event keys are involved in each posting)
Value String - It indicates the posting rule that always contain same account
assignment char to certain transaction event key
Account Modifier - It is a subdivision of transaction event key in which GL
account is linked during the process of automatic account determination
Valuation class and material type is assigned to it
Steps -
1 Activate valuation Group code
2 Assign Valuation area to valuation grouping code
3 Create Account Cat Ref and valuation class
4 Assign valuation class to Account Cat Ref
5 Assign Account Cat Ref to Material type
6 Assign account grouping to movement types
7 Configure Automatic posting
Customize settings -
SPRO 1048774 IMG 1048774 MM 1048774 Valuation Class and Account Assignment 1048774 Account
Determination 1048774 Account determination without wizard
1 Define valuation control T Code OMWM
2 Group together valuation areas T Code OMWD
3 Define valuation class T Code OMSK
bull Account category reference
bull Valuation class
bull Material type Account Cat Ref
4 Define Account grouping for movement type T Code OMWN
5 Configure automatic posting T Code OMWB
Transaction Event Keyrsquos
BSX - Stock Posting Inventory Posting
PRD - Price difference
GBB - Offsetting entry for stock posting
WRX - GRIR Clearing
FRI - Freight Clearing
Automatic PURCHASE ORDER (PO) How Automatic PO raised
How Automatic PO raised
At fixed time say 1230 AM automatic scheduler runs and checks whether the
stock is less than or equal to the replenishment point If stock is less than or
equal to Repli Point than PR raised automatically to Purchasing Deptt
bull Activate the option automatic PO in purchasing view in material master record
bull Activate the option automatic PO in purchasing data view in vendor master
record
bull Maintain Source List amp select fixed vendor
bull PR crated automatically
bull Automatic creation of PO from PR ndash ME59
Enter the Purchasing group purchasing organization Vendor Plant and
Purchasing Requisition Document Number 1048774 Execute
Material Master Related Important Terms (Part 1)
Material Group
Key that you use to group together several materials or services with the same
attributes and to assign them to a particular material group
Use You can use material groups to
bull Restrict the scope of analyses
bull Search specifically for material master records via search helps
Purchasing Group
Key for a buyer or a group of buyers who isare responsible for certain
purchasing activities
Use
bull Internally the purchasing group is responsible for the procurement of a
material or a class of materials
bull Externally it is the medium through which contacts with the vendor are
maintained
Purchasing Value Key
Key defining the reminder days and tolerance limits valid as well as the
shipping instructions and order acknowledgment requirement of the material for
Purchasing
Procedure If you have chosen a purchasing value key the system enters the
values defined in Customizing (for Purchasing) in the fields
Batch Batches (LO-BM)
A subset of the total quantity of a material in stock managed separately from
other subsets of the same material
Example Different production lots (such as paints dyes wallpapers and
pharmaceutical products) delivery lots quality grades of a material
Batch management requirement indicator Specifies whether the material is
managed in batches
Use
This indicator can be set in the material master record manually or if batches
are valuated individually it is set automatically for the plants concerned in
which case it cannot be changed
The indicator cannot be changed if stocks exist in either the current period or in
the previous period The reason for checking the previous period is because
stocks can be posted to this period when goods movements are entered
CIN - Country India Version ~ Volume 1
PurposeCountry Version India (CIN) contains a number of enhancements to standard
Sales and Distribution (SD) functions that allow you to handle local
requirements in particular excise duty
Features
In Country Version India (CIN) this component handles sales processes as
found in India In addition to the generic functions it allows you to
Handle CENVAT in your sales processes
The system calculates excise on your sales and creates excise invoices as
required and makes the appropriate postings to your CENVAT accounts
It covers sales from factories sales from depots and offers functions for other
types of goods movements it also covers sales to export-oriented units and
export sales
Record concessional and exemption forms sent to you by your customers
Make adjustment postings to your CENVAT accounts
Excise Invoice (Outgoing)
Definition
The document that acts as the proof of payment of excise duty and is required
for the customer to take CENVAT credit on the item
Use
In the SAP System there are three different procedures for creating excise
invoices
Sales direct from the factory
This procedure is for when you sell manufactured goods straight from the
factory at which they were produced in which case you levy excise duty when
the goods leave the factory on their way to the customer
If when you send the goods to the customer you enclose the commercial
invoice you create the excise invoice with reference to the commercial invoice
If you want to send the commercial invoice after you have dispatched the goods
however you create the excise invoice with reference to a pro forma
commercial invoice For more information about these procedures see Sales
from Factories
As well as creating excise invoices individually you can also create them in
batches (see Creation of Excise Invoices in Batches)
Sales from depots
A depot is a site at which the goods are stored away from the factory at which
they were produced In this procedure you have to levy the excise duty when
you transfer the goods from the factory to the depot and then make sure this is
passed on to the customer when it makes a purchase For more information see
Sales from Depots
Sales (other goods movements)
Some other goods movements may also require you to create an excise invoice
with reference to other documents The SAP System offers separate functions
for these purposes (see Excise Invoices (Outgoing) for Other Movements)
StructureNumbering of Excise Invoices
Outgoing excise invoices have two numbers an internal document number
which is assigned immediately you create an excise invoice and an excise
invoice number which is not assigned until you have verified and posted it
As far as the excise invoice number is concerned you have to number your
outgoing excise invoices in sequential order starting each year on 1 April You
must notify the excise authority of the jurisdiction of the invoicing location The
serial number must be printed on each page of the excise invoice
Each number range is governed by a series group You must create at least one
series group in order to be able to number the excise invoices If you need more
than one number range you must create the corresponding number of series
groups You do so in the CIN Implementation Guide (IMG) by choosing Global
Settings reg Series Groups
Number of Line Items Per Excise Invoice
Some states allow you to include only a limited number of items for each page
of an excise invoice (for example if the excise invoices are to be printed on
prenumbered forms) You can customize the system so that it prints the excise
invoice accordingly in the CIN IMG by choosing Global Settings reg Excise
Registration IDs
Customer Master (Excise Data) Definition
The part of the customer master record that contains information relating to
Indian excise duty
Use
In conjunction with other data this data is used to calculate excise duty on
various transactions
To maintain the data from the SAP Easy Access screen choose Indirect Taxes reg
Master Data reg Excise Rate Maintenance and then select the following options
described below
Structure
The excise part of the customer master contains the following information
Customer Excise Details
On this screen you enter your customers tax registration numbers which are
used for various forms of correspondence and reports
1 Excise registration number (and the range division and collectorate in which
this is located)
2 Central sales tax (CST) number
3 Local sales tax (LST) registration number
4 Permanent account number (PAN)
In order for the system to be able to calculate which rate of excise duty to apply
on sales to the customer you must also assign it a customer excise duty status
(for more information about how this works see Determination of Excise Duty
Rates)
Excise Indicator for Plant and Customer
On this screen you define the final excise duty indicator (for more information
about how this works see Determination of Excise Duty Rates)
Determination of Excise Duty Use
When you execute a business transaction involving materials that are subject to
excise duty the system automatically calculates the duty for you
Prerequisites
In order for the system to be able to determine which rate of excise duty to
apply you must have maintained all the data on the Excise Rate Maintenance
screen which you can access from the SAP Easy Access screen by choosing
Indirect Taxes reg Master Data reg Excise Rate Maintenance
You maintain the following types of data
Plant master data
You assign each of your plants an excise duty indicator You can use the same
indicator for all the plants with the same excise status from a legal point of view
such as all those that are in an exempt zone
See also the information about manufacturers that are only entitled to deduct a
certain portion of the duty (see Partial CENVAT Credit)
Vendor master data
For each of your vendors with the same excise status from a legal perspective
you define an excise duty indicator You must also specify the vendor type ndash for
example whether the vendor is a manufacturer a depot or a first-stage dealer
You must also stipulate if the vendor qualifies as a small-scale industry
For each permutation of plant indicator and vendor indicator you then create a
final excise duty indicator
Customer master data
Similarly you assign the same excise duty indicator to each of your customers
that share the same legal excise status
Again for each permutation of plant indicator and customer indicator you then
create a final excise duty indicator
Material master data
Each material is assigned a chapter ID
Excise tax rate
For every chapter ID and final excise duty indicator you maintain the rate of
excise duty
If your business only qualifies for partial CENVAT credit you must customize
your system accordingly
Activities
Let us consider an example to illustrate how the system determines which rate
of excise duty to apply to a material Assume you are posting a sale of ball
bearings to a customer The system automatically determines the rate of excise
duty as follows
Looks up the customer master data to see what status you have assigned the
customer
Lets assume youve assigned the customer status 3
Looks up the plant master data to see what status you have assigned the plant
Similarly your plant has status 2
The system looks up the table under Excise Indicator for Plant and Customer to
see what the final excise duty indictor is for customer status 3 and plant status
2 It is 7
The system determines the chapter ID of the ball bearing for the plant
Letrsquos assume the chapter ID at plant for the ball bearings is 100001
Finally the system looks up the table under Excise Tax Rate to see what rate of
duty applies to chapter ID 100001 under status 7
Plant Master (Excise Data) Definition
The part of the plant master record that contains information relating to Indian
excise duty
Use
In conjunction with other data this data is used to calculate excise duty on
various transactions
To maintain the data from the SAP Easy Access screen choose Indirect Taxes reg
Master Data reg Excise Rate Maintenance and then select the following options
described below
Structure
The excise part of the plant master is divided into the following screens
Excise Indicator for Plant
On this screen you enter your plants tax registration numbers which are used
for various forms of correspondence and reports
1 Central sales tax (CST) number
2 Local sales tax (LST) registration number
3 Permanent account number (PAN)
In order for the system to be able to calculate which rate of excise duty to apply
on purchases for this plant you must also assign it a plant excise duty status
(for more information about how this works see Determination of Excise Duty
Rates)
Excise Indicator for Plant and Vendor
On this screen you define the final excise duty indicator (for more information
about how this works see Determination of Excise Duty Rates)
Excise Indicator for Plant and Customer
On this screen you define the final excise duty indicator (for more information
about how this works see Determination of Excise Duty Rates)
Automatic Creation of Excise Invoices Use
The SAP System can automatically create an outgoing excise invoice for you
immediately you post a commercial invoice (or a pro forma invoice) for a
customer sale This function applies to excise invoices for sales from factories
only
Prerequisites
To activate this function in the Country Version India (CIN) Implementation
Guide (IMG) make the following settings
1 Under Global Settings reg Excise Groups select Create EI
This activates the automatic creation function
2 Under Sales and Distribution reg Utilization Determination
Here you specify which CENVAT accounts the system is to post the different
types of excise duty to
3 Under Sales and Distribution reg Excise GroupndashSeries Group Determination
Here you specify which excise group and series group the excise invoices are to
be created for
Features
When you post an invoice the system creates an excise invoice All the
information that it needs to create the excise invoice is provided either by the
invoice or by the Customizing settings that you have made in Sales and
Distribution It also determines the excise invoice type automatically by means
of a user exit
Creating Excise Invoices for Stock Transfers 1 From the SAP Easy Access screen choose Indirect Taxes reg Procurement reg
Excise Invoice reg For Depot reg CreateChangeDisplay
2 In the Material document field enter the goods receipt number and choose
The system displays the information from the goods receipt for example the
sending plant the excise registration the range the division and the
collectorate
3 Choose Details
The system copies the items from the goods receipt document In the depot it is
possible to have a separate excise invoice at line item level
4 Enter the internal document number of the excise invoice sent by the factory
5 Choose More documents to go the excise invoice details screen
6 Enter the internal document number of the excise invoice from the factory
The system copies the information to the line item (for example the excise
invoice number the excise invoice date the item number the chapter ID the
excise invoice quantity the amount of excise duty paid the excise base value
and the serial number of the Part II register entry with which the excise was
paid)
You can change the receipt quantity to match the actual quantity received at
the depot if necessary The system automatically adjusts the excise
accordingly
7 Go back to the item details screen
8 Save the excise invoice
Creating Excise Invoices for Direct Purchases 1 From the SAP Easy Access screen choose Indirect Taxes reg Procurement reg
Excise Invoice reg For Depot reg CreateChangeDisplay
2 In the Material document field enter the goods receipt number and choose
The system displays the information from the goods receipt for example the
sending plant the excise registration the range the division and the
collectorate
You can also maintain the excise registration details for the ship-from party as
for with the vendor The ship-from can be different from the vendor code (The
delivering plant can be maintained as a ship-from in the system When a valid
ship-from is entered the excise registration details copied from the vendor will
be overwritten by the ship-from excise registration details)
The ship-from registration details displayed can also be overwritten manually
The dealers commercial invoice number can be stored in the vendor excise
invoice number as in this case the dealer himself will not have an excise
invoice
3 Choose Details
The system copies the items from the goods receipt document It also copies the
vendors excise invoice number and the serial numbers of the entries in the RG
23A RG 23C and personal ledger account (PLA) registers
4 Enter the internal document number of the excise invoice sent by the factory
5 Select an item and choose More documents to go the excise invoice details
screen
In the case of direct purchases there will not be any excise invoice in the
system so leave the internal document field blank The vendors invoice will
show the details of the excise invoices through which excise has been paid for
the item that is being dispatched You can enter these details here
6 For each item the chapter ID excise base value and excise duty amounts
are defaulted from the purchase order You can change them if there is any
difference Enter the excise amount paid and the receipt quantity You also
enter the Part II register serial numbers with which the excise duty was paid and
the excise registration information from the original excise invoice
7 Go back to the item details screen
8 Save the excise invoice
The system creates an entry in register RG 23D You can change the excise
invoice as long as it has not been used in any sales
Assigning Excise Invoices to a Delivery Use
You follow this procedure to specify which excise invoices are to be assigned to
a delivery from a depot (or other material document)
You can also automate this procedure using the batch selection program
(J_1IJCHK) by making the appropriate Customizing settings in the Country
Version India (CIN) Implementation Guide (IMG)
Procedure
1 From the SAP Easy Access screen choose Indirect Taxes reg SalesOutbound
Movements reg Excise Invoice reg For Depot reg CreateChangeDisplay reg Delivery
or Material Document reg RG 23D Selection
2 Enter the delivery document number or the material number and choose
3 Select the excise invoice you want
4 Choose
5 Choose Excise invoice
A list of excise invoices appears These are the excise invoices at the depot with
a balance quantity
The system also shows a list of the A certificates that can be used You can pick
up any of the A certificates but they must be for the same excise invoice You
can only pick up an A certificate in its entirety You cannot select part of an A
certificate
6 Select the excise invoices that are relevant to the delivery
7 Specify what quantity to be used from each excise invoice
The system recalculates the excise accordingly
8 Go back to the item details screen
9 Save the data
Result
The system creates an entry in register RG 23D and generates the depot excise
invoice numbers
If you selected any A certificates the system also generates additional entries in
the RG 23D register The system marks the original A certificates as updated so
that they cannot be used for any other removals
CIN - Country India Version ~ Vol 2
Continue Volume 1
Creating Excise Invoices
Use
This is the procedure that you follow to create an excise invoice for the less
common types of goods movement
Procedure
1 From the SAP Easy Access screen choose Indirect Taxes reg SalesOutbound
Movements reg Excise Invoice reg For Other Movements reg CreateChangeDisplay
reg
2 On the selection screen enter data as required including
(i)Reference
group box
Specify which document you want to create the excise invoice for and which
excise group it is for
(ii)Details
group box
Specify the vendor or customer that you are sending the invoice to
3 Choose
If you entered an internal document number the system copies the item details
from it
4 Choose
5 Enter line items for each of the materials to be included in the excise invoice
For each item enter the following data
(i)Material
(ii)Quantity
(iii)Unit of measure
(iv)Base value
(v)Excise duty
6 To pick the rate and amount from a specific excise invoice choose Get excise
invoice
7 Save the excise invoice
If you are using the one-step procedure the system creates and posts an excise
invoice Otherwise the system saves the information but does not make any
postings it now has to be verified
Verifying and Posting Excise Invoices
Use
You follow this procedure to verify that the information in an excise invoice that
has already been created and to post it once you are satisfied
Procedure
From the SAP Easy Access screen choose Indirect Taxes reg SalesOutbound
Movements reg Excise Invoice reg For Other Movements reg Posting
1 Enter the internal document number of the excise invoice
2 Choose Release to accounting
The system displays the excise invoice The excise duty that is to be posted is
displayed at the foot of the screen which you can change if necessary
3 To access the balance utilization choose
4 To display the balance available on the CENVAT accounts choose Account
balances
5 Save the excise invoice
The system generates the accounting documents
6 To print the excise invoice choose
Making a Transfer Posting
Use
In this procedure you make a transfer posting for the goods ordered by another
plant For more information about this function see Entering the Removal from
Storage at the Issuing Plant
Procedure
1 From the SAP Easy Access screen choose Logistics reg Materials Management
reg Inventory Management reg Goods Movement reg Transfer Posting
2 Choose Movement type reg Transfer posting reg Plant to plant reg To stock in
transit
3 Enter the number of the issuing plant and storage location
4 Choose To purchase order
5 In the dialog box enter the number of the stock transport order that the
receiving plant created and choose
6 Check the data
7 Save the transfer posting
Transaction Codes for India
Transaction Action
J1I2 Prepare a sales tax register
J1I3 Create outgoing excise invoices in batches
J1I5
Update the RG 1 and Part I registers
J1I8
Post the challan used to remit TDS
J1IC194C
Create annual return under section 194 C (Classic TDS)
J1IC194D
Create annual return under section 194 D (Classic TDS)
J1IC194I
Create annual return under section 194 I (Classic TDS)
J1IC194J
Create annual return under section 194 J (Classic TDS)
J1IEX
Incoming Excise Invoices (central transaction)
J1IEX_C
Capture an incoming excise invoice (excise clerk)
J1IEX_P
Post an incoming excise invoice (excise supervisor)
J1INBANK
Post a bank challan
J1INCANC
Cancel a vendor withholding tax certificate
J1INCERT
Print a vendor withholding tax certificate
J1INCHLN
Create a remittance challan
J1INCUST
Post a customer withholding tax certificate
J1INHC
Withholding Tax Migration Health Check Program
J1INMIG
Withholding Tax Data Migration Tool
JI1NCHLC
Create a remittance challan for customers
J1INCC
Print customer withholding tax certificates
J1INMIS
Withholding Tax Information System
JI1NAR
Prepare annual returns (Extended Withholding Tax)
J1IF01
Create a subcontracting challan
J1IF11
Change a subcontracting challan
J1IF12
Display a subcontracting challan
J1IF13
Complete reverse or recredit a subcontracting challan
J1IFQ
Reconcile quantities for subcontracting challans
J1IFR
List subcontracting challans
J1IH
Make a CENVAT adjustment posting
J1IIN
Create an outgoing excise invoice
J1IJ
Assign excise invoices to a delivery for sales from depots
J1INJV
Adjust withholding tax Item
J1INREP
Reprint a vendor withholding tax certificate
J1INREV
Reverse a remittance challan
J1INPR
Calculate withholding tax on clearing accounts
J1INUT
Clear withholding tax on clearing accounts
J1IR
Download register data
J1IS
Process an excise invoice (outgoing) for other movements
J1IU
Process exemption forms
J1IW
Verify and post an incoming excise invoice
J1IX
Create an incoming excise invoice (without reference to purchase order)
J2I8
Transfer excise duty to CENVAT account
J2ID
Archive tax deducted at source (TDS) documents
J2IE
Locate tax deducted at source documents in archive
J2IU
Remit excise duty fortnightly
J2I9
Monthly CENVAT return
J1IG
Excise invoice entry at depot
J1IGA
Create additional excise entry at depot
J2I5
Extract data for excise registers
J2I6
Print excise registers
Sales from Factories
Purpose
This process describes how the SAP System handles the sales process allowing
for the creation of excise invoices which you have to send with each delivery
that is subject to excise duty There are two scenarios depending on whether
you want to send the commercial invoice along with the delivery or at a later
date
Prerequisites
In order for the system to be able to copy the information from document to
document you must have set up the copying control procedures in Customizing
for Sales and Distribution (SD) This differs according to when you want to send
the commercial invoice
1 Along with the delivery
In this case the document flow would be OR (standard sales order type) ndash LF
(standard delivery type) ndash F2 (invoice)
2 At a later date
The document flow would be OR ndash JF (delivery type a copy of LF) ndash JEX (pro
forma billing document type a copy of document type F8) ndash F2
In addition you must also have maintained the settings in the Country Version
India (CIN) Implementation Guide (IMG) by choosing Global Settings reg Assign
Excise Invoice Billing Type to Delivery Type
A sample pricing procedure JFACT is provided for this sales procedure
Process Flow
1 The sales clerk creates a sales order following the
(i)standard procedure
There are special procedures for
(i)Customers in possession of exemption forms
(ii)Exports
2 The shipping clerk creates a delivery again following the
standard procedure
On the initial screen you set the appropriate delivery type (see above)
3 In the warehouse the storeperson issues the goods
The system only allows users to create a pro forma excise invoice if the delivery
is complete so as to prevent them from creating multiple pro forma excise
invoices
4 What you do at this stage depends on whether you want to send the
commercial invoice along with the delivery or whether you want to invoice the
customer later
(A) If the invoice is to be shipped with delivery the shipping clerk
(i)Creates an invoice following the standard procedure
(ii)Creates an excise invoice from the invoice
(B) If the invoice is to be sent on at a later date the shipping clerk
(i)Creates the pro forma excise invoice
The pro forma excise invoice is only required for technical purposes and is not
sent to the customer The system does not make any accounting postings at this
stage
(ii)Creates
an excise invoice from the pro forma excise invoice
In both these cases the system creates an accounting document to post the
excise duty to a clearing account
Instead of creating excise invoices manually you can also have the system
create them automatically Alternatively you can create them in batches
5 You ship the goods
6 When the time comes to invoice the customer you create the invoice
following the standard procedure
Irrespective of the number of excise invoices that you have issued you can
combine the delivery items in a single invoice (if the standard requirements are
met)
Sales from Depots
Purpose
You may sell finished goods directly from the place of manufacture as described
under Sales from Factories or you may first ship them to a separate location for
storage (a depot) from where you will sell them The second procedure is
described here
Sales from depots are handled differently from sales from factories because of
excise law Excise duty is payable when you send the goods from the factory to
the depot but it is not levied again when you sell the goods
Sometimes when you make a final sale of goods from a depot price escalations
could have happened with retrospective effect In such scenarios you need to
pay the extra excise duty at the factory using an A Certificate You need to
register the A certificate details in the RG 23D register and the excise recovered
from the customer
Prerequisites
You have customized
1 Stock transport processing in Customizing for Materials Management (MM)
by choosing Purchasing reg Purchase Order reg Set Up Stock Transport Order
2 The copying control for copying stock transport order NL to excise invoice JEX
You make this setting in the Country Version India (CIN) Implementation Guide
(IMG) by choosing Sales and Distribution reg Assign Excise Invoice Billing Type to
Delivery Type
3 The item category NLN (standard transport order) so that it is relevant for
billing
You do this in the standard IMG in Customizing for Sales and Distribution (SD)
by choosing Sales reg Sales Documents reg Sales Document Item
Process Flow
1 You create the sales order following the
standard procedure
The standard pricing procedure for depot sales is JDEPOT
2 You create the delivery again following the
standard procedure
3 You
assign excise invoices to the delivery or material document
4 You
verify that you have selected the correct excise invoices and post them
Alternatively if you have selected the wrong excise invoices you can cancel the
assignment
5 You create the invoice following the standard procedure
SPECIAL STOCKS amp SPECIAL PROCUREMENT TYPES
Special Stocks are those stocks which are not belongs to our company code
These are not placed in our storage locations amp no physical inventory is
performed and treated as special stocks for the reason of ownership
Different types are of Special Stocks are as follows
1 Subcontracting
2 Consignment
3 Pipeline
4 Stock transfer
5 Third party
6 Returnable transport packaging
7 Sales order stock
8 Project stock
SUBCONTRACTING
In subcontracting process we create subcontracting PO to supply or issue
subcomponents to vendor in order to get final product The price maintained in
subcontracting PO is a service charge paid to vendor
Steps to perform subcontracting
1 Create subcontracting inforecord (Optional)
2 Create subcontracting PO with item category L
There are to ways to supply subcomponents to vendor
bull Manually maintain the subcomponents in the subcontracting
PO though explode BOM
bull Through BOM (Bill of material) T Code CS01 CS02 amp CS03
3 Create Transfer Posting with Movement Type 541 to issue the subcomponents
to the vendor
4 Goods Reciept
5 Invoice Reciept
Path ME21N ---gt Enter Item Category L --gt Material (End Product) PO
Quantity Delivery Date Net Price Plant --gt Click on Item Details --gt Tab
Material Data -- gtComponents select Explode BOM --gt Click on Components
button --gt Enter the subcomponents --gt Go back amp Save
Create Transfer Posting with movement type 541 amp T Code MB1B
GR MIGO
IR MIRO
CONSIGNMENT - (No Concept of Invoice)
In consignment process we will not create Purchasing document for the vendor
vendor himself send the material to our plant though the material is available
to our plant the responsibility amp ownership of the material is of vendor Aliability
only arises when the material withdrawal (Consumption) is posted in the system
from consignment stock
Steps
1 Create Consignment info record (mandatory)
2 Create Consignment purchase order with item category lsquoKrsquo amp maintain Info
record number
3 Create GR Movement type lsquo101Krsquo
4 Create GI Movement Type lsquo201Krsquo
5 Consignment settlement T Code MRKO
Path --gtME11 --gt In info record --gt Purchasing Org Data 1 views of info record
enter the tax code and save it
--gt Create Consignment Purchase Order ME21N (Price option is grayed out with
price zero)
--gt Create GR with movement type 101K
--gt Create Goods Issue (GI) T Code MB1A amp Movement Type 201K Enter Cost
center vendor
--gt Consignment Settlement T Code MRKO Click Activate Consignment Activate
Settle Execute
--gt Display the Document Number ie Invoice receipt T Code FB03
PIPELINE PROCESS (No Concept of Invoice)
In pipeline handling your company does not need to order or store the material
concerned It is ready available to you as and when required via pipeline (eg oil
or water) or some other type of cable (eg electricity) Consumption of the
material is settled with the vendor on a regular basis
Steps
1 Create a Material master record with material type PIPE
2 Create Pipeline info record
3 Create GI with movement type 201P
4 Pipeline settlement T Code MRKO
RETURNABLE TRANSPORT PACKAGING (RTP)
When company orders goods from a vendor the goods are delivered with
returnable transport packaging (pallets containers) that belongs to the vendor
and is stored on our premises until you return it to the vendor
Steps
1 Create Material master record with material type LEIH
2 Create PO
3 Create GR by maintaining RTP material by selecting the option transport
equipments with movement type 501M
4 IR
STOCK TRANSFER
In stock transfer processing goods are procured and supplied within a company
One plant orders the goods internally to another plant (receiving plantissuing
plant) The goods are procured with a special type of purchase order the stock
transport order
Steps
1 Create a Material master in both supplying and receiving plant
2 Create stock transport order (STO) with item category lsquoUrsquo
3 Create transfer posting with movement type 351 amp T Code MB1B (Go to
MMBE stock overview the stock will decrease in supplying plant and it will not
update stock of receiving plant it will be under stock in transit)
4 Create GR stock will update in receiving plant
This scenario is under one company code between two plants
Material Master Related Important Terms (Part 2)
Controlling (CO) An organizational unit in Accounting that reflects a
management-oriented structure of the organization for the purpose of internal
control
Operating results for profit centers can be analyzed using either the cost of
sales approach or the period accounting approach
By analyzing the fixed capital as well you can expand your profit centers for use
as investment centers
Profit Center
Key that uniquely identifies the profit center in the current controlling area
Valuation Category
Determines whether stocks of the material are valuated together or separately
Dependencies
In the case of split valuation this indicator also determines which valuation
types are allowed that is the criteria by which stocks can be valuated
Valuation type
Invoice Verification (MM-IV)
A subdivision of a valuation category in split valuation
Example An enterprise manages its stocks of a material using the valuation
category Quality comprising the following valuation types
bull High quality Average quality Inferior
Hazardous material number
Number that identifies the material as a hazardous material or as dangerous
goods and assigns hazardous material data or dangerous goods data to it
Use The hazardous material number indicates that the material is dangerous
making special precautions necessary for its storage and shipment
Valuation Class
Assignment of a material to a group of GL accounts
With other factors the valuation class determines the GL accounts that are
updated as a result of a valuation-relevant transaction or event such as a goods
movement
The valuation class makes it possible to
bull Post the stock values of materials of the same material type to different GL
accounts
bull Post the stock values of materials of different material types to the same GL
account
Default value for the valuation class for valuated stocks of this material
Use The valuation class has the following functions
bull Allows the stock values of materials of the same material type to be posted to
different GL accounts
bull Allows the stock values of materials of different material types to be posted to
the same GL account
bull Determines together with other factors the GL accounts updated for a
valuation-relevant transaction (such as a goods movement
CIN - Country India Version ~ Volume 1
PurposeCountry Version India (CIN) contains a number of enhancements to standard
Sales and Distribution (SD) functions that allow you to handle local
requirements in particular excise duty
Features
In Country Version India (CIN) this component handles sales processes as
found in India In addition to the generic functions it allows you to
Handle CENVAT in your sales processes
The system calculates excise on your sales and creates excise invoices as
required and makes the appropriate postings to your CENVAT accounts
It covers sales from factories sales from depots and offers functions for other
types of goods movements it also covers sales to export-oriented units and
export sales
Record concessional and exemption forms sent to you by your customers
Make adjustment postings to your CENVAT accounts
Excise Invoice (Outgoing)
Definition
The document that acts as the proof of payment of excise duty and is required
for the customer to take CENVAT credit on the item
Use
In the SAP System there are three different procedures for creating excise
invoices
Sales direct from the factory
This procedure is for when you sell manufactured goods straight from the
factory at which they were produced in which case you levy excise duty when
the goods leave the factory on their way to the customer
If when you send the goods to the customer you enclose the commercial
invoice you create the excise invoice with reference to the commercial invoice
If you want to send the commercial invoice after you have dispatched the goods
however you create the excise invoice with reference to a pro forma
commercial invoice For more information about these procedures see Sales
from Factories
As well as creating excise invoices individually you can also create them in
batches (see Creation of Excise Invoices in Batches)
Sales from depots
A depot is a site at which the goods are stored away from the factory at which
they were produced In this procedure you have to levy the excise duty when
you transfer the goods from the factory to the depot and then make sure this is
passed on to the customer when it makes a purchase For more information see
Sales from Depots
Sales (other goods movements)
Some other goods movements may also require you to create an excise invoice
with reference to other documents The SAP System offers separate functions
for these purposes (see Excise Invoices (Outgoing) for Other Movements)
StructureNumbering of Excise Invoices
Outgoing excise invoices have two numbers an internal document number
which is assigned immediately you create an excise invoice and an excise
invoice number which is not assigned until you have verified and posted it
As far as the excise invoice number is concerned you have to number your
outgoing excise invoices in sequential order starting each year on 1 April You
must notify the excise authority of the jurisdiction of the invoicing location The
serial number must be printed on each page of the excise invoice
Each number range is governed by a series group You must create at least one
series group in order to be able to number the excise invoices If you need more
than one number range you must create the corresponding number of series
groups You do so in the CIN Implementation Guide (IMG) by choosing Global
Settings reg Series Groups
Number of Line Items Per Excise Invoice
Some states allow you to include only a limited number of items for each page
of an excise invoice (for example if the excise invoices are to be printed on
prenumbered forms) You can customize the system so that it prints the excise
invoice accordingly in the CIN IMG by choosing Global Settings reg Excise
Registration IDs
Customer Master (Excise Data) Definition
The part of the customer master record that contains information relating to
Indian excise duty
Use
In conjunction with other data this data is used to calculate excise duty on
various transactions
To maintain the data from the SAP Easy Access screen choose Indirect Taxes reg
Master Data reg Excise Rate Maintenance and then select the following options
described below
Structure
The excise part of the customer master contains the following information
Customer Excise Details
On this screen you enter your customers tax registration numbers which are
used for various forms of correspondence and reports
1 Excise registration number (and the range division and collectorate in which
this is located)
2 Central sales tax (CST) number
3 Local sales tax (LST) registration number
4 Permanent account number (PAN)
In order for the system to be able to calculate which rate of excise duty to apply
on sales to the customer you must also assign it a customer excise duty status
(for more information about how this works see Determination of Excise Duty
Rates)
Excise Indicator for Plant and Customer
On this screen you define the final excise duty indicator (for more information
about how this works see Determination of Excise Duty Rates)
Determination of Excise Duty Use
When you execute a business transaction involving materials that are subject to
excise duty the system automatically calculates the duty for you
Prerequisites
In order for the system to be able to determine which rate of excise duty to
apply you must have maintained all the data on the Excise Rate Maintenance
screen which you can access from the SAP Easy Access screen by choosing
Indirect Taxes reg Master Data reg Excise Rate Maintenance
You maintain the following types of data
Plant master data
You assign each of your plants an excise duty indicator You can use the same
indicator for all the plants with the same excise status from a legal point of view
such as all those that are in an exempt zone
See also the information about manufacturers that are only entitled to deduct a
certain portion of the duty (see Partial CENVAT Credit)
Vendor master data
For each of your vendors with the same excise status from a legal perspective
you define an excise duty indicator You must also specify the vendor type ndash for
example whether the vendor is a manufacturer a depot or a first-stage dealer
You must also stipulate if the vendor qualifies as a small-scale industry
For each permutation of plant indicator and vendor indicator you then create a
final excise duty indicator
Customer master data
Similarly you assign the same excise duty indicator to each of your customers
that share the same legal excise status
Again for each permutation of plant indicator and customer indicator you then
create a final excise duty indicator
Material master data
Each material is assigned a chapter ID
Excise tax rate
For every chapter ID and final excise duty indicator you maintain the rate of
excise duty
If your business only qualifies for partial CENVAT credit you must customize
your system accordingly
Activities
Let us consider an example to illustrate how the system determines which rate
of excise duty to apply to a material Assume you are posting a sale of ball
bearings to a customer The system automatically determines the rate of excise
duty as follows
Looks up the customer master data to see what status you have assigned the
customer
Lets assume youve assigned the customer status 3
Looks up the plant master data to see what status you have assigned the plant
Similarly your plant has status 2
The system looks up the table under Excise Indicator for Plant and Customer to
see what the final excise duty indictor is for customer status 3 and plant status
2 It is 7
The system determines the chapter ID of the ball bearing for the plant
Letrsquos assume the chapter ID at plant for the ball bearings is 100001
Finally the system looks up the table under Excise Tax Rate to see what rate of
duty applies to chapter ID 100001 under status 7
Plant Master (Excise Data) Definition
The part of the plant master record that contains information relating to Indian
excise duty
Use
In conjunction with other data this data is used to calculate excise duty on
various transactions
To maintain the data from the SAP Easy Access screen choose Indirect Taxes reg
Master Data reg Excise Rate Maintenance and then select the following options
described below
Structure
The excise part of the plant master is divided into the following screens
Excise Indicator for Plant
On this screen you enter your plants tax registration numbers which are used
for various forms of correspondence and reports
1 Central sales tax (CST) number
2 Local sales tax (LST) registration number
3 Permanent account number (PAN)
In order for the system to be able to calculate which rate of excise duty to apply
on purchases for this plant you must also assign it a plant excise duty status
(for more information about how this works see Determination of Excise Duty
Rates)
Excise Indicator for Plant and Vendor
On this screen you define the final excise duty indicator (for more information
about how this works see Determination of Excise Duty Rates)
Excise Indicator for Plant and Customer
On this screen you define the final excise duty indicator (for more information
about how this works see Determination of Excise Duty Rates)
Automatic Creation of Excise Invoices Use
The SAP System can automatically create an outgoing excise invoice for you
immediately you post a commercial invoice (or a pro forma invoice) for a
customer sale This function applies to excise invoices for sales from factories
only
Prerequisites
To activate this function in the Country Version India (CIN) Implementation
Guide (IMG) make the following settings
1 Under Global Settings reg Excise Groups select Create EI
This activates the automatic creation function
2 Under Sales and Distribution reg Utilization Determination
Here you specify which CENVAT accounts the system is to post the different
types of excise duty to
3 Under Sales and Distribution reg Excise GroupndashSeries Group Determination
Here you specify which excise group and series group the excise invoices are to
be created for
Features
When you post an invoice the system creates an excise invoice All the
information that it needs to create the excise invoice is provided either by the
invoice or by the Customizing settings that you have made in Sales and
Distribution It also determines the excise invoice type automatically by means
of a user exit
Creating Excise Invoices for Stock Transfers 1 From the SAP Easy Access screen choose Indirect Taxes reg Procurement reg
Excise Invoice reg For Depot reg CreateChangeDisplay
2 In the Material document field enter the goods receipt number and choose
The system displays the information from the goods receipt for example the
sending plant the excise registration the range the division and the
collectorate
3 Choose Details
The system copies the items from the goods receipt document In the depot it is
possible to have a separate excise invoice at line item level
4 Enter the internal document number of the excise invoice sent by the factory
5 Choose More documents to go the excise invoice details screen
6 Enter the internal document number of the excise invoice from the factory
The system copies the information to the line item (for example the excise
invoice number the excise invoice date the item number the chapter ID the
excise invoice quantity the amount of excise duty paid the excise base value
and the serial number of the Part II register entry with which the excise was
paid)
You can change the receipt quantity to match the actual quantity received at
the depot if necessary The system automatically adjusts the excise
accordingly
7 Go back to the item details screen
8 Save the excise invoice
Creating Excise Invoices for Direct Purchases 1 From the SAP Easy Access screen choose Indirect Taxes reg Procurement reg
Excise Invoice reg For Depot reg CreateChangeDisplay
2 In the Material document field enter the goods receipt number and choose
The system displays the information from the goods receipt for example the
sending plant the excise registration the range the division and the
collectorate
You can also maintain the excise registration details for the ship-from party as
for with the vendor The ship-from can be different from the vendor code (The
delivering plant can be maintained as a ship-from in the system When a valid
ship-from is entered the excise registration details copied from the vendor will
be overwritten by the ship-from excise registration details)
The ship-from registration details displayed can also be overwritten manually
The dealers commercial invoice number can be stored in the vendor excise
invoice number as in this case the dealer himself will not have an excise
invoice
3 Choose Details
The system copies the items from the goods receipt document It also copies the
vendors excise invoice number and the serial numbers of the entries in the RG
23A RG 23C and personal ledger account (PLA) registers
4 Enter the internal document number of the excise invoice sent by the factory
5 Select an item and choose More documents to go the excise invoice details
screen
In the case of direct purchases there will not be any excise invoice in the
system so leave the internal document field blank The vendors invoice will
show the details of the excise invoices through which excise has been paid for
the item that is being dispatched You can enter these details here
6 For each item the chapter ID excise base value and excise duty amounts
are defaulted from the purchase order You can change them if there is any
difference Enter the excise amount paid and the receipt quantity You also
enter the Part II register serial numbers with which the excise duty was paid and
the excise registration information from the original excise invoice
7 Go back to the item details screen
8 Save the excise invoice
The system creates an entry in register RG 23D You can change the excise
invoice as long as it has not been used in any sales
Assigning Excise Invoices to a Delivery Use
You follow this procedure to specify which excise invoices are to be assigned to
a delivery from a depot (or other material document)
You can also automate this procedure using the batch selection program
(J_1IJCHK) by making the appropriate Customizing settings in the Country
Version India (CIN) Implementation Guide (IMG)
Procedure
1 From the SAP Easy Access screen choose Indirect Taxes reg SalesOutbound
Movements reg Excise Invoice reg For Depot reg CreateChangeDisplay reg Delivery
or Material Document reg RG 23D Selection
2 Enter the delivery document number or the material number and choose
3 Select the excise invoice you want
4 Choose
5 Choose Excise invoice
A list of excise invoices appears These are the excise invoices at the depot with
a balance quantity
The system also shows a list of the A certificates that can be used You can pick
up any of the A certificates but they must be for the same excise invoice You
can only pick up an A certificate in its entirety You cannot select part of an A
certificate
6 Select the excise invoices that are relevant to the delivery
7 Specify what quantity to be used from each excise invoice
The system recalculates the excise accordingly
8 Go back to the item details screen
9 Save the data
Result
The system creates an entry in register RG 23D and generates the depot excise
invoice numbers
If you selected any A certificates the system also generates additional entries in
the RG 23D register The system marks the original A certificates as updated so
that they cannot be used for any other removals
Continue see Volume 2 (Next post)
EXTERNAL SERVICE MASTER
EXTERNAL SERVICE MASTER ESM
We procure the different type of services from vendors they are-
1048774 Hardware amp software services
1048774 Construction amp transportation services
1048774 Machinery services
1048774 Annual maintenance services
1048774 Present to and breakdown service Etc
Service Procurement Cycle -
1048774 Requirement identification
1048774 Source determination
1048774 Source selection
1048774 Service master
1048774 Service PO
1048774 Service entry sheet acceptance
1048774 Invoice with respect to service entry sheet
Steps to perform services -
1 Create service master (AC03)
2 Create Service PO (ME21N) with AC Assignment category lsquoKrsquo amp Item
Category lsquoDrsquo
3 Create service entry sheet (ML81N)
4 Invoice with respect to Service Entry sheet
Customize settings
(For service category Number Ranges amp organization status for service
category)
SPRO 1048774 IMG 1048774 MM 1048774 ESM 1048774 Service Master
1048774 Define organization Status for service Categories
1048774 Define Service Category
1048774 Define Number Ranges
Define organization Status for service Categories
bull Click on New Entries
bull Org service Category
bull BDS (Basic data service is stored in service master record under this service
category)
bull CNST 1048774 Controlling Status
bull PUST 1048774 Purchasing data Status
bull SDST 1048774 Sales amp Distributed Status
bull Org status description service category 1048774 Press Enter amp Save
Define Service Category
bull Same path as above
bull Select Standard
bull Click on Copy as
bull AC reference 1048774 always takes as 0006
bull Enter amp Save
Define Number Ranges
Click on groups 1048774 Groups 1048774 Insert 1048774 select enter Number Ranges
Select the service category
Click on Element
Select Group amp Click on Element Group
Save
Create Service Master - (AC03)
Click on Create New Services
Service Number (any number) Service Category
Basic unit of measure (Hours lsquoHrsquo)
Enter
Basic Data 1048774 Master Service Group 1048774 007
Valuation class 1048774 3200 1048774 Enter 1048774 Save
To See the Service list 1048774 AC06
Create Service PO (ME21N)
AC assignment category lsquoKrsquo Item Category lsquoDrsquo
Enter the Short text Quantity Delivery date Net Price Material group Plant
Storage Location
Enter service number in Service Tab (Item Details) quantity price Enter
Account Assignment 1048774 GL Account Number eg400000
Cost Center eg 9999
Press Enter amp Save
Create Service Entry Sheet - ML81N
Select other purchase order (enter PO number) 1048774 Enter 1048774 Click on Create1048774 Enter
Short Text 1048774 Enter 1048774 Service Number 1048774 Enter ndashClick on Flag button 1048774 Save
Take Service entry Sheet Number
Go to Invoice MIRO 1048774 Enter company code 1048774 Select Service Sheet Option 1048774 Enter
Service Entry Sheet Number 1048774 save it
Physical Inventory and Inventory Management
Physical inventory Process - 1 Create Physical inventory document
T Code MI01 ndash Create single inventory document
T Code MI31 ndash Create multiple physical inventory documents
I Enter the desired fields ie material material type site storage location and
Maximum number items Documents ndash 100 etc 1048774 Press Enter
II Click on Process Session
III Select the line items and click on the process
IV System displays a dialog box select Background and click on process
Inventory document is created
2 Print Inventory Document and handed over to responsible person say
Manager
3 Enter Physical Inventory count
T Code MI04
i Enter the physical inventory document number Fiscal year count date 1048774 Press
enter
ii Enter the Material Quantity and click on post
4 Listing of difference
T Code MI20
Enter the physical inventory document number and execute system displays a
screen wherein we will be able to view the differences
5 Post the differences
T Code MI07 amp Mov Type 701 amp 702
Enter the physical inventory document number year posting date enter the
difference and post
INVENTORY MANAGEMENT Maintaining stock by value or by quantity is called inventory The total inventory
management deals with the goods movement of the material
Goods movement -
It is a process in which transaction resulting change in stocks It is further sub-
divided into three categories
1 Goods Receipt (GR)
2 Goods Issue (GI)
3 Transfer Posting (TP)
Goods Receipt (GR) - It is a goods movement in which receipt of goods is
posted for vendor or for production A GR posted in the system will leads to
increase in stock No Concept of Price or value
Goods Issue (GI) - It is goods movement in which material withdrawal is
posted for consumption or for customer A GI posted in system will leads to
decrease in stock
Stock Transfer (ST) - It is method of removal of material from one location
and transferring it to another location This process is performed between two
plants and two storage locations
Transfer Posting (TP) - It is a general term of stock transfer that changes the
stock type or stock categories The difference between transfer posting and
stock transfer is -
TP is logical stock transfer and ST is a physical stock transfer
Movement Type - It is a three-digit code which plays a role of important
control function in inventory management It acts as a central role in automatic
account determination It determines which stock account or consumption
account is updated in financial accounting
Reservation - It stores requisition created from particular cost center to
particular department for issuing the material reservation posted in the system
It leads to decrease in stock
Stock Types - The different stock types are
1 Unrestricted use stock
2 Quality inspection stock
3 Blocked stock
4 Warehouse stock
Transaction code -
1 To Create GR - MIGO
2 To Create GI - MB1A
3 For Transfer Posting - MB1B
4 To display MaterialGR document ndash MB03
5 To create reservations - MB21 MB22 MB23
6 To See Stock Overview - MMBE
7 To enter Other GR - MB1C
When GR is posted in the system
1 Material document is created - MB03
2 Accounting Document is generated - MB03
3 MMR updated - MM02 MM03
4 PO history updated - ME23N
Movement Typersquos
Movement Types under GR - 101 331333335501503505551553555
561351 (For all Mov Typersquos there is a reversal eg 101 has 102 Note No
reversal for 121)
Movement Typersquos under GI - 201 331333335551553555
Transfer Posting It is performed in three ways
1 TP BW Plant to Plant
2 TP BW Storage Location to Storage Location
3 TP BW Stock to Stock
Movement Types under TP BW Plant to Plant
301 - 1 step
303 amp 305 - 2 step
Movement Type under TP BW Storage location to Storage Location
311 - 1 step
313 amp 315 - 2 step
Movement Type under TP BW stock to stock
321 323 325 343349
To Cancel the GR Movement type 102
Return delivery to vendor movement type 122 amp T Code MIGO
Transfer Posting Stock to Stock
From Blocked stock to Quality Inspection
T Code MB1B amp Movement Type 349
From Blocked stock to Unrestricted Stock
T Code MB1B amp Movement Type 343
From Quality Inspection to Unrestricted Stock
T Code MB1B amp Movement Type 321
Transfer Posting from Plant to Plant
For One Step Movement Type 301
For Two Steps Movement Type 303 amp 305
After posting stock will display in Stock in Transit (Plant)
To receive material by receiving Plant Movement Type 305
Transfer Posting BW Storage Location to Storage Location
Under One Plant BW two Storage Locationrsquos Movement Type 311
Back to Parent storage Location Movement Type 313 (It Show stock in transfer)
use Movement type 315 at Parent storage location
To create Goods Issue (GI) T Code MB1A amp Movement Type 201
To Create Reservations T Code MB21 MB22 amp MB23
Creation of GI wrt Reservations
T Code MB1A amp Movement Type 201
Click on Reservation Enter Reservation Number 1048774 Click on Adopt + Details
GR wrt Reservations T Code MIGO amp Select as Reservation instead of GR
GR without PO Movement type 501 amp T Code MB1C Select others instead of
Purchase order Enter Material Quantity Plant Storage Location 1048774 Press Enter
Partner Option will be visible (Vendor) 1048774 Save it
Invoice - Invoice is a document which is issued to a buyer (Company) from the
supplier (vendor) for the payment The following information is maintained in
invoice
Invoice date Posting date Invoice ref number tax amount amount tax code
terms of payments vendor address banking accounting information etc
When invoice document is posted in the system
bull Invoice document created
bull Accounting document is generated (MIR4)
bull PO history updated (ME23N)
bull FI document created (FB03)
PRICE DETERMINATION PROCESS or PRICING PROCEDURE
CONDITIONS OR PRICING PROCEDURE or PRICE DETERMINATION PROCESSWe deal with the Pricing Procedure for vendors
PB00 Gross Price (info record contract scheduled Agreement)
PBXX Gross Price (PO)
FRA1 Freight
RA00 Discount on net
RA01 Discount on Gross
ZA00 Surcharge on net
SKT0 Surcharge discount
ZPB0 Rebates
MWVS Input Tax
MWAS Output Tax
BASB Base Amount
RM0000 Calculation Schema or Pricing Procedure
(PB00 amp PBXX)
RM0002 Calculation Schema or Pricing Procedure
(PB00)
PB00 --gt AB00
Copy the Standard one and create new one (ours)
RM0000 contains all the condition types
Pricing Procedure (PP)
We define the pricing procedure to define condition supplement for the material
price The condition supplement specifies the discount surcharge freight etc
that we want a system every time to access material price condition records
The total value of the material is calculated or based on all addition and
subtraction ie discounts surcharge tax freight etc
Condition Table
It is a table which defines the structure of condition record key
Condition Record
It is a data record used to store conditions or condition supplements ie
condition like discount freight and surcharge Tax etc
Condition Type
It is used for different functions In Pricing the condition types leads you to
differentiate different types of discounts in output determination batch
determination difference between two output types such as delivery note or
order confirmation between different strategy types
Access Sequence
It specifies the order in which system searches or access the condition records
from condition table
Difference between PB00 amp PBXX
1 Condition maintained in PB00 is time dependent whereas PBXX is time
independent
2 Condition type PB00 ndash used for IR RFQ Contract Schedule Agreement
Condition type PBXX ndash used for PO
Calculation Schema
The main function of calculation schema is to provide framework of steps for the
price determination process to specify the discounts surcharge freight rebate
etc
It also determines the sequence of conditions that are to be followed and in
which sequence
Schema Group Vendor
The main function of it is to identify or to pick the right process and conditions
for a particular vendor
Schema Group Purchasing Organization
Key that determines which calculation schema (pricing procedure) is to be used
in purchasing documents assigned to the relevant purchasing organization
Schema Group
It allows to group together the purchasing organizations which uses the same
calculation schema
Steps -
1 Create Access sequence
2 Create condition types
3 Create pricing procedure or calculation schema
4 Link pricing procedure amp access sequence to condition type
5 Create schema group for vendor
6 Create schema group for purchase organization
7 Assign schema group vendor-to-vendor master record in purchasing data
view
8 Assign schema group purchase organization to our purchase organization
9 In inforecord purchase organization data enter condition types and pricing or
calculation procedure
CUSTOMIZE SETTINGS -
SPRO --gt IMG--gtMM--gtPUR--gtConditions --gtDefine price determination Process
1 Define access sequence
2 Define Condition type
3 Define cal Schema
4 Define schema group
o Schema group vendor
o Schema group purchasing group
5 Assignment of schema group to PUR org
6 Define schema determination agrave determine cal schema for standard PO
PURCHASE ORDER
PURCHASE ORDER
PO is an external document created for the procurement of materials and
services from vendor The document of PO is also divided into 4 parts as PR -
1 Document Overview
2 Header (DeliveryInvoice Conditions Address Partners Org data status)
3 Item Overview (AC assign cat Item Category Material Plant Del date SL)
4 Item Details (Material data Confirmations condition control delivery delivery
Schedule Quantitiesweights invoice)
A procurement type is defined for each of the document items The following
procurement types exist
1048774 Standard
1048774 Subcontracting
1048774 Consignment
1048774 Stock transfer
1048774 External service
bull There are different ways to create PO -
1 Directly through transaction code ME21N
2 With reference to PR
3 With reference to RFQ
4 With reference to info records
5 With reference to Contracts
6 With reference to Cost Centre GL Account (cost element) for consumable
items or not stock items with account assignment category lsquoKrsquo (K= cost centre)
(For non stock and consumables)
0 COMMENTS L INKS TO THIS POST
LABELS PO PURCHASE ORDER
Reaction
s
PURCHASE REQUISITION T CODE ME51 or ME51N
Purchasing Requisition -
It is a request or instruction from particular department (Cost Centre) to
purchasing department to procure certain quantity of material and services It is
only one internal document in SAP-MM
Purchasing Requisition document is divided into four parts -
bull Document Overview
bull Header
bull Item Overview
bull Item Details
Document Overview -
It displays the list of purchasing documents which are created previously
according to our requirement
Header -
Any text message or information is maintained
Item Overview -
In this we enter material plant delivery date quantity storage location
purchasing group AC assignment category Item category etc
Item Details -
It displays the detailed information about item overview (like Master data
valuation source of supply contact person delivery address status etc)
0 COMMENTS L INKS TO THIS POST
LABELS PR PURCHASE PURCHASE ORDER PURCHASE REQUIS IT ION SALES ORDER
Reaction
s
Automatic PURCHASE ORDER (PO) How Automatic PO raised
How Automatic PO raised
At fixed time say 1230 AM automatic scheduler runs and checks whether the
stock is less than or equal to the replenishment point If stock is less than or
equal to Repli Point than PR raised automatically to Purchasing Deptt
bull Activate the option automatic PO in purchasing view in material master record
bull Activate the option automatic PO in purchasing data view in vendor master
record
bull Maintain Source List amp select fixed vendor
bull PR crated automatically
bull Automatic creation of PO from PR ndash ME59
Enter the Purchasing group purchasing organization Vendor Plant and
Purchasing Requisition Document Number 1048774 Execute
RELEASE PROCEDURE Release strategyThe main function of Release procedure is to determine the approval process
or the release process for the procurement of material amp services rather than
relying for manual signatures The release procedure contains release strategy
Release Strategy (RS)
A plan defining the release codes with which a purchase requisition item a
complete purchase requisition or a complete external purchasing document
must
be released (that is approved) and the sequence in which release is to be
effected
using these codes It is a unique set of conditions sequence and level of release
It is a 2 digit code eg S1 S2 S3etc
The Release Strategy contains the following -
bull Release Group
bull Release Codes
bull Release Indicators
bull Release Prerequisite
Release Group -
It is a 2-digit code which is assigned with a class (Class contains group of
characteristics) It contains one or more release strategies
Release Codes -
It is a 2digit code which identifies the department or responsible person for
the approval process amp release process
Eg AA - Manager
BB - Sr Manager
CC - Vice President
DD - Managing Director
Release Indicator -
It is a Code that represents the release status If the proper approval
process is performed that the release Strategy has to be release if it is not
performed than the Release Strategy is blocked
R ndash Release
B ndash Blocked
Release Conditions -
It determines the type of the release strategy
For eg
bull If the price ranges from 1 to 1000 It is approved by AA BB and CC
bull If the ranges from1001 to 1lac then it is approved by AA BB CC and DD
- 80 -
Release Prerequisite
It will informs the system which RS has to be take place in the PO CEKKO is
a communication structure where it displays the field names amp field lengths to
create characteristics ie we maintain characteristics in customizing by
selecting
the field names from this communication structure for all external documents
CEBAN is used for the purchasing requisition
Characteristics -
1 Net value of PO --- GNETW (GSWRT for PR)
2 Plant --- WERKS
3 Purchasing organization -- EKORG
4 Purchasing Group --- EKGRP
5Material group ndashMATKL
CUSTOMIZE SETTINGSSPRO--gtIMG--gt MM--gt Purchasing--gtPO--gt Release Procedure for PO
1 Edit Characteristics T Code CT04
2 Edit Class T Code CL02
3 Define Release Procedure for PO
4 Check Release Strategy
Edit Characteristics -
Characteristics - eg NET VALUE OF VALUE
Click or Create Button
Under Basic Data
Description - Value for PO
Status - Release
Data Type - Currency Format
No Of Characters - 15
Currency - EUR
Activate multiple values amp Internal Values Allowed
Additional Data
Table name - CEKKO
Field Name - GNETW
Values
Activate Additional Values
Save the document
Create another Characteristic for Plant -
Plant date Create ndash Description Status
Data Type Characteristic Format
Number of Characteristics 4
Activate Multiple Values
Additional data-
Table Name - CEKKO
Field Name - WERKS
Values
Activate Additional Values
For Purchasing Organization Name - EKORG
For purchasing Group EKGRP
Edit Class
Class - SAPMM
Class Type - 032 Release Strategies
Click on Create button
Basic Data
Description - Class for PO
Status - Released
Valid From _____ Valid to _____
Click on Characteristic
Characteristic
Enter all the Characteristics Created amp Save it
Define Release Procedure for PO-
bull Release Group
bull Release Codes
bull Release Indicators
bull Release Strategies
bull Workflow
Release Group - New Entries Release Group Class and Description
Press Enter amp Save
Release Code - New Entries
Group Codes Description
99 AA Manager
99 BB Sr Manager
99 CC Vice President
99 DD Managing Director
Press Enter amp Save
Release Indicator - (B ndash Blocked R - Release)
New Entries
Release Indicators Description
B Blocked
R Released
Release Strategies -
New Entries
Release Group 99
Release Strategy S1
Release Codes AA BB CC and DD
Click on Release Prerequisites
Release Status -
Continue
Classification
Enter the Value (Same Price)
Plant (9999)
Go Back amp Save it
Release Simulation - Simulate Release
Create a PO -
There are two ways to release the PO
Individual releaseME28
Collective release ME29N
How to delete procedure
Delete Release GP
Create Release RG
Delete R Strategies
Delete R Code
Delete R Group
SAP R3 SYSTEM LANDSCAPE
System LandscapeThe system landscape contains all the SAP Systems that you have installed It
can consist of several system groups whorsquos SAP Systems are linked by transport
routes
After you decide which clients you need and which roles you want them to have
you need to decide how to distribute them amongst the different SAP Systems
You can set up multiple clients independently of one another in a single SAP
System However when you configure the data you must remember that cross-
client Customizing settings and Repository objects are identical for all clients in
a single SAP System Changes made in one client apply immediately to all
clients in the system
Three-System Landscape
SAP recommends a three-system landscape in which each of the central clients
has its own SAP System
This consists of a development system DEV a quality assurance system QAS
and a production system PRD The development system contains the
Customizing client CUST the quality assurance system contains the quality
assurance client QTST and the production system contains the production client
PROD Make all changes to Customizing data and Repository objects in the
Customizing client When you release the corresponding change requests they
are transported into the quality assurance client This means that changes to
cross-client data only appear in the quality assurance client after the transport
In the quality assurance client you can test whether the transports are
complete or whether any linked changes are missing and are still in unreleased
change requests If the test is successful the change requests are transported
into the production client The production client is completely separate from the
other clients as regards cross-client data
SPECIAL STOCKS amp SPECIAL PROCUREMENT TYPES
Special Stocks are those stocks which are not belongs to our company code
These are not placed in our storage locations amp no physical inventory is
performed and treated as special stocks for the reason of ownership
Different types are of Special Stocks are as follows
1 Subcontracting
2 Consignment
3 Pipeline
4 Stock transfer
5 Third party
6 Returnable transport packaging
7 Sales order stock
8 Project stock
SUBCONTRACTING
In subcontracting process we create subcontracting PO to supply or issue
subcomponents to vendor in order to get final product The price maintained in
subcontracting PO is a service charge paid to vendor
Steps to perform subcontracting
1 Create subcontracting inforecord (Optional)
2 Create subcontracting PO with item category L
There are to ways to supply subcomponents to vendor
bull Manually maintain the subcomponents in the subcontracting
PO though explode BOM
bull Through BOM (Bill of material) T Code CS01 CS02 amp CS03
3 Create Transfer Posting with Movement Type 541 to issue the subcomponents
to the vendor
4 Goods Reciept
5 Invoice Reciept
Path ME21N ---gt Enter Item Category L --gt Material (End Product) PO
Quantity Delivery Date Net Price Plant --gt Click on Item Details --gt Tab
Material Data -- gtComponents select Explode BOM --gt Click on Components
button --gt Enter the subcomponents --gt Go back amp Save
Create Transfer Posting with movement type 541 amp T Code MB1B
GR MIGO
IR MIRO
CONSIGNMENT - (No Concept of Invoice)
In consignment process we will not create Purchasing document for the vendor
vendor himself send the material to our plant though the material is available
to our plant the responsibility amp ownership of the material is of vendor Aliability
only arises when the material withdrawal (Consumption) is posted in the system
from consignment stock
Steps
1 Create Consignment info record (mandatory)
2 Create Consignment purchase order with item category lsquoKrsquo amp maintain Info
record number
3 Create GR Movement type lsquo101Krsquo
4 Create GI Movement Type lsquo201Krsquo
5 Consignment settlement T Code MRKO
Path --gtME11 --gt In info record --gt Purchasing Org Data 1 views of info record
enter the tax code and save it
--gt Create Consignment Purchase Order ME21N (Price option is grayed out with
price zero)
--gt Create GR with movement type 101K
--gt Create Goods Issue (GI) T Code MB1A amp Movement Type 201K Enter Cost
center vendor
--gt Consignment Settlement T Code MRKO Click Activate Consignment Activate
Settle Execute
--gt Display the Document Number ie Invoice receipt T Code FB03
PIPELINE PROCESS (No Concept of Invoice)
In pipeline handling your company does not need to order or store the material
concerned It is ready available to you as and when required via pipeline (eg oil
or water) or some other type of cable (eg electricity) Consumption of the
material is settled with the vendor on a regular basis
Steps
1 Create a Material master record with material type PIPE
2 Create Pipeline info record
3 Create GI with movement type 201P
4 Pipeline settlement T Code MRKO
RETURNABLE TRANSPORT PACKAGING (RTP)
When company orders goods from a vendor the goods are delivered with
returnable transport packaging (pallets containers) that belongs to the vendor
and is stored on our premises until you return it to the vendor
Steps
1 Create Material master record with material type LEIH
2 Create PO
3 Create GR by maintaining RTP material by selecting the option transport
equipments with movement type 501M
4 IR
STOCK TRANSFER
In stock transfer processing goods are procured and supplied within a company
One plant orders the goods internally to another plant (receiving plantissuing
plant) The goods are procured with a special type of purchase order the stock
transport order
Steps
1 Create a Material master in both supplying and receiving plant
2 Create stock transport order (STO) with item category lsquoUrsquo
3 Create transfer posting with movement type 351 amp T Code MB1B (Go to
MMBE stock overview the stock will decrease in supplying plant and it will not
update stock of receiving plant it will be under stock in transit)
4 Create GR stock will update in receiving plant
This scenario is under one company code between two plants
SAP IMPLEMENTATION PROCESS End to End Inplementation of SAP
First we have to prepare documentation about the client business (like turnover
vendors customers payments materials production marketing etc)
The implementer company made two teams (1) Steering team (2) Steering
community
Steering team (SAP functional consultants) prepares a detailed
documentation about the client with the help of core team (client company
team)
amp this study is known as Feasibility Study After that the steering team handed
over this documentation to Steering community (Project manager Sr software
engineer and other higher authorities)
Steering community prepares the BBP (Business Blue Print) BBP
Prepares in MS-Word
10487741048774 ASAP - Accelerated System Application Product in Data Processing
10487741048774 Business Process - ASAP Methodology
1 Project Preparation
2 BBP (Business Blue Print)
3 Realization
4 Final Preparation
5 Go live amp Support
10487741048774 Project Preparation -
It consists of identifying team members amp development strategy as
how to go
AS ndash IS (Existing Process followed requirements)
TO ndash BE (Requirement analysis and best process recommended)
Difference between (AS ndash IS) amp (TO - BE) is called GAP Analysis
10487741048774 Business Blue Print (BPP) -
It is a legal documentation between client amp the company
(implementer service provider) We have to understand the current business
process of client amp analyzing the business amp prepare documentation It is a
detailed documentation for the client
10487741048774 Realization -
This Phase is used to Implement or migrate the entire business of
client from Non-SAP environment to SAP environment
10487741048774 Final Preparation -
This phase is used for testing amp end user training After successfully
completion of this phase client is ready to run business in SAP R3
10487741048774 Go live amp Support -
In this phase we deliver the project end date amp end user training at
client site
THIRD - PARTY PROCESSING
THIRD - PARTY PROCESSING
In third party processing your company passes on a sales order to an external
vendor who sends the goods directly to the customer The sales order is not
processed by your company but by the vendor Third-party items can be
entered in purchase requisitions purchase orders and sales orders Third party
processing is integrated with Sales and Distribution If the sales order contains
third-party items the system creates a purchase requisition from the order
Steps
1 Create MMR with sales views and maintain Division Distribution channel
sales org item category group and general item category group ndash BANS (Third
party item) amp Account group Sold to party
2 Create Customer master record T Code XD01 XD02 XD03
3 Create sales order T Code VA01 VA02 VA03 (PR generated automatically)
4 PO - T Code ME21N
5 GR ndash T Code MIGO
6 IR ndash T Code MIRO
7 Sales Billing Billing Document T Code VF01 VF02 VF03

movement
The valuation class makes it possible to
bull Post the stock values of materials of the same material type to different GL
accounts
bull Post the stock values of materials of different material types to the same GL
account
Default value for the valuation class for valuated stocks of this material
Use The valuation class has the following functions
bull Allows the stock values of materials of the same material type to be posted to
different GL accounts
bull Allows the stock values of materials of different material types to be posted to
the same GL account
bull Determines together with other factors the GL accounts updated for a
valuation-relevant transaction (such as a goods movement
Material Master Related Important Terms (Part 1)
Material Group
Key that you use to group together several materials or services with the same
attributes and to assign them to a particular material group
Use You can use material groups to
bull Restrict the scope of analyses
bull Search specifically for material master records via search helps
Purchasing Group
Key for a buyer or a group of buyers who isare responsible for certain
purchasing activities
Use
bull Internally the purchasing group is responsible for the procurement of a
material or a class of materials
bull Externally it is the medium through which contacts with the vendor are
maintained
Purchasing Value Key
Key defining the reminder days and tolerance limits valid as well as the
shipping instructions and order acknowledgment requirement of the material for
Purchasing
Procedure If you have chosen a purchasing value key the system enters the
values defined in Customizing (for Purchasing) in the fields
Batch Batches (LO-BM)
A subset of the total quantity of a material in stock managed separately from
other subsets of the same material
Example Different production lots (such as paints dyes wallpapers and
pharmaceutical products) delivery lots quality grades of a material
Batch management requirement indicator Specifies whether the material is
managed in batches
Use
This indicator can be set in the material master record manually or if batches
are valuated individually it is set automatically for the plants concerned in
which case it cannot be changed
The indicator cannot be changed if stocks exist in either the current period or in
the previous period The reason for checking the previous period is because
stocks can be posted to this period when goods movements are entered
AUOTOMATIC ACCOUNT DETERMINATION OR ASSIGNMENT
AUOTOMATIC ACCOUNT DETERMINATION OR ASSIGNMENT Whenever there is goods movement accounting documents financial accounts
updated automatically so we do some settings in customization is called
automatic account assignment
It works with three important factors -
bull Chart of accounts
bull Material type
bull Valuation grouping code
Chart of accounts - It is a group of accounts (GL Accounts) which is assigned
to our company code One company code is assigned to one chart of account
but one chart of account can be maintained for n number of company codes
Valuation grouping code valuation modification - It is a 4-digit code
which is assigned to company code along with valuation area (Plant)
Account category reference - It is a 4-digit code that establishes relationship
between material types and valuation class One account cat ref assigned to n
number of material type and valuation class
Transaction Event key - It is an internal processing key that facilitates the
automatic account determination for the various material and invoice posting
Use - Key to determine the account in which a posting line is generated (at
least two transaction event keys are involved in each posting)
Value String - It indicates the posting rule that always contain same account
assignment char to certain transaction event key
Account Modifier - It is a subdivision of transaction event key in which GL
account is linked during the process of automatic account determination
Valuation class and material type is assigned to it
Steps -
1 Activate valuation Group code
2 Assign Valuation area to valuation grouping code
3 Create Account Cat Ref and valuation class
4 Assign valuation class to Account Cat Ref
5 Assign Account Cat Ref to Material type
6 Assign account grouping to movement types
7 Configure Automatic posting
Customize settings -
SPRO 1048774 IMG 1048774 MM 1048774 Valuation Class and Account Assignment 1048774 Account
Determination 1048774 Account determination without wizard
1 Define valuation control T Code OMWM
2 Group together valuation areas T Code OMWD
3 Define valuation class T Code OMSK
bull Account category reference
bull Valuation class
bull Material type Account Cat Ref
4 Define Account grouping for movement type T Code OMWN
5 Configure automatic posting T Code OMWB
Transaction Event Keyrsquos
BSX - Stock Posting Inventory Posting
PRD - Price difference
GBB - Offsetting entry for stock posting
WRX - GRIR Clearing
FRI - Freight Clearing
Automatic PURCHASE ORDER (PO) How Automatic PO raised
How Automatic PO raised
At fixed time say 1230 AM automatic scheduler runs and checks whether the
stock is less than or equal to the replenishment point If stock is less than or
equal to Repli Point than PR raised automatically to Purchasing Deptt
bull Activate the option automatic PO in purchasing view in material master record
bull Activate the option automatic PO in purchasing data view in vendor master
record
bull Maintain Source List amp select fixed vendor
bull PR crated automatically
bull Automatic creation of PO from PR ndash ME59
Enter the Purchasing group purchasing organization Vendor Plant and
Purchasing Requisition Document Number 1048774 Execute
Material Master Related Important Terms (Part 1)
Material Group
Key that you use to group together several materials or services with the same
attributes and to assign them to a particular material group
Use You can use material groups to
bull Restrict the scope of analyses
bull Search specifically for material master records via search helps
Purchasing Group
Key for a buyer or a group of buyers who isare responsible for certain
purchasing activities
Use
bull Internally the purchasing group is responsible for the procurement of a
material or a class of materials
bull Externally it is the medium through which contacts with the vendor are
maintained
Purchasing Value Key
Key defining the reminder days and tolerance limits valid as well as the
shipping instructions and order acknowledgment requirement of the material for
Purchasing
Procedure If you have chosen a purchasing value key the system enters the
values defined in Customizing (for Purchasing) in the fields
Batch Batches (LO-BM)
A subset of the total quantity of a material in stock managed separately from
other subsets of the same material
Example Different production lots (such as paints dyes wallpapers and
pharmaceutical products) delivery lots quality grades of a material
Batch management requirement indicator Specifies whether the material is
managed in batches
Use
This indicator can be set in the material master record manually or if batches
are valuated individually it is set automatically for the plants concerned in
which case it cannot be changed
The indicator cannot be changed if stocks exist in either the current period or in
the previous period The reason for checking the previous period is because
stocks can be posted to this period when goods movements are entered
CIN - Country India Version ~ Volume 1
PurposeCountry Version India (CIN) contains a number of enhancements to standard
Sales and Distribution (SD) functions that allow you to handle local
requirements in particular excise duty
Features
In Country Version India (CIN) this component handles sales processes as
found in India In addition to the generic functions it allows you to
Handle CENVAT in your sales processes
The system calculates excise on your sales and creates excise invoices as
required and makes the appropriate postings to your CENVAT accounts
It covers sales from factories sales from depots and offers functions for other
types of goods movements it also covers sales to export-oriented units and
export sales
Record concessional and exemption forms sent to you by your customers
Make adjustment postings to your CENVAT accounts
Excise Invoice (Outgoing)
Definition
The document that acts as the proof of payment of excise duty and is required
for the customer to take CENVAT credit on the item
Use
In the SAP System there are three different procedures for creating excise
invoices
Sales direct from the factory
This procedure is for when you sell manufactured goods straight from the
factory at which they were produced in which case you levy excise duty when
the goods leave the factory on their way to the customer
If when you send the goods to the customer you enclose the commercial
invoice you create the excise invoice with reference to the commercial invoice
If you want to send the commercial invoice after you have dispatched the goods
however you create the excise invoice with reference to a pro forma
commercial invoice For more information about these procedures see Sales
from Factories
As well as creating excise invoices individually you can also create them in
batches (see Creation of Excise Invoices in Batches)
Sales from depots
A depot is a site at which the goods are stored away from the factory at which
they were produced In this procedure you have to levy the excise duty when
you transfer the goods from the factory to the depot and then make sure this is
passed on to the customer when it makes a purchase For more information see
Sales from Depots
Sales (other goods movements)
Some other goods movements may also require you to create an excise invoice
with reference to other documents The SAP System offers separate functions
for these purposes (see Excise Invoices (Outgoing) for Other Movements)
StructureNumbering of Excise Invoices
Outgoing excise invoices have two numbers an internal document number
which is assigned immediately you create an excise invoice and an excise
invoice number which is not assigned until you have verified and posted it
As far as the excise invoice number is concerned you have to number your
outgoing excise invoices in sequential order starting each year on 1 April You
must notify the excise authority of the jurisdiction of the invoicing location The
serial number must be printed on each page of the excise invoice
Each number range is governed by a series group You must create at least one
series group in order to be able to number the excise invoices If you need more
than one number range you must create the corresponding number of series
groups You do so in the CIN Implementation Guide (IMG) by choosing Global
Settings reg Series Groups
Number of Line Items Per Excise Invoice
Some states allow you to include only a limited number of items for each page
of an excise invoice (for example if the excise invoices are to be printed on
prenumbered forms) You can customize the system so that it prints the excise
invoice accordingly in the CIN IMG by choosing Global Settings reg Excise
Registration IDs
Customer Master (Excise Data) Definition
The part of the customer master record that contains information relating to
Indian excise duty
Use
In conjunction with other data this data is used to calculate excise duty on
various transactions
To maintain the data from the SAP Easy Access screen choose Indirect Taxes reg
Master Data reg Excise Rate Maintenance and then select the following options
described below
Structure
The excise part of the customer master contains the following information
Customer Excise Details
On this screen you enter your customers tax registration numbers which are
used for various forms of correspondence and reports
1 Excise registration number (and the range division and collectorate in which
this is located)
2 Central sales tax (CST) number
3 Local sales tax (LST) registration number
4 Permanent account number (PAN)
In order for the system to be able to calculate which rate of excise duty to apply
on sales to the customer you must also assign it a customer excise duty status
(for more information about how this works see Determination of Excise Duty
Rates)
Excise Indicator for Plant and Customer
On this screen you define the final excise duty indicator (for more information
about how this works see Determination of Excise Duty Rates)
Determination of Excise Duty Use
When you execute a business transaction involving materials that are subject to
excise duty the system automatically calculates the duty for you
Prerequisites
In order for the system to be able to determine which rate of excise duty to
apply you must have maintained all the data on the Excise Rate Maintenance
screen which you can access from the SAP Easy Access screen by choosing
Indirect Taxes reg Master Data reg Excise Rate Maintenance
You maintain the following types of data
Plant master data
You assign each of your plants an excise duty indicator You can use the same
indicator for all the plants with the same excise status from a legal point of view
such as all those that are in an exempt zone
See also the information about manufacturers that are only entitled to deduct a
certain portion of the duty (see Partial CENVAT Credit)
Vendor master data
For each of your vendors with the same excise status from a legal perspective
you define an excise duty indicator You must also specify the vendor type ndash for
example whether the vendor is a manufacturer a depot or a first-stage dealer
You must also stipulate if the vendor qualifies as a small-scale industry
For each permutation of plant indicator and vendor indicator you then create a
final excise duty indicator
Customer master data
Similarly you assign the same excise duty indicator to each of your customers
that share the same legal excise status
Again for each permutation of plant indicator and customer indicator you then
create a final excise duty indicator
Material master data
Each material is assigned a chapter ID
Excise tax rate
For every chapter ID and final excise duty indicator you maintain the rate of
excise duty
If your business only qualifies for partial CENVAT credit you must customize
your system accordingly
Activities
Let us consider an example to illustrate how the system determines which rate
of excise duty to apply to a material Assume you are posting a sale of ball
bearings to a customer The system automatically determines the rate of excise
duty as follows
Looks up the customer master data to see what status you have assigned the
customer
Lets assume youve assigned the customer status 3
Looks up the plant master data to see what status you have assigned the plant
Similarly your plant has status 2
The system looks up the table under Excise Indicator for Plant and Customer to
see what the final excise duty indictor is for customer status 3 and plant status
2 It is 7
The system determines the chapter ID of the ball bearing for the plant
Letrsquos assume the chapter ID at plant for the ball bearings is 100001
Finally the system looks up the table under Excise Tax Rate to see what rate of
duty applies to chapter ID 100001 under status 7
Plant Master (Excise Data) Definition
The part of the plant master record that contains information relating to Indian
excise duty
Use
In conjunction with other data this data is used to calculate excise duty on
various transactions
To maintain the data from the SAP Easy Access screen choose Indirect Taxes reg
Master Data reg Excise Rate Maintenance and then select the following options
described below
Structure
The excise part of the plant master is divided into the following screens
Excise Indicator for Plant
On this screen you enter your plants tax registration numbers which are used
for various forms of correspondence and reports
1 Central sales tax (CST) number
2 Local sales tax (LST) registration number
3 Permanent account number (PAN)
In order for the system to be able to calculate which rate of excise duty to apply
on purchases for this plant you must also assign it a plant excise duty status
(for more information about how this works see Determination of Excise Duty
Rates)
Excise Indicator for Plant and Vendor
On this screen you define the final excise duty indicator (for more information
about how this works see Determination of Excise Duty Rates)
Excise Indicator for Plant and Customer
On this screen you define the final excise duty indicator (for more information
about how this works see Determination of Excise Duty Rates)
Automatic Creation of Excise Invoices Use
The SAP System can automatically create an outgoing excise invoice for you
immediately you post a commercial invoice (or a pro forma invoice) for a
customer sale This function applies to excise invoices for sales from factories
only
Prerequisites
To activate this function in the Country Version India (CIN) Implementation
Guide (IMG) make the following settings
1 Under Global Settings reg Excise Groups select Create EI
This activates the automatic creation function
2 Under Sales and Distribution reg Utilization Determination
Here you specify which CENVAT accounts the system is to post the different
types of excise duty to
3 Under Sales and Distribution reg Excise GroupndashSeries Group Determination
Here you specify which excise group and series group the excise invoices are to
be created for
Features
When you post an invoice the system creates an excise invoice All the
information that it needs to create the excise invoice is provided either by the
invoice or by the Customizing settings that you have made in Sales and
Distribution It also determines the excise invoice type automatically by means
of a user exit
Creating Excise Invoices for Stock Transfers 1 From the SAP Easy Access screen choose Indirect Taxes reg Procurement reg
Excise Invoice reg For Depot reg CreateChangeDisplay
2 In the Material document field enter the goods receipt number and choose
The system displays the information from the goods receipt for example the
sending plant the excise registration the range the division and the
collectorate
3 Choose Details
The system copies the items from the goods receipt document In the depot it is
possible to have a separate excise invoice at line item level
4 Enter the internal document number of the excise invoice sent by the factory
5 Choose More documents to go the excise invoice details screen
6 Enter the internal document number of the excise invoice from the factory
The system copies the information to the line item (for example the excise
invoice number the excise invoice date the item number the chapter ID the
excise invoice quantity the amount of excise duty paid the excise base value
and the serial number of the Part II register entry with which the excise was
paid)
You can change the receipt quantity to match the actual quantity received at
the depot if necessary The system automatically adjusts the excise
accordingly
7 Go back to the item details screen
8 Save the excise invoice
Creating Excise Invoices for Direct Purchases 1 From the SAP Easy Access screen choose Indirect Taxes reg Procurement reg
Excise Invoice reg For Depot reg CreateChangeDisplay
2 In the Material document field enter the goods receipt number and choose
The system displays the information from the goods receipt for example the
sending plant the excise registration the range the division and the
collectorate
You can also maintain the excise registration details for the ship-from party as
for with the vendor The ship-from can be different from the vendor code (The
delivering plant can be maintained as a ship-from in the system When a valid
ship-from is entered the excise registration details copied from the vendor will
be overwritten by the ship-from excise registration details)
The ship-from registration details displayed can also be overwritten manually
The dealers commercial invoice number can be stored in the vendor excise
invoice number as in this case the dealer himself will not have an excise
invoice
3 Choose Details
The system copies the items from the goods receipt document It also copies the
vendors excise invoice number and the serial numbers of the entries in the RG
23A RG 23C and personal ledger account (PLA) registers
4 Enter the internal document number of the excise invoice sent by the factory
5 Select an item and choose More documents to go the excise invoice details
screen
In the case of direct purchases there will not be any excise invoice in the
system so leave the internal document field blank The vendors invoice will
show the details of the excise invoices through which excise has been paid for
the item that is being dispatched You can enter these details here
6 For each item the chapter ID excise base value and excise duty amounts
are defaulted from the purchase order You can change them if there is any
difference Enter the excise amount paid and the receipt quantity You also
enter the Part II register serial numbers with which the excise duty was paid and
the excise registration information from the original excise invoice
7 Go back to the item details screen
8 Save the excise invoice
The system creates an entry in register RG 23D You can change the excise
invoice as long as it has not been used in any sales
Assigning Excise Invoices to a Delivery Use
You follow this procedure to specify which excise invoices are to be assigned to
a delivery from a depot (or other material document)
You can also automate this procedure using the batch selection program
(J_1IJCHK) by making the appropriate Customizing settings in the Country
Version India (CIN) Implementation Guide (IMG)
Procedure
1 From the SAP Easy Access screen choose Indirect Taxes reg SalesOutbound
Movements reg Excise Invoice reg For Depot reg CreateChangeDisplay reg Delivery
or Material Document reg RG 23D Selection
2 Enter the delivery document number or the material number and choose
3 Select the excise invoice you want
4 Choose
5 Choose Excise invoice
A list of excise invoices appears These are the excise invoices at the depot with
a balance quantity
The system also shows a list of the A certificates that can be used You can pick
up any of the A certificates but they must be for the same excise invoice You
can only pick up an A certificate in its entirety You cannot select part of an A
certificate
6 Select the excise invoices that are relevant to the delivery
7 Specify what quantity to be used from each excise invoice
The system recalculates the excise accordingly
8 Go back to the item details screen
9 Save the data
Result
The system creates an entry in register RG 23D and generates the depot excise
invoice numbers
If you selected any A certificates the system also generates additional entries in
the RG 23D register The system marks the original A certificates as updated so
that they cannot be used for any other removals
CIN - Country India Version ~ Vol 2
Continue Volume 1
Creating Excise Invoices
Use
This is the procedure that you follow to create an excise invoice for the less
common types of goods movement
Procedure
1 From the SAP Easy Access screen choose Indirect Taxes reg SalesOutbound
Movements reg Excise Invoice reg For Other Movements reg CreateChangeDisplay
reg
2 On the selection screen enter data as required including
(i)Reference
group box
Specify which document you want to create the excise invoice for and which
excise group it is for
(ii)Details
group box
Specify the vendor or customer that you are sending the invoice to
3 Choose
If you entered an internal document number the system copies the item details
from it
4 Choose
5 Enter line items for each of the materials to be included in the excise invoice
For each item enter the following data
(i)Material
(ii)Quantity
(iii)Unit of measure
(iv)Base value
(v)Excise duty
6 To pick the rate and amount from a specific excise invoice choose Get excise
invoice
7 Save the excise invoice
If you are using the one-step procedure the system creates and posts an excise
invoice Otherwise the system saves the information but does not make any
postings it now has to be verified
Verifying and Posting Excise Invoices
Use
You follow this procedure to verify that the information in an excise invoice that
has already been created and to post it once you are satisfied
Procedure
From the SAP Easy Access screen choose Indirect Taxes reg SalesOutbound
Movements reg Excise Invoice reg For Other Movements reg Posting
1 Enter the internal document number of the excise invoice
2 Choose Release to accounting
The system displays the excise invoice The excise duty that is to be posted is
displayed at the foot of the screen which you can change if necessary
3 To access the balance utilization choose
4 To display the balance available on the CENVAT accounts choose Account
balances
5 Save the excise invoice
The system generates the accounting documents
6 To print the excise invoice choose
Making a Transfer Posting
Use
In this procedure you make a transfer posting for the goods ordered by another
plant For more information about this function see Entering the Removal from
Storage at the Issuing Plant
Procedure
1 From the SAP Easy Access screen choose Logistics reg Materials Management
reg Inventory Management reg Goods Movement reg Transfer Posting
2 Choose Movement type reg Transfer posting reg Plant to plant reg To stock in
transit
3 Enter the number of the issuing plant and storage location
4 Choose To purchase order
5 In the dialog box enter the number of the stock transport order that the
receiving plant created and choose
6 Check the data
7 Save the transfer posting
Transaction Codes for India
Transaction Action
J1I2 Prepare a sales tax register
J1I3 Create outgoing excise invoices in batches
J1I5
Update the RG 1 and Part I registers
J1I8
Post the challan used to remit TDS
J1IC194C
Create annual return under section 194 C (Classic TDS)
J1IC194D
Create annual return under section 194 D (Classic TDS)
J1IC194I
Create annual return under section 194 I (Classic TDS)
J1IC194J
Create annual return under section 194 J (Classic TDS)
J1IEX
Incoming Excise Invoices (central transaction)
J1IEX_C
Capture an incoming excise invoice (excise clerk)
J1IEX_P
Post an incoming excise invoice (excise supervisor)
J1INBANK
Post a bank challan
J1INCANC
Cancel a vendor withholding tax certificate
J1INCERT
Print a vendor withholding tax certificate
J1INCHLN
Create a remittance challan
J1INCUST
Post a customer withholding tax certificate
J1INHC
Withholding Tax Migration Health Check Program
J1INMIG
Withholding Tax Data Migration Tool
JI1NCHLC
Create a remittance challan for customers
J1INCC
Print customer withholding tax certificates
J1INMIS
Withholding Tax Information System
JI1NAR
Prepare annual returns (Extended Withholding Tax)
J1IF01
Create a subcontracting challan
J1IF11
Change a subcontracting challan
J1IF12
Display a subcontracting challan
J1IF13
Complete reverse or recredit a subcontracting challan
J1IFQ
Reconcile quantities for subcontracting challans
J1IFR
List subcontracting challans
J1IH
Make a CENVAT adjustment posting
J1IIN
Create an outgoing excise invoice
J1IJ
Assign excise invoices to a delivery for sales from depots
J1INJV
Adjust withholding tax Item
J1INREP
Reprint a vendor withholding tax certificate
J1INREV
Reverse a remittance challan
J1INPR
Calculate withholding tax on clearing accounts
J1INUT
Clear withholding tax on clearing accounts
J1IR
Download register data
J1IS
Process an excise invoice (outgoing) for other movements
J1IU
Process exemption forms
J1IW
Verify and post an incoming excise invoice
J1IX
Create an incoming excise invoice (without reference to purchase order)
J2I8
Transfer excise duty to CENVAT account
J2ID
Archive tax deducted at source (TDS) documents
J2IE
Locate tax deducted at source documents in archive
J2IU
Remit excise duty fortnightly
J2I9
Monthly CENVAT return
J1IG
Excise invoice entry at depot
J1IGA
Create additional excise entry at depot
J2I5
Extract data for excise registers
J2I6
Print excise registers
Sales from Factories
Purpose
This process describes how the SAP System handles the sales process allowing
for the creation of excise invoices which you have to send with each delivery
that is subject to excise duty There are two scenarios depending on whether
you want to send the commercial invoice along with the delivery or at a later
date
Prerequisites
In order for the system to be able to copy the information from document to
document you must have set up the copying control procedures in Customizing
for Sales and Distribution (SD) This differs according to when you want to send
the commercial invoice
1 Along with the delivery
In this case the document flow would be OR (standard sales order type) ndash LF
(standard delivery type) ndash F2 (invoice)
2 At a later date
The document flow would be OR ndash JF (delivery type a copy of LF) ndash JEX (pro
forma billing document type a copy of document type F8) ndash F2
In addition you must also have maintained the settings in the Country Version
India (CIN) Implementation Guide (IMG) by choosing Global Settings reg Assign
Excise Invoice Billing Type to Delivery Type
A sample pricing procedure JFACT is provided for this sales procedure
Process Flow
1 The sales clerk creates a sales order following the
(i)standard procedure
There are special procedures for
(i)Customers in possession of exemption forms
(ii)Exports
2 The shipping clerk creates a delivery again following the
standard procedure
On the initial screen you set the appropriate delivery type (see above)
3 In the warehouse the storeperson issues the goods
The system only allows users to create a pro forma excise invoice if the delivery
is complete so as to prevent them from creating multiple pro forma excise
invoices
4 What you do at this stage depends on whether you want to send the
commercial invoice along with the delivery or whether you want to invoice the
customer later
(A) If the invoice is to be shipped with delivery the shipping clerk
(i)Creates an invoice following the standard procedure
(ii)Creates an excise invoice from the invoice
(B) If the invoice is to be sent on at a later date the shipping clerk
(i)Creates the pro forma excise invoice
The pro forma excise invoice is only required for technical purposes and is not
sent to the customer The system does not make any accounting postings at this
stage
(ii)Creates
an excise invoice from the pro forma excise invoice
In both these cases the system creates an accounting document to post the
excise duty to a clearing account
Instead of creating excise invoices manually you can also have the system
create them automatically Alternatively you can create them in batches
5 You ship the goods
6 When the time comes to invoice the customer you create the invoice
following the standard procedure
Irrespective of the number of excise invoices that you have issued you can
combine the delivery items in a single invoice (if the standard requirements are
met)
Sales from Depots
Purpose
You may sell finished goods directly from the place of manufacture as described
under Sales from Factories or you may first ship them to a separate location for
storage (a depot) from where you will sell them The second procedure is
described here
Sales from depots are handled differently from sales from factories because of
excise law Excise duty is payable when you send the goods from the factory to
the depot but it is not levied again when you sell the goods
Sometimes when you make a final sale of goods from a depot price escalations
could have happened with retrospective effect In such scenarios you need to
pay the extra excise duty at the factory using an A Certificate You need to
register the A certificate details in the RG 23D register and the excise recovered
from the customer
Prerequisites
You have customized
1 Stock transport processing in Customizing for Materials Management (MM)
by choosing Purchasing reg Purchase Order reg Set Up Stock Transport Order
2 The copying control for copying stock transport order NL to excise invoice JEX
You make this setting in the Country Version India (CIN) Implementation Guide
(IMG) by choosing Sales and Distribution reg Assign Excise Invoice Billing Type to
Delivery Type
3 The item category NLN (standard transport order) so that it is relevant for
billing
You do this in the standard IMG in Customizing for Sales and Distribution (SD)
by choosing Sales reg Sales Documents reg Sales Document Item
Process Flow
1 You create the sales order following the
standard procedure
The standard pricing procedure for depot sales is JDEPOT
2 You create the delivery again following the
standard procedure
3 You
assign excise invoices to the delivery or material document
4 You
verify that you have selected the correct excise invoices and post them
Alternatively if you have selected the wrong excise invoices you can cancel the
assignment
5 You create the invoice following the standard procedure
SPECIAL STOCKS amp SPECIAL PROCUREMENT TYPES
Special Stocks are those stocks which are not belongs to our company code
These are not placed in our storage locations amp no physical inventory is
performed and treated as special stocks for the reason of ownership
Different types are of Special Stocks are as follows
1 Subcontracting
2 Consignment
3 Pipeline
4 Stock transfer
5 Third party
6 Returnable transport packaging
7 Sales order stock
8 Project stock
SUBCONTRACTING
In subcontracting process we create subcontracting PO to supply or issue
subcomponents to vendor in order to get final product The price maintained in
subcontracting PO is a service charge paid to vendor
Steps to perform subcontracting
1 Create subcontracting inforecord (Optional)
2 Create subcontracting PO with item category L
There are to ways to supply subcomponents to vendor
bull Manually maintain the subcomponents in the subcontracting
PO though explode BOM
bull Through BOM (Bill of material) T Code CS01 CS02 amp CS03
3 Create Transfer Posting with Movement Type 541 to issue the subcomponents
to the vendor
4 Goods Reciept
5 Invoice Reciept
Path ME21N ---gt Enter Item Category L --gt Material (End Product) PO
Quantity Delivery Date Net Price Plant --gt Click on Item Details --gt Tab
Material Data -- gtComponents select Explode BOM --gt Click on Components
button --gt Enter the subcomponents --gt Go back amp Save
Create Transfer Posting with movement type 541 amp T Code MB1B
GR MIGO
IR MIRO
CONSIGNMENT - (No Concept of Invoice)
In consignment process we will not create Purchasing document for the vendor
vendor himself send the material to our plant though the material is available
to our plant the responsibility amp ownership of the material is of vendor Aliability
only arises when the material withdrawal (Consumption) is posted in the system
from consignment stock
Steps
1 Create Consignment info record (mandatory)
2 Create Consignment purchase order with item category lsquoKrsquo amp maintain Info
record number
3 Create GR Movement type lsquo101Krsquo
4 Create GI Movement Type lsquo201Krsquo
5 Consignment settlement T Code MRKO
Path --gtME11 --gt In info record --gt Purchasing Org Data 1 views of info record
enter the tax code and save it
--gt Create Consignment Purchase Order ME21N (Price option is grayed out with
price zero)
--gt Create GR with movement type 101K
--gt Create Goods Issue (GI) T Code MB1A amp Movement Type 201K Enter Cost
center vendor
--gt Consignment Settlement T Code MRKO Click Activate Consignment Activate
Settle Execute
--gt Display the Document Number ie Invoice receipt T Code FB03
PIPELINE PROCESS (No Concept of Invoice)
In pipeline handling your company does not need to order or store the material
concerned It is ready available to you as and when required via pipeline (eg oil
or water) or some other type of cable (eg electricity) Consumption of the
material is settled with the vendor on a regular basis
Steps
1 Create a Material master record with material type PIPE
2 Create Pipeline info record
3 Create GI with movement type 201P
4 Pipeline settlement T Code MRKO
RETURNABLE TRANSPORT PACKAGING (RTP)
When company orders goods from a vendor the goods are delivered with
returnable transport packaging (pallets containers) that belongs to the vendor
and is stored on our premises until you return it to the vendor
Steps
1 Create Material master record with material type LEIH
2 Create PO
3 Create GR by maintaining RTP material by selecting the option transport
equipments with movement type 501M
4 IR
STOCK TRANSFER
In stock transfer processing goods are procured and supplied within a company
One plant orders the goods internally to another plant (receiving plantissuing
plant) The goods are procured with a special type of purchase order the stock
transport order
Steps
1 Create a Material master in both supplying and receiving plant
2 Create stock transport order (STO) with item category lsquoUrsquo
3 Create transfer posting with movement type 351 amp T Code MB1B (Go to
MMBE stock overview the stock will decrease in supplying plant and it will not
update stock of receiving plant it will be under stock in transit)
4 Create GR stock will update in receiving plant
This scenario is under one company code between two plants
Material Master Related Important Terms (Part 2)
Controlling (CO) An organizational unit in Accounting that reflects a
management-oriented structure of the organization for the purpose of internal
control
Operating results for profit centers can be analyzed using either the cost of
sales approach or the period accounting approach
By analyzing the fixed capital as well you can expand your profit centers for use
as investment centers
Profit Center
Key that uniquely identifies the profit center in the current controlling area
Valuation Category
Determines whether stocks of the material are valuated together or separately
Dependencies
In the case of split valuation this indicator also determines which valuation
types are allowed that is the criteria by which stocks can be valuated
Valuation type
Invoice Verification (MM-IV)
A subdivision of a valuation category in split valuation
Example An enterprise manages its stocks of a material using the valuation
category Quality comprising the following valuation types
bull High quality Average quality Inferior
Hazardous material number
Number that identifies the material as a hazardous material or as dangerous
goods and assigns hazardous material data or dangerous goods data to it
Use The hazardous material number indicates that the material is dangerous
making special precautions necessary for its storage and shipment
Valuation Class
Assignment of a material to a group of GL accounts
With other factors the valuation class determines the GL accounts that are
updated as a result of a valuation-relevant transaction or event such as a goods
movement
The valuation class makes it possible to
bull Post the stock values of materials of the same material type to different GL
accounts
bull Post the stock values of materials of different material types to the same GL
account
Default value for the valuation class for valuated stocks of this material
Use The valuation class has the following functions
bull Allows the stock values of materials of the same material type to be posted to
different GL accounts
bull Allows the stock values of materials of different material types to be posted to
the same GL account
bull Determines together with other factors the GL accounts updated for a
valuation-relevant transaction (such as a goods movement
CIN - Country India Version ~ Volume 1
PurposeCountry Version India (CIN) contains a number of enhancements to standard
Sales and Distribution (SD) functions that allow you to handle local
requirements in particular excise duty
Features
In Country Version India (CIN) this component handles sales processes as
found in India In addition to the generic functions it allows you to
Handle CENVAT in your sales processes
The system calculates excise on your sales and creates excise invoices as
required and makes the appropriate postings to your CENVAT accounts
It covers sales from factories sales from depots and offers functions for other
types of goods movements it also covers sales to export-oriented units and
export sales
Record concessional and exemption forms sent to you by your customers
Make adjustment postings to your CENVAT accounts
Excise Invoice (Outgoing)
Definition
The document that acts as the proof of payment of excise duty and is required
for the customer to take CENVAT credit on the item
Use
In the SAP System there are three different procedures for creating excise
invoices
Sales direct from the factory
This procedure is for when you sell manufactured goods straight from the
factory at which they were produced in which case you levy excise duty when
the goods leave the factory on their way to the customer
If when you send the goods to the customer you enclose the commercial
invoice you create the excise invoice with reference to the commercial invoice
If you want to send the commercial invoice after you have dispatched the goods
however you create the excise invoice with reference to a pro forma
commercial invoice For more information about these procedures see Sales
from Factories
As well as creating excise invoices individually you can also create them in
batches (see Creation of Excise Invoices in Batches)
Sales from depots
A depot is a site at which the goods are stored away from the factory at which
they were produced In this procedure you have to levy the excise duty when
you transfer the goods from the factory to the depot and then make sure this is
passed on to the customer when it makes a purchase For more information see
Sales from Depots
Sales (other goods movements)
Some other goods movements may also require you to create an excise invoice
with reference to other documents The SAP System offers separate functions
for these purposes (see Excise Invoices (Outgoing) for Other Movements)
StructureNumbering of Excise Invoices
Outgoing excise invoices have two numbers an internal document number
which is assigned immediately you create an excise invoice and an excise
invoice number which is not assigned until you have verified and posted it
As far as the excise invoice number is concerned you have to number your
outgoing excise invoices in sequential order starting each year on 1 April You
must notify the excise authority of the jurisdiction of the invoicing location The
serial number must be printed on each page of the excise invoice
Each number range is governed by a series group You must create at least one
series group in order to be able to number the excise invoices If you need more
than one number range you must create the corresponding number of series
groups You do so in the CIN Implementation Guide (IMG) by choosing Global
Settings reg Series Groups
Number of Line Items Per Excise Invoice
Some states allow you to include only a limited number of items for each page
of an excise invoice (for example if the excise invoices are to be printed on
prenumbered forms) You can customize the system so that it prints the excise
invoice accordingly in the CIN IMG by choosing Global Settings reg Excise
Registration IDs
Customer Master (Excise Data) Definition
The part of the customer master record that contains information relating to
Indian excise duty
Use
In conjunction with other data this data is used to calculate excise duty on
various transactions
To maintain the data from the SAP Easy Access screen choose Indirect Taxes reg
Master Data reg Excise Rate Maintenance and then select the following options
described below
Structure
The excise part of the customer master contains the following information
Customer Excise Details
On this screen you enter your customers tax registration numbers which are
used for various forms of correspondence and reports
1 Excise registration number (and the range division and collectorate in which
this is located)
2 Central sales tax (CST) number
3 Local sales tax (LST) registration number
4 Permanent account number (PAN)
In order for the system to be able to calculate which rate of excise duty to apply
on sales to the customer you must also assign it a customer excise duty status
(for more information about how this works see Determination of Excise Duty
Rates)
Excise Indicator for Plant and Customer
On this screen you define the final excise duty indicator (for more information
about how this works see Determination of Excise Duty Rates)
Determination of Excise Duty Use
When you execute a business transaction involving materials that are subject to
excise duty the system automatically calculates the duty for you
Prerequisites
In order for the system to be able to determine which rate of excise duty to
apply you must have maintained all the data on the Excise Rate Maintenance
screen which you can access from the SAP Easy Access screen by choosing
Indirect Taxes reg Master Data reg Excise Rate Maintenance
You maintain the following types of data
Plant master data
You assign each of your plants an excise duty indicator You can use the same
indicator for all the plants with the same excise status from a legal point of view
such as all those that are in an exempt zone
See also the information about manufacturers that are only entitled to deduct a
certain portion of the duty (see Partial CENVAT Credit)
Vendor master data
For each of your vendors with the same excise status from a legal perspective
you define an excise duty indicator You must also specify the vendor type ndash for
example whether the vendor is a manufacturer a depot or a first-stage dealer
You must also stipulate if the vendor qualifies as a small-scale industry
For each permutation of plant indicator and vendor indicator you then create a
final excise duty indicator
Customer master data
Similarly you assign the same excise duty indicator to each of your customers
that share the same legal excise status
Again for each permutation of plant indicator and customer indicator you then
create a final excise duty indicator
Material master data
Each material is assigned a chapter ID
Excise tax rate
For every chapter ID and final excise duty indicator you maintain the rate of
excise duty
If your business only qualifies for partial CENVAT credit you must customize
your system accordingly
Activities
Let us consider an example to illustrate how the system determines which rate
of excise duty to apply to a material Assume you are posting a sale of ball
bearings to a customer The system automatically determines the rate of excise
duty as follows
Looks up the customer master data to see what status you have assigned the
customer
Lets assume youve assigned the customer status 3
Looks up the plant master data to see what status you have assigned the plant
Similarly your plant has status 2
The system looks up the table under Excise Indicator for Plant and Customer to
see what the final excise duty indictor is for customer status 3 and plant status
2 It is 7
The system determines the chapter ID of the ball bearing for the plant
Letrsquos assume the chapter ID at plant for the ball bearings is 100001
Finally the system looks up the table under Excise Tax Rate to see what rate of
duty applies to chapter ID 100001 under status 7
Plant Master (Excise Data) Definition
The part of the plant master record that contains information relating to Indian
excise duty
Use
In conjunction with other data this data is used to calculate excise duty on
various transactions
To maintain the data from the SAP Easy Access screen choose Indirect Taxes reg
Master Data reg Excise Rate Maintenance and then select the following options
described below
Structure
The excise part of the plant master is divided into the following screens
Excise Indicator for Plant
On this screen you enter your plants tax registration numbers which are used
for various forms of correspondence and reports
1 Central sales tax (CST) number
2 Local sales tax (LST) registration number
3 Permanent account number (PAN)
In order for the system to be able to calculate which rate of excise duty to apply
on purchases for this plant you must also assign it a plant excise duty status
(for more information about how this works see Determination of Excise Duty
Rates)
Excise Indicator for Plant and Vendor
On this screen you define the final excise duty indicator (for more information
about how this works see Determination of Excise Duty Rates)
Excise Indicator for Plant and Customer
On this screen you define the final excise duty indicator (for more information
about how this works see Determination of Excise Duty Rates)
Automatic Creation of Excise Invoices Use
The SAP System can automatically create an outgoing excise invoice for you
immediately you post a commercial invoice (or a pro forma invoice) for a
customer sale This function applies to excise invoices for sales from factories
only
Prerequisites
To activate this function in the Country Version India (CIN) Implementation
Guide (IMG) make the following settings
1 Under Global Settings reg Excise Groups select Create EI
This activates the automatic creation function
2 Under Sales and Distribution reg Utilization Determination
Here you specify which CENVAT accounts the system is to post the different
types of excise duty to
3 Under Sales and Distribution reg Excise GroupndashSeries Group Determination
Here you specify which excise group and series group the excise invoices are to
be created for
Features
When you post an invoice the system creates an excise invoice All the
information that it needs to create the excise invoice is provided either by the
invoice or by the Customizing settings that you have made in Sales and
Distribution It also determines the excise invoice type automatically by means
of a user exit
Creating Excise Invoices for Stock Transfers 1 From the SAP Easy Access screen choose Indirect Taxes reg Procurement reg
Excise Invoice reg For Depot reg CreateChangeDisplay
2 In the Material document field enter the goods receipt number and choose
The system displays the information from the goods receipt for example the
sending plant the excise registration the range the division and the
collectorate
3 Choose Details
The system copies the items from the goods receipt document In the depot it is
possible to have a separate excise invoice at line item level
4 Enter the internal document number of the excise invoice sent by the factory
5 Choose More documents to go the excise invoice details screen
6 Enter the internal document number of the excise invoice from the factory
The system copies the information to the line item (for example the excise
invoice number the excise invoice date the item number the chapter ID the
excise invoice quantity the amount of excise duty paid the excise base value
and the serial number of the Part II register entry with which the excise was
paid)
You can change the receipt quantity to match the actual quantity received at
the depot if necessary The system automatically adjusts the excise
accordingly
7 Go back to the item details screen
8 Save the excise invoice
Creating Excise Invoices for Direct Purchases 1 From the SAP Easy Access screen choose Indirect Taxes reg Procurement reg
Excise Invoice reg For Depot reg CreateChangeDisplay
2 In the Material document field enter the goods receipt number and choose
The system displays the information from the goods receipt for example the
sending plant the excise registration the range the division and the
collectorate
You can also maintain the excise registration details for the ship-from party as
for with the vendor The ship-from can be different from the vendor code (The
delivering plant can be maintained as a ship-from in the system When a valid
ship-from is entered the excise registration details copied from the vendor will
be overwritten by the ship-from excise registration details)
The ship-from registration details displayed can also be overwritten manually
The dealers commercial invoice number can be stored in the vendor excise
invoice number as in this case the dealer himself will not have an excise
invoice
3 Choose Details
The system copies the items from the goods receipt document It also copies the
vendors excise invoice number and the serial numbers of the entries in the RG
23A RG 23C and personal ledger account (PLA) registers
4 Enter the internal document number of the excise invoice sent by the factory
5 Select an item and choose More documents to go the excise invoice details
screen
In the case of direct purchases there will not be any excise invoice in the
system so leave the internal document field blank The vendors invoice will
show the details of the excise invoices through which excise has been paid for
the item that is being dispatched You can enter these details here
6 For each item the chapter ID excise base value and excise duty amounts
are defaulted from the purchase order You can change them if there is any
difference Enter the excise amount paid and the receipt quantity You also
enter the Part II register serial numbers with which the excise duty was paid and
the excise registration information from the original excise invoice
7 Go back to the item details screen
8 Save the excise invoice
The system creates an entry in register RG 23D You can change the excise
invoice as long as it has not been used in any sales
Assigning Excise Invoices to a Delivery Use
You follow this procedure to specify which excise invoices are to be assigned to
a delivery from a depot (or other material document)
You can also automate this procedure using the batch selection program
(J_1IJCHK) by making the appropriate Customizing settings in the Country
Version India (CIN) Implementation Guide (IMG)
Procedure
1 From the SAP Easy Access screen choose Indirect Taxes reg SalesOutbound
Movements reg Excise Invoice reg For Depot reg CreateChangeDisplay reg Delivery
or Material Document reg RG 23D Selection
2 Enter the delivery document number or the material number and choose
3 Select the excise invoice you want
4 Choose
5 Choose Excise invoice
A list of excise invoices appears These are the excise invoices at the depot with
a balance quantity
The system also shows a list of the A certificates that can be used You can pick
up any of the A certificates but they must be for the same excise invoice You
can only pick up an A certificate in its entirety You cannot select part of an A
certificate
6 Select the excise invoices that are relevant to the delivery
7 Specify what quantity to be used from each excise invoice
The system recalculates the excise accordingly
8 Go back to the item details screen
9 Save the data
Result
The system creates an entry in register RG 23D and generates the depot excise
invoice numbers
If you selected any A certificates the system also generates additional entries in
the RG 23D register The system marks the original A certificates as updated so
that they cannot be used for any other removals
Continue see Volume 2 (Next post)
EXTERNAL SERVICE MASTER
EXTERNAL SERVICE MASTER ESM
We procure the different type of services from vendors they are-
1048774 Hardware amp software services
1048774 Construction amp transportation services
1048774 Machinery services
1048774 Annual maintenance services
1048774 Present to and breakdown service Etc
Service Procurement Cycle -
1048774 Requirement identification
1048774 Source determination
1048774 Source selection
1048774 Service master
1048774 Service PO
1048774 Service entry sheet acceptance
1048774 Invoice with respect to service entry sheet
Steps to perform services -
1 Create service master (AC03)
2 Create Service PO (ME21N) with AC Assignment category lsquoKrsquo amp Item
Category lsquoDrsquo
3 Create service entry sheet (ML81N)
4 Invoice with respect to Service Entry sheet
Customize settings
(For service category Number Ranges amp organization status for service
category)
SPRO 1048774 IMG 1048774 MM 1048774 ESM 1048774 Service Master
1048774 Define organization Status for service Categories
1048774 Define Service Category
1048774 Define Number Ranges
Define organization Status for service Categories
bull Click on New Entries
bull Org service Category
bull BDS (Basic data service is stored in service master record under this service
category)
bull CNST 1048774 Controlling Status
bull PUST 1048774 Purchasing data Status
bull SDST 1048774 Sales amp Distributed Status
bull Org status description service category 1048774 Press Enter amp Save
Define Service Category
bull Same path as above
bull Select Standard
bull Click on Copy as
bull AC reference 1048774 always takes as 0006
bull Enter amp Save
Define Number Ranges
Click on groups 1048774 Groups 1048774 Insert 1048774 select enter Number Ranges
Select the service category
Click on Element
Select Group amp Click on Element Group
Save
Create Service Master - (AC03)
Click on Create New Services
Service Number (any number) Service Category
Basic unit of measure (Hours lsquoHrsquo)
Enter
Basic Data 1048774 Master Service Group 1048774 007
Valuation class 1048774 3200 1048774 Enter 1048774 Save
To See the Service list 1048774 AC06
Create Service PO (ME21N)
AC assignment category lsquoKrsquo Item Category lsquoDrsquo
Enter the Short text Quantity Delivery date Net Price Material group Plant
Storage Location
Enter service number in Service Tab (Item Details) quantity price Enter
Account Assignment 1048774 GL Account Number eg400000
Cost Center eg 9999
Press Enter amp Save
Create Service Entry Sheet - ML81N
Select other purchase order (enter PO number) 1048774 Enter 1048774 Click on Create1048774 Enter
Short Text 1048774 Enter 1048774 Service Number 1048774 Enter ndashClick on Flag button 1048774 Save
Take Service entry Sheet Number
Go to Invoice MIRO 1048774 Enter company code 1048774 Select Service Sheet Option 1048774 Enter
Service Entry Sheet Number 1048774 save it
Physical Inventory and Inventory Management
Physical inventory Process - 1 Create Physical inventory document
T Code MI01 ndash Create single inventory document
T Code MI31 ndash Create multiple physical inventory documents
I Enter the desired fields ie material material type site storage location and
Maximum number items Documents ndash 100 etc 1048774 Press Enter
II Click on Process Session
III Select the line items and click on the process
IV System displays a dialog box select Background and click on process
Inventory document is created
2 Print Inventory Document and handed over to responsible person say
Manager
3 Enter Physical Inventory count
T Code MI04
i Enter the physical inventory document number Fiscal year count date 1048774 Press
enter
ii Enter the Material Quantity and click on post
4 Listing of difference
T Code MI20
Enter the physical inventory document number and execute system displays a
screen wherein we will be able to view the differences
5 Post the differences
T Code MI07 amp Mov Type 701 amp 702
Enter the physical inventory document number year posting date enter the
difference and post
INVENTORY MANAGEMENT Maintaining stock by value or by quantity is called inventory The total inventory
management deals with the goods movement of the material
Goods movement -
It is a process in which transaction resulting change in stocks It is further sub-
divided into three categories
1 Goods Receipt (GR)
2 Goods Issue (GI)
3 Transfer Posting (TP)
Goods Receipt (GR) - It is a goods movement in which receipt of goods is
posted for vendor or for production A GR posted in the system will leads to
increase in stock No Concept of Price or value
Goods Issue (GI) - It is goods movement in which material withdrawal is
posted for consumption or for customer A GI posted in system will leads to
decrease in stock
Stock Transfer (ST) - It is method of removal of material from one location
and transferring it to another location This process is performed between two
plants and two storage locations
Transfer Posting (TP) - It is a general term of stock transfer that changes the
stock type or stock categories The difference between transfer posting and
stock transfer is -
TP is logical stock transfer and ST is a physical stock transfer
Movement Type - It is a three-digit code which plays a role of important
control function in inventory management It acts as a central role in automatic
account determination It determines which stock account or consumption
account is updated in financial accounting
Reservation - It stores requisition created from particular cost center to
particular department for issuing the material reservation posted in the system
It leads to decrease in stock
Stock Types - The different stock types are
1 Unrestricted use stock
2 Quality inspection stock
3 Blocked stock
4 Warehouse stock
Transaction code -
1 To Create GR - MIGO
2 To Create GI - MB1A
3 For Transfer Posting - MB1B
4 To display MaterialGR document ndash MB03
5 To create reservations - MB21 MB22 MB23
6 To See Stock Overview - MMBE
7 To enter Other GR - MB1C
When GR is posted in the system
1 Material document is created - MB03
2 Accounting Document is generated - MB03
3 MMR updated - MM02 MM03
4 PO history updated - ME23N
Movement Typersquos
Movement Types under GR - 101 331333335501503505551553555
561351 (For all Mov Typersquos there is a reversal eg 101 has 102 Note No
reversal for 121)
Movement Typersquos under GI - 201 331333335551553555
Transfer Posting It is performed in three ways
1 TP BW Plant to Plant
2 TP BW Storage Location to Storage Location
3 TP BW Stock to Stock
Movement Types under TP BW Plant to Plant
301 - 1 step
303 amp 305 - 2 step
Movement Type under TP BW Storage location to Storage Location
311 - 1 step
313 amp 315 - 2 step
Movement Type under TP BW stock to stock
321 323 325 343349
To Cancel the GR Movement type 102
Return delivery to vendor movement type 122 amp T Code MIGO
Transfer Posting Stock to Stock
From Blocked stock to Quality Inspection
T Code MB1B amp Movement Type 349
From Blocked stock to Unrestricted Stock
T Code MB1B amp Movement Type 343
From Quality Inspection to Unrestricted Stock
T Code MB1B amp Movement Type 321
Transfer Posting from Plant to Plant
For One Step Movement Type 301
For Two Steps Movement Type 303 amp 305
After posting stock will display in Stock in Transit (Plant)
To receive material by receiving Plant Movement Type 305
Transfer Posting BW Storage Location to Storage Location
Under One Plant BW two Storage Locationrsquos Movement Type 311
Back to Parent storage Location Movement Type 313 (It Show stock in transfer)
use Movement type 315 at Parent storage location
To create Goods Issue (GI) T Code MB1A amp Movement Type 201
To Create Reservations T Code MB21 MB22 amp MB23
Creation of GI wrt Reservations
T Code MB1A amp Movement Type 201
Click on Reservation Enter Reservation Number 1048774 Click on Adopt + Details
GR wrt Reservations T Code MIGO amp Select as Reservation instead of GR
GR without PO Movement type 501 amp T Code MB1C Select others instead of
Purchase order Enter Material Quantity Plant Storage Location 1048774 Press Enter
Partner Option will be visible (Vendor) 1048774 Save it
Invoice - Invoice is a document which is issued to a buyer (Company) from the
supplier (vendor) for the payment The following information is maintained in
invoice
Invoice date Posting date Invoice ref number tax amount amount tax code
terms of payments vendor address banking accounting information etc
When invoice document is posted in the system
bull Invoice document created
bull Accounting document is generated (MIR4)
bull PO history updated (ME23N)
bull FI document created (FB03)
PRICE DETERMINATION PROCESS or PRICING PROCEDURE
CONDITIONS OR PRICING PROCEDURE or PRICE DETERMINATION PROCESSWe deal with the Pricing Procedure for vendors
PB00 Gross Price (info record contract scheduled Agreement)
PBXX Gross Price (PO)
FRA1 Freight
RA00 Discount on net
RA01 Discount on Gross
ZA00 Surcharge on net
SKT0 Surcharge discount
ZPB0 Rebates
MWVS Input Tax
MWAS Output Tax
BASB Base Amount
RM0000 Calculation Schema or Pricing Procedure
(PB00 amp PBXX)
RM0002 Calculation Schema or Pricing Procedure
(PB00)
PB00 --gt AB00
Copy the Standard one and create new one (ours)
RM0000 contains all the condition types
Pricing Procedure (PP)
We define the pricing procedure to define condition supplement for the material
price The condition supplement specifies the discount surcharge freight etc
that we want a system every time to access material price condition records
The total value of the material is calculated or based on all addition and
subtraction ie discounts surcharge tax freight etc
Condition Table
It is a table which defines the structure of condition record key
Condition Record
It is a data record used to store conditions or condition supplements ie
condition like discount freight and surcharge Tax etc
Condition Type
It is used for different functions In Pricing the condition types leads you to
differentiate different types of discounts in output determination batch
determination difference between two output types such as delivery note or
order confirmation between different strategy types
Access Sequence
It specifies the order in which system searches or access the condition records
from condition table
Difference between PB00 amp PBXX
1 Condition maintained in PB00 is time dependent whereas PBXX is time
independent
2 Condition type PB00 ndash used for IR RFQ Contract Schedule Agreement
Condition type PBXX ndash used for PO
Calculation Schema
The main function of calculation schema is to provide framework of steps for the
price determination process to specify the discounts surcharge freight rebate
etc
It also determines the sequence of conditions that are to be followed and in
which sequence
Schema Group Vendor
The main function of it is to identify or to pick the right process and conditions
for a particular vendor
Schema Group Purchasing Organization
Key that determines which calculation schema (pricing procedure) is to be used
in purchasing documents assigned to the relevant purchasing organization
Schema Group
It allows to group together the purchasing organizations which uses the same
calculation schema
Steps -
1 Create Access sequence
2 Create condition types
3 Create pricing procedure or calculation schema
4 Link pricing procedure amp access sequence to condition type
5 Create schema group for vendor
6 Create schema group for purchase organization
7 Assign schema group vendor-to-vendor master record in purchasing data
view
8 Assign schema group purchase organization to our purchase organization
9 In inforecord purchase organization data enter condition types and pricing or
calculation procedure
CUSTOMIZE SETTINGS -
SPRO --gt IMG--gtMM--gtPUR--gtConditions --gtDefine price determination Process
1 Define access sequence
2 Define Condition type
3 Define cal Schema
4 Define schema group
o Schema group vendor
o Schema group purchasing group
5 Assignment of schema group to PUR org
6 Define schema determination agrave determine cal schema for standard PO
PURCHASE ORDER
PURCHASE ORDER
PO is an external document created for the procurement of materials and
services from vendor The document of PO is also divided into 4 parts as PR -
1 Document Overview
2 Header (DeliveryInvoice Conditions Address Partners Org data status)
3 Item Overview (AC assign cat Item Category Material Plant Del date SL)
4 Item Details (Material data Confirmations condition control delivery delivery
Schedule Quantitiesweights invoice)
A procurement type is defined for each of the document items The following
procurement types exist
1048774 Standard
1048774 Subcontracting
1048774 Consignment
1048774 Stock transfer
1048774 External service
bull There are different ways to create PO -
1 Directly through transaction code ME21N
2 With reference to PR
3 With reference to RFQ
4 With reference to info records
5 With reference to Contracts
6 With reference to Cost Centre GL Account (cost element) for consumable
items or not stock items with account assignment category lsquoKrsquo (K= cost centre)
(For non stock and consumables)
0 COMMENTS L INKS TO THIS POST
LABELS PO PURCHASE ORDER
Reaction
s
PURCHASE REQUISITION T CODE ME51 or ME51N
Purchasing Requisition -
It is a request or instruction from particular department (Cost Centre) to
purchasing department to procure certain quantity of material and services It is
only one internal document in SAP-MM
Purchasing Requisition document is divided into four parts -
bull Document Overview
bull Header
bull Item Overview
bull Item Details
Document Overview -
It displays the list of purchasing documents which are created previously
according to our requirement
Header -
Any text message or information is maintained
Item Overview -
In this we enter material plant delivery date quantity storage location
purchasing group AC assignment category Item category etc
Item Details -
It displays the detailed information about item overview (like Master data
valuation source of supply contact person delivery address status etc)
0 COMMENTS L INKS TO THIS POST
LABELS PR PURCHASE PURCHASE ORDER PURCHASE REQUIS IT ION SALES ORDER
Reaction
s
Automatic PURCHASE ORDER (PO) How Automatic PO raised
How Automatic PO raised
At fixed time say 1230 AM automatic scheduler runs and checks whether the
stock is less than or equal to the replenishment point If stock is less than or
equal to Repli Point than PR raised automatically to Purchasing Deptt
bull Activate the option automatic PO in purchasing view in material master record
bull Activate the option automatic PO in purchasing data view in vendor master
record
bull Maintain Source List amp select fixed vendor
bull PR crated automatically
bull Automatic creation of PO from PR ndash ME59
Enter the Purchasing group purchasing organization Vendor Plant and
Purchasing Requisition Document Number 1048774 Execute
RELEASE PROCEDURE Release strategyThe main function of Release procedure is to determine the approval process
or the release process for the procurement of material amp services rather than
relying for manual signatures The release procedure contains release strategy
Release Strategy (RS)
A plan defining the release codes with which a purchase requisition item a
complete purchase requisition or a complete external purchasing document
must
be released (that is approved) and the sequence in which release is to be
effected
using these codes It is a unique set of conditions sequence and level of release
It is a 2 digit code eg S1 S2 S3etc
The Release Strategy contains the following -
bull Release Group
bull Release Codes
bull Release Indicators
bull Release Prerequisite
Release Group -
It is a 2-digit code which is assigned with a class (Class contains group of
characteristics) It contains one or more release strategies
Release Codes -
It is a 2digit code which identifies the department or responsible person for
the approval process amp release process
Eg AA - Manager
BB - Sr Manager
CC - Vice President
DD - Managing Director
Release Indicator -
It is a Code that represents the release status If the proper approval
process is performed that the release Strategy has to be release if it is not
performed than the Release Strategy is blocked
R ndash Release
B ndash Blocked
Release Conditions -
It determines the type of the release strategy
For eg
bull If the price ranges from 1 to 1000 It is approved by AA BB and CC
bull If the ranges from1001 to 1lac then it is approved by AA BB CC and DD
- 80 -
Release Prerequisite
It will informs the system which RS has to be take place in the PO CEKKO is
a communication structure where it displays the field names amp field lengths to
create characteristics ie we maintain characteristics in customizing by
selecting
the field names from this communication structure for all external documents
CEBAN is used for the purchasing requisition
Characteristics -
1 Net value of PO --- GNETW (GSWRT for PR)
2 Plant --- WERKS
3 Purchasing organization -- EKORG
4 Purchasing Group --- EKGRP
5Material group ndashMATKL
CUSTOMIZE SETTINGSSPRO--gtIMG--gt MM--gt Purchasing--gtPO--gt Release Procedure for PO
1 Edit Characteristics T Code CT04
2 Edit Class T Code CL02
3 Define Release Procedure for PO
4 Check Release Strategy
Edit Characteristics -
Characteristics - eg NET VALUE OF VALUE
Click or Create Button
Under Basic Data
Description - Value for PO
Status - Release
Data Type - Currency Format
No Of Characters - 15
Currency - EUR
Activate multiple values amp Internal Values Allowed
Additional Data
Table name - CEKKO
Field Name - GNETW
Values
Activate Additional Values
Save the document
Create another Characteristic for Plant -
Plant date Create ndash Description Status
Data Type Characteristic Format
Number of Characteristics 4
Activate Multiple Values
Additional data-
Table Name - CEKKO
Field Name - WERKS
Values
Activate Additional Values
For Purchasing Organization Name - EKORG
For purchasing Group EKGRP
Edit Class
Class - SAPMM
Class Type - 032 Release Strategies
Click on Create button
Basic Data
Description - Class for PO
Status - Released
Valid From _____ Valid to _____
Click on Characteristic
Characteristic
Enter all the Characteristics Created amp Save it
Define Release Procedure for PO-
bull Release Group
bull Release Codes
bull Release Indicators
bull Release Strategies
bull Workflow
Release Group - New Entries Release Group Class and Description
Press Enter amp Save
Release Code - New Entries
Group Codes Description
99 AA Manager
99 BB Sr Manager
99 CC Vice President
99 DD Managing Director
Press Enter amp Save
Release Indicator - (B ndash Blocked R - Release)
New Entries
Release Indicators Description
B Blocked
R Released
Release Strategies -
New Entries
Release Group 99
Release Strategy S1
Release Codes AA BB CC and DD
Click on Release Prerequisites
Release Status -
Continue
Classification
Enter the Value (Same Price)
Plant (9999)
Go Back amp Save it
Release Simulation - Simulate Release
Create a PO -
There are two ways to release the PO
Individual releaseME28
Collective release ME29N
How to delete procedure
Delete Release GP
Create Release RG
Delete R Strategies
Delete R Code
Delete R Group
SAP R3 SYSTEM LANDSCAPE
System LandscapeThe system landscape contains all the SAP Systems that you have installed It
can consist of several system groups whorsquos SAP Systems are linked by transport
routes
After you decide which clients you need and which roles you want them to have
you need to decide how to distribute them amongst the different SAP Systems
You can set up multiple clients independently of one another in a single SAP
System However when you configure the data you must remember that cross-
client Customizing settings and Repository objects are identical for all clients in
a single SAP System Changes made in one client apply immediately to all
clients in the system
Three-System Landscape
SAP recommends a three-system landscape in which each of the central clients
has its own SAP System
This consists of a development system DEV a quality assurance system QAS
and a production system PRD The development system contains the
Customizing client CUST the quality assurance system contains the quality
assurance client QTST and the production system contains the production client
PROD Make all changes to Customizing data and Repository objects in the
Customizing client When you release the corresponding change requests they
are transported into the quality assurance client This means that changes to
cross-client data only appear in the quality assurance client after the transport
In the quality assurance client you can test whether the transports are
complete or whether any linked changes are missing and are still in unreleased
change requests If the test is successful the change requests are transported
into the production client The production client is completely separate from the
other clients as regards cross-client data
SPECIAL STOCKS amp SPECIAL PROCUREMENT TYPES
Special Stocks are those stocks which are not belongs to our company code
These are not placed in our storage locations amp no physical inventory is
performed and treated as special stocks for the reason of ownership
Different types are of Special Stocks are as follows
1 Subcontracting
2 Consignment
3 Pipeline
4 Stock transfer
5 Third party
6 Returnable transport packaging
7 Sales order stock
8 Project stock
SUBCONTRACTING
In subcontracting process we create subcontracting PO to supply or issue
subcomponents to vendor in order to get final product The price maintained in
subcontracting PO is a service charge paid to vendor
Steps to perform subcontracting
1 Create subcontracting inforecord (Optional)
2 Create subcontracting PO with item category L
There are to ways to supply subcomponents to vendor
bull Manually maintain the subcomponents in the subcontracting
PO though explode BOM
bull Through BOM (Bill of material) T Code CS01 CS02 amp CS03
3 Create Transfer Posting with Movement Type 541 to issue the subcomponents
to the vendor
4 Goods Reciept
5 Invoice Reciept
Path ME21N ---gt Enter Item Category L --gt Material (End Product) PO
Quantity Delivery Date Net Price Plant --gt Click on Item Details --gt Tab
Material Data -- gtComponents select Explode BOM --gt Click on Components
button --gt Enter the subcomponents --gt Go back amp Save
Create Transfer Posting with movement type 541 amp T Code MB1B
GR MIGO
IR MIRO
CONSIGNMENT - (No Concept of Invoice)
In consignment process we will not create Purchasing document for the vendor
vendor himself send the material to our plant though the material is available
to our plant the responsibility amp ownership of the material is of vendor Aliability
only arises when the material withdrawal (Consumption) is posted in the system
from consignment stock
Steps
1 Create Consignment info record (mandatory)
2 Create Consignment purchase order with item category lsquoKrsquo amp maintain Info
record number
3 Create GR Movement type lsquo101Krsquo
4 Create GI Movement Type lsquo201Krsquo
5 Consignment settlement T Code MRKO
Path --gtME11 --gt In info record --gt Purchasing Org Data 1 views of info record
enter the tax code and save it
--gt Create Consignment Purchase Order ME21N (Price option is grayed out with
price zero)
--gt Create GR with movement type 101K
--gt Create Goods Issue (GI) T Code MB1A amp Movement Type 201K Enter Cost
center vendor
--gt Consignment Settlement T Code MRKO Click Activate Consignment Activate
Settle Execute
--gt Display the Document Number ie Invoice receipt T Code FB03
PIPELINE PROCESS (No Concept of Invoice)
In pipeline handling your company does not need to order or store the material
concerned It is ready available to you as and when required via pipeline (eg oil
or water) or some other type of cable (eg electricity) Consumption of the
material is settled with the vendor on a regular basis
Steps
1 Create a Material master record with material type PIPE
2 Create Pipeline info record
3 Create GI with movement type 201P
4 Pipeline settlement T Code MRKO
RETURNABLE TRANSPORT PACKAGING (RTP)
When company orders goods from a vendor the goods are delivered with
returnable transport packaging (pallets containers) that belongs to the vendor
and is stored on our premises until you return it to the vendor
Steps
1 Create Material master record with material type LEIH
2 Create PO
3 Create GR by maintaining RTP material by selecting the option transport
equipments with movement type 501M
4 IR
STOCK TRANSFER
In stock transfer processing goods are procured and supplied within a company
One plant orders the goods internally to another plant (receiving plantissuing
plant) The goods are procured with a special type of purchase order the stock
transport order
Steps
1 Create a Material master in both supplying and receiving plant
2 Create stock transport order (STO) with item category lsquoUrsquo
3 Create transfer posting with movement type 351 amp T Code MB1B (Go to
MMBE stock overview the stock will decrease in supplying plant and it will not
update stock of receiving plant it will be under stock in transit)
4 Create GR stock will update in receiving plant
This scenario is under one company code between two plants
SAP IMPLEMENTATION PROCESS End to End Inplementation of SAP
First we have to prepare documentation about the client business (like turnover
vendors customers payments materials production marketing etc)
The implementer company made two teams (1) Steering team (2) Steering
community
Steering team (SAP functional consultants) prepares a detailed
documentation about the client with the help of core team (client company
team)
amp this study is known as Feasibility Study After that the steering team handed
over this documentation to Steering community (Project manager Sr software
engineer and other higher authorities)
Steering community prepares the BBP (Business Blue Print) BBP
Prepares in MS-Word
10487741048774 ASAP - Accelerated System Application Product in Data Processing
10487741048774 Business Process - ASAP Methodology
1 Project Preparation
2 BBP (Business Blue Print)
3 Realization
4 Final Preparation
5 Go live amp Support
10487741048774 Project Preparation -
It consists of identifying team members amp development strategy as
how to go
AS ndash IS (Existing Process followed requirements)
TO ndash BE (Requirement analysis and best process recommended)
Difference between (AS ndash IS) amp (TO - BE) is called GAP Analysis
10487741048774 Business Blue Print (BPP) -
It is a legal documentation between client amp the company
(implementer service provider) We have to understand the current business
process of client amp analyzing the business amp prepare documentation It is a
detailed documentation for the client
10487741048774 Realization -
This Phase is used to Implement or migrate the entire business of
client from Non-SAP environment to SAP environment
10487741048774 Final Preparation -
This phase is used for testing amp end user training After successfully
completion of this phase client is ready to run business in SAP R3
10487741048774 Go live amp Support -
In this phase we deliver the project end date amp end user training at
client site
THIRD - PARTY PROCESSING
THIRD - PARTY PROCESSING
In third party processing your company passes on a sales order to an external
vendor who sends the goods directly to the customer The sales order is not
processed by your company but by the vendor Third-party items can be
entered in purchase requisitions purchase orders and sales orders Third party
processing is integrated with Sales and Distribution If the sales order contains
third-party items the system creates a purchase requisition from the order
Steps
1 Create MMR with sales views and maintain Division Distribution channel
sales org item category group and general item category group ndash BANS (Third
party item) amp Account group Sold to party
2 Create Customer master record T Code XD01 XD02 XD03
3 Create sales order T Code VA01 VA02 VA03 (PR generated automatically)
4 PO - T Code ME21N
5 GR ndash T Code MIGO
6 IR ndash T Code MIRO
7 Sales Billing Billing Document T Code VF01 VF02 VF03

maintained
Purchasing Value Key
Key defining the reminder days and tolerance limits valid as well as the
shipping instructions and order acknowledgment requirement of the material for
Purchasing
Procedure If you have chosen a purchasing value key the system enters the
values defined in Customizing (for Purchasing) in the fields
Batch Batches (LO-BM)
A subset of the total quantity of a material in stock managed separately from
other subsets of the same material
Example Different production lots (such as paints dyes wallpapers and
pharmaceutical products) delivery lots quality grades of a material
Batch management requirement indicator Specifies whether the material is
managed in batches
Use
This indicator can be set in the material master record manually or if batches
are valuated individually it is set automatically for the plants concerned in
which case it cannot be changed
The indicator cannot be changed if stocks exist in either the current period or in
the previous period The reason for checking the previous period is because
stocks can be posted to this period when goods movements are entered
AUOTOMATIC ACCOUNT DETERMINATION OR ASSIGNMENT
AUOTOMATIC ACCOUNT DETERMINATION OR ASSIGNMENT Whenever there is goods movement accounting documents financial accounts
updated automatically so we do some settings in customization is called
automatic account assignment
It works with three important factors -
bull Chart of accounts
bull Material type
bull Valuation grouping code
Chart of accounts - It is a group of accounts (GL Accounts) which is assigned
to our company code One company code is assigned to one chart of account
but one chart of account can be maintained for n number of company codes
Valuation grouping code valuation modification - It is a 4-digit code
which is assigned to company code along with valuation area (Plant)
Account category reference - It is a 4-digit code that establishes relationship
between material types and valuation class One account cat ref assigned to n
number of material type and valuation class
Transaction Event key - It is an internal processing key that facilitates the
automatic account determination for the various material and invoice posting
Use - Key to determine the account in which a posting line is generated (at
least two transaction event keys are involved in each posting)
Value String - It indicates the posting rule that always contain same account
assignment char to certain transaction event key
Account Modifier - It is a subdivision of transaction event key in which GL
account is linked during the process of automatic account determination
Valuation class and material type is assigned to it
Steps -
1 Activate valuation Group code
2 Assign Valuation area to valuation grouping code
3 Create Account Cat Ref and valuation class
4 Assign valuation class to Account Cat Ref
5 Assign Account Cat Ref to Material type
6 Assign account grouping to movement types
7 Configure Automatic posting
Customize settings -
SPRO 1048774 IMG 1048774 MM 1048774 Valuation Class and Account Assignment 1048774 Account
Determination 1048774 Account determination without wizard
1 Define valuation control T Code OMWM
2 Group together valuation areas T Code OMWD
3 Define valuation class T Code OMSK
bull Account category reference
bull Valuation class
bull Material type Account Cat Ref
4 Define Account grouping for movement type T Code OMWN
5 Configure automatic posting T Code OMWB
Transaction Event Keyrsquos
BSX - Stock Posting Inventory Posting
PRD - Price difference
GBB - Offsetting entry for stock posting
WRX - GRIR Clearing
FRI - Freight Clearing
Automatic PURCHASE ORDER (PO) How Automatic PO raised
How Automatic PO raised
At fixed time say 1230 AM automatic scheduler runs and checks whether the
stock is less than or equal to the replenishment point If stock is less than or
equal to Repli Point than PR raised automatically to Purchasing Deptt
bull Activate the option automatic PO in purchasing view in material master record
bull Activate the option automatic PO in purchasing data view in vendor master
record
bull Maintain Source List amp select fixed vendor
bull PR crated automatically
bull Automatic creation of PO from PR ndash ME59
Enter the Purchasing group purchasing organization Vendor Plant and
Purchasing Requisition Document Number 1048774 Execute
Material Master Related Important Terms (Part 1)
Material Group
Key that you use to group together several materials or services with the same
attributes and to assign them to a particular material group
Use You can use material groups to
bull Restrict the scope of analyses
bull Search specifically for material master records via search helps
Purchasing Group
Key for a buyer or a group of buyers who isare responsible for certain
purchasing activities
Use
bull Internally the purchasing group is responsible for the procurement of a
material or a class of materials
bull Externally it is the medium through which contacts with the vendor are
maintained
Purchasing Value Key
Key defining the reminder days and tolerance limits valid as well as the
shipping instructions and order acknowledgment requirement of the material for
Purchasing
Procedure If you have chosen a purchasing value key the system enters the
values defined in Customizing (for Purchasing) in the fields
Batch Batches (LO-BM)
A subset of the total quantity of a material in stock managed separately from
other subsets of the same material
Example Different production lots (such as paints dyes wallpapers and
pharmaceutical products) delivery lots quality grades of a material
Batch management requirement indicator Specifies whether the material is
managed in batches
Use
This indicator can be set in the material master record manually or if batches
are valuated individually it is set automatically for the plants concerned in
which case it cannot be changed
The indicator cannot be changed if stocks exist in either the current period or in
the previous period The reason for checking the previous period is because
stocks can be posted to this period when goods movements are entered
CIN - Country India Version ~ Volume 1
PurposeCountry Version India (CIN) contains a number of enhancements to standard
Sales and Distribution (SD) functions that allow you to handle local
requirements in particular excise duty
Features
In Country Version India (CIN) this component handles sales processes as
found in India In addition to the generic functions it allows you to
Handle CENVAT in your sales processes
The system calculates excise on your sales and creates excise invoices as
required and makes the appropriate postings to your CENVAT accounts
It covers sales from factories sales from depots and offers functions for other
types of goods movements it also covers sales to export-oriented units and
export sales
Record concessional and exemption forms sent to you by your customers
Make adjustment postings to your CENVAT accounts
Excise Invoice (Outgoing)
Definition
The document that acts as the proof of payment of excise duty and is required
for the customer to take CENVAT credit on the item
Use
In the SAP System there are three different procedures for creating excise
invoices
Sales direct from the factory
This procedure is for when you sell manufactured goods straight from the
factory at which they were produced in which case you levy excise duty when
the goods leave the factory on their way to the customer
If when you send the goods to the customer you enclose the commercial
invoice you create the excise invoice with reference to the commercial invoice
If you want to send the commercial invoice after you have dispatched the goods
however you create the excise invoice with reference to a pro forma
commercial invoice For more information about these procedures see Sales
from Factories
As well as creating excise invoices individually you can also create them in
batches (see Creation of Excise Invoices in Batches)
Sales from depots
A depot is a site at which the goods are stored away from the factory at which
they were produced In this procedure you have to levy the excise duty when
you transfer the goods from the factory to the depot and then make sure this is
passed on to the customer when it makes a purchase For more information see
Sales from Depots
Sales (other goods movements)
Some other goods movements may also require you to create an excise invoice
with reference to other documents The SAP System offers separate functions
for these purposes (see Excise Invoices (Outgoing) for Other Movements)
StructureNumbering of Excise Invoices
Outgoing excise invoices have two numbers an internal document number
which is assigned immediately you create an excise invoice and an excise
invoice number which is not assigned until you have verified and posted it
As far as the excise invoice number is concerned you have to number your
outgoing excise invoices in sequential order starting each year on 1 April You
must notify the excise authority of the jurisdiction of the invoicing location The
serial number must be printed on each page of the excise invoice
Each number range is governed by a series group You must create at least one
series group in order to be able to number the excise invoices If you need more
than one number range you must create the corresponding number of series
groups You do so in the CIN Implementation Guide (IMG) by choosing Global
Settings reg Series Groups
Number of Line Items Per Excise Invoice
Some states allow you to include only a limited number of items for each page
of an excise invoice (for example if the excise invoices are to be printed on
prenumbered forms) You can customize the system so that it prints the excise
invoice accordingly in the CIN IMG by choosing Global Settings reg Excise
Registration IDs
Customer Master (Excise Data) Definition
The part of the customer master record that contains information relating to
Indian excise duty
Use
In conjunction with other data this data is used to calculate excise duty on
various transactions
To maintain the data from the SAP Easy Access screen choose Indirect Taxes reg
Master Data reg Excise Rate Maintenance and then select the following options
described below
Structure
The excise part of the customer master contains the following information
Customer Excise Details
On this screen you enter your customers tax registration numbers which are
used for various forms of correspondence and reports
1 Excise registration number (and the range division and collectorate in which
this is located)
2 Central sales tax (CST) number
3 Local sales tax (LST) registration number
4 Permanent account number (PAN)
In order for the system to be able to calculate which rate of excise duty to apply
on sales to the customer you must also assign it a customer excise duty status
(for more information about how this works see Determination of Excise Duty
Rates)
Excise Indicator for Plant and Customer
On this screen you define the final excise duty indicator (for more information
about how this works see Determination of Excise Duty Rates)
Determination of Excise Duty Use
When you execute a business transaction involving materials that are subject to
excise duty the system automatically calculates the duty for you
Prerequisites
In order for the system to be able to determine which rate of excise duty to
apply you must have maintained all the data on the Excise Rate Maintenance
screen which you can access from the SAP Easy Access screen by choosing
Indirect Taxes reg Master Data reg Excise Rate Maintenance
You maintain the following types of data
Plant master data
You assign each of your plants an excise duty indicator You can use the same
indicator for all the plants with the same excise status from a legal point of view
such as all those that are in an exempt zone
See also the information about manufacturers that are only entitled to deduct a
certain portion of the duty (see Partial CENVAT Credit)
Vendor master data
For each of your vendors with the same excise status from a legal perspective
you define an excise duty indicator You must also specify the vendor type ndash for
example whether the vendor is a manufacturer a depot or a first-stage dealer
You must also stipulate if the vendor qualifies as a small-scale industry
For each permutation of plant indicator and vendor indicator you then create a
final excise duty indicator
Customer master data
Similarly you assign the same excise duty indicator to each of your customers
that share the same legal excise status
Again for each permutation of plant indicator and customer indicator you then
create a final excise duty indicator
Material master data
Each material is assigned a chapter ID
Excise tax rate
For every chapter ID and final excise duty indicator you maintain the rate of
excise duty
If your business only qualifies for partial CENVAT credit you must customize
your system accordingly
Activities
Let us consider an example to illustrate how the system determines which rate
of excise duty to apply to a material Assume you are posting a sale of ball
bearings to a customer The system automatically determines the rate of excise
duty as follows
Looks up the customer master data to see what status you have assigned the
customer
Lets assume youve assigned the customer status 3
Looks up the plant master data to see what status you have assigned the plant
Similarly your plant has status 2
The system looks up the table under Excise Indicator for Plant and Customer to
see what the final excise duty indictor is for customer status 3 and plant status
2 It is 7
The system determines the chapter ID of the ball bearing for the plant
Letrsquos assume the chapter ID at plant for the ball bearings is 100001
Finally the system looks up the table under Excise Tax Rate to see what rate of
duty applies to chapter ID 100001 under status 7
Plant Master (Excise Data) Definition
The part of the plant master record that contains information relating to Indian
excise duty
Use
In conjunction with other data this data is used to calculate excise duty on
various transactions
To maintain the data from the SAP Easy Access screen choose Indirect Taxes reg
Master Data reg Excise Rate Maintenance and then select the following options
described below
Structure
The excise part of the plant master is divided into the following screens
Excise Indicator for Plant
On this screen you enter your plants tax registration numbers which are used
for various forms of correspondence and reports
1 Central sales tax (CST) number
2 Local sales tax (LST) registration number
3 Permanent account number (PAN)
In order for the system to be able to calculate which rate of excise duty to apply
on purchases for this plant you must also assign it a plant excise duty status
(for more information about how this works see Determination of Excise Duty
Rates)
Excise Indicator for Plant and Vendor
On this screen you define the final excise duty indicator (for more information
about how this works see Determination of Excise Duty Rates)
Excise Indicator for Plant and Customer
On this screen you define the final excise duty indicator (for more information
about how this works see Determination of Excise Duty Rates)
Automatic Creation of Excise Invoices Use
The SAP System can automatically create an outgoing excise invoice for you
immediately you post a commercial invoice (or a pro forma invoice) for a
customer sale This function applies to excise invoices for sales from factories
only
Prerequisites
To activate this function in the Country Version India (CIN) Implementation
Guide (IMG) make the following settings
1 Under Global Settings reg Excise Groups select Create EI
This activates the automatic creation function
2 Under Sales and Distribution reg Utilization Determination
Here you specify which CENVAT accounts the system is to post the different
types of excise duty to
3 Under Sales and Distribution reg Excise GroupndashSeries Group Determination
Here you specify which excise group and series group the excise invoices are to
be created for
Features
When you post an invoice the system creates an excise invoice All the
information that it needs to create the excise invoice is provided either by the
invoice or by the Customizing settings that you have made in Sales and
Distribution It also determines the excise invoice type automatically by means
of a user exit
Creating Excise Invoices for Stock Transfers 1 From the SAP Easy Access screen choose Indirect Taxes reg Procurement reg
Excise Invoice reg For Depot reg CreateChangeDisplay
2 In the Material document field enter the goods receipt number and choose
The system displays the information from the goods receipt for example the
sending plant the excise registration the range the division and the
collectorate
3 Choose Details
The system copies the items from the goods receipt document In the depot it is
possible to have a separate excise invoice at line item level
4 Enter the internal document number of the excise invoice sent by the factory
5 Choose More documents to go the excise invoice details screen
6 Enter the internal document number of the excise invoice from the factory
The system copies the information to the line item (for example the excise
invoice number the excise invoice date the item number the chapter ID the
excise invoice quantity the amount of excise duty paid the excise base value
and the serial number of the Part II register entry with which the excise was
paid)
You can change the receipt quantity to match the actual quantity received at
the depot if necessary The system automatically adjusts the excise
accordingly
7 Go back to the item details screen
8 Save the excise invoice
Creating Excise Invoices for Direct Purchases 1 From the SAP Easy Access screen choose Indirect Taxes reg Procurement reg
Excise Invoice reg For Depot reg CreateChangeDisplay
2 In the Material document field enter the goods receipt number and choose
The system displays the information from the goods receipt for example the
sending plant the excise registration the range the division and the
collectorate
You can also maintain the excise registration details for the ship-from party as
for with the vendor The ship-from can be different from the vendor code (The
delivering plant can be maintained as a ship-from in the system When a valid
ship-from is entered the excise registration details copied from the vendor will
be overwritten by the ship-from excise registration details)
The ship-from registration details displayed can also be overwritten manually
The dealers commercial invoice number can be stored in the vendor excise
invoice number as in this case the dealer himself will not have an excise
invoice
3 Choose Details
The system copies the items from the goods receipt document It also copies the
vendors excise invoice number and the serial numbers of the entries in the RG
23A RG 23C and personal ledger account (PLA) registers
4 Enter the internal document number of the excise invoice sent by the factory
5 Select an item and choose More documents to go the excise invoice details
screen
In the case of direct purchases there will not be any excise invoice in the
system so leave the internal document field blank The vendors invoice will
show the details of the excise invoices through which excise has been paid for
the item that is being dispatched You can enter these details here
6 For each item the chapter ID excise base value and excise duty amounts
are defaulted from the purchase order You can change them if there is any
difference Enter the excise amount paid and the receipt quantity You also
enter the Part II register serial numbers with which the excise duty was paid and
the excise registration information from the original excise invoice
7 Go back to the item details screen
8 Save the excise invoice
The system creates an entry in register RG 23D You can change the excise
invoice as long as it has not been used in any sales
Assigning Excise Invoices to a Delivery Use
You follow this procedure to specify which excise invoices are to be assigned to
a delivery from a depot (or other material document)
You can also automate this procedure using the batch selection program
(J_1IJCHK) by making the appropriate Customizing settings in the Country
Version India (CIN) Implementation Guide (IMG)
Procedure
1 From the SAP Easy Access screen choose Indirect Taxes reg SalesOutbound
Movements reg Excise Invoice reg For Depot reg CreateChangeDisplay reg Delivery
or Material Document reg RG 23D Selection
2 Enter the delivery document number or the material number and choose
3 Select the excise invoice you want
4 Choose
5 Choose Excise invoice
A list of excise invoices appears These are the excise invoices at the depot with
a balance quantity
The system also shows a list of the A certificates that can be used You can pick
up any of the A certificates but they must be for the same excise invoice You
can only pick up an A certificate in its entirety You cannot select part of an A
certificate
6 Select the excise invoices that are relevant to the delivery
7 Specify what quantity to be used from each excise invoice
The system recalculates the excise accordingly
8 Go back to the item details screen
9 Save the data
Result
The system creates an entry in register RG 23D and generates the depot excise
invoice numbers
If you selected any A certificates the system also generates additional entries in
the RG 23D register The system marks the original A certificates as updated so
that they cannot be used for any other removals
CIN - Country India Version ~ Vol 2
Continue Volume 1
Creating Excise Invoices
Use
This is the procedure that you follow to create an excise invoice for the less
common types of goods movement
Procedure
1 From the SAP Easy Access screen choose Indirect Taxes reg SalesOutbound
Movements reg Excise Invoice reg For Other Movements reg CreateChangeDisplay
reg
2 On the selection screen enter data as required including
(i)Reference
group box
Specify which document you want to create the excise invoice for and which
excise group it is for
(ii)Details
group box
Specify the vendor or customer that you are sending the invoice to
3 Choose
If you entered an internal document number the system copies the item details
from it
4 Choose
5 Enter line items for each of the materials to be included in the excise invoice
For each item enter the following data
(i)Material
(ii)Quantity
(iii)Unit of measure
(iv)Base value
(v)Excise duty
6 To pick the rate and amount from a specific excise invoice choose Get excise
invoice
7 Save the excise invoice
If you are using the one-step procedure the system creates and posts an excise
invoice Otherwise the system saves the information but does not make any
postings it now has to be verified
Verifying and Posting Excise Invoices
Use
You follow this procedure to verify that the information in an excise invoice that
has already been created and to post it once you are satisfied
Procedure
From the SAP Easy Access screen choose Indirect Taxes reg SalesOutbound
Movements reg Excise Invoice reg For Other Movements reg Posting
1 Enter the internal document number of the excise invoice
2 Choose Release to accounting
The system displays the excise invoice The excise duty that is to be posted is
displayed at the foot of the screen which you can change if necessary
3 To access the balance utilization choose
4 To display the balance available on the CENVAT accounts choose Account
balances
5 Save the excise invoice
The system generates the accounting documents
6 To print the excise invoice choose
Making a Transfer Posting
Use
In this procedure you make a transfer posting for the goods ordered by another
plant For more information about this function see Entering the Removal from
Storage at the Issuing Plant
Procedure
1 From the SAP Easy Access screen choose Logistics reg Materials Management
reg Inventory Management reg Goods Movement reg Transfer Posting
2 Choose Movement type reg Transfer posting reg Plant to plant reg To stock in
transit
3 Enter the number of the issuing plant and storage location
4 Choose To purchase order
5 In the dialog box enter the number of the stock transport order that the
receiving plant created and choose
6 Check the data
7 Save the transfer posting
Transaction Codes for India
Transaction Action
J1I2 Prepare a sales tax register
J1I3 Create outgoing excise invoices in batches
J1I5
Update the RG 1 and Part I registers
J1I8
Post the challan used to remit TDS
J1IC194C
Create annual return under section 194 C (Classic TDS)
J1IC194D
Create annual return under section 194 D (Classic TDS)
J1IC194I
Create annual return under section 194 I (Classic TDS)
J1IC194J
Create annual return under section 194 J (Classic TDS)
J1IEX
Incoming Excise Invoices (central transaction)
J1IEX_C
Capture an incoming excise invoice (excise clerk)
J1IEX_P
Post an incoming excise invoice (excise supervisor)
J1INBANK
Post a bank challan
J1INCANC
Cancel a vendor withholding tax certificate
J1INCERT
Print a vendor withholding tax certificate
J1INCHLN
Create a remittance challan
J1INCUST
Post a customer withholding tax certificate
J1INHC
Withholding Tax Migration Health Check Program
J1INMIG
Withholding Tax Data Migration Tool
JI1NCHLC
Create a remittance challan for customers
J1INCC
Print customer withholding tax certificates
J1INMIS
Withholding Tax Information System
JI1NAR
Prepare annual returns (Extended Withholding Tax)
J1IF01
Create a subcontracting challan
J1IF11
Change a subcontracting challan
J1IF12
Display a subcontracting challan
J1IF13
Complete reverse or recredit a subcontracting challan
J1IFQ
Reconcile quantities for subcontracting challans
J1IFR
List subcontracting challans
J1IH
Make a CENVAT adjustment posting
J1IIN
Create an outgoing excise invoice
J1IJ
Assign excise invoices to a delivery for sales from depots
J1INJV
Adjust withholding tax Item
J1INREP
Reprint a vendor withholding tax certificate
J1INREV
Reverse a remittance challan
J1INPR
Calculate withholding tax on clearing accounts
J1INUT
Clear withholding tax on clearing accounts
J1IR
Download register data
J1IS
Process an excise invoice (outgoing) for other movements
J1IU
Process exemption forms
J1IW
Verify and post an incoming excise invoice
J1IX
Create an incoming excise invoice (without reference to purchase order)
J2I8
Transfer excise duty to CENVAT account
J2ID
Archive tax deducted at source (TDS) documents
J2IE
Locate tax deducted at source documents in archive
J2IU
Remit excise duty fortnightly
J2I9
Monthly CENVAT return
J1IG
Excise invoice entry at depot
J1IGA
Create additional excise entry at depot
J2I5
Extract data for excise registers
J2I6
Print excise registers
Sales from Factories
Purpose
This process describes how the SAP System handles the sales process allowing
for the creation of excise invoices which you have to send with each delivery
that is subject to excise duty There are two scenarios depending on whether
you want to send the commercial invoice along with the delivery or at a later
date
Prerequisites
In order for the system to be able to copy the information from document to
document you must have set up the copying control procedures in Customizing
for Sales and Distribution (SD) This differs according to when you want to send
the commercial invoice
1 Along with the delivery
In this case the document flow would be OR (standard sales order type) ndash LF
(standard delivery type) ndash F2 (invoice)
2 At a later date
The document flow would be OR ndash JF (delivery type a copy of LF) ndash JEX (pro
forma billing document type a copy of document type F8) ndash F2
In addition you must also have maintained the settings in the Country Version
India (CIN) Implementation Guide (IMG) by choosing Global Settings reg Assign
Excise Invoice Billing Type to Delivery Type
A sample pricing procedure JFACT is provided for this sales procedure
Process Flow
1 The sales clerk creates a sales order following the
(i)standard procedure
There are special procedures for
(i)Customers in possession of exemption forms
(ii)Exports
2 The shipping clerk creates a delivery again following the
standard procedure
On the initial screen you set the appropriate delivery type (see above)
3 In the warehouse the storeperson issues the goods
The system only allows users to create a pro forma excise invoice if the delivery
is complete so as to prevent them from creating multiple pro forma excise
invoices
4 What you do at this stage depends on whether you want to send the
commercial invoice along with the delivery or whether you want to invoice the
customer later
(A) If the invoice is to be shipped with delivery the shipping clerk
(i)Creates an invoice following the standard procedure
(ii)Creates an excise invoice from the invoice
(B) If the invoice is to be sent on at a later date the shipping clerk
(i)Creates the pro forma excise invoice
The pro forma excise invoice is only required for technical purposes and is not
sent to the customer The system does not make any accounting postings at this
stage
(ii)Creates
an excise invoice from the pro forma excise invoice
In both these cases the system creates an accounting document to post the
excise duty to a clearing account
Instead of creating excise invoices manually you can also have the system
create them automatically Alternatively you can create them in batches
5 You ship the goods
6 When the time comes to invoice the customer you create the invoice
following the standard procedure
Irrespective of the number of excise invoices that you have issued you can
combine the delivery items in a single invoice (if the standard requirements are
met)
Sales from Depots
Purpose
You may sell finished goods directly from the place of manufacture as described
under Sales from Factories or you may first ship them to a separate location for
storage (a depot) from where you will sell them The second procedure is
described here
Sales from depots are handled differently from sales from factories because of
excise law Excise duty is payable when you send the goods from the factory to
the depot but it is not levied again when you sell the goods
Sometimes when you make a final sale of goods from a depot price escalations
could have happened with retrospective effect In such scenarios you need to
pay the extra excise duty at the factory using an A Certificate You need to
register the A certificate details in the RG 23D register and the excise recovered
from the customer
Prerequisites
You have customized
1 Stock transport processing in Customizing for Materials Management (MM)
by choosing Purchasing reg Purchase Order reg Set Up Stock Transport Order
2 The copying control for copying stock transport order NL to excise invoice JEX
You make this setting in the Country Version India (CIN) Implementation Guide
(IMG) by choosing Sales and Distribution reg Assign Excise Invoice Billing Type to
Delivery Type
3 The item category NLN (standard transport order) so that it is relevant for
billing
You do this in the standard IMG in Customizing for Sales and Distribution (SD)
by choosing Sales reg Sales Documents reg Sales Document Item
Process Flow
1 You create the sales order following the
standard procedure
The standard pricing procedure for depot sales is JDEPOT
2 You create the delivery again following the
standard procedure
3 You
assign excise invoices to the delivery or material document
4 You
verify that you have selected the correct excise invoices and post them
Alternatively if you have selected the wrong excise invoices you can cancel the
assignment
5 You create the invoice following the standard procedure
SPECIAL STOCKS amp SPECIAL PROCUREMENT TYPES
Special Stocks are those stocks which are not belongs to our company code
These are not placed in our storage locations amp no physical inventory is
performed and treated as special stocks for the reason of ownership
Different types are of Special Stocks are as follows
1 Subcontracting
2 Consignment
3 Pipeline
4 Stock transfer
5 Third party
6 Returnable transport packaging
7 Sales order stock
8 Project stock
SUBCONTRACTING
In subcontracting process we create subcontracting PO to supply or issue
subcomponents to vendor in order to get final product The price maintained in
subcontracting PO is a service charge paid to vendor
Steps to perform subcontracting
1 Create subcontracting inforecord (Optional)
2 Create subcontracting PO with item category L
There are to ways to supply subcomponents to vendor
bull Manually maintain the subcomponents in the subcontracting
PO though explode BOM
bull Through BOM (Bill of material) T Code CS01 CS02 amp CS03
3 Create Transfer Posting with Movement Type 541 to issue the subcomponents
to the vendor
4 Goods Reciept
5 Invoice Reciept
Path ME21N ---gt Enter Item Category L --gt Material (End Product) PO
Quantity Delivery Date Net Price Plant --gt Click on Item Details --gt Tab
Material Data -- gtComponents select Explode BOM --gt Click on Components
button --gt Enter the subcomponents --gt Go back amp Save
Create Transfer Posting with movement type 541 amp T Code MB1B
GR MIGO
IR MIRO
CONSIGNMENT - (No Concept of Invoice)
In consignment process we will not create Purchasing document for the vendor
vendor himself send the material to our plant though the material is available
to our plant the responsibility amp ownership of the material is of vendor Aliability
only arises when the material withdrawal (Consumption) is posted in the system
from consignment stock
Steps
1 Create Consignment info record (mandatory)
2 Create Consignment purchase order with item category lsquoKrsquo amp maintain Info
record number
3 Create GR Movement type lsquo101Krsquo
4 Create GI Movement Type lsquo201Krsquo
5 Consignment settlement T Code MRKO
Path --gtME11 --gt In info record --gt Purchasing Org Data 1 views of info record
enter the tax code and save it
--gt Create Consignment Purchase Order ME21N (Price option is grayed out with
price zero)
--gt Create GR with movement type 101K
--gt Create Goods Issue (GI) T Code MB1A amp Movement Type 201K Enter Cost
center vendor
--gt Consignment Settlement T Code MRKO Click Activate Consignment Activate
Settle Execute
--gt Display the Document Number ie Invoice receipt T Code FB03
PIPELINE PROCESS (No Concept of Invoice)
In pipeline handling your company does not need to order or store the material
concerned It is ready available to you as and when required via pipeline (eg oil
or water) or some other type of cable (eg electricity) Consumption of the
material is settled with the vendor on a regular basis
Steps
1 Create a Material master record with material type PIPE
2 Create Pipeline info record
3 Create GI with movement type 201P
4 Pipeline settlement T Code MRKO
RETURNABLE TRANSPORT PACKAGING (RTP)
When company orders goods from a vendor the goods are delivered with
returnable transport packaging (pallets containers) that belongs to the vendor
and is stored on our premises until you return it to the vendor
Steps
1 Create Material master record with material type LEIH
2 Create PO
3 Create GR by maintaining RTP material by selecting the option transport
equipments with movement type 501M
4 IR
STOCK TRANSFER
In stock transfer processing goods are procured and supplied within a company
One plant orders the goods internally to another plant (receiving plantissuing
plant) The goods are procured with a special type of purchase order the stock
transport order
Steps
1 Create a Material master in both supplying and receiving plant
2 Create stock transport order (STO) with item category lsquoUrsquo
3 Create transfer posting with movement type 351 amp T Code MB1B (Go to
MMBE stock overview the stock will decrease in supplying plant and it will not
update stock of receiving plant it will be under stock in transit)
4 Create GR stock will update in receiving plant
This scenario is under one company code between two plants
Material Master Related Important Terms (Part 2)
Controlling (CO) An organizational unit in Accounting that reflects a
management-oriented structure of the organization for the purpose of internal
control
Operating results for profit centers can be analyzed using either the cost of
sales approach or the period accounting approach
By analyzing the fixed capital as well you can expand your profit centers for use
as investment centers
Profit Center
Key that uniquely identifies the profit center in the current controlling area
Valuation Category
Determines whether stocks of the material are valuated together or separately
Dependencies
In the case of split valuation this indicator also determines which valuation
types are allowed that is the criteria by which stocks can be valuated
Valuation type
Invoice Verification (MM-IV)
A subdivision of a valuation category in split valuation
Example An enterprise manages its stocks of a material using the valuation
category Quality comprising the following valuation types
bull High quality Average quality Inferior
Hazardous material number
Number that identifies the material as a hazardous material or as dangerous
goods and assigns hazardous material data or dangerous goods data to it
Use The hazardous material number indicates that the material is dangerous
making special precautions necessary for its storage and shipment
Valuation Class
Assignment of a material to a group of GL accounts
With other factors the valuation class determines the GL accounts that are
updated as a result of a valuation-relevant transaction or event such as a goods
movement
The valuation class makes it possible to
bull Post the stock values of materials of the same material type to different GL
accounts
bull Post the stock values of materials of different material types to the same GL
account
Default value for the valuation class for valuated stocks of this material
Use The valuation class has the following functions
bull Allows the stock values of materials of the same material type to be posted to
different GL accounts
bull Allows the stock values of materials of different material types to be posted to
the same GL account
bull Determines together with other factors the GL accounts updated for a
valuation-relevant transaction (such as a goods movement
CIN - Country India Version ~ Volume 1
PurposeCountry Version India (CIN) contains a number of enhancements to standard
Sales and Distribution (SD) functions that allow you to handle local
requirements in particular excise duty
Features
In Country Version India (CIN) this component handles sales processes as
found in India In addition to the generic functions it allows you to
Handle CENVAT in your sales processes
The system calculates excise on your sales and creates excise invoices as
required and makes the appropriate postings to your CENVAT accounts
It covers sales from factories sales from depots and offers functions for other
types of goods movements it also covers sales to export-oriented units and
export sales
Record concessional and exemption forms sent to you by your customers
Make adjustment postings to your CENVAT accounts
Excise Invoice (Outgoing)
Definition
The document that acts as the proof of payment of excise duty and is required
for the customer to take CENVAT credit on the item
Use
In the SAP System there are three different procedures for creating excise
invoices
Sales direct from the factory
This procedure is for when you sell manufactured goods straight from the
factory at which they were produced in which case you levy excise duty when
the goods leave the factory on their way to the customer
If when you send the goods to the customer you enclose the commercial
invoice you create the excise invoice with reference to the commercial invoice
If you want to send the commercial invoice after you have dispatched the goods
however you create the excise invoice with reference to a pro forma
commercial invoice For more information about these procedures see Sales
from Factories
As well as creating excise invoices individually you can also create them in
batches (see Creation of Excise Invoices in Batches)
Sales from depots
A depot is a site at which the goods are stored away from the factory at which
they were produced In this procedure you have to levy the excise duty when
you transfer the goods from the factory to the depot and then make sure this is
passed on to the customer when it makes a purchase For more information see
Sales from Depots
Sales (other goods movements)
Some other goods movements may also require you to create an excise invoice
with reference to other documents The SAP System offers separate functions
for these purposes (see Excise Invoices (Outgoing) for Other Movements)
StructureNumbering of Excise Invoices
Outgoing excise invoices have two numbers an internal document number
which is assigned immediately you create an excise invoice and an excise
invoice number which is not assigned until you have verified and posted it
As far as the excise invoice number is concerned you have to number your
outgoing excise invoices in sequential order starting each year on 1 April You
must notify the excise authority of the jurisdiction of the invoicing location The
serial number must be printed on each page of the excise invoice
Each number range is governed by a series group You must create at least one
series group in order to be able to number the excise invoices If you need more
than one number range you must create the corresponding number of series
groups You do so in the CIN Implementation Guide (IMG) by choosing Global
Settings reg Series Groups
Number of Line Items Per Excise Invoice
Some states allow you to include only a limited number of items for each page
of an excise invoice (for example if the excise invoices are to be printed on
prenumbered forms) You can customize the system so that it prints the excise
invoice accordingly in the CIN IMG by choosing Global Settings reg Excise
Registration IDs
Customer Master (Excise Data) Definition
The part of the customer master record that contains information relating to
Indian excise duty
Use
In conjunction with other data this data is used to calculate excise duty on
various transactions
To maintain the data from the SAP Easy Access screen choose Indirect Taxes reg
Master Data reg Excise Rate Maintenance and then select the following options
described below
Structure
The excise part of the customer master contains the following information
Customer Excise Details
On this screen you enter your customers tax registration numbers which are
used for various forms of correspondence and reports
1 Excise registration number (and the range division and collectorate in which
this is located)
2 Central sales tax (CST) number
3 Local sales tax (LST) registration number
4 Permanent account number (PAN)
In order for the system to be able to calculate which rate of excise duty to apply
on sales to the customer you must also assign it a customer excise duty status
(for more information about how this works see Determination of Excise Duty
Rates)
Excise Indicator for Plant and Customer
On this screen you define the final excise duty indicator (for more information
about how this works see Determination of Excise Duty Rates)
Determination of Excise Duty Use
When you execute a business transaction involving materials that are subject to
excise duty the system automatically calculates the duty for you
Prerequisites
In order for the system to be able to determine which rate of excise duty to
apply you must have maintained all the data on the Excise Rate Maintenance
screen which you can access from the SAP Easy Access screen by choosing
Indirect Taxes reg Master Data reg Excise Rate Maintenance
You maintain the following types of data
Plant master data
You assign each of your plants an excise duty indicator You can use the same
indicator for all the plants with the same excise status from a legal point of view
such as all those that are in an exempt zone
See also the information about manufacturers that are only entitled to deduct a
certain portion of the duty (see Partial CENVAT Credit)
Vendor master data
For each of your vendors with the same excise status from a legal perspective
you define an excise duty indicator You must also specify the vendor type ndash for
example whether the vendor is a manufacturer a depot or a first-stage dealer
You must also stipulate if the vendor qualifies as a small-scale industry
For each permutation of plant indicator and vendor indicator you then create a
final excise duty indicator
Customer master data
Similarly you assign the same excise duty indicator to each of your customers
that share the same legal excise status
Again for each permutation of plant indicator and customer indicator you then
create a final excise duty indicator
Material master data
Each material is assigned a chapter ID
Excise tax rate
For every chapter ID and final excise duty indicator you maintain the rate of
excise duty
If your business only qualifies for partial CENVAT credit you must customize
your system accordingly
Activities
Let us consider an example to illustrate how the system determines which rate
of excise duty to apply to a material Assume you are posting a sale of ball
bearings to a customer The system automatically determines the rate of excise
duty as follows
Looks up the customer master data to see what status you have assigned the
customer
Lets assume youve assigned the customer status 3
Looks up the plant master data to see what status you have assigned the plant
Similarly your plant has status 2
The system looks up the table under Excise Indicator for Plant and Customer to
see what the final excise duty indictor is for customer status 3 and plant status
2 It is 7
The system determines the chapter ID of the ball bearing for the plant
Letrsquos assume the chapter ID at plant for the ball bearings is 100001
Finally the system looks up the table under Excise Tax Rate to see what rate of
duty applies to chapter ID 100001 under status 7
Plant Master (Excise Data) Definition
The part of the plant master record that contains information relating to Indian
excise duty
Use
In conjunction with other data this data is used to calculate excise duty on
various transactions
To maintain the data from the SAP Easy Access screen choose Indirect Taxes reg
Master Data reg Excise Rate Maintenance and then select the following options
described below
Structure
The excise part of the plant master is divided into the following screens
Excise Indicator for Plant
On this screen you enter your plants tax registration numbers which are used
for various forms of correspondence and reports
1 Central sales tax (CST) number
2 Local sales tax (LST) registration number
3 Permanent account number (PAN)
In order for the system to be able to calculate which rate of excise duty to apply
on purchases for this plant you must also assign it a plant excise duty status
(for more information about how this works see Determination of Excise Duty
Rates)
Excise Indicator for Plant and Vendor
On this screen you define the final excise duty indicator (for more information
about how this works see Determination of Excise Duty Rates)
Excise Indicator for Plant and Customer
On this screen you define the final excise duty indicator (for more information
about how this works see Determination of Excise Duty Rates)
Automatic Creation of Excise Invoices Use
The SAP System can automatically create an outgoing excise invoice for you
immediately you post a commercial invoice (or a pro forma invoice) for a
customer sale This function applies to excise invoices for sales from factories
only
Prerequisites
To activate this function in the Country Version India (CIN) Implementation
Guide (IMG) make the following settings
1 Under Global Settings reg Excise Groups select Create EI
This activates the automatic creation function
2 Under Sales and Distribution reg Utilization Determination
Here you specify which CENVAT accounts the system is to post the different
types of excise duty to
3 Under Sales and Distribution reg Excise GroupndashSeries Group Determination
Here you specify which excise group and series group the excise invoices are to
be created for
Features
When you post an invoice the system creates an excise invoice All the
information that it needs to create the excise invoice is provided either by the
invoice or by the Customizing settings that you have made in Sales and
Distribution It also determines the excise invoice type automatically by means
of a user exit
Creating Excise Invoices for Stock Transfers 1 From the SAP Easy Access screen choose Indirect Taxes reg Procurement reg
Excise Invoice reg For Depot reg CreateChangeDisplay
2 In the Material document field enter the goods receipt number and choose
The system displays the information from the goods receipt for example the
sending plant the excise registration the range the division and the
collectorate
3 Choose Details
The system copies the items from the goods receipt document In the depot it is
possible to have a separate excise invoice at line item level
4 Enter the internal document number of the excise invoice sent by the factory
5 Choose More documents to go the excise invoice details screen
6 Enter the internal document number of the excise invoice from the factory
The system copies the information to the line item (for example the excise
invoice number the excise invoice date the item number the chapter ID the
excise invoice quantity the amount of excise duty paid the excise base value
and the serial number of the Part II register entry with which the excise was
paid)
You can change the receipt quantity to match the actual quantity received at
the depot if necessary The system automatically adjusts the excise
accordingly
7 Go back to the item details screen
8 Save the excise invoice
Creating Excise Invoices for Direct Purchases 1 From the SAP Easy Access screen choose Indirect Taxes reg Procurement reg
Excise Invoice reg For Depot reg CreateChangeDisplay
2 In the Material document field enter the goods receipt number and choose
The system displays the information from the goods receipt for example the
sending plant the excise registration the range the division and the
collectorate
You can also maintain the excise registration details for the ship-from party as
for with the vendor The ship-from can be different from the vendor code (The
delivering plant can be maintained as a ship-from in the system When a valid
ship-from is entered the excise registration details copied from the vendor will
be overwritten by the ship-from excise registration details)
The ship-from registration details displayed can also be overwritten manually
The dealers commercial invoice number can be stored in the vendor excise
invoice number as in this case the dealer himself will not have an excise
invoice
3 Choose Details
The system copies the items from the goods receipt document It also copies the
vendors excise invoice number and the serial numbers of the entries in the RG
23A RG 23C and personal ledger account (PLA) registers
4 Enter the internal document number of the excise invoice sent by the factory
5 Select an item and choose More documents to go the excise invoice details
screen
In the case of direct purchases there will not be any excise invoice in the
system so leave the internal document field blank The vendors invoice will
show the details of the excise invoices through which excise has been paid for
the item that is being dispatched You can enter these details here
6 For each item the chapter ID excise base value and excise duty amounts
are defaulted from the purchase order You can change them if there is any
difference Enter the excise amount paid and the receipt quantity You also
enter the Part II register serial numbers with which the excise duty was paid and
the excise registration information from the original excise invoice
7 Go back to the item details screen
8 Save the excise invoice
The system creates an entry in register RG 23D You can change the excise
invoice as long as it has not been used in any sales
Assigning Excise Invoices to a Delivery Use
You follow this procedure to specify which excise invoices are to be assigned to
a delivery from a depot (or other material document)
You can also automate this procedure using the batch selection program
(J_1IJCHK) by making the appropriate Customizing settings in the Country
Version India (CIN) Implementation Guide (IMG)
Procedure
1 From the SAP Easy Access screen choose Indirect Taxes reg SalesOutbound
Movements reg Excise Invoice reg For Depot reg CreateChangeDisplay reg Delivery
or Material Document reg RG 23D Selection
2 Enter the delivery document number or the material number and choose
3 Select the excise invoice you want
4 Choose
5 Choose Excise invoice
A list of excise invoices appears These are the excise invoices at the depot with
a balance quantity
The system also shows a list of the A certificates that can be used You can pick
up any of the A certificates but they must be for the same excise invoice You
can only pick up an A certificate in its entirety You cannot select part of an A
certificate
6 Select the excise invoices that are relevant to the delivery
7 Specify what quantity to be used from each excise invoice
The system recalculates the excise accordingly
8 Go back to the item details screen
9 Save the data
Result
The system creates an entry in register RG 23D and generates the depot excise
invoice numbers
If you selected any A certificates the system also generates additional entries in
the RG 23D register The system marks the original A certificates as updated so
that they cannot be used for any other removals
Continue see Volume 2 (Next post)
EXTERNAL SERVICE MASTER
EXTERNAL SERVICE MASTER ESM
We procure the different type of services from vendors they are-
1048774 Hardware amp software services
1048774 Construction amp transportation services
1048774 Machinery services
1048774 Annual maintenance services
1048774 Present to and breakdown service Etc
Service Procurement Cycle -
1048774 Requirement identification
1048774 Source determination
1048774 Source selection
1048774 Service master
1048774 Service PO
1048774 Service entry sheet acceptance
1048774 Invoice with respect to service entry sheet
Steps to perform services -
1 Create service master (AC03)
2 Create Service PO (ME21N) with AC Assignment category lsquoKrsquo amp Item
Category lsquoDrsquo
3 Create service entry sheet (ML81N)
4 Invoice with respect to Service Entry sheet
Customize settings
(For service category Number Ranges amp organization status for service
category)
SPRO 1048774 IMG 1048774 MM 1048774 ESM 1048774 Service Master
1048774 Define organization Status for service Categories
1048774 Define Service Category
1048774 Define Number Ranges
Define organization Status for service Categories
bull Click on New Entries
bull Org service Category
bull BDS (Basic data service is stored in service master record under this service
category)
bull CNST 1048774 Controlling Status
bull PUST 1048774 Purchasing data Status
bull SDST 1048774 Sales amp Distributed Status
bull Org status description service category 1048774 Press Enter amp Save
Define Service Category
bull Same path as above
bull Select Standard
bull Click on Copy as
bull AC reference 1048774 always takes as 0006
bull Enter amp Save
Define Number Ranges
Click on groups 1048774 Groups 1048774 Insert 1048774 select enter Number Ranges
Select the service category
Click on Element
Select Group amp Click on Element Group
Save
Create Service Master - (AC03)
Click on Create New Services
Service Number (any number) Service Category
Basic unit of measure (Hours lsquoHrsquo)
Enter
Basic Data 1048774 Master Service Group 1048774 007
Valuation class 1048774 3200 1048774 Enter 1048774 Save
To See the Service list 1048774 AC06
Create Service PO (ME21N)
AC assignment category lsquoKrsquo Item Category lsquoDrsquo
Enter the Short text Quantity Delivery date Net Price Material group Plant
Storage Location
Enter service number in Service Tab (Item Details) quantity price Enter
Account Assignment 1048774 GL Account Number eg400000
Cost Center eg 9999
Press Enter amp Save
Create Service Entry Sheet - ML81N
Select other purchase order (enter PO number) 1048774 Enter 1048774 Click on Create1048774 Enter
Short Text 1048774 Enter 1048774 Service Number 1048774 Enter ndashClick on Flag button 1048774 Save
Take Service entry Sheet Number
Go to Invoice MIRO 1048774 Enter company code 1048774 Select Service Sheet Option 1048774 Enter
Service Entry Sheet Number 1048774 save it
Physical Inventory and Inventory Management
Physical inventory Process - 1 Create Physical inventory document
T Code MI01 ndash Create single inventory document
T Code MI31 ndash Create multiple physical inventory documents
I Enter the desired fields ie material material type site storage location and
Maximum number items Documents ndash 100 etc 1048774 Press Enter
II Click on Process Session
III Select the line items and click on the process
IV System displays a dialog box select Background and click on process
Inventory document is created
2 Print Inventory Document and handed over to responsible person say
Manager
3 Enter Physical Inventory count
T Code MI04
i Enter the physical inventory document number Fiscal year count date 1048774 Press
enter
ii Enter the Material Quantity and click on post
4 Listing of difference
T Code MI20
Enter the physical inventory document number and execute system displays a
screen wherein we will be able to view the differences
5 Post the differences
T Code MI07 amp Mov Type 701 amp 702
Enter the physical inventory document number year posting date enter the
difference and post
INVENTORY MANAGEMENT Maintaining stock by value or by quantity is called inventory The total inventory
management deals with the goods movement of the material
Goods movement -
It is a process in which transaction resulting change in stocks It is further sub-
divided into three categories
1 Goods Receipt (GR)
2 Goods Issue (GI)
3 Transfer Posting (TP)
Goods Receipt (GR) - It is a goods movement in which receipt of goods is
posted for vendor or for production A GR posted in the system will leads to
increase in stock No Concept of Price or value
Goods Issue (GI) - It is goods movement in which material withdrawal is
posted for consumption or for customer A GI posted in system will leads to
decrease in stock
Stock Transfer (ST) - It is method of removal of material from one location
and transferring it to another location This process is performed between two
plants and two storage locations
Transfer Posting (TP) - It is a general term of stock transfer that changes the
stock type or stock categories The difference between transfer posting and
stock transfer is -
TP is logical stock transfer and ST is a physical stock transfer
Movement Type - It is a three-digit code which plays a role of important
control function in inventory management It acts as a central role in automatic
account determination It determines which stock account or consumption
account is updated in financial accounting
Reservation - It stores requisition created from particular cost center to
particular department for issuing the material reservation posted in the system
It leads to decrease in stock
Stock Types - The different stock types are
1 Unrestricted use stock
2 Quality inspection stock
3 Blocked stock
4 Warehouse stock
Transaction code -
1 To Create GR - MIGO
2 To Create GI - MB1A
3 For Transfer Posting - MB1B
4 To display MaterialGR document ndash MB03
5 To create reservations - MB21 MB22 MB23
6 To See Stock Overview - MMBE
7 To enter Other GR - MB1C
When GR is posted in the system
1 Material document is created - MB03
2 Accounting Document is generated - MB03
3 MMR updated - MM02 MM03
4 PO history updated - ME23N
Movement Typersquos
Movement Types under GR - 101 331333335501503505551553555
561351 (For all Mov Typersquos there is a reversal eg 101 has 102 Note No
reversal for 121)
Movement Typersquos under GI - 201 331333335551553555
Transfer Posting It is performed in three ways
1 TP BW Plant to Plant
2 TP BW Storage Location to Storage Location
3 TP BW Stock to Stock
Movement Types under TP BW Plant to Plant
301 - 1 step
303 amp 305 - 2 step
Movement Type under TP BW Storage location to Storage Location
311 - 1 step
313 amp 315 - 2 step
Movement Type under TP BW stock to stock
321 323 325 343349
To Cancel the GR Movement type 102
Return delivery to vendor movement type 122 amp T Code MIGO
Transfer Posting Stock to Stock
From Blocked stock to Quality Inspection
T Code MB1B amp Movement Type 349
From Blocked stock to Unrestricted Stock
T Code MB1B amp Movement Type 343
From Quality Inspection to Unrestricted Stock
T Code MB1B amp Movement Type 321
Transfer Posting from Plant to Plant
For One Step Movement Type 301
For Two Steps Movement Type 303 amp 305
After posting stock will display in Stock in Transit (Plant)
To receive material by receiving Plant Movement Type 305
Transfer Posting BW Storage Location to Storage Location
Under One Plant BW two Storage Locationrsquos Movement Type 311
Back to Parent storage Location Movement Type 313 (It Show stock in transfer)
use Movement type 315 at Parent storage location
To create Goods Issue (GI) T Code MB1A amp Movement Type 201
To Create Reservations T Code MB21 MB22 amp MB23
Creation of GI wrt Reservations
T Code MB1A amp Movement Type 201
Click on Reservation Enter Reservation Number 1048774 Click on Adopt + Details
GR wrt Reservations T Code MIGO amp Select as Reservation instead of GR
GR without PO Movement type 501 amp T Code MB1C Select others instead of
Purchase order Enter Material Quantity Plant Storage Location 1048774 Press Enter
Partner Option will be visible (Vendor) 1048774 Save it
Invoice - Invoice is a document which is issued to a buyer (Company) from the
supplier (vendor) for the payment The following information is maintained in
invoice
Invoice date Posting date Invoice ref number tax amount amount tax code
terms of payments vendor address banking accounting information etc
When invoice document is posted in the system
bull Invoice document created
bull Accounting document is generated (MIR4)
bull PO history updated (ME23N)
bull FI document created (FB03)
PRICE DETERMINATION PROCESS or PRICING PROCEDURE
CONDITIONS OR PRICING PROCEDURE or PRICE DETERMINATION PROCESSWe deal with the Pricing Procedure for vendors
PB00 Gross Price (info record contract scheduled Agreement)
PBXX Gross Price (PO)
FRA1 Freight
RA00 Discount on net
RA01 Discount on Gross
ZA00 Surcharge on net
SKT0 Surcharge discount
ZPB0 Rebates
MWVS Input Tax
MWAS Output Tax
BASB Base Amount
RM0000 Calculation Schema or Pricing Procedure
(PB00 amp PBXX)
RM0002 Calculation Schema or Pricing Procedure
(PB00)
PB00 --gt AB00
Copy the Standard one and create new one (ours)
RM0000 contains all the condition types
Pricing Procedure (PP)
We define the pricing procedure to define condition supplement for the material
price The condition supplement specifies the discount surcharge freight etc
that we want a system every time to access material price condition records
The total value of the material is calculated or based on all addition and
subtraction ie discounts surcharge tax freight etc
Condition Table
It is a table which defines the structure of condition record key
Condition Record
It is a data record used to store conditions or condition supplements ie
condition like discount freight and surcharge Tax etc
Condition Type
It is used for different functions In Pricing the condition types leads you to
differentiate different types of discounts in output determination batch
determination difference between two output types such as delivery note or
order confirmation between different strategy types
Access Sequence
It specifies the order in which system searches or access the condition records
from condition table
Difference between PB00 amp PBXX
1 Condition maintained in PB00 is time dependent whereas PBXX is time
independent
2 Condition type PB00 ndash used for IR RFQ Contract Schedule Agreement
Condition type PBXX ndash used for PO
Calculation Schema
The main function of calculation schema is to provide framework of steps for the
price determination process to specify the discounts surcharge freight rebate
etc
It also determines the sequence of conditions that are to be followed and in
which sequence
Schema Group Vendor
The main function of it is to identify or to pick the right process and conditions
for a particular vendor
Schema Group Purchasing Organization
Key that determines which calculation schema (pricing procedure) is to be used
in purchasing documents assigned to the relevant purchasing organization
Schema Group
It allows to group together the purchasing organizations which uses the same
calculation schema
Steps -
1 Create Access sequence
2 Create condition types
3 Create pricing procedure or calculation schema
4 Link pricing procedure amp access sequence to condition type
5 Create schema group for vendor
6 Create schema group for purchase organization
7 Assign schema group vendor-to-vendor master record in purchasing data
view
8 Assign schema group purchase organization to our purchase organization
9 In inforecord purchase organization data enter condition types and pricing or
calculation procedure
CUSTOMIZE SETTINGS -
SPRO --gt IMG--gtMM--gtPUR--gtConditions --gtDefine price determination Process
1 Define access sequence
2 Define Condition type
3 Define cal Schema
4 Define schema group
o Schema group vendor
o Schema group purchasing group
5 Assignment of schema group to PUR org
6 Define schema determination agrave determine cal schema for standard PO
PURCHASE ORDER
PURCHASE ORDER
PO is an external document created for the procurement of materials and
services from vendor The document of PO is also divided into 4 parts as PR -
1 Document Overview
2 Header (DeliveryInvoice Conditions Address Partners Org data status)
3 Item Overview (AC assign cat Item Category Material Plant Del date SL)
4 Item Details (Material data Confirmations condition control delivery delivery
Schedule Quantitiesweights invoice)
A procurement type is defined for each of the document items The following
procurement types exist
1048774 Standard
1048774 Subcontracting
1048774 Consignment
1048774 Stock transfer
1048774 External service
bull There are different ways to create PO -
1 Directly through transaction code ME21N
2 With reference to PR
3 With reference to RFQ
4 With reference to info records
5 With reference to Contracts
6 With reference to Cost Centre GL Account (cost element) for consumable
items or not stock items with account assignment category lsquoKrsquo (K= cost centre)
(For non stock and consumables)
0 COMMENTS L INKS TO THIS POST
LABELS PO PURCHASE ORDER
Reaction
s
PURCHASE REQUISITION T CODE ME51 or ME51N
Purchasing Requisition -
It is a request or instruction from particular department (Cost Centre) to
purchasing department to procure certain quantity of material and services It is
only one internal document in SAP-MM
Purchasing Requisition document is divided into four parts -
bull Document Overview
bull Header
bull Item Overview
bull Item Details
Document Overview -
It displays the list of purchasing documents which are created previously
according to our requirement
Header -
Any text message or information is maintained
Item Overview -
In this we enter material plant delivery date quantity storage location
purchasing group AC assignment category Item category etc
Item Details -
It displays the detailed information about item overview (like Master data
valuation source of supply contact person delivery address status etc)
0 COMMENTS L INKS TO THIS POST
LABELS PR PURCHASE PURCHASE ORDER PURCHASE REQUIS IT ION SALES ORDER
Reaction
s
Automatic PURCHASE ORDER (PO) How Automatic PO raised
How Automatic PO raised
At fixed time say 1230 AM automatic scheduler runs and checks whether the
stock is less than or equal to the replenishment point If stock is less than or
equal to Repli Point than PR raised automatically to Purchasing Deptt
bull Activate the option automatic PO in purchasing view in material master record
bull Activate the option automatic PO in purchasing data view in vendor master
record
bull Maintain Source List amp select fixed vendor
bull PR crated automatically
bull Automatic creation of PO from PR ndash ME59
Enter the Purchasing group purchasing organization Vendor Plant and
Purchasing Requisition Document Number 1048774 Execute
RELEASE PROCEDURE Release strategyThe main function of Release procedure is to determine the approval process
or the release process for the procurement of material amp services rather than
relying for manual signatures The release procedure contains release strategy
Release Strategy (RS)
A plan defining the release codes with which a purchase requisition item a
complete purchase requisition or a complete external purchasing document
must
be released (that is approved) and the sequence in which release is to be
effected
using these codes It is a unique set of conditions sequence and level of release
It is a 2 digit code eg S1 S2 S3etc
The Release Strategy contains the following -
bull Release Group
bull Release Codes
bull Release Indicators
bull Release Prerequisite
Release Group -
It is a 2-digit code which is assigned with a class (Class contains group of
characteristics) It contains one or more release strategies
Release Codes -
It is a 2digit code which identifies the department or responsible person for
the approval process amp release process
Eg AA - Manager
BB - Sr Manager
CC - Vice President
DD - Managing Director
Release Indicator -
It is a Code that represents the release status If the proper approval
process is performed that the release Strategy has to be release if it is not
performed than the Release Strategy is blocked
R ndash Release
B ndash Blocked
Release Conditions -
It determines the type of the release strategy
For eg
bull If the price ranges from 1 to 1000 It is approved by AA BB and CC
bull If the ranges from1001 to 1lac then it is approved by AA BB CC and DD
- 80 -
Release Prerequisite
It will informs the system which RS has to be take place in the PO CEKKO is
a communication structure where it displays the field names amp field lengths to
create characteristics ie we maintain characteristics in customizing by
selecting
the field names from this communication structure for all external documents
CEBAN is used for the purchasing requisition
Characteristics -
1 Net value of PO --- GNETW (GSWRT for PR)
2 Plant --- WERKS
3 Purchasing organization -- EKORG
4 Purchasing Group --- EKGRP
5Material group ndashMATKL
CUSTOMIZE SETTINGSSPRO--gtIMG--gt MM--gt Purchasing--gtPO--gt Release Procedure for PO
1 Edit Characteristics T Code CT04
2 Edit Class T Code CL02
3 Define Release Procedure for PO
4 Check Release Strategy
Edit Characteristics -
Characteristics - eg NET VALUE OF VALUE
Click or Create Button
Under Basic Data
Description - Value for PO
Status - Release
Data Type - Currency Format
No Of Characters - 15
Currency - EUR
Activate multiple values amp Internal Values Allowed
Additional Data
Table name - CEKKO
Field Name - GNETW
Values
Activate Additional Values
Save the document
Create another Characteristic for Plant -
Plant date Create ndash Description Status
Data Type Characteristic Format
Number of Characteristics 4
Activate Multiple Values
Additional data-
Table Name - CEKKO
Field Name - WERKS
Values
Activate Additional Values
For Purchasing Organization Name - EKORG
For purchasing Group EKGRP
Edit Class
Class - SAPMM
Class Type - 032 Release Strategies
Click on Create button
Basic Data
Description - Class for PO
Status - Released
Valid From _____ Valid to _____
Click on Characteristic
Characteristic
Enter all the Characteristics Created amp Save it
Define Release Procedure for PO-
bull Release Group
bull Release Codes
bull Release Indicators
bull Release Strategies
bull Workflow
Release Group - New Entries Release Group Class and Description
Press Enter amp Save
Release Code - New Entries
Group Codes Description
99 AA Manager
99 BB Sr Manager
99 CC Vice President
99 DD Managing Director
Press Enter amp Save
Release Indicator - (B ndash Blocked R - Release)
New Entries
Release Indicators Description
B Blocked
R Released
Release Strategies -
New Entries
Release Group 99
Release Strategy S1
Release Codes AA BB CC and DD
Click on Release Prerequisites
Release Status -
Continue
Classification
Enter the Value (Same Price)
Plant (9999)
Go Back amp Save it
Release Simulation - Simulate Release
Create a PO -
There are two ways to release the PO
Individual releaseME28
Collective release ME29N
How to delete procedure
Delete Release GP
Create Release RG
Delete R Strategies
Delete R Code
Delete R Group
SAP R3 SYSTEM LANDSCAPE
System LandscapeThe system landscape contains all the SAP Systems that you have installed It
can consist of several system groups whorsquos SAP Systems are linked by transport
routes
After you decide which clients you need and which roles you want them to have
you need to decide how to distribute them amongst the different SAP Systems
You can set up multiple clients independently of one another in a single SAP
System However when you configure the data you must remember that cross-
client Customizing settings and Repository objects are identical for all clients in
a single SAP System Changes made in one client apply immediately to all
clients in the system
Three-System Landscape
SAP recommends a three-system landscape in which each of the central clients
has its own SAP System
This consists of a development system DEV a quality assurance system QAS
and a production system PRD The development system contains the
Customizing client CUST the quality assurance system contains the quality
assurance client QTST and the production system contains the production client
PROD Make all changes to Customizing data and Repository objects in the
Customizing client When you release the corresponding change requests they
are transported into the quality assurance client This means that changes to
cross-client data only appear in the quality assurance client after the transport
In the quality assurance client you can test whether the transports are
complete or whether any linked changes are missing and are still in unreleased
change requests If the test is successful the change requests are transported
into the production client The production client is completely separate from the
other clients as regards cross-client data
SPECIAL STOCKS amp SPECIAL PROCUREMENT TYPES
Special Stocks are those stocks which are not belongs to our company code
These are not placed in our storage locations amp no physical inventory is
performed and treated as special stocks for the reason of ownership
Different types are of Special Stocks are as follows
1 Subcontracting
2 Consignment
3 Pipeline
4 Stock transfer
5 Third party
6 Returnable transport packaging
7 Sales order stock
8 Project stock
SUBCONTRACTING
In subcontracting process we create subcontracting PO to supply or issue
subcomponents to vendor in order to get final product The price maintained in
subcontracting PO is a service charge paid to vendor
Steps to perform subcontracting
1 Create subcontracting inforecord (Optional)
2 Create subcontracting PO with item category L
There are to ways to supply subcomponents to vendor
bull Manually maintain the subcomponents in the subcontracting
PO though explode BOM
bull Through BOM (Bill of material) T Code CS01 CS02 amp CS03
3 Create Transfer Posting with Movement Type 541 to issue the subcomponents
to the vendor
4 Goods Reciept
5 Invoice Reciept
Path ME21N ---gt Enter Item Category L --gt Material (End Product) PO
Quantity Delivery Date Net Price Plant --gt Click on Item Details --gt Tab
Material Data -- gtComponents select Explode BOM --gt Click on Components
button --gt Enter the subcomponents --gt Go back amp Save
Create Transfer Posting with movement type 541 amp T Code MB1B
GR MIGO
IR MIRO
CONSIGNMENT - (No Concept of Invoice)
In consignment process we will not create Purchasing document for the vendor
vendor himself send the material to our plant though the material is available
to our plant the responsibility amp ownership of the material is of vendor Aliability
only arises when the material withdrawal (Consumption) is posted in the system
from consignment stock
Steps
1 Create Consignment info record (mandatory)
2 Create Consignment purchase order with item category lsquoKrsquo amp maintain Info
record number
3 Create GR Movement type lsquo101Krsquo
4 Create GI Movement Type lsquo201Krsquo
5 Consignment settlement T Code MRKO
Path --gtME11 --gt In info record --gt Purchasing Org Data 1 views of info record
enter the tax code and save it
--gt Create Consignment Purchase Order ME21N (Price option is grayed out with
price zero)
--gt Create GR with movement type 101K
--gt Create Goods Issue (GI) T Code MB1A amp Movement Type 201K Enter Cost
center vendor
--gt Consignment Settlement T Code MRKO Click Activate Consignment Activate
Settle Execute
--gt Display the Document Number ie Invoice receipt T Code FB03
PIPELINE PROCESS (No Concept of Invoice)
In pipeline handling your company does not need to order or store the material
concerned It is ready available to you as and when required via pipeline (eg oil
or water) or some other type of cable (eg electricity) Consumption of the
material is settled with the vendor on a regular basis
Steps
1 Create a Material master record with material type PIPE
2 Create Pipeline info record
3 Create GI with movement type 201P
4 Pipeline settlement T Code MRKO
RETURNABLE TRANSPORT PACKAGING (RTP)
When company orders goods from a vendor the goods are delivered with
returnable transport packaging (pallets containers) that belongs to the vendor
and is stored on our premises until you return it to the vendor
Steps
1 Create Material master record with material type LEIH
2 Create PO
3 Create GR by maintaining RTP material by selecting the option transport
equipments with movement type 501M
4 IR
STOCK TRANSFER
In stock transfer processing goods are procured and supplied within a company
One plant orders the goods internally to another plant (receiving plantissuing
plant) The goods are procured with a special type of purchase order the stock
transport order
Steps
1 Create a Material master in both supplying and receiving plant
2 Create stock transport order (STO) with item category lsquoUrsquo
3 Create transfer posting with movement type 351 amp T Code MB1B (Go to
MMBE stock overview the stock will decrease in supplying plant and it will not
update stock of receiving plant it will be under stock in transit)
4 Create GR stock will update in receiving plant
This scenario is under one company code between two plants
SAP IMPLEMENTATION PROCESS End to End Inplementation of SAP
First we have to prepare documentation about the client business (like turnover
vendors customers payments materials production marketing etc)
The implementer company made two teams (1) Steering team (2) Steering
community
Steering team (SAP functional consultants) prepares a detailed
documentation about the client with the help of core team (client company
team)
amp this study is known as Feasibility Study After that the steering team handed
over this documentation to Steering community (Project manager Sr software
engineer and other higher authorities)
Steering community prepares the BBP (Business Blue Print) BBP
Prepares in MS-Word
10487741048774 ASAP - Accelerated System Application Product in Data Processing
10487741048774 Business Process - ASAP Methodology
1 Project Preparation
2 BBP (Business Blue Print)
3 Realization
4 Final Preparation
5 Go live amp Support
10487741048774 Project Preparation -
It consists of identifying team members amp development strategy as
how to go
AS ndash IS (Existing Process followed requirements)
TO ndash BE (Requirement analysis and best process recommended)
Difference between (AS ndash IS) amp (TO - BE) is called GAP Analysis
10487741048774 Business Blue Print (BPP) -
It is a legal documentation between client amp the company
(implementer service provider) We have to understand the current business
process of client amp analyzing the business amp prepare documentation It is a
detailed documentation for the client
10487741048774 Realization -
This Phase is used to Implement or migrate the entire business of
client from Non-SAP environment to SAP environment
10487741048774 Final Preparation -
This phase is used for testing amp end user training After successfully
completion of this phase client is ready to run business in SAP R3
10487741048774 Go live amp Support -
In this phase we deliver the project end date amp end user training at
client site
THIRD - PARTY PROCESSING
THIRD - PARTY PROCESSING
In third party processing your company passes on a sales order to an external
vendor who sends the goods directly to the customer The sales order is not
processed by your company but by the vendor Third-party items can be
entered in purchase requisitions purchase orders and sales orders Third party
processing is integrated with Sales and Distribution If the sales order contains
third-party items the system creates a purchase requisition from the order
Steps
1 Create MMR with sales views and maintain Division Distribution channel
sales org item category group and general item category group ndash BANS (Third
party item) amp Account group Sold to party
2 Create Customer master record T Code XD01 XD02 XD03
3 Create sales order T Code VA01 VA02 VA03 (PR generated automatically)
4 PO - T Code ME21N
5 GR ndash T Code MIGO
6 IR ndash T Code MIRO
7 Sales Billing Billing Document T Code VF01 VF02 VF03

Enter the Purchasing group purchasing organization Vendor Plant and
Purchasing Requisition Document Number 1048774 Execute
Material Master Related Important Terms (Part 1)
Material Group
Key that you use to group together several materials or services with the same
attributes and to assign them to a particular material group
Use You can use material groups to
bull Restrict the scope of analyses
bull Search specifically for material master records via search helps
Purchasing Group
Key for a buyer or a group of buyers who isare responsible for certain
purchasing activities
Use
bull Internally the purchasing group is responsible for the procurement of a
material or a class of materials
bull Externally it is the medium through which contacts with the vendor are
maintained
Purchasing Value Key
Key defining the reminder days and tolerance limits valid as well as the
shipping instructions and order acknowledgment requirement of the material for
Purchasing
Procedure If you have chosen a purchasing value key the system enters the
values defined in Customizing (for Purchasing) in the fields
Batch Batches (LO-BM)
A subset of the total quantity of a material in stock managed separately from
other subsets of the same material
Example Different production lots (such as paints dyes wallpapers and
pharmaceutical products) delivery lots quality grades of a material
Batch management requirement indicator Specifies whether the material is
managed in batches
Use
This indicator can be set in the material master record manually or if batches
are valuated individually it is set automatically for the plants concerned in
which case it cannot be changed
The indicator cannot be changed if stocks exist in either the current period or in
the previous period The reason for checking the previous period is because
stocks can be posted to this period when goods movements are entered
CIN - Country India Version ~ Volume 1
PurposeCountry Version India (CIN) contains a number of enhancements to standard
Sales and Distribution (SD) functions that allow you to handle local
requirements in particular excise duty
Features
In Country Version India (CIN) this component handles sales processes as
found in India In addition to the generic functions it allows you to
Handle CENVAT in your sales processes
The system calculates excise on your sales and creates excise invoices as
required and makes the appropriate postings to your CENVAT accounts
It covers sales from factories sales from depots and offers functions for other
types of goods movements it also covers sales to export-oriented units and
export sales
Record concessional and exemption forms sent to you by your customers
Make adjustment postings to your CENVAT accounts
Excise Invoice (Outgoing)
Definition
The document that acts as the proof of payment of excise duty and is required
for the customer to take CENVAT credit on the item
Use
In the SAP System there are three different procedures for creating excise
invoices
Sales direct from the factory
This procedure is for when you sell manufactured goods straight from the
factory at which they were produced in which case you levy excise duty when
the goods leave the factory on their way to the customer
If when you send the goods to the customer you enclose the commercial
invoice you create the excise invoice with reference to the commercial invoice
If you want to send the commercial invoice after you have dispatched the goods
however you create the excise invoice with reference to a pro forma
commercial invoice For more information about these procedures see Sales
from Factories
As well as creating excise invoices individually you can also create them in
batches (see Creation of Excise Invoices in Batches)
Sales from depots
A depot is a site at which the goods are stored away from the factory at which
they were produced In this procedure you have to levy the excise duty when
you transfer the goods from the factory to the depot and then make sure this is
passed on to the customer when it makes a purchase For more information see
Sales from Depots
Sales (other goods movements)
Some other goods movements may also require you to create an excise invoice
with reference to other documents The SAP System offers separate functions
for these purposes (see Excise Invoices (Outgoing) for Other Movements)
StructureNumbering of Excise Invoices
Outgoing excise invoices have two numbers an internal document number
which is assigned immediately you create an excise invoice and an excise
invoice number which is not assigned until you have verified and posted it
As far as the excise invoice number is concerned you have to number your
outgoing excise invoices in sequential order starting each year on 1 April You
must notify the excise authority of the jurisdiction of the invoicing location The
serial number must be printed on each page of the excise invoice
Each number range is governed by a series group You must create at least one
series group in order to be able to number the excise invoices If you need more
than one number range you must create the corresponding number of series
groups You do so in the CIN Implementation Guide (IMG) by choosing Global
Settings reg Series Groups
Number of Line Items Per Excise Invoice
Some states allow you to include only a limited number of items for each page
of an excise invoice (for example if the excise invoices are to be printed on
prenumbered forms) You can customize the system so that it prints the excise
invoice accordingly in the CIN IMG by choosing Global Settings reg Excise
Registration IDs
Customer Master (Excise Data) Definition
The part of the customer master record that contains information relating to
Indian excise duty
Use
In conjunction with other data this data is used to calculate excise duty on
various transactions
To maintain the data from the SAP Easy Access screen choose Indirect Taxes reg
Master Data reg Excise Rate Maintenance and then select the following options
described below
Structure
The excise part of the customer master contains the following information
Customer Excise Details
On this screen you enter your customers tax registration numbers which are
used for various forms of correspondence and reports
1 Excise registration number (and the range division and collectorate in which
this is located)
2 Central sales tax (CST) number
3 Local sales tax (LST) registration number
4 Permanent account number (PAN)
In order for the system to be able to calculate which rate of excise duty to apply
on sales to the customer you must also assign it a customer excise duty status
(for more information about how this works see Determination of Excise Duty
Rates)
Excise Indicator for Plant and Customer
On this screen you define the final excise duty indicator (for more information
about how this works see Determination of Excise Duty Rates)
Determination of Excise Duty Use
When you execute a business transaction involving materials that are subject to
excise duty the system automatically calculates the duty for you
Prerequisites
In order for the system to be able to determine which rate of excise duty to
apply you must have maintained all the data on the Excise Rate Maintenance
screen which you can access from the SAP Easy Access screen by choosing
Indirect Taxes reg Master Data reg Excise Rate Maintenance
You maintain the following types of data
Plant master data
You assign each of your plants an excise duty indicator You can use the same
indicator for all the plants with the same excise status from a legal point of view
such as all those that are in an exempt zone
See also the information about manufacturers that are only entitled to deduct a
certain portion of the duty (see Partial CENVAT Credit)
Vendor master data
For each of your vendors with the same excise status from a legal perspective
you define an excise duty indicator You must also specify the vendor type ndash for
example whether the vendor is a manufacturer a depot or a first-stage dealer
You must also stipulate if the vendor qualifies as a small-scale industry
For each permutation of plant indicator and vendor indicator you then create a
final excise duty indicator
Customer master data
Similarly you assign the same excise duty indicator to each of your customers
that share the same legal excise status
Again for each permutation of plant indicator and customer indicator you then
create a final excise duty indicator
Material master data
Each material is assigned a chapter ID
Excise tax rate
For every chapter ID and final excise duty indicator you maintain the rate of
excise duty
If your business only qualifies for partial CENVAT credit you must customize
your system accordingly
Activities
Let us consider an example to illustrate how the system determines which rate
of excise duty to apply to a material Assume you are posting a sale of ball
bearings to a customer The system automatically determines the rate of excise
duty as follows
Looks up the customer master data to see what status you have assigned the
customer
Lets assume youve assigned the customer status 3
Looks up the plant master data to see what status you have assigned the plant
Similarly your plant has status 2
The system looks up the table under Excise Indicator for Plant and Customer to
see what the final excise duty indictor is for customer status 3 and plant status
2 It is 7
The system determines the chapter ID of the ball bearing for the plant
Letrsquos assume the chapter ID at plant for the ball bearings is 100001
Finally the system looks up the table under Excise Tax Rate to see what rate of
duty applies to chapter ID 100001 under status 7
Plant Master (Excise Data) Definition
The part of the plant master record that contains information relating to Indian
excise duty
Use
In conjunction with other data this data is used to calculate excise duty on
various transactions
To maintain the data from the SAP Easy Access screen choose Indirect Taxes reg
Master Data reg Excise Rate Maintenance and then select the following options
described below
Structure
The excise part of the plant master is divided into the following screens
Excise Indicator for Plant
On this screen you enter your plants tax registration numbers which are used
for various forms of correspondence and reports
1 Central sales tax (CST) number
2 Local sales tax (LST) registration number
3 Permanent account number (PAN)
In order for the system to be able to calculate which rate of excise duty to apply
on purchases for this plant you must also assign it a plant excise duty status
(for more information about how this works see Determination of Excise Duty
Rates)
Excise Indicator for Plant and Vendor
On this screen you define the final excise duty indicator (for more information
about how this works see Determination of Excise Duty Rates)
Excise Indicator for Plant and Customer
On this screen you define the final excise duty indicator (for more information
about how this works see Determination of Excise Duty Rates)
Automatic Creation of Excise Invoices Use
The SAP System can automatically create an outgoing excise invoice for you
immediately you post a commercial invoice (or a pro forma invoice) for a
customer sale This function applies to excise invoices for sales from factories
only
Prerequisites
To activate this function in the Country Version India (CIN) Implementation
Guide (IMG) make the following settings
1 Under Global Settings reg Excise Groups select Create EI
This activates the automatic creation function
2 Under Sales and Distribution reg Utilization Determination
Here you specify which CENVAT accounts the system is to post the different
types of excise duty to
3 Under Sales and Distribution reg Excise GroupndashSeries Group Determination
Here you specify which excise group and series group the excise invoices are to
be created for
Features
When you post an invoice the system creates an excise invoice All the
information that it needs to create the excise invoice is provided either by the
invoice or by the Customizing settings that you have made in Sales and
Distribution It also determines the excise invoice type automatically by means
of a user exit
Creating Excise Invoices for Stock Transfers 1 From the SAP Easy Access screen choose Indirect Taxes reg Procurement reg
Excise Invoice reg For Depot reg CreateChangeDisplay
2 In the Material document field enter the goods receipt number and choose
The system displays the information from the goods receipt for example the
sending plant the excise registration the range the division and the
collectorate
3 Choose Details
The system copies the items from the goods receipt document In the depot it is
possible to have a separate excise invoice at line item level
4 Enter the internal document number of the excise invoice sent by the factory
5 Choose More documents to go the excise invoice details screen
6 Enter the internal document number of the excise invoice from the factory
The system copies the information to the line item (for example the excise
invoice number the excise invoice date the item number the chapter ID the
excise invoice quantity the amount of excise duty paid the excise base value
and the serial number of the Part II register entry with which the excise was
paid)
You can change the receipt quantity to match the actual quantity received at
the depot if necessary The system automatically adjusts the excise
accordingly
7 Go back to the item details screen
8 Save the excise invoice
Creating Excise Invoices for Direct Purchases 1 From the SAP Easy Access screen choose Indirect Taxes reg Procurement reg
Excise Invoice reg For Depot reg CreateChangeDisplay
2 In the Material document field enter the goods receipt number and choose
The system displays the information from the goods receipt for example the
sending plant the excise registration the range the division and the
collectorate
You can also maintain the excise registration details for the ship-from party as
for with the vendor The ship-from can be different from the vendor code (The
delivering plant can be maintained as a ship-from in the system When a valid
ship-from is entered the excise registration details copied from the vendor will
be overwritten by the ship-from excise registration details)
The ship-from registration details displayed can also be overwritten manually
The dealers commercial invoice number can be stored in the vendor excise
invoice number as in this case the dealer himself will not have an excise
invoice
3 Choose Details
The system copies the items from the goods receipt document It also copies the
vendors excise invoice number and the serial numbers of the entries in the RG
23A RG 23C and personal ledger account (PLA) registers
4 Enter the internal document number of the excise invoice sent by the factory
5 Select an item and choose More documents to go the excise invoice details
screen
In the case of direct purchases there will not be any excise invoice in the
system so leave the internal document field blank The vendors invoice will
show the details of the excise invoices through which excise has been paid for
the item that is being dispatched You can enter these details here
6 For each item the chapter ID excise base value and excise duty amounts
are defaulted from the purchase order You can change them if there is any
difference Enter the excise amount paid and the receipt quantity You also
enter the Part II register serial numbers with which the excise duty was paid and
the excise registration information from the original excise invoice
7 Go back to the item details screen
8 Save the excise invoice
The system creates an entry in register RG 23D You can change the excise
invoice as long as it has not been used in any sales
Assigning Excise Invoices to a Delivery Use
You follow this procedure to specify which excise invoices are to be assigned to
a delivery from a depot (or other material document)
You can also automate this procedure using the batch selection program
(J_1IJCHK) by making the appropriate Customizing settings in the Country
Version India (CIN) Implementation Guide (IMG)
Procedure
1 From the SAP Easy Access screen choose Indirect Taxes reg SalesOutbound
Movements reg Excise Invoice reg For Depot reg CreateChangeDisplay reg Delivery
or Material Document reg RG 23D Selection
2 Enter the delivery document number or the material number and choose
3 Select the excise invoice you want
4 Choose
5 Choose Excise invoice
A list of excise invoices appears These are the excise invoices at the depot with
a balance quantity
The system also shows a list of the A certificates that can be used You can pick
up any of the A certificates but they must be for the same excise invoice You
can only pick up an A certificate in its entirety You cannot select part of an A
certificate
6 Select the excise invoices that are relevant to the delivery
7 Specify what quantity to be used from each excise invoice
The system recalculates the excise accordingly
8 Go back to the item details screen
9 Save the data
Result
The system creates an entry in register RG 23D and generates the depot excise
invoice numbers
If you selected any A certificates the system also generates additional entries in
the RG 23D register The system marks the original A certificates as updated so
that they cannot be used for any other removals
CIN - Country India Version ~ Vol 2
Continue Volume 1
Creating Excise Invoices
Use
This is the procedure that you follow to create an excise invoice for the less
common types of goods movement
Procedure
1 From the SAP Easy Access screen choose Indirect Taxes reg SalesOutbound
Movements reg Excise Invoice reg For Other Movements reg CreateChangeDisplay
reg
2 On the selection screen enter data as required including
(i)Reference
group box
Specify which document you want to create the excise invoice for and which
excise group it is for
(ii)Details
group box
Specify the vendor or customer that you are sending the invoice to
3 Choose
If you entered an internal document number the system copies the item details
from it
4 Choose
5 Enter line items for each of the materials to be included in the excise invoice
For each item enter the following data
(i)Material
(ii)Quantity
(iii)Unit of measure
(iv)Base value
(v)Excise duty
6 To pick the rate and amount from a specific excise invoice choose Get excise
invoice
7 Save the excise invoice
If you are using the one-step procedure the system creates and posts an excise
invoice Otherwise the system saves the information but does not make any
postings it now has to be verified
Verifying and Posting Excise Invoices
Use
You follow this procedure to verify that the information in an excise invoice that
has already been created and to post it once you are satisfied
Procedure
From the SAP Easy Access screen choose Indirect Taxes reg SalesOutbound
Movements reg Excise Invoice reg For Other Movements reg Posting
1 Enter the internal document number of the excise invoice
2 Choose Release to accounting
The system displays the excise invoice The excise duty that is to be posted is
displayed at the foot of the screen which you can change if necessary
3 To access the balance utilization choose
4 To display the balance available on the CENVAT accounts choose Account
balances
5 Save the excise invoice
The system generates the accounting documents
6 To print the excise invoice choose
Making a Transfer Posting
Use
In this procedure you make a transfer posting for the goods ordered by another
plant For more information about this function see Entering the Removal from
Storage at the Issuing Plant
Procedure
1 From the SAP Easy Access screen choose Logistics reg Materials Management
reg Inventory Management reg Goods Movement reg Transfer Posting
2 Choose Movement type reg Transfer posting reg Plant to plant reg To stock in
transit
3 Enter the number of the issuing plant and storage location
4 Choose To purchase order
5 In the dialog box enter the number of the stock transport order that the
receiving plant created and choose
6 Check the data
7 Save the transfer posting
Transaction Codes for India
Transaction Action
J1I2 Prepare a sales tax register
J1I3 Create outgoing excise invoices in batches
J1I5
Update the RG 1 and Part I registers
J1I8
Post the challan used to remit TDS
J1IC194C
Create annual return under section 194 C (Classic TDS)
J1IC194D
Create annual return under section 194 D (Classic TDS)
J1IC194I
Create annual return under section 194 I (Classic TDS)
J1IC194J
Create annual return under section 194 J (Classic TDS)
J1IEX
Incoming Excise Invoices (central transaction)
J1IEX_C
Capture an incoming excise invoice (excise clerk)
J1IEX_P
Post an incoming excise invoice (excise supervisor)
J1INBANK
Post a bank challan
J1INCANC
Cancel a vendor withholding tax certificate
J1INCERT
Print a vendor withholding tax certificate
J1INCHLN
Create a remittance challan
J1INCUST
Post a customer withholding tax certificate
J1INHC
Withholding Tax Migration Health Check Program
J1INMIG
Withholding Tax Data Migration Tool
JI1NCHLC
Create a remittance challan for customers
J1INCC
Print customer withholding tax certificates
J1INMIS
Withholding Tax Information System
JI1NAR
Prepare annual returns (Extended Withholding Tax)
J1IF01
Create a subcontracting challan
J1IF11
Change a subcontracting challan
J1IF12
Display a subcontracting challan
J1IF13
Complete reverse or recredit a subcontracting challan
J1IFQ
Reconcile quantities for subcontracting challans
J1IFR
List subcontracting challans
J1IH
Make a CENVAT adjustment posting
J1IIN
Create an outgoing excise invoice
J1IJ
Assign excise invoices to a delivery for sales from depots
J1INJV
Adjust withholding tax Item
J1INREP
Reprint a vendor withholding tax certificate
J1INREV
Reverse a remittance challan
J1INPR
Calculate withholding tax on clearing accounts
J1INUT
Clear withholding tax on clearing accounts
J1IR
Download register data
J1IS
Process an excise invoice (outgoing) for other movements
J1IU
Process exemption forms
J1IW
Verify and post an incoming excise invoice
J1IX
Create an incoming excise invoice (without reference to purchase order)
J2I8
Transfer excise duty to CENVAT account
J2ID
Archive tax deducted at source (TDS) documents
J2IE
Locate tax deducted at source documents in archive
J2IU
Remit excise duty fortnightly
J2I9
Monthly CENVAT return
J1IG
Excise invoice entry at depot
J1IGA
Create additional excise entry at depot
J2I5
Extract data for excise registers
J2I6
Print excise registers
Sales from Factories
Purpose
This process describes how the SAP System handles the sales process allowing
for the creation of excise invoices which you have to send with each delivery
that is subject to excise duty There are two scenarios depending on whether
you want to send the commercial invoice along with the delivery or at a later
date
Prerequisites
In order for the system to be able to copy the information from document to
document you must have set up the copying control procedures in Customizing
for Sales and Distribution (SD) This differs according to when you want to send
the commercial invoice
1 Along with the delivery
In this case the document flow would be OR (standard sales order type) ndash LF
(standard delivery type) ndash F2 (invoice)
2 At a later date
The document flow would be OR ndash JF (delivery type a copy of LF) ndash JEX (pro
forma billing document type a copy of document type F8) ndash F2
In addition you must also have maintained the settings in the Country Version
India (CIN) Implementation Guide (IMG) by choosing Global Settings reg Assign
Excise Invoice Billing Type to Delivery Type
A sample pricing procedure JFACT is provided for this sales procedure
Process Flow
1 The sales clerk creates a sales order following the
(i)standard procedure
There are special procedures for
(i)Customers in possession of exemption forms
(ii)Exports
2 The shipping clerk creates a delivery again following the
standard procedure
On the initial screen you set the appropriate delivery type (see above)
3 In the warehouse the storeperson issues the goods
The system only allows users to create a pro forma excise invoice if the delivery
is complete so as to prevent them from creating multiple pro forma excise
invoices
4 What you do at this stage depends on whether you want to send the
commercial invoice along with the delivery or whether you want to invoice the
customer later
(A) If the invoice is to be shipped with delivery the shipping clerk
(i)Creates an invoice following the standard procedure
(ii)Creates an excise invoice from the invoice
(B) If the invoice is to be sent on at a later date the shipping clerk
(i)Creates the pro forma excise invoice
The pro forma excise invoice is only required for technical purposes and is not
sent to the customer The system does not make any accounting postings at this
stage
(ii)Creates
an excise invoice from the pro forma excise invoice
In both these cases the system creates an accounting document to post the
excise duty to a clearing account
Instead of creating excise invoices manually you can also have the system
create them automatically Alternatively you can create them in batches
5 You ship the goods
6 When the time comes to invoice the customer you create the invoice
following the standard procedure
Irrespective of the number of excise invoices that you have issued you can
combine the delivery items in a single invoice (if the standard requirements are
met)
Sales from Depots
Purpose
You may sell finished goods directly from the place of manufacture as described
under Sales from Factories or you may first ship them to a separate location for
storage (a depot) from where you will sell them The second procedure is
described here
Sales from depots are handled differently from sales from factories because of
excise law Excise duty is payable when you send the goods from the factory to
the depot but it is not levied again when you sell the goods
Sometimes when you make a final sale of goods from a depot price escalations
could have happened with retrospective effect In such scenarios you need to
pay the extra excise duty at the factory using an A Certificate You need to
register the A certificate details in the RG 23D register and the excise recovered
from the customer
Prerequisites
You have customized
1 Stock transport processing in Customizing for Materials Management (MM)
by choosing Purchasing reg Purchase Order reg Set Up Stock Transport Order
2 The copying control for copying stock transport order NL to excise invoice JEX
You make this setting in the Country Version India (CIN) Implementation Guide
(IMG) by choosing Sales and Distribution reg Assign Excise Invoice Billing Type to
Delivery Type
3 The item category NLN (standard transport order) so that it is relevant for
billing
You do this in the standard IMG in Customizing for Sales and Distribution (SD)
by choosing Sales reg Sales Documents reg Sales Document Item
Process Flow
1 You create the sales order following the
standard procedure
The standard pricing procedure for depot sales is JDEPOT
2 You create the delivery again following the
standard procedure
3 You
assign excise invoices to the delivery or material document
4 You
verify that you have selected the correct excise invoices and post them
Alternatively if you have selected the wrong excise invoices you can cancel the
assignment
5 You create the invoice following the standard procedure
SPECIAL STOCKS amp SPECIAL PROCUREMENT TYPES
Special Stocks are those stocks which are not belongs to our company code
These are not placed in our storage locations amp no physical inventory is
performed and treated as special stocks for the reason of ownership
Different types are of Special Stocks are as follows
1 Subcontracting
2 Consignment
3 Pipeline
4 Stock transfer
5 Third party
6 Returnable transport packaging
7 Sales order stock
8 Project stock
SUBCONTRACTING
In subcontracting process we create subcontracting PO to supply or issue
subcomponents to vendor in order to get final product The price maintained in
subcontracting PO is a service charge paid to vendor
Steps to perform subcontracting
1 Create subcontracting inforecord (Optional)
2 Create subcontracting PO with item category L
There are to ways to supply subcomponents to vendor
bull Manually maintain the subcomponents in the subcontracting
PO though explode BOM
bull Through BOM (Bill of material) T Code CS01 CS02 amp CS03
3 Create Transfer Posting with Movement Type 541 to issue the subcomponents
to the vendor
4 Goods Reciept
5 Invoice Reciept
Path ME21N ---gt Enter Item Category L --gt Material (End Product) PO
Quantity Delivery Date Net Price Plant --gt Click on Item Details --gt Tab
Material Data -- gtComponents select Explode BOM --gt Click on Components
button --gt Enter the subcomponents --gt Go back amp Save
Create Transfer Posting with movement type 541 amp T Code MB1B
GR MIGO
IR MIRO
CONSIGNMENT - (No Concept of Invoice)
In consignment process we will not create Purchasing document for the vendor
vendor himself send the material to our plant though the material is available
to our plant the responsibility amp ownership of the material is of vendor Aliability
only arises when the material withdrawal (Consumption) is posted in the system
from consignment stock
Steps
1 Create Consignment info record (mandatory)
2 Create Consignment purchase order with item category lsquoKrsquo amp maintain Info
record number
3 Create GR Movement type lsquo101Krsquo
4 Create GI Movement Type lsquo201Krsquo
5 Consignment settlement T Code MRKO
Path --gtME11 --gt In info record --gt Purchasing Org Data 1 views of info record
enter the tax code and save it
--gt Create Consignment Purchase Order ME21N (Price option is grayed out with
price zero)
--gt Create GR with movement type 101K
--gt Create Goods Issue (GI) T Code MB1A amp Movement Type 201K Enter Cost
center vendor
--gt Consignment Settlement T Code MRKO Click Activate Consignment Activate
Settle Execute
--gt Display the Document Number ie Invoice receipt T Code FB03
PIPELINE PROCESS (No Concept of Invoice)
In pipeline handling your company does not need to order or store the material
concerned It is ready available to you as and when required via pipeline (eg oil
or water) or some other type of cable (eg electricity) Consumption of the
material is settled with the vendor on a regular basis
Steps
1 Create a Material master record with material type PIPE
2 Create Pipeline info record
3 Create GI with movement type 201P
4 Pipeline settlement T Code MRKO
RETURNABLE TRANSPORT PACKAGING (RTP)
When company orders goods from a vendor the goods are delivered with
returnable transport packaging (pallets containers) that belongs to the vendor
and is stored on our premises until you return it to the vendor
Steps
1 Create Material master record with material type LEIH
2 Create PO
3 Create GR by maintaining RTP material by selecting the option transport
equipments with movement type 501M
4 IR
STOCK TRANSFER
In stock transfer processing goods are procured and supplied within a company
One plant orders the goods internally to another plant (receiving plantissuing
plant) The goods are procured with a special type of purchase order the stock
transport order
Steps
1 Create a Material master in both supplying and receiving plant
2 Create stock transport order (STO) with item category lsquoUrsquo
3 Create transfer posting with movement type 351 amp T Code MB1B (Go to
MMBE stock overview the stock will decrease in supplying plant and it will not
update stock of receiving plant it will be under stock in transit)
4 Create GR stock will update in receiving plant
This scenario is under one company code between two plants
Material Master Related Important Terms (Part 2)
Controlling (CO) An organizational unit in Accounting that reflects a
management-oriented structure of the organization for the purpose of internal
control
Operating results for profit centers can be analyzed using either the cost of
sales approach or the period accounting approach
By analyzing the fixed capital as well you can expand your profit centers for use
as investment centers
Profit Center
Key that uniquely identifies the profit center in the current controlling area
Valuation Category
Determines whether stocks of the material are valuated together or separately
Dependencies
In the case of split valuation this indicator also determines which valuation
types are allowed that is the criteria by which stocks can be valuated
Valuation type
Invoice Verification (MM-IV)
A subdivision of a valuation category in split valuation
Example An enterprise manages its stocks of a material using the valuation
category Quality comprising the following valuation types
bull High quality Average quality Inferior
Hazardous material number
Number that identifies the material as a hazardous material or as dangerous
goods and assigns hazardous material data or dangerous goods data to it
Use The hazardous material number indicates that the material is dangerous
making special precautions necessary for its storage and shipment
Valuation Class
Assignment of a material to a group of GL accounts
With other factors the valuation class determines the GL accounts that are
updated as a result of a valuation-relevant transaction or event such as a goods
movement
The valuation class makes it possible to
bull Post the stock values of materials of the same material type to different GL
accounts
bull Post the stock values of materials of different material types to the same GL
account
Default value for the valuation class for valuated stocks of this material
Use The valuation class has the following functions
bull Allows the stock values of materials of the same material type to be posted to
different GL accounts
bull Allows the stock values of materials of different material types to be posted to
the same GL account
bull Determines together with other factors the GL accounts updated for a
valuation-relevant transaction (such as a goods movement
CIN - Country India Version ~ Volume 1
PurposeCountry Version India (CIN) contains a number of enhancements to standard
Sales and Distribution (SD) functions that allow you to handle local
requirements in particular excise duty
Features
In Country Version India (CIN) this component handles sales processes as
found in India In addition to the generic functions it allows you to
Handle CENVAT in your sales processes
The system calculates excise on your sales and creates excise invoices as
required and makes the appropriate postings to your CENVAT accounts
It covers sales from factories sales from depots and offers functions for other
types of goods movements it also covers sales to export-oriented units and
export sales
Record concessional and exemption forms sent to you by your customers
Make adjustment postings to your CENVAT accounts
Excise Invoice (Outgoing)
Definition
The document that acts as the proof of payment of excise duty and is required
for the customer to take CENVAT credit on the item
Use
In the SAP System there are three different procedures for creating excise
invoices
Sales direct from the factory
This procedure is for when you sell manufactured goods straight from the
factory at which they were produced in which case you levy excise duty when
the goods leave the factory on their way to the customer
If when you send the goods to the customer you enclose the commercial
invoice you create the excise invoice with reference to the commercial invoice
If you want to send the commercial invoice after you have dispatched the goods
however you create the excise invoice with reference to a pro forma
commercial invoice For more information about these procedures see Sales
from Factories
As well as creating excise invoices individually you can also create them in
batches (see Creation of Excise Invoices in Batches)
Sales from depots
A depot is a site at which the goods are stored away from the factory at which
they were produced In this procedure you have to levy the excise duty when
you transfer the goods from the factory to the depot and then make sure this is
passed on to the customer when it makes a purchase For more information see
Sales from Depots
Sales (other goods movements)
Some other goods movements may also require you to create an excise invoice
with reference to other documents The SAP System offers separate functions
for these purposes (see Excise Invoices (Outgoing) for Other Movements)
StructureNumbering of Excise Invoices
Outgoing excise invoices have two numbers an internal document number
which is assigned immediately you create an excise invoice and an excise
invoice number which is not assigned until you have verified and posted it
As far as the excise invoice number is concerned you have to number your
outgoing excise invoices in sequential order starting each year on 1 April You
must notify the excise authority of the jurisdiction of the invoicing location The
serial number must be printed on each page of the excise invoice
Each number range is governed by a series group You must create at least one
series group in order to be able to number the excise invoices If you need more
than one number range you must create the corresponding number of series
groups You do so in the CIN Implementation Guide (IMG) by choosing Global
Settings reg Series Groups
Number of Line Items Per Excise Invoice
Some states allow you to include only a limited number of items for each page
of an excise invoice (for example if the excise invoices are to be printed on
prenumbered forms) You can customize the system so that it prints the excise
invoice accordingly in the CIN IMG by choosing Global Settings reg Excise
Registration IDs
Customer Master (Excise Data) Definition
The part of the customer master record that contains information relating to
Indian excise duty
Use
In conjunction with other data this data is used to calculate excise duty on
various transactions
To maintain the data from the SAP Easy Access screen choose Indirect Taxes reg
Master Data reg Excise Rate Maintenance and then select the following options
described below
Structure
The excise part of the customer master contains the following information
Customer Excise Details
On this screen you enter your customers tax registration numbers which are
used for various forms of correspondence and reports
1 Excise registration number (and the range division and collectorate in which
this is located)
2 Central sales tax (CST) number
3 Local sales tax (LST) registration number
4 Permanent account number (PAN)
In order for the system to be able to calculate which rate of excise duty to apply
on sales to the customer you must also assign it a customer excise duty status
(for more information about how this works see Determination of Excise Duty
Rates)
Excise Indicator for Plant and Customer
On this screen you define the final excise duty indicator (for more information
about how this works see Determination of Excise Duty Rates)
Determination of Excise Duty Use
When you execute a business transaction involving materials that are subject to
excise duty the system automatically calculates the duty for you
Prerequisites
In order for the system to be able to determine which rate of excise duty to
apply you must have maintained all the data on the Excise Rate Maintenance
screen which you can access from the SAP Easy Access screen by choosing
Indirect Taxes reg Master Data reg Excise Rate Maintenance
You maintain the following types of data
Plant master data
You assign each of your plants an excise duty indicator You can use the same
indicator for all the plants with the same excise status from a legal point of view
such as all those that are in an exempt zone
See also the information about manufacturers that are only entitled to deduct a
certain portion of the duty (see Partial CENVAT Credit)
Vendor master data
For each of your vendors with the same excise status from a legal perspective
you define an excise duty indicator You must also specify the vendor type ndash for
example whether the vendor is a manufacturer a depot or a first-stage dealer
You must also stipulate if the vendor qualifies as a small-scale industry
For each permutation of plant indicator and vendor indicator you then create a
final excise duty indicator
Customer master data
Similarly you assign the same excise duty indicator to each of your customers
that share the same legal excise status
Again for each permutation of plant indicator and customer indicator you then
create a final excise duty indicator
Material master data
Each material is assigned a chapter ID
Excise tax rate
For every chapter ID and final excise duty indicator you maintain the rate of
excise duty
If your business only qualifies for partial CENVAT credit you must customize
your system accordingly
Activities
Let us consider an example to illustrate how the system determines which rate
of excise duty to apply to a material Assume you are posting a sale of ball
bearings to a customer The system automatically determines the rate of excise
duty as follows
Looks up the customer master data to see what status you have assigned the
customer
Lets assume youve assigned the customer status 3
Looks up the plant master data to see what status you have assigned the plant
Similarly your plant has status 2
The system looks up the table under Excise Indicator for Plant and Customer to
see what the final excise duty indictor is for customer status 3 and plant status
2 It is 7
The system determines the chapter ID of the ball bearing for the plant
Letrsquos assume the chapter ID at plant for the ball bearings is 100001
Finally the system looks up the table under Excise Tax Rate to see what rate of
duty applies to chapter ID 100001 under status 7
Plant Master (Excise Data) Definition
The part of the plant master record that contains information relating to Indian
excise duty
Use
In conjunction with other data this data is used to calculate excise duty on
various transactions
To maintain the data from the SAP Easy Access screen choose Indirect Taxes reg
Master Data reg Excise Rate Maintenance and then select the following options
described below
Structure
The excise part of the plant master is divided into the following screens
Excise Indicator for Plant
On this screen you enter your plants tax registration numbers which are used
for various forms of correspondence and reports
1 Central sales tax (CST) number
2 Local sales tax (LST) registration number
3 Permanent account number (PAN)
In order for the system to be able to calculate which rate of excise duty to apply
on purchases for this plant you must also assign it a plant excise duty status
(for more information about how this works see Determination of Excise Duty
Rates)
Excise Indicator for Plant and Vendor
On this screen you define the final excise duty indicator (for more information
about how this works see Determination of Excise Duty Rates)
Excise Indicator for Plant and Customer
On this screen you define the final excise duty indicator (for more information
about how this works see Determination of Excise Duty Rates)
Automatic Creation of Excise Invoices Use
The SAP System can automatically create an outgoing excise invoice for you
immediately you post a commercial invoice (or a pro forma invoice) for a
customer sale This function applies to excise invoices for sales from factories
only
Prerequisites
To activate this function in the Country Version India (CIN) Implementation
Guide (IMG) make the following settings
1 Under Global Settings reg Excise Groups select Create EI
This activates the automatic creation function
2 Under Sales and Distribution reg Utilization Determination
Here you specify which CENVAT accounts the system is to post the different
types of excise duty to
3 Under Sales and Distribution reg Excise GroupndashSeries Group Determination
Here you specify which excise group and series group the excise invoices are to
be created for
Features
When you post an invoice the system creates an excise invoice All the
information that it needs to create the excise invoice is provided either by the
invoice or by the Customizing settings that you have made in Sales and
Distribution It also determines the excise invoice type automatically by means
of a user exit
Creating Excise Invoices for Stock Transfers 1 From the SAP Easy Access screen choose Indirect Taxes reg Procurement reg
Excise Invoice reg For Depot reg CreateChangeDisplay
2 In the Material document field enter the goods receipt number and choose
The system displays the information from the goods receipt for example the
sending plant the excise registration the range the division and the
collectorate
3 Choose Details
The system copies the items from the goods receipt document In the depot it is
possible to have a separate excise invoice at line item level
4 Enter the internal document number of the excise invoice sent by the factory
5 Choose More documents to go the excise invoice details screen
6 Enter the internal document number of the excise invoice from the factory
The system copies the information to the line item (for example the excise
invoice number the excise invoice date the item number the chapter ID the
excise invoice quantity the amount of excise duty paid the excise base value
and the serial number of the Part II register entry with which the excise was
paid)
You can change the receipt quantity to match the actual quantity received at
the depot if necessary The system automatically adjusts the excise
accordingly
7 Go back to the item details screen
8 Save the excise invoice
Creating Excise Invoices for Direct Purchases 1 From the SAP Easy Access screen choose Indirect Taxes reg Procurement reg
Excise Invoice reg For Depot reg CreateChangeDisplay
2 In the Material document field enter the goods receipt number and choose
The system displays the information from the goods receipt for example the
sending plant the excise registration the range the division and the
collectorate
You can also maintain the excise registration details for the ship-from party as
for with the vendor The ship-from can be different from the vendor code (The
delivering plant can be maintained as a ship-from in the system When a valid
ship-from is entered the excise registration details copied from the vendor will
be overwritten by the ship-from excise registration details)
The ship-from registration details displayed can also be overwritten manually
The dealers commercial invoice number can be stored in the vendor excise
invoice number as in this case the dealer himself will not have an excise
invoice
3 Choose Details
The system copies the items from the goods receipt document It also copies the
vendors excise invoice number and the serial numbers of the entries in the RG
23A RG 23C and personal ledger account (PLA) registers
4 Enter the internal document number of the excise invoice sent by the factory
5 Select an item and choose More documents to go the excise invoice details
screen
In the case of direct purchases there will not be any excise invoice in the
system so leave the internal document field blank The vendors invoice will
show the details of the excise invoices through which excise has been paid for
the item that is being dispatched You can enter these details here
6 For each item the chapter ID excise base value and excise duty amounts
are defaulted from the purchase order You can change them if there is any
difference Enter the excise amount paid and the receipt quantity You also
enter the Part II register serial numbers with which the excise duty was paid and
the excise registration information from the original excise invoice
7 Go back to the item details screen
8 Save the excise invoice
The system creates an entry in register RG 23D You can change the excise
invoice as long as it has not been used in any sales
Assigning Excise Invoices to a Delivery Use
You follow this procedure to specify which excise invoices are to be assigned to
a delivery from a depot (or other material document)
You can also automate this procedure using the batch selection program
(J_1IJCHK) by making the appropriate Customizing settings in the Country
Version India (CIN) Implementation Guide (IMG)
Procedure
1 From the SAP Easy Access screen choose Indirect Taxes reg SalesOutbound
Movements reg Excise Invoice reg For Depot reg CreateChangeDisplay reg Delivery
or Material Document reg RG 23D Selection
2 Enter the delivery document number or the material number and choose
3 Select the excise invoice you want
4 Choose
5 Choose Excise invoice
A list of excise invoices appears These are the excise invoices at the depot with
a balance quantity
The system also shows a list of the A certificates that can be used You can pick
up any of the A certificates but they must be for the same excise invoice You
can only pick up an A certificate in its entirety You cannot select part of an A
certificate
6 Select the excise invoices that are relevant to the delivery
7 Specify what quantity to be used from each excise invoice
The system recalculates the excise accordingly
8 Go back to the item details screen
9 Save the data
Result
The system creates an entry in register RG 23D and generates the depot excise
invoice numbers
If you selected any A certificates the system also generates additional entries in
the RG 23D register The system marks the original A certificates as updated so
that they cannot be used for any other removals
Continue see Volume 2 (Next post)
EXTERNAL SERVICE MASTER
EXTERNAL SERVICE MASTER ESM
We procure the different type of services from vendors they are-
1048774 Hardware amp software services
1048774 Construction amp transportation services
1048774 Machinery services
1048774 Annual maintenance services
1048774 Present to and breakdown service Etc
Service Procurement Cycle -
1048774 Requirement identification
1048774 Source determination
1048774 Source selection
1048774 Service master
1048774 Service PO
1048774 Service entry sheet acceptance
1048774 Invoice with respect to service entry sheet
Steps to perform services -
1 Create service master (AC03)
2 Create Service PO (ME21N) with AC Assignment category lsquoKrsquo amp Item
Category lsquoDrsquo
3 Create service entry sheet (ML81N)
4 Invoice with respect to Service Entry sheet
Customize settings
(For service category Number Ranges amp organization status for service
category)
SPRO 1048774 IMG 1048774 MM 1048774 ESM 1048774 Service Master
1048774 Define organization Status for service Categories
1048774 Define Service Category
1048774 Define Number Ranges
Define organization Status for service Categories
bull Click on New Entries
bull Org service Category
bull BDS (Basic data service is stored in service master record under this service
category)
bull CNST 1048774 Controlling Status
bull PUST 1048774 Purchasing data Status
bull SDST 1048774 Sales amp Distributed Status
bull Org status description service category 1048774 Press Enter amp Save
Define Service Category
bull Same path as above
bull Select Standard
bull Click on Copy as
bull AC reference 1048774 always takes as 0006
bull Enter amp Save
Define Number Ranges
Click on groups 1048774 Groups 1048774 Insert 1048774 select enter Number Ranges
Select the service category
Click on Element
Select Group amp Click on Element Group
Save
Create Service Master - (AC03)
Click on Create New Services
Service Number (any number) Service Category
Basic unit of measure (Hours lsquoHrsquo)
Enter
Basic Data 1048774 Master Service Group 1048774 007
Valuation class 1048774 3200 1048774 Enter 1048774 Save
To See the Service list 1048774 AC06
Create Service PO (ME21N)
AC assignment category lsquoKrsquo Item Category lsquoDrsquo
Enter the Short text Quantity Delivery date Net Price Material group Plant
Storage Location
Enter service number in Service Tab (Item Details) quantity price Enter
Account Assignment 1048774 GL Account Number eg400000
Cost Center eg 9999
Press Enter amp Save
Create Service Entry Sheet - ML81N
Select other purchase order (enter PO number) 1048774 Enter 1048774 Click on Create1048774 Enter
Short Text 1048774 Enter 1048774 Service Number 1048774 Enter ndashClick on Flag button 1048774 Save
Take Service entry Sheet Number
Go to Invoice MIRO 1048774 Enter company code 1048774 Select Service Sheet Option 1048774 Enter
Service Entry Sheet Number 1048774 save it
Physical Inventory and Inventory Management
Physical inventory Process - 1 Create Physical inventory document
T Code MI01 ndash Create single inventory document
T Code MI31 ndash Create multiple physical inventory documents
I Enter the desired fields ie material material type site storage location and
Maximum number items Documents ndash 100 etc 1048774 Press Enter
II Click on Process Session
III Select the line items and click on the process
IV System displays a dialog box select Background and click on process
Inventory document is created
2 Print Inventory Document and handed over to responsible person say
Manager
3 Enter Physical Inventory count
T Code MI04
i Enter the physical inventory document number Fiscal year count date 1048774 Press
enter
ii Enter the Material Quantity and click on post
4 Listing of difference
T Code MI20
Enter the physical inventory document number and execute system displays a
screen wherein we will be able to view the differences
5 Post the differences
T Code MI07 amp Mov Type 701 amp 702
Enter the physical inventory document number year posting date enter the
difference and post
INVENTORY MANAGEMENT Maintaining stock by value or by quantity is called inventory The total inventory
management deals with the goods movement of the material
Goods movement -
It is a process in which transaction resulting change in stocks It is further sub-
divided into three categories
1 Goods Receipt (GR)
2 Goods Issue (GI)
3 Transfer Posting (TP)
Goods Receipt (GR) - It is a goods movement in which receipt of goods is
posted for vendor or for production A GR posted in the system will leads to
increase in stock No Concept of Price or value
Goods Issue (GI) - It is goods movement in which material withdrawal is
posted for consumption or for customer A GI posted in system will leads to
decrease in stock
Stock Transfer (ST) - It is method of removal of material from one location
and transferring it to another location This process is performed between two
plants and two storage locations
Transfer Posting (TP) - It is a general term of stock transfer that changes the
stock type or stock categories The difference between transfer posting and
stock transfer is -
TP is logical stock transfer and ST is a physical stock transfer
Movement Type - It is a three-digit code which plays a role of important
control function in inventory management It acts as a central role in automatic
account determination It determines which stock account or consumption
account is updated in financial accounting
Reservation - It stores requisition created from particular cost center to
particular department for issuing the material reservation posted in the system
It leads to decrease in stock
Stock Types - The different stock types are
1 Unrestricted use stock
2 Quality inspection stock
3 Blocked stock
4 Warehouse stock
Transaction code -
1 To Create GR - MIGO
2 To Create GI - MB1A
3 For Transfer Posting - MB1B
4 To display MaterialGR document ndash MB03
5 To create reservations - MB21 MB22 MB23
6 To See Stock Overview - MMBE
7 To enter Other GR - MB1C
When GR is posted in the system
1 Material document is created - MB03
2 Accounting Document is generated - MB03
3 MMR updated - MM02 MM03
4 PO history updated - ME23N
Movement Typersquos
Movement Types under GR - 101 331333335501503505551553555
561351 (For all Mov Typersquos there is a reversal eg 101 has 102 Note No
reversal for 121)
Movement Typersquos under GI - 201 331333335551553555
Transfer Posting It is performed in three ways
1 TP BW Plant to Plant
2 TP BW Storage Location to Storage Location
3 TP BW Stock to Stock
Movement Types under TP BW Plant to Plant
301 - 1 step
303 amp 305 - 2 step
Movement Type under TP BW Storage location to Storage Location
311 - 1 step
313 amp 315 - 2 step
Movement Type under TP BW stock to stock
321 323 325 343349
To Cancel the GR Movement type 102
Return delivery to vendor movement type 122 amp T Code MIGO
Transfer Posting Stock to Stock
From Blocked stock to Quality Inspection
T Code MB1B amp Movement Type 349
From Blocked stock to Unrestricted Stock
T Code MB1B amp Movement Type 343
From Quality Inspection to Unrestricted Stock
T Code MB1B amp Movement Type 321
Transfer Posting from Plant to Plant
For One Step Movement Type 301
For Two Steps Movement Type 303 amp 305
After posting stock will display in Stock in Transit (Plant)
To receive material by receiving Plant Movement Type 305
Transfer Posting BW Storage Location to Storage Location
Under One Plant BW two Storage Locationrsquos Movement Type 311
Back to Parent storage Location Movement Type 313 (It Show stock in transfer)
use Movement type 315 at Parent storage location
To create Goods Issue (GI) T Code MB1A amp Movement Type 201
To Create Reservations T Code MB21 MB22 amp MB23
Creation of GI wrt Reservations
T Code MB1A amp Movement Type 201
Click on Reservation Enter Reservation Number 1048774 Click on Adopt + Details
GR wrt Reservations T Code MIGO amp Select as Reservation instead of GR
GR without PO Movement type 501 amp T Code MB1C Select others instead of
Purchase order Enter Material Quantity Plant Storage Location 1048774 Press Enter
Partner Option will be visible (Vendor) 1048774 Save it
Invoice - Invoice is a document which is issued to a buyer (Company) from the
supplier (vendor) for the payment The following information is maintained in
invoice
Invoice date Posting date Invoice ref number tax amount amount tax code
terms of payments vendor address banking accounting information etc
When invoice document is posted in the system
bull Invoice document created
bull Accounting document is generated (MIR4)
bull PO history updated (ME23N)
bull FI document created (FB03)
PRICE DETERMINATION PROCESS or PRICING PROCEDURE
CONDITIONS OR PRICING PROCEDURE or PRICE DETERMINATION PROCESSWe deal with the Pricing Procedure for vendors
PB00 Gross Price (info record contract scheduled Agreement)
PBXX Gross Price (PO)
FRA1 Freight
RA00 Discount on net
RA01 Discount on Gross
ZA00 Surcharge on net
SKT0 Surcharge discount
ZPB0 Rebates
MWVS Input Tax
MWAS Output Tax
BASB Base Amount
RM0000 Calculation Schema or Pricing Procedure
(PB00 amp PBXX)
RM0002 Calculation Schema or Pricing Procedure
(PB00)
PB00 --gt AB00
Copy the Standard one and create new one (ours)
RM0000 contains all the condition types
Pricing Procedure (PP)
We define the pricing procedure to define condition supplement for the material
price The condition supplement specifies the discount surcharge freight etc
that we want a system every time to access material price condition records
The total value of the material is calculated or based on all addition and
subtraction ie discounts surcharge tax freight etc
Condition Table
It is a table which defines the structure of condition record key
Condition Record
It is a data record used to store conditions or condition supplements ie
condition like discount freight and surcharge Tax etc
Condition Type
It is used for different functions In Pricing the condition types leads you to
differentiate different types of discounts in output determination batch
determination difference between two output types such as delivery note or
order confirmation between different strategy types
Access Sequence
It specifies the order in which system searches or access the condition records
from condition table
Difference between PB00 amp PBXX
1 Condition maintained in PB00 is time dependent whereas PBXX is time
independent
2 Condition type PB00 ndash used for IR RFQ Contract Schedule Agreement
Condition type PBXX ndash used for PO
Calculation Schema
The main function of calculation schema is to provide framework of steps for the
price determination process to specify the discounts surcharge freight rebate
etc
It also determines the sequence of conditions that are to be followed and in
which sequence
Schema Group Vendor
The main function of it is to identify or to pick the right process and conditions
for a particular vendor
Schema Group Purchasing Organization
Key that determines which calculation schema (pricing procedure) is to be used
in purchasing documents assigned to the relevant purchasing organization
Schema Group
It allows to group together the purchasing organizations which uses the same
calculation schema
Steps -
1 Create Access sequence
2 Create condition types
3 Create pricing procedure or calculation schema
4 Link pricing procedure amp access sequence to condition type
5 Create schema group for vendor
6 Create schema group for purchase organization
7 Assign schema group vendor-to-vendor master record in purchasing data
view
8 Assign schema group purchase organization to our purchase organization
9 In inforecord purchase organization data enter condition types and pricing or
calculation procedure
CUSTOMIZE SETTINGS -
SPRO --gt IMG--gtMM--gtPUR--gtConditions --gtDefine price determination Process
1 Define access sequence
2 Define Condition type
3 Define cal Schema
4 Define schema group
o Schema group vendor
o Schema group purchasing group
5 Assignment of schema group to PUR org
6 Define schema determination agrave determine cal schema for standard PO
PURCHASE ORDER
PURCHASE ORDER
PO is an external document created for the procurement of materials and
services from vendor The document of PO is also divided into 4 parts as PR -
1 Document Overview
2 Header (DeliveryInvoice Conditions Address Partners Org data status)
3 Item Overview (AC assign cat Item Category Material Plant Del date SL)
4 Item Details (Material data Confirmations condition control delivery delivery
Schedule Quantitiesweights invoice)
A procurement type is defined for each of the document items The following
procurement types exist
1048774 Standard
1048774 Subcontracting
1048774 Consignment
1048774 Stock transfer
1048774 External service
bull There are different ways to create PO -
1 Directly through transaction code ME21N
2 With reference to PR
3 With reference to RFQ
4 With reference to info records
5 With reference to Contracts
6 With reference to Cost Centre GL Account (cost element) for consumable
items or not stock items with account assignment category lsquoKrsquo (K= cost centre)
(For non stock and consumables)
0 COMMENTS L INKS TO THIS POST
LABELS PO PURCHASE ORDER
Reaction
s
PURCHASE REQUISITION T CODE ME51 or ME51N
Purchasing Requisition -
It is a request or instruction from particular department (Cost Centre) to
purchasing department to procure certain quantity of material and services It is
only one internal document in SAP-MM
Purchasing Requisition document is divided into four parts -
bull Document Overview
bull Header
bull Item Overview
bull Item Details
Document Overview -
It displays the list of purchasing documents which are created previously
according to our requirement
Header -
Any text message or information is maintained
Item Overview -
In this we enter material plant delivery date quantity storage location
purchasing group AC assignment category Item category etc
Item Details -
It displays the detailed information about item overview (like Master data
valuation source of supply contact person delivery address status etc)
0 COMMENTS L INKS TO THIS POST
LABELS PR PURCHASE PURCHASE ORDER PURCHASE REQUIS IT ION SALES ORDER
Reaction
s
Automatic PURCHASE ORDER (PO) How Automatic PO raised
How Automatic PO raised
At fixed time say 1230 AM automatic scheduler runs and checks whether the
stock is less than or equal to the replenishment point If stock is less than or
equal to Repli Point than PR raised automatically to Purchasing Deptt
bull Activate the option automatic PO in purchasing view in material master record
bull Activate the option automatic PO in purchasing data view in vendor master
record
bull Maintain Source List amp select fixed vendor
bull PR crated automatically
bull Automatic creation of PO from PR ndash ME59
Enter the Purchasing group purchasing organization Vendor Plant and
Purchasing Requisition Document Number 1048774 Execute
RELEASE PROCEDURE Release strategyThe main function of Release procedure is to determine the approval process
or the release process for the procurement of material amp services rather than
relying for manual signatures The release procedure contains release strategy
Release Strategy (RS)
A plan defining the release codes with which a purchase requisition item a
complete purchase requisition or a complete external purchasing document
must
be released (that is approved) and the sequence in which release is to be
effected
using these codes It is a unique set of conditions sequence and level of release
It is a 2 digit code eg S1 S2 S3etc
The Release Strategy contains the following -
bull Release Group
bull Release Codes
bull Release Indicators
bull Release Prerequisite
Release Group -
It is a 2-digit code which is assigned with a class (Class contains group of
characteristics) It contains one or more release strategies
Release Codes -
It is a 2digit code which identifies the department or responsible person for
the approval process amp release process
Eg AA - Manager
BB - Sr Manager
CC - Vice President
DD - Managing Director
Release Indicator -
It is a Code that represents the release status If the proper approval
process is performed that the release Strategy has to be release if it is not
performed than the Release Strategy is blocked
R ndash Release
B ndash Blocked
Release Conditions -
It determines the type of the release strategy
For eg
bull If the price ranges from 1 to 1000 It is approved by AA BB and CC
bull If the ranges from1001 to 1lac then it is approved by AA BB CC and DD
- 80 -
Release Prerequisite
It will informs the system which RS has to be take place in the PO CEKKO is
a communication structure where it displays the field names amp field lengths to
create characteristics ie we maintain characteristics in customizing by
selecting
the field names from this communication structure for all external documents
CEBAN is used for the purchasing requisition
Characteristics -
1 Net value of PO --- GNETW (GSWRT for PR)
2 Plant --- WERKS
3 Purchasing organization -- EKORG
4 Purchasing Group --- EKGRP
5Material group ndashMATKL
CUSTOMIZE SETTINGSSPRO--gtIMG--gt MM--gt Purchasing--gtPO--gt Release Procedure for PO
1 Edit Characteristics T Code CT04
2 Edit Class T Code CL02
3 Define Release Procedure for PO
4 Check Release Strategy
Edit Characteristics -
Characteristics - eg NET VALUE OF VALUE
Click or Create Button
Under Basic Data
Description - Value for PO
Status - Release
Data Type - Currency Format
No Of Characters - 15
Currency - EUR
Activate multiple values amp Internal Values Allowed
Additional Data
Table name - CEKKO
Field Name - GNETW
Values
Activate Additional Values
Save the document
Create another Characteristic for Plant -
Plant date Create ndash Description Status
Data Type Characteristic Format
Number of Characteristics 4
Activate Multiple Values
Additional data-
Table Name - CEKKO
Field Name - WERKS
Values
Activate Additional Values
For Purchasing Organization Name - EKORG
For purchasing Group EKGRP
Edit Class
Class - SAPMM
Class Type - 032 Release Strategies
Click on Create button
Basic Data
Description - Class for PO
Status - Released
Valid From _____ Valid to _____
Click on Characteristic
Characteristic
Enter all the Characteristics Created amp Save it
Define Release Procedure for PO-
bull Release Group
bull Release Codes
bull Release Indicators
bull Release Strategies
bull Workflow
Release Group - New Entries Release Group Class and Description
Press Enter amp Save
Release Code - New Entries
Group Codes Description
99 AA Manager
99 BB Sr Manager
99 CC Vice President
99 DD Managing Director
Press Enter amp Save
Release Indicator - (B ndash Blocked R - Release)
New Entries
Release Indicators Description
B Blocked
R Released
Release Strategies -
New Entries
Release Group 99
Release Strategy S1
Release Codes AA BB CC and DD
Click on Release Prerequisites
Release Status -
Continue
Classification
Enter the Value (Same Price)
Plant (9999)
Go Back amp Save it
Release Simulation - Simulate Release
Create a PO -
There are two ways to release the PO
Individual releaseME28
Collective release ME29N
How to delete procedure
Delete Release GP
Create Release RG
Delete R Strategies
Delete R Code
Delete R Group
SAP R3 SYSTEM LANDSCAPE
System LandscapeThe system landscape contains all the SAP Systems that you have installed It
can consist of several system groups whorsquos SAP Systems are linked by transport
routes
After you decide which clients you need and which roles you want them to have
you need to decide how to distribute them amongst the different SAP Systems
You can set up multiple clients independently of one another in a single SAP
System However when you configure the data you must remember that cross-
client Customizing settings and Repository objects are identical for all clients in
a single SAP System Changes made in one client apply immediately to all
clients in the system
Three-System Landscape
SAP recommends a three-system landscape in which each of the central clients
has its own SAP System
This consists of a development system DEV a quality assurance system QAS
and a production system PRD The development system contains the
Customizing client CUST the quality assurance system contains the quality
assurance client QTST and the production system contains the production client
PROD Make all changes to Customizing data and Repository objects in the
Customizing client When you release the corresponding change requests they
are transported into the quality assurance client This means that changes to
cross-client data only appear in the quality assurance client after the transport
In the quality assurance client you can test whether the transports are
complete or whether any linked changes are missing and are still in unreleased
change requests If the test is successful the change requests are transported
into the production client The production client is completely separate from the
other clients as regards cross-client data
SPECIAL STOCKS amp SPECIAL PROCUREMENT TYPES
Special Stocks are those stocks which are not belongs to our company code
These are not placed in our storage locations amp no physical inventory is
performed and treated as special stocks for the reason of ownership
Different types are of Special Stocks are as follows
1 Subcontracting
2 Consignment
3 Pipeline
4 Stock transfer
5 Third party
6 Returnable transport packaging
7 Sales order stock
8 Project stock
SUBCONTRACTING
In subcontracting process we create subcontracting PO to supply or issue
subcomponents to vendor in order to get final product The price maintained in
subcontracting PO is a service charge paid to vendor
Steps to perform subcontracting
1 Create subcontracting inforecord (Optional)
2 Create subcontracting PO with item category L
There are to ways to supply subcomponents to vendor
bull Manually maintain the subcomponents in the subcontracting
PO though explode BOM
bull Through BOM (Bill of material) T Code CS01 CS02 amp CS03
3 Create Transfer Posting with Movement Type 541 to issue the subcomponents
to the vendor
4 Goods Reciept
5 Invoice Reciept
Path ME21N ---gt Enter Item Category L --gt Material (End Product) PO
Quantity Delivery Date Net Price Plant --gt Click on Item Details --gt Tab
Material Data -- gtComponents select Explode BOM --gt Click on Components
button --gt Enter the subcomponents --gt Go back amp Save
Create Transfer Posting with movement type 541 amp T Code MB1B
GR MIGO
IR MIRO
CONSIGNMENT - (No Concept of Invoice)
In consignment process we will not create Purchasing document for the vendor
vendor himself send the material to our plant though the material is available
to our plant the responsibility amp ownership of the material is of vendor Aliability
only arises when the material withdrawal (Consumption) is posted in the system
from consignment stock
Steps
1 Create Consignment info record (mandatory)
2 Create Consignment purchase order with item category lsquoKrsquo amp maintain Info
record number
3 Create GR Movement type lsquo101Krsquo
4 Create GI Movement Type lsquo201Krsquo
5 Consignment settlement T Code MRKO
Path --gtME11 --gt In info record --gt Purchasing Org Data 1 views of info record
enter the tax code and save it
--gt Create Consignment Purchase Order ME21N (Price option is grayed out with
price zero)
--gt Create GR with movement type 101K
--gt Create Goods Issue (GI) T Code MB1A amp Movement Type 201K Enter Cost
center vendor
--gt Consignment Settlement T Code MRKO Click Activate Consignment Activate
Settle Execute
--gt Display the Document Number ie Invoice receipt T Code FB03
PIPELINE PROCESS (No Concept of Invoice)
In pipeline handling your company does not need to order or store the material
concerned It is ready available to you as and when required via pipeline (eg oil
or water) or some other type of cable (eg electricity) Consumption of the
material is settled with the vendor on a regular basis
Steps
1 Create a Material master record with material type PIPE
2 Create Pipeline info record
3 Create GI with movement type 201P
4 Pipeline settlement T Code MRKO
RETURNABLE TRANSPORT PACKAGING (RTP)
When company orders goods from a vendor the goods are delivered with
returnable transport packaging (pallets containers) that belongs to the vendor
and is stored on our premises until you return it to the vendor
Steps
1 Create Material master record with material type LEIH
2 Create PO
3 Create GR by maintaining RTP material by selecting the option transport
equipments with movement type 501M
4 IR
STOCK TRANSFER
In stock transfer processing goods are procured and supplied within a company
One plant orders the goods internally to another plant (receiving plantissuing
plant) The goods are procured with a special type of purchase order the stock
transport order
Steps
1 Create a Material master in both supplying and receiving plant
2 Create stock transport order (STO) with item category lsquoUrsquo
3 Create transfer posting with movement type 351 amp T Code MB1B (Go to
MMBE stock overview the stock will decrease in supplying plant and it will not
update stock of receiving plant it will be under stock in transit)
4 Create GR stock will update in receiving plant
This scenario is under one company code between two plants
SAP IMPLEMENTATION PROCESS End to End Inplementation of SAP
First we have to prepare documentation about the client business (like turnover
vendors customers payments materials production marketing etc)
The implementer company made two teams (1) Steering team (2) Steering
community
Steering team (SAP functional consultants) prepares a detailed
documentation about the client with the help of core team (client company
team)
amp this study is known as Feasibility Study After that the steering team handed
over this documentation to Steering community (Project manager Sr software
engineer and other higher authorities)
Steering community prepares the BBP (Business Blue Print) BBP
Prepares in MS-Word
10487741048774 ASAP - Accelerated System Application Product in Data Processing
10487741048774 Business Process - ASAP Methodology
1 Project Preparation
2 BBP (Business Blue Print)
3 Realization
4 Final Preparation
5 Go live amp Support
10487741048774 Project Preparation -
It consists of identifying team members amp development strategy as
how to go
AS ndash IS (Existing Process followed requirements)
TO ndash BE (Requirement analysis and best process recommended)
Difference between (AS ndash IS) amp (TO - BE) is called GAP Analysis
10487741048774 Business Blue Print (BPP) -
It is a legal documentation between client amp the company
(implementer service provider) We have to understand the current business
process of client amp analyzing the business amp prepare documentation It is a
detailed documentation for the client
10487741048774 Realization -
This Phase is used to Implement or migrate the entire business of
client from Non-SAP environment to SAP environment
10487741048774 Final Preparation -
This phase is used for testing amp end user training After successfully
completion of this phase client is ready to run business in SAP R3
10487741048774 Go live amp Support -
In this phase we deliver the project end date amp end user training at
client site
THIRD - PARTY PROCESSING
THIRD - PARTY PROCESSING
In third party processing your company passes on a sales order to an external
vendor who sends the goods directly to the customer The sales order is not
processed by your company but by the vendor Third-party items can be
entered in purchase requisitions purchase orders and sales orders Third party
processing is integrated with Sales and Distribution If the sales order contains
third-party items the system creates a purchase requisition from the order
Steps
1 Create MMR with sales views and maintain Division Distribution channel
sales org item category group and general item category group ndash BANS (Third
party item) amp Account group Sold to party
2 Create Customer master record T Code XD01 XD02 XD03
3 Create sales order T Code VA01 VA02 VA03 (PR generated automatically)
4 PO - T Code ME21N
5 GR ndash T Code MIGO
6 IR ndash T Code MIRO
7 Sales Billing Billing Document T Code VF01 VF02 VF03

This procedure is for when you sell manufactured goods straight from the
factory at which they were produced in which case you levy excise duty when
the goods leave the factory on their way to the customer
If when you send the goods to the customer you enclose the commercial
invoice you create the excise invoice with reference to the commercial invoice
If you want to send the commercial invoice after you have dispatched the goods
however you create the excise invoice with reference to a pro forma
commercial invoice For more information about these procedures see Sales
from Factories
As well as creating excise invoices individually you can also create them in
batches (see Creation of Excise Invoices in Batches)
Sales from depots
A depot is a site at which the goods are stored away from the factory at which
they were produced In this procedure you have to levy the excise duty when
you transfer the goods from the factory to the depot and then make sure this is
passed on to the customer when it makes a purchase For more information see
Sales from Depots
Sales (other goods movements)
Some other goods movements may also require you to create an excise invoice
with reference to other documents The SAP System offers separate functions
for these purposes (see Excise Invoices (Outgoing) for Other Movements)
StructureNumbering of Excise Invoices
Outgoing excise invoices have two numbers an internal document number
which is assigned immediately you create an excise invoice and an excise
invoice number which is not assigned until you have verified and posted it
As far as the excise invoice number is concerned you have to number your
outgoing excise invoices in sequential order starting each year on 1 April You
must notify the excise authority of the jurisdiction of the invoicing location The
serial number must be printed on each page of the excise invoice
Each number range is governed by a series group You must create at least one
series group in order to be able to number the excise invoices If you need more
than one number range you must create the corresponding number of series
groups You do so in the CIN Implementation Guide (IMG) by choosing Global
Settings reg Series Groups
Number of Line Items Per Excise Invoice
Some states allow you to include only a limited number of items for each page
of an excise invoice (for example if the excise invoices are to be printed on
prenumbered forms) You can customize the system so that it prints the excise
invoice accordingly in the CIN IMG by choosing Global Settings reg Excise
Registration IDs
Customer Master (Excise Data) Definition
The part of the customer master record that contains information relating to
Indian excise duty
Use
In conjunction with other data this data is used to calculate excise duty on
various transactions
To maintain the data from the SAP Easy Access screen choose Indirect Taxes reg
Master Data reg Excise Rate Maintenance and then select the following options
described below
Structure
The excise part of the customer master contains the following information
Customer Excise Details
On this screen you enter your customers tax registration numbers which are
used for various forms of correspondence and reports
1 Excise registration number (and the range division and collectorate in which
this is located)
2 Central sales tax (CST) number
3 Local sales tax (LST) registration number
4 Permanent account number (PAN)
In order for the system to be able to calculate which rate of excise duty to apply
on sales to the customer you must also assign it a customer excise duty status
(for more information about how this works see Determination of Excise Duty
Rates)
Excise Indicator for Plant and Customer
On this screen you define the final excise duty indicator (for more information
about how this works see Determination of Excise Duty Rates)
Determination of Excise Duty Use
When you execute a business transaction involving materials that are subject to
excise duty the system automatically calculates the duty for you
Prerequisites
In order for the system to be able to determine which rate of excise duty to
apply you must have maintained all the data on the Excise Rate Maintenance
screen which you can access from the SAP Easy Access screen by choosing
Indirect Taxes reg Master Data reg Excise Rate Maintenance
You maintain the following types of data
Plant master data
You assign each of your plants an excise duty indicator You can use the same
indicator for all the plants with the same excise status from a legal point of view
such as all those that are in an exempt zone
See also the information about manufacturers that are only entitled to deduct a
certain portion of the duty (see Partial CENVAT Credit)
Vendor master data
For each of your vendors with the same excise status from a legal perspective
you define an excise duty indicator You must also specify the vendor type ndash for
example whether the vendor is a manufacturer a depot or a first-stage dealer
You must also stipulate if the vendor qualifies as a small-scale industry
For each permutation of plant indicator and vendor indicator you then create a
final excise duty indicator
Customer master data
Similarly you assign the same excise duty indicator to each of your customers
that share the same legal excise status
Again for each permutation of plant indicator and customer indicator you then
create a final excise duty indicator
Material master data
Each material is assigned a chapter ID
Excise tax rate
For every chapter ID and final excise duty indicator you maintain the rate of
excise duty
If your business only qualifies for partial CENVAT credit you must customize
your system accordingly
Activities
Let us consider an example to illustrate how the system determines which rate
of excise duty to apply to a material Assume you are posting a sale of ball
bearings to a customer The system automatically determines the rate of excise
duty as follows
Looks up the customer master data to see what status you have assigned the
customer
Lets assume youve assigned the customer status 3
Looks up the plant master data to see what status you have assigned the plant
Similarly your plant has status 2
The system looks up the table under Excise Indicator for Plant and Customer to
see what the final excise duty indictor is for customer status 3 and plant status
2 It is 7
The system determines the chapter ID of the ball bearing for the plant
Letrsquos assume the chapter ID at plant for the ball bearings is 100001
Finally the system looks up the table under Excise Tax Rate to see what rate of
duty applies to chapter ID 100001 under status 7
Plant Master (Excise Data) Definition
The part of the plant master record that contains information relating to Indian
excise duty
Use
In conjunction with other data this data is used to calculate excise duty on
various transactions
To maintain the data from the SAP Easy Access screen choose Indirect Taxes reg
Master Data reg Excise Rate Maintenance and then select the following options
described below
Structure
The excise part of the plant master is divided into the following screens
Excise Indicator for Plant
On this screen you enter your plants tax registration numbers which are used
for various forms of correspondence and reports
1 Central sales tax (CST) number
2 Local sales tax (LST) registration number
3 Permanent account number (PAN)
In order for the system to be able to calculate which rate of excise duty to apply
on purchases for this plant you must also assign it a plant excise duty status
(for more information about how this works see Determination of Excise Duty
Rates)
Excise Indicator for Plant and Vendor
On this screen you define the final excise duty indicator (for more information
about how this works see Determination of Excise Duty Rates)
Excise Indicator for Plant and Customer
On this screen you define the final excise duty indicator (for more information
about how this works see Determination of Excise Duty Rates)
Automatic Creation of Excise Invoices Use
The SAP System can automatically create an outgoing excise invoice for you
immediately you post a commercial invoice (or a pro forma invoice) for a
customer sale This function applies to excise invoices for sales from factories
only
Prerequisites
To activate this function in the Country Version India (CIN) Implementation
Guide (IMG) make the following settings
1 Under Global Settings reg Excise Groups select Create EI
This activates the automatic creation function
2 Under Sales and Distribution reg Utilization Determination
Here you specify which CENVAT accounts the system is to post the different
types of excise duty to
3 Under Sales and Distribution reg Excise GroupndashSeries Group Determination
Here you specify which excise group and series group the excise invoices are to
be created for
Features
When you post an invoice the system creates an excise invoice All the
information that it needs to create the excise invoice is provided either by the
invoice or by the Customizing settings that you have made in Sales and
Distribution It also determines the excise invoice type automatically by means
of a user exit
Creating Excise Invoices for Stock Transfers 1 From the SAP Easy Access screen choose Indirect Taxes reg Procurement reg
Excise Invoice reg For Depot reg CreateChangeDisplay
2 In the Material document field enter the goods receipt number and choose
The system displays the information from the goods receipt for example the
sending plant the excise registration the range the division and the
collectorate
3 Choose Details
The system copies the items from the goods receipt document In the depot it is
possible to have a separate excise invoice at line item level
4 Enter the internal document number of the excise invoice sent by the factory
5 Choose More documents to go the excise invoice details screen
6 Enter the internal document number of the excise invoice from the factory
The system copies the information to the line item (for example the excise
invoice number the excise invoice date the item number the chapter ID the
excise invoice quantity the amount of excise duty paid the excise base value
and the serial number of the Part II register entry with which the excise was
paid)
You can change the receipt quantity to match the actual quantity received at
the depot if necessary The system automatically adjusts the excise
accordingly
7 Go back to the item details screen
8 Save the excise invoice
Creating Excise Invoices for Direct Purchases 1 From the SAP Easy Access screen choose Indirect Taxes reg Procurement reg
Excise Invoice reg For Depot reg CreateChangeDisplay
2 In the Material document field enter the goods receipt number and choose
The system displays the information from the goods receipt for example the
sending plant the excise registration the range the division and the
collectorate
You can also maintain the excise registration details for the ship-from party as
for with the vendor The ship-from can be different from the vendor code (The
delivering plant can be maintained as a ship-from in the system When a valid
ship-from is entered the excise registration details copied from the vendor will
be overwritten by the ship-from excise registration details)
The ship-from registration details displayed can also be overwritten manually
The dealers commercial invoice number can be stored in the vendor excise
invoice number as in this case the dealer himself will not have an excise
invoice
3 Choose Details
The system copies the items from the goods receipt document It also copies the
vendors excise invoice number and the serial numbers of the entries in the RG
23A RG 23C and personal ledger account (PLA) registers
4 Enter the internal document number of the excise invoice sent by the factory
5 Select an item and choose More documents to go the excise invoice details
screen
In the case of direct purchases there will not be any excise invoice in the
system so leave the internal document field blank The vendors invoice will
show the details of the excise invoices through which excise has been paid for
the item that is being dispatched You can enter these details here
6 For each item the chapter ID excise base value and excise duty amounts
are defaulted from the purchase order You can change them if there is any
difference Enter the excise amount paid and the receipt quantity You also
enter the Part II register serial numbers with which the excise duty was paid and
the excise registration information from the original excise invoice
7 Go back to the item details screen
8 Save the excise invoice
The system creates an entry in register RG 23D You can change the excise
invoice as long as it has not been used in any sales
Assigning Excise Invoices to a Delivery Use
You follow this procedure to specify which excise invoices are to be assigned to
a delivery from a depot (or other material document)
You can also automate this procedure using the batch selection program
(J_1IJCHK) by making the appropriate Customizing settings in the Country
Version India (CIN) Implementation Guide (IMG)
Procedure
1 From the SAP Easy Access screen choose Indirect Taxes reg SalesOutbound
Movements reg Excise Invoice reg For Depot reg CreateChangeDisplay reg Delivery
or Material Document reg RG 23D Selection
2 Enter the delivery document number or the material number and choose
3 Select the excise invoice you want
4 Choose
5 Choose Excise invoice
A list of excise invoices appears These are the excise invoices at the depot with
a balance quantity
The system also shows a list of the A certificates that can be used You can pick
up any of the A certificates but they must be for the same excise invoice You
can only pick up an A certificate in its entirety You cannot select part of an A
certificate
6 Select the excise invoices that are relevant to the delivery
7 Specify what quantity to be used from each excise invoice
The system recalculates the excise accordingly
8 Go back to the item details screen
9 Save the data
Result
The system creates an entry in register RG 23D and generates the depot excise
invoice numbers
If you selected any A certificates the system also generates additional entries in
the RG 23D register The system marks the original A certificates as updated so
that they cannot be used for any other removals
CIN - Country India Version ~ Vol 2
Continue Volume 1
Creating Excise Invoices
Use
This is the procedure that you follow to create an excise invoice for the less
common types of goods movement
Procedure
1 From the SAP Easy Access screen choose Indirect Taxes reg SalesOutbound
Movements reg Excise Invoice reg For Other Movements reg CreateChangeDisplay
reg
2 On the selection screen enter data as required including
(i)Reference
group box
Specify which document you want to create the excise invoice for and which
excise group it is for
(ii)Details
group box
Specify the vendor or customer that you are sending the invoice to
3 Choose
If you entered an internal document number the system copies the item details
from it
4 Choose
5 Enter line items for each of the materials to be included in the excise invoice
For each item enter the following data
(i)Material
(ii)Quantity
(iii)Unit of measure
(iv)Base value
(v)Excise duty
6 To pick the rate and amount from a specific excise invoice choose Get excise
invoice
7 Save the excise invoice
If you are using the one-step procedure the system creates and posts an excise
invoice Otherwise the system saves the information but does not make any
postings it now has to be verified
Verifying and Posting Excise Invoices
Use
You follow this procedure to verify that the information in an excise invoice that
has already been created and to post it once you are satisfied
Procedure
From the SAP Easy Access screen choose Indirect Taxes reg SalesOutbound
Movements reg Excise Invoice reg For Other Movements reg Posting
1 Enter the internal document number of the excise invoice
2 Choose Release to accounting
The system displays the excise invoice The excise duty that is to be posted is
displayed at the foot of the screen which you can change if necessary
3 To access the balance utilization choose
4 To display the balance available on the CENVAT accounts choose Account
balances
5 Save the excise invoice
The system generates the accounting documents
6 To print the excise invoice choose
Making a Transfer Posting
Use
In this procedure you make a transfer posting for the goods ordered by another
plant For more information about this function see Entering the Removal from
Storage at the Issuing Plant
Procedure
1 From the SAP Easy Access screen choose Logistics reg Materials Management
reg Inventory Management reg Goods Movement reg Transfer Posting
2 Choose Movement type reg Transfer posting reg Plant to plant reg To stock in
transit
3 Enter the number of the issuing plant and storage location
4 Choose To purchase order
5 In the dialog box enter the number of the stock transport order that the
receiving plant created and choose
6 Check the data
7 Save the transfer posting
Transaction Codes for India
Transaction Action
J1I2 Prepare a sales tax register
J1I3 Create outgoing excise invoices in batches
J1I5
Update the RG 1 and Part I registers
J1I8
Post the challan used to remit TDS
J1IC194C
Create annual return under section 194 C (Classic TDS)
J1IC194D
Create annual return under section 194 D (Classic TDS)
J1IC194I
Create annual return under section 194 I (Classic TDS)
J1IC194J
Create annual return under section 194 J (Classic TDS)
J1IEX
Incoming Excise Invoices (central transaction)
J1IEX_C
Capture an incoming excise invoice (excise clerk)
J1IEX_P
Post an incoming excise invoice (excise supervisor)
J1INBANK
Post a bank challan
J1INCANC
Cancel a vendor withholding tax certificate
J1INCERT
Print a vendor withholding tax certificate
J1INCHLN
Create a remittance challan
J1INCUST
Post a customer withholding tax certificate
J1INHC
Withholding Tax Migration Health Check Program
J1INMIG
Withholding Tax Data Migration Tool
JI1NCHLC
Create a remittance challan for customers
J1INCC
Print customer withholding tax certificates
J1INMIS
Withholding Tax Information System
JI1NAR
Prepare annual returns (Extended Withholding Tax)
J1IF01
Create a subcontracting challan
J1IF11
Change a subcontracting challan
J1IF12
Display a subcontracting challan
J1IF13
Complete reverse or recredit a subcontracting challan
J1IFQ
Reconcile quantities for subcontracting challans
J1IFR
List subcontracting challans
J1IH
Make a CENVAT adjustment posting
J1IIN
Create an outgoing excise invoice
J1IJ
Assign excise invoices to a delivery for sales from depots
J1INJV
Adjust withholding tax Item
J1INREP
Reprint a vendor withholding tax certificate
J1INREV
Reverse a remittance challan
J1INPR
Calculate withholding tax on clearing accounts
J1INUT
Clear withholding tax on clearing accounts
J1IR
Download register data
J1IS
Process an excise invoice (outgoing) for other movements
J1IU
Process exemption forms
J1IW
Verify and post an incoming excise invoice
J1IX
Create an incoming excise invoice (without reference to purchase order)
J2I8
Transfer excise duty to CENVAT account
J2ID
Archive tax deducted at source (TDS) documents
J2IE
Locate tax deducted at source documents in archive
J2IU
Remit excise duty fortnightly
J2I9
Monthly CENVAT return
J1IG
Excise invoice entry at depot
J1IGA
Create additional excise entry at depot
J2I5
Extract data for excise registers
J2I6
Print excise registers
Sales from Factories
Purpose
This process describes how the SAP System handles the sales process allowing
for the creation of excise invoices which you have to send with each delivery
that is subject to excise duty There are two scenarios depending on whether
you want to send the commercial invoice along with the delivery or at a later
date
Prerequisites
In order for the system to be able to copy the information from document to
document you must have set up the copying control procedures in Customizing
for Sales and Distribution (SD) This differs according to when you want to send
the commercial invoice
1 Along with the delivery
In this case the document flow would be OR (standard sales order type) ndash LF
(standard delivery type) ndash F2 (invoice)
2 At a later date
The document flow would be OR ndash JF (delivery type a copy of LF) ndash JEX (pro
forma billing document type a copy of document type F8) ndash F2
In addition you must also have maintained the settings in the Country Version
India (CIN) Implementation Guide (IMG) by choosing Global Settings reg Assign
Excise Invoice Billing Type to Delivery Type
A sample pricing procedure JFACT is provided for this sales procedure
Process Flow
1 The sales clerk creates a sales order following the
(i)standard procedure
There are special procedures for
(i)Customers in possession of exemption forms
(ii)Exports
2 The shipping clerk creates a delivery again following the
standard procedure
On the initial screen you set the appropriate delivery type (see above)
3 In the warehouse the storeperson issues the goods
The system only allows users to create a pro forma excise invoice if the delivery
is complete so as to prevent them from creating multiple pro forma excise
invoices
4 What you do at this stage depends on whether you want to send the
commercial invoice along with the delivery or whether you want to invoice the
customer later
(A) If the invoice is to be shipped with delivery the shipping clerk
(i)Creates an invoice following the standard procedure
(ii)Creates an excise invoice from the invoice
(B) If the invoice is to be sent on at a later date the shipping clerk
(i)Creates the pro forma excise invoice
The pro forma excise invoice is only required for technical purposes and is not
sent to the customer The system does not make any accounting postings at this
stage
(ii)Creates
an excise invoice from the pro forma excise invoice
In both these cases the system creates an accounting document to post the
excise duty to a clearing account
Instead of creating excise invoices manually you can also have the system
create them automatically Alternatively you can create them in batches
5 You ship the goods
6 When the time comes to invoice the customer you create the invoice
following the standard procedure
Irrespective of the number of excise invoices that you have issued you can
combine the delivery items in a single invoice (if the standard requirements are
met)
Sales from Depots
Purpose
You may sell finished goods directly from the place of manufacture as described
under Sales from Factories or you may first ship them to a separate location for
storage (a depot) from where you will sell them The second procedure is
described here
Sales from depots are handled differently from sales from factories because of
excise law Excise duty is payable when you send the goods from the factory to
the depot but it is not levied again when you sell the goods
Sometimes when you make a final sale of goods from a depot price escalations
could have happened with retrospective effect In such scenarios you need to
pay the extra excise duty at the factory using an A Certificate You need to
register the A certificate details in the RG 23D register and the excise recovered
from the customer
Prerequisites
You have customized
1 Stock transport processing in Customizing for Materials Management (MM)
by choosing Purchasing reg Purchase Order reg Set Up Stock Transport Order
2 The copying control for copying stock transport order NL to excise invoice JEX
You make this setting in the Country Version India (CIN) Implementation Guide
(IMG) by choosing Sales and Distribution reg Assign Excise Invoice Billing Type to
Delivery Type
3 The item category NLN (standard transport order) so that it is relevant for
billing
You do this in the standard IMG in Customizing for Sales and Distribution (SD)
by choosing Sales reg Sales Documents reg Sales Document Item
Process Flow
1 You create the sales order following the
standard procedure
The standard pricing procedure for depot sales is JDEPOT
2 You create the delivery again following the
standard procedure
3 You
assign excise invoices to the delivery or material document
4 You
verify that you have selected the correct excise invoices and post them
Alternatively if you have selected the wrong excise invoices you can cancel the
assignment
5 You create the invoice following the standard procedure
SPECIAL STOCKS amp SPECIAL PROCUREMENT TYPES
Special Stocks are those stocks which are not belongs to our company code
These are not placed in our storage locations amp no physical inventory is
performed and treated as special stocks for the reason of ownership
Different types are of Special Stocks are as follows
1 Subcontracting
2 Consignment
3 Pipeline
4 Stock transfer
5 Third party
6 Returnable transport packaging
7 Sales order stock
8 Project stock
SUBCONTRACTING
In subcontracting process we create subcontracting PO to supply or issue
subcomponents to vendor in order to get final product The price maintained in
subcontracting PO is a service charge paid to vendor
Steps to perform subcontracting
1 Create subcontracting inforecord (Optional)
2 Create subcontracting PO with item category L
There are to ways to supply subcomponents to vendor
bull Manually maintain the subcomponents in the subcontracting
PO though explode BOM
bull Through BOM (Bill of material) T Code CS01 CS02 amp CS03
3 Create Transfer Posting with Movement Type 541 to issue the subcomponents
to the vendor
4 Goods Reciept
5 Invoice Reciept
Path ME21N ---gt Enter Item Category L --gt Material (End Product) PO
Quantity Delivery Date Net Price Plant --gt Click on Item Details --gt Tab
Material Data -- gtComponents select Explode BOM --gt Click on Components
button --gt Enter the subcomponents --gt Go back amp Save
Create Transfer Posting with movement type 541 amp T Code MB1B
GR MIGO
IR MIRO
CONSIGNMENT - (No Concept of Invoice)
In consignment process we will not create Purchasing document for the vendor
vendor himself send the material to our plant though the material is available
to our plant the responsibility amp ownership of the material is of vendor Aliability
only arises when the material withdrawal (Consumption) is posted in the system
from consignment stock
Steps
1 Create Consignment info record (mandatory)
2 Create Consignment purchase order with item category lsquoKrsquo amp maintain Info
record number
3 Create GR Movement type lsquo101Krsquo
4 Create GI Movement Type lsquo201Krsquo
5 Consignment settlement T Code MRKO
Path --gtME11 --gt In info record --gt Purchasing Org Data 1 views of info record
enter the tax code and save it
--gt Create Consignment Purchase Order ME21N (Price option is grayed out with
price zero)
--gt Create GR with movement type 101K
--gt Create Goods Issue (GI) T Code MB1A amp Movement Type 201K Enter Cost
center vendor
--gt Consignment Settlement T Code MRKO Click Activate Consignment Activate
Settle Execute
--gt Display the Document Number ie Invoice receipt T Code FB03
PIPELINE PROCESS (No Concept of Invoice)
In pipeline handling your company does not need to order or store the material
concerned It is ready available to you as and when required via pipeline (eg oil
or water) or some other type of cable (eg electricity) Consumption of the
material is settled with the vendor on a regular basis
Steps
1 Create a Material master record with material type PIPE
2 Create Pipeline info record
3 Create GI with movement type 201P
4 Pipeline settlement T Code MRKO
RETURNABLE TRANSPORT PACKAGING (RTP)
When company orders goods from a vendor the goods are delivered with
returnable transport packaging (pallets containers) that belongs to the vendor
and is stored on our premises until you return it to the vendor
Steps
1 Create Material master record with material type LEIH
2 Create PO
3 Create GR by maintaining RTP material by selecting the option transport
equipments with movement type 501M
4 IR
STOCK TRANSFER
In stock transfer processing goods are procured and supplied within a company
One plant orders the goods internally to another plant (receiving plantissuing
plant) The goods are procured with a special type of purchase order the stock
transport order
Steps
1 Create a Material master in both supplying and receiving plant
2 Create stock transport order (STO) with item category lsquoUrsquo
3 Create transfer posting with movement type 351 amp T Code MB1B (Go to
MMBE stock overview the stock will decrease in supplying plant and it will not
update stock of receiving plant it will be under stock in transit)
4 Create GR stock will update in receiving plant
This scenario is under one company code between two plants
Material Master Related Important Terms (Part 2)
Controlling (CO) An organizational unit in Accounting that reflects a
management-oriented structure of the organization for the purpose of internal
control
Operating results for profit centers can be analyzed using either the cost of
sales approach or the period accounting approach
By analyzing the fixed capital as well you can expand your profit centers for use
as investment centers
Profit Center
Key that uniquely identifies the profit center in the current controlling area
Valuation Category
Determines whether stocks of the material are valuated together or separately
Dependencies
In the case of split valuation this indicator also determines which valuation
types are allowed that is the criteria by which stocks can be valuated
Valuation type
Invoice Verification (MM-IV)
A subdivision of a valuation category in split valuation
Example An enterprise manages its stocks of a material using the valuation
category Quality comprising the following valuation types
bull High quality Average quality Inferior
Hazardous material number
Number that identifies the material as a hazardous material or as dangerous
goods and assigns hazardous material data or dangerous goods data to it
Use The hazardous material number indicates that the material is dangerous
making special precautions necessary for its storage and shipment
Valuation Class
Assignment of a material to a group of GL accounts
With other factors the valuation class determines the GL accounts that are
updated as a result of a valuation-relevant transaction or event such as a goods
movement
The valuation class makes it possible to
bull Post the stock values of materials of the same material type to different GL
accounts
bull Post the stock values of materials of different material types to the same GL
account
Default value for the valuation class for valuated stocks of this material
Use The valuation class has the following functions
bull Allows the stock values of materials of the same material type to be posted to
different GL accounts
bull Allows the stock values of materials of different material types to be posted to
the same GL account
bull Determines together with other factors the GL accounts updated for a
valuation-relevant transaction (such as a goods movement
CIN - Country India Version ~ Volume 1
PurposeCountry Version India (CIN) contains a number of enhancements to standard
Sales and Distribution (SD) functions that allow you to handle local
requirements in particular excise duty
Features
In Country Version India (CIN) this component handles sales processes as
found in India In addition to the generic functions it allows you to
Handle CENVAT in your sales processes
The system calculates excise on your sales and creates excise invoices as
required and makes the appropriate postings to your CENVAT accounts
It covers sales from factories sales from depots and offers functions for other
types of goods movements it also covers sales to export-oriented units and
export sales
Record concessional and exemption forms sent to you by your customers
Make adjustment postings to your CENVAT accounts
Excise Invoice (Outgoing)
Definition
The document that acts as the proof of payment of excise duty and is required
for the customer to take CENVAT credit on the item
Use
In the SAP System there are three different procedures for creating excise
invoices
Sales direct from the factory
This procedure is for when you sell manufactured goods straight from the
factory at which they were produced in which case you levy excise duty when
the goods leave the factory on their way to the customer
If when you send the goods to the customer you enclose the commercial
invoice you create the excise invoice with reference to the commercial invoice
If you want to send the commercial invoice after you have dispatched the goods
however you create the excise invoice with reference to a pro forma
commercial invoice For more information about these procedures see Sales
from Factories
As well as creating excise invoices individually you can also create them in
batches (see Creation of Excise Invoices in Batches)
Sales from depots
A depot is a site at which the goods are stored away from the factory at which
they were produced In this procedure you have to levy the excise duty when
you transfer the goods from the factory to the depot and then make sure this is
passed on to the customer when it makes a purchase For more information see
Sales from Depots
Sales (other goods movements)
Some other goods movements may also require you to create an excise invoice
with reference to other documents The SAP System offers separate functions
for these purposes (see Excise Invoices (Outgoing) for Other Movements)
StructureNumbering of Excise Invoices
Outgoing excise invoices have two numbers an internal document number
which is assigned immediately you create an excise invoice and an excise
invoice number which is not assigned until you have verified and posted it
As far as the excise invoice number is concerned you have to number your
outgoing excise invoices in sequential order starting each year on 1 April You
must notify the excise authority of the jurisdiction of the invoicing location The
serial number must be printed on each page of the excise invoice
Each number range is governed by a series group You must create at least one
series group in order to be able to number the excise invoices If you need more
than one number range you must create the corresponding number of series
groups You do so in the CIN Implementation Guide (IMG) by choosing Global
Settings reg Series Groups
Number of Line Items Per Excise Invoice
Some states allow you to include only a limited number of items for each page
of an excise invoice (for example if the excise invoices are to be printed on
prenumbered forms) You can customize the system so that it prints the excise
invoice accordingly in the CIN IMG by choosing Global Settings reg Excise
Registration IDs
Customer Master (Excise Data) Definition
The part of the customer master record that contains information relating to
Indian excise duty
Use
In conjunction with other data this data is used to calculate excise duty on
various transactions
To maintain the data from the SAP Easy Access screen choose Indirect Taxes reg
Master Data reg Excise Rate Maintenance and then select the following options
described below
Structure
The excise part of the customer master contains the following information
Customer Excise Details
On this screen you enter your customers tax registration numbers which are
used for various forms of correspondence and reports
1 Excise registration number (and the range division and collectorate in which
this is located)
2 Central sales tax (CST) number
3 Local sales tax (LST) registration number
4 Permanent account number (PAN)
In order for the system to be able to calculate which rate of excise duty to apply
on sales to the customer you must also assign it a customer excise duty status
(for more information about how this works see Determination of Excise Duty
Rates)
Excise Indicator for Plant and Customer
On this screen you define the final excise duty indicator (for more information
about how this works see Determination of Excise Duty Rates)
Determination of Excise Duty Use
When you execute a business transaction involving materials that are subject to
excise duty the system automatically calculates the duty for you
Prerequisites
In order for the system to be able to determine which rate of excise duty to
apply you must have maintained all the data on the Excise Rate Maintenance
screen which you can access from the SAP Easy Access screen by choosing
Indirect Taxes reg Master Data reg Excise Rate Maintenance
You maintain the following types of data
Plant master data
You assign each of your plants an excise duty indicator You can use the same
indicator for all the plants with the same excise status from a legal point of view
such as all those that are in an exempt zone
See also the information about manufacturers that are only entitled to deduct a
certain portion of the duty (see Partial CENVAT Credit)
Vendor master data
For each of your vendors with the same excise status from a legal perspective
you define an excise duty indicator You must also specify the vendor type ndash for
example whether the vendor is a manufacturer a depot or a first-stage dealer
You must also stipulate if the vendor qualifies as a small-scale industry
For each permutation of plant indicator and vendor indicator you then create a
final excise duty indicator
Customer master data
Similarly you assign the same excise duty indicator to each of your customers
that share the same legal excise status
Again for each permutation of plant indicator and customer indicator you then
create a final excise duty indicator
Material master data
Each material is assigned a chapter ID
Excise tax rate
For every chapter ID and final excise duty indicator you maintain the rate of
excise duty
If your business only qualifies for partial CENVAT credit you must customize
your system accordingly
Activities
Let us consider an example to illustrate how the system determines which rate
of excise duty to apply to a material Assume you are posting a sale of ball
bearings to a customer The system automatically determines the rate of excise
duty as follows
Looks up the customer master data to see what status you have assigned the
customer
Lets assume youve assigned the customer status 3
Looks up the plant master data to see what status you have assigned the plant
Similarly your plant has status 2
The system looks up the table under Excise Indicator for Plant and Customer to
see what the final excise duty indictor is for customer status 3 and plant status
2 It is 7
The system determines the chapter ID of the ball bearing for the plant
Letrsquos assume the chapter ID at plant for the ball bearings is 100001
Finally the system looks up the table under Excise Tax Rate to see what rate of
duty applies to chapter ID 100001 under status 7
Plant Master (Excise Data) Definition
The part of the plant master record that contains information relating to Indian
excise duty
Use
In conjunction with other data this data is used to calculate excise duty on
various transactions
To maintain the data from the SAP Easy Access screen choose Indirect Taxes reg
Master Data reg Excise Rate Maintenance and then select the following options
described below
Structure
The excise part of the plant master is divided into the following screens
Excise Indicator for Plant
On this screen you enter your plants tax registration numbers which are used
for various forms of correspondence and reports
1 Central sales tax (CST) number
2 Local sales tax (LST) registration number
3 Permanent account number (PAN)
In order for the system to be able to calculate which rate of excise duty to apply
on purchases for this plant you must also assign it a plant excise duty status
(for more information about how this works see Determination of Excise Duty
Rates)
Excise Indicator for Plant and Vendor
On this screen you define the final excise duty indicator (for more information
about how this works see Determination of Excise Duty Rates)
Excise Indicator for Plant and Customer
On this screen you define the final excise duty indicator (for more information
about how this works see Determination of Excise Duty Rates)
Automatic Creation of Excise Invoices Use
The SAP System can automatically create an outgoing excise invoice for you
immediately you post a commercial invoice (or a pro forma invoice) for a
customer sale This function applies to excise invoices for sales from factories
only
Prerequisites
To activate this function in the Country Version India (CIN) Implementation
Guide (IMG) make the following settings
1 Under Global Settings reg Excise Groups select Create EI
This activates the automatic creation function
2 Under Sales and Distribution reg Utilization Determination
Here you specify which CENVAT accounts the system is to post the different
types of excise duty to
3 Under Sales and Distribution reg Excise GroupndashSeries Group Determination
Here you specify which excise group and series group the excise invoices are to
be created for
Features
When you post an invoice the system creates an excise invoice All the
information that it needs to create the excise invoice is provided either by the
invoice or by the Customizing settings that you have made in Sales and
Distribution It also determines the excise invoice type automatically by means
of a user exit
Creating Excise Invoices for Stock Transfers 1 From the SAP Easy Access screen choose Indirect Taxes reg Procurement reg
Excise Invoice reg For Depot reg CreateChangeDisplay
2 In the Material document field enter the goods receipt number and choose
The system displays the information from the goods receipt for example the
sending plant the excise registration the range the division and the
collectorate
3 Choose Details
The system copies the items from the goods receipt document In the depot it is
possible to have a separate excise invoice at line item level
4 Enter the internal document number of the excise invoice sent by the factory
5 Choose More documents to go the excise invoice details screen
6 Enter the internal document number of the excise invoice from the factory
The system copies the information to the line item (for example the excise
invoice number the excise invoice date the item number the chapter ID the
excise invoice quantity the amount of excise duty paid the excise base value
and the serial number of the Part II register entry with which the excise was
paid)
You can change the receipt quantity to match the actual quantity received at
the depot if necessary The system automatically adjusts the excise
accordingly
7 Go back to the item details screen
8 Save the excise invoice
Creating Excise Invoices for Direct Purchases 1 From the SAP Easy Access screen choose Indirect Taxes reg Procurement reg
Excise Invoice reg For Depot reg CreateChangeDisplay
2 In the Material document field enter the goods receipt number and choose
The system displays the information from the goods receipt for example the
sending plant the excise registration the range the division and the
collectorate
You can also maintain the excise registration details for the ship-from party as
for with the vendor The ship-from can be different from the vendor code (The
delivering plant can be maintained as a ship-from in the system When a valid
ship-from is entered the excise registration details copied from the vendor will
be overwritten by the ship-from excise registration details)
The ship-from registration details displayed can also be overwritten manually
The dealers commercial invoice number can be stored in the vendor excise
invoice number as in this case the dealer himself will not have an excise
invoice
3 Choose Details
The system copies the items from the goods receipt document It also copies the
vendors excise invoice number and the serial numbers of the entries in the RG
23A RG 23C and personal ledger account (PLA) registers
4 Enter the internal document number of the excise invoice sent by the factory
5 Select an item and choose More documents to go the excise invoice details
screen
In the case of direct purchases there will not be any excise invoice in the
system so leave the internal document field blank The vendors invoice will
show the details of the excise invoices through which excise has been paid for
the item that is being dispatched You can enter these details here
6 For each item the chapter ID excise base value and excise duty amounts
are defaulted from the purchase order You can change them if there is any
difference Enter the excise amount paid and the receipt quantity You also
enter the Part II register serial numbers with which the excise duty was paid and
the excise registration information from the original excise invoice
7 Go back to the item details screen
8 Save the excise invoice
The system creates an entry in register RG 23D You can change the excise
invoice as long as it has not been used in any sales
Assigning Excise Invoices to a Delivery Use
You follow this procedure to specify which excise invoices are to be assigned to
a delivery from a depot (or other material document)
You can also automate this procedure using the batch selection program
(J_1IJCHK) by making the appropriate Customizing settings in the Country
Version India (CIN) Implementation Guide (IMG)
Procedure
1 From the SAP Easy Access screen choose Indirect Taxes reg SalesOutbound
Movements reg Excise Invoice reg For Depot reg CreateChangeDisplay reg Delivery
or Material Document reg RG 23D Selection
2 Enter the delivery document number or the material number and choose
3 Select the excise invoice you want
4 Choose
5 Choose Excise invoice
A list of excise invoices appears These are the excise invoices at the depot with
a balance quantity
The system also shows a list of the A certificates that can be used You can pick
up any of the A certificates but they must be for the same excise invoice You
can only pick up an A certificate in its entirety You cannot select part of an A
certificate
6 Select the excise invoices that are relevant to the delivery
7 Specify what quantity to be used from each excise invoice
The system recalculates the excise accordingly
8 Go back to the item details screen
9 Save the data
Result
The system creates an entry in register RG 23D and generates the depot excise
invoice numbers
If you selected any A certificates the system also generates additional entries in
the RG 23D register The system marks the original A certificates as updated so
that they cannot be used for any other removals
Continue see Volume 2 (Next post)
EXTERNAL SERVICE MASTER
EXTERNAL SERVICE MASTER ESM
We procure the different type of services from vendors they are-
1048774 Hardware amp software services
1048774 Construction amp transportation services
1048774 Machinery services
1048774 Annual maintenance services
1048774 Present to and breakdown service Etc
Service Procurement Cycle -
1048774 Requirement identification
1048774 Source determination
1048774 Source selection
1048774 Service master
1048774 Service PO
1048774 Service entry sheet acceptance
1048774 Invoice with respect to service entry sheet
Steps to perform services -
1 Create service master (AC03)
2 Create Service PO (ME21N) with AC Assignment category lsquoKrsquo amp Item
Category lsquoDrsquo
3 Create service entry sheet (ML81N)
4 Invoice with respect to Service Entry sheet
Customize settings
(For service category Number Ranges amp organization status for service
category)
SPRO 1048774 IMG 1048774 MM 1048774 ESM 1048774 Service Master
1048774 Define organization Status for service Categories
1048774 Define Service Category
1048774 Define Number Ranges
Define organization Status for service Categories
bull Click on New Entries
bull Org service Category
bull BDS (Basic data service is stored in service master record under this service
category)
bull CNST 1048774 Controlling Status
bull PUST 1048774 Purchasing data Status
bull SDST 1048774 Sales amp Distributed Status
bull Org status description service category 1048774 Press Enter amp Save
Define Service Category
bull Same path as above
bull Select Standard
bull Click on Copy as
bull AC reference 1048774 always takes as 0006
bull Enter amp Save
Define Number Ranges
Click on groups 1048774 Groups 1048774 Insert 1048774 select enter Number Ranges
Select the service category
Click on Element
Select Group amp Click on Element Group
Save
Create Service Master - (AC03)
Click on Create New Services
Service Number (any number) Service Category
Basic unit of measure (Hours lsquoHrsquo)
Enter
Basic Data 1048774 Master Service Group 1048774 007
Valuation class 1048774 3200 1048774 Enter 1048774 Save
To See the Service list 1048774 AC06
Create Service PO (ME21N)
AC assignment category lsquoKrsquo Item Category lsquoDrsquo
Enter the Short text Quantity Delivery date Net Price Material group Plant
Storage Location
Enter service number in Service Tab (Item Details) quantity price Enter
Account Assignment 1048774 GL Account Number eg400000
Cost Center eg 9999
Press Enter amp Save
Create Service Entry Sheet - ML81N
Select other purchase order (enter PO number) 1048774 Enter 1048774 Click on Create1048774 Enter
Short Text 1048774 Enter 1048774 Service Number 1048774 Enter ndashClick on Flag button 1048774 Save
Take Service entry Sheet Number
Go to Invoice MIRO 1048774 Enter company code 1048774 Select Service Sheet Option 1048774 Enter
Service Entry Sheet Number 1048774 save it
Physical Inventory and Inventory Management
Physical inventory Process - 1 Create Physical inventory document
T Code MI01 ndash Create single inventory document
T Code MI31 ndash Create multiple physical inventory documents
I Enter the desired fields ie material material type site storage location and
Maximum number items Documents ndash 100 etc 1048774 Press Enter
II Click on Process Session
III Select the line items and click on the process
IV System displays a dialog box select Background and click on process
Inventory document is created
2 Print Inventory Document and handed over to responsible person say
Manager
3 Enter Physical Inventory count
T Code MI04
i Enter the physical inventory document number Fiscal year count date 1048774 Press
enter
ii Enter the Material Quantity and click on post
4 Listing of difference
T Code MI20
Enter the physical inventory document number and execute system displays a
screen wherein we will be able to view the differences
5 Post the differences
T Code MI07 amp Mov Type 701 amp 702
Enter the physical inventory document number year posting date enter the
difference and post
INVENTORY MANAGEMENT Maintaining stock by value or by quantity is called inventory The total inventory
management deals with the goods movement of the material
Goods movement -
It is a process in which transaction resulting change in stocks It is further sub-
divided into three categories
1 Goods Receipt (GR)
2 Goods Issue (GI)
3 Transfer Posting (TP)
Goods Receipt (GR) - It is a goods movement in which receipt of goods is
posted for vendor or for production A GR posted in the system will leads to
increase in stock No Concept of Price or value
Goods Issue (GI) - It is goods movement in which material withdrawal is
posted for consumption or for customer A GI posted in system will leads to
decrease in stock
Stock Transfer (ST) - It is method of removal of material from one location
and transferring it to another location This process is performed between two
plants and two storage locations
Transfer Posting (TP) - It is a general term of stock transfer that changes the
stock type or stock categories The difference between transfer posting and
stock transfer is -
TP is logical stock transfer and ST is a physical stock transfer
Movement Type - It is a three-digit code which plays a role of important
control function in inventory management It acts as a central role in automatic
account determination It determines which stock account or consumption
account is updated in financial accounting
Reservation - It stores requisition created from particular cost center to
particular department for issuing the material reservation posted in the system
It leads to decrease in stock
Stock Types - The different stock types are
1 Unrestricted use stock
2 Quality inspection stock
3 Blocked stock
4 Warehouse stock
Transaction code -
1 To Create GR - MIGO
2 To Create GI - MB1A
3 For Transfer Posting - MB1B
4 To display MaterialGR document ndash MB03
5 To create reservations - MB21 MB22 MB23
6 To See Stock Overview - MMBE
7 To enter Other GR - MB1C
When GR is posted in the system
1 Material document is created - MB03
2 Accounting Document is generated - MB03
3 MMR updated - MM02 MM03
4 PO history updated - ME23N
Movement Typersquos
Movement Types under GR - 101 331333335501503505551553555
561351 (For all Mov Typersquos there is a reversal eg 101 has 102 Note No
reversal for 121)
Movement Typersquos under GI - 201 331333335551553555
Transfer Posting It is performed in three ways
1 TP BW Plant to Plant
2 TP BW Storage Location to Storage Location
3 TP BW Stock to Stock
Movement Types under TP BW Plant to Plant
301 - 1 step
303 amp 305 - 2 step
Movement Type under TP BW Storage location to Storage Location
311 - 1 step
313 amp 315 - 2 step
Movement Type under TP BW stock to stock
321 323 325 343349
To Cancel the GR Movement type 102
Return delivery to vendor movement type 122 amp T Code MIGO
Transfer Posting Stock to Stock
From Blocked stock to Quality Inspection
T Code MB1B amp Movement Type 349
From Blocked stock to Unrestricted Stock
T Code MB1B amp Movement Type 343
From Quality Inspection to Unrestricted Stock
T Code MB1B amp Movement Type 321
Transfer Posting from Plant to Plant
For One Step Movement Type 301
For Two Steps Movement Type 303 amp 305
After posting stock will display in Stock in Transit (Plant)
To receive material by receiving Plant Movement Type 305
Transfer Posting BW Storage Location to Storage Location
Under One Plant BW two Storage Locationrsquos Movement Type 311
Back to Parent storage Location Movement Type 313 (It Show stock in transfer)
use Movement type 315 at Parent storage location
To create Goods Issue (GI) T Code MB1A amp Movement Type 201
To Create Reservations T Code MB21 MB22 amp MB23
Creation of GI wrt Reservations
T Code MB1A amp Movement Type 201
Click on Reservation Enter Reservation Number 1048774 Click on Adopt + Details
GR wrt Reservations T Code MIGO amp Select as Reservation instead of GR
GR without PO Movement type 501 amp T Code MB1C Select others instead of
Purchase order Enter Material Quantity Plant Storage Location 1048774 Press Enter
Partner Option will be visible (Vendor) 1048774 Save it
Invoice - Invoice is a document which is issued to a buyer (Company) from the
supplier (vendor) for the payment The following information is maintained in
invoice
Invoice date Posting date Invoice ref number tax amount amount tax code
terms of payments vendor address banking accounting information etc
When invoice document is posted in the system
bull Invoice document created
bull Accounting document is generated (MIR4)
bull PO history updated (ME23N)
bull FI document created (FB03)
PRICE DETERMINATION PROCESS or PRICING PROCEDURE
CONDITIONS OR PRICING PROCEDURE or PRICE DETERMINATION PROCESSWe deal with the Pricing Procedure for vendors
PB00 Gross Price (info record contract scheduled Agreement)
PBXX Gross Price (PO)
FRA1 Freight
RA00 Discount on net
RA01 Discount on Gross
ZA00 Surcharge on net
SKT0 Surcharge discount
ZPB0 Rebates
MWVS Input Tax
MWAS Output Tax
BASB Base Amount
RM0000 Calculation Schema or Pricing Procedure
(PB00 amp PBXX)
RM0002 Calculation Schema or Pricing Procedure
(PB00)
PB00 --gt AB00
Copy the Standard one and create new one (ours)
RM0000 contains all the condition types
Pricing Procedure (PP)
We define the pricing procedure to define condition supplement for the material
price The condition supplement specifies the discount surcharge freight etc
that we want a system every time to access material price condition records
The total value of the material is calculated or based on all addition and
subtraction ie discounts surcharge tax freight etc
Condition Table
It is a table which defines the structure of condition record key
Condition Record
It is a data record used to store conditions or condition supplements ie
condition like discount freight and surcharge Tax etc
Condition Type
It is used for different functions In Pricing the condition types leads you to
differentiate different types of discounts in output determination batch
determination difference between two output types such as delivery note or
order confirmation between different strategy types
Access Sequence
It specifies the order in which system searches or access the condition records
from condition table
Difference between PB00 amp PBXX
1 Condition maintained in PB00 is time dependent whereas PBXX is time
independent
2 Condition type PB00 ndash used for IR RFQ Contract Schedule Agreement
Condition type PBXX ndash used for PO
Calculation Schema
The main function of calculation schema is to provide framework of steps for the
price determination process to specify the discounts surcharge freight rebate
etc
It also determines the sequence of conditions that are to be followed and in
which sequence
Schema Group Vendor
The main function of it is to identify or to pick the right process and conditions
for a particular vendor
Schema Group Purchasing Organization
Key that determines which calculation schema (pricing procedure) is to be used
in purchasing documents assigned to the relevant purchasing organization
Schema Group
It allows to group together the purchasing organizations which uses the same
calculation schema
Steps -
1 Create Access sequence
2 Create condition types
3 Create pricing procedure or calculation schema
4 Link pricing procedure amp access sequence to condition type
5 Create schema group for vendor
6 Create schema group for purchase organization
7 Assign schema group vendor-to-vendor master record in purchasing data
view
8 Assign schema group purchase organization to our purchase organization
9 In inforecord purchase organization data enter condition types and pricing or
calculation procedure
CUSTOMIZE SETTINGS -
SPRO --gt IMG--gtMM--gtPUR--gtConditions --gtDefine price determination Process
1 Define access sequence
2 Define Condition type
3 Define cal Schema
4 Define schema group
o Schema group vendor
o Schema group purchasing group
5 Assignment of schema group to PUR org
6 Define schema determination agrave determine cal schema for standard PO
PURCHASE ORDER
PURCHASE ORDER
PO is an external document created for the procurement of materials and
services from vendor The document of PO is also divided into 4 parts as PR -
1 Document Overview
2 Header (DeliveryInvoice Conditions Address Partners Org data status)
3 Item Overview (AC assign cat Item Category Material Plant Del date SL)
4 Item Details (Material data Confirmations condition control delivery delivery
Schedule Quantitiesweights invoice)
A procurement type is defined for each of the document items The following
procurement types exist
1048774 Standard
1048774 Subcontracting
1048774 Consignment
1048774 Stock transfer
1048774 External service
bull There are different ways to create PO -
1 Directly through transaction code ME21N
2 With reference to PR
3 With reference to RFQ
4 With reference to info records
5 With reference to Contracts
6 With reference to Cost Centre GL Account (cost element) for consumable
items or not stock items with account assignment category lsquoKrsquo (K= cost centre)
(For non stock and consumables)
0 COMMENTS L INKS TO THIS POST
LABELS PO PURCHASE ORDER
Reaction
s
PURCHASE REQUISITION T CODE ME51 or ME51N
Purchasing Requisition -
It is a request or instruction from particular department (Cost Centre) to
purchasing department to procure certain quantity of material and services It is
only one internal document in SAP-MM
Purchasing Requisition document is divided into four parts -
bull Document Overview
bull Header
bull Item Overview
bull Item Details
Document Overview -
It displays the list of purchasing documents which are created previously
according to our requirement
Header -
Any text message or information is maintained
Item Overview -
In this we enter material plant delivery date quantity storage location
purchasing group AC assignment category Item category etc
Item Details -
It displays the detailed information about item overview (like Master data
valuation source of supply contact person delivery address status etc)
0 COMMENTS L INKS TO THIS POST
LABELS PR PURCHASE PURCHASE ORDER PURCHASE REQUIS IT ION SALES ORDER
Reaction
s
Automatic PURCHASE ORDER (PO) How Automatic PO raised
How Automatic PO raised
At fixed time say 1230 AM automatic scheduler runs and checks whether the
stock is less than or equal to the replenishment point If stock is less than or
equal to Repli Point than PR raised automatically to Purchasing Deptt
bull Activate the option automatic PO in purchasing view in material master record
bull Activate the option automatic PO in purchasing data view in vendor master
record
bull Maintain Source List amp select fixed vendor
bull PR crated automatically
bull Automatic creation of PO from PR ndash ME59
Enter the Purchasing group purchasing organization Vendor Plant and
Purchasing Requisition Document Number 1048774 Execute
RELEASE PROCEDURE Release strategyThe main function of Release procedure is to determine the approval process
or the release process for the procurement of material amp services rather than
relying for manual signatures The release procedure contains release strategy
Release Strategy (RS)
A plan defining the release codes with which a purchase requisition item a
complete purchase requisition or a complete external purchasing document
must
be released (that is approved) and the sequence in which release is to be
effected
using these codes It is a unique set of conditions sequence and level of release
It is a 2 digit code eg S1 S2 S3etc
The Release Strategy contains the following -
bull Release Group
bull Release Codes
bull Release Indicators
bull Release Prerequisite
Release Group -
It is a 2-digit code which is assigned with a class (Class contains group of
characteristics) It contains one or more release strategies
Release Codes -
It is a 2digit code which identifies the department or responsible person for
the approval process amp release process
Eg AA - Manager
BB - Sr Manager
CC - Vice President
DD - Managing Director
Release Indicator -
It is a Code that represents the release status If the proper approval
process is performed that the release Strategy has to be release if it is not
performed than the Release Strategy is blocked
R ndash Release
B ndash Blocked
Release Conditions -
It determines the type of the release strategy
For eg
bull If the price ranges from 1 to 1000 It is approved by AA BB and CC
bull If the ranges from1001 to 1lac then it is approved by AA BB CC and DD
- 80 -
Release Prerequisite
It will informs the system which RS has to be take place in the PO CEKKO is
a communication structure where it displays the field names amp field lengths to
create characteristics ie we maintain characteristics in customizing by
selecting
the field names from this communication structure for all external documents
CEBAN is used for the purchasing requisition
Characteristics -
1 Net value of PO --- GNETW (GSWRT for PR)
2 Plant --- WERKS
3 Purchasing organization -- EKORG
4 Purchasing Group --- EKGRP
5Material group ndashMATKL
CUSTOMIZE SETTINGSSPRO--gtIMG--gt MM--gt Purchasing--gtPO--gt Release Procedure for PO
1 Edit Characteristics T Code CT04
2 Edit Class T Code CL02
3 Define Release Procedure for PO
4 Check Release Strategy
Edit Characteristics -
Characteristics - eg NET VALUE OF VALUE
Click or Create Button
Under Basic Data
Description - Value for PO
Status - Release
Data Type - Currency Format
No Of Characters - 15
Currency - EUR
Activate multiple values amp Internal Values Allowed
Additional Data
Table name - CEKKO
Field Name - GNETW
Values
Activate Additional Values
Save the document
Create another Characteristic for Plant -
Plant date Create ndash Description Status
Data Type Characteristic Format
Number of Characteristics 4
Activate Multiple Values
Additional data-
Table Name - CEKKO
Field Name - WERKS
Values
Activate Additional Values
For Purchasing Organization Name - EKORG
For purchasing Group EKGRP
Edit Class
Class - SAPMM
Class Type - 032 Release Strategies
Click on Create button
Basic Data
Description - Class for PO
Status - Released
Valid From _____ Valid to _____
Click on Characteristic
Characteristic
Enter all the Characteristics Created amp Save it
Define Release Procedure for PO-
bull Release Group
bull Release Codes
bull Release Indicators
bull Release Strategies
bull Workflow
Release Group - New Entries Release Group Class and Description
Press Enter amp Save
Release Code - New Entries
Group Codes Description
99 AA Manager
99 BB Sr Manager
99 CC Vice President
99 DD Managing Director
Press Enter amp Save
Release Indicator - (B ndash Blocked R - Release)
New Entries
Release Indicators Description
B Blocked
R Released
Release Strategies -
New Entries
Release Group 99
Release Strategy S1
Release Codes AA BB CC and DD
Click on Release Prerequisites
Release Status -
Continue
Classification
Enter the Value (Same Price)
Plant (9999)
Go Back amp Save it
Release Simulation - Simulate Release
Create a PO -
There are two ways to release the PO
Individual releaseME28
Collective release ME29N
How to delete procedure
Delete Release GP
Create Release RG
Delete R Strategies
Delete R Code
Delete R Group
SAP R3 SYSTEM LANDSCAPE
System LandscapeThe system landscape contains all the SAP Systems that you have installed It
can consist of several system groups whorsquos SAP Systems are linked by transport
routes
After you decide which clients you need and which roles you want them to have
you need to decide how to distribute them amongst the different SAP Systems
You can set up multiple clients independently of one another in a single SAP
System However when you configure the data you must remember that cross-
client Customizing settings and Repository objects are identical for all clients in
a single SAP System Changes made in one client apply immediately to all
clients in the system
Three-System Landscape
SAP recommends a three-system landscape in which each of the central clients
has its own SAP System
This consists of a development system DEV a quality assurance system QAS
and a production system PRD The development system contains the
Customizing client CUST the quality assurance system contains the quality
assurance client QTST and the production system contains the production client
PROD Make all changes to Customizing data and Repository objects in the
Customizing client When you release the corresponding change requests they
are transported into the quality assurance client This means that changes to
cross-client data only appear in the quality assurance client after the transport
In the quality assurance client you can test whether the transports are
complete or whether any linked changes are missing and are still in unreleased
change requests If the test is successful the change requests are transported
into the production client The production client is completely separate from the
other clients as regards cross-client data
SPECIAL STOCKS amp SPECIAL PROCUREMENT TYPES
Special Stocks are those stocks which are not belongs to our company code
These are not placed in our storage locations amp no physical inventory is
performed and treated as special stocks for the reason of ownership
Different types are of Special Stocks are as follows
1 Subcontracting
2 Consignment
3 Pipeline
4 Stock transfer
5 Third party
6 Returnable transport packaging
7 Sales order stock
8 Project stock
SUBCONTRACTING
In subcontracting process we create subcontracting PO to supply or issue
subcomponents to vendor in order to get final product The price maintained in
subcontracting PO is a service charge paid to vendor
Steps to perform subcontracting
1 Create subcontracting inforecord (Optional)
2 Create subcontracting PO with item category L
There are to ways to supply subcomponents to vendor
bull Manually maintain the subcomponents in the subcontracting
PO though explode BOM
bull Through BOM (Bill of material) T Code CS01 CS02 amp CS03
3 Create Transfer Posting with Movement Type 541 to issue the subcomponents
to the vendor
4 Goods Reciept
5 Invoice Reciept
Path ME21N ---gt Enter Item Category L --gt Material (End Product) PO
Quantity Delivery Date Net Price Plant --gt Click on Item Details --gt Tab
Material Data -- gtComponents select Explode BOM --gt Click on Components
button --gt Enter the subcomponents --gt Go back amp Save
Create Transfer Posting with movement type 541 amp T Code MB1B
GR MIGO
IR MIRO
CONSIGNMENT - (No Concept of Invoice)
In consignment process we will not create Purchasing document for the vendor
vendor himself send the material to our plant though the material is available
to our plant the responsibility amp ownership of the material is of vendor Aliability
only arises when the material withdrawal (Consumption) is posted in the system
from consignment stock
Steps
1 Create Consignment info record (mandatory)
2 Create Consignment purchase order with item category lsquoKrsquo amp maintain Info
record number
3 Create GR Movement type lsquo101Krsquo
4 Create GI Movement Type lsquo201Krsquo
5 Consignment settlement T Code MRKO
Path --gtME11 --gt In info record --gt Purchasing Org Data 1 views of info record
enter the tax code and save it
--gt Create Consignment Purchase Order ME21N (Price option is grayed out with
price zero)
--gt Create GR with movement type 101K
--gt Create Goods Issue (GI) T Code MB1A amp Movement Type 201K Enter Cost
center vendor
--gt Consignment Settlement T Code MRKO Click Activate Consignment Activate
Settle Execute
--gt Display the Document Number ie Invoice receipt T Code FB03
PIPELINE PROCESS (No Concept of Invoice)
In pipeline handling your company does not need to order or store the material
concerned It is ready available to you as and when required via pipeline (eg oil
or water) or some other type of cable (eg electricity) Consumption of the
material is settled with the vendor on a regular basis
Steps
1 Create a Material master record with material type PIPE
2 Create Pipeline info record
3 Create GI with movement type 201P
4 Pipeline settlement T Code MRKO
RETURNABLE TRANSPORT PACKAGING (RTP)
When company orders goods from a vendor the goods are delivered with
returnable transport packaging (pallets containers) that belongs to the vendor
and is stored on our premises until you return it to the vendor
Steps
1 Create Material master record with material type LEIH
2 Create PO
3 Create GR by maintaining RTP material by selecting the option transport
equipments with movement type 501M
4 IR
STOCK TRANSFER
In stock transfer processing goods are procured and supplied within a company
One plant orders the goods internally to another plant (receiving plantissuing
plant) The goods are procured with a special type of purchase order the stock
transport order
Steps
1 Create a Material master in both supplying and receiving plant
2 Create stock transport order (STO) with item category lsquoUrsquo
3 Create transfer posting with movement type 351 amp T Code MB1B (Go to
MMBE stock overview the stock will decrease in supplying plant and it will not
update stock of receiving plant it will be under stock in transit)
4 Create GR stock will update in receiving plant
This scenario is under one company code between two plants
SAP IMPLEMENTATION PROCESS End to End Inplementation of SAP
First we have to prepare documentation about the client business (like turnover
vendors customers payments materials production marketing etc)
The implementer company made two teams (1) Steering team (2) Steering
community
Steering team (SAP functional consultants) prepares a detailed
documentation about the client with the help of core team (client company
team)
amp this study is known as Feasibility Study After that the steering team handed
over this documentation to Steering community (Project manager Sr software
engineer and other higher authorities)
Steering community prepares the BBP (Business Blue Print) BBP
Prepares in MS-Word
10487741048774 ASAP - Accelerated System Application Product in Data Processing
10487741048774 Business Process - ASAP Methodology
1 Project Preparation
2 BBP (Business Blue Print)
3 Realization
4 Final Preparation
5 Go live amp Support
10487741048774 Project Preparation -
It consists of identifying team members amp development strategy as
how to go
AS ndash IS (Existing Process followed requirements)
TO ndash BE (Requirement analysis and best process recommended)
Difference between (AS ndash IS) amp (TO - BE) is called GAP Analysis
10487741048774 Business Blue Print (BPP) -
It is a legal documentation between client amp the company
(implementer service provider) We have to understand the current business
process of client amp analyzing the business amp prepare documentation It is a
detailed documentation for the client
10487741048774 Realization -
This Phase is used to Implement or migrate the entire business of
client from Non-SAP environment to SAP environment
10487741048774 Final Preparation -
This phase is used for testing amp end user training After successfully
completion of this phase client is ready to run business in SAP R3
10487741048774 Go live amp Support -
In this phase we deliver the project end date amp end user training at
client site
THIRD - PARTY PROCESSING
THIRD - PARTY PROCESSING
In third party processing your company passes on a sales order to an external
vendor who sends the goods directly to the customer The sales order is not
processed by your company but by the vendor Third-party items can be
entered in purchase requisitions purchase orders and sales orders Third party
processing is integrated with Sales and Distribution If the sales order contains
third-party items the system creates a purchase requisition from the order
Steps
1 Create MMR with sales views and maintain Division Distribution channel
sales org item category group and general item category group ndash BANS (Third
party item) amp Account group Sold to party
2 Create Customer master record T Code XD01 XD02 XD03
3 Create sales order T Code VA01 VA02 VA03 (PR generated automatically)
4 PO - T Code ME21N
5 GR ndash T Code MIGO
6 IR ndash T Code MIRO
7 Sales Billing Billing Document T Code VF01 VF02 VF03
series group in order to be able to number the excise invoices If you need more
than one number range you must create the corresponding number of series
groups You do so in the CIN Implementation Guide (IMG) by choosing Global
Settings reg Series Groups
Number of Line Items Per Excise Invoice
Some states allow you to include only a limited number of items for each page
of an excise invoice (for example if the excise invoices are to be printed on
prenumbered forms) You can customize the system so that it prints the excise
invoice accordingly in the CIN IMG by choosing Global Settings reg Excise
Registration IDs
Customer Master (Excise Data) Definition
The part of the customer master record that contains information relating to
Indian excise duty
Use
In conjunction with other data this data is used to calculate excise duty on
various transactions
To maintain the data from the SAP Easy Access screen choose Indirect Taxes reg
Master Data reg Excise Rate Maintenance and then select the following options
described below
Structure
The excise part of the customer master contains the following information
Customer Excise Details
On this screen you enter your customers tax registration numbers which are
used for various forms of correspondence and reports
1 Excise registration number (and the range division and collectorate in which
this is located)
2 Central sales tax (CST) number
3 Local sales tax (LST) registration number
4 Permanent account number (PAN)
In order for the system to be able to calculate which rate of excise duty to apply
on sales to the customer you must also assign it a customer excise duty status
(for more information about how this works see Determination of Excise Duty
Rates)
Excise Indicator for Plant and Customer
On this screen you define the final excise duty indicator (for more information
about how this works see Determination of Excise Duty Rates)
Determination of Excise Duty Use
When you execute a business transaction involving materials that are subject to
excise duty the system automatically calculates the duty for you
Prerequisites
In order for the system to be able to determine which rate of excise duty to
apply you must have maintained all the data on the Excise Rate Maintenance
screen which you can access from the SAP Easy Access screen by choosing
Indirect Taxes reg Master Data reg Excise Rate Maintenance
You maintain the following types of data
Plant master data
You assign each of your plants an excise duty indicator You can use the same
indicator for all the plants with the same excise status from a legal point of view
such as all those that are in an exempt zone
See also the information about manufacturers that are only entitled to deduct a
certain portion of the duty (see Partial CENVAT Credit)
Vendor master data
For each of your vendors with the same excise status from a legal perspective
you define an excise duty indicator You must also specify the vendor type ndash for
example whether the vendor is a manufacturer a depot or a first-stage dealer
You must also stipulate if the vendor qualifies as a small-scale industry
For each permutation of plant indicator and vendor indicator you then create a
final excise duty indicator
Customer master data
Similarly you assign the same excise duty indicator to each of your customers
that share the same legal excise status
Again for each permutation of plant indicator and customer indicator you then
create a final excise duty indicator
Material master data
Each material is assigned a chapter ID
Excise tax rate
For every chapter ID and final excise duty indicator you maintain the rate of
excise duty
If your business only qualifies for partial CENVAT credit you must customize
your system accordingly
Activities
Let us consider an example to illustrate how the system determines which rate
of excise duty to apply to a material Assume you are posting a sale of ball
bearings to a customer The system automatically determines the rate of excise
duty as follows
Looks up the customer master data to see what status you have assigned the
customer
Lets assume youve assigned the customer status 3
Looks up the plant master data to see what status you have assigned the plant
Similarly your plant has status 2
The system looks up the table under Excise Indicator for Plant and Customer to
see what the final excise duty indictor is for customer status 3 and plant status
2 It is 7
The system determines the chapter ID of the ball bearing for the plant
Letrsquos assume the chapter ID at plant for the ball bearings is 100001
Finally the system looks up the table under Excise Tax Rate to see what rate of
duty applies to chapter ID 100001 under status 7
Plant Master (Excise Data) Definition
The part of the plant master record that contains information relating to Indian
excise duty
Use
In conjunction with other data this data is used to calculate excise duty on
various transactions
To maintain the data from the SAP Easy Access screen choose Indirect Taxes reg
Master Data reg Excise Rate Maintenance and then select the following options
described below
Structure
The excise part of the plant master is divided into the following screens
Excise Indicator for Plant
On this screen you enter your plants tax registration numbers which are used
for various forms of correspondence and reports
1 Central sales tax (CST) number
2 Local sales tax (LST) registration number
3 Permanent account number (PAN)
In order for the system to be able to calculate which rate of excise duty to apply
on purchases for this plant you must also assign it a plant excise duty status
(for more information about how this works see Determination of Excise Duty
Rates)
Excise Indicator for Plant and Vendor
On this screen you define the final excise duty indicator (for more information
about how this works see Determination of Excise Duty Rates)
Excise Indicator for Plant and Customer
On this screen you define the final excise duty indicator (for more information
about how this works see Determination of Excise Duty Rates)
Automatic Creation of Excise Invoices Use
The SAP System can automatically create an outgoing excise invoice for you
immediately you post a commercial invoice (or a pro forma invoice) for a
customer sale This function applies to excise invoices for sales from factories
only
Prerequisites
To activate this function in the Country Version India (CIN) Implementation
Guide (IMG) make the following settings
1 Under Global Settings reg Excise Groups select Create EI
This activates the automatic creation function
2 Under Sales and Distribution reg Utilization Determination
Here you specify which CENVAT accounts the system is to post the different
types of excise duty to
3 Under Sales and Distribution reg Excise GroupndashSeries Group Determination
Here you specify which excise group and series group the excise invoices are to
be created for
Features
When you post an invoice the system creates an excise invoice All the
information that it needs to create the excise invoice is provided either by the
invoice or by the Customizing settings that you have made in Sales and
Distribution It also determines the excise invoice type automatically by means
of a user exit
Creating Excise Invoices for Stock Transfers 1 From the SAP Easy Access screen choose Indirect Taxes reg Procurement reg
Excise Invoice reg For Depot reg CreateChangeDisplay
2 In the Material document field enter the goods receipt number and choose
The system displays the information from the goods receipt for example the
sending plant the excise registration the range the division and the
collectorate
3 Choose Details
The system copies the items from the goods receipt document In the depot it is
possible to have a separate excise invoice at line item level
4 Enter the internal document number of the excise invoice sent by the factory
5 Choose More documents to go the excise invoice details screen
6 Enter the internal document number of the excise invoice from the factory
The system copies the information to the line item (for example the excise
invoice number the excise invoice date the item number the chapter ID the
excise invoice quantity the amount of excise duty paid the excise base value
and the serial number of the Part II register entry with which the excise was
paid)
You can change the receipt quantity to match the actual quantity received at
the depot if necessary The system automatically adjusts the excise
accordingly
7 Go back to the item details screen
8 Save the excise invoice
Creating Excise Invoices for Direct Purchases 1 From the SAP Easy Access screen choose Indirect Taxes reg Procurement reg
Excise Invoice reg For Depot reg CreateChangeDisplay
2 In the Material document field enter the goods receipt number and choose
The system displays the information from the goods receipt for example the
sending plant the excise registration the range the division and the
collectorate
You can also maintain the excise registration details for the ship-from party as
for with the vendor The ship-from can be different from the vendor code (The
delivering plant can be maintained as a ship-from in the system When a valid
ship-from is entered the excise registration details copied from the vendor will
be overwritten by the ship-from excise registration details)
The ship-from registration details displayed can also be overwritten manually
The dealers commercial invoice number can be stored in the vendor excise
invoice number as in this case the dealer himself will not have an excise
invoice
3 Choose Details
The system copies the items from the goods receipt document It also copies the
vendors excise invoice number and the serial numbers of the entries in the RG
23A RG 23C and personal ledger account (PLA) registers
4 Enter the internal document number of the excise invoice sent by the factory
5 Select an item and choose More documents to go the excise invoice details
screen
In the case of direct purchases there will not be any excise invoice in the
system so leave the internal document field blank The vendors invoice will
show the details of the excise invoices through which excise has been paid for
the item that is being dispatched You can enter these details here
6 For each item the chapter ID excise base value and excise duty amounts
are defaulted from the purchase order You can change them if there is any
difference Enter the excise amount paid and the receipt quantity You also
enter the Part II register serial numbers with which the excise duty was paid and
the excise registration information from the original excise invoice
7 Go back to the item details screen
8 Save the excise invoice
The system creates an entry in register RG 23D You can change the excise
invoice as long as it has not been used in any sales
Assigning Excise Invoices to a Delivery Use
You follow this procedure to specify which excise invoices are to be assigned to
a delivery from a depot (or other material document)
You can also automate this procedure using the batch selection program
(J_1IJCHK) by making the appropriate Customizing settings in the Country
Version India (CIN) Implementation Guide (IMG)
Procedure
1 From the SAP Easy Access screen choose Indirect Taxes reg SalesOutbound
Movements reg Excise Invoice reg For Depot reg CreateChangeDisplay reg Delivery
or Material Document reg RG 23D Selection
2 Enter the delivery document number or the material number and choose
3 Select the excise invoice you want
4 Choose
5 Choose Excise invoice
A list of excise invoices appears These are the excise invoices at the depot with
a balance quantity
The system also shows a list of the A certificates that can be used You can pick
up any of the A certificates but they must be for the same excise invoice You
can only pick up an A certificate in its entirety You cannot select part of an A
certificate
6 Select the excise invoices that are relevant to the delivery
7 Specify what quantity to be used from each excise invoice
The system recalculates the excise accordingly
8 Go back to the item details screen
9 Save the data
Result
The system creates an entry in register RG 23D and generates the depot excise
invoice numbers
If you selected any A certificates the system also generates additional entries in
the RG 23D register The system marks the original A certificates as updated so
that they cannot be used for any other removals
CIN - Country India Version ~ Vol 2
Continue Volume 1
Creating Excise Invoices
Use
This is the procedure that you follow to create an excise invoice for the less
common types of goods movement
Procedure
1 From the SAP Easy Access screen choose Indirect Taxes reg SalesOutbound
Movements reg Excise Invoice reg For Other Movements reg CreateChangeDisplay
reg
2 On the selection screen enter data as required including
(i)Reference
group box
Specify which document you want to create the excise invoice for and which
excise group it is for
(ii)Details
group box
Specify the vendor or customer that you are sending the invoice to
3 Choose
If you entered an internal document number the system copies the item details
from it
4 Choose
5 Enter line items for each of the materials to be included in the excise invoice
For each item enter the following data
(i)Material
(ii)Quantity
(iii)Unit of measure
(iv)Base value
(v)Excise duty
6 To pick the rate and amount from a specific excise invoice choose Get excise
invoice
7 Save the excise invoice
If you are using the one-step procedure the system creates and posts an excise
invoice Otherwise the system saves the information but does not make any
postings it now has to be verified
Verifying and Posting Excise Invoices
Use
You follow this procedure to verify that the information in an excise invoice that
has already been created and to post it once you are satisfied
Procedure
From the SAP Easy Access screen choose Indirect Taxes reg SalesOutbound
Movements reg Excise Invoice reg For Other Movements reg Posting
1 Enter the internal document number of the excise invoice
2 Choose Release to accounting
The system displays the excise invoice The excise duty that is to be posted is
displayed at the foot of the screen which you can change if necessary
3 To access the balance utilization choose
4 To display the balance available on the CENVAT accounts choose Account
balances
5 Save the excise invoice
The system generates the accounting documents
6 To print the excise invoice choose
Making a Transfer Posting
Use
In this procedure you make a transfer posting for the goods ordered by another
plant For more information about this function see Entering the Removal from
Storage at the Issuing Plant
Procedure
1 From the SAP Easy Access screen choose Logistics reg Materials Management
reg Inventory Management reg Goods Movement reg Transfer Posting
2 Choose Movement type reg Transfer posting reg Plant to plant reg To stock in
transit
3 Enter the number of the issuing plant and storage location
4 Choose To purchase order
5 In the dialog box enter the number of the stock transport order that the
receiving plant created and choose
6 Check the data
7 Save the transfer posting
Transaction Codes for India
Transaction Action
J1I2 Prepare a sales tax register
J1I3 Create outgoing excise invoices in batches
J1I5
Update the RG 1 and Part I registers
J1I8
Post the challan used to remit TDS
J1IC194C
Create annual return under section 194 C (Classic TDS)
J1IC194D
Create annual return under section 194 D (Classic TDS)
J1IC194I
Create annual return under section 194 I (Classic TDS)
J1IC194J
Create annual return under section 194 J (Classic TDS)
J1IEX
Incoming Excise Invoices (central transaction)
J1IEX_C
Capture an incoming excise invoice (excise clerk)
J1IEX_P
Post an incoming excise invoice (excise supervisor)
J1INBANK
Post a bank challan
J1INCANC
Cancel a vendor withholding tax certificate
J1INCERT
Print a vendor withholding tax certificate
J1INCHLN
Create a remittance challan
J1INCUST
Post a customer withholding tax certificate
J1INHC
Withholding Tax Migration Health Check Program
J1INMIG
Withholding Tax Data Migration Tool
JI1NCHLC
Create a remittance challan for customers
J1INCC
Print customer withholding tax certificates
J1INMIS
Withholding Tax Information System
JI1NAR
Prepare annual returns (Extended Withholding Tax)
J1IF01
Create a subcontracting challan
J1IF11
Change a subcontracting challan
J1IF12
Display a subcontracting challan
J1IF13
Complete reverse or recredit a subcontracting challan
J1IFQ
Reconcile quantities for subcontracting challans
J1IFR
List subcontracting challans
J1IH
Make a CENVAT adjustment posting
J1IIN
Create an outgoing excise invoice
J1IJ
Assign excise invoices to a delivery for sales from depots
J1INJV
Adjust withholding tax Item
J1INREP
Reprint a vendor withholding tax certificate
J1INREV
Reverse a remittance challan
J1INPR
Calculate withholding tax on clearing accounts
J1INUT
Clear withholding tax on clearing accounts
J1IR
Download register data
J1IS
Process an excise invoice (outgoing) for other movements
J1IU
Process exemption forms
J1IW
Verify and post an incoming excise invoice
J1IX
Create an incoming excise invoice (without reference to purchase order)
J2I8
Transfer excise duty to CENVAT account
J2ID
Archive tax deducted at source (TDS) documents
J2IE
Locate tax deducted at source documents in archive
J2IU
Remit excise duty fortnightly
J2I9
Monthly CENVAT return
J1IG
Excise invoice entry at depot
J1IGA
Create additional excise entry at depot
J2I5
Extract data for excise registers
J2I6
Print excise registers
Sales from Factories
Purpose
This process describes how the SAP System handles the sales process allowing
for the creation of excise invoices which you have to send with each delivery
that is subject to excise duty There are two scenarios depending on whether
you want to send the commercial invoice along with the delivery or at a later
date
Prerequisites
In order for the system to be able to copy the information from document to
document you must have set up the copying control procedures in Customizing
for Sales and Distribution (SD) This differs according to when you want to send
the commercial invoice
1 Along with the delivery
In this case the document flow would be OR (standard sales order type) ndash LF
(standard delivery type) ndash F2 (invoice)
2 At a later date
The document flow would be OR ndash JF (delivery type a copy of LF) ndash JEX (pro
forma billing document type a copy of document type F8) ndash F2
In addition you must also have maintained the settings in the Country Version
India (CIN) Implementation Guide (IMG) by choosing Global Settings reg Assign
Excise Invoice Billing Type to Delivery Type
A sample pricing procedure JFACT is provided for this sales procedure
Process Flow
1 The sales clerk creates a sales order following the
(i)standard procedure
There are special procedures for
(i)Customers in possession of exemption forms
(ii)Exports
2 The shipping clerk creates a delivery again following the
standard procedure
On the initial screen you set the appropriate delivery type (see above)
3 In the warehouse the storeperson issues the goods
The system only allows users to create a pro forma excise invoice if the delivery
is complete so as to prevent them from creating multiple pro forma excise
invoices
4 What you do at this stage depends on whether you want to send the
commercial invoice along with the delivery or whether you want to invoice the
customer later
(A) If the invoice is to be shipped with delivery the shipping clerk
(i)Creates an invoice following the standard procedure
(ii)Creates an excise invoice from the invoice
(B) If the invoice is to be sent on at a later date the shipping clerk
(i)Creates the pro forma excise invoice
The pro forma excise invoice is only required for technical purposes and is not
sent to the customer The system does not make any accounting postings at this
stage
(ii)Creates
an excise invoice from the pro forma excise invoice
In both these cases the system creates an accounting document to post the
excise duty to a clearing account
Instead of creating excise invoices manually you can also have the system
create them automatically Alternatively you can create them in batches
5 You ship the goods
6 When the time comes to invoice the customer you create the invoice
following the standard procedure
Irrespective of the number of excise invoices that you have issued you can
combine the delivery items in a single invoice (if the standard requirements are
met)
Sales from Depots
Purpose
You may sell finished goods directly from the place of manufacture as described
under Sales from Factories or you may first ship them to a separate location for
storage (a depot) from where you will sell them The second procedure is
described here
Sales from depots are handled differently from sales from factories because of
excise law Excise duty is payable when you send the goods from the factory to
the depot but it is not levied again when you sell the goods
Sometimes when you make a final sale of goods from a depot price escalations
could have happened with retrospective effect In such scenarios you need to
pay the extra excise duty at the factory using an A Certificate You need to
register the A certificate details in the RG 23D register and the excise recovered
from the customer
Prerequisites
You have customized
1 Stock transport processing in Customizing for Materials Management (MM)
by choosing Purchasing reg Purchase Order reg Set Up Stock Transport Order
2 The copying control for copying stock transport order NL to excise invoice JEX
You make this setting in the Country Version India (CIN) Implementation Guide
(IMG) by choosing Sales and Distribution reg Assign Excise Invoice Billing Type to
Delivery Type
3 The item category NLN (standard transport order) so that it is relevant for
billing
You do this in the standard IMG in Customizing for Sales and Distribution (SD)
by choosing Sales reg Sales Documents reg Sales Document Item
Process Flow
1 You create the sales order following the
standard procedure
The standard pricing procedure for depot sales is JDEPOT
2 You create the delivery again following the
standard procedure
3 You
assign excise invoices to the delivery or material document
4 You
verify that you have selected the correct excise invoices and post them
Alternatively if you have selected the wrong excise invoices you can cancel the
assignment
5 You create the invoice following the standard procedure
SPECIAL STOCKS amp SPECIAL PROCUREMENT TYPES
Special Stocks are those stocks which are not belongs to our company code
These are not placed in our storage locations amp no physical inventory is
performed and treated as special stocks for the reason of ownership
Different types are of Special Stocks are as follows
1 Subcontracting
2 Consignment
3 Pipeline
4 Stock transfer
5 Third party
6 Returnable transport packaging
7 Sales order stock
8 Project stock
SUBCONTRACTING
In subcontracting process we create subcontracting PO to supply or issue
subcomponents to vendor in order to get final product The price maintained in
subcontracting PO is a service charge paid to vendor
Steps to perform subcontracting
1 Create subcontracting inforecord (Optional)
2 Create subcontracting PO with item category L
There are to ways to supply subcomponents to vendor
bull Manually maintain the subcomponents in the subcontracting
PO though explode BOM
bull Through BOM (Bill of material) T Code CS01 CS02 amp CS03
3 Create Transfer Posting with Movement Type 541 to issue the subcomponents
to the vendor
4 Goods Reciept
5 Invoice Reciept
Path ME21N ---gt Enter Item Category L --gt Material (End Product) PO
Quantity Delivery Date Net Price Plant --gt Click on Item Details --gt Tab
Material Data -- gtComponents select Explode BOM --gt Click on Components
button --gt Enter the subcomponents --gt Go back amp Save
Create Transfer Posting with movement type 541 amp T Code MB1B
GR MIGO
IR MIRO
CONSIGNMENT - (No Concept of Invoice)
In consignment process we will not create Purchasing document for the vendor
vendor himself send the material to our plant though the material is available
to our plant the responsibility amp ownership of the material is of vendor Aliability
only arises when the material withdrawal (Consumption) is posted in the system
from consignment stock
Steps
1 Create Consignment info record (mandatory)
2 Create Consignment purchase order with item category lsquoKrsquo amp maintain Info
record number
3 Create GR Movement type lsquo101Krsquo
4 Create GI Movement Type lsquo201Krsquo
5 Consignment settlement T Code MRKO
Path --gtME11 --gt In info record --gt Purchasing Org Data 1 views of info record
enter the tax code and save it
--gt Create Consignment Purchase Order ME21N (Price option is grayed out with
price zero)
--gt Create GR with movement type 101K
--gt Create Goods Issue (GI) T Code MB1A amp Movement Type 201K Enter Cost
center vendor
--gt Consignment Settlement T Code MRKO Click Activate Consignment Activate
Settle Execute
--gt Display the Document Number ie Invoice receipt T Code FB03
PIPELINE PROCESS (No Concept of Invoice)
In pipeline handling your company does not need to order or store the material
concerned It is ready available to you as and when required via pipeline (eg oil
or water) or some other type of cable (eg electricity) Consumption of the
material is settled with the vendor on a regular basis
Steps
1 Create a Material master record with material type PIPE
2 Create Pipeline info record
3 Create GI with movement type 201P
4 Pipeline settlement T Code MRKO
RETURNABLE TRANSPORT PACKAGING (RTP)
When company orders goods from a vendor the goods are delivered with
returnable transport packaging (pallets containers) that belongs to the vendor
and is stored on our premises until you return it to the vendor
Steps
1 Create Material master record with material type LEIH
2 Create PO
3 Create GR by maintaining RTP material by selecting the option transport
equipments with movement type 501M
4 IR
STOCK TRANSFER
In stock transfer processing goods are procured and supplied within a company
One plant orders the goods internally to another plant (receiving plantissuing
plant) The goods are procured with a special type of purchase order the stock
transport order
Steps
1 Create a Material master in both supplying and receiving plant
2 Create stock transport order (STO) with item category lsquoUrsquo
3 Create transfer posting with movement type 351 amp T Code MB1B (Go to
MMBE stock overview the stock will decrease in supplying plant and it will not
update stock of receiving plant it will be under stock in transit)
4 Create GR stock will update in receiving plant
This scenario is under one company code between two plants
Material Master Related Important Terms (Part 2)
Controlling (CO) An organizational unit in Accounting that reflects a
management-oriented structure of the organization for the purpose of internal
control
Operating results for profit centers can be analyzed using either the cost of
sales approach or the period accounting approach
By analyzing the fixed capital as well you can expand your profit centers for use
as investment centers
Profit Center
Key that uniquely identifies the profit center in the current controlling area
Valuation Category
Determines whether stocks of the material are valuated together or separately
Dependencies
In the case of split valuation this indicator also determines which valuation
types are allowed that is the criteria by which stocks can be valuated
Valuation type
Invoice Verification (MM-IV)
A subdivision of a valuation category in split valuation
Example An enterprise manages its stocks of a material using the valuation
category Quality comprising the following valuation types
bull High quality Average quality Inferior
Hazardous material number
Number that identifies the material as a hazardous material or as dangerous
goods and assigns hazardous material data or dangerous goods data to it
Use The hazardous material number indicates that the material is dangerous
making special precautions necessary for its storage and shipment
Valuation Class
Assignment of a material to a group of GL accounts
With other factors the valuation class determines the GL accounts that are
updated as a result of a valuation-relevant transaction or event such as a goods
movement
The valuation class makes it possible to
bull Post the stock values of materials of the same material type to different GL
accounts
bull Post the stock values of materials of different material types to the same GL
account
Default value for the valuation class for valuated stocks of this material
Use The valuation class has the following functions
bull Allows the stock values of materials of the same material type to be posted to
different GL accounts
bull Allows the stock values of materials of different material types to be posted to
the same GL account
bull Determines together with other factors the GL accounts updated for a
valuation-relevant transaction (such as a goods movement
CIN - Country India Version ~ Volume 1
PurposeCountry Version India (CIN) contains a number of enhancements to standard
Sales and Distribution (SD) functions that allow you to handle local
requirements in particular excise duty
Features
In Country Version India (CIN) this component handles sales processes as
found in India In addition to the generic functions it allows you to
Handle CENVAT in your sales processes
The system calculates excise on your sales and creates excise invoices as
required and makes the appropriate postings to your CENVAT accounts
It covers sales from factories sales from depots and offers functions for other
types of goods movements it also covers sales to export-oriented units and
export sales
Record concessional and exemption forms sent to you by your customers
Make adjustment postings to your CENVAT accounts
Excise Invoice (Outgoing)
Definition
The document that acts as the proof of payment of excise duty and is required
for the customer to take CENVAT credit on the item
Use
In the SAP System there are three different procedures for creating excise
invoices
Sales direct from the factory
This procedure is for when you sell manufactured goods straight from the
factory at which they were produced in which case you levy excise duty when
the goods leave the factory on their way to the customer
If when you send the goods to the customer you enclose the commercial
invoice you create the excise invoice with reference to the commercial invoice
If you want to send the commercial invoice after you have dispatched the goods
however you create the excise invoice with reference to a pro forma
commercial invoice For more information about these procedures see Sales
from Factories
As well as creating excise invoices individually you can also create them in
batches (see Creation of Excise Invoices in Batches)
Sales from depots
A depot is a site at which the goods are stored away from the factory at which
they were produced In this procedure you have to levy the excise duty when
you transfer the goods from the factory to the depot and then make sure this is
passed on to the customer when it makes a purchase For more information see
Sales from Depots
Sales (other goods movements)
Some other goods movements may also require you to create an excise invoice
with reference to other documents The SAP System offers separate functions
for these purposes (see Excise Invoices (Outgoing) for Other Movements)
StructureNumbering of Excise Invoices
Outgoing excise invoices have two numbers an internal document number
which is assigned immediately you create an excise invoice and an excise
invoice number which is not assigned until you have verified and posted it
As far as the excise invoice number is concerned you have to number your
outgoing excise invoices in sequential order starting each year on 1 April You
must notify the excise authority of the jurisdiction of the invoicing location The
serial number must be printed on each page of the excise invoice
Each number range is governed by a series group You must create at least one
series group in order to be able to number the excise invoices If you need more
than one number range you must create the corresponding number of series
groups You do so in the CIN Implementation Guide (IMG) by choosing Global
Settings reg Series Groups
Number of Line Items Per Excise Invoice
Some states allow you to include only a limited number of items for each page
of an excise invoice (for example if the excise invoices are to be printed on
prenumbered forms) You can customize the system so that it prints the excise
invoice accordingly in the CIN IMG by choosing Global Settings reg Excise
Registration IDs
Customer Master (Excise Data) Definition
The part of the customer master record that contains information relating to
Indian excise duty
Use
In conjunction with other data this data is used to calculate excise duty on
various transactions
To maintain the data from the SAP Easy Access screen choose Indirect Taxes reg
Master Data reg Excise Rate Maintenance and then select the following options
described below
Structure
The excise part of the customer master contains the following information
Customer Excise Details
On this screen you enter your customers tax registration numbers which are
used for various forms of correspondence and reports
1 Excise registration number (and the range division and collectorate in which
this is located)
2 Central sales tax (CST) number
3 Local sales tax (LST) registration number
4 Permanent account number (PAN)
In order for the system to be able to calculate which rate of excise duty to apply
on sales to the customer you must also assign it a customer excise duty status
(for more information about how this works see Determination of Excise Duty
Rates)
Excise Indicator for Plant and Customer
On this screen you define the final excise duty indicator (for more information
about how this works see Determination of Excise Duty Rates)
Determination of Excise Duty Use
When you execute a business transaction involving materials that are subject to
excise duty the system automatically calculates the duty for you
Prerequisites
In order for the system to be able to determine which rate of excise duty to
apply you must have maintained all the data on the Excise Rate Maintenance
screen which you can access from the SAP Easy Access screen by choosing
Indirect Taxes reg Master Data reg Excise Rate Maintenance
You maintain the following types of data
Plant master data
You assign each of your plants an excise duty indicator You can use the same
indicator for all the plants with the same excise status from a legal point of view
such as all those that are in an exempt zone
See also the information about manufacturers that are only entitled to deduct a
certain portion of the duty (see Partial CENVAT Credit)
Vendor master data
For each of your vendors with the same excise status from a legal perspective
you define an excise duty indicator You must also specify the vendor type ndash for
example whether the vendor is a manufacturer a depot or a first-stage dealer
You must also stipulate if the vendor qualifies as a small-scale industry
For each permutation of plant indicator and vendor indicator you then create a
final excise duty indicator
Customer master data
Similarly you assign the same excise duty indicator to each of your customers
that share the same legal excise status
Again for each permutation of plant indicator and customer indicator you then
create a final excise duty indicator
Material master data
Each material is assigned a chapter ID
Excise tax rate
For every chapter ID and final excise duty indicator you maintain the rate of
excise duty
If your business only qualifies for partial CENVAT credit you must customize
your system accordingly
Activities
Let us consider an example to illustrate how the system determines which rate
of excise duty to apply to a material Assume you are posting a sale of ball
bearings to a customer The system automatically determines the rate of excise
duty as follows
Looks up the customer master data to see what status you have assigned the
customer
Lets assume youve assigned the customer status 3
Looks up the plant master data to see what status you have assigned the plant
Similarly your plant has status 2
The system looks up the table under Excise Indicator for Plant and Customer to
see what the final excise duty indictor is for customer status 3 and plant status
2 It is 7
The system determines the chapter ID of the ball bearing for the plant
Letrsquos assume the chapter ID at plant for the ball bearings is 100001
Finally the system looks up the table under Excise Tax Rate to see what rate of
duty applies to chapter ID 100001 under status 7
Plant Master (Excise Data) Definition
The part of the plant master record that contains information relating to Indian
excise duty
Use
In conjunction with other data this data is used to calculate excise duty on
various transactions
To maintain the data from the SAP Easy Access screen choose Indirect Taxes reg
Master Data reg Excise Rate Maintenance and then select the following options
described below
Structure
The excise part of the plant master is divided into the following screens
Excise Indicator for Plant
On this screen you enter your plants tax registration numbers which are used
for various forms of correspondence and reports
1 Central sales tax (CST) number
2 Local sales tax (LST) registration number
3 Permanent account number (PAN)
In order for the system to be able to calculate which rate of excise duty to apply
on purchases for this plant you must also assign it a plant excise duty status
(for more information about how this works see Determination of Excise Duty
Rates)
Excise Indicator for Plant and Vendor
On this screen you define the final excise duty indicator (for more information
about how this works see Determination of Excise Duty Rates)
Excise Indicator for Plant and Customer
On this screen you define the final excise duty indicator (for more information
about how this works see Determination of Excise Duty Rates)
Automatic Creation of Excise Invoices Use
The SAP System can automatically create an outgoing excise invoice for you
immediately you post a commercial invoice (or a pro forma invoice) for a
customer sale This function applies to excise invoices for sales from factories
only
Prerequisites
To activate this function in the Country Version India (CIN) Implementation
Guide (IMG) make the following settings
1 Under Global Settings reg Excise Groups select Create EI
This activates the automatic creation function
2 Under Sales and Distribution reg Utilization Determination
Here you specify which CENVAT accounts the system is to post the different
types of excise duty to
3 Under Sales and Distribution reg Excise GroupndashSeries Group Determination
Here you specify which excise group and series group the excise invoices are to
be created for
Features
When you post an invoice the system creates an excise invoice All the
information that it needs to create the excise invoice is provided either by the
invoice or by the Customizing settings that you have made in Sales and
Distribution It also determines the excise invoice type automatically by means
of a user exit
Creating Excise Invoices for Stock Transfers 1 From the SAP Easy Access screen choose Indirect Taxes reg Procurement reg
Excise Invoice reg For Depot reg CreateChangeDisplay
2 In the Material document field enter the goods receipt number and choose
The system displays the information from the goods receipt for example the
sending plant the excise registration the range the division and the
collectorate
3 Choose Details
The system copies the items from the goods receipt document In the depot it is
possible to have a separate excise invoice at line item level
4 Enter the internal document number of the excise invoice sent by the factory
5 Choose More documents to go the excise invoice details screen
6 Enter the internal document number of the excise invoice from the factory
The system copies the information to the line item (for example the excise
invoice number the excise invoice date the item number the chapter ID the
excise invoice quantity the amount of excise duty paid the excise base value
and the serial number of the Part II register entry with which the excise was
paid)
You can change the receipt quantity to match the actual quantity received at
the depot if necessary The system automatically adjusts the excise
accordingly
7 Go back to the item details screen
8 Save the excise invoice
Creating Excise Invoices for Direct Purchases 1 From the SAP Easy Access screen choose Indirect Taxes reg Procurement reg
Excise Invoice reg For Depot reg CreateChangeDisplay
2 In the Material document field enter the goods receipt number and choose
The system displays the information from the goods receipt for example the
sending plant the excise registration the range the division and the
collectorate
You can also maintain the excise registration details for the ship-from party as
for with the vendor The ship-from can be different from the vendor code (The
delivering plant can be maintained as a ship-from in the system When a valid
ship-from is entered the excise registration details copied from the vendor will
be overwritten by the ship-from excise registration details)
The ship-from registration details displayed can also be overwritten manually
The dealers commercial invoice number can be stored in the vendor excise
invoice number as in this case the dealer himself will not have an excise
invoice
3 Choose Details
The system copies the items from the goods receipt document It also copies the
vendors excise invoice number and the serial numbers of the entries in the RG
23A RG 23C and personal ledger account (PLA) registers
4 Enter the internal document number of the excise invoice sent by the factory
5 Select an item and choose More documents to go the excise invoice details
screen
In the case of direct purchases there will not be any excise invoice in the
system so leave the internal document field blank The vendors invoice will
show the details of the excise invoices through which excise has been paid for
the item that is being dispatched You can enter these details here
6 For each item the chapter ID excise base value and excise duty amounts
are defaulted from the purchase order You can change them if there is any
difference Enter the excise amount paid and the receipt quantity You also
enter the Part II register serial numbers with which the excise duty was paid and
the excise registration information from the original excise invoice
7 Go back to the item details screen
8 Save the excise invoice
The system creates an entry in register RG 23D You can change the excise
invoice as long as it has not been used in any sales
Assigning Excise Invoices to a Delivery Use
You follow this procedure to specify which excise invoices are to be assigned to
a delivery from a depot (or other material document)
You can also automate this procedure using the batch selection program
(J_1IJCHK) by making the appropriate Customizing settings in the Country
Version India (CIN) Implementation Guide (IMG)
Procedure
1 From the SAP Easy Access screen choose Indirect Taxes reg SalesOutbound
Movements reg Excise Invoice reg For Depot reg CreateChangeDisplay reg Delivery
or Material Document reg RG 23D Selection
2 Enter the delivery document number or the material number and choose
3 Select the excise invoice you want
4 Choose
5 Choose Excise invoice
A list of excise invoices appears These are the excise invoices at the depot with
a balance quantity
The system also shows a list of the A certificates that can be used You can pick
up any of the A certificates but they must be for the same excise invoice You
can only pick up an A certificate in its entirety You cannot select part of an A
certificate
6 Select the excise invoices that are relevant to the delivery
7 Specify what quantity to be used from each excise invoice
The system recalculates the excise accordingly
8 Go back to the item details screen
9 Save the data
Result
The system creates an entry in register RG 23D and generates the depot excise
invoice numbers
If you selected any A certificates the system also generates additional entries in
the RG 23D register The system marks the original A certificates as updated so
that they cannot be used for any other removals
Continue see Volume 2 (Next post)
EXTERNAL SERVICE MASTER
EXTERNAL SERVICE MASTER ESM
We procure the different type of services from vendors they are-
1048774 Hardware amp software services
1048774 Construction amp transportation services
1048774 Machinery services
1048774 Annual maintenance services
1048774 Present to and breakdown service Etc
Service Procurement Cycle -
1048774 Requirement identification
1048774 Source determination
1048774 Source selection
1048774 Service master
1048774 Service PO
1048774 Service entry sheet acceptance
1048774 Invoice with respect to service entry sheet
Steps to perform services -
1 Create service master (AC03)
2 Create Service PO (ME21N) with AC Assignment category lsquoKrsquo amp Item
Category lsquoDrsquo
3 Create service entry sheet (ML81N)
4 Invoice with respect to Service Entry sheet
Customize settings
(For service category Number Ranges amp organization status for service
category)
SPRO 1048774 IMG 1048774 MM 1048774 ESM 1048774 Service Master
1048774 Define organization Status for service Categories
1048774 Define Service Category
1048774 Define Number Ranges
Define organization Status for service Categories
bull Click on New Entries
bull Org service Category
bull BDS (Basic data service is stored in service master record under this service
category)
bull CNST 1048774 Controlling Status
bull PUST 1048774 Purchasing data Status
bull SDST 1048774 Sales amp Distributed Status
bull Org status description service category 1048774 Press Enter amp Save
Define Service Category
bull Same path as above
bull Select Standard
bull Click on Copy as
bull AC reference 1048774 always takes as 0006
bull Enter amp Save
Define Number Ranges
Click on groups 1048774 Groups 1048774 Insert 1048774 select enter Number Ranges
Select the service category
Click on Element
Select Group amp Click on Element Group
Save
Create Service Master - (AC03)
Click on Create New Services
Service Number (any number) Service Category
Basic unit of measure (Hours lsquoHrsquo)
Enter
Basic Data 1048774 Master Service Group 1048774 007
Valuation class 1048774 3200 1048774 Enter 1048774 Save
To See the Service list 1048774 AC06
Create Service PO (ME21N)
AC assignment category lsquoKrsquo Item Category lsquoDrsquo
Enter the Short text Quantity Delivery date Net Price Material group Plant
Storage Location
Enter service number in Service Tab (Item Details) quantity price Enter
Account Assignment 1048774 GL Account Number eg400000
Cost Center eg 9999
Press Enter amp Save
Create Service Entry Sheet - ML81N
Select other purchase order (enter PO number) 1048774 Enter 1048774 Click on Create1048774 Enter
Short Text 1048774 Enter 1048774 Service Number 1048774 Enter ndashClick on Flag button 1048774 Save
Take Service entry Sheet Number
Go to Invoice MIRO 1048774 Enter company code 1048774 Select Service Sheet Option 1048774 Enter
Service Entry Sheet Number 1048774 save it
Physical Inventory and Inventory Management
Physical inventory Process - 1 Create Physical inventory document
T Code MI01 ndash Create single inventory document
T Code MI31 ndash Create multiple physical inventory documents
I Enter the desired fields ie material material type site storage location and
Maximum number items Documents ndash 100 etc 1048774 Press Enter
II Click on Process Session
III Select the line items and click on the process
IV System displays a dialog box select Background and click on process
Inventory document is created
2 Print Inventory Document and handed over to responsible person say
Manager
3 Enter Physical Inventory count
T Code MI04
i Enter the physical inventory document number Fiscal year count date 1048774 Press
enter
ii Enter the Material Quantity and click on post
4 Listing of difference
T Code MI20
Enter the physical inventory document number and execute system displays a
screen wherein we will be able to view the differences
5 Post the differences
T Code MI07 amp Mov Type 701 amp 702
Enter the physical inventory document number year posting date enter the
difference and post
INVENTORY MANAGEMENT Maintaining stock by value or by quantity is called inventory The total inventory
management deals with the goods movement of the material
Goods movement -
It is a process in which transaction resulting change in stocks It is further sub-
divided into three categories
1 Goods Receipt (GR)
2 Goods Issue (GI)
3 Transfer Posting (TP)
Goods Receipt (GR) - It is a goods movement in which receipt of goods is
posted for vendor or for production A GR posted in the system will leads to
increase in stock No Concept of Price or value
Goods Issue (GI) - It is goods movement in which material withdrawal is
posted for consumption or for customer A GI posted in system will leads to
decrease in stock
Stock Transfer (ST) - It is method of removal of material from one location
and transferring it to another location This process is performed between two
plants and two storage locations
Transfer Posting (TP) - It is a general term of stock transfer that changes the
stock type or stock categories The difference between transfer posting and
stock transfer is -
TP is logical stock transfer and ST is a physical stock transfer
Movement Type - It is a three-digit code which plays a role of important
control function in inventory management It acts as a central role in automatic
account determination It determines which stock account or consumption
account is updated in financial accounting
Reservation - It stores requisition created from particular cost center to
particular department for issuing the material reservation posted in the system
It leads to decrease in stock
Stock Types - The different stock types are
1 Unrestricted use stock
2 Quality inspection stock
3 Blocked stock
4 Warehouse stock
Transaction code -
1 To Create GR - MIGO
2 To Create GI - MB1A
3 For Transfer Posting - MB1B
4 To display MaterialGR document ndash MB03
5 To create reservations - MB21 MB22 MB23
6 To See Stock Overview - MMBE
7 To enter Other GR - MB1C
When GR is posted in the system
1 Material document is created - MB03
2 Accounting Document is generated - MB03
3 MMR updated - MM02 MM03
4 PO history updated - ME23N
Movement Typersquos
Movement Types under GR - 101 331333335501503505551553555
561351 (For all Mov Typersquos there is a reversal eg 101 has 102 Note No
reversal for 121)
Movement Typersquos under GI - 201 331333335551553555
Transfer Posting It is performed in three ways
1 TP BW Plant to Plant
2 TP BW Storage Location to Storage Location
3 TP BW Stock to Stock
Movement Types under TP BW Plant to Plant
301 - 1 step
303 amp 305 - 2 step
Movement Type under TP BW Storage location to Storage Location
311 - 1 step
313 amp 315 - 2 step
Movement Type under TP BW stock to stock
321 323 325 343349
To Cancel the GR Movement type 102
Return delivery to vendor movement type 122 amp T Code MIGO
Transfer Posting Stock to Stock
From Blocked stock to Quality Inspection
T Code MB1B amp Movement Type 349
From Blocked stock to Unrestricted Stock
T Code MB1B amp Movement Type 343
From Quality Inspection to Unrestricted Stock
T Code MB1B amp Movement Type 321
Transfer Posting from Plant to Plant
For One Step Movement Type 301
For Two Steps Movement Type 303 amp 305
After posting stock will display in Stock in Transit (Plant)
To receive material by receiving Plant Movement Type 305
Transfer Posting BW Storage Location to Storage Location
Under One Plant BW two Storage Locationrsquos Movement Type 311
Back to Parent storage Location Movement Type 313 (It Show stock in transfer)
use Movement type 315 at Parent storage location
To create Goods Issue (GI) T Code MB1A amp Movement Type 201
To Create Reservations T Code MB21 MB22 amp MB23
Creation of GI wrt Reservations
T Code MB1A amp Movement Type 201
Click on Reservation Enter Reservation Number 1048774 Click on Adopt + Details
GR wrt Reservations T Code MIGO amp Select as Reservation instead of GR
GR without PO Movement type 501 amp T Code MB1C Select others instead of
Purchase order Enter Material Quantity Plant Storage Location 1048774 Press Enter
Partner Option will be visible (Vendor) 1048774 Save it
Invoice - Invoice is a document which is issued to a buyer (Company) from the
supplier (vendor) for the payment The following information is maintained in
invoice
Invoice date Posting date Invoice ref number tax amount amount tax code
terms of payments vendor address banking accounting information etc
When invoice document is posted in the system
bull Invoice document created
bull Accounting document is generated (MIR4)
bull PO history updated (ME23N)
bull FI document created (FB03)
PRICE DETERMINATION PROCESS or PRICING PROCEDURE
CONDITIONS OR PRICING PROCEDURE or PRICE DETERMINATION PROCESSWe deal with the Pricing Procedure for vendors
PB00 Gross Price (info record contract scheduled Agreement)
PBXX Gross Price (PO)
FRA1 Freight
RA00 Discount on net
RA01 Discount on Gross
ZA00 Surcharge on net
SKT0 Surcharge discount
ZPB0 Rebates
MWVS Input Tax
MWAS Output Tax
BASB Base Amount
RM0000 Calculation Schema or Pricing Procedure
(PB00 amp PBXX)
RM0002 Calculation Schema or Pricing Procedure
(PB00)
PB00 --gt AB00
Copy the Standard one and create new one (ours)
RM0000 contains all the condition types
Pricing Procedure (PP)
We define the pricing procedure to define condition supplement for the material
price The condition supplement specifies the discount surcharge freight etc
that we want a system every time to access material price condition records
The total value of the material is calculated or based on all addition and
subtraction ie discounts surcharge tax freight etc
Condition Table
It is a table which defines the structure of condition record key
Condition Record
It is a data record used to store conditions or condition supplements ie
condition like discount freight and surcharge Tax etc
Condition Type
It is used for different functions In Pricing the condition types leads you to
differentiate different types of discounts in output determination batch
determination difference between two output types such as delivery note or
order confirmation between different strategy types
Access Sequence
It specifies the order in which system searches or access the condition records
from condition table
Difference between PB00 amp PBXX
1 Condition maintained in PB00 is time dependent whereas PBXX is time
independent
2 Condition type PB00 ndash used for IR RFQ Contract Schedule Agreement
Condition type PBXX ndash used for PO
Calculation Schema
The main function of calculation schema is to provide framework of steps for the
price determination process to specify the discounts surcharge freight rebate
etc
It also determines the sequence of conditions that are to be followed and in
which sequence
Schema Group Vendor
The main function of it is to identify or to pick the right process and conditions
for a particular vendor
Schema Group Purchasing Organization
Key that determines which calculation schema (pricing procedure) is to be used
in purchasing documents assigned to the relevant purchasing organization
Schema Group
It allows to group together the purchasing organizations which uses the same
calculation schema
Steps -
1 Create Access sequence
2 Create condition types
3 Create pricing procedure or calculation schema
4 Link pricing procedure amp access sequence to condition type
5 Create schema group for vendor
6 Create schema group for purchase organization
7 Assign schema group vendor-to-vendor master record in purchasing data
view
8 Assign schema group purchase organization to our purchase organization
9 In inforecord purchase organization data enter condition types and pricing or
calculation procedure
CUSTOMIZE SETTINGS -
SPRO --gt IMG--gtMM--gtPUR--gtConditions --gtDefine price determination Process
1 Define access sequence
2 Define Condition type
3 Define cal Schema
4 Define schema group
o Schema group vendor
o Schema group purchasing group
5 Assignment of schema group to PUR org
6 Define schema determination agrave determine cal schema for standard PO
PURCHASE ORDER
PURCHASE ORDER
PO is an external document created for the procurement of materials and
services from vendor The document of PO is also divided into 4 parts as PR -
1 Document Overview
2 Header (DeliveryInvoice Conditions Address Partners Org data status)
3 Item Overview (AC assign cat Item Category Material Plant Del date SL)
4 Item Details (Material data Confirmations condition control delivery delivery
Schedule Quantitiesweights invoice)
A procurement type is defined for each of the document items The following
procurement types exist
1048774 Standard
1048774 Subcontracting
1048774 Consignment
1048774 Stock transfer
1048774 External service
bull There are different ways to create PO -
1 Directly through transaction code ME21N
2 With reference to PR
3 With reference to RFQ
4 With reference to info records
5 With reference to Contracts
6 With reference to Cost Centre GL Account (cost element) for consumable
items or not stock items with account assignment category lsquoKrsquo (K= cost centre)
(For non stock and consumables)
0 COMMENTS L INKS TO THIS POST
LABELS PO PURCHASE ORDER
Reaction
s
PURCHASE REQUISITION T CODE ME51 or ME51N
Purchasing Requisition -
It is a request or instruction from particular department (Cost Centre) to
purchasing department to procure certain quantity of material and services It is
only one internal document in SAP-MM
Purchasing Requisition document is divided into four parts -
bull Document Overview
bull Header
bull Item Overview
bull Item Details
Document Overview -
It displays the list of purchasing documents which are created previously
according to our requirement
Header -
Any text message or information is maintained
Item Overview -
In this we enter material plant delivery date quantity storage location
purchasing group AC assignment category Item category etc
Item Details -
It displays the detailed information about item overview (like Master data
valuation source of supply contact person delivery address status etc)
0 COMMENTS L INKS TO THIS POST
LABELS PR PURCHASE PURCHASE ORDER PURCHASE REQUIS IT ION SALES ORDER
Reaction
s
Automatic PURCHASE ORDER (PO) How Automatic PO raised
How Automatic PO raised
At fixed time say 1230 AM automatic scheduler runs and checks whether the
stock is less than or equal to the replenishment point If stock is less than or
equal to Repli Point than PR raised automatically to Purchasing Deptt
bull Activate the option automatic PO in purchasing view in material master record
bull Activate the option automatic PO in purchasing data view in vendor master
record
bull Maintain Source List amp select fixed vendor
bull PR crated automatically
bull Automatic creation of PO from PR ndash ME59
Enter the Purchasing group purchasing organization Vendor Plant and
Purchasing Requisition Document Number 1048774 Execute
RELEASE PROCEDURE Release strategyThe main function of Release procedure is to determine the approval process
or the release process for the procurement of material amp services rather than
relying for manual signatures The release procedure contains release strategy
Release Strategy (RS)
A plan defining the release codes with which a purchase requisition item a
complete purchase requisition or a complete external purchasing document
must
be released (that is approved) and the sequence in which release is to be
effected
using these codes It is a unique set of conditions sequence and level of release
It is a 2 digit code eg S1 S2 S3etc
The Release Strategy contains the following -
bull Release Group
bull Release Codes
bull Release Indicators
bull Release Prerequisite
Release Group -
It is a 2-digit code which is assigned with a class (Class contains group of
characteristics) It contains one or more release strategies
Release Codes -
It is a 2digit code which identifies the department or responsible person for
the approval process amp release process
Eg AA - Manager
BB - Sr Manager
CC - Vice President
DD - Managing Director
Release Indicator -
It is a Code that represents the release status If the proper approval
process is performed that the release Strategy has to be release if it is not
performed than the Release Strategy is blocked
R ndash Release
B ndash Blocked
Release Conditions -
It determines the type of the release strategy
For eg
bull If the price ranges from 1 to 1000 It is approved by AA BB and CC
bull If the ranges from1001 to 1lac then it is approved by AA BB CC and DD
- 80 -
Release Prerequisite
It will informs the system which RS has to be take place in the PO CEKKO is
a communication structure where it displays the field names amp field lengths to
create characteristics ie we maintain characteristics in customizing by
selecting
the field names from this communication structure for all external documents
CEBAN is used for the purchasing requisition
Characteristics -
1 Net value of PO --- GNETW (GSWRT for PR)
2 Plant --- WERKS
3 Purchasing organization -- EKORG
4 Purchasing Group --- EKGRP
5Material group ndashMATKL
CUSTOMIZE SETTINGSSPRO--gtIMG--gt MM--gt Purchasing--gtPO--gt Release Procedure for PO
1 Edit Characteristics T Code CT04
2 Edit Class T Code CL02
3 Define Release Procedure for PO
4 Check Release Strategy
Edit Characteristics -
Characteristics - eg NET VALUE OF VALUE
Click or Create Button
Under Basic Data
Description - Value for PO
Status - Release
Data Type - Currency Format
No Of Characters - 15
Currency - EUR
Activate multiple values amp Internal Values Allowed
Additional Data
Table name - CEKKO
Field Name - GNETW
Values
Activate Additional Values
Save the document
Create another Characteristic for Plant -
Plant date Create ndash Description Status
Data Type Characteristic Format
Number of Characteristics 4
Activate Multiple Values
Additional data-
Table Name - CEKKO
Field Name - WERKS
Values
Activate Additional Values
For Purchasing Organization Name - EKORG
For purchasing Group EKGRP
Edit Class
Class - SAPMM
Class Type - 032 Release Strategies
Click on Create button
Basic Data
Description - Class for PO
Status - Released
Valid From _____ Valid to _____
Click on Characteristic
Characteristic
Enter all the Characteristics Created amp Save it
Define Release Procedure for PO-
bull Release Group
bull Release Codes
bull Release Indicators
bull Release Strategies
bull Workflow
Release Group - New Entries Release Group Class and Description
Press Enter amp Save
Release Code - New Entries
Group Codes Description
99 AA Manager
99 BB Sr Manager
99 CC Vice President
99 DD Managing Director
Press Enter amp Save
Release Indicator - (B ndash Blocked R - Release)
New Entries
Release Indicators Description
B Blocked
R Released
Release Strategies -
New Entries
Release Group 99
Release Strategy S1
Release Codes AA BB CC and DD
Click on Release Prerequisites
Release Status -
Continue
Classification
Enter the Value (Same Price)
Plant (9999)
Go Back amp Save it
Release Simulation - Simulate Release
Create a PO -
There are two ways to release the PO
Individual releaseME28
Collective release ME29N
How to delete procedure
Delete Release GP
Create Release RG
Delete R Strategies
Delete R Code
Delete R Group
SAP R3 SYSTEM LANDSCAPE
System LandscapeThe system landscape contains all the SAP Systems that you have installed It
can consist of several system groups whorsquos SAP Systems are linked by transport
routes
After you decide which clients you need and which roles you want them to have
you need to decide how to distribute them amongst the different SAP Systems
You can set up multiple clients independently of one another in a single SAP
System However when you configure the data you must remember that cross-
client Customizing settings and Repository objects are identical for all clients in
a single SAP System Changes made in one client apply immediately to all
clients in the system
Three-System Landscape
SAP recommends a three-system landscape in which each of the central clients
has its own SAP System
This consists of a development system DEV a quality assurance system QAS
and a production system PRD The development system contains the
Customizing client CUST the quality assurance system contains the quality
assurance client QTST and the production system contains the production client
PROD Make all changes to Customizing data and Repository objects in the
Customizing client When you release the corresponding change requests they
are transported into the quality assurance client This means that changes to
cross-client data only appear in the quality assurance client after the transport
In the quality assurance client you can test whether the transports are
complete or whether any linked changes are missing and are still in unreleased
change requests If the test is successful the change requests are transported
into the production client The production client is completely separate from the
other clients as regards cross-client data
SPECIAL STOCKS amp SPECIAL PROCUREMENT TYPES
Special Stocks are those stocks which are not belongs to our company code
These are not placed in our storage locations amp no physical inventory is
performed and treated as special stocks for the reason of ownership
Different types are of Special Stocks are as follows
1 Subcontracting
2 Consignment
3 Pipeline
4 Stock transfer
5 Third party
6 Returnable transport packaging
7 Sales order stock
8 Project stock
SUBCONTRACTING
In subcontracting process we create subcontracting PO to supply or issue
subcomponents to vendor in order to get final product The price maintained in
subcontracting PO is a service charge paid to vendor
Steps to perform subcontracting
1 Create subcontracting inforecord (Optional)
2 Create subcontracting PO with item category L
There are to ways to supply subcomponents to vendor
bull Manually maintain the subcomponents in the subcontracting
PO though explode BOM
bull Through BOM (Bill of material) T Code CS01 CS02 amp CS03
3 Create Transfer Posting with Movement Type 541 to issue the subcomponents
to the vendor
4 Goods Reciept
5 Invoice Reciept
Path ME21N ---gt Enter Item Category L --gt Material (End Product) PO
Quantity Delivery Date Net Price Plant --gt Click on Item Details --gt Tab
Material Data -- gtComponents select Explode BOM --gt Click on Components
button --gt Enter the subcomponents --gt Go back amp Save
Create Transfer Posting with movement type 541 amp T Code MB1B
GR MIGO
IR MIRO
CONSIGNMENT - (No Concept of Invoice)
In consignment process we will not create Purchasing document for the vendor
vendor himself send the material to our plant though the material is available
to our plant the responsibility amp ownership of the material is of vendor Aliability
only arises when the material withdrawal (Consumption) is posted in the system
from consignment stock
Steps
1 Create Consignment info record (mandatory)
2 Create Consignment purchase order with item category lsquoKrsquo amp maintain Info
record number
3 Create GR Movement type lsquo101Krsquo
4 Create GI Movement Type lsquo201Krsquo
5 Consignment settlement T Code MRKO
Path --gtME11 --gt In info record --gt Purchasing Org Data 1 views of info record
enter the tax code and save it
--gt Create Consignment Purchase Order ME21N (Price option is grayed out with
price zero)
--gt Create GR with movement type 101K
--gt Create Goods Issue (GI) T Code MB1A amp Movement Type 201K Enter Cost
center vendor
--gt Consignment Settlement T Code MRKO Click Activate Consignment Activate
Settle Execute
--gt Display the Document Number ie Invoice receipt T Code FB03
PIPELINE PROCESS (No Concept of Invoice)
In pipeline handling your company does not need to order or store the material
concerned It is ready available to you as and when required via pipeline (eg oil
or water) or some other type of cable (eg electricity) Consumption of the
material is settled with the vendor on a regular basis
Steps
1 Create a Material master record with material type PIPE
2 Create Pipeline info record
3 Create GI with movement type 201P
4 Pipeline settlement T Code MRKO
RETURNABLE TRANSPORT PACKAGING (RTP)
When company orders goods from a vendor the goods are delivered with
returnable transport packaging (pallets containers) that belongs to the vendor
and is stored on our premises until you return it to the vendor
Steps
1 Create Material master record with material type LEIH
2 Create PO
3 Create GR by maintaining RTP material by selecting the option transport
equipments with movement type 501M
4 IR
STOCK TRANSFER
In stock transfer processing goods are procured and supplied within a company
One plant orders the goods internally to another plant (receiving plantissuing
plant) The goods are procured with a special type of purchase order the stock
transport order
Steps
1 Create a Material master in both supplying and receiving plant
2 Create stock transport order (STO) with item category lsquoUrsquo
3 Create transfer posting with movement type 351 amp T Code MB1B (Go to
MMBE stock overview the stock will decrease in supplying plant and it will not
update stock of receiving plant it will be under stock in transit)
4 Create GR stock will update in receiving plant
This scenario is under one company code between two plants
SAP IMPLEMENTATION PROCESS End to End Inplementation of SAP
First we have to prepare documentation about the client business (like turnover
vendors customers payments materials production marketing etc)
The implementer company made two teams (1) Steering team (2) Steering
community
Steering team (SAP functional consultants) prepares a detailed
documentation about the client with the help of core team (client company
team)
amp this study is known as Feasibility Study After that the steering team handed
over this documentation to Steering community (Project manager Sr software
engineer and other higher authorities)
Steering community prepares the BBP (Business Blue Print) BBP
Prepares in MS-Word
10487741048774 ASAP - Accelerated System Application Product in Data Processing
10487741048774 Business Process - ASAP Methodology
1 Project Preparation
2 BBP (Business Blue Print)
3 Realization
4 Final Preparation
5 Go live amp Support
10487741048774 Project Preparation -
It consists of identifying team members amp development strategy as
how to go
AS ndash IS (Existing Process followed requirements)
TO ndash BE (Requirement analysis and best process recommended)
Difference between (AS ndash IS) amp (TO - BE) is called GAP Analysis
10487741048774 Business Blue Print (BPP) -
It is a legal documentation between client amp the company
(implementer service provider) We have to understand the current business
process of client amp analyzing the business amp prepare documentation It is a
detailed documentation for the client
10487741048774 Realization -
This Phase is used to Implement or migrate the entire business of
client from Non-SAP environment to SAP environment
10487741048774 Final Preparation -
This phase is used for testing amp end user training After successfully
completion of this phase client is ready to run business in SAP R3
10487741048774 Go live amp Support -
In this phase we deliver the project end date amp end user training at
client site
THIRD - PARTY PROCESSING
THIRD - PARTY PROCESSING
In third party processing your company passes on a sales order to an external
vendor who sends the goods directly to the customer The sales order is not
processed by your company but by the vendor Third-party items can be
entered in purchase requisitions purchase orders and sales orders Third party
processing is integrated with Sales and Distribution If the sales order contains
third-party items the system creates a purchase requisition from the order
Steps
1 Create MMR with sales views and maintain Division Distribution channel
sales org item category group and general item category group ndash BANS (Third
party item) amp Account group Sold to party
2 Create Customer master record T Code XD01 XD02 XD03
3 Create sales order T Code VA01 VA02 VA03 (PR generated automatically)
4 PO - T Code ME21N
5 GR ndash T Code MIGO
6 IR ndash T Code MIRO
7 Sales Billing Billing Document T Code VF01 VF02 VF03

(for more information about how this works see Determination of Excise Duty
Rates)
Excise Indicator for Plant and Customer
On this screen you define the final excise duty indicator (for more information
about how this works see Determination of Excise Duty Rates)
Determination of Excise Duty Use
When you execute a business transaction involving materials that are subject to
excise duty the system automatically calculates the duty for you
Prerequisites
In order for the system to be able to determine which rate of excise duty to
apply you must have maintained all the data on the Excise Rate Maintenance
screen which you can access from the SAP Easy Access screen by choosing
Indirect Taxes reg Master Data reg Excise Rate Maintenance
You maintain the following types of data
Plant master data
You assign each of your plants an excise duty indicator You can use the same
indicator for all the plants with the same excise status from a legal point of view
such as all those that are in an exempt zone
See also the information about manufacturers that are only entitled to deduct a
certain portion of the duty (see Partial CENVAT Credit)
Vendor master data
For each of your vendors with the same excise status from a legal perspective
you define an excise duty indicator You must also specify the vendor type ndash for
example whether the vendor is a manufacturer a depot or a first-stage dealer
You must also stipulate if the vendor qualifies as a small-scale industry
For each permutation of plant indicator and vendor indicator you then create a
final excise duty indicator
Customer master data
Similarly you assign the same excise duty indicator to each of your customers
that share the same legal excise status
Again for each permutation of plant indicator and customer indicator you then
create a final excise duty indicator
Material master data
Each material is assigned a chapter ID
Excise tax rate
For every chapter ID and final excise duty indicator you maintain the rate of
excise duty
If your business only qualifies for partial CENVAT credit you must customize
your system accordingly
Activities
Let us consider an example to illustrate how the system determines which rate
of excise duty to apply to a material Assume you are posting a sale of ball
bearings to a customer The system automatically determines the rate of excise
duty as follows
Looks up the customer master data to see what status you have assigned the
customer
Lets assume youve assigned the customer status 3
Looks up the plant master data to see what status you have assigned the plant
Similarly your plant has status 2
The system looks up the table under Excise Indicator for Plant and Customer to
see what the final excise duty indictor is for customer status 3 and plant status
2 It is 7
The system determines the chapter ID of the ball bearing for the plant
Letrsquos assume the chapter ID at plant for the ball bearings is 100001
Finally the system looks up the table under Excise Tax Rate to see what rate of
duty applies to chapter ID 100001 under status 7
Plant Master (Excise Data) Definition
The part of the plant master record that contains information relating to Indian
excise duty
Use
In conjunction with other data this data is used to calculate excise duty on
various transactions
To maintain the data from the SAP Easy Access screen choose Indirect Taxes reg
Master Data reg Excise Rate Maintenance and then select the following options
described below
Structure
The excise part of the plant master is divided into the following screens
Excise Indicator for Plant
On this screen you enter your plants tax registration numbers which are used
for various forms of correspondence and reports
1 Central sales tax (CST) number
2 Local sales tax (LST) registration number
3 Permanent account number (PAN)
In order for the system to be able to calculate which rate of excise duty to apply
on purchases for this plant you must also assign it a plant excise duty status
(for more information about how this works see Determination of Excise Duty
Rates)
Excise Indicator for Plant and Vendor
On this screen you define the final excise duty indicator (for more information
about how this works see Determination of Excise Duty Rates)
Excise Indicator for Plant and Customer
On this screen you define the final excise duty indicator (for more information
about how this works see Determination of Excise Duty Rates)
Automatic Creation of Excise Invoices Use
The SAP System can automatically create an outgoing excise invoice for you
immediately you post a commercial invoice (or a pro forma invoice) for a
customer sale This function applies to excise invoices for sales from factories
only
Prerequisites
To activate this function in the Country Version India (CIN) Implementation
Guide (IMG) make the following settings
1 Under Global Settings reg Excise Groups select Create EI
This activates the automatic creation function
2 Under Sales and Distribution reg Utilization Determination
Here you specify which CENVAT accounts the system is to post the different
types of excise duty to
3 Under Sales and Distribution reg Excise GroupndashSeries Group Determination
Here you specify which excise group and series group the excise invoices are to
be created for
Features
When you post an invoice the system creates an excise invoice All the
information that it needs to create the excise invoice is provided either by the
invoice or by the Customizing settings that you have made in Sales and
Distribution It also determines the excise invoice type automatically by means
of a user exit
Creating Excise Invoices for Stock Transfers 1 From the SAP Easy Access screen choose Indirect Taxes reg Procurement reg
Excise Invoice reg For Depot reg CreateChangeDisplay
2 In the Material document field enter the goods receipt number and choose
The system displays the information from the goods receipt for example the
sending plant the excise registration the range the division and the
collectorate
3 Choose Details
The system copies the items from the goods receipt document In the depot it is
possible to have a separate excise invoice at line item level
4 Enter the internal document number of the excise invoice sent by the factory
5 Choose More documents to go the excise invoice details screen
6 Enter the internal document number of the excise invoice from the factory
The system copies the information to the line item (for example the excise
invoice number the excise invoice date the item number the chapter ID the
excise invoice quantity the amount of excise duty paid the excise base value
and the serial number of the Part II register entry with which the excise was
paid)
You can change the receipt quantity to match the actual quantity received at
the depot if necessary The system automatically adjusts the excise
accordingly
7 Go back to the item details screen
8 Save the excise invoice
Creating Excise Invoices for Direct Purchases 1 From the SAP Easy Access screen choose Indirect Taxes reg Procurement reg
Excise Invoice reg For Depot reg CreateChangeDisplay
2 In the Material document field enter the goods receipt number and choose
The system displays the information from the goods receipt for example the
sending plant the excise registration the range the division and the
collectorate
You can also maintain the excise registration details for the ship-from party as
for with the vendor The ship-from can be different from the vendor code (The
delivering plant can be maintained as a ship-from in the system When a valid
ship-from is entered the excise registration details copied from the vendor will
be overwritten by the ship-from excise registration details)
The ship-from registration details displayed can also be overwritten manually
The dealers commercial invoice number can be stored in the vendor excise
invoice number as in this case the dealer himself will not have an excise
invoice
3 Choose Details
The system copies the items from the goods receipt document It also copies the
vendors excise invoice number and the serial numbers of the entries in the RG
23A RG 23C and personal ledger account (PLA) registers
4 Enter the internal document number of the excise invoice sent by the factory
5 Select an item and choose More documents to go the excise invoice details
screen
In the case of direct purchases there will not be any excise invoice in the
system so leave the internal document field blank The vendors invoice will
show the details of the excise invoices through which excise has been paid for
the item that is being dispatched You can enter these details here
6 For each item the chapter ID excise base value and excise duty amounts
are defaulted from the purchase order You can change them if there is any
difference Enter the excise amount paid and the receipt quantity You also
enter the Part II register serial numbers with which the excise duty was paid and
the excise registration information from the original excise invoice
7 Go back to the item details screen
8 Save the excise invoice
The system creates an entry in register RG 23D You can change the excise
invoice as long as it has not been used in any sales
Assigning Excise Invoices to a Delivery Use
You follow this procedure to specify which excise invoices are to be assigned to
a delivery from a depot (or other material document)
You can also automate this procedure using the batch selection program
(J_1IJCHK) by making the appropriate Customizing settings in the Country
Version India (CIN) Implementation Guide (IMG)
Procedure
1 From the SAP Easy Access screen choose Indirect Taxes reg SalesOutbound
Movements reg Excise Invoice reg For Depot reg CreateChangeDisplay reg Delivery
or Material Document reg RG 23D Selection
2 Enter the delivery document number or the material number and choose
3 Select the excise invoice you want
4 Choose
5 Choose Excise invoice
A list of excise invoices appears These are the excise invoices at the depot with
a balance quantity
The system also shows a list of the A certificates that can be used You can pick
up any of the A certificates but they must be for the same excise invoice You
can only pick up an A certificate in its entirety You cannot select part of an A
certificate
6 Select the excise invoices that are relevant to the delivery
7 Specify what quantity to be used from each excise invoice
The system recalculates the excise accordingly
8 Go back to the item details screen
9 Save the data
Result
The system creates an entry in register RG 23D and generates the depot excise
invoice numbers
If you selected any A certificates the system also generates additional entries in
the RG 23D register The system marks the original A certificates as updated so
that they cannot be used for any other removals
CIN - Country India Version ~ Vol 2
Continue Volume 1
Creating Excise Invoices
Use
This is the procedure that you follow to create an excise invoice for the less
common types of goods movement
Procedure
1 From the SAP Easy Access screen choose Indirect Taxes reg SalesOutbound
Movements reg Excise Invoice reg For Other Movements reg CreateChangeDisplay
reg
2 On the selection screen enter data as required including
(i)Reference
group box
Specify which document you want to create the excise invoice for and which
excise group it is for
(ii)Details
group box
Specify the vendor or customer that you are sending the invoice to
3 Choose
If you entered an internal document number the system copies the item details
from it
4 Choose
5 Enter line items for each of the materials to be included in the excise invoice
For each item enter the following data
(i)Material
(ii)Quantity
(iii)Unit of measure
(iv)Base value
(v)Excise duty
6 To pick the rate and amount from a specific excise invoice choose Get excise
invoice
7 Save the excise invoice
If you are using the one-step procedure the system creates and posts an excise
invoice Otherwise the system saves the information but does not make any
postings it now has to be verified
Verifying and Posting Excise Invoices
Use
You follow this procedure to verify that the information in an excise invoice that
has already been created and to post it once you are satisfied
Procedure
From the SAP Easy Access screen choose Indirect Taxes reg SalesOutbound
Movements reg Excise Invoice reg For Other Movements reg Posting
1 Enter the internal document number of the excise invoice
2 Choose Release to accounting
The system displays the excise invoice The excise duty that is to be posted is
displayed at the foot of the screen which you can change if necessary
3 To access the balance utilization choose
4 To display the balance available on the CENVAT accounts choose Account
balances
5 Save the excise invoice
The system generates the accounting documents
6 To print the excise invoice choose
Making a Transfer Posting
Use
In this procedure you make a transfer posting for the goods ordered by another
plant For more information about this function see Entering the Removal from
Storage at the Issuing Plant
Procedure
1 From the SAP Easy Access screen choose Logistics reg Materials Management
reg Inventory Management reg Goods Movement reg Transfer Posting
2 Choose Movement type reg Transfer posting reg Plant to plant reg To stock in
transit
3 Enter the number of the issuing plant and storage location
4 Choose To purchase order
5 In the dialog box enter the number of the stock transport order that the
receiving plant created and choose
6 Check the data
7 Save the transfer posting
Transaction Codes for India
Transaction Action
J1I2 Prepare a sales tax register
J1I3 Create outgoing excise invoices in batches
J1I5
Update the RG 1 and Part I registers
J1I8
Post the challan used to remit TDS
J1IC194C
Create annual return under section 194 C (Classic TDS)
J1IC194D
Create annual return under section 194 D (Classic TDS)
J1IC194I
Create annual return under section 194 I (Classic TDS)
J1IC194J
Create annual return under section 194 J (Classic TDS)
J1IEX
Incoming Excise Invoices (central transaction)
J1IEX_C
Capture an incoming excise invoice (excise clerk)
J1IEX_P
Post an incoming excise invoice (excise supervisor)
J1INBANK
Post a bank challan
J1INCANC
Cancel a vendor withholding tax certificate
J1INCERT
Print a vendor withholding tax certificate
J1INCHLN
Create a remittance challan
J1INCUST
Post a customer withholding tax certificate
J1INHC
Withholding Tax Migration Health Check Program
J1INMIG
Withholding Tax Data Migration Tool
JI1NCHLC
Create a remittance challan for customers
J1INCC
Print customer withholding tax certificates
J1INMIS
Withholding Tax Information System
JI1NAR
Prepare annual returns (Extended Withholding Tax)
J1IF01
Create a subcontracting challan
J1IF11
Change a subcontracting challan
J1IF12
Display a subcontracting challan
J1IF13
Complete reverse or recredit a subcontracting challan
J1IFQ
Reconcile quantities for subcontracting challans
J1IFR
List subcontracting challans
J1IH
Make a CENVAT adjustment posting
J1IIN
Create an outgoing excise invoice
J1IJ
Assign excise invoices to a delivery for sales from depots
J1INJV
Adjust withholding tax Item
J1INREP
Reprint a vendor withholding tax certificate
J1INREV
Reverse a remittance challan
J1INPR
Calculate withholding tax on clearing accounts
J1INUT
Clear withholding tax on clearing accounts
J1IR
Download register data
J1IS
Process an excise invoice (outgoing) for other movements
J1IU
Process exemption forms
J1IW
Verify and post an incoming excise invoice
J1IX
Create an incoming excise invoice (without reference to purchase order)
J2I8
Transfer excise duty to CENVAT account
J2ID
Archive tax deducted at source (TDS) documents
J2IE
Locate tax deducted at source documents in archive
J2IU
Remit excise duty fortnightly
J2I9
Monthly CENVAT return
J1IG
Excise invoice entry at depot
J1IGA
Create additional excise entry at depot
J2I5
Extract data for excise registers
J2I6
Print excise registers
Sales from Factories
Purpose
This process describes how the SAP System handles the sales process allowing
for the creation of excise invoices which you have to send with each delivery
that is subject to excise duty There are two scenarios depending on whether
you want to send the commercial invoice along with the delivery or at a later
date
Prerequisites
In order for the system to be able to copy the information from document to
document you must have set up the copying control procedures in Customizing
for Sales and Distribution (SD) This differs according to when you want to send
the commercial invoice
1 Along with the delivery
In this case the document flow would be OR (standard sales order type) ndash LF
(standard delivery type) ndash F2 (invoice)
2 At a later date
The document flow would be OR ndash JF (delivery type a copy of LF) ndash JEX (pro
forma billing document type a copy of document type F8) ndash F2
In addition you must also have maintained the settings in the Country Version
India (CIN) Implementation Guide (IMG) by choosing Global Settings reg Assign
Excise Invoice Billing Type to Delivery Type
A sample pricing procedure JFACT is provided for this sales procedure
Process Flow
1 The sales clerk creates a sales order following the
(i)standard procedure
There are special procedures for
(i)Customers in possession of exemption forms
(ii)Exports
2 The shipping clerk creates a delivery again following the
standard procedure
On the initial screen you set the appropriate delivery type (see above)
3 In the warehouse the storeperson issues the goods
The system only allows users to create a pro forma excise invoice if the delivery
is complete so as to prevent them from creating multiple pro forma excise
invoices
4 What you do at this stage depends on whether you want to send the
commercial invoice along with the delivery or whether you want to invoice the
customer later
(A) If the invoice is to be shipped with delivery the shipping clerk
(i)Creates an invoice following the standard procedure
(ii)Creates an excise invoice from the invoice
(B) If the invoice is to be sent on at a later date the shipping clerk
(i)Creates the pro forma excise invoice
The pro forma excise invoice is only required for technical purposes and is not
sent to the customer The system does not make any accounting postings at this
stage
(ii)Creates
an excise invoice from the pro forma excise invoice
In both these cases the system creates an accounting document to post the
excise duty to a clearing account
Instead of creating excise invoices manually you can also have the system
create them automatically Alternatively you can create them in batches
5 You ship the goods
6 When the time comes to invoice the customer you create the invoice
following the standard procedure
Irrespective of the number of excise invoices that you have issued you can
combine the delivery items in a single invoice (if the standard requirements are
met)
Sales from Depots
Purpose
You may sell finished goods directly from the place of manufacture as described
under Sales from Factories or you may first ship them to a separate location for
storage (a depot) from where you will sell them The second procedure is
described here
Sales from depots are handled differently from sales from factories because of
excise law Excise duty is payable when you send the goods from the factory to
the depot but it is not levied again when you sell the goods
Sometimes when you make a final sale of goods from a depot price escalations
could have happened with retrospective effect In such scenarios you need to
pay the extra excise duty at the factory using an A Certificate You need to
register the A certificate details in the RG 23D register and the excise recovered
from the customer
Prerequisites
You have customized
1 Stock transport processing in Customizing for Materials Management (MM)
by choosing Purchasing reg Purchase Order reg Set Up Stock Transport Order
2 The copying control for copying stock transport order NL to excise invoice JEX
You make this setting in the Country Version India (CIN) Implementation Guide
(IMG) by choosing Sales and Distribution reg Assign Excise Invoice Billing Type to
Delivery Type
3 The item category NLN (standard transport order) so that it is relevant for
billing
You do this in the standard IMG in Customizing for Sales and Distribution (SD)
by choosing Sales reg Sales Documents reg Sales Document Item
Process Flow
1 You create the sales order following the
standard procedure
The standard pricing procedure for depot sales is JDEPOT
2 You create the delivery again following the
standard procedure
3 You
assign excise invoices to the delivery or material document
4 You
verify that you have selected the correct excise invoices and post them
Alternatively if you have selected the wrong excise invoices you can cancel the
assignment
5 You create the invoice following the standard procedure
SPECIAL STOCKS amp SPECIAL PROCUREMENT TYPES
Special Stocks are those stocks which are not belongs to our company code
These are not placed in our storage locations amp no physical inventory is
performed and treated as special stocks for the reason of ownership
Different types are of Special Stocks are as follows
1 Subcontracting
2 Consignment
3 Pipeline
4 Stock transfer
5 Third party
6 Returnable transport packaging
7 Sales order stock
8 Project stock
SUBCONTRACTING
In subcontracting process we create subcontracting PO to supply or issue
subcomponents to vendor in order to get final product The price maintained in
subcontracting PO is a service charge paid to vendor
Steps to perform subcontracting
1 Create subcontracting inforecord (Optional)
2 Create subcontracting PO with item category L
There are to ways to supply subcomponents to vendor
bull Manually maintain the subcomponents in the subcontracting
PO though explode BOM
bull Through BOM (Bill of material) T Code CS01 CS02 amp CS03
3 Create Transfer Posting with Movement Type 541 to issue the subcomponents
to the vendor
4 Goods Reciept
5 Invoice Reciept
Path ME21N ---gt Enter Item Category L --gt Material (End Product) PO
Quantity Delivery Date Net Price Plant --gt Click on Item Details --gt Tab
Material Data -- gtComponents select Explode BOM --gt Click on Components
button --gt Enter the subcomponents --gt Go back amp Save
Create Transfer Posting with movement type 541 amp T Code MB1B
GR MIGO
IR MIRO
CONSIGNMENT - (No Concept of Invoice)
In consignment process we will not create Purchasing document for the vendor
vendor himself send the material to our plant though the material is available
to our plant the responsibility amp ownership of the material is of vendor Aliability
only arises when the material withdrawal (Consumption) is posted in the system
from consignment stock
Steps
1 Create Consignment info record (mandatory)
2 Create Consignment purchase order with item category lsquoKrsquo amp maintain Info
record number
3 Create GR Movement type lsquo101Krsquo
4 Create GI Movement Type lsquo201Krsquo
5 Consignment settlement T Code MRKO
Path --gtME11 --gt In info record --gt Purchasing Org Data 1 views of info record
enter the tax code and save it
--gt Create Consignment Purchase Order ME21N (Price option is grayed out with
price zero)
--gt Create GR with movement type 101K
--gt Create Goods Issue (GI) T Code MB1A amp Movement Type 201K Enter Cost
center vendor
--gt Consignment Settlement T Code MRKO Click Activate Consignment Activate
Settle Execute
--gt Display the Document Number ie Invoice receipt T Code FB03
PIPELINE PROCESS (No Concept of Invoice)
In pipeline handling your company does not need to order or store the material
concerned It is ready available to you as and when required via pipeline (eg oil
or water) or some other type of cable (eg electricity) Consumption of the
material is settled with the vendor on a regular basis
Steps
1 Create a Material master record with material type PIPE
2 Create Pipeline info record
3 Create GI with movement type 201P
4 Pipeline settlement T Code MRKO
RETURNABLE TRANSPORT PACKAGING (RTP)
When company orders goods from a vendor the goods are delivered with
returnable transport packaging (pallets containers) that belongs to the vendor
and is stored on our premises until you return it to the vendor
Steps
1 Create Material master record with material type LEIH
2 Create PO
3 Create GR by maintaining RTP material by selecting the option transport
equipments with movement type 501M
4 IR
STOCK TRANSFER
In stock transfer processing goods are procured and supplied within a company
One plant orders the goods internally to another plant (receiving plantissuing
plant) The goods are procured with a special type of purchase order the stock
transport order
Steps
1 Create a Material master in both supplying and receiving plant
2 Create stock transport order (STO) with item category lsquoUrsquo
3 Create transfer posting with movement type 351 amp T Code MB1B (Go to
MMBE stock overview the stock will decrease in supplying plant and it will not
update stock of receiving plant it will be under stock in transit)
4 Create GR stock will update in receiving plant
This scenario is under one company code between two plants
Material Master Related Important Terms (Part 2)
Controlling (CO) An organizational unit in Accounting that reflects a
management-oriented structure of the organization for the purpose of internal
control
Operating results for profit centers can be analyzed using either the cost of
sales approach or the period accounting approach
By analyzing the fixed capital as well you can expand your profit centers for use
as investment centers
Profit Center
Key that uniquely identifies the profit center in the current controlling area
Valuation Category
Determines whether stocks of the material are valuated together or separately
Dependencies
In the case of split valuation this indicator also determines which valuation
types are allowed that is the criteria by which stocks can be valuated
Valuation type
Invoice Verification (MM-IV)
A subdivision of a valuation category in split valuation
Example An enterprise manages its stocks of a material using the valuation
category Quality comprising the following valuation types
bull High quality Average quality Inferior
Hazardous material number
Number that identifies the material as a hazardous material or as dangerous
goods and assigns hazardous material data or dangerous goods data to it
Use The hazardous material number indicates that the material is dangerous
making special precautions necessary for its storage and shipment
Valuation Class
Assignment of a material to a group of GL accounts
With other factors the valuation class determines the GL accounts that are
updated as a result of a valuation-relevant transaction or event such as a goods
movement
The valuation class makes it possible to
bull Post the stock values of materials of the same material type to different GL
accounts
bull Post the stock values of materials of different material types to the same GL
account
Default value for the valuation class for valuated stocks of this material
Use The valuation class has the following functions
bull Allows the stock values of materials of the same material type to be posted to
different GL accounts
bull Allows the stock values of materials of different material types to be posted to
the same GL account
bull Determines together with other factors the GL accounts updated for a
valuation-relevant transaction (such as a goods movement
CIN - Country India Version ~ Volume 1
PurposeCountry Version India (CIN) contains a number of enhancements to standard
Sales and Distribution (SD) functions that allow you to handle local
requirements in particular excise duty
Features
In Country Version India (CIN) this component handles sales processes as
found in India In addition to the generic functions it allows you to
Handle CENVAT in your sales processes
The system calculates excise on your sales and creates excise invoices as
required and makes the appropriate postings to your CENVAT accounts
It covers sales from factories sales from depots and offers functions for other
types of goods movements it also covers sales to export-oriented units and
export sales
Record concessional and exemption forms sent to you by your customers
Make adjustment postings to your CENVAT accounts
Excise Invoice (Outgoing)
Definition
The document that acts as the proof of payment of excise duty and is required
for the customer to take CENVAT credit on the item
Use
In the SAP System there are three different procedures for creating excise
invoices
Sales direct from the factory
This procedure is for when you sell manufactured goods straight from the
factory at which they were produced in which case you levy excise duty when
the goods leave the factory on their way to the customer
If when you send the goods to the customer you enclose the commercial
invoice you create the excise invoice with reference to the commercial invoice
If you want to send the commercial invoice after you have dispatched the goods
however you create the excise invoice with reference to a pro forma
commercial invoice For more information about these procedures see Sales
from Factories
As well as creating excise invoices individually you can also create them in
batches (see Creation of Excise Invoices in Batches)
Sales from depots
A depot is a site at which the goods are stored away from the factory at which
they were produced In this procedure you have to levy the excise duty when
you transfer the goods from the factory to the depot and then make sure this is
passed on to the customer when it makes a purchase For more information see
Sales from Depots
Sales (other goods movements)
Some other goods movements may also require you to create an excise invoice
with reference to other documents The SAP System offers separate functions
for these purposes (see Excise Invoices (Outgoing) for Other Movements)
StructureNumbering of Excise Invoices
Outgoing excise invoices have two numbers an internal document number
which is assigned immediately you create an excise invoice and an excise
invoice number which is not assigned until you have verified and posted it
As far as the excise invoice number is concerned you have to number your
outgoing excise invoices in sequential order starting each year on 1 April You
must notify the excise authority of the jurisdiction of the invoicing location The
serial number must be printed on each page of the excise invoice
Each number range is governed by a series group You must create at least one
series group in order to be able to number the excise invoices If you need more
than one number range you must create the corresponding number of series
groups You do so in the CIN Implementation Guide (IMG) by choosing Global
Settings reg Series Groups
Number of Line Items Per Excise Invoice
Some states allow you to include only a limited number of items for each page
of an excise invoice (for example if the excise invoices are to be printed on
prenumbered forms) You can customize the system so that it prints the excise
invoice accordingly in the CIN IMG by choosing Global Settings reg Excise
Registration IDs
Customer Master (Excise Data) Definition
The part of the customer master record that contains information relating to
Indian excise duty
Use
In conjunction with other data this data is used to calculate excise duty on
various transactions
To maintain the data from the SAP Easy Access screen choose Indirect Taxes reg
Master Data reg Excise Rate Maintenance and then select the following options
described below
Structure
The excise part of the customer master contains the following information
Customer Excise Details
On this screen you enter your customers tax registration numbers which are
used for various forms of correspondence and reports
1 Excise registration number (and the range division and collectorate in which
this is located)
2 Central sales tax (CST) number
3 Local sales tax (LST) registration number
4 Permanent account number (PAN)
In order for the system to be able to calculate which rate of excise duty to apply
on sales to the customer you must also assign it a customer excise duty status
(for more information about how this works see Determination of Excise Duty
Rates)
Excise Indicator for Plant and Customer
On this screen you define the final excise duty indicator (for more information
about how this works see Determination of Excise Duty Rates)
Determination of Excise Duty Use
When you execute a business transaction involving materials that are subject to
excise duty the system automatically calculates the duty for you
Prerequisites
In order for the system to be able to determine which rate of excise duty to
apply you must have maintained all the data on the Excise Rate Maintenance
screen which you can access from the SAP Easy Access screen by choosing
Indirect Taxes reg Master Data reg Excise Rate Maintenance
You maintain the following types of data
Plant master data
You assign each of your plants an excise duty indicator You can use the same
indicator for all the plants with the same excise status from a legal point of view
such as all those that are in an exempt zone
See also the information about manufacturers that are only entitled to deduct a
certain portion of the duty (see Partial CENVAT Credit)
Vendor master data
For each of your vendors with the same excise status from a legal perspective
you define an excise duty indicator You must also specify the vendor type ndash for
example whether the vendor is a manufacturer a depot or a first-stage dealer
You must also stipulate if the vendor qualifies as a small-scale industry
For each permutation of plant indicator and vendor indicator you then create a
final excise duty indicator
Customer master data
Similarly you assign the same excise duty indicator to each of your customers
that share the same legal excise status
Again for each permutation of plant indicator and customer indicator you then
create a final excise duty indicator
Material master data
Each material is assigned a chapter ID
Excise tax rate
For every chapter ID and final excise duty indicator you maintain the rate of
excise duty
If your business only qualifies for partial CENVAT credit you must customize
your system accordingly
Activities
Let us consider an example to illustrate how the system determines which rate
of excise duty to apply to a material Assume you are posting a sale of ball
bearings to a customer The system automatically determines the rate of excise
duty as follows
Looks up the customer master data to see what status you have assigned the
customer
Lets assume youve assigned the customer status 3
Looks up the plant master data to see what status you have assigned the plant
Similarly your plant has status 2
The system looks up the table under Excise Indicator for Plant and Customer to
see what the final excise duty indictor is for customer status 3 and plant status
2 It is 7
The system determines the chapter ID of the ball bearing for the plant
Letrsquos assume the chapter ID at plant for the ball bearings is 100001
Finally the system looks up the table under Excise Tax Rate to see what rate of
duty applies to chapter ID 100001 under status 7
Plant Master (Excise Data) Definition
The part of the plant master record that contains information relating to Indian
excise duty
Use
In conjunction with other data this data is used to calculate excise duty on
various transactions
To maintain the data from the SAP Easy Access screen choose Indirect Taxes reg
Master Data reg Excise Rate Maintenance and then select the following options
described below
Structure
The excise part of the plant master is divided into the following screens
Excise Indicator for Plant
On this screen you enter your plants tax registration numbers which are used
for various forms of correspondence and reports
1 Central sales tax (CST) number
2 Local sales tax (LST) registration number
3 Permanent account number (PAN)
In order for the system to be able to calculate which rate of excise duty to apply
on purchases for this plant you must also assign it a plant excise duty status
(for more information about how this works see Determination of Excise Duty
Rates)
Excise Indicator for Plant and Vendor
On this screen you define the final excise duty indicator (for more information
about how this works see Determination of Excise Duty Rates)
Excise Indicator for Plant and Customer
On this screen you define the final excise duty indicator (for more information
about how this works see Determination of Excise Duty Rates)
Automatic Creation of Excise Invoices Use
The SAP System can automatically create an outgoing excise invoice for you
immediately you post a commercial invoice (or a pro forma invoice) for a
customer sale This function applies to excise invoices for sales from factories
only
Prerequisites
To activate this function in the Country Version India (CIN) Implementation
Guide (IMG) make the following settings
1 Under Global Settings reg Excise Groups select Create EI
This activates the automatic creation function
2 Under Sales and Distribution reg Utilization Determination
Here you specify which CENVAT accounts the system is to post the different
types of excise duty to
3 Under Sales and Distribution reg Excise GroupndashSeries Group Determination
Here you specify which excise group and series group the excise invoices are to
be created for
Features
When you post an invoice the system creates an excise invoice All the
information that it needs to create the excise invoice is provided either by the
invoice or by the Customizing settings that you have made in Sales and
Distribution It also determines the excise invoice type automatically by means
of a user exit
Creating Excise Invoices for Stock Transfers 1 From the SAP Easy Access screen choose Indirect Taxes reg Procurement reg
Excise Invoice reg For Depot reg CreateChangeDisplay
2 In the Material document field enter the goods receipt number and choose
The system displays the information from the goods receipt for example the
sending plant the excise registration the range the division and the
collectorate
3 Choose Details
The system copies the items from the goods receipt document In the depot it is
possible to have a separate excise invoice at line item level
4 Enter the internal document number of the excise invoice sent by the factory
5 Choose More documents to go the excise invoice details screen
6 Enter the internal document number of the excise invoice from the factory
The system copies the information to the line item (for example the excise
invoice number the excise invoice date the item number the chapter ID the
excise invoice quantity the amount of excise duty paid the excise base value
and the serial number of the Part II register entry with which the excise was
paid)
You can change the receipt quantity to match the actual quantity received at
the depot if necessary The system automatically adjusts the excise
accordingly
7 Go back to the item details screen
8 Save the excise invoice
Creating Excise Invoices for Direct Purchases 1 From the SAP Easy Access screen choose Indirect Taxes reg Procurement reg
Excise Invoice reg For Depot reg CreateChangeDisplay
2 In the Material document field enter the goods receipt number and choose
The system displays the information from the goods receipt for example the
sending plant the excise registration the range the division and the
collectorate
You can also maintain the excise registration details for the ship-from party as
for with the vendor The ship-from can be different from the vendor code (The
delivering plant can be maintained as a ship-from in the system When a valid
ship-from is entered the excise registration details copied from the vendor will
be overwritten by the ship-from excise registration details)
The ship-from registration details displayed can also be overwritten manually
The dealers commercial invoice number can be stored in the vendor excise
invoice number as in this case the dealer himself will not have an excise
invoice
3 Choose Details
The system copies the items from the goods receipt document It also copies the
vendors excise invoice number and the serial numbers of the entries in the RG
23A RG 23C and personal ledger account (PLA) registers
4 Enter the internal document number of the excise invoice sent by the factory
5 Select an item and choose More documents to go the excise invoice details
screen
In the case of direct purchases there will not be any excise invoice in the
system so leave the internal document field blank The vendors invoice will
show the details of the excise invoices through which excise has been paid for
the item that is being dispatched You can enter these details here
6 For each item the chapter ID excise base value and excise duty amounts
are defaulted from the purchase order You can change them if there is any
difference Enter the excise amount paid and the receipt quantity You also
enter the Part II register serial numbers with which the excise duty was paid and
the excise registration information from the original excise invoice
7 Go back to the item details screen
8 Save the excise invoice
The system creates an entry in register RG 23D You can change the excise
invoice as long as it has not been used in any sales
Assigning Excise Invoices to a Delivery Use
You follow this procedure to specify which excise invoices are to be assigned to
a delivery from a depot (or other material document)
You can also automate this procedure using the batch selection program
(J_1IJCHK) by making the appropriate Customizing settings in the Country
Version India (CIN) Implementation Guide (IMG)
Procedure
1 From the SAP Easy Access screen choose Indirect Taxes reg SalesOutbound
Movements reg Excise Invoice reg For Depot reg CreateChangeDisplay reg Delivery
or Material Document reg RG 23D Selection
2 Enter the delivery document number or the material number and choose
3 Select the excise invoice you want
4 Choose
5 Choose Excise invoice
A list of excise invoices appears These are the excise invoices at the depot with
a balance quantity
The system also shows a list of the A certificates that can be used You can pick
up any of the A certificates but they must be for the same excise invoice You
can only pick up an A certificate in its entirety You cannot select part of an A
certificate
6 Select the excise invoices that are relevant to the delivery
7 Specify what quantity to be used from each excise invoice
The system recalculates the excise accordingly
8 Go back to the item details screen
9 Save the data
Result
The system creates an entry in register RG 23D and generates the depot excise
invoice numbers
If you selected any A certificates the system also generates additional entries in
the RG 23D register The system marks the original A certificates as updated so
that they cannot be used for any other removals
Continue see Volume 2 (Next post)
EXTERNAL SERVICE MASTER
EXTERNAL SERVICE MASTER ESM
We procure the different type of services from vendors they are-
1048774 Hardware amp software services
1048774 Construction amp transportation services
1048774 Machinery services
1048774 Annual maintenance services
1048774 Present to and breakdown service Etc
Service Procurement Cycle -
1048774 Requirement identification
1048774 Source determination
1048774 Source selection
1048774 Service master
1048774 Service PO
1048774 Service entry sheet acceptance
1048774 Invoice with respect to service entry sheet
Steps to perform services -
1 Create service master (AC03)
2 Create Service PO (ME21N) with AC Assignment category lsquoKrsquo amp Item
Category lsquoDrsquo
3 Create service entry sheet (ML81N)
4 Invoice with respect to Service Entry sheet
Customize settings
(For service category Number Ranges amp organization status for service
category)
SPRO 1048774 IMG 1048774 MM 1048774 ESM 1048774 Service Master
1048774 Define organization Status for service Categories
1048774 Define Service Category
1048774 Define Number Ranges
Define organization Status for service Categories
bull Click on New Entries
bull Org service Category
bull BDS (Basic data service is stored in service master record under this service
category)
bull CNST 1048774 Controlling Status
bull PUST 1048774 Purchasing data Status
bull SDST 1048774 Sales amp Distributed Status
bull Org status description service category 1048774 Press Enter amp Save
Define Service Category
bull Same path as above
bull Select Standard
bull Click on Copy as
bull AC reference 1048774 always takes as 0006
bull Enter amp Save
Define Number Ranges
Click on groups 1048774 Groups 1048774 Insert 1048774 select enter Number Ranges
Select the service category
Click on Element
Select Group amp Click on Element Group
Save
Create Service Master - (AC03)
Click on Create New Services
Service Number (any number) Service Category
Basic unit of measure (Hours lsquoHrsquo)
Enter
Basic Data 1048774 Master Service Group 1048774 007
Valuation class 1048774 3200 1048774 Enter 1048774 Save
To See the Service list 1048774 AC06
Create Service PO (ME21N)
AC assignment category lsquoKrsquo Item Category lsquoDrsquo
Enter the Short text Quantity Delivery date Net Price Material group Plant
Storage Location
Enter service number in Service Tab (Item Details) quantity price Enter
Account Assignment 1048774 GL Account Number eg400000
Cost Center eg 9999
Press Enter amp Save
Create Service Entry Sheet - ML81N
Select other purchase order (enter PO number) 1048774 Enter 1048774 Click on Create1048774 Enter
Short Text 1048774 Enter 1048774 Service Number 1048774 Enter ndashClick on Flag button 1048774 Save
Take Service entry Sheet Number
Go to Invoice MIRO 1048774 Enter company code 1048774 Select Service Sheet Option 1048774 Enter
Service Entry Sheet Number 1048774 save it
Physical Inventory and Inventory Management
Physical inventory Process - 1 Create Physical inventory document
T Code MI01 ndash Create single inventory document
T Code MI31 ndash Create multiple physical inventory documents
I Enter the desired fields ie material material type site storage location and
Maximum number items Documents ndash 100 etc 1048774 Press Enter
II Click on Process Session
III Select the line items and click on the process
IV System displays a dialog box select Background and click on process
Inventory document is created
2 Print Inventory Document and handed over to responsible person say
Manager
3 Enter Physical Inventory count
T Code MI04
i Enter the physical inventory document number Fiscal year count date 1048774 Press
enter
ii Enter the Material Quantity and click on post
4 Listing of difference
T Code MI20
Enter the physical inventory document number and execute system displays a
screen wherein we will be able to view the differences
5 Post the differences
T Code MI07 amp Mov Type 701 amp 702
Enter the physical inventory document number year posting date enter the
difference and post
INVENTORY MANAGEMENT Maintaining stock by value or by quantity is called inventory The total inventory
management deals with the goods movement of the material
Goods movement -
It is a process in which transaction resulting change in stocks It is further sub-
divided into three categories
1 Goods Receipt (GR)
2 Goods Issue (GI)
3 Transfer Posting (TP)
Goods Receipt (GR) - It is a goods movement in which receipt of goods is
posted for vendor or for production A GR posted in the system will leads to
increase in stock No Concept of Price or value
Goods Issue (GI) - It is goods movement in which material withdrawal is
posted for consumption or for customer A GI posted in system will leads to
decrease in stock
Stock Transfer (ST) - It is method of removal of material from one location
and transferring it to another location This process is performed between two
plants and two storage locations
Transfer Posting (TP) - It is a general term of stock transfer that changes the
stock type or stock categories The difference between transfer posting and
stock transfer is -
TP is logical stock transfer and ST is a physical stock transfer
Movement Type - It is a three-digit code which plays a role of important
control function in inventory management It acts as a central role in automatic
account determination It determines which stock account or consumption
account is updated in financial accounting
Reservation - It stores requisition created from particular cost center to
particular department for issuing the material reservation posted in the system
It leads to decrease in stock
Stock Types - The different stock types are
1 Unrestricted use stock
2 Quality inspection stock
3 Blocked stock
4 Warehouse stock
Transaction code -
1 To Create GR - MIGO
2 To Create GI - MB1A
3 For Transfer Posting - MB1B
4 To display MaterialGR document ndash MB03
5 To create reservations - MB21 MB22 MB23
6 To See Stock Overview - MMBE
7 To enter Other GR - MB1C
When GR is posted in the system
1 Material document is created - MB03
2 Accounting Document is generated - MB03
3 MMR updated - MM02 MM03
4 PO history updated - ME23N
Movement Typersquos
Movement Types under GR - 101 331333335501503505551553555
561351 (For all Mov Typersquos there is a reversal eg 101 has 102 Note No
reversal for 121)
Movement Typersquos under GI - 201 331333335551553555
Transfer Posting It is performed in three ways
1 TP BW Plant to Plant
2 TP BW Storage Location to Storage Location
3 TP BW Stock to Stock
Movement Types under TP BW Plant to Plant
301 - 1 step
303 amp 305 - 2 step
Movement Type under TP BW Storage location to Storage Location
311 - 1 step
313 amp 315 - 2 step
Movement Type under TP BW stock to stock
321 323 325 343349
To Cancel the GR Movement type 102
Return delivery to vendor movement type 122 amp T Code MIGO
Transfer Posting Stock to Stock
From Blocked stock to Quality Inspection
T Code MB1B amp Movement Type 349
From Blocked stock to Unrestricted Stock
T Code MB1B amp Movement Type 343
From Quality Inspection to Unrestricted Stock
T Code MB1B amp Movement Type 321
Transfer Posting from Plant to Plant
For One Step Movement Type 301
For Two Steps Movement Type 303 amp 305
After posting stock will display in Stock in Transit (Plant)
To receive material by receiving Plant Movement Type 305
Transfer Posting BW Storage Location to Storage Location
Under One Plant BW two Storage Locationrsquos Movement Type 311
Back to Parent storage Location Movement Type 313 (It Show stock in transfer)
use Movement type 315 at Parent storage location
To create Goods Issue (GI) T Code MB1A amp Movement Type 201
To Create Reservations T Code MB21 MB22 amp MB23
Creation of GI wrt Reservations
T Code MB1A amp Movement Type 201
Click on Reservation Enter Reservation Number 1048774 Click on Adopt + Details
GR wrt Reservations T Code MIGO amp Select as Reservation instead of GR
GR without PO Movement type 501 amp T Code MB1C Select others instead of
Purchase order Enter Material Quantity Plant Storage Location 1048774 Press Enter
Partner Option will be visible (Vendor) 1048774 Save it
Invoice - Invoice is a document which is issued to a buyer (Company) from the
supplier (vendor) for the payment The following information is maintained in
invoice
Invoice date Posting date Invoice ref number tax amount amount tax code
terms of payments vendor address banking accounting information etc
When invoice document is posted in the system
bull Invoice document created
bull Accounting document is generated (MIR4)
bull PO history updated (ME23N)
bull FI document created (FB03)
PRICE DETERMINATION PROCESS or PRICING PROCEDURE
CONDITIONS OR PRICING PROCEDURE or PRICE DETERMINATION PROCESSWe deal with the Pricing Procedure for vendors
PB00 Gross Price (info record contract scheduled Agreement)
PBXX Gross Price (PO)
FRA1 Freight
RA00 Discount on net
RA01 Discount on Gross
ZA00 Surcharge on net
SKT0 Surcharge discount
ZPB0 Rebates
MWVS Input Tax
MWAS Output Tax
BASB Base Amount
RM0000 Calculation Schema or Pricing Procedure
(PB00 amp PBXX)
RM0002 Calculation Schema or Pricing Procedure
(PB00)
PB00 --gt AB00
Copy the Standard one and create new one (ours)
RM0000 contains all the condition types
Pricing Procedure (PP)
We define the pricing procedure to define condition supplement for the material
price The condition supplement specifies the discount surcharge freight etc
that we want a system every time to access material price condition records
The total value of the material is calculated or based on all addition and
subtraction ie discounts surcharge tax freight etc
Condition Table
It is a table which defines the structure of condition record key
Condition Record
It is a data record used to store conditions or condition supplements ie
condition like discount freight and surcharge Tax etc
Condition Type
It is used for different functions In Pricing the condition types leads you to
differentiate different types of discounts in output determination batch
determination difference between two output types such as delivery note or
order confirmation between different strategy types
Access Sequence
It specifies the order in which system searches or access the condition records
from condition table
Difference between PB00 amp PBXX
1 Condition maintained in PB00 is time dependent whereas PBXX is time
independent
2 Condition type PB00 ndash used for IR RFQ Contract Schedule Agreement
Condition type PBXX ndash used for PO
Calculation Schema
The main function of calculation schema is to provide framework of steps for the
price determination process to specify the discounts surcharge freight rebate
etc
It also determines the sequence of conditions that are to be followed and in
which sequence
Schema Group Vendor
The main function of it is to identify or to pick the right process and conditions
for a particular vendor
Schema Group Purchasing Organization
Key that determines which calculation schema (pricing procedure) is to be used
in purchasing documents assigned to the relevant purchasing organization
Schema Group
It allows to group together the purchasing organizations which uses the same
calculation schema
Steps -
1 Create Access sequence
2 Create condition types
3 Create pricing procedure or calculation schema
4 Link pricing procedure amp access sequence to condition type
5 Create schema group for vendor
6 Create schema group for purchase organization
7 Assign schema group vendor-to-vendor master record in purchasing data
view
8 Assign schema group purchase organization to our purchase organization
9 In inforecord purchase organization data enter condition types and pricing or
calculation procedure
CUSTOMIZE SETTINGS -
SPRO --gt IMG--gtMM--gtPUR--gtConditions --gtDefine price determination Process
1 Define access sequence
2 Define Condition type
3 Define cal Schema
4 Define schema group
o Schema group vendor
o Schema group purchasing group
5 Assignment of schema group to PUR org
6 Define schema determination agrave determine cal schema for standard PO
PURCHASE ORDER
PURCHASE ORDER
PO is an external document created for the procurement of materials and
services from vendor The document of PO is also divided into 4 parts as PR -
1 Document Overview
2 Header (DeliveryInvoice Conditions Address Partners Org data status)
3 Item Overview (AC assign cat Item Category Material Plant Del date SL)
4 Item Details (Material data Confirmations condition control delivery delivery
Schedule Quantitiesweights invoice)
A procurement type is defined for each of the document items The following
procurement types exist
1048774 Standard
1048774 Subcontracting
1048774 Consignment
1048774 Stock transfer
1048774 External service
bull There are different ways to create PO -
1 Directly through transaction code ME21N
2 With reference to PR
3 With reference to RFQ
4 With reference to info records
5 With reference to Contracts
6 With reference to Cost Centre GL Account (cost element) for consumable
items or not stock items with account assignment category lsquoKrsquo (K= cost centre)
(For non stock and consumables)
0 COMMENTS L INKS TO THIS POST
LABELS PO PURCHASE ORDER
Reaction
s
PURCHASE REQUISITION T CODE ME51 or ME51N
Purchasing Requisition -
It is a request or instruction from particular department (Cost Centre) to
purchasing department to procure certain quantity of material and services It is
only one internal document in SAP-MM
Purchasing Requisition document is divided into four parts -
bull Document Overview
bull Header
bull Item Overview
bull Item Details
Document Overview -
It displays the list of purchasing documents which are created previously
according to our requirement
Header -
Any text message or information is maintained
Item Overview -
In this we enter material plant delivery date quantity storage location
purchasing group AC assignment category Item category etc
Item Details -
It displays the detailed information about item overview (like Master data
valuation source of supply contact person delivery address status etc)
0 COMMENTS L INKS TO THIS POST
LABELS PR PURCHASE PURCHASE ORDER PURCHASE REQUIS IT ION SALES ORDER
Reaction
s
Automatic PURCHASE ORDER (PO) How Automatic PO raised
How Automatic PO raised
At fixed time say 1230 AM automatic scheduler runs and checks whether the
stock is less than or equal to the replenishment point If stock is less than or
equal to Repli Point than PR raised automatically to Purchasing Deptt
bull Activate the option automatic PO in purchasing view in material master record
bull Activate the option automatic PO in purchasing data view in vendor master
record
bull Maintain Source List amp select fixed vendor
bull PR crated automatically
bull Automatic creation of PO from PR ndash ME59
Enter the Purchasing group purchasing organization Vendor Plant and
Purchasing Requisition Document Number 1048774 Execute
RELEASE PROCEDURE Release strategyThe main function of Release procedure is to determine the approval process
or the release process for the procurement of material amp services rather than
relying for manual signatures The release procedure contains release strategy
Release Strategy (RS)
A plan defining the release codes with which a purchase requisition item a
complete purchase requisition or a complete external purchasing document
must
be released (that is approved) and the sequence in which release is to be
effected
using these codes It is a unique set of conditions sequence and level of release
It is a 2 digit code eg S1 S2 S3etc
The Release Strategy contains the following -
bull Release Group
bull Release Codes
bull Release Indicators
bull Release Prerequisite
Release Group -
It is a 2-digit code which is assigned with a class (Class contains group of
characteristics) It contains one or more release strategies
Release Codes -
It is a 2digit code which identifies the department or responsible person for
the approval process amp release process
Eg AA - Manager
BB - Sr Manager
CC - Vice President
DD - Managing Director
Release Indicator -
It is a Code that represents the release status If the proper approval
process is performed that the release Strategy has to be release if it is not
performed than the Release Strategy is blocked
R ndash Release
B ndash Blocked
Release Conditions -
It determines the type of the release strategy
For eg
bull If the price ranges from 1 to 1000 It is approved by AA BB and CC
bull If the ranges from1001 to 1lac then it is approved by AA BB CC and DD
- 80 -
Release Prerequisite
It will informs the system which RS has to be take place in the PO CEKKO is
a communication structure where it displays the field names amp field lengths to
create characteristics ie we maintain characteristics in customizing by
selecting
the field names from this communication structure for all external documents
CEBAN is used for the purchasing requisition
Characteristics -
1 Net value of PO --- GNETW (GSWRT for PR)
2 Plant --- WERKS
3 Purchasing organization -- EKORG
4 Purchasing Group --- EKGRP
5Material group ndashMATKL
CUSTOMIZE SETTINGSSPRO--gtIMG--gt MM--gt Purchasing--gtPO--gt Release Procedure for PO
1 Edit Characteristics T Code CT04
2 Edit Class T Code CL02
3 Define Release Procedure for PO
4 Check Release Strategy
Edit Characteristics -
Characteristics - eg NET VALUE OF VALUE
Click or Create Button
Under Basic Data
Description - Value for PO
Status - Release
Data Type - Currency Format
No Of Characters - 15
Currency - EUR
Activate multiple values amp Internal Values Allowed
Additional Data
Table name - CEKKO
Field Name - GNETW
Values
Activate Additional Values
Save the document
Create another Characteristic for Plant -
Plant date Create ndash Description Status
Data Type Characteristic Format
Number of Characteristics 4
Activate Multiple Values
Additional data-
Table Name - CEKKO
Field Name - WERKS
Values
Activate Additional Values
For Purchasing Organization Name - EKORG
For purchasing Group EKGRP
Edit Class
Class - SAPMM
Class Type - 032 Release Strategies
Click on Create button
Basic Data
Description - Class for PO
Status - Released
Valid From _____ Valid to _____
Click on Characteristic
Characteristic
Enter all the Characteristics Created amp Save it
Define Release Procedure for PO-
bull Release Group
bull Release Codes
bull Release Indicators
bull Release Strategies
bull Workflow
Release Group - New Entries Release Group Class and Description
Press Enter amp Save
Release Code - New Entries
Group Codes Description
99 AA Manager
99 BB Sr Manager
99 CC Vice President
99 DD Managing Director
Press Enter amp Save
Release Indicator - (B ndash Blocked R - Release)
New Entries
Release Indicators Description
B Blocked
R Released
Release Strategies -
New Entries
Release Group 99
Release Strategy S1
Release Codes AA BB CC and DD
Click on Release Prerequisites
Release Status -
Continue
Classification
Enter the Value (Same Price)
Plant (9999)
Go Back amp Save it
Release Simulation - Simulate Release
Create a PO -
There are two ways to release the PO
Individual releaseME28
Collective release ME29N
How to delete procedure
Delete Release GP
Create Release RG
Delete R Strategies
Delete R Code
Delete R Group
SAP R3 SYSTEM LANDSCAPE
System LandscapeThe system landscape contains all the SAP Systems that you have installed It
can consist of several system groups whorsquos SAP Systems are linked by transport
routes
After you decide which clients you need and which roles you want them to have
you need to decide how to distribute them amongst the different SAP Systems
You can set up multiple clients independently of one another in a single SAP
System However when you configure the data you must remember that cross-
client Customizing settings and Repository objects are identical for all clients in
a single SAP System Changes made in one client apply immediately to all
clients in the system
Three-System Landscape
SAP recommends a three-system landscape in which each of the central clients
has its own SAP System
This consists of a development system DEV a quality assurance system QAS
and a production system PRD The development system contains the
Customizing client CUST the quality assurance system contains the quality
assurance client QTST and the production system contains the production client
PROD Make all changes to Customizing data and Repository objects in the
Customizing client When you release the corresponding change requests they
are transported into the quality assurance client This means that changes to
cross-client data only appear in the quality assurance client after the transport
In the quality assurance client you can test whether the transports are
complete or whether any linked changes are missing and are still in unreleased
change requests If the test is successful the change requests are transported
into the production client The production client is completely separate from the
other clients as regards cross-client data
SPECIAL STOCKS amp SPECIAL PROCUREMENT TYPES
Special Stocks are those stocks which are not belongs to our company code
These are not placed in our storage locations amp no physical inventory is
performed and treated as special stocks for the reason of ownership
Different types are of Special Stocks are as follows
1 Subcontracting
2 Consignment
3 Pipeline
4 Stock transfer
5 Third party
6 Returnable transport packaging
7 Sales order stock
8 Project stock
SUBCONTRACTING
In subcontracting process we create subcontracting PO to supply or issue
subcomponents to vendor in order to get final product The price maintained in
subcontracting PO is a service charge paid to vendor
Steps to perform subcontracting
1 Create subcontracting inforecord (Optional)
2 Create subcontracting PO with item category L
There are to ways to supply subcomponents to vendor
bull Manually maintain the subcomponents in the subcontracting
PO though explode BOM
bull Through BOM (Bill of material) T Code CS01 CS02 amp CS03
3 Create Transfer Posting with Movement Type 541 to issue the subcomponents
to the vendor
4 Goods Reciept
5 Invoice Reciept
Path ME21N ---gt Enter Item Category L --gt Material (End Product) PO
Quantity Delivery Date Net Price Plant --gt Click on Item Details --gt Tab
Material Data -- gtComponents select Explode BOM --gt Click on Components
button --gt Enter the subcomponents --gt Go back amp Save
Create Transfer Posting with movement type 541 amp T Code MB1B
GR MIGO
IR MIRO
CONSIGNMENT - (No Concept of Invoice)
In consignment process we will not create Purchasing document for the vendor
vendor himself send the material to our plant though the material is available
to our plant the responsibility amp ownership of the material is of vendor Aliability
only arises when the material withdrawal (Consumption) is posted in the system
from consignment stock
Steps
1 Create Consignment info record (mandatory)
2 Create Consignment purchase order with item category lsquoKrsquo amp maintain Info
record number
3 Create GR Movement type lsquo101Krsquo
4 Create GI Movement Type lsquo201Krsquo
5 Consignment settlement T Code MRKO
Path --gtME11 --gt In info record --gt Purchasing Org Data 1 views of info record
enter the tax code and save it
--gt Create Consignment Purchase Order ME21N (Price option is grayed out with
price zero)
--gt Create GR with movement type 101K
--gt Create Goods Issue (GI) T Code MB1A amp Movement Type 201K Enter Cost
center vendor
--gt Consignment Settlement T Code MRKO Click Activate Consignment Activate
Settle Execute
--gt Display the Document Number ie Invoice receipt T Code FB03
PIPELINE PROCESS (No Concept of Invoice)
In pipeline handling your company does not need to order or store the material
concerned It is ready available to you as and when required via pipeline (eg oil
or water) or some other type of cable (eg electricity) Consumption of the
material is settled with the vendor on a regular basis
Steps
1 Create a Material master record with material type PIPE
2 Create Pipeline info record
3 Create GI with movement type 201P
4 Pipeline settlement T Code MRKO
RETURNABLE TRANSPORT PACKAGING (RTP)
When company orders goods from a vendor the goods are delivered with
returnable transport packaging (pallets containers) that belongs to the vendor
and is stored on our premises until you return it to the vendor
Steps
1 Create Material master record with material type LEIH
2 Create PO
3 Create GR by maintaining RTP material by selecting the option transport
equipments with movement type 501M
4 IR
STOCK TRANSFER
In stock transfer processing goods are procured and supplied within a company
One plant orders the goods internally to another plant (receiving plantissuing
plant) The goods are procured with a special type of purchase order the stock
transport order
Steps
1 Create a Material master in both supplying and receiving plant
2 Create stock transport order (STO) with item category lsquoUrsquo
3 Create transfer posting with movement type 351 amp T Code MB1B (Go to
MMBE stock overview the stock will decrease in supplying plant and it will not
update stock of receiving plant it will be under stock in transit)
4 Create GR stock will update in receiving plant
This scenario is under one company code between two plants
SAP IMPLEMENTATION PROCESS End to End Inplementation of SAP
First we have to prepare documentation about the client business (like turnover
vendors customers payments materials production marketing etc)
The implementer company made two teams (1) Steering team (2) Steering
community
Steering team (SAP functional consultants) prepares a detailed
documentation about the client with the help of core team (client company
team)
amp this study is known as Feasibility Study After that the steering team handed
over this documentation to Steering community (Project manager Sr software
engineer and other higher authorities)
Steering community prepares the BBP (Business Blue Print) BBP
Prepares in MS-Word
10487741048774 ASAP - Accelerated System Application Product in Data Processing
10487741048774 Business Process - ASAP Methodology
1 Project Preparation
2 BBP (Business Blue Print)
3 Realization
4 Final Preparation
5 Go live amp Support
10487741048774 Project Preparation -
It consists of identifying team members amp development strategy as
how to go
AS ndash IS (Existing Process followed requirements)
TO ndash BE (Requirement analysis and best process recommended)
Difference between (AS ndash IS) amp (TO - BE) is called GAP Analysis
10487741048774 Business Blue Print (BPP) -
It is a legal documentation between client amp the company
(implementer service provider) We have to understand the current business
process of client amp analyzing the business amp prepare documentation It is a
detailed documentation for the client
10487741048774 Realization -
This Phase is used to Implement or migrate the entire business of
client from Non-SAP environment to SAP environment
10487741048774 Final Preparation -
This phase is used for testing amp end user training After successfully
completion of this phase client is ready to run business in SAP R3
10487741048774 Go live amp Support -
In this phase we deliver the project end date amp end user training at
client site
THIRD - PARTY PROCESSING
THIRD - PARTY PROCESSING
In third party processing your company passes on a sales order to an external
vendor who sends the goods directly to the customer The sales order is not
processed by your company but by the vendor Third-party items can be
entered in purchase requisitions purchase orders and sales orders Third party
processing is integrated with Sales and Distribution If the sales order contains
third-party items the system creates a purchase requisition from the order
Steps
1 Create MMR with sales views and maintain Division Distribution channel
sales org item category group and general item category group ndash BANS (Third
party item) amp Account group Sold to party
2 Create Customer master record T Code XD01 XD02 XD03
3 Create sales order T Code VA01 VA02 VA03 (PR generated automatically)
4 PO - T Code ME21N
5 GR ndash T Code MIGO
6 IR ndash T Code MIRO
7 Sales Billing Billing Document T Code VF01 VF02 VF03

Material master data
Each material is assigned a chapter ID
Excise tax rate
For every chapter ID and final excise duty indicator you maintain the rate of
excise duty
If your business only qualifies for partial CENVAT credit you must customize
your system accordingly
Activities
Let us consider an example to illustrate how the system determines which rate
of excise duty to apply to a material Assume you are posting a sale of ball
bearings to a customer The system automatically determines the rate of excise
duty as follows
Looks up the customer master data to see what status you have assigned the
customer
Lets assume youve assigned the customer status 3
Looks up the plant master data to see what status you have assigned the plant
Similarly your plant has status 2
The system looks up the table under Excise Indicator for Plant and Customer to
see what the final excise duty indictor is for customer status 3 and plant status
2 It is 7
The system determines the chapter ID of the ball bearing for the plant
Letrsquos assume the chapter ID at plant for the ball bearings is 100001
Finally the system looks up the table under Excise Tax Rate to see what rate of
duty applies to chapter ID 100001 under status 7
Plant Master (Excise Data) Definition
The part of the plant master record that contains information relating to Indian
excise duty
Use
In conjunction with other data this data is used to calculate excise duty on
various transactions
To maintain the data from the SAP Easy Access screen choose Indirect Taxes reg
Master Data reg Excise Rate Maintenance and then select the following options
described below
Structure
The excise part of the plant master is divided into the following screens
Excise Indicator for Plant
On this screen you enter your plants tax registration numbers which are used
for various forms of correspondence and reports
1 Central sales tax (CST) number
2 Local sales tax (LST) registration number
3 Permanent account number (PAN)
In order for the system to be able to calculate which rate of excise duty to apply
on purchases for this plant you must also assign it a plant excise duty status
(for more information about how this works see Determination of Excise Duty
Rates)
Excise Indicator for Plant and Vendor
On this screen you define the final excise duty indicator (for more information
about how this works see Determination of Excise Duty Rates)
Excise Indicator for Plant and Customer
On this screen you define the final excise duty indicator (for more information
about how this works see Determination of Excise Duty Rates)
Automatic Creation of Excise Invoices Use
The SAP System can automatically create an outgoing excise invoice for you
immediately you post a commercial invoice (or a pro forma invoice) for a
customer sale This function applies to excise invoices for sales from factories
only
Prerequisites
To activate this function in the Country Version India (CIN) Implementation
Guide (IMG) make the following settings
1 Under Global Settings reg Excise Groups select Create EI
This activates the automatic creation function
2 Under Sales and Distribution reg Utilization Determination
Here you specify which CENVAT accounts the system is to post the different
types of excise duty to
3 Under Sales and Distribution reg Excise GroupndashSeries Group Determination
Here you specify which excise group and series group the excise invoices are to
be created for
Features
When you post an invoice the system creates an excise invoice All the
information that it needs to create the excise invoice is provided either by the
invoice or by the Customizing settings that you have made in Sales and
Distribution It also determines the excise invoice type automatically by means
of a user exit
Creating Excise Invoices for Stock Transfers 1 From the SAP Easy Access screen choose Indirect Taxes reg Procurement reg
Excise Invoice reg For Depot reg CreateChangeDisplay
2 In the Material document field enter the goods receipt number and choose
The system displays the information from the goods receipt for example the
sending plant the excise registration the range the division and the
collectorate
3 Choose Details
The system copies the items from the goods receipt document In the depot it is
possible to have a separate excise invoice at line item level
4 Enter the internal document number of the excise invoice sent by the factory
5 Choose More documents to go the excise invoice details screen
6 Enter the internal document number of the excise invoice from the factory
The system copies the information to the line item (for example the excise
invoice number the excise invoice date the item number the chapter ID the
excise invoice quantity the amount of excise duty paid the excise base value
and the serial number of the Part II register entry with which the excise was
paid)
You can change the receipt quantity to match the actual quantity received at
the depot if necessary The system automatically adjusts the excise
accordingly
7 Go back to the item details screen
8 Save the excise invoice
Creating Excise Invoices for Direct Purchases 1 From the SAP Easy Access screen choose Indirect Taxes reg Procurement reg
Excise Invoice reg For Depot reg CreateChangeDisplay
2 In the Material document field enter the goods receipt number and choose
The system displays the information from the goods receipt for example the
sending plant the excise registration the range the division and the
collectorate
You can also maintain the excise registration details for the ship-from party as
for with the vendor The ship-from can be different from the vendor code (The
delivering plant can be maintained as a ship-from in the system When a valid
ship-from is entered the excise registration details copied from the vendor will
be overwritten by the ship-from excise registration details)
The ship-from registration details displayed can also be overwritten manually
The dealers commercial invoice number can be stored in the vendor excise
invoice number as in this case the dealer himself will not have an excise
invoice
3 Choose Details
The system copies the items from the goods receipt document It also copies the
vendors excise invoice number and the serial numbers of the entries in the RG
23A RG 23C and personal ledger account (PLA) registers
4 Enter the internal document number of the excise invoice sent by the factory
5 Select an item and choose More documents to go the excise invoice details
screen
In the case of direct purchases there will not be any excise invoice in the
system so leave the internal document field blank The vendors invoice will
show the details of the excise invoices through which excise has been paid for
the item that is being dispatched You can enter these details here
6 For each item the chapter ID excise base value and excise duty amounts
are defaulted from the purchase order You can change them if there is any
difference Enter the excise amount paid and the receipt quantity You also
enter the Part II register serial numbers with which the excise duty was paid and
the excise registration information from the original excise invoice
7 Go back to the item details screen
8 Save the excise invoice
The system creates an entry in register RG 23D You can change the excise
invoice as long as it has not been used in any sales
Assigning Excise Invoices to a Delivery Use
You follow this procedure to specify which excise invoices are to be assigned to
a delivery from a depot (or other material document)
You can also automate this procedure using the batch selection program
(J_1IJCHK) by making the appropriate Customizing settings in the Country
Version India (CIN) Implementation Guide (IMG)
Procedure
1 From the SAP Easy Access screen choose Indirect Taxes reg SalesOutbound
Movements reg Excise Invoice reg For Depot reg CreateChangeDisplay reg Delivery
or Material Document reg RG 23D Selection
2 Enter the delivery document number or the material number and choose
3 Select the excise invoice you want
4 Choose
5 Choose Excise invoice
A list of excise invoices appears These are the excise invoices at the depot with
a balance quantity
The system also shows a list of the A certificates that can be used You can pick
up any of the A certificates but they must be for the same excise invoice You
can only pick up an A certificate in its entirety You cannot select part of an A
certificate
6 Select the excise invoices that are relevant to the delivery
7 Specify what quantity to be used from each excise invoice
The system recalculates the excise accordingly
8 Go back to the item details screen
9 Save the data
Result
The system creates an entry in register RG 23D and generates the depot excise
invoice numbers
If you selected any A certificates the system also generates additional entries in
the RG 23D register The system marks the original A certificates as updated so
that they cannot be used for any other removals
CIN - Country India Version ~ Vol 2
Continue Volume 1
Creating Excise Invoices
Use
This is the procedure that you follow to create an excise invoice for the less
common types of goods movement
Procedure
1 From the SAP Easy Access screen choose Indirect Taxes reg SalesOutbound
Movements reg Excise Invoice reg For Other Movements reg CreateChangeDisplay
reg
2 On the selection screen enter data as required including
(i)Reference
group box
Specify which document you want to create the excise invoice for and which
excise group it is for
(ii)Details
group box
Specify the vendor or customer that you are sending the invoice to
3 Choose
If you entered an internal document number the system copies the item details
from it
4 Choose
5 Enter line items for each of the materials to be included in the excise invoice
For each item enter the following data
(i)Material
(ii)Quantity
(iii)Unit of measure
(iv)Base value
(v)Excise duty
6 To pick the rate and amount from a specific excise invoice choose Get excise
invoice
7 Save the excise invoice
If you are using the one-step procedure the system creates and posts an excise
invoice Otherwise the system saves the information but does not make any
postings it now has to be verified
Verifying and Posting Excise Invoices
Use
You follow this procedure to verify that the information in an excise invoice that
has already been created and to post it once you are satisfied
Procedure
From the SAP Easy Access screen choose Indirect Taxes reg SalesOutbound
Movements reg Excise Invoice reg For Other Movements reg Posting
1 Enter the internal document number of the excise invoice
2 Choose Release to accounting
The system displays the excise invoice The excise duty that is to be posted is
displayed at the foot of the screen which you can change if necessary
3 To access the balance utilization choose
4 To display the balance available on the CENVAT accounts choose Account
balances
5 Save the excise invoice
The system generates the accounting documents
6 To print the excise invoice choose
Making a Transfer Posting
Use
In this procedure you make a transfer posting for the goods ordered by another
plant For more information about this function see Entering the Removal from
Storage at the Issuing Plant
Procedure
1 From the SAP Easy Access screen choose Logistics reg Materials Management
reg Inventory Management reg Goods Movement reg Transfer Posting
2 Choose Movement type reg Transfer posting reg Plant to plant reg To stock in
transit
3 Enter the number of the issuing plant and storage location
4 Choose To purchase order
5 In the dialog box enter the number of the stock transport order that the
receiving plant created and choose
6 Check the data
7 Save the transfer posting
Transaction Codes for India
Transaction Action
J1I2 Prepare a sales tax register
J1I3 Create outgoing excise invoices in batches
J1I5
Update the RG 1 and Part I registers
J1I8
Post the challan used to remit TDS
J1IC194C
Create annual return under section 194 C (Classic TDS)
J1IC194D
Create annual return under section 194 D (Classic TDS)
J1IC194I
Create annual return under section 194 I (Classic TDS)
J1IC194J
Create annual return under section 194 J (Classic TDS)
J1IEX
Incoming Excise Invoices (central transaction)
J1IEX_C
Capture an incoming excise invoice (excise clerk)
J1IEX_P
Post an incoming excise invoice (excise supervisor)
J1INBANK
Post a bank challan
J1INCANC
Cancel a vendor withholding tax certificate
J1INCERT
Print a vendor withholding tax certificate
J1INCHLN
Create a remittance challan
J1INCUST
Post a customer withholding tax certificate
J1INHC
Withholding Tax Migration Health Check Program
J1INMIG
Withholding Tax Data Migration Tool
JI1NCHLC
Create a remittance challan for customers
J1INCC
Print customer withholding tax certificates
J1INMIS
Withholding Tax Information System
JI1NAR
Prepare annual returns (Extended Withholding Tax)
J1IF01
Create a subcontracting challan
J1IF11
Change a subcontracting challan
J1IF12
Display a subcontracting challan
J1IF13
Complete reverse or recredit a subcontracting challan
J1IFQ
Reconcile quantities for subcontracting challans
J1IFR
List subcontracting challans
J1IH
Make a CENVAT adjustment posting
J1IIN
Create an outgoing excise invoice
J1IJ
Assign excise invoices to a delivery for sales from depots
J1INJV
Adjust withholding tax Item
J1INREP
Reprint a vendor withholding tax certificate
J1INREV
Reverse a remittance challan
J1INPR
Calculate withholding tax on clearing accounts
J1INUT
Clear withholding tax on clearing accounts
J1IR
Download register data
J1IS
Process an excise invoice (outgoing) for other movements
J1IU
Process exemption forms
J1IW
Verify and post an incoming excise invoice
J1IX
Create an incoming excise invoice (without reference to purchase order)
J2I8
Transfer excise duty to CENVAT account
J2ID
Archive tax deducted at source (TDS) documents
J2IE
Locate tax deducted at source documents in archive
J2IU
Remit excise duty fortnightly
J2I9
Monthly CENVAT return
J1IG
Excise invoice entry at depot
J1IGA
Create additional excise entry at depot
J2I5
Extract data for excise registers
J2I6
Print excise registers
Sales from Factories
Purpose
This process describes how the SAP System handles the sales process allowing
for the creation of excise invoices which you have to send with each delivery
that is subject to excise duty There are two scenarios depending on whether
you want to send the commercial invoice along with the delivery or at a later
date
Prerequisites
In order for the system to be able to copy the information from document to
document you must have set up the copying control procedures in Customizing
for Sales and Distribution (SD) This differs according to when you want to send
the commercial invoice
1 Along with the delivery
In this case the document flow would be OR (standard sales order type) ndash LF
(standard delivery type) ndash F2 (invoice)
2 At a later date
The document flow would be OR ndash JF (delivery type a copy of LF) ndash JEX (pro
forma billing document type a copy of document type F8) ndash F2
In addition you must also have maintained the settings in the Country Version
India (CIN) Implementation Guide (IMG) by choosing Global Settings reg Assign
Excise Invoice Billing Type to Delivery Type
A sample pricing procedure JFACT is provided for this sales procedure
Process Flow
1 The sales clerk creates a sales order following the
(i)standard procedure
There are special procedures for
(i)Customers in possession of exemption forms
(ii)Exports
2 The shipping clerk creates a delivery again following the
standard procedure
On the initial screen you set the appropriate delivery type (see above)
3 In the warehouse the storeperson issues the goods
The system only allows users to create a pro forma excise invoice if the delivery
is complete so as to prevent them from creating multiple pro forma excise
invoices
4 What you do at this stage depends on whether you want to send the
commercial invoice along with the delivery or whether you want to invoice the
customer later
(A) If the invoice is to be shipped with delivery the shipping clerk
(i)Creates an invoice following the standard procedure
(ii)Creates an excise invoice from the invoice
(B) If the invoice is to be sent on at a later date the shipping clerk
(i)Creates the pro forma excise invoice
The pro forma excise invoice is only required for technical purposes and is not
sent to the customer The system does not make any accounting postings at this
stage
(ii)Creates
an excise invoice from the pro forma excise invoice
In both these cases the system creates an accounting document to post the
excise duty to a clearing account
Instead of creating excise invoices manually you can also have the system
create them automatically Alternatively you can create them in batches
5 You ship the goods
6 When the time comes to invoice the customer you create the invoice
following the standard procedure
Irrespective of the number of excise invoices that you have issued you can
combine the delivery items in a single invoice (if the standard requirements are
met)
Sales from Depots
Purpose
You may sell finished goods directly from the place of manufacture as described
under Sales from Factories or you may first ship them to a separate location for
storage (a depot) from where you will sell them The second procedure is
described here
Sales from depots are handled differently from sales from factories because of
excise law Excise duty is payable when you send the goods from the factory to
the depot but it is not levied again when you sell the goods
Sometimes when you make a final sale of goods from a depot price escalations
could have happened with retrospective effect In such scenarios you need to
pay the extra excise duty at the factory using an A Certificate You need to
register the A certificate details in the RG 23D register and the excise recovered
from the customer
Prerequisites
You have customized
1 Stock transport processing in Customizing for Materials Management (MM)
by choosing Purchasing reg Purchase Order reg Set Up Stock Transport Order
2 The copying control for copying stock transport order NL to excise invoice JEX
You make this setting in the Country Version India (CIN) Implementation Guide
(IMG) by choosing Sales and Distribution reg Assign Excise Invoice Billing Type to
Delivery Type
3 The item category NLN (standard transport order) so that it is relevant for
billing
You do this in the standard IMG in Customizing for Sales and Distribution (SD)
by choosing Sales reg Sales Documents reg Sales Document Item
Process Flow
1 You create the sales order following the
standard procedure
The standard pricing procedure for depot sales is JDEPOT
2 You create the delivery again following the
standard procedure
3 You
assign excise invoices to the delivery or material document
4 You
verify that you have selected the correct excise invoices and post them
Alternatively if you have selected the wrong excise invoices you can cancel the
assignment
5 You create the invoice following the standard procedure
SPECIAL STOCKS amp SPECIAL PROCUREMENT TYPES
Special Stocks are those stocks which are not belongs to our company code
These are not placed in our storage locations amp no physical inventory is
performed and treated as special stocks for the reason of ownership
Different types are of Special Stocks are as follows
1 Subcontracting
2 Consignment
3 Pipeline
4 Stock transfer
5 Third party
6 Returnable transport packaging
7 Sales order stock
8 Project stock
SUBCONTRACTING
In subcontracting process we create subcontracting PO to supply or issue
subcomponents to vendor in order to get final product The price maintained in
subcontracting PO is a service charge paid to vendor
Steps to perform subcontracting
1 Create subcontracting inforecord (Optional)
2 Create subcontracting PO with item category L
There are to ways to supply subcomponents to vendor
bull Manually maintain the subcomponents in the subcontracting
PO though explode BOM
bull Through BOM (Bill of material) T Code CS01 CS02 amp CS03
3 Create Transfer Posting with Movement Type 541 to issue the subcomponents
to the vendor
4 Goods Reciept
5 Invoice Reciept
Path ME21N ---gt Enter Item Category L --gt Material (End Product) PO
Quantity Delivery Date Net Price Plant --gt Click on Item Details --gt Tab
Material Data -- gtComponents select Explode BOM --gt Click on Components
button --gt Enter the subcomponents --gt Go back amp Save
Create Transfer Posting with movement type 541 amp T Code MB1B
GR MIGO
IR MIRO
CONSIGNMENT - (No Concept of Invoice)
In consignment process we will not create Purchasing document for the vendor
vendor himself send the material to our plant though the material is available
to our plant the responsibility amp ownership of the material is of vendor Aliability
only arises when the material withdrawal (Consumption) is posted in the system
from consignment stock
Steps
1 Create Consignment info record (mandatory)
2 Create Consignment purchase order with item category lsquoKrsquo amp maintain Info
record number
3 Create GR Movement type lsquo101Krsquo
4 Create GI Movement Type lsquo201Krsquo
5 Consignment settlement T Code MRKO
Path --gtME11 --gt In info record --gt Purchasing Org Data 1 views of info record
enter the tax code and save it
--gt Create Consignment Purchase Order ME21N (Price option is grayed out with
price zero)
--gt Create GR with movement type 101K
--gt Create Goods Issue (GI) T Code MB1A amp Movement Type 201K Enter Cost
center vendor
--gt Consignment Settlement T Code MRKO Click Activate Consignment Activate
Settle Execute
--gt Display the Document Number ie Invoice receipt T Code FB03
PIPELINE PROCESS (No Concept of Invoice)
In pipeline handling your company does not need to order or store the material
concerned It is ready available to you as and when required via pipeline (eg oil
or water) or some other type of cable (eg electricity) Consumption of the
material is settled with the vendor on a regular basis
Steps
1 Create a Material master record with material type PIPE
2 Create Pipeline info record
3 Create GI with movement type 201P
4 Pipeline settlement T Code MRKO
RETURNABLE TRANSPORT PACKAGING (RTP)
When company orders goods from a vendor the goods are delivered with
returnable transport packaging (pallets containers) that belongs to the vendor
and is stored on our premises until you return it to the vendor
Steps
1 Create Material master record with material type LEIH
2 Create PO
3 Create GR by maintaining RTP material by selecting the option transport
equipments with movement type 501M
4 IR
STOCK TRANSFER
In stock transfer processing goods are procured and supplied within a company
One plant orders the goods internally to another plant (receiving plantissuing
plant) The goods are procured with a special type of purchase order the stock
transport order
Steps
1 Create a Material master in both supplying and receiving plant
2 Create stock transport order (STO) with item category lsquoUrsquo
3 Create transfer posting with movement type 351 amp T Code MB1B (Go to
MMBE stock overview the stock will decrease in supplying plant and it will not
update stock of receiving plant it will be under stock in transit)
4 Create GR stock will update in receiving plant
This scenario is under one company code between two plants
Material Master Related Important Terms (Part 2)
Controlling (CO) An organizational unit in Accounting that reflects a
management-oriented structure of the organization for the purpose of internal
control
Operating results for profit centers can be analyzed using either the cost of
sales approach or the period accounting approach
By analyzing the fixed capital as well you can expand your profit centers for use
as investment centers
Profit Center
Key that uniquely identifies the profit center in the current controlling area
Valuation Category
Determines whether stocks of the material are valuated together or separately
Dependencies
In the case of split valuation this indicator also determines which valuation
types are allowed that is the criteria by which stocks can be valuated
Valuation type
Invoice Verification (MM-IV)
A subdivision of a valuation category in split valuation
Example An enterprise manages its stocks of a material using the valuation
category Quality comprising the following valuation types
bull High quality Average quality Inferior
Hazardous material number
Number that identifies the material as a hazardous material or as dangerous
goods and assigns hazardous material data or dangerous goods data to it
Use The hazardous material number indicates that the material is dangerous
making special precautions necessary for its storage and shipment
Valuation Class
Assignment of a material to a group of GL accounts
With other factors the valuation class determines the GL accounts that are
updated as a result of a valuation-relevant transaction or event such as a goods
movement
The valuation class makes it possible to
bull Post the stock values of materials of the same material type to different GL
accounts
bull Post the stock values of materials of different material types to the same GL
account
Default value for the valuation class for valuated stocks of this material
Use The valuation class has the following functions
bull Allows the stock values of materials of the same material type to be posted to
different GL accounts
bull Allows the stock values of materials of different material types to be posted to
the same GL account
bull Determines together with other factors the GL accounts updated for a
valuation-relevant transaction (such as a goods movement
CIN - Country India Version ~ Volume 1
PurposeCountry Version India (CIN) contains a number of enhancements to standard
Sales and Distribution (SD) functions that allow you to handle local
requirements in particular excise duty
Features
In Country Version India (CIN) this component handles sales processes as
found in India In addition to the generic functions it allows you to
Handle CENVAT in your sales processes
The system calculates excise on your sales and creates excise invoices as
required and makes the appropriate postings to your CENVAT accounts
It covers sales from factories sales from depots and offers functions for other
types of goods movements it also covers sales to export-oriented units and
export sales
Record concessional and exemption forms sent to you by your customers
Make adjustment postings to your CENVAT accounts
Excise Invoice (Outgoing)
Definition
The document that acts as the proof of payment of excise duty and is required
for the customer to take CENVAT credit on the item
Use
In the SAP System there are three different procedures for creating excise
invoices
Sales direct from the factory
This procedure is for when you sell manufactured goods straight from the
factory at which they were produced in which case you levy excise duty when
the goods leave the factory on their way to the customer
If when you send the goods to the customer you enclose the commercial
invoice you create the excise invoice with reference to the commercial invoice
If you want to send the commercial invoice after you have dispatched the goods
however you create the excise invoice with reference to a pro forma
commercial invoice For more information about these procedures see Sales
from Factories
As well as creating excise invoices individually you can also create them in
batches (see Creation of Excise Invoices in Batches)
Sales from depots
A depot is a site at which the goods are stored away from the factory at which
they were produced In this procedure you have to levy the excise duty when
you transfer the goods from the factory to the depot and then make sure this is
passed on to the customer when it makes a purchase For more information see
Sales from Depots
Sales (other goods movements)
Some other goods movements may also require you to create an excise invoice
with reference to other documents The SAP System offers separate functions
for these purposes (see Excise Invoices (Outgoing) for Other Movements)
StructureNumbering of Excise Invoices
Outgoing excise invoices have two numbers an internal document number
which is assigned immediately you create an excise invoice and an excise
invoice number which is not assigned until you have verified and posted it
As far as the excise invoice number is concerned you have to number your
outgoing excise invoices in sequential order starting each year on 1 April You
must notify the excise authority of the jurisdiction of the invoicing location The
serial number must be printed on each page of the excise invoice
Each number range is governed by a series group You must create at least one
series group in order to be able to number the excise invoices If you need more
than one number range you must create the corresponding number of series
groups You do so in the CIN Implementation Guide (IMG) by choosing Global
Settings reg Series Groups
Number of Line Items Per Excise Invoice
Some states allow you to include only a limited number of items for each page
of an excise invoice (for example if the excise invoices are to be printed on
prenumbered forms) You can customize the system so that it prints the excise
invoice accordingly in the CIN IMG by choosing Global Settings reg Excise
Registration IDs
Customer Master (Excise Data) Definition
The part of the customer master record that contains information relating to
Indian excise duty
Use
In conjunction with other data this data is used to calculate excise duty on
various transactions
To maintain the data from the SAP Easy Access screen choose Indirect Taxes reg
Master Data reg Excise Rate Maintenance and then select the following options
described below
Structure
The excise part of the customer master contains the following information
Customer Excise Details
On this screen you enter your customers tax registration numbers which are
used for various forms of correspondence and reports
1 Excise registration number (and the range division and collectorate in which
this is located)
2 Central sales tax (CST) number
3 Local sales tax (LST) registration number
4 Permanent account number (PAN)
In order for the system to be able to calculate which rate of excise duty to apply
on sales to the customer you must also assign it a customer excise duty status
(for more information about how this works see Determination of Excise Duty
Rates)
Excise Indicator for Plant and Customer
On this screen you define the final excise duty indicator (for more information
about how this works see Determination of Excise Duty Rates)
Determination of Excise Duty Use
When you execute a business transaction involving materials that are subject to
excise duty the system automatically calculates the duty for you
Prerequisites
In order for the system to be able to determine which rate of excise duty to
apply you must have maintained all the data on the Excise Rate Maintenance
screen which you can access from the SAP Easy Access screen by choosing
Indirect Taxes reg Master Data reg Excise Rate Maintenance
You maintain the following types of data
Plant master data
You assign each of your plants an excise duty indicator You can use the same
indicator for all the plants with the same excise status from a legal point of view
such as all those that are in an exempt zone
See also the information about manufacturers that are only entitled to deduct a
certain portion of the duty (see Partial CENVAT Credit)
Vendor master data
For each of your vendors with the same excise status from a legal perspective
you define an excise duty indicator You must also specify the vendor type ndash for
example whether the vendor is a manufacturer a depot or a first-stage dealer
You must also stipulate if the vendor qualifies as a small-scale industry
For each permutation of plant indicator and vendor indicator you then create a
final excise duty indicator
Customer master data
Similarly you assign the same excise duty indicator to each of your customers
that share the same legal excise status
Again for each permutation of plant indicator and customer indicator you then
create a final excise duty indicator
Material master data
Each material is assigned a chapter ID
Excise tax rate
For every chapter ID and final excise duty indicator you maintain the rate of
excise duty
If your business only qualifies for partial CENVAT credit you must customize
your system accordingly
Activities
Let us consider an example to illustrate how the system determines which rate
of excise duty to apply to a material Assume you are posting a sale of ball
bearings to a customer The system automatically determines the rate of excise
duty as follows
Looks up the customer master data to see what status you have assigned the
customer
Lets assume youve assigned the customer status 3
Looks up the plant master data to see what status you have assigned the plant
Similarly your plant has status 2
The system looks up the table under Excise Indicator for Plant and Customer to
see what the final excise duty indictor is for customer status 3 and plant status
2 It is 7
The system determines the chapter ID of the ball bearing for the plant
Letrsquos assume the chapter ID at plant for the ball bearings is 100001
Finally the system looks up the table under Excise Tax Rate to see what rate of
duty applies to chapter ID 100001 under status 7
Plant Master (Excise Data) Definition
The part of the plant master record that contains information relating to Indian
excise duty
Use
In conjunction with other data this data is used to calculate excise duty on
various transactions
To maintain the data from the SAP Easy Access screen choose Indirect Taxes reg
Master Data reg Excise Rate Maintenance and then select the following options
described below
Structure
The excise part of the plant master is divided into the following screens
Excise Indicator for Plant
On this screen you enter your plants tax registration numbers which are used
for various forms of correspondence and reports
1 Central sales tax (CST) number
2 Local sales tax (LST) registration number
3 Permanent account number (PAN)
In order for the system to be able to calculate which rate of excise duty to apply
on purchases for this plant you must also assign it a plant excise duty status
(for more information about how this works see Determination of Excise Duty
Rates)
Excise Indicator for Plant and Vendor
On this screen you define the final excise duty indicator (for more information
about how this works see Determination of Excise Duty Rates)
Excise Indicator for Plant and Customer
On this screen you define the final excise duty indicator (for more information
about how this works see Determination of Excise Duty Rates)
Automatic Creation of Excise Invoices Use
The SAP System can automatically create an outgoing excise invoice for you
immediately you post a commercial invoice (or a pro forma invoice) for a
customer sale This function applies to excise invoices for sales from factories
only
Prerequisites
To activate this function in the Country Version India (CIN) Implementation
Guide (IMG) make the following settings
1 Under Global Settings reg Excise Groups select Create EI
This activates the automatic creation function
2 Under Sales and Distribution reg Utilization Determination
Here you specify which CENVAT accounts the system is to post the different
types of excise duty to
3 Under Sales and Distribution reg Excise GroupndashSeries Group Determination
Here you specify which excise group and series group the excise invoices are to
be created for
Features
When you post an invoice the system creates an excise invoice All the
information that it needs to create the excise invoice is provided either by the
invoice or by the Customizing settings that you have made in Sales and
Distribution It also determines the excise invoice type automatically by means
of a user exit
Creating Excise Invoices for Stock Transfers 1 From the SAP Easy Access screen choose Indirect Taxes reg Procurement reg
Excise Invoice reg For Depot reg CreateChangeDisplay
2 In the Material document field enter the goods receipt number and choose
The system displays the information from the goods receipt for example the
sending plant the excise registration the range the division and the
collectorate
3 Choose Details
The system copies the items from the goods receipt document In the depot it is
possible to have a separate excise invoice at line item level
4 Enter the internal document number of the excise invoice sent by the factory
5 Choose More documents to go the excise invoice details screen
6 Enter the internal document number of the excise invoice from the factory
The system copies the information to the line item (for example the excise
invoice number the excise invoice date the item number the chapter ID the
excise invoice quantity the amount of excise duty paid the excise base value
and the serial number of the Part II register entry with which the excise was
paid)
You can change the receipt quantity to match the actual quantity received at
the depot if necessary The system automatically adjusts the excise
accordingly
7 Go back to the item details screen
8 Save the excise invoice
Creating Excise Invoices for Direct Purchases 1 From the SAP Easy Access screen choose Indirect Taxes reg Procurement reg
Excise Invoice reg For Depot reg CreateChangeDisplay
2 In the Material document field enter the goods receipt number and choose
The system displays the information from the goods receipt for example the
sending plant the excise registration the range the division and the
collectorate
You can also maintain the excise registration details for the ship-from party as
for with the vendor The ship-from can be different from the vendor code (The
delivering plant can be maintained as a ship-from in the system When a valid
ship-from is entered the excise registration details copied from the vendor will
be overwritten by the ship-from excise registration details)
The ship-from registration details displayed can also be overwritten manually
The dealers commercial invoice number can be stored in the vendor excise
invoice number as in this case the dealer himself will not have an excise
invoice
3 Choose Details
The system copies the items from the goods receipt document It also copies the
vendors excise invoice number and the serial numbers of the entries in the RG
23A RG 23C and personal ledger account (PLA) registers
4 Enter the internal document number of the excise invoice sent by the factory
5 Select an item and choose More documents to go the excise invoice details
screen
In the case of direct purchases there will not be any excise invoice in the
system so leave the internal document field blank The vendors invoice will
show the details of the excise invoices through which excise has been paid for
the item that is being dispatched You can enter these details here
6 For each item the chapter ID excise base value and excise duty amounts
are defaulted from the purchase order You can change them if there is any
difference Enter the excise amount paid and the receipt quantity You also
enter the Part II register serial numbers with which the excise duty was paid and
the excise registration information from the original excise invoice
7 Go back to the item details screen
8 Save the excise invoice
The system creates an entry in register RG 23D You can change the excise
invoice as long as it has not been used in any sales
Assigning Excise Invoices to a Delivery Use
You follow this procedure to specify which excise invoices are to be assigned to
a delivery from a depot (or other material document)
You can also automate this procedure using the batch selection program
(J_1IJCHK) by making the appropriate Customizing settings in the Country
Version India (CIN) Implementation Guide (IMG)
Procedure
1 From the SAP Easy Access screen choose Indirect Taxes reg SalesOutbound
Movements reg Excise Invoice reg For Depot reg CreateChangeDisplay reg Delivery
or Material Document reg RG 23D Selection
2 Enter the delivery document number or the material number and choose
3 Select the excise invoice you want
4 Choose
5 Choose Excise invoice
A list of excise invoices appears These are the excise invoices at the depot with
a balance quantity
The system also shows a list of the A certificates that can be used You can pick
up any of the A certificates but they must be for the same excise invoice You
can only pick up an A certificate in its entirety You cannot select part of an A
certificate
6 Select the excise invoices that are relevant to the delivery
7 Specify what quantity to be used from each excise invoice
The system recalculates the excise accordingly
8 Go back to the item details screen
9 Save the data
Result
The system creates an entry in register RG 23D and generates the depot excise
invoice numbers
If you selected any A certificates the system also generates additional entries in
the RG 23D register The system marks the original A certificates as updated so
that they cannot be used for any other removals
Continue see Volume 2 (Next post)
EXTERNAL SERVICE MASTER
EXTERNAL SERVICE MASTER ESM
We procure the different type of services from vendors they are-
1048774 Hardware amp software services
1048774 Construction amp transportation services
1048774 Machinery services
1048774 Annual maintenance services
1048774 Present to and breakdown service Etc
Service Procurement Cycle -
1048774 Requirement identification
1048774 Source determination
1048774 Source selection
1048774 Service master
1048774 Service PO
1048774 Service entry sheet acceptance
1048774 Invoice with respect to service entry sheet
Steps to perform services -
1 Create service master (AC03)
2 Create Service PO (ME21N) with AC Assignment category lsquoKrsquo amp Item
Category lsquoDrsquo
3 Create service entry sheet (ML81N)
4 Invoice with respect to Service Entry sheet
Customize settings
(For service category Number Ranges amp organization status for service
category)
SPRO 1048774 IMG 1048774 MM 1048774 ESM 1048774 Service Master
1048774 Define organization Status for service Categories
1048774 Define Service Category
1048774 Define Number Ranges
Define organization Status for service Categories
bull Click on New Entries
bull Org service Category
bull BDS (Basic data service is stored in service master record under this service
category)
bull CNST 1048774 Controlling Status
bull PUST 1048774 Purchasing data Status
bull SDST 1048774 Sales amp Distributed Status
bull Org status description service category 1048774 Press Enter amp Save
Define Service Category
bull Same path as above
bull Select Standard
bull Click on Copy as
bull AC reference 1048774 always takes as 0006
bull Enter amp Save
Define Number Ranges
Click on groups 1048774 Groups 1048774 Insert 1048774 select enter Number Ranges
Select the service category
Click on Element
Select Group amp Click on Element Group
Save
Create Service Master - (AC03)
Click on Create New Services
Service Number (any number) Service Category
Basic unit of measure (Hours lsquoHrsquo)
Enter
Basic Data 1048774 Master Service Group 1048774 007
Valuation class 1048774 3200 1048774 Enter 1048774 Save
To See the Service list 1048774 AC06
Create Service PO (ME21N)
AC assignment category lsquoKrsquo Item Category lsquoDrsquo
Enter the Short text Quantity Delivery date Net Price Material group Plant
Storage Location
Enter service number in Service Tab (Item Details) quantity price Enter
Account Assignment 1048774 GL Account Number eg400000
Cost Center eg 9999
Press Enter amp Save
Create Service Entry Sheet - ML81N
Select other purchase order (enter PO number) 1048774 Enter 1048774 Click on Create1048774 Enter
Short Text 1048774 Enter 1048774 Service Number 1048774 Enter ndashClick on Flag button 1048774 Save
Take Service entry Sheet Number
Go to Invoice MIRO 1048774 Enter company code 1048774 Select Service Sheet Option 1048774 Enter
Service Entry Sheet Number 1048774 save it
Physical Inventory and Inventory Management
Physical inventory Process - 1 Create Physical inventory document
T Code MI01 ndash Create single inventory document
T Code MI31 ndash Create multiple physical inventory documents
I Enter the desired fields ie material material type site storage location and
Maximum number items Documents ndash 100 etc 1048774 Press Enter
II Click on Process Session
III Select the line items and click on the process
IV System displays a dialog box select Background and click on process
Inventory document is created
2 Print Inventory Document and handed over to responsible person say
Manager
3 Enter Physical Inventory count
T Code MI04
i Enter the physical inventory document number Fiscal year count date 1048774 Press
enter
ii Enter the Material Quantity and click on post
4 Listing of difference
T Code MI20
Enter the physical inventory document number and execute system displays a
screen wherein we will be able to view the differences
5 Post the differences
T Code MI07 amp Mov Type 701 amp 702
Enter the physical inventory document number year posting date enter the
difference and post
INVENTORY MANAGEMENT Maintaining stock by value or by quantity is called inventory The total inventory
management deals with the goods movement of the material
Goods movement -
It is a process in which transaction resulting change in stocks It is further sub-
divided into three categories
1 Goods Receipt (GR)
2 Goods Issue (GI)
3 Transfer Posting (TP)
Goods Receipt (GR) - It is a goods movement in which receipt of goods is
posted for vendor or for production A GR posted in the system will leads to
increase in stock No Concept of Price or value
Goods Issue (GI) - It is goods movement in which material withdrawal is
posted for consumption or for customer A GI posted in system will leads to
decrease in stock
Stock Transfer (ST) - It is method of removal of material from one location
and transferring it to another location This process is performed between two
plants and two storage locations
Transfer Posting (TP) - It is a general term of stock transfer that changes the
stock type or stock categories The difference between transfer posting and
stock transfer is -
TP is logical stock transfer and ST is a physical stock transfer
Movement Type - It is a three-digit code which plays a role of important
control function in inventory management It acts as a central role in automatic
account determination It determines which stock account or consumption
account is updated in financial accounting
Reservation - It stores requisition created from particular cost center to
particular department for issuing the material reservation posted in the system
It leads to decrease in stock
Stock Types - The different stock types are
1 Unrestricted use stock
2 Quality inspection stock
3 Blocked stock
4 Warehouse stock
Transaction code -
1 To Create GR - MIGO
2 To Create GI - MB1A
3 For Transfer Posting - MB1B
4 To display MaterialGR document ndash MB03
5 To create reservations - MB21 MB22 MB23
6 To See Stock Overview - MMBE
7 To enter Other GR - MB1C
When GR is posted in the system
1 Material document is created - MB03
2 Accounting Document is generated - MB03
3 MMR updated - MM02 MM03
4 PO history updated - ME23N
Movement Typersquos
Movement Types under GR - 101 331333335501503505551553555
561351 (For all Mov Typersquos there is a reversal eg 101 has 102 Note No
reversal for 121)
Movement Typersquos under GI - 201 331333335551553555
Transfer Posting It is performed in three ways
1 TP BW Plant to Plant
2 TP BW Storage Location to Storage Location
3 TP BW Stock to Stock
Movement Types under TP BW Plant to Plant
301 - 1 step
303 amp 305 - 2 step
Movement Type under TP BW Storage location to Storage Location
311 - 1 step
313 amp 315 - 2 step
Movement Type under TP BW stock to stock
321 323 325 343349
To Cancel the GR Movement type 102
Return delivery to vendor movement type 122 amp T Code MIGO
Transfer Posting Stock to Stock
From Blocked stock to Quality Inspection
T Code MB1B amp Movement Type 349
From Blocked stock to Unrestricted Stock
T Code MB1B amp Movement Type 343
From Quality Inspection to Unrestricted Stock
T Code MB1B amp Movement Type 321
Transfer Posting from Plant to Plant
For One Step Movement Type 301
For Two Steps Movement Type 303 amp 305
After posting stock will display in Stock in Transit (Plant)
To receive material by receiving Plant Movement Type 305
Transfer Posting BW Storage Location to Storage Location
Under One Plant BW two Storage Locationrsquos Movement Type 311
Back to Parent storage Location Movement Type 313 (It Show stock in transfer)
use Movement type 315 at Parent storage location
To create Goods Issue (GI) T Code MB1A amp Movement Type 201
To Create Reservations T Code MB21 MB22 amp MB23
Creation of GI wrt Reservations
T Code MB1A amp Movement Type 201
Click on Reservation Enter Reservation Number 1048774 Click on Adopt + Details
GR wrt Reservations T Code MIGO amp Select as Reservation instead of GR
GR without PO Movement type 501 amp T Code MB1C Select others instead of
Purchase order Enter Material Quantity Plant Storage Location 1048774 Press Enter
Partner Option will be visible (Vendor) 1048774 Save it
Invoice - Invoice is a document which is issued to a buyer (Company) from the
supplier (vendor) for the payment The following information is maintained in
invoice
Invoice date Posting date Invoice ref number tax amount amount tax code
terms of payments vendor address banking accounting information etc
When invoice document is posted in the system
bull Invoice document created
bull Accounting document is generated (MIR4)
bull PO history updated (ME23N)
bull FI document created (FB03)
PRICE DETERMINATION PROCESS or PRICING PROCEDURE
CONDITIONS OR PRICING PROCEDURE or PRICE DETERMINATION PROCESSWe deal with the Pricing Procedure for vendors
PB00 Gross Price (info record contract scheduled Agreement)
PBXX Gross Price (PO)
FRA1 Freight
RA00 Discount on net
RA01 Discount on Gross
ZA00 Surcharge on net
SKT0 Surcharge discount
ZPB0 Rebates
MWVS Input Tax
MWAS Output Tax
BASB Base Amount
RM0000 Calculation Schema or Pricing Procedure
(PB00 amp PBXX)
RM0002 Calculation Schema or Pricing Procedure
(PB00)
PB00 --gt AB00
Copy the Standard one and create new one (ours)
RM0000 contains all the condition types
Pricing Procedure (PP)
We define the pricing procedure to define condition supplement for the material
price The condition supplement specifies the discount surcharge freight etc
that we want a system every time to access material price condition records
The total value of the material is calculated or based on all addition and
subtraction ie discounts surcharge tax freight etc
Condition Table
It is a table which defines the structure of condition record key
Condition Record
It is a data record used to store conditions or condition supplements ie
condition like discount freight and surcharge Tax etc
Condition Type
It is used for different functions In Pricing the condition types leads you to
differentiate different types of discounts in output determination batch
determination difference between two output types such as delivery note or
order confirmation between different strategy types
Access Sequence
It specifies the order in which system searches or access the condition records
from condition table
Difference between PB00 amp PBXX
1 Condition maintained in PB00 is time dependent whereas PBXX is time
independent
2 Condition type PB00 ndash used for IR RFQ Contract Schedule Agreement
Condition type PBXX ndash used for PO
Calculation Schema
The main function of calculation schema is to provide framework of steps for the
price determination process to specify the discounts surcharge freight rebate
etc
It also determines the sequence of conditions that are to be followed and in
which sequence
Schema Group Vendor
The main function of it is to identify or to pick the right process and conditions
for a particular vendor
Schema Group Purchasing Organization
Key that determines which calculation schema (pricing procedure) is to be used
in purchasing documents assigned to the relevant purchasing organization
Schema Group
It allows to group together the purchasing organizations which uses the same
calculation schema
Steps -
1 Create Access sequence
2 Create condition types
3 Create pricing procedure or calculation schema
4 Link pricing procedure amp access sequence to condition type
5 Create schema group for vendor
6 Create schema group for purchase organization
7 Assign schema group vendor-to-vendor master record in purchasing data
view
8 Assign schema group purchase organization to our purchase organization
9 In inforecord purchase organization data enter condition types and pricing or
calculation procedure
CUSTOMIZE SETTINGS -
SPRO --gt IMG--gtMM--gtPUR--gtConditions --gtDefine price determination Process
1 Define access sequence
2 Define Condition type
3 Define cal Schema
4 Define schema group
o Schema group vendor
o Schema group purchasing group
5 Assignment of schema group to PUR org
6 Define schema determination agrave determine cal schema for standard PO
PURCHASE ORDER
PURCHASE ORDER
PO is an external document created for the procurement of materials and
services from vendor The document of PO is also divided into 4 parts as PR -
1 Document Overview
2 Header (DeliveryInvoice Conditions Address Partners Org data status)
3 Item Overview (AC assign cat Item Category Material Plant Del date SL)
4 Item Details (Material data Confirmations condition control delivery delivery
Schedule Quantitiesweights invoice)
A procurement type is defined for each of the document items The following
procurement types exist
1048774 Standard
1048774 Subcontracting
1048774 Consignment
1048774 Stock transfer
1048774 External service
bull There are different ways to create PO -
1 Directly through transaction code ME21N
2 With reference to PR
3 With reference to RFQ
4 With reference to info records
5 With reference to Contracts
6 With reference to Cost Centre GL Account (cost element) for consumable
items or not stock items with account assignment category lsquoKrsquo (K= cost centre)
(For non stock and consumables)
0 COMMENTS L INKS TO THIS POST
LABELS PO PURCHASE ORDER
Reaction
s
PURCHASE REQUISITION T CODE ME51 or ME51N
Purchasing Requisition -
It is a request or instruction from particular department (Cost Centre) to
purchasing department to procure certain quantity of material and services It is
only one internal document in SAP-MM
Purchasing Requisition document is divided into four parts -
bull Document Overview
bull Header
bull Item Overview
bull Item Details
Document Overview -
It displays the list of purchasing documents which are created previously
according to our requirement
Header -
Any text message or information is maintained
Item Overview -
In this we enter material plant delivery date quantity storage location
purchasing group AC assignment category Item category etc
Item Details -
It displays the detailed information about item overview (like Master data
valuation source of supply contact person delivery address status etc)
0 COMMENTS L INKS TO THIS POST
LABELS PR PURCHASE PURCHASE ORDER PURCHASE REQUIS IT ION SALES ORDER
Reaction
s
Automatic PURCHASE ORDER (PO) How Automatic PO raised
How Automatic PO raised
At fixed time say 1230 AM automatic scheduler runs and checks whether the
stock is less than or equal to the replenishment point If stock is less than or
equal to Repli Point than PR raised automatically to Purchasing Deptt
bull Activate the option automatic PO in purchasing view in material master record
bull Activate the option automatic PO in purchasing data view in vendor master
record
bull Maintain Source List amp select fixed vendor
bull PR crated automatically
bull Automatic creation of PO from PR ndash ME59
Enter the Purchasing group purchasing organization Vendor Plant and
Purchasing Requisition Document Number 1048774 Execute
RELEASE PROCEDURE Release strategyThe main function of Release procedure is to determine the approval process
or the release process for the procurement of material amp services rather than
relying for manual signatures The release procedure contains release strategy
Release Strategy (RS)
A plan defining the release codes with which a purchase requisition item a
complete purchase requisition or a complete external purchasing document
must
be released (that is approved) and the sequence in which release is to be
effected
using these codes It is a unique set of conditions sequence and level of release
It is a 2 digit code eg S1 S2 S3etc
The Release Strategy contains the following -
bull Release Group
bull Release Codes
bull Release Indicators
bull Release Prerequisite
Release Group -
It is a 2-digit code which is assigned with a class (Class contains group of
characteristics) It contains one or more release strategies
Release Codes -
It is a 2digit code which identifies the department or responsible person for
the approval process amp release process
Eg AA - Manager
BB - Sr Manager
CC - Vice President
DD - Managing Director
Release Indicator -
It is a Code that represents the release status If the proper approval
process is performed that the release Strategy has to be release if it is not
performed than the Release Strategy is blocked
R ndash Release
B ndash Blocked
Release Conditions -
It determines the type of the release strategy
For eg
bull If the price ranges from 1 to 1000 It is approved by AA BB and CC
bull If the ranges from1001 to 1lac then it is approved by AA BB CC and DD
- 80 -
Release Prerequisite
It will informs the system which RS has to be take place in the PO CEKKO is
a communication structure where it displays the field names amp field lengths to
create characteristics ie we maintain characteristics in customizing by
selecting
the field names from this communication structure for all external documents
CEBAN is used for the purchasing requisition
Characteristics -
1 Net value of PO --- GNETW (GSWRT for PR)
2 Plant --- WERKS
3 Purchasing organization -- EKORG
4 Purchasing Group --- EKGRP
5Material group ndashMATKL
CUSTOMIZE SETTINGSSPRO--gtIMG--gt MM--gt Purchasing--gtPO--gt Release Procedure for PO
1 Edit Characteristics T Code CT04
2 Edit Class T Code CL02
3 Define Release Procedure for PO
4 Check Release Strategy
Edit Characteristics -
Characteristics - eg NET VALUE OF VALUE
Click or Create Button
Under Basic Data
Description - Value for PO
Status - Release
Data Type - Currency Format
No Of Characters - 15
Currency - EUR
Activate multiple values amp Internal Values Allowed
Additional Data
Table name - CEKKO
Field Name - GNETW
Values
Activate Additional Values
Save the document
Create another Characteristic for Plant -
Plant date Create ndash Description Status
Data Type Characteristic Format
Number of Characteristics 4
Activate Multiple Values
Additional data-
Table Name - CEKKO
Field Name - WERKS
Values
Activate Additional Values
For Purchasing Organization Name - EKORG
For purchasing Group EKGRP
Edit Class
Class - SAPMM
Class Type - 032 Release Strategies
Click on Create button
Basic Data
Description - Class for PO
Status - Released
Valid From _____ Valid to _____
Click on Characteristic
Characteristic
Enter all the Characteristics Created amp Save it
Define Release Procedure for PO-
bull Release Group
bull Release Codes
bull Release Indicators
bull Release Strategies
bull Workflow
Release Group - New Entries Release Group Class and Description
Press Enter amp Save
Release Code - New Entries
Group Codes Description
99 AA Manager
99 BB Sr Manager
99 CC Vice President
99 DD Managing Director
Press Enter amp Save
Release Indicator - (B ndash Blocked R - Release)
New Entries
Release Indicators Description
B Blocked
R Released
Release Strategies -
New Entries
Release Group 99
Release Strategy S1
Release Codes AA BB CC and DD
Click on Release Prerequisites
Release Status -
Continue
Classification
Enter the Value (Same Price)
Plant (9999)
Go Back amp Save it
Release Simulation - Simulate Release
Create a PO -
There are two ways to release the PO
Individual releaseME28
Collective release ME29N
How to delete procedure
Delete Release GP
Create Release RG
Delete R Strategies
Delete R Code
Delete R Group
SAP R3 SYSTEM LANDSCAPE
System LandscapeThe system landscape contains all the SAP Systems that you have installed It
can consist of several system groups whorsquos SAP Systems are linked by transport
routes
After you decide which clients you need and which roles you want them to have
you need to decide how to distribute them amongst the different SAP Systems
You can set up multiple clients independently of one another in a single SAP
System However when you configure the data you must remember that cross-
client Customizing settings and Repository objects are identical for all clients in
a single SAP System Changes made in one client apply immediately to all
clients in the system
Three-System Landscape
SAP recommends a three-system landscape in which each of the central clients
has its own SAP System
This consists of a development system DEV a quality assurance system QAS
and a production system PRD The development system contains the
Customizing client CUST the quality assurance system contains the quality
assurance client QTST and the production system contains the production client
PROD Make all changes to Customizing data and Repository objects in the
Customizing client When you release the corresponding change requests they
are transported into the quality assurance client This means that changes to
cross-client data only appear in the quality assurance client after the transport
In the quality assurance client you can test whether the transports are
complete or whether any linked changes are missing and are still in unreleased
change requests If the test is successful the change requests are transported
into the production client The production client is completely separate from the
other clients as regards cross-client data
SPECIAL STOCKS amp SPECIAL PROCUREMENT TYPES
Special Stocks are those stocks which are not belongs to our company code
These are not placed in our storage locations amp no physical inventory is
performed and treated as special stocks for the reason of ownership
Different types are of Special Stocks are as follows
1 Subcontracting
2 Consignment
3 Pipeline
4 Stock transfer
5 Third party
6 Returnable transport packaging
7 Sales order stock
8 Project stock
SUBCONTRACTING
In subcontracting process we create subcontracting PO to supply or issue
subcomponents to vendor in order to get final product The price maintained in
subcontracting PO is a service charge paid to vendor
Steps to perform subcontracting
1 Create subcontracting inforecord (Optional)
2 Create subcontracting PO with item category L
There are to ways to supply subcomponents to vendor
bull Manually maintain the subcomponents in the subcontracting
PO though explode BOM
bull Through BOM (Bill of material) T Code CS01 CS02 amp CS03
3 Create Transfer Posting with Movement Type 541 to issue the subcomponents
to the vendor
4 Goods Reciept
5 Invoice Reciept
Path ME21N ---gt Enter Item Category L --gt Material (End Product) PO
Quantity Delivery Date Net Price Plant --gt Click on Item Details --gt Tab
Material Data -- gtComponents select Explode BOM --gt Click on Components
button --gt Enter the subcomponents --gt Go back amp Save
Create Transfer Posting with movement type 541 amp T Code MB1B
GR MIGO
IR MIRO
CONSIGNMENT - (No Concept of Invoice)
In consignment process we will not create Purchasing document for the vendor
vendor himself send the material to our plant though the material is available
to our plant the responsibility amp ownership of the material is of vendor Aliability
only arises when the material withdrawal (Consumption) is posted in the system
from consignment stock
Steps
1 Create Consignment info record (mandatory)
2 Create Consignment purchase order with item category lsquoKrsquo amp maintain Info
record number
3 Create GR Movement type lsquo101Krsquo
4 Create GI Movement Type lsquo201Krsquo
5 Consignment settlement T Code MRKO
Path --gtME11 --gt In info record --gt Purchasing Org Data 1 views of info record
enter the tax code and save it
--gt Create Consignment Purchase Order ME21N (Price option is grayed out with
price zero)
--gt Create GR with movement type 101K
--gt Create Goods Issue (GI) T Code MB1A amp Movement Type 201K Enter Cost
center vendor
--gt Consignment Settlement T Code MRKO Click Activate Consignment Activate
Settle Execute
--gt Display the Document Number ie Invoice receipt T Code FB03
PIPELINE PROCESS (No Concept of Invoice)
In pipeline handling your company does not need to order or store the material
concerned It is ready available to you as and when required via pipeline (eg oil
or water) or some other type of cable (eg electricity) Consumption of the
material is settled with the vendor on a regular basis
Steps
1 Create a Material master record with material type PIPE
2 Create Pipeline info record
3 Create GI with movement type 201P
4 Pipeline settlement T Code MRKO
RETURNABLE TRANSPORT PACKAGING (RTP)
When company orders goods from a vendor the goods are delivered with
returnable transport packaging (pallets containers) that belongs to the vendor
and is stored on our premises until you return it to the vendor
Steps
1 Create Material master record with material type LEIH
2 Create PO
3 Create GR by maintaining RTP material by selecting the option transport
equipments with movement type 501M
4 IR
STOCK TRANSFER
In stock transfer processing goods are procured and supplied within a company
One plant orders the goods internally to another plant (receiving plantissuing
plant) The goods are procured with a special type of purchase order the stock
transport order
Steps
1 Create a Material master in both supplying and receiving plant
2 Create stock transport order (STO) with item category lsquoUrsquo
3 Create transfer posting with movement type 351 amp T Code MB1B (Go to
MMBE stock overview the stock will decrease in supplying plant and it will not
update stock of receiving plant it will be under stock in transit)
4 Create GR stock will update in receiving plant
This scenario is under one company code between two plants
SAP IMPLEMENTATION PROCESS End to End Inplementation of SAP
First we have to prepare documentation about the client business (like turnover
vendors customers payments materials production marketing etc)
The implementer company made two teams (1) Steering team (2) Steering
community
Steering team (SAP functional consultants) prepares a detailed
documentation about the client with the help of core team (client company
team)
amp this study is known as Feasibility Study After that the steering team handed
over this documentation to Steering community (Project manager Sr software
engineer and other higher authorities)
Steering community prepares the BBP (Business Blue Print) BBP
Prepares in MS-Word
10487741048774 ASAP - Accelerated System Application Product in Data Processing
10487741048774 Business Process - ASAP Methodology
1 Project Preparation
2 BBP (Business Blue Print)
3 Realization
4 Final Preparation
5 Go live amp Support
10487741048774 Project Preparation -
It consists of identifying team members amp development strategy as
how to go
AS ndash IS (Existing Process followed requirements)
TO ndash BE (Requirement analysis and best process recommended)
Difference between (AS ndash IS) amp (TO - BE) is called GAP Analysis
10487741048774 Business Blue Print (BPP) -
It is a legal documentation between client amp the company
(implementer service provider) We have to understand the current business
process of client amp analyzing the business amp prepare documentation It is a
detailed documentation for the client
10487741048774 Realization -
This Phase is used to Implement or migrate the entire business of
client from Non-SAP environment to SAP environment
10487741048774 Final Preparation -
This phase is used for testing amp end user training After successfully
completion of this phase client is ready to run business in SAP R3
10487741048774 Go live amp Support -
In this phase we deliver the project end date amp end user training at
client site
THIRD - PARTY PROCESSING
THIRD - PARTY PROCESSING
In third party processing your company passes on a sales order to an external
vendor who sends the goods directly to the customer The sales order is not
processed by your company but by the vendor Third-party items can be
entered in purchase requisitions purchase orders and sales orders Third party
processing is integrated with Sales and Distribution If the sales order contains
third-party items the system creates a purchase requisition from the order
Steps
1 Create MMR with sales views and maintain Division Distribution channel
sales org item category group and general item category group ndash BANS (Third
party item) amp Account group Sold to party
2 Create Customer master record T Code XD01 XD02 XD03
3 Create sales order T Code VA01 VA02 VA03 (PR generated automatically)
4 PO - T Code ME21N
5 GR ndash T Code MIGO
6 IR ndash T Code MIRO
7 Sales Billing Billing Document T Code VF01 VF02 VF03

described below
Structure
The excise part of the plant master is divided into the following screens
Excise Indicator for Plant
On this screen you enter your plants tax registration numbers which are used
for various forms of correspondence and reports
1 Central sales tax (CST) number
2 Local sales tax (LST) registration number
3 Permanent account number (PAN)
In order for the system to be able to calculate which rate of excise duty to apply
on purchases for this plant you must also assign it a plant excise duty status
(for more information about how this works see Determination of Excise Duty
Rates)
Excise Indicator for Plant and Vendor
On this screen you define the final excise duty indicator (for more information
about how this works see Determination of Excise Duty Rates)
Excise Indicator for Plant and Customer
On this screen you define the final excise duty indicator (for more information
about how this works see Determination of Excise Duty Rates)
Automatic Creation of Excise Invoices Use
The SAP System can automatically create an outgoing excise invoice for you
immediately you post a commercial invoice (or a pro forma invoice) for a
customer sale This function applies to excise invoices for sales from factories
only
Prerequisites
To activate this function in the Country Version India (CIN) Implementation
Guide (IMG) make the following settings
1 Under Global Settings reg Excise Groups select Create EI
This activates the automatic creation function
2 Under Sales and Distribution reg Utilization Determination
Here you specify which CENVAT accounts the system is to post the different
types of excise duty to
3 Under Sales and Distribution reg Excise GroupndashSeries Group Determination
Here you specify which excise group and series group the excise invoices are to
be created for
Features
When you post an invoice the system creates an excise invoice All the
information that it needs to create the excise invoice is provided either by the
invoice or by the Customizing settings that you have made in Sales and
Distribution It also determines the excise invoice type automatically by means
of a user exit
Creating Excise Invoices for Stock Transfers 1 From the SAP Easy Access screen choose Indirect Taxes reg Procurement reg
Excise Invoice reg For Depot reg CreateChangeDisplay
2 In the Material document field enter the goods receipt number and choose
The system displays the information from the goods receipt for example the
sending plant the excise registration the range the division and the
collectorate
3 Choose Details
The system copies the items from the goods receipt document In the depot it is
possible to have a separate excise invoice at line item level
4 Enter the internal document number of the excise invoice sent by the factory
5 Choose More documents to go the excise invoice details screen
6 Enter the internal document number of the excise invoice from the factory
The system copies the information to the line item (for example the excise
invoice number the excise invoice date the item number the chapter ID the
excise invoice quantity the amount of excise duty paid the excise base value
and the serial number of the Part II register entry with which the excise was
paid)
You can change the receipt quantity to match the actual quantity received at
the depot if necessary The system automatically adjusts the excise
accordingly
7 Go back to the item details screen
8 Save the excise invoice
Creating Excise Invoices for Direct Purchases 1 From the SAP Easy Access screen choose Indirect Taxes reg Procurement reg
Excise Invoice reg For Depot reg CreateChangeDisplay
2 In the Material document field enter the goods receipt number and choose
The system displays the information from the goods receipt for example the
sending plant the excise registration the range the division and the
collectorate
You can also maintain the excise registration details for the ship-from party as
for with the vendor The ship-from can be different from the vendor code (The
delivering plant can be maintained as a ship-from in the system When a valid
ship-from is entered the excise registration details copied from the vendor will
be overwritten by the ship-from excise registration details)
The ship-from registration details displayed can also be overwritten manually
The dealers commercial invoice number can be stored in the vendor excise
invoice number as in this case the dealer himself will not have an excise
invoice
3 Choose Details
The system copies the items from the goods receipt document It also copies the
vendors excise invoice number and the serial numbers of the entries in the RG
23A RG 23C and personal ledger account (PLA) registers
4 Enter the internal document number of the excise invoice sent by the factory
5 Select an item and choose More documents to go the excise invoice details
screen
In the case of direct purchases there will not be any excise invoice in the
system so leave the internal document field blank The vendors invoice will
show the details of the excise invoices through which excise has been paid for
the item that is being dispatched You can enter these details here
6 For each item the chapter ID excise base value and excise duty amounts
are defaulted from the purchase order You can change them if there is any
difference Enter the excise amount paid and the receipt quantity You also
enter the Part II register serial numbers with which the excise duty was paid and
the excise registration information from the original excise invoice
7 Go back to the item details screen
8 Save the excise invoice
The system creates an entry in register RG 23D You can change the excise
invoice as long as it has not been used in any sales
Assigning Excise Invoices to a Delivery Use
You follow this procedure to specify which excise invoices are to be assigned to
a delivery from a depot (or other material document)
You can also automate this procedure using the batch selection program
(J_1IJCHK) by making the appropriate Customizing settings in the Country
Version India (CIN) Implementation Guide (IMG)
Procedure
1 From the SAP Easy Access screen choose Indirect Taxes reg SalesOutbound
Movements reg Excise Invoice reg For Depot reg CreateChangeDisplay reg Delivery
or Material Document reg RG 23D Selection
2 Enter the delivery document number or the material number and choose
3 Select the excise invoice you want
4 Choose
5 Choose Excise invoice
A list of excise invoices appears These are the excise invoices at the depot with
a balance quantity
The system also shows a list of the A certificates that can be used You can pick
up any of the A certificates but they must be for the same excise invoice You
can only pick up an A certificate in its entirety You cannot select part of an A
certificate
6 Select the excise invoices that are relevant to the delivery
7 Specify what quantity to be used from each excise invoice
The system recalculates the excise accordingly
8 Go back to the item details screen
9 Save the data
Result
The system creates an entry in register RG 23D and generates the depot excise
invoice numbers
If you selected any A certificates the system also generates additional entries in
the RG 23D register The system marks the original A certificates as updated so
that they cannot be used for any other removals
CIN - Country India Version ~ Vol 2
Continue Volume 1
Creating Excise Invoices
Use
This is the procedure that you follow to create an excise invoice for the less
common types of goods movement
Procedure
1 From the SAP Easy Access screen choose Indirect Taxes reg SalesOutbound
Movements reg Excise Invoice reg For Other Movements reg CreateChangeDisplay
reg
2 On the selection screen enter data as required including
(i)Reference
group box
Specify which document you want to create the excise invoice for and which
excise group it is for
(ii)Details
group box
Specify the vendor or customer that you are sending the invoice to
3 Choose
If you entered an internal document number the system copies the item details
from it
4 Choose
5 Enter line items for each of the materials to be included in the excise invoice
For each item enter the following data
(i)Material
(ii)Quantity
(iii)Unit of measure
(iv)Base value
(v)Excise duty
6 To pick the rate and amount from a specific excise invoice choose Get excise
invoice
7 Save the excise invoice
If you are using the one-step procedure the system creates and posts an excise
invoice Otherwise the system saves the information but does not make any
postings it now has to be verified
Verifying and Posting Excise Invoices
Use
You follow this procedure to verify that the information in an excise invoice that
has already been created and to post it once you are satisfied
Procedure
From the SAP Easy Access screen choose Indirect Taxes reg SalesOutbound
Movements reg Excise Invoice reg For Other Movements reg Posting
1 Enter the internal document number of the excise invoice
2 Choose Release to accounting
The system displays the excise invoice The excise duty that is to be posted is
displayed at the foot of the screen which you can change if necessary
3 To access the balance utilization choose
4 To display the balance available on the CENVAT accounts choose Account
balances
5 Save the excise invoice
The system generates the accounting documents
6 To print the excise invoice choose
Making a Transfer Posting
Use
In this procedure you make a transfer posting for the goods ordered by another
plant For more information about this function see Entering the Removal from
Storage at the Issuing Plant
Procedure
1 From the SAP Easy Access screen choose Logistics reg Materials Management
reg Inventory Management reg Goods Movement reg Transfer Posting
2 Choose Movement type reg Transfer posting reg Plant to plant reg To stock in
transit
3 Enter the number of the issuing plant and storage location
4 Choose To purchase order
5 In the dialog box enter the number of the stock transport order that the
receiving plant created and choose
6 Check the data
7 Save the transfer posting
Transaction Codes for India
Transaction Action
J1I2 Prepare a sales tax register
J1I3 Create outgoing excise invoices in batches
J1I5
Update the RG 1 and Part I registers
J1I8
Post the challan used to remit TDS
J1IC194C
Create annual return under section 194 C (Classic TDS)
J1IC194D
Create annual return under section 194 D (Classic TDS)
J1IC194I
Create annual return under section 194 I (Classic TDS)
J1IC194J
Create annual return under section 194 J (Classic TDS)
J1IEX
Incoming Excise Invoices (central transaction)
J1IEX_C
Capture an incoming excise invoice (excise clerk)
J1IEX_P
Post an incoming excise invoice (excise supervisor)
J1INBANK
Post a bank challan
J1INCANC
Cancel a vendor withholding tax certificate
J1INCERT
Print a vendor withholding tax certificate
J1INCHLN
Create a remittance challan
J1INCUST
Post a customer withholding tax certificate
J1INHC
Withholding Tax Migration Health Check Program
J1INMIG
Withholding Tax Data Migration Tool
JI1NCHLC
Create a remittance challan for customers
J1INCC
Print customer withholding tax certificates
J1INMIS
Withholding Tax Information System
JI1NAR
Prepare annual returns (Extended Withholding Tax)
J1IF01
Create a subcontracting challan
J1IF11
Change a subcontracting challan
J1IF12
Display a subcontracting challan
J1IF13
Complete reverse or recredit a subcontracting challan
J1IFQ
Reconcile quantities for subcontracting challans
J1IFR
List subcontracting challans
J1IH
Make a CENVAT adjustment posting
J1IIN
Create an outgoing excise invoice
J1IJ
Assign excise invoices to a delivery for sales from depots
J1INJV
Adjust withholding tax Item
J1INREP
Reprint a vendor withholding tax certificate
J1INREV
Reverse a remittance challan
J1INPR
Calculate withholding tax on clearing accounts
J1INUT
Clear withholding tax on clearing accounts
J1IR
Download register data
J1IS
Process an excise invoice (outgoing) for other movements
J1IU
Process exemption forms
J1IW
Verify and post an incoming excise invoice
J1IX
Create an incoming excise invoice (without reference to purchase order)
J2I8
Transfer excise duty to CENVAT account
J2ID
Archive tax deducted at source (TDS) documents
J2IE
Locate tax deducted at source documents in archive
J2IU
Remit excise duty fortnightly
J2I9
Monthly CENVAT return
J1IG
Excise invoice entry at depot
J1IGA
Create additional excise entry at depot
J2I5
Extract data for excise registers
J2I6
Print excise registers
Sales from Factories
Purpose
This process describes how the SAP System handles the sales process allowing
for the creation of excise invoices which you have to send with each delivery
that is subject to excise duty There are two scenarios depending on whether
you want to send the commercial invoice along with the delivery or at a later
date
Prerequisites
In order for the system to be able to copy the information from document to
document you must have set up the copying control procedures in Customizing
for Sales and Distribution (SD) This differs according to when you want to send
the commercial invoice
1 Along with the delivery
In this case the document flow would be OR (standard sales order type) ndash LF
(standard delivery type) ndash F2 (invoice)
2 At a later date
The document flow would be OR ndash JF (delivery type a copy of LF) ndash JEX (pro
forma billing document type a copy of document type F8) ndash F2
In addition you must also have maintained the settings in the Country Version
India (CIN) Implementation Guide (IMG) by choosing Global Settings reg Assign
Excise Invoice Billing Type to Delivery Type
A sample pricing procedure JFACT is provided for this sales procedure
Process Flow
1 The sales clerk creates a sales order following the
(i)standard procedure
There are special procedures for
(i)Customers in possession of exemption forms
(ii)Exports
2 The shipping clerk creates a delivery again following the
standard procedure
On the initial screen you set the appropriate delivery type (see above)
3 In the warehouse the storeperson issues the goods
The system only allows users to create a pro forma excise invoice if the delivery
is complete so as to prevent them from creating multiple pro forma excise
invoices
4 What you do at this stage depends on whether you want to send the
commercial invoice along with the delivery or whether you want to invoice the
customer later
(A) If the invoice is to be shipped with delivery the shipping clerk
(i)Creates an invoice following the standard procedure
(ii)Creates an excise invoice from the invoice
(B) If the invoice is to be sent on at a later date the shipping clerk
(i)Creates the pro forma excise invoice
The pro forma excise invoice is only required for technical purposes and is not
sent to the customer The system does not make any accounting postings at this
stage
(ii)Creates
an excise invoice from the pro forma excise invoice
In both these cases the system creates an accounting document to post the
excise duty to a clearing account
Instead of creating excise invoices manually you can also have the system
create them automatically Alternatively you can create them in batches
5 You ship the goods
6 When the time comes to invoice the customer you create the invoice
following the standard procedure
Irrespective of the number of excise invoices that you have issued you can
combine the delivery items in a single invoice (if the standard requirements are
met)
Sales from Depots
Purpose
You may sell finished goods directly from the place of manufacture as described
under Sales from Factories or you may first ship them to a separate location for
storage (a depot) from where you will sell them The second procedure is
described here
Sales from depots are handled differently from sales from factories because of
excise law Excise duty is payable when you send the goods from the factory to
the depot but it is not levied again when you sell the goods
Sometimes when you make a final sale of goods from a depot price escalations
could have happened with retrospective effect In such scenarios you need to
pay the extra excise duty at the factory using an A Certificate You need to
register the A certificate details in the RG 23D register and the excise recovered
from the customer
Prerequisites
You have customized
1 Stock transport processing in Customizing for Materials Management (MM)
by choosing Purchasing reg Purchase Order reg Set Up Stock Transport Order
2 The copying control for copying stock transport order NL to excise invoice JEX
You make this setting in the Country Version India (CIN) Implementation Guide
(IMG) by choosing Sales and Distribution reg Assign Excise Invoice Billing Type to
Delivery Type
3 The item category NLN (standard transport order) so that it is relevant for
billing
You do this in the standard IMG in Customizing for Sales and Distribution (SD)
by choosing Sales reg Sales Documents reg Sales Document Item
Process Flow
1 You create the sales order following the
standard procedure
The standard pricing procedure for depot sales is JDEPOT
2 You create the delivery again following the
standard procedure
3 You
assign excise invoices to the delivery or material document
4 You
verify that you have selected the correct excise invoices and post them
Alternatively if you have selected the wrong excise invoices you can cancel the
assignment
5 You create the invoice following the standard procedure
SPECIAL STOCKS amp SPECIAL PROCUREMENT TYPES
Special Stocks are those stocks which are not belongs to our company code
These are not placed in our storage locations amp no physical inventory is
performed and treated as special stocks for the reason of ownership
Different types are of Special Stocks are as follows
1 Subcontracting
2 Consignment
3 Pipeline
4 Stock transfer
5 Third party
6 Returnable transport packaging
7 Sales order stock
8 Project stock
SUBCONTRACTING
In subcontracting process we create subcontracting PO to supply or issue
subcomponents to vendor in order to get final product The price maintained in
subcontracting PO is a service charge paid to vendor
Steps to perform subcontracting
1 Create subcontracting inforecord (Optional)
2 Create subcontracting PO with item category L
There are to ways to supply subcomponents to vendor
bull Manually maintain the subcomponents in the subcontracting
PO though explode BOM
bull Through BOM (Bill of material) T Code CS01 CS02 amp CS03
3 Create Transfer Posting with Movement Type 541 to issue the subcomponents
to the vendor
4 Goods Reciept
5 Invoice Reciept
Path ME21N ---gt Enter Item Category L --gt Material (End Product) PO
Quantity Delivery Date Net Price Plant --gt Click on Item Details --gt Tab
Material Data -- gtComponents select Explode BOM --gt Click on Components
button --gt Enter the subcomponents --gt Go back amp Save
Create Transfer Posting with movement type 541 amp T Code MB1B
GR MIGO
IR MIRO
CONSIGNMENT - (No Concept of Invoice)
In consignment process we will not create Purchasing document for the vendor
vendor himself send the material to our plant though the material is available
to our plant the responsibility amp ownership of the material is of vendor Aliability
only arises when the material withdrawal (Consumption) is posted in the system
from consignment stock
Steps
1 Create Consignment info record (mandatory)
2 Create Consignment purchase order with item category lsquoKrsquo amp maintain Info
record number
3 Create GR Movement type lsquo101Krsquo
4 Create GI Movement Type lsquo201Krsquo
5 Consignment settlement T Code MRKO
Path --gtME11 --gt In info record --gt Purchasing Org Data 1 views of info record
enter the tax code and save it
--gt Create Consignment Purchase Order ME21N (Price option is grayed out with
price zero)
--gt Create GR with movement type 101K
--gt Create Goods Issue (GI) T Code MB1A amp Movement Type 201K Enter Cost
center vendor
--gt Consignment Settlement T Code MRKO Click Activate Consignment Activate
Settle Execute
--gt Display the Document Number ie Invoice receipt T Code FB03
PIPELINE PROCESS (No Concept of Invoice)
In pipeline handling your company does not need to order or store the material
concerned It is ready available to you as and when required via pipeline (eg oil
or water) or some other type of cable (eg electricity) Consumption of the
material is settled with the vendor on a regular basis
Steps
1 Create a Material master record with material type PIPE
2 Create Pipeline info record
3 Create GI with movement type 201P
4 Pipeline settlement T Code MRKO
RETURNABLE TRANSPORT PACKAGING (RTP)
When company orders goods from a vendor the goods are delivered with
returnable transport packaging (pallets containers) that belongs to the vendor
and is stored on our premises until you return it to the vendor
Steps
1 Create Material master record with material type LEIH
2 Create PO
3 Create GR by maintaining RTP material by selecting the option transport
equipments with movement type 501M
4 IR
STOCK TRANSFER
In stock transfer processing goods are procured and supplied within a company
One plant orders the goods internally to another plant (receiving plantissuing
plant) The goods are procured with a special type of purchase order the stock
transport order
Steps
1 Create a Material master in both supplying and receiving plant
2 Create stock transport order (STO) with item category lsquoUrsquo
3 Create transfer posting with movement type 351 amp T Code MB1B (Go to
MMBE stock overview the stock will decrease in supplying plant and it will not
update stock of receiving plant it will be under stock in transit)
4 Create GR stock will update in receiving plant
This scenario is under one company code between two plants
Material Master Related Important Terms (Part 2)
Controlling (CO) An organizational unit in Accounting that reflects a
management-oriented structure of the organization for the purpose of internal
control
Operating results for profit centers can be analyzed using either the cost of
sales approach or the period accounting approach
By analyzing the fixed capital as well you can expand your profit centers for use
as investment centers
Profit Center
Key that uniquely identifies the profit center in the current controlling area
Valuation Category
Determines whether stocks of the material are valuated together or separately
Dependencies
In the case of split valuation this indicator also determines which valuation
types are allowed that is the criteria by which stocks can be valuated
Valuation type
Invoice Verification (MM-IV)
A subdivision of a valuation category in split valuation
Example An enterprise manages its stocks of a material using the valuation
category Quality comprising the following valuation types
bull High quality Average quality Inferior
Hazardous material number
Number that identifies the material as a hazardous material or as dangerous
goods and assigns hazardous material data or dangerous goods data to it
Use The hazardous material number indicates that the material is dangerous
making special precautions necessary for its storage and shipment
Valuation Class
Assignment of a material to a group of GL accounts
With other factors the valuation class determines the GL accounts that are
updated as a result of a valuation-relevant transaction or event such as a goods
movement
The valuation class makes it possible to
bull Post the stock values of materials of the same material type to different GL
accounts
bull Post the stock values of materials of different material types to the same GL
account
Default value for the valuation class for valuated stocks of this material
Use The valuation class has the following functions
bull Allows the stock values of materials of the same material type to be posted to
different GL accounts
bull Allows the stock values of materials of different material types to be posted to
the same GL account
bull Determines together with other factors the GL accounts updated for a
valuation-relevant transaction (such as a goods movement
CIN - Country India Version ~ Volume 1
PurposeCountry Version India (CIN) contains a number of enhancements to standard
Sales and Distribution (SD) functions that allow you to handle local
requirements in particular excise duty
Features
In Country Version India (CIN) this component handles sales processes as
found in India In addition to the generic functions it allows you to
Handle CENVAT in your sales processes
The system calculates excise on your sales and creates excise invoices as
required and makes the appropriate postings to your CENVAT accounts
It covers sales from factories sales from depots and offers functions for other
types of goods movements it also covers sales to export-oriented units and
export sales
Record concessional and exemption forms sent to you by your customers
Make adjustment postings to your CENVAT accounts
Excise Invoice (Outgoing)
Definition
The document that acts as the proof of payment of excise duty and is required
for the customer to take CENVAT credit on the item
Use
In the SAP System there are three different procedures for creating excise
invoices
Sales direct from the factory
This procedure is for when you sell manufactured goods straight from the
factory at which they were produced in which case you levy excise duty when
the goods leave the factory on their way to the customer
If when you send the goods to the customer you enclose the commercial
invoice you create the excise invoice with reference to the commercial invoice
If you want to send the commercial invoice after you have dispatched the goods
however you create the excise invoice with reference to a pro forma
commercial invoice For more information about these procedures see Sales
from Factories
As well as creating excise invoices individually you can also create them in
batches (see Creation of Excise Invoices in Batches)
Sales from depots
A depot is a site at which the goods are stored away from the factory at which
they were produced In this procedure you have to levy the excise duty when
you transfer the goods from the factory to the depot and then make sure this is
passed on to the customer when it makes a purchase For more information see
Sales from Depots
Sales (other goods movements)
Some other goods movements may also require you to create an excise invoice
with reference to other documents The SAP System offers separate functions
for these purposes (see Excise Invoices (Outgoing) for Other Movements)
StructureNumbering of Excise Invoices
Outgoing excise invoices have two numbers an internal document number
which is assigned immediately you create an excise invoice and an excise
invoice number which is not assigned until you have verified and posted it
As far as the excise invoice number is concerned you have to number your
outgoing excise invoices in sequential order starting each year on 1 April You
must notify the excise authority of the jurisdiction of the invoicing location The
serial number must be printed on each page of the excise invoice
Each number range is governed by a series group You must create at least one
series group in order to be able to number the excise invoices If you need more
than one number range you must create the corresponding number of series
groups You do so in the CIN Implementation Guide (IMG) by choosing Global
Settings reg Series Groups
Number of Line Items Per Excise Invoice
Some states allow you to include only a limited number of items for each page
of an excise invoice (for example if the excise invoices are to be printed on
prenumbered forms) You can customize the system so that it prints the excise
invoice accordingly in the CIN IMG by choosing Global Settings reg Excise
Registration IDs
Customer Master (Excise Data) Definition
The part of the customer master record that contains information relating to
Indian excise duty
Use
In conjunction with other data this data is used to calculate excise duty on
various transactions
To maintain the data from the SAP Easy Access screen choose Indirect Taxes reg
Master Data reg Excise Rate Maintenance and then select the following options
described below
Structure
The excise part of the customer master contains the following information
Customer Excise Details
On this screen you enter your customers tax registration numbers which are
used for various forms of correspondence and reports
1 Excise registration number (and the range division and collectorate in which
this is located)
2 Central sales tax (CST) number
3 Local sales tax (LST) registration number
4 Permanent account number (PAN)
In order for the system to be able to calculate which rate of excise duty to apply
on sales to the customer you must also assign it a customer excise duty status
(for more information about how this works see Determination of Excise Duty
Rates)
Excise Indicator for Plant and Customer
On this screen you define the final excise duty indicator (for more information
about how this works see Determination of Excise Duty Rates)
Determination of Excise Duty Use
When you execute a business transaction involving materials that are subject to
excise duty the system automatically calculates the duty for you
Prerequisites
In order for the system to be able to determine which rate of excise duty to
apply you must have maintained all the data on the Excise Rate Maintenance
screen which you can access from the SAP Easy Access screen by choosing
Indirect Taxes reg Master Data reg Excise Rate Maintenance
You maintain the following types of data
Plant master data
You assign each of your plants an excise duty indicator You can use the same
indicator for all the plants with the same excise status from a legal point of view
such as all those that are in an exempt zone
See also the information about manufacturers that are only entitled to deduct a
certain portion of the duty (see Partial CENVAT Credit)
Vendor master data
For each of your vendors with the same excise status from a legal perspective
you define an excise duty indicator You must also specify the vendor type ndash for
example whether the vendor is a manufacturer a depot or a first-stage dealer
You must also stipulate if the vendor qualifies as a small-scale industry
For each permutation of plant indicator and vendor indicator you then create a
final excise duty indicator
Customer master data
Similarly you assign the same excise duty indicator to each of your customers
that share the same legal excise status
Again for each permutation of plant indicator and customer indicator you then
create a final excise duty indicator
Material master data
Each material is assigned a chapter ID
Excise tax rate
For every chapter ID and final excise duty indicator you maintain the rate of
excise duty
If your business only qualifies for partial CENVAT credit you must customize
your system accordingly
Activities
Let us consider an example to illustrate how the system determines which rate
of excise duty to apply to a material Assume you are posting a sale of ball
bearings to a customer The system automatically determines the rate of excise
duty as follows
Looks up the customer master data to see what status you have assigned the
customer
Lets assume youve assigned the customer status 3
Looks up the plant master data to see what status you have assigned the plant
Similarly your plant has status 2
The system looks up the table under Excise Indicator for Plant and Customer to
see what the final excise duty indictor is for customer status 3 and plant status
2 It is 7
The system determines the chapter ID of the ball bearing for the plant
Letrsquos assume the chapter ID at plant for the ball bearings is 100001
Finally the system looks up the table under Excise Tax Rate to see what rate of
duty applies to chapter ID 100001 under status 7
Plant Master (Excise Data) Definition
The part of the plant master record that contains information relating to Indian
excise duty
Use
In conjunction with other data this data is used to calculate excise duty on
various transactions
To maintain the data from the SAP Easy Access screen choose Indirect Taxes reg
Master Data reg Excise Rate Maintenance and then select the following options
described below
Structure
The excise part of the plant master is divided into the following screens
Excise Indicator for Plant
On this screen you enter your plants tax registration numbers which are used
for various forms of correspondence and reports
1 Central sales tax (CST) number
2 Local sales tax (LST) registration number
3 Permanent account number (PAN)
In order for the system to be able to calculate which rate of excise duty to apply
on purchases for this plant you must also assign it a plant excise duty status
(for more information about how this works see Determination of Excise Duty
Rates)
Excise Indicator for Plant and Vendor
On this screen you define the final excise duty indicator (for more information
about how this works see Determination of Excise Duty Rates)
Excise Indicator for Plant and Customer
On this screen you define the final excise duty indicator (for more information
about how this works see Determination of Excise Duty Rates)
Automatic Creation of Excise Invoices Use
The SAP System can automatically create an outgoing excise invoice for you
immediately you post a commercial invoice (or a pro forma invoice) for a
customer sale This function applies to excise invoices for sales from factories
only
Prerequisites
To activate this function in the Country Version India (CIN) Implementation
Guide (IMG) make the following settings
1 Under Global Settings reg Excise Groups select Create EI
This activates the automatic creation function
2 Under Sales and Distribution reg Utilization Determination
Here you specify which CENVAT accounts the system is to post the different
types of excise duty to
3 Under Sales and Distribution reg Excise GroupndashSeries Group Determination
Here you specify which excise group and series group the excise invoices are to
be created for
Features
When you post an invoice the system creates an excise invoice All the
information that it needs to create the excise invoice is provided either by the
invoice or by the Customizing settings that you have made in Sales and
Distribution It also determines the excise invoice type automatically by means
of a user exit
Creating Excise Invoices for Stock Transfers 1 From the SAP Easy Access screen choose Indirect Taxes reg Procurement reg
Excise Invoice reg For Depot reg CreateChangeDisplay
2 In the Material document field enter the goods receipt number and choose
The system displays the information from the goods receipt for example the
sending plant the excise registration the range the division and the
collectorate
3 Choose Details
The system copies the items from the goods receipt document In the depot it is
possible to have a separate excise invoice at line item level
4 Enter the internal document number of the excise invoice sent by the factory
5 Choose More documents to go the excise invoice details screen
6 Enter the internal document number of the excise invoice from the factory
The system copies the information to the line item (for example the excise
invoice number the excise invoice date the item number the chapter ID the
excise invoice quantity the amount of excise duty paid the excise base value
and the serial number of the Part II register entry with which the excise was
paid)
You can change the receipt quantity to match the actual quantity received at
the depot if necessary The system automatically adjusts the excise
accordingly
7 Go back to the item details screen
8 Save the excise invoice
Creating Excise Invoices for Direct Purchases 1 From the SAP Easy Access screen choose Indirect Taxes reg Procurement reg
Excise Invoice reg For Depot reg CreateChangeDisplay
2 In the Material document field enter the goods receipt number and choose
The system displays the information from the goods receipt for example the
sending plant the excise registration the range the division and the
collectorate
You can also maintain the excise registration details for the ship-from party as
for with the vendor The ship-from can be different from the vendor code (The
delivering plant can be maintained as a ship-from in the system When a valid
ship-from is entered the excise registration details copied from the vendor will
be overwritten by the ship-from excise registration details)
The ship-from registration details displayed can also be overwritten manually
The dealers commercial invoice number can be stored in the vendor excise
invoice number as in this case the dealer himself will not have an excise
invoice
3 Choose Details
The system copies the items from the goods receipt document It also copies the
vendors excise invoice number and the serial numbers of the entries in the RG
23A RG 23C and personal ledger account (PLA) registers
4 Enter the internal document number of the excise invoice sent by the factory
5 Select an item and choose More documents to go the excise invoice details
screen
In the case of direct purchases there will not be any excise invoice in the
system so leave the internal document field blank The vendors invoice will
show the details of the excise invoices through which excise has been paid for
the item that is being dispatched You can enter these details here
6 For each item the chapter ID excise base value and excise duty amounts
are defaulted from the purchase order You can change them if there is any
difference Enter the excise amount paid and the receipt quantity You also
enter the Part II register serial numbers with which the excise duty was paid and
the excise registration information from the original excise invoice
7 Go back to the item details screen
8 Save the excise invoice
The system creates an entry in register RG 23D You can change the excise
invoice as long as it has not been used in any sales
Assigning Excise Invoices to a Delivery Use
You follow this procedure to specify which excise invoices are to be assigned to
a delivery from a depot (or other material document)
You can also automate this procedure using the batch selection program
(J_1IJCHK) by making the appropriate Customizing settings in the Country
Version India (CIN) Implementation Guide (IMG)
Procedure
1 From the SAP Easy Access screen choose Indirect Taxes reg SalesOutbound
Movements reg Excise Invoice reg For Depot reg CreateChangeDisplay reg Delivery
or Material Document reg RG 23D Selection
2 Enter the delivery document number or the material number and choose
3 Select the excise invoice you want
4 Choose
5 Choose Excise invoice
A list of excise invoices appears These are the excise invoices at the depot with
a balance quantity
The system also shows a list of the A certificates that can be used You can pick
up any of the A certificates but they must be for the same excise invoice You
can only pick up an A certificate in its entirety You cannot select part of an A
certificate
6 Select the excise invoices that are relevant to the delivery
7 Specify what quantity to be used from each excise invoice
The system recalculates the excise accordingly
8 Go back to the item details screen
9 Save the data
Result
The system creates an entry in register RG 23D and generates the depot excise
invoice numbers
If you selected any A certificates the system also generates additional entries in
the RG 23D register The system marks the original A certificates as updated so
that they cannot be used for any other removals
Continue see Volume 2 (Next post)
EXTERNAL SERVICE MASTER
EXTERNAL SERVICE MASTER ESM
We procure the different type of services from vendors they are-
1048774 Hardware amp software services
1048774 Construction amp transportation services
1048774 Machinery services
1048774 Annual maintenance services
1048774 Present to and breakdown service Etc
Service Procurement Cycle -
1048774 Requirement identification
1048774 Source determination
1048774 Source selection
1048774 Service master
1048774 Service PO
1048774 Service entry sheet acceptance
1048774 Invoice with respect to service entry sheet
Steps to perform services -
1 Create service master (AC03)
2 Create Service PO (ME21N) with AC Assignment category lsquoKrsquo amp Item
Category lsquoDrsquo
3 Create service entry sheet (ML81N)
4 Invoice with respect to Service Entry sheet
Customize settings
(For service category Number Ranges amp organization status for service
category)
SPRO 1048774 IMG 1048774 MM 1048774 ESM 1048774 Service Master
1048774 Define organization Status for service Categories
1048774 Define Service Category
1048774 Define Number Ranges
Define organization Status for service Categories
bull Click on New Entries
bull Org service Category
bull BDS (Basic data service is stored in service master record under this service
category)
bull CNST 1048774 Controlling Status
bull PUST 1048774 Purchasing data Status
bull SDST 1048774 Sales amp Distributed Status
bull Org status description service category 1048774 Press Enter amp Save
Define Service Category
bull Same path as above
bull Select Standard
bull Click on Copy as
bull AC reference 1048774 always takes as 0006
bull Enter amp Save
Define Number Ranges
Click on groups 1048774 Groups 1048774 Insert 1048774 select enter Number Ranges
Select the service category
Click on Element
Select Group amp Click on Element Group
Save
Create Service Master - (AC03)
Click on Create New Services
Service Number (any number) Service Category
Basic unit of measure (Hours lsquoHrsquo)
Enter
Basic Data 1048774 Master Service Group 1048774 007
Valuation class 1048774 3200 1048774 Enter 1048774 Save
To See the Service list 1048774 AC06
Create Service PO (ME21N)
AC assignment category lsquoKrsquo Item Category lsquoDrsquo
Enter the Short text Quantity Delivery date Net Price Material group Plant
Storage Location
Enter service number in Service Tab (Item Details) quantity price Enter
Account Assignment 1048774 GL Account Number eg400000
Cost Center eg 9999
Press Enter amp Save
Create Service Entry Sheet - ML81N
Select other purchase order (enter PO number) 1048774 Enter 1048774 Click on Create1048774 Enter
Short Text 1048774 Enter 1048774 Service Number 1048774 Enter ndashClick on Flag button 1048774 Save
Take Service entry Sheet Number
Go to Invoice MIRO 1048774 Enter company code 1048774 Select Service Sheet Option 1048774 Enter
Service Entry Sheet Number 1048774 save it
Physical Inventory and Inventory Management
Physical inventory Process - 1 Create Physical inventory document
T Code MI01 ndash Create single inventory document
T Code MI31 ndash Create multiple physical inventory documents
I Enter the desired fields ie material material type site storage location and
Maximum number items Documents ndash 100 etc 1048774 Press Enter
II Click on Process Session
III Select the line items and click on the process
IV System displays a dialog box select Background and click on process
Inventory document is created
2 Print Inventory Document and handed over to responsible person say
Manager
3 Enter Physical Inventory count
T Code MI04
i Enter the physical inventory document number Fiscal year count date 1048774 Press
enter
ii Enter the Material Quantity and click on post
4 Listing of difference
T Code MI20
Enter the physical inventory document number and execute system displays a
screen wherein we will be able to view the differences
5 Post the differences
T Code MI07 amp Mov Type 701 amp 702
Enter the physical inventory document number year posting date enter the
difference and post
INVENTORY MANAGEMENT Maintaining stock by value or by quantity is called inventory The total inventory
management deals with the goods movement of the material
Goods movement -
It is a process in which transaction resulting change in stocks It is further sub-
divided into three categories
1 Goods Receipt (GR)
2 Goods Issue (GI)
3 Transfer Posting (TP)
Goods Receipt (GR) - It is a goods movement in which receipt of goods is
posted for vendor or for production A GR posted in the system will leads to
increase in stock No Concept of Price or value
Goods Issue (GI) - It is goods movement in which material withdrawal is
posted for consumption or for customer A GI posted in system will leads to
decrease in stock
Stock Transfer (ST) - It is method of removal of material from one location
and transferring it to another location This process is performed between two
plants and two storage locations
Transfer Posting (TP) - It is a general term of stock transfer that changes the
stock type or stock categories The difference between transfer posting and
stock transfer is -
TP is logical stock transfer and ST is a physical stock transfer
Movement Type - It is a three-digit code which plays a role of important
control function in inventory management It acts as a central role in automatic
account determination It determines which stock account or consumption
account is updated in financial accounting
Reservation - It stores requisition created from particular cost center to
particular department for issuing the material reservation posted in the system
It leads to decrease in stock
Stock Types - The different stock types are
1 Unrestricted use stock
2 Quality inspection stock
3 Blocked stock
4 Warehouse stock
Transaction code -
1 To Create GR - MIGO
2 To Create GI - MB1A
3 For Transfer Posting - MB1B
4 To display MaterialGR document ndash MB03
5 To create reservations - MB21 MB22 MB23
6 To See Stock Overview - MMBE
7 To enter Other GR - MB1C
When GR is posted in the system
1 Material document is created - MB03
2 Accounting Document is generated - MB03
3 MMR updated - MM02 MM03
4 PO history updated - ME23N
Movement Typersquos
Movement Types under GR - 101 331333335501503505551553555
561351 (For all Mov Typersquos there is a reversal eg 101 has 102 Note No
reversal for 121)
Movement Typersquos under GI - 201 331333335551553555
Transfer Posting It is performed in three ways
1 TP BW Plant to Plant
2 TP BW Storage Location to Storage Location
3 TP BW Stock to Stock
Movement Types under TP BW Plant to Plant
301 - 1 step
303 amp 305 - 2 step
Movement Type under TP BW Storage location to Storage Location
311 - 1 step
313 amp 315 - 2 step
Movement Type under TP BW stock to stock
321 323 325 343349
To Cancel the GR Movement type 102
Return delivery to vendor movement type 122 amp T Code MIGO
Transfer Posting Stock to Stock
From Blocked stock to Quality Inspection
T Code MB1B amp Movement Type 349
From Blocked stock to Unrestricted Stock
T Code MB1B amp Movement Type 343
From Quality Inspection to Unrestricted Stock
T Code MB1B amp Movement Type 321
Transfer Posting from Plant to Plant
For One Step Movement Type 301
For Two Steps Movement Type 303 amp 305
After posting stock will display in Stock in Transit (Plant)
To receive material by receiving Plant Movement Type 305
Transfer Posting BW Storage Location to Storage Location
Under One Plant BW two Storage Locationrsquos Movement Type 311
Back to Parent storage Location Movement Type 313 (It Show stock in transfer)
use Movement type 315 at Parent storage location
To create Goods Issue (GI) T Code MB1A amp Movement Type 201
To Create Reservations T Code MB21 MB22 amp MB23
Creation of GI wrt Reservations
T Code MB1A amp Movement Type 201
Click on Reservation Enter Reservation Number 1048774 Click on Adopt + Details
GR wrt Reservations T Code MIGO amp Select as Reservation instead of GR
GR without PO Movement type 501 amp T Code MB1C Select others instead of
Purchase order Enter Material Quantity Plant Storage Location 1048774 Press Enter
Partner Option will be visible (Vendor) 1048774 Save it
Invoice - Invoice is a document which is issued to a buyer (Company) from the
supplier (vendor) for the payment The following information is maintained in
invoice
Invoice date Posting date Invoice ref number tax amount amount tax code
terms of payments vendor address banking accounting information etc
When invoice document is posted in the system
bull Invoice document created
bull Accounting document is generated (MIR4)
bull PO history updated (ME23N)
bull FI document created (FB03)
PRICE DETERMINATION PROCESS or PRICING PROCEDURE
CONDITIONS OR PRICING PROCEDURE or PRICE DETERMINATION PROCESSWe deal with the Pricing Procedure for vendors
PB00 Gross Price (info record contract scheduled Agreement)
PBXX Gross Price (PO)
FRA1 Freight
RA00 Discount on net
RA01 Discount on Gross
ZA00 Surcharge on net
SKT0 Surcharge discount
ZPB0 Rebates
MWVS Input Tax
MWAS Output Tax
BASB Base Amount
RM0000 Calculation Schema or Pricing Procedure
(PB00 amp PBXX)
RM0002 Calculation Schema or Pricing Procedure
(PB00)
PB00 --gt AB00
Copy the Standard one and create new one (ours)
RM0000 contains all the condition types
Pricing Procedure (PP)
We define the pricing procedure to define condition supplement for the material
price The condition supplement specifies the discount surcharge freight etc
that we want a system every time to access material price condition records
The total value of the material is calculated or based on all addition and
subtraction ie discounts surcharge tax freight etc
Condition Table
It is a table which defines the structure of condition record key
Condition Record
It is a data record used to store conditions or condition supplements ie
condition like discount freight and surcharge Tax etc
Condition Type
It is used for different functions In Pricing the condition types leads you to
differentiate different types of discounts in output determination batch
determination difference between two output types such as delivery note or
order confirmation between different strategy types
Access Sequence
It specifies the order in which system searches or access the condition records
from condition table
Difference between PB00 amp PBXX
1 Condition maintained in PB00 is time dependent whereas PBXX is time
independent
2 Condition type PB00 ndash used for IR RFQ Contract Schedule Agreement
Condition type PBXX ndash used for PO
Calculation Schema
The main function of calculation schema is to provide framework of steps for the
price determination process to specify the discounts surcharge freight rebate
etc
It also determines the sequence of conditions that are to be followed and in
which sequence
Schema Group Vendor
The main function of it is to identify or to pick the right process and conditions
for a particular vendor
Schema Group Purchasing Organization
Key that determines which calculation schema (pricing procedure) is to be used
in purchasing documents assigned to the relevant purchasing organization
Schema Group
It allows to group together the purchasing organizations which uses the same
calculation schema
Steps -
1 Create Access sequence
2 Create condition types
3 Create pricing procedure or calculation schema
4 Link pricing procedure amp access sequence to condition type
5 Create schema group for vendor
6 Create schema group for purchase organization
7 Assign schema group vendor-to-vendor master record in purchasing data
view
8 Assign schema group purchase organization to our purchase organization
9 In inforecord purchase organization data enter condition types and pricing or
calculation procedure
CUSTOMIZE SETTINGS -
SPRO --gt IMG--gtMM--gtPUR--gtConditions --gtDefine price determination Process
1 Define access sequence
2 Define Condition type
3 Define cal Schema
4 Define schema group
o Schema group vendor
o Schema group purchasing group
5 Assignment of schema group to PUR org
6 Define schema determination agrave determine cal schema for standard PO
PURCHASE ORDER
PURCHASE ORDER
PO is an external document created for the procurement of materials and
services from vendor The document of PO is also divided into 4 parts as PR -
1 Document Overview
2 Header (DeliveryInvoice Conditions Address Partners Org data status)
3 Item Overview (AC assign cat Item Category Material Plant Del date SL)
4 Item Details (Material data Confirmations condition control delivery delivery
Schedule Quantitiesweights invoice)
A procurement type is defined for each of the document items The following
procurement types exist
1048774 Standard
1048774 Subcontracting
1048774 Consignment
1048774 Stock transfer
1048774 External service
bull There are different ways to create PO -
1 Directly through transaction code ME21N
2 With reference to PR
3 With reference to RFQ
4 With reference to info records
5 With reference to Contracts
6 With reference to Cost Centre GL Account (cost element) for consumable
items or not stock items with account assignment category lsquoKrsquo (K= cost centre)
(For non stock and consumables)
0 COMMENTS L INKS TO THIS POST
LABELS PO PURCHASE ORDER
Reaction
s
PURCHASE REQUISITION T CODE ME51 or ME51N
Purchasing Requisition -
It is a request or instruction from particular department (Cost Centre) to
purchasing department to procure certain quantity of material and services It is
only one internal document in SAP-MM
Purchasing Requisition document is divided into four parts -
bull Document Overview
bull Header
bull Item Overview
bull Item Details
Document Overview -
It displays the list of purchasing documents which are created previously
according to our requirement
Header -
Any text message or information is maintained
Item Overview -
In this we enter material plant delivery date quantity storage location
purchasing group AC assignment category Item category etc
Item Details -
It displays the detailed information about item overview (like Master data
valuation source of supply contact person delivery address status etc)
0 COMMENTS L INKS TO THIS POST
LABELS PR PURCHASE PURCHASE ORDER PURCHASE REQUIS IT ION SALES ORDER
Reaction
s
Automatic PURCHASE ORDER (PO) How Automatic PO raised
How Automatic PO raised
At fixed time say 1230 AM automatic scheduler runs and checks whether the
stock is less than or equal to the replenishment point If stock is less than or
equal to Repli Point than PR raised automatically to Purchasing Deptt
bull Activate the option automatic PO in purchasing view in material master record
bull Activate the option automatic PO in purchasing data view in vendor master
record
bull Maintain Source List amp select fixed vendor
bull PR crated automatically
bull Automatic creation of PO from PR ndash ME59
Enter the Purchasing group purchasing organization Vendor Plant and
Purchasing Requisition Document Number 1048774 Execute
RELEASE PROCEDURE Release strategyThe main function of Release procedure is to determine the approval process
or the release process for the procurement of material amp services rather than
relying for manual signatures The release procedure contains release strategy
Release Strategy (RS)
A plan defining the release codes with which a purchase requisition item a
complete purchase requisition or a complete external purchasing document
must
be released (that is approved) and the sequence in which release is to be
effected
using these codes It is a unique set of conditions sequence and level of release
It is a 2 digit code eg S1 S2 S3etc
The Release Strategy contains the following -
bull Release Group
bull Release Codes
bull Release Indicators
bull Release Prerequisite
Release Group -
It is a 2-digit code which is assigned with a class (Class contains group of
characteristics) It contains one or more release strategies
Release Codes -
It is a 2digit code which identifies the department or responsible person for
the approval process amp release process
Eg AA - Manager
BB - Sr Manager
CC - Vice President
DD - Managing Director
Release Indicator -
It is a Code that represents the release status If the proper approval
process is performed that the release Strategy has to be release if it is not
performed than the Release Strategy is blocked
R ndash Release
B ndash Blocked
Release Conditions -
It determines the type of the release strategy
For eg
bull If the price ranges from 1 to 1000 It is approved by AA BB and CC
bull If the ranges from1001 to 1lac then it is approved by AA BB CC and DD
- 80 -
Release Prerequisite
It will informs the system which RS has to be take place in the PO CEKKO is
a communication structure where it displays the field names amp field lengths to
create characteristics ie we maintain characteristics in customizing by
selecting
the field names from this communication structure for all external documents
CEBAN is used for the purchasing requisition
Characteristics -
1 Net value of PO --- GNETW (GSWRT for PR)
2 Plant --- WERKS
3 Purchasing organization -- EKORG
4 Purchasing Group --- EKGRP
5Material group ndashMATKL
CUSTOMIZE SETTINGSSPRO--gtIMG--gt MM--gt Purchasing--gtPO--gt Release Procedure for PO
1 Edit Characteristics T Code CT04
2 Edit Class T Code CL02
3 Define Release Procedure for PO
4 Check Release Strategy
Edit Characteristics -
Characteristics - eg NET VALUE OF VALUE
Click or Create Button
Under Basic Data
Description - Value for PO
Status - Release
Data Type - Currency Format
No Of Characters - 15
Currency - EUR
Activate multiple values amp Internal Values Allowed
Additional Data
Table name - CEKKO
Field Name - GNETW
Values
Activate Additional Values
Save the document
Create another Characteristic for Plant -
Plant date Create ndash Description Status
Data Type Characteristic Format
Number of Characteristics 4
Activate Multiple Values
Additional data-
Table Name - CEKKO
Field Name - WERKS
Values
Activate Additional Values
For Purchasing Organization Name - EKORG
For purchasing Group EKGRP
Edit Class
Class - SAPMM
Class Type - 032 Release Strategies
Click on Create button
Basic Data
Description - Class for PO
Status - Released
Valid From _____ Valid to _____
Click on Characteristic
Characteristic
Enter all the Characteristics Created amp Save it
Define Release Procedure for PO-
bull Release Group
bull Release Codes
bull Release Indicators
bull Release Strategies
bull Workflow
Release Group - New Entries Release Group Class and Description
Press Enter amp Save
Release Code - New Entries
Group Codes Description
99 AA Manager
99 BB Sr Manager
99 CC Vice President
99 DD Managing Director
Press Enter amp Save
Release Indicator - (B ndash Blocked R - Release)
New Entries
Release Indicators Description
B Blocked
R Released
Release Strategies -
New Entries
Release Group 99
Release Strategy S1
Release Codes AA BB CC and DD
Click on Release Prerequisites
Release Status -
Continue
Classification
Enter the Value (Same Price)
Plant (9999)
Go Back amp Save it
Release Simulation - Simulate Release
Create a PO -
There are two ways to release the PO
Individual releaseME28
Collective release ME29N
How to delete procedure
Delete Release GP
Create Release RG
Delete R Strategies
Delete R Code
Delete R Group
SAP R3 SYSTEM LANDSCAPE
System LandscapeThe system landscape contains all the SAP Systems that you have installed It
can consist of several system groups whorsquos SAP Systems are linked by transport
routes
After you decide which clients you need and which roles you want them to have
you need to decide how to distribute them amongst the different SAP Systems
You can set up multiple clients independently of one another in a single SAP
System However when you configure the data you must remember that cross-
client Customizing settings and Repository objects are identical for all clients in
a single SAP System Changes made in one client apply immediately to all
clients in the system
Three-System Landscape
SAP recommends a three-system landscape in which each of the central clients
has its own SAP System
This consists of a development system DEV a quality assurance system QAS
and a production system PRD The development system contains the
Customizing client CUST the quality assurance system contains the quality
assurance client QTST and the production system contains the production client
PROD Make all changes to Customizing data and Repository objects in the
Customizing client When you release the corresponding change requests they
are transported into the quality assurance client This means that changes to
cross-client data only appear in the quality assurance client after the transport
In the quality assurance client you can test whether the transports are
complete or whether any linked changes are missing and are still in unreleased
change requests If the test is successful the change requests are transported
into the production client The production client is completely separate from the
other clients as regards cross-client data
SPECIAL STOCKS amp SPECIAL PROCUREMENT TYPES
Special Stocks are those stocks which are not belongs to our company code
These are not placed in our storage locations amp no physical inventory is
performed and treated as special stocks for the reason of ownership
Different types are of Special Stocks are as follows
1 Subcontracting
2 Consignment
3 Pipeline
4 Stock transfer
5 Third party
6 Returnable transport packaging
7 Sales order stock
8 Project stock
SUBCONTRACTING
In subcontracting process we create subcontracting PO to supply or issue
subcomponents to vendor in order to get final product The price maintained in
subcontracting PO is a service charge paid to vendor
Steps to perform subcontracting
1 Create subcontracting inforecord (Optional)
2 Create subcontracting PO with item category L
There are to ways to supply subcomponents to vendor
bull Manually maintain the subcomponents in the subcontracting
PO though explode BOM
bull Through BOM (Bill of material) T Code CS01 CS02 amp CS03
3 Create Transfer Posting with Movement Type 541 to issue the subcomponents
to the vendor
4 Goods Reciept
5 Invoice Reciept
Path ME21N ---gt Enter Item Category L --gt Material (End Product) PO
Quantity Delivery Date Net Price Plant --gt Click on Item Details --gt Tab
Material Data -- gtComponents select Explode BOM --gt Click on Components
button --gt Enter the subcomponents --gt Go back amp Save
Create Transfer Posting with movement type 541 amp T Code MB1B
GR MIGO
IR MIRO
CONSIGNMENT - (No Concept of Invoice)
In consignment process we will not create Purchasing document for the vendor
vendor himself send the material to our plant though the material is available
to our plant the responsibility amp ownership of the material is of vendor Aliability
only arises when the material withdrawal (Consumption) is posted in the system
from consignment stock
Steps
1 Create Consignment info record (mandatory)
2 Create Consignment purchase order with item category lsquoKrsquo amp maintain Info
record number
3 Create GR Movement type lsquo101Krsquo
4 Create GI Movement Type lsquo201Krsquo
5 Consignment settlement T Code MRKO
Path --gtME11 --gt In info record --gt Purchasing Org Data 1 views of info record
enter the tax code and save it
--gt Create Consignment Purchase Order ME21N (Price option is grayed out with
price zero)
--gt Create GR with movement type 101K
--gt Create Goods Issue (GI) T Code MB1A amp Movement Type 201K Enter Cost
center vendor
--gt Consignment Settlement T Code MRKO Click Activate Consignment Activate
Settle Execute
--gt Display the Document Number ie Invoice receipt T Code FB03
PIPELINE PROCESS (No Concept of Invoice)
In pipeline handling your company does not need to order or store the material
concerned It is ready available to you as and when required via pipeline (eg oil
or water) or some other type of cable (eg electricity) Consumption of the
material is settled with the vendor on a regular basis
Steps
1 Create a Material master record with material type PIPE
2 Create Pipeline info record
3 Create GI with movement type 201P
4 Pipeline settlement T Code MRKO
RETURNABLE TRANSPORT PACKAGING (RTP)
When company orders goods from a vendor the goods are delivered with
returnable transport packaging (pallets containers) that belongs to the vendor
and is stored on our premises until you return it to the vendor
Steps
1 Create Material master record with material type LEIH
2 Create PO
3 Create GR by maintaining RTP material by selecting the option transport
equipments with movement type 501M
4 IR
STOCK TRANSFER
In stock transfer processing goods are procured and supplied within a company
One plant orders the goods internally to another plant (receiving plantissuing
plant) The goods are procured with a special type of purchase order the stock
transport order
Steps
1 Create a Material master in both supplying and receiving plant
2 Create stock transport order (STO) with item category lsquoUrsquo
3 Create transfer posting with movement type 351 amp T Code MB1B (Go to
MMBE stock overview the stock will decrease in supplying plant and it will not
update stock of receiving plant it will be under stock in transit)
4 Create GR stock will update in receiving plant
This scenario is under one company code between two plants
SAP IMPLEMENTATION PROCESS End to End Inplementation of SAP
First we have to prepare documentation about the client business (like turnover
vendors customers payments materials production marketing etc)
The implementer company made two teams (1) Steering team (2) Steering
community
Steering team (SAP functional consultants) prepares a detailed
documentation about the client with the help of core team (client company
team)
amp this study is known as Feasibility Study After that the steering team handed
over this documentation to Steering community (Project manager Sr software
engineer and other higher authorities)
Steering community prepares the BBP (Business Blue Print) BBP
Prepares in MS-Word
10487741048774 ASAP - Accelerated System Application Product in Data Processing
10487741048774 Business Process - ASAP Methodology
1 Project Preparation
2 BBP (Business Blue Print)
3 Realization
4 Final Preparation
5 Go live amp Support
10487741048774 Project Preparation -
It consists of identifying team members amp development strategy as
how to go
AS ndash IS (Existing Process followed requirements)
TO ndash BE (Requirement analysis and best process recommended)
Difference between (AS ndash IS) amp (TO - BE) is called GAP Analysis
10487741048774 Business Blue Print (BPP) -
It is a legal documentation between client amp the company
(implementer service provider) We have to understand the current business
process of client amp analyzing the business amp prepare documentation It is a
detailed documentation for the client
10487741048774 Realization -
This Phase is used to Implement or migrate the entire business of
client from Non-SAP environment to SAP environment
10487741048774 Final Preparation -
This phase is used for testing amp end user training After successfully
completion of this phase client is ready to run business in SAP R3
10487741048774 Go live amp Support -
In this phase we deliver the project end date amp end user training at
client site
THIRD - PARTY PROCESSING
THIRD - PARTY PROCESSING
In third party processing your company passes on a sales order to an external
vendor who sends the goods directly to the customer The sales order is not
processed by your company but by the vendor Third-party items can be
entered in purchase requisitions purchase orders and sales orders Third party
processing is integrated with Sales and Distribution If the sales order contains
third-party items the system creates a purchase requisition from the order
Steps
1 Create MMR with sales views and maintain Division Distribution channel
sales org item category group and general item category group ndash BANS (Third
party item) amp Account group Sold to party
2 Create Customer master record T Code XD01 XD02 XD03
3 Create sales order T Code VA01 VA02 VA03 (PR generated automatically)
4 PO - T Code ME21N
5 GR ndash T Code MIGO
6 IR ndash T Code MIRO
7 Sales Billing Billing Document T Code VF01 VF02 VF03

types of excise duty to
3 Under Sales and Distribution reg Excise GroupndashSeries Group Determination
Here you specify which excise group and series group the excise invoices are to
be created for
Features
When you post an invoice the system creates an excise invoice All the
information that it needs to create the excise invoice is provided either by the
invoice or by the Customizing settings that you have made in Sales and
Distribution It also determines the excise invoice type automatically by means
of a user exit
Creating Excise Invoices for Stock Transfers 1 From the SAP Easy Access screen choose Indirect Taxes reg Procurement reg
Excise Invoice reg For Depot reg CreateChangeDisplay
2 In the Material document field enter the goods receipt number and choose
The system displays the information from the goods receipt for example the
sending plant the excise registration the range the division and the
collectorate
3 Choose Details
The system copies the items from the goods receipt document In the depot it is
possible to have a separate excise invoice at line item level
4 Enter the internal document number of the excise invoice sent by the factory
5 Choose More documents to go the excise invoice details screen
6 Enter the internal document number of the excise invoice from the factory
The system copies the information to the line item (for example the excise
invoice number the excise invoice date the item number the chapter ID the
excise invoice quantity the amount of excise duty paid the excise base value
and the serial number of the Part II register entry with which the excise was
paid)
You can change the receipt quantity to match the actual quantity received at
the depot if necessary The system automatically adjusts the excise
accordingly
7 Go back to the item details screen
8 Save the excise invoice
Creating Excise Invoices for Direct Purchases 1 From the SAP Easy Access screen choose Indirect Taxes reg Procurement reg
Excise Invoice reg For Depot reg CreateChangeDisplay
2 In the Material document field enter the goods receipt number and choose
The system displays the information from the goods receipt for example the
sending plant the excise registration the range the division and the
collectorate
You can also maintain the excise registration details for the ship-from party as
for with the vendor The ship-from can be different from the vendor code (The
delivering plant can be maintained as a ship-from in the system When a valid
ship-from is entered the excise registration details copied from the vendor will
be overwritten by the ship-from excise registration details)
The ship-from registration details displayed can also be overwritten manually
The dealers commercial invoice number can be stored in the vendor excise
invoice number as in this case the dealer himself will not have an excise
invoice
3 Choose Details
The system copies the items from the goods receipt document It also copies the
vendors excise invoice number and the serial numbers of the entries in the RG
23A RG 23C and personal ledger account (PLA) registers
4 Enter the internal document number of the excise invoice sent by the factory
5 Select an item and choose More documents to go the excise invoice details
screen
In the case of direct purchases there will not be any excise invoice in the
system so leave the internal document field blank The vendors invoice will
show the details of the excise invoices through which excise has been paid for
the item that is being dispatched You can enter these details here
6 For each item the chapter ID excise base value and excise duty amounts
are defaulted from the purchase order You can change them if there is any
difference Enter the excise amount paid and the receipt quantity You also
enter the Part II register serial numbers with which the excise duty was paid and
the excise registration information from the original excise invoice
7 Go back to the item details screen
8 Save the excise invoice
The system creates an entry in register RG 23D You can change the excise
invoice as long as it has not been used in any sales
Assigning Excise Invoices to a Delivery Use
You follow this procedure to specify which excise invoices are to be assigned to
a delivery from a depot (or other material document)
You can also automate this procedure using the batch selection program
(J_1IJCHK) by making the appropriate Customizing settings in the Country
Version India (CIN) Implementation Guide (IMG)
Procedure
1 From the SAP Easy Access screen choose Indirect Taxes reg SalesOutbound
Movements reg Excise Invoice reg For Depot reg CreateChangeDisplay reg Delivery
or Material Document reg RG 23D Selection
2 Enter the delivery document number or the material number and choose
3 Select the excise invoice you want
4 Choose
5 Choose Excise invoice
A list of excise invoices appears These are the excise invoices at the depot with
a balance quantity
The system also shows a list of the A certificates that can be used You can pick
up any of the A certificates but they must be for the same excise invoice You
can only pick up an A certificate in its entirety You cannot select part of an A
certificate
6 Select the excise invoices that are relevant to the delivery
7 Specify what quantity to be used from each excise invoice
The system recalculates the excise accordingly
8 Go back to the item details screen
9 Save the data
Result
The system creates an entry in register RG 23D and generates the depot excise
invoice numbers
If you selected any A certificates the system also generates additional entries in
the RG 23D register The system marks the original A certificates as updated so
that they cannot be used for any other removals
CIN - Country India Version ~ Vol 2
Continue Volume 1
Creating Excise Invoices
Use
This is the procedure that you follow to create an excise invoice for the less
common types of goods movement
Procedure
1 From the SAP Easy Access screen choose Indirect Taxes reg SalesOutbound
Movements reg Excise Invoice reg For Other Movements reg CreateChangeDisplay
reg
2 On the selection screen enter data as required including
(i)Reference
group box
Specify which document you want to create the excise invoice for and which
excise group it is for
(ii)Details
group box
Specify the vendor or customer that you are sending the invoice to
3 Choose
If you entered an internal document number the system copies the item details
from it
4 Choose
5 Enter line items for each of the materials to be included in the excise invoice
For each item enter the following data
(i)Material
(ii)Quantity
(iii)Unit of measure
(iv)Base value
(v)Excise duty
6 To pick the rate and amount from a specific excise invoice choose Get excise
invoice
7 Save the excise invoice
If you are using the one-step procedure the system creates and posts an excise
invoice Otherwise the system saves the information but does not make any
postings it now has to be verified
Verifying and Posting Excise Invoices
Use
You follow this procedure to verify that the information in an excise invoice that
has already been created and to post it once you are satisfied
Procedure
From the SAP Easy Access screen choose Indirect Taxes reg SalesOutbound
Movements reg Excise Invoice reg For Other Movements reg Posting
1 Enter the internal document number of the excise invoice
2 Choose Release to accounting
The system displays the excise invoice The excise duty that is to be posted is
displayed at the foot of the screen which you can change if necessary
3 To access the balance utilization choose
4 To display the balance available on the CENVAT accounts choose Account
balances
5 Save the excise invoice
The system generates the accounting documents
6 To print the excise invoice choose
Making a Transfer Posting
Use
In this procedure you make a transfer posting for the goods ordered by another
plant For more information about this function see Entering the Removal from
Storage at the Issuing Plant
Procedure
1 From the SAP Easy Access screen choose Logistics reg Materials Management
reg Inventory Management reg Goods Movement reg Transfer Posting
2 Choose Movement type reg Transfer posting reg Plant to plant reg To stock in
transit
3 Enter the number of the issuing plant and storage location
4 Choose To purchase order
5 In the dialog box enter the number of the stock transport order that the
receiving plant created and choose
6 Check the data
7 Save the transfer posting
Transaction Codes for India
Transaction Action
J1I2 Prepare a sales tax register
J1I3 Create outgoing excise invoices in batches
J1I5
Update the RG 1 and Part I registers
J1I8
Post the challan used to remit TDS
J1IC194C
Create annual return under section 194 C (Classic TDS)
J1IC194D
Create annual return under section 194 D (Classic TDS)
J1IC194I
Create annual return under section 194 I (Classic TDS)
J1IC194J
Create annual return under section 194 J (Classic TDS)
J1IEX
Incoming Excise Invoices (central transaction)
J1IEX_C
Capture an incoming excise invoice (excise clerk)
J1IEX_P
Post an incoming excise invoice (excise supervisor)
J1INBANK
Post a bank challan
J1INCANC
Cancel a vendor withholding tax certificate
J1INCERT
Print a vendor withholding tax certificate
J1INCHLN
Create a remittance challan
J1INCUST
Post a customer withholding tax certificate
J1INHC
Withholding Tax Migration Health Check Program
J1INMIG
Withholding Tax Data Migration Tool
JI1NCHLC
Create a remittance challan for customers
J1INCC
Print customer withholding tax certificates
J1INMIS
Withholding Tax Information System
JI1NAR
Prepare annual returns (Extended Withholding Tax)
J1IF01
Create a subcontracting challan
J1IF11
Change a subcontracting challan
J1IF12
Display a subcontracting challan
J1IF13
Complete reverse or recredit a subcontracting challan
J1IFQ
Reconcile quantities for subcontracting challans
J1IFR
List subcontracting challans
J1IH
Make a CENVAT adjustment posting
J1IIN
Create an outgoing excise invoice
J1IJ
Assign excise invoices to a delivery for sales from depots
J1INJV
Adjust withholding tax Item
J1INREP
Reprint a vendor withholding tax certificate
J1INREV
Reverse a remittance challan
J1INPR
Calculate withholding tax on clearing accounts
J1INUT
Clear withholding tax on clearing accounts
J1IR
Download register data
J1IS
Process an excise invoice (outgoing) for other movements
J1IU
Process exemption forms
J1IW
Verify and post an incoming excise invoice
J1IX
Create an incoming excise invoice (without reference to purchase order)
J2I8
Transfer excise duty to CENVAT account
J2ID
Archive tax deducted at source (TDS) documents
J2IE
Locate tax deducted at source documents in archive
J2IU
Remit excise duty fortnightly
J2I9
Monthly CENVAT return
J1IG
Excise invoice entry at depot
J1IGA
Create additional excise entry at depot
J2I5
Extract data for excise registers
J2I6
Print excise registers
Sales from Factories
Purpose
This process describes how the SAP System handles the sales process allowing
for the creation of excise invoices which you have to send with each delivery
that is subject to excise duty There are two scenarios depending on whether
you want to send the commercial invoice along with the delivery or at a later
date
Prerequisites
In order for the system to be able to copy the information from document to
document you must have set up the copying control procedures in Customizing
for Sales and Distribution (SD) This differs according to when you want to send
the commercial invoice
1 Along with the delivery
In this case the document flow would be OR (standard sales order type) ndash LF
(standard delivery type) ndash F2 (invoice)
2 At a later date
The document flow would be OR ndash JF (delivery type a copy of LF) ndash JEX (pro
forma billing document type a copy of document type F8) ndash F2
In addition you must also have maintained the settings in the Country Version
India (CIN) Implementation Guide (IMG) by choosing Global Settings reg Assign
Excise Invoice Billing Type to Delivery Type
A sample pricing procedure JFACT is provided for this sales procedure
Process Flow
1 The sales clerk creates a sales order following the
(i)standard procedure
There are special procedures for
(i)Customers in possession of exemption forms
(ii)Exports
2 The shipping clerk creates a delivery again following the
standard procedure
On the initial screen you set the appropriate delivery type (see above)
3 In the warehouse the storeperson issues the goods
The system only allows users to create a pro forma excise invoice if the delivery
is complete so as to prevent them from creating multiple pro forma excise
invoices
4 What you do at this stage depends on whether you want to send the
commercial invoice along with the delivery or whether you want to invoice the
customer later
(A) If the invoice is to be shipped with delivery the shipping clerk
(i)Creates an invoice following the standard procedure
(ii)Creates an excise invoice from the invoice
(B) If the invoice is to be sent on at a later date the shipping clerk
(i)Creates the pro forma excise invoice
The pro forma excise invoice is only required for technical purposes and is not
sent to the customer The system does not make any accounting postings at this
stage
(ii)Creates
an excise invoice from the pro forma excise invoice
In both these cases the system creates an accounting document to post the
excise duty to a clearing account
Instead of creating excise invoices manually you can also have the system
create them automatically Alternatively you can create them in batches
5 You ship the goods
6 When the time comes to invoice the customer you create the invoice
following the standard procedure
Irrespective of the number of excise invoices that you have issued you can
combine the delivery items in a single invoice (if the standard requirements are
met)
Sales from Depots
Purpose
You may sell finished goods directly from the place of manufacture as described
under Sales from Factories or you may first ship them to a separate location for
storage (a depot) from where you will sell them The second procedure is
described here
Sales from depots are handled differently from sales from factories because of
excise law Excise duty is payable when you send the goods from the factory to
the depot but it is not levied again when you sell the goods
Sometimes when you make a final sale of goods from a depot price escalations
could have happened with retrospective effect In such scenarios you need to
pay the extra excise duty at the factory using an A Certificate You need to
register the A certificate details in the RG 23D register and the excise recovered
from the customer
Prerequisites
You have customized
1 Stock transport processing in Customizing for Materials Management (MM)
by choosing Purchasing reg Purchase Order reg Set Up Stock Transport Order
2 The copying control for copying stock transport order NL to excise invoice JEX
You make this setting in the Country Version India (CIN) Implementation Guide
(IMG) by choosing Sales and Distribution reg Assign Excise Invoice Billing Type to
Delivery Type
3 The item category NLN (standard transport order) so that it is relevant for
billing
You do this in the standard IMG in Customizing for Sales and Distribution (SD)
by choosing Sales reg Sales Documents reg Sales Document Item
Process Flow
1 You create the sales order following the
standard procedure
The standard pricing procedure for depot sales is JDEPOT
2 You create the delivery again following the
standard procedure
3 You
assign excise invoices to the delivery or material document
4 You
verify that you have selected the correct excise invoices and post them
Alternatively if you have selected the wrong excise invoices you can cancel the
assignment
5 You create the invoice following the standard procedure
SPECIAL STOCKS amp SPECIAL PROCUREMENT TYPES
Special Stocks are those stocks which are not belongs to our company code
These are not placed in our storage locations amp no physical inventory is
performed and treated as special stocks for the reason of ownership
Different types are of Special Stocks are as follows
1 Subcontracting
2 Consignment
3 Pipeline
4 Stock transfer
5 Third party
6 Returnable transport packaging
7 Sales order stock
8 Project stock
SUBCONTRACTING
In subcontracting process we create subcontracting PO to supply or issue
subcomponents to vendor in order to get final product The price maintained in
subcontracting PO is a service charge paid to vendor
Steps to perform subcontracting
1 Create subcontracting inforecord (Optional)
2 Create subcontracting PO with item category L
There are to ways to supply subcomponents to vendor
bull Manually maintain the subcomponents in the subcontracting
PO though explode BOM
bull Through BOM (Bill of material) T Code CS01 CS02 amp CS03
3 Create Transfer Posting with Movement Type 541 to issue the subcomponents
to the vendor
4 Goods Reciept
5 Invoice Reciept
Path ME21N ---gt Enter Item Category L --gt Material (End Product) PO
Quantity Delivery Date Net Price Plant --gt Click on Item Details --gt Tab
Material Data -- gtComponents select Explode BOM --gt Click on Components
button --gt Enter the subcomponents --gt Go back amp Save
Create Transfer Posting with movement type 541 amp T Code MB1B
GR MIGO
IR MIRO
CONSIGNMENT - (No Concept of Invoice)
In consignment process we will not create Purchasing document for the vendor
vendor himself send the material to our plant though the material is available
to our plant the responsibility amp ownership of the material is of vendor Aliability
only arises when the material withdrawal (Consumption) is posted in the system
from consignment stock
Steps
1 Create Consignment info record (mandatory)
2 Create Consignment purchase order with item category lsquoKrsquo amp maintain Info
record number
3 Create GR Movement type lsquo101Krsquo
4 Create GI Movement Type lsquo201Krsquo
5 Consignment settlement T Code MRKO
Path --gtME11 --gt In info record --gt Purchasing Org Data 1 views of info record
enter the tax code and save it
--gt Create Consignment Purchase Order ME21N (Price option is grayed out with
price zero)
--gt Create GR with movement type 101K
--gt Create Goods Issue (GI) T Code MB1A amp Movement Type 201K Enter Cost
center vendor
--gt Consignment Settlement T Code MRKO Click Activate Consignment Activate
Settle Execute
--gt Display the Document Number ie Invoice receipt T Code FB03
PIPELINE PROCESS (No Concept of Invoice)
In pipeline handling your company does not need to order or store the material
concerned It is ready available to you as and when required via pipeline (eg oil
or water) or some other type of cable (eg electricity) Consumption of the
material is settled with the vendor on a regular basis
Steps
1 Create a Material master record with material type PIPE
2 Create Pipeline info record
3 Create GI with movement type 201P
4 Pipeline settlement T Code MRKO
RETURNABLE TRANSPORT PACKAGING (RTP)
When company orders goods from a vendor the goods are delivered with
returnable transport packaging (pallets containers) that belongs to the vendor
and is stored on our premises until you return it to the vendor
Steps
1 Create Material master record with material type LEIH
2 Create PO
3 Create GR by maintaining RTP material by selecting the option transport
equipments with movement type 501M
4 IR
STOCK TRANSFER
In stock transfer processing goods are procured and supplied within a company
One plant orders the goods internally to another plant (receiving plantissuing
plant) The goods are procured with a special type of purchase order the stock
transport order
Steps
1 Create a Material master in both supplying and receiving plant
2 Create stock transport order (STO) with item category lsquoUrsquo
3 Create transfer posting with movement type 351 amp T Code MB1B (Go to
MMBE stock overview the stock will decrease in supplying plant and it will not
update stock of receiving plant it will be under stock in transit)
4 Create GR stock will update in receiving plant
This scenario is under one company code between two plants
Material Master Related Important Terms (Part 2)
Controlling (CO) An organizational unit in Accounting that reflects a
management-oriented structure of the organization for the purpose of internal
control
Operating results for profit centers can be analyzed using either the cost of
sales approach or the period accounting approach
By analyzing the fixed capital as well you can expand your profit centers for use
as investment centers
Profit Center
Key that uniquely identifies the profit center in the current controlling area
Valuation Category
Determines whether stocks of the material are valuated together or separately
Dependencies
In the case of split valuation this indicator also determines which valuation
types are allowed that is the criteria by which stocks can be valuated
Valuation type
Invoice Verification (MM-IV)
A subdivision of a valuation category in split valuation
Example An enterprise manages its stocks of a material using the valuation
category Quality comprising the following valuation types
bull High quality Average quality Inferior
Hazardous material number
Number that identifies the material as a hazardous material or as dangerous
goods and assigns hazardous material data or dangerous goods data to it
Use The hazardous material number indicates that the material is dangerous
making special precautions necessary for its storage and shipment
Valuation Class
Assignment of a material to a group of GL accounts
With other factors the valuation class determines the GL accounts that are
updated as a result of a valuation-relevant transaction or event such as a goods
movement
The valuation class makes it possible to
bull Post the stock values of materials of the same material type to different GL
accounts
bull Post the stock values of materials of different material types to the same GL
account
Default value for the valuation class for valuated stocks of this material
Use The valuation class has the following functions
bull Allows the stock values of materials of the same material type to be posted to
different GL accounts
bull Allows the stock values of materials of different material types to be posted to
the same GL account
bull Determines together with other factors the GL accounts updated for a
valuation-relevant transaction (such as a goods movement
CIN - Country India Version ~ Volume 1
PurposeCountry Version India (CIN) contains a number of enhancements to standard
Sales and Distribution (SD) functions that allow you to handle local
requirements in particular excise duty
Features
In Country Version India (CIN) this component handles sales processes as
found in India In addition to the generic functions it allows you to
Handle CENVAT in your sales processes
The system calculates excise on your sales and creates excise invoices as
required and makes the appropriate postings to your CENVAT accounts
It covers sales from factories sales from depots and offers functions for other
types of goods movements it also covers sales to export-oriented units and
export sales
Record concessional and exemption forms sent to you by your customers
Make adjustment postings to your CENVAT accounts
Excise Invoice (Outgoing)
Definition
The document that acts as the proof of payment of excise duty and is required
for the customer to take CENVAT credit on the item
Use
In the SAP System there are three different procedures for creating excise
invoices
Sales direct from the factory
This procedure is for when you sell manufactured goods straight from the
factory at which they were produced in which case you levy excise duty when
the goods leave the factory on their way to the customer
If when you send the goods to the customer you enclose the commercial
invoice you create the excise invoice with reference to the commercial invoice
If you want to send the commercial invoice after you have dispatched the goods
however you create the excise invoice with reference to a pro forma
commercial invoice For more information about these procedures see Sales
from Factories
As well as creating excise invoices individually you can also create them in
batches (see Creation of Excise Invoices in Batches)
Sales from depots
A depot is a site at which the goods are stored away from the factory at which
they were produced In this procedure you have to levy the excise duty when
you transfer the goods from the factory to the depot and then make sure this is
passed on to the customer when it makes a purchase For more information see
Sales from Depots
Sales (other goods movements)
Some other goods movements may also require you to create an excise invoice
with reference to other documents The SAP System offers separate functions
for these purposes (see Excise Invoices (Outgoing) for Other Movements)
StructureNumbering of Excise Invoices
Outgoing excise invoices have two numbers an internal document number
which is assigned immediately you create an excise invoice and an excise
invoice number which is not assigned until you have verified and posted it
As far as the excise invoice number is concerned you have to number your
outgoing excise invoices in sequential order starting each year on 1 April You
must notify the excise authority of the jurisdiction of the invoicing location The
serial number must be printed on each page of the excise invoice
Each number range is governed by a series group You must create at least one
series group in order to be able to number the excise invoices If you need more
than one number range you must create the corresponding number of series
groups You do so in the CIN Implementation Guide (IMG) by choosing Global
Settings reg Series Groups
Number of Line Items Per Excise Invoice
Some states allow you to include only a limited number of items for each page
of an excise invoice (for example if the excise invoices are to be printed on
prenumbered forms) You can customize the system so that it prints the excise
invoice accordingly in the CIN IMG by choosing Global Settings reg Excise
Registration IDs
Customer Master (Excise Data) Definition
The part of the customer master record that contains information relating to
Indian excise duty
Use
In conjunction with other data this data is used to calculate excise duty on
various transactions
To maintain the data from the SAP Easy Access screen choose Indirect Taxes reg
Master Data reg Excise Rate Maintenance and then select the following options
described below
Structure
The excise part of the customer master contains the following information
Customer Excise Details
On this screen you enter your customers tax registration numbers which are
used for various forms of correspondence and reports
1 Excise registration number (and the range division and collectorate in which
this is located)
2 Central sales tax (CST) number
3 Local sales tax (LST) registration number
4 Permanent account number (PAN)
In order for the system to be able to calculate which rate of excise duty to apply
on sales to the customer you must also assign it a customer excise duty status
(for more information about how this works see Determination of Excise Duty
Rates)
Excise Indicator for Plant and Customer
On this screen you define the final excise duty indicator (for more information
about how this works see Determination of Excise Duty Rates)
Determination of Excise Duty Use
When you execute a business transaction involving materials that are subject to
excise duty the system automatically calculates the duty for you
Prerequisites
In order for the system to be able to determine which rate of excise duty to
apply you must have maintained all the data on the Excise Rate Maintenance
screen which you can access from the SAP Easy Access screen by choosing
Indirect Taxes reg Master Data reg Excise Rate Maintenance
You maintain the following types of data
Plant master data
You assign each of your plants an excise duty indicator You can use the same
indicator for all the plants with the same excise status from a legal point of view
such as all those that are in an exempt zone
See also the information about manufacturers that are only entitled to deduct a
certain portion of the duty (see Partial CENVAT Credit)
Vendor master data
For each of your vendors with the same excise status from a legal perspective
you define an excise duty indicator You must also specify the vendor type ndash for
example whether the vendor is a manufacturer a depot or a first-stage dealer
You must also stipulate if the vendor qualifies as a small-scale industry
For each permutation of plant indicator and vendor indicator you then create a
final excise duty indicator
Customer master data
Similarly you assign the same excise duty indicator to each of your customers
that share the same legal excise status
Again for each permutation of plant indicator and customer indicator you then
create a final excise duty indicator
Material master data
Each material is assigned a chapter ID
Excise tax rate
For every chapter ID and final excise duty indicator you maintain the rate of
excise duty
If your business only qualifies for partial CENVAT credit you must customize
your system accordingly
Activities
Let us consider an example to illustrate how the system determines which rate
of excise duty to apply to a material Assume you are posting a sale of ball
bearings to a customer The system automatically determines the rate of excise
duty as follows
Looks up the customer master data to see what status you have assigned the
customer
Lets assume youve assigned the customer status 3
Looks up the plant master data to see what status you have assigned the plant
Similarly your plant has status 2
The system looks up the table under Excise Indicator for Plant and Customer to
see what the final excise duty indictor is for customer status 3 and plant status
2 It is 7
The system determines the chapter ID of the ball bearing for the plant
Letrsquos assume the chapter ID at plant for the ball bearings is 100001
Finally the system looks up the table under Excise Tax Rate to see what rate of
duty applies to chapter ID 100001 under status 7
Plant Master (Excise Data) Definition
The part of the plant master record that contains information relating to Indian
excise duty
Use
In conjunction with other data this data is used to calculate excise duty on
various transactions
To maintain the data from the SAP Easy Access screen choose Indirect Taxes reg
Master Data reg Excise Rate Maintenance and then select the following options
described below
Structure
The excise part of the plant master is divided into the following screens
Excise Indicator for Plant
On this screen you enter your plants tax registration numbers which are used
for various forms of correspondence and reports
1 Central sales tax (CST) number
2 Local sales tax (LST) registration number
3 Permanent account number (PAN)
In order for the system to be able to calculate which rate of excise duty to apply
on purchases for this plant you must also assign it a plant excise duty status
(for more information about how this works see Determination of Excise Duty
Rates)
Excise Indicator for Plant and Vendor
On this screen you define the final excise duty indicator (for more information
about how this works see Determination of Excise Duty Rates)
Excise Indicator for Plant and Customer
On this screen you define the final excise duty indicator (for more information
about how this works see Determination of Excise Duty Rates)
Automatic Creation of Excise Invoices Use
The SAP System can automatically create an outgoing excise invoice for you
immediately you post a commercial invoice (or a pro forma invoice) for a
customer sale This function applies to excise invoices for sales from factories
only
Prerequisites
To activate this function in the Country Version India (CIN) Implementation
Guide (IMG) make the following settings
1 Under Global Settings reg Excise Groups select Create EI
This activates the automatic creation function
2 Under Sales and Distribution reg Utilization Determination
Here you specify which CENVAT accounts the system is to post the different
types of excise duty to
3 Under Sales and Distribution reg Excise GroupndashSeries Group Determination
Here you specify which excise group and series group the excise invoices are to
be created for
Features
When you post an invoice the system creates an excise invoice All the
information that it needs to create the excise invoice is provided either by the
invoice or by the Customizing settings that you have made in Sales and
Distribution It also determines the excise invoice type automatically by means
of a user exit
Creating Excise Invoices for Stock Transfers 1 From the SAP Easy Access screen choose Indirect Taxes reg Procurement reg
Excise Invoice reg For Depot reg CreateChangeDisplay
2 In the Material document field enter the goods receipt number and choose
The system displays the information from the goods receipt for example the
sending plant the excise registration the range the division and the
collectorate
3 Choose Details
The system copies the items from the goods receipt document In the depot it is
possible to have a separate excise invoice at line item level
4 Enter the internal document number of the excise invoice sent by the factory
5 Choose More documents to go the excise invoice details screen
6 Enter the internal document number of the excise invoice from the factory
The system copies the information to the line item (for example the excise
invoice number the excise invoice date the item number the chapter ID the
excise invoice quantity the amount of excise duty paid the excise base value
and the serial number of the Part II register entry with which the excise was
paid)
You can change the receipt quantity to match the actual quantity received at
the depot if necessary The system automatically adjusts the excise
accordingly
7 Go back to the item details screen
8 Save the excise invoice
Creating Excise Invoices for Direct Purchases 1 From the SAP Easy Access screen choose Indirect Taxes reg Procurement reg
Excise Invoice reg For Depot reg CreateChangeDisplay
2 In the Material document field enter the goods receipt number and choose
The system displays the information from the goods receipt for example the
sending plant the excise registration the range the division and the
collectorate
You can also maintain the excise registration details for the ship-from party as
for with the vendor The ship-from can be different from the vendor code (The
delivering plant can be maintained as a ship-from in the system When a valid
ship-from is entered the excise registration details copied from the vendor will
be overwritten by the ship-from excise registration details)
The ship-from registration details displayed can also be overwritten manually
The dealers commercial invoice number can be stored in the vendor excise
invoice number as in this case the dealer himself will not have an excise
invoice
3 Choose Details
The system copies the items from the goods receipt document It also copies the
vendors excise invoice number and the serial numbers of the entries in the RG
23A RG 23C and personal ledger account (PLA) registers
4 Enter the internal document number of the excise invoice sent by the factory
5 Select an item and choose More documents to go the excise invoice details
screen
In the case of direct purchases there will not be any excise invoice in the
system so leave the internal document field blank The vendors invoice will
show the details of the excise invoices through which excise has been paid for
the item that is being dispatched You can enter these details here
6 For each item the chapter ID excise base value and excise duty amounts
are defaulted from the purchase order You can change them if there is any
difference Enter the excise amount paid and the receipt quantity You also
enter the Part II register serial numbers with which the excise duty was paid and
the excise registration information from the original excise invoice
7 Go back to the item details screen
8 Save the excise invoice
The system creates an entry in register RG 23D You can change the excise
invoice as long as it has not been used in any sales
Assigning Excise Invoices to a Delivery Use
You follow this procedure to specify which excise invoices are to be assigned to
a delivery from a depot (or other material document)
You can also automate this procedure using the batch selection program
(J_1IJCHK) by making the appropriate Customizing settings in the Country
Version India (CIN) Implementation Guide (IMG)
Procedure
1 From the SAP Easy Access screen choose Indirect Taxes reg SalesOutbound
Movements reg Excise Invoice reg For Depot reg CreateChangeDisplay reg Delivery
or Material Document reg RG 23D Selection
2 Enter the delivery document number or the material number and choose
3 Select the excise invoice you want
4 Choose
5 Choose Excise invoice
A list of excise invoices appears These are the excise invoices at the depot with
a balance quantity
The system also shows a list of the A certificates that can be used You can pick
up any of the A certificates but they must be for the same excise invoice You
can only pick up an A certificate in its entirety You cannot select part of an A
certificate
6 Select the excise invoices that are relevant to the delivery
7 Specify what quantity to be used from each excise invoice
The system recalculates the excise accordingly
8 Go back to the item details screen
9 Save the data
Result
The system creates an entry in register RG 23D and generates the depot excise
invoice numbers
If you selected any A certificates the system also generates additional entries in
the RG 23D register The system marks the original A certificates as updated so
that they cannot be used for any other removals
Continue see Volume 2 (Next post)
EXTERNAL SERVICE MASTER
EXTERNAL SERVICE MASTER ESM
We procure the different type of services from vendors they are-
1048774 Hardware amp software services
1048774 Construction amp transportation services
1048774 Machinery services
1048774 Annual maintenance services
1048774 Present to and breakdown service Etc
Service Procurement Cycle -
1048774 Requirement identification
1048774 Source determination
1048774 Source selection
1048774 Service master
1048774 Service PO
1048774 Service entry sheet acceptance
1048774 Invoice with respect to service entry sheet
Steps to perform services -
1 Create service master (AC03)
2 Create Service PO (ME21N) with AC Assignment category lsquoKrsquo amp Item
Category lsquoDrsquo
3 Create service entry sheet (ML81N)
4 Invoice with respect to Service Entry sheet
Customize settings
(For service category Number Ranges amp organization status for service
category)
SPRO 1048774 IMG 1048774 MM 1048774 ESM 1048774 Service Master
1048774 Define organization Status for service Categories
1048774 Define Service Category
1048774 Define Number Ranges
Define organization Status for service Categories
bull Click on New Entries
bull Org service Category
bull BDS (Basic data service is stored in service master record under this service
category)
bull CNST 1048774 Controlling Status
bull PUST 1048774 Purchasing data Status
bull SDST 1048774 Sales amp Distributed Status
bull Org status description service category 1048774 Press Enter amp Save
Define Service Category
bull Same path as above
bull Select Standard
bull Click on Copy as
bull AC reference 1048774 always takes as 0006
bull Enter amp Save
Define Number Ranges
Click on groups 1048774 Groups 1048774 Insert 1048774 select enter Number Ranges
Select the service category
Click on Element
Select Group amp Click on Element Group
Save
Create Service Master - (AC03)
Click on Create New Services
Service Number (any number) Service Category
Basic unit of measure (Hours lsquoHrsquo)
Enter
Basic Data 1048774 Master Service Group 1048774 007
Valuation class 1048774 3200 1048774 Enter 1048774 Save
To See the Service list 1048774 AC06
Create Service PO (ME21N)
AC assignment category lsquoKrsquo Item Category lsquoDrsquo
Enter the Short text Quantity Delivery date Net Price Material group Plant
Storage Location
Enter service number in Service Tab (Item Details) quantity price Enter
Account Assignment 1048774 GL Account Number eg400000
Cost Center eg 9999
Press Enter amp Save
Create Service Entry Sheet - ML81N
Select other purchase order (enter PO number) 1048774 Enter 1048774 Click on Create1048774 Enter
Short Text 1048774 Enter 1048774 Service Number 1048774 Enter ndashClick on Flag button 1048774 Save
Take Service entry Sheet Number
Go to Invoice MIRO 1048774 Enter company code 1048774 Select Service Sheet Option 1048774 Enter
Service Entry Sheet Number 1048774 save it
Physical Inventory and Inventory Management
Physical inventory Process - 1 Create Physical inventory document
T Code MI01 ndash Create single inventory document
T Code MI31 ndash Create multiple physical inventory documents
I Enter the desired fields ie material material type site storage location and
Maximum number items Documents ndash 100 etc 1048774 Press Enter
II Click on Process Session
III Select the line items and click on the process
IV System displays a dialog box select Background and click on process
Inventory document is created
2 Print Inventory Document and handed over to responsible person say
Manager
3 Enter Physical Inventory count
T Code MI04
i Enter the physical inventory document number Fiscal year count date 1048774 Press
enter
ii Enter the Material Quantity and click on post
4 Listing of difference
T Code MI20
Enter the physical inventory document number and execute system displays a
screen wherein we will be able to view the differences
5 Post the differences
T Code MI07 amp Mov Type 701 amp 702
Enter the physical inventory document number year posting date enter the
difference and post
INVENTORY MANAGEMENT Maintaining stock by value or by quantity is called inventory The total inventory
management deals with the goods movement of the material
Goods movement -
It is a process in which transaction resulting change in stocks It is further sub-
divided into three categories
1 Goods Receipt (GR)
2 Goods Issue (GI)
3 Transfer Posting (TP)
Goods Receipt (GR) - It is a goods movement in which receipt of goods is
posted for vendor or for production A GR posted in the system will leads to
increase in stock No Concept of Price or value
Goods Issue (GI) - It is goods movement in which material withdrawal is
posted for consumption or for customer A GI posted in system will leads to
decrease in stock
Stock Transfer (ST) - It is method of removal of material from one location
and transferring it to another location This process is performed between two
plants and two storage locations
Transfer Posting (TP) - It is a general term of stock transfer that changes the
stock type or stock categories The difference between transfer posting and
stock transfer is -
TP is logical stock transfer and ST is a physical stock transfer
Movement Type - It is a three-digit code which plays a role of important
control function in inventory management It acts as a central role in automatic
account determination It determines which stock account or consumption
account is updated in financial accounting
Reservation - It stores requisition created from particular cost center to
particular department for issuing the material reservation posted in the system
It leads to decrease in stock
Stock Types - The different stock types are
1 Unrestricted use stock
2 Quality inspection stock
3 Blocked stock
4 Warehouse stock
Transaction code -
1 To Create GR - MIGO
2 To Create GI - MB1A
3 For Transfer Posting - MB1B
4 To display MaterialGR document ndash MB03
5 To create reservations - MB21 MB22 MB23
6 To See Stock Overview - MMBE
7 To enter Other GR - MB1C
When GR is posted in the system
1 Material document is created - MB03
2 Accounting Document is generated - MB03
3 MMR updated - MM02 MM03
4 PO history updated - ME23N
Movement Typersquos
Movement Types under GR - 101 331333335501503505551553555
561351 (For all Mov Typersquos there is a reversal eg 101 has 102 Note No
reversal for 121)
Movement Typersquos under GI - 201 331333335551553555
Transfer Posting It is performed in three ways
1 TP BW Plant to Plant
2 TP BW Storage Location to Storage Location
3 TP BW Stock to Stock
Movement Types under TP BW Plant to Plant
301 - 1 step
303 amp 305 - 2 step
Movement Type under TP BW Storage location to Storage Location
311 - 1 step
313 amp 315 - 2 step
Movement Type under TP BW stock to stock
321 323 325 343349
To Cancel the GR Movement type 102
Return delivery to vendor movement type 122 amp T Code MIGO
Transfer Posting Stock to Stock
From Blocked stock to Quality Inspection
T Code MB1B amp Movement Type 349
From Blocked stock to Unrestricted Stock
T Code MB1B amp Movement Type 343
From Quality Inspection to Unrestricted Stock
T Code MB1B amp Movement Type 321
Transfer Posting from Plant to Plant
For One Step Movement Type 301
For Two Steps Movement Type 303 amp 305
After posting stock will display in Stock in Transit (Plant)
To receive material by receiving Plant Movement Type 305
Transfer Posting BW Storage Location to Storage Location
Under One Plant BW two Storage Locationrsquos Movement Type 311
Back to Parent storage Location Movement Type 313 (It Show stock in transfer)
use Movement type 315 at Parent storage location
To create Goods Issue (GI) T Code MB1A amp Movement Type 201
To Create Reservations T Code MB21 MB22 amp MB23
Creation of GI wrt Reservations
T Code MB1A amp Movement Type 201
Click on Reservation Enter Reservation Number 1048774 Click on Adopt + Details
GR wrt Reservations T Code MIGO amp Select as Reservation instead of GR
GR without PO Movement type 501 amp T Code MB1C Select others instead of
Purchase order Enter Material Quantity Plant Storage Location 1048774 Press Enter
Partner Option will be visible (Vendor) 1048774 Save it
Invoice - Invoice is a document which is issued to a buyer (Company) from the
supplier (vendor) for the payment The following information is maintained in
invoice
Invoice date Posting date Invoice ref number tax amount amount tax code
terms of payments vendor address banking accounting information etc
When invoice document is posted in the system
bull Invoice document created
bull Accounting document is generated (MIR4)
bull PO history updated (ME23N)
bull FI document created (FB03)
PRICE DETERMINATION PROCESS or PRICING PROCEDURE
CONDITIONS OR PRICING PROCEDURE or PRICE DETERMINATION PROCESSWe deal with the Pricing Procedure for vendors
PB00 Gross Price (info record contract scheduled Agreement)
PBXX Gross Price (PO)
FRA1 Freight
RA00 Discount on net
RA01 Discount on Gross
ZA00 Surcharge on net
SKT0 Surcharge discount
ZPB0 Rebates
MWVS Input Tax
MWAS Output Tax
BASB Base Amount
RM0000 Calculation Schema or Pricing Procedure
(PB00 amp PBXX)
RM0002 Calculation Schema or Pricing Procedure
(PB00)
PB00 --gt AB00
Copy the Standard one and create new one (ours)
RM0000 contains all the condition types
Pricing Procedure (PP)
We define the pricing procedure to define condition supplement for the material
price The condition supplement specifies the discount surcharge freight etc
that we want a system every time to access material price condition records
The total value of the material is calculated or based on all addition and
subtraction ie discounts surcharge tax freight etc
Condition Table
It is a table which defines the structure of condition record key
Condition Record
It is a data record used to store conditions or condition supplements ie
condition like discount freight and surcharge Tax etc
Condition Type
It is used for different functions In Pricing the condition types leads you to
differentiate different types of discounts in output determination batch
determination difference between two output types such as delivery note or
order confirmation between different strategy types
Access Sequence
It specifies the order in which system searches or access the condition records
from condition table
Difference between PB00 amp PBXX
1 Condition maintained in PB00 is time dependent whereas PBXX is time
independent
2 Condition type PB00 ndash used for IR RFQ Contract Schedule Agreement
Condition type PBXX ndash used for PO
Calculation Schema
The main function of calculation schema is to provide framework of steps for the
price determination process to specify the discounts surcharge freight rebate
etc
It also determines the sequence of conditions that are to be followed and in
which sequence
Schema Group Vendor
The main function of it is to identify or to pick the right process and conditions
for a particular vendor
Schema Group Purchasing Organization
Key that determines which calculation schema (pricing procedure) is to be used
in purchasing documents assigned to the relevant purchasing organization
Schema Group
It allows to group together the purchasing organizations which uses the same
calculation schema
Steps -
1 Create Access sequence
2 Create condition types
3 Create pricing procedure or calculation schema
4 Link pricing procedure amp access sequence to condition type
5 Create schema group for vendor
6 Create schema group for purchase organization
7 Assign schema group vendor-to-vendor master record in purchasing data
view
8 Assign schema group purchase organization to our purchase organization
9 In inforecord purchase organization data enter condition types and pricing or
calculation procedure
CUSTOMIZE SETTINGS -
SPRO --gt IMG--gtMM--gtPUR--gtConditions --gtDefine price determination Process
1 Define access sequence
2 Define Condition type
3 Define cal Schema
4 Define schema group
o Schema group vendor
o Schema group purchasing group
5 Assignment of schema group to PUR org
6 Define schema determination agrave determine cal schema for standard PO
PURCHASE ORDER
PURCHASE ORDER
PO is an external document created for the procurement of materials and
services from vendor The document of PO is also divided into 4 parts as PR -
1 Document Overview
2 Header (DeliveryInvoice Conditions Address Partners Org data status)
3 Item Overview (AC assign cat Item Category Material Plant Del date SL)
4 Item Details (Material data Confirmations condition control delivery delivery
Schedule Quantitiesweights invoice)
A procurement type is defined for each of the document items The following
procurement types exist
1048774 Standard
1048774 Subcontracting
1048774 Consignment
1048774 Stock transfer
1048774 External service
bull There are different ways to create PO -
1 Directly through transaction code ME21N
2 With reference to PR
3 With reference to RFQ
4 With reference to info records
5 With reference to Contracts
6 With reference to Cost Centre GL Account (cost element) for consumable
items or not stock items with account assignment category lsquoKrsquo (K= cost centre)
(For non stock and consumables)
0 COMMENTS L INKS TO THIS POST
LABELS PO PURCHASE ORDER
Reaction
s
PURCHASE REQUISITION T CODE ME51 or ME51N
Purchasing Requisition -
It is a request or instruction from particular department (Cost Centre) to
purchasing department to procure certain quantity of material and services It is
only one internal document in SAP-MM
Purchasing Requisition document is divided into four parts -
bull Document Overview
bull Header
bull Item Overview
bull Item Details
Document Overview -
It displays the list of purchasing documents which are created previously
according to our requirement
Header -
Any text message or information is maintained
Item Overview -
In this we enter material plant delivery date quantity storage location
purchasing group AC assignment category Item category etc
Item Details -
It displays the detailed information about item overview (like Master data
valuation source of supply contact person delivery address status etc)
0 COMMENTS L INKS TO THIS POST
LABELS PR PURCHASE PURCHASE ORDER PURCHASE REQUIS IT ION SALES ORDER
Reaction
s
Automatic PURCHASE ORDER (PO) How Automatic PO raised
How Automatic PO raised
At fixed time say 1230 AM automatic scheduler runs and checks whether the
stock is less than or equal to the replenishment point If stock is less than or
equal to Repli Point than PR raised automatically to Purchasing Deptt
bull Activate the option automatic PO in purchasing view in material master record
bull Activate the option automatic PO in purchasing data view in vendor master
record
bull Maintain Source List amp select fixed vendor
bull PR crated automatically
bull Automatic creation of PO from PR ndash ME59
Enter the Purchasing group purchasing organization Vendor Plant and
Purchasing Requisition Document Number 1048774 Execute
RELEASE PROCEDURE Release strategyThe main function of Release procedure is to determine the approval process
or the release process for the procurement of material amp services rather than
relying for manual signatures The release procedure contains release strategy
Release Strategy (RS)
A plan defining the release codes with which a purchase requisition item a
complete purchase requisition or a complete external purchasing document
must
be released (that is approved) and the sequence in which release is to be
effected
using these codes It is a unique set of conditions sequence and level of release
It is a 2 digit code eg S1 S2 S3etc
The Release Strategy contains the following -
bull Release Group
bull Release Codes
bull Release Indicators
bull Release Prerequisite
Release Group -
It is a 2-digit code which is assigned with a class (Class contains group of
characteristics) It contains one or more release strategies
Release Codes -
It is a 2digit code which identifies the department or responsible person for
the approval process amp release process
Eg AA - Manager
BB - Sr Manager
CC - Vice President
DD - Managing Director
Release Indicator -
It is a Code that represents the release status If the proper approval
process is performed that the release Strategy has to be release if it is not
performed than the Release Strategy is blocked
R ndash Release
B ndash Blocked
Release Conditions -
It determines the type of the release strategy
For eg
bull If the price ranges from 1 to 1000 It is approved by AA BB and CC
bull If the ranges from1001 to 1lac then it is approved by AA BB CC and DD
- 80 -
Release Prerequisite
It will informs the system which RS has to be take place in the PO CEKKO is
a communication structure where it displays the field names amp field lengths to
create characteristics ie we maintain characteristics in customizing by
selecting
the field names from this communication structure for all external documents
CEBAN is used for the purchasing requisition
Characteristics -
1 Net value of PO --- GNETW (GSWRT for PR)
2 Plant --- WERKS
3 Purchasing organization -- EKORG
4 Purchasing Group --- EKGRP
5Material group ndashMATKL
CUSTOMIZE SETTINGSSPRO--gtIMG--gt MM--gt Purchasing--gtPO--gt Release Procedure for PO
1 Edit Characteristics T Code CT04
2 Edit Class T Code CL02
3 Define Release Procedure for PO
4 Check Release Strategy
Edit Characteristics -
Characteristics - eg NET VALUE OF VALUE
Click or Create Button
Under Basic Data
Description - Value for PO
Status - Release
Data Type - Currency Format
No Of Characters - 15
Currency - EUR
Activate multiple values amp Internal Values Allowed
Additional Data
Table name - CEKKO
Field Name - GNETW
Values
Activate Additional Values
Save the document
Create another Characteristic for Plant -
Plant date Create ndash Description Status
Data Type Characteristic Format
Number of Characteristics 4
Activate Multiple Values
Additional data-
Table Name - CEKKO
Field Name - WERKS
Values
Activate Additional Values
For Purchasing Organization Name - EKORG
For purchasing Group EKGRP
Edit Class
Class - SAPMM
Class Type - 032 Release Strategies
Click on Create button
Basic Data
Description - Class for PO
Status - Released
Valid From _____ Valid to _____
Click on Characteristic
Characteristic
Enter all the Characteristics Created amp Save it
Define Release Procedure for PO-
bull Release Group
bull Release Codes
bull Release Indicators
bull Release Strategies
bull Workflow
Release Group - New Entries Release Group Class and Description
Press Enter amp Save
Release Code - New Entries
Group Codes Description
99 AA Manager
99 BB Sr Manager
99 CC Vice President
99 DD Managing Director
Press Enter amp Save
Release Indicator - (B ndash Blocked R - Release)
New Entries
Release Indicators Description
B Blocked
R Released
Release Strategies -
New Entries
Release Group 99
Release Strategy S1
Release Codes AA BB CC and DD
Click on Release Prerequisites
Release Status -
Continue
Classification
Enter the Value (Same Price)
Plant (9999)
Go Back amp Save it
Release Simulation - Simulate Release
Create a PO -
There are two ways to release the PO
Individual releaseME28
Collective release ME29N
How to delete procedure
Delete Release GP
Create Release RG
Delete R Strategies
Delete R Code
Delete R Group
SAP R3 SYSTEM LANDSCAPE
System LandscapeThe system landscape contains all the SAP Systems that you have installed It
can consist of several system groups whorsquos SAP Systems are linked by transport
routes
After you decide which clients you need and which roles you want them to have
you need to decide how to distribute them amongst the different SAP Systems
You can set up multiple clients independently of one another in a single SAP
System However when you configure the data you must remember that cross-
client Customizing settings and Repository objects are identical for all clients in
a single SAP System Changes made in one client apply immediately to all
clients in the system
Three-System Landscape
SAP recommends a three-system landscape in which each of the central clients
has its own SAP System
This consists of a development system DEV a quality assurance system QAS
and a production system PRD The development system contains the
Customizing client CUST the quality assurance system contains the quality
assurance client QTST and the production system contains the production client
PROD Make all changes to Customizing data and Repository objects in the
Customizing client When you release the corresponding change requests they
are transported into the quality assurance client This means that changes to
cross-client data only appear in the quality assurance client after the transport
In the quality assurance client you can test whether the transports are
complete or whether any linked changes are missing and are still in unreleased
change requests If the test is successful the change requests are transported
into the production client The production client is completely separate from the
other clients as regards cross-client data
SPECIAL STOCKS amp SPECIAL PROCUREMENT TYPES
Special Stocks are those stocks which are not belongs to our company code
These are not placed in our storage locations amp no physical inventory is
performed and treated as special stocks for the reason of ownership
Different types are of Special Stocks are as follows
1 Subcontracting
2 Consignment
3 Pipeline
4 Stock transfer
5 Third party
6 Returnable transport packaging
7 Sales order stock
8 Project stock
SUBCONTRACTING
In subcontracting process we create subcontracting PO to supply or issue
subcomponents to vendor in order to get final product The price maintained in
subcontracting PO is a service charge paid to vendor
Steps to perform subcontracting
1 Create subcontracting inforecord (Optional)
2 Create subcontracting PO with item category L
There are to ways to supply subcomponents to vendor
bull Manually maintain the subcomponents in the subcontracting
PO though explode BOM
bull Through BOM (Bill of material) T Code CS01 CS02 amp CS03
3 Create Transfer Posting with Movement Type 541 to issue the subcomponents
to the vendor
4 Goods Reciept
5 Invoice Reciept
Path ME21N ---gt Enter Item Category L --gt Material (End Product) PO
Quantity Delivery Date Net Price Plant --gt Click on Item Details --gt Tab
Material Data -- gtComponents select Explode BOM --gt Click on Components
button --gt Enter the subcomponents --gt Go back amp Save
Create Transfer Posting with movement type 541 amp T Code MB1B
GR MIGO
IR MIRO
CONSIGNMENT - (No Concept of Invoice)
In consignment process we will not create Purchasing document for the vendor
vendor himself send the material to our plant though the material is available
to our plant the responsibility amp ownership of the material is of vendor Aliability
only arises when the material withdrawal (Consumption) is posted in the system
from consignment stock
Steps
1 Create Consignment info record (mandatory)
2 Create Consignment purchase order with item category lsquoKrsquo amp maintain Info
record number
3 Create GR Movement type lsquo101Krsquo
4 Create GI Movement Type lsquo201Krsquo
5 Consignment settlement T Code MRKO
Path --gtME11 --gt In info record --gt Purchasing Org Data 1 views of info record
enter the tax code and save it
--gt Create Consignment Purchase Order ME21N (Price option is grayed out with
price zero)
--gt Create GR with movement type 101K
--gt Create Goods Issue (GI) T Code MB1A amp Movement Type 201K Enter Cost
center vendor
--gt Consignment Settlement T Code MRKO Click Activate Consignment Activate
Settle Execute
--gt Display the Document Number ie Invoice receipt T Code FB03
PIPELINE PROCESS (No Concept of Invoice)
In pipeline handling your company does not need to order or store the material
concerned It is ready available to you as and when required via pipeline (eg oil
or water) or some other type of cable (eg electricity) Consumption of the
material is settled with the vendor on a regular basis
Steps
1 Create a Material master record with material type PIPE
2 Create Pipeline info record
3 Create GI with movement type 201P
4 Pipeline settlement T Code MRKO
RETURNABLE TRANSPORT PACKAGING (RTP)
When company orders goods from a vendor the goods are delivered with
returnable transport packaging (pallets containers) that belongs to the vendor
and is stored on our premises until you return it to the vendor
Steps
1 Create Material master record with material type LEIH
2 Create PO
3 Create GR by maintaining RTP material by selecting the option transport
equipments with movement type 501M
4 IR
STOCK TRANSFER
In stock transfer processing goods are procured and supplied within a company
One plant orders the goods internally to another plant (receiving plantissuing
plant) The goods are procured with a special type of purchase order the stock
transport order
Steps
1 Create a Material master in both supplying and receiving plant
2 Create stock transport order (STO) with item category lsquoUrsquo
3 Create transfer posting with movement type 351 amp T Code MB1B (Go to
MMBE stock overview the stock will decrease in supplying plant and it will not
update stock of receiving plant it will be under stock in transit)
4 Create GR stock will update in receiving plant
This scenario is under one company code between two plants
SAP IMPLEMENTATION PROCESS End to End Inplementation of SAP
First we have to prepare documentation about the client business (like turnover
vendors customers payments materials production marketing etc)
The implementer company made two teams (1) Steering team (2) Steering
community
Steering team (SAP functional consultants) prepares a detailed
documentation about the client with the help of core team (client company
team)
amp this study is known as Feasibility Study After that the steering team handed
over this documentation to Steering community (Project manager Sr software
engineer and other higher authorities)
Steering community prepares the BBP (Business Blue Print) BBP
Prepares in MS-Word
10487741048774 ASAP - Accelerated System Application Product in Data Processing
10487741048774 Business Process - ASAP Methodology
1 Project Preparation
2 BBP (Business Blue Print)
3 Realization
4 Final Preparation
5 Go live amp Support
10487741048774 Project Preparation -
It consists of identifying team members amp development strategy as
how to go
AS ndash IS (Existing Process followed requirements)
TO ndash BE (Requirement analysis and best process recommended)
Difference between (AS ndash IS) amp (TO - BE) is called GAP Analysis
10487741048774 Business Blue Print (BPP) -
It is a legal documentation between client amp the company
(implementer service provider) We have to understand the current business
process of client amp analyzing the business amp prepare documentation It is a
detailed documentation for the client
10487741048774 Realization -
This Phase is used to Implement or migrate the entire business of
client from Non-SAP environment to SAP environment
10487741048774 Final Preparation -
This phase is used for testing amp end user training After successfully
completion of this phase client is ready to run business in SAP R3
10487741048774 Go live amp Support -
In this phase we deliver the project end date amp end user training at
client site
THIRD - PARTY PROCESSING
THIRD - PARTY PROCESSING
In third party processing your company passes on a sales order to an external
vendor who sends the goods directly to the customer The sales order is not
processed by your company but by the vendor Third-party items can be
entered in purchase requisitions purchase orders and sales orders Third party
processing is integrated with Sales and Distribution If the sales order contains
third-party items the system creates a purchase requisition from the order
Steps
1 Create MMR with sales views and maintain Division Distribution channel
sales org item category group and general item category group ndash BANS (Third
party item) amp Account group Sold to party
2 Create Customer master record T Code XD01 XD02 XD03
3 Create sales order T Code VA01 VA02 VA03 (PR generated automatically)
4 PO - T Code ME21N
5 GR ndash T Code MIGO
6 IR ndash T Code MIRO
7 Sales Billing Billing Document T Code VF01 VF02 VF03
Creating Excise Invoices for Direct Purchases 1 From the SAP Easy Access screen choose Indirect Taxes reg Procurement reg
Excise Invoice reg For Depot reg CreateChangeDisplay
2 In the Material document field enter the goods receipt number and choose
The system displays the information from the goods receipt for example the
sending plant the excise registration the range the division and the
collectorate
You can also maintain the excise registration details for the ship-from party as
for with the vendor The ship-from can be different from the vendor code (The
delivering plant can be maintained as a ship-from in the system When a valid
ship-from is entered the excise registration details copied from the vendor will
be overwritten by the ship-from excise registration details)
The ship-from registration details displayed can also be overwritten manually
The dealers commercial invoice number can be stored in the vendor excise
invoice number as in this case the dealer himself will not have an excise
invoice
3 Choose Details
The system copies the items from the goods receipt document It also copies the
vendors excise invoice number and the serial numbers of the entries in the RG
23A RG 23C and personal ledger account (PLA) registers
4 Enter the internal document number of the excise invoice sent by the factory
5 Select an item and choose More documents to go the excise invoice details
screen
In the case of direct purchases there will not be any excise invoice in the
system so leave the internal document field blank The vendors invoice will
show the details of the excise invoices through which excise has been paid for
the item that is being dispatched You can enter these details here
6 For each item the chapter ID excise base value and excise duty amounts
are defaulted from the purchase order You can change them if there is any
difference Enter the excise amount paid and the receipt quantity You also
enter the Part II register serial numbers with which the excise duty was paid and
the excise registration information from the original excise invoice
7 Go back to the item details screen
8 Save the excise invoice
The system creates an entry in register RG 23D You can change the excise
invoice as long as it has not been used in any sales
Assigning Excise Invoices to a Delivery Use
You follow this procedure to specify which excise invoices are to be assigned to
a delivery from a depot (or other material document)
You can also automate this procedure using the batch selection program
(J_1IJCHK) by making the appropriate Customizing settings in the Country
Version India (CIN) Implementation Guide (IMG)
Procedure
1 From the SAP Easy Access screen choose Indirect Taxes reg SalesOutbound
Movements reg Excise Invoice reg For Depot reg CreateChangeDisplay reg Delivery
or Material Document reg RG 23D Selection
2 Enter the delivery document number or the material number and choose
3 Select the excise invoice you want
4 Choose
5 Choose Excise invoice
A list of excise invoices appears These are the excise invoices at the depot with
a balance quantity
The system also shows a list of the A certificates that can be used You can pick
up any of the A certificates but they must be for the same excise invoice You
can only pick up an A certificate in its entirety You cannot select part of an A
certificate
6 Select the excise invoices that are relevant to the delivery
7 Specify what quantity to be used from each excise invoice
The system recalculates the excise accordingly
8 Go back to the item details screen
9 Save the data
Result
The system creates an entry in register RG 23D and generates the depot excise
invoice numbers
If you selected any A certificates the system also generates additional entries in
the RG 23D register The system marks the original A certificates as updated so
that they cannot be used for any other removals
CIN - Country India Version ~ Vol 2
Continue Volume 1
Creating Excise Invoices
Use
This is the procedure that you follow to create an excise invoice for the less
common types of goods movement
Procedure
1 From the SAP Easy Access screen choose Indirect Taxes reg SalesOutbound
Movements reg Excise Invoice reg For Other Movements reg CreateChangeDisplay
reg
2 On the selection screen enter data as required including
(i)Reference
group box
Specify which document you want to create the excise invoice for and which
excise group it is for
(ii)Details
group box
Specify the vendor or customer that you are sending the invoice to
3 Choose
If you entered an internal document number the system copies the item details
from it
4 Choose
5 Enter line items for each of the materials to be included in the excise invoice
For each item enter the following data
(i)Material
(ii)Quantity
(iii)Unit of measure
(iv)Base value
(v)Excise duty
6 To pick the rate and amount from a specific excise invoice choose Get excise
invoice
7 Save the excise invoice
If you are using the one-step procedure the system creates and posts an excise
invoice Otherwise the system saves the information but does not make any
postings it now has to be verified
Verifying and Posting Excise Invoices
Use
You follow this procedure to verify that the information in an excise invoice that
has already been created and to post it once you are satisfied
Procedure
From the SAP Easy Access screen choose Indirect Taxes reg SalesOutbound
Movements reg Excise Invoice reg For Other Movements reg Posting
1 Enter the internal document number of the excise invoice
2 Choose Release to accounting
The system displays the excise invoice The excise duty that is to be posted is
displayed at the foot of the screen which you can change if necessary
3 To access the balance utilization choose
4 To display the balance available on the CENVAT accounts choose Account
balances
5 Save the excise invoice
The system generates the accounting documents
6 To print the excise invoice choose
Making a Transfer Posting
Use
In this procedure you make a transfer posting for the goods ordered by another
plant For more information about this function see Entering the Removal from
Storage at the Issuing Plant
Procedure
1 From the SAP Easy Access screen choose Logistics reg Materials Management
reg Inventory Management reg Goods Movement reg Transfer Posting
2 Choose Movement type reg Transfer posting reg Plant to plant reg To stock in
transit
3 Enter the number of the issuing plant and storage location
4 Choose To purchase order
5 In the dialog box enter the number of the stock transport order that the
receiving plant created and choose
6 Check the data
7 Save the transfer posting
Transaction Codes for India
Transaction Action
J1I2 Prepare a sales tax register
J1I3 Create outgoing excise invoices in batches
J1I5
Update the RG 1 and Part I registers
J1I8
Post the challan used to remit TDS
J1IC194C
Create annual return under section 194 C (Classic TDS)
J1IC194D
Create annual return under section 194 D (Classic TDS)
J1IC194I
Create annual return under section 194 I (Classic TDS)
J1IC194J
Create annual return under section 194 J (Classic TDS)
J1IEX
Incoming Excise Invoices (central transaction)
J1IEX_C
Capture an incoming excise invoice (excise clerk)
J1IEX_P
Post an incoming excise invoice (excise supervisor)
J1INBANK
Post a bank challan
J1INCANC
Cancel a vendor withholding tax certificate
J1INCERT
Print a vendor withholding tax certificate
J1INCHLN
Create a remittance challan
J1INCUST
Post a customer withholding tax certificate
J1INHC
Withholding Tax Migration Health Check Program
J1INMIG
Withholding Tax Data Migration Tool
JI1NCHLC
Create a remittance challan for customers
J1INCC
Print customer withholding tax certificates
J1INMIS
Withholding Tax Information System
JI1NAR
Prepare annual returns (Extended Withholding Tax)
J1IF01
Create a subcontracting challan
J1IF11
Change a subcontracting challan
J1IF12
Display a subcontracting challan
J1IF13
Complete reverse or recredit a subcontracting challan
J1IFQ
Reconcile quantities for subcontracting challans
J1IFR
List subcontracting challans
J1IH
Make a CENVAT adjustment posting
J1IIN
Create an outgoing excise invoice
J1IJ
Assign excise invoices to a delivery for sales from depots
J1INJV
Adjust withholding tax Item
J1INREP
Reprint a vendor withholding tax certificate
J1INREV
Reverse a remittance challan
J1INPR
Calculate withholding tax on clearing accounts
J1INUT
Clear withholding tax on clearing accounts
J1IR
Download register data
J1IS
Process an excise invoice (outgoing) for other movements
J1IU
Process exemption forms
J1IW
Verify and post an incoming excise invoice
J1IX
Create an incoming excise invoice (without reference to purchase order)
J2I8
Transfer excise duty to CENVAT account
J2ID
Archive tax deducted at source (TDS) documents
J2IE
Locate tax deducted at source documents in archive
J2IU
Remit excise duty fortnightly
J2I9
Monthly CENVAT return
J1IG
Excise invoice entry at depot
J1IGA
Create additional excise entry at depot
J2I5
Extract data for excise registers
J2I6
Print excise registers
Sales from Factories
Purpose
This process describes how the SAP System handles the sales process allowing
for the creation of excise invoices which you have to send with each delivery
that is subject to excise duty There are two scenarios depending on whether
you want to send the commercial invoice along with the delivery or at a later
date
Prerequisites
In order for the system to be able to copy the information from document to
document you must have set up the copying control procedures in Customizing
for Sales and Distribution (SD) This differs according to when you want to send
the commercial invoice
1 Along with the delivery
In this case the document flow would be OR (standard sales order type) ndash LF
(standard delivery type) ndash F2 (invoice)
2 At a later date
The document flow would be OR ndash JF (delivery type a copy of LF) ndash JEX (pro
forma billing document type a copy of document type F8) ndash F2
In addition you must also have maintained the settings in the Country Version
India (CIN) Implementation Guide (IMG) by choosing Global Settings reg Assign
Excise Invoice Billing Type to Delivery Type
A sample pricing procedure JFACT is provided for this sales procedure
Process Flow
1 The sales clerk creates a sales order following the
(i)standard procedure
There are special procedures for
(i)Customers in possession of exemption forms
(ii)Exports
2 The shipping clerk creates a delivery again following the
standard procedure
On the initial screen you set the appropriate delivery type (see above)
3 In the warehouse the storeperson issues the goods
The system only allows users to create a pro forma excise invoice if the delivery
is complete so as to prevent them from creating multiple pro forma excise
invoices
4 What you do at this stage depends on whether you want to send the
commercial invoice along with the delivery or whether you want to invoice the
customer later
(A) If the invoice is to be shipped with delivery the shipping clerk
(i)Creates an invoice following the standard procedure
(ii)Creates an excise invoice from the invoice
(B) If the invoice is to be sent on at a later date the shipping clerk
(i)Creates the pro forma excise invoice
The pro forma excise invoice is only required for technical purposes and is not
sent to the customer The system does not make any accounting postings at this
stage
(ii)Creates
an excise invoice from the pro forma excise invoice
In both these cases the system creates an accounting document to post the
excise duty to a clearing account
Instead of creating excise invoices manually you can also have the system
create them automatically Alternatively you can create them in batches
5 You ship the goods
6 When the time comes to invoice the customer you create the invoice
following the standard procedure
Irrespective of the number of excise invoices that you have issued you can
combine the delivery items in a single invoice (if the standard requirements are
met)
Sales from Depots
Purpose
You may sell finished goods directly from the place of manufacture as described
under Sales from Factories or you may first ship them to a separate location for
storage (a depot) from where you will sell them The second procedure is
described here
Sales from depots are handled differently from sales from factories because of
excise law Excise duty is payable when you send the goods from the factory to
the depot but it is not levied again when you sell the goods
Sometimes when you make a final sale of goods from a depot price escalations
could have happened with retrospective effect In such scenarios you need to
pay the extra excise duty at the factory using an A Certificate You need to
register the A certificate details in the RG 23D register and the excise recovered
from the customer
Prerequisites
You have customized
1 Stock transport processing in Customizing for Materials Management (MM)
by choosing Purchasing reg Purchase Order reg Set Up Stock Transport Order
2 The copying control for copying stock transport order NL to excise invoice JEX
You make this setting in the Country Version India (CIN) Implementation Guide
(IMG) by choosing Sales and Distribution reg Assign Excise Invoice Billing Type to
Delivery Type
3 The item category NLN (standard transport order) so that it is relevant for
billing
You do this in the standard IMG in Customizing for Sales and Distribution (SD)
by choosing Sales reg Sales Documents reg Sales Document Item
Process Flow
1 You create the sales order following the
standard procedure
The standard pricing procedure for depot sales is JDEPOT
2 You create the delivery again following the
standard procedure
3 You
assign excise invoices to the delivery or material document
4 You
verify that you have selected the correct excise invoices and post them
Alternatively if you have selected the wrong excise invoices you can cancel the
assignment
5 You create the invoice following the standard procedure
SPECIAL STOCKS amp SPECIAL PROCUREMENT TYPES
Special Stocks are those stocks which are not belongs to our company code
These are not placed in our storage locations amp no physical inventory is
performed and treated as special stocks for the reason of ownership
Different types are of Special Stocks are as follows
1 Subcontracting
2 Consignment
3 Pipeline
4 Stock transfer
5 Third party
6 Returnable transport packaging
7 Sales order stock
8 Project stock
SUBCONTRACTING
In subcontracting process we create subcontracting PO to supply or issue
subcomponents to vendor in order to get final product The price maintained in
subcontracting PO is a service charge paid to vendor
Steps to perform subcontracting
1 Create subcontracting inforecord (Optional)
2 Create subcontracting PO with item category L
There are to ways to supply subcomponents to vendor
bull Manually maintain the subcomponents in the subcontracting
PO though explode BOM
bull Through BOM (Bill of material) T Code CS01 CS02 amp CS03
3 Create Transfer Posting with Movement Type 541 to issue the subcomponents
to the vendor
4 Goods Reciept
5 Invoice Reciept
Path ME21N ---gt Enter Item Category L --gt Material (End Product) PO
Quantity Delivery Date Net Price Plant --gt Click on Item Details --gt Tab
Material Data -- gtComponents select Explode BOM --gt Click on Components
button --gt Enter the subcomponents --gt Go back amp Save
Create Transfer Posting with movement type 541 amp T Code MB1B
GR MIGO
IR MIRO
CONSIGNMENT - (No Concept of Invoice)
In consignment process we will not create Purchasing document for the vendor
vendor himself send the material to our plant though the material is available
to our plant the responsibility amp ownership of the material is of vendor Aliability
only arises when the material withdrawal (Consumption) is posted in the system
from consignment stock
Steps
1 Create Consignment info record (mandatory)
2 Create Consignment purchase order with item category lsquoKrsquo amp maintain Info
record number
3 Create GR Movement type lsquo101Krsquo
4 Create GI Movement Type lsquo201Krsquo
5 Consignment settlement T Code MRKO
Path --gtME11 --gt In info record --gt Purchasing Org Data 1 views of info record
enter the tax code and save it
--gt Create Consignment Purchase Order ME21N (Price option is grayed out with
price zero)
--gt Create GR with movement type 101K
--gt Create Goods Issue (GI) T Code MB1A amp Movement Type 201K Enter Cost
center vendor
--gt Consignment Settlement T Code MRKO Click Activate Consignment Activate
Settle Execute
--gt Display the Document Number ie Invoice receipt T Code FB03
PIPELINE PROCESS (No Concept of Invoice)
In pipeline handling your company does not need to order or store the material
concerned It is ready available to you as and when required via pipeline (eg oil
or water) or some other type of cable (eg electricity) Consumption of the
material is settled with the vendor on a regular basis
Steps
1 Create a Material master record with material type PIPE
2 Create Pipeline info record
3 Create GI with movement type 201P
4 Pipeline settlement T Code MRKO
RETURNABLE TRANSPORT PACKAGING (RTP)
When company orders goods from a vendor the goods are delivered with
returnable transport packaging (pallets containers) that belongs to the vendor
and is stored on our premises until you return it to the vendor
Steps
1 Create Material master record with material type LEIH
2 Create PO
3 Create GR by maintaining RTP material by selecting the option transport
equipments with movement type 501M
4 IR
STOCK TRANSFER
In stock transfer processing goods are procured and supplied within a company
One plant orders the goods internally to another plant (receiving plantissuing
plant) The goods are procured with a special type of purchase order the stock
transport order
Steps
1 Create a Material master in both supplying and receiving plant
2 Create stock transport order (STO) with item category lsquoUrsquo
3 Create transfer posting with movement type 351 amp T Code MB1B (Go to
MMBE stock overview the stock will decrease in supplying plant and it will not
update stock of receiving plant it will be under stock in transit)
4 Create GR stock will update in receiving plant
This scenario is under one company code between two plants
Material Master Related Important Terms (Part 2)
Controlling (CO) An organizational unit in Accounting that reflects a
management-oriented structure of the organization for the purpose of internal
control
Operating results for profit centers can be analyzed using either the cost of
sales approach or the period accounting approach
By analyzing the fixed capital as well you can expand your profit centers for use
as investment centers
Profit Center
Key that uniquely identifies the profit center in the current controlling area
Valuation Category
Determines whether stocks of the material are valuated together or separately
Dependencies
In the case of split valuation this indicator also determines which valuation
types are allowed that is the criteria by which stocks can be valuated
Valuation type
Invoice Verification (MM-IV)
A subdivision of a valuation category in split valuation
Example An enterprise manages its stocks of a material using the valuation
category Quality comprising the following valuation types
bull High quality Average quality Inferior
Hazardous material number
Number that identifies the material as a hazardous material or as dangerous
goods and assigns hazardous material data or dangerous goods data to it
Use The hazardous material number indicates that the material is dangerous
making special precautions necessary for its storage and shipment
Valuation Class
Assignment of a material to a group of GL accounts
With other factors the valuation class determines the GL accounts that are
updated as a result of a valuation-relevant transaction or event such as a goods
movement
The valuation class makes it possible to
bull Post the stock values of materials of the same material type to different GL
accounts
bull Post the stock values of materials of different material types to the same GL
account
Default value for the valuation class for valuated stocks of this material
Use The valuation class has the following functions
bull Allows the stock values of materials of the same material type to be posted to
different GL accounts
bull Allows the stock values of materials of different material types to be posted to
the same GL account
bull Determines together with other factors the GL accounts updated for a
valuation-relevant transaction (such as a goods movement
CIN - Country India Version ~ Volume 1
PurposeCountry Version India (CIN) contains a number of enhancements to standard
Sales and Distribution (SD) functions that allow you to handle local
requirements in particular excise duty
Features
In Country Version India (CIN) this component handles sales processes as
found in India In addition to the generic functions it allows you to
Handle CENVAT in your sales processes
The system calculates excise on your sales and creates excise invoices as
required and makes the appropriate postings to your CENVAT accounts
It covers sales from factories sales from depots and offers functions for other
types of goods movements it also covers sales to export-oriented units and
export sales
Record concessional and exemption forms sent to you by your customers
Make adjustment postings to your CENVAT accounts
Excise Invoice (Outgoing)
Definition
The document that acts as the proof of payment of excise duty and is required
for the customer to take CENVAT credit on the item
Use
In the SAP System there are three different procedures for creating excise
invoices
Sales direct from the factory
This procedure is for when you sell manufactured goods straight from the
factory at which they were produced in which case you levy excise duty when
the goods leave the factory on their way to the customer
If when you send the goods to the customer you enclose the commercial
invoice you create the excise invoice with reference to the commercial invoice
If you want to send the commercial invoice after you have dispatched the goods
however you create the excise invoice with reference to a pro forma
commercial invoice For more information about these procedures see Sales
from Factories
As well as creating excise invoices individually you can also create them in
batches (see Creation of Excise Invoices in Batches)
Sales from depots
A depot is a site at which the goods are stored away from the factory at which
they were produced In this procedure you have to levy the excise duty when
you transfer the goods from the factory to the depot and then make sure this is
passed on to the customer when it makes a purchase For more information see
Sales from Depots
Sales (other goods movements)
Some other goods movements may also require you to create an excise invoice
with reference to other documents The SAP System offers separate functions
for these purposes (see Excise Invoices (Outgoing) for Other Movements)
StructureNumbering of Excise Invoices
Outgoing excise invoices have two numbers an internal document number
which is assigned immediately you create an excise invoice and an excise
invoice number which is not assigned until you have verified and posted it
As far as the excise invoice number is concerned you have to number your
outgoing excise invoices in sequential order starting each year on 1 April You
must notify the excise authority of the jurisdiction of the invoicing location The
serial number must be printed on each page of the excise invoice
Each number range is governed by a series group You must create at least one
series group in order to be able to number the excise invoices If you need more
than one number range you must create the corresponding number of series
groups You do so in the CIN Implementation Guide (IMG) by choosing Global
Settings reg Series Groups
Number of Line Items Per Excise Invoice
Some states allow you to include only a limited number of items for each page
of an excise invoice (for example if the excise invoices are to be printed on
prenumbered forms) You can customize the system so that it prints the excise
invoice accordingly in the CIN IMG by choosing Global Settings reg Excise
Registration IDs
Customer Master (Excise Data) Definition
The part of the customer master record that contains information relating to
Indian excise duty
Use
In conjunction with other data this data is used to calculate excise duty on
various transactions
To maintain the data from the SAP Easy Access screen choose Indirect Taxes reg
Master Data reg Excise Rate Maintenance and then select the following options
described below
Structure
The excise part of the customer master contains the following information
Customer Excise Details
On this screen you enter your customers tax registration numbers which are
used for various forms of correspondence and reports
1 Excise registration number (and the range division and collectorate in which
this is located)
2 Central sales tax (CST) number
3 Local sales tax (LST) registration number
4 Permanent account number (PAN)
In order for the system to be able to calculate which rate of excise duty to apply
on sales to the customer you must also assign it a customer excise duty status
(for more information about how this works see Determination of Excise Duty
Rates)
Excise Indicator for Plant and Customer
On this screen you define the final excise duty indicator (for more information
about how this works see Determination of Excise Duty Rates)
Determination of Excise Duty Use
When you execute a business transaction involving materials that are subject to
excise duty the system automatically calculates the duty for you
Prerequisites
In order for the system to be able to determine which rate of excise duty to
apply you must have maintained all the data on the Excise Rate Maintenance
screen which you can access from the SAP Easy Access screen by choosing
Indirect Taxes reg Master Data reg Excise Rate Maintenance
You maintain the following types of data
Plant master data
You assign each of your plants an excise duty indicator You can use the same
indicator for all the plants with the same excise status from a legal point of view
such as all those that are in an exempt zone
See also the information about manufacturers that are only entitled to deduct a
certain portion of the duty (see Partial CENVAT Credit)
Vendor master data
For each of your vendors with the same excise status from a legal perspective
you define an excise duty indicator You must also specify the vendor type ndash for
example whether the vendor is a manufacturer a depot or a first-stage dealer
You must also stipulate if the vendor qualifies as a small-scale industry
For each permutation of plant indicator and vendor indicator you then create a
final excise duty indicator
Customer master data
Similarly you assign the same excise duty indicator to each of your customers
that share the same legal excise status
Again for each permutation of plant indicator and customer indicator you then
create a final excise duty indicator
Material master data
Each material is assigned a chapter ID
Excise tax rate
For every chapter ID and final excise duty indicator you maintain the rate of
excise duty
If your business only qualifies for partial CENVAT credit you must customize
your system accordingly
Activities
Let us consider an example to illustrate how the system determines which rate
of excise duty to apply to a material Assume you are posting a sale of ball
bearings to a customer The system automatically determines the rate of excise
duty as follows
Looks up the customer master data to see what status you have assigned the
customer
Lets assume youve assigned the customer status 3
Looks up the plant master data to see what status you have assigned the plant
Similarly your plant has status 2
The system looks up the table under Excise Indicator for Plant and Customer to
see what the final excise duty indictor is for customer status 3 and plant status
2 It is 7
The system determines the chapter ID of the ball bearing for the plant
Letrsquos assume the chapter ID at plant for the ball bearings is 100001
Finally the system looks up the table under Excise Tax Rate to see what rate of
duty applies to chapter ID 100001 under status 7
Plant Master (Excise Data) Definition
The part of the plant master record that contains information relating to Indian
excise duty
Use
In conjunction with other data this data is used to calculate excise duty on
various transactions
To maintain the data from the SAP Easy Access screen choose Indirect Taxes reg
Master Data reg Excise Rate Maintenance and then select the following options
described below
Structure
The excise part of the plant master is divided into the following screens
Excise Indicator for Plant
On this screen you enter your plants tax registration numbers which are used
for various forms of correspondence and reports
1 Central sales tax (CST) number
2 Local sales tax (LST) registration number
3 Permanent account number (PAN)
In order for the system to be able to calculate which rate of excise duty to apply
on purchases for this plant you must also assign it a plant excise duty status
(for more information about how this works see Determination of Excise Duty
Rates)
Excise Indicator for Plant and Vendor
On this screen you define the final excise duty indicator (for more information
about how this works see Determination of Excise Duty Rates)
Excise Indicator for Plant and Customer
On this screen you define the final excise duty indicator (for more information
about how this works see Determination of Excise Duty Rates)
Automatic Creation of Excise Invoices Use
The SAP System can automatically create an outgoing excise invoice for you
immediately you post a commercial invoice (or a pro forma invoice) for a
customer sale This function applies to excise invoices for sales from factories
only
Prerequisites
To activate this function in the Country Version India (CIN) Implementation
Guide (IMG) make the following settings
1 Under Global Settings reg Excise Groups select Create EI
This activates the automatic creation function
2 Under Sales and Distribution reg Utilization Determination
Here you specify which CENVAT accounts the system is to post the different
types of excise duty to
3 Under Sales and Distribution reg Excise GroupndashSeries Group Determination
Here you specify which excise group and series group the excise invoices are to
be created for
Features
When you post an invoice the system creates an excise invoice All the
information that it needs to create the excise invoice is provided either by the
invoice or by the Customizing settings that you have made in Sales and
Distribution It also determines the excise invoice type automatically by means
of a user exit
Creating Excise Invoices for Stock Transfers 1 From the SAP Easy Access screen choose Indirect Taxes reg Procurement reg
Excise Invoice reg For Depot reg CreateChangeDisplay
2 In the Material document field enter the goods receipt number and choose
The system displays the information from the goods receipt for example the
sending plant the excise registration the range the division and the
collectorate
3 Choose Details
The system copies the items from the goods receipt document In the depot it is
possible to have a separate excise invoice at line item level
4 Enter the internal document number of the excise invoice sent by the factory
5 Choose More documents to go the excise invoice details screen
6 Enter the internal document number of the excise invoice from the factory
The system copies the information to the line item (for example the excise
invoice number the excise invoice date the item number the chapter ID the
excise invoice quantity the amount of excise duty paid the excise base value
and the serial number of the Part II register entry with which the excise was
paid)
You can change the receipt quantity to match the actual quantity received at
the depot if necessary The system automatically adjusts the excise
accordingly
7 Go back to the item details screen
8 Save the excise invoice
Creating Excise Invoices for Direct Purchases 1 From the SAP Easy Access screen choose Indirect Taxes reg Procurement reg
Excise Invoice reg For Depot reg CreateChangeDisplay
2 In the Material document field enter the goods receipt number and choose
The system displays the information from the goods receipt for example the
sending plant the excise registration the range the division and the
collectorate
You can also maintain the excise registration details for the ship-from party as
for with the vendor The ship-from can be different from the vendor code (The
delivering plant can be maintained as a ship-from in the system When a valid
ship-from is entered the excise registration details copied from the vendor will
be overwritten by the ship-from excise registration details)
The ship-from registration details displayed can also be overwritten manually
The dealers commercial invoice number can be stored in the vendor excise
invoice number as in this case the dealer himself will not have an excise
invoice
3 Choose Details
The system copies the items from the goods receipt document It also copies the
vendors excise invoice number and the serial numbers of the entries in the RG
23A RG 23C and personal ledger account (PLA) registers
4 Enter the internal document number of the excise invoice sent by the factory
5 Select an item and choose More documents to go the excise invoice details
screen
In the case of direct purchases there will not be any excise invoice in the
system so leave the internal document field blank The vendors invoice will
show the details of the excise invoices through which excise has been paid for
the item that is being dispatched You can enter these details here
6 For each item the chapter ID excise base value and excise duty amounts
are defaulted from the purchase order You can change them if there is any
difference Enter the excise amount paid and the receipt quantity You also
enter the Part II register serial numbers with which the excise duty was paid and
the excise registration information from the original excise invoice
7 Go back to the item details screen
8 Save the excise invoice
The system creates an entry in register RG 23D You can change the excise
invoice as long as it has not been used in any sales
Assigning Excise Invoices to a Delivery Use
You follow this procedure to specify which excise invoices are to be assigned to
a delivery from a depot (or other material document)
You can also automate this procedure using the batch selection program
(J_1IJCHK) by making the appropriate Customizing settings in the Country
Version India (CIN) Implementation Guide (IMG)
Procedure
1 From the SAP Easy Access screen choose Indirect Taxes reg SalesOutbound
Movements reg Excise Invoice reg For Depot reg CreateChangeDisplay reg Delivery
or Material Document reg RG 23D Selection
2 Enter the delivery document number or the material number and choose
3 Select the excise invoice you want
4 Choose
5 Choose Excise invoice
A list of excise invoices appears These are the excise invoices at the depot with
a balance quantity
The system also shows a list of the A certificates that can be used You can pick
up any of the A certificates but they must be for the same excise invoice You
can only pick up an A certificate in its entirety You cannot select part of an A
certificate
6 Select the excise invoices that are relevant to the delivery
7 Specify what quantity to be used from each excise invoice
The system recalculates the excise accordingly
8 Go back to the item details screen
9 Save the data
Result
The system creates an entry in register RG 23D and generates the depot excise
invoice numbers
If you selected any A certificates the system also generates additional entries in
the RG 23D register The system marks the original A certificates as updated so
that they cannot be used for any other removals
Continue see Volume 2 (Next post)
EXTERNAL SERVICE MASTER
EXTERNAL SERVICE MASTER ESM
We procure the different type of services from vendors they are-
1048774 Hardware amp software services
1048774 Construction amp transportation services
1048774 Machinery services
1048774 Annual maintenance services
1048774 Present to and breakdown service Etc
Service Procurement Cycle -
1048774 Requirement identification
1048774 Source determination
1048774 Source selection
1048774 Service master
1048774 Service PO
1048774 Service entry sheet acceptance
1048774 Invoice with respect to service entry sheet
Steps to perform services -
1 Create service master (AC03)
2 Create Service PO (ME21N) with AC Assignment category lsquoKrsquo amp Item
Category lsquoDrsquo
3 Create service entry sheet (ML81N)
4 Invoice with respect to Service Entry sheet
Customize settings
(For service category Number Ranges amp organization status for service
category)
SPRO 1048774 IMG 1048774 MM 1048774 ESM 1048774 Service Master
1048774 Define organization Status for service Categories
1048774 Define Service Category
1048774 Define Number Ranges
Define organization Status for service Categories
bull Click on New Entries
bull Org service Category
bull BDS (Basic data service is stored in service master record under this service
category)
bull CNST 1048774 Controlling Status
bull PUST 1048774 Purchasing data Status
bull SDST 1048774 Sales amp Distributed Status
bull Org status description service category 1048774 Press Enter amp Save
Define Service Category
bull Same path as above
bull Select Standard
bull Click on Copy as
bull AC reference 1048774 always takes as 0006
bull Enter amp Save
Define Number Ranges
Click on groups 1048774 Groups 1048774 Insert 1048774 select enter Number Ranges
Select the service category
Click on Element
Select Group amp Click on Element Group
Save
Create Service Master - (AC03)
Click on Create New Services
Service Number (any number) Service Category
Basic unit of measure (Hours lsquoHrsquo)
Enter
Basic Data 1048774 Master Service Group 1048774 007
Valuation class 1048774 3200 1048774 Enter 1048774 Save
To See the Service list 1048774 AC06
Create Service PO (ME21N)
AC assignment category lsquoKrsquo Item Category lsquoDrsquo
Enter the Short text Quantity Delivery date Net Price Material group Plant
Storage Location
Enter service number in Service Tab (Item Details) quantity price Enter
Account Assignment 1048774 GL Account Number eg400000
Cost Center eg 9999
Press Enter amp Save
Create Service Entry Sheet - ML81N
Select other purchase order (enter PO number) 1048774 Enter 1048774 Click on Create1048774 Enter
Short Text 1048774 Enter 1048774 Service Number 1048774 Enter ndashClick on Flag button 1048774 Save
Take Service entry Sheet Number
Go to Invoice MIRO 1048774 Enter company code 1048774 Select Service Sheet Option 1048774 Enter
Service Entry Sheet Number 1048774 save it
Physical Inventory and Inventory Management
Physical inventory Process - 1 Create Physical inventory document
T Code MI01 ndash Create single inventory document
T Code MI31 ndash Create multiple physical inventory documents
I Enter the desired fields ie material material type site storage location and
Maximum number items Documents ndash 100 etc 1048774 Press Enter
II Click on Process Session
III Select the line items and click on the process
IV System displays a dialog box select Background and click on process
Inventory document is created
2 Print Inventory Document and handed over to responsible person say
Manager
3 Enter Physical Inventory count
T Code MI04
i Enter the physical inventory document number Fiscal year count date 1048774 Press
enter
ii Enter the Material Quantity and click on post
4 Listing of difference
T Code MI20
Enter the physical inventory document number and execute system displays a
screen wherein we will be able to view the differences
5 Post the differences
T Code MI07 amp Mov Type 701 amp 702
Enter the physical inventory document number year posting date enter the
difference and post
INVENTORY MANAGEMENT Maintaining stock by value or by quantity is called inventory The total inventory
management deals with the goods movement of the material
Goods movement -
It is a process in which transaction resulting change in stocks It is further sub-
divided into three categories
1 Goods Receipt (GR)
2 Goods Issue (GI)
3 Transfer Posting (TP)
Goods Receipt (GR) - It is a goods movement in which receipt of goods is
posted for vendor or for production A GR posted in the system will leads to
increase in stock No Concept of Price or value
Goods Issue (GI) - It is goods movement in which material withdrawal is
posted for consumption or for customer A GI posted in system will leads to
decrease in stock
Stock Transfer (ST) - It is method of removal of material from one location
and transferring it to another location This process is performed between two
plants and two storage locations
Transfer Posting (TP) - It is a general term of stock transfer that changes the
stock type or stock categories The difference between transfer posting and
stock transfer is -
TP is logical stock transfer and ST is a physical stock transfer
Movement Type - It is a three-digit code which plays a role of important
control function in inventory management It acts as a central role in automatic
account determination It determines which stock account or consumption
account is updated in financial accounting
Reservation - It stores requisition created from particular cost center to
particular department for issuing the material reservation posted in the system
It leads to decrease in stock
Stock Types - The different stock types are
1 Unrestricted use stock
2 Quality inspection stock
3 Blocked stock
4 Warehouse stock
Transaction code -
1 To Create GR - MIGO
2 To Create GI - MB1A
3 For Transfer Posting - MB1B
4 To display MaterialGR document ndash MB03
5 To create reservations - MB21 MB22 MB23
6 To See Stock Overview - MMBE
7 To enter Other GR - MB1C
When GR is posted in the system
1 Material document is created - MB03
2 Accounting Document is generated - MB03
3 MMR updated - MM02 MM03
4 PO history updated - ME23N
Movement Typersquos
Movement Types under GR - 101 331333335501503505551553555
561351 (For all Mov Typersquos there is a reversal eg 101 has 102 Note No
reversal for 121)
Movement Typersquos under GI - 201 331333335551553555
Transfer Posting It is performed in three ways
1 TP BW Plant to Plant
2 TP BW Storage Location to Storage Location
3 TP BW Stock to Stock
Movement Types under TP BW Plant to Plant
301 - 1 step
303 amp 305 - 2 step
Movement Type under TP BW Storage location to Storage Location
311 - 1 step
313 amp 315 - 2 step
Movement Type under TP BW stock to stock
321 323 325 343349
To Cancel the GR Movement type 102
Return delivery to vendor movement type 122 amp T Code MIGO
Transfer Posting Stock to Stock
From Blocked stock to Quality Inspection
T Code MB1B amp Movement Type 349
From Blocked stock to Unrestricted Stock
T Code MB1B amp Movement Type 343
From Quality Inspection to Unrestricted Stock
T Code MB1B amp Movement Type 321
Transfer Posting from Plant to Plant
For One Step Movement Type 301
For Two Steps Movement Type 303 amp 305
After posting stock will display in Stock in Transit (Plant)
To receive material by receiving Plant Movement Type 305
Transfer Posting BW Storage Location to Storage Location
Under One Plant BW two Storage Locationrsquos Movement Type 311
Back to Parent storage Location Movement Type 313 (It Show stock in transfer)
use Movement type 315 at Parent storage location
To create Goods Issue (GI) T Code MB1A amp Movement Type 201
To Create Reservations T Code MB21 MB22 amp MB23
Creation of GI wrt Reservations
T Code MB1A amp Movement Type 201
Click on Reservation Enter Reservation Number 1048774 Click on Adopt + Details
GR wrt Reservations T Code MIGO amp Select as Reservation instead of GR
GR without PO Movement type 501 amp T Code MB1C Select others instead of
Purchase order Enter Material Quantity Plant Storage Location 1048774 Press Enter
Partner Option will be visible (Vendor) 1048774 Save it
Invoice - Invoice is a document which is issued to a buyer (Company) from the
supplier (vendor) for the payment The following information is maintained in
invoice
Invoice date Posting date Invoice ref number tax amount amount tax code
terms of payments vendor address banking accounting information etc
When invoice document is posted in the system
bull Invoice document created
bull Accounting document is generated (MIR4)
bull PO history updated (ME23N)
bull FI document created (FB03)
PRICE DETERMINATION PROCESS or PRICING PROCEDURE
CONDITIONS OR PRICING PROCEDURE or PRICE DETERMINATION PROCESSWe deal with the Pricing Procedure for vendors
PB00 Gross Price (info record contract scheduled Agreement)
PBXX Gross Price (PO)
FRA1 Freight
RA00 Discount on net
RA01 Discount on Gross
ZA00 Surcharge on net
SKT0 Surcharge discount
ZPB0 Rebates
MWVS Input Tax
MWAS Output Tax
BASB Base Amount
RM0000 Calculation Schema or Pricing Procedure
(PB00 amp PBXX)
RM0002 Calculation Schema or Pricing Procedure
(PB00)
PB00 --gt AB00
Copy the Standard one and create new one (ours)
RM0000 contains all the condition types
Pricing Procedure (PP)
We define the pricing procedure to define condition supplement for the material
price The condition supplement specifies the discount surcharge freight etc
that we want a system every time to access material price condition records
The total value of the material is calculated or based on all addition and
subtraction ie discounts surcharge tax freight etc
Condition Table
It is a table which defines the structure of condition record key
Condition Record
It is a data record used to store conditions or condition supplements ie
condition like discount freight and surcharge Tax etc
Condition Type
It is used for different functions In Pricing the condition types leads you to
differentiate different types of discounts in output determination batch
determination difference between two output types such as delivery note or
order confirmation between different strategy types
Access Sequence
It specifies the order in which system searches or access the condition records
from condition table
Difference between PB00 amp PBXX
1 Condition maintained in PB00 is time dependent whereas PBXX is time
independent
2 Condition type PB00 ndash used for IR RFQ Contract Schedule Agreement
Condition type PBXX ndash used for PO
Calculation Schema
The main function of calculation schema is to provide framework of steps for the
price determination process to specify the discounts surcharge freight rebate
etc
It also determines the sequence of conditions that are to be followed and in
which sequence
Schema Group Vendor
The main function of it is to identify or to pick the right process and conditions
for a particular vendor
Schema Group Purchasing Organization
Key that determines which calculation schema (pricing procedure) is to be used
in purchasing documents assigned to the relevant purchasing organization
Schema Group
It allows to group together the purchasing organizations which uses the same
calculation schema
Steps -
1 Create Access sequence
2 Create condition types
3 Create pricing procedure or calculation schema
4 Link pricing procedure amp access sequence to condition type
5 Create schema group for vendor
6 Create schema group for purchase organization
7 Assign schema group vendor-to-vendor master record in purchasing data
view
8 Assign schema group purchase organization to our purchase organization
9 In inforecord purchase organization data enter condition types and pricing or
calculation procedure
CUSTOMIZE SETTINGS -
SPRO --gt IMG--gtMM--gtPUR--gtConditions --gtDefine price determination Process
1 Define access sequence
2 Define Condition type
3 Define cal Schema
4 Define schema group
o Schema group vendor
o Schema group purchasing group
5 Assignment of schema group to PUR org
6 Define schema determination agrave determine cal schema for standard PO
PURCHASE ORDER
PURCHASE ORDER
PO is an external document created for the procurement of materials and
services from vendor The document of PO is also divided into 4 parts as PR -
1 Document Overview
2 Header (DeliveryInvoice Conditions Address Partners Org data status)
3 Item Overview (AC assign cat Item Category Material Plant Del date SL)
4 Item Details (Material data Confirmations condition control delivery delivery
Schedule Quantitiesweights invoice)
A procurement type is defined for each of the document items The following
procurement types exist
1048774 Standard
1048774 Subcontracting
1048774 Consignment
1048774 Stock transfer
1048774 External service
bull There are different ways to create PO -
1 Directly through transaction code ME21N
2 With reference to PR
3 With reference to RFQ
4 With reference to info records
5 With reference to Contracts
6 With reference to Cost Centre GL Account (cost element) for consumable
items or not stock items with account assignment category lsquoKrsquo (K= cost centre)
(For non stock and consumables)
0 COMMENTS L INKS TO THIS POST
LABELS PO PURCHASE ORDER
Reaction
s
PURCHASE REQUISITION T CODE ME51 or ME51N
Purchasing Requisition -
It is a request or instruction from particular department (Cost Centre) to
purchasing department to procure certain quantity of material and services It is
only one internal document in SAP-MM
Purchasing Requisition document is divided into four parts -
bull Document Overview
bull Header
bull Item Overview
bull Item Details
Document Overview -
It displays the list of purchasing documents which are created previously
according to our requirement
Header -
Any text message or information is maintained
Item Overview -
In this we enter material plant delivery date quantity storage location
purchasing group AC assignment category Item category etc
Item Details -
It displays the detailed information about item overview (like Master data
valuation source of supply contact person delivery address status etc)
0 COMMENTS L INKS TO THIS POST
LABELS PR PURCHASE PURCHASE ORDER PURCHASE REQUIS IT ION SALES ORDER
Reaction
s
Automatic PURCHASE ORDER (PO) How Automatic PO raised
How Automatic PO raised
At fixed time say 1230 AM automatic scheduler runs and checks whether the
stock is less than or equal to the replenishment point If stock is less than or
equal to Repli Point than PR raised automatically to Purchasing Deptt
bull Activate the option automatic PO in purchasing view in material master record
bull Activate the option automatic PO in purchasing data view in vendor master
record
bull Maintain Source List amp select fixed vendor
bull PR crated automatically
bull Automatic creation of PO from PR ndash ME59
Enter the Purchasing group purchasing organization Vendor Plant and
Purchasing Requisition Document Number 1048774 Execute
RELEASE PROCEDURE Release strategyThe main function of Release procedure is to determine the approval process
or the release process for the procurement of material amp services rather than
relying for manual signatures The release procedure contains release strategy
Release Strategy (RS)
A plan defining the release codes with which a purchase requisition item a
complete purchase requisition or a complete external purchasing document
must
be released (that is approved) and the sequence in which release is to be
effected
using these codes It is a unique set of conditions sequence and level of release
It is a 2 digit code eg S1 S2 S3etc
The Release Strategy contains the following -
bull Release Group
bull Release Codes
bull Release Indicators
bull Release Prerequisite
Release Group -
It is a 2-digit code which is assigned with a class (Class contains group of
characteristics) It contains one or more release strategies
Release Codes -
It is a 2digit code which identifies the department or responsible person for
the approval process amp release process
Eg AA - Manager
BB - Sr Manager
CC - Vice President
DD - Managing Director
Release Indicator -
It is a Code that represents the release status If the proper approval
process is performed that the release Strategy has to be release if it is not
performed than the Release Strategy is blocked
R ndash Release
B ndash Blocked
Release Conditions -
It determines the type of the release strategy
For eg
bull If the price ranges from 1 to 1000 It is approved by AA BB and CC
bull If the ranges from1001 to 1lac then it is approved by AA BB CC and DD
- 80 -
Release Prerequisite
It will informs the system which RS has to be take place in the PO CEKKO is
a communication structure where it displays the field names amp field lengths to
create characteristics ie we maintain characteristics in customizing by
selecting
the field names from this communication structure for all external documents
CEBAN is used for the purchasing requisition
Characteristics -
1 Net value of PO --- GNETW (GSWRT for PR)
2 Plant --- WERKS
3 Purchasing organization -- EKORG
4 Purchasing Group --- EKGRP
5Material group ndashMATKL
CUSTOMIZE SETTINGSSPRO--gtIMG--gt MM--gt Purchasing--gtPO--gt Release Procedure for PO
1 Edit Characteristics T Code CT04
2 Edit Class T Code CL02
3 Define Release Procedure for PO
4 Check Release Strategy
Edit Characteristics -
Characteristics - eg NET VALUE OF VALUE
Click or Create Button
Under Basic Data
Description - Value for PO
Status - Release
Data Type - Currency Format
No Of Characters - 15
Currency - EUR
Activate multiple values amp Internal Values Allowed
Additional Data
Table name - CEKKO
Field Name - GNETW
Values
Activate Additional Values
Save the document
Create another Characteristic for Plant -
Plant date Create ndash Description Status
Data Type Characteristic Format
Number of Characteristics 4
Activate Multiple Values
Additional data-
Table Name - CEKKO
Field Name - WERKS
Values
Activate Additional Values
For Purchasing Organization Name - EKORG
For purchasing Group EKGRP
Edit Class
Class - SAPMM
Class Type - 032 Release Strategies
Click on Create button
Basic Data
Description - Class for PO
Status - Released
Valid From _____ Valid to _____
Click on Characteristic
Characteristic
Enter all the Characteristics Created amp Save it
Define Release Procedure for PO-
bull Release Group
bull Release Codes
bull Release Indicators
bull Release Strategies
bull Workflow
Release Group - New Entries Release Group Class and Description
Press Enter amp Save
Release Code - New Entries
Group Codes Description
99 AA Manager
99 BB Sr Manager
99 CC Vice President
99 DD Managing Director
Press Enter amp Save
Release Indicator - (B ndash Blocked R - Release)
New Entries
Release Indicators Description
B Blocked
R Released
Release Strategies -
New Entries
Release Group 99
Release Strategy S1
Release Codes AA BB CC and DD
Click on Release Prerequisites
Release Status -
Continue
Classification
Enter the Value (Same Price)
Plant (9999)
Go Back amp Save it
Release Simulation - Simulate Release
Create a PO -
There are two ways to release the PO
Individual releaseME28
Collective release ME29N
How to delete procedure
Delete Release GP
Create Release RG
Delete R Strategies
Delete R Code
Delete R Group
SAP R3 SYSTEM LANDSCAPE
System LandscapeThe system landscape contains all the SAP Systems that you have installed It
can consist of several system groups whorsquos SAP Systems are linked by transport
routes
After you decide which clients you need and which roles you want them to have
you need to decide how to distribute them amongst the different SAP Systems
You can set up multiple clients independently of one another in a single SAP
System However when you configure the data you must remember that cross-
client Customizing settings and Repository objects are identical for all clients in
a single SAP System Changes made in one client apply immediately to all
clients in the system
Three-System Landscape
SAP recommends a three-system landscape in which each of the central clients
has its own SAP System
This consists of a development system DEV a quality assurance system QAS
and a production system PRD The development system contains the
Customizing client CUST the quality assurance system contains the quality
assurance client QTST and the production system contains the production client
PROD Make all changes to Customizing data and Repository objects in the
Customizing client When you release the corresponding change requests they
are transported into the quality assurance client This means that changes to
cross-client data only appear in the quality assurance client after the transport
In the quality assurance client you can test whether the transports are
complete or whether any linked changes are missing and are still in unreleased
change requests If the test is successful the change requests are transported
into the production client The production client is completely separate from the
other clients as regards cross-client data
SPECIAL STOCKS amp SPECIAL PROCUREMENT TYPES
Special Stocks are those stocks which are not belongs to our company code
These are not placed in our storage locations amp no physical inventory is
performed and treated as special stocks for the reason of ownership
Different types are of Special Stocks are as follows
1 Subcontracting
2 Consignment
3 Pipeline
4 Stock transfer
5 Third party
6 Returnable transport packaging
7 Sales order stock
8 Project stock
SUBCONTRACTING
In subcontracting process we create subcontracting PO to supply or issue
subcomponents to vendor in order to get final product The price maintained in
subcontracting PO is a service charge paid to vendor
Steps to perform subcontracting
1 Create subcontracting inforecord (Optional)
2 Create subcontracting PO with item category L
There are to ways to supply subcomponents to vendor
bull Manually maintain the subcomponents in the subcontracting
PO though explode BOM
bull Through BOM (Bill of material) T Code CS01 CS02 amp CS03
3 Create Transfer Posting with Movement Type 541 to issue the subcomponents
to the vendor
4 Goods Reciept
5 Invoice Reciept
Path ME21N ---gt Enter Item Category L --gt Material (End Product) PO
Quantity Delivery Date Net Price Plant --gt Click on Item Details --gt Tab
Material Data -- gtComponents select Explode BOM --gt Click on Components
button --gt Enter the subcomponents --gt Go back amp Save
Create Transfer Posting with movement type 541 amp T Code MB1B
GR MIGO
IR MIRO
CONSIGNMENT - (No Concept of Invoice)
In consignment process we will not create Purchasing document for the vendor
vendor himself send the material to our plant though the material is available
to our plant the responsibility amp ownership of the material is of vendor Aliability
only arises when the material withdrawal (Consumption) is posted in the system
from consignment stock
Steps
1 Create Consignment info record (mandatory)
2 Create Consignment purchase order with item category lsquoKrsquo amp maintain Info
record number
3 Create GR Movement type lsquo101Krsquo
4 Create GI Movement Type lsquo201Krsquo
5 Consignment settlement T Code MRKO
Path --gtME11 --gt In info record --gt Purchasing Org Data 1 views of info record
enter the tax code and save it
--gt Create Consignment Purchase Order ME21N (Price option is grayed out with
price zero)
--gt Create GR with movement type 101K
--gt Create Goods Issue (GI) T Code MB1A amp Movement Type 201K Enter Cost
center vendor
--gt Consignment Settlement T Code MRKO Click Activate Consignment Activate
Settle Execute
--gt Display the Document Number ie Invoice receipt T Code FB03
PIPELINE PROCESS (No Concept of Invoice)
In pipeline handling your company does not need to order or store the material
concerned It is ready available to you as and when required via pipeline (eg oil
or water) or some other type of cable (eg electricity) Consumption of the
material is settled with the vendor on a regular basis
Steps
1 Create a Material master record with material type PIPE
2 Create Pipeline info record
3 Create GI with movement type 201P
4 Pipeline settlement T Code MRKO
RETURNABLE TRANSPORT PACKAGING (RTP)
When company orders goods from a vendor the goods are delivered with
returnable transport packaging (pallets containers) that belongs to the vendor
and is stored on our premises until you return it to the vendor
Steps
1 Create Material master record with material type LEIH
2 Create PO
3 Create GR by maintaining RTP material by selecting the option transport
equipments with movement type 501M
4 IR
STOCK TRANSFER
In stock transfer processing goods are procured and supplied within a company
One plant orders the goods internally to another plant (receiving plantissuing
plant) The goods are procured with a special type of purchase order the stock
transport order
Steps
1 Create a Material master in both supplying and receiving plant
2 Create stock transport order (STO) with item category lsquoUrsquo
3 Create transfer posting with movement type 351 amp T Code MB1B (Go to
MMBE stock overview the stock will decrease in supplying plant and it will not
update stock of receiving plant it will be under stock in transit)
4 Create GR stock will update in receiving plant
This scenario is under one company code between two plants
SAP IMPLEMENTATION PROCESS End to End Inplementation of SAP
First we have to prepare documentation about the client business (like turnover
vendors customers payments materials production marketing etc)
The implementer company made two teams (1) Steering team (2) Steering
community
Steering team (SAP functional consultants) prepares a detailed
documentation about the client with the help of core team (client company
team)
amp this study is known as Feasibility Study After that the steering team handed
over this documentation to Steering community (Project manager Sr software
engineer and other higher authorities)
Steering community prepares the BBP (Business Blue Print) BBP
Prepares in MS-Word
10487741048774 ASAP - Accelerated System Application Product in Data Processing
10487741048774 Business Process - ASAP Methodology
1 Project Preparation
2 BBP (Business Blue Print)
3 Realization
4 Final Preparation
5 Go live amp Support
10487741048774 Project Preparation -
It consists of identifying team members amp development strategy as
how to go
AS ndash IS (Existing Process followed requirements)
TO ndash BE (Requirement analysis and best process recommended)
Difference between (AS ndash IS) amp (TO - BE) is called GAP Analysis
10487741048774 Business Blue Print (BPP) -
It is a legal documentation between client amp the company
(implementer service provider) We have to understand the current business
process of client amp analyzing the business amp prepare documentation It is a
detailed documentation for the client
10487741048774 Realization -
This Phase is used to Implement or migrate the entire business of
client from Non-SAP environment to SAP environment
10487741048774 Final Preparation -
This phase is used for testing amp end user training After successfully
completion of this phase client is ready to run business in SAP R3
10487741048774 Go live amp Support -
In this phase we deliver the project end date amp end user training at
client site
THIRD - PARTY PROCESSING
THIRD - PARTY PROCESSING
In third party processing your company passes on a sales order to an external
vendor who sends the goods directly to the customer The sales order is not
processed by your company but by the vendor Third-party items can be
entered in purchase requisitions purchase orders and sales orders Third party
processing is integrated with Sales and Distribution If the sales order contains
third-party items the system creates a purchase requisition from the order
Steps
1 Create MMR with sales views and maintain Division Distribution channel
sales org item category group and general item category group ndash BANS (Third
party item) amp Account group Sold to party
2 Create Customer master record T Code XD01 XD02 XD03
3 Create sales order T Code VA01 VA02 VA03 (PR generated automatically)
4 PO - T Code ME21N
5 GR ndash T Code MIGO
6 IR ndash T Code MIRO
7 Sales Billing Billing Document T Code VF01 VF02 VF03

8 Save the excise invoice
The system creates an entry in register RG 23D You can change the excise
invoice as long as it has not been used in any sales
Assigning Excise Invoices to a Delivery Use
You follow this procedure to specify which excise invoices are to be assigned to
a delivery from a depot (or other material document)
You can also automate this procedure using the batch selection program
(J_1IJCHK) by making the appropriate Customizing settings in the Country
Version India (CIN) Implementation Guide (IMG)
Procedure
1 From the SAP Easy Access screen choose Indirect Taxes reg SalesOutbound
Movements reg Excise Invoice reg For Depot reg CreateChangeDisplay reg Delivery
or Material Document reg RG 23D Selection
2 Enter the delivery document number or the material number and choose
3 Select the excise invoice you want
4 Choose
5 Choose Excise invoice
A list of excise invoices appears These are the excise invoices at the depot with
a balance quantity
The system also shows a list of the A certificates that can be used You can pick
up any of the A certificates but they must be for the same excise invoice You
can only pick up an A certificate in its entirety You cannot select part of an A
certificate
6 Select the excise invoices that are relevant to the delivery
7 Specify what quantity to be used from each excise invoice
The system recalculates the excise accordingly
8 Go back to the item details screen
9 Save the data
Result
The system creates an entry in register RG 23D and generates the depot excise
invoice numbers
If you selected any A certificates the system also generates additional entries in
the RG 23D register The system marks the original A certificates as updated so
that they cannot be used for any other removals
CIN - Country India Version ~ Vol 2
Continue Volume 1
Creating Excise Invoices
Use
This is the procedure that you follow to create an excise invoice for the less
common types of goods movement
Procedure
1 From the SAP Easy Access screen choose Indirect Taxes reg SalesOutbound
Movements reg Excise Invoice reg For Other Movements reg CreateChangeDisplay
reg
2 On the selection screen enter data as required including
(i)Reference
group box
Specify which document you want to create the excise invoice for and which
excise group it is for
(ii)Details
group box
Specify the vendor or customer that you are sending the invoice to
3 Choose
If you entered an internal document number the system copies the item details
from it
4 Choose
5 Enter line items for each of the materials to be included in the excise invoice
For each item enter the following data
(i)Material
(ii)Quantity
(iii)Unit of measure
(iv)Base value
(v)Excise duty
6 To pick the rate and amount from a specific excise invoice choose Get excise
invoice
7 Save the excise invoice
If you are using the one-step procedure the system creates and posts an excise
invoice Otherwise the system saves the information but does not make any
postings it now has to be verified
Verifying and Posting Excise Invoices
Use
You follow this procedure to verify that the information in an excise invoice that
has already been created and to post it once you are satisfied
Procedure
From the SAP Easy Access screen choose Indirect Taxes reg SalesOutbound
Movements reg Excise Invoice reg For Other Movements reg Posting
1 Enter the internal document number of the excise invoice
2 Choose Release to accounting
The system displays the excise invoice The excise duty that is to be posted is
displayed at the foot of the screen which you can change if necessary
3 To access the balance utilization choose
4 To display the balance available on the CENVAT accounts choose Account
balances
5 Save the excise invoice
The system generates the accounting documents
6 To print the excise invoice choose
Making a Transfer Posting
Use
In this procedure you make a transfer posting for the goods ordered by another
plant For more information about this function see Entering the Removal from
Storage at the Issuing Plant
Procedure
1 From the SAP Easy Access screen choose Logistics reg Materials Management
reg Inventory Management reg Goods Movement reg Transfer Posting
2 Choose Movement type reg Transfer posting reg Plant to plant reg To stock in
transit
3 Enter the number of the issuing plant and storage location
4 Choose To purchase order
5 In the dialog box enter the number of the stock transport order that the
receiving plant created and choose
6 Check the data
7 Save the transfer posting
Transaction Codes for India
Transaction Action
J1I2 Prepare a sales tax register
J1I3 Create outgoing excise invoices in batches
J1I5
Update the RG 1 and Part I registers
J1I8
Post the challan used to remit TDS
J1IC194C
Create annual return under section 194 C (Classic TDS)
J1IC194D
Create annual return under section 194 D (Classic TDS)
J1IC194I
Create annual return under section 194 I (Classic TDS)
J1IC194J
Create annual return under section 194 J (Classic TDS)
J1IEX
Incoming Excise Invoices (central transaction)
J1IEX_C
Capture an incoming excise invoice (excise clerk)
J1IEX_P
Post an incoming excise invoice (excise supervisor)
J1INBANK
Post a bank challan
J1INCANC
Cancel a vendor withholding tax certificate
J1INCERT
Print a vendor withholding tax certificate
J1INCHLN
Create a remittance challan
J1INCUST
Post a customer withholding tax certificate
J1INHC
Withholding Tax Migration Health Check Program
J1INMIG
Withholding Tax Data Migration Tool
JI1NCHLC
Create a remittance challan for customers
J1INCC
Print customer withholding tax certificates
J1INMIS
Withholding Tax Information System
JI1NAR
Prepare annual returns (Extended Withholding Tax)
J1IF01
Create a subcontracting challan
J1IF11
Change a subcontracting challan
J1IF12
Display a subcontracting challan
J1IF13
Complete reverse or recredit a subcontracting challan
J1IFQ
Reconcile quantities for subcontracting challans
J1IFR
List subcontracting challans
J1IH
Make a CENVAT adjustment posting
J1IIN
Create an outgoing excise invoice
J1IJ
Assign excise invoices to a delivery for sales from depots
J1INJV
Adjust withholding tax Item
J1INREP
Reprint a vendor withholding tax certificate
J1INREV
Reverse a remittance challan
J1INPR
Calculate withholding tax on clearing accounts
J1INUT
Clear withholding tax on clearing accounts
J1IR
Download register data
J1IS
Process an excise invoice (outgoing) for other movements
J1IU
Process exemption forms
J1IW
Verify and post an incoming excise invoice
J1IX
Create an incoming excise invoice (without reference to purchase order)
J2I8
Transfer excise duty to CENVAT account
J2ID
Archive tax deducted at source (TDS) documents
J2IE
Locate tax deducted at source documents in archive
J2IU
Remit excise duty fortnightly
J2I9
Monthly CENVAT return
J1IG
Excise invoice entry at depot
J1IGA
Create additional excise entry at depot
J2I5
Extract data for excise registers
J2I6
Print excise registers
Sales from Factories
Purpose
This process describes how the SAP System handles the sales process allowing
for the creation of excise invoices which you have to send with each delivery
that is subject to excise duty There are two scenarios depending on whether
you want to send the commercial invoice along with the delivery or at a later
date
Prerequisites
In order for the system to be able to copy the information from document to
document you must have set up the copying control procedures in Customizing
for Sales and Distribution (SD) This differs according to when you want to send
the commercial invoice
1 Along with the delivery
In this case the document flow would be OR (standard sales order type) ndash LF
(standard delivery type) ndash F2 (invoice)
2 At a later date
The document flow would be OR ndash JF (delivery type a copy of LF) ndash JEX (pro
forma billing document type a copy of document type F8) ndash F2
In addition you must also have maintained the settings in the Country Version
India (CIN) Implementation Guide (IMG) by choosing Global Settings reg Assign
Excise Invoice Billing Type to Delivery Type
A sample pricing procedure JFACT is provided for this sales procedure
Process Flow
1 The sales clerk creates a sales order following the
(i)standard procedure
There are special procedures for
(i)Customers in possession of exemption forms
(ii)Exports
2 The shipping clerk creates a delivery again following the
standard procedure
On the initial screen you set the appropriate delivery type (see above)
3 In the warehouse the storeperson issues the goods
The system only allows users to create a pro forma excise invoice if the delivery
is complete so as to prevent them from creating multiple pro forma excise
invoices
4 What you do at this stage depends on whether you want to send the
commercial invoice along with the delivery or whether you want to invoice the
customer later
(A) If the invoice is to be shipped with delivery the shipping clerk
(i)Creates an invoice following the standard procedure
(ii)Creates an excise invoice from the invoice
(B) If the invoice is to be sent on at a later date the shipping clerk
(i)Creates the pro forma excise invoice
The pro forma excise invoice is only required for technical purposes and is not
sent to the customer The system does not make any accounting postings at this
stage
(ii)Creates
an excise invoice from the pro forma excise invoice
In both these cases the system creates an accounting document to post the
excise duty to a clearing account
Instead of creating excise invoices manually you can also have the system
create them automatically Alternatively you can create them in batches
5 You ship the goods
6 When the time comes to invoice the customer you create the invoice
following the standard procedure
Irrespective of the number of excise invoices that you have issued you can
combine the delivery items in a single invoice (if the standard requirements are
met)
Sales from Depots
Purpose
You may sell finished goods directly from the place of manufacture as described
under Sales from Factories or you may first ship them to a separate location for
storage (a depot) from where you will sell them The second procedure is
described here
Sales from depots are handled differently from sales from factories because of
excise law Excise duty is payable when you send the goods from the factory to
the depot but it is not levied again when you sell the goods
Sometimes when you make a final sale of goods from a depot price escalations
could have happened with retrospective effect In such scenarios you need to
pay the extra excise duty at the factory using an A Certificate You need to
register the A certificate details in the RG 23D register and the excise recovered
from the customer
Prerequisites
You have customized
1 Stock transport processing in Customizing for Materials Management (MM)
by choosing Purchasing reg Purchase Order reg Set Up Stock Transport Order
2 The copying control for copying stock transport order NL to excise invoice JEX
You make this setting in the Country Version India (CIN) Implementation Guide
(IMG) by choosing Sales and Distribution reg Assign Excise Invoice Billing Type to
Delivery Type
3 The item category NLN (standard transport order) so that it is relevant for
billing
You do this in the standard IMG in Customizing for Sales and Distribution (SD)
by choosing Sales reg Sales Documents reg Sales Document Item
Process Flow
1 You create the sales order following the
standard procedure
The standard pricing procedure for depot sales is JDEPOT
2 You create the delivery again following the
standard procedure
3 You
assign excise invoices to the delivery or material document
4 You
verify that you have selected the correct excise invoices and post them
Alternatively if you have selected the wrong excise invoices you can cancel the
assignment
5 You create the invoice following the standard procedure
SPECIAL STOCKS amp SPECIAL PROCUREMENT TYPES
Special Stocks are those stocks which are not belongs to our company code
These are not placed in our storage locations amp no physical inventory is
performed and treated as special stocks for the reason of ownership
Different types are of Special Stocks are as follows
1 Subcontracting
2 Consignment
3 Pipeline
4 Stock transfer
5 Third party
6 Returnable transport packaging
7 Sales order stock
8 Project stock
SUBCONTRACTING
In subcontracting process we create subcontracting PO to supply or issue
subcomponents to vendor in order to get final product The price maintained in
subcontracting PO is a service charge paid to vendor
Steps to perform subcontracting
1 Create subcontracting inforecord (Optional)
2 Create subcontracting PO with item category L
There are to ways to supply subcomponents to vendor
bull Manually maintain the subcomponents in the subcontracting
PO though explode BOM
bull Through BOM (Bill of material) T Code CS01 CS02 amp CS03
3 Create Transfer Posting with Movement Type 541 to issue the subcomponents
to the vendor
4 Goods Reciept
5 Invoice Reciept
Path ME21N ---gt Enter Item Category L --gt Material (End Product) PO
Quantity Delivery Date Net Price Plant --gt Click on Item Details --gt Tab
Material Data -- gtComponents select Explode BOM --gt Click on Components
button --gt Enter the subcomponents --gt Go back amp Save
Create Transfer Posting with movement type 541 amp T Code MB1B
GR MIGO
IR MIRO
CONSIGNMENT - (No Concept of Invoice)
In consignment process we will not create Purchasing document for the vendor
vendor himself send the material to our plant though the material is available
to our plant the responsibility amp ownership of the material is of vendor Aliability
only arises when the material withdrawal (Consumption) is posted in the system
from consignment stock
Steps
1 Create Consignment info record (mandatory)
2 Create Consignment purchase order with item category lsquoKrsquo amp maintain Info
record number
3 Create GR Movement type lsquo101Krsquo
4 Create GI Movement Type lsquo201Krsquo
5 Consignment settlement T Code MRKO
Path --gtME11 --gt In info record --gt Purchasing Org Data 1 views of info record
enter the tax code and save it
--gt Create Consignment Purchase Order ME21N (Price option is grayed out with
price zero)
--gt Create GR with movement type 101K
--gt Create Goods Issue (GI) T Code MB1A amp Movement Type 201K Enter Cost
center vendor
--gt Consignment Settlement T Code MRKO Click Activate Consignment Activate
Settle Execute
--gt Display the Document Number ie Invoice receipt T Code FB03
PIPELINE PROCESS (No Concept of Invoice)
In pipeline handling your company does not need to order or store the material
concerned It is ready available to you as and when required via pipeline (eg oil
or water) or some other type of cable (eg electricity) Consumption of the
material is settled with the vendor on a regular basis
Steps
1 Create a Material master record with material type PIPE
2 Create Pipeline info record
3 Create GI with movement type 201P
4 Pipeline settlement T Code MRKO
RETURNABLE TRANSPORT PACKAGING (RTP)
When company orders goods from a vendor the goods are delivered with
returnable transport packaging (pallets containers) that belongs to the vendor
and is stored on our premises until you return it to the vendor
Steps
1 Create Material master record with material type LEIH
2 Create PO
3 Create GR by maintaining RTP material by selecting the option transport
equipments with movement type 501M
4 IR
STOCK TRANSFER
In stock transfer processing goods are procured and supplied within a company
One plant orders the goods internally to another plant (receiving plantissuing
plant) The goods are procured with a special type of purchase order the stock
transport order
Steps
1 Create a Material master in both supplying and receiving plant
2 Create stock transport order (STO) with item category lsquoUrsquo
3 Create transfer posting with movement type 351 amp T Code MB1B (Go to
MMBE stock overview the stock will decrease in supplying plant and it will not
update stock of receiving plant it will be under stock in transit)
4 Create GR stock will update in receiving plant
This scenario is under one company code between two plants
Material Master Related Important Terms (Part 2)
Controlling (CO) An organizational unit in Accounting that reflects a
management-oriented structure of the organization for the purpose of internal
control
Operating results for profit centers can be analyzed using either the cost of
sales approach or the period accounting approach
By analyzing the fixed capital as well you can expand your profit centers for use
as investment centers
Profit Center
Key that uniquely identifies the profit center in the current controlling area
Valuation Category
Determines whether stocks of the material are valuated together or separately
Dependencies
In the case of split valuation this indicator also determines which valuation
types are allowed that is the criteria by which stocks can be valuated
Valuation type
Invoice Verification (MM-IV)
A subdivision of a valuation category in split valuation
Example An enterprise manages its stocks of a material using the valuation
category Quality comprising the following valuation types
bull High quality Average quality Inferior
Hazardous material number
Number that identifies the material as a hazardous material or as dangerous
goods and assigns hazardous material data or dangerous goods data to it
Use The hazardous material number indicates that the material is dangerous
making special precautions necessary for its storage and shipment
Valuation Class
Assignment of a material to a group of GL accounts
With other factors the valuation class determines the GL accounts that are
updated as a result of a valuation-relevant transaction or event such as a goods
movement
The valuation class makes it possible to
bull Post the stock values of materials of the same material type to different GL
accounts
bull Post the stock values of materials of different material types to the same GL
account
Default value for the valuation class for valuated stocks of this material
Use The valuation class has the following functions
bull Allows the stock values of materials of the same material type to be posted to
different GL accounts
bull Allows the stock values of materials of different material types to be posted to
the same GL account
bull Determines together with other factors the GL accounts updated for a
valuation-relevant transaction (such as a goods movement
CIN - Country India Version ~ Volume 1
PurposeCountry Version India (CIN) contains a number of enhancements to standard
Sales and Distribution (SD) functions that allow you to handle local
requirements in particular excise duty
Features
In Country Version India (CIN) this component handles sales processes as
found in India In addition to the generic functions it allows you to
Handle CENVAT in your sales processes
The system calculates excise on your sales and creates excise invoices as
required and makes the appropriate postings to your CENVAT accounts
It covers sales from factories sales from depots and offers functions for other
types of goods movements it also covers sales to export-oriented units and
export sales
Record concessional and exemption forms sent to you by your customers
Make adjustment postings to your CENVAT accounts
Excise Invoice (Outgoing)
Definition
The document that acts as the proof of payment of excise duty and is required
for the customer to take CENVAT credit on the item
Use
In the SAP System there are three different procedures for creating excise
invoices
Sales direct from the factory
This procedure is for when you sell manufactured goods straight from the
factory at which they were produced in which case you levy excise duty when
the goods leave the factory on their way to the customer
If when you send the goods to the customer you enclose the commercial
invoice you create the excise invoice with reference to the commercial invoice
If you want to send the commercial invoice after you have dispatched the goods
however you create the excise invoice with reference to a pro forma
commercial invoice For more information about these procedures see Sales
from Factories
As well as creating excise invoices individually you can also create them in
batches (see Creation of Excise Invoices in Batches)
Sales from depots
A depot is a site at which the goods are stored away from the factory at which
they were produced In this procedure you have to levy the excise duty when
you transfer the goods from the factory to the depot and then make sure this is
passed on to the customer when it makes a purchase For more information see
Sales from Depots
Sales (other goods movements)
Some other goods movements may also require you to create an excise invoice
with reference to other documents The SAP System offers separate functions
for these purposes (see Excise Invoices (Outgoing) for Other Movements)
StructureNumbering of Excise Invoices
Outgoing excise invoices have two numbers an internal document number
which is assigned immediately you create an excise invoice and an excise
invoice number which is not assigned until you have verified and posted it
As far as the excise invoice number is concerned you have to number your
outgoing excise invoices in sequential order starting each year on 1 April You
must notify the excise authority of the jurisdiction of the invoicing location The
serial number must be printed on each page of the excise invoice
Each number range is governed by a series group You must create at least one
series group in order to be able to number the excise invoices If you need more
than one number range you must create the corresponding number of series
groups You do so in the CIN Implementation Guide (IMG) by choosing Global
Settings reg Series Groups
Number of Line Items Per Excise Invoice
Some states allow you to include only a limited number of items for each page
of an excise invoice (for example if the excise invoices are to be printed on
prenumbered forms) You can customize the system so that it prints the excise
invoice accordingly in the CIN IMG by choosing Global Settings reg Excise
Registration IDs
Customer Master (Excise Data) Definition
The part of the customer master record that contains information relating to
Indian excise duty
Use
In conjunction with other data this data is used to calculate excise duty on
various transactions
To maintain the data from the SAP Easy Access screen choose Indirect Taxes reg
Master Data reg Excise Rate Maintenance and then select the following options
described below
Structure
The excise part of the customer master contains the following information
Customer Excise Details
On this screen you enter your customers tax registration numbers which are
used for various forms of correspondence and reports
1 Excise registration number (and the range division and collectorate in which
this is located)
2 Central sales tax (CST) number
3 Local sales tax (LST) registration number
4 Permanent account number (PAN)
In order for the system to be able to calculate which rate of excise duty to apply
on sales to the customer you must also assign it a customer excise duty status
(for more information about how this works see Determination of Excise Duty
Rates)
Excise Indicator for Plant and Customer
On this screen you define the final excise duty indicator (for more information
about how this works see Determination of Excise Duty Rates)
Determination of Excise Duty Use
When you execute a business transaction involving materials that are subject to
excise duty the system automatically calculates the duty for you
Prerequisites
In order for the system to be able to determine which rate of excise duty to
apply you must have maintained all the data on the Excise Rate Maintenance
screen which you can access from the SAP Easy Access screen by choosing
Indirect Taxes reg Master Data reg Excise Rate Maintenance
You maintain the following types of data
Plant master data
You assign each of your plants an excise duty indicator You can use the same
indicator for all the plants with the same excise status from a legal point of view
such as all those that are in an exempt zone
See also the information about manufacturers that are only entitled to deduct a
certain portion of the duty (see Partial CENVAT Credit)
Vendor master data
For each of your vendors with the same excise status from a legal perspective
you define an excise duty indicator You must also specify the vendor type ndash for
example whether the vendor is a manufacturer a depot or a first-stage dealer
You must also stipulate if the vendor qualifies as a small-scale industry
For each permutation of plant indicator and vendor indicator you then create a
final excise duty indicator
Customer master data
Similarly you assign the same excise duty indicator to each of your customers
that share the same legal excise status
Again for each permutation of plant indicator and customer indicator you then
create a final excise duty indicator
Material master data
Each material is assigned a chapter ID
Excise tax rate
For every chapter ID and final excise duty indicator you maintain the rate of
excise duty
If your business only qualifies for partial CENVAT credit you must customize
your system accordingly
Activities
Let us consider an example to illustrate how the system determines which rate
of excise duty to apply to a material Assume you are posting a sale of ball
bearings to a customer The system automatically determines the rate of excise
duty as follows
Looks up the customer master data to see what status you have assigned the
customer
Lets assume youve assigned the customer status 3
Looks up the plant master data to see what status you have assigned the plant
Similarly your plant has status 2
The system looks up the table under Excise Indicator for Plant and Customer to
see what the final excise duty indictor is for customer status 3 and plant status
2 It is 7
The system determines the chapter ID of the ball bearing for the plant
Letrsquos assume the chapter ID at plant for the ball bearings is 100001
Finally the system looks up the table under Excise Tax Rate to see what rate of
duty applies to chapter ID 100001 under status 7
Plant Master (Excise Data) Definition
The part of the plant master record that contains information relating to Indian
excise duty
Use
In conjunction with other data this data is used to calculate excise duty on
various transactions
To maintain the data from the SAP Easy Access screen choose Indirect Taxes reg
Master Data reg Excise Rate Maintenance and then select the following options
described below
Structure
The excise part of the plant master is divided into the following screens
Excise Indicator for Plant
On this screen you enter your plants tax registration numbers which are used
for various forms of correspondence and reports
1 Central sales tax (CST) number
2 Local sales tax (LST) registration number
3 Permanent account number (PAN)
In order for the system to be able to calculate which rate of excise duty to apply
on purchases for this plant you must also assign it a plant excise duty status
(for more information about how this works see Determination of Excise Duty
Rates)
Excise Indicator for Plant and Vendor
On this screen you define the final excise duty indicator (for more information
about how this works see Determination of Excise Duty Rates)
Excise Indicator for Plant and Customer
On this screen you define the final excise duty indicator (for more information
about how this works see Determination of Excise Duty Rates)
Automatic Creation of Excise Invoices Use
The SAP System can automatically create an outgoing excise invoice for you
immediately you post a commercial invoice (or a pro forma invoice) for a
customer sale This function applies to excise invoices for sales from factories
only
Prerequisites
To activate this function in the Country Version India (CIN) Implementation
Guide (IMG) make the following settings
1 Under Global Settings reg Excise Groups select Create EI
This activates the automatic creation function
2 Under Sales and Distribution reg Utilization Determination
Here you specify which CENVAT accounts the system is to post the different
types of excise duty to
3 Under Sales and Distribution reg Excise GroupndashSeries Group Determination
Here you specify which excise group and series group the excise invoices are to
be created for
Features
When you post an invoice the system creates an excise invoice All the
information that it needs to create the excise invoice is provided either by the
invoice or by the Customizing settings that you have made in Sales and
Distribution It also determines the excise invoice type automatically by means
of a user exit
Creating Excise Invoices for Stock Transfers 1 From the SAP Easy Access screen choose Indirect Taxes reg Procurement reg
Excise Invoice reg For Depot reg CreateChangeDisplay
2 In the Material document field enter the goods receipt number and choose
The system displays the information from the goods receipt for example the
sending plant the excise registration the range the division and the
collectorate
3 Choose Details
The system copies the items from the goods receipt document In the depot it is
possible to have a separate excise invoice at line item level
4 Enter the internal document number of the excise invoice sent by the factory
5 Choose More documents to go the excise invoice details screen
6 Enter the internal document number of the excise invoice from the factory
The system copies the information to the line item (for example the excise
invoice number the excise invoice date the item number the chapter ID the
excise invoice quantity the amount of excise duty paid the excise base value
and the serial number of the Part II register entry with which the excise was
paid)
You can change the receipt quantity to match the actual quantity received at
the depot if necessary The system automatically adjusts the excise
accordingly
7 Go back to the item details screen
8 Save the excise invoice
Creating Excise Invoices for Direct Purchases 1 From the SAP Easy Access screen choose Indirect Taxes reg Procurement reg
Excise Invoice reg For Depot reg CreateChangeDisplay
2 In the Material document field enter the goods receipt number and choose
The system displays the information from the goods receipt for example the
sending plant the excise registration the range the division and the
collectorate
You can also maintain the excise registration details for the ship-from party as
for with the vendor The ship-from can be different from the vendor code (The
delivering plant can be maintained as a ship-from in the system When a valid
ship-from is entered the excise registration details copied from the vendor will
be overwritten by the ship-from excise registration details)
The ship-from registration details displayed can also be overwritten manually
The dealers commercial invoice number can be stored in the vendor excise
invoice number as in this case the dealer himself will not have an excise
invoice
3 Choose Details
The system copies the items from the goods receipt document It also copies the
vendors excise invoice number and the serial numbers of the entries in the RG
23A RG 23C and personal ledger account (PLA) registers
4 Enter the internal document number of the excise invoice sent by the factory
5 Select an item and choose More documents to go the excise invoice details
screen
In the case of direct purchases there will not be any excise invoice in the
system so leave the internal document field blank The vendors invoice will
show the details of the excise invoices through which excise has been paid for
the item that is being dispatched You can enter these details here
6 For each item the chapter ID excise base value and excise duty amounts
are defaulted from the purchase order You can change them if there is any
difference Enter the excise amount paid and the receipt quantity You also
enter the Part II register serial numbers with which the excise duty was paid and
the excise registration information from the original excise invoice
7 Go back to the item details screen
8 Save the excise invoice
The system creates an entry in register RG 23D You can change the excise
invoice as long as it has not been used in any sales
Assigning Excise Invoices to a Delivery Use
You follow this procedure to specify which excise invoices are to be assigned to
a delivery from a depot (or other material document)
You can also automate this procedure using the batch selection program
(J_1IJCHK) by making the appropriate Customizing settings in the Country
Version India (CIN) Implementation Guide (IMG)
Procedure
1 From the SAP Easy Access screen choose Indirect Taxes reg SalesOutbound
Movements reg Excise Invoice reg For Depot reg CreateChangeDisplay reg Delivery
or Material Document reg RG 23D Selection
2 Enter the delivery document number or the material number and choose
3 Select the excise invoice you want
4 Choose
5 Choose Excise invoice
A list of excise invoices appears These are the excise invoices at the depot with
a balance quantity
The system also shows a list of the A certificates that can be used You can pick
up any of the A certificates but they must be for the same excise invoice You
can only pick up an A certificate in its entirety You cannot select part of an A
certificate
6 Select the excise invoices that are relevant to the delivery
7 Specify what quantity to be used from each excise invoice
The system recalculates the excise accordingly
8 Go back to the item details screen
9 Save the data
Result
The system creates an entry in register RG 23D and generates the depot excise
invoice numbers
If you selected any A certificates the system also generates additional entries in
the RG 23D register The system marks the original A certificates as updated so
that they cannot be used for any other removals
Continue see Volume 2 (Next post)
EXTERNAL SERVICE MASTER
EXTERNAL SERVICE MASTER ESM
We procure the different type of services from vendors they are-
1048774 Hardware amp software services
1048774 Construction amp transportation services
1048774 Machinery services
1048774 Annual maintenance services
1048774 Present to and breakdown service Etc
Service Procurement Cycle -
1048774 Requirement identification
1048774 Source determination
1048774 Source selection
1048774 Service master
1048774 Service PO
1048774 Service entry sheet acceptance
1048774 Invoice with respect to service entry sheet
Steps to perform services -
1 Create service master (AC03)
2 Create Service PO (ME21N) with AC Assignment category lsquoKrsquo amp Item
Category lsquoDrsquo
3 Create service entry sheet (ML81N)
4 Invoice with respect to Service Entry sheet
Customize settings
(For service category Number Ranges amp organization status for service
category)
SPRO 1048774 IMG 1048774 MM 1048774 ESM 1048774 Service Master
1048774 Define organization Status for service Categories
1048774 Define Service Category
1048774 Define Number Ranges
Define organization Status for service Categories
bull Click on New Entries
bull Org service Category
bull BDS (Basic data service is stored in service master record under this service
category)
bull CNST 1048774 Controlling Status
bull PUST 1048774 Purchasing data Status
bull SDST 1048774 Sales amp Distributed Status
bull Org status description service category 1048774 Press Enter amp Save
Define Service Category
bull Same path as above
bull Select Standard
bull Click on Copy as
bull AC reference 1048774 always takes as 0006
bull Enter amp Save
Define Number Ranges
Click on groups 1048774 Groups 1048774 Insert 1048774 select enter Number Ranges
Select the service category
Click on Element
Select Group amp Click on Element Group
Save
Create Service Master - (AC03)
Click on Create New Services
Service Number (any number) Service Category
Basic unit of measure (Hours lsquoHrsquo)
Enter
Basic Data 1048774 Master Service Group 1048774 007
Valuation class 1048774 3200 1048774 Enter 1048774 Save
To See the Service list 1048774 AC06
Create Service PO (ME21N)
AC assignment category lsquoKrsquo Item Category lsquoDrsquo
Enter the Short text Quantity Delivery date Net Price Material group Plant
Storage Location
Enter service number in Service Tab (Item Details) quantity price Enter
Account Assignment 1048774 GL Account Number eg400000
Cost Center eg 9999
Press Enter amp Save
Create Service Entry Sheet - ML81N
Select other purchase order (enter PO number) 1048774 Enter 1048774 Click on Create1048774 Enter
Short Text 1048774 Enter 1048774 Service Number 1048774 Enter ndashClick on Flag button 1048774 Save
Take Service entry Sheet Number
Go to Invoice MIRO 1048774 Enter company code 1048774 Select Service Sheet Option 1048774 Enter
Service Entry Sheet Number 1048774 save it
Physical Inventory and Inventory Management
Physical inventory Process - 1 Create Physical inventory document
T Code MI01 ndash Create single inventory document
T Code MI31 ndash Create multiple physical inventory documents
I Enter the desired fields ie material material type site storage location and
Maximum number items Documents ndash 100 etc 1048774 Press Enter
II Click on Process Session
III Select the line items and click on the process
IV System displays a dialog box select Background and click on process
Inventory document is created
2 Print Inventory Document and handed over to responsible person say
Manager
3 Enter Physical Inventory count
T Code MI04
i Enter the physical inventory document number Fiscal year count date 1048774 Press
enter
ii Enter the Material Quantity and click on post
4 Listing of difference
T Code MI20
Enter the physical inventory document number and execute system displays a
screen wherein we will be able to view the differences
5 Post the differences
T Code MI07 amp Mov Type 701 amp 702
Enter the physical inventory document number year posting date enter the
difference and post
INVENTORY MANAGEMENT Maintaining stock by value or by quantity is called inventory The total inventory
management deals with the goods movement of the material
Goods movement -
It is a process in which transaction resulting change in stocks It is further sub-
divided into three categories
1 Goods Receipt (GR)
2 Goods Issue (GI)
3 Transfer Posting (TP)
Goods Receipt (GR) - It is a goods movement in which receipt of goods is
posted for vendor or for production A GR posted in the system will leads to
increase in stock No Concept of Price or value
Goods Issue (GI) - It is goods movement in which material withdrawal is
posted for consumption or for customer A GI posted in system will leads to
decrease in stock
Stock Transfer (ST) - It is method of removal of material from one location
and transferring it to another location This process is performed between two
plants and two storage locations
Transfer Posting (TP) - It is a general term of stock transfer that changes the
stock type or stock categories The difference between transfer posting and
stock transfer is -
TP is logical stock transfer and ST is a physical stock transfer
Movement Type - It is a three-digit code which plays a role of important
control function in inventory management It acts as a central role in automatic
account determination It determines which stock account or consumption
account is updated in financial accounting
Reservation - It stores requisition created from particular cost center to
particular department for issuing the material reservation posted in the system
It leads to decrease in stock
Stock Types - The different stock types are
1 Unrestricted use stock
2 Quality inspection stock
3 Blocked stock
4 Warehouse stock
Transaction code -
1 To Create GR - MIGO
2 To Create GI - MB1A
3 For Transfer Posting - MB1B
4 To display MaterialGR document ndash MB03
5 To create reservations - MB21 MB22 MB23
6 To See Stock Overview - MMBE
7 To enter Other GR - MB1C
When GR is posted in the system
1 Material document is created - MB03
2 Accounting Document is generated - MB03
3 MMR updated - MM02 MM03
4 PO history updated - ME23N
Movement Typersquos
Movement Types under GR - 101 331333335501503505551553555
561351 (For all Mov Typersquos there is a reversal eg 101 has 102 Note No
reversal for 121)
Movement Typersquos under GI - 201 331333335551553555
Transfer Posting It is performed in three ways
1 TP BW Plant to Plant
2 TP BW Storage Location to Storage Location
3 TP BW Stock to Stock
Movement Types under TP BW Plant to Plant
301 - 1 step
303 amp 305 - 2 step
Movement Type under TP BW Storage location to Storage Location
311 - 1 step
313 amp 315 - 2 step
Movement Type under TP BW stock to stock
321 323 325 343349
To Cancel the GR Movement type 102
Return delivery to vendor movement type 122 amp T Code MIGO
Transfer Posting Stock to Stock
From Blocked stock to Quality Inspection
T Code MB1B amp Movement Type 349
From Blocked stock to Unrestricted Stock
T Code MB1B amp Movement Type 343
From Quality Inspection to Unrestricted Stock
T Code MB1B amp Movement Type 321
Transfer Posting from Plant to Plant
For One Step Movement Type 301
For Two Steps Movement Type 303 amp 305
After posting stock will display in Stock in Transit (Plant)
To receive material by receiving Plant Movement Type 305
Transfer Posting BW Storage Location to Storage Location
Under One Plant BW two Storage Locationrsquos Movement Type 311
Back to Parent storage Location Movement Type 313 (It Show stock in transfer)
use Movement type 315 at Parent storage location
To create Goods Issue (GI) T Code MB1A amp Movement Type 201
To Create Reservations T Code MB21 MB22 amp MB23
Creation of GI wrt Reservations
T Code MB1A amp Movement Type 201
Click on Reservation Enter Reservation Number 1048774 Click on Adopt + Details
GR wrt Reservations T Code MIGO amp Select as Reservation instead of GR
GR without PO Movement type 501 amp T Code MB1C Select others instead of
Purchase order Enter Material Quantity Plant Storage Location 1048774 Press Enter
Partner Option will be visible (Vendor) 1048774 Save it
Invoice - Invoice is a document which is issued to a buyer (Company) from the
supplier (vendor) for the payment The following information is maintained in
invoice
Invoice date Posting date Invoice ref number tax amount amount tax code
terms of payments vendor address banking accounting information etc
When invoice document is posted in the system
bull Invoice document created
bull Accounting document is generated (MIR4)
bull PO history updated (ME23N)
bull FI document created (FB03)
PRICE DETERMINATION PROCESS or PRICING PROCEDURE
CONDITIONS OR PRICING PROCEDURE or PRICE DETERMINATION PROCESSWe deal with the Pricing Procedure for vendors
PB00 Gross Price (info record contract scheduled Agreement)
PBXX Gross Price (PO)
FRA1 Freight
RA00 Discount on net
RA01 Discount on Gross
ZA00 Surcharge on net
SKT0 Surcharge discount
ZPB0 Rebates
MWVS Input Tax
MWAS Output Tax
BASB Base Amount
RM0000 Calculation Schema or Pricing Procedure
(PB00 amp PBXX)
RM0002 Calculation Schema or Pricing Procedure
(PB00)
PB00 --gt AB00
Copy the Standard one and create new one (ours)
RM0000 contains all the condition types
Pricing Procedure (PP)
We define the pricing procedure to define condition supplement for the material
price The condition supplement specifies the discount surcharge freight etc
that we want a system every time to access material price condition records
The total value of the material is calculated or based on all addition and
subtraction ie discounts surcharge tax freight etc
Condition Table
It is a table which defines the structure of condition record key
Condition Record
It is a data record used to store conditions or condition supplements ie
condition like discount freight and surcharge Tax etc
Condition Type
It is used for different functions In Pricing the condition types leads you to
differentiate different types of discounts in output determination batch
determination difference between two output types such as delivery note or
order confirmation between different strategy types
Access Sequence
It specifies the order in which system searches or access the condition records
from condition table
Difference between PB00 amp PBXX
1 Condition maintained in PB00 is time dependent whereas PBXX is time
independent
2 Condition type PB00 ndash used for IR RFQ Contract Schedule Agreement
Condition type PBXX ndash used for PO
Calculation Schema
The main function of calculation schema is to provide framework of steps for the
price determination process to specify the discounts surcharge freight rebate
etc
It also determines the sequence of conditions that are to be followed and in
which sequence
Schema Group Vendor
The main function of it is to identify or to pick the right process and conditions
for a particular vendor
Schema Group Purchasing Organization
Key that determines which calculation schema (pricing procedure) is to be used
in purchasing documents assigned to the relevant purchasing organization
Schema Group
It allows to group together the purchasing organizations which uses the same
calculation schema
Steps -
1 Create Access sequence
2 Create condition types
3 Create pricing procedure or calculation schema
4 Link pricing procedure amp access sequence to condition type
5 Create schema group for vendor
6 Create schema group for purchase organization
7 Assign schema group vendor-to-vendor master record in purchasing data
view
8 Assign schema group purchase organization to our purchase organization
9 In inforecord purchase organization data enter condition types and pricing or
calculation procedure
CUSTOMIZE SETTINGS -
SPRO --gt IMG--gtMM--gtPUR--gtConditions --gtDefine price determination Process
1 Define access sequence
2 Define Condition type
3 Define cal Schema
4 Define schema group
o Schema group vendor
o Schema group purchasing group
5 Assignment of schema group to PUR org
6 Define schema determination agrave determine cal schema for standard PO
PURCHASE ORDER
PURCHASE ORDER
PO is an external document created for the procurement of materials and
services from vendor The document of PO is also divided into 4 parts as PR -
1 Document Overview
2 Header (DeliveryInvoice Conditions Address Partners Org data status)
3 Item Overview (AC assign cat Item Category Material Plant Del date SL)
4 Item Details (Material data Confirmations condition control delivery delivery
Schedule Quantitiesweights invoice)
A procurement type is defined for each of the document items The following
procurement types exist
1048774 Standard
1048774 Subcontracting
1048774 Consignment
1048774 Stock transfer
1048774 External service
bull There are different ways to create PO -
1 Directly through transaction code ME21N
2 With reference to PR
3 With reference to RFQ
4 With reference to info records
5 With reference to Contracts
6 With reference to Cost Centre GL Account (cost element) for consumable
items or not stock items with account assignment category lsquoKrsquo (K= cost centre)
(For non stock and consumables)
0 COMMENTS L INKS TO THIS POST
LABELS PO PURCHASE ORDER
Reaction
s
PURCHASE REQUISITION T CODE ME51 or ME51N
Purchasing Requisition -
It is a request or instruction from particular department (Cost Centre) to
purchasing department to procure certain quantity of material and services It is
only one internal document in SAP-MM
Purchasing Requisition document is divided into four parts -
bull Document Overview
bull Header
bull Item Overview
bull Item Details
Document Overview -
It displays the list of purchasing documents which are created previously
according to our requirement
Header -
Any text message or information is maintained
Item Overview -
In this we enter material plant delivery date quantity storage location
purchasing group AC assignment category Item category etc
Item Details -
It displays the detailed information about item overview (like Master data
valuation source of supply contact person delivery address status etc)
0 COMMENTS L INKS TO THIS POST
LABELS PR PURCHASE PURCHASE ORDER PURCHASE REQUIS IT ION SALES ORDER
Reaction
s
Automatic PURCHASE ORDER (PO) How Automatic PO raised
How Automatic PO raised
At fixed time say 1230 AM automatic scheduler runs and checks whether the
stock is less than or equal to the replenishment point If stock is less than or
equal to Repli Point than PR raised automatically to Purchasing Deptt
bull Activate the option automatic PO in purchasing view in material master record
bull Activate the option automatic PO in purchasing data view in vendor master
record
bull Maintain Source List amp select fixed vendor
bull PR crated automatically
bull Automatic creation of PO from PR ndash ME59
Enter the Purchasing group purchasing organization Vendor Plant and
Purchasing Requisition Document Number 1048774 Execute
RELEASE PROCEDURE Release strategyThe main function of Release procedure is to determine the approval process
or the release process for the procurement of material amp services rather than
relying for manual signatures The release procedure contains release strategy
Release Strategy (RS)
A plan defining the release codes with which a purchase requisition item a
complete purchase requisition or a complete external purchasing document
must
be released (that is approved) and the sequence in which release is to be
effected
using these codes It is a unique set of conditions sequence and level of release
It is a 2 digit code eg S1 S2 S3etc
The Release Strategy contains the following -
bull Release Group
bull Release Codes
bull Release Indicators
bull Release Prerequisite
Release Group -
It is a 2-digit code which is assigned with a class (Class contains group of
characteristics) It contains one or more release strategies
Release Codes -
It is a 2digit code which identifies the department or responsible person for
the approval process amp release process
Eg AA - Manager
BB - Sr Manager
CC - Vice President
DD - Managing Director
Release Indicator -
It is a Code that represents the release status If the proper approval
process is performed that the release Strategy has to be release if it is not
performed than the Release Strategy is blocked
R ndash Release
B ndash Blocked
Release Conditions -
It determines the type of the release strategy
For eg
bull If the price ranges from 1 to 1000 It is approved by AA BB and CC
bull If the ranges from1001 to 1lac then it is approved by AA BB CC and DD
- 80 -
Release Prerequisite
It will informs the system which RS has to be take place in the PO CEKKO is
a communication structure where it displays the field names amp field lengths to
create characteristics ie we maintain characteristics in customizing by
selecting
the field names from this communication structure for all external documents
CEBAN is used for the purchasing requisition
Characteristics -
1 Net value of PO --- GNETW (GSWRT for PR)
2 Plant --- WERKS
3 Purchasing organization -- EKORG
4 Purchasing Group --- EKGRP
5Material group ndashMATKL
CUSTOMIZE SETTINGSSPRO--gtIMG--gt MM--gt Purchasing--gtPO--gt Release Procedure for PO
1 Edit Characteristics T Code CT04
2 Edit Class T Code CL02
3 Define Release Procedure for PO
4 Check Release Strategy
Edit Characteristics -
Characteristics - eg NET VALUE OF VALUE
Click or Create Button
Under Basic Data
Description - Value for PO
Status - Release
Data Type - Currency Format
No Of Characters - 15
Currency - EUR
Activate multiple values amp Internal Values Allowed
Additional Data
Table name - CEKKO
Field Name - GNETW
Values
Activate Additional Values
Save the document
Create another Characteristic for Plant -
Plant date Create ndash Description Status
Data Type Characteristic Format
Number of Characteristics 4
Activate Multiple Values
Additional data-
Table Name - CEKKO
Field Name - WERKS
Values
Activate Additional Values
For Purchasing Organization Name - EKORG
For purchasing Group EKGRP
Edit Class
Class - SAPMM
Class Type - 032 Release Strategies
Click on Create button
Basic Data
Description - Class for PO
Status - Released
Valid From _____ Valid to _____
Click on Characteristic
Characteristic
Enter all the Characteristics Created amp Save it
Define Release Procedure for PO-
bull Release Group
bull Release Codes
bull Release Indicators
bull Release Strategies
bull Workflow
Release Group - New Entries Release Group Class and Description
Press Enter amp Save
Release Code - New Entries
Group Codes Description
99 AA Manager
99 BB Sr Manager
99 CC Vice President
99 DD Managing Director
Press Enter amp Save
Release Indicator - (B ndash Blocked R - Release)
New Entries
Release Indicators Description
B Blocked
R Released
Release Strategies -
New Entries
Release Group 99
Release Strategy S1
Release Codes AA BB CC and DD
Click on Release Prerequisites
Release Status -
Continue
Classification
Enter the Value (Same Price)
Plant (9999)
Go Back amp Save it
Release Simulation - Simulate Release
Create a PO -
There are two ways to release the PO
Individual releaseME28
Collective release ME29N
How to delete procedure
Delete Release GP
Create Release RG
Delete R Strategies
Delete R Code
Delete R Group
SAP R3 SYSTEM LANDSCAPE
System LandscapeThe system landscape contains all the SAP Systems that you have installed It
can consist of several system groups whorsquos SAP Systems are linked by transport
routes
After you decide which clients you need and which roles you want them to have
you need to decide how to distribute them amongst the different SAP Systems
You can set up multiple clients independently of one another in a single SAP
System However when you configure the data you must remember that cross-
client Customizing settings and Repository objects are identical for all clients in
a single SAP System Changes made in one client apply immediately to all
clients in the system
Three-System Landscape
SAP recommends a three-system landscape in which each of the central clients
has its own SAP System
This consists of a development system DEV a quality assurance system QAS
and a production system PRD The development system contains the
Customizing client CUST the quality assurance system contains the quality
assurance client QTST and the production system contains the production client
PROD Make all changes to Customizing data and Repository objects in the
Customizing client When you release the corresponding change requests they
are transported into the quality assurance client This means that changes to
cross-client data only appear in the quality assurance client after the transport
In the quality assurance client you can test whether the transports are
complete or whether any linked changes are missing and are still in unreleased
change requests If the test is successful the change requests are transported
into the production client The production client is completely separate from the
other clients as regards cross-client data
SPECIAL STOCKS amp SPECIAL PROCUREMENT TYPES
Special Stocks are those stocks which are not belongs to our company code
These are not placed in our storage locations amp no physical inventory is
performed and treated as special stocks for the reason of ownership
Different types are of Special Stocks are as follows
1 Subcontracting
2 Consignment
3 Pipeline
4 Stock transfer
5 Third party
6 Returnable transport packaging
7 Sales order stock
8 Project stock
SUBCONTRACTING
In subcontracting process we create subcontracting PO to supply or issue
subcomponents to vendor in order to get final product The price maintained in
subcontracting PO is a service charge paid to vendor
Steps to perform subcontracting
1 Create subcontracting inforecord (Optional)
2 Create subcontracting PO with item category L
There are to ways to supply subcomponents to vendor
bull Manually maintain the subcomponents in the subcontracting
PO though explode BOM
bull Through BOM (Bill of material) T Code CS01 CS02 amp CS03
3 Create Transfer Posting with Movement Type 541 to issue the subcomponents
to the vendor
4 Goods Reciept
5 Invoice Reciept
Path ME21N ---gt Enter Item Category L --gt Material (End Product) PO
Quantity Delivery Date Net Price Plant --gt Click on Item Details --gt Tab
Material Data -- gtComponents select Explode BOM --gt Click on Components
button --gt Enter the subcomponents --gt Go back amp Save
Create Transfer Posting with movement type 541 amp T Code MB1B
GR MIGO
IR MIRO
CONSIGNMENT - (No Concept of Invoice)
In consignment process we will not create Purchasing document for the vendor
vendor himself send the material to our plant though the material is available
to our plant the responsibility amp ownership of the material is of vendor Aliability
only arises when the material withdrawal (Consumption) is posted in the system
from consignment stock
Steps
1 Create Consignment info record (mandatory)
2 Create Consignment purchase order with item category lsquoKrsquo amp maintain Info
record number
3 Create GR Movement type lsquo101Krsquo
4 Create GI Movement Type lsquo201Krsquo
5 Consignment settlement T Code MRKO
Path --gtME11 --gt In info record --gt Purchasing Org Data 1 views of info record
enter the tax code and save it
--gt Create Consignment Purchase Order ME21N (Price option is grayed out with
price zero)
--gt Create GR with movement type 101K
--gt Create Goods Issue (GI) T Code MB1A amp Movement Type 201K Enter Cost
center vendor
--gt Consignment Settlement T Code MRKO Click Activate Consignment Activate
Settle Execute
--gt Display the Document Number ie Invoice receipt T Code FB03
PIPELINE PROCESS (No Concept of Invoice)
In pipeline handling your company does not need to order or store the material
concerned It is ready available to you as and when required via pipeline (eg oil
or water) or some other type of cable (eg electricity) Consumption of the
material is settled with the vendor on a regular basis
Steps
1 Create a Material master record with material type PIPE
2 Create Pipeline info record
3 Create GI with movement type 201P
4 Pipeline settlement T Code MRKO
RETURNABLE TRANSPORT PACKAGING (RTP)
When company orders goods from a vendor the goods are delivered with
returnable transport packaging (pallets containers) that belongs to the vendor
and is stored on our premises until you return it to the vendor
Steps
1 Create Material master record with material type LEIH
2 Create PO
3 Create GR by maintaining RTP material by selecting the option transport
equipments with movement type 501M
4 IR
STOCK TRANSFER
In stock transfer processing goods are procured and supplied within a company
One plant orders the goods internally to another plant (receiving plantissuing
plant) The goods are procured with a special type of purchase order the stock
transport order
Steps
1 Create a Material master in both supplying and receiving plant
2 Create stock transport order (STO) with item category lsquoUrsquo
3 Create transfer posting with movement type 351 amp T Code MB1B (Go to
MMBE stock overview the stock will decrease in supplying plant and it will not
update stock of receiving plant it will be under stock in transit)
4 Create GR stock will update in receiving plant
This scenario is under one company code between two plants
SAP IMPLEMENTATION PROCESS End to End Inplementation of SAP
First we have to prepare documentation about the client business (like turnover
vendors customers payments materials production marketing etc)
The implementer company made two teams (1) Steering team (2) Steering
community
Steering team (SAP functional consultants) prepares a detailed
documentation about the client with the help of core team (client company
team)
amp this study is known as Feasibility Study After that the steering team handed
over this documentation to Steering community (Project manager Sr software
engineer and other higher authorities)
Steering community prepares the BBP (Business Blue Print) BBP
Prepares in MS-Word
10487741048774 ASAP - Accelerated System Application Product in Data Processing
10487741048774 Business Process - ASAP Methodology
1 Project Preparation
2 BBP (Business Blue Print)
3 Realization
4 Final Preparation
5 Go live amp Support
10487741048774 Project Preparation -
It consists of identifying team members amp development strategy as
how to go
AS ndash IS (Existing Process followed requirements)
TO ndash BE (Requirement analysis and best process recommended)
Difference between (AS ndash IS) amp (TO - BE) is called GAP Analysis
10487741048774 Business Blue Print (BPP) -
It is a legal documentation between client amp the company
(implementer service provider) We have to understand the current business
process of client amp analyzing the business amp prepare documentation It is a
detailed documentation for the client
10487741048774 Realization -
This Phase is used to Implement or migrate the entire business of
client from Non-SAP environment to SAP environment
10487741048774 Final Preparation -
This phase is used for testing amp end user training After successfully
completion of this phase client is ready to run business in SAP R3
10487741048774 Go live amp Support -
In this phase we deliver the project end date amp end user training at
client site
THIRD - PARTY PROCESSING
THIRD - PARTY PROCESSING
In third party processing your company passes on a sales order to an external
vendor who sends the goods directly to the customer The sales order is not
processed by your company but by the vendor Third-party items can be
entered in purchase requisitions purchase orders and sales orders Third party
processing is integrated with Sales and Distribution If the sales order contains
third-party items the system creates a purchase requisition from the order
Steps
1 Create MMR with sales views and maintain Division Distribution channel
sales org item category group and general item category group ndash BANS (Third
party item) amp Account group Sold to party
2 Create Customer master record T Code XD01 XD02 XD03
3 Create sales order T Code VA01 VA02 VA03 (PR generated automatically)
4 PO - T Code ME21N
5 GR ndash T Code MIGO
6 IR ndash T Code MIRO
7 Sales Billing Billing Document T Code VF01 VF02 VF03
the RG 23D register The system marks the original A certificates as updated so
that they cannot be used for any other removals
CIN - Country India Version ~ Vol 2
Continue Volume 1
Creating Excise Invoices
Use
This is the procedure that you follow to create an excise invoice for the less
common types of goods movement
Procedure
1 From the SAP Easy Access screen choose Indirect Taxes reg SalesOutbound
Movements reg Excise Invoice reg For Other Movements reg CreateChangeDisplay
reg
2 On the selection screen enter data as required including
(i)Reference
group box
Specify which document you want to create the excise invoice for and which
excise group it is for
(ii)Details
group box
Specify the vendor or customer that you are sending the invoice to
3 Choose
If you entered an internal document number the system copies the item details
from it
4 Choose
5 Enter line items for each of the materials to be included in the excise invoice
For each item enter the following data
(i)Material
(ii)Quantity
(iii)Unit of measure
(iv)Base value
(v)Excise duty
6 To pick the rate and amount from a specific excise invoice choose Get excise
invoice
7 Save the excise invoice
If you are using the one-step procedure the system creates and posts an excise
invoice Otherwise the system saves the information but does not make any
postings it now has to be verified
Verifying and Posting Excise Invoices
Use
You follow this procedure to verify that the information in an excise invoice that
has already been created and to post it once you are satisfied
Procedure
From the SAP Easy Access screen choose Indirect Taxes reg SalesOutbound
Movements reg Excise Invoice reg For Other Movements reg Posting
1 Enter the internal document number of the excise invoice
2 Choose Release to accounting
The system displays the excise invoice The excise duty that is to be posted is
displayed at the foot of the screen which you can change if necessary
3 To access the balance utilization choose
4 To display the balance available on the CENVAT accounts choose Account
balances
5 Save the excise invoice
The system generates the accounting documents
6 To print the excise invoice choose
Making a Transfer Posting
Use
In this procedure you make a transfer posting for the goods ordered by another
plant For more information about this function see Entering the Removal from
Storage at the Issuing Plant
Procedure
1 From the SAP Easy Access screen choose Logistics reg Materials Management
reg Inventory Management reg Goods Movement reg Transfer Posting
2 Choose Movement type reg Transfer posting reg Plant to plant reg To stock in
transit
3 Enter the number of the issuing plant and storage location
4 Choose To purchase order
5 In the dialog box enter the number of the stock transport order that the
receiving plant created and choose
6 Check the data
7 Save the transfer posting
Transaction Codes for India
Transaction Action
J1I2 Prepare a sales tax register
J1I3 Create outgoing excise invoices in batches
J1I5
Update the RG 1 and Part I registers
J1I8
Post the challan used to remit TDS
J1IC194C
Create annual return under section 194 C (Classic TDS)
J1IC194D
Create annual return under section 194 D (Classic TDS)
J1IC194I
Create annual return under section 194 I (Classic TDS)
J1IC194J
Create annual return under section 194 J (Classic TDS)
J1IEX
Incoming Excise Invoices (central transaction)
J1IEX_C
Capture an incoming excise invoice (excise clerk)
J1IEX_P
Post an incoming excise invoice (excise supervisor)
J1INBANK
Post a bank challan
J1INCANC
Cancel a vendor withholding tax certificate
J1INCERT
Print a vendor withholding tax certificate
J1INCHLN
Create a remittance challan
J1INCUST
Post a customer withholding tax certificate
J1INHC
Withholding Tax Migration Health Check Program
J1INMIG
Withholding Tax Data Migration Tool
JI1NCHLC
Create a remittance challan for customers
J1INCC
Print customer withholding tax certificates
J1INMIS
Withholding Tax Information System
JI1NAR
Prepare annual returns (Extended Withholding Tax)
J1IF01
Create a subcontracting challan
J1IF11
Change a subcontracting challan
J1IF12
Display a subcontracting challan
J1IF13
Complete reverse or recredit a subcontracting challan
J1IFQ
Reconcile quantities for subcontracting challans
J1IFR
List subcontracting challans
J1IH
Make a CENVAT adjustment posting
J1IIN
Create an outgoing excise invoice
J1IJ
Assign excise invoices to a delivery for sales from depots
J1INJV
Adjust withholding tax Item
J1INREP
Reprint a vendor withholding tax certificate
J1INREV
Reverse a remittance challan
J1INPR
Calculate withholding tax on clearing accounts
J1INUT
Clear withholding tax on clearing accounts
J1IR
Download register data
J1IS
Process an excise invoice (outgoing) for other movements
J1IU
Process exemption forms
J1IW
Verify and post an incoming excise invoice
J1IX
Create an incoming excise invoice (without reference to purchase order)
J2I8
Transfer excise duty to CENVAT account
J2ID
Archive tax deducted at source (TDS) documents
J2IE
Locate tax deducted at source documents in archive
J2IU
Remit excise duty fortnightly
J2I9
Monthly CENVAT return
J1IG
Excise invoice entry at depot
J1IGA
Create additional excise entry at depot
J2I5
Extract data for excise registers
J2I6
Print excise registers
Sales from Factories
Purpose
This process describes how the SAP System handles the sales process allowing
for the creation of excise invoices which you have to send with each delivery
that is subject to excise duty There are two scenarios depending on whether
you want to send the commercial invoice along with the delivery or at a later
date
Prerequisites
In order for the system to be able to copy the information from document to
document you must have set up the copying control procedures in Customizing
for Sales and Distribution (SD) This differs according to when you want to send
the commercial invoice
1 Along with the delivery
In this case the document flow would be OR (standard sales order type) ndash LF
(standard delivery type) ndash F2 (invoice)
2 At a later date
The document flow would be OR ndash JF (delivery type a copy of LF) ndash JEX (pro
forma billing document type a copy of document type F8) ndash F2
In addition you must also have maintained the settings in the Country Version
India (CIN) Implementation Guide (IMG) by choosing Global Settings reg Assign
Excise Invoice Billing Type to Delivery Type
A sample pricing procedure JFACT is provided for this sales procedure
Process Flow
1 The sales clerk creates a sales order following the
(i)standard procedure
There are special procedures for
(i)Customers in possession of exemption forms
(ii)Exports
2 The shipping clerk creates a delivery again following the
standard procedure
On the initial screen you set the appropriate delivery type (see above)
3 In the warehouse the storeperson issues the goods
The system only allows users to create a pro forma excise invoice if the delivery
is complete so as to prevent them from creating multiple pro forma excise
invoices
4 What you do at this stage depends on whether you want to send the
commercial invoice along with the delivery or whether you want to invoice the
customer later
(A) If the invoice is to be shipped with delivery the shipping clerk
(i)Creates an invoice following the standard procedure
(ii)Creates an excise invoice from the invoice
(B) If the invoice is to be sent on at a later date the shipping clerk
(i)Creates the pro forma excise invoice
The pro forma excise invoice is only required for technical purposes and is not
sent to the customer The system does not make any accounting postings at this
stage
(ii)Creates
an excise invoice from the pro forma excise invoice
In both these cases the system creates an accounting document to post the
excise duty to a clearing account
Instead of creating excise invoices manually you can also have the system
create them automatically Alternatively you can create them in batches
5 You ship the goods
6 When the time comes to invoice the customer you create the invoice
following the standard procedure
Irrespective of the number of excise invoices that you have issued you can
combine the delivery items in a single invoice (if the standard requirements are
met)
Sales from Depots
Purpose
You may sell finished goods directly from the place of manufacture as described
under Sales from Factories or you may first ship them to a separate location for
storage (a depot) from where you will sell them The second procedure is
described here
Sales from depots are handled differently from sales from factories because of
excise law Excise duty is payable when you send the goods from the factory to
the depot but it is not levied again when you sell the goods
Sometimes when you make a final sale of goods from a depot price escalations
could have happened with retrospective effect In such scenarios you need to
pay the extra excise duty at the factory using an A Certificate You need to
register the A certificate details in the RG 23D register and the excise recovered
from the customer
Prerequisites
You have customized
1 Stock transport processing in Customizing for Materials Management (MM)
by choosing Purchasing reg Purchase Order reg Set Up Stock Transport Order
2 The copying control for copying stock transport order NL to excise invoice JEX
You make this setting in the Country Version India (CIN) Implementation Guide
(IMG) by choosing Sales and Distribution reg Assign Excise Invoice Billing Type to
Delivery Type
3 The item category NLN (standard transport order) so that it is relevant for
billing
You do this in the standard IMG in Customizing for Sales and Distribution (SD)
by choosing Sales reg Sales Documents reg Sales Document Item
Process Flow
1 You create the sales order following the
standard procedure
The standard pricing procedure for depot sales is JDEPOT
2 You create the delivery again following the
standard procedure
3 You
assign excise invoices to the delivery or material document
4 You
verify that you have selected the correct excise invoices and post them
Alternatively if you have selected the wrong excise invoices you can cancel the
assignment
5 You create the invoice following the standard procedure
SPECIAL STOCKS amp SPECIAL PROCUREMENT TYPES
Special Stocks are those stocks which are not belongs to our company code
These are not placed in our storage locations amp no physical inventory is
performed and treated as special stocks for the reason of ownership
Different types are of Special Stocks are as follows
1 Subcontracting
2 Consignment
3 Pipeline
4 Stock transfer
5 Third party
6 Returnable transport packaging
7 Sales order stock
8 Project stock
SUBCONTRACTING
In subcontracting process we create subcontracting PO to supply or issue
subcomponents to vendor in order to get final product The price maintained in
subcontracting PO is a service charge paid to vendor
Steps to perform subcontracting
1 Create subcontracting inforecord (Optional)
2 Create subcontracting PO with item category L
There are to ways to supply subcomponents to vendor
bull Manually maintain the subcomponents in the subcontracting
PO though explode BOM
bull Through BOM (Bill of material) T Code CS01 CS02 amp CS03
3 Create Transfer Posting with Movement Type 541 to issue the subcomponents
to the vendor
4 Goods Reciept
5 Invoice Reciept
Path ME21N ---gt Enter Item Category L --gt Material (End Product) PO
Quantity Delivery Date Net Price Plant --gt Click on Item Details --gt Tab
Material Data -- gtComponents select Explode BOM --gt Click on Components
button --gt Enter the subcomponents --gt Go back amp Save
Create Transfer Posting with movement type 541 amp T Code MB1B
GR MIGO
IR MIRO
CONSIGNMENT - (No Concept of Invoice)
In consignment process we will not create Purchasing document for the vendor
vendor himself send the material to our plant though the material is available
to our plant the responsibility amp ownership of the material is of vendor Aliability
only arises when the material withdrawal (Consumption) is posted in the system
from consignment stock
Steps
1 Create Consignment info record (mandatory)
2 Create Consignment purchase order with item category lsquoKrsquo amp maintain Info
record number
3 Create GR Movement type lsquo101Krsquo
4 Create GI Movement Type lsquo201Krsquo
5 Consignment settlement T Code MRKO
Path --gtME11 --gt In info record --gt Purchasing Org Data 1 views of info record
enter the tax code and save it
--gt Create Consignment Purchase Order ME21N (Price option is grayed out with
price zero)
--gt Create GR with movement type 101K
--gt Create Goods Issue (GI) T Code MB1A amp Movement Type 201K Enter Cost
center vendor
--gt Consignment Settlement T Code MRKO Click Activate Consignment Activate
Settle Execute
--gt Display the Document Number ie Invoice receipt T Code FB03
PIPELINE PROCESS (No Concept of Invoice)
In pipeline handling your company does not need to order or store the material
concerned It is ready available to you as and when required via pipeline (eg oil
or water) or some other type of cable (eg electricity) Consumption of the
material is settled with the vendor on a regular basis
Steps
1 Create a Material master record with material type PIPE
2 Create Pipeline info record
3 Create GI with movement type 201P
4 Pipeline settlement T Code MRKO
RETURNABLE TRANSPORT PACKAGING (RTP)
When company orders goods from a vendor the goods are delivered with
returnable transport packaging (pallets containers) that belongs to the vendor
and is stored on our premises until you return it to the vendor
Steps
1 Create Material master record with material type LEIH
2 Create PO
3 Create GR by maintaining RTP material by selecting the option transport
equipments with movement type 501M
4 IR
STOCK TRANSFER
In stock transfer processing goods are procured and supplied within a company
One plant orders the goods internally to another plant (receiving plantissuing
plant) The goods are procured with a special type of purchase order the stock
transport order
Steps
1 Create a Material master in both supplying and receiving plant
2 Create stock transport order (STO) with item category lsquoUrsquo
3 Create transfer posting with movement type 351 amp T Code MB1B (Go to
MMBE stock overview the stock will decrease in supplying plant and it will not
update stock of receiving plant it will be under stock in transit)
4 Create GR stock will update in receiving plant
This scenario is under one company code between two plants
Material Master Related Important Terms (Part 2)
Controlling (CO) An organizational unit in Accounting that reflects a
management-oriented structure of the organization for the purpose of internal
control
Operating results for profit centers can be analyzed using either the cost of
sales approach or the period accounting approach
By analyzing the fixed capital as well you can expand your profit centers for use
as investment centers
Profit Center
Key that uniquely identifies the profit center in the current controlling area
Valuation Category
Determines whether stocks of the material are valuated together or separately
Dependencies
In the case of split valuation this indicator also determines which valuation
types are allowed that is the criteria by which stocks can be valuated
Valuation type
Invoice Verification (MM-IV)
A subdivision of a valuation category in split valuation
Example An enterprise manages its stocks of a material using the valuation
category Quality comprising the following valuation types
bull High quality Average quality Inferior
Hazardous material number
Number that identifies the material as a hazardous material or as dangerous
goods and assigns hazardous material data or dangerous goods data to it
Use The hazardous material number indicates that the material is dangerous
making special precautions necessary for its storage and shipment
Valuation Class
Assignment of a material to a group of GL accounts
With other factors the valuation class determines the GL accounts that are
updated as a result of a valuation-relevant transaction or event such as a goods
movement
The valuation class makes it possible to
bull Post the stock values of materials of the same material type to different GL
accounts
bull Post the stock values of materials of different material types to the same GL
account
Default value for the valuation class for valuated stocks of this material
Use The valuation class has the following functions
bull Allows the stock values of materials of the same material type to be posted to
different GL accounts
bull Allows the stock values of materials of different material types to be posted to
the same GL account
bull Determines together with other factors the GL accounts updated for a
valuation-relevant transaction (such as a goods movement
CIN - Country India Version ~ Volume 1
PurposeCountry Version India (CIN) contains a number of enhancements to standard
Sales and Distribution (SD) functions that allow you to handle local
requirements in particular excise duty
Features
In Country Version India (CIN) this component handles sales processes as
found in India In addition to the generic functions it allows you to
Handle CENVAT in your sales processes
The system calculates excise on your sales and creates excise invoices as
required and makes the appropriate postings to your CENVAT accounts
It covers sales from factories sales from depots and offers functions for other
types of goods movements it also covers sales to export-oriented units and
export sales
Record concessional and exemption forms sent to you by your customers
Make adjustment postings to your CENVAT accounts
Excise Invoice (Outgoing)
Definition
The document that acts as the proof of payment of excise duty and is required
for the customer to take CENVAT credit on the item
Use
In the SAP System there are three different procedures for creating excise
invoices
Sales direct from the factory
This procedure is for when you sell manufactured goods straight from the
factory at which they were produced in which case you levy excise duty when
the goods leave the factory on their way to the customer
If when you send the goods to the customer you enclose the commercial
invoice you create the excise invoice with reference to the commercial invoice
If you want to send the commercial invoice after you have dispatched the goods
however you create the excise invoice with reference to a pro forma
commercial invoice For more information about these procedures see Sales
from Factories
As well as creating excise invoices individually you can also create them in
batches (see Creation of Excise Invoices in Batches)
Sales from depots
A depot is a site at which the goods are stored away from the factory at which
they were produced In this procedure you have to levy the excise duty when
you transfer the goods from the factory to the depot and then make sure this is
passed on to the customer when it makes a purchase For more information see
Sales from Depots
Sales (other goods movements)
Some other goods movements may also require you to create an excise invoice
with reference to other documents The SAP System offers separate functions
for these purposes (see Excise Invoices (Outgoing) for Other Movements)
StructureNumbering of Excise Invoices
Outgoing excise invoices have two numbers an internal document number
which is assigned immediately you create an excise invoice and an excise
invoice number which is not assigned until you have verified and posted it
As far as the excise invoice number is concerned you have to number your
outgoing excise invoices in sequential order starting each year on 1 April You
must notify the excise authority of the jurisdiction of the invoicing location The
serial number must be printed on each page of the excise invoice
Each number range is governed by a series group You must create at least one
series group in order to be able to number the excise invoices If you need more
than one number range you must create the corresponding number of series
groups You do so in the CIN Implementation Guide (IMG) by choosing Global
Settings reg Series Groups
Number of Line Items Per Excise Invoice
Some states allow you to include only a limited number of items for each page
of an excise invoice (for example if the excise invoices are to be printed on
prenumbered forms) You can customize the system so that it prints the excise
invoice accordingly in the CIN IMG by choosing Global Settings reg Excise
Registration IDs
Customer Master (Excise Data) Definition
The part of the customer master record that contains information relating to
Indian excise duty
Use
In conjunction with other data this data is used to calculate excise duty on
various transactions
To maintain the data from the SAP Easy Access screen choose Indirect Taxes reg
Master Data reg Excise Rate Maintenance and then select the following options
described below
Structure
The excise part of the customer master contains the following information
Customer Excise Details
On this screen you enter your customers tax registration numbers which are
used for various forms of correspondence and reports
1 Excise registration number (and the range division and collectorate in which
this is located)
2 Central sales tax (CST) number
3 Local sales tax (LST) registration number
4 Permanent account number (PAN)
In order for the system to be able to calculate which rate of excise duty to apply
on sales to the customer you must also assign it a customer excise duty status
(for more information about how this works see Determination of Excise Duty
Rates)
Excise Indicator for Plant and Customer
On this screen you define the final excise duty indicator (for more information
about how this works see Determination of Excise Duty Rates)
Determination of Excise Duty Use
When you execute a business transaction involving materials that are subject to
excise duty the system automatically calculates the duty for you
Prerequisites
In order for the system to be able to determine which rate of excise duty to
apply you must have maintained all the data on the Excise Rate Maintenance
screen which you can access from the SAP Easy Access screen by choosing
Indirect Taxes reg Master Data reg Excise Rate Maintenance
You maintain the following types of data
Plant master data
You assign each of your plants an excise duty indicator You can use the same
indicator for all the plants with the same excise status from a legal point of view
such as all those that are in an exempt zone
See also the information about manufacturers that are only entitled to deduct a
certain portion of the duty (see Partial CENVAT Credit)
Vendor master data
For each of your vendors with the same excise status from a legal perspective
you define an excise duty indicator You must also specify the vendor type ndash for
example whether the vendor is a manufacturer a depot or a first-stage dealer
You must also stipulate if the vendor qualifies as a small-scale industry
For each permutation of plant indicator and vendor indicator you then create a
final excise duty indicator
Customer master data
Similarly you assign the same excise duty indicator to each of your customers
that share the same legal excise status
Again for each permutation of plant indicator and customer indicator you then
create a final excise duty indicator
Material master data
Each material is assigned a chapter ID
Excise tax rate
For every chapter ID and final excise duty indicator you maintain the rate of
excise duty
If your business only qualifies for partial CENVAT credit you must customize
your system accordingly
Activities
Let us consider an example to illustrate how the system determines which rate
of excise duty to apply to a material Assume you are posting a sale of ball
bearings to a customer The system automatically determines the rate of excise
duty as follows
Looks up the customer master data to see what status you have assigned the
customer
Lets assume youve assigned the customer status 3
Looks up the plant master data to see what status you have assigned the plant
Similarly your plant has status 2
The system looks up the table under Excise Indicator for Plant and Customer to
see what the final excise duty indictor is for customer status 3 and plant status
2 It is 7
The system determines the chapter ID of the ball bearing for the plant
Letrsquos assume the chapter ID at plant for the ball bearings is 100001
Finally the system looks up the table under Excise Tax Rate to see what rate of
duty applies to chapter ID 100001 under status 7
Plant Master (Excise Data) Definition
The part of the plant master record that contains information relating to Indian
excise duty
Use
In conjunction with other data this data is used to calculate excise duty on
various transactions
To maintain the data from the SAP Easy Access screen choose Indirect Taxes reg
Master Data reg Excise Rate Maintenance and then select the following options
described below
Structure
The excise part of the plant master is divided into the following screens
Excise Indicator for Plant
On this screen you enter your plants tax registration numbers which are used
for various forms of correspondence and reports
1 Central sales tax (CST) number
2 Local sales tax (LST) registration number
3 Permanent account number (PAN)
In order for the system to be able to calculate which rate of excise duty to apply
on purchases for this plant you must also assign it a plant excise duty status
(for more information about how this works see Determination of Excise Duty
Rates)
Excise Indicator for Plant and Vendor
On this screen you define the final excise duty indicator (for more information
about how this works see Determination of Excise Duty Rates)
Excise Indicator for Plant and Customer
On this screen you define the final excise duty indicator (for more information
about how this works see Determination of Excise Duty Rates)
Automatic Creation of Excise Invoices Use
The SAP System can automatically create an outgoing excise invoice for you
immediately you post a commercial invoice (or a pro forma invoice) for a
customer sale This function applies to excise invoices for sales from factories
only
Prerequisites
To activate this function in the Country Version India (CIN) Implementation
Guide (IMG) make the following settings
1 Under Global Settings reg Excise Groups select Create EI
This activates the automatic creation function
2 Under Sales and Distribution reg Utilization Determination
Here you specify which CENVAT accounts the system is to post the different
types of excise duty to
3 Under Sales and Distribution reg Excise GroupndashSeries Group Determination
Here you specify which excise group and series group the excise invoices are to
be created for
Features
When you post an invoice the system creates an excise invoice All the
information that it needs to create the excise invoice is provided either by the
invoice or by the Customizing settings that you have made in Sales and
Distribution It also determines the excise invoice type automatically by means
of a user exit
Creating Excise Invoices for Stock Transfers 1 From the SAP Easy Access screen choose Indirect Taxes reg Procurement reg
Excise Invoice reg For Depot reg CreateChangeDisplay
2 In the Material document field enter the goods receipt number and choose
The system displays the information from the goods receipt for example the
sending plant the excise registration the range the division and the
collectorate
3 Choose Details
The system copies the items from the goods receipt document In the depot it is
possible to have a separate excise invoice at line item level
4 Enter the internal document number of the excise invoice sent by the factory
5 Choose More documents to go the excise invoice details screen
6 Enter the internal document number of the excise invoice from the factory
The system copies the information to the line item (for example the excise
invoice number the excise invoice date the item number the chapter ID the
excise invoice quantity the amount of excise duty paid the excise base value
and the serial number of the Part II register entry with which the excise was
paid)
You can change the receipt quantity to match the actual quantity received at
the depot if necessary The system automatically adjusts the excise
accordingly
7 Go back to the item details screen
8 Save the excise invoice
Creating Excise Invoices for Direct Purchases 1 From the SAP Easy Access screen choose Indirect Taxes reg Procurement reg
Excise Invoice reg For Depot reg CreateChangeDisplay
2 In the Material document field enter the goods receipt number and choose
The system displays the information from the goods receipt for example the
sending plant the excise registration the range the division and the
collectorate
You can also maintain the excise registration details for the ship-from party as
for with the vendor The ship-from can be different from the vendor code (The
delivering plant can be maintained as a ship-from in the system When a valid
ship-from is entered the excise registration details copied from the vendor will
be overwritten by the ship-from excise registration details)
The ship-from registration details displayed can also be overwritten manually
The dealers commercial invoice number can be stored in the vendor excise
invoice number as in this case the dealer himself will not have an excise
invoice
3 Choose Details
The system copies the items from the goods receipt document It also copies the
vendors excise invoice number and the serial numbers of the entries in the RG
23A RG 23C and personal ledger account (PLA) registers
4 Enter the internal document number of the excise invoice sent by the factory
5 Select an item and choose More documents to go the excise invoice details
screen
In the case of direct purchases there will not be any excise invoice in the
system so leave the internal document field blank The vendors invoice will
show the details of the excise invoices through which excise has been paid for
the item that is being dispatched You can enter these details here
6 For each item the chapter ID excise base value and excise duty amounts
are defaulted from the purchase order You can change them if there is any
difference Enter the excise amount paid and the receipt quantity You also
enter the Part II register serial numbers with which the excise duty was paid and
the excise registration information from the original excise invoice
7 Go back to the item details screen
8 Save the excise invoice
The system creates an entry in register RG 23D You can change the excise
invoice as long as it has not been used in any sales
Assigning Excise Invoices to a Delivery Use
You follow this procedure to specify which excise invoices are to be assigned to
a delivery from a depot (or other material document)
You can also automate this procedure using the batch selection program
(J_1IJCHK) by making the appropriate Customizing settings in the Country
Version India (CIN) Implementation Guide (IMG)
Procedure
1 From the SAP Easy Access screen choose Indirect Taxes reg SalesOutbound
Movements reg Excise Invoice reg For Depot reg CreateChangeDisplay reg Delivery
or Material Document reg RG 23D Selection
2 Enter the delivery document number or the material number and choose
3 Select the excise invoice you want
4 Choose
5 Choose Excise invoice
A list of excise invoices appears These are the excise invoices at the depot with
a balance quantity
The system also shows a list of the A certificates that can be used You can pick
up any of the A certificates but they must be for the same excise invoice You
can only pick up an A certificate in its entirety You cannot select part of an A
certificate
6 Select the excise invoices that are relevant to the delivery
7 Specify what quantity to be used from each excise invoice
The system recalculates the excise accordingly
8 Go back to the item details screen
9 Save the data
Result
The system creates an entry in register RG 23D and generates the depot excise
invoice numbers
If you selected any A certificates the system also generates additional entries in
the RG 23D register The system marks the original A certificates as updated so
that they cannot be used for any other removals
Continue see Volume 2 (Next post)
EXTERNAL SERVICE MASTER
EXTERNAL SERVICE MASTER ESM
We procure the different type of services from vendors they are-
1048774 Hardware amp software services
1048774 Construction amp transportation services
1048774 Machinery services
1048774 Annual maintenance services
1048774 Present to and breakdown service Etc
Service Procurement Cycle -
1048774 Requirement identification
1048774 Source determination
1048774 Source selection
1048774 Service master
1048774 Service PO
1048774 Service entry sheet acceptance
1048774 Invoice with respect to service entry sheet
Steps to perform services -
1 Create service master (AC03)
2 Create Service PO (ME21N) with AC Assignment category lsquoKrsquo amp Item
Category lsquoDrsquo
3 Create service entry sheet (ML81N)
4 Invoice with respect to Service Entry sheet
Customize settings
(For service category Number Ranges amp organization status for service
category)
SPRO 1048774 IMG 1048774 MM 1048774 ESM 1048774 Service Master
1048774 Define organization Status for service Categories
1048774 Define Service Category
1048774 Define Number Ranges
Define organization Status for service Categories
bull Click on New Entries
bull Org service Category
bull BDS (Basic data service is stored in service master record under this service
category)
bull CNST 1048774 Controlling Status
bull PUST 1048774 Purchasing data Status
bull SDST 1048774 Sales amp Distributed Status
bull Org status description service category 1048774 Press Enter amp Save
Define Service Category
bull Same path as above
bull Select Standard
bull Click on Copy as
bull AC reference 1048774 always takes as 0006
bull Enter amp Save
Define Number Ranges
Click on groups 1048774 Groups 1048774 Insert 1048774 select enter Number Ranges
Select the service category
Click on Element
Select Group amp Click on Element Group
Save
Create Service Master - (AC03)
Click on Create New Services
Service Number (any number) Service Category
Basic unit of measure (Hours lsquoHrsquo)
Enter
Basic Data 1048774 Master Service Group 1048774 007
Valuation class 1048774 3200 1048774 Enter 1048774 Save
To See the Service list 1048774 AC06
Create Service PO (ME21N)
AC assignment category lsquoKrsquo Item Category lsquoDrsquo
Enter the Short text Quantity Delivery date Net Price Material group Plant
Storage Location
Enter service number in Service Tab (Item Details) quantity price Enter
Account Assignment 1048774 GL Account Number eg400000
Cost Center eg 9999
Press Enter amp Save
Create Service Entry Sheet - ML81N
Select other purchase order (enter PO number) 1048774 Enter 1048774 Click on Create1048774 Enter
Short Text 1048774 Enter 1048774 Service Number 1048774 Enter ndashClick on Flag button 1048774 Save
Take Service entry Sheet Number
Go to Invoice MIRO 1048774 Enter company code 1048774 Select Service Sheet Option 1048774 Enter
Service Entry Sheet Number 1048774 save it
Physical Inventory and Inventory Management
Physical inventory Process - 1 Create Physical inventory document
T Code MI01 ndash Create single inventory document
T Code MI31 ndash Create multiple physical inventory documents
I Enter the desired fields ie material material type site storage location and
Maximum number items Documents ndash 100 etc 1048774 Press Enter
II Click on Process Session
III Select the line items and click on the process
IV System displays a dialog box select Background and click on process
Inventory document is created
2 Print Inventory Document and handed over to responsible person say
Manager
3 Enter Physical Inventory count
T Code MI04
i Enter the physical inventory document number Fiscal year count date 1048774 Press
enter
ii Enter the Material Quantity and click on post
4 Listing of difference
T Code MI20
Enter the physical inventory document number and execute system displays a
screen wherein we will be able to view the differences
5 Post the differences
T Code MI07 amp Mov Type 701 amp 702
Enter the physical inventory document number year posting date enter the
difference and post
INVENTORY MANAGEMENT Maintaining stock by value or by quantity is called inventory The total inventory
management deals with the goods movement of the material
Goods movement -
It is a process in which transaction resulting change in stocks It is further sub-
divided into three categories
1 Goods Receipt (GR)
2 Goods Issue (GI)
3 Transfer Posting (TP)
Goods Receipt (GR) - It is a goods movement in which receipt of goods is
posted for vendor or for production A GR posted in the system will leads to
increase in stock No Concept of Price or value
Goods Issue (GI) - It is goods movement in which material withdrawal is
posted for consumption or for customer A GI posted in system will leads to
decrease in stock
Stock Transfer (ST) - It is method of removal of material from one location
and transferring it to another location This process is performed between two
plants and two storage locations
Transfer Posting (TP) - It is a general term of stock transfer that changes the
stock type or stock categories The difference between transfer posting and
stock transfer is -
TP is logical stock transfer and ST is a physical stock transfer
Movement Type - It is a three-digit code which plays a role of important
control function in inventory management It acts as a central role in automatic
account determination It determines which stock account or consumption
account is updated in financial accounting
Reservation - It stores requisition created from particular cost center to
particular department for issuing the material reservation posted in the system
It leads to decrease in stock
Stock Types - The different stock types are
1 Unrestricted use stock
2 Quality inspection stock
3 Blocked stock
4 Warehouse stock
Transaction code -
1 To Create GR - MIGO
2 To Create GI - MB1A
3 For Transfer Posting - MB1B
4 To display MaterialGR document ndash MB03
5 To create reservations - MB21 MB22 MB23
6 To See Stock Overview - MMBE
7 To enter Other GR - MB1C
When GR is posted in the system
1 Material document is created - MB03
2 Accounting Document is generated - MB03
3 MMR updated - MM02 MM03
4 PO history updated - ME23N
Movement Typersquos
Movement Types under GR - 101 331333335501503505551553555
561351 (For all Mov Typersquos there is a reversal eg 101 has 102 Note No
reversal for 121)
Movement Typersquos under GI - 201 331333335551553555
Transfer Posting It is performed in three ways
1 TP BW Plant to Plant
2 TP BW Storage Location to Storage Location
3 TP BW Stock to Stock
Movement Types under TP BW Plant to Plant
301 - 1 step
303 amp 305 - 2 step
Movement Type under TP BW Storage location to Storage Location
311 - 1 step
313 amp 315 - 2 step
Movement Type under TP BW stock to stock
321 323 325 343349
To Cancel the GR Movement type 102
Return delivery to vendor movement type 122 amp T Code MIGO
Transfer Posting Stock to Stock
From Blocked stock to Quality Inspection
T Code MB1B amp Movement Type 349
From Blocked stock to Unrestricted Stock
T Code MB1B amp Movement Type 343
From Quality Inspection to Unrestricted Stock
T Code MB1B amp Movement Type 321
Transfer Posting from Plant to Plant
For One Step Movement Type 301
For Two Steps Movement Type 303 amp 305
After posting stock will display in Stock in Transit (Plant)
To receive material by receiving Plant Movement Type 305
Transfer Posting BW Storage Location to Storage Location
Under One Plant BW two Storage Locationrsquos Movement Type 311
Back to Parent storage Location Movement Type 313 (It Show stock in transfer)
use Movement type 315 at Parent storage location
To create Goods Issue (GI) T Code MB1A amp Movement Type 201
To Create Reservations T Code MB21 MB22 amp MB23
Creation of GI wrt Reservations
T Code MB1A amp Movement Type 201
Click on Reservation Enter Reservation Number 1048774 Click on Adopt + Details
GR wrt Reservations T Code MIGO amp Select as Reservation instead of GR
GR without PO Movement type 501 amp T Code MB1C Select others instead of
Purchase order Enter Material Quantity Plant Storage Location 1048774 Press Enter
Partner Option will be visible (Vendor) 1048774 Save it
Invoice - Invoice is a document which is issued to a buyer (Company) from the
supplier (vendor) for the payment The following information is maintained in
invoice
Invoice date Posting date Invoice ref number tax amount amount tax code
terms of payments vendor address banking accounting information etc
When invoice document is posted in the system
bull Invoice document created
bull Accounting document is generated (MIR4)
bull PO history updated (ME23N)
bull FI document created (FB03)
PRICE DETERMINATION PROCESS or PRICING PROCEDURE
CONDITIONS OR PRICING PROCEDURE or PRICE DETERMINATION PROCESSWe deal with the Pricing Procedure for vendors
PB00 Gross Price (info record contract scheduled Agreement)
PBXX Gross Price (PO)
FRA1 Freight
RA00 Discount on net
RA01 Discount on Gross
ZA00 Surcharge on net
SKT0 Surcharge discount
ZPB0 Rebates
MWVS Input Tax
MWAS Output Tax
BASB Base Amount
RM0000 Calculation Schema or Pricing Procedure
(PB00 amp PBXX)
RM0002 Calculation Schema or Pricing Procedure
(PB00)
PB00 --gt AB00
Copy the Standard one and create new one (ours)
RM0000 contains all the condition types
Pricing Procedure (PP)
We define the pricing procedure to define condition supplement for the material
price The condition supplement specifies the discount surcharge freight etc
that we want a system every time to access material price condition records
The total value of the material is calculated or based on all addition and
subtraction ie discounts surcharge tax freight etc
Condition Table
It is a table which defines the structure of condition record key
Condition Record
It is a data record used to store conditions or condition supplements ie
condition like discount freight and surcharge Tax etc
Condition Type
It is used for different functions In Pricing the condition types leads you to
differentiate different types of discounts in output determination batch
determination difference between two output types such as delivery note or
order confirmation between different strategy types
Access Sequence
It specifies the order in which system searches or access the condition records
from condition table
Difference between PB00 amp PBXX
1 Condition maintained in PB00 is time dependent whereas PBXX is time
independent
2 Condition type PB00 ndash used for IR RFQ Contract Schedule Agreement
Condition type PBXX ndash used for PO
Calculation Schema
The main function of calculation schema is to provide framework of steps for the
price determination process to specify the discounts surcharge freight rebate
etc
It also determines the sequence of conditions that are to be followed and in
which sequence
Schema Group Vendor
The main function of it is to identify or to pick the right process and conditions
for a particular vendor
Schema Group Purchasing Organization
Key that determines which calculation schema (pricing procedure) is to be used
in purchasing documents assigned to the relevant purchasing organization
Schema Group
It allows to group together the purchasing organizations which uses the same
calculation schema
Steps -
1 Create Access sequence
2 Create condition types
3 Create pricing procedure or calculation schema
4 Link pricing procedure amp access sequence to condition type
5 Create schema group for vendor
6 Create schema group for purchase organization
7 Assign schema group vendor-to-vendor master record in purchasing data
view
8 Assign schema group purchase organization to our purchase organization
9 In inforecord purchase organization data enter condition types and pricing or
calculation procedure
CUSTOMIZE SETTINGS -
SPRO --gt IMG--gtMM--gtPUR--gtConditions --gtDefine price determination Process
1 Define access sequence
2 Define Condition type
3 Define cal Schema
4 Define schema group
o Schema group vendor
o Schema group purchasing group
5 Assignment of schema group to PUR org
6 Define schema determination agrave determine cal schema for standard PO
PURCHASE ORDER
PURCHASE ORDER
PO is an external document created for the procurement of materials and
services from vendor The document of PO is also divided into 4 parts as PR -
1 Document Overview
2 Header (DeliveryInvoice Conditions Address Partners Org data status)
3 Item Overview (AC assign cat Item Category Material Plant Del date SL)
4 Item Details (Material data Confirmations condition control delivery delivery
Schedule Quantitiesweights invoice)
A procurement type is defined for each of the document items The following
procurement types exist
1048774 Standard
1048774 Subcontracting
1048774 Consignment
1048774 Stock transfer
1048774 External service
bull There are different ways to create PO -
1 Directly through transaction code ME21N
2 With reference to PR
3 With reference to RFQ
4 With reference to info records
5 With reference to Contracts
6 With reference to Cost Centre GL Account (cost element) for consumable
items or not stock items with account assignment category lsquoKrsquo (K= cost centre)
(For non stock and consumables)
0 COMMENTS L INKS TO THIS POST
LABELS PO PURCHASE ORDER
Reaction
s
PURCHASE REQUISITION T CODE ME51 or ME51N
Purchasing Requisition -
It is a request or instruction from particular department (Cost Centre) to
purchasing department to procure certain quantity of material and services It is
only one internal document in SAP-MM
Purchasing Requisition document is divided into four parts -
bull Document Overview
bull Header
bull Item Overview
bull Item Details
Document Overview -
It displays the list of purchasing documents which are created previously
according to our requirement
Header -
Any text message or information is maintained
Item Overview -
In this we enter material plant delivery date quantity storage location
purchasing group AC assignment category Item category etc
Item Details -
It displays the detailed information about item overview (like Master data
valuation source of supply contact person delivery address status etc)
0 COMMENTS L INKS TO THIS POST
LABELS PR PURCHASE PURCHASE ORDER PURCHASE REQUIS IT ION SALES ORDER
Reaction
s
Automatic PURCHASE ORDER (PO) How Automatic PO raised
How Automatic PO raised
At fixed time say 1230 AM automatic scheduler runs and checks whether the
stock is less than or equal to the replenishment point If stock is less than or
equal to Repli Point than PR raised automatically to Purchasing Deptt
bull Activate the option automatic PO in purchasing view in material master record
bull Activate the option automatic PO in purchasing data view in vendor master
record
bull Maintain Source List amp select fixed vendor
bull PR crated automatically
bull Automatic creation of PO from PR ndash ME59
Enter the Purchasing group purchasing organization Vendor Plant and
Purchasing Requisition Document Number 1048774 Execute
RELEASE PROCEDURE Release strategyThe main function of Release procedure is to determine the approval process
or the release process for the procurement of material amp services rather than
relying for manual signatures The release procedure contains release strategy
Release Strategy (RS)
A plan defining the release codes with which a purchase requisition item a
complete purchase requisition or a complete external purchasing document
must
be released (that is approved) and the sequence in which release is to be
effected
using these codes It is a unique set of conditions sequence and level of release
It is a 2 digit code eg S1 S2 S3etc
The Release Strategy contains the following -
bull Release Group
bull Release Codes
bull Release Indicators
bull Release Prerequisite
Release Group -
It is a 2-digit code which is assigned with a class (Class contains group of
characteristics) It contains one or more release strategies
Release Codes -
It is a 2digit code which identifies the department or responsible person for
the approval process amp release process
Eg AA - Manager
BB - Sr Manager
CC - Vice President
DD - Managing Director
Release Indicator -
It is a Code that represents the release status If the proper approval
process is performed that the release Strategy has to be release if it is not
performed than the Release Strategy is blocked
R ndash Release
B ndash Blocked
Release Conditions -
It determines the type of the release strategy
For eg
bull If the price ranges from 1 to 1000 It is approved by AA BB and CC
bull If the ranges from1001 to 1lac then it is approved by AA BB CC and DD
- 80 -
Release Prerequisite
It will informs the system which RS has to be take place in the PO CEKKO is
a communication structure where it displays the field names amp field lengths to
create characteristics ie we maintain characteristics in customizing by
selecting
the field names from this communication structure for all external documents
CEBAN is used for the purchasing requisition
Characteristics -
1 Net value of PO --- GNETW (GSWRT for PR)
2 Plant --- WERKS
3 Purchasing organization -- EKORG
4 Purchasing Group --- EKGRP
5Material group ndashMATKL
CUSTOMIZE SETTINGSSPRO--gtIMG--gt MM--gt Purchasing--gtPO--gt Release Procedure for PO
1 Edit Characteristics T Code CT04
2 Edit Class T Code CL02
3 Define Release Procedure for PO
4 Check Release Strategy
Edit Characteristics -
Characteristics - eg NET VALUE OF VALUE
Click or Create Button
Under Basic Data
Description - Value for PO
Status - Release
Data Type - Currency Format
No Of Characters - 15
Currency - EUR
Activate multiple values amp Internal Values Allowed
Additional Data
Table name - CEKKO
Field Name - GNETW
Values
Activate Additional Values
Save the document
Create another Characteristic for Plant -
Plant date Create ndash Description Status
Data Type Characteristic Format
Number of Characteristics 4
Activate Multiple Values
Additional data-
Table Name - CEKKO
Field Name - WERKS
Values
Activate Additional Values
For Purchasing Organization Name - EKORG
For purchasing Group EKGRP
Edit Class
Class - SAPMM
Class Type - 032 Release Strategies
Click on Create button
Basic Data
Description - Class for PO
Status - Released
Valid From _____ Valid to _____
Click on Characteristic
Characteristic
Enter all the Characteristics Created amp Save it
Define Release Procedure for PO-
bull Release Group
bull Release Codes
bull Release Indicators
bull Release Strategies
bull Workflow
Release Group - New Entries Release Group Class and Description
Press Enter amp Save
Release Code - New Entries
Group Codes Description
99 AA Manager
99 BB Sr Manager
99 CC Vice President
99 DD Managing Director
Press Enter amp Save
Release Indicator - (B ndash Blocked R - Release)
New Entries
Release Indicators Description
B Blocked
R Released
Release Strategies -
New Entries
Release Group 99
Release Strategy S1
Release Codes AA BB CC and DD
Click on Release Prerequisites
Release Status -
Continue
Classification
Enter the Value (Same Price)
Plant (9999)
Go Back amp Save it
Release Simulation - Simulate Release
Create a PO -
There are two ways to release the PO
Individual releaseME28
Collective release ME29N
How to delete procedure
Delete Release GP
Create Release RG
Delete R Strategies
Delete R Code
Delete R Group
SAP R3 SYSTEM LANDSCAPE
System LandscapeThe system landscape contains all the SAP Systems that you have installed It
can consist of several system groups whorsquos SAP Systems are linked by transport
routes
After you decide which clients you need and which roles you want them to have
you need to decide how to distribute them amongst the different SAP Systems
You can set up multiple clients independently of one another in a single SAP
System However when you configure the data you must remember that cross-
client Customizing settings and Repository objects are identical for all clients in
a single SAP System Changes made in one client apply immediately to all
clients in the system
Three-System Landscape
SAP recommends a three-system landscape in which each of the central clients
has its own SAP System
This consists of a development system DEV a quality assurance system QAS
and a production system PRD The development system contains the
Customizing client CUST the quality assurance system contains the quality
assurance client QTST and the production system contains the production client
PROD Make all changes to Customizing data and Repository objects in the
Customizing client When you release the corresponding change requests they
are transported into the quality assurance client This means that changes to
cross-client data only appear in the quality assurance client after the transport
In the quality assurance client you can test whether the transports are
complete or whether any linked changes are missing and are still in unreleased
change requests If the test is successful the change requests are transported
into the production client The production client is completely separate from the
other clients as regards cross-client data
SPECIAL STOCKS amp SPECIAL PROCUREMENT TYPES
Special Stocks are those stocks which are not belongs to our company code
These are not placed in our storage locations amp no physical inventory is
performed and treated as special stocks for the reason of ownership
Different types are of Special Stocks are as follows
1 Subcontracting
2 Consignment
3 Pipeline
4 Stock transfer
5 Third party
6 Returnable transport packaging
7 Sales order stock
8 Project stock
SUBCONTRACTING
In subcontracting process we create subcontracting PO to supply or issue
subcomponents to vendor in order to get final product The price maintained in
subcontracting PO is a service charge paid to vendor
Steps to perform subcontracting
1 Create subcontracting inforecord (Optional)
2 Create subcontracting PO with item category L
There are to ways to supply subcomponents to vendor
bull Manually maintain the subcomponents in the subcontracting
PO though explode BOM
bull Through BOM (Bill of material) T Code CS01 CS02 amp CS03
3 Create Transfer Posting with Movement Type 541 to issue the subcomponents
to the vendor
4 Goods Reciept
5 Invoice Reciept
Path ME21N ---gt Enter Item Category L --gt Material (End Product) PO
Quantity Delivery Date Net Price Plant --gt Click on Item Details --gt Tab
Material Data -- gtComponents select Explode BOM --gt Click on Components
button --gt Enter the subcomponents --gt Go back amp Save
Create Transfer Posting with movement type 541 amp T Code MB1B
GR MIGO
IR MIRO
CONSIGNMENT - (No Concept of Invoice)
In consignment process we will not create Purchasing document for the vendor
vendor himself send the material to our plant though the material is available
to our plant the responsibility amp ownership of the material is of vendor Aliability
only arises when the material withdrawal (Consumption) is posted in the system
from consignment stock
Steps
1 Create Consignment info record (mandatory)
2 Create Consignment purchase order with item category lsquoKrsquo amp maintain Info
record number
3 Create GR Movement type lsquo101Krsquo
4 Create GI Movement Type lsquo201Krsquo
5 Consignment settlement T Code MRKO
Path --gtME11 --gt In info record --gt Purchasing Org Data 1 views of info record
enter the tax code and save it
--gt Create Consignment Purchase Order ME21N (Price option is grayed out with
price zero)
--gt Create GR with movement type 101K
--gt Create Goods Issue (GI) T Code MB1A amp Movement Type 201K Enter Cost
center vendor
--gt Consignment Settlement T Code MRKO Click Activate Consignment Activate
Settle Execute
--gt Display the Document Number ie Invoice receipt T Code FB03
PIPELINE PROCESS (No Concept of Invoice)
In pipeline handling your company does not need to order or store the material
concerned It is ready available to you as and when required via pipeline (eg oil
or water) or some other type of cable (eg electricity) Consumption of the
material is settled with the vendor on a regular basis
Steps
1 Create a Material master record with material type PIPE
2 Create Pipeline info record
3 Create GI with movement type 201P
4 Pipeline settlement T Code MRKO
RETURNABLE TRANSPORT PACKAGING (RTP)
When company orders goods from a vendor the goods are delivered with
returnable transport packaging (pallets containers) that belongs to the vendor
and is stored on our premises until you return it to the vendor
Steps
1 Create Material master record with material type LEIH
2 Create PO
3 Create GR by maintaining RTP material by selecting the option transport
equipments with movement type 501M
4 IR
STOCK TRANSFER
In stock transfer processing goods are procured and supplied within a company
One plant orders the goods internally to another plant (receiving plantissuing
plant) The goods are procured with a special type of purchase order the stock
transport order
Steps
1 Create a Material master in both supplying and receiving plant
2 Create stock transport order (STO) with item category lsquoUrsquo
3 Create transfer posting with movement type 351 amp T Code MB1B (Go to
MMBE stock overview the stock will decrease in supplying plant and it will not
update stock of receiving plant it will be under stock in transit)
4 Create GR stock will update in receiving plant
This scenario is under one company code between two plants
SAP IMPLEMENTATION PROCESS End to End Inplementation of SAP
First we have to prepare documentation about the client business (like turnover
vendors customers payments materials production marketing etc)
The implementer company made two teams (1) Steering team (2) Steering
community
Steering team (SAP functional consultants) prepares a detailed
documentation about the client with the help of core team (client company
team)
amp this study is known as Feasibility Study After that the steering team handed
over this documentation to Steering community (Project manager Sr software
engineer and other higher authorities)
Steering community prepares the BBP (Business Blue Print) BBP
Prepares in MS-Word
10487741048774 ASAP - Accelerated System Application Product in Data Processing
10487741048774 Business Process - ASAP Methodology
1 Project Preparation
2 BBP (Business Blue Print)
3 Realization
4 Final Preparation
5 Go live amp Support
10487741048774 Project Preparation -
It consists of identifying team members amp development strategy as
how to go
AS ndash IS (Existing Process followed requirements)
TO ndash BE (Requirement analysis and best process recommended)
Difference between (AS ndash IS) amp (TO - BE) is called GAP Analysis
10487741048774 Business Blue Print (BPP) -
It is a legal documentation between client amp the company
(implementer service provider) We have to understand the current business
process of client amp analyzing the business amp prepare documentation It is a
detailed documentation for the client
10487741048774 Realization -
This Phase is used to Implement or migrate the entire business of
client from Non-SAP environment to SAP environment
10487741048774 Final Preparation -
This phase is used for testing amp end user training After successfully
completion of this phase client is ready to run business in SAP R3
10487741048774 Go live amp Support -
In this phase we deliver the project end date amp end user training at
client site
THIRD - PARTY PROCESSING
THIRD - PARTY PROCESSING
In third party processing your company passes on a sales order to an external
vendor who sends the goods directly to the customer The sales order is not
processed by your company but by the vendor Third-party items can be
entered in purchase requisitions purchase orders and sales orders Third party
processing is integrated with Sales and Distribution If the sales order contains
third-party items the system creates a purchase requisition from the order
Steps
1 Create MMR with sales views and maintain Division Distribution channel
sales org item category group and general item category group ndash BANS (Third
party item) amp Account group Sold to party
2 Create Customer master record T Code XD01 XD02 XD03
3 Create sales order T Code VA01 VA02 VA03 (PR generated automatically)
4 PO - T Code ME21N
5 GR ndash T Code MIGO
6 IR ndash T Code MIRO
7 Sales Billing Billing Document T Code VF01 VF02 VF03

invoice
7 Save the excise invoice
If you are using the one-step procedure the system creates and posts an excise
invoice Otherwise the system saves the information but does not make any
postings it now has to be verified
Verifying and Posting Excise Invoices
Use
You follow this procedure to verify that the information in an excise invoice that
has already been created and to post it once you are satisfied
Procedure
From the SAP Easy Access screen choose Indirect Taxes reg SalesOutbound
Movements reg Excise Invoice reg For Other Movements reg Posting
1 Enter the internal document number of the excise invoice
2 Choose Release to accounting
The system displays the excise invoice The excise duty that is to be posted is
displayed at the foot of the screen which you can change if necessary
3 To access the balance utilization choose
4 To display the balance available on the CENVAT accounts choose Account
balances
5 Save the excise invoice
The system generates the accounting documents
6 To print the excise invoice choose
Making a Transfer Posting
Use
In this procedure you make a transfer posting for the goods ordered by another
plant For more information about this function see Entering the Removal from
Storage at the Issuing Plant
Procedure
1 From the SAP Easy Access screen choose Logistics reg Materials Management
reg Inventory Management reg Goods Movement reg Transfer Posting
2 Choose Movement type reg Transfer posting reg Plant to plant reg To stock in
transit
3 Enter the number of the issuing plant and storage location
4 Choose To purchase order
5 In the dialog box enter the number of the stock transport order that the
receiving plant created and choose
6 Check the data
7 Save the transfer posting
Transaction Codes for India
Transaction Action
J1I2 Prepare a sales tax register
J1I3 Create outgoing excise invoices in batches
J1I5
Update the RG 1 and Part I registers
J1I8
Post the challan used to remit TDS
J1IC194C
Create annual return under section 194 C (Classic TDS)
J1IC194D
Create annual return under section 194 D (Classic TDS)
J1IC194I
Create annual return under section 194 I (Classic TDS)
J1IC194J
Create annual return under section 194 J (Classic TDS)
J1IEX
Incoming Excise Invoices (central transaction)
J1IEX_C
Capture an incoming excise invoice (excise clerk)
J1IEX_P
Post an incoming excise invoice (excise supervisor)
J1INBANK
Post a bank challan
J1INCANC
Cancel a vendor withholding tax certificate
J1INCERT
Print a vendor withholding tax certificate
J1INCHLN
Create a remittance challan
J1INCUST
Post a customer withholding tax certificate
J1INHC
Withholding Tax Migration Health Check Program
J1INMIG
Withholding Tax Data Migration Tool
JI1NCHLC
Create a remittance challan for customers
J1INCC
Print customer withholding tax certificates
J1INMIS
Withholding Tax Information System
JI1NAR
Prepare annual returns (Extended Withholding Tax)
J1IF01
Create a subcontracting challan
J1IF11
Change a subcontracting challan
J1IF12
Display a subcontracting challan
J1IF13
Complete reverse or recredit a subcontracting challan
J1IFQ
Reconcile quantities for subcontracting challans
J1IFR
List subcontracting challans
J1IH
Make a CENVAT adjustment posting
J1IIN
Create an outgoing excise invoice
J1IJ
Assign excise invoices to a delivery for sales from depots
J1INJV
Adjust withholding tax Item
J1INREP
Reprint a vendor withholding tax certificate
J1INREV
Reverse a remittance challan
J1INPR
Calculate withholding tax on clearing accounts
J1INUT
Clear withholding tax on clearing accounts
J1IR
Download register data
J1IS
Process an excise invoice (outgoing) for other movements
J1IU
Process exemption forms
J1IW
Verify and post an incoming excise invoice
J1IX
Create an incoming excise invoice (without reference to purchase order)
J2I8
Transfer excise duty to CENVAT account
J2ID
Archive tax deducted at source (TDS) documents
J2IE
Locate tax deducted at source documents in archive
J2IU
Remit excise duty fortnightly
J2I9
Monthly CENVAT return
J1IG
Excise invoice entry at depot
J1IGA
Create additional excise entry at depot
J2I5
Extract data for excise registers
J2I6
Print excise registers
Sales from Factories
Purpose
This process describes how the SAP System handles the sales process allowing
for the creation of excise invoices which you have to send with each delivery
that is subject to excise duty There are two scenarios depending on whether
you want to send the commercial invoice along with the delivery or at a later
date
Prerequisites
In order for the system to be able to copy the information from document to
document you must have set up the copying control procedures in Customizing
for Sales and Distribution (SD) This differs according to when you want to send
the commercial invoice
1 Along with the delivery
In this case the document flow would be OR (standard sales order type) ndash LF
(standard delivery type) ndash F2 (invoice)
2 At a later date
The document flow would be OR ndash JF (delivery type a copy of LF) ndash JEX (pro
forma billing document type a copy of document type F8) ndash F2
In addition you must also have maintained the settings in the Country Version
India (CIN) Implementation Guide (IMG) by choosing Global Settings reg Assign
Excise Invoice Billing Type to Delivery Type
A sample pricing procedure JFACT is provided for this sales procedure
Process Flow
1 The sales clerk creates a sales order following the
(i)standard procedure
There are special procedures for
(i)Customers in possession of exemption forms
(ii)Exports
2 The shipping clerk creates a delivery again following the
standard procedure
On the initial screen you set the appropriate delivery type (see above)
3 In the warehouse the storeperson issues the goods
The system only allows users to create a pro forma excise invoice if the delivery
is complete so as to prevent them from creating multiple pro forma excise
invoices
4 What you do at this stage depends on whether you want to send the
commercial invoice along with the delivery or whether you want to invoice the
customer later
(A) If the invoice is to be shipped with delivery the shipping clerk
(i)Creates an invoice following the standard procedure
(ii)Creates an excise invoice from the invoice
(B) If the invoice is to be sent on at a later date the shipping clerk
(i)Creates the pro forma excise invoice
The pro forma excise invoice is only required for technical purposes and is not
sent to the customer The system does not make any accounting postings at this
stage
(ii)Creates
an excise invoice from the pro forma excise invoice
In both these cases the system creates an accounting document to post the
excise duty to a clearing account
Instead of creating excise invoices manually you can also have the system
create them automatically Alternatively you can create them in batches
5 You ship the goods
6 When the time comes to invoice the customer you create the invoice
following the standard procedure
Irrespective of the number of excise invoices that you have issued you can
combine the delivery items in a single invoice (if the standard requirements are
met)
Sales from Depots
Purpose
You may sell finished goods directly from the place of manufacture as described
under Sales from Factories or you may first ship them to a separate location for
storage (a depot) from where you will sell them The second procedure is
described here
Sales from depots are handled differently from sales from factories because of
excise law Excise duty is payable when you send the goods from the factory to
the depot but it is not levied again when you sell the goods
Sometimes when you make a final sale of goods from a depot price escalations
could have happened with retrospective effect In such scenarios you need to
pay the extra excise duty at the factory using an A Certificate You need to
register the A certificate details in the RG 23D register and the excise recovered
from the customer
Prerequisites
You have customized
1 Stock transport processing in Customizing for Materials Management (MM)
by choosing Purchasing reg Purchase Order reg Set Up Stock Transport Order
2 The copying control for copying stock transport order NL to excise invoice JEX
You make this setting in the Country Version India (CIN) Implementation Guide
(IMG) by choosing Sales and Distribution reg Assign Excise Invoice Billing Type to
Delivery Type
3 The item category NLN (standard transport order) so that it is relevant for
billing
You do this in the standard IMG in Customizing for Sales and Distribution (SD)
by choosing Sales reg Sales Documents reg Sales Document Item
Process Flow
1 You create the sales order following the
standard procedure
The standard pricing procedure for depot sales is JDEPOT
2 You create the delivery again following the
standard procedure
3 You
assign excise invoices to the delivery or material document
4 You
verify that you have selected the correct excise invoices and post them
Alternatively if you have selected the wrong excise invoices you can cancel the
assignment
5 You create the invoice following the standard procedure
SPECIAL STOCKS amp SPECIAL PROCUREMENT TYPES
Special Stocks are those stocks which are not belongs to our company code
These are not placed in our storage locations amp no physical inventory is
performed and treated as special stocks for the reason of ownership
Different types are of Special Stocks are as follows
1 Subcontracting
2 Consignment
3 Pipeline
4 Stock transfer
5 Third party
6 Returnable transport packaging
7 Sales order stock
8 Project stock
SUBCONTRACTING
In subcontracting process we create subcontracting PO to supply or issue
subcomponents to vendor in order to get final product The price maintained in
subcontracting PO is a service charge paid to vendor
Steps to perform subcontracting
1 Create subcontracting inforecord (Optional)
2 Create subcontracting PO with item category L
There are to ways to supply subcomponents to vendor
bull Manually maintain the subcomponents in the subcontracting
PO though explode BOM
bull Through BOM (Bill of material) T Code CS01 CS02 amp CS03
3 Create Transfer Posting with Movement Type 541 to issue the subcomponents
to the vendor
4 Goods Reciept
5 Invoice Reciept
Path ME21N ---gt Enter Item Category L --gt Material (End Product) PO
Quantity Delivery Date Net Price Plant --gt Click on Item Details --gt Tab
Material Data -- gtComponents select Explode BOM --gt Click on Components
button --gt Enter the subcomponents --gt Go back amp Save
Create Transfer Posting with movement type 541 amp T Code MB1B
GR MIGO
IR MIRO
CONSIGNMENT - (No Concept of Invoice)
In consignment process we will not create Purchasing document for the vendor
vendor himself send the material to our plant though the material is available
to our plant the responsibility amp ownership of the material is of vendor Aliability
only arises when the material withdrawal (Consumption) is posted in the system
from consignment stock
Steps
1 Create Consignment info record (mandatory)
2 Create Consignment purchase order with item category lsquoKrsquo amp maintain Info
record number
3 Create GR Movement type lsquo101Krsquo
4 Create GI Movement Type lsquo201Krsquo
5 Consignment settlement T Code MRKO
Path --gtME11 --gt In info record --gt Purchasing Org Data 1 views of info record
enter the tax code and save it
--gt Create Consignment Purchase Order ME21N (Price option is grayed out with
price zero)
--gt Create GR with movement type 101K
--gt Create Goods Issue (GI) T Code MB1A amp Movement Type 201K Enter Cost
center vendor
--gt Consignment Settlement T Code MRKO Click Activate Consignment Activate
Settle Execute
--gt Display the Document Number ie Invoice receipt T Code FB03
PIPELINE PROCESS (No Concept of Invoice)
In pipeline handling your company does not need to order or store the material
concerned It is ready available to you as and when required via pipeline (eg oil
or water) or some other type of cable (eg electricity) Consumption of the
material is settled with the vendor on a regular basis
Steps
1 Create a Material master record with material type PIPE
2 Create Pipeline info record
3 Create GI with movement type 201P
4 Pipeline settlement T Code MRKO
RETURNABLE TRANSPORT PACKAGING (RTP)
When company orders goods from a vendor the goods are delivered with
returnable transport packaging (pallets containers) that belongs to the vendor
and is stored on our premises until you return it to the vendor
Steps
1 Create Material master record with material type LEIH
2 Create PO
3 Create GR by maintaining RTP material by selecting the option transport
equipments with movement type 501M
4 IR
STOCK TRANSFER
In stock transfer processing goods are procured and supplied within a company
One plant orders the goods internally to another plant (receiving plantissuing
plant) The goods are procured with a special type of purchase order the stock
transport order
Steps
1 Create a Material master in both supplying and receiving plant
2 Create stock transport order (STO) with item category lsquoUrsquo
3 Create transfer posting with movement type 351 amp T Code MB1B (Go to
MMBE stock overview the stock will decrease in supplying plant and it will not
update stock of receiving plant it will be under stock in transit)
4 Create GR stock will update in receiving plant
This scenario is under one company code between two plants
Material Master Related Important Terms (Part 2)
Controlling (CO) An organizational unit in Accounting that reflects a
management-oriented structure of the organization for the purpose of internal
control
Operating results for profit centers can be analyzed using either the cost of
sales approach or the period accounting approach
By analyzing the fixed capital as well you can expand your profit centers for use
as investment centers
Profit Center
Key that uniquely identifies the profit center in the current controlling area
Valuation Category
Determines whether stocks of the material are valuated together or separately
Dependencies
In the case of split valuation this indicator also determines which valuation
types are allowed that is the criteria by which stocks can be valuated
Valuation type
Invoice Verification (MM-IV)
A subdivision of a valuation category in split valuation
Example An enterprise manages its stocks of a material using the valuation
category Quality comprising the following valuation types
bull High quality Average quality Inferior
Hazardous material number
Number that identifies the material as a hazardous material or as dangerous
goods and assigns hazardous material data or dangerous goods data to it
Use The hazardous material number indicates that the material is dangerous
making special precautions necessary for its storage and shipment
Valuation Class
Assignment of a material to a group of GL accounts
With other factors the valuation class determines the GL accounts that are
updated as a result of a valuation-relevant transaction or event such as a goods
movement
The valuation class makes it possible to
bull Post the stock values of materials of the same material type to different GL
accounts
bull Post the stock values of materials of different material types to the same GL
account
Default value for the valuation class for valuated stocks of this material
Use The valuation class has the following functions
bull Allows the stock values of materials of the same material type to be posted to
different GL accounts
bull Allows the stock values of materials of different material types to be posted to
the same GL account
bull Determines together with other factors the GL accounts updated for a
valuation-relevant transaction (such as a goods movement
CIN - Country India Version ~ Volume 1
PurposeCountry Version India (CIN) contains a number of enhancements to standard
Sales and Distribution (SD) functions that allow you to handle local
requirements in particular excise duty
Features
In Country Version India (CIN) this component handles sales processes as
found in India In addition to the generic functions it allows you to
Handle CENVAT in your sales processes
The system calculates excise on your sales and creates excise invoices as
required and makes the appropriate postings to your CENVAT accounts
It covers sales from factories sales from depots and offers functions for other
types of goods movements it also covers sales to export-oriented units and
export sales
Record concessional and exemption forms sent to you by your customers
Make adjustment postings to your CENVAT accounts
Excise Invoice (Outgoing)
Definition
The document that acts as the proof of payment of excise duty and is required
for the customer to take CENVAT credit on the item
Use
In the SAP System there are three different procedures for creating excise
invoices
Sales direct from the factory
This procedure is for when you sell manufactured goods straight from the
factory at which they were produced in which case you levy excise duty when
the goods leave the factory on their way to the customer
If when you send the goods to the customer you enclose the commercial
invoice you create the excise invoice with reference to the commercial invoice
If you want to send the commercial invoice after you have dispatched the goods
however you create the excise invoice with reference to a pro forma
commercial invoice For more information about these procedures see Sales
from Factories
As well as creating excise invoices individually you can also create them in
batches (see Creation of Excise Invoices in Batches)
Sales from depots
A depot is a site at which the goods are stored away from the factory at which
they were produced In this procedure you have to levy the excise duty when
you transfer the goods from the factory to the depot and then make sure this is
passed on to the customer when it makes a purchase For more information see
Sales from Depots
Sales (other goods movements)
Some other goods movements may also require you to create an excise invoice
with reference to other documents The SAP System offers separate functions
for these purposes (see Excise Invoices (Outgoing) for Other Movements)
StructureNumbering of Excise Invoices
Outgoing excise invoices have two numbers an internal document number
which is assigned immediately you create an excise invoice and an excise
invoice number which is not assigned until you have verified and posted it
As far as the excise invoice number is concerned you have to number your
outgoing excise invoices in sequential order starting each year on 1 April You
must notify the excise authority of the jurisdiction of the invoicing location The
serial number must be printed on each page of the excise invoice
Each number range is governed by a series group You must create at least one
series group in order to be able to number the excise invoices If you need more
than one number range you must create the corresponding number of series
groups You do so in the CIN Implementation Guide (IMG) by choosing Global
Settings reg Series Groups
Number of Line Items Per Excise Invoice
Some states allow you to include only a limited number of items for each page
of an excise invoice (for example if the excise invoices are to be printed on
prenumbered forms) You can customize the system so that it prints the excise
invoice accordingly in the CIN IMG by choosing Global Settings reg Excise
Registration IDs
Customer Master (Excise Data) Definition
The part of the customer master record that contains information relating to
Indian excise duty
Use
In conjunction with other data this data is used to calculate excise duty on
various transactions
To maintain the data from the SAP Easy Access screen choose Indirect Taxes reg
Master Data reg Excise Rate Maintenance and then select the following options
described below
Structure
The excise part of the customer master contains the following information
Customer Excise Details
On this screen you enter your customers tax registration numbers which are
used for various forms of correspondence and reports
1 Excise registration number (and the range division and collectorate in which
this is located)
2 Central sales tax (CST) number
3 Local sales tax (LST) registration number
4 Permanent account number (PAN)
In order for the system to be able to calculate which rate of excise duty to apply
on sales to the customer you must also assign it a customer excise duty status
(for more information about how this works see Determination of Excise Duty
Rates)
Excise Indicator for Plant and Customer
On this screen you define the final excise duty indicator (for more information
about how this works see Determination of Excise Duty Rates)
Determination of Excise Duty Use
When you execute a business transaction involving materials that are subject to
excise duty the system automatically calculates the duty for you
Prerequisites
In order for the system to be able to determine which rate of excise duty to
apply you must have maintained all the data on the Excise Rate Maintenance
screen which you can access from the SAP Easy Access screen by choosing
Indirect Taxes reg Master Data reg Excise Rate Maintenance
You maintain the following types of data
Plant master data
You assign each of your plants an excise duty indicator You can use the same
indicator for all the plants with the same excise status from a legal point of view
such as all those that are in an exempt zone
See also the information about manufacturers that are only entitled to deduct a
certain portion of the duty (see Partial CENVAT Credit)
Vendor master data
For each of your vendors with the same excise status from a legal perspective
you define an excise duty indicator You must also specify the vendor type ndash for
example whether the vendor is a manufacturer a depot or a first-stage dealer
You must also stipulate if the vendor qualifies as a small-scale industry
For each permutation of plant indicator and vendor indicator you then create a
final excise duty indicator
Customer master data
Similarly you assign the same excise duty indicator to each of your customers
that share the same legal excise status
Again for each permutation of plant indicator and customer indicator you then
create a final excise duty indicator
Material master data
Each material is assigned a chapter ID
Excise tax rate
For every chapter ID and final excise duty indicator you maintain the rate of
excise duty
If your business only qualifies for partial CENVAT credit you must customize
your system accordingly
Activities
Let us consider an example to illustrate how the system determines which rate
of excise duty to apply to a material Assume you are posting a sale of ball
bearings to a customer The system automatically determines the rate of excise
duty as follows
Looks up the customer master data to see what status you have assigned the
customer
Lets assume youve assigned the customer status 3
Looks up the plant master data to see what status you have assigned the plant
Similarly your plant has status 2
The system looks up the table under Excise Indicator for Plant and Customer to
see what the final excise duty indictor is for customer status 3 and plant status
2 It is 7
The system determines the chapter ID of the ball bearing for the plant
Letrsquos assume the chapter ID at plant for the ball bearings is 100001
Finally the system looks up the table under Excise Tax Rate to see what rate of
duty applies to chapter ID 100001 under status 7
Plant Master (Excise Data) Definition
The part of the plant master record that contains information relating to Indian
excise duty
Use
In conjunction with other data this data is used to calculate excise duty on
various transactions
To maintain the data from the SAP Easy Access screen choose Indirect Taxes reg
Master Data reg Excise Rate Maintenance and then select the following options
described below
Structure
The excise part of the plant master is divided into the following screens
Excise Indicator for Plant
On this screen you enter your plants tax registration numbers which are used
for various forms of correspondence and reports
1 Central sales tax (CST) number
2 Local sales tax (LST) registration number
3 Permanent account number (PAN)
In order for the system to be able to calculate which rate of excise duty to apply
on purchases for this plant you must also assign it a plant excise duty status
(for more information about how this works see Determination of Excise Duty
Rates)
Excise Indicator for Plant and Vendor
On this screen you define the final excise duty indicator (for more information
about how this works see Determination of Excise Duty Rates)
Excise Indicator for Plant and Customer
On this screen you define the final excise duty indicator (for more information
about how this works see Determination of Excise Duty Rates)
Automatic Creation of Excise Invoices Use
The SAP System can automatically create an outgoing excise invoice for you
immediately you post a commercial invoice (or a pro forma invoice) for a
customer sale This function applies to excise invoices for sales from factories
only
Prerequisites
To activate this function in the Country Version India (CIN) Implementation
Guide (IMG) make the following settings
1 Under Global Settings reg Excise Groups select Create EI
This activates the automatic creation function
2 Under Sales and Distribution reg Utilization Determination
Here you specify which CENVAT accounts the system is to post the different
types of excise duty to
3 Under Sales and Distribution reg Excise GroupndashSeries Group Determination
Here you specify which excise group and series group the excise invoices are to
be created for
Features
When you post an invoice the system creates an excise invoice All the
information that it needs to create the excise invoice is provided either by the
invoice or by the Customizing settings that you have made in Sales and
Distribution It also determines the excise invoice type automatically by means
of a user exit
Creating Excise Invoices for Stock Transfers 1 From the SAP Easy Access screen choose Indirect Taxes reg Procurement reg
Excise Invoice reg For Depot reg CreateChangeDisplay
2 In the Material document field enter the goods receipt number and choose
The system displays the information from the goods receipt for example the
sending plant the excise registration the range the division and the
collectorate
3 Choose Details
The system copies the items from the goods receipt document In the depot it is
possible to have a separate excise invoice at line item level
4 Enter the internal document number of the excise invoice sent by the factory
5 Choose More documents to go the excise invoice details screen
6 Enter the internal document number of the excise invoice from the factory
The system copies the information to the line item (for example the excise
invoice number the excise invoice date the item number the chapter ID the
excise invoice quantity the amount of excise duty paid the excise base value
and the serial number of the Part II register entry with which the excise was
paid)
You can change the receipt quantity to match the actual quantity received at
the depot if necessary The system automatically adjusts the excise
accordingly
7 Go back to the item details screen
8 Save the excise invoice
Creating Excise Invoices for Direct Purchases 1 From the SAP Easy Access screen choose Indirect Taxes reg Procurement reg
Excise Invoice reg For Depot reg CreateChangeDisplay
2 In the Material document field enter the goods receipt number and choose
The system displays the information from the goods receipt for example the
sending plant the excise registration the range the division and the
collectorate
You can also maintain the excise registration details for the ship-from party as
for with the vendor The ship-from can be different from the vendor code (The
delivering plant can be maintained as a ship-from in the system When a valid
ship-from is entered the excise registration details copied from the vendor will
be overwritten by the ship-from excise registration details)
The ship-from registration details displayed can also be overwritten manually
The dealers commercial invoice number can be stored in the vendor excise
invoice number as in this case the dealer himself will not have an excise
invoice
3 Choose Details
The system copies the items from the goods receipt document It also copies the
vendors excise invoice number and the serial numbers of the entries in the RG
23A RG 23C and personal ledger account (PLA) registers
4 Enter the internal document number of the excise invoice sent by the factory
5 Select an item and choose More documents to go the excise invoice details
screen
In the case of direct purchases there will not be any excise invoice in the
system so leave the internal document field blank The vendors invoice will
show the details of the excise invoices through which excise has been paid for
the item that is being dispatched You can enter these details here
6 For each item the chapter ID excise base value and excise duty amounts
are defaulted from the purchase order You can change them if there is any
difference Enter the excise amount paid and the receipt quantity You also
enter the Part II register serial numbers with which the excise duty was paid and
the excise registration information from the original excise invoice
7 Go back to the item details screen
8 Save the excise invoice
The system creates an entry in register RG 23D You can change the excise
invoice as long as it has not been used in any sales
Assigning Excise Invoices to a Delivery Use
You follow this procedure to specify which excise invoices are to be assigned to
a delivery from a depot (or other material document)
You can also automate this procedure using the batch selection program
(J_1IJCHK) by making the appropriate Customizing settings in the Country
Version India (CIN) Implementation Guide (IMG)
Procedure
1 From the SAP Easy Access screen choose Indirect Taxes reg SalesOutbound
Movements reg Excise Invoice reg For Depot reg CreateChangeDisplay reg Delivery
or Material Document reg RG 23D Selection
2 Enter the delivery document number or the material number and choose
3 Select the excise invoice you want
4 Choose
5 Choose Excise invoice
A list of excise invoices appears These are the excise invoices at the depot with
a balance quantity
The system also shows a list of the A certificates that can be used You can pick
up any of the A certificates but they must be for the same excise invoice You
can only pick up an A certificate in its entirety You cannot select part of an A
certificate
6 Select the excise invoices that are relevant to the delivery
7 Specify what quantity to be used from each excise invoice
The system recalculates the excise accordingly
8 Go back to the item details screen
9 Save the data
Result
The system creates an entry in register RG 23D and generates the depot excise
invoice numbers
If you selected any A certificates the system also generates additional entries in
the RG 23D register The system marks the original A certificates as updated so
that they cannot be used for any other removals
Continue see Volume 2 (Next post)
EXTERNAL SERVICE MASTER
EXTERNAL SERVICE MASTER ESM
We procure the different type of services from vendors they are-
1048774 Hardware amp software services
1048774 Construction amp transportation services
1048774 Machinery services
1048774 Annual maintenance services
1048774 Present to and breakdown service Etc
Service Procurement Cycle -
1048774 Requirement identification
1048774 Source determination
1048774 Source selection
1048774 Service master
1048774 Service PO
1048774 Service entry sheet acceptance
1048774 Invoice with respect to service entry sheet
Steps to perform services -
1 Create service master (AC03)
2 Create Service PO (ME21N) with AC Assignment category lsquoKrsquo amp Item
Category lsquoDrsquo
3 Create service entry sheet (ML81N)
4 Invoice with respect to Service Entry sheet
Customize settings
(For service category Number Ranges amp organization status for service
category)
SPRO 1048774 IMG 1048774 MM 1048774 ESM 1048774 Service Master
1048774 Define organization Status for service Categories
1048774 Define Service Category
1048774 Define Number Ranges
Define organization Status for service Categories
bull Click on New Entries
bull Org service Category
bull BDS (Basic data service is stored in service master record under this service
category)
bull CNST 1048774 Controlling Status
bull PUST 1048774 Purchasing data Status
bull SDST 1048774 Sales amp Distributed Status
bull Org status description service category 1048774 Press Enter amp Save
Define Service Category
bull Same path as above
bull Select Standard
bull Click on Copy as
bull AC reference 1048774 always takes as 0006
bull Enter amp Save
Define Number Ranges
Click on groups 1048774 Groups 1048774 Insert 1048774 select enter Number Ranges
Select the service category
Click on Element
Select Group amp Click on Element Group
Save
Create Service Master - (AC03)
Click on Create New Services
Service Number (any number) Service Category
Basic unit of measure (Hours lsquoHrsquo)
Enter
Basic Data 1048774 Master Service Group 1048774 007
Valuation class 1048774 3200 1048774 Enter 1048774 Save
To See the Service list 1048774 AC06
Create Service PO (ME21N)
AC assignment category lsquoKrsquo Item Category lsquoDrsquo
Enter the Short text Quantity Delivery date Net Price Material group Plant
Storage Location
Enter service number in Service Tab (Item Details) quantity price Enter
Account Assignment 1048774 GL Account Number eg400000
Cost Center eg 9999
Press Enter amp Save
Create Service Entry Sheet - ML81N
Select other purchase order (enter PO number) 1048774 Enter 1048774 Click on Create1048774 Enter
Short Text 1048774 Enter 1048774 Service Number 1048774 Enter ndashClick on Flag button 1048774 Save
Take Service entry Sheet Number
Go to Invoice MIRO 1048774 Enter company code 1048774 Select Service Sheet Option 1048774 Enter
Service Entry Sheet Number 1048774 save it
Physical Inventory and Inventory Management
Physical inventory Process - 1 Create Physical inventory document
T Code MI01 ndash Create single inventory document
T Code MI31 ndash Create multiple physical inventory documents
I Enter the desired fields ie material material type site storage location and
Maximum number items Documents ndash 100 etc 1048774 Press Enter
II Click on Process Session
III Select the line items and click on the process
IV System displays a dialog box select Background and click on process
Inventory document is created
2 Print Inventory Document and handed over to responsible person say
Manager
3 Enter Physical Inventory count
T Code MI04
i Enter the physical inventory document number Fiscal year count date 1048774 Press
enter
ii Enter the Material Quantity and click on post
4 Listing of difference
T Code MI20
Enter the physical inventory document number and execute system displays a
screen wherein we will be able to view the differences
5 Post the differences
T Code MI07 amp Mov Type 701 amp 702
Enter the physical inventory document number year posting date enter the
difference and post
INVENTORY MANAGEMENT Maintaining stock by value or by quantity is called inventory The total inventory
management deals with the goods movement of the material
Goods movement -
It is a process in which transaction resulting change in stocks It is further sub-
divided into three categories
1 Goods Receipt (GR)
2 Goods Issue (GI)
3 Transfer Posting (TP)
Goods Receipt (GR) - It is a goods movement in which receipt of goods is
posted for vendor or for production A GR posted in the system will leads to
increase in stock No Concept of Price or value
Goods Issue (GI) - It is goods movement in which material withdrawal is
posted for consumption or for customer A GI posted in system will leads to
decrease in stock
Stock Transfer (ST) - It is method of removal of material from one location
and transferring it to another location This process is performed between two
plants and two storage locations
Transfer Posting (TP) - It is a general term of stock transfer that changes the
stock type or stock categories The difference between transfer posting and
stock transfer is -
TP is logical stock transfer and ST is a physical stock transfer
Movement Type - It is a three-digit code which plays a role of important
control function in inventory management It acts as a central role in automatic
account determination It determines which stock account or consumption
account is updated in financial accounting
Reservation - It stores requisition created from particular cost center to
particular department for issuing the material reservation posted in the system
It leads to decrease in stock
Stock Types - The different stock types are
1 Unrestricted use stock
2 Quality inspection stock
3 Blocked stock
4 Warehouse stock
Transaction code -
1 To Create GR - MIGO
2 To Create GI - MB1A
3 For Transfer Posting - MB1B
4 To display MaterialGR document ndash MB03
5 To create reservations - MB21 MB22 MB23
6 To See Stock Overview - MMBE
7 To enter Other GR - MB1C
When GR is posted in the system
1 Material document is created - MB03
2 Accounting Document is generated - MB03
3 MMR updated - MM02 MM03
4 PO history updated - ME23N
Movement Typersquos
Movement Types under GR - 101 331333335501503505551553555
561351 (For all Mov Typersquos there is a reversal eg 101 has 102 Note No
reversal for 121)
Movement Typersquos under GI - 201 331333335551553555
Transfer Posting It is performed in three ways
1 TP BW Plant to Plant
2 TP BW Storage Location to Storage Location
3 TP BW Stock to Stock
Movement Types under TP BW Plant to Plant
301 - 1 step
303 amp 305 - 2 step
Movement Type under TP BW Storage location to Storage Location
311 - 1 step
313 amp 315 - 2 step
Movement Type under TP BW stock to stock
321 323 325 343349
To Cancel the GR Movement type 102
Return delivery to vendor movement type 122 amp T Code MIGO
Transfer Posting Stock to Stock
From Blocked stock to Quality Inspection
T Code MB1B amp Movement Type 349
From Blocked stock to Unrestricted Stock
T Code MB1B amp Movement Type 343
From Quality Inspection to Unrestricted Stock
T Code MB1B amp Movement Type 321
Transfer Posting from Plant to Plant
For One Step Movement Type 301
For Two Steps Movement Type 303 amp 305
After posting stock will display in Stock in Transit (Plant)
To receive material by receiving Plant Movement Type 305
Transfer Posting BW Storage Location to Storage Location
Under One Plant BW two Storage Locationrsquos Movement Type 311
Back to Parent storage Location Movement Type 313 (It Show stock in transfer)
use Movement type 315 at Parent storage location
To create Goods Issue (GI) T Code MB1A amp Movement Type 201
To Create Reservations T Code MB21 MB22 amp MB23
Creation of GI wrt Reservations
T Code MB1A amp Movement Type 201
Click on Reservation Enter Reservation Number 1048774 Click on Adopt + Details
GR wrt Reservations T Code MIGO amp Select as Reservation instead of GR
GR without PO Movement type 501 amp T Code MB1C Select others instead of
Purchase order Enter Material Quantity Plant Storage Location 1048774 Press Enter
Partner Option will be visible (Vendor) 1048774 Save it
Invoice - Invoice is a document which is issued to a buyer (Company) from the
supplier (vendor) for the payment The following information is maintained in
invoice
Invoice date Posting date Invoice ref number tax amount amount tax code
terms of payments vendor address banking accounting information etc
When invoice document is posted in the system
bull Invoice document created
bull Accounting document is generated (MIR4)
bull PO history updated (ME23N)
bull FI document created (FB03)
PRICE DETERMINATION PROCESS or PRICING PROCEDURE
CONDITIONS OR PRICING PROCEDURE or PRICE DETERMINATION PROCESSWe deal with the Pricing Procedure for vendors
PB00 Gross Price (info record contract scheduled Agreement)
PBXX Gross Price (PO)
FRA1 Freight
RA00 Discount on net
RA01 Discount on Gross
ZA00 Surcharge on net
SKT0 Surcharge discount
ZPB0 Rebates
MWVS Input Tax
MWAS Output Tax
BASB Base Amount
RM0000 Calculation Schema or Pricing Procedure
(PB00 amp PBXX)
RM0002 Calculation Schema or Pricing Procedure
(PB00)
PB00 --gt AB00
Copy the Standard one and create new one (ours)
RM0000 contains all the condition types
Pricing Procedure (PP)
We define the pricing procedure to define condition supplement for the material
price The condition supplement specifies the discount surcharge freight etc
that we want a system every time to access material price condition records
The total value of the material is calculated or based on all addition and
subtraction ie discounts surcharge tax freight etc
Condition Table
It is a table which defines the structure of condition record key
Condition Record
It is a data record used to store conditions or condition supplements ie
condition like discount freight and surcharge Tax etc
Condition Type
It is used for different functions In Pricing the condition types leads you to
differentiate different types of discounts in output determination batch
determination difference between two output types such as delivery note or
order confirmation between different strategy types
Access Sequence
It specifies the order in which system searches or access the condition records
from condition table
Difference between PB00 amp PBXX
1 Condition maintained in PB00 is time dependent whereas PBXX is time
independent
2 Condition type PB00 ndash used for IR RFQ Contract Schedule Agreement
Condition type PBXX ndash used for PO
Calculation Schema
The main function of calculation schema is to provide framework of steps for the
price determination process to specify the discounts surcharge freight rebate
etc
It also determines the sequence of conditions that are to be followed and in
which sequence
Schema Group Vendor
The main function of it is to identify or to pick the right process and conditions
for a particular vendor
Schema Group Purchasing Organization
Key that determines which calculation schema (pricing procedure) is to be used
in purchasing documents assigned to the relevant purchasing organization
Schema Group
It allows to group together the purchasing organizations which uses the same
calculation schema
Steps -
1 Create Access sequence
2 Create condition types
3 Create pricing procedure or calculation schema
4 Link pricing procedure amp access sequence to condition type
5 Create schema group for vendor
6 Create schema group for purchase organization
7 Assign schema group vendor-to-vendor master record in purchasing data
view
8 Assign schema group purchase organization to our purchase organization
9 In inforecord purchase organization data enter condition types and pricing or
calculation procedure
CUSTOMIZE SETTINGS -
SPRO --gt IMG--gtMM--gtPUR--gtConditions --gtDefine price determination Process
1 Define access sequence
2 Define Condition type
3 Define cal Schema
4 Define schema group
o Schema group vendor
o Schema group purchasing group
5 Assignment of schema group to PUR org
6 Define schema determination agrave determine cal schema for standard PO
PURCHASE ORDER
PURCHASE ORDER
PO is an external document created for the procurement of materials and
services from vendor The document of PO is also divided into 4 parts as PR -
1 Document Overview
2 Header (DeliveryInvoice Conditions Address Partners Org data status)
3 Item Overview (AC assign cat Item Category Material Plant Del date SL)
4 Item Details (Material data Confirmations condition control delivery delivery
Schedule Quantitiesweights invoice)
A procurement type is defined for each of the document items The following
procurement types exist
1048774 Standard
1048774 Subcontracting
1048774 Consignment
1048774 Stock transfer
1048774 External service
bull There are different ways to create PO -
1 Directly through transaction code ME21N
2 With reference to PR
3 With reference to RFQ
4 With reference to info records
5 With reference to Contracts
6 With reference to Cost Centre GL Account (cost element) for consumable
items or not stock items with account assignment category lsquoKrsquo (K= cost centre)
(For non stock and consumables)
0 COMMENTS L INKS TO THIS POST
LABELS PO PURCHASE ORDER
Reaction
s
PURCHASE REQUISITION T CODE ME51 or ME51N
Purchasing Requisition -
It is a request or instruction from particular department (Cost Centre) to
purchasing department to procure certain quantity of material and services It is
only one internal document in SAP-MM
Purchasing Requisition document is divided into four parts -
bull Document Overview
bull Header
bull Item Overview
bull Item Details
Document Overview -
It displays the list of purchasing documents which are created previously
according to our requirement
Header -
Any text message or information is maintained
Item Overview -
In this we enter material plant delivery date quantity storage location
purchasing group AC assignment category Item category etc
Item Details -
It displays the detailed information about item overview (like Master data
valuation source of supply contact person delivery address status etc)
0 COMMENTS L INKS TO THIS POST
LABELS PR PURCHASE PURCHASE ORDER PURCHASE REQUIS IT ION SALES ORDER
Reaction
s
Automatic PURCHASE ORDER (PO) How Automatic PO raised
How Automatic PO raised
At fixed time say 1230 AM automatic scheduler runs and checks whether the
stock is less than or equal to the replenishment point If stock is less than or
equal to Repli Point than PR raised automatically to Purchasing Deptt
bull Activate the option automatic PO in purchasing view in material master record
bull Activate the option automatic PO in purchasing data view in vendor master
record
bull Maintain Source List amp select fixed vendor
bull PR crated automatically
bull Automatic creation of PO from PR ndash ME59
Enter the Purchasing group purchasing organization Vendor Plant and
Purchasing Requisition Document Number 1048774 Execute
RELEASE PROCEDURE Release strategyThe main function of Release procedure is to determine the approval process
or the release process for the procurement of material amp services rather than
relying for manual signatures The release procedure contains release strategy
Release Strategy (RS)
A plan defining the release codes with which a purchase requisition item a
complete purchase requisition or a complete external purchasing document
must
be released (that is approved) and the sequence in which release is to be
effected
using these codes It is a unique set of conditions sequence and level of release
It is a 2 digit code eg S1 S2 S3etc
The Release Strategy contains the following -
bull Release Group
bull Release Codes
bull Release Indicators
bull Release Prerequisite
Release Group -
It is a 2-digit code which is assigned with a class (Class contains group of
characteristics) It contains one or more release strategies
Release Codes -
It is a 2digit code which identifies the department or responsible person for
the approval process amp release process
Eg AA - Manager
BB - Sr Manager
CC - Vice President
DD - Managing Director
Release Indicator -
It is a Code that represents the release status If the proper approval
process is performed that the release Strategy has to be release if it is not
performed than the Release Strategy is blocked
R ndash Release
B ndash Blocked
Release Conditions -
It determines the type of the release strategy
For eg
bull If the price ranges from 1 to 1000 It is approved by AA BB and CC
bull If the ranges from1001 to 1lac then it is approved by AA BB CC and DD
- 80 -
Release Prerequisite
It will informs the system which RS has to be take place in the PO CEKKO is
a communication structure where it displays the field names amp field lengths to
create characteristics ie we maintain characteristics in customizing by
selecting
the field names from this communication structure for all external documents
CEBAN is used for the purchasing requisition
Characteristics -
1 Net value of PO --- GNETW (GSWRT for PR)
2 Plant --- WERKS
3 Purchasing organization -- EKORG
4 Purchasing Group --- EKGRP
5Material group ndashMATKL
CUSTOMIZE SETTINGSSPRO--gtIMG--gt MM--gt Purchasing--gtPO--gt Release Procedure for PO
1 Edit Characteristics T Code CT04
2 Edit Class T Code CL02
3 Define Release Procedure for PO
4 Check Release Strategy
Edit Characteristics -
Characteristics - eg NET VALUE OF VALUE
Click or Create Button
Under Basic Data
Description - Value for PO
Status - Release
Data Type - Currency Format
No Of Characters - 15
Currency - EUR
Activate multiple values amp Internal Values Allowed
Additional Data
Table name - CEKKO
Field Name - GNETW
Values
Activate Additional Values
Save the document
Create another Characteristic for Plant -
Plant date Create ndash Description Status
Data Type Characteristic Format
Number of Characteristics 4
Activate Multiple Values
Additional data-
Table Name - CEKKO
Field Name - WERKS
Values
Activate Additional Values
For Purchasing Organization Name - EKORG
For purchasing Group EKGRP
Edit Class
Class - SAPMM
Class Type - 032 Release Strategies
Click on Create button
Basic Data
Description - Class for PO
Status - Released
Valid From _____ Valid to _____
Click on Characteristic
Characteristic
Enter all the Characteristics Created amp Save it
Define Release Procedure for PO-
bull Release Group
bull Release Codes
bull Release Indicators
bull Release Strategies
bull Workflow
Release Group - New Entries Release Group Class and Description
Press Enter amp Save
Release Code - New Entries
Group Codes Description
99 AA Manager
99 BB Sr Manager
99 CC Vice President
99 DD Managing Director
Press Enter amp Save
Release Indicator - (B ndash Blocked R - Release)
New Entries
Release Indicators Description
B Blocked
R Released
Release Strategies -
New Entries
Release Group 99
Release Strategy S1
Release Codes AA BB CC and DD
Click on Release Prerequisites
Release Status -
Continue
Classification
Enter the Value (Same Price)
Plant (9999)
Go Back amp Save it
Release Simulation - Simulate Release
Create a PO -
There are two ways to release the PO
Individual releaseME28
Collective release ME29N
How to delete procedure
Delete Release GP
Create Release RG
Delete R Strategies
Delete R Code
Delete R Group
SAP R3 SYSTEM LANDSCAPE
System LandscapeThe system landscape contains all the SAP Systems that you have installed It
can consist of several system groups whorsquos SAP Systems are linked by transport
routes
After you decide which clients you need and which roles you want them to have
you need to decide how to distribute them amongst the different SAP Systems
You can set up multiple clients independently of one another in a single SAP
System However when you configure the data you must remember that cross-
client Customizing settings and Repository objects are identical for all clients in
a single SAP System Changes made in one client apply immediately to all
clients in the system
Three-System Landscape
SAP recommends a three-system landscape in which each of the central clients
has its own SAP System
This consists of a development system DEV a quality assurance system QAS
and a production system PRD The development system contains the
Customizing client CUST the quality assurance system contains the quality
assurance client QTST and the production system contains the production client
PROD Make all changes to Customizing data and Repository objects in the
Customizing client When you release the corresponding change requests they
are transported into the quality assurance client This means that changes to
cross-client data only appear in the quality assurance client after the transport
In the quality assurance client you can test whether the transports are
complete or whether any linked changes are missing and are still in unreleased
change requests If the test is successful the change requests are transported
into the production client The production client is completely separate from the
other clients as regards cross-client data
SPECIAL STOCKS amp SPECIAL PROCUREMENT TYPES
Special Stocks are those stocks which are not belongs to our company code
These are not placed in our storage locations amp no physical inventory is
performed and treated as special stocks for the reason of ownership
Different types are of Special Stocks are as follows
1 Subcontracting
2 Consignment
3 Pipeline
4 Stock transfer
5 Third party
6 Returnable transport packaging
7 Sales order stock
8 Project stock
SUBCONTRACTING
In subcontracting process we create subcontracting PO to supply or issue
subcomponents to vendor in order to get final product The price maintained in
subcontracting PO is a service charge paid to vendor
Steps to perform subcontracting
1 Create subcontracting inforecord (Optional)
2 Create subcontracting PO with item category L
There are to ways to supply subcomponents to vendor
bull Manually maintain the subcomponents in the subcontracting
PO though explode BOM
bull Through BOM (Bill of material) T Code CS01 CS02 amp CS03
3 Create Transfer Posting with Movement Type 541 to issue the subcomponents
to the vendor
4 Goods Reciept
5 Invoice Reciept
Path ME21N ---gt Enter Item Category L --gt Material (End Product) PO
Quantity Delivery Date Net Price Plant --gt Click on Item Details --gt Tab
Material Data -- gtComponents select Explode BOM --gt Click on Components
button --gt Enter the subcomponents --gt Go back amp Save
Create Transfer Posting with movement type 541 amp T Code MB1B
GR MIGO
IR MIRO
CONSIGNMENT - (No Concept of Invoice)
In consignment process we will not create Purchasing document for the vendor
vendor himself send the material to our plant though the material is available
to our plant the responsibility amp ownership of the material is of vendor Aliability
only arises when the material withdrawal (Consumption) is posted in the system
from consignment stock
Steps
1 Create Consignment info record (mandatory)
2 Create Consignment purchase order with item category lsquoKrsquo amp maintain Info
record number
3 Create GR Movement type lsquo101Krsquo
4 Create GI Movement Type lsquo201Krsquo
5 Consignment settlement T Code MRKO
Path --gtME11 --gt In info record --gt Purchasing Org Data 1 views of info record
enter the tax code and save it
--gt Create Consignment Purchase Order ME21N (Price option is grayed out with
price zero)
--gt Create GR with movement type 101K
--gt Create Goods Issue (GI) T Code MB1A amp Movement Type 201K Enter Cost
center vendor
--gt Consignment Settlement T Code MRKO Click Activate Consignment Activate
Settle Execute
--gt Display the Document Number ie Invoice receipt T Code FB03
PIPELINE PROCESS (No Concept of Invoice)
In pipeline handling your company does not need to order or store the material
concerned It is ready available to you as and when required via pipeline (eg oil
or water) or some other type of cable (eg electricity) Consumption of the
material is settled with the vendor on a regular basis
Steps
1 Create a Material master record with material type PIPE
2 Create Pipeline info record
3 Create GI with movement type 201P
4 Pipeline settlement T Code MRKO
RETURNABLE TRANSPORT PACKAGING (RTP)
When company orders goods from a vendor the goods are delivered with
returnable transport packaging (pallets containers) that belongs to the vendor
and is stored on our premises until you return it to the vendor
Steps
1 Create Material master record with material type LEIH
2 Create PO
3 Create GR by maintaining RTP material by selecting the option transport
equipments with movement type 501M
4 IR
STOCK TRANSFER
In stock transfer processing goods are procured and supplied within a company
One plant orders the goods internally to another plant (receiving plantissuing
plant) The goods are procured with a special type of purchase order the stock
transport order
Steps
1 Create a Material master in both supplying and receiving plant
2 Create stock transport order (STO) with item category lsquoUrsquo
3 Create transfer posting with movement type 351 amp T Code MB1B (Go to
MMBE stock overview the stock will decrease in supplying plant and it will not
update stock of receiving plant it will be under stock in transit)
4 Create GR stock will update in receiving plant
This scenario is under one company code between two plants
SAP IMPLEMENTATION PROCESS End to End Inplementation of SAP
First we have to prepare documentation about the client business (like turnover
vendors customers payments materials production marketing etc)
The implementer company made two teams (1) Steering team (2) Steering
community
Steering team (SAP functional consultants) prepares a detailed
documentation about the client with the help of core team (client company
team)
amp this study is known as Feasibility Study After that the steering team handed
over this documentation to Steering community (Project manager Sr software
engineer and other higher authorities)
Steering community prepares the BBP (Business Blue Print) BBP
Prepares in MS-Word
10487741048774 ASAP - Accelerated System Application Product in Data Processing
10487741048774 Business Process - ASAP Methodology
1 Project Preparation
2 BBP (Business Blue Print)
3 Realization
4 Final Preparation
5 Go live amp Support
10487741048774 Project Preparation -
It consists of identifying team members amp development strategy as
how to go
AS ndash IS (Existing Process followed requirements)
TO ndash BE (Requirement analysis and best process recommended)
Difference between (AS ndash IS) amp (TO - BE) is called GAP Analysis
10487741048774 Business Blue Print (BPP) -
It is a legal documentation between client amp the company
(implementer service provider) We have to understand the current business
process of client amp analyzing the business amp prepare documentation It is a
detailed documentation for the client
10487741048774 Realization -
This Phase is used to Implement or migrate the entire business of
client from Non-SAP environment to SAP environment
10487741048774 Final Preparation -
This phase is used for testing amp end user training After successfully
completion of this phase client is ready to run business in SAP R3
10487741048774 Go live amp Support -
In this phase we deliver the project end date amp end user training at
client site
THIRD - PARTY PROCESSING
THIRD - PARTY PROCESSING
In third party processing your company passes on a sales order to an external
vendor who sends the goods directly to the customer The sales order is not
processed by your company but by the vendor Third-party items can be
entered in purchase requisitions purchase orders and sales orders Third party
processing is integrated with Sales and Distribution If the sales order contains
third-party items the system creates a purchase requisition from the order
Steps
1 Create MMR with sales views and maintain Division Distribution channel
sales org item category group and general item category group ndash BANS (Third
party item) amp Account group Sold to party
2 Create Customer master record T Code XD01 XD02 XD03
3 Create sales order T Code VA01 VA02 VA03 (PR generated automatically)
4 PO - T Code ME21N
5 GR ndash T Code MIGO
6 IR ndash T Code MIRO
7 Sales Billing Billing Document T Code VF01 VF02 VF03

Steps to perform subcontracting
1 Create subcontracting inforecord (Optional)
2 Create subcontracting PO with item category L
There are to ways to supply subcomponents to vendor
bull Manually maintain the subcomponents in the subcontracting
PO though explode BOM
bull Through BOM (Bill of material) T Code CS01 CS02 amp CS03
3 Create Transfer Posting with Movement Type 541 to issue the subcomponents
to the vendor
4 Goods Reciept
5 Invoice Reciept
Path ME21N ---gt Enter Item Category L --gt Material (End Product) PO
Quantity Delivery Date Net Price Plant --gt Click on Item Details --gt Tab
Material Data -- gtComponents select Explode BOM --gt Click on Components
button --gt Enter the subcomponents --gt Go back amp Save
Create Transfer Posting with movement type 541 amp T Code MB1B
GR MIGO
IR MIRO
CONSIGNMENT - (No Concept of Invoice)
In consignment process we will not create Purchasing document for the vendor
vendor himself send the material to our plant though the material is available
to our plant the responsibility amp ownership of the material is of vendor Aliability
only arises when the material withdrawal (Consumption) is posted in the system
from consignment stock
Steps
1 Create Consignment info record (mandatory)
2 Create Consignment purchase order with item category lsquoKrsquo amp maintain Info
record number
3 Create GR Movement type lsquo101Krsquo
4 Create GI Movement Type lsquo201Krsquo
5 Consignment settlement T Code MRKO
Path --gtME11 --gt In info record --gt Purchasing Org Data 1 views of info record
enter the tax code and save it
--gt Create Consignment Purchase Order ME21N (Price option is grayed out with
price zero)
--gt Create GR with movement type 101K
--gt Create Goods Issue (GI) T Code MB1A amp Movement Type 201K Enter Cost
center vendor
--gt Consignment Settlement T Code MRKO Click Activate Consignment Activate
Settle Execute
--gt Display the Document Number ie Invoice receipt T Code FB03
PIPELINE PROCESS (No Concept of Invoice)
In pipeline handling your company does not need to order or store the material
concerned It is ready available to you as and when required via pipeline (eg oil
or water) or some other type of cable (eg electricity) Consumption of the
material is settled with the vendor on a regular basis
Steps
1 Create a Material master record with material type PIPE
2 Create Pipeline info record
3 Create GI with movement type 201P
4 Pipeline settlement T Code MRKO
RETURNABLE TRANSPORT PACKAGING (RTP)
When company orders goods from a vendor the goods are delivered with
returnable transport packaging (pallets containers) that belongs to the vendor
and is stored on our premises until you return it to the vendor
Steps
1 Create Material master record with material type LEIH
2 Create PO
3 Create GR by maintaining RTP material by selecting the option transport
equipments with movement type 501M
4 IR
STOCK TRANSFER
In stock transfer processing goods are procured and supplied within a company
One plant orders the goods internally to another plant (receiving plantissuing
plant) The goods are procured with a special type of purchase order the stock
transport order
Steps
1 Create a Material master in both supplying and receiving plant
2 Create stock transport order (STO) with item category lsquoUrsquo
3 Create transfer posting with movement type 351 amp T Code MB1B (Go to
MMBE stock overview the stock will decrease in supplying plant and it will not
update stock of receiving plant it will be under stock in transit)
4 Create GR stock will update in receiving plant
This scenario is under one company code between two plants
Material Master Related Important Terms (Part 2)
Controlling (CO) An organizational unit in Accounting that reflects a
management-oriented structure of the organization for the purpose of internal
control
Operating results for profit centers can be analyzed using either the cost of
sales approach or the period accounting approach
By analyzing the fixed capital as well you can expand your profit centers for use
as investment centers
Profit Center
Key that uniquely identifies the profit center in the current controlling area
Valuation Category
Determines whether stocks of the material are valuated together or separately
Dependencies
In the case of split valuation this indicator also determines which valuation
types are allowed that is the criteria by which stocks can be valuated
Valuation type
Invoice Verification (MM-IV)
A subdivision of a valuation category in split valuation
Example An enterprise manages its stocks of a material using the valuation
category Quality comprising the following valuation types
bull High quality Average quality Inferior
Hazardous material number
Number that identifies the material as a hazardous material or as dangerous
goods and assigns hazardous material data or dangerous goods data to it
Use The hazardous material number indicates that the material is dangerous
making special precautions necessary for its storage and shipment
Valuation Class
Assignment of a material to a group of GL accounts
With other factors the valuation class determines the GL accounts that are
updated as a result of a valuation-relevant transaction or event such as a goods
movement
The valuation class makes it possible to
bull Post the stock values of materials of the same material type to different GL
accounts
bull Post the stock values of materials of different material types to the same GL
account
Default value for the valuation class for valuated stocks of this material
Use The valuation class has the following functions
bull Allows the stock values of materials of the same material type to be posted to
different GL accounts
bull Allows the stock values of materials of different material types to be posted to
the same GL account
bull Determines together with other factors the GL accounts updated for a
valuation-relevant transaction (such as a goods movement
CIN - Country India Version ~ Volume 1
PurposeCountry Version India (CIN) contains a number of enhancements to standard
Sales and Distribution (SD) functions that allow you to handle local
requirements in particular excise duty
Features
In Country Version India (CIN) this component handles sales processes as
found in India In addition to the generic functions it allows you to
Handle CENVAT in your sales processes
The system calculates excise on your sales and creates excise invoices as
required and makes the appropriate postings to your CENVAT accounts
It covers sales from factories sales from depots and offers functions for other
types of goods movements it also covers sales to export-oriented units and
export sales
Record concessional and exemption forms sent to you by your customers
Make adjustment postings to your CENVAT accounts
Excise Invoice (Outgoing)
Definition
The document that acts as the proof of payment of excise duty and is required
for the customer to take CENVAT credit on the item
Use
In the SAP System there are three different procedures for creating excise
invoices
Sales direct from the factory
This procedure is for when you sell manufactured goods straight from the
factory at which they were produced in which case you levy excise duty when
the goods leave the factory on their way to the customer
If when you send the goods to the customer you enclose the commercial
invoice you create the excise invoice with reference to the commercial invoice
If you want to send the commercial invoice after you have dispatched the goods
however you create the excise invoice with reference to a pro forma
commercial invoice For more information about these procedures see Sales
from Factories
As well as creating excise invoices individually you can also create them in
batches (see Creation of Excise Invoices in Batches)
Sales from depots
A depot is a site at which the goods are stored away from the factory at which
they were produced In this procedure you have to levy the excise duty when
you transfer the goods from the factory to the depot and then make sure this is
passed on to the customer when it makes a purchase For more information see
Sales from Depots
Sales (other goods movements)
Some other goods movements may also require you to create an excise invoice
with reference to other documents The SAP System offers separate functions
for these purposes (see Excise Invoices (Outgoing) for Other Movements)
StructureNumbering of Excise Invoices
Outgoing excise invoices have two numbers an internal document number
which is assigned immediately you create an excise invoice and an excise
invoice number which is not assigned until you have verified and posted it
As far as the excise invoice number is concerned you have to number your
outgoing excise invoices in sequential order starting each year on 1 April You
must notify the excise authority of the jurisdiction of the invoicing location The
serial number must be printed on each page of the excise invoice
Each number range is governed by a series group You must create at least one
series group in order to be able to number the excise invoices If you need more
than one number range you must create the corresponding number of series
groups You do so in the CIN Implementation Guide (IMG) by choosing Global
Settings reg Series Groups
Number of Line Items Per Excise Invoice
Some states allow you to include only a limited number of items for each page
of an excise invoice (for example if the excise invoices are to be printed on
prenumbered forms) You can customize the system so that it prints the excise
invoice accordingly in the CIN IMG by choosing Global Settings reg Excise
Registration IDs
Customer Master (Excise Data) Definition
The part of the customer master record that contains information relating to
Indian excise duty
Use
In conjunction with other data this data is used to calculate excise duty on
various transactions
To maintain the data from the SAP Easy Access screen choose Indirect Taxes reg
Master Data reg Excise Rate Maintenance and then select the following options
described below
Structure
The excise part of the customer master contains the following information
Customer Excise Details
On this screen you enter your customers tax registration numbers which are
used for various forms of correspondence and reports
1 Excise registration number (and the range division and collectorate in which
this is located)
2 Central sales tax (CST) number
3 Local sales tax (LST) registration number
4 Permanent account number (PAN)
In order for the system to be able to calculate which rate of excise duty to apply
on sales to the customer you must also assign it a customer excise duty status
(for more information about how this works see Determination of Excise Duty
Rates)
Excise Indicator for Plant and Customer
On this screen you define the final excise duty indicator (for more information
about how this works see Determination of Excise Duty Rates)
Determination of Excise Duty Use
When you execute a business transaction involving materials that are subject to
excise duty the system automatically calculates the duty for you
Prerequisites
In order for the system to be able to determine which rate of excise duty to
apply you must have maintained all the data on the Excise Rate Maintenance
screen which you can access from the SAP Easy Access screen by choosing
Indirect Taxes reg Master Data reg Excise Rate Maintenance
You maintain the following types of data
Plant master data
You assign each of your plants an excise duty indicator You can use the same
indicator for all the plants with the same excise status from a legal point of view
such as all those that are in an exempt zone
See also the information about manufacturers that are only entitled to deduct a
certain portion of the duty (see Partial CENVAT Credit)
Vendor master data
For each of your vendors with the same excise status from a legal perspective
you define an excise duty indicator You must also specify the vendor type ndash for
example whether the vendor is a manufacturer a depot or a first-stage dealer
You must also stipulate if the vendor qualifies as a small-scale industry
For each permutation of plant indicator and vendor indicator you then create a
final excise duty indicator
Customer master data
Similarly you assign the same excise duty indicator to each of your customers
that share the same legal excise status
Again for each permutation of plant indicator and customer indicator you then
create a final excise duty indicator
Material master data
Each material is assigned a chapter ID
Excise tax rate
For every chapter ID and final excise duty indicator you maintain the rate of
excise duty
If your business only qualifies for partial CENVAT credit you must customize
your system accordingly
Activities
Let us consider an example to illustrate how the system determines which rate
of excise duty to apply to a material Assume you are posting a sale of ball
bearings to a customer The system automatically determines the rate of excise
duty as follows
Looks up the customer master data to see what status you have assigned the
customer
Lets assume youve assigned the customer status 3
Looks up the plant master data to see what status you have assigned the plant
Similarly your plant has status 2
The system looks up the table under Excise Indicator for Plant and Customer to
see what the final excise duty indictor is for customer status 3 and plant status
2 It is 7
The system determines the chapter ID of the ball bearing for the plant
Letrsquos assume the chapter ID at plant for the ball bearings is 100001
Finally the system looks up the table under Excise Tax Rate to see what rate of
duty applies to chapter ID 100001 under status 7
Plant Master (Excise Data) Definition
The part of the plant master record that contains information relating to Indian
excise duty
Use
In conjunction with other data this data is used to calculate excise duty on
various transactions
To maintain the data from the SAP Easy Access screen choose Indirect Taxes reg
Master Data reg Excise Rate Maintenance and then select the following options
described below
Structure
The excise part of the plant master is divided into the following screens
Excise Indicator for Plant
On this screen you enter your plants tax registration numbers which are used
for various forms of correspondence and reports
1 Central sales tax (CST) number
2 Local sales tax (LST) registration number
3 Permanent account number (PAN)
In order for the system to be able to calculate which rate of excise duty to apply
on purchases for this plant you must also assign it a plant excise duty status
(for more information about how this works see Determination of Excise Duty
Rates)
Excise Indicator for Plant and Vendor
On this screen you define the final excise duty indicator (for more information
about how this works see Determination of Excise Duty Rates)
Excise Indicator for Plant and Customer
On this screen you define the final excise duty indicator (for more information
about how this works see Determination of Excise Duty Rates)
Automatic Creation of Excise Invoices Use
The SAP System can automatically create an outgoing excise invoice for you
immediately you post a commercial invoice (or a pro forma invoice) for a
customer sale This function applies to excise invoices for sales from factories
only
Prerequisites
To activate this function in the Country Version India (CIN) Implementation
Guide (IMG) make the following settings
1 Under Global Settings reg Excise Groups select Create EI
This activates the automatic creation function
2 Under Sales and Distribution reg Utilization Determination
Here you specify which CENVAT accounts the system is to post the different
types of excise duty to
3 Under Sales and Distribution reg Excise GroupndashSeries Group Determination
Here you specify which excise group and series group the excise invoices are to
be created for
Features
When you post an invoice the system creates an excise invoice All the
information that it needs to create the excise invoice is provided either by the
invoice or by the Customizing settings that you have made in Sales and
Distribution It also determines the excise invoice type automatically by means
of a user exit
Creating Excise Invoices for Stock Transfers 1 From the SAP Easy Access screen choose Indirect Taxes reg Procurement reg
Excise Invoice reg For Depot reg CreateChangeDisplay
2 In the Material document field enter the goods receipt number and choose
The system displays the information from the goods receipt for example the
sending plant the excise registration the range the division and the
collectorate
3 Choose Details
The system copies the items from the goods receipt document In the depot it is
possible to have a separate excise invoice at line item level
4 Enter the internal document number of the excise invoice sent by the factory
5 Choose More documents to go the excise invoice details screen
6 Enter the internal document number of the excise invoice from the factory
The system copies the information to the line item (for example the excise
invoice number the excise invoice date the item number the chapter ID the
excise invoice quantity the amount of excise duty paid the excise base value
and the serial number of the Part II register entry with which the excise was
paid)
You can change the receipt quantity to match the actual quantity received at
the depot if necessary The system automatically adjusts the excise
accordingly
7 Go back to the item details screen
8 Save the excise invoice
Creating Excise Invoices for Direct Purchases 1 From the SAP Easy Access screen choose Indirect Taxes reg Procurement reg
Excise Invoice reg For Depot reg CreateChangeDisplay
2 In the Material document field enter the goods receipt number and choose
The system displays the information from the goods receipt for example the
sending plant the excise registration the range the division and the
collectorate
You can also maintain the excise registration details for the ship-from party as
for with the vendor The ship-from can be different from the vendor code (The
delivering plant can be maintained as a ship-from in the system When a valid
ship-from is entered the excise registration details copied from the vendor will
be overwritten by the ship-from excise registration details)
The ship-from registration details displayed can also be overwritten manually
The dealers commercial invoice number can be stored in the vendor excise
invoice number as in this case the dealer himself will not have an excise
invoice
3 Choose Details
The system copies the items from the goods receipt document It also copies the
vendors excise invoice number and the serial numbers of the entries in the RG
23A RG 23C and personal ledger account (PLA) registers
4 Enter the internal document number of the excise invoice sent by the factory
5 Select an item and choose More documents to go the excise invoice details
screen
In the case of direct purchases there will not be any excise invoice in the
system so leave the internal document field blank The vendors invoice will
show the details of the excise invoices through which excise has been paid for
the item that is being dispatched You can enter these details here
6 For each item the chapter ID excise base value and excise duty amounts
are defaulted from the purchase order You can change them if there is any
difference Enter the excise amount paid and the receipt quantity You also
enter the Part II register serial numbers with which the excise duty was paid and
the excise registration information from the original excise invoice
7 Go back to the item details screen
8 Save the excise invoice
The system creates an entry in register RG 23D You can change the excise
invoice as long as it has not been used in any sales
Assigning Excise Invoices to a Delivery Use
You follow this procedure to specify which excise invoices are to be assigned to
a delivery from a depot (or other material document)
You can also automate this procedure using the batch selection program
(J_1IJCHK) by making the appropriate Customizing settings in the Country
Version India (CIN) Implementation Guide (IMG)
Procedure
1 From the SAP Easy Access screen choose Indirect Taxes reg SalesOutbound
Movements reg Excise Invoice reg For Depot reg CreateChangeDisplay reg Delivery
or Material Document reg RG 23D Selection
2 Enter the delivery document number or the material number and choose
3 Select the excise invoice you want
4 Choose
5 Choose Excise invoice
A list of excise invoices appears These are the excise invoices at the depot with
a balance quantity
The system also shows a list of the A certificates that can be used You can pick
up any of the A certificates but they must be for the same excise invoice You
can only pick up an A certificate in its entirety You cannot select part of an A
certificate
6 Select the excise invoices that are relevant to the delivery
7 Specify what quantity to be used from each excise invoice
The system recalculates the excise accordingly
8 Go back to the item details screen
9 Save the data
Result
The system creates an entry in register RG 23D and generates the depot excise
invoice numbers
If you selected any A certificates the system also generates additional entries in
the RG 23D register The system marks the original A certificates as updated so
that they cannot be used for any other removals
Continue see Volume 2 (Next post)
EXTERNAL SERVICE MASTER
EXTERNAL SERVICE MASTER ESM
We procure the different type of services from vendors they are-
1048774 Hardware amp software services
1048774 Construction amp transportation services
1048774 Machinery services
1048774 Annual maintenance services
1048774 Present to and breakdown service Etc
Service Procurement Cycle -
1048774 Requirement identification
1048774 Source determination
1048774 Source selection
1048774 Service master
1048774 Service PO
1048774 Service entry sheet acceptance
1048774 Invoice with respect to service entry sheet
Steps to perform services -
1 Create service master (AC03)
2 Create Service PO (ME21N) with AC Assignment category lsquoKrsquo amp Item
Category lsquoDrsquo
3 Create service entry sheet (ML81N)
4 Invoice with respect to Service Entry sheet
Customize settings
(For service category Number Ranges amp organization status for service
category)
SPRO 1048774 IMG 1048774 MM 1048774 ESM 1048774 Service Master
1048774 Define organization Status for service Categories
1048774 Define Service Category
1048774 Define Number Ranges
Define organization Status for service Categories
bull Click on New Entries
bull Org service Category
bull BDS (Basic data service is stored in service master record under this service
category)
bull CNST 1048774 Controlling Status
bull PUST 1048774 Purchasing data Status
bull SDST 1048774 Sales amp Distributed Status
bull Org status description service category 1048774 Press Enter amp Save
Define Service Category
bull Same path as above
bull Select Standard
bull Click on Copy as
bull AC reference 1048774 always takes as 0006
bull Enter amp Save
Define Number Ranges
Click on groups 1048774 Groups 1048774 Insert 1048774 select enter Number Ranges
Select the service category
Click on Element
Select Group amp Click on Element Group
Save
Create Service Master - (AC03)
Click on Create New Services
Service Number (any number) Service Category
Basic unit of measure (Hours lsquoHrsquo)
Enter
Basic Data 1048774 Master Service Group 1048774 007
Valuation class 1048774 3200 1048774 Enter 1048774 Save
To See the Service list 1048774 AC06
Create Service PO (ME21N)
AC assignment category lsquoKrsquo Item Category lsquoDrsquo
Enter the Short text Quantity Delivery date Net Price Material group Plant
Storage Location
Enter service number in Service Tab (Item Details) quantity price Enter
Account Assignment 1048774 GL Account Number eg400000
Cost Center eg 9999
Press Enter amp Save
Create Service Entry Sheet - ML81N
Select other purchase order (enter PO number) 1048774 Enter 1048774 Click on Create1048774 Enter
Short Text 1048774 Enter 1048774 Service Number 1048774 Enter ndashClick on Flag button 1048774 Save
Take Service entry Sheet Number
Go to Invoice MIRO 1048774 Enter company code 1048774 Select Service Sheet Option 1048774 Enter
Service Entry Sheet Number 1048774 save it
Physical Inventory and Inventory Management
Physical inventory Process - 1 Create Physical inventory document
T Code MI01 ndash Create single inventory document
T Code MI31 ndash Create multiple physical inventory documents
I Enter the desired fields ie material material type site storage location and
Maximum number items Documents ndash 100 etc 1048774 Press Enter
II Click on Process Session
III Select the line items and click on the process
IV System displays a dialog box select Background and click on process
Inventory document is created
2 Print Inventory Document and handed over to responsible person say
Manager
3 Enter Physical Inventory count
T Code MI04
i Enter the physical inventory document number Fiscal year count date 1048774 Press
enter
ii Enter the Material Quantity and click on post
4 Listing of difference
T Code MI20
Enter the physical inventory document number and execute system displays a
screen wherein we will be able to view the differences
5 Post the differences
T Code MI07 amp Mov Type 701 amp 702
Enter the physical inventory document number year posting date enter the
difference and post
INVENTORY MANAGEMENT Maintaining stock by value or by quantity is called inventory The total inventory
management deals with the goods movement of the material
Goods movement -
It is a process in which transaction resulting change in stocks It is further sub-
divided into three categories
1 Goods Receipt (GR)
2 Goods Issue (GI)
3 Transfer Posting (TP)
Goods Receipt (GR) - It is a goods movement in which receipt of goods is
posted for vendor or for production A GR posted in the system will leads to
increase in stock No Concept of Price or value
Goods Issue (GI) - It is goods movement in which material withdrawal is
posted for consumption or for customer A GI posted in system will leads to
decrease in stock
Stock Transfer (ST) - It is method of removal of material from one location
and transferring it to another location This process is performed between two
plants and two storage locations
Transfer Posting (TP) - It is a general term of stock transfer that changes the
stock type or stock categories The difference between transfer posting and
stock transfer is -
TP is logical stock transfer and ST is a physical stock transfer
Movement Type - It is a three-digit code which plays a role of important
control function in inventory management It acts as a central role in automatic
account determination It determines which stock account or consumption
account is updated in financial accounting
Reservation - It stores requisition created from particular cost center to
particular department for issuing the material reservation posted in the system
It leads to decrease in stock
Stock Types - The different stock types are
1 Unrestricted use stock
2 Quality inspection stock
3 Blocked stock
4 Warehouse stock
Transaction code -
1 To Create GR - MIGO
2 To Create GI - MB1A
3 For Transfer Posting - MB1B
4 To display MaterialGR document ndash MB03
5 To create reservations - MB21 MB22 MB23
6 To See Stock Overview - MMBE
7 To enter Other GR - MB1C
When GR is posted in the system
1 Material document is created - MB03
2 Accounting Document is generated - MB03
3 MMR updated - MM02 MM03
4 PO history updated - ME23N
Movement Typersquos
Movement Types under GR - 101 331333335501503505551553555
561351 (For all Mov Typersquos there is a reversal eg 101 has 102 Note No
reversal for 121)
Movement Typersquos under GI - 201 331333335551553555
Transfer Posting It is performed in three ways
1 TP BW Plant to Plant
2 TP BW Storage Location to Storage Location
3 TP BW Stock to Stock
Movement Types under TP BW Plant to Plant
301 - 1 step
303 amp 305 - 2 step
Movement Type under TP BW Storage location to Storage Location
311 - 1 step
313 amp 315 - 2 step
Movement Type under TP BW stock to stock
321 323 325 343349
To Cancel the GR Movement type 102
Return delivery to vendor movement type 122 amp T Code MIGO
Transfer Posting Stock to Stock
From Blocked stock to Quality Inspection
T Code MB1B amp Movement Type 349
From Blocked stock to Unrestricted Stock
T Code MB1B amp Movement Type 343
From Quality Inspection to Unrestricted Stock
T Code MB1B amp Movement Type 321
Transfer Posting from Plant to Plant
For One Step Movement Type 301
For Two Steps Movement Type 303 amp 305
After posting stock will display in Stock in Transit (Plant)
To receive material by receiving Plant Movement Type 305
Transfer Posting BW Storage Location to Storage Location
Under One Plant BW two Storage Locationrsquos Movement Type 311
Back to Parent storage Location Movement Type 313 (It Show stock in transfer)
use Movement type 315 at Parent storage location
To create Goods Issue (GI) T Code MB1A amp Movement Type 201
To Create Reservations T Code MB21 MB22 amp MB23
Creation of GI wrt Reservations
T Code MB1A amp Movement Type 201
Click on Reservation Enter Reservation Number 1048774 Click on Adopt + Details
GR wrt Reservations T Code MIGO amp Select as Reservation instead of GR
GR without PO Movement type 501 amp T Code MB1C Select others instead of
Purchase order Enter Material Quantity Plant Storage Location 1048774 Press Enter
Partner Option will be visible (Vendor) 1048774 Save it
Invoice - Invoice is a document which is issued to a buyer (Company) from the
supplier (vendor) for the payment The following information is maintained in
invoice
Invoice date Posting date Invoice ref number tax amount amount tax code
terms of payments vendor address banking accounting information etc
When invoice document is posted in the system
bull Invoice document created
bull Accounting document is generated (MIR4)
bull PO history updated (ME23N)
bull FI document created (FB03)
PRICE DETERMINATION PROCESS or PRICING PROCEDURE
CONDITIONS OR PRICING PROCEDURE or PRICE DETERMINATION PROCESSWe deal with the Pricing Procedure for vendors
PB00 Gross Price (info record contract scheduled Agreement)
PBXX Gross Price (PO)
FRA1 Freight
RA00 Discount on net
RA01 Discount on Gross
ZA00 Surcharge on net
SKT0 Surcharge discount
ZPB0 Rebates
MWVS Input Tax
MWAS Output Tax
BASB Base Amount
RM0000 Calculation Schema or Pricing Procedure
(PB00 amp PBXX)
RM0002 Calculation Schema or Pricing Procedure
(PB00)
PB00 --gt AB00
Copy the Standard one and create new one (ours)
RM0000 contains all the condition types
Pricing Procedure (PP)
We define the pricing procedure to define condition supplement for the material
price The condition supplement specifies the discount surcharge freight etc
that we want a system every time to access material price condition records
The total value of the material is calculated or based on all addition and
subtraction ie discounts surcharge tax freight etc
Condition Table
It is a table which defines the structure of condition record key
Condition Record
It is a data record used to store conditions or condition supplements ie
condition like discount freight and surcharge Tax etc
Condition Type
It is used for different functions In Pricing the condition types leads you to
differentiate different types of discounts in output determination batch
determination difference between two output types such as delivery note or
order confirmation between different strategy types
Access Sequence
It specifies the order in which system searches or access the condition records
from condition table
Difference between PB00 amp PBXX
1 Condition maintained in PB00 is time dependent whereas PBXX is time
independent
2 Condition type PB00 ndash used for IR RFQ Contract Schedule Agreement
Condition type PBXX ndash used for PO
Calculation Schema
The main function of calculation schema is to provide framework of steps for the
price determination process to specify the discounts surcharge freight rebate
etc
It also determines the sequence of conditions that are to be followed and in
which sequence
Schema Group Vendor
The main function of it is to identify or to pick the right process and conditions
for a particular vendor
Schema Group Purchasing Organization
Key that determines which calculation schema (pricing procedure) is to be used
in purchasing documents assigned to the relevant purchasing organization
Schema Group
It allows to group together the purchasing organizations which uses the same
calculation schema
Steps -
1 Create Access sequence
2 Create condition types
3 Create pricing procedure or calculation schema
4 Link pricing procedure amp access sequence to condition type
5 Create schema group for vendor
6 Create schema group for purchase organization
7 Assign schema group vendor-to-vendor master record in purchasing data
view
8 Assign schema group purchase organization to our purchase organization
9 In inforecord purchase organization data enter condition types and pricing or
calculation procedure
CUSTOMIZE SETTINGS -
SPRO --gt IMG--gtMM--gtPUR--gtConditions --gtDefine price determination Process
1 Define access sequence
2 Define Condition type
3 Define cal Schema
4 Define schema group
o Schema group vendor
o Schema group purchasing group
5 Assignment of schema group to PUR org
6 Define schema determination agrave determine cal schema for standard PO
PURCHASE ORDER
PURCHASE ORDER
PO is an external document created for the procurement of materials and
services from vendor The document of PO is also divided into 4 parts as PR -
1 Document Overview
2 Header (DeliveryInvoice Conditions Address Partners Org data status)
3 Item Overview (AC assign cat Item Category Material Plant Del date SL)
4 Item Details (Material data Confirmations condition control delivery delivery
Schedule Quantitiesweights invoice)
A procurement type is defined for each of the document items The following
procurement types exist
1048774 Standard
1048774 Subcontracting
1048774 Consignment
1048774 Stock transfer
1048774 External service
bull There are different ways to create PO -
1 Directly through transaction code ME21N
2 With reference to PR
3 With reference to RFQ
4 With reference to info records
5 With reference to Contracts
6 With reference to Cost Centre GL Account (cost element) for consumable
items or not stock items with account assignment category lsquoKrsquo (K= cost centre)
(For non stock and consumables)
0 COMMENTS L INKS TO THIS POST
LABELS PO PURCHASE ORDER
Reaction
s
PURCHASE REQUISITION T CODE ME51 or ME51N
Purchasing Requisition -
It is a request or instruction from particular department (Cost Centre) to
purchasing department to procure certain quantity of material and services It is
only one internal document in SAP-MM
Purchasing Requisition document is divided into four parts -
bull Document Overview
bull Header
bull Item Overview
bull Item Details
Document Overview -
It displays the list of purchasing documents which are created previously
according to our requirement
Header -
Any text message or information is maintained
Item Overview -
In this we enter material plant delivery date quantity storage location
purchasing group AC assignment category Item category etc
Item Details -
It displays the detailed information about item overview (like Master data
valuation source of supply contact person delivery address status etc)
0 COMMENTS L INKS TO THIS POST
LABELS PR PURCHASE PURCHASE ORDER PURCHASE REQUIS IT ION SALES ORDER
Reaction
s
Automatic PURCHASE ORDER (PO) How Automatic PO raised
How Automatic PO raised
At fixed time say 1230 AM automatic scheduler runs and checks whether the
stock is less than or equal to the replenishment point If stock is less than or
equal to Repli Point than PR raised automatically to Purchasing Deptt
bull Activate the option automatic PO in purchasing view in material master record
bull Activate the option automatic PO in purchasing data view in vendor master
record
bull Maintain Source List amp select fixed vendor
bull PR crated automatically
bull Automatic creation of PO from PR ndash ME59
Enter the Purchasing group purchasing organization Vendor Plant and
Purchasing Requisition Document Number 1048774 Execute
RELEASE PROCEDURE Release strategyThe main function of Release procedure is to determine the approval process
or the release process for the procurement of material amp services rather than
relying for manual signatures The release procedure contains release strategy
Release Strategy (RS)
A plan defining the release codes with which a purchase requisition item a
complete purchase requisition or a complete external purchasing document
must
be released (that is approved) and the sequence in which release is to be
effected
using these codes It is a unique set of conditions sequence and level of release
It is a 2 digit code eg S1 S2 S3etc
The Release Strategy contains the following -
bull Release Group
bull Release Codes
bull Release Indicators
bull Release Prerequisite
Release Group -
It is a 2-digit code which is assigned with a class (Class contains group of
characteristics) It contains one or more release strategies
Release Codes -
It is a 2digit code which identifies the department or responsible person for
the approval process amp release process
Eg AA - Manager
BB - Sr Manager
CC - Vice President
DD - Managing Director
Release Indicator -
It is a Code that represents the release status If the proper approval
process is performed that the release Strategy has to be release if it is not
performed than the Release Strategy is blocked
R ndash Release
B ndash Blocked
Release Conditions -
It determines the type of the release strategy
For eg
bull If the price ranges from 1 to 1000 It is approved by AA BB and CC
bull If the ranges from1001 to 1lac then it is approved by AA BB CC and DD
- 80 -
Release Prerequisite
It will informs the system which RS has to be take place in the PO CEKKO is
a communication structure where it displays the field names amp field lengths to
create characteristics ie we maintain characteristics in customizing by
selecting
the field names from this communication structure for all external documents
CEBAN is used for the purchasing requisition
Characteristics -
1 Net value of PO --- GNETW (GSWRT for PR)
2 Plant --- WERKS
3 Purchasing organization -- EKORG
4 Purchasing Group --- EKGRP
5Material group ndashMATKL
CUSTOMIZE SETTINGSSPRO--gtIMG--gt MM--gt Purchasing--gtPO--gt Release Procedure for PO
1 Edit Characteristics T Code CT04
2 Edit Class T Code CL02
3 Define Release Procedure for PO
4 Check Release Strategy
Edit Characteristics -
Characteristics - eg NET VALUE OF VALUE
Click or Create Button
Under Basic Data
Description - Value for PO
Status - Release
Data Type - Currency Format
No Of Characters - 15
Currency - EUR
Activate multiple values amp Internal Values Allowed
Additional Data
Table name - CEKKO
Field Name - GNETW
Values
Activate Additional Values
Save the document
Create another Characteristic for Plant -
Plant date Create ndash Description Status
Data Type Characteristic Format
Number of Characteristics 4
Activate Multiple Values
Additional data-
Table Name - CEKKO
Field Name - WERKS
Values
Activate Additional Values
For Purchasing Organization Name - EKORG
For purchasing Group EKGRP
Edit Class
Class - SAPMM
Class Type - 032 Release Strategies
Click on Create button
Basic Data
Description - Class for PO
Status - Released
Valid From _____ Valid to _____
Click on Characteristic
Characteristic
Enter all the Characteristics Created amp Save it
Define Release Procedure for PO-
bull Release Group
bull Release Codes
bull Release Indicators
bull Release Strategies
bull Workflow
Release Group - New Entries Release Group Class and Description
Press Enter amp Save
Release Code - New Entries
Group Codes Description
99 AA Manager
99 BB Sr Manager
99 CC Vice President
99 DD Managing Director
Press Enter amp Save
Release Indicator - (B ndash Blocked R - Release)
New Entries
Release Indicators Description
B Blocked
R Released
Release Strategies -
New Entries
Release Group 99
Release Strategy S1
Release Codes AA BB CC and DD
Click on Release Prerequisites
Release Status -
Continue
Classification
Enter the Value (Same Price)
Plant (9999)
Go Back amp Save it
Release Simulation - Simulate Release
Create a PO -
There are two ways to release the PO
Individual releaseME28
Collective release ME29N
How to delete procedure
Delete Release GP
Create Release RG
Delete R Strategies
Delete R Code
Delete R Group
SAP R3 SYSTEM LANDSCAPE
System LandscapeThe system landscape contains all the SAP Systems that you have installed It
can consist of several system groups whorsquos SAP Systems are linked by transport
routes
After you decide which clients you need and which roles you want them to have
you need to decide how to distribute them amongst the different SAP Systems
You can set up multiple clients independently of one another in a single SAP
System However when you configure the data you must remember that cross-
client Customizing settings and Repository objects are identical for all clients in
a single SAP System Changes made in one client apply immediately to all
clients in the system
Three-System Landscape
SAP recommends a three-system landscape in which each of the central clients
has its own SAP System
This consists of a development system DEV a quality assurance system QAS
and a production system PRD The development system contains the
Customizing client CUST the quality assurance system contains the quality
assurance client QTST and the production system contains the production client
PROD Make all changes to Customizing data and Repository objects in the
Customizing client When you release the corresponding change requests they
are transported into the quality assurance client This means that changes to
cross-client data only appear in the quality assurance client after the transport
In the quality assurance client you can test whether the transports are
complete or whether any linked changes are missing and are still in unreleased
change requests If the test is successful the change requests are transported
into the production client The production client is completely separate from the
other clients as regards cross-client data
SPECIAL STOCKS amp SPECIAL PROCUREMENT TYPES
Special Stocks are those stocks which are not belongs to our company code
These are not placed in our storage locations amp no physical inventory is
performed and treated as special stocks for the reason of ownership
Different types are of Special Stocks are as follows
1 Subcontracting
2 Consignment
3 Pipeline
4 Stock transfer
5 Third party
6 Returnable transport packaging
7 Sales order stock
8 Project stock
SUBCONTRACTING
In subcontracting process we create subcontracting PO to supply or issue
subcomponents to vendor in order to get final product The price maintained in
subcontracting PO is a service charge paid to vendor
Steps to perform subcontracting
1 Create subcontracting inforecord (Optional)
2 Create subcontracting PO with item category L
There are to ways to supply subcomponents to vendor
bull Manually maintain the subcomponents in the subcontracting
PO though explode BOM
bull Through BOM (Bill of material) T Code CS01 CS02 amp CS03
3 Create Transfer Posting with Movement Type 541 to issue the subcomponents
to the vendor
4 Goods Reciept
5 Invoice Reciept
Path ME21N ---gt Enter Item Category L --gt Material (End Product) PO
Quantity Delivery Date Net Price Plant --gt Click on Item Details --gt Tab
Material Data -- gtComponents select Explode BOM --gt Click on Components
button --gt Enter the subcomponents --gt Go back amp Save
Create Transfer Posting with movement type 541 amp T Code MB1B
GR MIGO
IR MIRO
CONSIGNMENT - (No Concept of Invoice)
In consignment process we will not create Purchasing document for the vendor
vendor himself send the material to our plant though the material is available
to our plant the responsibility amp ownership of the material is of vendor Aliability
only arises when the material withdrawal (Consumption) is posted in the system
from consignment stock
Steps
1 Create Consignment info record (mandatory)
2 Create Consignment purchase order with item category lsquoKrsquo amp maintain Info
record number
3 Create GR Movement type lsquo101Krsquo
4 Create GI Movement Type lsquo201Krsquo
5 Consignment settlement T Code MRKO
Path --gtME11 --gt In info record --gt Purchasing Org Data 1 views of info record
enter the tax code and save it
--gt Create Consignment Purchase Order ME21N (Price option is grayed out with
price zero)
--gt Create GR with movement type 101K
--gt Create Goods Issue (GI) T Code MB1A amp Movement Type 201K Enter Cost
center vendor
--gt Consignment Settlement T Code MRKO Click Activate Consignment Activate
Settle Execute
--gt Display the Document Number ie Invoice receipt T Code FB03
PIPELINE PROCESS (No Concept of Invoice)
In pipeline handling your company does not need to order or store the material
concerned It is ready available to you as and when required via pipeline (eg oil
or water) or some other type of cable (eg electricity) Consumption of the
material is settled with the vendor on a regular basis
Steps
1 Create a Material master record with material type PIPE
2 Create Pipeline info record
3 Create GI with movement type 201P
4 Pipeline settlement T Code MRKO
RETURNABLE TRANSPORT PACKAGING (RTP)
When company orders goods from a vendor the goods are delivered with
returnable transport packaging (pallets containers) that belongs to the vendor
and is stored on our premises until you return it to the vendor
Steps
1 Create Material master record with material type LEIH
2 Create PO
3 Create GR by maintaining RTP material by selecting the option transport
equipments with movement type 501M
4 IR
STOCK TRANSFER
In stock transfer processing goods are procured and supplied within a company
One plant orders the goods internally to another plant (receiving plantissuing
plant) The goods are procured with a special type of purchase order the stock
transport order
Steps
1 Create a Material master in both supplying and receiving plant
2 Create stock transport order (STO) with item category lsquoUrsquo
3 Create transfer posting with movement type 351 amp T Code MB1B (Go to
MMBE stock overview the stock will decrease in supplying plant and it will not
update stock of receiving plant it will be under stock in transit)
4 Create GR stock will update in receiving plant
This scenario is under one company code between two plants
SAP IMPLEMENTATION PROCESS End to End Inplementation of SAP
First we have to prepare documentation about the client business (like turnover
vendors customers payments materials production marketing etc)
The implementer company made two teams (1) Steering team (2) Steering
community
Steering team (SAP functional consultants) prepares a detailed
documentation about the client with the help of core team (client company
team)
amp this study is known as Feasibility Study After that the steering team handed
over this documentation to Steering community (Project manager Sr software
engineer and other higher authorities)
Steering community prepares the BBP (Business Blue Print) BBP
Prepares in MS-Word
10487741048774 ASAP - Accelerated System Application Product in Data Processing
10487741048774 Business Process - ASAP Methodology
1 Project Preparation
2 BBP (Business Blue Print)
3 Realization
4 Final Preparation
5 Go live amp Support
10487741048774 Project Preparation -
It consists of identifying team members amp development strategy as
how to go
AS ndash IS (Existing Process followed requirements)
TO ndash BE (Requirement analysis and best process recommended)
Difference between (AS ndash IS) amp (TO - BE) is called GAP Analysis
10487741048774 Business Blue Print (BPP) -
It is a legal documentation between client amp the company
(implementer service provider) We have to understand the current business
process of client amp analyzing the business amp prepare documentation It is a
detailed documentation for the client
10487741048774 Realization -
This Phase is used to Implement or migrate the entire business of
client from Non-SAP environment to SAP environment
10487741048774 Final Preparation -
This phase is used for testing amp end user training After successfully
completion of this phase client is ready to run business in SAP R3
10487741048774 Go live amp Support -
In this phase we deliver the project end date amp end user training at
client site
THIRD - PARTY PROCESSING
THIRD - PARTY PROCESSING
In third party processing your company passes on a sales order to an external
vendor who sends the goods directly to the customer The sales order is not
processed by your company but by the vendor Third-party items can be
entered in purchase requisitions purchase orders and sales orders Third party
processing is integrated with Sales and Distribution If the sales order contains
third-party items the system creates a purchase requisition from the order
Steps
1 Create MMR with sales views and maintain Division Distribution channel
sales org item category group and general item category group ndash BANS (Third
party item) amp Account group Sold to party
2 Create Customer master record T Code XD01 XD02 XD03
3 Create sales order T Code VA01 VA02 VA03 (PR generated automatically)
4 PO - T Code ME21N
5 GR ndash T Code MIGO
6 IR ndash T Code MIRO
7 Sales Billing Billing Document T Code VF01 VF02 VF03

only arises when the material withdrawal (Consumption) is posted in the system
from consignment stock
Steps
1 Create Consignment info record (mandatory)
2 Create Consignment purchase order with item category lsquoKrsquo amp maintain Info
record number
3 Create GR Movement type lsquo101Krsquo
4 Create GI Movement Type lsquo201Krsquo
5 Consignment settlement T Code MRKO
Path --gtME11 --gt In info record --gt Purchasing Org Data 1 views of info record
enter the tax code and save it
--gt Create Consignment Purchase Order ME21N (Price option is grayed out with
price zero)
--gt Create GR with movement type 101K
--gt Create Goods Issue (GI) T Code MB1A amp Movement Type 201K Enter Cost
center vendor
--gt Consignment Settlement T Code MRKO Click Activate Consignment Activate
Settle Execute
--gt Display the Document Number ie Invoice receipt T Code FB03
PIPELINE PROCESS (No Concept of Invoice)
In pipeline handling your company does not need to order or store the material
concerned It is ready available to you as and when required via pipeline (eg oil
or water) or some other type of cable (eg electricity) Consumption of the
material is settled with the vendor on a regular basis
Steps
1 Create a Material master record with material type PIPE
2 Create Pipeline info record
3 Create GI with movement type 201P
4 Pipeline settlement T Code MRKO
RETURNABLE TRANSPORT PACKAGING (RTP)
When company orders goods from a vendor the goods are delivered with
returnable transport packaging (pallets containers) that belongs to the vendor
and is stored on our premises until you return it to the vendor
Steps
1 Create Material master record with material type LEIH
2 Create PO
3 Create GR by maintaining RTP material by selecting the option transport
equipments with movement type 501M
4 IR
STOCK TRANSFER
In stock transfer processing goods are procured and supplied within a company
One plant orders the goods internally to another plant (receiving plantissuing
plant) The goods are procured with a special type of purchase order the stock
transport order
Steps
1 Create a Material master in both supplying and receiving plant
2 Create stock transport order (STO) with item category lsquoUrsquo
3 Create transfer posting with movement type 351 amp T Code MB1B (Go to
MMBE stock overview the stock will decrease in supplying plant and it will not
update stock of receiving plant it will be under stock in transit)
4 Create GR stock will update in receiving plant
This scenario is under one company code between two plants
Material Master Related Important Terms (Part 2)
Controlling (CO) An organizational unit in Accounting that reflects a
management-oriented structure of the organization for the purpose of internal
control
Operating results for profit centers can be analyzed using either the cost of
sales approach or the period accounting approach
By analyzing the fixed capital as well you can expand your profit centers for use
as investment centers
Profit Center
Key that uniquely identifies the profit center in the current controlling area
Valuation Category
Determines whether stocks of the material are valuated together or separately
Dependencies
In the case of split valuation this indicator also determines which valuation
types are allowed that is the criteria by which stocks can be valuated
Valuation type
Invoice Verification (MM-IV)
A subdivision of a valuation category in split valuation
Example An enterprise manages its stocks of a material using the valuation
category Quality comprising the following valuation types
bull High quality Average quality Inferior
Hazardous material number
Number that identifies the material as a hazardous material or as dangerous
goods and assigns hazardous material data or dangerous goods data to it
Use The hazardous material number indicates that the material is dangerous
making special precautions necessary for its storage and shipment
Valuation Class
Assignment of a material to a group of GL accounts
With other factors the valuation class determines the GL accounts that are
updated as a result of a valuation-relevant transaction or event such as a goods
movement
The valuation class makes it possible to
bull Post the stock values of materials of the same material type to different GL
accounts
bull Post the stock values of materials of different material types to the same GL
account
Default value for the valuation class for valuated stocks of this material
Use The valuation class has the following functions
bull Allows the stock values of materials of the same material type to be posted to
different GL accounts
bull Allows the stock values of materials of different material types to be posted to
the same GL account
bull Determines together with other factors the GL accounts updated for a
valuation-relevant transaction (such as a goods movement
CIN - Country India Version ~ Volume 1
PurposeCountry Version India (CIN) contains a number of enhancements to standard
Sales and Distribution (SD) functions that allow you to handle local
requirements in particular excise duty
Features
In Country Version India (CIN) this component handles sales processes as
found in India In addition to the generic functions it allows you to
Handle CENVAT in your sales processes
The system calculates excise on your sales and creates excise invoices as
required and makes the appropriate postings to your CENVAT accounts
It covers sales from factories sales from depots and offers functions for other
types of goods movements it also covers sales to export-oriented units and
export sales
Record concessional and exemption forms sent to you by your customers
Make adjustment postings to your CENVAT accounts
Excise Invoice (Outgoing)
Definition
The document that acts as the proof of payment of excise duty and is required
for the customer to take CENVAT credit on the item
Use
In the SAP System there are three different procedures for creating excise
invoices
Sales direct from the factory
This procedure is for when you sell manufactured goods straight from the
factory at which they were produced in which case you levy excise duty when
the goods leave the factory on their way to the customer
If when you send the goods to the customer you enclose the commercial
invoice you create the excise invoice with reference to the commercial invoice
If you want to send the commercial invoice after you have dispatched the goods
however you create the excise invoice with reference to a pro forma
commercial invoice For more information about these procedures see Sales
from Factories
As well as creating excise invoices individually you can also create them in
batches (see Creation of Excise Invoices in Batches)
Sales from depots
A depot is a site at which the goods are stored away from the factory at which
they were produced In this procedure you have to levy the excise duty when
you transfer the goods from the factory to the depot and then make sure this is
passed on to the customer when it makes a purchase For more information see
Sales from Depots
Sales (other goods movements)
Some other goods movements may also require you to create an excise invoice
with reference to other documents The SAP System offers separate functions
for these purposes (see Excise Invoices (Outgoing) for Other Movements)
StructureNumbering of Excise Invoices
Outgoing excise invoices have two numbers an internal document number
which is assigned immediately you create an excise invoice and an excise
invoice number which is not assigned until you have verified and posted it
As far as the excise invoice number is concerned you have to number your
outgoing excise invoices in sequential order starting each year on 1 April You
must notify the excise authority of the jurisdiction of the invoicing location The
serial number must be printed on each page of the excise invoice
Each number range is governed by a series group You must create at least one
series group in order to be able to number the excise invoices If you need more
than one number range you must create the corresponding number of series
groups You do so in the CIN Implementation Guide (IMG) by choosing Global
Settings reg Series Groups
Number of Line Items Per Excise Invoice
Some states allow you to include only a limited number of items for each page
of an excise invoice (for example if the excise invoices are to be printed on
prenumbered forms) You can customize the system so that it prints the excise
invoice accordingly in the CIN IMG by choosing Global Settings reg Excise
Registration IDs
Customer Master (Excise Data) Definition
The part of the customer master record that contains information relating to
Indian excise duty
Use
In conjunction with other data this data is used to calculate excise duty on
various transactions
To maintain the data from the SAP Easy Access screen choose Indirect Taxes reg
Master Data reg Excise Rate Maintenance and then select the following options
described below
Structure
The excise part of the customer master contains the following information
Customer Excise Details
On this screen you enter your customers tax registration numbers which are
used for various forms of correspondence and reports
1 Excise registration number (and the range division and collectorate in which
this is located)
2 Central sales tax (CST) number
3 Local sales tax (LST) registration number
4 Permanent account number (PAN)
In order for the system to be able to calculate which rate of excise duty to apply
on sales to the customer you must also assign it a customer excise duty status
(for more information about how this works see Determination of Excise Duty
Rates)
Excise Indicator for Plant and Customer
On this screen you define the final excise duty indicator (for more information
about how this works see Determination of Excise Duty Rates)
Determination of Excise Duty Use
When you execute a business transaction involving materials that are subject to
excise duty the system automatically calculates the duty for you
Prerequisites
In order for the system to be able to determine which rate of excise duty to
apply you must have maintained all the data on the Excise Rate Maintenance
screen which you can access from the SAP Easy Access screen by choosing
Indirect Taxes reg Master Data reg Excise Rate Maintenance
You maintain the following types of data
Plant master data
You assign each of your plants an excise duty indicator You can use the same
indicator for all the plants with the same excise status from a legal point of view
such as all those that are in an exempt zone
See also the information about manufacturers that are only entitled to deduct a
certain portion of the duty (see Partial CENVAT Credit)
Vendor master data
For each of your vendors with the same excise status from a legal perspective
you define an excise duty indicator You must also specify the vendor type ndash for
example whether the vendor is a manufacturer a depot or a first-stage dealer
You must also stipulate if the vendor qualifies as a small-scale industry
For each permutation of plant indicator and vendor indicator you then create a
final excise duty indicator
Customer master data
Similarly you assign the same excise duty indicator to each of your customers
that share the same legal excise status
Again for each permutation of plant indicator and customer indicator you then
create a final excise duty indicator
Material master data
Each material is assigned a chapter ID
Excise tax rate
For every chapter ID and final excise duty indicator you maintain the rate of
excise duty
If your business only qualifies for partial CENVAT credit you must customize
your system accordingly
Activities
Let us consider an example to illustrate how the system determines which rate
of excise duty to apply to a material Assume you are posting a sale of ball
bearings to a customer The system automatically determines the rate of excise
duty as follows
Looks up the customer master data to see what status you have assigned the
customer
Lets assume youve assigned the customer status 3
Looks up the plant master data to see what status you have assigned the plant
Similarly your plant has status 2
The system looks up the table under Excise Indicator for Plant and Customer to
see what the final excise duty indictor is for customer status 3 and plant status
2 It is 7
The system determines the chapter ID of the ball bearing for the plant
Letrsquos assume the chapter ID at plant for the ball bearings is 100001
Finally the system looks up the table under Excise Tax Rate to see what rate of
duty applies to chapter ID 100001 under status 7
Plant Master (Excise Data) Definition
The part of the plant master record that contains information relating to Indian
excise duty
Use
In conjunction with other data this data is used to calculate excise duty on
various transactions
To maintain the data from the SAP Easy Access screen choose Indirect Taxes reg
Master Data reg Excise Rate Maintenance and then select the following options
described below
Structure
The excise part of the plant master is divided into the following screens
Excise Indicator for Plant
On this screen you enter your plants tax registration numbers which are used
for various forms of correspondence and reports
1 Central sales tax (CST) number
2 Local sales tax (LST) registration number
3 Permanent account number (PAN)
In order for the system to be able to calculate which rate of excise duty to apply
on purchases for this plant you must also assign it a plant excise duty status
(for more information about how this works see Determination of Excise Duty
Rates)
Excise Indicator for Plant and Vendor
On this screen you define the final excise duty indicator (for more information
about how this works see Determination of Excise Duty Rates)
Excise Indicator for Plant and Customer
On this screen you define the final excise duty indicator (for more information
about how this works see Determination of Excise Duty Rates)
Automatic Creation of Excise Invoices Use
The SAP System can automatically create an outgoing excise invoice for you
immediately you post a commercial invoice (or a pro forma invoice) for a
customer sale This function applies to excise invoices for sales from factories
only
Prerequisites
To activate this function in the Country Version India (CIN) Implementation
Guide (IMG) make the following settings
1 Under Global Settings reg Excise Groups select Create EI
This activates the automatic creation function
2 Under Sales and Distribution reg Utilization Determination
Here you specify which CENVAT accounts the system is to post the different
types of excise duty to
3 Under Sales and Distribution reg Excise GroupndashSeries Group Determination
Here you specify which excise group and series group the excise invoices are to
be created for
Features
When you post an invoice the system creates an excise invoice All the
information that it needs to create the excise invoice is provided either by the
invoice or by the Customizing settings that you have made in Sales and
Distribution It also determines the excise invoice type automatically by means
of a user exit
Creating Excise Invoices for Stock Transfers 1 From the SAP Easy Access screen choose Indirect Taxes reg Procurement reg
Excise Invoice reg For Depot reg CreateChangeDisplay
2 In the Material document field enter the goods receipt number and choose
The system displays the information from the goods receipt for example the
sending plant the excise registration the range the division and the
collectorate
3 Choose Details
The system copies the items from the goods receipt document In the depot it is
possible to have a separate excise invoice at line item level
4 Enter the internal document number of the excise invoice sent by the factory
5 Choose More documents to go the excise invoice details screen
6 Enter the internal document number of the excise invoice from the factory
The system copies the information to the line item (for example the excise
invoice number the excise invoice date the item number the chapter ID the
excise invoice quantity the amount of excise duty paid the excise base value
and the serial number of the Part II register entry with which the excise was
paid)
You can change the receipt quantity to match the actual quantity received at
the depot if necessary The system automatically adjusts the excise
accordingly
7 Go back to the item details screen
8 Save the excise invoice
Creating Excise Invoices for Direct Purchases 1 From the SAP Easy Access screen choose Indirect Taxes reg Procurement reg
Excise Invoice reg For Depot reg CreateChangeDisplay
2 In the Material document field enter the goods receipt number and choose
The system displays the information from the goods receipt for example the
sending plant the excise registration the range the division and the
collectorate
You can also maintain the excise registration details for the ship-from party as
for with the vendor The ship-from can be different from the vendor code (The
delivering plant can be maintained as a ship-from in the system When a valid
ship-from is entered the excise registration details copied from the vendor will
be overwritten by the ship-from excise registration details)
The ship-from registration details displayed can also be overwritten manually
The dealers commercial invoice number can be stored in the vendor excise
invoice number as in this case the dealer himself will not have an excise
invoice
3 Choose Details
The system copies the items from the goods receipt document It also copies the
vendors excise invoice number and the serial numbers of the entries in the RG
23A RG 23C and personal ledger account (PLA) registers
4 Enter the internal document number of the excise invoice sent by the factory
5 Select an item and choose More documents to go the excise invoice details
screen
In the case of direct purchases there will not be any excise invoice in the
system so leave the internal document field blank The vendors invoice will
show the details of the excise invoices through which excise has been paid for
the item that is being dispatched You can enter these details here
6 For each item the chapter ID excise base value and excise duty amounts
are defaulted from the purchase order You can change them if there is any
difference Enter the excise amount paid and the receipt quantity You also
enter the Part II register serial numbers with which the excise duty was paid and
the excise registration information from the original excise invoice
7 Go back to the item details screen
8 Save the excise invoice
The system creates an entry in register RG 23D You can change the excise
invoice as long as it has not been used in any sales
Assigning Excise Invoices to a Delivery Use
You follow this procedure to specify which excise invoices are to be assigned to
a delivery from a depot (or other material document)
You can also automate this procedure using the batch selection program
(J_1IJCHK) by making the appropriate Customizing settings in the Country
Version India (CIN) Implementation Guide (IMG)
Procedure
1 From the SAP Easy Access screen choose Indirect Taxes reg SalesOutbound
Movements reg Excise Invoice reg For Depot reg CreateChangeDisplay reg Delivery
or Material Document reg RG 23D Selection
2 Enter the delivery document number or the material number and choose
3 Select the excise invoice you want
4 Choose
5 Choose Excise invoice
A list of excise invoices appears These are the excise invoices at the depot with
a balance quantity
The system also shows a list of the A certificates that can be used You can pick
up any of the A certificates but they must be for the same excise invoice You
can only pick up an A certificate in its entirety You cannot select part of an A
certificate
6 Select the excise invoices that are relevant to the delivery
7 Specify what quantity to be used from each excise invoice
The system recalculates the excise accordingly
8 Go back to the item details screen
9 Save the data
Result
The system creates an entry in register RG 23D and generates the depot excise
invoice numbers
If you selected any A certificates the system also generates additional entries in
the RG 23D register The system marks the original A certificates as updated so
that they cannot be used for any other removals
Continue see Volume 2 (Next post)
EXTERNAL SERVICE MASTER
EXTERNAL SERVICE MASTER ESM
We procure the different type of services from vendors they are-
1048774 Hardware amp software services
1048774 Construction amp transportation services
1048774 Machinery services
1048774 Annual maintenance services
1048774 Present to and breakdown service Etc
Service Procurement Cycle -
1048774 Requirement identification
1048774 Source determination
1048774 Source selection
1048774 Service master
1048774 Service PO
1048774 Service entry sheet acceptance
1048774 Invoice with respect to service entry sheet
Steps to perform services -
1 Create service master (AC03)
2 Create Service PO (ME21N) with AC Assignment category lsquoKrsquo amp Item
Category lsquoDrsquo
3 Create service entry sheet (ML81N)
4 Invoice with respect to Service Entry sheet
Customize settings
(For service category Number Ranges amp organization status for service
category)
SPRO 1048774 IMG 1048774 MM 1048774 ESM 1048774 Service Master
1048774 Define organization Status for service Categories
1048774 Define Service Category
1048774 Define Number Ranges
Define organization Status for service Categories
bull Click on New Entries
bull Org service Category
bull BDS (Basic data service is stored in service master record under this service
category)
bull CNST 1048774 Controlling Status
bull PUST 1048774 Purchasing data Status
bull SDST 1048774 Sales amp Distributed Status
bull Org status description service category 1048774 Press Enter amp Save
Define Service Category
bull Same path as above
bull Select Standard
bull Click on Copy as
bull AC reference 1048774 always takes as 0006
bull Enter amp Save
Define Number Ranges
Click on groups 1048774 Groups 1048774 Insert 1048774 select enter Number Ranges
Select the service category
Click on Element
Select Group amp Click on Element Group
Save
Create Service Master - (AC03)
Click on Create New Services
Service Number (any number) Service Category
Basic unit of measure (Hours lsquoHrsquo)
Enter
Basic Data 1048774 Master Service Group 1048774 007
Valuation class 1048774 3200 1048774 Enter 1048774 Save
To See the Service list 1048774 AC06
Create Service PO (ME21N)
AC assignment category lsquoKrsquo Item Category lsquoDrsquo
Enter the Short text Quantity Delivery date Net Price Material group Plant
Storage Location
Enter service number in Service Tab (Item Details) quantity price Enter
Account Assignment 1048774 GL Account Number eg400000
Cost Center eg 9999
Press Enter amp Save
Create Service Entry Sheet - ML81N
Select other purchase order (enter PO number) 1048774 Enter 1048774 Click on Create1048774 Enter
Short Text 1048774 Enter 1048774 Service Number 1048774 Enter ndashClick on Flag button 1048774 Save
Take Service entry Sheet Number
Go to Invoice MIRO 1048774 Enter company code 1048774 Select Service Sheet Option 1048774 Enter
Service Entry Sheet Number 1048774 save it
Physical Inventory and Inventory Management
Physical inventory Process - 1 Create Physical inventory document
T Code MI01 ndash Create single inventory document
T Code MI31 ndash Create multiple physical inventory documents
I Enter the desired fields ie material material type site storage location and
Maximum number items Documents ndash 100 etc 1048774 Press Enter
II Click on Process Session
III Select the line items and click on the process
IV System displays a dialog box select Background and click on process
Inventory document is created
2 Print Inventory Document and handed over to responsible person say
Manager
3 Enter Physical Inventory count
T Code MI04
i Enter the physical inventory document number Fiscal year count date 1048774 Press
enter
ii Enter the Material Quantity and click on post
4 Listing of difference
T Code MI20
Enter the physical inventory document number and execute system displays a
screen wherein we will be able to view the differences
5 Post the differences
T Code MI07 amp Mov Type 701 amp 702
Enter the physical inventory document number year posting date enter the
difference and post
INVENTORY MANAGEMENT Maintaining stock by value or by quantity is called inventory The total inventory
management deals with the goods movement of the material
Goods movement -
It is a process in which transaction resulting change in stocks It is further sub-
divided into three categories
1 Goods Receipt (GR)
2 Goods Issue (GI)
3 Transfer Posting (TP)
Goods Receipt (GR) - It is a goods movement in which receipt of goods is
posted for vendor or for production A GR posted in the system will leads to
increase in stock No Concept of Price or value
Goods Issue (GI) - It is goods movement in which material withdrawal is
posted for consumption or for customer A GI posted in system will leads to
decrease in stock
Stock Transfer (ST) - It is method of removal of material from one location
and transferring it to another location This process is performed between two
plants and two storage locations
Transfer Posting (TP) - It is a general term of stock transfer that changes the
stock type or stock categories The difference between transfer posting and
stock transfer is -
TP is logical stock transfer and ST is a physical stock transfer
Movement Type - It is a three-digit code which plays a role of important
control function in inventory management It acts as a central role in automatic
account determination It determines which stock account or consumption
account is updated in financial accounting
Reservation - It stores requisition created from particular cost center to
particular department for issuing the material reservation posted in the system
It leads to decrease in stock
Stock Types - The different stock types are
1 Unrestricted use stock
2 Quality inspection stock
3 Blocked stock
4 Warehouse stock
Transaction code -
1 To Create GR - MIGO
2 To Create GI - MB1A
3 For Transfer Posting - MB1B
4 To display MaterialGR document ndash MB03
5 To create reservations - MB21 MB22 MB23
6 To See Stock Overview - MMBE
7 To enter Other GR - MB1C
When GR is posted in the system
1 Material document is created - MB03
2 Accounting Document is generated - MB03
3 MMR updated - MM02 MM03
4 PO history updated - ME23N
Movement Typersquos
Movement Types under GR - 101 331333335501503505551553555
561351 (For all Mov Typersquos there is a reversal eg 101 has 102 Note No
reversal for 121)
Movement Typersquos under GI - 201 331333335551553555
Transfer Posting It is performed in three ways
1 TP BW Plant to Plant
2 TP BW Storage Location to Storage Location
3 TP BW Stock to Stock
Movement Types under TP BW Plant to Plant
301 - 1 step
303 amp 305 - 2 step
Movement Type under TP BW Storage location to Storage Location
311 - 1 step
313 amp 315 - 2 step
Movement Type under TP BW stock to stock
321 323 325 343349
To Cancel the GR Movement type 102
Return delivery to vendor movement type 122 amp T Code MIGO
Transfer Posting Stock to Stock
From Blocked stock to Quality Inspection
T Code MB1B amp Movement Type 349
From Blocked stock to Unrestricted Stock
T Code MB1B amp Movement Type 343
From Quality Inspection to Unrestricted Stock
T Code MB1B amp Movement Type 321
Transfer Posting from Plant to Plant
For One Step Movement Type 301
For Two Steps Movement Type 303 amp 305
After posting stock will display in Stock in Transit (Plant)
To receive material by receiving Plant Movement Type 305
Transfer Posting BW Storage Location to Storage Location
Under One Plant BW two Storage Locationrsquos Movement Type 311
Back to Parent storage Location Movement Type 313 (It Show stock in transfer)
use Movement type 315 at Parent storage location
To create Goods Issue (GI) T Code MB1A amp Movement Type 201
To Create Reservations T Code MB21 MB22 amp MB23
Creation of GI wrt Reservations
T Code MB1A amp Movement Type 201
Click on Reservation Enter Reservation Number 1048774 Click on Adopt + Details
GR wrt Reservations T Code MIGO amp Select as Reservation instead of GR
GR without PO Movement type 501 amp T Code MB1C Select others instead of
Purchase order Enter Material Quantity Plant Storage Location 1048774 Press Enter
Partner Option will be visible (Vendor) 1048774 Save it
Invoice - Invoice is a document which is issued to a buyer (Company) from the
supplier (vendor) for the payment The following information is maintained in
invoice
Invoice date Posting date Invoice ref number tax amount amount tax code
terms of payments vendor address banking accounting information etc
When invoice document is posted in the system
bull Invoice document created
bull Accounting document is generated (MIR4)
bull PO history updated (ME23N)
bull FI document created (FB03)
PRICE DETERMINATION PROCESS or PRICING PROCEDURE
CONDITIONS OR PRICING PROCEDURE or PRICE DETERMINATION PROCESSWe deal with the Pricing Procedure for vendors
PB00 Gross Price (info record contract scheduled Agreement)
PBXX Gross Price (PO)
FRA1 Freight
RA00 Discount on net
RA01 Discount on Gross
ZA00 Surcharge on net
SKT0 Surcharge discount
ZPB0 Rebates
MWVS Input Tax
MWAS Output Tax
BASB Base Amount
RM0000 Calculation Schema or Pricing Procedure
(PB00 amp PBXX)
RM0002 Calculation Schema or Pricing Procedure
(PB00)
PB00 --gt AB00
Copy the Standard one and create new one (ours)
RM0000 contains all the condition types
Pricing Procedure (PP)
We define the pricing procedure to define condition supplement for the material
price The condition supplement specifies the discount surcharge freight etc
that we want a system every time to access material price condition records
The total value of the material is calculated or based on all addition and
subtraction ie discounts surcharge tax freight etc
Condition Table
It is a table which defines the structure of condition record key
Condition Record
It is a data record used to store conditions or condition supplements ie
condition like discount freight and surcharge Tax etc
Condition Type
It is used for different functions In Pricing the condition types leads you to
differentiate different types of discounts in output determination batch
determination difference between two output types such as delivery note or
order confirmation between different strategy types
Access Sequence
It specifies the order in which system searches or access the condition records
from condition table
Difference between PB00 amp PBXX
1 Condition maintained in PB00 is time dependent whereas PBXX is time
independent
2 Condition type PB00 ndash used for IR RFQ Contract Schedule Agreement
Condition type PBXX ndash used for PO
Calculation Schema
The main function of calculation schema is to provide framework of steps for the
price determination process to specify the discounts surcharge freight rebate
etc
It also determines the sequence of conditions that are to be followed and in
which sequence
Schema Group Vendor
The main function of it is to identify or to pick the right process and conditions
for a particular vendor
Schema Group Purchasing Organization
Key that determines which calculation schema (pricing procedure) is to be used
in purchasing documents assigned to the relevant purchasing organization
Schema Group
It allows to group together the purchasing organizations which uses the same
calculation schema
Steps -
1 Create Access sequence
2 Create condition types
3 Create pricing procedure or calculation schema
4 Link pricing procedure amp access sequence to condition type
5 Create schema group for vendor
6 Create schema group for purchase organization
7 Assign schema group vendor-to-vendor master record in purchasing data
view
8 Assign schema group purchase organization to our purchase organization
9 In inforecord purchase organization data enter condition types and pricing or
calculation procedure
CUSTOMIZE SETTINGS -
SPRO --gt IMG--gtMM--gtPUR--gtConditions --gtDefine price determination Process
1 Define access sequence
2 Define Condition type
3 Define cal Schema
4 Define schema group
o Schema group vendor
o Schema group purchasing group
5 Assignment of schema group to PUR org
6 Define schema determination agrave determine cal schema for standard PO
PURCHASE ORDER
PURCHASE ORDER
PO is an external document created for the procurement of materials and
services from vendor The document of PO is also divided into 4 parts as PR -
1 Document Overview
2 Header (DeliveryInvoice Conditions Address Partners Org data status)
3 Item Overview (AC assign cat Item Category Material Plant Del date SL)
4 Item Details (Material data Confirmations condition control delivery delivery
Schedule Quantitiesweights invoice)
A procurement type is defined for each of the document items The following
procurement types exist
1048774 Standard
1048774 Subcontracting
1048774 Consignment
1048774 Stock transfer
1048774 External service
bull There are different ways to create PO -
1 Directly through transaction code ME21N
2 With reference to PR
3 With reference to RFQ
4 With reference to info records
5 With reference to Contracts
6 With reference to Cost Centre GL Account (cost element) for consumable
items or not stock items with account assignment category lsquoKrsquo (K= cost centre)
(For non stock and consumables)
0 COMMENTS L INKS TO THIS POST
LABELS PO PURCHASE ORDER
Reaction
s
PURCHASE REQUISITION T CODE ME51 or ME51N
Purchasing Requisition -
It is a request or instruction from particular department (Cost Centre) to
purchasing department to procure certain quantity of material and services It is
only one internal document in SAP-MM
Purchasing Requisition document is divided into four parts -
bull Document Overview
bull Header
bull Item Overview
bull Item Details
Document Overview -
It displays the list of purchasing documents which are created previously
according to our requirement
Header -
Any text message or information is maintained
Item Overview -
In this we enter material plant delivery date quantity storage location
purchasing group AC assignment category Item category etc
Item Details -
It displays the detailed information about item overview (like Master data
valuation source of supply contact person delivery address status etc)
0 COMMENTS L INKS TO THIS POST
LABELS PR PURCHASE PURCHASE ORDER PURCHASE REQUIS IT ION SALES ORDER
Reaction
s
Automatic PURCHASE ORDER (PO) How Automatic PO raised
How Automatic PO raised
At fixed time say 1230 AM automatic scheduler runs and checks whether the
stock is less than or equal to the replenishment point If stock is less than or
equal to Repli Point than PR raised automatically to Purchasing Deptt
bull Activate the option automatic PO in purchasing view in material master record
bull Activate the option automatic PO in purchasing data view in vendor master
record
bull Maintain Source List amp select fixed vendor
bull PR crated automatically
bull Automatic creation of PO from PR ndash ME59
Enter the Purchasing group purchasing organization Vendor Plant and
Purchasing Requisition Document Number 1048774 Execute
RELEASE PROCEDURE Release strategyThe main function of Release procedure is to determine the approval process
or the release process for the procurement of material amp services rather than
relying for manual signatures The release procedure contains release strategy
Release Strategy (RS)
A plan defining the release codes with which a purchase requisition item a
complete purchase requisition or a complete external purchasing document
must
be released (that is approved) and the sequence in which release is to be
effected
using these codes It is a unique set of conditions sequence and level of release
It is a 2 digit code eg S1 S2 S3etc
The Release Strategy contains the following -
bull Release Group
bull Release Codes
bull Release Indicators
bull Release Prerequisite
Release Group -
It is a 2-digit code which is assigned with a class (Class contains group of
characteristics) It contains one or more release strategies
Release Codes -
It is a 2digit code which identifies the department or responsible person for
the approval process amp release process
Eg AA - Manager
BB - Sr Manager
CC - Vice President
DD - Managing Director
Release Indicator -
It is a Code that represents the release status If the proper approval
process is performed that the release Strategy has to be release if it is not
performed than the Release Strategy is blocked
R ndash Release
B ndash Blocked
Release Conditions -
It determines the type of the release strategy
For eg
bull If the price ranges from 1 to 1000 It is approved by AA BB and CC
bull If the ranges from1001 to 1lac then it is approved by AA BB CC and DD
- 80 -
Release Prerequisite
It will informs the system which RS has to be take place in the PO CEKKO is
a communication structure where it displays the field names amp field lengths to
create characteristics ie we maintain characteristics in customizing by
selecting
the field names from this communication structure for all external documents
CEBAN is used for the purchasing requisition
Characteristics -
1 Net value of PO --- GNETW (GSWRT for PR)
2 Plant --- WERKS
3 Purchasing organization -- EKORG
4 Purchasing Group --- EKGRP
5Material group ndashMATKL
CUSTOMIZE SETTINGSSPRO--gtIMG--gt MM--gt Purchasing--gtPO--gt Release Procedure for PO
1 Edit Characteristics T Code CT04
2 Edit Class T Code CL02
3 Define Release Procedure for PO
4 Check Release Strategy
Edit Characteristics -
Characteristics - eg NET VALUE OF VALUE
Click or Create Button
Under Basic Data
Description - Value for PO
Status - Release
Data Type - Currency Format
No Of Characters - 15
Currency - EUR
Activate multiple values amp Internal Values Allowed
Additional Data
Table name - CEKKO
Field Name - GNETW
Values
Activate Additional Values
Save the document
Create another Characteristic for Plant -
Plant date Create ndash Description Status
Data Type Characteristic Format
Number of Characteristics 4
Activate Multiple Values
Additional data-
Table Name - CEKKO
Field Name - WERKS
Values
Activate Additional Values
For Purchasing Organization Name - EKORG
For purchasing Group EKGRP
Edit Class
Class - SAPMM
Class Type - 032 Release Strategies
Click on Create button
Basic Data
Description - Class for PO
Status - Released
Valid From _____ Valid to _____
Click on Characteristic
Characteristic
Enter all the Characteristics Created amp Save it
Define Release Procedure for PO-
bull Release Group
bull Release Codes
bull Release Indicators
bull Release Strategies
bull Workflow
Release Group - New Entries Release Group Class and Description
Press Enter amp Save
Release Code - New Entries
Group Codes Description
99 AA Manager
99 BB Sr Manager
99 CC Vice President
99 DD Managing Director
Press Enter amp Save
Release Indicator - (B ndash Blocked R - Release)
New Entries
Release Indicators Description
B Blocked
R Released
Release Strategies -
New Entries
Release Group 99
Release Strategy S1
Release Codes AA BB CC and DD
Click on Release Prerequisites
Release Status -
Continue
Classification
Enter the Value (Same Price)
Plant (9999)
Go Back amp Save it
Release Simulation - Simulate Release
Create a PO -
There are two ways to release the PO
Individual releaseME28
Collective release ME29N
How to delete procedure
Delete Release GP
Create Release RG
Delete R Strategies
Delete R Code
Delete R Group
SAP R3 SYSTEM LANDSCAPE
System LandscapeThe system landscape contains all the SAP Systems that you have installed It
can consist of several system groups whorsquos SAP Systems are linked by transport
routes
After you decide which clients you need and which roles you want them to have
you need to decide how to distribute them amongst the different SAP Systems
You can set up multiple clients independently of one another in a single SAP
System However when you configure the data you must remember that cross-
client Customizing settings and Repository objects are identical for all clients in
a single SAP System Changes made in one client apply immediately to all
clients in the system
Three-System Landscape
SAP recommends a three-system landscape in which each of the central clients
has its own SAP System
This consists of a development system DEV a quality assurance system QAS
and a production system PRD The development system contains the
Customizing client CUST the quality assurance system contains the quality
assurance client QTST and the production system contains the production client
PROD Make all changes to Customizing data and Repository objects in the
Customizing client When you release the corresponding change requests they
are transported into the quality assurance client This means that changes to
cross-client data only appear in the quality assurance client after the transport
In the quality assurance client you can test whether the transports are
complete or whether any linked changes are missing and are still in unreleased
change requests If the test is successful the change requests are transported
into the production client The production client is completely separate from the
other clients as regards cross-client data
SPECIAL STOCKS amp SPECIAL PROCUREMENT TYPES
Special Stocks are those stocks which are not belongs to our company code
These are not placed in our storage locations amp no physical inventory is
performed and treated as special stocks for the reason of ownership
Different types are of Special Stocks are as follows
1 Subcontracting
2 Consignment
3 Pipeline
4 Stock transfer
5 Third party
6 Returnable transport packaging
7 Sales order stock
8 Project stock
SUBCONTRACTING
In subcontracting process we create subcontracting PO to supply or issue
subcomponents to vendor in order to get final product The price maintained in
subcontracting PO is a service charge paid to vendor
Steps to perform subcontracting
1 Create subcontracting inforecord (Optional)
2 Create subcontracting PO with item category L
There are to ways to supply subcomponents to vendor
bull Manually maintain the subcomponents in the subcontracting
PO though explode BOM
bull Through BOM (Bill of material) T Code CS01 CS02 amp CS03
3 Create Transfer Posting with Movement Type 541 to issue the subcomponents
to the vendor
4 Goods Reciept
5 Invoice Reciept
Path ME21N ---gt Enter Item Category L --gt Material (End Product) PO
Quantity Delivery Date Net Price Plant --gt Click on Item Details --gt Tab
Material Data -- gtComponents select Explode BOM --gt Click on Components
button --gt Enter the subcomponents --gt Go back amp Save
Create Transfer Posting with movement type 541 amp T Code MB1B
GR MIGO
IR MIRO
CONSIGNMENT - (No Concept of Invoice)
In consignment process we will not create Purchasing document for the vendor
vendor himself send the material to our plant though the material is available
to our plant the responsibility amp ownership of the material is of vendor Aliability
only arises when the material withdrawal (Consumption) is posted in the system
from consignment stock
Steps
1 Create Consignment info record (mandatory)
2 Create Consignment purchase order with item category lsquoKrsquo amp maintain Info
record number
3 Create GR Movement type lsquo101Krsquo
4 Create GI Movement Type lsquo201Krsquo
5 Consignment settlement T Code MRKO
Path --gtME11 --gt In info record --gt Purchasing Org Data 1 views of info record
enter the tax code and save it
--gt Create Consignment Purchase Order ME21N (Price option is grayed out with
price zero)
--gt Create GR with movement type 101K
--gt Create Goods Issue (GI) T Code MB1A amp Movement Type 201K Enter Cost
center vendor
--gt Consignment Settlement T Code MRKO Click Activate Consignment Activate
Settle Execute
--gt Display the Document Number ie Invoice receipt T Code FB03
PIPELINE PROCESS (No Concept of Invoice)
In pipeline handling your company does not need to order or store the material
concerned It is ready available to you as and when required via pipeline (eg oil
or water) or some other type of cable (eg electricity) Consumption of the
material is settled with the vendor on a regular basis
Steps
1 Create a Material master record with material type PIPE
2 Create Pipeline info record
3 Create GI with movement type 201P
4 Pipeline settlement T Code MRKO
RETURNABLE TRANSPORT PACKAGING (RTP)
When company orders goods from a vendor the goods are delivered with
returnable transport packaging (pallets containers) that belongs to the vendor
and is stored on our premises until you return it to the vendor
Steps
1 Create Material master record with material type LEIH
2 Create PO
3 Create GR by maintaining RTP material by selecting the option transport
equipments with movement type 501M
4 IR
STOCK TRANSFER
In stock transfer processing goods are procured and supplied within a company
One plant orders the goods internally to another plant (receiving plantissuing
plant) The goods are procured with a special type of purchase order the stock
transport order
Steps
1 Create a Material master in both supplying and receiving plant
2 Create stock transport order (STO) with item category lsquoUrsquo
3 Create transfer posting with movement type 351 amp T Code MB1B (Go to
MMBE stock overview the stock will decrease in supplying plant and it will not
update stock of receiving plant it will be under stock in transit)
4 Create GR stock will update in receiving plant
This scenario is under one company code between two plants
SAP IMPLEMENTATION PROCESS End to End Inplementation of SAP
First we have to prepare documentation about the client business (like turnover
vendors customers payments materials production marketing etc)
The implementer company made two teams (1) Steering team (2) Steering
community
Steering team (SAP functional consultants) prepares a detailed
documentation about the client with the help of core team (client company
team)
amp this study is known as Feasibility Study After that the steering team handed
over this documentation to Steering community (Project manager Sr software
engineer and other higher authorities)
Steering community prepares the BBP (Business Blue Print) BBP
Prepares in MS-Word
10487741048774 ASAP - Accelerated System Application Product in Data Processing
10487741048774 Business Process - ASAP Methodology
1 Project Preparation
2 BBP (Business Blue Print)
3 Realization
4 Final Preparation
5 Go live amp Support
10487741048774 Project Preparation -
It consists of identifying team members amp development strategy as
how to go
AS ndash IS (Existing Process followed requirements)
TO ndash BE (Requirement analysis and best process recommended)
Difference between (AS ndash IS) amp (TO - BE) is called GAP Analysis
10487741048774 Business Blue Print (BPP) -
It is a legal documentation between client amp the company
(implementer service provider) We have to understand the current business
process of client amp analyzing the business amp prepare documentation It is a
detailed documentation for the client
10487741048774 Realization -
This Phase is used to Implement or migrate the entire business of
client from Non-SAP environment to SAP environment
10487741048774 Final Preparation -
This phase is used for testing amp end user training After successfully
completion of this phase client is ready to run business in SAP R3
10487741048774 Go live amp Support -
In this phase we deliver the project end date amp end user training at
client site
THIRD - PARTY PROCESSING
THIRD - PARTY PROCESSING
In third party processing your company passes on a sales order to an external
vendor who sends the goods directly to the customer The sales order is not
processed by your company but by the vendor Third-party items can be
entered in purchase requisitions purchase orders and sales orders Third party
processing is integrated with Sales and Distribution If the sales order contains
third-party items the system creates a purchase requisition from the order
Steps
1 Create MMR with sales views and maintain Division Distribution channel
sales org item category group and general item category group ndash BANS (Third
party item) amp Account group Sold to party
2 Create Customer master record T Code XD01 XD02 XD03
3 Create sales order T Code VA01 VA02 VA03 (PR generated automatically)
4 PO - T Code ME21N
5 GR ndash T Code MIGO
6 IR ndash T Code MIRO
7 Sales Billing Billing Document T Code VF01 VF02 VF03

Steps
1 Create a Material master record with material type PIPE
2 Create Pipeline info record
3 Create GI with movement type 201P
4 Pipeline settlement T Code MRKO
RETURNABLE TRANSPORT PACKAGING (RTP)
When company orders goods from a vendor the goods are delivered with
returnable transport packaging (pallets containers) that belongs to the vendor
and is stored on our premises until you return it to the vendor
Steps
1 Create Material master record with material type LEIH
2 Create PO
3 Create GR by maintaining RTP material by selecting the option transport
equipments with movement type 501M
4 IR
STOCK TRANSFER
In stock transfer processing goods are procured and supplied within a company
One plant orders the goods internally to another plant (receiving plantissuing
plant) The goods are procured with a special type of purchase order the stock
transport order
Steps
1 Create a Material master in both supplying and receiving plant
2 Create stock transport order (STO) with item category lsquoUrsquo
3 Create transfer posting with movement type 351 amp T Code MB1B (Go to
MMBE stock overview the stock will decrease in supplying plant and it will not
update stock of receiving plant it will be under stock in transit)
4 Create GR stock will update in receiving plant
This scenario is under one company code between two plants
Material Master Related Important Terms (Part 2)
Controlling (CO) An organizational unit in Accounting that reflects a
management-oriented structure of the organization for the purpose of internal
control
Operating results for profit centers can be analyzed using either the cost of
sales approach or the period accounting approach
By analyzing the fixed capital as well you can expand your profit centers for use
as investment centers
Profit Center
Key that uniquely identifies the profit center in the current controlling area
Valuation Category
Determines whether stocks of the material are valuated together or separately
Dependencies
In the case of split valuation this indicator also determines which valuation
types are allowed that is the criteria by which stocks can be valuated
Valuation type
Invoice Verification (MM-IV)
A subdivision of a valuation category in split valuation
Example An enterprise manages its stocks of a material using the valuation
category Quality comprising the following valuation types
bull High quality Average quality Inferior
Hazardous material number
Number that identifies the material as a hazardous material or as dangerous
goods and assigns hazardous material data or dangerous goods data to it
Use The hazardous material number indicates that the material is dangerous
making special precautions necessary for its storage and shipment
Valuation Class
Assignment of a material to a group of GL accounts
With other factors the valuation class determines the GL accounts that are
updated as a result of a valuation-relevant transaction or event such as a goods
movement
The valuation class makes it possible to
bull Post the stock values of materials of the same material type to different GL
accounts
bull Post the stock values of materials of different material types to the same GL
account
Default value for the valuation class for valuated stocks of this material
Use The valuation class has the following functions
bull Allows the stock values of materials of the same material type to be posted to
different GL accounts
bull Allows the stock values of materials of different material types to be posted to
the same GL account
bull Determines together with other factors the GL accounts updated for a
valuation-relevant transaction (such as a goods movement
CIN - Country India Version ~ Volume 1
PurposeCountry Version India (CIN) contains a number of enhancements to standard
Sales and Distribution (SD) functions that allow you to handle local
requirements in particular excise duty
Features
In Country Version India (CIN) this component handles sales processes as
found in India In addition to the generic functions it allows you to
Handle CENVAT in your sales processes
The system calculates excise on your sales and creates excise invoices as
required and makes the appropriate postings to your CENVAT accounts
It covers sales from factories sales from depots and offers functions for other
types of goods movements it also covers sales to export-oriented units and
export sales
Record concessional and exemption forms sent to you by your customers
Make adjustment postings to your CENVAT accounts
Excise Invoice (Outgoing)
Definition
The document that acts as the proof of payment of excise duty and is required
for the customer to take CENVAT credit on the item
Use
In the SAP System there are three different procedures for creating excise
invoices
Sales direct from the factory
This procedure is for when you sell manufactured goods straight from the
factory at which they were produced in which case you levy excise duty when
the goods leave the factory on their way to the customer
If when you send the goods to the customer you enclose the commercial
invoice you create the excise invoice with reference to the commercial invoice
If you want to send the commercial invoice after you have dispatched the goods
however you create the excise invoice with reference to a pro forma
commercial invoice For more information about these procedures see Sales
from Factories
As well as creating excise invoices individually you can also create them in
batches (see Creation of Excise Invoices in Batches)
Sales from depots
A depot is a site at which the goods are stored away from the factory at which
they were produced In this procedure you have to levy the excise duty when
you transfer the goods from the factory to the depot and then make sure this is
passed on to the customer when it makes a purchase For more information see
Sales from Depots
Sales (other goods movements)
Some other goods movements may also require you to create an excise invoice
with reference to other documents The SAP System offers separate functions
for these purposes (see Excise Invoices (Outgoing) for Other Movements)
StructureNumbering of Excise Invoices
Outgoing excise invoices have two numbers an internal document number
which is assigned immediately you create an excise invoice and an excise
invoice number which is not assigned until you have verified and posted it
As far as the excise invoice number is concerned you have to number your
outgoing excise invoices in sequential order starting each year on 1 April You
must notify the excise authority of the jurisdiction of the invoicing location The
serial number must be printed on each page of the excise invoice
Each number range is governed by a series group You must create at least one
series group in order to be able to number the excise invoices If you need more
than one number range you must create the corresponding number of series
groups You do so in the CIN Implementation Guide (IMG) by choosing Global
Settings reg Series Groups
Number of Line Items Per Excise Invoice
Some states allow you to include only a limited number of items for each page
of an excise invoice (for example if the excise invoices are to be printed on
prenumbered forms) You can customize the system so that it prints the excise
invoice accordingly in the CIN IMG by choosing Global Settings reg Excise
Registration IDs
Customer Master (Excise Data) Definition
The part of the customer master record that contains information relating to
Indian excise duty
Use
In conjunction with other data this data is used to calculate excise duty on
various transactions
To maintain the data from the SAP Easy Access screen choose Indirect Taxes reg
Master Data reg Excise Rate Maintenance and then select the following options
described below
Structure
The excise part of the customer master contains the following information
Customer Excise Details
On this screen you enter your customers tax registration numbers which are
used for various forms of correspondence and reports
1 Excise registration number (and the range division and collectorate in which
this is located)
2 Central sales tax (CST) number
3 Local sales tax (LST) registration number
4 Permanent account number (PAN)
In order for the system to be able to calculate which rate of excise duty to apply
on sales to the customer you must also assign it a customer excise duty status
(for more information about how this works see Determination of Excise Duty
Rates)
Excise Indicator for Plant and Customer
On this screen you define the final excise duty indicator (for more information
about how this works see Determination of Excise Duty Rates)
Determination of Excise Duty Use
When you execute a business transaction involving materials that are subject to
excise duty the system automatically calculates the duty for you
Prerequisites
In order for the system to be able to determine which rate of excise duty to
apply you must have maintained all the data on the Excise Rate Maintenance
screen which you can access from the SAP Easy Access screen by choosing
Indirect Taxes reg Master Data reg Excise Rate Maintenance
You maintain the following types of data
Plant master data
You assign each of your plants an excise duty indicator You can use the same
indicator for all the plants with the same excise status from a legal point of view
such as all those that are in an exempt zone
See also the information about manufacturers that are only entitled to deduct a
certain portion of the duty (see Partial CENVAT Credit)
Vendor master data
For each of your vendors with the same excise status from a legal perspective
you define an excise duty indicator You must also specify the vendor type ndash for
example whether the vendor is a manufacturer a depot or a first-stage dealer
You must also stipulate if the vendor qualifies as a small-scale industry
For each permutation of plant indicator and vendor indicator you then create a
final excise duty indicator
Customer master data
Similarly you assign the same excise duty indicator to each of your customers
that share the same legal excise status
Again for each permutation of plant indicator and customer indicator you then
create a final excise duty indicator
Material master data
Each material is assigned a chapter ID
Excise tax rate
For every chapter ID and final excise duty indicator you maintain the rate of
excise duty
If your business only qualifies for partial CENVAT credit you must customize
your system accordingly
Activities
Let us consider an example to illustrate how the system determines which rate
of excise duty to apply to a material Assume you are posting a sale of ball
bearings to a customer The system automatically determines the rate of excise
duty as follows
Looks up the customer master data to see what status you have assigned the
customer
Lets assume youve assigned the customer status 3
Looks up the plant master data to see what status you have assigned the plant
Similarly your plant has status 2
The system looks up the table under Excise Indicator for Plant and Customer to
see what the final excise duty indictor is for customer status 3 and plant status
2 It is 7
The system determines the chapter ID of the ball bearing for the plant
Letrsquos assume the chapter ID at plant for the ball bearings is 100001
Finally the system looks up the table under Excise Tax Rate to see what rate of
duty applies to chapter ID 100001 under status 7
Plant Master (Excise Data) Definition
The part of the plant master record that contains information relating to Indian
excise duty
Use
In conjunction with other data this data is used to calculate excise duty on
various transactions
To maintain the data from the SAP Easy Access screen choose Indirect Taxes reg
Master Data reg Excise Rate Maintenance and then select the following options
described below
Structure
The excise part of the plant master is divided into the following screens
Excise Indicator for Plant
On this screen you enter your plants tax registration numbers which are used
for various forms of correspondence and reports
1 Central sales tax (CST) number
2 Local sales tax (LST) registration number
3 Permanent account number (PAN)
In order for the system to be able to calculate which rate of excise duty to apply
on purchases for this plant you must also assign it a plant excise duty status
(for more information about how this works see Determination of Excise Duty
Rates)
Excise Indicator for Plant and Vendor
On this screen you define the final excise duty indicator (for more information
about how this works see Determination of Excise Duty Rates)
Excise Indicator for Plant and Customer
On this screen you define the final excise duty indicator (for more information
about how this works see Determination of Excise Duty Rates)
Automatic Creation of Excise Invoices Use
The SAP System can automatically create an outgoing excise invoice for you
immediately you post a commercial invoice (or a pro forma invoice) for a
customer sale This function applies to excise invoices for sales from factories
only
Prerequisites
To activate this function in the Country Version India (CIN) Implementation
Guide (IMG) make the following settings
1 Under Global Settings reg Excise Groups select Create EI
This activates the automatic creation function
2 Under Sales and Distribution reg Utilization Determination
Here you specify which CENVAT accounts the system is to post the different
types of excise duty to
3 Under Sales and Distribution reg Excise GroupndashSeries Group Determination
Here you specify which excise group and series group the excise invoices are to
be created for
Features
When you post an invoice the system creates an excise invoice All the
information that it needs to create the excise invoice is provided either by the
invoice or by the Customizing settings that you have made in Sales and
Distribution It also determines the excise invoice type automatically by means
of a user exit
Creating Excise Invoices for Stock Transfers 1 From the SAP Easy Access screen choose Indirect Taxes reg Procurement reg
Excise Invoice reg For Depot reg CreateChangeDisplay
2 In the Material document field enter the goods receipt number and choose
The system displays the information from the goods receipt for example the
sending plant the excise registration the range the division and the
collectorate
3 Choose Details
The system copies the items from the goods receipt document In the depot it is
possible to have a separate excise invoice at line item level
4 Enter the internal document number of the excise invoice sent by the factory
5 Choose More documents to go the excise invoice details screen
6 Enter the internal document number of the excise invoice from the factory
The system copies the information to the line item (for example the excise
invoice number the excise invoice date the item number the chapter ID the
excise invoice quantity the amount of excise duty paid the excise base value
and the serial number of the Part II register entry with which the excise was
paid)
You can change the receipt quantity to match the actual quantity received at
the depot if necessary The system automatically adjusts the excise
accordingly
7 Go back to the item details screen
8 Save the excise invoice
Creating Excise Invoices for Direct Purchases 1 From the SAP Easy Access screen choose Indirect Taxes reg Procurement reg
Excise Invoice reg For Depot reg CreateChangeDisplay
2 In the Material document field enter the goods receipt number and choose
The system displays the information from the goods receipt for example the
sending plant the excise registration the range the division and the
collectorate
You can also maintain the excise registration details for the ship-from party as
for with the vendor The ship-from can be different from the vendor code (The
delivering plant can be maintained as a ship-from in the system When a valid
ship-from is entered the excise registration details copied from the vendor will
be overwritten by the ship-from excise registration details)
The ship-from registration details displayed can also be overwritten manually
The dealers commercial invoice number can be stored in the vendor excise
invoice number as in this case the dealer himself will not have an excise
invoice
3 Choose Details
The system copies the items from the goods receipt document It also copies the
vendors excise invoice number and the serial numbers of the entries in the RG
23A RG 23C and personal ledger account (PLA) registers
4 Enter the internal document number of the excise invoice sent by the factory
5 Select an item and choose More documents to go the excise invoice details
screen
In the case of direct purchases there will not be any excise invoice in the
system so leave the internal document field blank The vendors invoice will
show the details of the excise invoices through which excise has been paid for
the item that is being dispatched You can enter these details here
6 For each item the chapter ID excise base value and excise duty amounts
are defaulted from the purchase order You can change them if there is any
difference Enter the excise amount paid and the receipt quantity You also
enter the Part II register serial numbers with which the excise duty was paid and
the excise registration information from the original excise invoice
7 Go back to the item details screen
8 Save the excise invoice
The system creates an entry in register RG 23D You can change the excise
invoice as long as it has not been used in any sales
Assigning Excise Invoices to a Delivery Use
You follow this procedure to specify which excise invoices are to be assigned to
a delivery from a depot (or other material document)
You can also automate this procedure using the batch selection program
(J_1IJCHK) by making the appropriate Customizing settings in the Country
Version India (CIN) Implementation Guide (IMG)
Procedure
1 From the SAP Easy Access screen choose Indirect Taxes reg SalesOutbound
Movements reg Excise Invoice reg For Depot reg CreateChangeDisplay reg Delivery
or Material Document reg RG 23D Selection
2 Enter the delivery document number or the material number and choose
3 Select the excise invoice you want
4 Choose
5 Choose Excise invoice
A list of excise invoices appears These are the excise invoices at the depot with
a balance quantity
The system also shows a list of the A certificates that can be used You can pick
up any of the A certificates but they must be for the same excise invoice You
can only pick up an A certificate in its entirety You cannot select part of an A
certificate
6 Select the excise invoices that are relevant to the delivery
7 Specify what quantity to be used from each excise invoice
The system recalculates the excise accordingly
8 Go back to the item details screen
9 Save the data
Result
The system creates an entry in register RG 23D and generates the depot excise
invoice numbers
If you selected any A certificates the system also generates additional entries in
the RG 23D register The system marks the original A certificates as updated so
that they cannot be used for any other removals
Continue see Volume 2 (Next post)
EXTERNAL SERVICE MASTER
EXTERNAL SERVICE MASTER ESM
We procure the different type of services from vendors they are-
1048774 Hardware amp software services
1048774 Construction amp transportation services
1048774 Machinery services
1048774 Annual maintenance services
1048774 Present to and breakdown service Etc
Service Procurement Cycle -
1048774 Requirement identification
1048774 Source determination
1048774 Source selection
1048774 Service master
1048774 Service PO
1048774 Service entry sheet acceptance
1048774 Invoice with respect to service entry sheet
Steps to perform services -
1 Create service master (AC03)
2 Create Service PO (ME21N) with AC Assignment category lsquoKrsquo amp Item
Category lsquoDrsquo
3 Create service entry sheet (ML81N)
4 Invoice with respect to Service Entry sheet
Customize settings
(For service category Number Ranges amp organization status for service
category)
SPRO 1048774 IMG 1048774 MM 1048774 ESM 1048774 Service Master
1048774 Define organization Status for service Categories
1048774 Define Service Category
1048774 Define Number Ranges
Define organization Status for service Categories
bull Click on New Entries
bull Org service Category
bull BDS (Basic data service is stored in service master record under this service
category)
bull CNST 1048774 Controlling Status
bull PUST 1048774 Purchasing data Status
bull SDST 1048774 Sales amp Distributed Status
bull Org status description service category 1048774 Press Enter amp Save
Define Service Category
bull Same path as above
bull Select Standard
bull Click on Copy as
bull AC reference 1048774 always takes as 0006
bull Enter amp Save
Define Number Ranges
Click on groups 1048774 Groups 1048774 Insert 1048774 select enter Number Ranges
Select the service category
Click on Element
Select Group amp Click on Element Group
Save
Create Service Master - (AC03)
Click on Create New Services
Service Number (any number) Service Category
Basic unit of measure (Hours lsquoHrsquo)
Enter
Basic Data 1048774 Master Service Group 1048774 007
Valuation class 1048774 3200 1048774 Enter 1048774 Save
To See the Service list 1048774 AC06
Create Service PO (ME21N)
AC assignment category lsquoKrsquo Item Category lsquoDrsquo
Enter the Short text Quantity Delivery date Net Price Material group Plant
Storage Location
Enter service number in Service Tab (Item Details) quantity price Enter
Account Assignment 1048774 GL Account Number eg400000
Cost Center eg 9999
Press Enter amp Save
Create Service Entry Sheet - ML81N
Select other purchase order (enter PO number) 1048774 Enter 1048774 Click on Create1048774 Enter
Short Text 1048774 Enter 1048774 Service Number 1048774 Enter ndashClick on Flag button 1048774 Save
Take Service entry Sheet Number
Go to Invoice MIRO 1048774 Enter company code 1048774 Select Service Sheet Option 1048774 Enter
Service Entry Sheet Number 1048774 save it
Physical Inventory and Inventory Management
Physical inventory Process - 1 Create Physical inventory document
T Code MI01 ndash Create single inventory document
T Code MI31 ndash Create multiple physical inventory documents
I Enter the desired fields ie material material type site storage location and
Maximum number items Documents ndash 100 etc 1048774 Press Enter
II Click on Process Session
III Select the line items and click on the process
IV System displays a dialog box select Background and click on process
Inventory document is created
2 Print Inventory Document and handed over to responsible person say
Manager
3 Enter Physical Inventory count
T Code MI04
i Enter the physical inventory document number Fiscal year count date 1048774 Press
enter
ii Enter the Material Quantity and click on post
4 Listing of difference
T Code MI20
Enter the physical inventory document number and execute system displays a
screen wherein we will be able to view the differences
5 Post the differences
T Code MI07 amp Mov Type 701 amp 702
Enter the physical inventory document number year posting date enter the
difference and post
INVENTORY MANAGEMENT Maintaining stock by value or by quantity is called inventory The total inventory
management deals with the goods movement of the material
Goods movement -
It is a process in which transaction resulting change in stocks It is further sub-
divided into three categories
1 Goods Receipt (GR)
2 Goods Issue (GI)
3 Transfer Posting (TP)
Goods Receipt (GR) - It is a goods movement in which receipt of goods is
posted for vendor or for production A GR posted in the system will leads to
increase in stock No Concept of Price or value
Goods Issue (GI) - It is goods movement in which material withdrawal is
posted for consumption or for customer A GI posted in system will leads to
decrease in stock
Stock Transfer (ST) - It is method of removal of material from one location
and transferring it to another location This process is performed between two
plants and two storage locations
Transfer Posting (TP) - It is a general term of stock transfer that changes the
stock type or stock categories The difference between transfer posting and
stock transfer is -
TP is logical stock transfer and ST is a physical stock transfer
Movement Type - It is a three-digit code which plays a role of important
control function in inventory management It acts as a central role in automatic
account determination It determines which stock account or consumption
account is updated in financial accounting
Reservation - It stores requisition created from particular cost center to
particular department for issuing the material reservation posted in the system
It leads to decrease in stock
Stock Types - The different stock types are
1 Unrestricted use stock
2 Quality inspection stock
3 Blocked stock
4 Warehouse stock
Transaction code -
1 To Create GR - MIGO
2 To Create GI - MB1A
3 For Transfer Posting - MB1B
4 To display MaterialGR document ndash MB03
5 To create reservations - MB21 MB22 MB23
6 To See Stock Overview - MMBE
7 To enter Other GR - MB1C
When GR is posted in the system
1 Material document is created - MB03
2 Accounting Document is generated - MB03
3 MMR updated - MM02 MM03
4 PO history updated - ME23N
Movement Typersquos
Movement Types under GR - 101 331333335501503505551553555
561351 (For all Mov Typersquos there is a reversal eg 101 has 102 Note No
reversal for 121)
Movement Typersquos under GI - 201 331333335551553555
Transfer Posting It is performed in three ways
1 TP BW Plant to Plant
2 TP BW Storage Location to Storage Location
3 TP BW Stock to Stock
Movement Types under TP BW Plant to Plant
301 - 1 step
303 amp 305 - 2 step
Movement Type under TP BW Storage location to Storage Location
311 - 1 step
313 amp 315 - 2 step
Movement Type under TP BW stock to stock
321 323 325 343349
To Cancel the GR Movement type 102
Return delivery to vendor movement type 122 amp T Code MIGO
Transfer Posting Stock to Stock
From Blocked stock to Quality Inspection
T Code MB1B amp Movement Type 349
From Blocked stock to Unrestricted Stock
T Code MB1B amp Movement Type 343
From Quality Inspection to Unrestricted Stock
T Code MB1B amp Movement Type 321
Transfer Posting from Plant to Plant
For One Step Movement Type 301
For Two Steps Movement Type 303 amp 305
After posting stock will display in Stock in Transit (Plant)
To receive material by receiving Plant Movement Type 305
Transfer Posting BW Storage Location to Storage Location
Under One Plant BW two Storage Locationrsquos Movement Type 311
Back to Parent storage Location Movement Type 313 (It Show stock in transfer)
use Movement type 315 at Parent storage location
To create Goods Issue (GI) T Code MB1A amp Movement Type 201
To Create Reservations T Code MB21 MB22 amp MB23
Creation of GI wrt Reservations
T Code MB1A amp Movement Type 201
Click on Reservation Enter Reservation Number 1048774 Click on Adopt + Details
GR wrt Reservations T Code MIGO amp Select as Reservation instead of GR
GR without PO Movement type 501 amp T Code MB1C Select others instead of
Purchase order Enter Material Quantity Plant Storage Location 1048774 Press Enter
Partner Option will be visible (Vendor) 1048774 Save it
Invoice - Invoice is a document which is issued to a buyer (Company) from the
supplier (vendor) for the payment The following information is maintained in
invoice
Invoice date Posting date Invoice ref number tax amount amount tax code
terms of payments vendor address banking accounting information etc
When invoice document is posted in the system
bull Invoice document created
bull Accounting document is generated (MIR4)
bull PO history updated (ME23N)
bull FI document created (FB03)
PRICE DETERMINATION PROCESS or PRICING PROCEDURE
CONDITIONS OR PRICING PROCEDURE or PRICE DETERMINATION PROCESSWe deal with the Pricing Procedure for vendors
PB00 Gross Price (info record contract scheduled Agreement)
PBXX Gross Price (PO)
FRA1 Freight
RA00 Discount on net
RA01 Discount on Gross
ZA00 Surcharge on net
SKT0 Surcharge discount
ZPB0 Rebates
MWVS Input Tax
MWAS Output Tax
BASB Base Amount
RM0000 Calculation Schema or Pricing Procedure
(PB00 amp PBXX)
RM0002 Calculation Schema or Pricing Procedure
(PB00)
PB00 --gt AB00
Copy the Standard one and create new one (ours)
RM0000 contains all the condition types
Pricing Procedure (PP)
We define the pricing procedure to define condition supplement for the material
price The condition supplement specifies the discount surcharge freight etc
that we want a system every time to access material price condition records
The total value of the material is calculated or based on all addition and
subtraction ie discounts surcharge tax freight etc
Condition Table
It is a table which defines the structure of condition record key
Condition Record
It is a data record used to store conditions or condition supplements ie
condition like discount freight and surcharge Tax etc
Condition Type
It is used for different functions In Pricing the condition types leads you to
differentiate different types of discounts in output determination batch
determination difference between two output types such as delivery note or
order confirmation between different strategy types
Access Sequence
It specifies the order in which system searches or access the condition records
from condition table
Difference between PB00 amp PBXX
1 Condition maintained in PB00 is time dependent whereas PBXX is time
independent
2 Condition type PB00 ndash used for IR RFQ Contract Schedule Agreement
Condition type PBXX ndash used for PO
Calculation Schema
The main function of calculation schema is to provide framework of steps for the
price determination process to specify the discounts surcharge freight rebate
etc
It also determines the sequence of conditions that are to be followed and in
which sequence
Schema Group Vendor
The main function of it is to identify or to pick the right process and conditions
for a particular vendor
Schema Group Purchasing Organization
Key that determines which calculation schema (pricing procedure) is to be used
in purchasing documents assigned to the relevant purchasing organization
Schema Group
It allows to group together the purchasing organizations which uses the same
calculation schema
Steps -
1 Create Access sequence
2 Create condition types
3 Create pricing procedure or calculation schema
4 Link pricing procedure amp access sequence to condition type
5 Create schema group for vendor
6 Create schema group for purchase organization
7 Assign schema group vendor-to-vendor master record in purchasing data
view
8 Assign schema group purchase organization to our purchase organization
9 In inforecord purchase organization data enter condition types and pricing or
calculation procedure
CUSTOMIZE SETTINGS -
SPRO --gt IMG--gtMM--gtPUR--gtConditions --gtDefine price determination Process
1 Define access sequence
2 Define Condition type
3 Define cal Schema
4 Define schema group
o Schema group vendor
o Schema group purchasing group
5 Assignment of schema group to PUR org
6 Define schema determination agrave determine cal schema for standard PO
PURCHASE ORDER
PURCHASE ORDER
PO is an external document created for the procurement of materials and
services from vendor The document of PO is also divided into 4 parts as PR -
1 Document Overview
2 Header (DeliveryInvoice Conditions Address Partners Org data status)
3 Item Overview (AC assign cat Item Category Material Plant Del date SL)
4 Item Details (Material data Confirmations condition control delivery delivery
Schedule Quantitiesweights invoice)
A procurement type is defined for each of the document items The following
procurement types exist
1048774 Standard
1048774 Subcontracting
1048774 Consignment
1048774 Stock transfer
1048774 External service
bull There are different ways to create PO -
1 Directly through transaction code ME21N
2 With reference to PR
3 With reference to RFQ
4 With reference to info records
5 With reference to Contracts
6 With reference to Cost Centre GL Account (cost element) for consumable
items or not stock items with account assignment category lsquoKrsquo (K= cost centre)
(For non stock and consumables)
0 COMMENTS L INKS TO THIS POST
LABELS PO PURCHASE ORDER
Reaction
s
PURCHASE REQUISITION T CODE ME51 or ME51N
Purchasing Requisition -
It is a request or instruction from particular department (Cost Centre) to
purchasing department to procure certain quantity of material and services It is
only one internal document in SAP-MM
Purchasing Requisition document is divided into four parts -
bull Document Overview
bull Header
bull Item Overview
bull Item Details
Document Overview -
It displays the list of purchasing documents which are created previously
according to our requirement
Header -
Any text message or information is maintained
Item Overview -
In this we enter material plant delivery date quantity storage location
purchasing group AC assignment category Item category etc
Item Details -
It displays the detailed information about item overview (like Master data
valuation source of supply contact person delivery address status etc)
0 COMMENTS L INKS TO THIS POST
LABELS PR PURCHASE PURCHASE ORDER PURCHASE REQUIS IT ION SALES ORDER
Reaction
s
Automatic PURCHASE ORDER (PO) How Automatic PO raised
How Automatic PO raised
At fixed time say 1230 AM automatic scheduler runs and checks whether the
stock is less than or equal to the replenishment point If stock is less than or
equal to Repli Point than PR raised automatically to Purchasing Deptt
bull Activate the option automatic PO in purchasing view in material master record
bull Activate the option automatic PO in purchasing data view in vendor master
record
bull Maintain Source List amp select fixed vendor
bull PR crated automatically
bull Automatic creation of PO from PR ndash ME59
Enter the Purchasing group purchasing organization Vendor Plant and
Purchasing Requisition Document Number 1048774 Execute
RELEASE PROCEDURE Release strategyThe main function of Release procedure is to determine the approval process
or the release process for the procurement of material amp services rather than
relying for manual signatures The release procedure contains release strategy
Release Strategy (RS)
A plan defining the release codes with which a purchase requisition item a
complete purchase requisition or a complete external purchasing document
must
be released (that is approved) and the sequence in which release is to be
effected
using these codes It is a unique set of conditions sequence and level of release
It is a 2 digit code eg S1 S2 S3etc
The Release Strategy contains the following -
bull Release Group
bull Release Codes
bull Release Indicators
bull Release Prerequisite
Release Group -
It is a 2-digit code which is assigned with a class (Class contains group of
characteristics) It contains one or more release strategies
Release Codes -
It is a 2digit code which identifies the department or responsible person for
the approval process amp release process
Eg AA - Manager
BB - Sr Manager
CC - Vice President
DD - Managing Director
Release Indicator -
It is a Code that represents the release status If the proper approval
process is performed that the release Strategy has to be release if it is not
performed than the Release Strategy is blocked
R ndash Release
B ndash Blocked
Release Conditions -
It determines the type of the release strategy
For eg
bull If the price ranges from 1 to 1000 It is approved by AA BB and CC
bull If the ranges from1001 to 1lac then it is approved by AA BB CC and DD
- 80 -
Release Prerequisite
It will informs the system which RS has to be take place in the PO CEKKO is
a communication structure where it displays the field names amp field lengths to
create characteristics ie we maintain characteristics in customizing by
selecting
the field names from this communication structure for all external documents
CEBAN is used for the purchasing requisition
Characteristics -
1 Net value of PO --- GNETW (GSWRT for PR)
2 Plant --- WERKS
3 Purchasing organization -- EKORG
4 Purchasing Group --- EKGRP
5Material group ndashMATKL
CUSTOMIZE SETTINGSSPRO--gtIMG--gt MM--gt Purchasing--gtPO--gt Release Procedure for PO
1 Edit Characteristics T Code CT04
2 Edit Class T Code CL02
3 Define Release Procedure for PO
4 Check Release Strategy
Edit Characteristics -
Characteristics - eg NET VALUE OF VALUE
Click or Create Button
Under Basic Data
Description - Value for PO
Status - Release
Data Type - Currency Format
No Of Characters - 15
Currency - EUR
Activate multiple values amp Internal Values Allowed
Additional Data
Table name - CEKKO
Field Name - GNETW
Values
Activate Additional Values
Save the document
Create another Characteristic for Plant -
Plant date Create ndash Description Status
Data Type Characteristic Format
Number of Characteristics 4
Activate Multiple Values
Additional data-
Table Name - CEKKO
Field Name - WERKS
Values
Activate Additional Values
For Purchasing Organization Name - EKORG
For purchasing Group EKGRP
Edit Class
Class - SAPMM
Class Type - 032 Release Strategies
Click on Create button
Basic Data
Description - Class for PO
Status - Released
Valid From _____ Valid to _____
Click on Characteristic
Characteristic
Enter all the Characteristics Created amp Save it
Define Release Procedure for PO-
bull Release Group
bull Release Codes
bull Release Indicators
bull Release Strategies
bull Workflow
Release Group - New Entries Release Group Class and Description
Press Enter amp Save
Release Code - New Entries
Group Codes Description
99 AA Manager
99 BB Sr Manager
99 CC Vice President
99 DD Managing Director
Press Enter amp Save
Release Indicator - (B ndash Blocked R - Release)
New Entries
Release Indicators Description
B Blocked
R Released
Release Strategies -
New Entries
Release Group 99
Release Strategy S1
Release Codes AA BB CC and DD
Click on Release Prerequisites
Release Status -
Continue
Classification
Enter the Value (Same Price)
Plant (9999)
Go Back amp Save it
Release Simulation - Simulate Release
Create a PO -
There are two ways to release the PO
Individual releaseME28
Collective release ME29N
How to delete procedure
Delete Release GP
Create Release RG
Delete R Strategies
Delete R Code
Delete R Group
SAP R3 SYSTEM LANDSCAPE
System LandscapeThe system landscape contains all the SAP Systems that you have installed It
can consist of several system groups whorsquos SAP Systems are linked by transport
routes
After you decide which clients you need and which roles you want them to have
you need to decide how to distribute them amongst the different SAP Systems
You can set up multiple clients independently of one another in a single SAP
System However when you configure the data you must remember that cross-
client Customizing settings and Repository objects are identical for all clients in
a single SAP System Changes made in one client apply immediately to all
clients in the system
Three-System Landscape
SAP recommends a three-system landscape in which each of the central clients
has its own SAP System
This consists of a development system DEV a quality assurance system QAS
and a production system PRD The development system contains the
Customizing client CUST the quality assurance system contains the quality
assurance client QTST and the production system contains the production client
PROD Make all changes to Customizing data and Repository objects in the
Customizing client When you release the corresponding change requests they
are transported into the quality assurance client This means that changes to
cross-client data only appear in the quality assurance client after the transport
In the quality assurance client you can test whether the transports are
complete or whether any linked changes are missing and are still in unreleased
change requests If the test is successful the change requests are transported
into the production client The production client is completely separate from the
other clients as regards cross-client data
SPECIAL STOCKS amp SPECIAL PROCUREMENT TYPES
Special Stocks are those stocks which are not belongs to our company code
These are not placed in our storage locations amp no physical inventory is
performed and treated as special stocks for the reason of ownership
Different types are of Special Stocks are as follows
1 Subcontracting
2 Consignment
3 Pipeline
4 Stock transfer
5 Third party
6 Returnable transport packaging
7 Sales order stock
8 Project stock
SUBCONTRACTING
In subcontracting process we create subcontracting PO to supply or issue
subcomponents to vendor in order to get final product The price maintained in
subcontracting PO is a service charge paid to vendor
Steps to perform subcontracting
1 Create subcontracting inforecord (Optional)
2 Create subcontracting PO with item category L
There are to ways to supply subcomponents to vendor
bull Manually maintain the subcomponents in the subcontracting
PO though explode BOM
bull Through BOM (Bill of material) T Code CS01 CS02 amp CS03
3 Create Transfer Posting with Movement Type 541 to issue the subcomponents
to the vendor
4 Goods Reciept
5 Invoice Reciept
Path ME21N ---gt Enter Item Category L --gt Material (End Product) PO
Quantity Delivery Date Net Price Plant --gt Click on Item Details --gt Tab
Material Data -- gtComponents select Explode BOM --gt Click on Components
button --gt Enter the subcomponents --gt Go back amp Save
Create Transfer Posting with movement type 541 amp T Code MB1B
GR MIGO
IR MIRO
CONSIGNMENT - (No Concept of Invoice)
In consignment process we will not create Purchasing document for the vendor
vendor himself send the material to our plant though the material is available
to our plant the responsibility amp ownership of the material is of vendor Aliability
only arises when the material withdrawal (Consumption) is posted in the system
from consignment stock
Steps
1 Create Consignment info record (mandatory)
2 Create Consignment purchase order with item category lsquoKrsquo amp maintain Info
record number
3 Create GR Movement type lsquo101Krsquo
4 Create GI Movement Type lsquo201Krsquo
5 Consignment settlement T Code MRKO
Path --gtME11 --gt In info record --gt Purchasing Org Data 1 views of info record
enter the tax code and save it
--gt Create Consignment Purchase Order ME21N (Price option is grayed out with
price zero)
--gt Create GR with movement type 101K
--gt Create Goods Issue (GI) T Code MB1A amp Movement Type 201K Enter Cost
center vendor
--gt Consignment Settlement T Code MRKO Click Activate Consignment Activate
Settle Execute
--gt Display the Document Number ie Invoice receipt T Code FB03
PIPELINE PROCESS (No Concept of Invoice)
In pipeline handling your company does not need to order or store the material
concerned It is ready available to you as and when required via pipeline (eg oil
or water) or some other type of cable (eg electricity) Consumption of the
material is settled with the vendor on a regular basis
Steps
1 Create a Material master record with material type PIPE
2 Create Pipeline info record
3 Create GI with movement type 201P
4 Pipeline settlement T Code MRKO
RETURNABLE TRANSPORT PACKAGING (RTP)
When company orders goods from a vendor the goods are delivered with
returnable transport packaging (pallets containers) that belongs to the vendor
and is stored on our premises until you return it to the vendor
Steps
1 Create Material master record with material type LEIH
2 Create PO
3 Create GR by maintaining RTP material by selecting the option transport
equipments with movement type 501M
4 IR
STOCK TRANSFER
In stock transfer processing goods are procured and supplied within a company
One plant orders the goods internally to another plant (receiving plantissuing
plant) The goods are procured with a special type of purchase order the stock
transport order
Steps
1 Create a Material master in both supplying and receiving plant
2 Create stock transport order (STO) with item category lsquoUrsquo
3 Create transfer posting with movement type 351 amp T Code MB1B (Go to
MMBE stock overview the stock will decrease in supplying plant and it will not
update stock of receiving plant it will be under stock in transit)
4 Create GR stock will update in receiving plant
This scenario is under one company code between two plants
SAP IMPLEMENTATION PROCESS End to End Inplementation of SAP
First we have to prepare documentation about the client business (like turnover
vendors customers payments materials production marketing etc)
The implementer company made two teams (1) Steering team (2) Steering
community
Steering team (SAP functional consultants) prepares a detailed
documentation about the client with the help of core team (client company
team)
amp this study is known as Feasibility Study After that the steering team handed
over this documentation to Steering community (Project manager Sr software
engineer and other higher authorities)
Steering community prepares the BBP (Business Blue Print) BBP
Prepares in MS-Word
10487741048774 ASAP - Accelerated System Application Product in Data Processing
10487741048774 Business Process - ASAP Methodology
1 Project Preparation
2 BBP (Business Blue Print)
3 Realization
4 Final Preparation
5 Go live amp Support
10487741048774 Project Preparation -
It consists of identifying team members amp development strategy as
how to go
AS ndash IS (Existing Process followed requirements)
TO ndash BE (Requirement analysis and best process recommended)
Difference between (AS ndash IS) amp (TO - BE) is called GAP Analysis
10487741048774 Business Blue Print (BPP) -
It is a legal documentation between client amp the company
(implementer service provider) We have to understand the current business
process of client amp analyzing the business amp prepare documentation It is a
detailed documentation for the client
10487741048774 Realization -
This Phase is used to Implement or migrate the entire business of
client from Non-SAP environment to SAP environment
10487741048774 Final Preparation -
This phase is used for testing amp end user training After successfully
completion of this phase client is ready to run business in SAP R3
10487741048774 Go live amp Support -
In this phase we deliver the project end date amp end user training at
client site
THIRD - PARTY PROCESSING
THIRD - PARTY PROCESSING
In third party processing your company passes on a sales order to an external
vendor who sends the goods directly to the customer The sales order is not
processed by your company but by the vendor Third-party items can be
entered in purchase requisitions purchase orders and sales orders Third party
processing is integrated with Sales and Distribution If the sales order contains
third-party items the system creates a purchase requisition from the order
Steps
1 Create MMR with sales views and maintain Division Distribution channel
sales org item category group and general item category group ndash BANS (Third
party item) amp Account group Sold to party
2 Create Customer master record T Code XD01 XD02 XD03
3 Create sales order T Code VA01 VA02 VA03 (PR generated automatically)
4 PO - T Code ME21N
5 GR ndash T Code MIGO
6 IR ndash T Code MIRO
7 Sales Billing Billing Document T Code VF01 VF02 VF03

Steps
1 Create a Material master in both supplying and receiving plant
2 Create stock transport order (STO) with item category lsquoUrsquo
3 Create transfer posting with movement type 351 amp T Code MB1B (Go to
MMBE stock overview the stock will decrease in supplying plant and it will not
update stock of receiving plant it will be under stock in transit)
4 Create GR stock will update in receiving plant
This scenario is under one company code between two plants
Material Master Related Important Terms (Part 2)
Controlling (CO) An organizational unit in Accounting that reflects a
management-oriented structure of the organization for the purpose of internal
control
Operating results for profit centers can be analyzed using either the cost of
sales approach or the period accounting approach
By analyzing the fixed capital as well you can expand your profit centers for use
as investment centers
Profit Center
Key that uniquely identifies the profit center in the current controlling area
Valuation Category
Determines whether stocks of the material are valuated together or separately
Dependencies
In the case of split valuation this indicator also determines which valuation
types are allowed that is the criteria by which stocks can be valuated
Valuation type
Invoice Verification (MM-IV)
A subdivision of a valuation category in split valuation
Example An enterprise manages its stocks of a material using the valuation
category Quality comprising the following valuation types
bull High quality Average quality Inferior
Hazardous material number
Number that identifies the material as a hazardous material or as dangerous
goods and assigns hazardous material data or dangerous goods data to it
Use The hazardous material number indicates that the material is dangerous
making special precautions necessary for its storage and shipment
Valuation Class
Assignment of a material to a group of GL accounts
With other factors the valuation class determines the GL accounts that are
updated as a result of a valuation-relevant transaction or event such as a goods
movement
The valuation class makes it possible to
bull Post the stock values of materials of the same material type to different GL
accounts
bull Post the stock values of materials of different material types to the same GL
account
Default value for the valuation class for valuated stocks of this material
Use The valuation class has the following functions
bull Allows the stock values of materials of the same material type to be posted to
different GL accounts
bull Allows the stock values of materials of different material types to be posted to
the same GL account
bull Determines together with other factors the GL accounts updated for a
valuation-relevant transaction (such as a goods movement
CIN - Country India Version ~ Volume 1
PurposeCountry Version India (CIN) contains a number of enhancements to standard
Sales and Distribution (SD) functions that allow you to handle local
requirements in particular excise duty
Features
In Country Version India (CIN) this component handles sales processes as
found in India In addition to the generic functions it allows you to
Handle CENVAT in your sales processes
The system calculates excise on your sales and creates excise invoices as
required and makes the appropriate postings to your CENVAT accounts
It covers sales from factories sales from depots and offers functions for other
types of goods movements it also covers sales to export-oriented units and
export sales
Record concessional and exemption forms sent to you by your customers
Make adjustment postings to your CENVAT accounts
Excise Invoice (Outgoing)
Definition
The document that acts as the proof of payment of excise duty and is required
for the customer to take CENVAT credit on the item
Use
In the SAP System there are three different procedures for creating excise
invoices
Sales direct from the factory
This procedure is for when you sell manufactured goods straight from the
factory at which they were produced in which case you levy excise duty when
the goods leave the factory on their way to the customer
If when you send the goods to the customer you enclose the commercial
invoice you create the excise invoice with reference to the commercial invoice
If you want to send the commercial invoice after you have dispatched the goods
however you create the excise invoice with reference to a pro forma
commercial invoice For more information about these procedures see Sales
from Factories
As well as creating excise invoices individually you can also create them in
batches (see Creation of Excise Invoices in Batches)
Sales from depots
A depot is a site at which the goods are stored away from the factory at which
they were produced In this procedure you have to levy the excise duty when
you transfer the goods from the factory to the depot and then make sure this is
passed on to the customer when it makes a purchase For more information see
Sales from Depots
Sales (other goods movements)
Some other goods movements may also require you to create an excise invoice
with reference to other documents The SAP System offers separate functions
for these purposes (see Excise Invoices (Outgoing) for Other Movements)
StructureNumbering of Excise Invoices
Outgoing excise invoices have two numbers an internal document number
which is assigned immediately you create an excise invoice and an excise
invoice number which is not assigned until you have verified and posted it
As far as the excise invoice number is concerned you have to number your
outgoing excise invoices in sequential order starting each year on 1 April You
must notify the excise authority of the jurisdiction of the invoicing location The
serial number must be printed on each page of the excise invoice
Each number range is governed by a series group You must create at least one
series group in order to be able to number the excise invoices If you need more
than one number range you must create the corresponding number of series
groups You do so in the CIN Implementation Guide (IMG) by choosing Global
Settings reg Series Groups
Number of Line Items Per Excise Invoice
Some states allow you to include only a limited number of items for each page
of an excise invoice (for example if the excise invoices are to be printed on
prenumbered forms) You can customize the system so that it prints the excise
invoice accordingly in the CIN IMG by choosing Global Settings reg Excise
Registration IDs
Customer Master (Excise Data) Definition
The part of the customer master record that contains information relating to
Indian excise duty
Use
In conjunction with other data this data is used to calculate excise duty on
various transactions
To maintain the data from the SAP Easy Access screen choose Indirect Taxes reg
Master Data reg Excise Rate Maintenance and then select the following options
described below
Structure
The excise part of the customer master contains the following information
Customer Excise Details
On this screen you enter your customers tax registration numbers which are
used for various forms of correspondence and reports
1 Excise registration number (and the range division and collectorate in which
this is located)
2 Central sales tax (CST) number
3 Local sales tax (LST) registration number
4 Permanent account number (PAN)
In order for the system to be able to calculate which rate of excise duty to apply
on sales to the customer you must also assign it a customer excise duty status
(for more information about how this works see Determination of Excise Duty
Rates)
Excise Indicator for Plant and Customer
On this screen you define the final excise duty indicator (for more information
about how this works see Determination of Excise Duty Rates)
Determination of Excise Duty Use
When you execute a business transaction involving materials that are subject to
excise duty the system automatically calculates the duty for you
Prerequisites
In order for the system to be able to determine which rate of excise duty to
apply you must have maintained all the data on the Excise Rate Maintenance
screen which you can access from the SAP Easy Access screen by choosing
Indirect Taxes reg Master Data reg Excise Rate Maintenance
You maintain the following types of data
Plant master data
You assign each of your plants an excise duty indicator You can use the same
indicator for all the plants with the same excise status from a legal point of view
such as all those that are in an exempt zone
See also the information about manufacturers that are only entitled to deduct a
certain portion of the duty (see Partial CENVAT Credit)
Vendor master data
For each of your vendors with the same excise status from a legal perspective
you define an excise duty indicator You must also specify the vendor type ndash for
example whether the vendor is a manufacturer a depot or a first-stage dealer
You must also stipulate if the vendor qualifies as a small-scale industry
For each permutation of plant indicator and vendor indicator you then create a
final excise duty indicator
Customer master data
Similarly you assign the same excise duty indicator to each of your customers
that share the same legal excise status
Again for each permutation of plant indicator and customer indicator you then
create a final excise duty indicator
Material master data
Each material is assigned a chapter ID
Excise tax rate
For every chapter ID and final excise duty indicator you maintain the rate of
excise duty
If your business only qualifies for partial CENVAT credit you must customize
your system accordingly
Activities
Let us consider an example to illustrate how the system determines which rate
of excise duty to apply to a material Assume you are posting a sale of ball
bearings to a customer The system automatically determines the rate of excise
duty as follows
Looks up the customer master data to see what status you have assigned the
customer
Lets assume youve assigned the customer status 3
Looks up the plant master data to see what status you have assigned the plant
Similarly your plant has status 2
The system looks up the table under Excise Indicator for Plant and Customer to
see what the final excise duty indictor is for customer status 3 and plant status
2 It is 7
The system determines the chapter ID of the ball bearing for the plant
Letrsquos assume the chapter ID at plant for the ball bearings is 100001
Finally the system looks up the table under Excise Tax Rate to see what rate of
duty applies to chapter ID 100001 under status 7
Plant Master (Excise Data) Definition
The part of the plant master record that contains information relating to Indian
excise duty
Use
In conjunction with other data this data is used to calculate excise duty on
various transactions
To maintain the data from the SAP Easy Access screen choose Indirect Taxes reg
Master Data reg Excise Rate Maintenance and then select the following options
described below
Structure
The excise part of the plant master is divided into the following screens
Excise Indicator for Plant
On this screen you enter your plants tax registration numbers which are used
for various forms of correspondence and reports
1 Central sales tax (CST) number
2 Local sales tax (LST) registration number
3 Permanent account number (PAN)
In order for the system to be able to calculate which rate of excise duty to apply
on purchases for this plant you must also assign it a plant excise duty status
(for more information about how this works see Determination of Excise Duty
Rates)
Excise Indicator for Plant and Vendor
On this screen you define the final excise duty indicator (for more information
about how this works see Determination of Excise Duty Rates)
Excise Indicator for Plant and Customer
On this screen you define the final excise duty indicator (for more information
about how this works see Determination of Excise Duty Rates)
Automatic Creation of Excise Invoices Use
The SAP System can automatically create an outgoing excise invoice for you
immediately you post a commercial invoice (or a pro forma invoice) for a
customer sale This function applies to excise invoices for sales from factories
only
Prerequisites
To activate this function in the Country Version India (CIN) Implementation
Guide (IMG) make the following settings
1 Under Global Settings reg Excise Groups select Create EI
This activates the automatic creation function
2 Under Sales and Distribution reg Utilization Determination
Here you specify which CENVAT accounts the system is to post the different
types of excise duty to
3 Under Sales and Distribution reg Excise GroupndashSeries Group Determination
Here you specify which excise group and series group the excise invoices are to
be created for
Features
When you post an invoice the system creates an excise invoice All the
information that it needs to create the excise invoice is provided either by the
invoice or by the Customizing settings that you have made in Sales and
Distribution It also determines the excise invoice type automatically by means
of a user exit
Creating Excise Invoices for Stock Transfers 1 From the SAP Easy Access screen choose Indirect Taxes reg Procurement reg
Excise Invoice reg For Depot reg CreateChangeDisplay
2 In the Material document field enter the goods receipt number and choose
The system displays the information from the goods receipt for example the
sending plant the excise registration the range the division and the
collectorate
3 Choose Details
The system copies the items from the goods receipt document In the depot it is
possible to have a separate excise invoice at line item level
4 Enter the internal document number of the excise invoice sent by the factory
5 Choose More documents to go the excise invoice details screen
6 Enter the internal document number of the excise invoice from the factory
The system copies the information to the line item (for example the excise
invoice number the excise invoice date the item number the chapter ID the
excise invoice quantity the amount of excise duty paid the excise base value
and the serial number of the Part II register entry with which the excise was
paid)
You can change the receipt quantity to match the actual quantity received at
the depot if necessary The system automatically adjusts the excise
accordingly
7 Go back to the item details screen
8 Save the excise invoice
Creating Excise Invoices for Direct Purchases 1 From the SAP Easy Access screen choose Indirect Taxes reg Procurement reg
Excise Invoice reg For Depot reg CreateChangeDisplay
2 In the Material document field enter the goods receipt number and choose
The system displays the information from the goods receipt for example the
sending plant the excise registration the range the division and the
collectorate
You can also maintain the excise registration details for the ship-from party as
for with the vendor The ship-from can be different from the vendor code (The
delivering plant can be maintained as a ship-from in the system When a valid
ship-from is entered the excise registration details copied from the vendor will
be overwritten by the ship-from excise registration details)
The ship-from registration details displayed can also be overwritten manually
The dealers commercial invoice number can be stored in the vendor excise
invoice number as in this case the dealer himself will not have an excise
invoice
3 Choose Details
The system copies the items from the goods receipt document It also copies the
vendors excise invoice number and the serial numbers of the entries in the RG
23A RG 23C and personal ledger account (PLA) registers
4 Enter the internal document number of the excise invoice sent by the factory
5 Select an item and choose More documents to go the excise invoice details
screen
In the case of direct purchases there will not be any excise invoice in the
system so leave the internal document field blank The vendors invoice will
show the details of the excise invoices through which excise has been paid for
the item that is being dispatched You can enter these details here
6 For each item the chapter ID excise base value and excise duty amounts
are defaulted from the purchase order You can change them if there is any
difference Enter the excise amount paid and the receipt quantity You also
enter the Part II register serial numbers with which the excise duty was paid and
the excise registration information from the original excise invoice
7 Go back to the item details screen
8 Save the excise invoice
The system creates an entry in register RG 23D You can change the excise
invoice as long as it has not been used in any sales
Assigning Excise Invoices to a Delivery Use
You follow this procedure to specify which excise invoices are to be assigned to
a delivery from a depot (or other material document)
You can also automate this procedure using the batch selection program
(J_1IJCHK) by making the appropriate Customizing settings in the Country
Version India (CIN) Implementation Guide (IMG)
Procedure
1 From the SAP Easy Access screen choose Indirect Taxes reg SalesOutbound
Movements reg Excise Invoice reg For Depot reg CreateChangeDisplay reg Delivery
or Material Document reg RG 23D Selection
2 Enter the delivery document number or the material number and choose
3 Select the excise invoice you want
4 Choose
5 Choose Excise invoice
A list of excise invoices appears These are the excise invoices at the depot with
a balance quantity
The system also shows a list of the A certificates that can be used You can pick
up any of the A certificates but they must be for the same excise invoice You
can only pick up an A certificate in its entirety You cannot select part of an A
certificate
6 Select the excise invoices that are relevant to the delivery
7 Specify what quantity to be used from each excise invoice
The system recalculates the excise accordingly
8 Go back to the item details screen
9 Save the data
Result
The system creates an entry in register RG 23D and generates the depot excise
invoice numbers
If you selected any A certificates the system also generates additional entries in
the RG 23D register The system marks the original A certificates as updated so
that they cannot be used for any other removals
Continue see Volume 2 (Next post)
EXTERNAL SERVICE MASTER
EXTERNAL SERVICE MASTER ESM
We procure the different type of services from vendors they are-
1048774 Hardware amp software services
1048774 Construction amp transportation services
1048774 Machinery services
1048774 Annual maintenance services
1048774 Present to and breakdown service Etc
Service Procurement Cycle -
1048774 Requirement identification
1048774 Source determination
1048774 Source selection
1048774 Service master
1048774 Service PO
1048774 Service entry sheet acceptance
1048774 Invoice with respect to service entry sheet
Steps to perform services -
1 Create service master (AC03)
2 Create Service PO (ME21N) with AC Assignment category lsquoKrsquo amp Item
Category lsquoDrsquo
3 Create service entry sheet (ML81N)
4 Invoice with respect to Service Entry sheet
Customize settings
(For service category Number Ranges amp organization status for service
category)
SPRO 1048774 IMG 1048774 MM 1048774 ESM 1048774 Service Master
1048774 Define organization Status for service Categories
1048774 Define Service Category
1048774 Define Number Ranges
Define organization Status for service Categories
bull Click on New Entries
bull Org service Category
bull BDS (Basic data service is stored in service master record under this service
category)
bull CNST 1048774 Controlling Status
bull PUST 1048774 Purchasing data Status
bull SDST 1048774 Sales amp Distributed Status
bull Org status description service category 1048774 Press Enter amp Save
Define Service Category
bull Same path as above
bull Select Standard
bull Click on Copy as
bull AC reference 1048774 always takes as 0006
bull Enter amp Save
Define Number Ranges
Click on groups 1048774 Groups 1048774 Insert 1048774 select enter Number Ranges
Select the service category
Click on Element
Select Group amp Click on Element Group
Save
Create Service Master - (AC03)
Click on Create New Services
Service Number (any number) Service Category
Basic unit of measure (Hours lsquoHrsquo)
Enter
Basic Data 1048774 Master Service Group 1048774 007
Valuation class 1048774 3200 1048774 Enter 1048774 Save
To See the Service list 1048774 AC06
Create Service PO (ME21N)
AC assignment category lsquoKrsquo Item Category lsquoDrsquo
Enter the Short text Quantity Delivery date Net Price Material group Plant
Storage Location
Enter service number in Service Tab (Item Details) quantity price Enter
Account Assignment 1048774 GL Account Number eg400000
Cost Center eg 9999
Press Enter amp Save
Create Service Entry Sheet - ML81N
Select other purchase order (enter PO number) 1048774 Enter 1048774 Click on Create1048774 Enter
Short Text 1048774 Enter 1048774 Service Number 1048774 Enter ndashClick on Flag button 1048774 Save
Take Service entry Sheet Number
Go to Invoice MIRO 1048774 Enter company code 1048774 Select Service Sheet Option 1048774 Enter
Service Entry Sheet Number 1048774 save it
Physical Inventory and Inventory Management
Physical inventory Process - 1 Create Physical inventory document
T Code MI01 ndash Create single inventory document
T Code MI31 ndash Create multiple physical inventory documents
I Enter the desired fields ie material material type site storage location and
Maximum number items Documents ndash 100 etc 1048774 Press Enter
II Click on Process Session
III Select the line items and click on the process
IV System displays a dialog box select Background and click on process
Inventory document is created
2 Print Inventory Document and handed over to responsible person say
Manager
3 Enter Physical Inventory count
T Code MI04
i Enter the physical inventory document number Fiscal year count date 1048774 Press
enter
ii Enter the Material Quantity and click on post
4 Listing of difference
T Code MI20
Enter the physical inventory document number and execute system displays a
screen wherein we will be able to view the differences
5 Post the differences
T Code MI07 amp Mov Type 701 amp 702
Enter the physical inventory document number year posting date enter the
difference and post
INVENTORY MANAGEMENT Maintaining stock by value or by quantity is called inventory The total inventory
management deals with the goods movement of the material
Goods movement -
It is a process in which transaction resulting change in stocks It is further sub-
divided into three categories
1 Goods Receipt (GR)
2 Goods Issue (GI)
3 Transfer Posting (TP)
Goods Receipt (GR) - It is a goods movement in which receipt of goods is
posted for vendor or for production A GR posted in the system will leads to
increase in stock No Concept of Price or value
Goods Issue (GI) - It is goods movement in which material withdrawal is
posted for consumption or for customer A GI posted in system will leads to
decrease in stock
Stock Transfer (ST) - It is method of removal of material from one location
and transferring it to another location This process is performed between two
plants and two storage locations
Transfer Posting (TP) - It is a general term of stock transfer that changes the
stock type or stock categories The difference between transfer posting and
stock transfer is -
TP is logical stock transfer and ST is a physical stock transfer
Movement Type - It is a three-digit code which plays a role of important
control function in inventory management It acts as a central role in automatic
account determination It determines which stock account or consumption
account is updated in financial accounting
Reservation - It stores requisition created from particular cost center to
particular department for issuing the material reservation posted in the system
It leads to decrease in stock
Stock Types - The different stock types are
1 Unrestricted use stock
2 Quality inspection stock
3 Blocked stock
4 Warehouse stock
Transaction code -
1 To Create GR - MIGO
2 To Create GI - MB1A
3 For Transfer Posting - MB1B
4 To display MaterialGR document ndash MB03
5 To create reservations - MB21 MB22 MB23
6 To See Stock Overview - MMBE
7 To enter Other GR - MB1C
When GR is posted in the system
1 Material document is created - MB03
2 Accounting Document is generated - MB03
3 MMR updated - MM02 MM03
4 PO history updated - ME23N
Movement Typersquos
Movement Types under GR - 101 331333335501503505551553555
561351 (For all Mov Typersquos there is a reversal eg 101 has 102 Note No
reversal for 121)
Movement Typersquos under GI - 201 331333335551553555
Transfer Posting It is performed in three ways
1 TP BW Plant to Plant
2 TP BW Storage Location to Storage Location
3 TP BW Stock to Stock
Movement Types under TP BW Plant to Plant
301 - 1 step
303 amp 305 - 2 step
Movement Type under TP BW Storage location to Storage Location
311 - 1 step
313 amp 315 - 2 step
Movement Type under TP BW stock to stock
321 323 325 343349
To Cancel the GR Movement type 102
Return delivery to vendor movement type 122 amp T Code MIGO
Transfer Posting Stock to Stock
From Blocked stock to Quality Inspection
T Code MB1B amp Movement Type 349
From Blocked stock to Unrestricted Stock
T Code MB1B amp Movement Type 343
From Quality Inspection to Unrestricted Stock
T Code MB1B amp Movement Type 321
Transfer Posting from Plant to Plant
For One Step Movement Type 301
For Two Steps Movement Type 303 amp 305
After posting stock will display in Stock in Transit (Plant)
To receive material by receiving Plant Movement Type 305
Transfer Posting BW Storage Location to Storage Location
Under One Plant BW two Storage Locationrsquos Movement Type 311
Back to Parent storage Location Movement Type 313 (It Show stock in transfer)
use Movement type 315 at Parent storage location
To create Goods Issue (GI) T Code MB1A amp Movement Type 201
To Create Reservations T Code MB21 MB22 amp MB23
Creation of GI wrt Reservations
T Code MB1A amp Movement Type 201
Click on Reservation Enter Reservation Number 1048774 Click on Adopt + Details
GR wrt Reservations T Code MIGO amp Select as Reservation instead of GR
GR without PO Movement type 501 amp T Code MB1C Select others instead of
Purchase order Enter Material Quantity Plant Storage Location 1048774 Press Enter
Partner Option will be visible (Vendor) 1048774 Save it
Invoice - Invoice is a document which is issued to a buyer (Company) from the
supplier (vendor) for the payment The following information is maintained in
invoice
Invoice date Posting date Invoice ref number tax amount amount tax code
terms of payments vendor address banking accounting information etc
When invoice document is posted in the system
bull Invoice document created
bull Accounting document is generated (MIR4)
bull PO history updated (ME23N)
bull FI document created (FB03)
PRICE DETERMINATION PROCESS or PRICING PROCEDURE
CONDITIONS OR PRICING PROCEDURE or PRICE DETERMINATION PROCESSWe deal with the Pricing Procedure for vendors
PB00 Gross Price (info record contract scheduled Agreement)
PBXX Gross Price (PO)
FRA1 Freight
RA00 Discount on net
RA01 Discount on Gross
ZA00 Surcharge on net
SKT0 Surcharge discount
ZPB0 Rebates
MWVS Input Tax
MWAS Output Tax
BASB Base Amount
RM0000 Calculation Schema or Pricing Procedure
(PB00 amp PBXX)
RM0002 Calculation Schema or Pricing Procedure
(PB00)
PB00 --gt AB00
Copy the Standard one and create new one (ours)
RM0000 contains all the condition types
Pricing Procedure (PP)
We define the pricing procedure to define condition supplement for the material
price The condition supplement specifies the discount surcharge freight etc
that we want a system every time to access material price condition records
The total value of the material is calculated or based on all addition and
subtraction ie discounts surcharge tax freight etc
Condition Table
It is a table which defines the structure of condition record key
Condition Record
It is a data record used to store conditions or condition supplements ie
condition like discount freight and surcharge Tax etc
Condition Type
It is used for different functions In Pricing the condition types leads you to
differentiate different types of discounts in output determination batch
determination difference between two output types such as delivery note or
order confirmation between different strategy types
Access Sequence
It specifies the order in which system searches or access the condition records
from condition table
Difference between PB00 amp PBXX
1 Condition maintained in PB00 is time dependent whereas PBXX is time
independent
2 Condition type PB00 ndash used for IR RFQ Contract Schedule Agreement
Condition type PBXX ndash used for PO
Calculation Schema
The main function of calculation schema is to provide framework of steps for the
price determination process to specify the discounts surcharge freight rebate
etc
It also determines the sequence of conditions that are to be followed and in
which sequence
Schema Group Vendor
The main function of it is to identify or to pick the right process and conditions
for a particular vendor
Schema Group Purchasing Organization
Key that determines which calculation schema (pricing procedure) is to be used
in purchasing documents assigned to the relevant purchasing organization
Schema Group
It allows to group together the purchasing organizations which uses the same
calculation schema
Steps -
1 Create Access sequence
2 Create condition types
3 Create pricing procedure or calculation schema
4 Link pricing procedure amp access sequence to condition type
5 Create schema group for vendor
6 Create schema group for purchase organization
7 Assign schema group vendor-to-vendor master record in purchasing data
view
8 Assign schema group purchase organization to our purchase organization
9 In inforecord purchase organization data enter condition types and pricing or
calculation procedure
CUSTOMIZE SETTINGS -
SPRO --gt IMG--gtMM--gtPUR--gtConditions --gtDefine price determination Process
1 Define access sequence
2 Define Condition type
3 Define cal Schema
4 Define schema group
o Schema group vendor
o Schema group purchasing group
5 Assignment of schema group to PUR org
6 Define schema determination agrave determine cal schema for standard PO
PURCHASE ORDER
PURCHASE ORDER
PO is an external document created for the procurement of materials and
services from vendor The document of PO is also divided into 4 parts as PR -
1 Document Overview
2 Header (DeliveryInvoice Conditions Address Partners Org data status)
3 Item Overview (AC assign cat Item Category Material Plant Del date SL)
4 Item Details (Material data Confirmations condition control delivery delivery
Schedule Quantitiesweights invoice)
A procurement type is defined for each of the document items The following
procurement types exist
1048774 Standard
1048774 Subcontracting
1048774 Consignment
1048774 Stock transfer
1048774 External service
bull There are different ways to create PO -
1 Directly through transaction code ME21N
2 With reference to PR
3 With reference to RFQ
4 With reference to info records
5 With reference to Contracts
6 With reference to Cost Centre GL Account (cost element) for consumable
items or not stock items with account assignment category lsquoKrsquo (K= cost centre)
(For non stock and consumables)
0 COMMENTS L INKS TO THIS POST
LABELS PO PURCHASE ORDER
Reaction
s
PURCHASE REQUISITION T CODE ME51 or ME51N
Purchasing Requisition -
It is a request or instruction from particular department (Cost Centre) to
purchasing department to procure certain quantity of material and services It is
only one internal document in SAP-MM
Purchasing Requisition document is divided into four parts -
bull Document Overview
bull Header
bull Item Overview
bull Item Details
Document Overview -
It displays the list of purchasing documents which are created previously
according to our requirement
Header -
Any text message or information is maintained
Item Overview -
In this we enter material plant delivery date quantity storage location
purchasing group AC assignment category Item category etc
Item Details -
It displays the detailed information about item overview (like Master data
valuation source of supply contact person delivery address status etc)
0 COMMENTS L INKS TO THIS POST
LABELS PR PURCHASE PURCHASE ORDER PURCHASE REQUIS IT ION SALES ORDER
Reaction
s
Automatic PURCHASE ORDER (PO) How Automatic PO raised
How Automatic PO raised
At fixed time say 1230 AM automatic scheduler runs and checks whether the
stock is less than or equal to the replenishment point If stock is less than or
equal to Repli Point than PR raised automatically to Purchasing Deptt
bull Activate the option automatic PO in purchasing view in material master record
bull Activate the option automatic PO in purchasing data view in vendor master
record
bull Maintain Source List amp select fixed vendor
bull PR crated automatically
bull Automatic creation of PO from PR ndash ME59
Enter the Purchasing group purchasing organization Vendor Plant and
Purchasing Requisition Document Number 1048774 Execute
RELEASE PROCEDURE Release strategyThe main function of Release procedure is to determine the approval process
or the release process for the procurement of material amp services rather than
relying for manual signatures The release procedure contains release strategy
Release Strategy (RS)
A plan defining the release codes with which a purchase requisition item a
complete purchase requisition or a complete external purchasing document
must
be released (that is approved) and the sequence in which release is to be
effected
using these codes It is a unique set of conditions sequence and level of release
It is a 2 digit code eg S1 S2 S3etc
The Release Strategy contains the following -
bull Release Group
bull Release Codes
bull Release Indicators
bull Release Prerequisite
Release Group -
It is a 2-digit code which is assigned with a class (Class contains group of
characteristics) It contains one or more release strategies
Release Codes -
It is a 2digit code which identifies the department or responsible person for
the approval process amp release process
Eg AA - Manager
BB - Sr Manager
CC - Vice President
DD - Managing Director
Release Indicator -
It is a Code that represents the release status If the proper approval
process is performed that the release Strategy has to be release if it is not
performed than the Release Strategy is blocked
R ndash Release
B ndash Blocked
Release Conditions -
It determines the type of the release strategy
For eg
bull If the price ranges from 1 to 1000 It is approved by AA BB and CC
bull If the ranges from1001 to 1lac then it is approved by AA BB CC and DD
- 80 -
Release Prerequisite
It will informs the system which RS has to be take place in the PO CEKKO is
a communication structure where it displays the field names amp field lengths to
create characteristics ie we maintain characteristics in customizing by
selecting
the field names from this communication structure for all external documents
CEBAN is used for the purchasing requisition
Characteristics -
1 Net value of PO --- GNETW (GSWRT for PR)
2 Plant --- WERKS
3 Purchasing organization -- EKORG
4 Purchasing Group --- EKGRP
5Material group ndashMATKL
CUSTOMIZE SETTINGSSPRO--gtIMG--gt MM--gt Purchasing--gtPO--gt Release Procedure for PO
1 Edit Characteristics T Code CT04
2 Edit Class T Code CL02
3 Define Release Procedure for PO
4 Check Release Strategy
Edit Characteristics -
Characteristics - eg NET VALUE OF VALUE
Click or Create Button
Under Basic Data
Description - Value for PO
Status - Release
Data Type - Currency Format
No Of Characters - 15
Currency - EUR
Activate multiple values amp Internal Values Allowed
Additional Data
Table name - CEKKO
Field Name - GNETW
Values
Activate Additional Values
Save the document
Create another Characteristic for Plant -
Plant date Create ndash Description Status
Data Type Characteristic Format
Number of Characteristics 4
Activate Multiple Values
Additional data-
Table Name - CEKKO
Field Name - WERKS
Values
Activate Additional Values
For Purchasing Organization Name - EKORG
For purchasing Group EKGRP
Edit Class
Class - SAPMM
Class Type - 032 Release Strategies
Click on Create button
Basic Data
Description - Class for PO
Status - Released
Valid From _____ Valid to _____
Click on Characteristic
Characteristic
Enter all the Characteristics Created amp Save it
Define Release Procedure for PO-
bull Release Group
bull Release Codes
bull Release Indicators
bull Release Strategies
bull Workflow
Release Group - New Entries Release Group Class and Description
Press Enter amp Save
Release Code - New Entries
Group Codes Description
99 AA Manager
99 BB Sr Manager
99 CC Vice President
99 DD Managing Director
Press Enter amp Save
Release Indicator - (B ndash Blocked R - Release)
New Entries
Release Indicators Description
B Blocked
R Released
Release Strategies -
New Entries
Release Group 99
Release Strategy S1
Release Codes AA BB CC and DD
Click on Release Prerequisites
Release Status -
Continue
Classification
Enter the Value (Same Price)
Plant (9999)
Go Back amp Save it
Release Simulation - Simulate Release
Create a PO -
There are two ways to release the PO
Individual releaseME28
Collective release ME29N
How to delete procedure
Delete Release GP
Create Release RG
Delete R Strategies
Delete R Code
Delete R Group
SAP R3 SYSTEM LANDSCAPE
System LandscapeThe system landscape contains all the SAP Systems that you have installed It
can consist of several system groups whorsquos SAP Systems are linked by transport
routes
After you decide which clients you need and which roles you want them to have
you need to decide how to distribute them amongst the different SAP Systems
You can set up multiple clients independently of one another in a single SAP
System However when you configure the data you must remember that cross-
client Customizing settings and Repository objects are identical for all clients in
a single SAP System Changes made in one client apply immediately to all
clients in the system
Three-System Landscape
SAP recommends a three-system landscape in which each of the central clients
has its own SAP System
This consists of a development system DEV a quality assurance system QAS
and a production system PRD The development system contains the
Customizing client CUST the quality assurance system contains the quality
assurance client QTST and the production system contains the production client
PROD Make all changes to Customizing data and Repository objects in the
Customizing client When you release the corresponding change requests they
are transported into the quality assurance client This means that changes to
cross-client data only appear in the quality assurance client after the transport
In the quality assurance client you can test whether the transports are
complete or whether any linked changes are missing and are still in unreleased
change requests If the test is successful the change requests are transported
into the production client The production client is completely separate from the
other clients as regards cross-client data
SPECIAL STOCKS amp SPECIAL PROCUREMENT TYPES
Special Stocks are those stocks which are not belongs to our company code
These are not placed in our storage locations amp no physical inventory is
performed and treated as special stocks for the reason of ownership
Different types are of Special Stocks are as follows
1 Subcontracting
2 Consignment
3 Pipeline
4 Stock transfer
5 Third party
6 Returnable transport packaging
7 Sales order stock
8 Project stock
SUBCONTRACTING
In subcontracting process we create subcontracting PO to supply or issue
subcomponents to vendor in order to get final product The price maintained in
subcontracting PO is a service charge paid to vendor
Steps to perform subcontracting
1 Create subcontracting inforecord (Optional)
2 Create subcontracting PO with item category L
There are to ways to supply subcomponents to vendor
bull Manually maintain the subcomponents in the subcontracting
PO though explode BOM
bull Through BOM (Bill of material) T Code CS01 CS02 amp CS03
3 Create Transfer Posting with Movement Type 541 to issue the subcomponents
to the vendor
4 Goods Reciept
5 Invoice Reciept
Path ME21N ---gt Enter Item Category L --gt Material (End Product) PO
Quantity Delivery Date Net Price Plant --gt Click on Item Details --gt Tab
Material Data -- gtComponents select Explode BOM --gt Click on Components
button --gt Enter the subcomponents --gt Go back amp Save
Create Transfer Posting with movement type 541 amp T Code MB1B
GR MIGO
IR MIRO
CONSIGNMENT - (No Concept of Invoice)
In consignment process we will not create Purchasing document for the vendor
vendor himself send the material to our plant though the material is available
to our plant the responsibility amp ownership of the material is of vendor Aliability
only arises when the material withdrawal (Consumption) is posted in the system
from consignment stock
Steps
1 Create Consignment info record (mandatory)
2 Create Consignment purchase order with item category lsquoKrsquo amp maintain Info
record number
3 Create GR Movement type lsquo101Krsquo
4 Create GI Movement Type lsquo201Krsquo
5 Consignment settlement T Code MRKO
Path --gtME11 --gt In info record --gt Purchasing Org Data 1 views of info record
enter the tax code and save it
--gt Create Consignment Purchase Order ME21N (Price option is grayed out with
price zero)
--gt Create GR with movement type 101K
--gt Create Goods Issue (GI) T Code MB1A amp Movement Type 201K Enter Cost
center vendor
--gt Consignment Settlement T Code MRKO Click Activate Consignment Activate
Settle Execute
--gt Display the Document Number ie Invoice receipt T Code FB03
PIPELINE PROCESS (No Concept of Invoice)
In pipeline handling your company does not need to order or store the material
concerned It is ready available to you as and when required via pipeline (eg oil
or water) or some other type of cable (eg electricity) Consumption of the
material is settled with the vendor on a regular basis
Steps
1 Create a Material master record with material type PIPE
2 Create Pipeline info record
3 Create GI with movement type 201P
4 Pipeline settlement T Code MRKO
RETURNABLE TRANSPORT PACKAGING (RTP)
When company orders goods from a vendor the goods are delivered with
returnable transport packaging (pallets containers) that belongs to the vendor
and is stored on our premises until you return it to the vendor
Steps
1 Create Material master record with material type LEIH
2 Create PO
3 Create GR by maintaining RTP material by selecting the option transport
equipments with movement type 501M
4 IR
STOCK TRANSFER
In stock transfer processing goods are procured and supplied within a company
One plant orders the goods internally to another plant (receiving plantissuing
plant) The goods are procured with a special type of purchase order the stock
transport order
Steps
1 Create a Material master in both supplying and receiving plant
2 Create stock transport order (STO) with item category lsquoUrsquo
3 Create transfer posting with movement type 351 amp T Code MB1B (Go to
MMBE stock overview the stock will decrease in supplying plant and it will not
update stock of receiving plant it will be under stock in transit)
4 Create GR stock will update in receiving plant
This scenario is under one company code between two plants
SAP IMPLEMENTATION PROCESS End to End Inplementation of SAP
First we have to prepare documentation about the client business (like turnover
vendors customers payments materials production marketing etc)
The implementer company made two teams (1) Steering team (2) Steering
community
Steering team (SAP functional consultants) prepares a detailed
documentation about the client with the help of core team (client company
team)
amp this study is known as Feasibility Study After that the steering team handed
over this documentation to Steering community (Project manager Sr software
engineer and other higher authorities)
Steering community prepares the BBP (Business Blue Print) BBP
Prepares in MS-Word
10487741048774 ASAP - Accelerated System Application Product in Data Processing
10487741048774 Business Process - ASAP Methodology
1 Project Preparation
2 BBP (Business Blue Print)
3 Realization
4 Final Preparation
5 Go live amp Support
10487741048774 Project Preparation -
It consists of identifying team members amp development strategy as
how to go
AS ndash IS (Existing Process followed requirements)
TO ndash BE (Requirement analysis and best process recommended)
Difference between (AS ndash IS) amp (TO - BE) is called GAP Analysis
10487741048774 Business Blue Print (BPP) -
It is a legal documentation between client amp the company
(implementer service provider) We have to understand the current business
process of client amp analyzing the business amp prepare documentation It is a
detailed documentation for the client
10487741048774 Realization -
This Phase is used to Implement or migrate the entire business of
client from Non-SAP environment to SAP environment
10487741048774 Final Preparation -
This phase is used for testing amp end user training After successfully
completion of this phase client is ready to run business in SAP R3
10487741048774 Go live amp Support -
In this phase we deliver the project end date amp end user training at
client site
THIRD - PARTY PROCESSING
THIRD - PARTY PROCESSING
In third party processing your company passes on a sales order to an external
vendor who sends the goods directly to the customer The sales order is not
processed by your company but by the vendor Third-party items can be
entered in purchase requisitions purchase orders and sales orders Third party
processing is integrated with Sales and Distribution If the sales order contains
third-party items the system creates a purchase requisition from the order
Steps
1 Create MMR with sales views and maintain Division Distribution channel
sales org item category group and general item category group ndash BANS (Third
party item) amp Account group Sold to party
2 Create Customer master record T Code XD01 XD02 XD03
3 Create sales order T Code VA01 VA02 VA03 (PR generated automatically)
4 PO - T Code ME21N
5 GR ndash T Code MIGO
6 IR ndash T Code MIRO
7 Sales Billing Billing Document T Code VF01 VF02 VF03
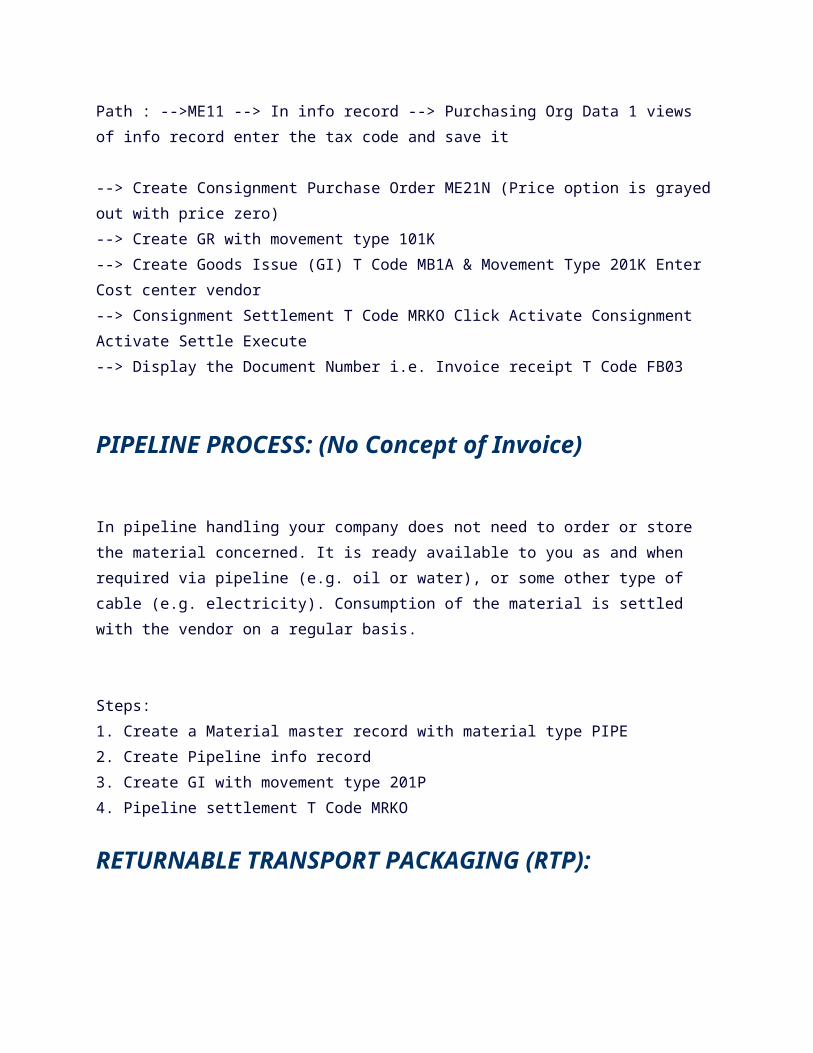
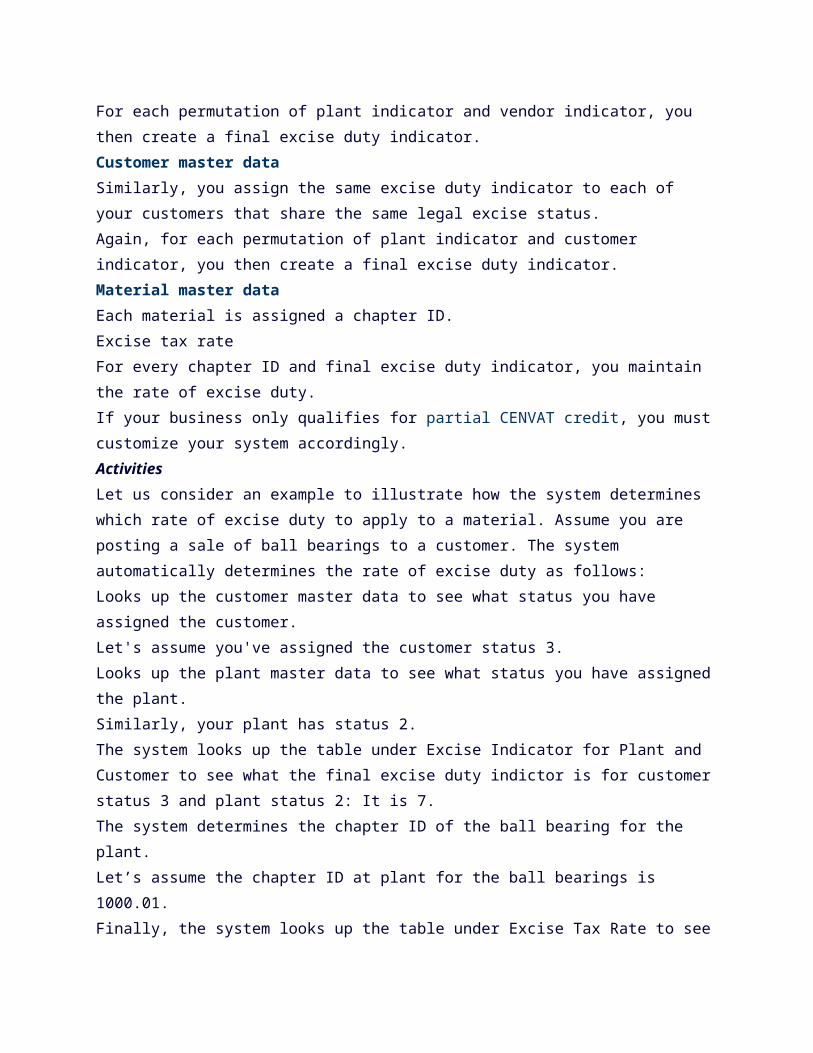
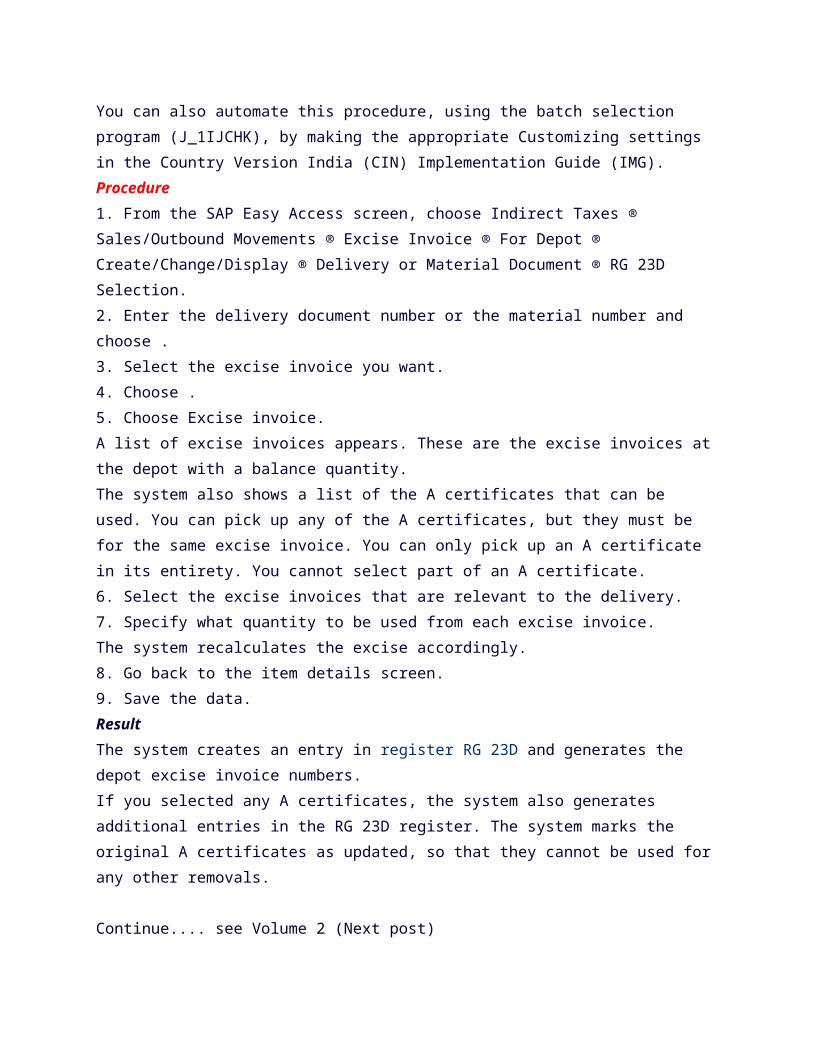
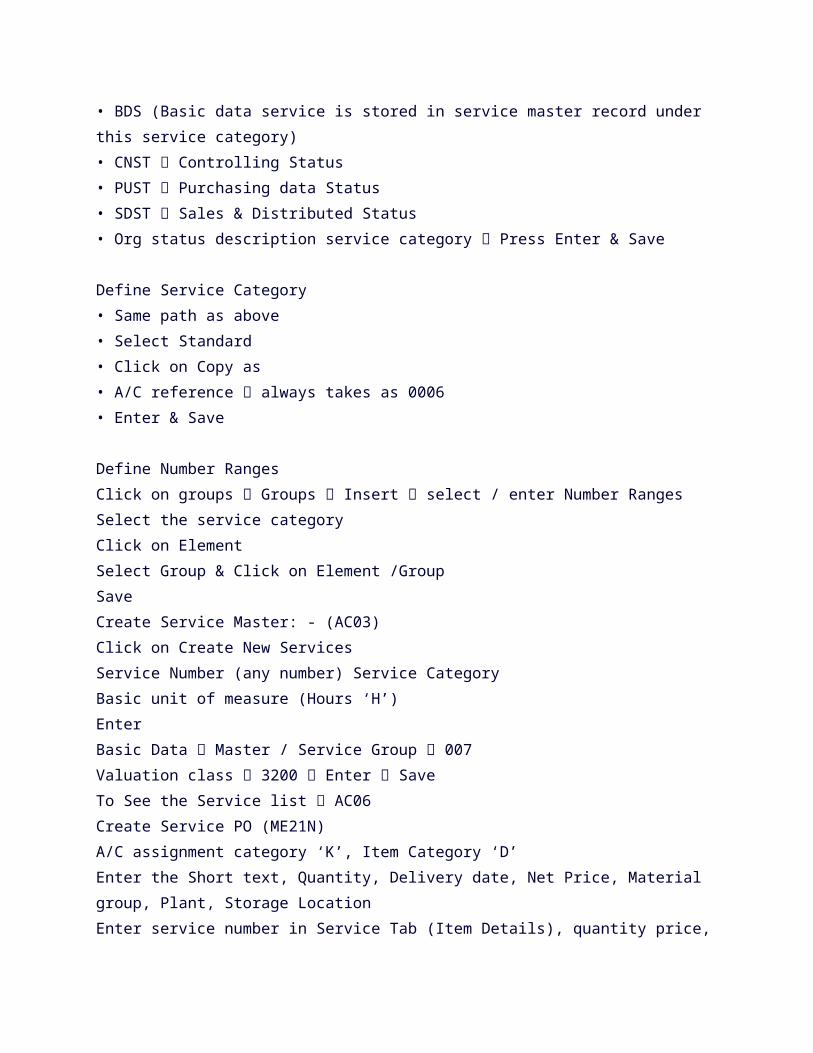
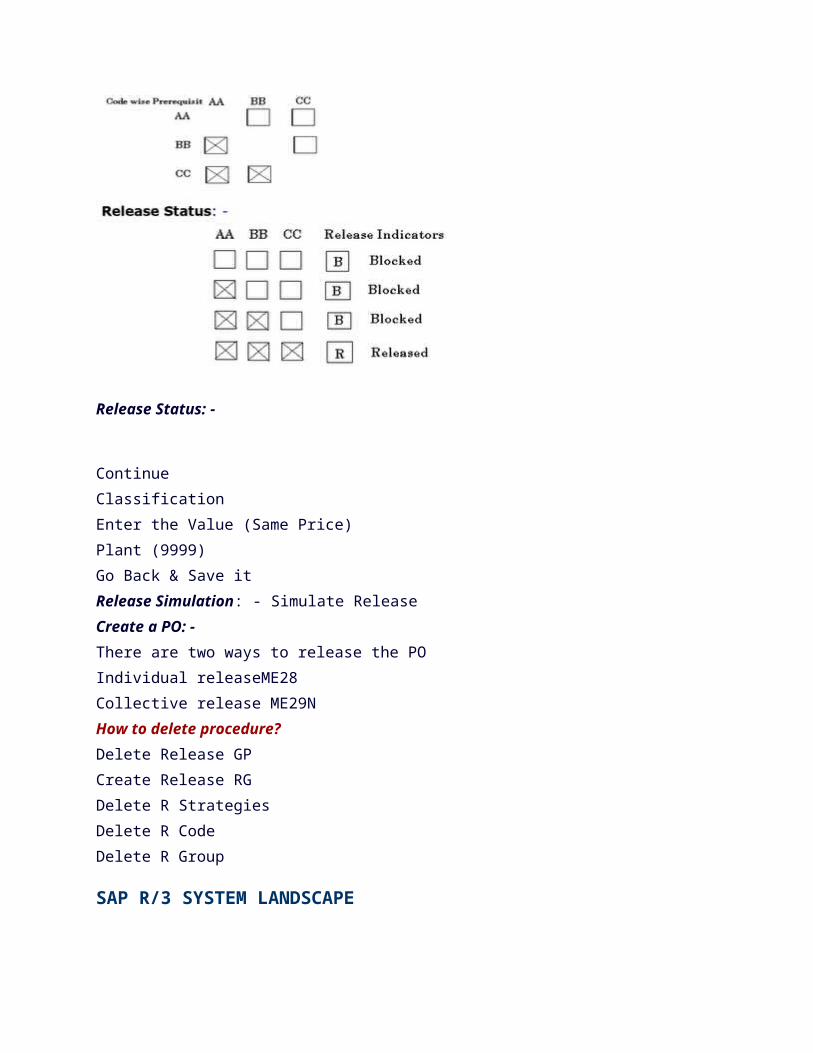
Steps
1 Create a Material master record with material type PIPE
2 Create Pipeline info record
3 Create GI with movement type 201P
4 Pipeline settlement T Code MRKO
RETURNABLE TRANSPORT PACKAGING (RTP)
When company orders goods from a vendor the goods are delivered with
returnable transport packaging (pallets containers) that belongs to the vendor
and is stored on our premises until you return it to the vendor
Steps
1 Create Material master record with material type LEIH
2 Create PO
3 Create GR by maintaining RTP material by selecting the option transport
equipments with movement type 501M
4 IR
STOCK TRANSFER
In stock transfer processing goods are procured and supplied within a company
One plant orders the goods internally to another plant (receiving plantissuing
plant) The goods are procured with a special type of purchase order the stock
transport order
Steps
1 Create a Material master in both supplying and receiving plant
2 Create stock transport order (STO) with item category lsquoUrsquo
3 Create transfer posting with movement type 351 amp T Code MB1B (Go to
MMBE stock overview the stock will decrease in supplying plant and it will not
update stock of receiving plant it will be under stock in transit)
4 Create GR stock will update in receiving plant
This scenario is under one company code between two plants
SAP IMPLEMENTATION PROCESS End to End Inplementation of SAP
First we have to prepare documentation about the client business (like turnover
vendors customers payments materials production marketing etc)
The implementer company made two teams (1) Steering team (2) Steering
community
Steering team (SAP functional consultants) prepares a detailed
documentation about the client with the help of core team (client company
team)
amp this study is known as Feasibility Study After that the steering team handed
over this documentation to Steering community (Project manager Sr software
engineer and other higher authorities)
Steering community prepares the BBP (Business Blue Print) BBP
Prepares in MS-Word
10487741048774 ASAP - Accelerated System Application Product in Data Processing
10487741048774 Business Process - ASAP Methodology
1 Project Preparation
2 BBP (Business Blue Print)
3 Realization
4 Final Preparation
5 Go live amp Support
10487741048774 Project Preparation -
It consists of identifying team members amp development strategy as
how to go
AS ndash IS (Existing Process followed requirements)
TO ndash BE (Requirement analysis and best process recommended)
Difference between (AS ndash IS) amp (TO - BE) is called GAP Analysis
10487741048774 Business Blue Print (BPP) -
It is a legal documentation between client amp the company
(implementer service provider) We have to understand the current business
process of client amp analyzing the business amp prepare documentation It is a
detailed documentation for the client
10487741048774 Realization -
This Phase is used to Implement or migrate the entire business of
client from Non-SAP environment to SAP environment
10487741048774 Final Preparation -
This phase is used for testing amp end user training After successfully
completion of this phase client is ready to run business in SAP R3
10487741048774 Go live amp Support -
In this phase we deliver the project end date amp end user training at
client site
THIRD - PARTY PROCESSING
THIRD - PARTY PROCESSING
In third party processing your company passes on a sales order to an external
vendor who sends the goods directly to the customer The sales order is not
processed by your company but by the vendor Third-party items can be
entered in purchase requisitions purchase orders and sales orders Third party
processing is integrated with Sales and Distribution If the sales order contains
third-party items the system creates a purchase requisition from the order
Steps
1 Create MMR with sales views and maintain Division Distribution channel
sales org item category group and general item category group ndash BANS (Third
party item) amp Account group Sold to party
2 Create Customer master record T Code XD01 XD02 XD03
3 Create sales order T Code VA01 VA02 VA03 (PR generated automatically)
4 PO - T Code ME21N
5 GR ndash T Code MIGO
6 IR ndash T Code MIRO
7 Sales Billing Billing Document T Code VF01 VF02 VF03
Steps
1 Create a Material master in both supplying and receiving plant
2 Create stock transport order (STO) with item category lsquoUrsquo
3 Create transfer posting with movement type 351 amp T Code MB1B (Go to
MMBE stock overview the stock will decrease in supplying plant and it will not
update stock of receiving plant it will be under stock in transit)
4 Create GR stock will update in receiving plant
This scenario is under one company code between two plants
SAP IMPLEMENTATION PROCESS End to End Inplementation of SAP
First we have to prepare documentation about the client business (like turnover
vendors customers payments materials production marketing etc)
The implementer company made two teams (1) Steering team (2) Steering
community
Steering team (SAP functional consultants) prepares a detailed
documentation about the client with the help of core team (client company
team)
amp this study is known as Feasibility Study After that the steering team handed
over this documentation to Steering community (Project manager Sr software
engineer and other higher authorities)
Steering community prepares the BBP (Business Blue Print) BBP
Prepares in MS-Word
10487741048774 ASAP - Accelerated System Application Product in Data Processing
10487741048774 Business Process - ASAP Methodology
1 Project Preparation
2 BBP (Business Blue Print)
3 Realization
4 Final Preparation
5 Go live amp Support
10487741048774 Project Preparation -
It consists of identifying team members amp development strategy as
how to go
AS ndash IS (Existing Process followed requirements)
TO ndash BE (Requirement analysis and best process recommended)
Difference between (AS ndash IS) amp (TO - BE) is called GAP Analysis
10487741048774 Business Blue Print (BPP) -
It is a legal documentation between client amp the company
(implementer service provider) We have to understand the current business
process of client amp analyzing the business amp prepare documentation It is a
detailed documentation for the client
10487741048774 Realization -
This Phase is used to Implement or migrate the entire business of
client from Non-SAP environment to SAP environment
10487741048774 Final Preparation -
This phase is used for testing amp end user training After successfully
completion of this phase client is ready to run business in SAP R3
10487741048774 Go live amp Support -
In this phase we deliver the project end date amp end user training at
client site
THIRD - PARTY PROCESSING
THIRD - PARTY PROCESSING
In third party processing your company passes on a sales order to an external
vendor who sends the goods directly to the customer The sales order is not
processed by your company but by the vendor Third-party items can be
entered in purchase requisitions purchase orders and sales orders Third party
processing is integrated with Sales and Distribution If the sales order contains
third-party items the system creates a purchase requisition from the order
Steps
1 Create MMR with sales views and maintain Division Distribution channel
sales org item category group and general item category group ndash BANS (Third
party item) amp Account group Sold to party
2 Create Customer master record T Code XD01 XD02 XD03
3 Create sales order T Code VA01 VA02 VA03 (PR generated automatically)
4 PO - T Code ME21N
5 GR ndash T Code MIGO
6 IR ndash T Code MIRO
7 Sales Billing Billing Document T Code VF01 VF02 VF03


