

1
Monkey Pixels Tutorial
By Robbert Prins, September 7, 2011
Contents
1. Introduction
1.1. About this tutorial 2
1.2. The Monkey language 2
1.3. Monkey Pixels gameplay 2
1.4. Websites 2
2. File structure
2.1. Contents of the project folder 3
2.2. The build folder 3
2.3. Clearing out the build folder after a language version change 3
3. Typical Monkey main program
3.1. Minimal example 4
3.2. Three required methods in class Game 5
4. Monkey Pixels main program
4.1. Naming conventions 6
4.2. Description of monkeypixels.monkey 6
4.3. Using states to control program flow 11
4.4. Using states to control individual game objects 11
5. TDeltaTimer class
5.1. Delta timing 12
5.2. Description of deltatimer.monkey 12
5.3. Static classes 13
6. Constants
6.1. Description of constants.monkey 14
7. TPixel class
7.1. Base class 15
7.2. Extending classes 15
7.3. Description of pixel.monkey 15
7.4. Global list of objects inside class 18
7.5. Functions inside class 18
7.6. Abstract methods 18
8. TPlayer class
8.1. Description of player.monkey 19
9. TEnemy class
9.1. Description of enemy.monkey 21

2
1. Introduction
1.1. About this tutorial
This text is an explanation of the source code of the game Monkey Pixels. Monkey Pixels is a
new version of my 2002 game Pixelwars, which was written in Blitz Basic. I decided to
rewrite it in Monkey so it can be played in the browser. I also had the idea of writing a small
tutorial for it, and explaining the structure and workings of a game is easier if that game is not
too complex. At the end of this introduction you can read where the game and the source code
can be found. The biggest part of this tutorial consists a reproduction of the source code itself,
with explanation added. The explanation has a blue background so you can see it is not part of
the source code.
1.2. The Monkey language
Monkey Pixels is programmed in the Monkey language. Monkey allows you to write a game
in one language and then translate it to something that can be played on different devices,
such as webbrowsers using Flash or HTML5 and a variety of mobile phones. To keep it
simple I only considered the Flash and HTML5 targets.
Monkey is a language in the Blitz Basic series of languages that are inspired by BASIC, a
classic programming language. Being the latest addition to that series, it is in fact more
similar to more modern languages such as Java. It supports functions and a number of helpful
datastructures, and allows for object-oriented programming through the use of classes. In
addition it contains functionality to deal with input, graphics and sound, very important for
game programming!
1.3. Monkey Pixels gameplay
In the game, the player controls a green pixel that has to avoid being touched by red pixels for
as long as possible. Moving the green pixel is done using the arrow keys on the keyboard. The
number of seconds the player manages to stay alive is the score. Red pixels can change into a
special blinking pixel; if the player runs into a blinking pixel, a number of red pixels will be
deleted to create a bit more room to move in.
1.4. Websites
The Monkey Pixels game and source code described in this tutorial can be found here:
http://www.foppygames.nl
The Monkey language can be tried and purchased from:
http://monkeycoder.co.nz

3
2. File structure
2.1. Contents of the project folder
It is probably common practice to store the code and other files for a game you're working on
in a project folder. Inside my MonkeyPixels project folder, I created a main source code file
called monkeypixels.monkey. All Monkey source code files should have the .monkey
extension. Next, Monkey expects to find a data folder that has the same name as the main
source code file, only ending in .data. When you tell Monkey to load external graphics or
sound effects into the game, this is where it will look for those files. So in my case there's a
folder called monkeypixels.data. Another folder, but this time created automatically by
Monkey, has a name ending in .build, in my case monkeypixels.build, and will contain the
game ready to be run. Finally, you can of course add your own folders. I added a folder called
'includes', containing separate source code files.
All in all my project folder contains the following:
1) monkeypixels.monkey main source code file
2) monkeypixels.data folder for data such as graphics and sound files
3) monkeypixels.build folder added by Monkey when you 'build' the game
4) includes folder added by me for separate source code files
2.2. The build folder
While working on your game’s soure code you can instruct Monkey to 'build' an executable
program out of it. The result will be placed in the projectname.build folder. The build folder
will not exist up to that point. For every target you ask Monkey to build your game for (Flash,
HTML5, Android, …) Monkey will create a separate folder inside the build folder. In the case
of Flash and HTML5, the contents of that folder should be placed on your webspace for
people to play your game. For example, for Flash it will contain a SWF file that is the actual
game and an HTML file that displays the SWF.
2.3. Clearing out the build folder after a language version change
An interesting point about the build folder is that when you install a new version of the
Monkey language it is a good idea (if not a requirement) to delete the contents of the build
folder of the game you are working on. This way, Monkey will create a fresh version of your
game when building, based on the new language version, instead of adding to what was
already there. If you do not clean out the build folder after upgrading (or, in fact,
downgrading) the language, you may get funny error messages when building.
4
3. Typical Monkey main program
3.1. Minimal example
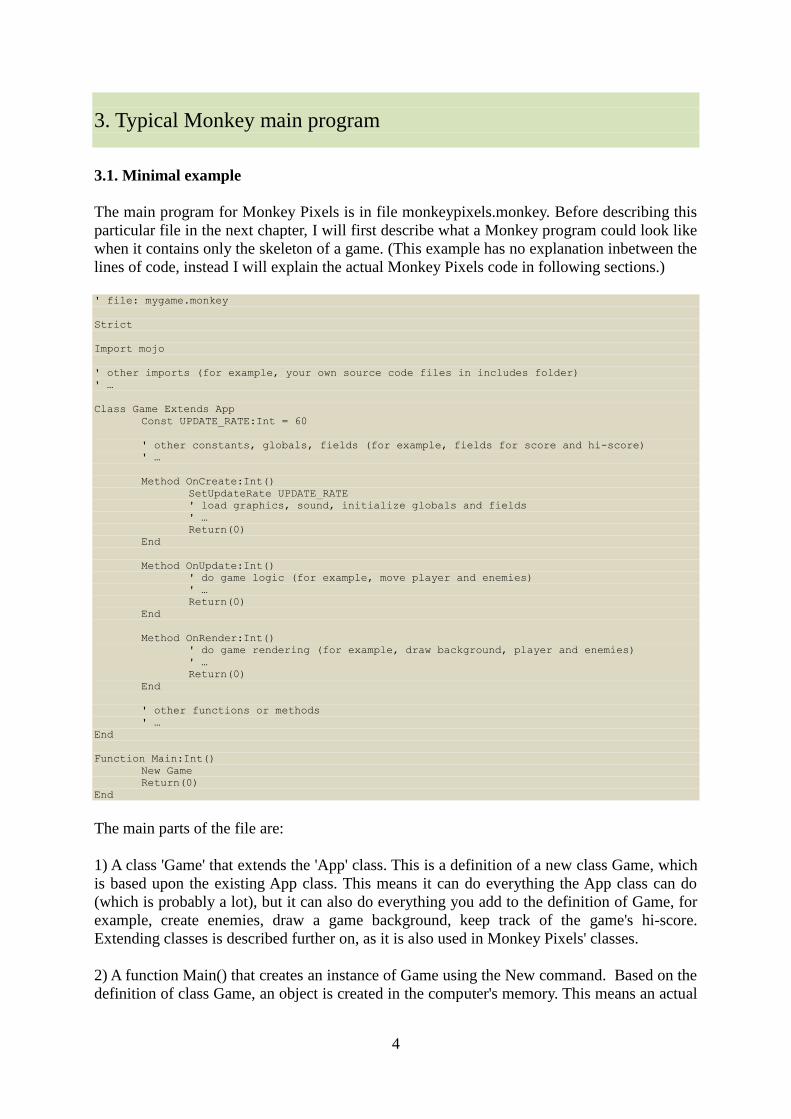
The main program for Monkey Pixels is in file monkeypixels.monkey. Before describing this
particular file in the next chapter, I will first describe what a Monkey program could look like
when it contains only the skeleton of a game. (This example has no explanation inbetween the
lines of code, instead I will explain the actual Monkey Pixels code in following sections.)
' file: mygame.monkey
Strict
Import mojo
' other imports (for example, your own source code files in includes folder)
' …
Class Game Extends App
Const UPDATE_RATE:Int = 60
' other constants, globals, fields (for example, fields for score and hi-score)
' …
Method OnCreate:Int()
SetUpdateRate UPDATE_RATE
' load graphics, sound, initialize globals and fields
' …
Return(0)
End
Method OnUpdate:Int()
' do game logic (for example, move player and enemies)
' …
Return(0)
End
Method OnRender:Int()
' do game rendering (for example, draw background, player and enemies)
' …
Return(0)
End
' other functions or methods
' …
End
Function Main:Int()
New Game
Return(0)
End
The main parts of the file are:
1) A class 'Game' that extends the 'App' class. This is a definition of a new class Game, which
is based upon the existing App class. This means it can do everything the App class can do
(which is probably a lot), but it can also do everything you add to the definition of Game, for
example, create enemies, draw a game background, keep track of the game's hi-score.
Extending classes is described further on, as it is also used in Monkey Pixels' classes.
2) A function Main() that creates an instance of Game using the New command. Based on the
definition of class Game, an object is created in the computer's memory. This means an actual

5
Game object is now up and running. When programmed correctly it will start displaying the
game on your screen.
3.2. Three required methods in class Game
The Game class should have three standard methods:
1) OnCreate()
2) OnUpdate()
3) OnRender()
OnCreate() is called when an instance of Game is first created. Code to initialize your game
should be put in this method. It will not be called again for the time your game runs. One
command that you'd place here is a call to SetUpdateRate. It defines how often per second
your game's OnUpdate() method will be called. This basically controls the speed at which
your game runs. If you set it to 60, any code placed in OnUpdate() will be run 60 times per
second.
OnUpdate(), as explained above, is called a set number of times per second after your game
has initialized. It is the heart of the game. Here you would put all code to make your game
objects move, but also code to go from the title screen to the action part of your game, and
from there to the game over screen, and back to the title screen again. (If your game uses a
structure like that.) In practice you would not put literally all the code here, but instead place
calls to methods and functions that are described in other source code files. (Otherwise this
one OnUpdate() method would get so big it would be difficult to manage.)
OnRender() is like OnUpdate() in that it gets called many times per second. Where
OnUpdate() updates the game state (moving things around), OnRender() displays the game
state on the screen (drawing things at their new location).
If you want to draw an image, a command that draws that image should be added to
OnRender(). It could be a direct call to a drawing command in the Monkey language, such as
DrawImage(), or it could be a call to a method of an object that in turn makes a call to
DrawImage(). For example, in Monkey Pixels, the class TPixel contains a function called
renderAll() that draws all pixels.
If you draw something, it appears on top of things that were drawn before. Therefore in
OnRender() you would typically first draw the game background, and then draw the game
objects, so that they appear on top of the background.

6
4. Monkey Pixels main program
4.1. Naming conventions
In my programming I use some conventions for naming variables and other parts of the
program. Some of these are also used by other people, other conventions are a bit more
personal, that's why it is probably a good idea to mention them before showing more of my
code:
Constants are written in all upper case: EXAMPLE_CONSTANT
Variables and functions use camel case: exampleLocalVariable, exampleFunction()
Globals get a 'g' prefix: gExampleGlobal
Fields get an 'f' prefix: fExampleField
Parameters get a 'p' prefix: pExampleParameter
Class names get a T: TExampleClass
Images get an extra 'gfx' prefix: gGfxExampleGlobalImage
Sounds get an extra 'snd' prefix: gSndExampleGlobalSound
This way of writing constants and the use of camel case is fairly universal. The prefixes for
globals, fields and parameters are more personal. I like to be able to see insantly whether I am
talking about a global variable, a class field, a function parameter, or (if there are no prefixes)
a local variable. It also makes it easier to use similar names without using the same name
twice. For instance, in a class method setName(pName:String) I could say fName = pName
and it would be instantly clear that I am assigning the parameter value to the class field.
Without prefixes it would of course also be possible, and I would then have to do Self.name =
name, which is not bad, but I still prefer to use my prefixes.
4.2. Description of monkeypixels.monkey
This is the main program file for Monkey Pixels. In its basic structure it is similar to the
minimalistic main program presented in the previous chapter, but this time code has been
added inside the structure that turns this into a particular game with its own rules and game
objects.
' Monkey Pixels, Foppygames 2011
' monkeypixels.monkey
Strict
Strict tells Monkey that in checking the syntax of this program it should use its strictest
set of rules. Typically this means your code will look better and fewer mistakes will be made.
Import mojo
Import includes.constants
Import includes.deltatimer
Import includes.pixel
Import includes.player
Import includes.enemy
In order to use code that is in other files, the files need to be 'imported' using the Import
command. First 'mojo' is imported, a part of Monkey that allows us to use graphics, sounds and
input devices. Then, source code files that I made myself, containing the constants and the
class definitions for the game, are imported. Putting everything in one file is also possible
but I prefer to use separate files. Note that even though the source code files have the
extension .monkey, this extension is not used when importing the file.

7
Class Game Extends App
Field fGfxTitleScreen:Image
Field fGfxGameOverScreen:Image
Field fGfxDigits:Image
A couple of fields for our Game class that will hold images. The class Image is a part
of the mojo module, imported earlier. This would not work if mojo was not imported.
(In fact, extending the Game class from the App class would fail too, since App is also
part of mojo. Extending classes is discussed in more detail later, in the description
of other classes.) I put an f at the front of every field name. This way you can see
right away that something is a field. Different programmers sometimes use different
variable naming rules, I got used to this.
Field fPlayer:TPixel
Field fState:Int
Field fNextEnemy:Int
Field fNextPoint:Int
Field fScore:Int
Field fHiScore:Int
Some more fields. fPlayer is an instance of the TPixel class, the definition of which
was imported at the top of the file. Then there are a few int variables, basically
numbers that help in running the game. fState is the variable that holds the current
game state. The use of 'states' or a 'state machine' to control game flow is described
in more detail below this code example.
Method OnCreate:Int()
OnCreate() is called once automatically at the start of the game. It is used to
set up the game by loading any graphics and sound, setting the update rate (the
speed the game will run at) and setting the first game state to be the title
screen. It also initializes the class TDeltaTimer, which is a class that makes
sure that every object moves at the intended speed, even if the game is slowed
down because the computer is having a hard time. (This will be explained
later.)
loadGraphics()
SetUpdateRate UPDATE_RATE
Note that UPDATE_RATE is a constant declared in file constants.monkey, imported
at the top of the file. Its value is 60. I could have used the value 60 here
directly, but using constants helps to make the code readable. It also means
that if I use the update rate constant at multiple places in the code, I can
change it later just by changing the value assigned to the constant.
switchToState(STATE_TITLE)
TDeltaTimer.init()
fHiScore = 0
Return(0)
End
Method OnUpdate:Int()
OnUpdate() is called automatically at the rate set in OnCreate(). In the case
of Monkey Pixels, this is 60 times per second. In this method you are expected
to update the game logic. If the game is currently being played, this means
objects are moved around, new objects are created, old ones removed, etc. If
the current state is the title screen or the game over screen, updating the
logic means checking if the player has pressed space bar and then changing the
state if he or she has.
TDeltaTimer.update()
The class that keeps track of the game's speed needs to be updated too, so it
knows how fast the game is running. We have not declared a variable for an
instance of the class; instead, functions from the class definition are called
upon directly. The class is a 'static' class, which is explained later.
Select fState
This is a Select statement that tells Monkey what should be done for
different values of fState.
Case STATE_TITLE
' space bar was pressed
If (KeyHit(KEY_SPACE)) Then
switchToState(STATE_GAME)
End If
8
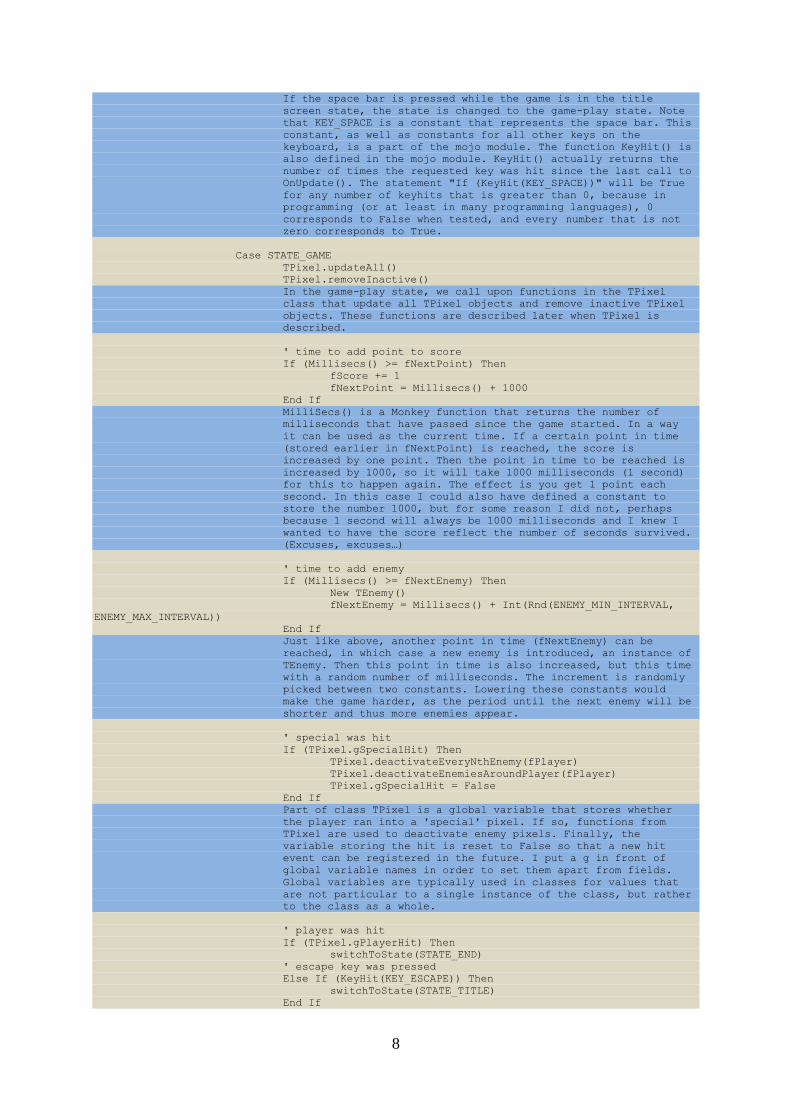
If the space bar is pressed while the game is in the title
screen state, the state is changed to the game-play state. Note
that KEY_SPACE is a constant that represents the space bar. This
constant, as well as constants for all other keys on the
keyboard, is a part of the mojo module. The function KeyHit() is
also defined in the mojo module. KeyHit() actually returns the
number of times the requested key was hit since the last call to
OnUpdate(). The statement "If (KeyHit(KEY_SPACE))" will be True
for any number of keyhits that is greater than 0, because in
programming (or at least in many programming languages), 0
corresponds to False when tested, and every number that is not
zero corresponds to True.
Case STATE_GAME
TPixel.updateAll()
TPixel.removeInactive()
In the game-play state, we call upon functions in the TPixel
class that update all TPixel objects and remove inactive TPixel
objects. These functions are described later when TPixel is
described.
' time to add point to score
If (Millisecs() >= fNextPoint) Then
fScore += 1
fNextPoint = Millisecs() + 1000
End If
MilliSecs() is a Monkey function that returns the number of
milliseconds that have passed since the game started. In a way
it can be used as the current time. If a certain point in time
(stored earlier in fNextPoint) is reached, the score is
increased by one point. Then the point in time to be reached is
increased by 1000, so it will take 1000 milliseconds (1 second)
for this to happen again. The effect is you get 1 point each
second. In this case I could also have defined a constant to
store the number 1000, but for some reason I did not, perhaps
because 1 second will always be 1000 milliseconds and I knew I
wanted to have the score reflect the number of seconds survived.
(Excuses, excuses…)
' time to add enemy
If (Millisecs() >= fNextEnemy) Then
New TEnemy()
fNextEnemy = Millisecs() + Int(Rnd(ENEMY_MIN_INTERVAL,
ENEMY_MAX_INTERVAL))
End If
Just like above, another point in time (fNextEnemy) can be
reached, in which case a new enemy is introduced, an instance of
TEnemy. Then this point in time is also increased, but this time
with a random number of milliseconds. The increment is randomly
picked between two constants. Lowering these constants would
make the game harder, as the period until the next enemy will be
shorter and thus more enemies appear.
' special was hit
If (TPixel.gSpecialHit) Then
TPixel.deactivateEveryNthEnemy(fPlayer)
TPixel.deactivateEnemiesAroundPlayer(fPlayer)
TPixel.gSpecialHit = False
End If
Part of class TPixel is a global variable that stores whether
the player ran into a 'special' pixel. If so, functions from
TPixel are used to deactivate enemy pixels. Finally, the
variable storing the hit is reset to False so that a new hit
event can be registered in the future. I put a g in front of
global variable names in order to set them apart from fields.
Global variables are typically used in classes for values that
are not particular to a single instance of the class, but rather
to the class as a whole.
' player was hit
If (TPixel.gPlayerHit) Then
switchToState(STATE_END)
' escape key was pressed
Else If (KeyHit(KEY_ESCAPE)) Then
switchToState(STATE_TITLE)
End If

9
Another global in TPixel tells us if the player was hit (by a
non-special pixel). If so, it's game over as the game state is
changed to the game over state (STATE_END). Note that constants
are used to denote game states. I could have used direct values
such as 0, 1, and 2 but that would make the code quite
unreadable for (most) humans. If the player was not hit, but
instead the player pressed the escape key, we end the game by
returning to the title screen state. I used an 'else' here
because I don't want these two things to happen at the same
time. It would be a big coincedence but if the player died AND
escape was pressed, the game would be instructed to move to one
state, and then to another, in the same update step, which could
lead to unforeseen effects. It's better to make sure that as an
effect of one update step, at most one state change can happen.
It's also best to make that state change the last thing you do
within the update step. For example, it would be unwise to
start by changing the state to the title screen state, and THEN
try to move all game objects around! They might not even exist
anymore, after the state change.
Case STATE_END
' space bar was pressed
If (KeyHit(KEY_SPACE)) Then
switchToState(STATE_TITLE)
End If
If the space bar is pressed while the game is in the game-over
state, the state is changed to the title screen state.
End Select
Return(0)
End
Method OnRender:Int()
OnRender() is called automatically after every call to OnUpdate(). It is the
place to put commands for drawing your game so that the effects made in
OnUpdate() (such as creating and moving objects) become visible.
SetAlpha(1)
SetColor(255,255,255)
SetAlpha() is used to set transparency for following drawing actions, 0 meaning
fully transparent and 1 being not transparent at all. SetColor() determines the
color used in following drawing actions. Some drawing that is done from objects
in my game change these values, so now they are reset again.
If (fState = STATE_TITLE) Then
DrawImage(fGfxTitleScreen,0,0)
Else
Cls(0,0,0)
End If
If we are on the title screen, draw the title screen image. Else, just clear
the screen and make it black.
' display hi-score and current score
drawDigits(String(fScore),SCREEN_WIDTH-8,SCREEN_HEIGHT-25,True)
drawDigits(String(fHiScore),8,SCREEN_HEIGHT-25)
DrawDigits() is a method that is defined below. It uses an image containing the
digits (0-9) to draw a number to the screen. We could use a Monkey command for
displaying text, but those are usually a bit slow and better used during
debugging only. Using an image also allows us to create our own font. (Although
in this case I am re-using a font I created for an older game called Flyout and
which was also used in my game Ranger…)
If (fState = STATE_GAME) Then
TPixel.renderAll()
End If
If we are in the game play state, draw the pixels! This calls a function in
class TPixels that will in turn take care of drawing all individual TPixel
objects, as explained below in the description of class TPixel.
If (fState = STATE_END) Then
TPixel.renderAll()
SetAlpha(1)
SetColor(255,255,255)
DrawImage(fGfxGameOverScreen,0,0)
End If

10
If we are in the game-over state, we ALSO draw all pixels. In addition we then
draw a game-over image. This looks better than just drawing the game-over
image, as now the player can still see the end result of the game, even though
he or she can't move around anymore.
Return(0)
End
Method drawDigits:Void(pNumber:String,pX:Int,pY:Int,pRightAligned:Bool=False)
A method for drawing a number using separate image frames. Monkey's DrawImage()
command allows you to draw a frame out of an image that contains several frames
(images next to each other, each of the same width). In this case the image
contain the digits 0 to 9 from left to right. The method uses DrawImage() to
draw one of those frames for each digit in the number pNumber we provided.
If (pRightAligned) Then
pX -= pNumber.Length()*17
End If
For Local i:Int=0 To pNumber.Length()-1
DrawImage(fGfxDigits,pX+i*17,pY,pNumber[i]-48)
Next
End Method
Method switchToState:Void(pState:Int)
This method is called to change the current game state. In addition to just
changing the value in fState (for which alone you would not need a separate
method) it does everything needed to initialize the new state (and to shut down
the old state, if necessary). For each state there is a 'Case' in the Select
statement below.
Select (pState)
Case STATE_TITLE
When switching to the title screen: store the new hi-score if it
is indeed better than the current hi-score.
' new hi-score was reached
If (fScore > fHiScore) Then
fHiScore = fScore
End If
Case STATE_GAME
When switching to the game play state: set a new base value
(seed) for random numbers, initialize the TPixel class (it will
remove all current TPixel objects), create the player, set the
first time-points for a new enemy and the next score point, and
finally set the score to 0.
Seed = Millisecs()
TPixel.init()
fPlayer = New TPlayer()
fNextEnemy = Millisecs() + 1000
fNextPoint = Millisecs() + 1000
fScore = 0
Case STATE_END
When switching to the game over state, we don't need to do
anything extra, but I still put a Case here, to make it
complete.
End Select
fState = pState
Here the new state value is actually stored in fState. This is done at the end.
If necessary the code above could still use the state value in fState before it
was changed, to refer to the old state. It was not necessary here but you can
imagine saying something like "if the old state is the title screen, play a
song for leaving the title screen".
End Method
Method loadGraphics:Void()
A method for loading the images used in this game into the fields of the Game
class. Monkey knows that images loaded with LoadImage() will be in the
projectname.data folder in the project folder, so here we just specify the file
name, not the path to the file. The projectname.data folder is where you need
to put all such data. This also goes for sound effects and music (such as .wav
and .mp3 files), but Monkey Pixels does not use any sound effects.
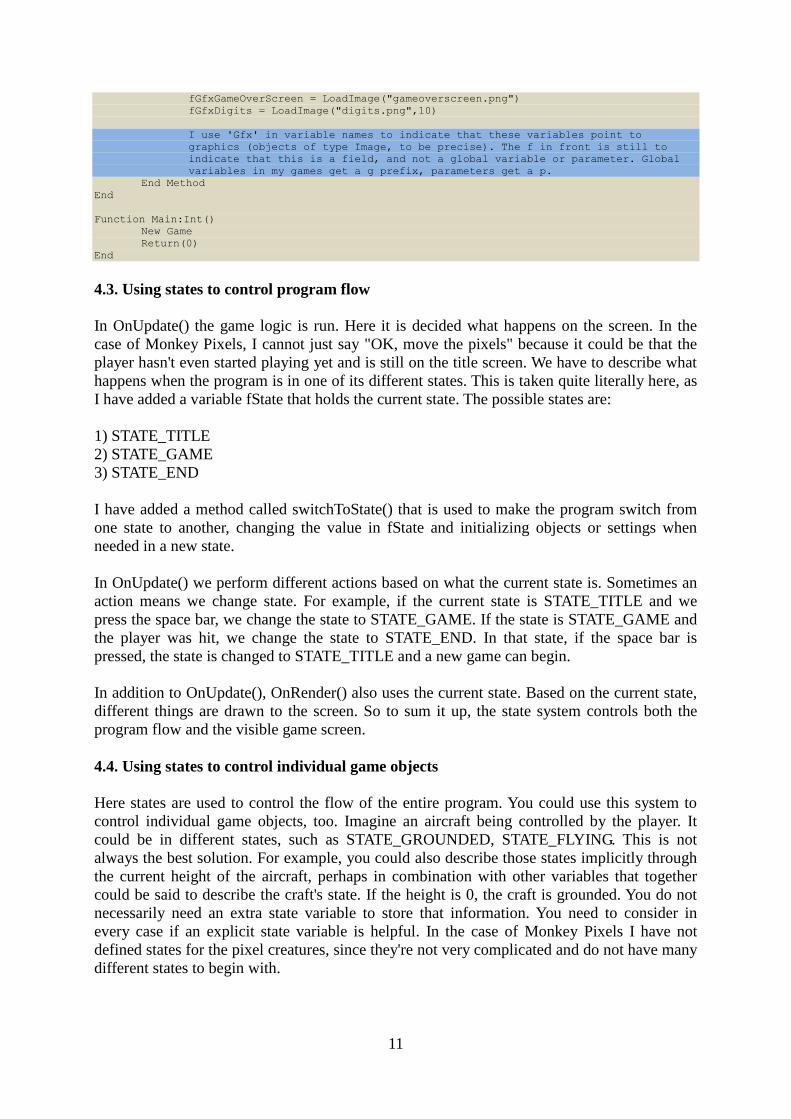
fGfxTitleScreen = LoadImage("titlescreen.png")
11
fGfxGameOverScreen = LoadImage("gameoverscreen.png")
fGfxDigits = LoadImage("digits.png",10)
I use 'Gfx' in variable names to indicate that these variables point to
graphics (objects of type Image, to be precise). The f in front is still to
indicate that this is a field, and not a global variable or parameter. Global
variables in my games get a g prefix, parameters get a p.
End Method
End
Function Main:Int()
New Game
Return(0)
End
4.3. Using states to control program flow
In OnUpdate() the game logic is run. Here it is decided what happens on the screen. In the
case of Monkey Pixels, I cannot just say "OK, move the pixels" because it could be that the
player hasn't even started playing yet and is still on the title screen. We have to describe what
happens when the program is in one of its different states. This is taken quite literally here, as
I have added a variable fState that holds the current state. The possible states are:
1) STATE_TITLE
2) STATE_GAME
3) STATE_END
I have added a method called switchToState() that is used to make the program switch from
one state to another, changing the value in fState and initializing objects or settings when
needed in a new state.
In OnUpdate() we perform different actions based on what the current state is. Sometimes an
action means we change state. For example, if the current state is STATE_TITLE and we
press the space bar, we change the state to STATE_GAME. If the state is STATE_GAME and
the player was hit, we change the state to STATE_END. In that state, if the space bar is
pressed, the state is changed to STATE_TITLE and a new game can begin.
In addition to OnUpdate(), OnRender() also uses the current state. Based on the current state,
different things are drawn to the screen. So to sum it up, the state system controls both the
program flow and the visible game screen.
4.4. Using states to control individual game objects
Here states are used to control the flow of the entire program. You could use this system to
control individual game objects, too. Imagine an aircraft being controlled by the player. It
could be in different states, such as STATE_GROUNDED, STATE_FLYING. This is not
always the best solution. For example, you could also describe those states implicitly through
the current height of the aircraft, perhaps in combination with other variables that together
could be said to describe the craft's state. If the height is 0, the craft is grounded. You do not
necessarily need an extra state variable to store that information. You need to consider in
every case if an explicit state variable is helpful. In the case of Monkey Pixels I have not
defined states for the pixel creatures, since they're not very complicated and do not have many
different states to begin with.

12
5. TDeltaTimer class
5.1. Delta timing
I want my game to run at 60 frames per second. However, it could be that for some reason it is
slowed down. The player could have lots of other programs running, for example. Some
players could even run a special program to slow my game down and get a better hi-score!
Either way the result would be slow moving game objects. One way to counter this is to speed
up the game objects as much as the game slows down, by making them move in bigger steps.
This way the objects would again move at the desired speed.
'Delta Timing' is a method that does this. If the game runs ten times as slow as intended, game
objects should move in steps that are ten times as big. This factor should not only be applied
to the movement of game objects, but also to other things such as counters that count until
something happens. (Note: if you use MilliSecs() to see if a certain time has elapsed, this does
not need Delta Timing to be applied to it, because it is based on actual time. Even if the game
slows down, a second is still a second, and that is what MilliSecs() measures.)
In order to know by what factor the speed of game objects should be adjusted, Delta Timing
computes for every frame how long that frame took, and compares this to how long it should
have taken ideally. If it took 10 times as long, the resulting Delta Time factor is 10. Applying
this to game object speeds means they will move ten times as fast to make up for the
slowdown.
5.2. Description of deltatimer.monkey
File deltatimer.monkey contains the definition of class TDeltaTimer. I decided to create a
separate class to handle the delta timing. This way I can easily copy it into another project
later. It is not a class that will be used to create many instances of; you typically only need a
single Delta Timer. Therefore I have implemented this as a 'static class'. The idea of static
classes is explained further after the code explanation.
' Monkey Pixels, Foppygames 2011
' deltatimer.monkey
Import mojo
Import constants
Class TDeltaTimer
Global gDeltaTime:Int
Global gDeltaFactor:Float
These globals are used to store the last time we called the TDeltaTimer.update()
function, and the resulting delta time factor. This last value is the one the rest of
the program will be interested in. As you can see, there are no fields, and no methods
in this class. It only has globals and functions. This means it is not meant to be used
to create objects from. There will be no 'New TDeltaTimer()' anywhere in the program.
In fact, there is not even a method New(). Instead, functions are called upon directly
as in 'TDeltaTimer.update()'. This is called a 'static class' and it's a nice way of
combining variables and functions that work together in a certain context.
Function init:Void()
gDeltaTime = Millisecs()
End Function
Function update:Void()
13
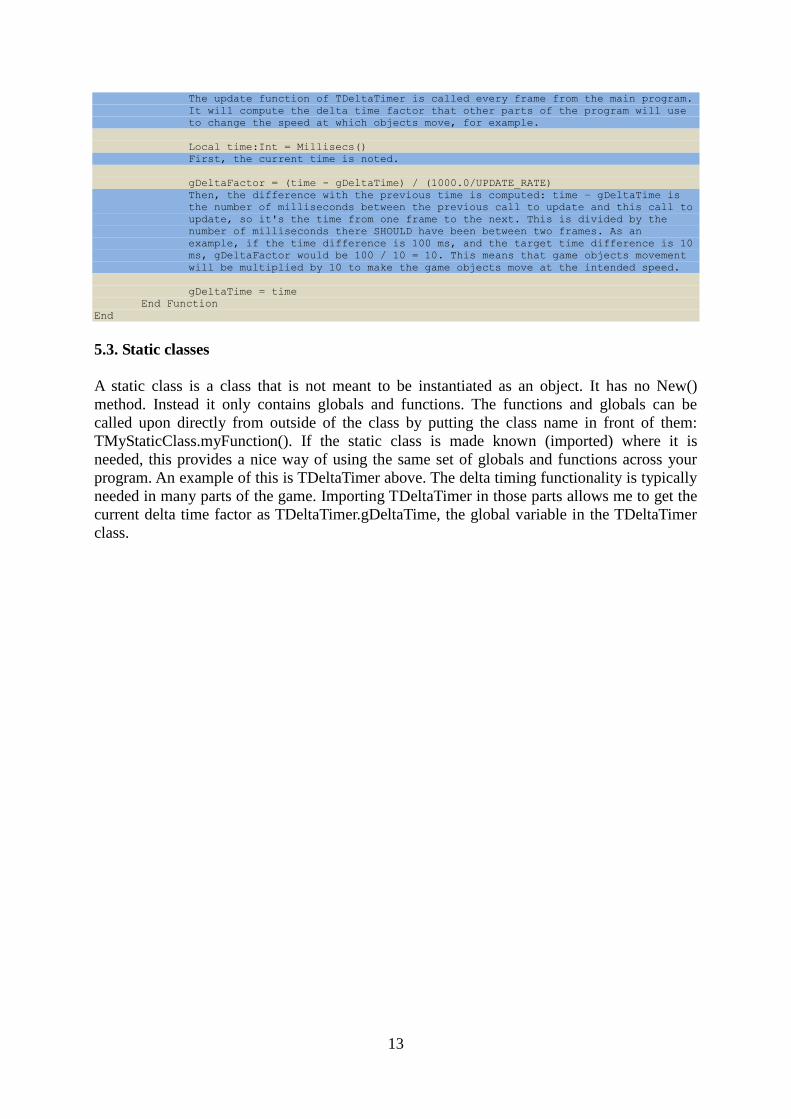
The update function of TDeltaTimer is called every frame from the main program.
It will compute the delta time factor that other parts of the program will use
to change the speed at which objects move, for example.
Local time:Int = Millisecs()
First, the current time is noted.
gDeltaFactor = (time - gDeltaTime) / (1000.0/UPDATE_RATE)
Then, the difference with the previous time is computed: time – gDeltaTime is
the number of milliseconds between the previous call to update and this call to
update, so it's the time from one frame to the next. This is divided by the
number of milliseconds there SHOULD have been between two frames. As an
example, if the time difference is 100 ms, and the target time difference is 10
ms, gDeltaFactor would be 100 / 10 = 10. This means that game objects movement
will be multiplied by 10 to make the game objects move at the intended speed.
gDeltaTime = time
End Function
End
5.3. Static classes
A static class is a class that is not meant to be instantiated as an object. It has no New()
method. Instead it only contains globals and functions. The functions and globals can be
called upon directly from outside of the class by putting the class name in front of them:
TMyStaticClass.myFunction(). If the static class is made known (imported) where it is
needed, this provides a nice way of using the same set of globals and functions across your
program. An example of this is TDeltaTimer above. The delta timing functionality is typically
needed in many parts of the game. Importing TDeltaTimer in those parts allows me to get the
current delta time factor as TDeltaTimer.gDeltaTime, the global variable in the TDeltaTimer
class.

14
6. Constants
6.1. Description of constants.monkey
For this game I have collected the constants in one file called constants.monkey. Another
approach (perhaps more logical) would be to put constants in the class that uses them. For
instance, the state identifier constants, such as STATE_TITLE, could be put in the Game
class, that being the only class that uses them. On the other hand, some constants are used
throughout the whole program and in those cases it's better to define them once in a shared
file.
' Monkey Pixels, Foppygames 2011
' constants.monkey
Const SCREEN_WIDTH:Int = 640
Const SCREEN_HEIGHT:Int = 480
Const UPDATE_RATE:Int = 60
Const STATE_TITLE:Int = 0
Const STATE_GAME:Int = 1
Const STATE_END:Int = 2
These values are used to identify the different states the game can be in. The values 0, 1 and
2 are in fact not very important, it could also have been 324, 765 and 654, as long as they
are unique, but it's of course easier to just start counting at 0.
Const PIXEL_WIDTH:Int = 4
Const PIXEL_HEIGHT:Int = 4
These are the width and height of the TPixel objects on screen. In the original Pixel Wars I
think they were actual pixels (1*1) but Monkey Pixels is displayed in a 640*480 window (not
full screen) so we need bigger pixels to make it playable.
Const PLAYER_SPEED:Float = 1.0
Const ENEMY_SPEED:Float = 0.8
Const LAUNCH_RADIUS:Int = 14
Const HIT_RADIUS:Int = 2
Launch radius is the radius of the circle around the player in which new (enemy) pixels will
be introduced. Hit radius is used to decide if the player hits another pixel; closer than hit
radius means it's a hit.
Const SPECIAL_CHANCE:Int = 2
Const SPECIAL_REMOVE_EVERY_NTH:Int = 8
Const SPECIAL_REMOVE_RADIUS:Int = 60
Every time an enemy pixel is introduced, it has a SPECIAL_CHANCE out of 100 of becoming
special. A special pixel blinks and can be used by the player to create room. When the player
runs into a special pixel, every SPECIAL_REMOVE_EVERY_NTH enemy pixel is removed and all enemy
pixel in a SPECIAL_REMOVE_RADIUS around the player is removed.
Const ENEMY_MIN_INTERVAL:Int = 150
Const ENEMY_MAX_INTERVAL:Int = 700
Const ENEMY_ALPHA_CHANGE:Float = 1.0/(UPDATE_RATE*2)
The interval constants are the minimum and maximum number of milliseconds between introducing
one enemy and introducing the next. The ENEMY_ALPHA_CHANGE value is about how quickly an enemy
becomes non-transparent. The alpha value used in the enemies ranges from 0 to 1, 0 being fully
transparent. Every frame, the above constant value is added. The step size is 1 divided by the
number of frames in two seconds. With this step size it will take two seconds to go from 0 to
1.

15
7. TPixel class
7.1. Base class
TPixel is the class behind the pixel objects in the game. However, TPixel itself is a base class.
It is used as a basis for two other classes that represent the player and the enemies on screen.
This means we will not be using instances of TPixel itself, but only of the classes that are
extended from it.
7.2. Extending classes
Extending classes from a base class is a nice way of reducing the work for the programmer.
While writing the game I realized that the player object and the enemy object have some
things in common. They both can be active or inactive, they have a current location on the
screen, they have a certain width and height, they move in four directions, they should stay on
the screen... The only big difference is that one is controlled by the player (using the
keyboard) and the other is controlled by the computer.
In such a situation it makes sense to create a base class that contains everything the player and
enemy objects share, and then create two extended classes from the base class, one for the
player and one for the enemy, in which the things that differ are defined. TPixel below is the
base class. TPlayer and TEnemy described later are the extended classes. Now I can talk
about objects of type TPixel (for instance, have a function that accepts a TPixel object as a
parameter), and it will work with objects of type TPlayer and TEnemy.
7.3. Description of pixel.monkey
' Monkey Pixels, Foppygames 2011
' pixel.monkey
Import mojo
Import constants
Import deltatimer
Class TPixel
Global gList:List<TPixel> = New List<TPixel>
A global list of objects of type TPixel, as part of the TPixel class itself. The class
also has functions to maintain this list. Keeping as much as possible within the class
itself is preferable to keeping track of all TPixel objects from the main program.
Global gPlayerX:Int
Global gPlayerY:Int
Global gPlayerHit:Bool
Global gSpecialHit:Bool
It may seem strange to talk about the player here, but storing the location of the
player pixel in globals inside the TPixel class provides a way of letting the enemy
pixels know where the player is. This is used to check if any enemy collides with the
player. If we did not store it in a central location like this, we would have to either
track which pixel is the player (for instance using a global gPlayer:TPixel, which
would be a good solution, perhaps even better than the solution I am using here),
or look through the whole list of pixels everytime to see which one is the player
(which is a bad solution), or keep separate lists of player objects and enemy
objects, an idea I don't like as it would go against the concept of player and enemy
being based on and treated as the same base class. In general it can be said that
there are several solutions to such "communication" problems.
Field fX:Float
Field fY:Float
Field fW:Int
16
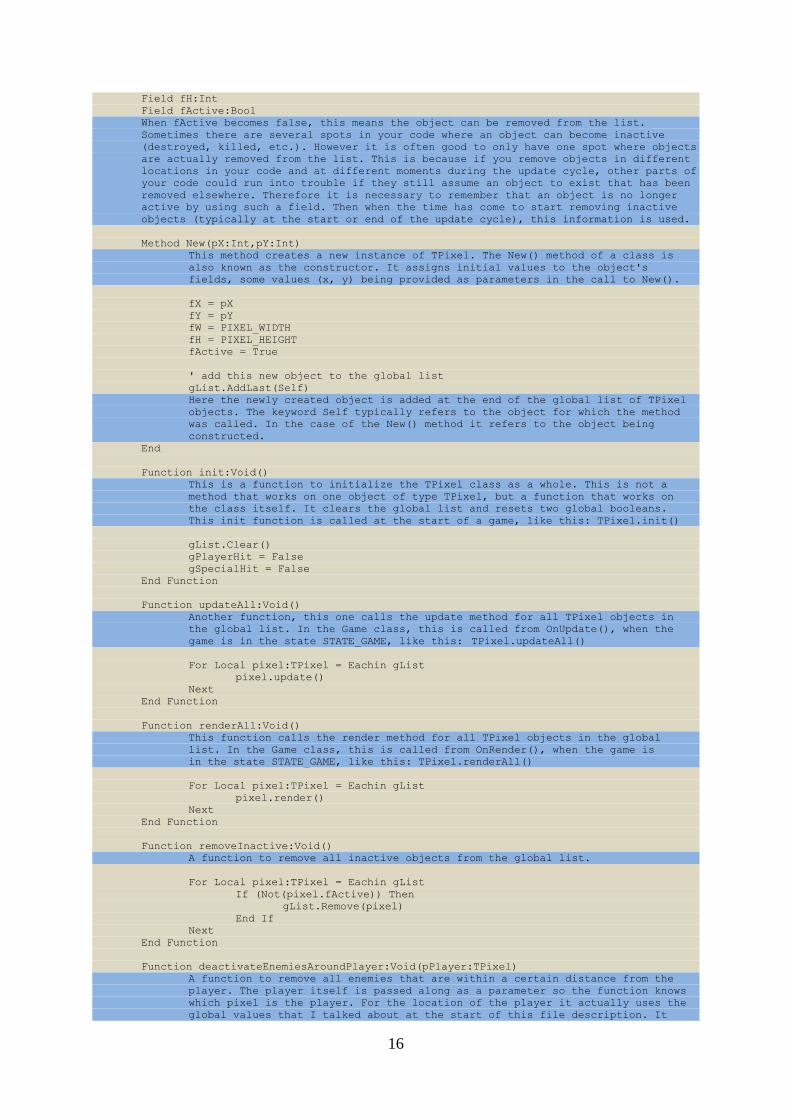
Field fH:Int
Field fActive:Bool
When fActive becomes false, this means the object can be removed from the list.
Sometimes there are several spots in your code where an object can become inactive
(destroyed, killed, etc.). However it is often good to only have one spot where objects
are actually removed from the list. This is because if you remove objects in different
locations in your code and at different moments during the update cycle, other parts of
your code could run into trouble if they still assume an object to exist that has been
removed elsewhere. Therefore it is necessary to remember that an object is no longer
active by using such a field. Then when the time has come to start removing inactive
objects (typically at the start or end of the update cycle), this information is used.
Method New(pX:Int,pY:Int)
This method creates a new instance of TPixel. The New() method of a class is
also known as the constructor. It assigns initial values to the object's
fields, some values (x, y) being provided as parameters in the call to New().
fX = pX
fY = pY
fW = PIXEL_WIDTH
fH = PIXEL_HEIGHT
fActive = True
' add this new object to the global list
gList.AddLast(Self)
Here the newly created object is added at the end of the global list of TPixel
objects. The keyword Self typically refers to the object for which the method
was called. In the case of the New() method it refers to the object being
constructed.
End
Function init:Void()
This is a function to initialize the TPixel class as a whole. This is not a
method that works on one object of type TPixel, but a function that works on
the class itself. It clears the global list and resets two global booleans.
This init function is called at the start of a game, like this: TPixel.init()
gList.Clear()
gPlayerHit = False
gSpecialHit = False
End Function
Function updateAll:Void()
Another function, this one calls the update method for all TPixel objects in
the global list. In the Game class, this is called from OnUpdate(), when the
game is in the state STATE_GAME, like this: TPixel.updateAll()
For Local pixel:TPixel = Eachin gList
pixel.update()
Next
End Function
Function renderAll:Void()
This function calls the render method for all TPixel objects in the global
list. In the Game class, this is called from OnRender(), when the game is
in the state STATE_GAME, like this: TPixel.renderAll()
For Local pixel:TPixel = Eachin gList
pixel.render()
Next
End Function
Function removeInactive:Void()
A function to remove all inactive objects from the global list.
For Local pixel:TPixel = Eachin gList
If (Not(pixel.fActive)) Then
gList.Remove(pixel)
End If
Next
End Function
Function deactivateEnemiesAroundPlayer:Void(pPlayer:TPixel)
A function to remove all enemies that are within a certain distance from the
player. The player itself is passed along as a parameter so the function knows
which pixel is the player. For the location of the player it actually uses the
global values that I talked about at the start of this file description. It

17
could again be said that perhaps storing a global pointer to the player object
(gPlayer:TPixel) is a better solution, as then we would not need the pPlayer
parameter in this function, and we would have access to the player location as
gPlayer.fX and gPlayer.fY.
For Local pixel:TPixel = Eachin gList
Local dX:Int = gPlayerX - pixel.fX
Local dY:Int = gPlayerY - pixel.fY
' pixel is within radius from player
If (Sqrt(dX*dX+dY*dY) <= SPECIAL_REMOVE_RADIUS) Then
Here we use Pythagoras' theorem to compute the distance between
two objects, using the differences in their x and y components.
If the distance is smaller than the constant
SPECIAL_REMOVE_RADIUS, the pixel is removed, but only if it is
not the player. The pixel is not removed directly; instead its
fActive value is set to false, so it will be removed later.
' pixel is not player
If (pixel <> pPlayer) Then
pixel.fActive = False
End If
End If
Next
End Function
Function deactivateEveryNthEnemy:Void(pPlayer:TPixel)
A function to remove every Nth enemy. Again the player itself is passed along
as a parameter so the function knows which pixel is the player and therefore
not an enemy. The function goes through all TPixel objects in a For...Next
loop, while counting from 0. Once count is equal to (or greater than) N, the
pixel currently being visited in the list will be removed (if it is not the
player). The count is then also reset to zero.
Local count:Int = 0
For Local pixel:TPixel = Eachin gList
count += 1
' pixel is next Nth pixel in list
If (count >= SPECIAL_REMOVE_EVERY_NTH) Then
' pixel is not player
If (pixel <> pPlayer) Then
pixel.fActive = False
count = 0
End If
End If
Next
End Function
Method stayOnScreen:Void()
Once we decide that TPixel, as a base class, has a position (x, y) we can also
decide that such an object may never be moved from the screen. This can then be
added to the base class as a method. When moving the pixel around, we then only
need to call stayOnScreen() after moving to make sure the pixel stays on
screen. The method checks that x and y do not go beyond the values that
represent the screen border: not smaller than 0, and not greater than the width
or height of the screen. In doing this it takes the width and height of the
object into account. (The x and y values of the TPixel object are used as its
upper-left corner in drawing. This means if you do not take the width into
account, it could cross the screen border with its right side. The same is true
for the height and the bottom side.)
If (fX < 0) Then
fX = 0
End If
If (fX > SCREEN_WIDTH-fW) Then
fX = SCREEN_WIDTH-fW
End If
If (fY < 0) Then
fY = 0
End If
If (fY > SCREEN_HEIGHT-fH) Then
fY = SCREEN_HEIGHT-fH
End If
End Method
Method update:Void() Abstract
Method render:Void() Abstract

18
Update() and render() are abstract methods. This means they need to be defined in
classes that are extended from this base class TPixel. Below this code is some more
explanation of abstract methods.
End
7.4. Global list of objects inside class
The global gList is a list that contains TPixel objects. Instead of maintaining a list of TPixel
objects in the main program, it is now part of TPixel itself. TPixel contains a set of functions
that work on the list of TPixel objects, such as functions for drawing all objects and for
removing inactive objects from the list.
7.5. Functions inside class
The TDeltaTimer class described earlier only had functions, this is why it was called a static
class. TPixel is not a static class: it has methods. But it also has functions. The functions are
not related to any TPixel object in particular, but to the class as a whole.
7.6. Abstract methods
There are two methods in TPixel that have no body. Instead, the keyword Abstract is behind
their names. This means that they are not defined in TPixel, but classes extended from TPixel
are required to define them.
TPixel is a base class that will never be used to create objects from directly. The fact that is
has abstract methods makes it indeed impossible to create an object of type TPixel, because
definitions are still missing. However, we know that at some stage, we want to be able to
update objects extended from the base class, and to render them. That is why the abstract
methods are already added. Not definining them in extended classes will result in an error
message from Monkey. This is a way of reminding the programmer that although we do not
provide a definition just yet, in the future these methods need to be defined.
This makes your code more portable: if you hand this class to another programmer, the fact
that the methods are abstract will help that other programmer to make proper use of the class.
He or she will be able to see instantly what should be added to any classes extended from the
base class.
19
8. TPlayer class
8.1. Description of player.monkey
In the chapter about file pixel.monkey it was explained that TPixel was a base class, from
which other classes could be extended. The TPlayer class is one such extended class, TEnemy
being the other. TPlayer is a class that represents the player on screen. Being extended from
TPixel it does everything TPixel does, plus what we add in TPlayer. We also need to come up
with definitions for the abstract methods in TPixel, update() and render(). If we would not add
actual definitions for those methods, TPlayer would itself only be able to function as a base
class. But we actually want to create an instance of it, namely the player.
You will see that TPlayer is not a very big class. Most of its functionality has already been
taken care of by TPixel on which it is based. What is added is in fact the definitions for
update(), the method that deals with moving the pixel around based on keyboard input, and
render(), the method that displays the pixel on the screen.
' Monkey Pixels, Foppygames 2011
' player.monkey
Import mojo
Import constants
Import deltatimer
Import pixel
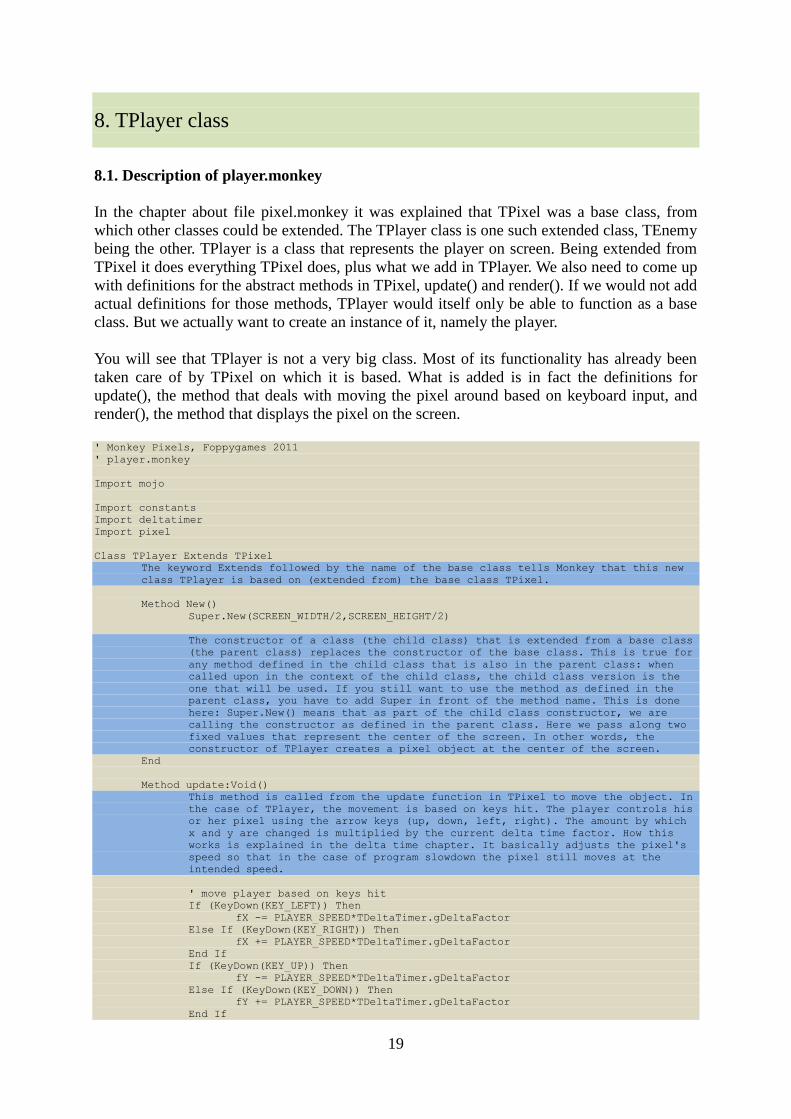
Class TPlayer Extends TPixel
The keyword Extends followed by the name of the base class tells Monkey that this new
class TPlayer is based on (extended from) the base class TPixel.
Method New()
Super.New(SCREEN_WIDTH/2,SCREEN_HEIGHT/2)
The constructor of a class (the child class) that is extended from a base class
(the parent class) replaces the constructor of the base class. This is true for
any method defined in the child class that is also in the parent class: when
called upon in the context of the child class, the child class version is the
one that will be used. If you still want to use the method as defined in the
parent class, you have to add Super in front of the method name. This is done
here: Super.New() means that as part of the child class constructor, we are
calling the constructor as defined in the parent class. Here we pass along two
fixed values that represent the center of the screen. In other words, the
constructor of TPlayer creates a pixel object at the center of the screen.
End
Method update:Void()
This method is called from the update function in TPixel to move the object. In
the case of TPlayer, the movement is based on keys hit. The player controls his
or her pixel using the arrow keys (up, down, left, right). The amount by which
x and y are changed is multiplied by the current delta time factor. How this
works is explained in the delta time chapter. It basically adjusts the pixel's
speed so that in the case of program slowdown the pixel still moves at the
intended speed.
' move player based on keys hit
If (KeyDown(KEY_LEFT)) Then
fX -= PLAYER_SPEED*TDeltaTimer.gDeltaFactor
Else If (KeyDown(KEY_RIGHT)) Then
fX += PLAYER_SPEED*TDeltaTimer.gDeltaFactor
End If
If (KeyDown(KEY_UP)) Then
fY -= PLAYER_SPEED*TDeltaTimer.gDeltaFactor
Else If (KeyDown(KEY_DOWN)) Then
fY += PLAYER_SPEED*TDeltaTimer.gDeltaFactor
End If

20
stayOnScreen()
Method stayOnScreen() is part of TPixel. As TPlayer is extended from TPixel, it
can make use of this method. It is called after changing fX and fY to adjust
those values so the pixel stays on screen.
' also store player location in global variables
gPlayerX = fX
gPlayerY = fY
The location of the player is now stored in globals defined in TPixel (and
therefore usable from TPlayer, the child class) so that it may be used by
pixels of type TEnemy (which will be shown in the next chapter to also be a
child class of TPixel).
End Method
Method render:Void()
Method render() is called from the render function of TPixel to draw all pixel
objects. It draws a solid green rectangle at the current location.
SetAlpha(1)
SetColor(0,255,0)
DrawRect(fX,fY,fW,fH)
End Method
End

21
9. TEnemy class
9.1. Description of enemy.monkey
The class defined in enemy.monkey is TEnemy. It is extended from the base class TPixel.
Like TPlayer, it defines the render() and update() methods, but this time the result is an object
that is controlled by the computer instead of through the keyboard.
' Monkey Pixels, Foppygames 2011
' enemy.monkey
Import mojo
Import constants
Import deltatimer
Import pixel
Class TEnemy Extends TPixel
TEnemy extends TPixel, just like TPlayer did. TEnemy and TPlayer have the same parent
class.
Field fAlpha:Float
Field fSpecial:Bool
Field fSpecialCountDown:Float
Method New()
Super.New(gPlayerX+Rnd(-LAUNCH_RADIUS,LAUNCH_RADIUS),gPlayerY+Rnd(-
LAUNCH_RADIUS,LAUNCH_RADIUS))
Like TPlayer, TEnemy also calls the construtor of its parent class. This time
the location that is passed along is based on the location of the player, as we
want the enemy pixel to appear close to the player.
fAlpha = 0
fSpecial = False
' enemy will become special
If (Int(Rnd(100)) < SPECIAL_CHANCE) Then
fSpecialCountDown = Rnd(600,1200)
' enemy will not become special
Else
fSpecialCountDown = 0
End If
Some enemies will be 'special'. Here we basically throw a dice to see if this
enemy will become special. Int(Rnd(100)) gives a random number between 0
(inclusive) and 100 (exclusive). If the number is smaller than SPECIAL_CHANCE,
it will become special. As an example, if we were to set SPECIAL_CHANCE to 100,
the random number would always be smaller than that, resulting in a 100% chance
of the enemy becoming special. If the enemy is special, its special count down
is set to a number that is higher than zero. If that count down reaches zero
(later on) the enemy will truely become special and start blinking.
End
Method update:Void()
The update method of the enemy pixel moves it around at random, but only if it
is fully visible. If not fully visible, it will continue to increase its fAlpha
value until the enemy is visible (fAlpha is then 1).
' enemy is fully visible
If (fAlpha = 1) Then
' move enemy in random direction
fX += (Int(Rnd(3))-1)*ENEMY_SPEED*TDeltaTimer.gDeltaFactor
fY += (Int(Rnd(3))-1)*ENEMY_SPEED*TDeltaTimer.gDeltaFactor
The x and y values are changed by a value that is either -1, 0 or 1
times the enemy pixel speed. For the x component, that means it will
move to the left, stay were it is, or move to the right respectively.
Int(Rnd(3)) is a random value that is 0, 1 or 2. If we then subtract 1
from that, we get -1, 0 or 1.
22
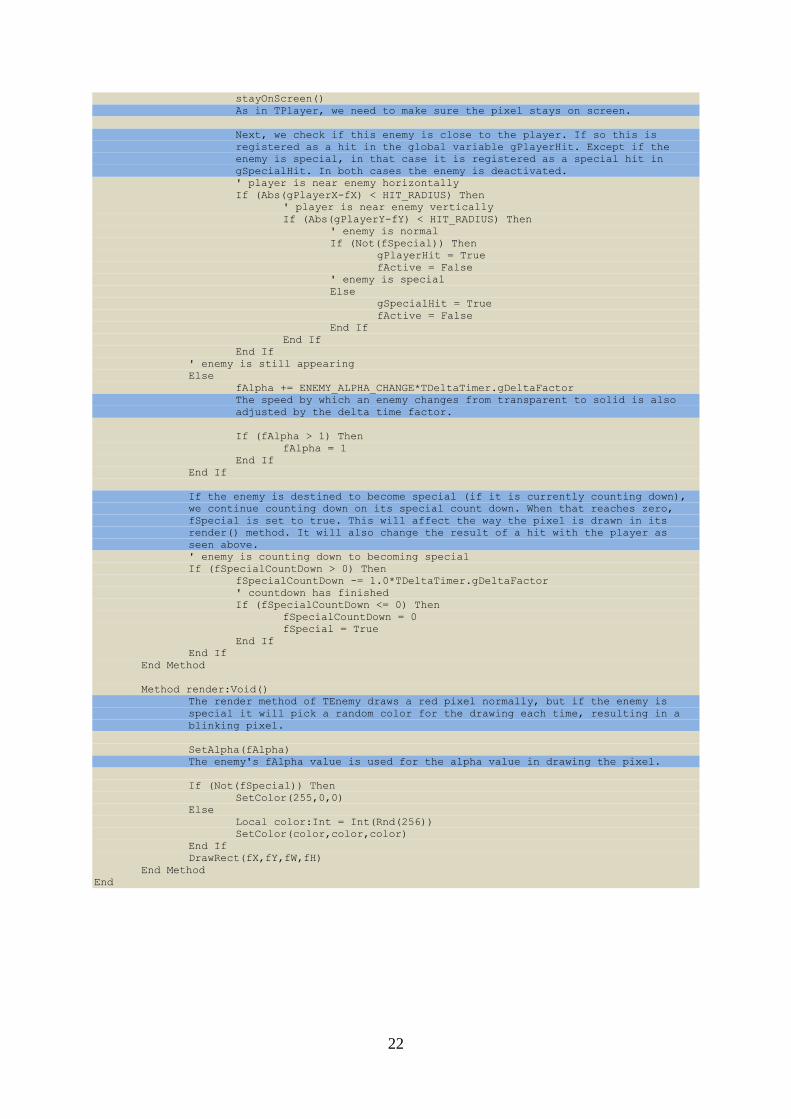
stayOnScreen()
As in TPlayer, we need to make sure the pixel stays on screen.
Next, we check if this enemy is close to the player. If so this is
registered as a hit in the global variable gPlayerHit. Except if the
enemy is special, in that case it is registered as a special hit in
gSpecialHit. In both cases the enemy is deactivated.
' player is near enemy horizontally
If (Abs(gPlayerX-fX) < HIT_RADIUS) Then
' player is near enemy vertically
If (Abs(gPlayerY-fY) < HIT_RADIUS) Then
' enemy is normal
If (Not(fSpecial)) Then
gPlayerHit = True
fActive = False
' enemy is special
Else
gSpecialHit = True
fActive = False
End If
End If
End If
' enemy is still appearing
Else
fAlpha += ENEMY_ALPHA_CHANGE*TDeltaTimer.gDeltaFactor
The speed by which an enemy changes from transparent to solid is also
adjusted by the delta time factor.
If (fAlpha > 1) Then
fAlpha = 1
End If
End If
If the enemy is destined to become special (if it is currently counting down),
we continue counting down on its special count down. When that reaches zero,
fSpecial is set to true. This will affect the way the pixel is drawn in its
render() method. It will also change the result of a hit with the player as
seen above.
' enemy is counting down to becoming special
If (fSpecialCountDown > 0) Then
fSpecialCountDown -= 1.0*TDeltaTimer.gDeltaFactor
' countdown has finished
If (fSpecialCountDown <= 0) Then
fSpecialCountDown = 0
fSpecial = True
End If
End If
End Method
Method render:Void()
The render method of TEnemy draws a red pixel normally, but if the enemy is
special it will pick a random color for the drawing each time, resulting in a
blinking pixel.
SetAlpha(fAlpha)
The enemy's fAlpha value is used for the alpha value in drawing the pixel.
If (Not(fSpecial)) Then
SetColor(255,0,0)
Else
Local color:Int = Int(Rnd(256))
SetColor(color,color,color)
End If
DrawRect(fX,fY,fW,fH)
End Method
End


