
Quick Start GuideGuía de inicio rápido
Guida di riferimento rapidoKurzanleitung
Guide de démarrage rapide
Cisco Small Business
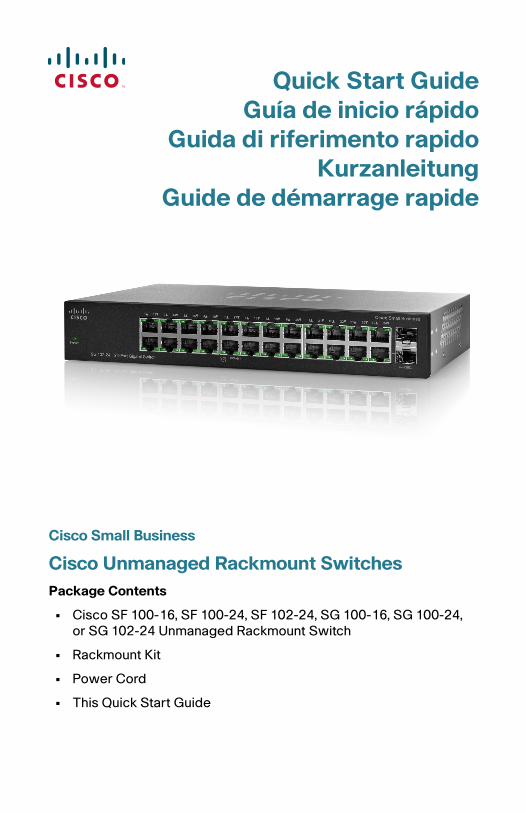
Cisco Unmanaged Rackmount Switches Package Contents
• Cisco SF 100-16, SF 100-24, SF 102-24, SG 100-16, SG 100-24, or SG 102-24 Unmanaged Rackmount Switch
• Rackmount Kit
• Power Cord
• This Quick Start Guide

Welcome
Thank you for choosing the Cisco SF 100-16, SF 100-24, SF 102-24, SG 100-16, SG 100-24, or SG 102-24 Unmanaged Rackmount Switch, a Cisco Small Business network communications device.
This guide will familiarize you with the layout of the unmanaged rackmount switch and describe how to deploy the device in your network. For additional information, see www.cisco.com/smb.
Network Speed and Auto MDI/MDI-X DetectionAll ports support network speed auto-negotiation and auto MDI/MDI-X crossover detection. Network speed auto-negotiation automatically selects the best connection speed and mode (half- or full-duplex) for communicating with attached devices. Auto MDI/MDI-X crossover detection automatically adjusts for the cable type (straight-through or crossover) used to connect the unmanaged rackmount switch to other devices.
Green Energy–Efficient TechnologySG 100-16, SG 100-24, and SG 102-24 switches support Green Energy-efficient Technology that increases energy efficiency and helps businesses to use less energy and save money.
Traffic PrioritizationThe unmanaged rackmount switches deliver Quality of Service (QoS); all received packets are examined for QoS priority encoding. The switch reads the priority level and forwards the packet based on that priority level. For example, during heavy loads voice and video traffic are given priority over data traffic. This ensures that time-sensitive traffic gets the highest level of service.
Jumbo Frame SupportSG 100-16, SG 100-24, and SG 102-24 switches support frames up to 9,000 bytes called jumbo frames. Jumbo Frame support improves network throughput and reduces CPU utilization during large file transfers, such as multimedia files, by allowing larger payloads in each packet.
Cisco Unmanaged Rackmount Switches 1

Installing the Cisco Switch
There are three ways to physically install the switch:
• Set the switch on a flat surface.
• Mount the switch in a standard rack (1U high).
• Mount the switch on a wall.
Before you install the Unmanaged Rackmount Switch, follow the guidelines in this section.
When you choose a location for the switch, consider the following guidelines:
• Make sure that the switch is accessible and that the cables can be connected easily.
• Keep cabling away from sources of electrical noise, power lines, and fluorescent lighting fixtures.
• Position the switch away from water and moisture sources.
• To ensure adequate air flow around the switch, be sure to provide a minimum clearance of two inches (50 mm).
• Do not stack free-standing switches more than four units high.
Do not deploy the device in a location where any of the following conditions exist:
High Ambient Temperature—The ambient temperature must not exceed 104 degrees Fahrenheit (40C).
Reduced Air Flow—Both side panels must be unobstructed to prevent overheating.
Mechanical Overloading—The device should be level, stable, and secure to avoid it sliding or shifting out of position.
Circuit Overloading—Adding the device to the power outlet must not overload that circuit.
1
2 Cisco Unmanaged Rackmount Switches

Rack-Mount PlacementFollow these steps to rack-mount the switch in any standard 19-inch rack.
STEP 1 Place the switch on a hard, flat surface with the front panel facing towards you.
STEP 2 Attach a rack–mount bracket to one side of the switch with the supplied screws and secure the bracket tightly. Repeat this step to attach the other bracket to the opposite side of the switch.
STEP 3 After the brackets are attached to the switch, use suitable screws to securely attach the brackets to any standard 19-inch rack.
Wall MountingA Cisco SF 100-16, SF 100-24, SG 100-16, or SG 102-24 Unmanaged Rackmount Switch can be wall-mounted.
If you plan to mount this switch to a wall, you need 2 wallboard screws to deploy the unmanaged desktop switch. We recommend using screws with a minimum of 0.27 inches (6.8 mm) width at the head and at least 0.69 inches (17.6 mm) long. Depending on your mounting surface, you might require longer screws or drywall anchors with a minimum of 0.31 inches (8 mm) width at the head and at least 0.87 inches (22.2 mm) long.
WARNING Insecure mounting might damage the device or cause injury. Cisco is not responsible for damages incurred by insecure wall-mounting.
12
34
56
78
910
1112
1314
1516
1718
1920
2122
2324
miniGBIC1
(Shared with 12) (Shared with 24)
miniGBIC2
Cisco Small BusinessSR2024
24-Port10/100/1000 Switch
1 2 3 4 5 6 7 8 9 10 11 12 / miniGBIC1
Link/Act
Gigabit
Link/Act
Gigabit
SYSTEM13 14 15 16 17 18 19 20 21 22 23 24 / miniGBIC2
1930
86
Cisco Unmanaged Rackmount Switches 3

To mount the unmanaged rackmount switch to the wall:
STEP 1 Determine where you want to mount the unmanaged rackmount switch. Verify that the surface is smooth, flat, dry, and sturdy.
STEP 2 Drill two pilot holes into the surface 3.74 inches (95 mm) apart, and with a minimum of 5.12 inches (130 mm) of clearance.
STEP 3 Insert a screw into each hole, leaving a gap between the surface and the base of the screw head of at least 0.1 inches (3 mm).
STEP 4 Place the unmanaged rackmount switch wall-mount slots over the screws and slide the unmanaged rackmount switch down until the screws fit snugly into the wall-mount slots.
2765
83
4 Cisco Unmanaged Rackmount Switches

Connecting Network Devices
The application diagram is an example of a typical network configuration.
To connect the unmanaged rackmount switch to the network:
STEP 1 Connect the Ethernet cable to the Ethernet port of a computer, printer, network storage, or other network device.
STEP 2 Connect the other end of the network Ethernet cable to one of the numbered unmanaged rackmount switch Ethernet ports.
The LED of the port lights if the device connected is active.
NOTE If the uplink from one unmanaged, cascaded switch to another is moved from one port to another port, it can take up to one minute for full network operation to resume. This is normal and expected behavior.
STEP 3 Repeat Step 1 and Step 2 for each device you want to connect to the unmanaged rackmount switch.
NOTE To prioritize voice or video traffic by using the QoS feature on the switch, set flow control to off in the configurations of the connected devices. Otherwise, flow control might send a pause
2
1 2 3 4 5 6 7 8 9 10 11 12
13 14 15 16 17 18 19 20 21 22 23 24 miniGBIC1
(Shared with 12) (Shared with 24)
miniGBIC2
Cisco Small BusinessSR2024
24-Port10/100/ 1000 Swit ch
1 2 3 4 5 6 7 8 9 10 11 12 / miniGBIC1
Link/Act
Gigabit
Link/Act
Gigabit
SYSTEM 13 14 15 16 17 18 19 20 21 22 23 24 / miniGBIC2
1938
03
Cisco Unmanaged Rackmount Switches 5

frame to the switch, blocking the high-priority QoS packets queued on the port. On some devices, such as some IP phones and IP cameras, flow control might not be configurable.
STEP 4 Connect the power cord to the switch and a power source.
Features of the Unmanaged Rackmount Switch
This section describes the exterior of the unmanaged rackmount switches that provide non-blocking, wire-speed switching for your network clients.
Front Panel PortsThe ports and LEDs are located on the front panel of the switch.
RJ-45 Ethernet Ports —Use these ports to connect network devices, such as computers, printers, and access points, to the switch. The auto-sensing, Ethernet (802.3) ports are used for wired network communications. Each Ethernet port supports network speeds of 10 Mbps, 100 Mbps, or 1000 Mbps.
MiniGBIC (if present)—The miniGBIC (gigabit interface converter) ports are connection points for miniGBIC modules, so the unmanaged rackmount switch can uplink to other switches by using optical fiber.
• MiniGBIC ports are compatible with Cisco miniGBIC modules MGBSX1, MGBLH1, MGBT1, MGBLX1, and MGBBX1, as well as other brands of miniGBIC modules.
• MiniGBIC interface is a combination port, shared with one other RJ-45 interface. When the MiniGBIC is active, the closest RJ-45 port is disabled.
• The LEDs on RJ-45 respond to the miniGBIC interface traffic.
3
2765
79
14 3 15 4 16 5 17 6 18 7 19 8 20 9 21 10 22 11 23 12 24131 2
LINK GIGABITACT
6 Cisco Unmanaged Rackmount Switches

Front Panel LEDsSystem LED—Lights green when the switch is powered on.
Link/Act LED—(Green) Lights when a link between the corresponding port and another device is detected. Flashes when the port is passing traffic.
100M LED (if present)—(Green) Lights and remains lit when another device is connected to the port, is powered on, and a 100 Mbps link is established between the devices. When the LED is off, the connection speed is under 100 Mbps or nothing is cabled to the port.
Gigabit LED (if present)—Lights and remains lit when another device is connected to the port, is powered on, and a 1000 Mbps link is established between the devices. When the LED is off, the connection speed is under 1000 Mbps or nothing is cabled to the port.
MiniGBIC (if present)—Lights green when a connection is made through the shared RJ-45 port. It flashes green when the connection is active.
Back PanelThe power port is located on the back panel of the unmanaged rackmount switch.
Side PanelThe Kensington lock is located on the side panel of the unmanaged rackmount switch. (Only the Cisco SF 100-16, SF 100-24, SG 100-16, or SG 102-24 Unmanaged Rackmount Switch has a lock.)
2765
80POWER
2765
81
Cisco Unmanaged Rackmount Switches 7

Specifications
The following tables list the specifications for the unmanaged rackmount switches.
Weights and Dimensions
Model Weight Dimensions mm Dimensions Inch
SF 100-1616 RJ-45 10/100 ports
1.251 Kg2.758 lbs
279.4x44.45x170 11x1.75x6.7
SF 100-2424 RJ-45 10/100 ports
1.322 Kg2.915 lbs
279.4x44.45x170 11x1.75x6.7
SF 102-2424 RJ-45 10/100 ports, 2 shared Gigabit RJ-45/miniGBIC ports
1.995 Kg4.398 lbs
440x44.45x202.5 17.35x1.74x7.99
SG 100-1616 RJ-45 10/100/1000 ports
1.429 Kg3.150 lbs
279.4x44.45x170 11x1.75x6.7
SG 100-2424 RJ-45 10/100/1000 ports
2.292 Kg2.292 lbs
440x44.45x202.5 17.35x1.74x7.99
SG 102-2424 RJ-45 10/100/1000 ports, 2 miniGBIC uplinks
1.629 Kg3.591 lbs
279.4x44.45x170 11x1.75x6.7
4
8 Cisco Unmanaged Rackmount Switches

Features
Feature DescriptionStandards IEEE 802.3, 802.3u, 802.3x, 802.3ab, 802.3z,
and 802.1p
Cabling Type Category 5 or better
Physical Security Kensington security slot on a Cisco SF 100-16, SF 100-24, SG 100-16, or SG 102-24 Unmanaged Rackmount Switch
Power 100V-240V~ 1A 50-60 Hz
Certification FCC Class A, CE
Operating Temperature 32 to 104ºF (0 to 40ºC)
Storage Temperature -4 to 158ºF (-20 to 70ºC)
Operating Humidity 10% to 90% Relative Humidity, noncondensing
Storage Humidity 10% to 90% Relative Humidity, noncondensing
Cisco Unmanaged Rackmount Switches 9

Where to Go From Here
Support
Cisco Small Business Community
www.cisco.com/smb
Cisco Small Business Support Community
www.cisco.com/go/smallbizsupport
Online Technical Support and Documentation (Login Required)
www.cisco.com/support
Phone Support Contacts www.cisco.com/en/US/support/tsd_cisco_ small_business_support_center_contacts.html
Product Documentation
Cisco Unmanaged Rackmount Switches Quick Start Guide
www.cisco.com/en/US/docs/switches/lan/csbus/sf10x-xx_sg10x-xx/quick_start/guide/78-19225-01.pdf
Regulatory, Compliance, and Safety Information
www.cisco.com/en/US/products/ps10007/tsd_products_support_series_home.html
Warranty Information www.cisco.com/go/warranty
Cisco Small Business
Cisco Partner Central for Small Business (Partner Login Required)
www.cisco.com/web/partners/sell/smb
Cisco Small Business Home www.cisco.com/smb
Marketplace www.cisco.com/go/marketplace
5
10 Cisco Unmanaged Rackmount Switches

Bienvenido
Gracias por elegir el Switch no administrado para montaje en rack SF 100-16, SF 100-24, SF 102-24, SG 100-16, SG 100-24 o SG 102-24 de Cisco, un dispositivo de comunicación de redes para la PYME de Cisco.
Esta guía lo familiarizará con la disposición del switches no administrados para montaje en rack y describirá cómo implementar el dispositivo en su red. Para obtener más información, consulte www.cisco.com/smb.
Velocidad de red y detección automática de MDI/MDI-XTodos los puertos admiten negociación automática de velocidad de red y detección de MDI/MDI-X cruzado. La negociación automática de la velocidad de red selecciona la mejor velocidad de conexión y modo (semidúplex o dúplex completo) para comunicarse con los dispositivos conectados. La detección automática de MDI/MDI-X cruzado ajusta el tipo de cable (de conexión directa o cruzado) utilizado para conectar el switches no administrados para montaje en rack a otros dispositivos.
Tecnología ecológica para el uso eficiente de la energíaLos switches SG 100-16, SG 100-24 y SG 102-24 admiten la tecnología ecológica para el uso eficiente de la energía, que aumenta la eficacia de la energía y ayuda a las empresas a usar menos energía y ahorrar dinero.
Priorización del tráficoEl switches no administrados para montaje en rack suministra calidad de servicio (QoS): todos los paquetes recibidos son analizados por el mecanismo codificador de prioridades de QoS. El switch lee el nivel de prioridad y reenvía el paquete en función de este nivel de prioridad. Por ejemplo, en situaciones de carga extrema, el tráfico de voz y video tiene prioridad sobre el tráfico de datos. De esta manera se garantiza que el tráfico que dependa del factor tiempo obtenga el nivel de servicio más alto.
Soporte de tramas JumboLos switches SG 100-16, SG 100-24 y SG 102-24 admiten tramas de hasta 9.000 bytes denominadas tramas Jumbo. El soporte de tramas Jumbo mejora el rendimiento de la red y reduce la utilización de la CPU durante la transferencia de archivos de gran tamaño, como los archivos multimedia, mediante el aumento de la carga útil de cada paquete.
Switches no administrados para montaje en rack de Cisco 1

Instalación del switch Cisco
Existen tres maneras de instalar físicamente el switch:
• Ubicar el switch en una superficie plana.
• Montar el switch en un rack estándar (1U de alto).
• Montar el switch en la pared.
Antes de instalar el Switch no administrado para montaje en rack, siga las pautas de esta sección.
Al elegir una ubicación para el switch, tenga en cuenta lo siguiente:
• Asegúrese de que el switch sea accesible y que los cables se puedan conectar con facilidad.
• Mantenga el cableado alejado de fuentes de ruido eléctrico, líneas de alta tensión y dispositivos de iluminación fluorescente.
• Ubique el switch en un lugar alejado de fuentes de agua o humedad.
• Para garantizar la circulación de aire adecuada alrededor del switch, asegúrese de proporcionar un espacio mínimo de dos pulgadas (50 mm).
• No apile más de cuatro switches independientes.
No implemente el dispositivo en una ubicación donde existan algunas de las siguientes condiciones:
Temperatura ambiente elevada: la temperatura ambiente no debe exceder los 40 °C (104 °F).
Circulación de aire reducida: no se deben obstruir los paneles laterales para evitar el sobrecalentamiento.
Sobrecarga mecánica: el dispositivo debe estar nivelado, estable y asegurado para evitar que se deslice o se desplace de su posición.
Sobrecarga del circuito: al conectar el dispositivo a la toma de corriente el circuito no debe sobrecargarse.
1
2 Switches no administrados para montaje en rack de Cisco

Ubicación del montaje en rackSiga los siguientes pasos para montar el switch en cualquier rack estándar de 19 pulgadas.
PASO 1 Ubique el switch en una superficie dura y plana con el panel frontal orientado hacia usted.
PASO 2 Conecte el soporte de montaje en rack a uno de los lados del switch con los tornillos suministrados y fíjelo firmemente. Repita este paso para conectar el otro soporte en el lado opuesto del switch.
PASO 3 Una vez colocados los soportes en el switch, utilice los tornillos adecuados para fijar firmemente los soportes a cualquier rack de 19 pulgadas.
Montaje en paredEl Switches no administrados para montaje en rack SF 100-16, SF 100-24, SG 100-16 o SG 102-24 de Cisco se puede montar en la pared.
Antes de comenzar, necesitará dos tornillos de pared (incluidos) para montar el switches no administrados para montaje en rack. Se recomienda usar tornillos con una cabeza de al menos 4 mm de ancho y con un eje de por lo menos 1,5 mm de diámetro.
ADVERTENCIA Un montaje inseguro podría dañar el dispositivo o causar lesiones. Cisco no se responsabiliza por los daños ocasionados por un montaje en pared inseguro.
12
34
56
78
910
1112
1314
1516
1718
1920
2122
2324
miniGBIC1
(Shared with 12) (Shared with 24)
miniGBIC2
Cisco Small BusinessSR2024
24-Port10/100/1000 Switch
1 2 3 4 5 6 7 8 9 10 11 12 / miniGBIC1
Link/Act
Gigabit
Link/Act
Gigabit
SYSTEM13 14 15 16 17 18 19 20 21 22 23 24 / miniGBIC2
1930
86
Switches no administrados para montaje en rack de Cisco 3

Para montar el switches no administrados para montaje en rack a la pared:
PASO 1 Decida el sitio donde quiere montar el switches no administrados para montaje en rack. Compruebe que la superficie sea lisa, plana, maciza y esté seca.
PASO 2 Perfore dos orificios de guía en la superficie con una separación de 3,74 pulgadas (95 mm) y con un espacio mínimo de 5,12 pulgadas (130 mm).
PASO 3 Inserte un tornillo en cada orificio y deje un espacio entre la superficie y la base de la cabeza del tornillo de por lo menos 0,1 pulgadas (3 mm).
PASO 4 Coloque las ranuras para montaje en la pared sobre los tornillos y deslice el switches no administrados para montaje en rack hacia abajo hasta que los tornillos queden firmes dentro de las ranuras.
2765
83
4 Switches no administrados para montaje en rack de Cisco

Conexión de los dispositivos de red
El diagrama de aplicación es un ejemplo de una configuración de red típica.
Para conectar el switches no administrados para montaje en rack a la red:
PASO 1 Conecte el cable Ethernet al puerto Ethernet de un equipo, impresora, red de almacenamiento u otro dispositivo de red.
PASO 2 Conecte el otro extremo del cable de red Ethernet a uno de los puertos Ethernet numerados del switches no administrados para montaje en rack.
El indicador luminoso del puerto se enciende si el dispositivo conectado está activo.
NOTA Si el vínculo ascendente de un conmutador no administrado y en cascada a otro se traslada de un puerto a otro, es posible que la operación de red completa demore hasta 1 minuto en reanudarse. Se trata de un comportamiento normal y esperado.
PASO 3 Repita el Paso 1 y el Paso 2 para cada dispositivo que quiera conectar al switches no administrados para montaje en rack.
2
1 2 3 4 5 6 7 8 9 10 11 12
13 14 15 16 17 18 19 20 21 22 23 24 miniGBIC1
(Shared with 12) (Shared with 24)
miniGBIC2
Cisco Small BusinessSR2024
24-Port10/100/ 1000 Swit ch
1 2 3 4 5 6 7 8 9 10 11 12 / miniGBIC1
Link/Act
Gigabit
Link/Act
Gigabit
SYSTEM 13 14 15 16 17 18 19 20 21 22 23 24 / miniGBIC2
1938
03
Switches no administrados para montaje en rack de Cisco 5

NOTA Para dar prioridad al tráfico de voz o video con la función de calidad de servicio (QoS) del switch, coloque el control de flujo en la posición off (desactivado) en la configuración de los dispositivos conectados. De no ser así, el control de flujo podría enviar una trama de pausa al switch y bloquear los paquetes QoS de alta prioridad que se encuentran en la cola del puerto. En algunos dispositivos, como determinados teléfonos o cámaras IP, es posible que el control de flujo no sea configurable.
PASO 4 Conecte el cable de alimentación eléctrica al switch y a la fuente de alimentación.
Características del Switch no administrado para montaje en rack
Esta sección describe el exterior del switches no administrados para montaje en rack que proporciona conmutación sin bloqueos y a velocidad de cable para los clientes de red.
Puertos del panel frontalLos puertos e indicadores luminosos se encuentran en el panel frontal del switch.
Puertos Ethernet RJ-45 : utilice estos puertos para conectar dispositivos de red como equipos, impresoras y puntos de acceso al switch. Los puertos Ethernet (802.3) de detección automática se utilizan para comunicaciones de redes por cable. Cada puerto Ethernet soporta velocidades de 10 Mbps, 100 Mbps o 1000 Mbps.
3
2765
79
14 3 15 4 16 5 17 6 18 7 19 8 20 9 21 10 22 11 23 12 24131 2
LINK GIGABITACT
6 Switches no administrados para montaje en rack de Cisco

MiniGBIC (si hubiera): los puertos miniGBIC (conversor de interfaz gigabit) son puntos de conexión para módulos miniGBIC a fin de que el switches no administrados para montaje en rack pueda enlazarse con otros switches mediante fibra óptica.
• Los puertos miniGBIC son compatibles con los módulos miniGBIC MGBSX1, MGBLH1, MGBT1, MGBLX1 y MGBBX1 de Cisco, y con otros módulos miniGBIC de otras marcas.
• La interfaz miniGBIC es un puerto de combinación compartido con otra interfaz RJ-45. Cuando el puerto miniGBIC está activo, se deshabilita el puerto RJ-45 más cercano.
• Los indicadores luminosos de los puertos RJ-45 responden al tráfico de la interfaz miniGBIC.
Indicadores luminosos del panel frontalIndicadores luminosos del sistema: están en verde cuando el switch está encendido.
Indicador luminoso Link/Act : (verde) se enciende cuando se detecta un link entre el puerto correspondiente y otro dispositivo. Parpadea cuando hay tráfico en el puerto.
Indicador luminoso 100M (si hubiera): (verde) se enciende y permanece encendido cuando se conecta otro dispositivo al puerto, se enciende y se establece un link de 100 Mbps entre los dispositivos. Cuando el indicador luminoso está apagado, la velocidad de conexión está por debajo de los 100 Mbps o no hay ningún dispositivo conectado al puerto.
Indicador luminoso Gigabit (si hubiera): se enciende y permanece encendido cuando se conecta otro dispositivo al puerto, se enciende y se establece un link de 1000 Mbps entre los dispositivos. Cuando el indicador luminoso está apagado, la velocidad de conexión está por debajo de los 1000 Mbps o no hay ningún dispositivo conectado al puerto.
MiniGBIC (si hubiera): se pone en verde cuando se realiza una conexión a través del puerto RJ-45 compartido. Parpadea en verde cuando está activa la conexión.
Switches no administrados para montaje en rack de Cisco 7

Panel posteriorEl puerto de encendido está ubicado en el panel posterior del switches no administrados para montaje en rack.
Panel lateralEl bloqueo Kensignton está ubicado en el panel lateral del switches no administrados para montaje en rack. (Sólo Switches no administrados para montaje en rack SF 100-16, SF 100-24, SG 100-16 o SG 102-24 de Cisco tienen bloqueo).
Especificaciones
Las siguientes tablas detallan las especificaciones para los switches no administrados para montaje en rack.
Peso y dimensiones
Modelo Peso Dimensiones en mm
Dimensiones en pulgadas
SF 100-1616 puertos RJ-45 10/100
1,251 kg2,758 lb
279,4x44,45x170 11x1,75x6,7
SF 100-2424 puertos RJ-45 10/100
1,322 kg2,915 lb
279,4x44,45x170 11x1,75x6,7
2765
80POWER
2765
81
4
8 Switches no administrados para montaje en rack de Cisco

Funciones
SF 102-2424 puertos RJ-45 10/100, 2 Gigabit compartidos puertos RJ-45/miniGBIC
1,995 kg4,398 lb
440x44,45x202,5 17,35x1,74x7,99
SG 100-1616 puertos RJ-45 10/100/1000
1,429 kg3,150 lb
279,4x44,45x170 11x1,75x6,7
SG 100-2424 puertos RJ-45 10/100/1000
2,292 kg5,053 lb
440x44,45x202,5 17,35x1,74x7,99
SG 102-2424 puertos RJ-45 10/100/1000, 2 uplinks miniGBIC
1,629 kg3,591 lb
279,4x44,45x170 11x1,75x6,7
Función DescripciónNormas IEEE 802.3, 802.3u, 802.3x, 802.3ab, 802.3z
y 802.1p
Tipo de cableado Categoría 5 o superior
Seguridad física Ranura de seguridad Kensington en el Switches no administrados para montaje en rack SF 100-16, SF 100-24, SG 100-16 o SG 102-24 de Cisco
Energía 100 V - 240 V~ 1A 50-60 Hz
Certificación FCC Clase A, CE
Temperatura operativa 32 a 104 ºF (0 a 40 ºC)
Temperatura de almacenamiento
-4 a 158 ºF (-20 a 70 ºC)
Humedad operativa 10% al 90% de humedad relativa, sin condensación
Humedad de almacenamiento
10% al 90% de humedad relativa, sin condensación
Modelo Peso Dimensiones en mm
Dimensiones en pulgadas
Switches no administrados para montaje en rack de Cisco 9

Cómo seguir
Asistencia técnica
Comunidad de asistencia técnica de Cisco para la PYME
www.cisco.com/go/smallbizsupport
Asistencia técnica y documentación en línea (se debe iniciar sesión)
www.cisco.com/support
Contactos de asistencia técnica telefónica
www.cisco.com/en/US/support/tsd_cisco_ small_business_support_center_contacts.html
Documentación del producto
Switches no administrados para montaje en rack de Cisco Guía de inicio rápido
www.cisco.com/en/US/docs/switches/lan/csbus/sf10x-xx_sg10x-xx/quick_start/guide/78-19225-01.pdf
Información sobre cumplimiento de normativas y seguridad
www.cisco.com/en/US/products/ps10007/tsd_products_support_series_home.html
Información de garantía www.cisco.com/go/warranty
Cisco Small Business
Central para socios Cisco para la PYME (se debe iniciar sesión como socio)
www.cisco.com/web/partners/sell/smb
Página principal de Cisco Small Business
www.cisco.com/smb
Mercado www.cisco.com/go/marketplace
5
10 Switches no administrados para montaje en rack de Cisco

Benvenuti
Grazie per aver scelto lo Switch Cisco per montaggio in rack non gestito SF 100-16, SF 100-24, SF 102-24, SG 100-16, SG 100-24 o SG 102-24, un dispositivo di comunicazione di rete Cisco Small Business.
Questa guida farà familiarizzare con il layout dello switch per montaggio in rack non gestito e descriverà come distribuire il dispositivo sulla rete. Per ulteriori informazioni, consultare www.cisco.com/smb.
Velocità di rete e rilevamento MDI/MDI-X automaticiTutte le porte supportano la negoziazione della velocità di rete e il rilevamento del cavo MDI/MDIX automatici. La negoziazione della velocità di rete automatica seleziona automaticamente la velocità e la modalità di connessione (half-duplex o full-duplex) migliori per la comunicazione con i dispositivi collegati. Il rilevamento del cavo MDI/MDI-X automatico consente di regolare automaticamente il tipo di cavo (passante diretto o a scambio incrociato) utilizzato per collegare lo switch per montaggio in rack non gestito ad altri dispositivi.
Tecnologia Energia verdeGli switch SG 100-16, SG 100-24 e SG 102-24 supportano la tecnologia Energia verde che aumenta l'efficienza dell'energia e aiuta le imprese a utilizzare meno energia e a risparmiare denaro.
Assegnazione di priorità del trafficoGli switch per montaggio in rack non gestito offrono Quality of Service (QoS); tutti i pacchetti ricevuti vengono esaminati per la codifica della priorità QoS. Lo switch legge il livello di priorità e inoltra il pacchetto in base a quel livello di priorità. Per esempio, in caso di utilizzo intenso il traffico vocale e quello video rappresentano una priorità stabilita sul traffico di dati. Ciò assicura che il traffico con esigenze in termini di tempi di risposta ottenga il massimo livello di servizio.
Supporto frame jumboGli switch SG 100-16, SG 100-24 e SG 102-24 supportano frame fino a 9.000 byte chiamati frame jumbo. Il supporto frame jumbo migliora il throughput di rete e riduce l'utilizzo di CPU durante trasferimenti di file di grandi dimensioni, come file multimediali, consentendo maggiori carichi utili in ogni pacchetto.
Switch Cisco per montaggio in rack non gestito 1

Installazione dello switch Cisco
È possibile installare fisicamente lo switch in tre modi:
• Installare lo switch su una superficie piana.
• Montare lo switch in un rack standard (alto 1U).
• Montare lo switch su una parete.
Prima di installare lo Switch per montaggio in rack non gestito, seguire le indicazioni in questa sezione.
Posizionare lo switch considerando le seguenti indicazioni:
• Accertarsi che lo switch sia accessibile e che sia facile collegare i cavi.
• Mantenere i cavi distanti da fonti di possibili disturbi elettromagnetici, linee elettriche e sorgenti di luce fluorescente.
• Posizionare lo switch distante da acqua o fonti di umidità.
• Per garantire una circolazione dell'aria sufficiente intorno allo switch, lasciare uno spazio libero di almeno due pollici (50 mm).
• Non impilare più di quattro switch indipendenti.
Non distribuire il dispositivo in posti in cui sussiste una delle seguenti condizioni:
Temperatura ambiente elevata: la temperatura ambiente non deve superare i 104 gradi Fahrenheit (40 °C).
Circolazione dell'aria ridotta: entrambi i pannelli laterali devono essere liberi in modo da evitare il surriscaldamento.
Sovraccarico meccanico: il dispositivo deve essere piatto, stabile e sicuro in modo da evitare che scivoli o che si sposti dalla posizione.
Sovraccarico del circuito: l'aggiunta del dispositivo alla presa di corrente non deve sovraccaricare quel circuito.
1
2 Switch Cisco per montaggio in rack non gestito

Installazione all'interno di rackPer installare lo switch all'interno di qualsiasi rack standard largo 19 pollici, attenersi alla seguente procedura.
PASSAGGIO1 Posizionare lo switch su una superficie piana, rigida con il pannello frontale rivolto verso di sé.
PASSAGGIO2 Fissare una staffa di montaggio a uno dei lati dello switch utilizzando le viti fornite e stringerla saldamente. Ripetere questo passaggio per fissare l'altra staffa sul lato opposto dello switch.
PASSAGGIO3 Fissate le staffe allo switch, utilizzare viti appropriate per fissare saldamente le staffe a qualsiasi rack standard lungo 19 pollici.
Montaggio a pareteUno Switch Cisco per montaggio in rack non gestito SF 100-16, SF 100-24, SG 100-16 o SG 102-24 può essere montato a parete.
Prima di iniziare, sono necessarie 2 viti per cartongesso (fornite) per montare lo switch per montaggio in rack non gestito. Si consiglia di utilizzare viti con testa larga almeno 4 mm e un diametro del fusto di almeno 1,5 mm.
AVVISO Il montaggio non sicuro potrebbe danneggiare il dispositivo o provocare lesioni. Cisco non è responsabile dei danni verificatisi a causa di un montaggio a parete non sicuro.
12
34
56
78
910
1112
1314
1516
1718
1920
2122
2324
miniGBIC1
(Shared with 12) (Shared with 24)
miniGBIC2
Cisco Small BusinessSR2024
24-Port10/100/1000 Switch
1 2 3 4 5 6 7 8 9 10 11 12 / miniGBIC1
Link/Act
Gigabit
Link/Act
Gigabit
SYSTEM13 14 15 16 17 18 19 20 21 22 23 24 / miniGBIC2
1930
86
Switch Cisco per montaggio in rack non gestito 3

Per montare lo switch per montaggio in rack non gestito alla parete:
PASSAGGIO1 Determinare dove si desidera montare lo switch per montaggio in rack non gestito. Verificare che la superficie sia liscia, piana, asciutta e solida.
PASSAGGIO2 Effettuare due fori pilota sulla superficie a 3,74 pollici (95 mm) di distanza e con uno spazio libero di almeno 5,12 pollici (130 mm).
PASSAGGIO3 Inserire una vite in ogni foro, lasciando uno spazio tra la superficie e la base della testa della vite di almeno 0,1 pollici (3 mm).
PASSAGGIO4 Allineare le fessure per il montaggio a parete dello switch per montaggio in rack non gestito con le viti e spingere lo switch per montaggio in rack non gestito verso il basso fino a inserire saldamente le viti nelle fessure.
2765
83
4 Switch Cisco per montaggio in rack non gestito

Collegamento di dispositivi di rete
La figura rappresenta un esempio della tipica configurazione di rete.
Per collegare lo switch per montaggio in rack non gestito alla rete:
PASSAGGIO1 Collegare un cavo Ethernet alla porta Ethernet di un computer, di una stampante, di un sistema di memorizzazione di rete oppure di un altro dispositivo di rete.
PASSAGGIO2 Collegare l'altra estremità del cavo di rete Ethernet a una delle porte Ethernet numerate dello switch per montaggio in rack non gestito.
Il LED della porta si accende se il dispositivo connesso è attivo.
NOTA Se il collegamento da uno switch non gestito e a cascata a un altro viene spostato da una porta a un'altra, per riattivare il funzionamento completo della rete dura circa un minuto. Si tratta di un'operazione normale e prevista.
PASSAGGIO3 Ripetere il Passaggio 1 e il Passaggio 2 per ogni dispositivo che si desidera collegare allo switch per montaggio in rack non gestito.
2
1 2 3 4 5 6 7 8 9 10 11 12
13 14 15 16 17 18 19 20 21 22 23 24 miniGBIC1
(Shared with 12) (Shared with 24)
miniGBIC2
Cisco Small BusinessSR2024
24-Port10/100/ 1000 Swit ch
1 2 3 4 5 6 7 8 9 10 11 12 / miniGBIC1
Link/Act
Gigabit
Link/Act
Gigabit
SYSTEM 13 14 15 16 17 18 19 20 21 22 23 24 / miniGBIC2
1938
03
Switch Cisco per montaggio in rack non gestito 5

NOTA Per dare priorità al traffico vocale e video attraverso la funzione QoS dello switch, impostare il controllo del flusso su off nelle configurazioni dei dispositivi collegati. In caso contrario, il controllo del flusso potrebbe inviare un frame di pausa allo switch, bloccando i pacchetti QoS ad alta priorità in coda nella porta. In alcuni dispositivi, come i telefoni e le telecamere IP, il controllo del flusso potrebbe non essere configurabile.
PASSAGGIO4 Collegare il cavo di alimentazione allo switch e a una fonte di alimentazione.
Funzioni dello Switch per montaggio in rack non gestito
Questa sezione descrive l'esterno degli switch per montaggio in rack non gestito che offrono uno switching senza blocchi e wire speed per i clienti della rete.
Porte del pannello frontaleLe porte e i LED sono posizionati sul pannello frontale dello switch.
Porte Ethernet RJ-45: utilizzare queste porte per collegare i dispositivi di rete, come i computer, le stampanti e i punti di accesso, allo switch. Le porte con rilevamento automatico Ethernet (802.3) vengono utilizzate per le comunicazioni di rete cablate. Ogni porta Ethernet supporta velocità di rete pari a 10 Mbps, 100 Mbps o 1000 Mbps.
3
2765
79
14 3 15 4 16 5 17 6 18 7 19 8 20 9 21 10 22 11 23 12 24131 2
LINK GIGABITACT
6 Switch Cisco per montaggio in rack non gestito

MiniGBIC (se presente): le porte di conversione dell'interfaccia Gigabit sono punti di connessione per i moduli miniGBIC, quindi lo switch per montaggio in rack non gestito può collegare altri switch attraverso una fibra ottica.
• Le porte miniGBIC sono compatibili con i moduli miniGBIC di Cisco MGBSX1, MGBLH1, MGBT1, MGBLX1, MGBBX1 e con gli altri marchi dei moduli miniGBIC.
• L'interfaccia miniGBIC è una porta di combinazione, condivisa con un'altra interfaccia RJ-45. Quando MiniGBIC è attivo, la porta RJ-45 più vicina è disattivata.
• I LED in RJ-45 rispondono al traffico dell'interfaccia miniGBIC.
LED del pannello frontaleLED di sistema: si accende di colore verde quando lo switch è alimentato.
LED collegamento/attività: si accende (di colore verde) quando viene rilevato un collegamento tra la porta corrispondente e un altro dispositivo. Lampeggia quando nella porta sta passando traffico.
LED 100M (se presente): si accende (di colore verde) e rimane acceso quando un altro dispositivo è collegato alla porta, è alimentato e viene stabilita una connessione a 100 Mbps tra i dispositivi. Quando il LED è disattivato, la velocità di connessione è inferiore ai 100 Mbps oppure non c'è niente collegato alla porta.
LED Gigabit (se presente): si accende e rimane acceso quando un altro dispositivo è collegato alla porta, è alimentato e viene stabilita una connessione a 1000 Mbps tra i dispositivi. Quando il LED è disattivato, la velocità di connessione è inferiore ai 1000 Mbps oppure non c'è niente collegato alla porta.
MiniGBIC (se presente): si accende di colore verde quando viene realizzata una connessione attraverso la porta RJ-45 condivisa. Lampeggia di colore verde quando la connessione è attiva.
Pannello posterioreLa porta di alimentazione è posizionata sul pannello posteriore dello switch per montaggio in rack non gestito.
2765
80POWER
Switch Cisco per montaggio in rack non gestito 7

Pannello lateraleIl blocco Kensington è posizionato sul pannello laterale dello switch per montaggio in rack non gestito (Solo lo Switch Cisco per montaggio in rack non gestito SF 100-16, SF 100-24, SG 100-16 o SG 102-24 ha un blocco).
Specifiche
Le seguenti tabelle elencano le specifiche degli switch per montaggio in rack non gestito.
Pesi e dimensioni
Modello Peso Dimensioni in mm
Dimensioni in pollici
Porte SF 100-1616 RJ-45 10/100
1,251 Kg2,758 lbs
279,4x44,45x170 11x1,75x6,7
Porte SF 100-2424 RJ-45 10/100
1,322 Kg2,915 lbs
279,4x44,45x170 11x1,75x6,7
Porte SF 102-2424 RJ-45 10/100, 2 Gigabit condivisi porte RJ-45/miniGBIC
1,995 Kg4,398 lbs
440x44,45x202,5 17,35x1,74x7,99
Porte SG 100-1616 RJ-45 10/100/1000
1,429 Kg3,150 lbs
279,4x44,45x170 11x1,75x6,7
Porte SG 100-2424 RJ-45 10/100/1000
2,292 Kg2,292 lbs
440x44,45x202,5 17,35x1,74x7,99
Porte SG 102-2424 RJ-45 10/100/1000, 2 collegamenti miniGBIC
1,629 Kg3,591 lbs
279,4x44,45x170 11x1,75x6,7
2765
81
4
8 Switch Cisco per montaggio in rack non gestito

Caratteristiche
Funzione DescrizioneStandard IEEE 802.3, 802.3u, 802.3x, 802.3ab, 802.3z
e 802.1p
Tipo di cavo Categoria 5 o di qualità superiore
Protezione fisica Slot di sicurezza Kensington su uno Switch Cisco per montaggio in rack non gestito SF 100-16, SF 100-24, SG 100-16 o SG 102-24
Alimentazione 100V-240V~ 1A 50-60 Hz
Certificazioni Classe A FCC, CE
Temperatura di esercizio Da 32 a 104 ºF (da 0 a 40 ºC)
Temperatura di immagazzinaggio
Da -4 a 158 ºF (da -20 a 70 °C)
Umidità di esercizio Dal 10% al 90% di umidità relativa, senza condensa
Umidità di immagazzinaggio
Dal 10% al 90% di umidità relativa, senza condensa
Switch Cisco per montaggio in rack non gestito 9

Risorse aggiuntive
Supporto
Cisco Small Business Support Community
www.cisco.com/go/smallbizsupport
Assistenza tecnica e documentazione online (richiede l'immissione di dati di accesso)
www.cisco.com/support
Contatti del supporto telefonico www.cisco.com/en/US/support/tsd_cisco_ small_business_support_center_contacts.html
Documentazione prodotti
Guida di riferimento rapido degli Switch Cisco per montaggio in rack non gestito
www.cisco.com/en/US/docs/switches/lan/csbus/sf10x-xx_sg10x-xx/quick_start/guide/78-19225-01.pdf
Conformità alle normative e informazioni sulla sicurezza
www.cisco.com/en/US/products/ps10007/tsd_products_support_series_home.html
Informazioni sulla garanzia www.cisco.com/go/warranty
Cisco Small Business
Cisco Partner Central per Small Business (richiede l'immissione di dati di accesso da parte dei partner)
www.cisco.com/web/partners/sell/smb
Cisco Small Business Home www.cisco.com/smb
Marketplace www.cisco.com/go/marketplace
5
10 Switch Cisco per montaggio in rack non gestito

Willkommen
Vielen Dank, dass Sie sich für den Cisco SF 100-16, SF 100-24, SF 102-24, SG 100-16, SG 100-24 oder SG 102-24 Unmanaged Rackmount Switch entschieden haben, ein Netzwerkkommunikationsgerät von Cisco Small Business.
In dieser Anleitung wird der Aufbau des Unmanaged Rackmount Switch beschrieben und wie Sie das Gerät in Ihrem Netzwerk bereitstellen können. Weitere Informationen finden Sie unter www.cisco.com/smb.
Netzwerkgeschwindigkeit und Auto-MDI/MDI-X-ErkennungAlle Ports unterstützen die automatische Aushandlung der Netzwerkgeschwindigkeit und Auto-MDI/MDI-X-Kreuzungserkennung. Mit der automatischen Aushandlung der Netzwerkgeschwindigkeit werden automatisch die optimale Verbindungsgeschwindigkeit und der optimale Modus (Halb- oder Vollduplex) für die Kommunikation mit angeschlossenen Geräten ausgewählt. Die Auto MDI/MDI-X-Kreuzungserkennung stellt sich automatisch auf die Art des Kabels (gekreuzt oder ungekreuzt) ein, mit dem der Unmanaged Rackmount Switch mit anderen Geräten verbunden wird.
Umweltfreundliche energieeffiziente TechnologieSG 100-16, SG 100-24 und SG 102-24 Switches unterstützen die umweltfreundliche energieeffiziente Technologie, die die Energieeffizienz erhöht und Unternehmen dabei unterstützt, weniger Energie zu verwenden und so Geld zu sparen.
Priorität des DatenverkehrsDie Unmanaged Rackmount Switches liefern Quality of Service (QoS, Servicequalität); alle empfangenen Pakete werden auf ihre QoS-Prioritätskodierung geprüft. Der Switch liest das Prioritätslevel und leitet das Paket auf Grundlage dieses Prioritätslevels weiter. Beispielsweise erhalten Video- und Sprachübertragungen bei hohen Belastungen Priorität gegenüber Datenübertragungen. Dadurch wird gewährleistet, dass zeitsensibler Datenverkehr das höchste Servicelevel erhält.
Jumbo Frame-UnterstützungSG 100-16, SG 100-24 und SG 102-24 Switches unterstützen Frames von bis zu 9.000 Byte, sogenannte Jumbo Frames. Die Jumbo Frame-Unterstützung verbessert den Netzwerkdurchsatz und verringert bei großen Datenübertragungen wie Multimediadateien die CPU-Auslastung, da mit jedem Paket mehr Daten übertragen werden können.
Cisco Unmanaged Rackmount Switches 1

Installation des Cisco Switch
Es gibt drei Möglichkeiten, den Switch zu installieren:
• Legen Sie den Switch auf eine flache Oberfläche.
• Montieren Sie den Switch in einem Standard-Rack (1 HE hoch).
• Montieren Sie den Switch an einer Wand.
Beachten Sie die Hinweise in diesem Abschnitt, bevor Sie den Unmanaged Rackmount Switch installieren.
Beachten Sie bei der Auswahl eines Installationsorts für den Switch die folgenden Hinweise:
• Stellen Sie sicher, dass der Switch zugänglich ist und die Kabel leicht verbunden werden können.
• Halten Sie Kabel von elektronischen Lärmquellen, Stromleitungen und Neonlichtgeräten fern.
• Positionieren Sie den Switch nicht in der Nähe von Wasser und Feuchtigkeitsquellen.
• Achten Sie darauf, dass um den Switch herum mindestens ein Freiraum von 50 mm eingehalten wird, um eine ausreichende Luftzirkulation sicherzustellen.
• Stapeln Sie freistehende Switches nicht höher als vier Einheiten.
Stellen Sie das Gerät nicht an einem Ort auf, auf den eines der folgenden Kriterien zutrifft:
Hohe Umgebungstemperatur – Die Umgebungstemperatur darf 40 C° nicht überschreiten.
Verringerte Luftzirkulation – Um beide Seitenteile herum muss ein Freiraum vorhanden sein, damit eine Überhitzung vermieden wird.
Mechanische Überlastung – Das Gerät sollte gerade, stabil und sicher aufgestellt werden, damit es nicht verrutscht oder sich bewegt.
Überlastung des Stromkreises – Der Anschluss des Geräts an die Steckdose darf diesen Stromkreis nicht überlasten.
1
2 Cisco Unmanaged Rackmount Switches

RackinstallationFolgen Sie diesen Schritten, um den Switch in einem handelsüblichen 19-Zoll-Rack zu installieren.
SCHRITT 1 Legen Sie den Switch mit der Vorderseite zu Ihnen auf eine feste und flache Oberfläche.
SCHRITT 2 Befestigen Sie an einer Seite des Switch mit den mitgelieferten Schrauben eine Halterung zur Rackinstallation und ziehen Sie die Schrauben an der Halterung fest an. Wiederholen Sie diesen Schritt, um die andere Halterung auf der anderen Seite des Switch zu befestigen.
SCHRITT 3 Befestigen Sie nach dem Anbringen der Halterungen am Switch die Halterungen mit passenden Schrauben an einem handelsüblichen 19-Zoll-Rack und ziehen Sie diese Schrauben fest an.
WandmontageEin Cisco SF 100-16, SF 100-24, SG 100-16 oder SG 102-24 Unmanaged Rackmount Switch kann an der Wand befestigt werden.
Bevor Sie beginnen, benötigen Sie die 2 Schrauben zur Wandbefestigung (mitgeliefert), damit Sie den Unmanaged Rackmount Switch befestigen können. Wir empfehlen, Schrauben zu verwenden, deren Kopf mindestens 4 mm breit ist und deren Gewindedurchmesser mindestens 1,5 mm beträgt.
WARNUNG Eine instabile Befestigung könnte das Gerät beschädigen oder zu Verletzungen führen. Cisco übernimmt keine Verantwortung für Schäden, die durch instabile Wandbefestigungen entstehen.
12
34
56
78
910
1112
1314
1516
1718
1920
2122
2324
miniGBIC1
(Shared with 12) (Shared with 24)
miniGBIC2
Cisco Small BusinessSR2024
24-Port10/100/1000 Switch
1 2 3 4 5 6 7 8 9 10 11 12 / miniGBIC1
Link/Act
Gigabit
Link/Act
Gigabit
SYSTEM13 14 15 16 17 18 19 20 21 22 23 24 / miniGBIC2
1930
86
Cisco Unmanaged Rackmount Switches 3

So befestigen Sie den Unmanaged Rackmount Switch an der Wand:
SCHRITT 1 Legen Sie fest, wo Sie den Unmanaged Rackmount Switch befestigen möchten. Vergewissern Sie sich, dass die Oberfläche glatt, flach, trocken und stabil ist.
SCHRITT 2 Bohren Sie mit einem Abstand von 95 mm und unter Einhaltung eines Mindestabstands von 130 mm (5,12 Zoll) zwei Vorbohrungen in die Oberfläche.
SCHRITT 3 Drehen Sie in jedes Loch eine Schraube ein, lassen Sie dabei zwischen der Oberfläche und dem Schraubenkopf mindestens einen Abstand von 3 mm.
SCHRITT 4 Führen Sie die Montageschlitze des Unmanaged Rackmount Switch über die Schrauben und schieben Sie den Unmanaged Rackmount Switch nach unten, bis die Schrauben fest in die Schlitze eingerastet sind.
2765
83
4 Cisco Unmanaged Rackmount Switches

Anschluss von Netzwerkgeräten
Das Anwendungsdiagramm ist ein Beispiel für eine typische Netzwerkkonfiguration.
So verbinden Sie den Unmanaged Rackmount Switch mit dem Netzwerk:
SCHRITT 1 Verbinden Sie das Ethernet-Kabel mit dem Ethernet-Port eines Computers, Druckers, Netzwerkspeichers oder eines anderen Netzwerkgeräts.
SCHRITT 2 Verbinden Sie das andere Ende des Netzwerk-Ethernet-Kabels mit einem der durchnummerierten Ethernet-Ports des Unmanaged Rackmount Switch.
Die LED des Ports leuchtet auf, wenn das angeschlossene Gerät aktiv ist.
HINWEIS Wenn die Uplink-Verbindung eines nicht verwalteten, hintereinander geschalteten Switch von einem Port zu einem anderen Port verlegt wird, kann es bis zu einer Minute dauern, bis die Betriebsfähigkeit des Netzwerks wieder vollständig wiederhergestellt ist. Das ist ein normales und erwartungsgemäßes Verhalten.
2
1 2 3 4 5 6 7 8 9 10 11 12
13 14 15 16 17 18 19 20 21 22 23 24 miniGBIC1
(Shared with 12) (Shared with 24)
miniGBIC2
Cisco Small BusinessSR2024
24-Port10/100/ 1000 Swit ch
1 2 3 4 5 6 7 8 9 10 11 12 / miniGBIC1
Link/Act
Gigabit
Link/Act
Gigabit
SYSTEM 13 14 15 16 17 18 19 20 21 22 23 24 / miniGBIC2
1938
03
Cisco Unmanaged Rackmount Switches 5

SCHRITT 3 Wiederholen Sie Schritt 1 und Schritt 2 für jedes Gerät, dass Sie mit dem Unmanaged Rackmount Switch verbinden möchten.
HINWEIS Wenn Sie mit der QoS-Funktion des Switch Sprach- oder Videoübertragungen Priorität einräumen möchten, setzen Sie in den Konfigurationen der angeschlossenen Geräte die Flusssteuerung auf Aus. Wenn Sie dies nicht tun, sendet die Flusssteuerung möglicherweise einen Pausenframe an den Switch, der die am Port aufgelaufenen hochprioritären QoS-Pakete blockiert. Bei einigen Geräten wie etwa IP-Telefonen und IP-Kameras lässt sich die Flusssteuerung möglicherweise nicht konfigurieren.
SCHRITT 4 Schließen Sie das Netzkabel an den Switch und eine Stromquelle an.
Funktonen des Unmanaged Rackmount Switch
In diesem Abschnitt wird das Äußere der Unmanaged Rackmount Switches beschrieben, die Ihren Netzwerk-Clients Non-Blocking-, Wire-Speed-Switching bieten.
Ports an der VorderseiteDie Ports und LEDs befinden sich an der Vorderseite des Switch.
RJ-45-Ethernet-Ports – Verwenden Sie diese Ports, um Netzwerkgeräte wie Computer, Drucker und Access Points an den Switch anzuschließen. Die Autosensing-Ethernet-802.3-Ports werden für die drahtgebundene Netzwerkkommunikation verwendet. Jeder Ethernet-Port unterstützt Netzwerkgeschwindigkeiten von 10 MBit/s, 100 MBit/s oder 1000 MBit/s.
327
6579
14 3 15 4 16 5 17 6 18 7 19 8 20 9 21 10 22 11 23 12 24131 2
LINK GIGABITACT
6 Cisco Unmanaged Rackmount Switches
MiniGBIC (sofern vorhanden) – Die MiniGBIC-Ports (GBIC, Gigabit Interface Converter) sind Anschlusspunkte für MiniGBIC-Module, sodass der Unmanaged Rackmount Switch über einen Lichtwellenleiter eine Uplink-Verbindung mit anderen Switches herstellen kann.
• MiniGBIC-Ports sind kompatibel mit den MiniGBIC-Modulen MGBSX1, MGBLH1, MGBT1, MGBLX1 und MGBBX1 von Cisco sowie mit MiniGBIC-Modulen anderer Hersteller.
• Die MiniGBIC-Schnittstelle ist ein Mehrfach-Port, der mit einer anderen RJ-45-Schnittstelle geteilt wird. Wenn der MiniGBIC aktiv ist, ist der nächste RJ-45-Port deaktiviert.
• Die LEDs am RJ-45 reagieren auf den Datenverkehr der MiniGBIC-Schnittstelle.
LEDs an der VorderseiteSystem-LED – Leuchtet grün auf, wenn der Switch eingeschaltet wird.
Link/Act-LED – Leuchtet (grün) auf, wenn eine Verbindung zwischen dem betreffendem Port und einem anderen Gerät erkannt wird. Blinkt, wenn der Port Daten weiterleitet.
100M-LED (wenn vorhanden) – Leuchtet (grün) auf und bleibt an, wenn ein anderes Gerät an den Port angeschlossen, er eingeschaltet und eine Verbindung von 100-MBit/s zwischen den Geräten besteht. Wenn die LED aus ist, liegt die Verbindungsgeschwindigkeit unter 100 MBit/s oder an den Port ist nichts angeschlossen.
Gigabit-LED (wenn vorhanden) – Leuchtet auf und bleibt an, wenn ein anderes Gerät an den Port angeschlossen, er eingeschaltet und eine Verbindung von 1000 MBit/s zwischen den Geräten besteht. Wenn die LED aus ist, liegt die Verbindungsgeschwindigkeit unter 1000 MBit/s oder an den Port ist nichts angeschlossen.
MiniGBIC (wenn vorhanden) – Leuchtet Grün auf, wenn über den gemeinsamen RJ-45-Port eine Verbindung aufgebaut wird. Sie blinkt grün, wenn die Verbindung aktiv ist.
Cisco Unmanaged Rackmount Switches 7

RückseiteDer Netzanschluss befindet sich auf der Rückseite des Unmanaged Rackmount Switch.
SeitenteilDas Kensington-Schloss befindet sich am Seitenteil des Unmanaged Rackmount Switch. (Nur das Cisco SF 100-16, SF 100-24, SG 100-16 oder SG 102-24 Unmanaged Rackmount Switch verfügt über ein Schloss.)
Technische Daten
In den folgenden Tabellen werden die technischen Daten für die Unmanaged Rackmount Switches aufgelistet.
Gewicht und Abmessungen
Modell Gewicht Abmessungen in mm
Abmessungen in Zoll
SF 100-1616 RJ-45-10/100-Ports
1,251 kg 279,4 x 44,45 x 170 11 x 1,75 x 6,7
SF 100-2424 RJ-45-10/100-Ports
1,322 kg 279,4 x 44,45 x 170 11 x 1,75 x 6,7
SF 102-2424 RJ-45-10/100-Ports, 2 geteilte Gigabit-RJ-45/miniGBIC-Ports
1,995 kg 440 x 44,45 x 202,5
17,35 x 1,74 x 7,99
2765
80POWER
2765
81
4
8 Cisco Unmanaged Rackmount Switches

Funktionen
SG 100-1616 RJ-45-10/100/1000-Ports
1,429 kg 279,4 x 44,45 x 170
11 x 1,75 x 6,7
SG 100-2424 RJ-45-10/100/1000-Ports
2,292 kg 440 x 44,45 x 202,5
17,35 x 1,74 x 7,99
SG 102-2424 RJ-45-10/100/1000-Ports, 2 MiniGBIC-Uplink-Verbindungen
1,629 kg 279,4 x 44,45 x 170
11 x 1,75 x 6,7
Funktion ErläuterungStandards IEEE 802.3, 802.3u, 802.3x, 802.3ab, 802.3z
und 802.1p
Kabelart Kategorie 5 oder besser
Physische Sicherheit Vorrichtung für Kensington-Schloss bei einem Cisco SF 100-16, SF 100-24, SG 100-16 oder SG 102-24 Unmanaged Rackmount Switch
Stromversorgung 100 V - 240 V~ 1A 50 - 60 Hz
Zertifizierung FCC-Klasse A, CE
Betriebstemperatur 0 bis 40 ºC
Lagertemperatur -20 bis 70 ºC
Luftfeuchtigkeit im Betrieb 10 % bis 90 % relative Luftfeuchtigkeit, nichtkondensierend
Luftfeuchtigkeit bei Lagerung
10 % bis 90 % relative Luftfeuchtigkeit, nichtkondensierend
Modell Gewicht Abmessungen in mm
Abmessungen in Zoll
Cisco Unmanaged Rackmount Switches 9

Weitere Informationen
Support
Cisco Small Business-Support-Community
www.cisco.com/go/smallbizsupport
Technischer Online-Support und Dokumentation (Anmeldung erforderlich)
www.cisco.com/support
Telefonischer Kundensupport www.cisco.com/en/US/support/tsd_cisco_ small_business_support_center_contacts.html
Produktdokumentation
Cisco Unmanaged Rackmount Switches Kurzanleitung
www.cisco.com/en/US/docs/switches/lan/csbus/sf10x-xx_sg10x-xx/quick_start/guide/78-19225-01.pdf
Gesetzliche Bestimmungen und Sicherheitsinformationen
www.cisco.com/en/US/products/ps10007/tsd_products_support_series_home.html
Garantiebestimmungen www.cisco.com/go/warranty
Cisco Small Business
Cisco Partnerzentrale für Small Business (Partner-Anmeldung erforderlich)
www.cisco.com/web/partners/sell/smb
Cisco Small Business-Homepage
www.cisco.com/smb
Marktplatz www.cisco.com/go/marketplace
5
10 Cisco Unmanaged Rackmount Switches

Bienvenue
Merci d’avoir choisi le Commutateur non géré SF 100-16, SF 100-24, SF 102-24, SG 100-16, SG 100-24 ou SG 102-24 Cisco montable en rack, un appareil de communication en réseau de Cisco Small Business.
Ce guide a pour objectif de vous aider à vous familiariser avec la disposition du commutateur non géré montable en rack et décrit également le déploiement de l’appareil sur votre réseau. Pour plus d’informations, consultez le site www.cisco.com/smb.
Négociation automatique de la vitesse du réseau et détection automatique de MDI/MDI-XTous les ports prennent en charge la négociation automatique de la vitesse du réseau ainsi que la détection automatique de MDI/MDI-X. La fonction de négociation automatique sélectionne automatiquement la vitesse et le mode de connexion (en duplex intégral/partiel) les plus appropriés pour la communication des appareils reliés. La fonction de détection automatique de MDI/MDI-X détermine automatiquement le type de câble adéquat (droit ou croisé) reliant le commutateur non géré montable en rack aux autres appareils.
Technologie d’énergie verteLes commutateurs SG 100-16, SG 100-24 et SG 102-24 prennent en charge cette technologie permettant d’améliorer l’efficacité énergétique. Les entreprises peuvent ainsi réaliser des économies en utilisant moins d’énergie.
Définition de la priorité du traficLa qualité de service (QoS) est assurée pour l’ensemble des commutateurs non gérés montables en rack. Un niveau de priorité de la qualité de service est attribué à chaque paquet reçu. Le commutateur lit le niveau de priorité et transfère le paquet en fonction de ce niveau. Par exemple, lors des chargements importants, les trafics vocal et vidéo sont prioritaires par rapport au trafic de données. Ainsi, les trafics urgents obtiennent le niveau de service le plus élevé.
Prise en charge des trames JumboLes commutateurs SG 100-16, SG 100-24 et SG 102-24 prennent en charge des trames jusqu’à 9 000 octets, également appelées trames Jumbo. La prise en charge de ces trames améliore les performances du réseau. Elle réduit également l’utilisation du processeur lors des transferts de fichiers volumineux, tels que les fichiers multimédias, et permet ainsi des charges utiles par paquet plus grandes.
Commutateurs non gérés Cisco montables en rack 1

Installation du commutateur Cisco
Pour installer le commutateur, vous disposez de trois possibilités :
• Placez le commutateur sur une surface plane.
• Installez le commutateur dans une armoire rack standard (d’une hauteur 1U).
• Fixez le commutateur au mur.
Avant de procéder à l’installation du Commutateur non géré montable en rack, suivez les instructions de cette section.
Lorsque vous choisissez un emplacement pour le commutateur, procédez comme suit :
• Assurez-vous que le commutateur est accessible et que les câbles peuvent être branchés facilement.
• Eloignez les câbles des sources susceptibles de produire du bruit électrique, des lignes électriques et des éclairages fluorescents.
• Veillez à ne pas placer le commutateur à proximité d’une source d’eau ou d’humidité.
• Assurez-vous d’avoir laissé au moins 50 mm (2 pouces) autour du commutateur pour permettre une ventilation suffisante.
• Veillez à ne pas empiler plus de quatre commutateurs amovibles.
Veillez à ne pas installer l’appareil dans un local s’il remplit l’une des conditions suivantes :
Une température ambiante élevée : la température ambiante ne doit pas dépasser les 40 °C (104 °F).
Une ventilation limitée : les deux panneaux latéraux ne doivent pas être obstrués pour éviter la surchauffe.
Surcharge mécanique : l’appareil doit être nivelé, stable et fixe pour éviter tout glissement ou déplacement par rapport à son emplacement d’origine.
Surcharge du circuit : le branchement de l’appareil à la prise secteur ne doit en aucun cas surcharger le circuit.
1
2 Commutateurs non gérés Cisco montables en rack

Montage en rackPour monter le commutateur en rack dans une armoire rack standard de 19 pouces, procédez comme suit.
ÉTAPE 1 Placez le commutateur sur une surface dure et plane en orientant le panneau avant vers vous.
ÉTAPE 2 Fixez un support de montage en rack à l’un des côtés du commutateur à l’aide des vis fournies et resserrez-les fermement. Renouvelez cette étape pour fixer l’autre support sur le côté opposé du commutateur.
ÉTAPE 3 Après avoir fixé les supports au commutateur, utilisez les vis appropriées pour fixer fermement ces supports dans une armoire rack standard de 19 pouces.
Montage muralVous pouvez fixer un Commutateur non géré SF 100-16, SF 100-24, SG 100-16 ou SG 102-24 Cisco montable en rack au mur.
Avant de procéder au montage mural du commutateur non géré montable en rack, repérez les deux vis murales (incluses). Nous vous recommandons d’utiliser des vis d’une épaisseur de tête minimale de 4 mm et d’un diamètre de tige d’au moins 1,5 mm.
AVERTISSEMENT Tout montage non conforme peut endommager l’appareil ou entraîner des blessures. Cisco ne peut en aucun cas être tenu responsable de tout dommage découlant d’un montage mural non conforme.
12
34
56
78
910
1112
1314
1516
1718
1920
2122
2324
miniGBIC1
(Shared with 12) (Shared with 24)
miniGBIC2
Cisco Small BusinessSR2024
24-Port10/100/1000 Switch
1 2 3 4 5 6 7 8 9 10 11 12 / miniGBIC1
Link/Act
Gigabit
Link/Act
Gigabit
SYSTEM13 14 15 16 17 18 19 20 21 22 23 24 / miniGBIC2
1930
86
Commutateurs non gérés Cisco montables en rack 3

Pour procéder au montage mural du commutateur non géré montable en rack :
ÉTAPE 1 Déterminez l’endroit où vous souhaitez installer le commutateur non géré montable en rack. Assurez-vous que la surface est lisse, plane, sèche et solide.
ÉTAPE 2 Percez deux trous pilotes en les espaçant de 95 mm (3,74 pouces) et en laissant au moins 130 mm (5,12 pouces) du bord.
ÉTAPE 3 Insérez une vis dans chaque trou, en laissant un espace d’au moins 3 mm (0,1 pouce) entre la surface et la base de la tête de vis.
ÉTAPE 4 Placez les logements d’installation murale du commutateur non géré montable en rack au-dessus des vis, puis faites glisser le commutateur non géré montable en rack vers le bas jusqu’à introduire doucement les têtes de vis dans ces logements.
2765
83
4 Commutateurs non gérés Cisco montables en rack

Connexion des appareils de réseautique
Le diagramme d’application est un exemple d’une configuration réseau type.
Pour connecter le commutateur non géré montable en rack au réseau :
ÉTAPE 1 Branchez le câble Ethernet au port Ethernet d’un ordinateur, d’une imprimante, d’un stockage réseau ou de tout autre appareil de réseautique.
ÉTAPE 2 Branchez l’autre extrémité du câble Ethernet à l’un des ports Ethernet du commutateur non géré montable en rack.
La LED du port s’allume lorsque l’appareil connecté est activé.
REMARQUE Si la liaison montante entre un commutateur en cascade non géré et un autre commutateur est déplacée d’un port vers un autre, la reprise du fonctionnement du réseau complet peut prendre jusqu’à une minute. Ce comportement est normal.
ÉTAPE 3 Renouvelez l’Étape 1 et l’Étape 2 pour chaque appareil que vous voulez relier au commutateur non géré montable en rack.
2
1 2 3 4 5 6 7 8 9 10 11 12
13 14 15 16 17 18 19 20 21 22 23 24 miniGBIC1
(Shared with 12) (Shared with 24)
miniGBIC2
Cisco Small BusinessSR2024
24-Port10/100/ 1000 Swit ch
1 2 3 4 5 6 7 8 9 10 11 12 / miniGBIC1
Link/Act
Gigabit
Link/Act
Gigabit
SYSTEM 13 14 15 16 17 18 19 20 21 22 23 24 / miniGBIC2
1938
03
Commutateurs non gérés Cisco montables en rack 5

REMARQUE Pour attribuer un niveau de priorité au trafic vocal et vidéo à l’aide de la fonction de qualité de service du commutateur, définissez le contrôle de flux sur Désactivé dans les configurations des appareils connectés. Le cas échéant, le contrôle de flux peut envoyer une trame de pause au commutateur, en bloquant les paquets de priorité élevée mis en attente sur le port. Sur certains appareils, tels que les téléphones et les caméras IP, il est impossible de configurer le contrôle de flux.
ÉTAPE 4 Branchez le câble d’alimentation au commutateur et à une source d’alimentation.
Fonctionnalités du Commutateur non géré montable en rack
Cette section comprend une description des aspects extérieurs du commutateur non géré montable en rack qui offre une commutation à vitesse filaire non bloquante pour les clients de votre réseau.
Ports situés sur le panneau avantLes ports et les LED sont situés sur le panneau avant du commutateur.
Ports Ethernet RJ-45 : ces ports permettent de relier au commutateur les appareils de réseautique, tels que les ordinateurs, les imprimantes et les points d’accès. Les ports Ethernet (802.3) de détection automatique sont utilisés pour les communications réseau. Chaque port Ethernet prend en charge les vitesses du réseau de 10 Mbits/s, de 100 Mbits/s ou de 1 000 Mbits/s.
3
2765
79
14 3 15 4 16 5 17 6 18 7 19 8 20 9 21 10 22 11 23 12 24131 2
LINK GIGABITACT
6 Commutateurs non gérés Cisco montables en rack

Ports MiniGBIC (si disponible) : les ports MiniGBIC (gigabit interface converter) représentent les points de connexion pour les modules MiniGBIC. Le commutateur non géré montable en rack peut ainsi établir une liaison montante vers d’autres commutateurs via une fibre optique.
• Les ports MiniGBIC sont compatibles avec les modules MiniGBIC Cisco MGBSX1, MGBLH1, MGBT1, MGBLX1 et MGBBX1, ainsi qu’avec les modules MiniGBIC d’autres marques.
• L’interface MiniGBIC est un port de combinaison, partagé avec une autre interface RJ-45. Lorsque le port MiniGBIC est activé, le port RJ-45 le plus proche est désactivé.
• Les LED du port RJ-45 réagissent au trafic de l’interface MiniGBIC
LED situées sur le panneau avantLED système : s’allume en vert lorsque le commutateur est mis sous tension.
LED de liaison/d’action (en vert) : s’allume lorsqu’une liaison est détectée entre le port correspondant et un autre appareil. Elle clignote lorsque le trafic passe par ce port.
LED 100M (si disponible) : s’allume en vert et reste fixe lorsqu’un autre appareil est connecté au port, est mis sous tension. Une liaison de 100 Mbits/s est également établie entre les appareils. Lorsque cette LED est éteinte, la vitesse de connexion est inférieure à 100 Mbits/s ou aucun appareil n’est relié à ce port.
LED Gigabit (si disponible) : s’allume et reste fixe lorsqu’un autre appareil est connecté au port, est mis sous tension. Une liaison de 1 000 Mbits/s est également établie entre les appareils. Lorsque cette LED est éteinte, la vitesse de connexion est inférieure à 1000 Mbits/s ou aucun appareil n’est relié à ce port.
LED MiniGBIC (si disponible) : s’allume en vert lorsqu’une connexion est établie via le port RJ-45 partagé. Elle clignote en vert lorsque la connexion est active.
Commutateurs non gérés Cisco montables en rack 7
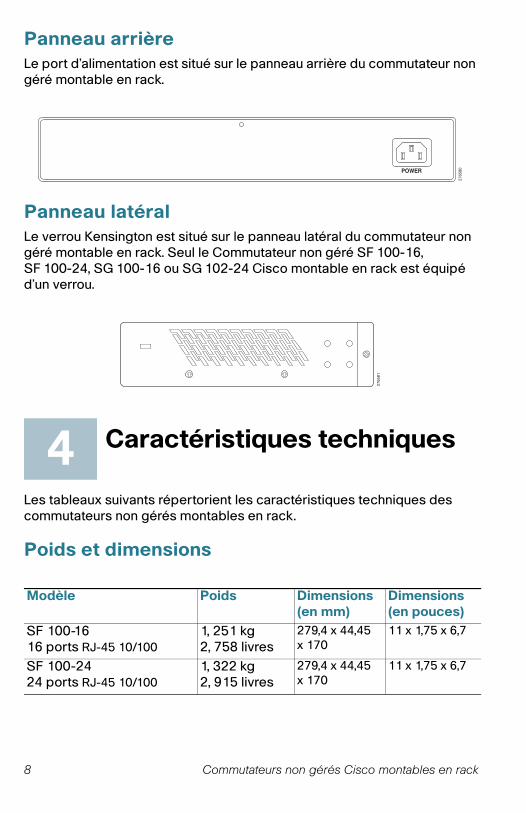
Panneau arrièreLe port d’alimentation est situé sur le panneau arrière du commutateur non géré montable en rack.
Panneau latéralLe verrou Kensington est situé sur le panneau latéral du commutateur non géré montable en rack. Seul le Commutateur non géré SF 100-16, SF 100-24, SG 100-16 ou SG 102-24 Cisco montable en rack est équipé d’un verrou.
Caractéristiques techniques
Les tableaux suivants répertorient les caractéristiques techniques des commutateurs non gérés montables en rack.
Poids et dimensions
Modèle Poids Dimensions (en mm)
Dimensions (en pouces)
SF 100-1616 ports RJ-45 10/100
1, 251 kg2, 758 livres
279,4 x 44,45 x 170
11 x 1,75 x 6,7
SF 100-2424 ports RJ-45 10/100
1, 322 kg2, 915 livres
279,4 x 44,45 x 170
11 x 1,75 x 6,7
2765
80POWER
2765
81
4
8 Commutateurs non gérés Cisco montables en rack

Fonctionnalités
SF 102-2424 ports RJ-45 10/100, 2 ports Gigabit RJ-45/MiniGBIC partagés
1, 995 kg4, 398 livres
440 x 44,45 x 202,5
17,35 x 1,74 x 7,99
SG 100-1616 ports RJ-45 10/100/1000
1, 429 kg3, 150 livres
279,4 x 44,45 x 170
11 x 1,75 x 6,7
SG 100-2424 ports RJ-45 10/100/1000
2, 292 kg2, 292 livres
440 x 44,45 x 202,5
17,35 x 1,74 x 7,99
SG 102-2424 ports RJ-45 10/100/1000, 2 liaisons montantes MiniGBIC
1, 629 kg3, 591 livres
279,4 x 44,45 x 170
11 x 1,75 x 6,7
Fonctionnalité DescriptionNormes IEEE 802.3, 802.3u, 802.3x, 802.3ab, 802.3z
et 802.1p
Type de câblage Catégorie 5 ou plus
Sécurité physique Logement de sécurité Kensington sur un Commutateur non géré SF 100-16, SF 100-24, SG 100-16 ou SG 102-24 Cisco montable en rack
Alimentation 100V-240V~ 1A 50-60 Hz
Certification FCC Classe A, CE
Température de fonctionnement
0 à 40 ºC (32 à 140 °F)
Température de stockage -20 à 70 ºC (-4 à 158 ºF)
Humidité de fonctionnement
Humidité relative (sans condensation) de 10 % à 90 %
Humidité de stockage Humidité relative (sans condensation) de 10 % à 90 %
Modèle Poids Dimensions (en mm)
Dimensions (en pouces)
Commutateurs non gérés Cisco montables en rack 9

Pour en savoir plus
Assistance
Communauté d’assistance Cisco Small Business
www.cisco.com/go/smallbizsupport
Assistance et documentation technique en ligne (Identification obligatoire)
www.cisco.com/support
Contacts assistance téléphonique
www.cisco.com/en/US/support/tsd_cisco_ small_business_support_center_contacts.html
Documentation produits
Guide de démarrage rapide pour Commutateurs non gérés Cisco montables en rack
www.cisco.com/en/US/docs/switches/lan/csbus/sf10x-xx_sg10x-xx/quick_start/guide/78-19225-01.pdf
Informations relatives aux réglementations, à la compatibilité et à la sécurité
www.cisco.com/en/US/products/ps10007/tsd_products_support_series_home.html
Informations relatives à la garantie
www.cisco.com/go/warranty
Cisco Small Business
Cisco Partner Central for Small Business (Identification partenaire obligatoire)
www.cisco.com/web/partners/sell/smb
Accueil Cisco Small Business www.cisco.com/smb
Marketplace www.cisco.com/go/marketplace
5
10 Commutateurs non gérés Cisco montables en rack

Americas HeadquartersCisco Systems, Inc.170 West Tasman DriveSan Jose, CA 95134-1706USAhttp://www.cisco.comTel: 408 526-4000
800 553-NETS (6387)Fax: 408 527-0883
Cisco, Cisco Systems, the Cisco logo, and the Cisco Systems logo are registered trademarksor trademarks of Cisco Systems, Inc. and/or its affiliates in the United States and certain othercountries. All other trademarks mentioned in this document or Website are the property of theirrespective owners. The use of the word partner does not imply a partnership relationshipbetween Cisco and any other company. (0705R)
© 2009 Cisco Systems, Inc. All rights reserved.
78-19198-01


