

8/11/2019 Raise a CNC’Ed Makerspace Shed _ MAKE
http://slidepdf.com/reader/full/raise-a-cnced-makerspace-shed-make 1/13
Sign In / Join
MAKE: PROJECTS
Raise a CNC’ed Makerspace ShedBuild a big, customizable, stand-alone workshop with CNC-cut trusses
f or about $1,000.
By Rick Schertle and Lendy Dunaway Category: Computer-Controlled Cutting, Music,
Workshop Difficulty: Difficult View Comments
One of my big projects this year was to open a Makerspace
for kids in a low income area of San Jose, California
(washingtonmakerworkshop.org ). There was a small
garage on the property, but we needed a larger structurewhere the classes could meet. We figured a 14-by-16-foot
space (224 square feet) would be about ideal.
I researched a number of quick-build designs but didn’t
Greener Web Ad

8/11/2019 Raise a CNC’Ed Makerspace Shed _ MAKE
http://slidepdf.com/reader/full/raise-a-cnced-makerspace-shed-make 2/13
This article
appeared in
Make: Vol. 40.
really find one to meet my needs, so I ran the idea by my
friend Lendy Dunaway, who’s involved in the Young Makers
program ( youngmakers.org) and is an expert fabricator. In
Lendy’s shop, his signature piece of equipment is an
industrial-size CNC router with a 5-by-10-foot cutting bed.
He offered to design an inexpensive structure using custom-made trusses with
very little scrap wood left over.
Here the results of our design and building process: the CNC Makerspace Shed.
The shed is big enough to seat 16 people comfortably at worktables, and it can
accommodate a huge 8-foot-high roll-up door. While we use it for a makerspace,
with a transparent roof to admit natural light, it can easily be customized into
something that works for you — and whatever your needs or weather conditions
may require.
PARTS
Lumber, 2×4 (nominal) (8)
Lumber, 2×6 (nominal) (8)
Lumber, 2×10 (nominal) (16)
OSB (oriented strand board), 23/32" (4)
OSB, 7/16" (4)Piers, concrete, 8"×8"×8" with wood block top
Joist hanger brackets, 2×6
Wood glue (1)
Wood screws or deck screws, 15/8" (25)
Lag screws, 3/8"×3" (32)
Bolts, coarse, 5/16"×3-1/2" (40)
Bolts, coarse, 5/16"×2-1/2" (16)
Nuts, coarse, 5/16" (56)Washers, 3/8" (144)
Angle stock, steel or aluminum, 2½"×2½" or bigger, 20' total length (20)
aka angle iron
Roofing materials, wall coverings, and doors of your choice
DXF drawing osb-contours.dxf
TOOLS
CNC router with 4'×8' bed (optional) You can also cut the trusses with handor power saws.
Hacksaw, reciprocating saw, or cutoff saw
Drill and drill bits for wood and metal
Socket set

8/11/2019 Raise a CNC’Ed Makerspace Shed _ MAKE
http://slidepdf.com/reader/full/raise-a-cnced-makerspace-shed-make 3/13
Print Project
PrevNext
Handheld circular saw aka Skilsaw
Leveling tools
Positive placement nail gun (optional)
Hammer
Clamps
LadderSTEPSPROJECT STEPS1. Build the trusses and brackets
2. Build the trusses and brackets (cont'd)
3. Build the floor structure
4. Lay the flooring
5. Raise the Trusses
6. Raise the Trusses (cont'd)
7. Finish the structure
8. Roof, Doors, and Windows
9. Finishing touches
Step #3: Build the floor structure

8/11/2019 Raise a CNC’Ed Makerspace Shed _ MAKE
http://slidepdf.com/reader/full/raise-a-cnced-makerspace-shed-make 4/13

8/11/2019 Raise a CNC’Ed Makerspace Shed _ MAKE
http://slidepdf.com/reader/full/raise-a-cnced-makerspace-shed-make 5/13
8/11/2019 Raise a CNC’Ed Makerspace Shed _ MAKE
http://slidepdf.com/reader/full/raise-a-cnced-makerspace-shed-make 6/13
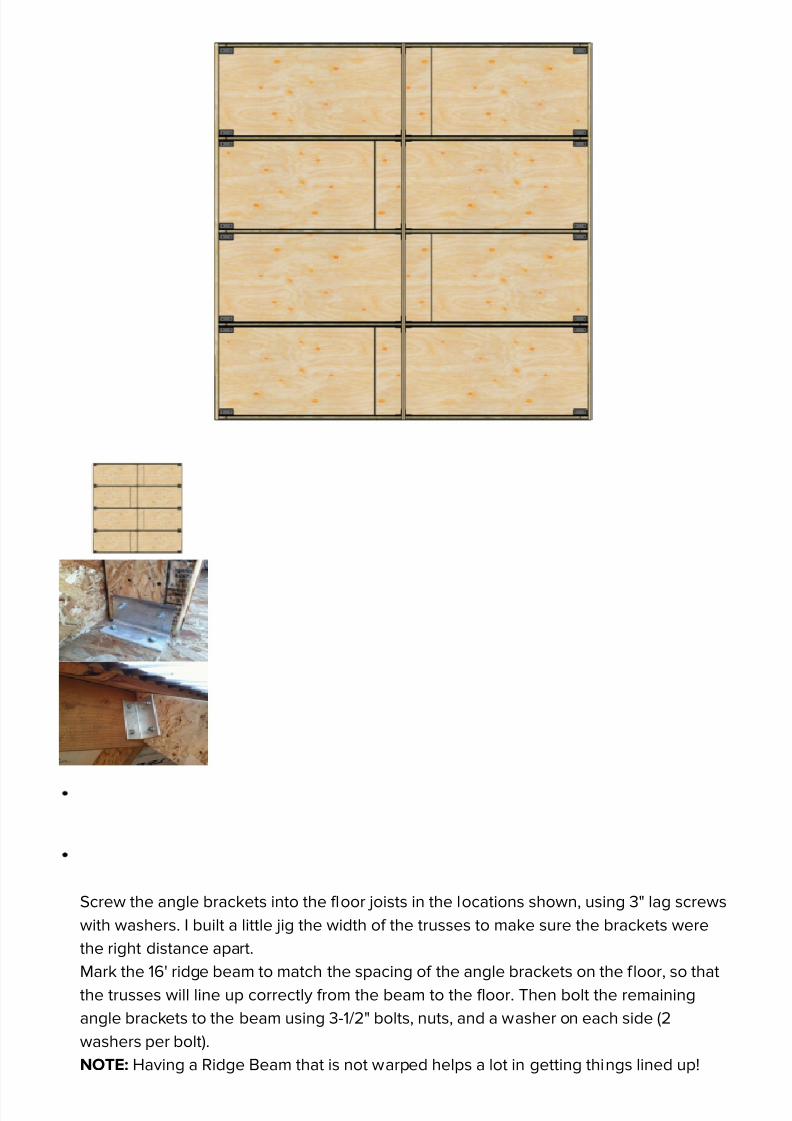
Screw the angle brackets into the floor joists in the locations shown, using 3" lag screws
with washers. I built a little jig the width of the trusses to make sure the brackets were
the right distance apart.
Mark the 16' ridge beam to match the spacing of the angle brackets on the floor, so that
the trusses will line up correctly from the beam to the floor. Then bolt the remaining
angle brackets to the beam using 3-1/2" bolts, nuts, and a washer on each side (2
washers per bolt).
NOTE: Having a Ridge Beam that is not warped helps a lot in getting things lined up!
8/11/2019 Raise a CNC’Ed Makerspace Shed _ MAKE
http://slidepdf.com/reader/full/raise-a-cnced-makerspace-shed-make 7/13
PrevNext
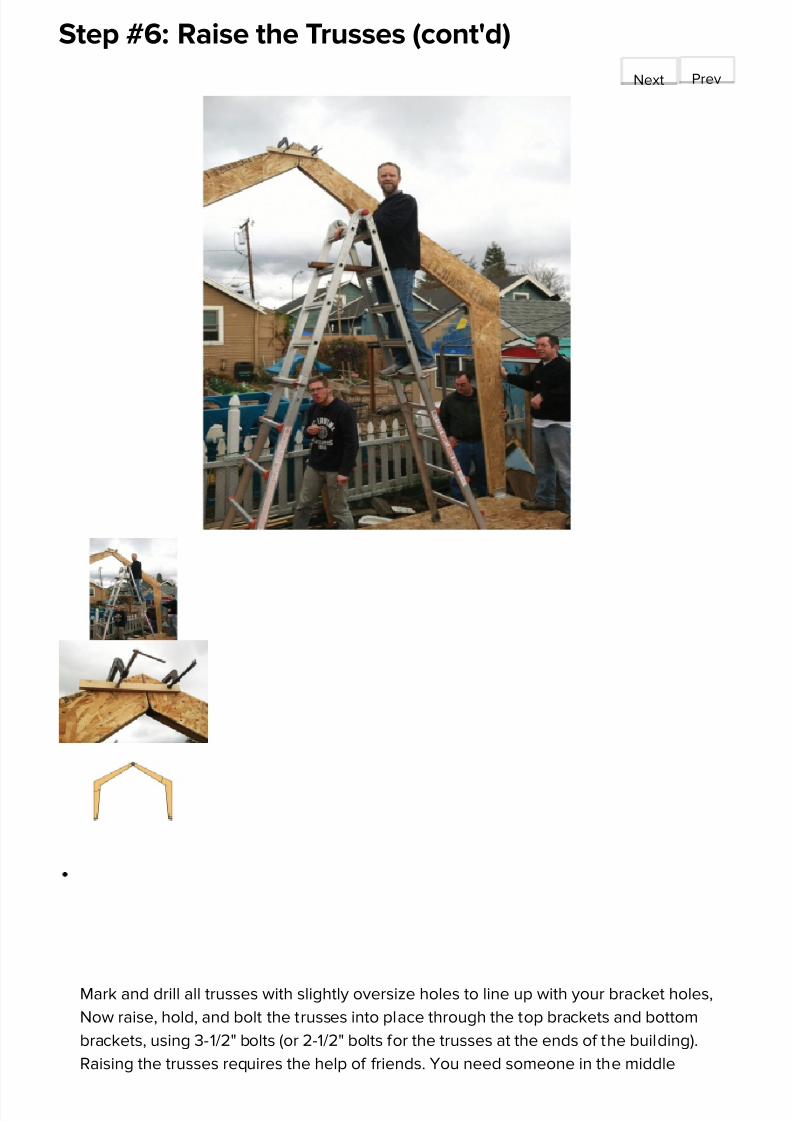
Step #6: Raise the Trusses (cont'd)
Mark and drill all trusses with slightly oversize holes to line up with your bracket holes,
Now raise, hold, and bolt the trusses into place through the top brackets and bottom
brackets, using 3-1/2" bolts (or 2-1/2" bolts for the trusses at the ends of the building).
Raising the trusses requires the help of friends. You need someone in the middle

8/11/2019 Raise a CNC’Ed Makerspace Shed _ MAKE
http://slidepdf.com/reader/full/raise-a-cnced-makerspace-shed-make 8/13

8/11/2019 Raise a CNC’Ed Makerspace Shed _ MAKE
http://slidepdf.com/reader/full/raise-a-cnced-makerspace-shed-make 9/13
PrevNext
Once all the trusses are bolted in place, install 2 sheets of OSB horizontally on the
bottom of each side. Before screwing them in, use a level to make sure the trusses are
vertical. The plywood should fit perfectly on the 16' length of the workshop.
Two additional sheets of OSB or plywood can be added to each side to fully enclose the
sides of the structure.
Step #8: Roof, Doors, and Windows
The shed is structurally complete, but it won’t keep the weather out yet.
For natural light, we put clear plastic panels on the roof. Inadvertently, though, we

8/11/2019 Raise a CNC’Ed Makerspace Shed _ MAKE
http://slidepdf.com/reader/full/raise-a-cnced-makerspace-shed-make 10/13
Prev
created a greenhouse that was so warm it was virtually unusable. I ended up putting in
rigid foam insulation on the sunny side. That did the trick!
The ends can be framed and finished however you wish. We put in an 8'-wide, 7-1/2'-tall
roll-up door on one side (about $500 online), and on the other side, two huge 4'- wide
by 5'-high “barn door” windows that swing open for ventilation during warm days.
Step #9: Finishing touches
The trusses provide a perfect setup for lots of built-in custom shelving. We’re also
planning on installing a storage loft on the end opposite the roll-up door. The inside is
light, airy, and a very pleasant workspace.
We added pull-down power cords and hanging work lights in the middle of the
workshop. Right now we’re using folding tables and stools but eventually we’d like to
add flexible custom worktables. Also in the works are a giant whiteboard and a large
LCD monitor for presentations.
8/11/2019 Raise a CNC’Ed Makerspace Shed _ MAKE
http://slidepdf.com/reader/full/raise-a-cnced-makerspace-shed-make 11/13
RICK SCHERTLE
Rick teaches middle school in San Jose, CA. He’s a contributing writer for MAKE
and leads after school making clubs with kids. He designed the compressed air
rocket for MAKE 15 and the folding-wing glider in MAKE 31. With his wife and kids,
Rick loves all things that fly. Rick is the co-founder of AirRocketWorks.com.
LENDY DUNAWAY
Lendy Dunaway is a lifelong lover of designing and
building things, and a collector of the tools, hardware,
and machines to do it with. After writing software for 20
years, he now runs a small industrial design and
fabrication company in San Jose, California, where he
hosts a Young Makers club.
8/11/2019 Raise a CNC’Ed Makerspace Shed _ MAKE
http://slidepdf.com/reader/full/raise-a-cnced-makerspace-shed-make 12/13
How-To: Recycled Candles and
Handmade Wicks
•
— thanks for sharing this!
A Mechanical 3D Printer
•
— This is an extraordinary
achievement! But I'm curious, because I
don't understand, how does this …
Future’s so Bright, I Gotta Wear
LED Shades
•
— Can you see through
them? How well? Do they filter UV?
An Extremely Unusual Walking Machine
•
— He-Man did it decades ago:
http://youtu.be/EZgh36Jvtwc
0 Comments

8/11/2019 Raise a CNC’Ed Makerspace Shed _ MAKE
http://slidepdf.com/reader/full/raise-a-cnced-makerspace-shed-make 13/13


