
PeopleSoft 8.9
Enterprise Learning
(Training Administration)
March 25, 2008

Training Guide Enterprise Learning Training Administration v8.9
Page ii
Table of Contents Setting Up a Session.......................................................................................................... 1
Adding a Course Session.............................................................................................................1 Adding an Instructor..................................................................................................................20
Enrolling Students .......................................................................................................... 27 Enrolling Students Individually.................................................................................................27 Enrolling Students in Multiple Courses..................................................................................... 33 Creating a Wait List...................................................................................................................38 Creating a Sign in Sheet ............................................................................................................43 Creating a Course Session Roster..............................................................................................52
Closing a Session ............................................................................................................. 59 Closing a Course Session ..........................................................................................................59 Evaluate a Course Session.........................................................................................................66
Reviewing Training Records.......................................................................................... 73 Viewing Course Session Summary ...........................................................................................73 Viewing Student Training Summary .........................................................................................77
Managing External Training & External Trainees (Non-Employees)....................... 81 Adding External Training Sessions ...........................................................................................81 Add an External Trainee............................................................................................................86 Modify an External Trainee.....................................................................................................112
Appendices..................................................................................................................... 120 Appendix A - Adding a Course Session ..................................................................................120 Appendix B – Adding an Instructor.........................................................................................123 Appendix C – Enrolling Students Individually .......................................................................124 Appendix D – Enrolling Students in Multiple Courses ...........................................................126 Appendix E – Creating a Sign-In Sheet................................................................................... 128 Appendix F – Creating a Course Roster .................................................................................. 129 Appendix G – Closing a Course Session.................................................................................130 Appendix H – Evaluate a Course Session ...............................................................................132 Appendix I – Creating a Wait List...........................................................................................135 Appendix J – Viewing a Course Session Summary ................................................................137 Appendix K – Viewing a Student Training Summary.............................................................138 Appendix L – Add an External Training Session ....................................................................138 Appendix M – Add an External Trainee..................................................................................139 Appendix N – Modify an External Trainee .............................................................................142
Training Guide Enterprise Learning Training Administration v8.9
Page 1
Setting Up a Session
Adding a Course Session Adding a Course Session PeopleSoft's Training Administration has two components that are the foundation of all actions within the training process. Courses and Sessions, to some extent, are involved with every action within training administration. Courses must be established first. A course may have several sessions active concurrently in PeopleSoft, but the sessions may not have identical details, such as time and facility. The date must be unique between sessions. NOTE: To maintain consistency and avoid duplication, the State Personnel Department maintains the Course Table. This topic will explain how to add a session for an existing course. A course session can be set up only if the Course Table has an active entry. If your course has not been entered on the Course Table, contact the State Peronnel Department's Training Division and submit the necessary information. Procedure In this topic, you will add a session for the Presentation Skills course (course code BSK001), and specify the session information in the PeopleSoft Human Resources application.

Training Guide Enterprise Learning Training Administration v8.9
Page 2
Procedure
Step Action
1. Click the Enterprise Learning link.
Training Guide Enterprise Learning Training Administration v8.9
Page 3
Step Action
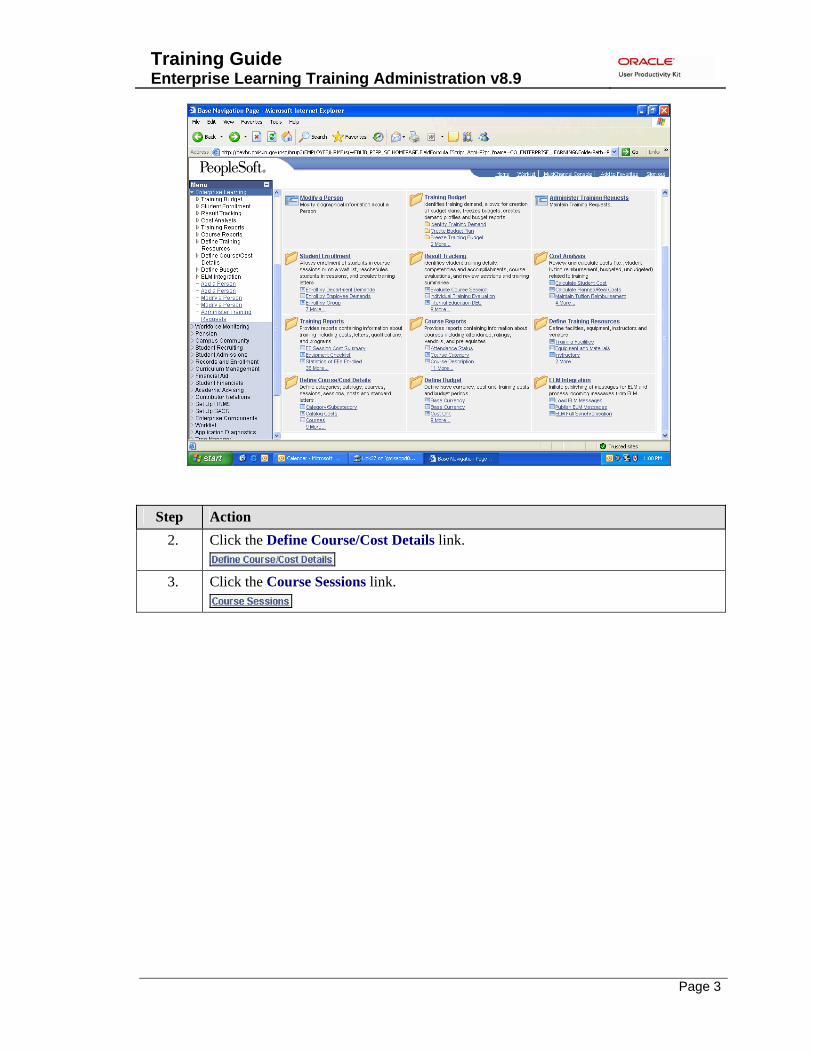
2. Click the Define Course/Cost Details link.
3. Click the Course Sessions link.
Training Guide Enterprise Learning Training Administration v8.9
Page 4
Step Action
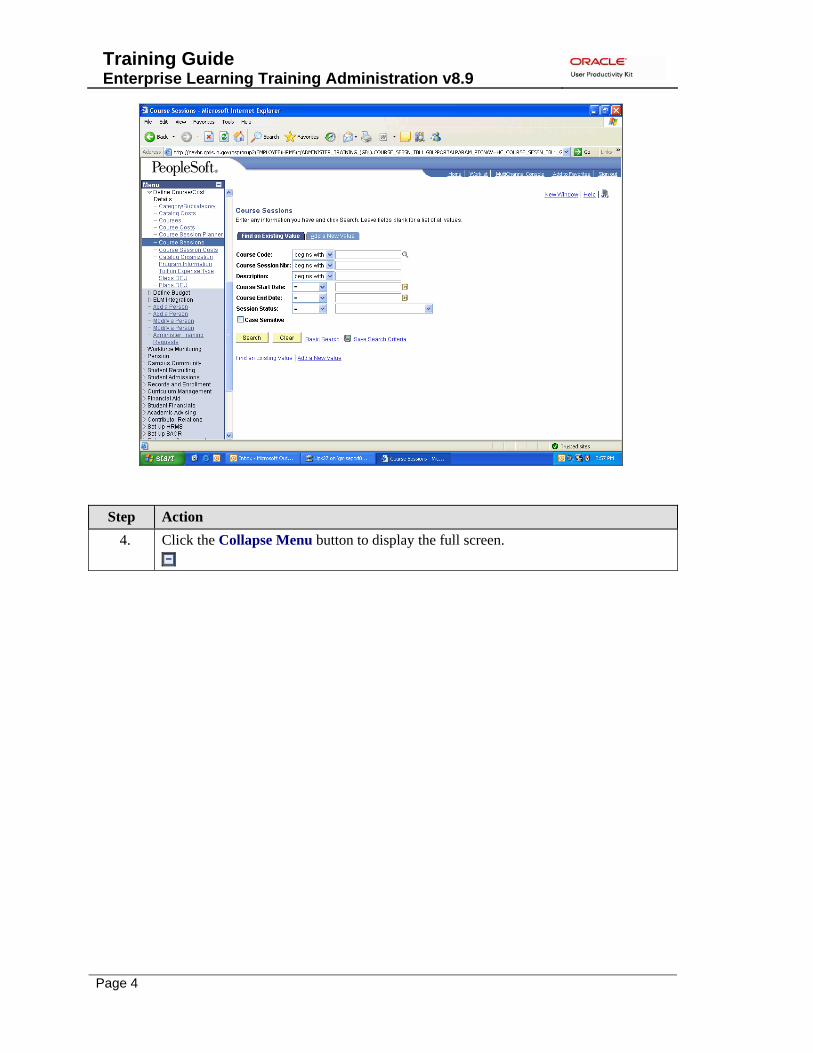
4. Click the Collapse Menu button to display the full screen.

Training Guide Enterprise Learning Training Administration v8.9
Page 5
Step Action
5. Click the Add a New Value tab.

Training Guide Enterprise Learning Training Administration v8.9
Page 6
Step Action
6. Click in the Course Code field.
7. Enter the course code number into the Course Code field. Note: If you do not know the course code, click on the Magnifying Glass (Alt+5) button to look up the course codes.
8. Click the Add button. IMPORTANT: Leave the Course Session Number Blank. The system will assign a sequential number when you save the record.
Training Guide Enterprise Learning Training Administration v8.9
Page 7
Step Action
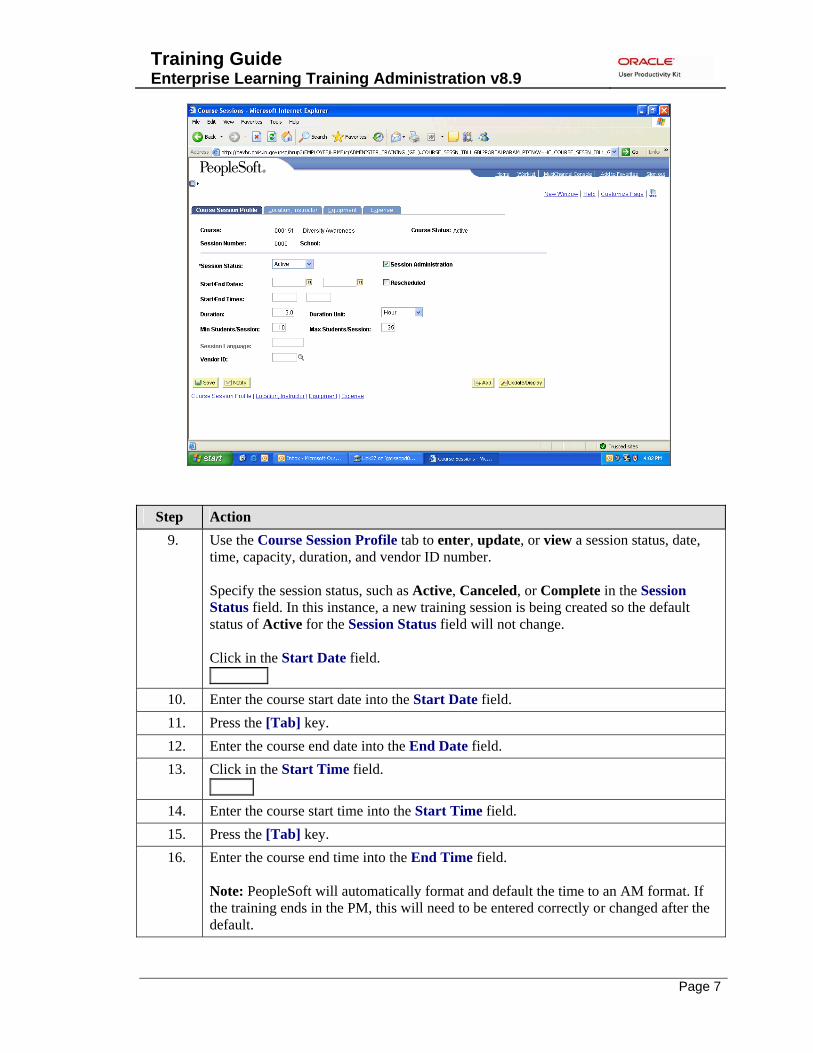
9. Use the Course Session Profile tab to enter, update, or view a session status, date, time, capacity, duration, and vendor ID number. Specify the session status, such as Active, Canceled, or Complete in the Session Status field. In this instance, a new training session is being created so the default status of Active for the Session Status field will not change. Click in the Start Date field.
10. Enter the course start date into the Start Date field. 11. Press the [Tab] key. 12. Enter the course end date into the End Date field. 13. Click in the Start Time field.
14. Enter the course start time into the Start Time field. 15. Press the [Tab] key. 16. Enter the course end time into the End Time field.
Note: PeopleSoft will automatically format and default the time to an AM format. If the training ends in the PM, this will need to be entered correctly or changed after the default.

Training Guide Enterprise Learning Training Administration v8.9
Page 8
Step Action
17. The Duration field indicates the length of the training as entered into the Start/End Times fields.
18. The Duration Unit field indicates the unit indication in the Duration field.
ALWAYS use the duration unit of Hour.
19. Click in the Vendor ID field.
20. Enter the Business Unit number of the business unit or vendor conducting the training
into the Vendor ID field. If the business unit number is unknown, click on the Magnifying Glass (Alt+5) button to look up the course codes.

Training Guide Enterprise Learning Training Administration v8.9
Page 9
Step Action
21. Click the Location, Instructor tab.
Training Guide Enterprise Learning Training Administration v8.9
Page 10
Step Action
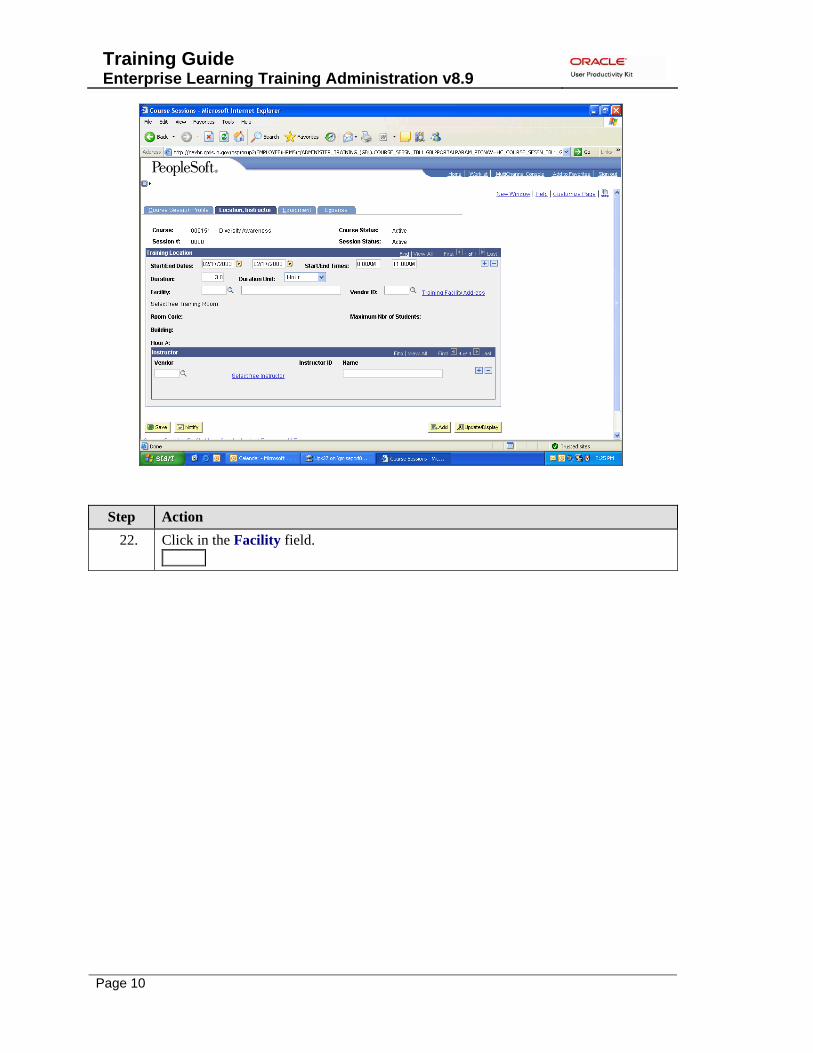
22. Click in the Facility field.
Training Guide Enterprise Learning Training Administration v8.9
Page 11
Step Action
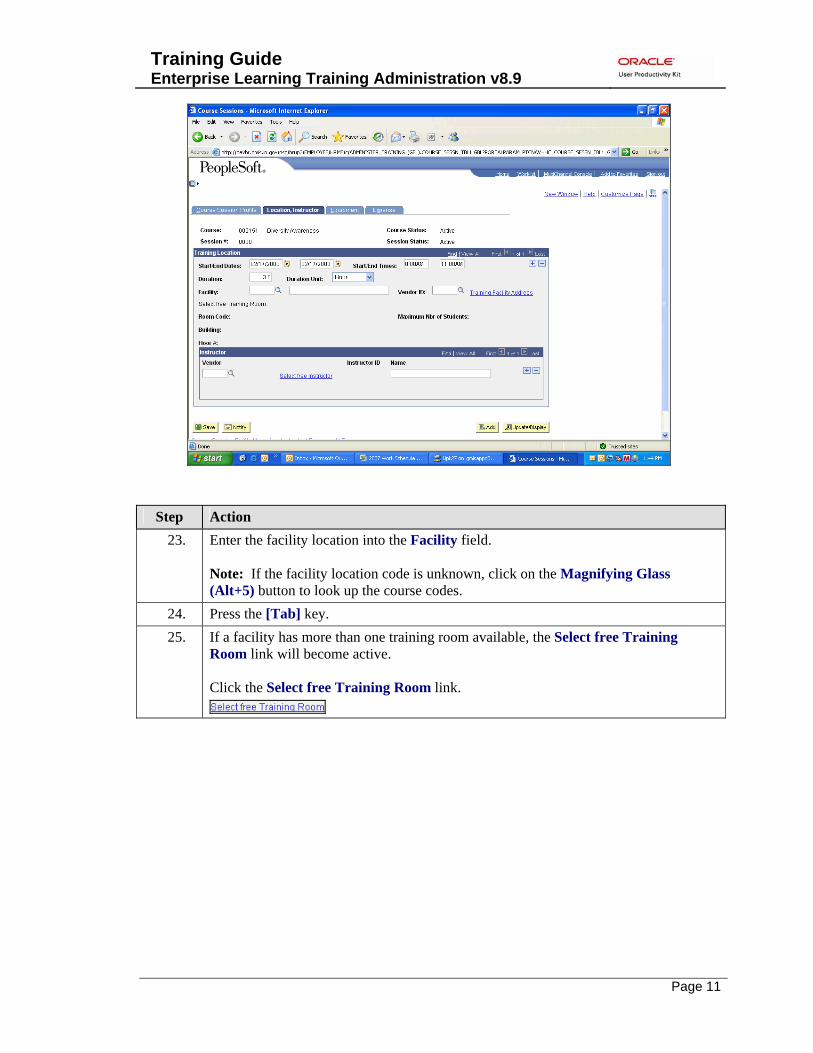
23. Enter the facility location into the Facility field. Note: If the facility location code is unknown, click on the Magnifying Glass (Alt+5) button to look up the course codes.
24. Press the [Tab] key. 25. If a facility has more than one training room available, the Select free Training
Room link will become active. Click the Select free Training Room link.
Training Guide Enterprise Learning Training Administration v8.9
Page 12
Step Action
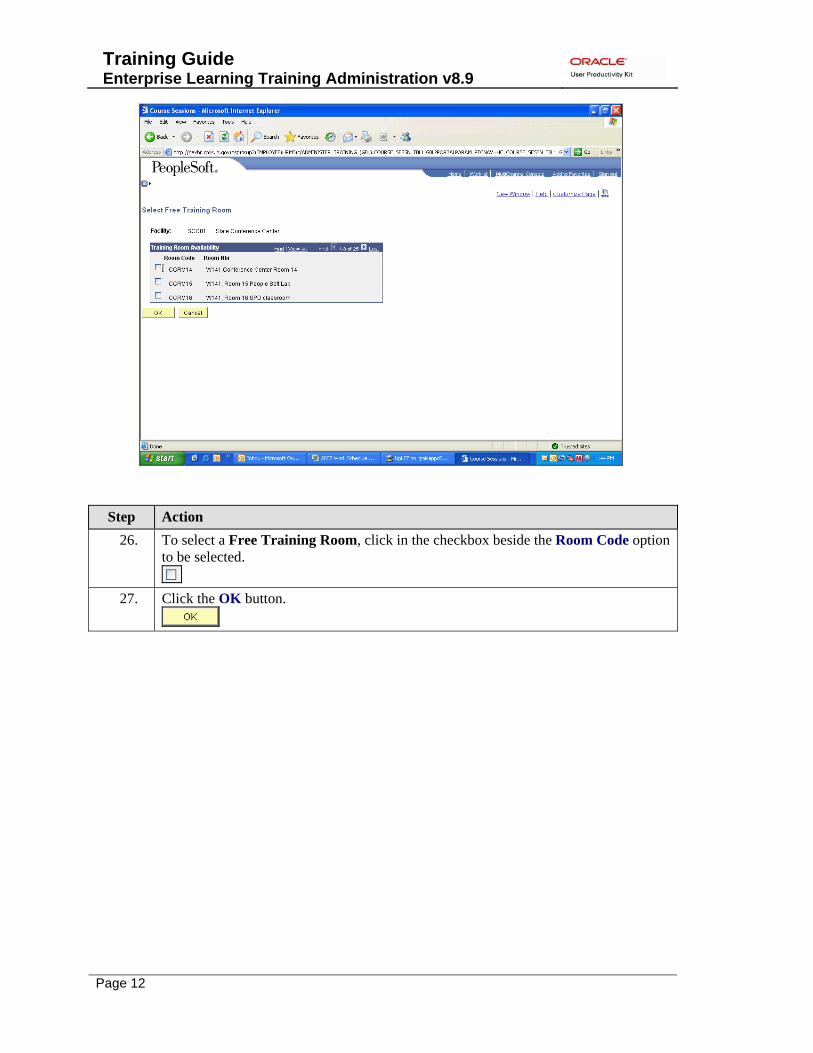
26. To select a Free Training Room, click in the checkbox beside the Room Code option to be selected.
27. Click the OK button.
Training Guide Enterprise Learning Training Administration v8.9
Page 13
Step Action
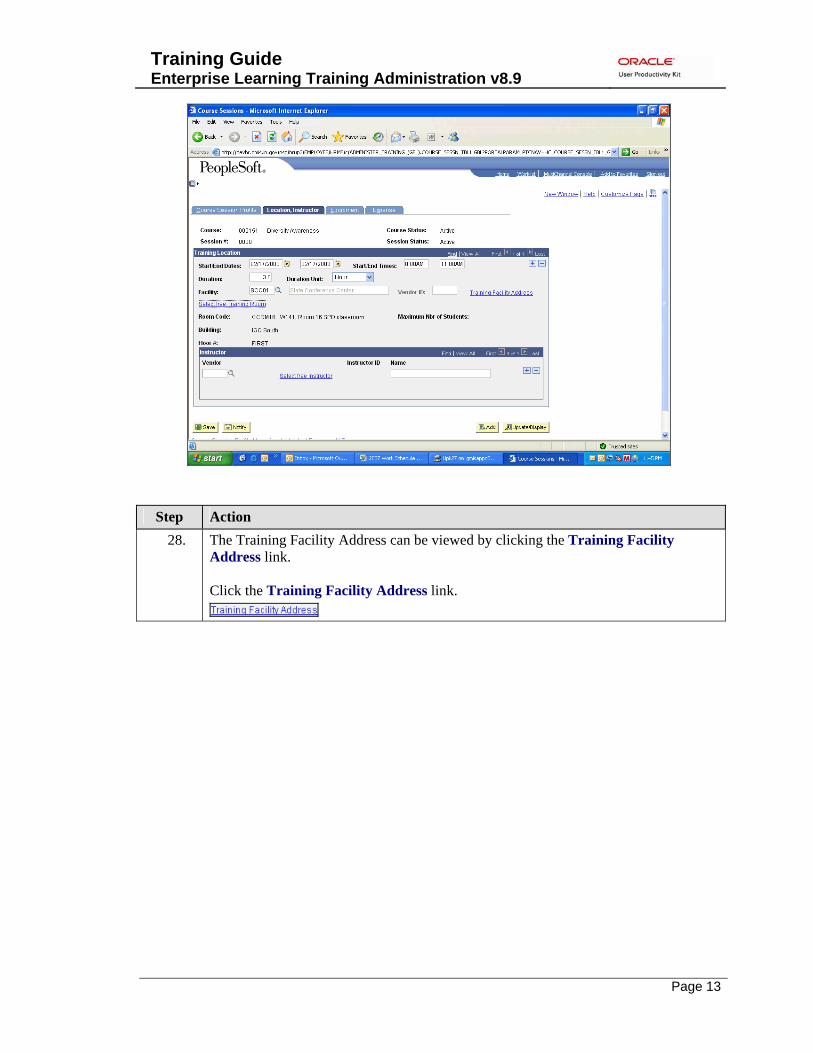
28. The Training Facility Address can be viewed by clicking the Training Facility Address link. Click the Training Facility Address link.
Training Guide Enterprise Learning Training Administration v8.9
Page 14
Step Action
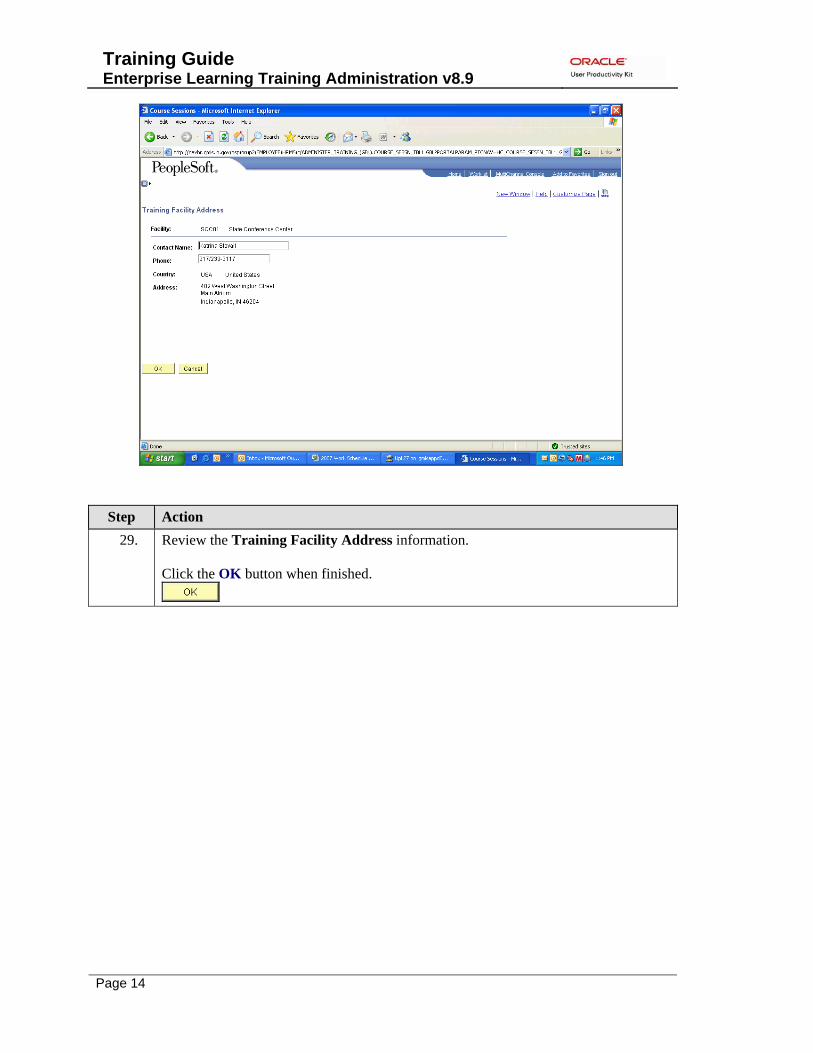
29. Review the Training Facility Address information. Click the OK button when finished.

Training Guide Enterprise Learning Training Administration v8.9
Page 15
Step Action
30. To add instructors who are certified to teach the training, click the Select free Instructor link.

Training Guide Enterprise Learning Training Administration v8.9
Page 16
Step Action
31. If more than 3 choices are present, clicking the View All link will allow all instructors to be viewed at one time. Click the View All link.
32. Click the checkbox of the selected instructor from the Instructor column.
33. Scroll down the page to locate the OK button. 34. Click the OK button.

Training Guide Enterprise Learning Training Administration v8.9
Page 17
Step Action
35. Click the Equipment tab.
Training Guide Enterprise Learning Training Administration v8.9
Page 18
Step Action
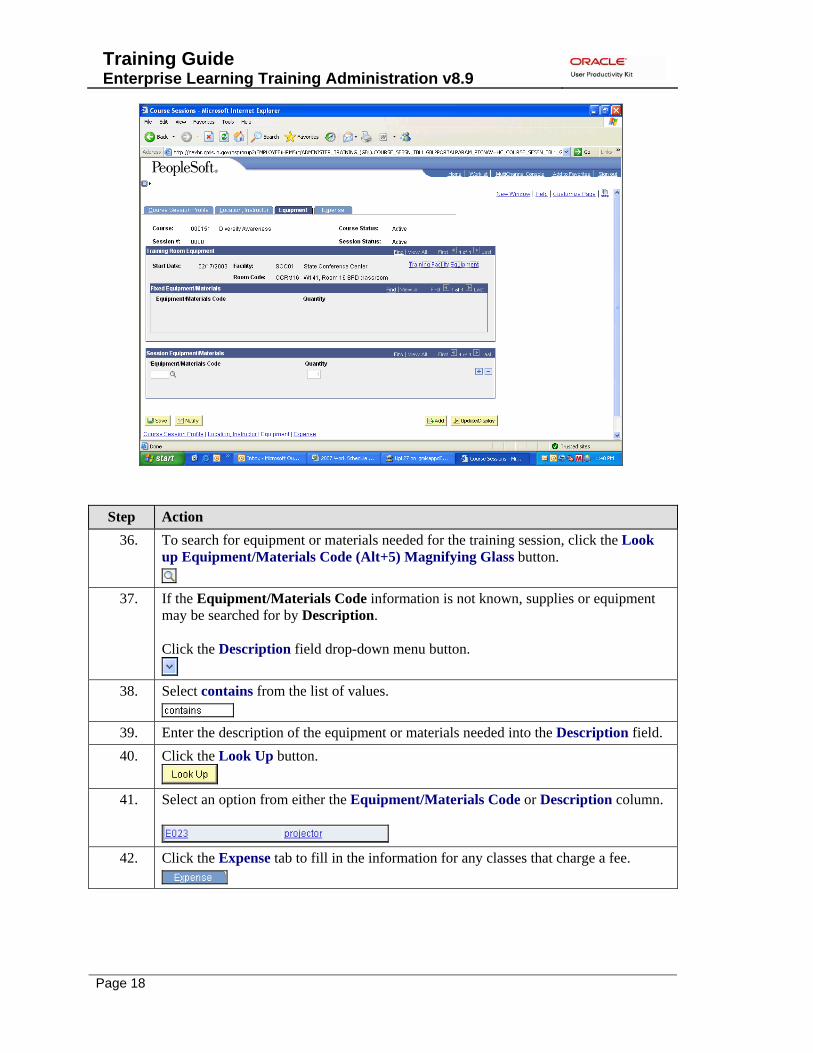
36. To search for equipment or materials needed for the training session, click the Look up Equipment/Materials Code (Alt+5) Magnifying Glass button.
37. If the Equipment/Materials Code information is not known, supplies or equipment
may be searched for by Description. Click the Description field drop-down menu button.
38. Select contains from the list of values.
39. Enter the description of the equipment or materials needed into the Description field. 40. Click the Look Up button.
41. Select an option from either the Equipment/Materials Code or Description column.
42. Click the Expense tab to fill in the information for any classes that charge a fee.

Training Guide Enterprise Learning Training Administration v8.9
Page 19
Step Action
43. Click the Save button. Note: Clicking the Save button will generate the Session # for the class.
44. Congratulations! You have successfully added a course session.
End of Procedure.

Training Guide Enterprise Learning Training Administration v8.9
Page 20
Adding an Instructor You need an instructor to lead a course. Instructors can be employees or non-employees. You cannot select instructors unless you specify that they are qualified to lead the course. You use the Instructor table to enter and update instructor information. In this example, your company has developed a presentation course internally for employees. Luis Duarte, an employee in your company, is selected as the qualified instructor for this course. Your goal is to add Luis Duarte as an instructor into the system.
Procedure
Step Action
1. Click the Enterprise Learning link.
Training Guide Enterprise Learning Training Administration v8.9
Page 21
Step Action
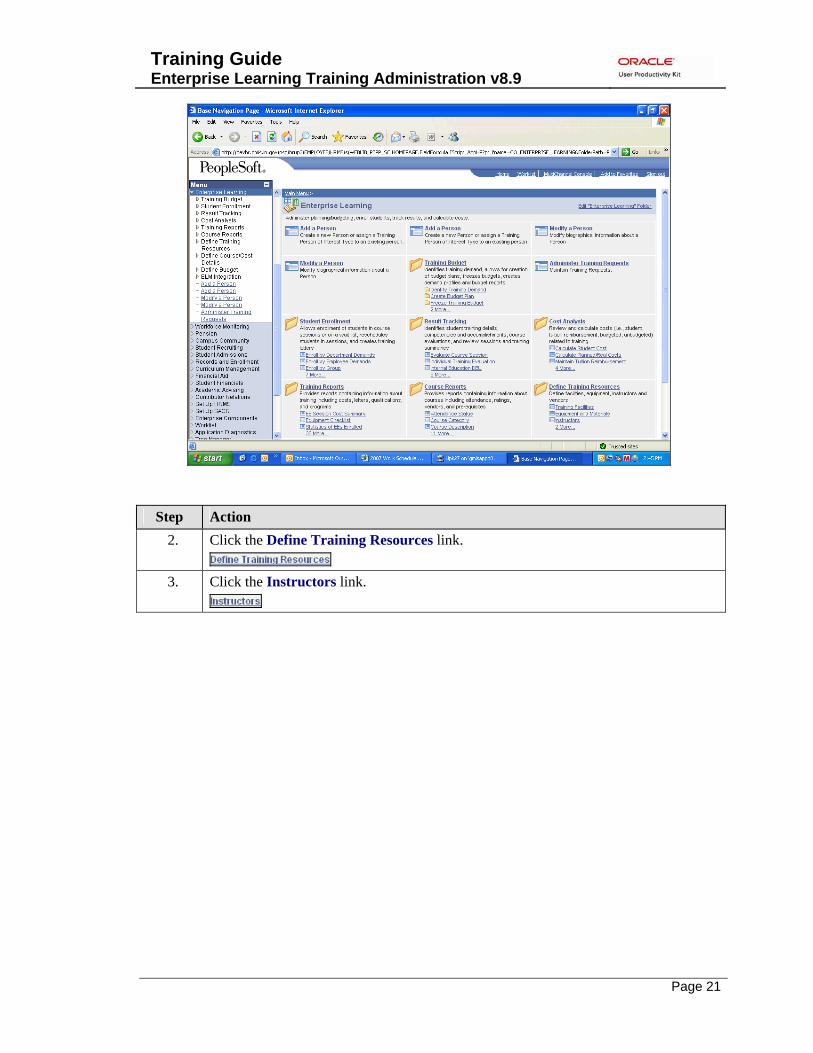
2. Click the Define Training Resources link.
3. Click the Instructors link.
Training Guide Enterprise Learning Training Administration v8.9
Page 22
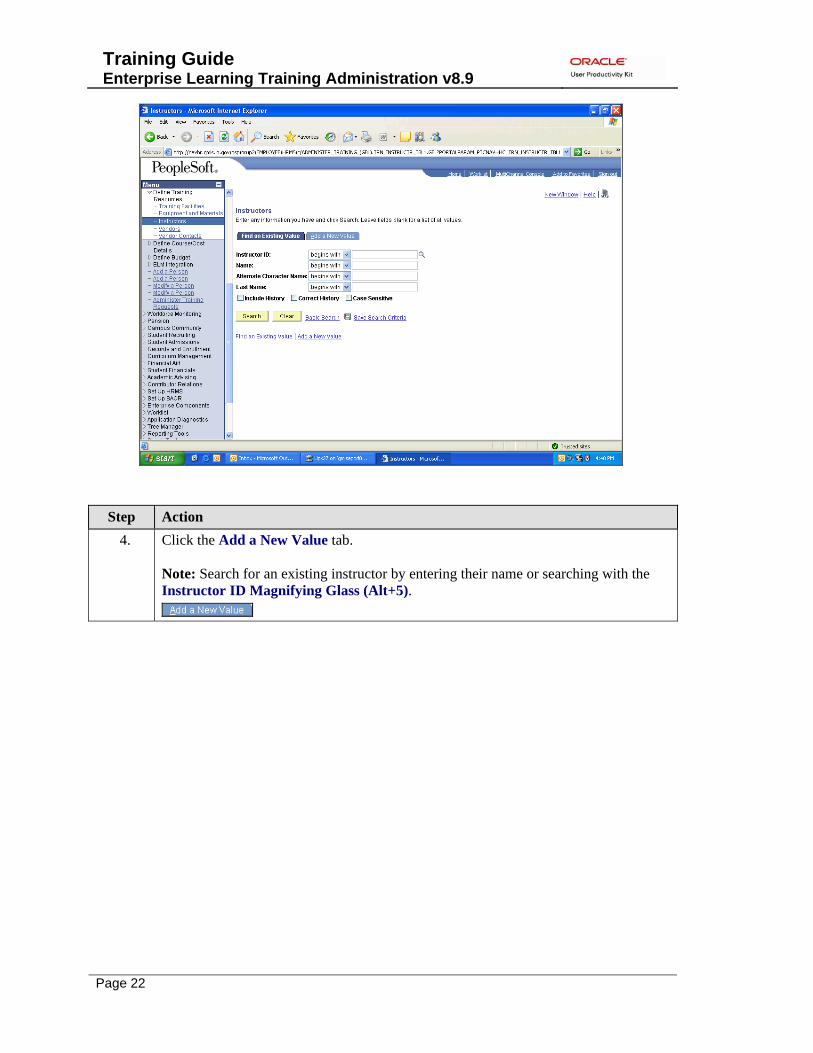
Step Action
4. Click the Add a New Value tab. Note: Search for an existing instructor by entering their name or searching with the Instructor ID Magnifying Glass (Alt+5).

Training Guide Enterprise Learning Training Administration v8.9
Page 23
Step Action
5. Click the Add a New Value tab.
6. Enter the instructor's PeopleSoft ID number into the Instructor ID field. 7. Click the Add button.

Training Guide Enterprise Learning Training Administration v8.9
Page 24
Step Action
8. The Instructor Details information box shows the Effective Date the instructor was entered into the system, the instructor's Status, and whether the instructor is an internal State of Indiana employee or an external vendor. Additional information may be added as desired.

Training Guide Enterprise Learning Training Administration v8.9
Page 25
Step Action
9. Use the Qualification tab to add, update, or display the courses that the instructor is qualified to teach. Click the Qualification tab.

Training Guide Enterprise Learning Training Administration v8.9
Page 26
Step Action
10. Click in the Course Code field.
11. In the Course Code field, specify a course code from the list of courses that the instructor will teach. Enter the course code into the Course Code field.
12. Press the [Tab] key to populate the Course title. 13. To list additional courses the instructor is qualified to teach, click the Add a new row
button.
14. Click the Save button.
15. You have successfully added an instructor.
End of Procedure.

Training Guide Enterprise Learning Training Administration v8.9
Page 27
Enrolling Students
Enrolling Students Individually Once you have set up your course sessions, you are ready to start enrolling students and adding students to course and session waiting lists. There are several methods of enrolling students, so you can select the best option for your facility. For example, you may set up sessions in advance and publish a training schedule that students review and submit enrollment requests. Alternatively, you may prefer to set up waiting lists and create course sessions when there are enough students on the lists to fill the session. You use the Course Session Enrollment page to enroll students individually in a session. Before enrolling students, you set up the session by using the Course Session table. You can use the Course Session Enrollment page to enroll multiple students in the same session. You may enroll students or adjust the existing enrollment status codes for students already enrolled. For instance, if a student requests to withdraw their enrollment in the class, you would change the status from enrolled to dropped. NOTE: You may only view and change enrollments for course sessions that have not been marked Complete. In this example, two employees want to enroll in the Presentation Skills course session 0001. Your goal is to enroll these students individually in this session and verify their enrollments.

Training Guide Enterprise Learning Training Administration v8.9
Page 28
Procedure
Step Action
1. Begin by navigating to the Course Session Enrollment page. Click the Enterprise Learning link.
2. Click the Student Enrollment link. 3. Click the Enroll Individually link.
Training Guide Enterprise Learning Training Administration v8.9
Page 29
Step Action
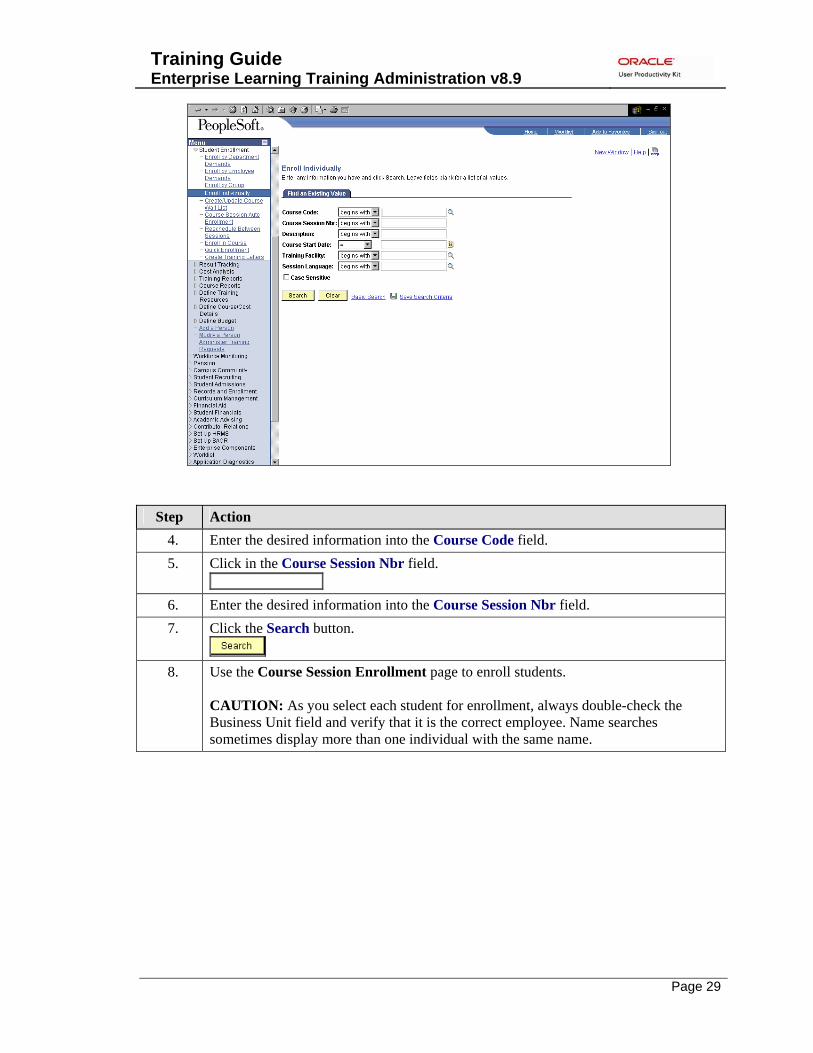
4. Enter the desired information into the Course Code field. 5. Click in the Course Session Nbr field.
6. Enter the desired information into the Course Session Nbr field. 7. Click the Search button.
8. Use the Course Session Enrollment page to enroll students.
CAUTION: As you select each student for enrollment, always double-check the Business Unit field and verify that it is the correct employee. Name searches sometimes display more than one individual with the same name.

Training Guide Enterprise Learning Training Administration v8.9
Page 30
Step Action
9. Enter the desired information into the EmplID field. 10. Specify the student enrollment status, such as Enrolled or Sessn Wait in the
Enrollment/Attendance field. Click the *Enrollment/Attendance list.
11. Select Enrolled.
12. The Status Date field uses the current system date by default. Accept the default date
for this field. 13. Specify the reason for training in the Training Reason field.
Click the Training Reason list.
14. Click an entry in the list. Always select Skill Enhancement.
Training Guide Enterprise Learning Training Administration v8.9
Page 31
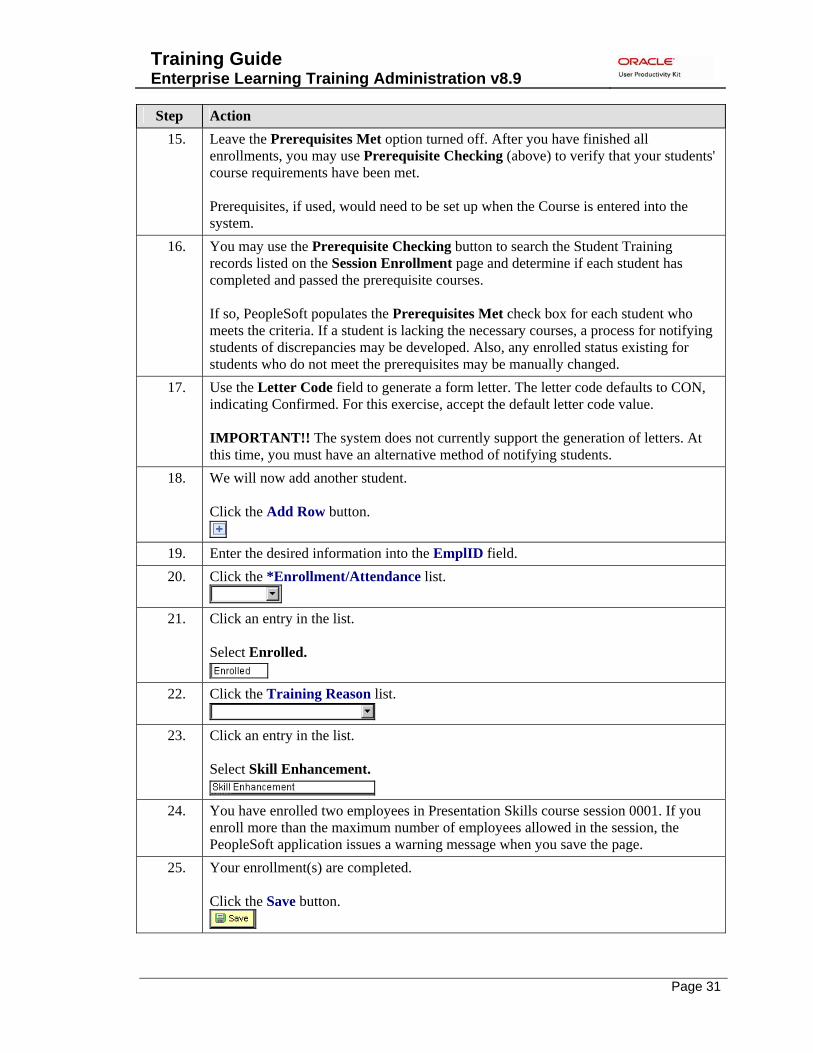
Step Action 15. Leave the Prerequisites Met option turned off. After you have finished all
enrollments, you may use Prerequisite Checking (above) to verify that your students' course requirements have been met. Prerequisites, if used, would need to be set up when the Course is entered into the system.
16. You may use the Prerequisite Checking button to search the Student Training records listed on the Session Enrollment page and determine if each student has completed and passed the prerequisite courses. If so, PeopleSoft populates the Prerequisites Met check box for each student who meets the criteria. If a student is lacking the necessary courses, a process for notifying students of discrepancies may be developed. Also, any enrolled status existing for students who do not meet the prerequisites may be manually changed.
17. Use the Letter Code field to generate a form letter. The letter code defaults to CON, indicating Confirmed. For this exercise, accept the default letter code value. IMPORTANT!! The system does not currently support the generation of letters. At this time, you must have an alternative method of notifying students.
18. We will now add another student. Click the Add Row button.
19. Enter the desired information into the EmplID field. 20. Click the *Enrollment/Attendance list.
21. Click an entry in the list.
Select Enrolled.
22. Click the Training Reason list.
23. Click an entry in the list.
Select Skill Enhancement.
24. You have enrolled two employees in Presentation Skills course session 0001. If you
enroll more than the maximum number of employees allowed in the session, the PeopleSoft application issues a warning message when you save the page.
25. Your enrollment(s) are completed. Click the Save button.

Training Guide Enterprise Learning Training Administration v8.9
Page 32
Step Action 26. You have successfully enrolled individual students into a course session.
End of Procedure.
Training Guide Enterprise Learning Training Administration v8.9
Page 33
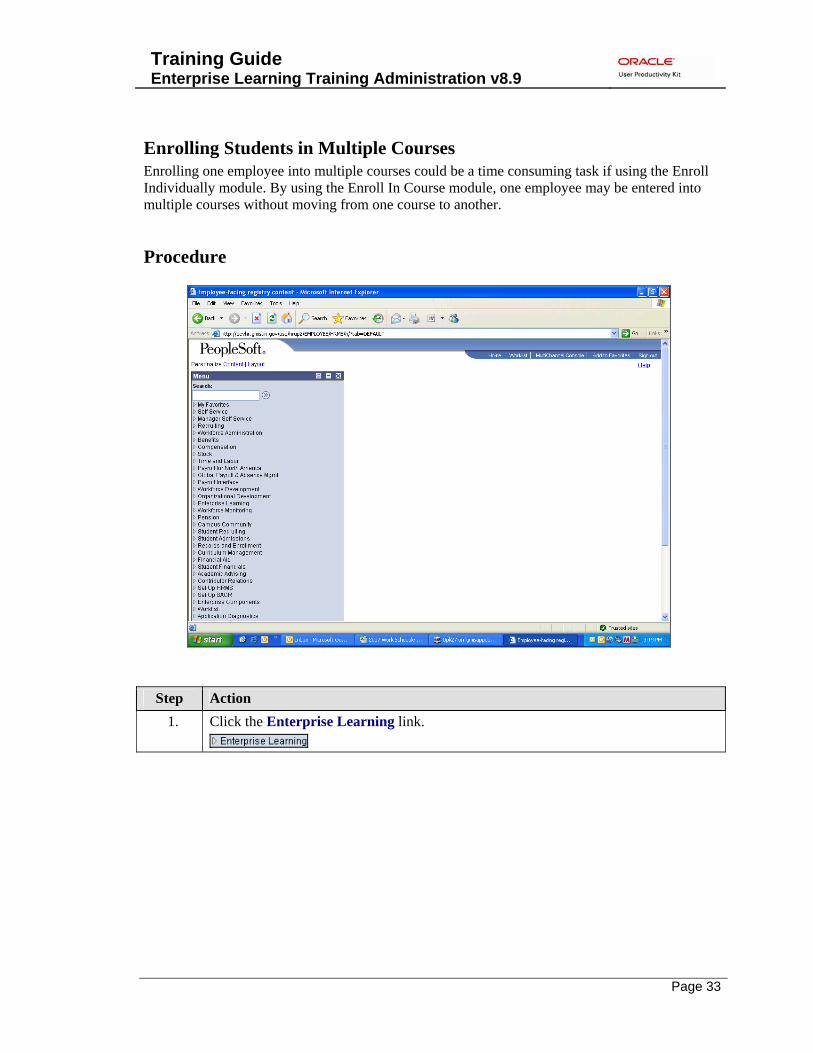
Enrolling Students in Multiple Courses Enrolling one employee into multiple courses could be a time consuming task if using the Enroll Individually module. By using the Enroll In Course module, one employee may be entered into multiple courses without moving from one course to another.
Procedure
Step Action
1. Click the Enterprise Learning link.
Training Guide Enterprise Learning Training Administration v8.9
Page 34
Step Action
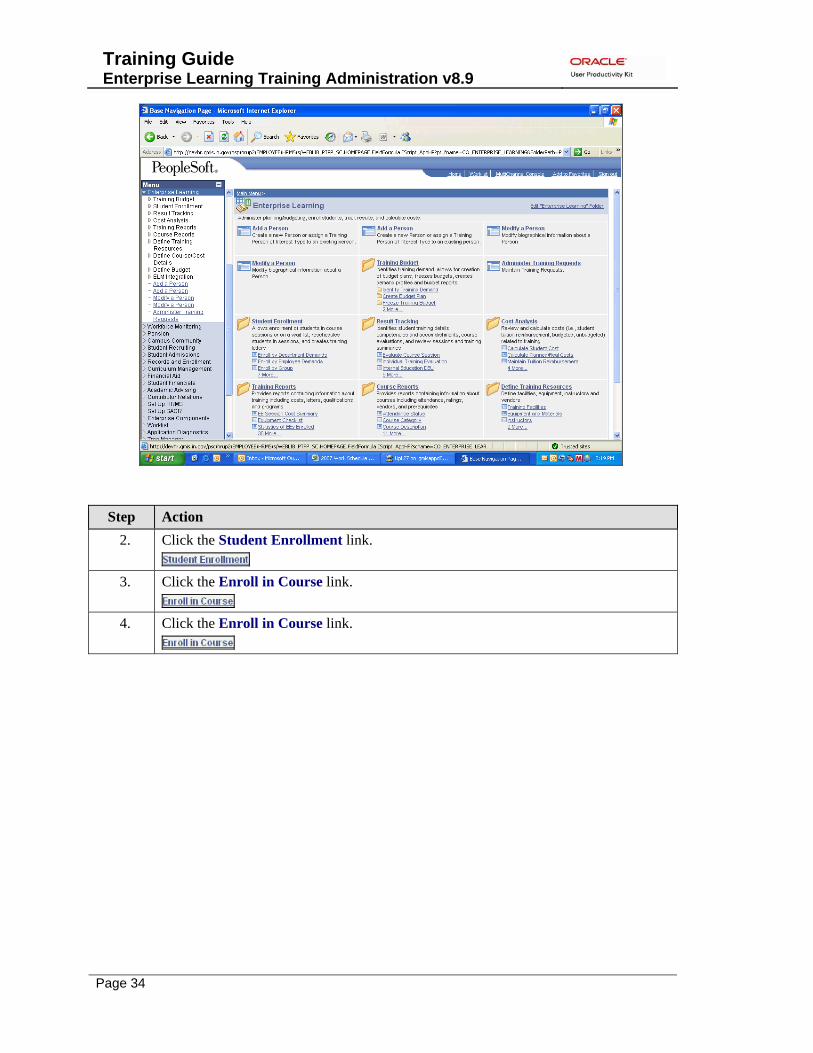
2. Click the Student Enrollment link.
3. Click the Enroll in Course link.
4. Click the Enroll in Course link.

Training Guide Enterprise Learning Training Administration v8.9
Page 35
Step Action
5. Enter the employee ID number into the EmplID field. If the employee's employee ID number is not known, search by the employee's name.
6. Click the Search button.
Training Guide Enterprise Learning Training Administration v8.9
Page 36
Step Action
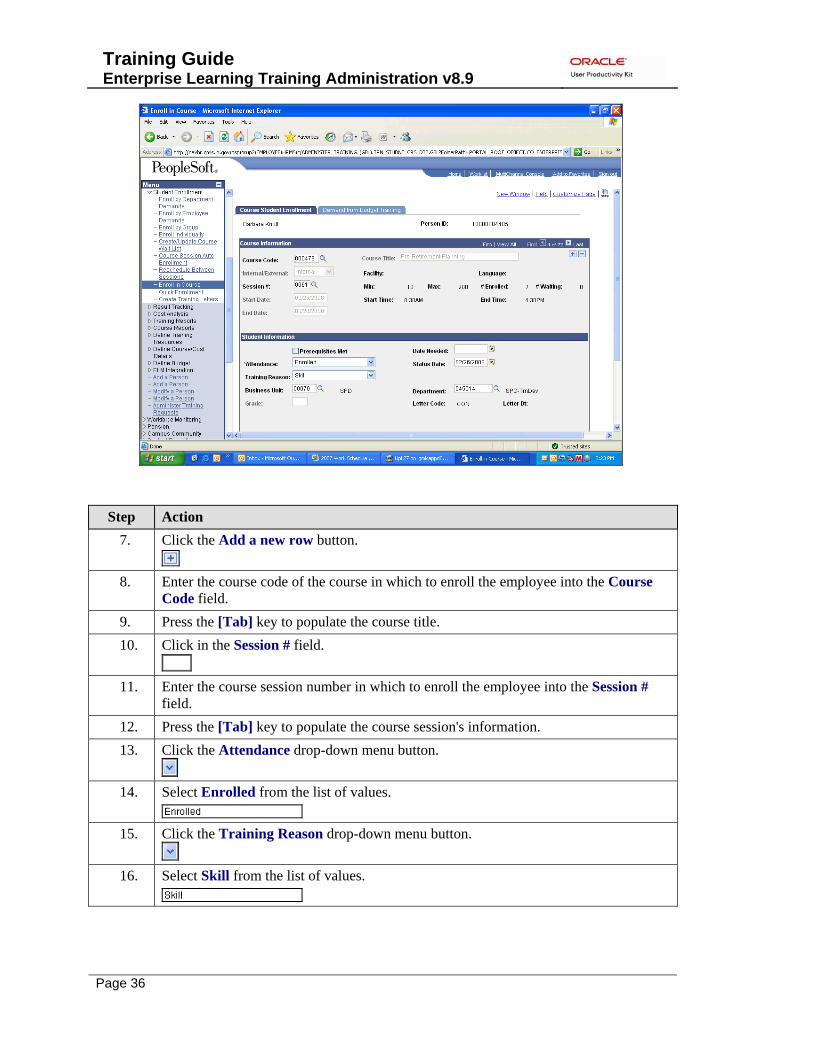
7. Click the Add a new row button.
8. Enter the course code of the course in which to enroll the employee into the Course Code field.
9. Press the [Tab] key to populate the course title. 10. Click in the Session # field.
11. Enter the course session number in which to enroll the employee into the Session #
field. 12. Press the [Tab] key to populate the course session's information. 13. Click the Attendance drop-down menu button.
14. Select Enrolled from the list of values.
15. Click the Training Reason drop-down menu button.
16. Select Skill from the list of values.
Training Guide Enterprise Learning Training Administration v8.9
Page 37
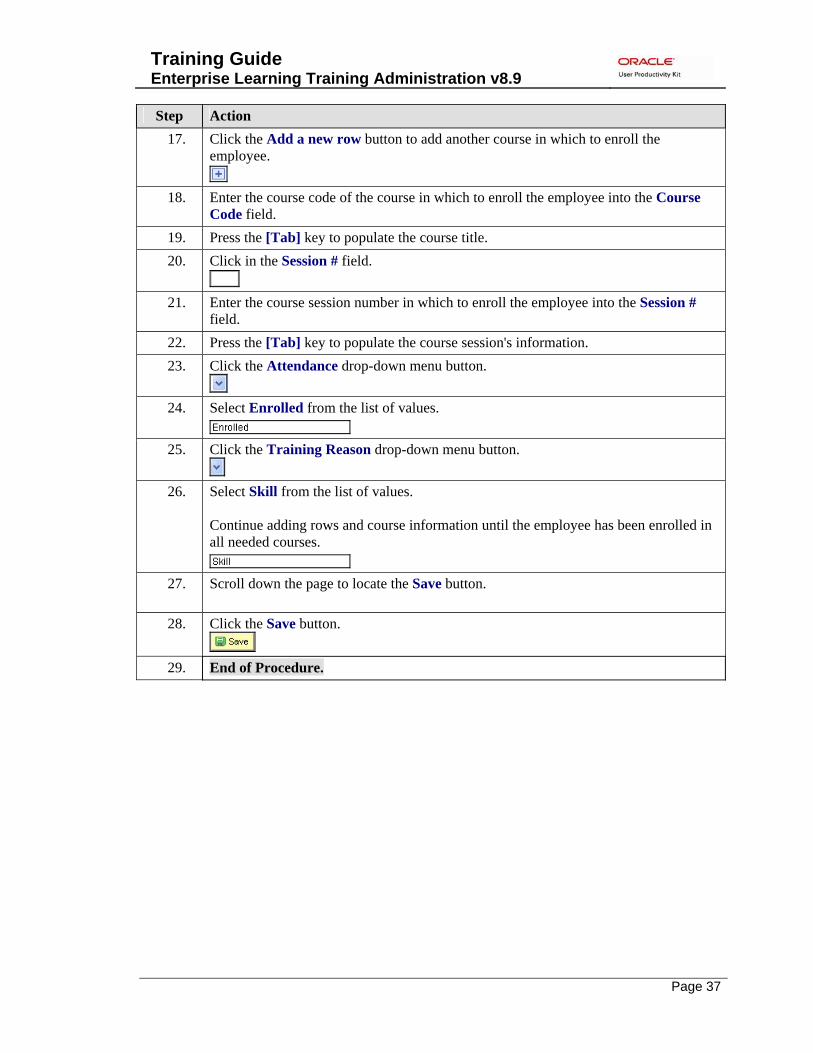
Step Action 17. Click the Add a new row button to add another course in which to enroll the
employee.
18. Enter the course code of the course in which to enroll the employee into the Course Code field.
19. Press the [Tab] key to populate the course title. 20. Click in the Session # field.
21. Enter the course session number in which to enroll the employee into the Session #
field. 22. Press the [Tab] key to populate the course session's information. 23. Click the Attendance drop-down menu button.
24. Select Enrolled from the list of values.
25. Click the Training Reason drop-down menu button.
26. Select Skill from the list of values.
Continue adding rows and course information until the employee has been enrolled in all needed courses.
27. Scroll down the page to locate the Save button.
28. Click the Save button.
29. End of Procedure.
Training Guide Enterprise Learning Training Administration v8.9
Page 38
Creating a Wait List Wait lists are used to organize the enrollment process and ensure fair enrollment. In addition, you use wait lists to monitor course demand and create sessions when enrollment demand is high. Alternatively, they are used to collect requests for existing course sessions, and enable automatic enrollment of students in the session. With the use of wait lists and automatic session enrollment, it is necessary to understand the way PeopleSoft processes information. The order in which students are enrolled from wait lists into sessions is determined by the PeopleSoft processing logic. When using course auto-enrollment, the session for which students are being enrolled must be specified. Once the session is selected, PeopleSoft enrolls students in the following order of preference or hierarchy: • Session Waitlist Status: Students with session wait list for the particular session selected are given priority over any student with a general course wait list status. • Waitlist Date: Students with session wait list status are then sorted for enrollment based on their wait list date, the date they were entered onto the wait list. Generally, the student with the oldest date is given first priority. If multiple students share the same date, priority is based on ID. • ID: Among students who share the same session wait list date, employees always get first opportunity for training sessions. If all of those employees have been enrolled, then non-employees with that same session wait list date are enrolled. • If all students with session wait list status for this session have been enrolled, then students with general course wait list status are enrolled under the same wait list date and ID guidelines listed above for session wait list status. • If a session has fewer seats available than students of equal standing, PeopleSoft does not perform any enrollment automatically. In that case, manual enrollment must be used, and some other form of selection must be imposed. Alternatively, the session could be modified to allow a larger enrollment. In this exercise, two people requested enrollment in the Professional Presentations course session K005. Your goal is to add them to a wait list for the Professional Presentations course session.
Training Guide Enterprise Learning Training Administration v8.9
Page 39
Procedure
Step Action
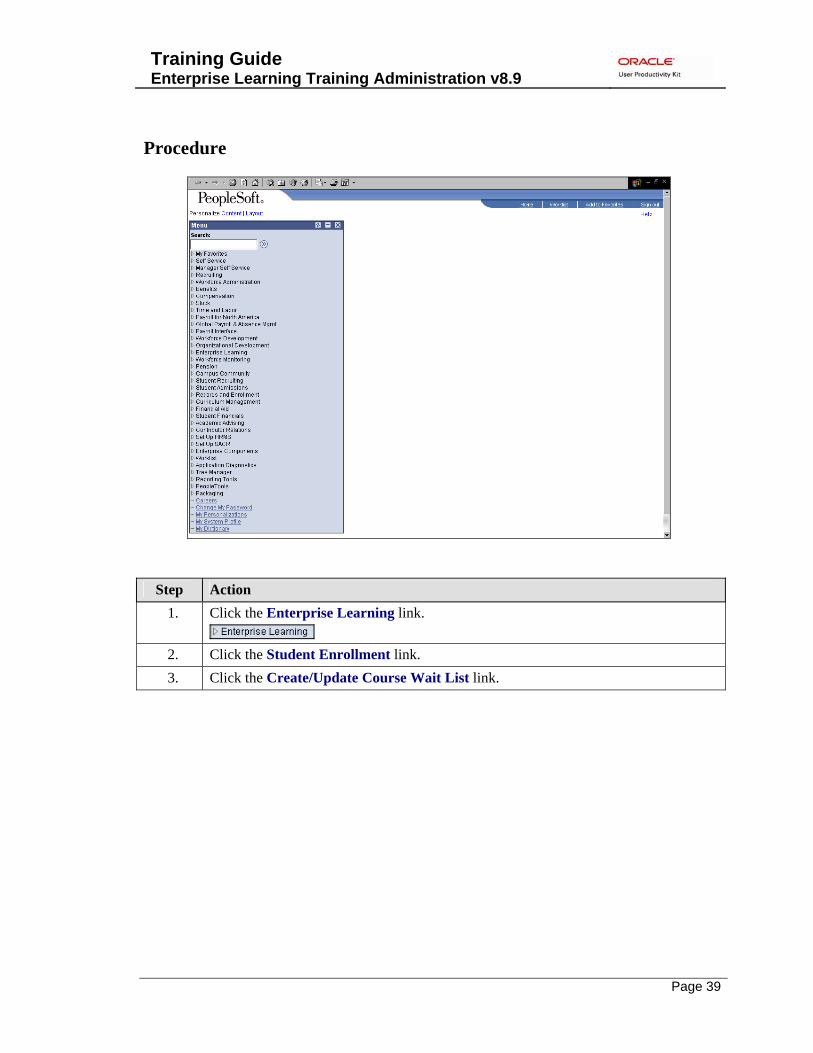
1. Click the Enterprise Learning link.
2. Click the Student Enrollment link. 3. Click the Create/Update Course Wait List link.

Training Guide Enterprise Learning Training Administration v8.9
Page 40
Step Action
4. Enter the desired information into the Course Code field. 5. Click the Search button.
6. Use the Course Wait List page to add employees and non-employees to wait lists and
assign the enrollment status. For this exercise, add two employees to the wait list. To add them to the wait list, specify their IDs in the EmplID field.

Training Guide Enterprise Learning Training Administration v8.9
Page 41
Step Action
7. Enter the desired information into the EmplID field. 8. Assign a wait list status to the employee in the Attendance field. The PeopleSoft
application provides a course wait list and a session wait list. Both of these statuses are used in the processing logic when enrolling students from a wait list to a session. The course wait option would be used when employees are interested in attending a course that does not have the required number of minimum students to schedule a course session. Click the Attendance drop-down menu button.
9. Select Sessn Wait from the list of values.
Session Wait is used when a course session is full and an employee is awaiting a course opening.
Training Guide Enterprise Learning Training Administration v8.9
Page 42
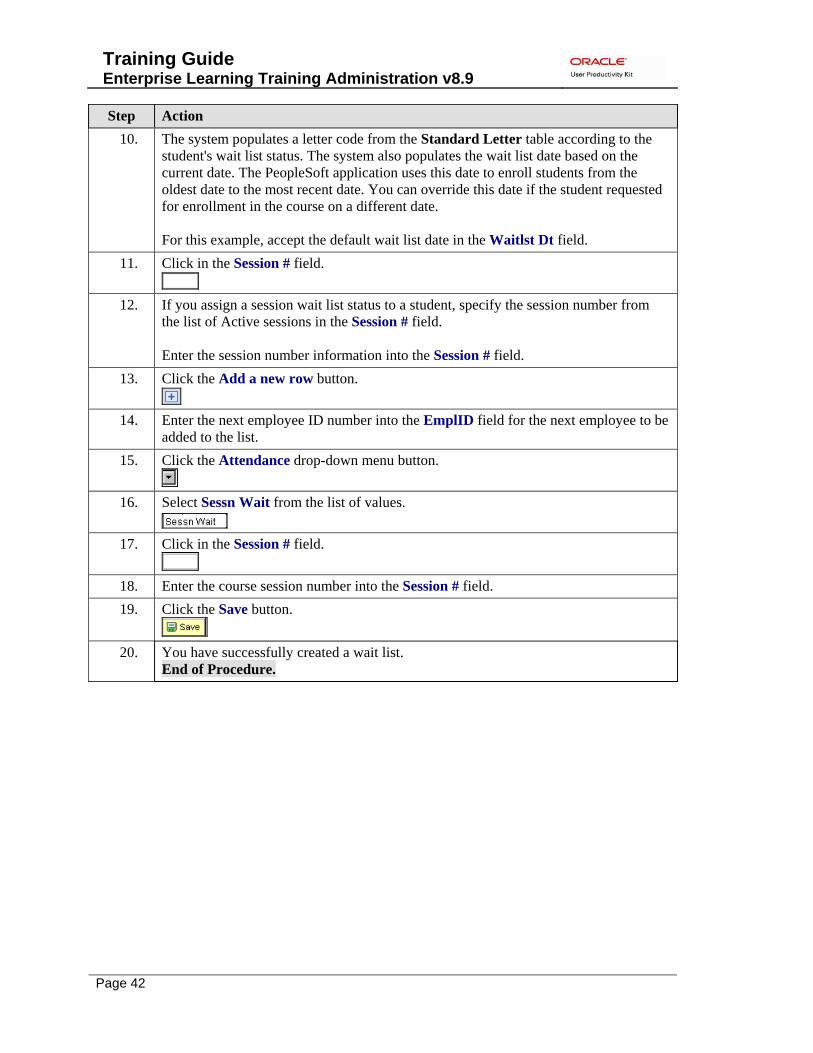
Step Action 10. The system populates a letter code from the Standard Letter table according to the
student's wait list status. The system also populates the wait list date based on the current date. The PeopleSoft application uses this date to enroll students from the oldest date to the most recent date. You can override this date if the student requested for enrollment in the course on a different date. For this example, accept the default wait list date in the Waitlst Dt field.
11. Click in the Session # field.
12. If you assign a session wait list status to a student, specify the session number from the list of Active sessions in the Session # field. Enter the session number information into the Session # field.
13. Click the Add a new row button.
14. Enter the next employee ID number into the EmplID field for the next employee to be added to the list.
15. Click the Attendance drop-down menu button.
16. Select Sessn Wait from the list of values.
17. Click in the Session # field.
18. Enter the course session number into the Session # field. 19. Click the Save button.
20. You have successfully created a wait list.
End of Procedure.
Training Guide Enterprise Learning Training Administration v8.9
Page 43
Creating a Sign in Sheet
Procedure
Step Action
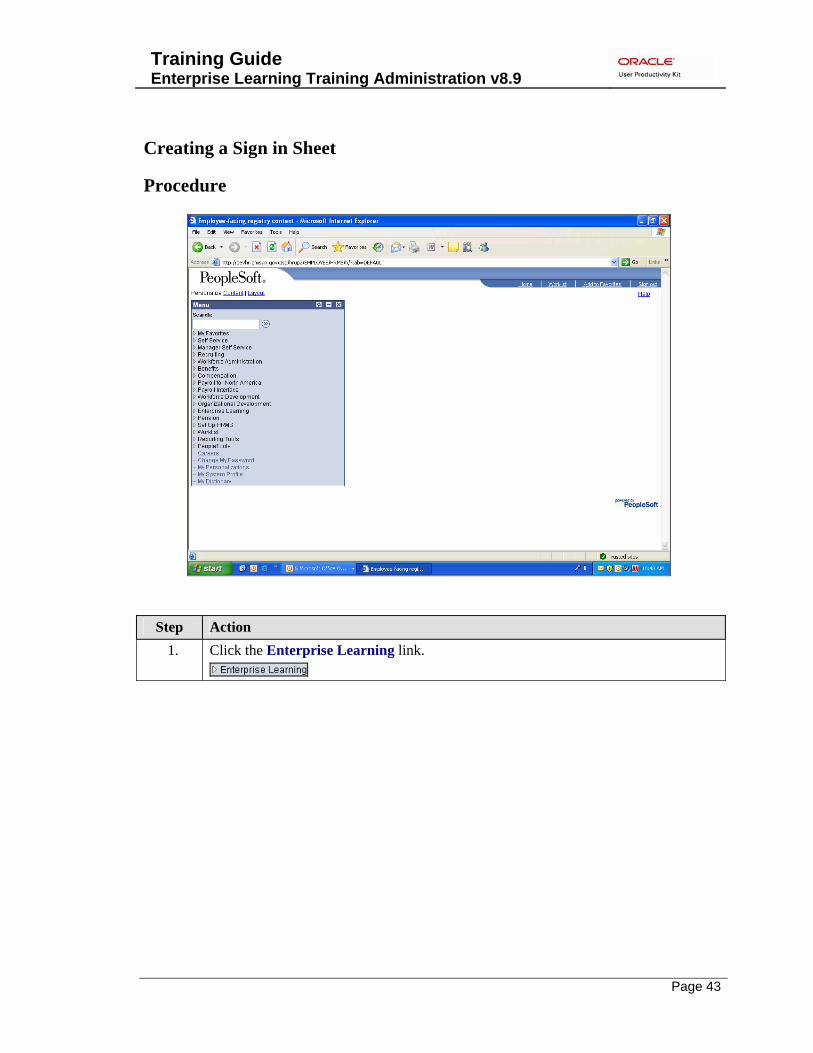
1. Click the Enterprise Learning link.

Training Guide Enterprise Learning Training Administration v8.9
Page 44
Step Action
2. Click the Training Reports link.
3. Click the Course Sign In link.

Training Guide Enterprise Learning Training Administration v8.9
Page 45
Step Action
4. Click the Add a New Value tab.
5. Enter the run control ID into the Run Control ID field. Note: The run control ID is not an assigned value. It is created by the user. The run control ID identifies the employee producing the course sign in sheet.
6. Click the Add button.

Training Guide Enterprise Learning Training Administration v8.9
Page 46
Step Action
7. Click in the Course field.
8. Enter the course number into the Course field. 9. Press the [Tab] key. 10. To add the session number, click the Session # Magnifying Glass button.
11. Click a course session number in the Course Session Nbr column.
12. Click the Run button.
Training Guide Enterprise Learning Training Administration v8.9
Page 47
Step Action
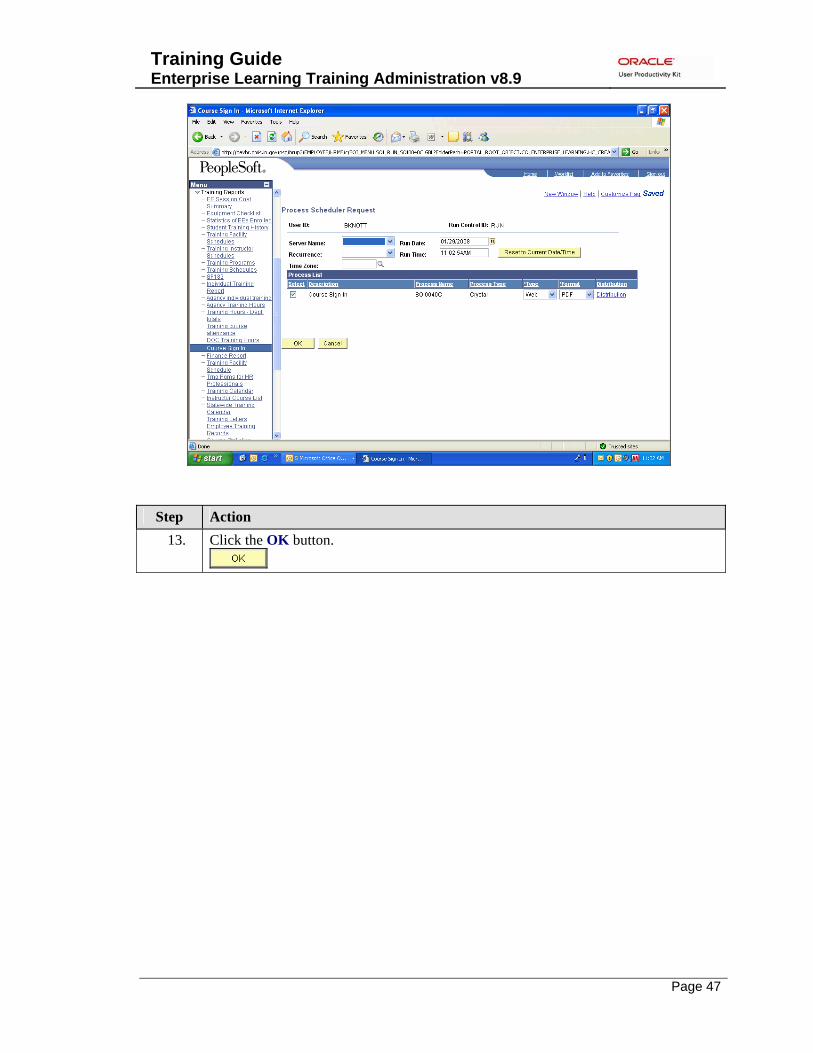
13. Click the OK button.

Training Guide Enterprise Learning Training Administration v8.9
Page 48
Step Action
14. Click the Refresh button. Note: The Refresh button will need to be clicked until the Run Status column indicates Success and Distribution Status column indicates Posted. The Refresh button may need to be clicked several times.
15. Click the Details link for the most recent report.
Note: The most recent report is always located at the top of the list.

Training Guide Enterprise Learning Training Administration v8.9
Page 49
Step Action
16. Click the View Log/Trace link.
Training Guide Enterprise Learning Training Administration v8.9
Page 50
Step Action
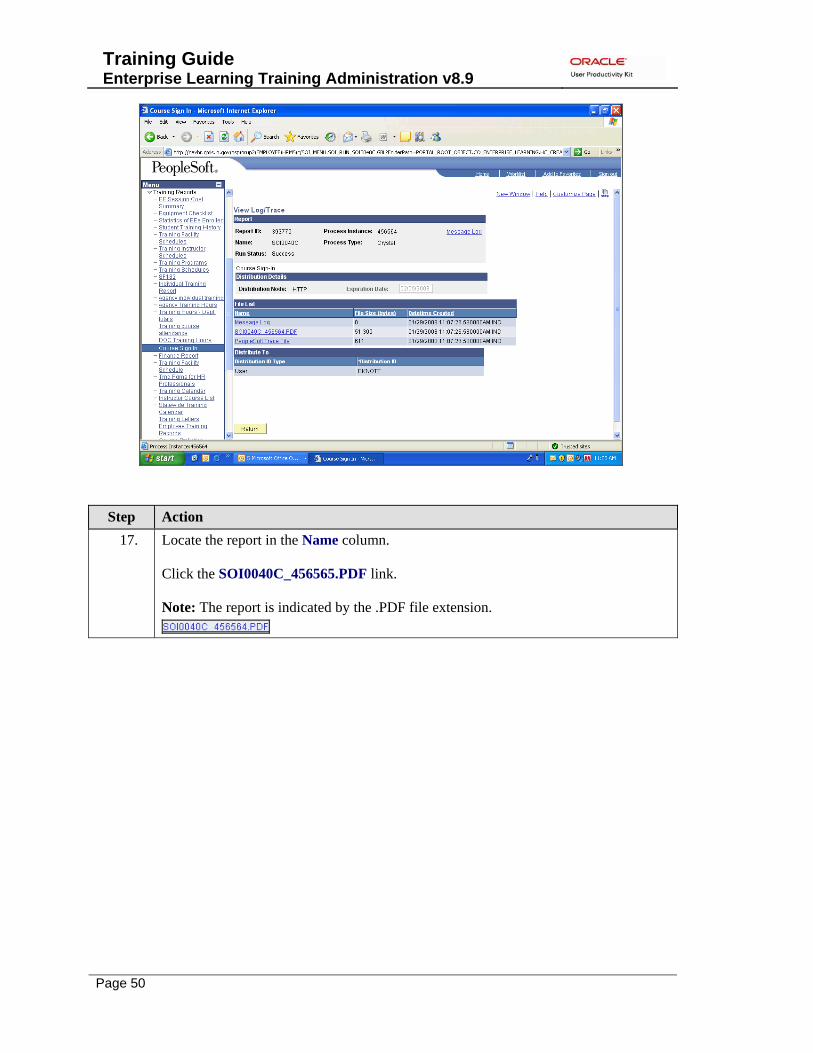
17. Locate the report in the Name column. Click the SOI0040C_456565.PDF link. Note: The report is indicated by the .PDF file extension.
Training Guide Enterprise Learning Training Administration v8.9
Page 51
Step Action
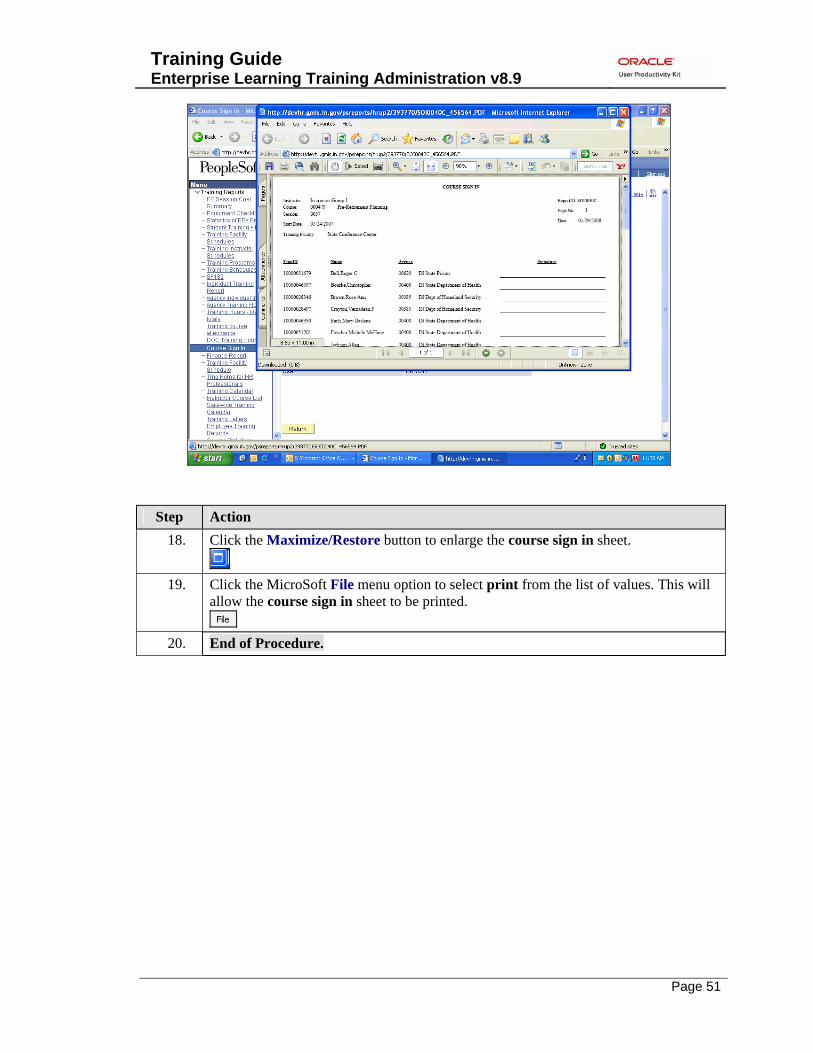
18. Click the Maximize/Restore button to enlarge the course sign in sheet.
19. Click the MicroSoft File menu option to select print from the list of values. This will
allow the course sign in sheet to be printed.
20. End of Procedure.
Training Guide Enterprise Learning Training Administration v8.9
Page 52
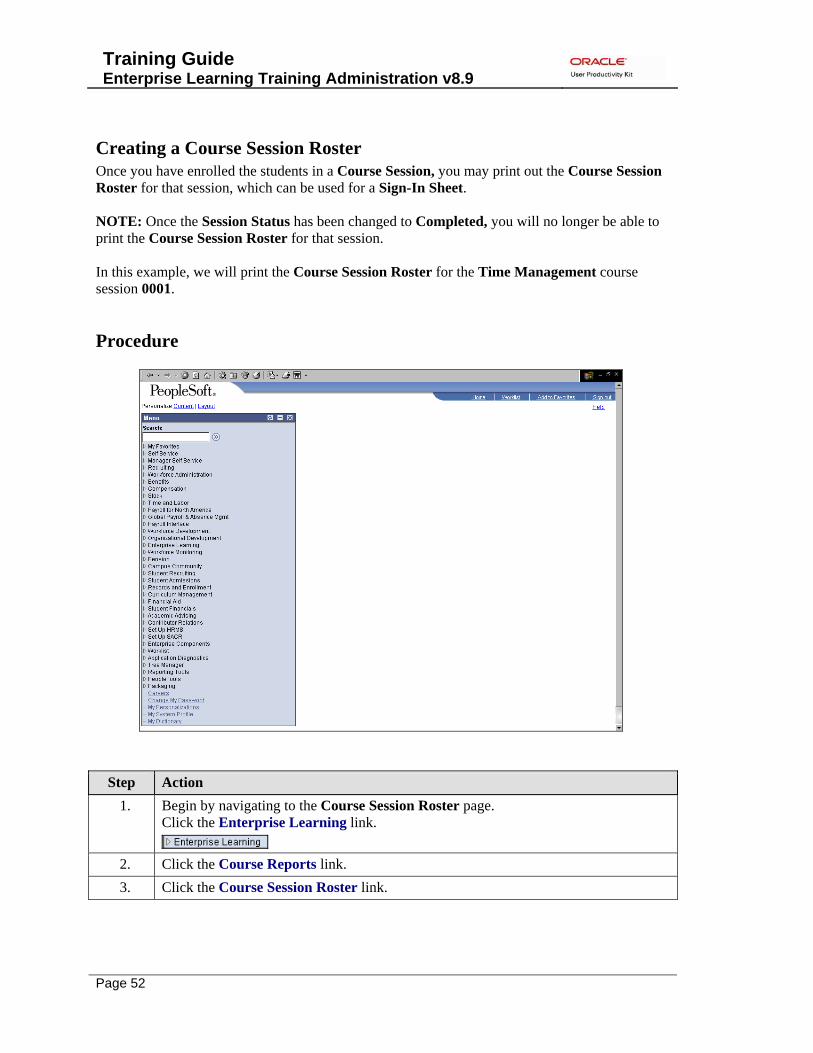
Creating a Course Session Roster Once you have enrolled the students in a Course Session, you may print out the Course Session Roster for that session, which can be used for a Sign-In Sheet. NOTE: Once the Session Status has been changed to Completed, you will no longer be able to print the Course Session Roster for that session. In this example, we will print the Course Session Roster for the Time Management course session 0001.
Procedure
Step Action
1. Begin by navigating to the Course Session Roster page. Click the Enterprise Learning link.
2. Click the Course Reports link. 3. Click the Course Session Roster link.

Training Guide Enterprise Learning Training Administration v8.9
Page 53
Step Action
4. You will need to Find an Existing or Add a New Value for Run Control ID. We are going to Add a New Value.

Training Guide Enterprise Learning Training Administration v8.9
Page 54
Step Action
5. Enter the desired information into the Run Control ID field. 6. Click the Add button.
7. Use the Course Session Roster page to define report parameters such as the course
name, session number, and session start date.
Training Guide Enterprise Learning Training Administration v8.9
Page 55
Step Action
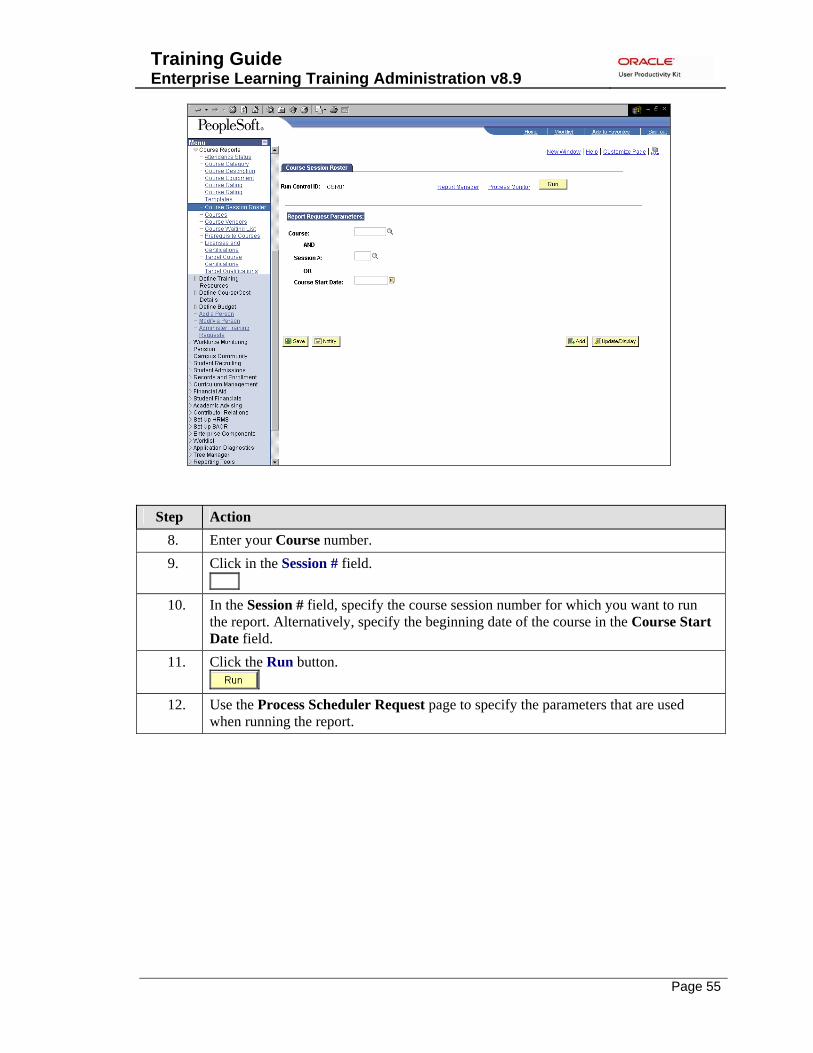
8. Enter your Course number. 9. Click in the Session # field.
10. In the Session # field, specify the course session number for which you want to run
the report. Alternatively, specify the beginning date of the course in the Course Start Date field.
11. Click the Run button.
12. Use the Process Scheduler Request page to specify the parameters that are used when running the report.

Training Guide Enterprise Learning Training Administration v8.9
Page 56
Step Action
13. Select Web from the Type list.
14. Select format PDF.
15. By clicking OK, you will submit the process to create the Course Session Roster for this session. Click the OK button.
Training Guide Enterprise Learning Training Administration v8.9
Page 57
Step Action
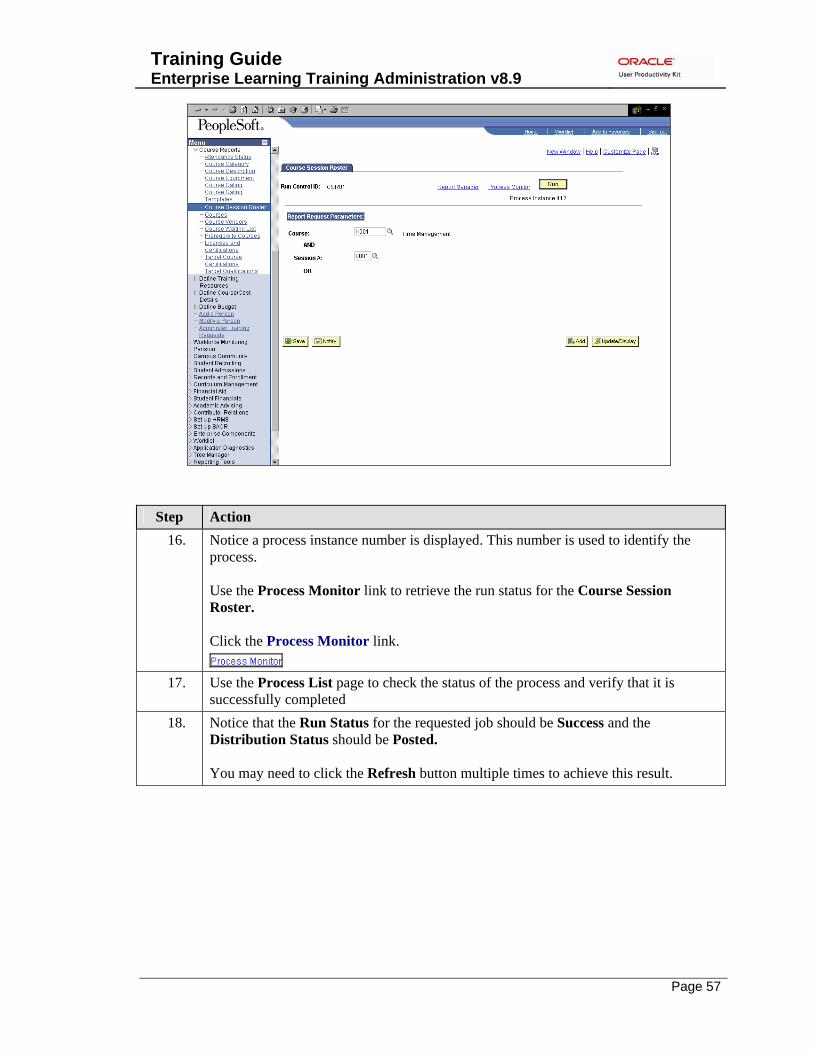
16. Notice a process instance number is displayed. This number is used to identify the process. Use the Process Monitor link to retrieve the run status for the Course Session Roster. Click the Process Monitor link.
17. Use the Process List page to check the status of the process and verify that it is
successfully completed 18. Notice that the Run Status for the requested job should be Success and the
Distribution Status should be Posted. You may need to click the Refresh button multiple times to achieve this result.

Training Guide Enterprise Learning Training Administration v8.9
Page 58
Click the Details link in the Details column. NOTE: The last document you sent to process will appear at the top, if there are several entries listed on the page. On the subsequent pages: Click the View Log/Trace link. Click the PDF document in the File List. When the Course Session Roster appears on the screen, you can send it to the printer.
Step Action
19. You have successfully created a course session roster. End of Procedure.

Training Guide Enterprise Learning Training Administration v8.9
Page 59
Closing a Session
Closing a Course Session You can set up training sessions for the courses that are designated for internal administration. You specify the session duration, capacity, location, time, instructors, and cost on the Course Session Profile page. You can enter, update, or view session status, date, time, and capacity of a course session on this page.
Procedure
Step Action
1. Click the Enterprise Learning link.

Training Guide Enterprise Learning Training Administration v8.9
Page 60
Step Action
2. Click the Student Enrollment link.
3. Click the Enroll Individually link.
Training Guide Enterprise Learning Training Administration v8.9
Page 61
Step Action
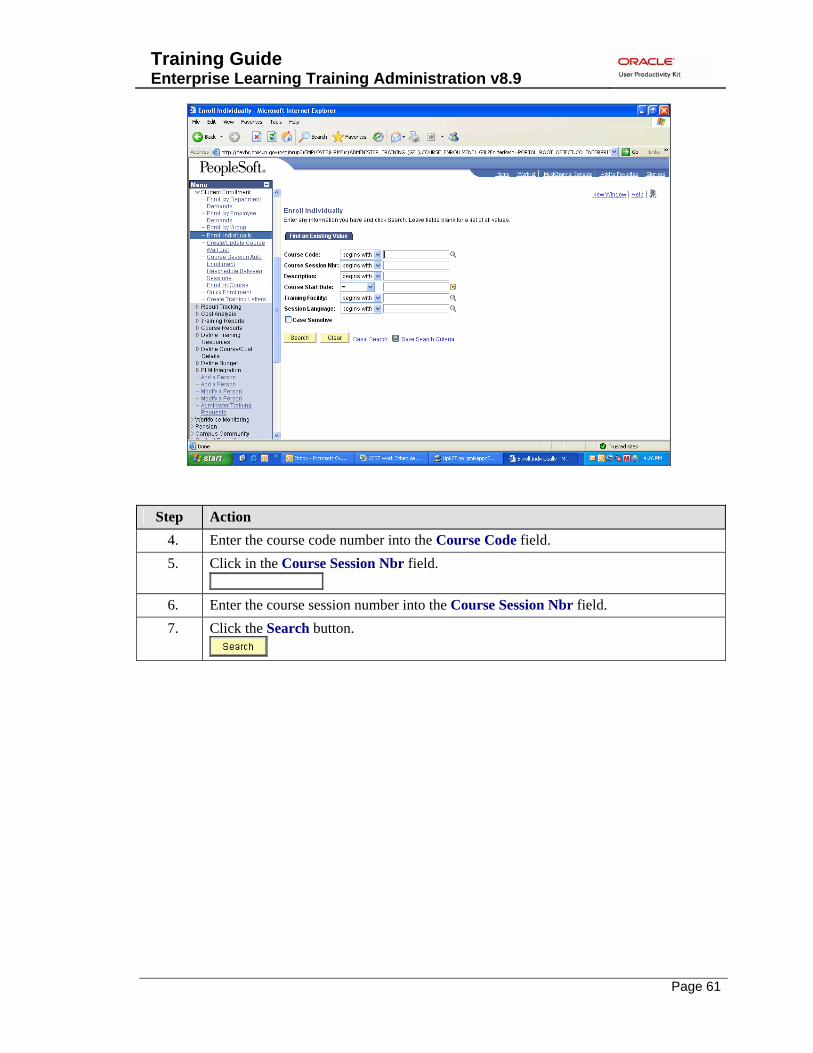
4. Enter the course code number into the Course Code field. 5. Click in the Course Session Nbr field.
6. Enter the course session number into the Course Session Nbr field. 7. Click the Search button.
Training Guide Enterprise Learning Training Administration v8.9
Page 62
Step Action
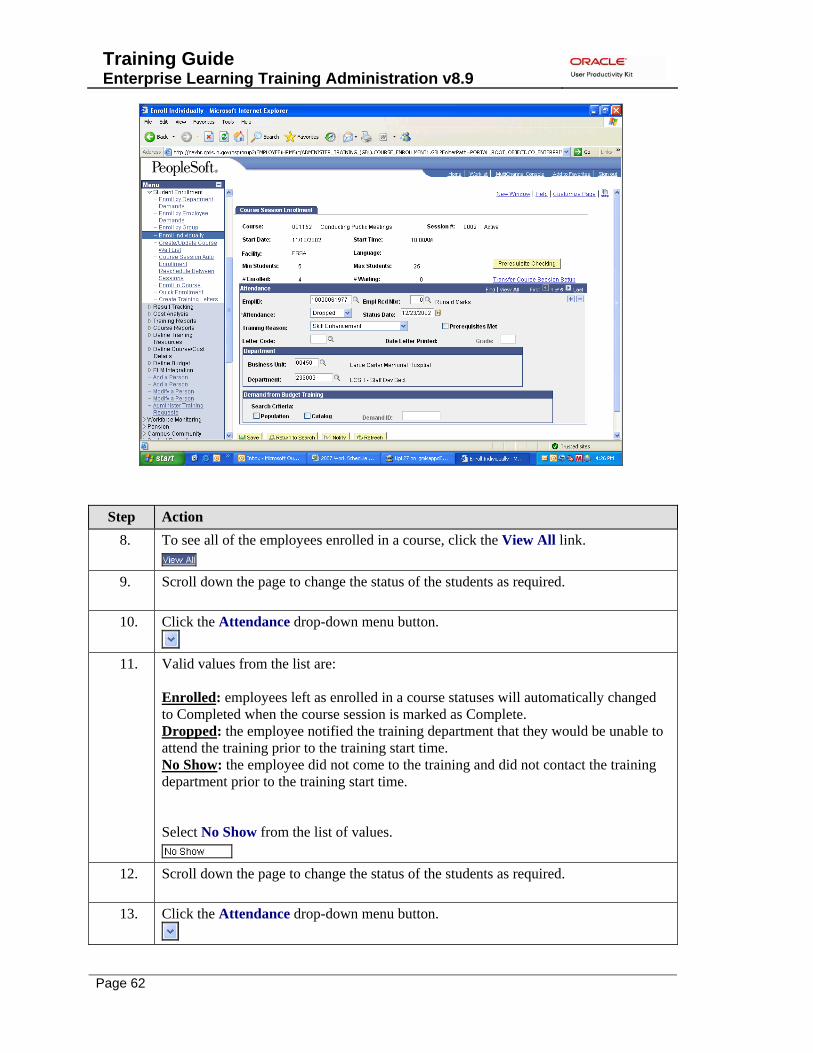
8. To see all of the employees enrolled in a course, click the View All link.
9. Scroll down the page to change the status of the students as required.
10. Click the Attendance drop-down menu button.
11. Valid values from the list are: Enrolled: employees left as enrolled in a course statuses will automatically changed to Completed when the course session is marked as Complete. Dropped: the employee notified the training department that they would be unable to attend the training prior to the training start time. No Show: the employee did not come to the training and did not contact the training department prior to the training start time. Select No Show from the list of values.
12. Scroll down the page to change the status of the students as required.
13. Click the Attendance drop-down menu button.

Training Guide Enterprise Learning Training Administration v8.9
Page 63
Step Action 14. Select Dropped from the list of values.
15. Once all Attendance field statuses have been updated, click the Save button.
16. Click the Define Course/Cost Details link.
Step Action
17. Click the Course Sessions link.
Training Guide Enterprise Learning Training Administration v8.9
Page 64
Step Action
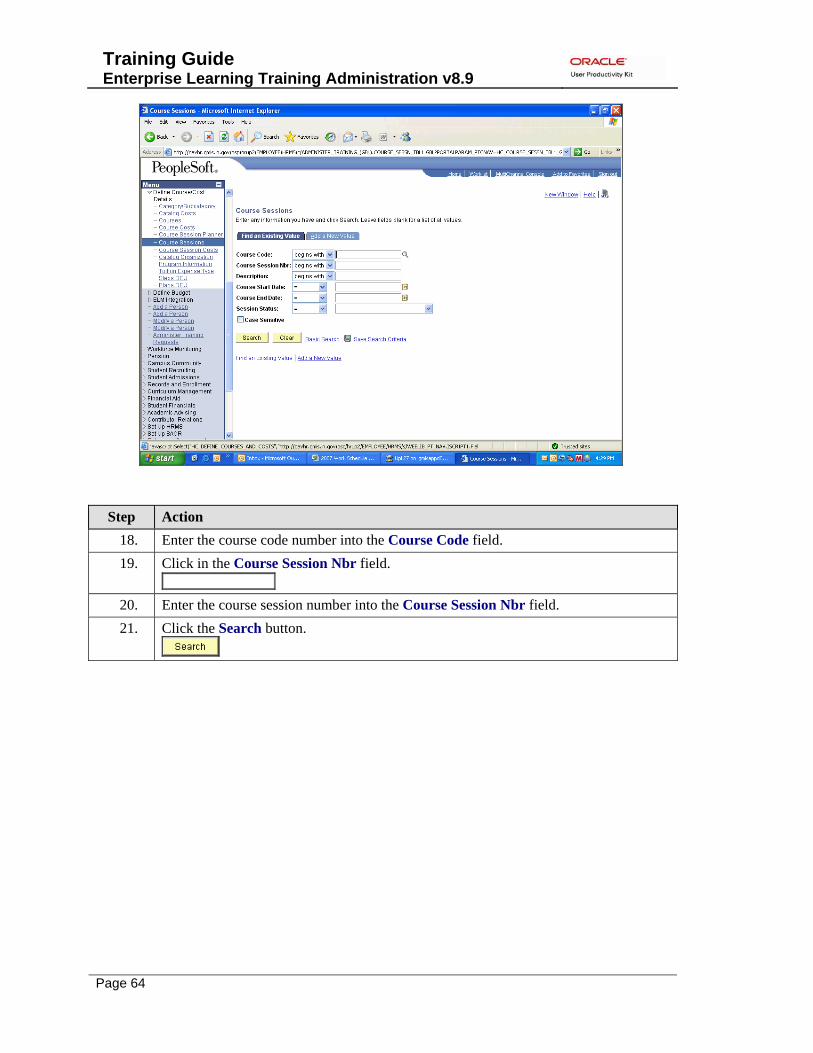
18. Enter the course code number into the Course Code field. 19. Click in the Course Session Nbr field.
20. Enter the course session number into the Course Session Nbr field. 21. Click the Search button.

Training Guide Enterprise Learning Training Administration v8.9
Page 65
Step Action
22. Click the Session Status drop-down menu button.
23. Select Complete from the list of values.
24. Click the Save button.
25. You have successfully closed a course session. End of Procedure.

Training Guide Enterprise Learning Training Administration v8.9
Page 66
Evaluate a Course Session
Procedure Use the Evaluate Course Session page to record student feedback on course sessions so that you know what areas need improvement. You can track course ratings for areas such as training facilities, instructors, course content, materials, and presentation. You can also review session statistics, including the number of responses per rating, average ratings, and the overall average for the session. Ratings can be entered only after you've marked the session "Completed".
Step Action
1. Click the Enterprise Learning link.
2. Click the Result Tracking link.
3. Click the Evaluate Course Session link.

Training Guide Enterprise Learning Training Administration v8.9
Page 67
Step Action
4. Enter the desired information into the Course Code field. 5. Enter the desired information into the Course Session Nbr field. 6. Click the Search button.

Training Guide Enterprise Learning Training Administration v8.9
Page 68
Step Action
7. In the Ratings Area you will need to follow the Standard Rating Form format and add rows of data to capture the correct information. The five areas are Content, Facility, Instructors, Materials, and Presentation. Important: Always remember to click the Plus Sign (+) before entering the ratings for your next area. Click the *Rating Area list.
8. Click an entry in the list.
9. Click the *Rating list.
10. In the Rating field, select the appropriate rating: Excellent, Good, Fair, or Poor.
Click an entry in the list.
11. In the Total Count Field, enter the number of students who selected the rating. The system computes the Rating Points assigned to each rating. Enter the desired information into the *Total Count field.
12. Click the Add a new row at row 1 (Alt+7) button.
Training Guide Enterprise Learning Training Administration v8.9
Page 69
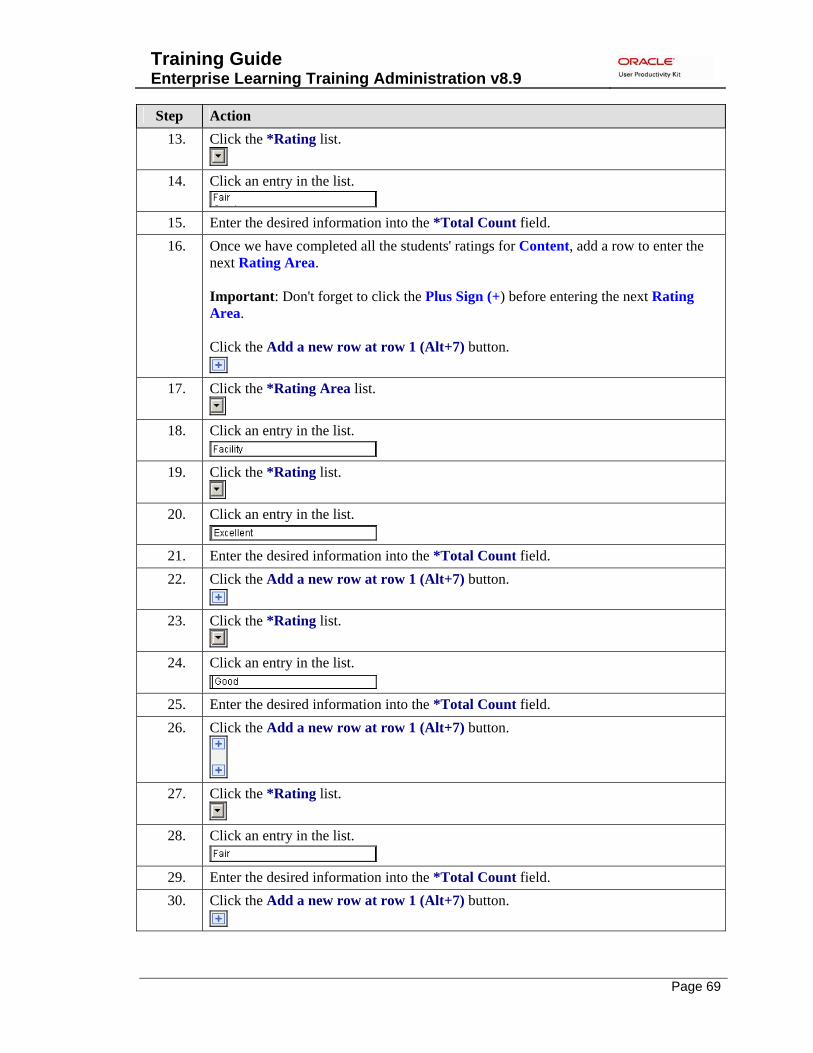
Step Action 13. Click the *Rating list.
14. Click an entry in the list.
15. Enter the desired information into the *Total Count field. 16. Once we have completed all the students' ratings for Content, add a row to enter the
next Rating Area. Important: Don't forget to click the Plus Sign (+) before entering the next Rating Area. Click the Add a new row at row 1 (Alt+7) button.
17. Click the *Rating Area list.
18. Click an entry in the list.
19. Click the *Rating list.
20. Click an entry in the list.
21. Enter the desired information into the *Total Count field. 22. Click the Add a new row at row 1 (Alt+7) button.
23. Click the *Rating list.
24. Click an entry in the list.
25. Enter the desired information into the *Total Count field. 26. Click the Add a new row at row 1 (Alt+7) button.
27. Click the *Rating list.
28. Click an entry in the list.
29. Enter the desired information into the *Total Count field. 30. Click the Add a new row at row 1 (Alt+7) button.

Training Guide Enterprise Learning Training Administration v8.9
Page 70
Step Action 31. Click the *Rating Area list.
32. Click an entry in the list.
33. Click the *Rating list.
34. Click an entry in the list.
35. Enter the desired information into the *Total Count field. 36. Click the Add a new row at row 1 (Alt+7) button.
37. Click the *Rating Area list.
38. Click an entry in the list.
39. Click the *Rating list.
40. Click an entry in the list.
41. Enter the desired information into the *Total Count field. 42. Click the Add a new row at row 1 (Alt+7) button.
43. Click the *Rating list.
44. Click an entry in the list.
45. Enter the desired information into the *Total Count field. 46. Click the Add a new row at row 1 (Alt+7) button.
47. Click the *Rating Area list.
48. Click an entry in the list.
49. Click the *Rating list.
50. Click an entry in the list.
51. Enter the desired information into the *Total Count field.
Training Guide Enterprise Learning Training Administration v8.9
Page 71
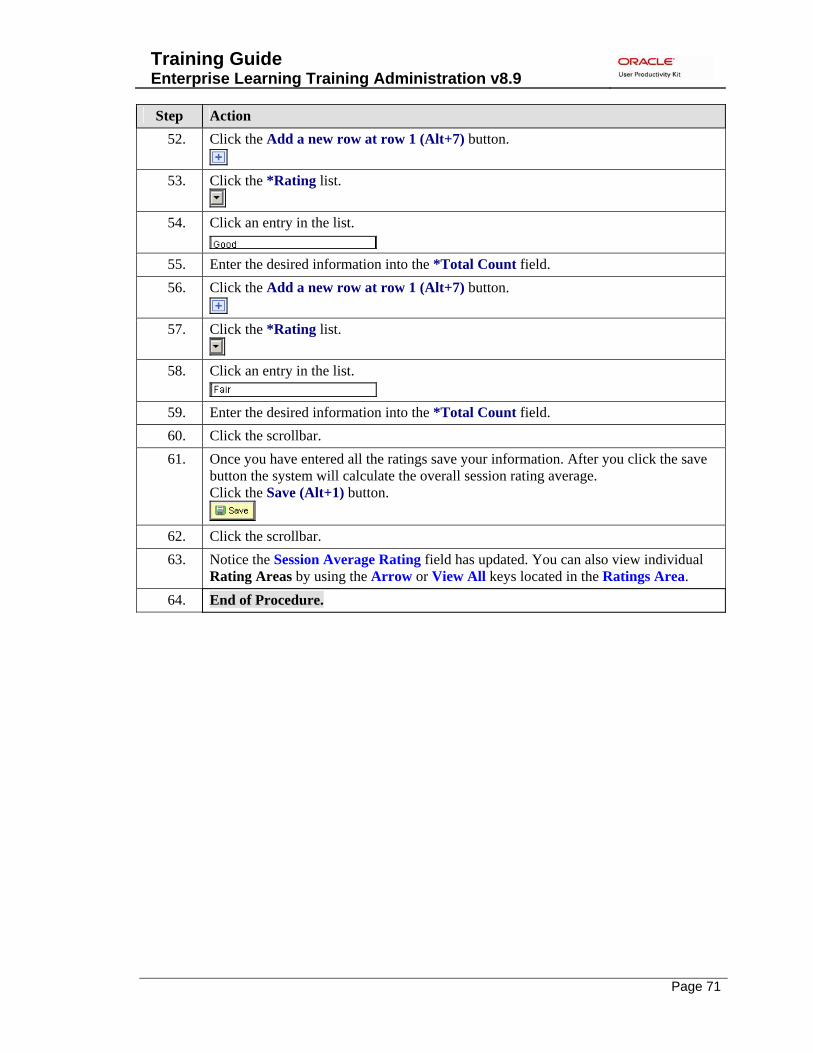
Step Action 52. Click the Add a new row at row 1 (Alt+7) button.
53. Click the *Rating list.
54. Click an entry in the list.
55. Enter the desired information into the *Total Count field. 56. Click the Add a new row at row 1 (Alt+7) button.
57. Click the *Rating list.
58. Click an entry in the list.
59. Enter the desired information into the *Total Count field. 60. Click the scrollbar. 61. Once you have entered all the ratings save your information. After you click the save
button the system will calculate the overall session rating average. Click the Save (Alt+1) button.
62. Click the scrollbar. 63. Notice the Session Average Rating field has updated. You can also view individual
Rating Areas by using the Arrow or View All keys located in the Ratings Area. 64. End of Procedure.


Training Guide Enterprise Learning Training Administration v8.9
Page 73
Reviewing Training Records
Viewing Course Session Summary
Procedure
Step Action
1. Click the Enterprise Learning link.

Training Guide Enterprise Learning Training Administration v8.9
Page 74
Step Action
2. Click the Result Tracking link.
3. Click the Review Session Summary link.

Training Guide Enterprise Learning Training Administration v8.9
Page 75
Step Action
4. Enter the course code number into the Course Code field. 5. Click in the Course Session Nbr field.
6. Enter the course session number into the Course Session Nbr field. 7. Click the Search button.

Training Guide Enterprise Learning Training Administration v8.9
Page 76
Step Action
8. From the Course Session Summary page, each employee who attended the course, their attendance status, and the course grade (if applicable) can be viewed. PeopleSoft has a feature that allows for sorting any column that has a live link for a column heading. Click the Status link for the course attendance status column.
9. Note how the Status column sorted course attendance statuses alphabetically.
Anytime the Excel Grid button is visible in PeopleSoft summaries or reports, the summary or report may be downloaded to a MicroSoft Excel spreadsheet by clicking on the button.
10. End of Procedure.

Training Guide Enterprise Learning Training Administration v8.9
Page 77
Viewing Student Training Summary Use the Review Training Summary page to view the entire training history for an employee. This information may also be saved to a spreadsheet. In this example, Martina Griffith's manager wants to know whether she has passed the Performance Management course, which can be done through the Review Training Summary.
Procedure
Step Action
1. Begin by navigating to the Student Training Summary page. Click the Enterprise Learning link.
2. Click the Result Tracking link. 3. Click the Review Training Summary link.
Training Guide Enterprise Learning Training Administration v8.9
Page 78
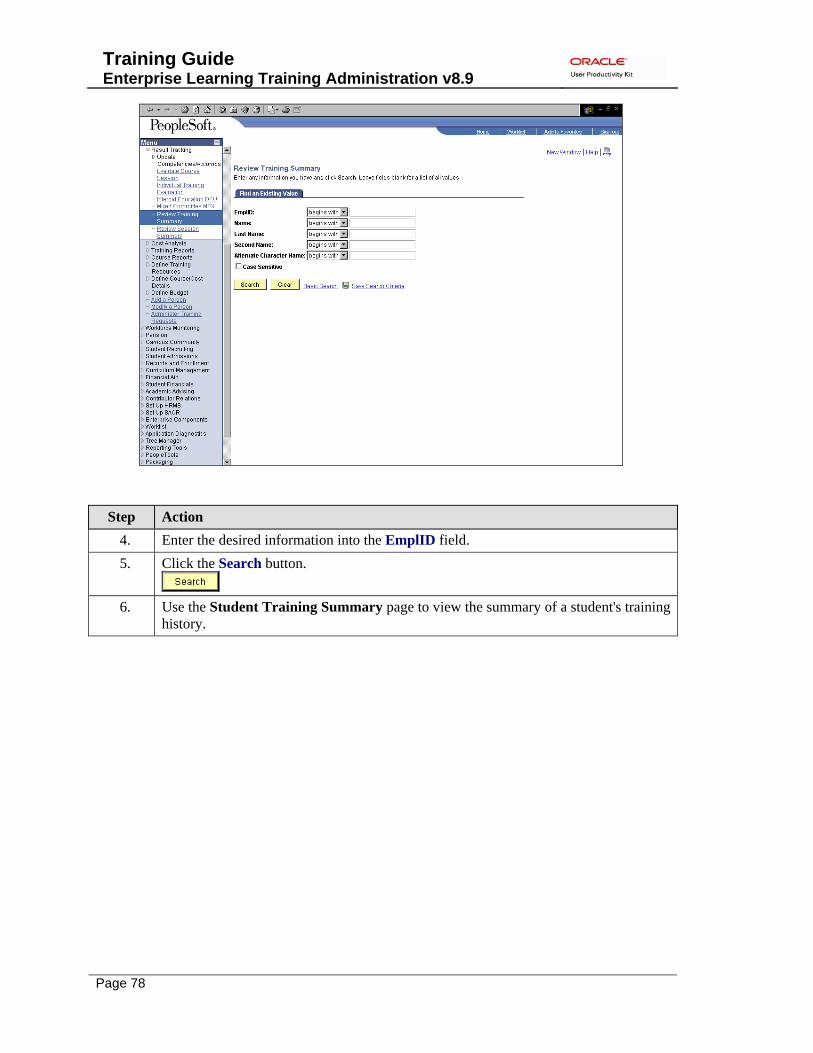
Step Action
4. Enter the desired information into the EmplID field. 5. Click the Search button.
6. Use the Student Training Summary page to view the summary of a student's training
history.
Training Guide Enterprise Learning Training Administration v8.9
Page 79
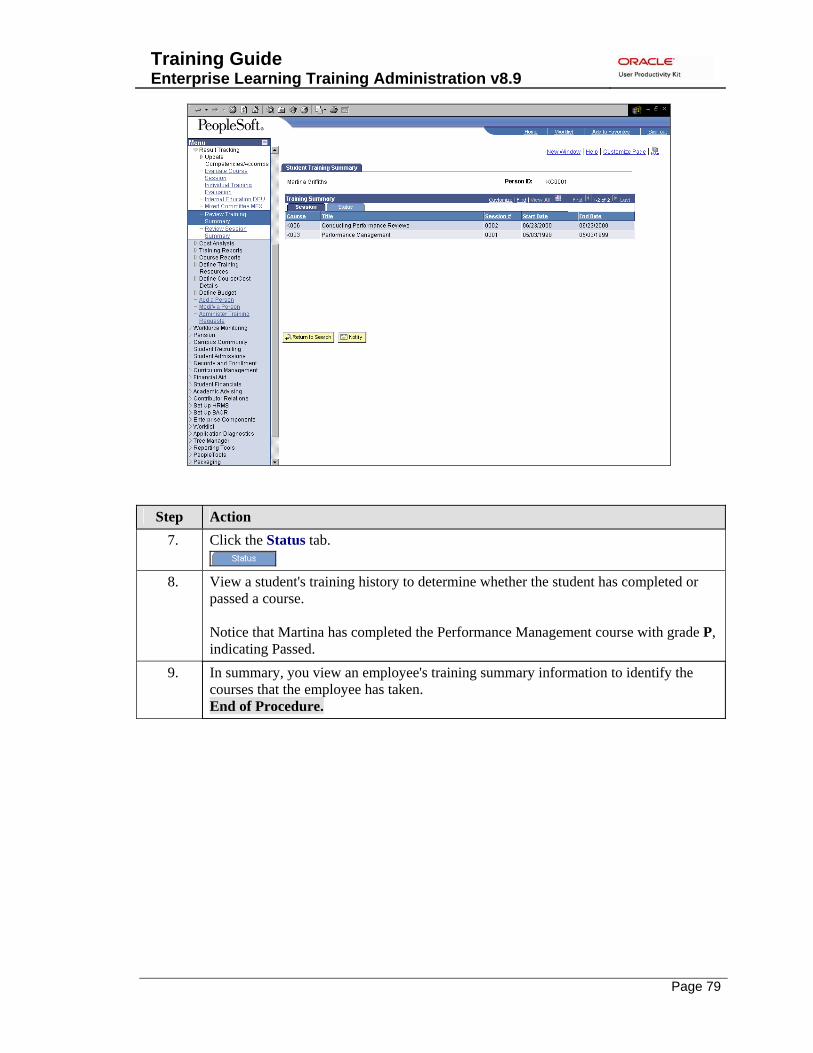
Step Action
7. Click the Status tab.
8. View a student's training history to determine whether the student has completed or passed a course. Notice that Martina has completed the Performance Management course with grade P, indicating Passed.
9. In summary, you view an employee's training summary information to identify the courses that the employee has taken. End of Procedure.

Training Guide Enterprise Learning Training Administration v8.9
Page 81
Managing External Training & External Trainees (Non-Employees) With the Person model, delivered in PeopleSoft 8.9, agencies can continue to track training activities for external trainees, most commonly referred to as non-employees. The Person model allows an employee or non-employee to maintain the same empl id number throughout their activity with the State of Indiana. The following instructions highlight how to add a new external trainee (someone who has never had a working relationship with the State of Indiana), and how to manage employees who have entered into a non-employee relationship, or how to change the business unit associated with the non-employee.
Adding External Training Sessions
Procedure
Step Action
1. Click the Enterprise Learning link.

Training Guide Enterprise Learning Training Administration v8.9
Page 82
Step Action
2. Click the Student Enrollment link.
3. Click the Enroll in Course link.
Training Guide Enterprise Learning Training Administration v8.9
Page 83
Step Action
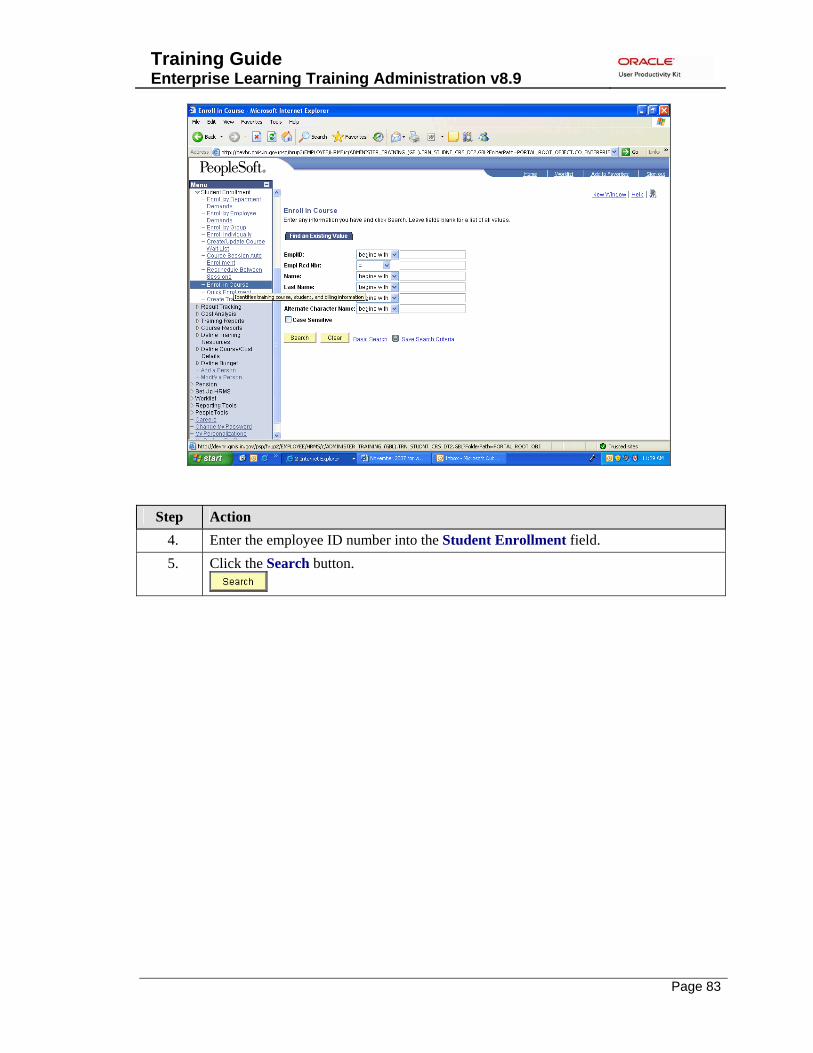
4. Enter the employee ID number into the Student Enrollment field. 5. Click the Search button.

Training Guide Enterprise Learning Training Administration v8.9
Page 84
Step Action
6. Click the Add a new row (Alt+7) button.
7. Press the [Tab] key. 8. Press the [Tab] key. 9. Enter the name of the course into the Course Title field. 10. Click the Internal/External drop-down menu button.
11. Select External from the list of values.
12. Click in the Start Date field.
13. Enter the start date into the Start Date field. 14. Press the [Tab] key. 15. Enter the end date into the End Date field. 16. Click in the School Name field.
17. Enter the school name if available into the School Name field. 18. Click the Attendance drop-down menu button.
Training Guide Enterprise Learning Training Administration v8.9
Page 85
Step Action 19. Select Completed from the list of values.
20. Click the Training Reason drop-down menu button.
21. Select Skill from the list of values.
22. Scroll down the page to locate the Save button. 23. Click the Save button.
24. End of Procedure.
Training Guide Enterprise Learning Training Administration v8.9
Page 86
Add an External Trainee
Procedure External trainees are contingent employees whose services are retained by the State of Indiana through another company. The vendor and/or contact company employees and pays the external employee.
Step Action
1. Click the Enterprise Learning link.

Training Guide Enterprise Learning Training Administration v8.9
Page 87
Step Action
2. Click the Add a Person link.
Training Guide Enterprise Learning Training Administration v8.9
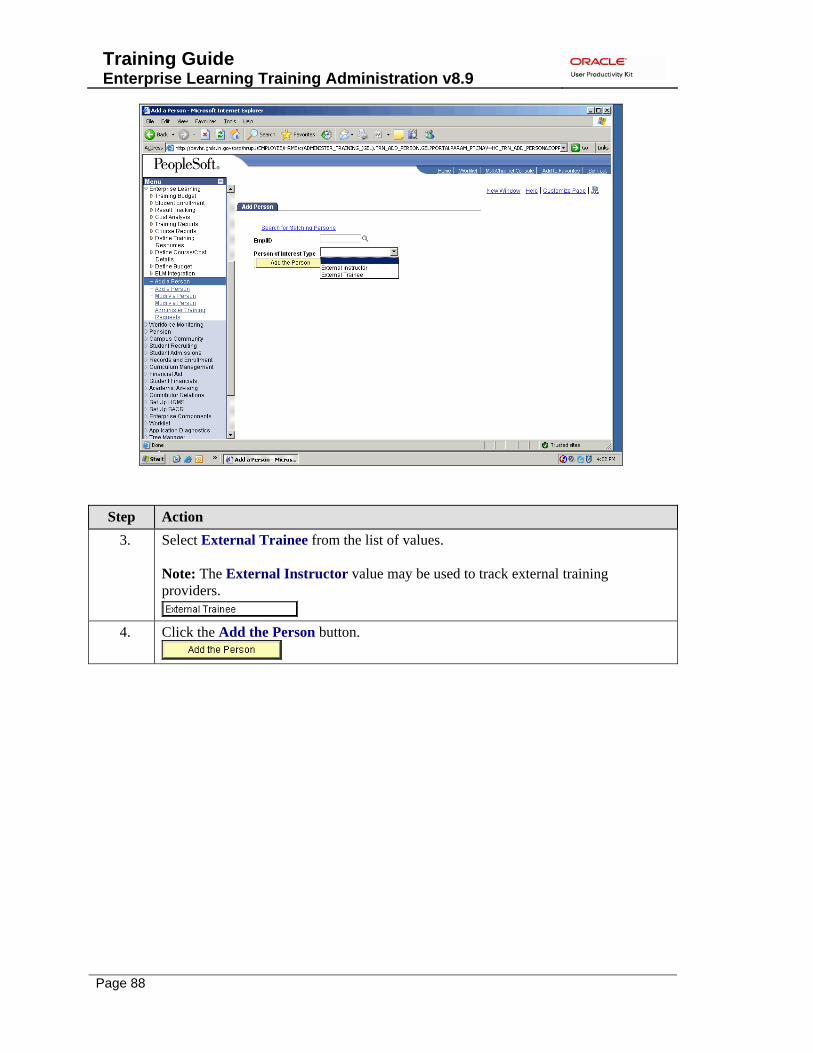
Page 88
Step Action
3. Select External Trainee from the list of values. Note: The External Instructor value may be used to track external training providers.
4. Click the Add the Person button.

Training Guide Enterprise Learning Training Administration v8.9
Page 89
Step Action
5. Click the Add button.
When adding a non-employee, be sure to update the effective date as needed. The effective date must reflect the date the non-employee began their contractual relationship with the agency. Failure to record the correct effective date will impact the ability to enroll this person in course sessions. A person (employee, non-employee) must be in an active status on the first date of the session to be enrolled.

Training Guide Enterprise Learning Training Administration v8.9
Page 90
Step Action
6. Click the Add Name link.

Training Guide Enterprise Learning Training Administration v8.9
Page 91
Step Action
7. Enter the external trainee's first name into the First Name field. 8. Enter the trainee's last name into the Last Name field. 9. Click the OK button.

Training Guide Enterprise Learning Training Administration v8.9
Page 92
Step Action
10. The Date of Birth field should be left blank for an external trainee or instructor. The Gender field is a required field and Male or Female must be one of the selected values. The Highest Ed Level and Marital Status fields should be marked Unknown or Not Indicated. Click the *Marital Status field drop-down menu button.
11. Select Unknown from the list of values.
12. Click the *National ID Type field drop-down menu button.
13. Select Driver's License Number from the list of values.
14. Enter the driver's license number into the National ID field.
Training Guide Enterprise Learning Training Administration v8.9
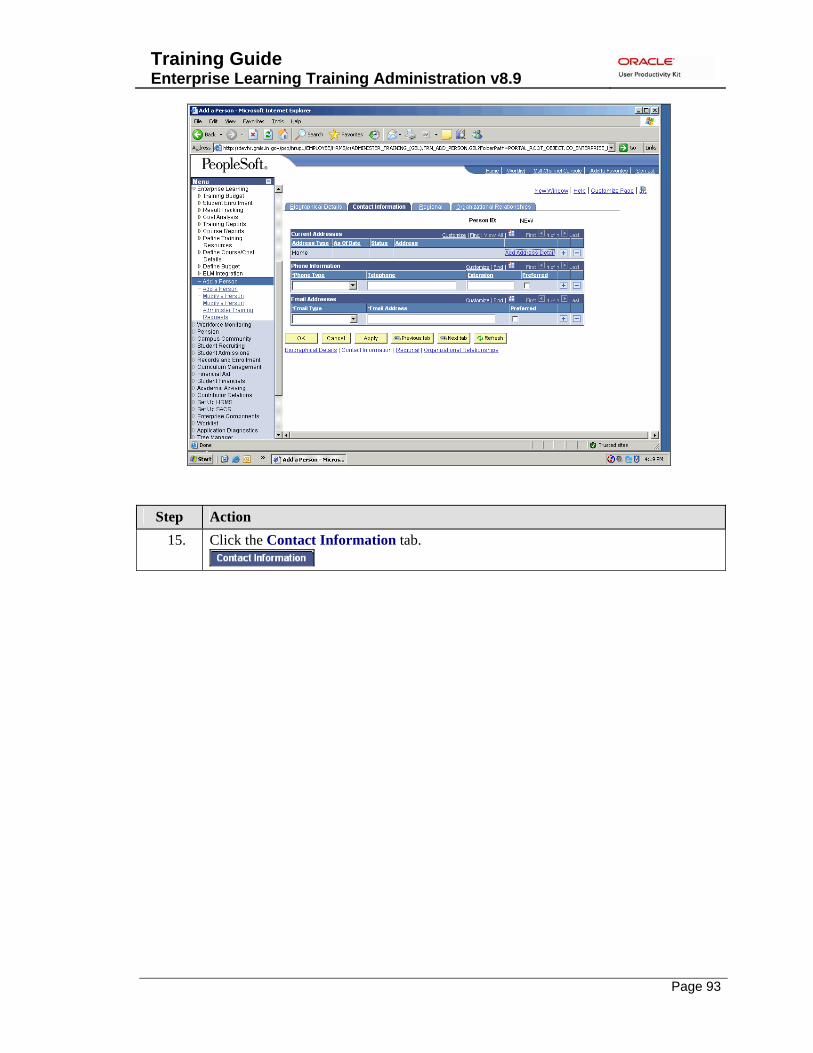
Page 93
Step Action
15. Click the Contact Information tab.
Training Guide Enterprise Learning Training Administration v8.9
Page 94
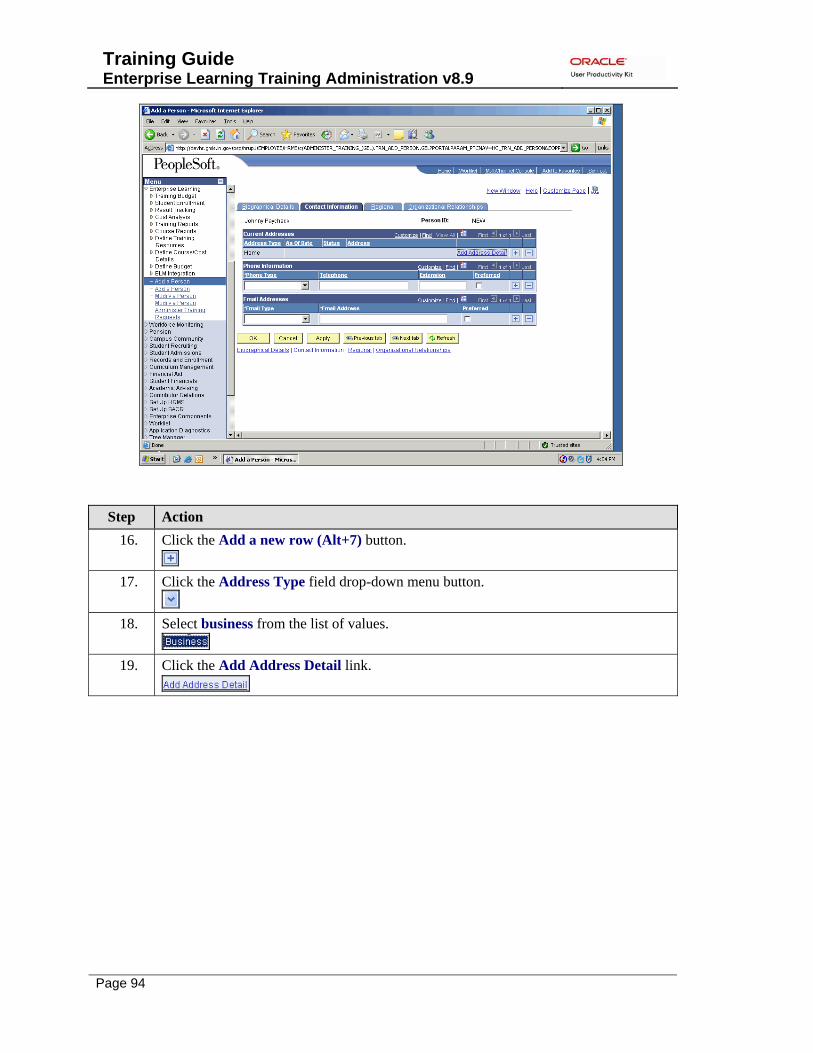
Step Action
16. Click the Add a new row (Alt+7) button.
17. Click the Address Type field drop-down menu button.
18. Select business from the list of values.
19. Click the Add Address Detail link.

Training Guide Enterprise Learning Training Administration v8.9
Page 95
Step Action
20. Click the Add Address link.

Training Guide Enterprise Learning Training Administration v8.9
Page 96
Step Action
21. Enter the business address into the Address 1 field. 22. Enter the city into the City field. 23. Enter the state into the State field. 24. Enter the zip code into the Postal field. 25. Enter the county into the County field. 26. Click the OK button.
Training Guide Enterprise Learning Training Administration v8.9
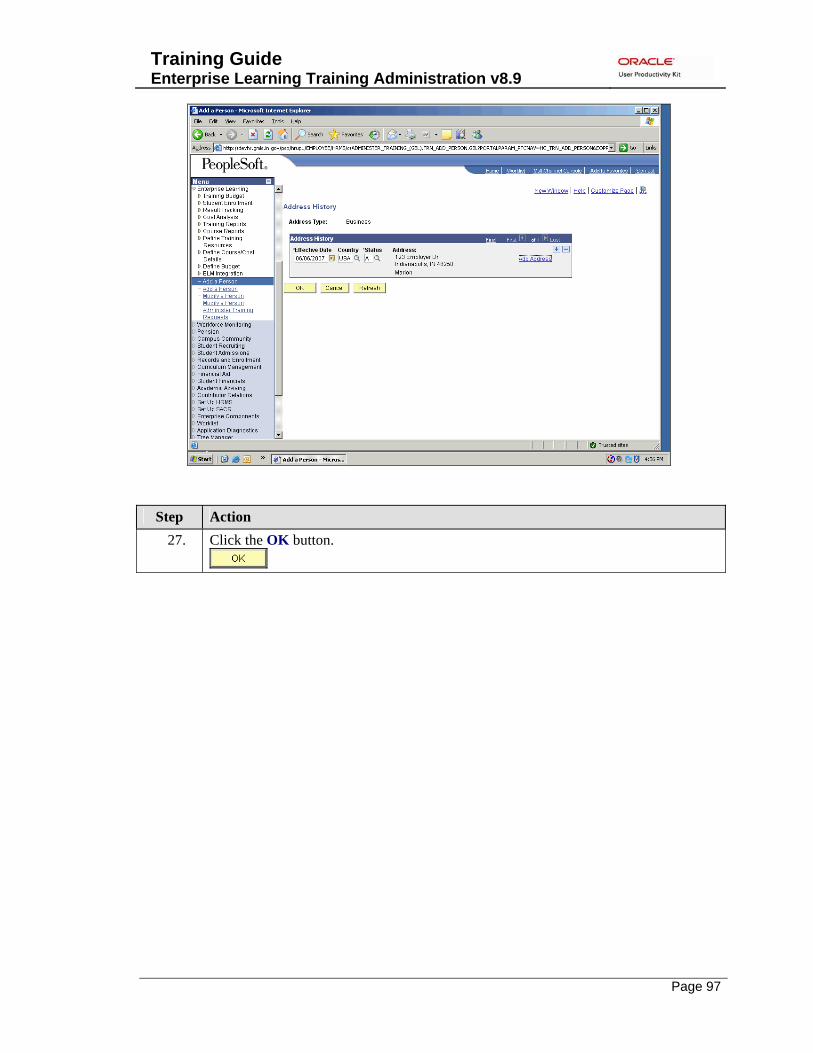
Page 97
Step Action
27. Click the OK button.

Training Guide Enterprise Learning Training Administration v8.9
Page 98
Step Action
28. Click the Delete row button to delete the home address row.

Training Guide Enterprise Learning Training Administration v8.9
Page 99
Step Action
29. Click the OK button.
Training Guide Enterprise Learning Training Administration v8.9
Page 100
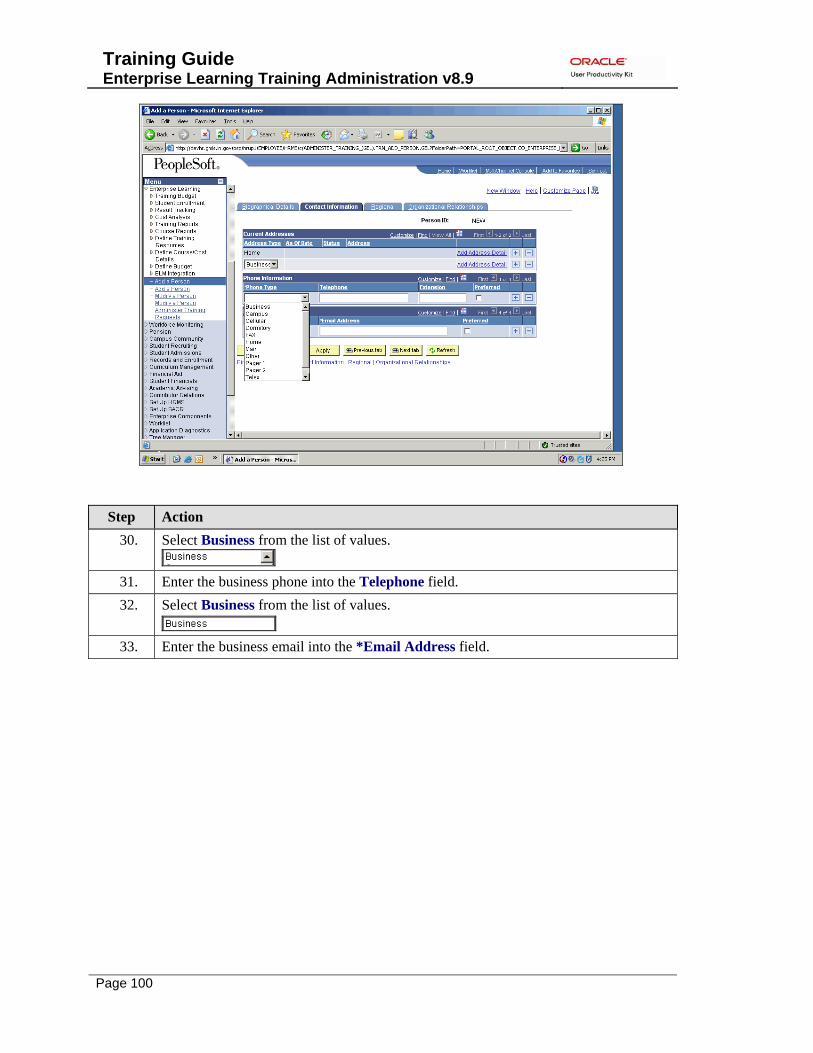
Step Action
30. Select Business from the list of values.
31. Enter the business phone into the Telephone field. 32. Select Business from the list of values.
33. Enter the business email into the *Email Address field.

Training Guide Enterprise Learning Training Administration v8.9
Page 101
Step Action
34. Click the Organizational Relationship tab.

Training Guide Enterprise Learning Training Administration v8.9
Page 102
Step Action
35. Click the Add the Relationship button.
Training Guide Enterprise Learning Training Administration v8.9
Page 103
Step Action
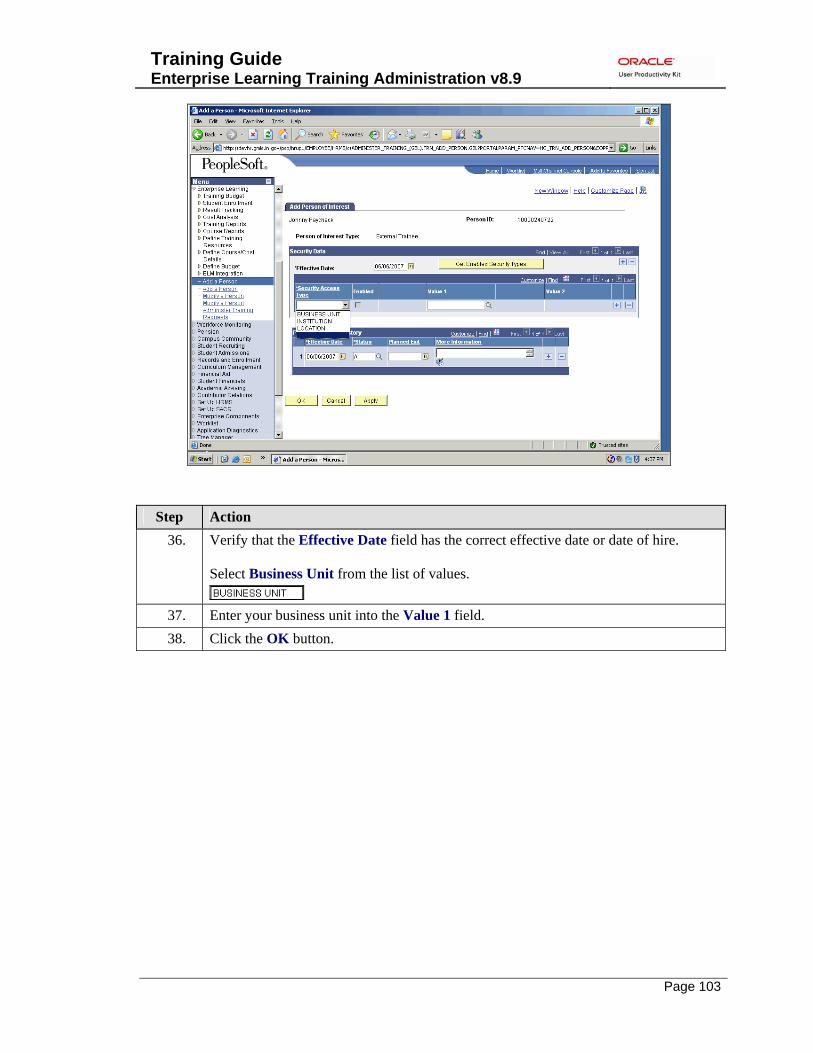
36. Verify that the Effective Date field has the correct effective date or date of hire. Select Business Unit from the list of values.
37. Enter your business unit into the Value 1 field. 38. Click the OK button.

Training Guide Enterprise Learning Training Administration v8.9
Page 104
Step Action
39. Click the Checklist Code drop-down menu button.
40. Select Add Person of Interest Inst. from the list of values.
41. Click the Apply button.
42. Click the Go to Person Checklist link.
Training Guide Enterprise Learning Training Administration v8.9
Page 105
Step Action
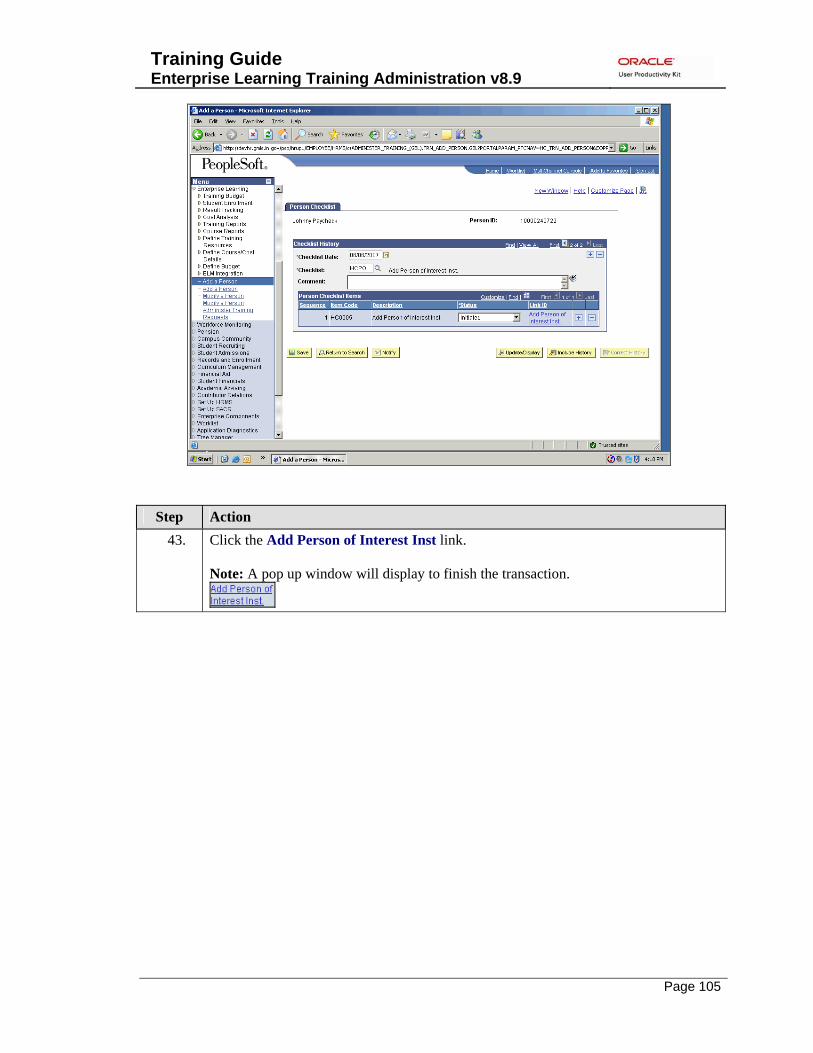
43. Click the Add Person of Interest Inst link. Note: A pop up window will display to finish the transaction.

Training Guide Enterprise Learning Training Administration v8.9
Page 106
Step Action
44. Enter the reason into the Reason code field. 45. Enter your business unit into the *Business Unit field. 46. Enter the department associated with the external trainee into the *Department field. 47. Press the [Tab] key.

Training Guide Enterprise Learning Training Administration v8.9
Page 107
Step Action
48. Click the Job Information tab.

Training Guide Enterprise Learning Training Administration v8.9
Page 108
Step Action
49. Enter the NONEMP into the *Job Code field.
Training Guide Enterprise Learning Training Administration v8.9
Page 109
Step Action
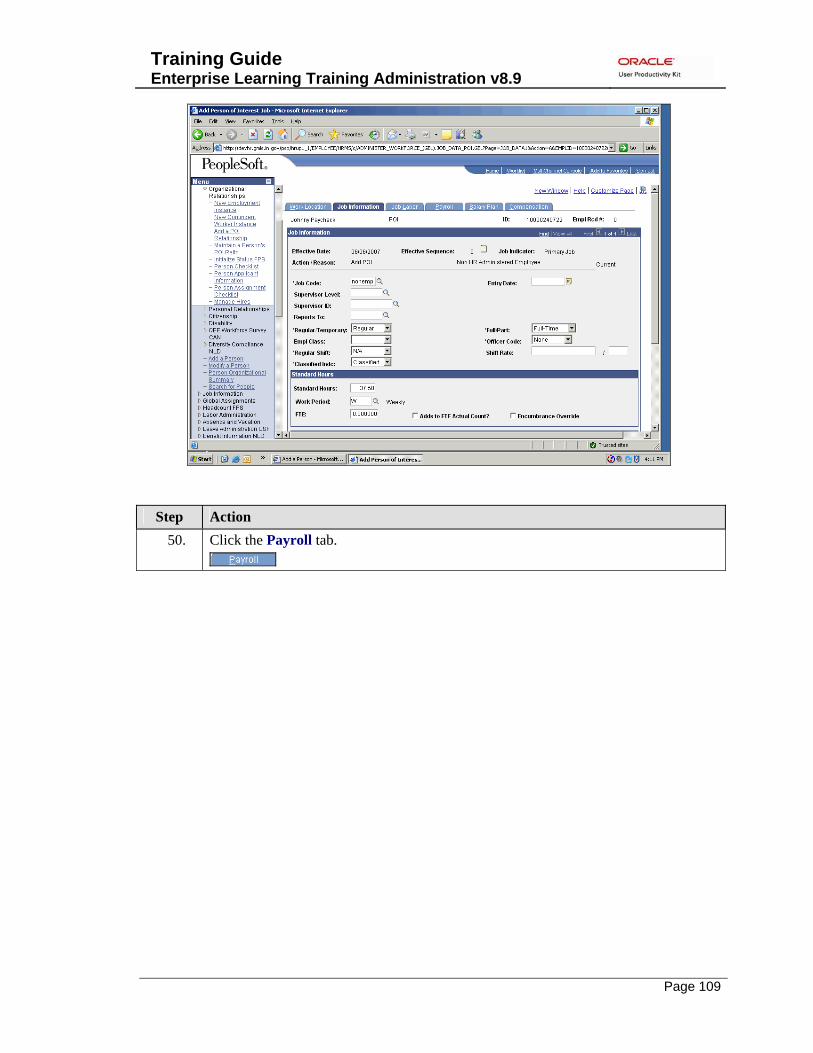
50. Click the Payroll tab.

Training Guide Enterprise Learning Training Administration v8.9
Page 110
Step Action
51. Click the Payroll System drop-down menu button.
52. Select Other from the list of values.
Training Guide Enterprise Learning Training Administration v8.9
Page 111
Step Action
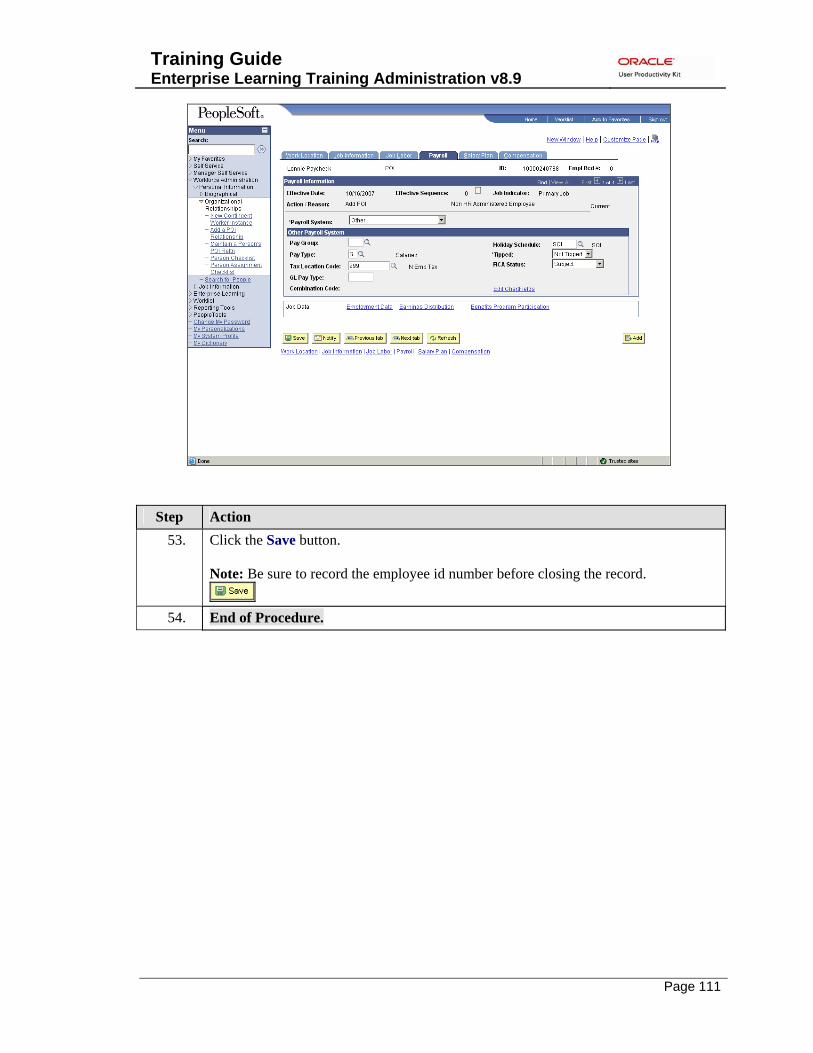
53. Click the Save button. Note: Be sure to record the employee id number before closing the record.
54. End of Procedure.
Training Guide Enterprise Learning Training Administration v8.9
Page 112
Modify an External Trainee
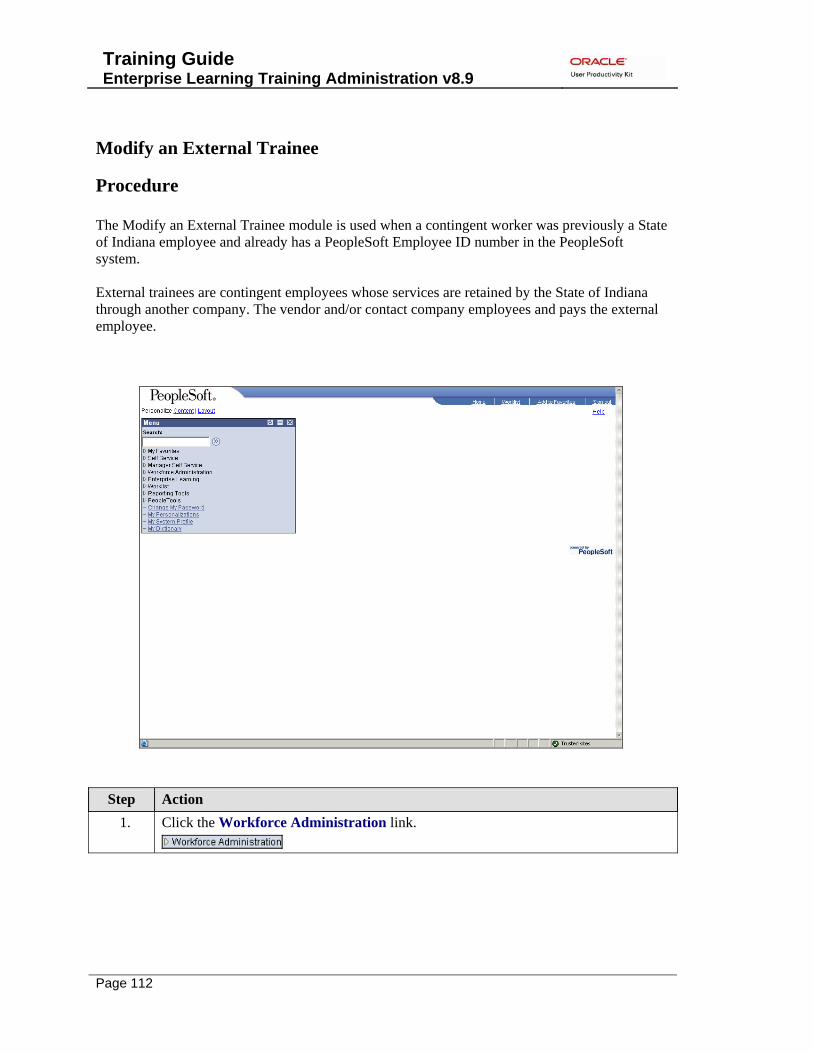
Procedure The Modify an External Trainee module is used when a contingent worker was previously a State of Indiana employee and already has a PeopleSoft Employee ID number in the PeopleSoft system. External trainees are contingent employees whose services are retained by the State of Indiana through another company. The vendor and/or contact company employees and pays the external employee.
Step Action
1. Click the Workforce Administration link.
Training Guide Enterprise Learning Training Administration v8.9
Page 113
Step Action
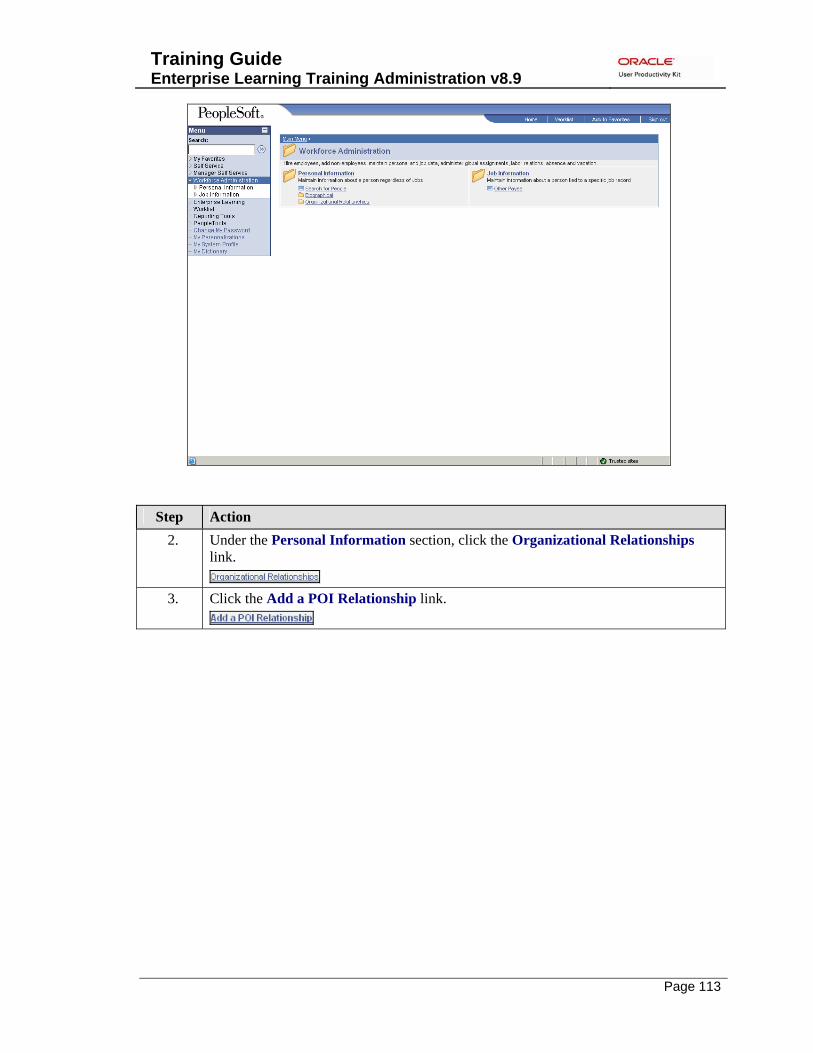
2. Under the Personal Information section, click the Organizational Relationships link.
3. Click the Add a POI Relationship link.
Training Guide Enterprise Learning Training Administration v8.9
Page 114
Step Action
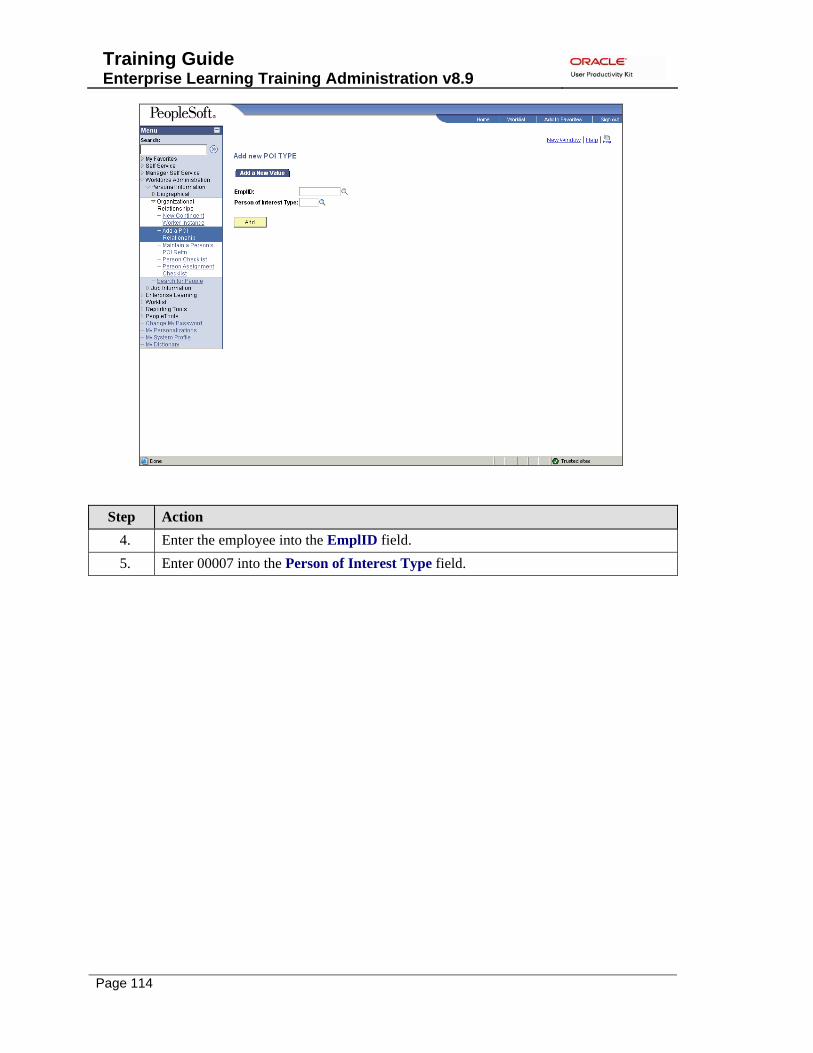
4. Enter the employee into the EmplID field. 5. Enter 00007 into the Person of Interest Type field.
Training Guide Enterprise Learning Training Administration v8.9
Page 115
Step Action
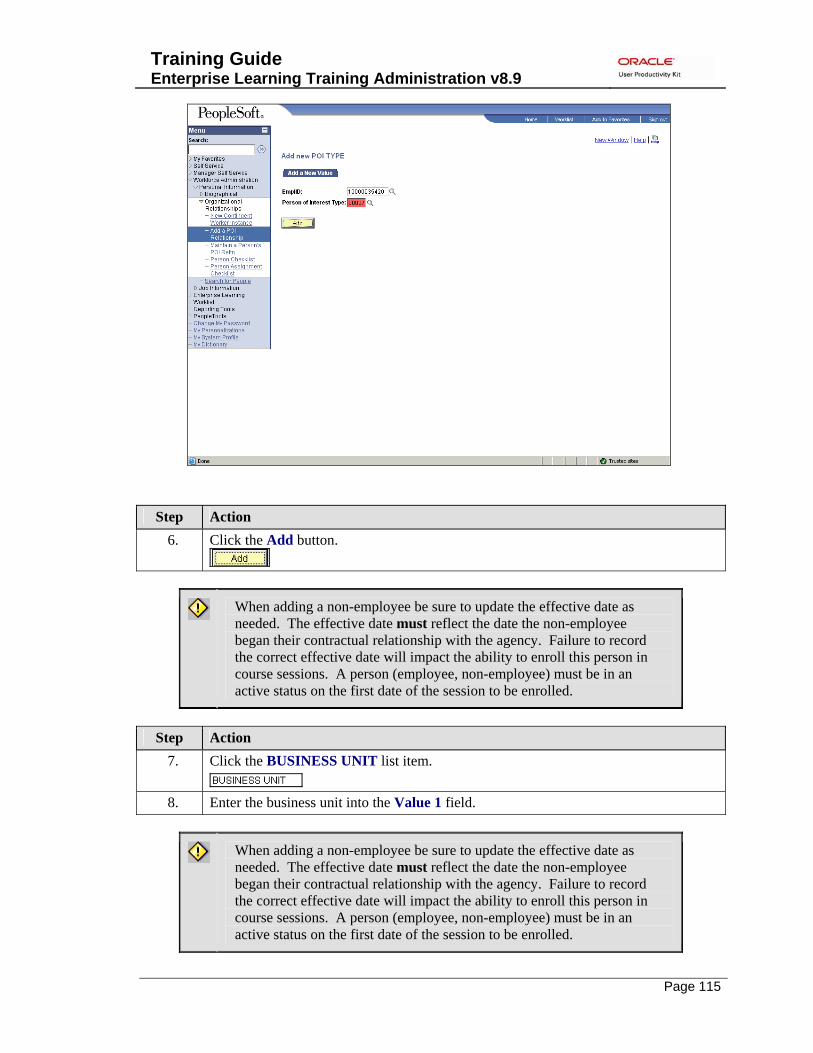
6. Click the Add button.
When adding a non-employee be sure to update the effective date as needed. The effective date must reflect the date the non-employee began their contractual relationship with the agency. Failure to record the correct effective date will impact the ability to enroll this person in course sessions. A person (employee, non-employee) must be in an active status on the first date of the session to be enrolled.
Step Action
7. Click the BUSINESS UNIT list item.
8. Enter the business unit into the Value 1 field.
When adding a non-employee be sure to update the effective date as needed. The effective date must reflect the date the non-employee began their contractual relationship with the agency. Failure to record the correct effective date will impact the ability to enroll this person in course sessions. A person (employee, non-employee) must be in an active status on the first date of the session to be enrolled.
Training Guide Enterprise Learning Training Administration v8.9
Page 116
Step Action
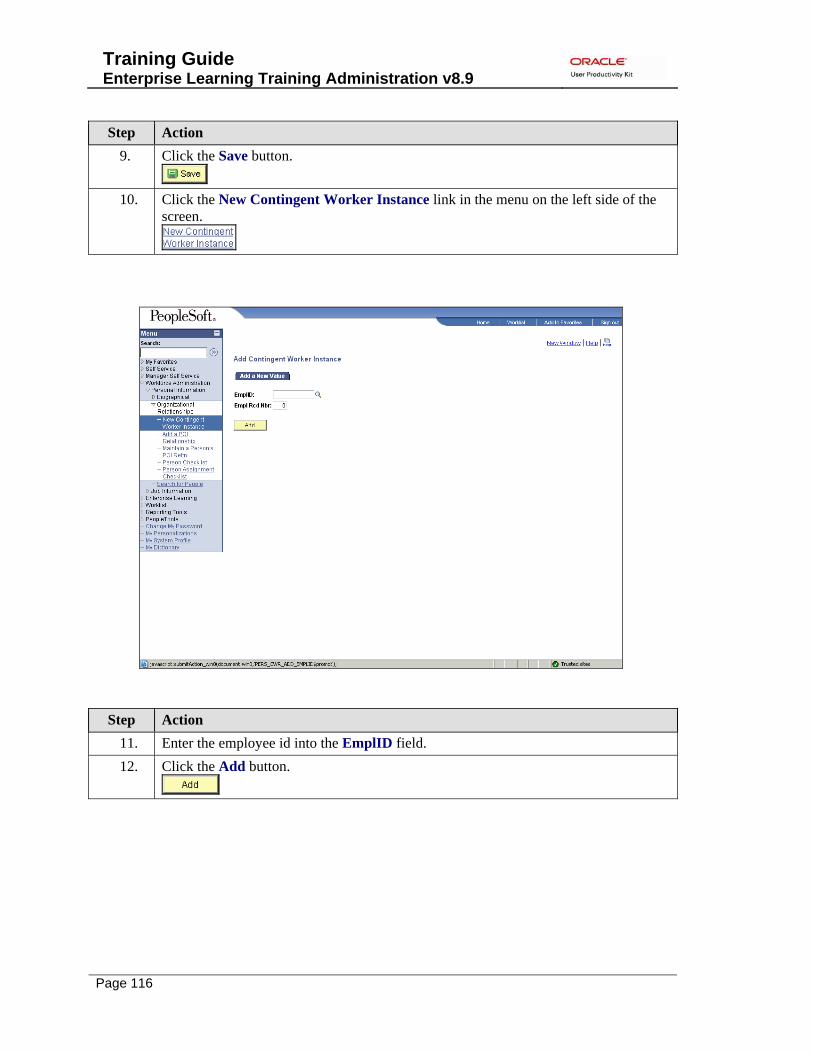
9. Click the Save button.
10. Click the New Contingent Worker Instance link in the menu on the left side of the screen.
Step Action
11. Enter the employee id into the EmplID field. 12. Click the Add button.

Training Guide Enterprise Learning Training Administration v8.9
Page 117
Step Action
13. Enter the effective date into the Effective Date field. 14. Enter the TRN into the Look up (Alt+5) field. 15. Enter the business unit into the Business Unit field. 16. Enter the department into the Department field. 17. Click the Job Information tab.

Training Guide Enterprise Learning Training Administration v8.9
Page 118
Step Action
18. Enter NONEMP into the Job Code field. 19. Click the Payroll tab.

Training Guide Enterprise Learning Training Administration v8.9
Page 119
Step Action
20. Click the Payroll System drop-down menu button.
21. Select Other from the list of values.
22. Click the Save button.
23. End of Procedure.
Training Guide Enterprise Learning Training Administration v8.9
Page 120
Appendices
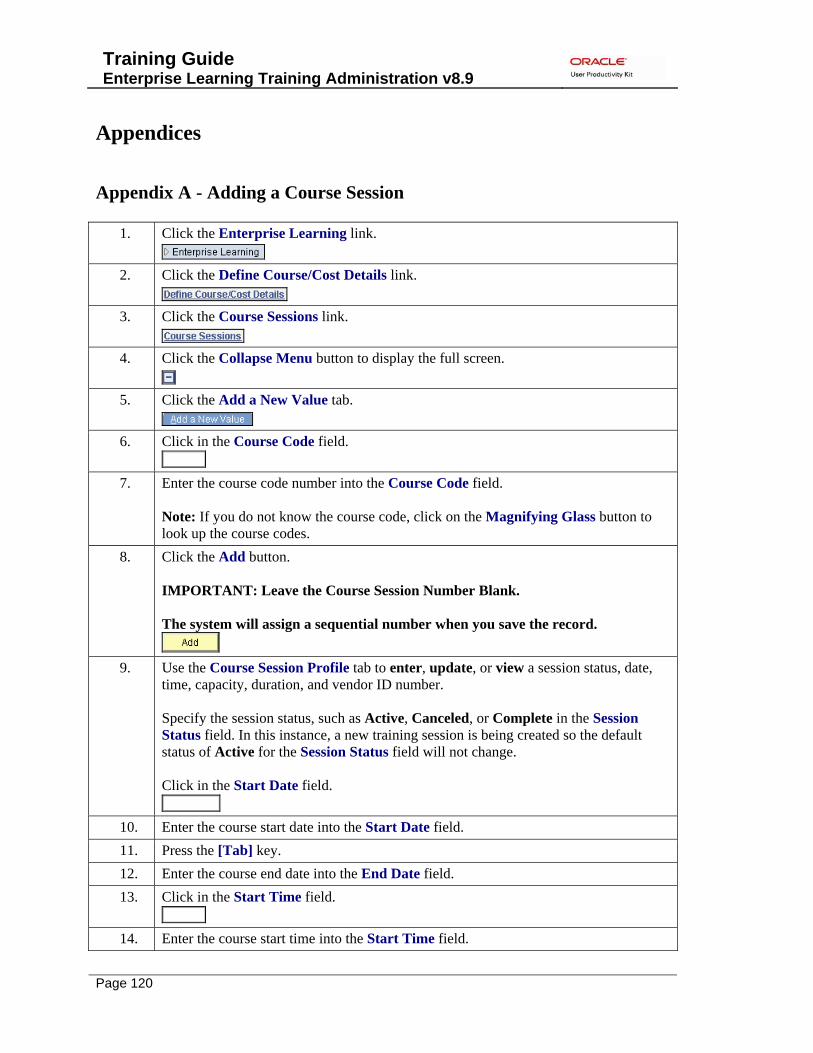
Appendix A - Adding a Course Session
1. Click the Enterprise Learning link.
2. Click the Define Course/Cost Details link.
3. Click the Course Sessions link.
4. Click the Collapse Menu button to display the full screen.
5. Click the Add a New Value tab.
6. Click in the Course Code field.
7. Enter the course code number into the Course Code field. Note: If you do not know the course code, click on the Magnifying Glass button to look up the course codes.
8. Click the Add button. IMPORTANT: Leave the Course Session Number Blank. The system will assign a sequential number when you save the record.
9. Use the Course Session Profile tab to enter, update, or view a session status, date,
time, capacity, duration, and vendor ID number. Specify the session status, such as Active, Canceled, or Complete in the Session Status field. In this instance, a new training session is being created so the default status of Active for the Session Status field will not change. Click in the Start Date field.
10. Enter the course start date into the Start Date field. 11. Press the [Tab] key. 12. Enter the course end date into the End Date field. 13. Click in the Start Time field.
14. Enter the course start time into the Start Time field.

Training Guide Enterprise Learning Training Administration v8.9
Page 121
15. Press the [Tab] key. 16. Enter the course end time into the End Time field.
Note: PeopleSoft will automatically format and default the time to an AM format. If the training ends in the PM, this will need to be entered correctly or changed after the default.
17. The Duration field indicates the length of the training as entered into the Start/End Times fields.
18. The Duration Unit field indicates the unit indication in the Duration field.
ALWAYS use the duration unit of Hour.
19. Click in the Vendor ID field.
20. Enter the Business Unit number of the business unit or vendor conducting the training
into the Vendor ID field. If the business unit number is unknown, click on the Magnifying Glass button to look up the course codes.
21. Click the Location, Instructor tab.
22. Click in the Facility field.
23. Enter the facility location into the Facility field. Note: If the facility location code is unknown, click on the Magnifying Glass button to look up the course codes.
24. Press the [Tab] key. 25. If a facility has more than one training room available, the Select free Training
Room link will become active. Click the Select free Training Room link.
26. To select a Free Training Room, click in the checkbox beside the Room Code option
to be selected.
27. Click the OK button.

Training Guide Enterprise Learning Training Administration v8.9
Page 122
28. The Training Facility Address can be viewed by clicking the Training Facility Address link. Click the Training Facility Address link.
29. Review the Training Facility Address information.
Click the OK button when finished.
30. To add instructors who are certified to teach the training, click the Select free
Instructor link.
31. If more than 3 choices are present, clicking the View All link will allow all instructors to be viewed at one time. Click the View All link.
32. Click the checkbox of the selected instructor from the Instructor column.
33. Scroll down the page to locate the OK button. 34. Click the OK button.
35. Click the Equipment tab.
36. To search for equipment or materials needed for the training session, click the Look
up Equipment/Materials Code (Alt+5) Magnifying Glass button.
37. If the Equipment/Materials Code information is not known, supplies or equipment may be searched for by Description. Click the Description field drop-down menu button.
38. Select contains from the list of values.
39. Enter the description of the equipment or materials needed into the Description field. 40. Click the Look Up button.
41. Select an option from either the Equipment/Materials Code or Description column.
42. Click the Expense tab to fill in the information for any classes that charge a fee.
Training Guide Enterprise Learning Training Administration v8.9
Page 123
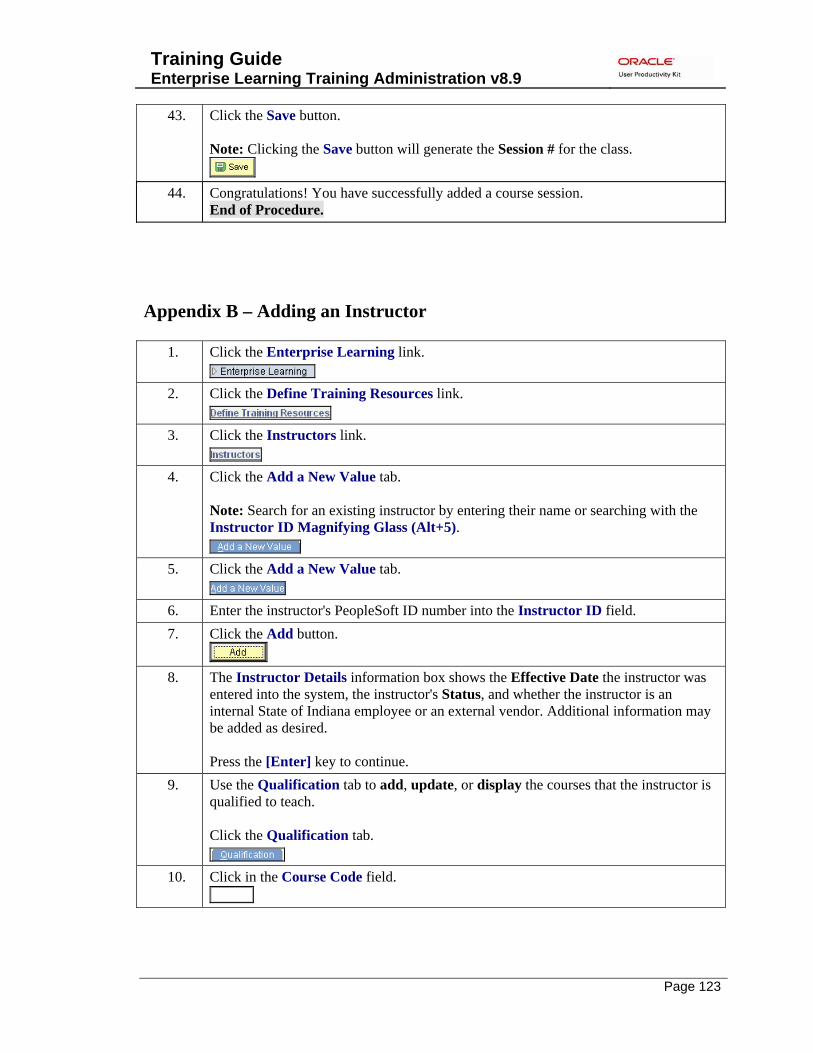
43. Click the Save button. Note: Clicking the Save button will generate the Session # for the class.
44. Congratulations! You have successfully added a course session.
End of Procedure.
Appendix B – Adding an Instructor
1. Click the Enterprise Learning link.
2. Click the Define Training Resources link.
3. Click the Instructors link.
4. Click the Add a New Value tab. Note: Search for an existing instructor by entering their name or searching with the Instructor ID Magnifying Glass (Alt+5).
5. Click the Add a New Value tab.
6. Enter the instructor's PeopleSoft ID number into the Instructor ID field. 7. Click the Add button.
8. The Instructor Details information box shows the Effective Date the instructor was
entered into the system, the instructor's Status, and whether the instructor is an internal State of Indiana employee or an external vendor. Additional information may be added as desired. Press the [Enter] key to continue.
9. Use the Qualification tab to add, update, or display the courses that the instructor is qualified to teach. Click the Qualification tab.
10. Click in the Course Code field.

Training Guide Enterprise Learning Training Administration v8.9
Page 124
11. In the Course Code field, specify a course code from the list of courses that the instructor will teach. Enter the course code into the Course Code field.
12. Press the [Tab] key to populate the Course title. 13. To list additional courses the instructor is qualified to teach, click the Add a new row
button.
14. Click the Save button.
15. You have successfully added Luis Duarte as an instructor.
End of Procedure.
Appendix C – Enrolling Students Individually
1. Begin by navigating to the Course Session Enrollment page. Click the Enterprise Learning link.
2. Click the Student Enrollment link. 3. Click the Enroll Individually link. 4. Enter the desired information into the Course Code field. 5. Click in the Course Session Nbr field.
6. Enter the desired information into the Course Session Nbr field. 7. Click the Search button.
8. Use the Course Session Enrollment page to enroll students.
CAUTION: As you select each student for enrollment, always double-check the Business Unit field and verify that it is the correct employee. Name searches sometimes display more than one individual with the same name.
9. Enter the desired information into the EmplID field. 10. Specify the student enrollment status, such as Enrolled or Sessn Wait in the
Enrollment/Attendance field. Click the *Enrollment/Attendance list.
11. Select Enrolled.

Training Guide Enterprise Learning Training Administration v8.9
Page 125
12. The Status Date field uses the current system date by default. Accept the default date for this field.
13. Specify the reason for training in the Training Reason field. Click the Training Reason list.
14. Click an entry in the list.
Always select Skill Enhancement.
15. Leave the Prerequisites Met option turned off. After you have finished all
enrollments, you may use Prerequisite Checking (above) to verify that your students' course requirements have been met. Prerequisites, if used, would need to be set up when the Course is entered into the system.
16. You may use the Prerequisite Checking button to search the Student Training records listed on the Session Enrollment page and determine if each student has completed and passed the prerequisite courses. If so, PeopleSoft populates the Prerequisites Met check box for each student who meets the criteria. If a student is lacking the necessary courses, a process for notifying students of discrepancies may be developed. Also, any enrolled status existing for students who do not meet the prerequisites may be manually changed.
17. Use the Letter Code field to generate a form letter. The letter code defaults to CON, indicating Confirmed. For this exercise, accept the default letter code value. IMPORTANT!! The system does not currently support the generation of letters. At this time, you must have an alternative method of notifying students.
18. We will now add another student. Click the Add Row button.
19. Enter the desired information into the EmplID field. 20. Click the *Enrollment/Attendance list.
21. Click an entry in the list.
Select Enrolled.
22. Click the Training Reason list.
23. Click an entry in the list.
Select Skill Enhancement.
Training Guide Enterprise Learning Training Administration v8.9
Page 126
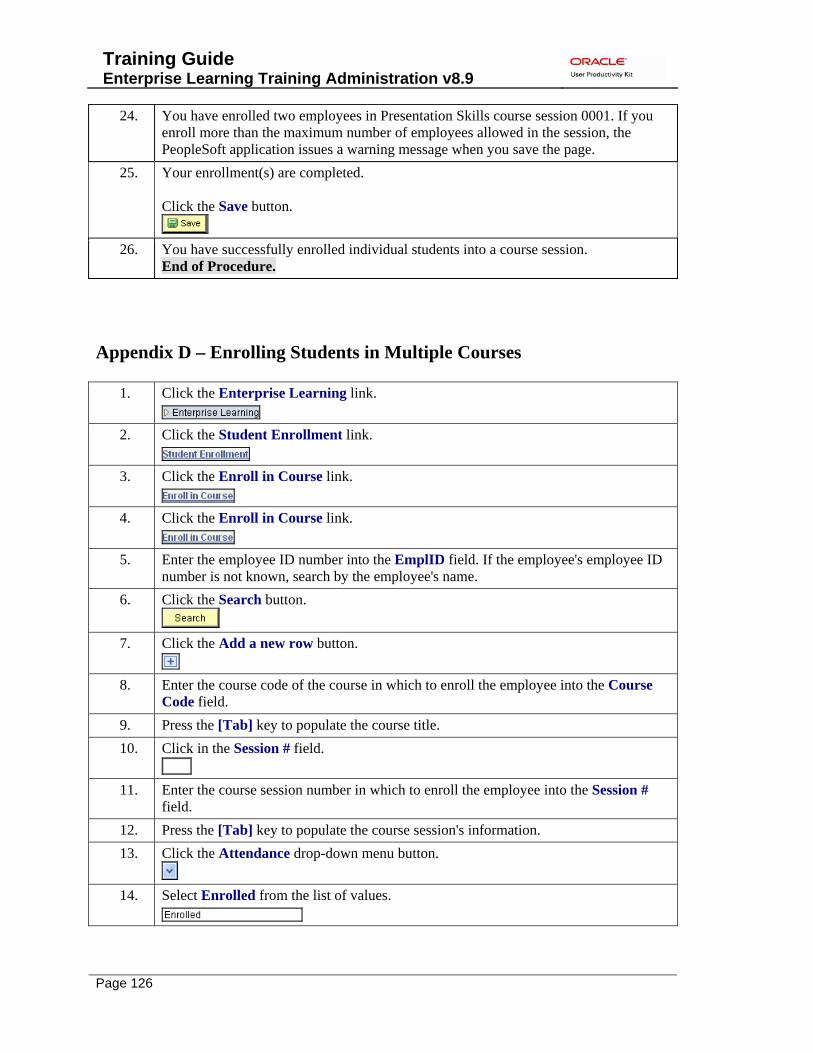
24. You have enrolled two employees in Presentation Skills course session 0001. If you enroll more than the maximum number of employees allowed in the session, the PeopleSoft application issues a warning message when you save the page.
25. Your enrollment(s) are completed. Click the Save button.
26. You have successfully enrolled individual students into a course session.
End of Procedure.
Appendix D – Enrolling Students in Multiple Courses
1. Click the Enterprise Learning link.
2. Click the Student Enrollment link.
3. Click the Enroll in Course link.
4. Click the Enroll in Course link.
5. Enter the employee ID number into the EmplID field. If the employee's employee ID number is not known, search by the employee's name.
6. Click the Search button.
7. Click the Add a new row button.
8. Enter the course code of the course in which to enroll the employee into the Course Code field.
9. Press the [Tab] key to populate the course title. 10. Click in the Session # field.
11. Enter the course session number in which to enroll the employee into the Session #
field. 12. Press the [Tab] key to populate the course session's information. 13. Click the Attendance drop-down menu button.
14. Select Enrolled from the list of values.
Training Guide Enterprise Learning Training Administration v8.9
Page 127
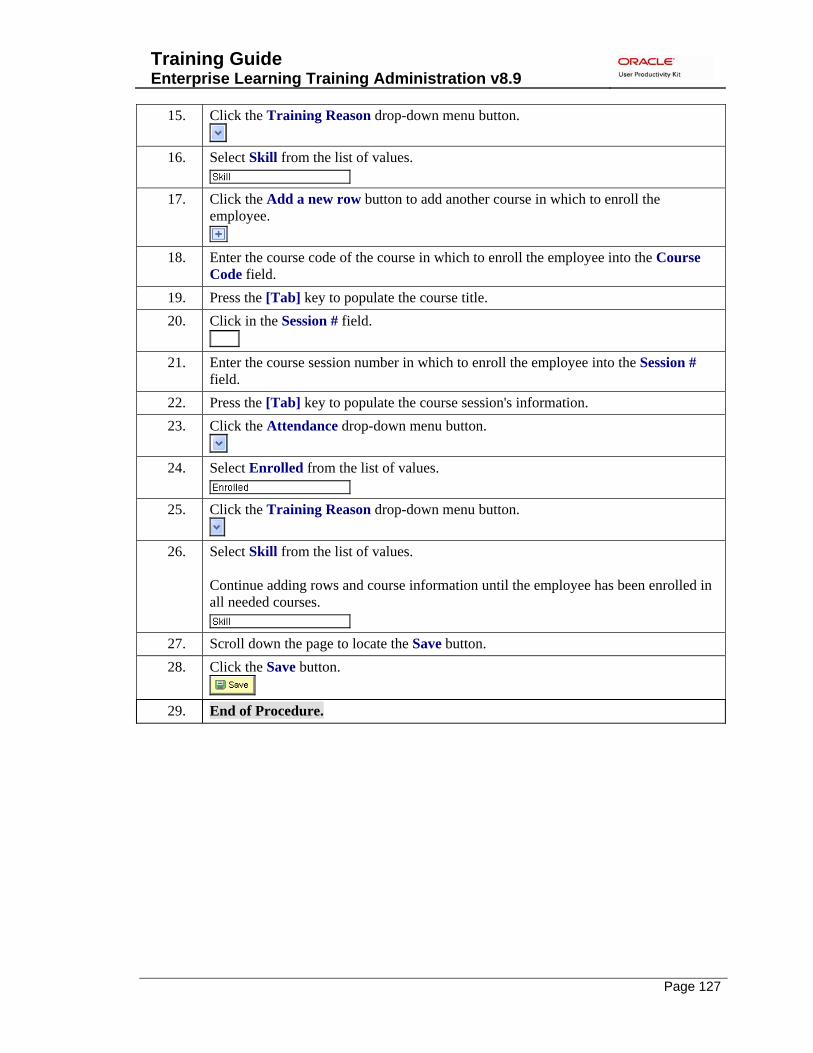
15. Click the Training Reason drop-down menu button.
16. Select Skill from the list of values.
17. Click the Add a new row button to add another course in which to enroll the employee.
18. Enter the course code of the course in which to enroll the employee into the Course
Code field. 19. Press the [Tab] key to populate the course title. 20. Click in the Session # field.
21. Enter the course session number in which to enroll the employee into the Session #
field. 22. Press the [Tab] key to populate the course session's information. 23. Click the Attendance drop-down menu button.
24. Select Enrolled from the list of values.
25. Click the Training Reason drop-down menu button.
26. Select Skill from the list of values.
Continue adding rows and course information until the employee has been enrolled in all needed courses.
27. Scroll down the page to locate the Save button. 28. Click the Save button.
29. End of Procedure.
Training Guide Enterprise Learning Training Administration v8.9
Page 128
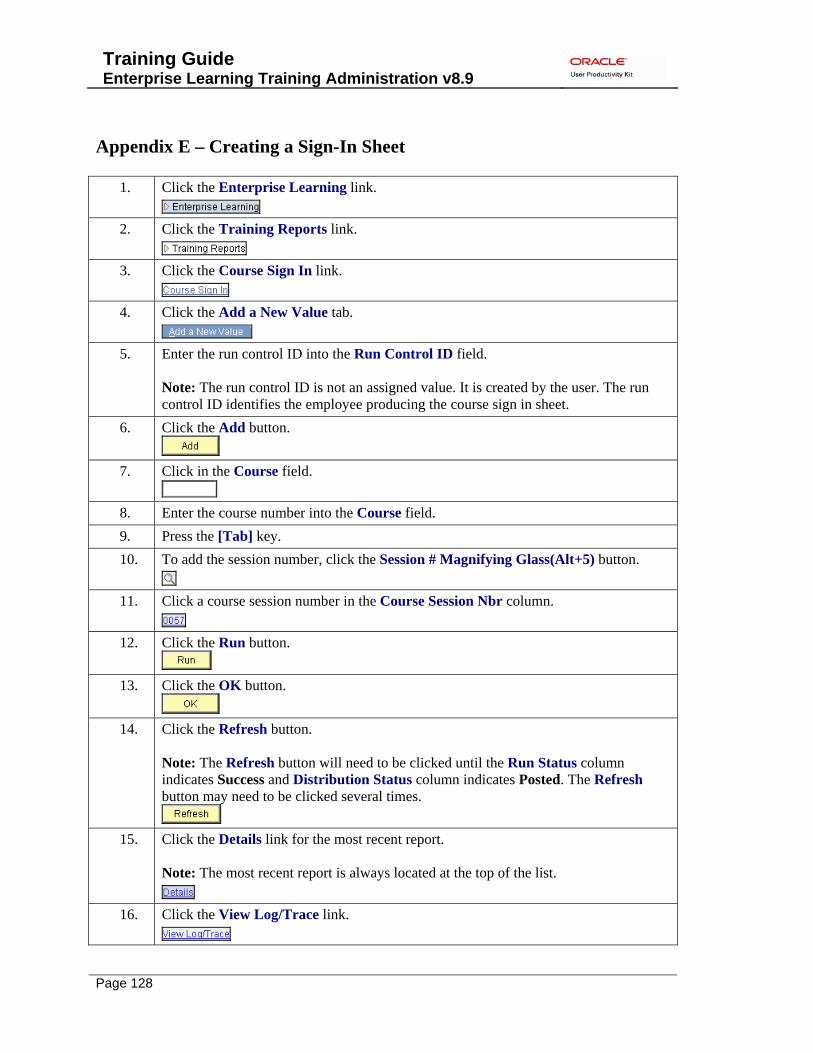
Appendix E – Creating a Sign-In Sheet
1. Click the Enterprise Learning link.
2. Click the Training Reports link.
3. Click the Course Sign In link.
4. Click the Add a New Value tab.
5. Enter the run control ID into the Run Control ID field. Note: The run control ID is not an assigned value. It is created by the user. The run control ID identifies the employee producing the course sign in sheet.
6. Click the Add button.
7. Click in the Course field.
8. Enter the course number into the Course field. 9. Press the [Tab] key. 10. To add the session number, click the Session # Magnifying Glass(Alt+5) button.
11. Click a course session number in the Course Session Nbr column.
12. Click the Run button.
13. Click the OK button.
14. Click the Refresh button.
Note: The Refresh button will need to be clicked until the Run Status column indicates Success and Distribution Status column indicates Posted. The Refresh button may need to be clicked several times.
15. Click the Details link for the most recent report.
Note: The most recent report is always located at the top of the list.
16. Click the View Log/Trace link.
Training Guide Enterprise Learning Training Administration v8.9
Page 129
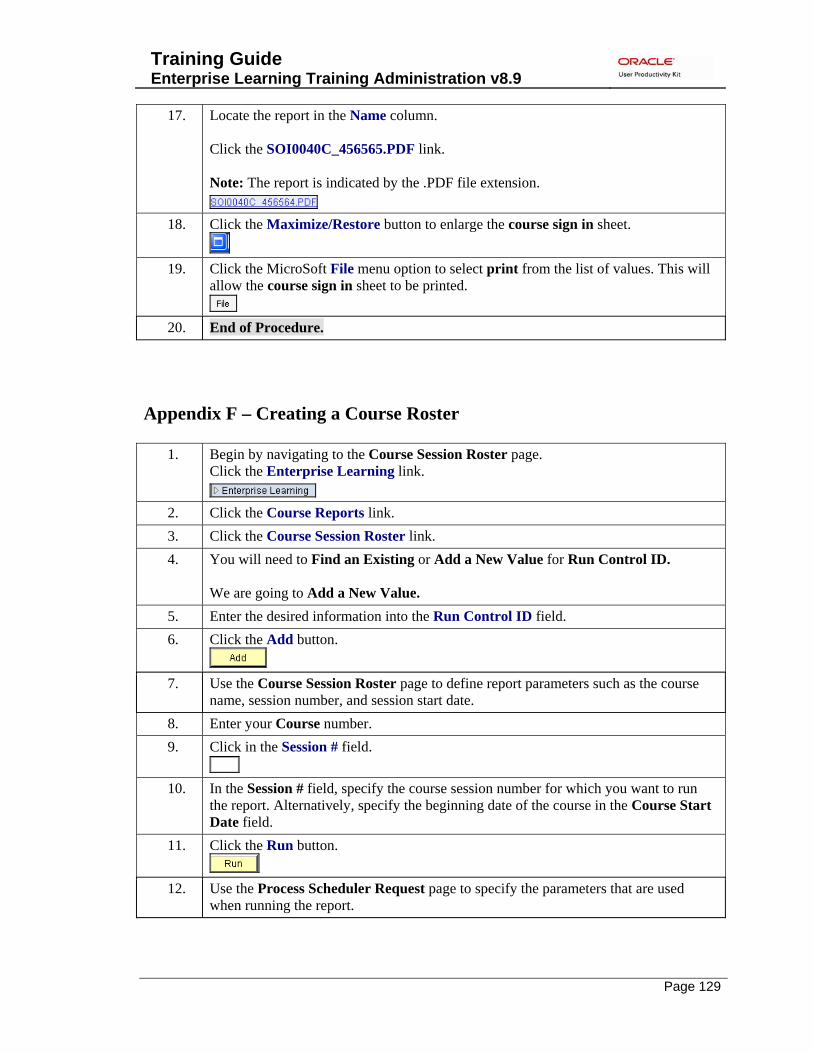
17. Locate the report in the Name column. Click the SOI0040C_456565.PDF link. Note: The report is indicated by the .PDF file extension.
18. Click the Maximize/Restore button to enlarge the course sign in sheet.
19. Click the MicroSoft File menu option to select print from the list of values. This will
allow the course sign in sheet to be printed.
20. End of Procedure.
Appendix F – Creating a Course Roster
1. Begin by navigating to the Course Session Roster page. Click the Enterprise Learning link.
2. Click the Course Reports link. 3. Click the Course Session Roster link. 4. You will need to Find an Existing or Add a New Value for Run Control ID.
We are going to Add a New Value.
5. Enter the desired information into the Run Control ID field. 6. Click the Add button.
7. Use the Course Session Roster page to define report parameters such as the course
name, session number, and session start date. 8. Enter your Course number. 9. Click in the Session # field.
10. In the Session # field, specify the course session number for which you want to run
the report. Alternatively, specify the beginning date of the course in the Course Start Date field.
11. Click the Run button.
12. Use the Process Scheduler Request page to specify the parameters that are used when running the report.
Training Guide Enterprise Learning Training Administration v8.9
Page 130
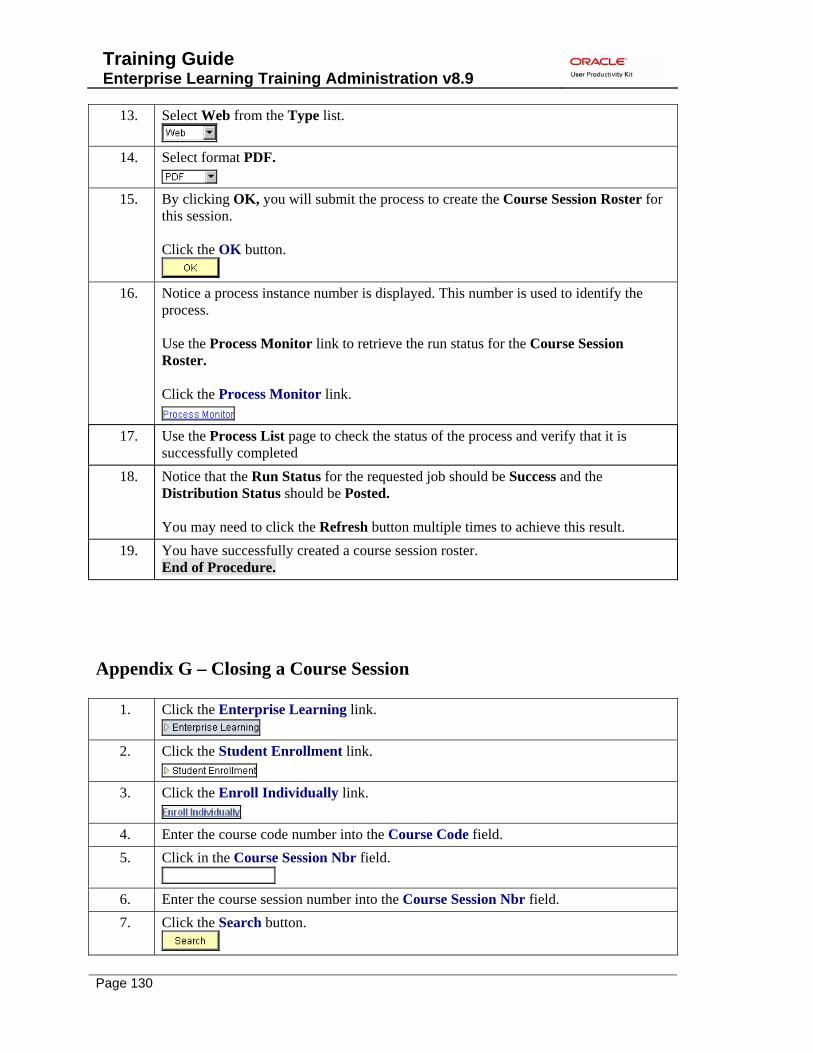
13. Select Web from the Type list.
14. Select format PDF.
15. By clicking OK, you will submit the process to create the Course Session Roster for this session. Click the OK button.
16. Notice a process instance number is displayed. This number is used to identify the
process. Use the Process Monitor link to retrieve the run status for the Course Session Roster. Click the Process Monitor link.
17. Use the Process List page to check the status of the process and verify that it is
successfully completed 18. Notice that the Run Status for the requested job should be Success and the
Distribution Status should be Posted. You may need to click the Refresh button multiple times to achieve this result.
19. You have successfully created a course session roster. End of Procedure.
Appendix G – Closing a Course Session
1. Click the Enterprise Learning link.
2. Click the Student Enrollment link.
3. Click the Enroll Individually link.
4. Enter the course code number into the Course Code field. 5. Click in the Course Session Nbr field.
6. Enter the course session number into the Course Session Nbr field. 7. Click the Search button.

Training Guide Enterprise Learning Training Administration v8.9
Page 131
8. To see all of the employees enrolled in a course, click the View All link.
9. Scroll down the page to change the status of the students as required. 10. Click the Attendance drop-down menu button.
11. Valid values from the list are:
Enrolled: employees left as enrolled in a course statuses will automatically changed to Completed when the course session is marked as Complete. Dropped: the employee notified the training department that they would be unable to attend the training prior to the training start time. No Show: the employee did not come to the training and did not contact the training department prior to the training start time. Select No Show from the list of values.
12. Scroll down the page to change the status of the students as required. 13. Click the Attendance drop-down menu button.
14. Select Dropped from the list of values.
15. Once all Attendance field statuses have been updated, click the Save button.
16. Click the Define Course/Cost Details link.
17. Click the Course Sessions link.
18. Enter the course code number into the Course Code field. 19. Click in the Course Session Nbr field.
20. Enter the course session number into the Course Session Nbr field. 21. Click the Search button.
22. Click the Session Status drop-down menu button.
23. Select Complete from the list of values.
24. Click the Save button.
Training Guide Enterprise Learning Training Administration v8.9
Page 132
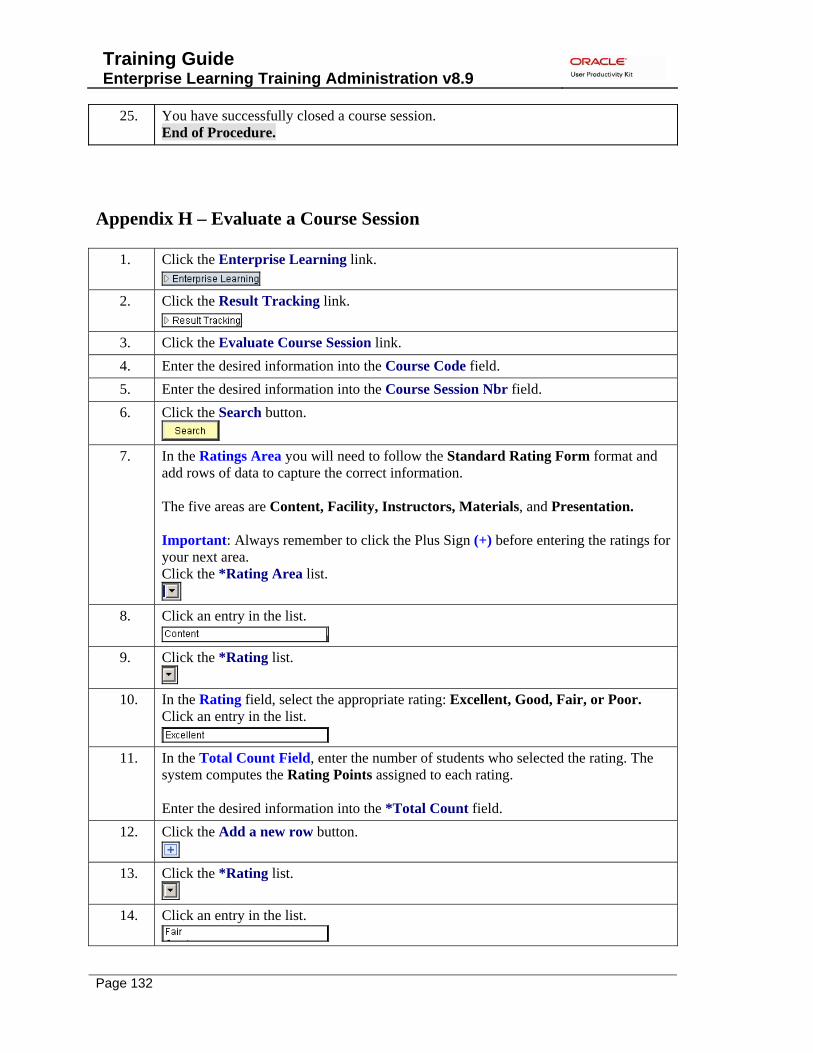
25. You have successfully closed a course session. End of Procedure.
Appendix H – Evaluate a Course Session
1. Click the Enterprise Learning link.
2. Click the Result Tracking link.
3. Click the Evaluate Course Session link. 4. Enter the desired information into the Course Code field. 5. Enter the desired information into the Course Session Nbr field. 6. Click the Search button.
7. In the Ratings Area you will need to follow the Standard Rating Form format and
add rows of data to capture the correct information. The five areas are Content, Facility, Instructors, Materials, and Presentation. Important: Always remember to click the Plus Sign (+) before entering the ratings for your next area. Click the *Rating Area list.
8. Click an entry in the list.
9. Click the *Rating list.
10. In the Rating field, select the appropriate rating: Excellent, Good, Fair, or Poor.
Click an entry in the list.
11. In the Total Count Field, enter the number of students who selected the rating. The system computes the Rating Points assigned to each rating. Enter the desired information into the *Total Count field.
12. Click the Add a new row button.
13. Click the *Rating list.
14. Click an entry in the list.
Training Guide Enterprise Learning Training Administration v8.9
Page 133
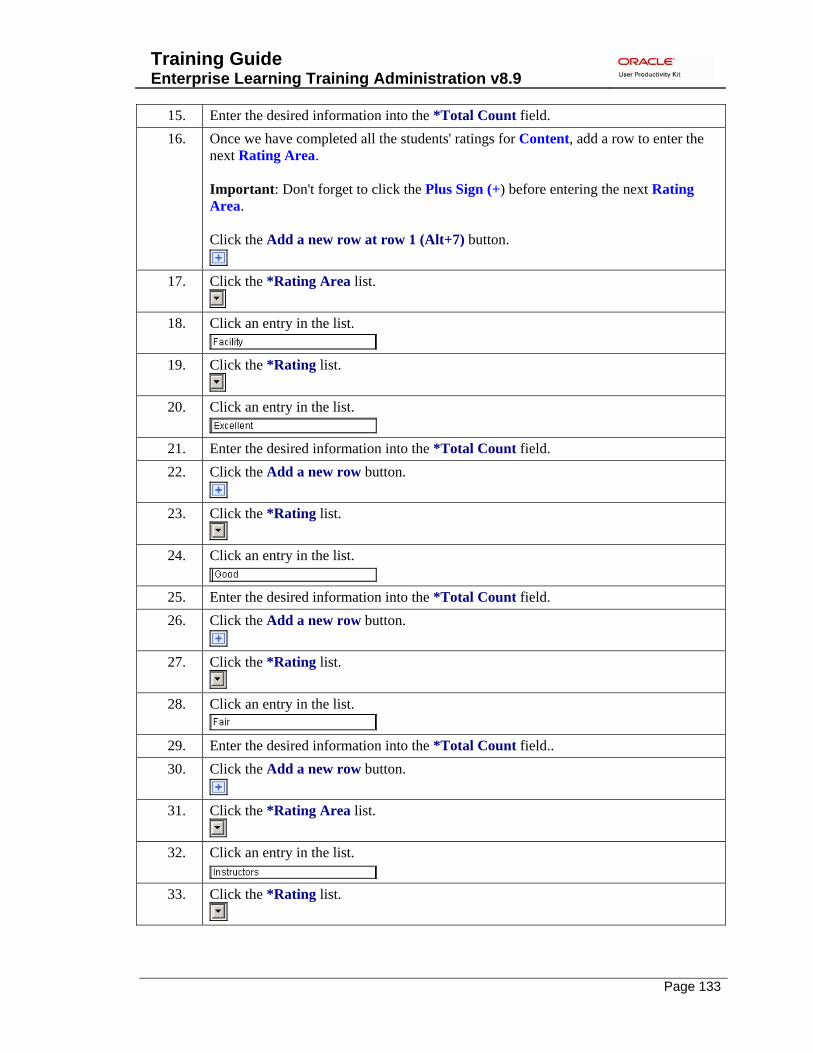
15. Enter the desired information into the *Total Count field. 16. Once we have completed all the students' ratings for Content, add a row to enter the
next Rating Area. Important: Don't forget to click the Plus Sign (+) before entering the next Rating Area. Click the Add a new row at row 1 (Alt+7) button.
17. Click the *Rating Area list.
18. Click an entry in the list.
19. Click the *Rating list.
20. Click an entry in the list.
21. Enter the desired information into the *Total Count field. 22. Click the Add a new row button.
23. Click the *Rating list.
24. Click an entry in the list.
25. Enter the desired information into the *Total Count field. 26. Click the Add a new row button.
27. Click the *Rating list.
28. Click an entry in the list.
29. Enter the desired information into the *Total Count field.. 30. Click the Add a new row button.
31. Click the *Rating Area list.
32. Click an entry in the list.
33. Click the *Rating list.
Training Guide Enterprise Learning Training Administration v8.9
Page 134
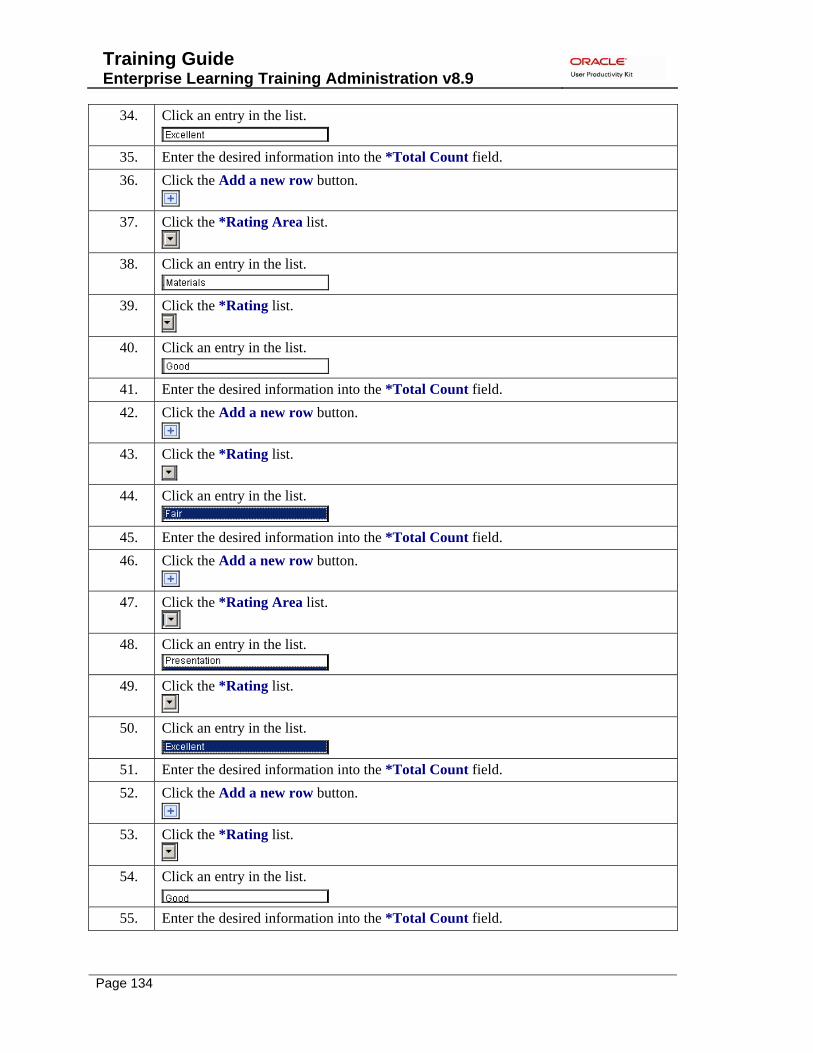
34. Click an entry in the list.
35. Enter the desired information into the *Total Count field. 36. Click the Add a new row button.
37. Click the *Rating Area list.
38. Click an entry in the list.
39. Click the *Rating list.
40. Click an entry in the list.
41. Enter the desired information into the *Total Count field. 42. Click the Add a new row button.
43. Click the *Rating list.
44. Click an entry in the list.
45. Enter the desired information into the *Total Count field. 46. Click the Add a new row button.
47. Click the *Rating Area list.
48. Click an entry in the list.
49. Click the *Rating list.
50. Click an entry in the list.
51. Enter the desired information into the *Total Count field. 52. Click the Add a new row button.
53. Click the *Rating list.
54. Click an entry in the list.
55. Enter the desired information into the *Total Count field.

Training Guide Enterprise Learning Training Administration v8.9
Page 135
56. Click the Add a new row button.
57. Click the *Rating list.
58. Click an entry in the list.
59. Enter the desired information into the *Total Count field. 60. Click the scrollbar. 61. Once you have entered all the ratings save your information. After you click the save
button the system will calculate the overall session rating average. Click the Save button.
62. Click the scrollbar. 63. Notice the Session Average Rating field has updated. You can also view individual
Rating Areas by using the Arrow or View All keys located in the Ratings Area. 64. End of Procedure.
Appendix I – Creating a Wait List
1. Click the Enterprise Learning link.
2. Click the Student Enrollment link. 3. Click the Create/Update Course Wait List link. 4. Enter the desired information into the Course Code field. 5. Click the Search button.
6. Use the Course Wait List page to add employees and non-employees to wait lists and
assign the enrollment status. For this exercise, add two employees to the wait list. To add them to the wait list, specify their IDs in the EmplID field.
7. Enter the desired information into the EmplID field.

Training Guide Enterprise Learning Training Administration v8.9
Page 136
8. Assign a wait list status to the employee in the Attendance field. The PeopleSoft application provides a course wait list and a session wait list. Both of these statuses are used in the processing logic when enrolling students from a wait list to a session. The course wait option would be used when employees are interested in attending a course that does not have the required number of minimum students to schedule a course session. Click the Attendance drop-down menu button.
9. Select Sessn Wait from the list of values.
Session Wait is used when a course session is full and an employee is awaiting a course opening.
10. The system populates a letter code from the Standard Letter table according to the
student's wait list status. The system also populates the wait list date based on the current date. The PeopleSoft application uses this date to enroll students from the oldest date to the most recent date. You can override this date if the student requested for enrollment in the course on a different date. For this example, accept the default wait list date in the Waitlst Dt field.
11. Click in the Session # field.
12. If you assign a session wait list status to a student, specify the session number from the list of Active sessions in the Session # field. Enter the session number information into the Session # field.
13. Click the Add a new row button.
14. Enter the next employee ID number into the EmplID field for the next employee to be added to the list.
15. Click the Attendance drop-down menu button.
16. Select Sessn Wait from the list of values.
17. Click in the Session # field.
18. Enter the course session number into the Session # field. 19. Click the Save button.

Training Guide Enterprise Learning Training Administration v8.9
Page 137
20. You have successfully created a wait list. End of Procedure.
Appendix J – Viewing a Course Session Summary
1. Click the Enterprise Learning link.
2. Click the Result Tracking link.
3. Click the Review Session Summary link.
4. Enter the course code number into the Course Code field. 5. Click in the Course Session Nbr field.
6. Enter the course session number into the Course Session Nbr field. 7. Click the Search button.
8. From the Course Session Summary page, each employee who attended the course,
their attendance status, and the course grade (if applicable) can be viewed. PeopleSoft has a feature that allows for sorting any column that has a live link for a column heading. Click the Status link for the course attendance status column.
9. Note how the Status column sorted course attendance statuses alphabetically.
Anytime the Excel Grid button is visible in PeopleSoft summaries or reports, the summary or report may be downloaded to a MicroSoft Excel spreadsheet by clicking on the button.
10. End of Procedure.

Training Guide Enterprise Learning Training Administration v8.9
Page 138
Appendix K – Viewing a Student Training Summary
1. Begin by navigating to the Student Training Summary page. Click the Enterprise Learning link.
2. Click the Result Tracking link. 3. Click the Review Training Summary link. 4. Enter the desired information into the EmplID field. 5. Click the Search button.
6. Use the Student Training Summary page to view the summary of a student's training
history. 7. Click the Status tab.
8. View a student's training history to determine whether the student has completed or
passed a course. Notice that Martina has completed the Performance Management course with grade P, indicating Passed.
9. In summary, you view an employee's training summary information to identify the courses that the employee has taken. End of Procedure.
Appendix L – Add an External Training Session
1. Click the Enterprise Learning link.
2. Click the Student Enrollment link.
3. Click the Enroll in Course link.
4. Enter the employee ID number into the Student Enrollment field. 5. Click the Search button.
6. Click the Add a new row (Alt+7) button.
7. Press the [Tab] key.

Training Guide Enterprise Learning Training Administration v8.9
Page 139
8. Press the [Tab] key. 9. Enter the name of the course into the Course Title field. 10. Click the Internal/External drop-down menu button.
11. Select External from the list of values.
12. Click in the Start Date field.
13. Enter the start date into the Start Date field. 14. Press the [Tab] key. 15. Enter the end date into the End Date field. 16. Click in the School Name field.
17. Enter the school name if available into the School Name field. 18. Click the Attendance drop-down menu button.
19. Select Completed from the list of values.
20. Click the Training Reason drop-down menu button.
21. Select Skill from the list of values.
22. Scroll down the page to locate the Save button. 23. Click the Save button.
24. End of Procedure.
Appendix M – Add an External Trainee
1. Click the Enterprise Learning link.
2. Click the Add a Person link.
3. Select External Trainee from the list of values. Note: The External Instructor value may be used to track external training providers.

Training Guide Enterprise Learning Training Administration v8.9
Page 140
4. Click the Add the Person button.
5. Click the Add button.
6. Click the Add Name link.
7. Enter the external trainee's first name into the First Name field. 8. Enter the trainee's last name into the Last Name field. 9. Click the OK button.
10. The Date of Birth field should be left blank for an external trainee or instructor.
The Gender field is a required field and Male or Female must be one of the selected values. The Highest Ed Level and Marital Status fields should be marked Unknown or Not Indicated. Click the *Marital Status field drop-down menu button.
11. Select Unknown from the list of values.
12. Click the *National ID Type field drop-down menu button.
13. Select Driver's License Number from the list of values.
14. Enter the driver's license number into the National ID field. 15. Click the Contact Information tab.
16. Click the Add a new row (Alt+7) button.
17. Click the Address Type field drop-down menu button.
18. Select business from the list of values.
19. Click the Add Address Detail link.
20. Click the Add Address link.
21. Enter the business address into the Address 1 field. 22. Enter the city into the City field.
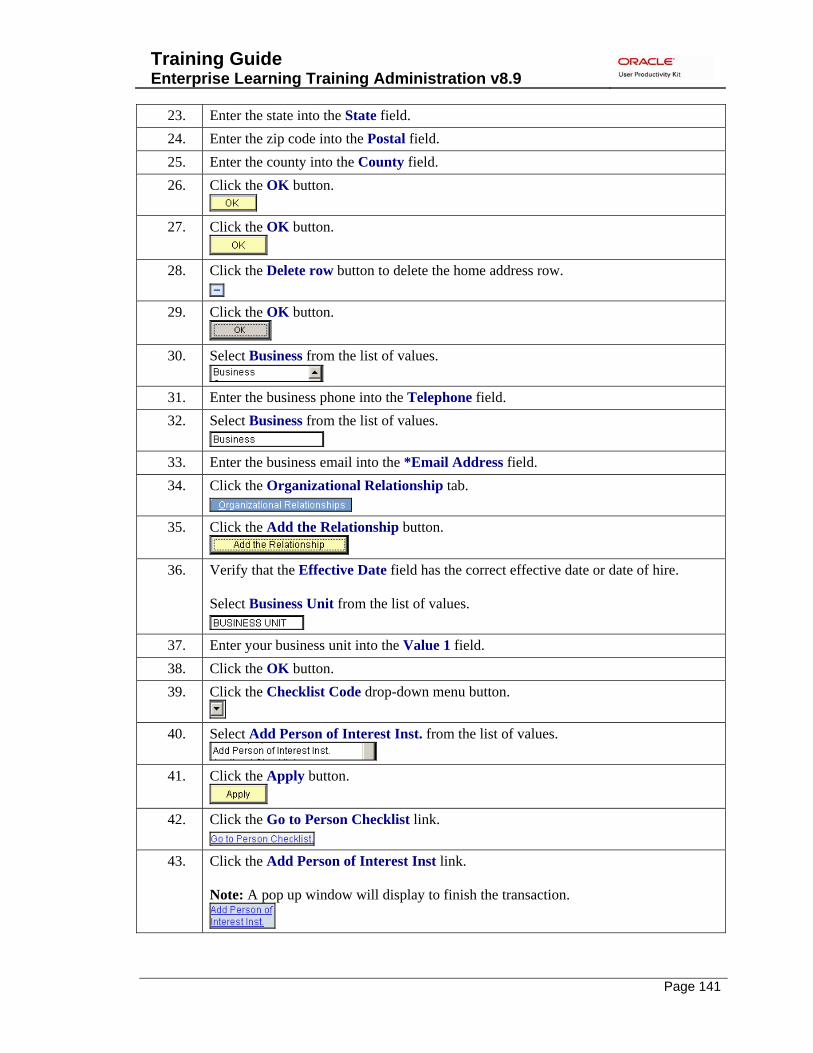
Training Guide Enterprise Learning Training Administration v8.9
Page 141
23. Enter the state into the State field. 24. Enter the zip code into the Postal field. 25. Enter the county into the County field. 26. Click the OK button.
27. Click the OK button.
28. Click the Delete row button to delete the home address row.
29. Click the OK button.
30. Select Business from the list of values.
31. Enter the business phone into the Telephone field. 32. Select Business from the list of values.
33. Enter the business email into the *Email Address field. 34. Click the Organizational Relationship tab.
35. Click the Add the Relationship button.
36. Verify that the Effective Date field has the correct effective date or date of hire.
Select Business Unit from the list of values.
37. Enter your business unit into the Value 1 field. 38. Click the OK button. 39. Click the Checklist Code drop-down menu button.
40. Select Add Person of Interest Inst. from the list of values.
41. Click the Apply button.
42. Click the Go to Person Checklist link.
43. Click the Add Person of Interest Inst link.
Note: A pop up window will display to finish the transaction.
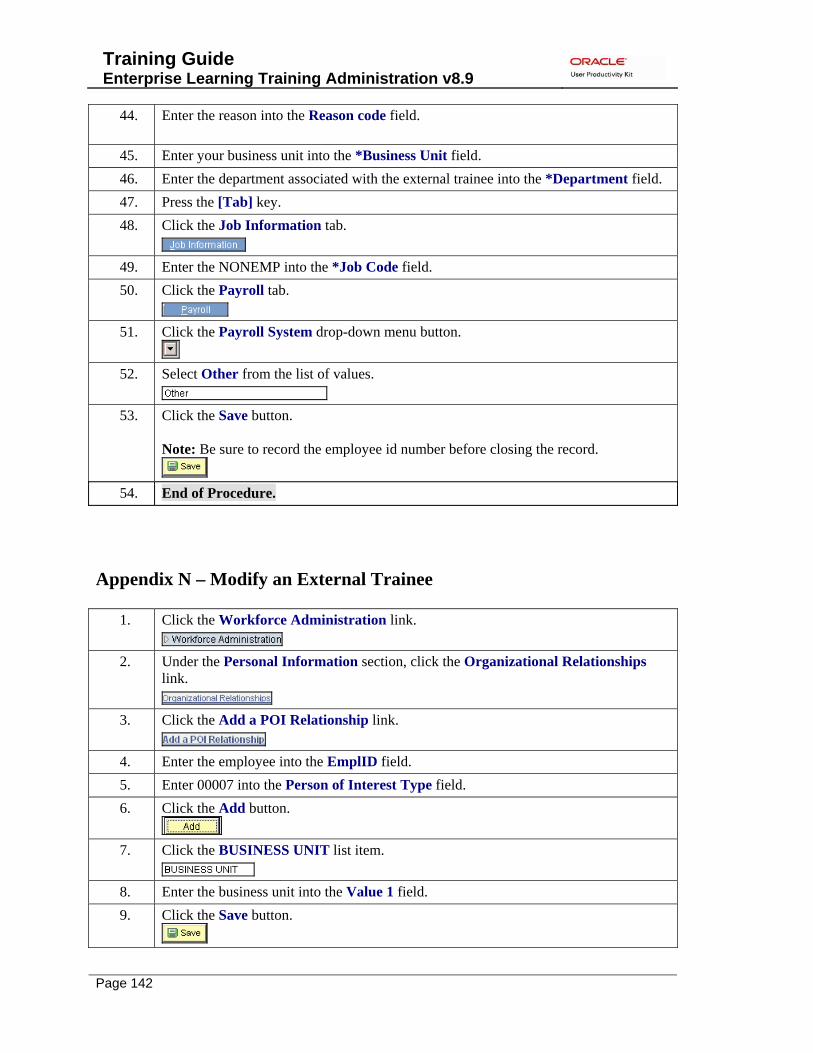
Training Guide Enterprise Learning Training Administration v8.9
Page 142
44. Enter the reason into the Reason code field.
45. Enter your business unit into the *Business Unit field. 46. Enter the department associated with the external trainee into the *Department field. 47. Press the [Tab] key. 48. Click the Job Information tab.
49. Enter the NONEMP into the *Job Code field. 50. Click the Payroll tab.
51. Click the Payroll System drop-down menu button.
52. Select Other from the list of values.
53. Click the Save button.
Note: Be sure to record the employee id number before closing the record.
54. End of Procedure.
Appendix N – Modify an External Trainee
1. Click the Workforce Administration link.
2. Under the Personal Information section, click the Organizational Relationships link.
3. Click the Add a POI Relationship link.
4. Enter the employee into the EmplID field. 5. Enter 00007 into the Person of Interest Type field. 6. Click the Add button.
7. Click the BUSINESS UNIT list item.
8. Enter the business unit into the Value 1 field. 9. Click the Save button.

Training Guide Enterprise Learning Training Administration v8.9
Page 143
10. Click the New Contingent Worker Instance link in the menu on the left side of the screen.
11. Enter the employee id into the EmplID field. 12. Click the Add button.
13. Enter the effective date into the Effective Date field. 14. Enter the TRN into the Look up (Alt+5) field. 15. Enter the business unit into the Business Unit field. 16. Enter the department into the Department field. 17. Click the Job Information tab.
18. Enter NONEMP into the Job Code field. 19. Click the Payroll tab.
20. Click the Payroll System drop-down menu button.
21. Select Other from the list of values.
22. Click the Save button.
23. End of Procedure.


