

CONTRACT WORK
RFP NO. H16-0020
STROGER HOSPITAL 4th
FLOOR RENOVATIONS
JOHN H. STROGER, JR. HOSPITAL OF COOK COUNTY
1901 WEST HARRISON STREET
CHICAGO, ILLINOIS 60612
VOLUME 3 OF 3
MECHANICAL, PLUMBING, ELECTRICAL AND FIRE PROTECTION SPECIFICATIONS
BOARD OF COMMISSIONERS
COUNTY OF COOK
TONI PRECKWINKLE, PRESIDENT
FOR THE
COOK COUNTY HEALTH AND HOSPITALS SYSTEM
JOHN JAY SHANNON, MD, CHIEF EXECUTIVE OFFICER
ISSUED BY THE
OFFICE OF SUPPLY CHAIN MANAGEMENT
CHARLES A. JONES, DIRECTOR STRATEGIC SOURCING & CONTRACT MANAGEMENT
THOMAS NEWMAN, SUPPLY CHAIN POINT OF CONTACT
PREPARED BY:
DESIGN ARCHITECT: TILTON, KELLY + BELL, LLC
ARCHITECT OF RECORD: WOLD ARCHITECTS AND ENGINEERS
ENGINEER OF RECORD: RTM ENGINEERING CONSULTANTS
42204.004
1 Table of Contents
VOLUME 3 – TABLE OF CONTENTS
Section No. Title
DIVISION 21 – FIRE SUPPRESSION
21 00 00 Water-Based Fire Suppression System
DIVISION 22 –PLUMBING
22 00 00 General Plumbing
22 05 10 Plumbing Specialties
22 05 35 Penetration Seals for Plumbing
22 05 53 Identification for Plumbing
22 07 00 Plumbing Insulation
22 10 00 Plumbing Piping
22 40 00 Plumbing Fixtures
22 60 00 Gas Systems for Healthcare
DIVISION 23- MECHANICAL
23 05 00 Basic Mechanical Requirements
23 05 13 Common Motor Requirements for HVAC Equipment
23 05 17 Sleeves and Sleeve Seals for HVAC Piping
23 05 18 Escutcheons for HVAC Piping
23 05 29 Hangers and Supports for HVAC Piping and Equipment
23 05 48 Vibration Controls for HVAC
23 05 53 Identification for HVAC Piping and Equipment
23 05 93 Testing, Adjusting, and Balancing for HVAC
23 07 13 HVAC Insulation
23 09 00 Temperature Controls
23 21 13 Hydronic Piping and Valves
23 21 16 Hydronic Piping Specialties
23 31 13 Metal Ducts
23 33 00 Air Duct Accessories
23 36 00 Air Terminal Units
23 37 13 Diffusers, Registers, and Grilles
23 82 16.11 Hydronic Air Coils
DIVISION 26 – ELECTRICAL
26 05 00 Common Work Results for Electrical
26 05 01 Electrical Demolition and Alterations
26 05 19 Low-Voltage Electrical Power Conductors
26 05 26 Grounding and Bonding for Electrical Systems
26 05 29 Hangers and Supports for Electrical Systems
26 05 33 Raceway and Boxes for Electrical Systems
26 05 44 Sleeves and Sleeve Seals for Electrical Raceways and Cabling
26 05 53 Identification for Electrical Systems
26 09 23 Lighting Control Devices
26 27 26 Wiring Devices
26 28 16 Enclosed Switches and Circuit Breakers
26 51 00 Interior Lighting with LED

42204.004
2 Table of Contents
Section No. Title
DIVISION 27 – COMMUNICATIONS
27 05 00 Requirements for Communications Installations
27 05 28 Voice-Data Communication Raceway System
27 15 00 Communications Horizontal Cabling
DIVISION 28 – ELECTRONIC SAFETY AND SECURITY
28 13 00 Electronic Access Control
28 31 11 Digital, Addressable Fire-Alarm System

42204.004 23 10 00-1 Water- Based Fire Suppression System
SECTION 21 10 00
WATER-BASED FIRE SUPPRESSION SYSTEM
PART 1 - GENERAL
1.1 RELATED DOCUMENTS
A. Drawings and general provisions of Contract, including General and Supplementary Conditions and
Division 1 Specifications, apply to Work specified in this Section.
1.2 SCOPE OF WORK
A. Scope shall be approved modifications of an existing automatic wet sprinkler system to accommodate
partition and ceiling renovations.
B. Scope also includes a pre-action system and its water supply.
C. Scope does not include modifications of an existing sprinkler system for the existing MRI.
1.3 GENERAL
A. This specification for the Fire Protection Work is a design/build performance scope specification. It is
intended to establish the design criteria for the Work. Fire Protection Contractor shall be the “Engineer
of Record”. Fire Protection Contractor shall assume full responsibility for final design and installation as
required by the authorities having jurisdiction.
B. Provide sprinkler system demand with 5-psi minimum safety margin below water supply curve. Demand
shall include hose allowance and double check valve pressure drop.
C. Contractor shall attend contractor job meetings.
D. Contractor's bid shall include furnishing all labor, material, permits, fees, equipment, and the performance
of all operations necessary for the installation.
E. Area of coverage includes vertical shafts in accordance to Building Code.
F. All wet portions of fire protection system shall be within heated spaces (above 40° F). Coordinate with
other trades accordingly.
G. All furnished components shall be labeled and listed by an approval agency such as Underwriters
Laboratories, Inc.
H. All installed components shall be compatible with each other as a complete system. Their assembly shall
be within the limitations of an approval agency.
I. Pipe welders shall meet qualifications of specified Referenced Standard.
J. Lack of information on existing conditions shall not be allowed as a valid cause for additional
compensation.
1.4 SECTION INCLUDES
PART 1 - General

42204.004 23 10 00-2 Water- Based Fire Suppression System
1.1 Related Documents 1.2 Scope of Work 1.3 General 1.4 Section Includes 1.5 Related Work 1.6 Work Furnished But Installed Under Other Sections 1.7 Work Not Included 1.8 Quality Assurance 1.9 Project Conditions 1.10 Contractor Review 1.11 Demolition 1.12 Warranty 1.13 Owner Instruction Manuals 1.14 Record Drawings 1.15 Basis of Design 1.16 Submittals
PART 2 - Products
2.1 Acceptable Manufacturers 2.2 Piping 2.3 Valves 2.4 Sprinklers 2.5 Drains And Inspector's Test Connection 2.6 Escutcheons
PART 3 - Execution
3.1 Examination 3.2 Access 3.3 Installation 3.4 Cutting And Patching 3.5 Supports and Anchors 3.6 Joint Preparation 3.7 Joints 3.8 Valves 3.9 Sprinklers 3.10 Drains And Inspector's Test Connections 3.11 Escutcheons 3.12 Tolerances 3.13 Field Quality Control 3.14 Protection 3.15 Flushing, Cleaning and Final Close Out
1.5 RELATED WORK
A. In addition to the requirements of this Section, comply with the appropriate requirements of the following
Divisions or Sections.
B. Electrical Connections: Division 26
C. Fire Alarm: Division 26
D. Pre-Action System: Section 21 1319

42204.004 23 10 00-3 Water- Based Fire Suppression System
E. Identification: Section 22 0553
F. Sleeves and Penetration Seals: Section 22 0535 and Division 7
1.6 WORK FURNISHED BUT INSTALLED UNDER OTHER SECTIONS
A. Access Panels
1.7 WORK NOT INCLUDED
A. Painting of Exposed Pipe
1.8 QUALITY ASSURANCE
A. Codes and Standards: Comply with provisions of the following codes, specifications and standards,
except where more stringent requirements are shown, specified or applicable.
1. ASME Section 9 Boiler and Pressure Vessel Code, “Welding and Brazing Qualifications”
2. AWS D10.9 Weld Procedures for Piping
3. NFPA 13 Automatic Fire Sprinkler System
4. NFPA 101 Life Safety Code
B. Regulatory requirements
1. State of Illinois Administrative Code Title 77 Public Health— Part 250 Hospitals, Section 2490
2. State of Illinois Administrative Code— Building Code
C. Permits
1. Secure and pay permits as required by the authorities having jurisdiction.
2. Secure and pay required backflow preventer plan review permits.
3. Secure and pay permits required by local utility companies if applicable.
D. Manufacturer: Company specializing in manufacturing the products and materials specified in this
Section shall possess a minimum of ten years documented experience.
E. Installer: Company specializing in performing the installation of this Section shall possess a minimum of
five years documented experience.
F. Field Supervision: Contractor shall maintain an experienced full-time supervisor who is at the jobsite
during times that Work is in progress.
G. Pipe welding process and operators shall be qualified in accordance with ASME “Boiler and Pressure
Vessel Code”, Section IX, “Welding and Brazing Qualifications”.
H. Electric components shall comply with standards, shall be UL listed and labeled, and shall be NEMA
compliant.
I. Confirm electrical voltages, phase and other characteristics. Do not order motors, motor controllers and
other equipment with line voltage connections until electrical characteristics are verified with Electrical
Contractor and with Project Conditions at the site.
1.9 PROJECT CONDITIONS

42204.004 23 10 00-4 Water- Based Fire Suppression System
A. Data on drawings that indicate existing conditions are not intended as representative or warranties of
accuracy. It is expressly understood that Owner, Architect or Engineer shall not be responsible for
interpretations or conclusions drawn from by the Contractor. Data are made available for the
convenience of the Contractor and are not guaranteed to represent conditions that may be encountered.
B. Field Measurements: Verify dimensions by field measurements. Verify that Work may be installed in
compliance with the original design and referenced standards.
1.10 CONTRACTOR REVIEW
A. The Contractor shall review Contract Documents and information furnished by Owner. Contractor shall
compare their observations with other Contractors.
B. The Contractor shall take field measurements and make necessary field observations to verify field
conditions. Contractor shall compare field conditions and other known information with the Contract
Documents.
C. The Contractor shall report errors, inconsistencies and omissions to the Architect immediately when
discovered.
D. The Contractor shall assume appropriate responsibility associated with errors, inconsistencies and
omissions in the Construction Documents that the Contractor recognized but has knowingly failed to
report to the Architect.
1.11 DEMOLITION
A. Requirements of Division 1 take precedence over the following.
B. Demolish piping, and support hardware within limits of contract or as required to complete Work.
C. Maintain the condition of Work not removed or designated as salvageable.
D. Dispose all material off site unless otherwise instructed.
E. Minimize lengths of dead ends when capping removed branches.
F. Note piping that is disconnected and abandoned on Record drawings.
1.12 WARRANTY
A. Contractor’s Warranty shall agree to adjust, repair or replace its installation Work that fails in material or
workmanship within the specified Warranty Period.
B. Manufacturer’s Warranty shall agree to repair or replace its furnished product, which fails in material or
workmanship within the specified Warranty Period or longer where specified.
C. Opinion of whether material or workmanship fails or repeats its failure shall be at the discretion of
Architect.
D. Warranty shall be in addition to, and not a limitation of, other rights that the Owner may have against
Contractor.
E. Warranty Period shall be one year after date of Substantial Completion of Work. Warranty Period shall
be longer where indicated in individual Sections.

42204.004 23 10 00-5 Water- Based Fire Suppression System
1.13 OWNER INSTRUCTION MANUALS
A. Requirements of Division 1 take precedence over the following.
1.14 RECORD DRAWINGS
A. Record Drawings shall conform to Division 1.
B. Record Drawings shall be available at the job site for review and shall be updated continuously.
1.15 BASIS OF DESIGN
A. Hydraulically calculated to reference standard, occupancy and building type as indicated in the
architectural documents.
B. Design as approved by the authorities having jurisdiction.
C. Design as necessary with the available water supply.
D. Design coordinated with other trades.
E. Water velocity in pipe shall not be greater than 24 feet per second.
F. Water demand shall not be less than supply and with a 5 psi cushion.
G. Below roof assemblies, minimize the need for sprinklers by coordinating with the architect for exceptions
as permitted in the reference standard.
H. System drains shall not be permitted finished spaces. Locate drains in mechanical rooms, storage rooms
or janitor closets and discharge to the exterior.
1.16 SUBMITTALS
A. Submit shop drawings under provisions of Division 1.
B. Submittals shall include:
1. Design Drawings
2. Hydraulic Calculations
3. Access Panels
4. Instructions and Equipment Manuals
5. Pipe Support System
6. Piping
7. Sprinkler Heads
8. Valves
9. Test Reports (to Architect at Work close out)
10. Record Drawings (to Architect at Work close out)
C. Architect shall review head locations and pipe locations and advise changes to meet design requirements.

42204.004 23 10 00-6 Water- Based Fire Suppression System
D. Contractor shall be responsible for providing design drawings as required of authorities having
jurisdiction. The plans shall be submitted for approval to the authorities having jurisdiction before any
equipment is installed.
E. Submittal shall include drawings, calculations and complete details for all materials to be furnished and
installed for this project. The Contractor shall be responsible for figures and dimensions on submittals.
The submittals shall be reviewed for informational purposes only. Fire Protection Contractor shall
assume full responsibility for design and installation.
PART 2 - PRODUCTS
2.1 ACCEPTABLE MANUFACTURERS
A. Gem, Potter-Roemer, Star, Victaulic or Viking
B. Others only in product type as indicated in this Section
C. Substitutions: Under provisions of Division 1
2.2 PIPING
A. Subject to compliance with requirements, provide pipe and fittings from the following manufacturers:
1. Gem
2. Victaulic
B. Pipe: Threaded steel 2-inch and less: Schedule 40, black, ASTM A53, A135 or A795
C. Pipe: Roll-grooved steel 2-1/2-inch or greater: Schedule 10, black, listed, ASTM A53, A135 or A795
D. Fittings: Screwed fittings shall be cast iron, Class 125, ANSI B16.4 or malleable iron, Class 150, ANSI
B16.3, grooved couplings and mechanical fittings shall be ductile iron, ASTM A536 Grade 65-45-12 with
EPDM or buna-N gaskets.
E. Furnish ferrous piping with galvanized coating, inside and outside, on dry portions of dry systems.
2.3 VALVES
A. Subject to compliance with requirements, provide valves from the following manufacturers:
1. Nibco
2. Kennedy
3. Grinnel
4. Reliable
5. Victaulic
6. Watts
B. Maximum working pressure, non-shock cold water, all valves: 175-psi unless otherwise indicated on
drawings.
C. Valves controlling water supplies to sprinklers shall be listed indicating.

42204.004 23 10 00-7 Water- Based Fire Suppression System
1. Open screw and yoke gate valve, iron or bronze construction, flanged or threaded.
2. Butterfly lug with gear operator, ductile iron or bronze construction, lug mounted, threaded or
groove joint.
D. The authority having jurisdiction shall approve drain valves.
E. Control valves and check valves shall be listed.
2.4 SPRINKLERS
A. Subject to compliance with requirements, provide from the following manufacturers:
1. Central Sprinkler Co.
2. Gem Sprinkler Co.
3. Pro Press System
4. The Viking Corporation
B. Sprinkler heads shall be of the proper temperature rating, size and type as required by NFPA.
C. Finish shall be factory applied only.
D. Types:
1. Exposed brass upright head
2. Exposed brass sidewall head
3. Semi-recessed pendant quick response head. Finish on head and escutcheon: painted white.
2.5 DRAINS AND INSPECTOR'S TEST CONNECTION
A. Provide NFPA drain and test connection(s) as required.
2.6 ESCUTCHEONS
A. All interior escutcheons for exposed pipe shall be polished chrome finish.
B. All exterior escutcheons, such as on system test and drain outlet or backflow preventer test discharge,
shall be brass with setscrew.
PART 3 - EXECUTION
3.1 EXAMINATION
A. Verify site is ready for piping installation.
B. Verify location and elevation of all points of connections.
C. Elevations and locations of all services as indicated on drawings are approximate and the Contractor shall
establish elevations and locations of services in the field.
D. Confirm location and space availability for control valves and drain valves.
E. Confirm location and space availability of pipe risers, pipe chases, and joist spaces.

42204.004 23 10 00-8 Water- Based Fire Suppression System
F. Report defects or deficiencies to Architect in writing.
G. Await Architect's decision on appropriate adjustment before proceeding.
H. The Architect reserves the right before any particular Work is started to slightly change location of
equipment, if found necessary, without additional payment to the Contractor.
I. Beginning of installation means acceptance of conditions.
3.2 ACCESS
A. Installation shall allow access to all valves and drains.
B. Valve handles shall be accessible to fire department and service personnel for full valve operation.
C. Pressure gauges and electric indicator lamps shall be visible from observation at floor level.
D. Water flow indicators shall be visible from an accessible location.
3.3 INSTALLATION
A. Contractor shall cooperate with the other contractors so that construction may proceed without hindrance.
Confer with other contractors regarding any Work that may affect this Work and arrange schedule so that
components shall be installed in a natural sequence. Contractor shall be responsible for grading, fitting,
joining or adjusting of his Work to all adjacent Work of other contractors.
B. Precedence in installing piping in close quarters shall be established by Architect and no contractor has
exclusive right of way in installing his Work.
C. Arrange and install all piping in straight lines and uniform pitch throughout.
D. Conceal all piping.
E. Install all piping so that it can be properly drained.
F. Support all piping throughout neatly and suitably in an approved manner to allow for ample expansion
and contraction.
G. Provide seismic requirements to local Code where required.
H. Anchor to concrete structure by means of concrete inserts or fasteners as recommended by manufacturer
of insert. Provide and set all concrete inserts in cooperation with the Concrete Contractor before concrete
is poured.
I. Anchor to other structural members with appropriate clamps or special devices as recommended by
manufacturer of device.
J. Where pipes are grouped, install trapeze hangers with "U" spacers to hold pipe alignment.
K. Anchors shall not be attached directly to steel decks.
L. Support vertical pipelines with wrought iron or steel pipe clamps at beams or floors.
M. All anchors, hangers and supports shall be designed to meet local structural requirements.

42204.004 23 10 00-9 Water- Based Fire Suppression System
N. Perforated iron shall not be used on any part of the piping system.
3.4 CUTTING AND PATCHING
A. Provide cutting or sleeves through walls, floors and ceilings as necessary to install piping. Patch as
necessary to restore construction. See Division 1.
B. Coordinate schedule of cutting and patching with General Contractor to avoid cutting finish surfaces.
C. Where Cutting is performed in existing construction, restore construction to original integrity. Restore
finish as specified in Divisions 1 and 9. Provide dust control with performance requirements as required.
D. Maintain fire-rating by providing appropriate Penetration Seals.
E. Patch openings created by removed pipes that are not re-used by new piping unless wall or floor is
entirely removed.
F. Provide openings, cutting, and sleeves as necessary to permit installation of piping or any other part of the
Work under this Section.
1. Make all arrangements with various contractors for any special framing or chases.
2. Accurately locate all openings and core drill openings or provide sleeves.
G. Openings shall not be less than one inch larger than outside diameter of pipe. Sleeves shall be of
sufficient length to pass through entire floor or wall construction, including plaster or drywall.
1. Sleeves in walls shall be flush with finished wall surface.
2. Sleeves in floors shall extend above finish floor by 2 inches except concrete floors cast on grade.
H. Where holes must be cut through reinforced concrete, they shall be carefully core drilled to avoid spalling
and unnecessary damage or weakening of any structural member. Chopping or breaking out shall not be
permitted.
1. Obtain Architect's approval before cutting or drilling through concrete or masonry in place, and
then proceed as directed.
2. Location of coring shall be reviewed and approved by the Structural Engineer prior to coring.
Then proceed as directed.
I. Seal space between pipe and opening with Penetration Seal.
J. When Contractor neglects to provide accurate and sufficient information for openings on a timely basis
and this results in damage to finish Work, Contractor shall restore finish Work at no additional cost, as
directed by the Architect, in accordance with Divisions 1 and 9.
3.5 SUPPORTS AND ANCHORS
A. Piping support system, including anchors, clamps, rods, concrete inserts, brackets, trapeze bar, and any
framing, shall be of adequate size.
B. Component capacity:
1. Mild steel, non-threaded: Weight of pipe and water shall not exceed load capacity as indicated by
manufacturer for dynamic loading.
2. Other material: Weight of pipe and water shall not exceed 20 percent of breaking load of support
system material.

42204.004 23 10 00-10 Water- Based Fire Suppression System
C. The design of hangers shall prevent bending in the support rod whether from swivel-type fittings or other
similar means.
D. The design of the support shall maintain engagement of the pipe from lateral displacement whether by
secure saddle, clamp or other similar means.
E. Exposed finish of ferrous metals shall be galvanized or painted.
F. The spacing and hanger rod size of horizontal and vertical pipe shall be provided as required in the
referenced standard.
G. Weight of pipe shall not bear on equipment, fixtures, and walls or on another pipe.
3.6 JOINT PREPARATION
A. Remove items sensitive to heat prior to welding.
B. All joints shall be clean. Material shall be cut to length and square.
C. Pipe or tube shall be blown clean with compressed air or with other industry accepted method.
D. Plug openings if not immediately joined.
3.7 JOINTS
A. Threaded: Threads conforming to ASME B1.20.1, thoroughly cleaned and reamed after cutting.
B. Groove Joint: rolled according to manufacturer’s instructions.
3.8 VALVES
A. Provide listed supervisory tamper switches on all control valves where required.
B. Install drain valves in all low portions of piping.
3.9 SPRINKLERS
A. Types of Heads shall be as follows:
1. Exposed brass upright heads shall be provided in rooms without suspended ceilings.
2. Semi-recessed pendant heads shall be provided in areas receiving finished ceilings.
a. The heads shall be located in the center of ceiling tile.
b. For scored tiles, the heads shall be located in the center of a scored portion of ceiling tile.
B. Unless already on hand, provide a mountable box with spare heads with proper wrenches. The number of
spare heads shall be as designated per NFPA.
C. Provide guards on all exposed heads in low position or subject to mechanical damage.
3.10 DRAINS AND INSPECTOR'S TEST CONNECTIONS
A. Provide drain valve at main riser.

42204.004 23 10 00-11 Water- Based Fire Suppression System
B. Provide test connection at remote location of each zone with Referenced Standard discharge to the
outside of the building.
C. Provide a test connection at riser as required. Provide safe drain to the outside of the building.
D. Coordinate additional plumbing drains with Plumbing Contractor.
3.11 ESCUTCHEONS
A. Furnish and install on all exposed piping passing through floors, walls, and ceiling.
B. Outside diameter of plate shall cover opening.
C. Inside diameter shall fit snugly around outside diameter of pipe.
3.12 TOLERANCES
A. Deflector height from ceiling finish: NFPA.
B. Deflector height from bottom of floor deck: NFPA.
C. Head location: within ½-inch of center of ceiling tile.
D. Pipe location: within +/- 3 inches of shop drawing dimensions.
3.13 FIELD QUALITY CONTROL
A. Confirm that all piping material has required material labeling.
B. Only qualified fire protection installers shall perform installation of all fire protection systems. Only
experienced installers shall perform pipe identification labeling.
C. Coordinate installation with Architect and all other trades.
D. Coordinate with local inspector for all required site inspections.
E. Perform testing according to NFPA as follows unless superseded by Code:
1. Fire protection system pressure test and flow test
2. Adequacy of required drains
3. All tests shall be made in the presence and satisfaction of the Architect's Representative or Owner
and the local inspector.
F. Verify pipe are within spaces designed to be no lower than 40° F.
G. Furnish “Contractor’s Material & Test Certificate for Above-ground Piping” to Architect.
3.14 PROTECTION
A. Protect final installation from damage during construction period.
3.15 FLUSHING, CLEANING AND FINAL CLOSE OUT
A. All items shall be left clean and ready for occupancy.

42204.004 23 10 00-12 Water- Based Fire Suppression System
END OF SECTION 23 10 00

42204.004 22 00 00-1 General Plumbing
SECTION 22 00 00
GENERAL PLUMBING
PART 1 - GENERAL
1.1 RELATED DOCUMENTS
A. Drawings and general provisions of Contract, including General and Supplementary Conditions and
Division 1 Specifications, apply to Work specified in this Section.
1.2 GENERAL
A. The purpose of these specifications is to establish Plumbing and Fire Protection Construction standards.
B. Contractor shall provide a complete operating system in accordance with drawings and the project
manual. All necessary equipment, labor and materials not specifically indicated or specified, but
necessary to complete the Work, shall be provided as part of the Work.
C. In accordance with the General Conditions Section of the Project Manual, the Contractor shall assume
appropriate responsibility associated with errors, inconsistencies and omissions in the Construction
Documents that the Contractor recognized but has knowingly failed to report to the Architect.
D. Everything essential for the completion of the Work to make the system ready for normal and proper
operation including all piping, valves, connections, fixtures, equipment, controls, testing and balancing as
specified and as schematically shown on Drawings shall be provided.
E. The Architect reserves the right before any particular Work is started to slightly change location of
equipment, if found necessary, without additional payment to the Contractor.
F. Contractor shall not scale the drawings for exact dimensions.
1.3 WORK NOT INCLUDED
A. Removing Hazardous Substances
1.4 SECTION INCLUDES
1.0 General
.1 Related Documents
.2 General
.3 Work Not Included
.4 Section Includes
.5 Related Work
.6 Quality Assurance
.7 Lead-Free Requirement in Plumbing
.8 Definitions
.9 Project Conditions
.10 Contractor Review
.11 Hazardous Materials
.12 Demolition
.13 Electrical Connections
.14 Equipment Connections
.15 Owner Instruction Manuals

42204.004 22 00 00-2 General Plumbing
.16 Warranty
.17 Record Drawings
.18 Maintenance
.19 Submittals
2.0 Products
3.0 Execution
.1 Examination
.2 Access
.3 Installation
.4 Equipment Set-Up and Adjustments
.5 Housekeeping Pads
.6 Tolerances
.7 Field Quality Control
.8 Protection
.9 Lubricating
.10 Disinfecting, Cleaning and Final Close Out
1.5 RELATED WORK
A. In addition to the requirements of this Section, comply with the appropriate requirements of the following
Divisions or Sections:
B. Insulation: Section 22 0700
C. Mechanical Identification: Section 22 0553
D. Penetration Seals: Section 22 0535
E. Plumbing Piping: Section 22 1000
F. Plumbing Specialties: Section 22 0510
G. Plumbing Fixtures: Section 22 4000
H. Medical Gases: Section 22 6000
1.6 QUALITY ASSURANCE
A. Codes and Standards: Comply with provisions of the following codes, specifications and standards,
except where more stringent requirements are shown, specified or applicable.
1. ANSI A117.1 Accessibility, ADA Guidelines
2. ANSI B16.22, Wrought Copper and Copper Alloy Solder-Joint Pressure Fittings
3. ASSE American Society of Sanitary Engineering
4. ASTM B32 Standard Specification for Solder Metal
5. ASTM B88 Specification for Seamless Copper Water Tube
6. CISPI Cast Iron Soil Pipe Institute
7. Manufacturer’s Standardization Society of the Valve and Fittings Industry, Inc. (MSS)
8. NSF National Sanitation Foundation 61 and 14

42204.004 22 00 00-3 General Plumbing
B. Regulatory requirements
1. State of Illinois Administrative Code Title 77 Public Health— Part 250 Hospitals, Section 2490
2. State of Illinois Administrative Code Title 77 Public Health— Part 890 Plumbing Code
3. State of Illinois Administrative Code— Building Code
C. Permits
1. Secure and pay permits required in all plumbing codes and as required by the authorities having
jurisdiction.
D. Manufacturer: Company specializing in manufacturing the products and materials specified in this
Section shall possess a minimum of ten years documented experience.
E. Installer: Company specializing in performing the installation of this Section shall possess a minimum of
five years documented experience.
F. Field Supervision: Contractor shall maintain an experienced full-time supervisor who is at the jobsite
during times that Work is in progress.
G. Electric components shall comply with standards, shall be UL listed and labeled, and shall be NEMA
compliant.
H. Manufacturer and Product Selection: The drawings and specifications indicate sizes, profiles, and
dimensional requirements of specific products and material. Products and material having equal
performance characteristics have been listed in the specifications for use on this project. The use of these
products or materials shall require the Contractor to consider all modifications to accommodate variations
in weights, connections, sizes, and similar parameters as compared to the products shown. The
Contractor shall be responsible for all modifications of other mechanical, structural, electrical, and
plumbing systems required to accommodate such products and materials. The Contractor shall be
responsible to maintain code compliance of the installed system and any other system that is affected by
the substitution.
I. Confirm electrical voltages, phase and other characteristics. Do not order motors, motor controllers and
other equipment with line voltage connections until electrical characteristics are verified with Electrical
Contractor and with Project Conditions at the site.
1.7 LEAD-FREE REQUIREMENT IN PLUMBING
A. Lead content of brasses and other metals in plumbing material shall meet the NSF 61 Section Standards
for residential use and shall meet the Reduction of Lead in Drinking Water Act.
1.8 DEFINITIONS
A. Btu: British thermal unit
B. Gpm: gallons per minute
C. NPT: national pipe thread complying with ANSI B 1.20.1
D. Engineer: RTM Engineering Consultants LLC
E. F: Fahrenheit
F. Psi or psig: pounds per square inch

42204.004 22 00 00-4 General Plumbing
G. Or Equivalent: To possess the same performance qualities and characteristics and fulfill the utilitarian
function without any decrease in quality, durability, or longevity. No inference that must be identical in
all respects if above conditions are satisfied.
H. Reviewed by design professional: Generically, this means that the design professional acquiesces to a
particular unqualified basis. The design professional's intent is to grant acquiescence only so long as the
subject matter is in conformity with the design concept.
I. Similar: Shall be taken in its general sense and not meaning identical, and all details of such Work shall
be in proper relation to the location and connections of other parts of the Work.
J. Waste Pipe: Sanitary waste pipe, sanitary soil pipe, or sanitary drain pipe.
1.9 PROJECT CONDITIONS
A. Data on drawings that indicate existing conditions are not intended as representative or warranties of
accuracy. It is expressly understood that Owner, Architect or Engineer shall not be responsible for
interpretations or conclusions drawn from by the Contractor. Data are made available for the
convenience of the Contractor and are not guaranteed to represent conditions that may be encountered.
B. Field Measurements: Verify dimensions by field measurements. Verify that Work may be installed in
compliance with the original design and referenced standards.
1.10 CONTRACTOR REVIEW
A. The Contractor shall review Contract Documents and information furnished by Owner.
B. The Contractor shall take field measurements and make necessary field observations to verify field
conditions. Contractor shall compare field conditions and other known information with the Contract
Documents.
C. The Contractor shall report errors, inconsistencies and omissions to the Architect immediately when
discovered.
D. The Contractor shall assume appropriate responsibility associated with errors, inconsistencies and
omissions in the Construction Documents that the Contractor recognized but has knowingly failed to
report to the Architect.
1.11 DEMOLITION
A. Requirements of Division 1 take precedence over the following.
B. Demolish equipment, fixtures, piping, and support hardware as indicated on drawings within limits of
contract or as required to complete Work.
C. Maintain the condition of Work not removed or designated as salvageable.
D. Dispose all material off site unless otherwise instructed.
E. Minimize lengths of dead ends when capping removed supply and drain branches.
F. Note piping that is disconnected and abandoned on Record drawings.
1.12 ELECTRICAL CONNECTIONS

42204.004 22 00 00-5 General Plumbing
A. All line voltage wiring (nominal 110 volts or above) shall be installed by Electrical Contractor.
B. Contractor shall be responsible for furnishing and installing low voltage wiring and connections for
equipment included in this Division.
1.13 EQUIPMENT CONNECTIONS
A. Connect water and indirect waste pipes to medical and HVAC equipment as required.
B. Locate floor drains and indirect waste receptors as required for equipment as required.
C. Provide water connection through approved cross connection controls. Verify whether approved air gaps
or vacuum breakers are provided within equipment. If required, provide code-required backflow
preventers.
1.14 OWNER INSTRUCTION MANUALS
A. Requirements of Division 1 take precedence over the following.
B. Upon completion of the installation, but before final acceptance of the system, the Contractor shall
instruct the Owner on the proper care and operation of all parts of the system.
C. Furnish to the Owner two bound copies of manufacturer’s operating and maintenance manuals for all
equipment immediately after receipt of Engineer reviewed shop drawings. Manuals shall be written in
English. The manual must include:
1. Manufacturer’s literature containing a complete description of replacement parts and materials for
wearing items
2. Explicit language concerning time intervals for all servicing and preventive maintenance, packing
materials and methods of equipment adjustments.
3. Operating instructions shall include detailed step-by-step start-up and shutdown procedures,
normal operating ranges such as temperatures and pressures, and changeover procedure to follow
to meet the demands of seasonal or unusual weather conditions.
4. Copies of reviewed submittals and shop drawings
5. Valve schedules
6. Records of tests and inspections by regulatory agencies
7. Manufacturer’s wiring diagrams
1.15 WARRANTY
A. Contractor’s Warranty shall agree to adjust, repair or replace its installation Work that fails in material or
workmanship within the specified Warranty Period.
B. Manufacturer’s Warranty shall agree to repair or replace its furnished product, which fails in material or
workmanship within the specified Warranty Period or longer where specified.
C. Opinion of whether material or workmanship fails or repeats its failure shall be at the discretion of
Architect or Engineer.
D. Warranty shall be in addition to, and not a limitation of, other rights that the Owner may have against
Contractor.

42204.004 22 00 00-6 General Plumbing
E. Warranty Period shall be one year after date of Substantial Completion of Work. Warranty Period shall
be longer where indicated in individual Sections.
1.16 RECORD DRAWINGS
A. Record Drawings shall conform to the following minimum standards unless Division 1 specifies more
stringent requirements.
1. Provide a single set of Contract Documents, of good condition, that reflect up-to-date Change
Orders and other changes to the Work.
2. Deviations shall be presented in a clear and legible manner, including text.
3. Lines shall connect. Lines shall be contrasting colors or line styles used consistently throughout
the set.
4. All work shall be shown on floor in which it is installed.
5. Show deviations of the Work not shown on the up-to-date Contract Documents. In addition, show
elevations of underground Work and indicate abandoned items.
6. Show deviations of existing work not shown accurately on the Contract Documents.
7. If Contractor is unable to clearly indicate drawing deviations on the Record Drawings, he shall
provide a sketch of the actual construction elsewhere on the drawing or attach a separate sketch to
the drawing, which shall become a part of the Record Drawings.
B. Record Drawings shall be available at the job site for review and shall be updated continuously.
1.17 SUBMITTALS
A. Submit shop drawings under provisions of Division 1.
B. Submit shop drawings indicating materials, component description and dimensioned drawings.
C. Components shall include:
1. See applicable Sections
D. Closure Submittals as follows shall be furnished to the Architect before Certificate of Substantial
Completion is issued.
1. Approved Shop Drawings
2. Record Drawings
3. Owner Instruction Manuals
4. Warranties
5. Performance Certificates as indicated in applicable Sections
PART 2 - PRODUCTS
Not Used. See applicable Sections.
PART 3 - EXECUTION

42204.004 22 00 00-7 General Plumbing
3.1 EXAMINATION
A. Verify site is ready for piping installation.
B. Elevations and locations of all points-of-connection as indicated on drawings are approximate and the
Contractor shall establish elevations and locations of services in the field.
C. Any anticipated offsets to avoid obstructions which are not shown on the drawings shall be noted.
D. The Contractor shall check all measurements of equipment and shall be responsible for connections of his
Work with the Work of other contractors.
E. Confirm location and space availability for access panels, service valves and drain valves.
F. Confirm location and space availability of pipe chases, joist spaces and subsurface locations.
G. Report defects or deficiencies to Architect in writing.
H. Await Architect's decision on appropriate adjustment before proceeding.
I. The Architect reserves the right before any particular Work is started to slightly change location of
equipment, if found necessary, without additional payment to the Contractor.
J. Beginning of installation means acceptance of conditions.
3.2 ACCESS
A. Installation shall allow access to all portions of equipment requiring routine service including:
1. Service, cleaning, inspection and lubrication as recommended by manufacturer
2. Replacement of renewable components as recommended by manufacturer
3. Visibility of all vents
4. Drain Valves
5. Name plate data
6. Gauges
B. Access shall not be encumbered by necessity to remove adjacent equipment or building components.
C. Access shall be available to replace one piece of equipment without disturbing the operation of any other
piece of equipment.
3.3 INSTALLATION
A. Contractor shall cooperate with the other contractors so that construction may proceed without hindrance.
Confer with other contractors regarding any Work that may affect this Work and arrange schedule so that
components shall be installed in a natural sequence. Contractor shall be responsible for grading, fitting,
joining or adjusting of his Work to all adjacent Work of other contractors.
B. Coordinate positioning of large equipment prior to enclosing building or equipment room.
C. Install Work to conform with reviewed shop drawings to greatest extent possible.
D. Arrange and install all piping in straight lines.

42204.004 22 00 00-8 General Plumbing
E. Piping shown on plan views shall be installed above finished ceilings of rooms shown unless otherwise
specified. In mechanical spaces and similar unfinished areas, install pipes as high as possible unless
otherwise specified.
F. Pipes on foundation plumping plans shall be installed below finished floor of rooms shown unless
otherwise specified.
G. Piping installed at specified pitch shall generally take precedence of ductwork and other piping.
H. Operation of doors, windows, lighting, Owner’s equipment or fixtures shall not be hindered by position
of piping.
I. Piping shall not be permitted above or through elevator equipment rooms, electrical rooms, telephone
rooms or computer rooms without the approval of the Architect.
J. In rated egress enclosures, such as stairways and exit discharge passageways, only piping related to such
spaces shall be permitted within these spaces.
3.4 TOLERANCES
A. Noise: no perceptible noise in any finished portions of the building.
B. Vibration: no perceptible lateral or oscillating movement or vibration on floors or walls beyond 3 feet of
all equipment.
3.5 FIELD QUALITY CONTROL
A. Coordinate installation with Architect and all other trades.
B. Installation shall only be performed by licensed plumbers.
C. Prior to initial operation of equipment, the Contractor shall conduct operating checks and proof tests to
establish that equipment is complete, properly installed, wired and connected and ready.
D. The Contractor shall be held liable for damage to the building or its contents due to leaks or other defects
in his Work which may develop during the period of installation and test.
E. Equipment shall be isolated from piping during pressure tests of all piping. Test pressure shall not exceed
the manufacturer’s maximum pressure for any vessel, pump, valve, or other component fabricated for this
installation.
F. Pressure testing of piping:
1. Storm, Clearwater and Clearwater Vent: Test system in sections or in its entirety, apply pressure
equivalent to not less than 10 feet of water, and verify leak-tight after 15 minute dwell time.
2. Waste and Vent: Test system in sections or in its entirety, apply pressure equivalent to not less
than 10 feet of water, and verify leak-tight after 15 minute dwell time.
3. With fixtures installed and traps filled, conduct final waste and vent testing by smoke method or
air pressure not to exceed 1 inch water column.
4. Water Piping: Test to a pressure of 150 psi in all parts of the system.
5. All tests shall be made in the presence and satisfaction of the Architect's Representative or Owner
and the local Plumbing Inspector.
6. Correct all defects. Retest if pressure was released for correction work.

42204.004 22 00 00-9 General Plumbing
G. Verify the location of supply and drain piping are within spaces designed to be no lower than 40° F.
H. Confirm that all piping material has required material labeling.
I. Confirm that valves, fittings, faucets and stops are lead-free and are marked accordingly.
J. Confirm hot water temperature set point with measured water sample from nearest fixture or from drain
valve.
K. Confirm attachment of correct ASME tags.
L. Confirm attachment of all equipment nameplate data.
3.6 PROTECTION
A. Protect final installation from damage during construction period.
B. Open ends of all piping shall be kept closed during construction.
3.7 DISINFECTING, CLEANING AND FINAL CLOSE OUT
A. See general contract provisions regarding final cleaning of fixtures used by construction crew.
B. Where painted surfaces have been abused or rusted during construction, the Contractor shall paint same
to match original factory finish.
C. Disinfect pre-piped spools and on-site installed piping in accordance with Code. Flush all pipes after
disinfecting in accordance with Code.
D. Remove protective coverings and manufacturer’s stickers from finished surfaces.
E. All items shall be left clean and ready for use.
END OF SECTION 22 00 00
42204.004 23 05 10-1 Plumbing Specialties
SECTION 22 05 10
PLUMBING SPECIALTIES
PART 1 - GENERAL
1.1 RELATED DOCUMENTS
A. Drawings and general provisions of Contract, including General and Supplementary Conditions and
Division 1 Specifications, apply to Work specified in this Section.
1.2 SECTION INCLUDES
PART 1 - General
1.1 Related Documents
1.2 Section Includes
1.3 Lead-Free Requirement in Plumbing
1.4 Submittals
1.5 Maintenance
PART 2 - Products
2.1 Backflow Preventers
2.2 Air Vent
2.3 Trap Primers
PART 3 - Execution
3.1 Backflow Preventers
3.2 Trap Primers
3.3 Field Quality Control
1.3 LEAD-FREE REQUIREMENT IN PLUMBING
A. Lead content of brasses and other metals in plumbing material shall meet the NSF 61 Section Standards
for residential use and shall meet the Reduction of Lead in Drinking Water Act.
1.4 SUBMITTALS
A. Submit shop drawings under provisions of Division 1.
B. Submit shop drawings indicating materials, component description and dimensioned drawings.
C. Components shall include:
1. Air Vent
2. Backflow Preventers
3. Trap Primers
1.5 MAINTENANCE

42204.004 23 05 10-2 Plumbing Specialties
A. All reduced pressure principle backflow preventers, pressure vacuum breaker assembly and back
siphonage backflow vacuum breakers shall have a Maintenance Agreement.
B. Maintenance Agreement shall include providing a Performance Test and purging debris from inline
strainer.
C. Performance Test shall be performed at time of installation, immediately after repairs or alterations, and
one year from the initial test.
D. Forward performance test reports with fee to the authorities having jurisdiction for each installed cross
connection control assemblies.
E. See Backflow Preventers.
PART 2 - PRODUCTS
2.1 BACKFLOW PREVENTERS
A. Subject to compliance with requirements, provide product from the following manufacturers.
1. Ames Company, Woodland, CA
2. Febco, CMB Industries, Fresno, CA
3. Hersey Products Inc., Dedham, MA
4. Watts Water Products Division, North Andover, MA
5. Wilkins Division, Paso Robles, CA
B. Substitutions: Under provisions of Division 1
C. Air gaps shall comply with ANSI A112.1.2.
D. Pipe Applied Atmospheric Type Vacuum Breaker (ASSE 1001): furnish approved device as required by
code.
E. Hose Connection Vacuum Breaker (ASSE 1011): furnish approved device as required by code. This is
not required where a drain valve is only intended to drain pipes, tanks or equipment.
F. Backflow Preventer with Intermediate Atmospheric Vent (ASSE 1012): where required by code, furnish
approved backflow preventer with intermediate atmospheric vent, complete with indirect waste pipe to
drain and air gap.
1. Provide Hersey Products, Inc. BCP
G. Reduced Pressure Principle Backflow Preventer (ASSE 1013): as required by code, furnish approved
reduced pressure principle backflow preventer complete with control valves, test cocks, air gap at vent
port, and local waste pipe to drain.
1. Preventer size shall be pipeline size or as indicated on drawings.
2. For 2-1/2-inch or larger, furnish Watts 957 OSY, or reviewed equivalent.
3. For 2-inch or less, furnish Watts 919 QT-S, or reviewed equivalent.
4. Furnish with strainer at inlet and provide drain valve at strainer plug.
5. Provide Water Hammer Arrestor downstream of backflow preventer if preventer connects to quick
opening valves such as quarter-turn valves and solenoids.

42204.004 23 05 10-3 Plumbing Specialties
2.2 AIR VENT
A. Subject to compliance with requirements, provide product from the following manufacturers.
1. Amtrol
2. Bell & Gossett
3. Taco
4. Watts
B. Substitutions: Under provisions of Division 1
C. Provide size and performance as scheduled.
D. Brass body, stainless non-ferrous internal working parts
E. Float type
F. Vent opening shall vary with volume of air.
2.3 TRAP PRIMERS
A. Subject to compliance with requirements, provide product from the following manufacturers.
1. Watts Drainage USA, Inc., Richmond, VA
2. Zurn Industries, Inc., Erie, PA
B. Substitutions: Under provisions of Division 1
C. Pressure rating: 125 PSIG
D. Trap primer shall comply with ASSE 1018
E. Types:
1. Single drain installation: Watts A200, or equivalent
2. Multiple drain installation: Watts T20 with D20 distributor, or equivalent
.
PART 3 - EXECUTION
3.1 BACKFLOW PREVENTERS
A. Install in accessible location as required by Code.
B. Provide indirect waste pipe or local waste pipe where required. Provide drains, air gaps, air breaks and
traps as required. Provide visible access to all air gaps and air breaks.
C. Provide strainer upstream of reduced pressure principle backflow preventer and equip drain port with a
ball valve.
D. Provide an initial Performance Test for reduced pressure principle backflow preventers included in this
Work.

42204.004 23 05 10-4 Plumbing Specialties
E. Performance Test shall be performed at time of installation, immediately after repairs or alterations, and
one year from the initial test.
F. Performance Test shall conform to ASSE standards by qualified individuals.
G. All Performance Test results shall be furnished to owner in writing and shall be furnished to State if
required.
H. Locate in branch line between last two fixtures and addition locations as required.
3.2 TRAP PRIMERS
A. Install trap primers on all all floor drains and sanitary standpipe receptors.
B. Install per manufacturer's recommendations and in accordance with the Plumbing Code.
C. Locate trap primer near end of active water supply branch such as a branch to a water closet or lavatory.
3.3 FIELD QUALITY CONTROL
A. Only licensed plumbers shall perform installation.
B. Conduct performance test of all reduced pressure principle backflow preventers, pressure vacuum breaker
assembly and back siphonage backflow vacuum breakers as specified.
C. Confirm attachment of correct ASME tags.
D. Confirm attachment of all equipment nameplate data.
END OF SECTION 23 05 10

42204.004 22 05 35-1 Penetration Seals for Plumbing
SECTION 22 05 35
PENETRATION SEALS FOR PLUMBING
PART 1 - GENERAL
1.1 RELATED DOCUMENTS
A. Drawings and general provisions of Contract, including General and Supplementary Conditions and
Division 1 Specifications, apply to Work specified in this Section.
1.2 SECTION INCLUDES
PART 1 - General
1.1 Related Documents 1.2 Section Includes 1.3 Quality Assurance 1.4 Submittals
PART 2 - Products
2.1 Fire Stop Systems 2.2 Exterior Penetration Seals
PART 3 - Execution
3.1 Installation
1.3 QUALITY ASSURANCE
A. Codes and Standards: Comply with provisions of the following codes, specifications, agencies and
standards, except where more stringent requirements are shown, specified or applicable.
1. Standard Test Method for Fire Tests of Through-Penetration Fire Stops ASTM E814
2. Fire Hazard Classification: ASTM E84, NFPA 255 or UL 723
3. UL Fire Resistance Directory
4. Warnock Hersey (ITS) Directory of Listed Products
5. Factory Mutual
B. Regulatory requirements
1. State of Illinois Administrative Code Title 77 Public Health— Part 250 Hospitals, Section 2490
2. State of Illinois Administrative Code— Building Code
C. Field Supervision: Contractor shall maintain an experienced full-time supervisor who is at the jobsite
during times that Work is in progress.
1.4 SUBMITTALS
A. Submit the following data for each Fire Stop System:
1. Product manufacturer and type

42204.004 22 05 35-2 Penetration Seals for Plumbing
2. Design designation of testing agency
3. Shop Drawing of product as installed
4. Certificate of Conformance with required Referenced Standards.
5. Material Safety Data Sheets of all products.
B. Closure Submittals shall be furnished to the Architect.
1. Contractor shall provide a written statement certifying that penetrations through fire-resistive
construction were performed properly in accordance with product listing.
PART 2 - PRODUCTS
2.1 FIRE STOP SYSTEMS
A. Subject to compliance with requirements, acceptable manufacturers for Fire Stop Systems:
1. Hilti, Corp., Tulsa, OK
2. Minnesota Mining & Manufacturing Co. (3M), St. Paul, MN
3. ProSet Systems, Inc., Lawrenceville, GA
4. RectorSeal, Houston, TX
5. Specified Technologies, Inc. Somerville, NJ
6. Thunderline Link-Seal, Houston, TX
7. Substitutions: Under provisions of Division 1.
B. Subject to compliance with requirements, acceptable products of Fire Stop Systems:
1. Approved Hilti products such as FS-ONE, CP 640 series or CP-618
2. Approved 3M products such as wrap/strip (PPD series, FS-195 series), caulk (CP-25 series, FD-
150 series, or FB-2000 series) or moldable putty (MP-2 series)
3. Approved ProSet products with integral pipe support and/or pipe sleeve
4. Approved RectorSeal product such as Metacaulk
5. Approved Thunderline product such as Link-Seal, Model T, FD or FS
C. Fire Stop Systems:
1. Provide System with code-required applicable F-Rating and T-Rating.
2. Fire Stop Systems include pipe penetrations through or into fire resistive construction and include
insulation of penetrating pipe.
3. Follow manufacturer’s recommendations regarding proper selection of Fire Stop Systems for a
given fire-resistive assembly, pipe material, pipe function, and insulation of pipe.
2.2 EXTERIOR PENETRATION SEALS
A. Penetrations to the exterior:
1. Thunderline Link-Seal, Model C
2. 3M FD-150 Series caulk
3. Provide backing material when required by manufacturer.

42204.004 22 05 35-3 Penetration Seals for Plumbing
B. Penetrations through foundation to soil:
1. Thunderline Link-Seal, Model C
PART 3 - EXECUTION
3.1 INSTALLATION
A. Examine and prepare substrates as recommended by manufacturer.
B. Comply with manufacturer’s recommendations for minimum and maximum annular space.
C. Provide forming, damming or backing material as recommended by manufacturer.
D. Provide fasteners as recommended by manufacturer.
E. Fill voids or cavity with caulk or putty as recommended by manufacturer.
F. Final installation shall be within the limitations of the product listing.
G. Provide access for inspection and coordinate timing of inspections with progress of Work.
END OF SECTION 22 05 35

42204.004 22 05 53-1 Identification for Plumbing
SECTION 22 05 53
IDENTIFICATION FOR PLUMBING
PART 1 - GENERAL
1.1 RELATED DOCUMENTS
A. Drawings and general provisions of Contract, including General and Supplementary Conditions and
Division 1 Specifications, apply to Work specified in this Section.
1.2 SECTION INCLUDES
PART 1 - General
1.1 Related Documents 1.2 Section Includes 1.3 Quality Assurance
PART 2 - PRODUCTS
2.1 Identification
PART 3 - EXECUTION
3.1 Access 3.2 Pipe Labels 3.3 Equipment Nameplates 3.4 Buried Pipe 3.5 Valve Tags
1.3 QUALITY ASSURANCE
A. Codes and Standards: Comply with provisions of the following codes, specifications and standards,
except where more stringent requirements are shown, specified or applicable.
1. ANSI A13.1
B. Coordinate with Owner and Owner’s previous projects to continue from existing numbering sequence.
Designate equipment numbers in agreement with Owner.
PART 2 - PRODUCTS
2.1 IDENTIFICATION
A. Subject to compliance with requirements, provide product from the following manufacturers.
1. EMED Co.
2. Marking Services Incorporated.
3. Seton Name Plate Co.
4. W. H. Brady.
B. Substitutions: Under provisions of Division 1.

42204.004 22 05 53-2 Identification for Plumbing
PART 3 - EXECUTION
3.1 ACCESS
A. Installation shall allow access to view identification.
B. Pipe legends shall be located so as to be visible from floor or access panel opening.
C. Valve tags shall be accessible by building maintenance personnel when operating valve.
D. Laminated nameplates or equipment stencil shall be located so as to be visible from floor.
3.2 PIPE LABELS
A. Provide color coded legends on pipe or pipe insulation jacket.
1. Provide adhesive-backed vinyl pipe markers.
2. Provide color-coded arrow banding tape on both ends of marker wrapped entirely around pipe.
B. Identify each pipe with color coding, text, letter height and flow arrows in accordance with Referenced
Standard.
C. Locate legends every 30 feet, near control valves, where pipes pass through floors, walls, or ceilings, and
within view from access panels.
D. Provide identification on Plumbing and Fire Protection piping whether exposed or concealed. Piping
includes:
1. Cold Water
2. Fire Sprinkler
3. Hot Water
4. Hot Water Return
5. Medical Gases
6. Sanitary Drain
7. Sanitary Vent
E. For color coding purposes:
1. Regard non-potable water supply as inherently hazardous.
2. Regard hot water pipes as inherently hazardous if system temperature control is set above 100° F.
3. Regard any fuel pipes (natural gas, oil, acetylene, etc.) as inherently hazardous.
4. Regard compressed air pipes as inherently hazardous if system pressure control is set above 90
psig.
5. Medical gas color coding: follow NFPA 99.
3.3 EQUIPMENT NAMEPLATES
A. Furnish engraved nameplates for motor controllers, and small equipment. Furnish Setonply Style 2060
melamine plastic laminate.

42204.004 22 05 53-3 Identification for Plumbing
1. Furnish 1/16-inch thick.
2. Furnish with self-tapping screws unless otherwise indicated.
3. Secure plates to inline motors/pumps, small pressure vessels, water meter and backflow preventers
with brass chains.
4. Where screws are prohibited from penetrating electric boxes, secure plates with permanent
adhesive.
5. Text shall have 1-inch high lettering of plan mark or plan tag.
6. Text shall have ½-inch high lettering of applicable Section. For example, PLUMBING.
7. Equipment label includes the following:
a. Backflow Preventers
8. Medical Gas alarm panels, recessed valve boxes and gas outlets shall be identified with labels or
other identity furnished with such equipment in accordance with NFPA 99.
9. Label on motor and corresponding motor controller shall be identical.
3.4 BURIED PIPE
A. Subject to compliance with requirements, provide product from the following manufacturers.
1. Thor Enterprises Magnatec
2. Carlton
3. Marking Services Incorporated.
4. Seton Name Plate Co.
B. Application: non-metallic exterior gas, sewer and water pipes connected to utilities, municipal systems or
storm water management systems.
C. Furnish detectable underground warning tape.
1. 5.0 mil overall thickness
2. 6" width
3. 0.0035" thick aluminum foil core with polyethylene jacket bonded to both sides.
4. Tape identity: Color-coded with “caution” and name of service printed on face of tape.
D. Identify entire length with underground warning tape. Secure tape to pipe with method approved by tape
manufacturer. Extend tape to surface at building entrances, meters, hydrants and valve boxes. Verify
electrical continuity.
E. Where existing underground warning tape is broken during excavation, replace with new tape identifying
appropriate service. Securely splice to ends of existing tape.
3.5 VALVE TAGS
A. Provide valve identification tags of minimum 1-1/2-inch diameter, 19-gauge polished brass tag.
B. Identity shall be stamped or engraved with ½ inch high lettering.
C. Secure tag with brass chain or brass S-hook fastened to body of valve.

42204.004 22 05 53-4 Identification for Plumbing
D. Valve Identification shall be required on all valves, including control valves, except:
1. Relief valves
2. Check valves
3. Plumbing fixture shut-offs
4. Equipment shut-offs
5. Drain valves near discharge opening
6. Equipment valves not installed by contractor
E. Valve schedule shall be a chart and a floor plan showing valve location, the tag identity and the building
area that the valve controls. Secure valve schedule with plastic cover and plywood backing to a wall in
an appropriate mechanical room of each floor or as directed by Architect. Furnish two schedules without
cover to Architect.
END OF SECTION 22 05 53

42204.004 22 07 00-1 Plumbing Insulation
SECTION 22 07 00
PLUMBING INSULATION
PART 1 - GENERAL
1.1 RELATED DOCUMENTS
A. Drawings and general provisions of Contract, including General and Supplementary Conditions and
Division 1 Specifications, apply to Work specified in this Section.
1.2 SECTION INCLUDES
PART 1 - General
1.1 Related Documents
1.2 Section Includes
1.3 Work Not Included
1.4 Quality Assurance
1.5 General
1.6 Submittals
PART 2 - Product
2.1 Acceptable Manufacturers
2.2 Pipe Insulation
2.3 Cement
2.4 Mastic
PART 3 - Execution
3.1 Examination
3.2 Pipe Insulation
3.3 Protection
1.3 WORK NOT INCLUDED
A. Factory Insulated Equipment
1.4 QUALITY ASSURANCE
A. Codes and Standards: Comply with provisions of the following codes, specifications and standards,
except where more stringent requirements are shown, specified or applicable.
1. Fire Hazard Classification: ASTM E84, NFPA 255 or UL 723
2. Thermal Insulation Cement: ASTM C195
3. Moisture Vapor Transmission: ASTM E96, Method A
4. Thermal Conductivity: ASTM C335
B. Regulatory requirements
1. State of Illinois Administrative Code Title 77 Public Health— Part 250 Hospitals, Section 2490

42204.004 22 07 00-2 Plumbing Insulation
2. State of Illinois Administrative Code— Building Code
1. State of Illinois Administrative Code Title 77 Public Health— Part 890 Plumbing Code
C. Field Supervision: Contractor shall maintain an experienced full-time supervisor who is at the jobsite
during times that Work is in progress.
1.5 GENERAL
A. Fire hazard classification:
1. Fire hazard rating of final assembly, including insulation, adhesives, jacket or facing, coatings,
mastics, tapes and cloths, as tested by standard, shall not exceed 25 flame spread and 50 smoke
developed.
2. All insulating materials or their containers shall have a label indicating that they do not exceed this
fire hazard classification.
B. Materials shall be physically and chemically stable, impervious to moisture barrier and resistant to air
transmission, vermin, insects, rot, odor and decay.
1.6 SUBMITTALS
A. Submit shop drawings under provisions of Division 1.
B. Submit shop drawings indicating materials, component description and dimensioned drawings.
C. Components shall include:
1. Pipe insulation
2. Equipment insulation
3. Fasteners
4. Joint Materials/Cements/Mastics/Tapes
5. Insulation Cover Material
PART 2 - PRODUCT
2.1 ACCEPTABLE MANUFACTURERS
A. Armstrong
B. Certainteed
C. Childers
D. Foster
E. Knauf
F. Owens-Corning Fiberglass
G. US Gypsum
2.2 PIPE INSULATION

42204.004 22 07 00-3 Plumbing Insulation
A. Insulation for pipes located inside shall be Owens-Corning Fiberglas SSL-II pipe insulation with all-
service vapor barrier jacketing sealed by adhesive lap-joints.
B. Insulation for pipes located outside shall be CellulaR glass insulation and shall be Pittsburg-Corning
Foamglas pipe insulation with .016 aluminum jacket with Pittsburg seam, butt joint seams and matching
fitting covers.
C. Insulation conductivity of all finished installations shall not exceed 0.27 Btu-inch per hour-square feet-
degrees F, 150° F mean temperature measured in accordance to ASTM C335.
D. Moisture vapor transmission of jacket or other covering shall not exceed 0.02 perms measured in
accordance to ASTM E96, Method A.
E. Furnish PVC covers on all fittings.
2.3 CEMENT
A. Shall comply with ASTM C195, Mineral Fiber Thermal Insulation Cement
B. Mastic shall meet general fire classification.
2.4 MASTIC
A. Vapor barrier mastics shall be polymeric resin.
B. Mastic shall meet general fire classification.
C. Moisture vapor transmission of jacket or other covering shall not exceed 0.02 perms measured in
accordance to ASTM E96, Method A.
PART 3 - EXECUTION
3.1 EXAMINATION
A. Verify site is ready for insulation.
B. Verify pipe, duct or equipment surfaces are ready for insulation in accordance with insulation
manufacturer’s recommendations.
C. Confirm with pipe fitter or plumber that pipes have been tested for leaks and defects, if any, have been
corrected.
D. Report defects or deficiencies to Architect in writing.
E. Await Architect's decision on appropriate adjustment before proceeding.
F. The Architect reserves the right before any particular Work is started to slightly change location of
equipment, if found necessary, without additional payment to the Contractor.
G. Beginning of installation means acceptance of conditions.
3.2 PIPE INSULATION

42204.004 22 07 00-4 Plumbing Insulation
A. Insulation shall be installed in accordance with manufacturer's recommendations and as stated herein. All
pipe joints shall be thoroughly tested, cleaned, dry, and inspected prior to applying insulation.
B. Furnish PVC covers on all fittings, secured by serrated-shaft stainless steel tacks.
C. Omit insulation on sanitary, storm and cold water encapsulated in masonry, concrete or soil. Omit
insulation on exposed, chrome-plated piping except as required for ADA requirements.
D. Insulate domestic cold water pipes.
1. Thickness: 1-inch
E. Insulate horizontal portions of storm water.
1. Thickness: ½-inch
F. Insulate other pipes according to the following table:
Minimum Insulation Thickness for Piping, Inches
Water
Design
Operating
Temp.
Range, °F.
Nominal Pipe Diameter (in.) Insulation Conductivity
Runouts
<2-1/2,
<12 ft.
<1-1/4
1-1/4
to 2
2-1/2
to 4
5 and 6
>6
Conductivity
Range
Btu•in./
(h•ft2•°F.)
Mean
Rating
Temp.
°F.
Plumbing Domestic Supply
105 and
greater
0.5 1.0 1.0 1.5 1.5 1.5 0.24 - 0.28 100
G. Insulate all fittings and valves with molded fiberglass fitting or with fiberglass blanket. Thickness shall be
equal to that of adjoining pipe insulation.
H. Vapor barrier jacket cover shall overlap adjoining cover in accordance with manufacturer’s
recommendations.
I. Provide 16-gage galvanized steel saddles under rigid insulation at pipe supports.
J. For insulating various large valves and similar custom applications, use standard pipe insulation sections,
rigid block insulation, fiber glass blanket or fabric reinforced insulation cement. Cover with PVC fitting
cover or protect with vapor seal mastic and fabric cover. Seal all joints.
K. All unions and flange fittings shall be insulated in such a manner that the insulation may be neatly
removed or replace for pipe servicing.
3.3 PROTECTION
A. Protect insulation from water damage during installation period.
B. Protect facing from mechanical damage during completion of building construction.
END OF SECTION 22 07 00

42204.004 22 10 00-1 Plumbing Piping
SECTION 22 10 00
PLUMBING PIPING
PART 1 - GENERAL
1.1 RELATED DOCUMENTS
A. Drawings and general provisions of Contract, including General and Supplementary Conditions and
Division 1 Specifications, apply to Work specified in this Section.
1.2 SECTION INCLUDES
PART 1 - General
1.1 Related Documents 1.2 Section Includes 1.3 Work Furnished But Installed Under Other Sections 1.4 Related Work 1.5 Submittals
PART 2 - Products
2.1 Acceptable Manufacturers 2.2 Piping 2.3 Sanitary and Vent 2.4 Water Supply Piping 2.5 Valves 2.6 Access Panels 2.7 Cleanouts 2.8 Floor Drains
PART 3 - Execution
3.1 Installation 3.2 Excavating and Backfilling 3.3 Cutting and Patching 3.4 Supports and Anchors 3.5 Joint Preparation 3.6 Joints 3.7 Dielectric Isolators 3.8 Escutcheons 3.9 Valves 3.10 Access Panels 3.11 Cleanouts 3.12 Drains 3.13 Flashing
1.3 WORK FURNISHED BUT INSTALLED UNDER OTHER SECTIONS
A. Access panels
1.4 RELATED WORK

42204.004 22 10 00-2 Plumbing Piping
A. In addition to the requirements of this Section, comply with the appropriate requirements of the following
Divisions or Sections:
B. Fire Wall Penetrations: Section 22 0535
C. Identification: Section 22 0553
D. Insulation: Section 22 0700
E. Roof Membrane: Division 7
1.5 SUBMITTALS
A. Submit shop drawings under provisions of Division 1.
B. Submit shop drawings indicating materials, component description and dimensioned drawings.
C. Components shall include:
1. Cleanouts
2. Floor Drains
3. Hub Drains
4. Piping-Waste and Vent
5. Piping-Supply
6. Roof Drains
7. Valves
PART 2 - PRODUCTS
2.1 ACCEPTABLE MANUFACTURERS
A. Couplings for hubless cast iron joints: Subject to compliance with requirements, provide acceptable
product by one of the following manufacturers:
1. Hi-Torq 80, Clamp-All Corporation, Haverhill, MA
2. Husky SD2000, Anaco, Corona, CA
B. Drains and Cleanouts: Subject to compliance with requirements, provide by one of the following
manufacturers:
1. Josam Company, Michigan City, IN
2. J. R. Smith Manufacturing Company, Montgomery, AL
3. Watts Drainage, Inc., Richmond, VA
4. Zurn Industries, Inc., Erie, PA
C. Valves: Subject to compliance with requirements, provide by one of the following manufacturers:
1. Hammond
2. Jomar, Warren, MI
3. Milwaukee Valve, Milwaukee, WI

42204.004 22 10 00-3 Plumbing Piping
4. Nibco Inc., Elkhart, IN
5. Victaulic
6. Watts
D. Valves, Balancing: Subject to compliance with requirements, provide by one of the following
manufacturers:
1. Amtrol Inc., West Warwick, RI
2. Bell & Gossett, Morton Grove, IL
3. Flow Design Inc., Dallas, TX
4. Nibco Inc., Elkhart, IN
5. Taco, Inc., Cranston, RI
6. Watts Water Products Division, North Andover, MA
E. Substitutions: Under provisions of Division 1.
2.2 PIPING
A. Pipe fittings shall be approved for installation with the piping material used and conform to the respective
pipe standards.
B. Water distribution and service piping shall have a working pressure not less than 150 psi and shall
conform to NSF 61.
C. Wetted surfaces of all piping (pipe, fittings and valves) conveying potable water shall be lead-free. Lead-
free shall mean 0.25 percent lead content by weight or less as defined in federal regulations. Piping shall
be marked lead-free by legible means.
D. Specified material indicates a minimal requirement.
2.3 SANITARY AND VENT
A. Storm drainage, sanitary waste, indirect waste and all vent piping shall conform to these requirements.
B. Sanitary tees shall be provided for fixture drain connections only. Wye fittings shall connect drainage
branches.
C. Radius of horizontal drainage elbows shall be short or long sweep, as designated in ASTM A74, extra
long turn, as designated in Grinnell catalogue PF-88.
D. Above ground:
1. Hubless cast iron pipe and fittings: latest edition of ASTM A888 and CISPI 301, NSF certified,
with sleeve gasket joints ASTM C564, and couplings C1540.
2. Galvanized steel pipe, couplings, nipples: less than 3-inch diameter, ASTM 53. Cast iron
drainage fittings, threaded, ANSI B16.4 or B16.12 and ASTM A126.
3. Copper ASTM B42 or B88, Type K, L, M or DWV hard drawn with sweat joint fittings, ASTM
B32 solder.
4. Materials for fixture connections to cast iron or steel piping: ABS nipples not longer than 4 inches
on wall-outlet water closets and PVC nipples not longer than 3 inches on trap adaptors. Directly
connected copper or brass with cast iron or steel is not permitted.

42204.004 22 10 00-4 Plumbing Piping
E. Below ground:
1. Hubless cast iron pipe and fittings: latest edition of ASTM A888 and CISPI 301, NSF certified,
with sleeve gasket joints ASTM C564, couplings C1540, and polyethylene wrap ASTM A674.
2.4 WATER SUPPLY PIPING
A. Stainless steel, 1/2-inch through 4-inch: ASME B36.19M, ASTM A270, austenitic 18-8 stainless steel,
Schedule 5S pipe; press fittings with mechanical compression joints, stainless steel specialty fitting,
ethylene-propylene diene monomer (EPDM) O-ring, temperature range up to 210° F; Viega ProPress and
ProPress XL-S, Victaulic, or equal.
B. Copper, 2-inch and less: ASTM B88, Type L hard drawn, with ASTM B75 wrought copper solder joint
fittings, ANSI B16.22, or lead-free cast bronze solder joint fittings, ANSI B16.18
C. Copper press fitting, 1/2-inch through 4-inch: fittings with mechanical compression joints, specialty
wrought copper fittings and lead-free cast bronze fittings compatible with ANSI B16.22; cast bronze
fittings of wall thickness comparable with ANSI B16.18, ethylene-propylene diene monomer (EPDM) O-
ring, temperature range up to 210° F
D. Copper, 2-inch and greater: ASTM B88, Type L hard drawn, with roll groove joints
1. Coupling: Ductile Iron ASTM A536 Grade 65-45-12
2. Groove Joint Fastener: Bolts and Nuts ASTM A183
3. Groove Joint Gasket: ethylene-propylene diene monomer (EPDM) meeting properties of ASTM
D2000 and temperature range up to 230° F
E. Galvanized steel pipe nipples: Schedule 40, ASTM 53. Cast iron fittings ASTM A126, threaded, ANSI
B16.4 Class 125, or malleable iron fittings ASTM A197, threaded, ANSI B16.3 Class 150. Nipples,
threaded ASTM A53 Grade B Type E
2.5 VALVES
A. Manufacturer's name and valve number shall be cast into body of valve.
B. All valves, except balancing valves and effluent valves, shall be of one manufacturer.
C. Pipe connections to valves shall be limited to those specified for piping.
D. Manufacturing Standards:
1. MSS SP-67 Butterfly Valves
2. MSS SP-70 Iron Gate Valves
3. MSS SP-110, Ball Valves
4. MSS SP-139 Bronze Gate Valves and Check Valves
5. NSF 61-8 including Annex F and G
E. Product listing for lead-free compliance
1. NSF 372
F. Ball valves: Nibco T580-80-EL-LF
1. Design: two piece, end entry, bronze threaded
42204.004 22 10 00-5 Plumbing Piping
2. Full-port for sizes up to 1-inch, conventional port for 1-1/4-inch and larger
3. Rated maximum working pressures: 600 psig at 150° F, 150 psig at 350° F
4. Seats: glass-reinforced polytetrafluoroethylene (PTFE).
5. Ball: lead-free silicon bronze alloy UNS C69300
6. Body: lead-free silicon bronze alloy UNS C87600
7. Stem: lead-free silicon bronze alloy UNS C69300
8. Discretionary connections: male or female threads, single union end, or press fitting
9. Furnish valve extension.
G. Check valves: Nibco T413-Y-LF
1. Horizontal swing
2. ANSI Class 150
3. Seats: polytetrafluoroethylene (PTFE)
4. Bonnet, body and disc hanger: lead-free silicon bronze alloy UNS C87850
5. Disc holder: lead-free silicon bronze alloy UNS C69300
6. Discretionary connections: male or female threads, single union end, or press fitting
H. Drain valves: Ball valve or hose bibb. Furnish with ¾-inch hose thread.
I. Balancing Valves:
1. Rated maximum working pressures: 600 psig at 250° F, 150 psig at 350° F
2. Bell & Gossett Models CB-LF, Circuit Setter Plus
3. Nibco 1709-LF or 1710-LF globe style
4. Taco CS-LF Series Circuit Setter
5. Watts CSM-61-M1-LF
2.6 ACCESS PANELS
A. Furnish access panels for all cleanouts, valves or other equipment requiring adjustment or servicing
concealed within walls, furred spaces or ceilings. Panels shall be minimum size of 18 x 18" or of size to
provide adequate access. Panels installed in fire rated walls or floors shall match fire rating.
B. Panels shall be Milcor by Inland Steel Products Company or equivalent as reviewed by the Engineer.
C. Panels shall be steel construction with screwdriver cam locking devices.
D. Refer to room finish schedule on Architectural drawings for location of applicable wall and ceiling
surfaces and finishes.
E. Follow manufacturer's published recommendations when providing access panels to service specific wall
and ceiling styles.
F. Access panels in required fire-rated walls shall be U.L. listed for use in such assemblies. They shall be
self-closing and latching.
2.7 CLEANOUTS

42204.004 22 10 00-6 Plumbing Piping
A. All exposed components shall be metallic nickel bronze or stainless steel.
B. FCO - J.R. Smith 4021 series, nickel bronze flush with finish floor. Furnish carpet markers as required.
C. WCO - Exposed or in chases, J.R. Smith 4511 series.
D. WCO - On finished walls, J.R. Smith 4531 series or 4422 series with stainless steel cover.
E. WCO - For PVC pipe, Section Freedom Plastics cleanout tee with plug.
F. YCO - J.R. Smith 4250 series with frost sleeve.
G. Metallic plugs shall be brass.
2.8 FLOOR DRAINS
A. Revise product model to match pipe material. For example, add appropriate suffix for a no-hub pipe
connection.
B. Provide trap primer connection where indicated.
C. Provide bottom dome strainer where indicated.
PART 3 - EXECUTION
3.1 INSTALLATION
A. Contractor shall cooperate with the other contractors so that construction may proceed without hindrance.
Confer with other contractors regarding any Work that may affect this Work and arrange schedule so that
components shall be installed in a natural sequence. Contractor shall be responsible for grading, fitting,
joining or adjusting of his Work to all adjacent Work of other contractors.
B. Precedence in installing fixtures and piping in close quarters shall be established by Architect and no
contractor has exclusive right of way in installing his Work.
C. Arrange and install all piping in straight lines and at uniform slope throughout.
D. Conceal all piping wherever possible.
E. Bring stub extensions as close to fixture connection as conditions shall permit.
F. Install all piping so that it can be properly drained.
G. Provide swing joints on water supplies to fixtures, to equipment, to risers and to branches.
H. Hot water return system.
1. Minimum pipe size ½-inch
2. Balance valve on each branch, set flow to ¼-GPM and to amount shown on drawings.
3. Balance valve at pump, set flow to amount indicated on drawing schedule.
4. Maximum branch length without hot water return: 25 feet.
I. Storm piping minimum pitch: 1/8-inch unless otherwise indicated on drawings.

42204.004 22 10 00-7 Plumbing Piping
J. Sanitary piping minimum pitch:
1. Pipe diameter up to and including 2-inch: ¼-inch per foot.
2. Water closet drain pipe: ¼-inch per foot.
3. Pipe diameter 3-inch and larger: 1/8-inch per foot.
K. All sewer piping installed below high water table shall be properly anchored against buoyancy, during no
flow, either by its own weight or by suitable ballast material fastened securely against pipe. All joints
shall remain sealed during times of high water table.
L. Support all piping throughout neatly and suitably in an approved manner to allow for ample expansion
and contraction.
M. Provide seismic requirements to local Code where required.
N. Anchor to concrete structure by means of concrete inserts or fasteners as recommended by manufacturer
of insert. Provide and set all concrete inserts in cooperation with the Concrete Contractor before concrete
is poured.
O. Anchor to other structural members with appropriate clamps or special devices as recommended by
manufacturer of device.
P. Where pipes are grouped, install trapeze hangers with "U" spacers to hold pipe alignment.
Q. Anchors shall not be attached directly to steel decks.
R. Support vertical pipelines with wrought iron or steel pipe clamps at beams or floors.
S. All anchors, hangers and supports shall be designed to meet local structural requirements.
T. Perforated iron shall not be used on any part of the Plumbing system.
3.2 EXCAVATING AND BACKFILLING
A. Excavate as required to lay all water supply pipes, drains, vents and sewers. All trenches shall be left
open until Plumbing Inspector has approved all piping. Barricade in accordance with governing
ordinances.
B. Pipe bedding: All new pipes shall be laid on a bedding with depth below pipe invert not less than 3
inches, with width of trench not less than 12 inches, and with support up around sides of pipe not less
than 2 inches (3 inches for PVC pipe material).
1. Bedding material shall consist of ASTM C33 Size 67.
2. Care shall be exercised to assure that pipe does not rest solely on bells or flanges of pipe but is
uniformly supported along its entire length.
3. For unstable trench bottoms, provide a longitudinally reinforced concrete slab on minimally 3-inch
thick base of bedding material. Slab shall be not less than 3 inches thick.
C. Pipe cover: After pipes are laid and approved, provide pipe cover material to a minimum elevation of 3
inches above top of pipe.
1. Pipe cover material includes fill material around and over the pipe and above the pipe bedding.

42204.004 22 10 00-8 Plumbing Piping
2. Pipe cover material shall consist of select fill, drainage fill or crushed stone as specified in
Backfilling Division 2 or unwashed bank-run sand or crushed bank-run gravel generally consisting
of substantially uniform sizes of durable particles ranging from fine to 1 inch.
D. Backfill: Provide backfill material up to grade of general area adjacent to trench.
1. Backfill material: crushed stone.
2. Compact to a minimum 95 percent Standard Proctor Density.
3.3 CUTTING AND PATCHING
A. Provide cutting or sleeves through walls, roof, floors and ceilings as necessary to install piping. Patch as
necessary to restore construction. See Division 1. Provide flashing in accordance with Division 7.
B. Coordinate schedule of cutting and patching with General Contractor to avoid cutting finish surfaces.
C. Where Cutting is performed in existing construction, restore construction to original integrity. Restore
finish as specified in Divisions 1 and 9. Provide dust control with performance requirements as specified
in Division 23 for Demolition.
D. Maintain fire-rating by providing appropriate Penetration Seals.
E. Patch openings created by removed pipes that are not re-used by new piping unless wall or floor is
entirely removed.
F. Provide openings, cutting, and sleeves as necessary to permit installation of piping or any other part of the
Work under this Section.
1. Make all arrangements with various contractors for any special framing or chases.
2. Accurately locate all openings and core drill openings or provide sleeves.
G. Openings shall not be less than one inch larger than outside diameter of pipe or pipe insulation. Sleeves
shall be of sufficient length to pass through entire floor or wall construction, including plaster or drywall.
1. Sleeves in walls shall be flush with finished wall surface.
2. Sleeves in floors shall extend above finish floor by 2 inches except concrete floors cast on grade.
H. Where holes must be cut through reinforced concrete, they shall be carefully core drilled to avoid spalling
and unnecessary damage or weakening of any structural member. Chopping or breaking out shall not be
permitted.
1. Obtain Architect's approval before cutting or drilling through concrete or masonry in place, and
then proceed as directed.
2. Location of coring shall be reviewed and approved by the Structural Engineer prior to coring.
Then proceed as directed.
I. Seal space between pipe and opening with Penetration Seal.
J. When Contractor neglects to provide accurate and sufficient information for openings on a timely basis
and this results in damage to finish Work, Contractor shall restore finish Work at no additional cost, as
directed by the Architect, in accordance with Divisions 1 and 9.
K. Flashing for roof penetrations, including vent terminals and roof drains, shall be compatible with roof
system.

42204.004 22 10 00-9 Plumbing Piping
3.4 SUPPORTS AND ANCHORS
A. Piping support system, including anchors, clamps, rods, concrete inserts, brackets, trapeze bar, and any
framing, shall be of adequate size.
B. Component capacity:
1. Mild steel, non-threaded: Weight of pipe and water shall not exceed load capacity as indicated by
manufacturer for dynamic loading.
2. Other material: Weight of pipe and water shall not exceed 20 percent of breaking load of support
system material.
C. The design of hangers shall prevent bending in the support rod whether from swivel-type fittings or other
similar means.
D. The design of the support shall maintain engagement of the pipe from lateral displacement whether by
secure saddle, clamp or other similar means.
E. Supports of bare copper pipe shall be copper or copper-plated. Provide isolation between copper pipe and
steel stud.
F. Exposed finish of ferrous metals shall be galvanized or painted.
G. Insulated pipes shall be supported with galvanized steel 10-inch long saddles placed between the
insulation jacket and the pipe support.
H. The spacing and hanger rod size of horizontal pipe supports for steel and copper pipes shall be provided
at elbows, ends of branches and shall not exceed the following:
PIPE SIZE (Nominal Inch) HANGER SPACING (Feet) ROD SIZE (Inch)
Up to ¾” 5 3/8
1 & 1 ¼ 6 3/8
1 ½ & 2 10 3/8
3 12 ½
4 14 5/8
5 16 5/8
6 17 ¾
8 19 7/8
10 22 7/8
I. The spacing of horizontal pipe supports for plastic pipes shall be provided at elbows, ends of branches
and spaced at not more than 4 feet apart. Rod sizes shall be the same as steel pipes.
J. The spacing of horizontal pipe supports for cast iron pipes shall be provided at elbows, ends of branches
and within 18 inches of joints. Spacing shall be alternating joints for runs less than 4 feet. Spacing shall
be not more than 10 feet apart and at each joint for runs greater than 4 feet. Rod sizes shall be the same
as steel pipes.
K. Vertical pipe supports shall be located at each floor or every other floor and spaced not more than as
follows:
Material Floor Spacing, feet
cast iron each floor 15

42204.004 22 10 00-10 Plumbing Piping
steel every other 30
copper each floor 10
L. Weight of pipe shall not bear on equipment, fixtures, and walls or on another pipe.
3.5 JOINT PREPARATION
A. All joints shall be clean. Material shall be cut to length and square.
B. Pipe or tube shall be blown clean with compressed air or with other industry accepted method.
C. Remove items sensitive to heat prior to welding, soldering or brazing. This includes, but is not limited to,
solenoid coils, valve elastomers, and expansion tank bulbs.
D. Plug openings if not immediately joined.
3.6 JOINTS
A. Compression joints: Install compression gaskets and hubless joints as per manufacturer's
recommendations.
B. Hubless cast iron elastomeric joint: Coupling with ASTM C564 sleeve gasket, stainless (AISI 300 series)
fasteners, bands and shield, and design complying with ASTM C1540.
C. Provide bracing at joints in conformance with the Cast Iron Soil Pipe & Fittings Handbook as published
by CISPI.
D. Shielded transition coupling: stainless steel material between cast iron and other material, ASTM C564
material, above ground only.
E. Threaded: Thread conforming to ASME B1.20.1, made tight with Teflon tape. Paint all exposed with
Rust-Oleum #769, thoroughly clean and ream all pipe after cutting.
F. Mechanical joint, push-on type: join pipe in accordance with referenced standard and manufacturer.
G. Flange joint: Limit flanged joints to equipment connections and valves.
H. Sweat: ASTM B32 95/5 tin-antimony solder and NSF-approved flux for Domestic Water Piping. Solder
shall be lead-free for Domestic Water Piping, meaning a chemical composition of 0.2 percent lead or less.
For other joints, ASTM B32 50/50 tin/lead solder. Joining method shall comply with ASTM B828.
I. Press fitting: hydraulically pressed in accordance with instructions of Viega or Ridge Tool Co., Victaulic.
Furnish material and join piping as recommended by fitting manufacturer.
3.7 DIELECTRIC ISOLATORS
A. Dielectric Isolators shall be so designed that non-ferrous metal piping cannot come in contact with ferrous
materials.
B. Ferrous material shall be isolated by the use of Teflon or nylon made up in the form of threaded couplings
or insulating gaskets with bolted sleeves and washers for standard flanged connection.
C. Alternatively, furnish Victaulic dielectric coupling.

42204.004 22 10 00-11 Plumbing Piping
D. Dielectric unions shall only be permitted in mechanical rooms.
E. Isolator shall be rated for 100 psig working pressure at 250° F.
3.8 ESCUTCHEONS
A. Provide escutcheons on all pipe passing through finished floors, walls, and ceilings with outside diameter
sufficient to cover sleeved opening and inside diameter to fit snugly with pipe or pipe insulation jacket.
B. All escutcheon plates shall be metal and chrome plated.
3.9 VALVES
A. Size of Valve shall be same as pipe size unless otherwise indicated.
B. All valves 2" and smaller shall be ball valves. Valves over 2 inches shall be butterfly valves.
C. Orient the position stem of valve at top or side of valve body.
D. Provide Full-Port Ball Valve With Drain as supply stop for hose bibs.
E. Place swing check valves on horizontal and up-flowing vertical pipes only.
F. Provide ¾” ball valve as a drain valve in all low portions of supply piping. Provide Standard 3/4" hose
thread and cap on drain outlet.
G. Balancing valves:
1. Provide straight length of pipe upstream and downstream of valve as recommended by
manufacturer.
2. Verify that pipes are full and all air is eliminated.
3. Adjust flow to amount as indicated on drawings after hot water system with pump are in
operation. Follow valve manufacturer’s recommendations to make adjustments.
4. Use manufacturer’s recommended equipment, tables and sizing scales to measure flow through
each valve.
5. Set memory marker or stop to valve setting when balancing is complete. Valves shall be ready for
service shut-down and then re-opened to set position without requiring rebalancing.
H. Valves for branches: install at each branch off risers and at other branches as required.
I. Provide valves on supply to all equipment and bypass valves where required.
3.10 ACCESS PANELS
A. Locate panels as necessary for plumbing access.
B. Deliver access panels to General Contractor at job site for installation by the General Contractor, where
and as directed by this Contractor.
3.11 CLEANOUTS
A. Provide cleanouts at the base of every stack, at every change of direction greater than 45°, and in straight
runs at an interval as required by Code.

42204.004 22 10 00-12 Plumbing Piping
B. Install floor cleanouts secure to floor structure, level and flush with finished floor.
C. FCO - Extend pipe to floor and provide cleanout. Install carpet markers for all carpeted finished areas.
D. WCO – For finished walls, provide cleanout tee with stainless steel cover.
E. WCO – As an alternate in finished areas, provide cleanout tee and an access panel.
F. YCO - On yard cleanouts, provide cleanout with frost sleeve. Provide concrete collar.
3.12 DRAINS
A. Drain size shall be as indicated on drawings.
B. Provide P-trap with seal depth as required by Code. Trap shall be the same size as drain.
C. Set tops level and at height to allow proper pitch of floor toward drain.
D. Secure waterproof membrane to flashing flange in all areas where membrane is installed.
E. Provide strainers on floor drains, hub drains and roof drains. Omit hub drain strainer if local code allows.
Provide bucket or dome strainer in bottom of floor drain if top strainer is modified or removed to accept
local waste pipe or indirect waste pipe.
F. Coordinate exact location of all drains to be provided for all equipment with the respective Contractor
before installation.
3.13 FLASHING
A. Provide appropriate flashing as required.
B. Flashing for roof penetrations, including vent terminals and roof drains, shall be compatible with the roof
system. See Division 7 for product and execution.
END OF SECTION 22 10 00

42204.004 22 40 00-1 Plumbing Fixtures
SECTION 22 40 00
PLUMBING FIXTURES
PART 1 - GENERAL
1.1 RELATED DOCUMENTS
A. Drawings and general provisions of Contract, including General and Supplementary Conditions and
Division 1 Specifications, apply to Work specified in this Section.
1.2 SECTION INCLUDES
PART 1 - General
1.1 Related Documents 1.2 Section Includes 1.3 Related Work 1.4 Submittals
PART 2 - Products
2.1 Acceptable Manufacturers 2.2 Fixture Materials 2.3 Supply and Trap Insulation 2.4 Lavatory - L-1 2.5 Sink S-1
2.6 Sink S-2
2.7 Shower SH-1
2.8 Mop Basin B-1
2.9 Clinic Sink CS-1
2.10 Water Closet - WC-1 2.11 Escutcheons
2.12 Hand Sink HS-1
PART 3 - Execution
3.1 Examination 3.2 Access 3.3 Installation 3.4 Accessibility 3.5 Wall Carriers 3.6 Tolerances 3.7 Field Quality Control 3.8 Protection 3.9 Cleaning
1.3 RELATED WORK
A. In addition to the requirements of this Section, comply with the appropriate requirements of the following
Divisions or Sections.
B. Backflow Preventers: Section 22 0510

42204.004 22 40 00-2 Plumbing Fixtures
C. Electrical Connections: Section 22 0000 and Division 26
D. Fixture Caulking: Division 7
1.4 SUBMITTALS
A. Submit shop drawings under provisions of Division 1.
B. Submit shop drawings indicating materials, component description and dimensioned drawings.
C. Components shall include:
1. Fixtures
2. Faucets
3. Flush Valves
4. Supplies and Stops
5. Traps and Strainers
6. Wall Carriers
7. Supply and Trap Insulation
8. Spout Outlets or Aerators
D. Drawings shall include wall carrier design, fastener size and fastener depth in building structure.
PART 2 - PRODUCTS
2.1 ACCEPTABLE MANUFACTURERS
A. Faucets: Subject to compliance with requirements, provide by one of the following manufacturers:
1. American Standard Inc., Trenton, NJ
2. The Chicago Faucet Company, Des Plaines, IL
3. Kohler Co., Kohler, WI
4. MAC Faucets LLC, Paramount CA
5. Moen Commercial, North Olmsted, OH
6. Sloan Valve Company, Franklin Park, IL
7. Speakman Company, Wilmington, DE
8. T & S Brass and Bronze Works, Inc., Travelers Rest, SC
9. Technical Concepts, Mundelein, IL (sensor only)
10. Zurn Industries Inc., Jamestown, NY
B. Fixtures, Vitreous China: Subject to compliance with requirements, provide by one of the following
manufacturers:
1. American Standard Inc., Trenton, NJ
2. Kohler Co., Kohler, WI
3. Sloan Valve Company, Franklin Park, IL

42204.004 22 40 00-3 Plumbing Fixtures
4. Crane, Piscataway, NJ
5. Zurn, Falconer, NY
C. Flush Valves: Subject to compliance with requirements, provide one of the following product series from
the corresponding manufacturer:
1. Aquavantage™ AV by Zurn Industries Inc., Sanford NC
2. Manual Water Closet Flushometer Valve by Toto USA Inc., Orange, CA
3. Royal® by Sloan Valve Company, Franklin Park, IL
D. Supplies and Drains: Subject to compliance with requirements, provide by one of the following
manufacturers:
1. Brass Craft Manufacturing Company, Novi, MI
2. Elkay Manufacturing Company, Oak Brook, IL
3. Engineered Brass Company, Franklin Park, IL
4. The Keeney Manufacturing Co., Newington, CT
5. McGuire Manufacturing Co., Inc. Cheshire, CT
6. Zurn, Falconer, NY
E. Supply And Trap Insulation: Subject to compliance with requirements, provide by one of the following
manufacturers:
1. Brocar Products
2. McGuire Manufacturing Co., Inc. Cheshire, CT
3. Truebro, Inc., Ellington, CT
F. Toilet Seats: Subject to compliance with requirements, provide by one of the following manufacturers:
1. Bemis Manufacturing Co., Sheboygan Falls, WI
2. Church Seat Company, Sheboygan Falls, WI
3. Olsonite Corp., Newnan, GA
G. Wall Carriers: Subject to compliance with requirements, provide by one of the following manufacturers:
1. J. R. Smith Manufacturing Company, Montgomery, AL
2. Watts Drainage, Inc., Richmond, VA
3. Josam Company, Michigan City, IN
4. Zurn Industries, Inc., Erie, PA
H. Substitutions: Under provisions of Division 1.
2.2 FIXTURE MATERIALS
A. Plumbing system shall be free from cross connections and of such design that back siphonage is
impossible.
B. Manufacturer's trademark or name shall be inconspicuous.

42204.004 22 40 00-4 Plumbing Fixtures
C. Mixing valves for individual or groups of fixtures shall have check valves. Check valves shall be gravity
type swing-check. Locate check valves in access panel near fixture or in ceiling above.
D. Flush valves with check stops shall be chrome-plated with polished finish, unless otherwise specified.
E. Manufacturer’s working pressure rating of flush-valve type fixtures shall not be greater than as follows
when flushing:
1. Wall-mount water closets: 30 PSI
F. Comply with following sub-sections for particular fixture material requirements.
G. Faucets and Supply Stops
1. Faucets and Supply Stops shall be chrome-plated with polished finish unless otherwise specified.
2. Faucet bodies and handles shall be solid cast brass. Faucet valving shall be ceramic disc.
3. Lead content of brasses and other metals in faucets and stops shall meet the NSF 61 Section
Standards for residential use and the Reduction of Lead in Drinking Water Act.
4. Faucet outlets shall be aerator with approximately 0.5-gpm across a pressure range from 40 to
120-psi.
5. Supply Stop shall be solid brass angle-stop with round handles, ½-inch National Pipe Thread inlet,
compression outlet and 3/8-inch copper riser.
6. All exposed piping in finished areas shall be chrome-plated.
H. Drains and Traps
1. Each drain strainer shall be wrought or cast brass with 17-gauge tubular tailpiece, chrome-plated.
2. Each P-trap on a wall outlet fixture shall be cast brass with cleanout plug, brass slip nuts, 17-gauge
brass tubular wall bend, polished finish, chrome-plated. Wall bend connection shall serve as
cleanout extension for waste pipe below.
3. All exposed piping in finished areas shall be chrome-plated.
2.3 SUPPLY AND TRAP INSULATION
A. Material: molded closed cell vinyl
B. Nominal thickness: 1/8-inch
C. Hardness: 70 Shore A durometer
D. Color: white
E. Burning resistance: ASTM D635, less than 5 seconds (ATB)
F. Thermal properties: ASTM C177 less than 1.0 Btu-in/(hr-ft^2-°F)
G. Disease transmission: ASTM G21 and G22 zero rating for both fungal growth and bacterial growth
H. Insulation shall fit snuggly around supplies and drain with proven performance record.
2.4 LAVATORY - L-1
A. Comply with ADA requirements

42204.004 22 40 00-5 Plumbing Fixtures
B. Fixture: Crane Harwich 1-412
1. Construction: Vitreous china, wall-hung
2. Size: 20" x 18"
3. Color: White
4. Faucet centers: 4” on center holes
C. Faucet: Chicago 404-V317ABCP manual faucet; 8” centers; 5” center rigid brass spout; 4” wristblade
handle; chrome finish.
D. Drain: McGuire PW2150WC pre-wrapped offset drain & trap
E. Angle supplies: See Fixture Material
F. Trap: See Fixture Material
G. Additional Instructions:
1. Coordinate with architectural plan for mounting height.
2. Provide ADA complying insulation on trap and supplies.
2.5 SINK - S-1
A. Fixture: Dupont Corian 871. Integral solid surface.
B. Faucet: Chicago Faucet 626-FC chrome plated deck mount gooseneck faucet with wall mounted
combination pedal valve – Chicago Faucet 834-EP.
C. Drain: McGuire 8912C chrome plated cast brass adjustable p-trap with cleanout.
D. Angle supplies: See Fixture Material
E. Trap: See Fixture Material
2.6 SINK - S-2
A. Fixture: Dupont Corian 871. Integral solid surface.
B. Faucet: Chicago Faucet 201-AGNAE3-319AB deck mounted; 8” fixed centers; swing gooseneck spouts;
2.2 gpm aerator; 6” elbow blade handle.
C. Drain: McGuire 8912C chrome plated cast brass adjustable p-trap with cleanout.
D. Angle supplies: See Fixture Material
E. Trap: See Fixture Material
2.7 SHOWER – SH-1
A. Fixture: Symmons Temptrol C-96-500-B30-V shower system with Hand Spray

42204.004 22 40 00-6 Plumbing Fixtures
2.8 MOP BASIN - MB-1
A. Fixture: Fiat TSB 3624 Floor mounted terrazzo 36x24 basin with raise drain shelf and 3” drain,
B. Faucet: Chicago Faucet 2814VB-E8 with atmospheric vacuum breaker: Chicago Faucet 892-WXF
2.9 CLINIC SINK - CS-1
A. Fixture:Kohler Camerton K-12867; wall hung; vitreous china; 1-1/2” top spud
B. Faucet: Chicago Faucet 815-VBCP; wall mounted with exposed foot pedal flushometer and vacuum
breaker – Royal #310.
C. Hanger: Zurn Z1218
D. Angle supplies: See Fixture Material
E. Trap: See Fixture Material
2.10 WATER CLOSET - WC-1
A. Fixture: Crane 1.5 Placidus 3-446
1. Construction: Wall-mount, flushometer, vitreous china, elongated bowl, with 1-1/2" top spud
2. Color: White
3. Flushing capacity: 1.6 gallons
4. Flushing type: Siphon jet
5. Mount rim of bowl 16 inches above finished floor
B. Flush Valve: Sloan Regal exposed chrome plated, 1.6 gallons per flush, 1-1/2” top spud, angled stop
check, vacuum breaker flush connection, wall flange and spud flange, anti-microbial handle.
C. Mount ADA compliant flush handle not greater than 44 inches above finished floor, on wide side of
bowl. Coordinate installation of flush valve with contractor responsible for mounting grab bars.
D. Wall carrier, single: J.R. Smith 400 series 4” vertical outlet with 2” vent and with side inlet (where
required), adjustable height, for wall overall thickness not greater than 13 inches. Anchor to concrete
floor with ½” steel fasteners not less than 4“ deep including rear support lug.
E. Seat: Bemis No. 3155CT DuraGuard
1. Construction: Heavy-duty elongated solid-plastic, integral bumpers with open-front and check
hinge. Seat shall not spring upward after use.
2. Surface material: anti-microbial
3. Color: White

42204.004 22 40 00-7 Plumbing Fixtures
2.11 ESCUTCHEONS
A. Provide escutcheons on all pipe passing through finished floors, walls, and ceilings with outside diameter
sufficient to cover sleeved opening and inside diameter to fit snugly with pipe or pipe insulation jacket.
B. All escutcheon plates shall be metal, polished finish and chrome plated.
2.12 HAND SINK - HS-1
A. Comply with ADA requirements
B. Fixture: Crane Harwich 1-412
1. Construction: Vitreous china, wall-hung
2. Size: 18" x 15"
3. Color: White
4. Faucet centers: 4” on center holes
C. Faucet: Chicago 404-V317ABCP manual faucet; 8” centers; 5” center rigid brass spout; 4” wristblade
handle; chrome finish.
D. Drain: McGuire PW2150WC pre-wrapped offset drain & trap
E. Angle supplies: See Fixture Material
F. Trap: See Fixture Material
G. Additional Instructions:
1. Coordinate with architectural plan for mounting height.
2. Provide ADA complying insulation on trap and supplies.
PART 3 - EXECUTION
3.1 EXAMINATION
A. Verify site is ready for fixture installation.
B. Verify locations of all points of connections to waste, vent and supplies as indicated on drawings.
C. Confirm location and space availability for all fixtures including ADA accessibility and flush handle
location.
D. Report defects or deficiencies to Architect in writing.
E. Await Architect's decision on appropriate adjustment before proceeding.
F. The Architect reserves the right before any particular Work is started to slightly change location of
equipment, if found necessary, without additional payment to the Contractor.

42204.004 22 40 00-8 Plumbing Fixtures
G. Beginning of installation means acceptance of conditions.
3.2 ACCESS
A. Installation shall allow access to all portions of fixture requiring routine service including:
1. Drain cleanouts including access to drain pipes in walls or floor
2. Drain slip-joints and concealed packing connections
3. Service, cleaning, and inspection as recommended by manufacturer
4. Replacement of renewable components as recommended by manufacturer
B. Renewable components shall include washers, strainers, O-rings, diaphragms, springs and similar faucet
or flush mechanism components.
C. Fixture shut-offs shall be accessed from the same room as fixture or through an accessible chase behind
fixture.
3.3 INSTALLATION
A. Precedence in installing fixtures and piping in close quarters shall be established by Architect and no
contractor has exclusive right of way in installing his Work.
B. Weight of fixture and other forces shall not be transmitted to drain and supply piping.
C. Provide suitable sealing material to join the drain of fixture earthenware to drain piping. Drain piping
flange shall be suitably anchored to building structure.
D. Shut-offs shall be provided at all hot and cold water supplies to each fixture.
E. Chrome plated escutcheons shall be provided at all locations where pipes protrude inside of cabinets or
through walls in finished areas, mechanical rooms and janitor closets.
F. Exposed supplies with angle stop valves shall be positioned as high as practical under fixtures.
G. Provide bolt caps on exposed fixture fasteners. Color of cap shall match fixture.
H. Provide smooth, continuous bead of white caulking according to Division 7, Interior Wet Area, where
fixture meets finished wall.
I. Provide smooth, continuous bead of caulking according to Division 7, Interior Wet Area, underneath rim
of all self-rimming fixtures.
J. Provide P-trap for floor fixture drains such as mop basins and similar basins.
K. Coordinate concrete pedestal for floor flushing rim sinks.
L. The Engineer reserves the right for final acceptance on the suitability of all material and workmanship
supplied by the Contractor.
3.4 ACCESSIBILITY
A. Where indicated, fixtures and installation of fixtures shall conform to the American’s With Disabilities
Act (ADA) requirements.

42204.004 22 40 00-9 Plumbing Fixtures
B. Top of ADA water closet seats shall be between 17 and 19 inches above finished floor.
C. Mount flush handles of ADA water closets on wide side of toilet area. Coordinate mounting height with
General Contractor for mounting grab bars.
D. Flush handles for ADA water closets or urinals shall be no more than 44 inches above finished floor.
E. Provide Supply and Trap Insulation on exposed supplies, drains and traps conforming to ADA
requirements.
F. In those cases where the drawings or specifications conflict with the ADA requirements, the ADA
requirements shall take precedence and the Contractor shall provide the fixture and installation to meet
them. If such a conflict is noted after the award of contract for the Work under this section, no additional
compensation shall be awarded to the Contractor.
3.5 WALL CARRIERS
A. Water closet: floor-mounted, adjustable height and adjustable closet connection, cast iron construction,
approved cast iron drainage fittings, ABS extension, fixture gasket and chrome-plated exposed hardware.
Carrier shall be compatible with fixture and wall space limitations.
B. Lavatory: floor mounted with lateral support, hanger plate, adjustable height, structural steel uprights, and
cast iron bases. Carrier shall be compatible with fixture and wall space limitations. Stabilize deflection
of sink, lavatory, drinking fountain and urinal carriers by fastening upper part of uprights to wall framing
or ceiling framing.
C. Floor anchors: minimum ½-inch diameter, with minimum 3 inches of depth into solid masonry. Provide
anchors at all locations as recommended by manufacturer. Verify sound masonry construction within 4
feet of anchors.
3.6 TOLERANCES
A. ADA complying fixtures shall meet ADAAG.
B. Fixture location: within +/- 1/4 inch of Shop Drawing dimensions.
3.7 FIELD QUALITY CONTROL
A. Only licensed plumbers shall perform installation.
B. Coordinate installation with Architect and all other trades.
C. Performance of all Work shall be verified.
D. Verify that jet holes on water closet rims are free of construction debris.
E. Verify the accessibility of all ADA complying fixtures.
F. Confirm the ease of use of all faucets.
3.8 PROTECTION
A. Protect final installation from damage during construction period.
3.9 CLEANING

42204.004 22 40 00-10 Plumbing Fixtures
A. At completion of Work, clean all fixture surfaces and polish all exposed plumbing pipes.
B. All items shall be left clean and ready for use.
C. Remove protective coverings from finished surfaces.
END OF SECTION 22 40 00

42204.004 22 60 00-1 Gas Systems for Healthcare
SECTION 22 60 00
GAS SYSTEMS FOR HEALTHCARE
PART 1 - GENERAL
1.1 RELATED DOCUMENTS
A. Drawings and general provisions of Contract, including General and Supplementary Conditions and
Division 1 Specifications, apply to Work specified in this Section.
1.2 SECTION INCLUDES
PART 1 - General
1.1 Related Documents
1.2 Section Includes
1.3 Related Work
1.4 Quality Assurance
1.5 Submittals
PART 2 - Products
2.1 Acceptable Product Manufacturers
2.2 Material for Gas and Vacuum Service
2.3 Valve Boxes
2.4 Area Alarms
2.5 Alarm Accessories
2.6 Wall Outlets
PART 3 - Execution
3.1 Examination
3.2 . Preparation
3.3 . Installation
3.4 .. Tolerances
3.5 Field Quality Control
3.6 Protection
3.7 Cleaning
1.3 RELATED WORK
A. In addition to the requirements of this Section, comply with the appropriate requirements of the following
Divisions or Sections.
B. Demolition: Section 22 0000
C. Cutting and Patching: Section 22 1000
D. Electrical Connections: Section 22 0000

42204.004 22 60 00-2 Gas Systems for Healthcare
E. Penetrations: Section 22 0535
F. Fire Stopping: Section 22 0535
G. Identification: Section 22 0553
H. Supports for Pipe: Section 22 1000
1.4 QUALITY ASSURANCE
A. Codes and Standards: Comply with provisions of the following codes, specifications and standards,
except where more stringent requirements are shown, specified or applicable.
1. NFPA 99, Health Care Facilities
2. ANSI A5.8 Specification for Brazing Filler Metal
3. ANSI B40.1, Gauges, Pressure Indicating Dial-Type, Elastic Element.
4. ANSI B16.22, Wrought Copper and Copper Alloy Solder-Joint Pressure Fittings.
5. ASTM B819, Standard Specification for Tube for Medical Gas Systems.
6. AWS B2.2, Standard for Brazing Procedure and Performance Qualifications.
7. Compressed Gas Association, Inc. (CGA)
a. CGA Pamphlet G4.1, Cleaning Equipment for Oxygen Service
b. CGA Pamphlet V-1, Standard for Compressed Gas Cylinder Valve Outlet and Inlet
Connections
c. CGA Pamphlet V-5, Diameter-Index Safety System – Non-interchangeable Low Pressure
Connections for Medical Gas Applications
8. ASME Section 9 Boiler and Pressure Vessel Code, “Welding and Brazing Qualifications”
9. ASSE American Society of Sanitary Engineering (ASSE)
a. ASSE 6010 Medical Gas Systems Installers Professional Qualifications Standard
b. ASSE 6030 Medical Gas Systems Verifiers Professional Qualifications Standard
10. Manufacturer’s Standardization Society of the Valve and Fittings Industry, Inc. (MSS).
a. MSS SP-110, Ball Valves, Threaded, Soldered Joint.
b. MSS SP-73, Brazing Joints for Wrought and Cast Copper Alloy Solder Joint Pressure
Fittings.
B. Regulatory requirements
1. State of Illinois Administrative Code Title 77 Public Health— Part 250 Hospitals, Section 2490
C. Provide Level 1 Medical Gas System and Medical Vacuum System.
D. Provide listed alarm panels.
E. Single Source Responsibility: Obtain all components from a single source having responsibility and
accountability to answer and resolve problems regarding proper installation, compatibility, performance
and acceptance.

42204.004 22 60 00-3 Gas Systems for Healthcare
F. Manufacturer: Company specializing in manufacturing the products and materials specified in this
Section shall possess a minimum of twenty years documented experience.
G. Installer: Company specializing in performing the installation of this Section shall possess a minimum of
five years documented experience.
H. Field Supervision: Contractor shall maintain an experienced full-time supervisor who is at the jobsite
during times that Work is in progress.
I. Pipe brazing process and operators shall be qualified in accordance with ASME “Boiler and Pressure
Vessel Code”, Section IX, “Welding and Brazing Qualifications”.
J. Electric components shall comply with standards, shall be UL listed and labeled, and shall be NEMA
compliant.
K. Manufacturer and Product Selection: The drawings and specifications indicate sizes, profiles, and
dimensional requirements of specific products and material. Products and material having equal
performance characteristics have been listed in the specifications for use on this project. The use of these
products or materials shall require the Contractor to consider all modifications to accommodate variations
in weights, connections, sizes, and similar parameters as compared to the products shown. The
Contractor shall be responsible for all modifications of other mechanical, structural, electrical, and
plumbing systems required to accommodate such products and materials. The Contractor shall be
responsible to maintain code compliance of the installed system and any other system that is affected by
the substitution.
L. Confirm electrical voltages, phase and other characteristics. Do not order motors, motor controllers and
other equipment with line voltage connections until electrical characteristics are verified with Electrical
Contractor and with Project Conditions at the site.
1.5 SUBMITTALS
A. Submit shop drawings under provisions of Division 1.
B. Submit shop drawings indicating materials, component description and dimensioned drawings.
C. Components shall include:
1. Piping
2. Valves
3. Station Outlets and Inlets
4. Alarm Panels And Alarm Accessories
5. Gauges And Sensors
6. Written Compliance Certification (at completion of Work)
PART 2 - PRODUCTS
2.1 ACCEPTABLE PRODUCT MANUFACTURERS
A. Amico Corporation, Passaic, NJ
B. Chemetron Medical Division, Allied Health Care Products, Inc., St. Louis, MO

42204.004 22 60 00-4 Gas Systems for Healthcare
C. Beacon Medaes (HillRom, Nellcor, Puritan Bennet), Charlotte, NC
D. Ohio Medical Corporation (Squire-Cogswell Company, Ohmeda), Gurnee, IL
2.2 MATERIAL FOR GAS AND VACUUM SERVICE
A. Tube: ASTM B819, Type L copper tubing, hard drawn. All pipe in this Section shall be manufactured
and prepared specially for oxygen service.
B. Fittings: wrought copper, ANSI B16.22 or MSS SP-73, manufactured specially for brazed connections
and specially prepared for oxygen service.
C. Valves: manufactured and prepared specially for oxygen service: full-port, ball valve, three-piece bronze,
for brazed connections.
2.3 VALVE BOXES
A. Shut-off valves with pressure gauges in recessed box ganged as necessary for the gases applied.
B. See drawings for gases served and pipe sizes.
C. Provide identification in accordance with Reference Standard.
2.4 AREA ALARMS
A. Provide complete unit including rough-in assembly, annunciator module, area alarm modules, relay
interface panel for LonWorks building management system, and blank modules.
B. In accordance with Referenced Standard, area alarm panels shall be provided for gases and vacuum to
anesthetizing areas vital life support areas, and critical care areas as required.
C. Annunciator module with microprocessor control shall include audio alarm and pushbutton controls.
Audio intensity shall be 80 dBA at 3-feet. Control includes system test, audio signal cancellation, and
alarm reset. Audio signal will repeat if fault is not corrected.
D. Each alarm module shall monitor and indicate the level of pressure for its particular gas and shall provide
alarm signals for excessive pressure, deficient pressure or wiring failure.
1. Each module shall visually provide normal condition indication and abnormal condition
indication.
2. Pressure readout shall be digital, accuracy within 1 percent and with units in psi.
3. Alarm set points shall be adjustable.
4. Sensor shall be remote from the panel and located as required.
5. Set point for alarm shall be pressures 20 percent above or below normal pressures.
E. Vacuum alarm module and waste anesthetic gas alarm module shall monitor and indicate level of vacuum
and shall provide an alarm signal if the vacuum decreases to 12-inch Hg or below or if wiring fails.
1. Each module shall visually provide normal condition indication and abnormal condition
indication.
2. Vacuum readout shall be digital accuracy within 1 percent and with units in inches of mercury.
3. Alarm set points shall be adjustable.
42204.004 22 60 00-5 Gas Systems for Healthcare
4. Sensor shall be remote from the panel and located as required.
F. See drawings for gases served.
G. Coordinate power supply with Electrical Contractor.
H. Provide low-voltage wiring.
I. Provide identification in accordance with Reference Standard.
2.5 ALARM ACCESSORIES
A. Pressure switch transducer shall be UL listed.
B. Switch enclosure shall be NEMA 4.
C. DISS demand check valve kit
2.6 WALL OUTLETS
A. Provide Chemetron compatible quick-coupler recessed wall station outlets and inlets.
B. Verify compatibility with Owner’s equipment adaptors.
C. See drawings for station configuration and gases served.
PART 3 - EXECUTION
3.1 EXAMINATION
A. Verify site is ready for medical gas installation.
B. Verify locations of all points of connections to existing sources of supply as indicated on drawings.
C. Confirm location and space availability for all equipment including alarm panels and valve access.
D. Confirm electrical voltages, phase and other characteristics.
E. Report defects or deficiencies to Architect in writing.
F. Await Architect's decision on appropriate adjustment before proceeding.
G. Beginning of installation means acceptance of conditions.
3.2 PREPARATION
A. If not furnished from manufacturer prepared for Medical Gas Service, thoroughly clean piping and valves
in accordance with Reference Standard before erection.
B. Internal cleaning of Medical Gas System after installation shall not be permitted.
3.3 INSTALLATION
A. Install piping in accordance with Reference Standard.

42204.004 22 60 00-6 Gas Systems for Healthcare
B. Brazed joints shall be with silver brazing alloy or similar high melting point (at least 1,000 °F) brazing
metal and only performed by qualified brazers in accordance with Reference Standard.
C. Where permitted, care shall be exercised in applying flux to avoid leaving excess inside completed joint.
D. The outside of piping shall be cleaned by washing with hot water after assembly.
E. Alternate joints: listed or approved brass flared type gas tubing fittings and screw connections at valves or
at equipment.
F. Piping shall not be installed in kitchens or electrical rooms.
G. Service valves for maintenance or provisions for future expansion shall be located in secure spaces or
locked open. Valves shall be labeled as required.
H. Sufficient space shall be accounted for between wall station outlets, inlets and user appliances, such as
vacuum bottles, so that all outlets and inlets are fully accessible for simultaneous use.
I. Provide brackets or chain systems as required to secure cylinders to wall or similar structure in
accordance with Reference Standard.
J. Installation of manufactured assemblies shall comply with Reference Standard.
K. Provide isolation between copper pipe and steel stud.
3.4 TOLERANCES
A. In accordance with NFPA 99
3.5 FIELD QUALITY CONTROL
A. Performance testing of piping and source equipment shall be in accordance with Reference Standard for
all portions of the Work. Testing includes the point of connection to the existing piping.
B. Oil-pumped compressed air or oil-pumped nitrogen shall be prohibited.
C. Testing medium shall be in compliance with Reference Standard. Source cylinder shall be labeled as oil-
free dry nitrogen.
D. Initial pressure test, standing pressure test, piping purge test, cross-connection test and other installer
testing shall be in accordance with Reference Standard.
E. System verification test shall be in accordance with Reference Standard by qualified technicians other
than the installer. Test results shall be recorded including actual readings taken.
F. Submit Written Certification of compliance to Architect.
3.6 PROTECTION
A. Protect final installation from damage during construction period.
3.7 CLEANING
A. Remove protective coverings from finished surfaces.

42204.004 22 60 00-7 Gas Systems for Healthcare
B. Clean and polish finished surfaces.
END OF SECTION 22 60 00

42204.004
23 05 00-1 Basic Mechanical Requirements
SECTION 23 05 00
BASIC MECHANICAL REQUIREMENTS
PART 1 - GENERAL
1.01 SECTION INCLUDES
A. Basic Mechanical Requirements specifically applicable to Division 23 Sections.
1.02 REFERENCES
A. ASTM E84 - Test Method for Surface Burning Characteristics of Building Materials.
1.03 ADDITIONAL REQUIREMENTS
A. The General Conditions, the Supplementary General Conditions and Division 1 shall govern work under
Division 23, in addition to these Basic Mechanical Requirements.
1.04 DEFINITIONS
A. “Piping” includes all pipe, fittings, valves, hangers, and other supports and accessories related to such piping.
B. “Ductwork” includes all ducts, fittings, transitions, dampers, hangers and other supports and accessories related
to such ductwork.
C. “Concealed” means hidden from sight in chases, furred spaces, shafts, hung ceilings, crawl spaces, embedded
in construction or buried.
D. “Exposed” means not concealed as defined above.
E. “Mechanical Work” is all of the work in Division 23.
F. "Contractor" means the Contractor or Subcontractor performing the required work of their respective Divisions.
G. “Or Equivalent” means to possess the same performance qualities and characteristics and fulfill the utilitarian
function without any decrease in quality, durability or longevity.
H. “Provide” means the Contractor shall furnish and install work and/or equipment.
1.05 SUBMITTALS
A. Submit shop drawings and product data grouped to include complete submittals of related systems, products,
and accessories in a single submittal.
B. Mark dimensions and values in units to match those specified.
C. Engineer's review of Shop Drawings shall not relieve Contractor from the responsibility for any variation from
the Contract Documents unless the Contractor has called the Engineer's attention in writing to each such
variation at the time of submission and the Engineer has given written approval of each such variation by a
specific written notation thereof incorporated in or accompanying the Shop Drawing review notes; nor shall
any review by the Engineer relieve the Contractor from responsibility for having complied with the provisions
of the contract, or from responsibility for errors or omissions in the shop drawings.
D. Physical dimension of shop drawings shall not exceed 8-1/2" x 11" unless impossible to illustrate data properly
without using a larger sheet.
1.06 SUBSTITUTIONS
A. Contractor shall provide all supporting data and assume the burden of proof that any substitute proposed is
equivalent as to appearance, construction, capacity and performance. The judgment of equivalency shall be
made by the Engineer at the time of shop drawing review, not during bidding.
B. Where substitute equipment is accepted and use of such equipment shall require redesign of any other part of
the architectural, structural, mechanical, sanitary or electrical work, the cost of all such redesign, drawings,
detailing and accompanying additional costs of any item of the work shall be paid for by the Contractor.
Redesign shall be subject to the approval of all authorities having jurisdiction over the work including the
Architect /Engineer.
C. Provide ductwork, piping, structural supports, insulation, controllers, motors, starters, electrical wiring and
conduit and any other additional materials and equipment required by the system due to equipment
substitutions at no additional cost to the owner.
1.07 GUARANTEES AND WARRANTIES

42204.004
23 05 00-2 Basic Mechanical Requirements
A. Guarantee in writing that all work installed shall be free from defects in workmanship and materials; that all
apparatus shall develop capacities and characteristics specified; and that if during the period of one year (or as
otherwise specified) from the date of substantial completion, any defects in workmanship, material or
performance appear, the Contractor shall remedy such defects within a reasonable time as specified in notice
from the Owner's Representative without cost to the owner. In default thereof, the Owner's Representative shall
have the work done and charge the cost of the work to the Contractor.
B. Furnish manufacturers written warranties for all equipment, stating effective date of Warranty, to the Owner's
Representative.
1.08 CUTTING AND PATCHING
A. Establish sizes and locations of openings and lintels in new work and transmit this information to the
Contractor whose work is involved at such time as to avoid cutting and patching.
B. All cutting and patching that shall be necessary for the installation of the work of this Contract shall be
provided by this Contractor under the direction and to the satisfaction of the Owner’s Representative unless this
work is specifically identified to be the work of the Contractors of other Divisions.
C. No cutting of structural work shall be done without the written consent of the Owner’s Representative being
previously obtained, and all such work shall be done in accordance with the Owner’s Representative’s
directions and supervision.
1.09 JURISDICTION OF WORK
A. The event of jurisdiction (as to whether the work is to be installed by another trade or subcontractor) shall not
release the work from this Contract. In such occurrence, the original contractor shall sublet the work to the
trade or subcontractor having jurisdiction.
B. The trade or subcontractor having jurisdiction shall perform the work in conformance with these drawings and
specifications.
1.10 OPERATION AND MAINTENANCE MANUALS
A. Submit to comply with requirements outlined in Division 1.
1.11 OPERATING INSTRUCTIONS
A. Upon completion of all work and tests, furnish the necessary skilled, qualified personnel for operating the
system for a total of 2 days of eight (8) hours each during times agreed to by the owner's representative.
B. Instruct the owner's representative fully in the operation, adjustment and maintenance of equipment furnished.
C. A representative of the Temperature Control Contractor shall be present during these instruction periods.
D. Give at least forty-eight (48) hours notice to the owner's representative in advance of this period.
E. Maintain a record of operating instruction periods, documenting the date, time involved, people in attendance
and have the owner's representative attest in writing for each session held; only documented and signed records
shall be used to show compliance to the specified instruction periods.
F. Video tape operating instruction sessions and provide owner with a copy of the tape.
PART 2 - PRODUCTS
2.01 FIRESTOP MATERIALS
A. Manufacturers:
1. 3M.
2. Insta-Foam Products.
3. Dow Corning.
4. HILTI.
B. One-part, intumescent elastomer, UL classified, non-corrosive to metal, and compatible with synthetic cable
jackets.
C. Material shall expand up to 10 times when exposed to flame or heat.
D. Maximum flame spread and fuel contributed of 25 and smoke development of 50 when tested in accordance
with ASTM E84.
PART 3 - EXECUTION (NOT APPLICABLE)

42204.004
23 05 00-3 Basic Mechanical Requirements
END OF SECTION 23 05 00

42204.004 23 05 13-1 Common Motor Requirements for HVAC Equipment
SECTION 23 05 13
MOTORS AND ELECTRICAL WORK
PART 1 - GENERAL
1.01 RELATED DOCUMENTS
A. Drawings and general provisions of the Contract, including General and Supplementary
Conditions and Division 01 Specification Sections, apply to this Section.
1.02 SUMMARY
A. Section includes general requirements for single-phase and three phase, general-purpose,
horizontal, small and medium, squirrel-cage induction motors for use on ac power systems up to
600 V and installed at equipment manufacturer's factory or shipped separately by equipment
manufacturer for field installation.
B. Section includes the following enclosed controllers rated 600 V and less:
1. Full-voltage manual.
2. Full-voltage magnetic.
3. Reduced-voltage magnetic.
4. Reduced-voltage solid state.
5. Multispeed.
C. Related Section:
1. Section 230514 "Variable Frequency Drives" for general-purpose, ac, adjustable-frequency,
pulse-width-modulated controllers for use on variable torque loads in ranges up to 200 hp.
1.03 DEFINITIONS
A. CPT: Control power transformer.
B. MCCB: Molded-case circuit breaker.
C. MCP: Motor circuit protector.
D. N.C.: Normally closed.
E. N.O.: Normally open.
F. OCPD: Overcurrent protective device.
G. SCR: Silicon-controlled rectifier.
1.04 COORDINATION
A. Coordinate features of motors, installed units, and
accessory devices to be compatible with the following:
1. Motor controllers.
2. Torque, speed, and horsepower requirements of the load.
3. Ratings and characteristics of supply circuit and required control sequence.
4. Ambient and environmental conditions of installation location.

42204.004 23 05 13-2 Common Motor Requirements for HVAC Equipment
B. Coordinate layout and installation of enclosed controllers with other construction including
conduit, piping, equipment, and adjacent surfaces. Maintain required workspace clearances and
required clearances for equipment access doors and panels.
PART 2 - PRODUCTS
2.01 MOTORS
B. GENERAL MOTOR REQUIREMENTS
1. Comply with NEMA MG 1 unless otherwise indicated.
2. Comply with IEEE 841 for severe-duty motors.
C. MOTOR CHARACTERISTICS
1. Duty: Continuous duty at ambient temperature of 40 deg C and at altitude of 3300 feet
above sea level.
2. Capacity and Torque Characteristics: Sufficient to start, accelerate, and operate connected
loads at designated speeds, at installed altitude and environment, with indicated operating
sequence, and without exceeding nameplate ratings or considering service factor.
D. THREE PHASE MOTORS
1. Description: NEMA MG 1, Design B, medium induction motor.
2. Efficiency: Energy efficient, as defined in NEMA MG 1, meeting requirements of ASHRAE
90.1-2013 Table 10.8.
3. Service Factor: 1.15.
4. Multispeed Motors: Variable torque.
a. For motors with 2:1 speed ratio, consequent pole, single winding.
b. For motors with other than 2:1 speed ratio, separate winding for each speed.
5. Multispeed Motors: Separate winding for each speed.
6. Rotor: Random-wound, squirrel cage.
7. Bearings: Regreasable, shielded, antifriction ball bearings suitable for radial and thrust
loading.
8. Temperature Rise: Match insulation rating.
9. Insulation: Class F.
10. Code Letter Designation:
a. Motors 15 HP and Larger: NEMA starting Code F or Code G.
b. Motors Smaller than 15 HP: Manufacturer's standard starting characteristic.
11. Enclosure Material: Cast iron for motor frame sizes 324T and larger; rolled steel for motor
frame sizes smaller than 324T.
E. THREE PHASE MOTORS WITH ADDITIONAL
REQUIREMENTS
1. Motors Used with Reduced-Voltage and Multispeed Controllers: Match wiring connection
requirements for controller with required motor leads. Provide terminals in motor terminal
box, suited to control method.
2. Motors Used with Variable Frequency Controllers:
a. Motor Design: NEMA MG 1-31.
b. Windings: Copper magnet wire with moisture-resistant insulation varnish, designed
and tested to resist transient spikes, high frequencies, and short time rise pulses
produced by pulse-width modulated inverters.
c. Energy- and Premium-Efficient Motors: Class B temperature rise; Class F insulation.
d. Shaft Grounding Ring Kits:
1) Manufacturer: Aegis, Model SGR or Inpro/SealCDR.
2) Type: Maintenance free shaft grounding ring kits to protect motors and
attached equipment from damaging shaft electrical currents at all motor
speeds.

42204.004 23 05 13-3 Common Motor Requirements for HVAC Equipment
3) Furnished and factory installed by equipment supplier.
3. Severe-Duty Motors: Comply with IEEE 841, with 1.15 minimum service factor.
F. SINGLE-PHASE MOTORS
1. Motors larger than 1/20 hp shall be one of the following, to suit starting torque and
requirements of specific motor application:
a. Permanent-split capacitor.
b. Split phase.
c. Capacitor start, inductor run.
d. Capacitor start, capacitor run.
2. Multispeed Motors: Variable-torque, permanent-split-capacitor type.
3. Bearings: Prelubricated, antifriction ball bearings or sleeve bearings suitable for radial and
thrust loading.
4. Motors 1/20 HP and Smaller: Shaded-pole type.
5. Thermal Protection: Internal protection to automatically open power supply circuit to motor
when winding temperature exceeds a safe value calibrated to temperature rating of motor
insulation. Thermal-protection device shall automatically reset when motor temperature
returns to normal range.
2.02 MOTOR CONTROLLERS
A. MANUFACTURERS
1. Manufacturers: Subject to compliance with requirements, provide products by one of the
following:
a. Asea Brown Bovari.
b. Cerus Industrial, Inc.
c. Eaton Electrical Sector; Eaton Corporation.
d. General Electric Company.
e. Rockwell Automation, Inc.
f. Square D; by Schneider Electric.
2. All motor controllers provided by same manufacturer unless integral part of equipment.
3. General Construction and Requirements:
a. Minimum AIC Rating: 25,000 RMS symmetrical amps at 240 VAC.
B. FULL-VOLTAGE CONTROLLERS
1. General Requirements for Full-Voltage Controllers: Comply with NEMA ICS 2, general
purpose, Class A.
2. Motor-Starting Switches: "Quick-make, quick-break" toggle or push-button action; marked
to show whether unit is off or on.
a. Configuration: Nonreversing.
b. NEMA ICS 6, general purpose flush mounted with stainless steel cover plate in
finished areas and where indicated and Type 1 surface mounted in unfinished areas.
c. Green pilot light.
3. Magnetic Controllers: Full voltage, across the line, electrically held.
a. Contactor Coils: Pressure-encapsulated type.
1) Operating Voltage: Depending on contactor NEMA size and line-voltage
rating, manufacturer's standard matching control power or line voltage.
b. Power Contacts: Totally enclosed, double-break, silver-cadmium oxide; assembled to
allow inspection and replacement without disturbing line or load wiring.
c. Control Circuits: 24-V ac; obtained from integral CPT, with primary and secondary
fuses, 100 VA minimum, with CPT of sufficient capacity to operate integral devices
and remotely located pilot, indicating, and control devices.
d. Solid-State Overload Relay:
1) Switch or dial selectable for motor running overload protection.
2) Sensors in each phase.
42204.004 23 05 13-4 Common Motor Requirements for HVAC Equipment
3) Class 10, Class 20 and Class 30 user selectable tripping characteristic to
protect motor against voltage and current unbalance and single phasing.
4) Class II ground-fault protection, with start and run delays to prevent nuisance
trip on starting.
e. One (1) N.C., and one (1) N.O., isolated auxiliary contacts.
f. External overload reset push button.
4. Combination Magnetic Controller: Factory-assembled combination of magnetic controller,
OCPD, and disconnecting means.
a. Fusible Disconnecting Means:
1) NEMA KS 1, heavy-duty, horsepower-rated, fusible switch with clips to
accommodate Class R fuses.
2) Lockable Handle: Accepts three padlocks and interlocks with cover in closed
position.
b. Nonfusible Disconnecting Means:
1) NEMA KS 1, heavy-duty, horsepower-rated, nonfusible switch.
2) Lockable Handle: Accepts three padlocks and interlocks with cover in closed
position.
c. MCP Disconnecting Means:
1) UL 489, NEMA AB 1, and NEMA AB 3, with interrupting capacity to comply
with available fault currents, instantaneous-only circuit breaker with front-
mounted, field-adjustable, short-circuit trip coordinated with motor locked-
rotor amperes.
2) Lockable Handle: Accepts three padlocks and interlocks with cover in closed
position.
d. MCCB Disconnecting Means:
1) UL 489, NEMA AB 1, and NEMA AB 3, with interrupting capacity to comply
with available fault currents; thermal-magnetic MCCB, with inverse time-
current element for low-level overloads and instantaneous magnetic trip
element for short circuits.
2) Front-mounted, adjustable magnetic trip setting for circuit-breaker frame
sizes 250 A and larger.
3) Lockable Handle: Accepts three padlocks and interlocks with cover in closed
position.
C. ENCLOSURES
1. Enclosed Controllers: NEMA ICS 6, to comply with environmental conditions at installed
location.
a. Dry and Clean Indoor Locations: Type 1.
b. Outdoor Locations: Type 3R.
c. Other Wet or Damp Indoor Locations: Type 4.
d. Indoor Locations Subject to Dust, Falling Dirt, and Dripping Noncorrosive Liquids:
Type 12.
D. ACCESSORIES
1. Provide the following when indicated on Drawings.
a. Push Buttons: Unguarded type.
b. Pilot Lights: LED type; green-run.
c. Selector Switches: Rotary type Hand-Off-Auto.
PART 3 - EXECUTION
3.01 MOTOR APPLICATION
A. Verify voltage with Electrical Contractor before ordering.

42204.004 23 05 13-5 Common Motor Requirements for HVAC Equipment
B. Motors located in exterior locations, grease laden airstreams, draw thru air handling units,
explosion proof environments or dust collection systems: Totally enclosed fan cooled.
3.02 MOTOR INSTALLATION
A. Install in accordance with manufacturer's instructions.
B. Install securely on firm foundation. Mount ball bearing motors with shaft in any position.
C. Check line voltage and phase and ensure agreement with nameplate.
3.03 MOTOR CONTROLLER AND DISCONNECT SWITCH INSTALLATION
A. Responsibilities of Division 23:
1. Furnish the following equipment and give to Division 26 for installation and wiring as
scheduled:
a. Motor controllers.
b. Disconnect switches.
c. Fuses.
d. Heater elements for eutectic alloy type overload relays.
B. Responsibilities of Division 26:
1. Install all motor controllers and disconnect switches furnished by Division 23 in accordance
with manufacturer's instructions.
2. Mounting Height: 5 ft. to operating handle.
3. Overload Relays for Motor Controllers:
a. Electronic Type: Adjust solid state overload relay settings to match installed motor
characteristics.
b. Eutectic Alloy Type: Determine required heater element sizes and notify Division 23.
Install all heater elements.
4. Install fuses furnished by Division 23 in fusible disconnect switches.
5. Maintain code service clearances.
6. Provide engraved nameplate on outside cover of each motor controller and disconnect
switch door identifying motor served, nameplate horsepower, full load amperes, code letter,
service factor, and voltage/phase rating.
END OF SECTION 23 05 13

42204.004 23 05 17-1 Sleeves and Sleeve Seals for HVAC Piping
SECTION 23 05 17
SLEEVES AND SLEEVE SEALS FOR HVAC PIPING
PART 1 - GENERAL
1.01 RELATED DOCUMENTS
A. Drawings and general provisions of the Contract, including General and Supplementary Conditions and
Division 01 Specification Sections, apply to this Section.
1.02 SUMMARY
A. Section Includes:
1. Sleeves.
2. Stack-sleeve fittings.
3. Sleeve-seal systems.
4. Sleeve-seal fittings.
5. Grout.
1.03 ACTION SUBMITTALS
A. Product Data: For each type of product indicated.
PART 2 - PRODUCTS
2.01 SLEEVES
A. Cast-Iron Wall Pipes: Cast or fabricated of cast or ductile iron and equivalent to ductile-iron pressure
pipe, with plain ends and integral waterstop unless otherwise indicated.
B. Galvanized-Steel Wall Pipes: ASTM A 53/A 53M, Schedule 40, with plain ends and welded steel collar;
zinc coated.
C. Galvanized-Steel-Pipe Sleeves: ASTM A 53/A 53M, Type E, Grade B, Schedule 40, zinc coated, with
plain ends.
D. PVC-Pipe Sleeves: ASTM D 1785, Schedule 40.
E. Galvanized-Steel-Sheet Sleeves: 18 gauge minimum thickness; round tube closed with welded
longitudinal joint.
F. Molded-PE or -PP Sleeves: Removable, tapered-cup shaped, and smooth outer surface with nailing flange
for attaching to wooden forms.
G. Molded-PVC Sleeves: With nailing flange for attaching to wooden forms.
2.02 SLEEVE-SEAL SYSTEMS
A. Manufacturers: Subject to compliance with requirements, provide products by one of the following:
1. Metraflex Company (The).
2. Pipeline Seal and Insulator, Inc.
3. Proco Products, Inc.
B. Description: Modular sealing-element unit, designed for field assembly, for filling annular space between
piping and sleeve.
1. Sealing Elements:
a. -40°F to 250°F: EPDM, ASTM D2000 M3 BA510.
b. -67°F to 400°F: Silicone, ASTM D2000 M1 GE505.
2. Pressure Plates: Carbon steel.
3. Connecting Bolts and Nuts: Carbon steel, with corrosion-resistant coating, of length required to
secure pressure plates to sealing elements.
42204.004 23 05 17-2 Sleeves and Sleeve Seals for HVAC Piping
2.03 GROUT
A. Standard: ASTM C 1107/C 1107M, Grade B, post-hardening and volume-adjusting, dry, hydraulic-
cement grout.
B. Characteristics: Nonshrink; recommended for interior and exterior applications.
C. Design Mix: 5000-psi, 28-day compressive strength.
D. Packaging: Premixed and factory packaged.
PART 3 - EXECUTION
3.01 SLEEVE INSTALLATION
A. Install sleeves for piping passing through penetrations in floors, partitions, roofs, and walls.
B. For sleeves that will have sleeve-seal system installed, select sleeves of size large enough to provide 1-
inch annular clear space between piping and concrete slabs and walls.
1. Sleeves are not required for core-drilled holes.
C. Install sleeves in concrete floors, concrete roof slabs, and concrete walls as new slabs and walls are
constructed.
1. Permanent sleeves are not required for holes in slabs formed by molded-PE or -PP sleeves.
2. Cut sleeves to length for mounting flush with both surfaces.
a. Exception: Extend sleeves installed in floors of mechanical equipment areas or other wet
areas 6 inches above finished floor level.
3. Using grout, seal the space outside of sleeves in slabs and walls without sleeve-seal system.
D. Install sleeves for pipes passing through interior partitions.
1. Cut sleeves to length for mounting flush with both surfaces.
2. Install sleeves that are large enough to provide 1/4-inch annular clear space between sleeve and
pipe or pipe insulation.
3. Seal annular space between sleeve and piping or piping insulation; use joint sealants appropriate
for size, depth, and location of joint. Comply with requirements for sealants specified in
Section 079200 "Joint Sealants."
E. Fire-Barrier Penetrations: Maintain indicated fire rating of walls, partitions, ceilings, and floors at pipe
penetrations. Seal pipe penetrations with firestop materials. Comply with requirements for firestopping
specified in Section 078413 "Penetration Firestopping."
3.02 SLEEVE-SEAL-SYSTEM INSTALLATION
A. Install sleeve-seal systems in sleeves in exterior concrete walls and slabs-on-grade at service piping
entries into building.
B. Select type, size, and number of sealing elements required for piping material and size and for sleeve ID
or hole size. Position piping in center of sleeve. Center piping in penetration, assemble sleeve-seal system
components, and install in annular space between piping and sleeve. Tighten bolts against pressure plates
that cause sealing elements to expand and make a watertight seal.
3.03 SLEEVE AND SLEEVE-SEAL SCHEDULE
A. Use sleeves and sleeve seals for the following piping-penetration applications:
1. Exterior Concrete Walls:
a. Piping Smaller Than NPS 6: Galvanized-steel wall sleeves with sleeve-seal system or
Galvanized-steel-pipe sleeves with sleeve-seal system.
1) Select sleeve size to allow for 1-inch annular clear space between piping and sleeve
for installing sleeve-seal system.
b. Piping NPS 6 and Larger: Galvanized-steel wall sleeves with sleeve-seal system.
1) Select sleeve size to allow for 1-inch annular clear space between piping and sleeve
for installing sleeve-seal system.
2. Interior Partitions:
a. Piping Smaller Than NPS 6: Galvanized-steel-pipe sleeves.
b. Piping NPS 6 and Larger: Galvanized-steel-sheet sleeves.
END OF SECTION 23 05 17

42204.004 23 05 17-3 Sleeves and Sleeve Seals for HVAC Piping

42204.004 23 05 18-1 Escutcheons for HVAC Piping
SECTION 23 05 18
ESCUTCHEONS FOR HVAC PIPING
PART 1 - GENERAL
1.01 RELATED DOCUMENTS
A. Drawings and general provisions of the Contract, including General and Supplementary Conditions and
Division 01 Specification Sections, apply to this Section.
1.02 SUMMARY
A. Section Includes:
1. Escutcheons.
2. Floor plates.
1.03 ACTION SUBMITTALS
A. Product Data: For each type of product indicated.
PART 2 - PRODUCTS
2.01 ESCUTCHEONS
A. One-Piece, Cast-Brass Type: With polished, chrome-plated finish and setscrew fastener.
B. One-Piece, Deep-Pattern Type: Deep-drawn, box-shaped brass with chrome-plated finish and spring-clip
fasteners.
C. One-Piece, Stamped-Steel Type: With chrome-plated finish and spring-clip fasteners.
D. Split-Casting Brass Type: With polished, chrome-plated finish and with concealed hinge and setscrew.
E. Split-Plate, Stamped-Steel Type: With chrome-plated finish, concealed hinge, and spring-clip fasteners.
2.02 FLOOR PLATES
A. One-Piece Floor Plates: Cast-iron flange with holes for fasteners.
B. Split-Casting Floor Plates: Cast brass with concealed hinge.
PART 3 - EXECUTION
3.01 INSTALLATION
A. Install escutcheons for piping penetrations of walls, ceilings, and finished floors.
B. Install escutcheons with ID to closely fit around pipe, tube, and insulation of piping and with OD that
completely covers opening.
1. Escutcheons for New Piping:
a. Piping with Fitting or Sleeve Protruding from Wall: One-piece, deep-pattern type.
b. Chrome-Plated Piping: One-piece, cast-brass type with polished, chrome-plated finish.
c. Insulated Piping: One-piece, stamped-steel type or split-plate, stamped-steel type with
concealed hinge.
d. Bare Piping at Wall and Floor Penetrations in Finished Spaces: One-piece, stamped-steel
type or split-plate, stamped-steel type with concealed hinge.
e. Bare Piping at Ceiling Penetrations in Finished Spaces: One-piece, stamped-steel type or
split-plate, stamped-steel type with concealed hinge.
f. Bare Piping at Wall and Floor Penetrations in Finished Spaces: Split-casting brass type
with polished, chrome-plated finish.
g. Bare Piping at Wall and Floor Penetrations in Finished Spaces: Split-plate, stamped-steel
type with concealed hinge.
h. Bare Piping at Ceiling Penetrations in Finished Spaces: Split-casting brass type with
polished, chrome-plated finish.

42204.004 23 05 18-2 Escutcheons for HVAC Piping
i. Bare Piping at Ceiling Penetrations in Finished Spaces: Split-plate, stamped-steel type with
concealed hinge.
C. Install floor plates with ID to closely fit around pipe, tube, and insulation of piping and with OD that
completely covers opening.
1. New Piping: One-piece, floor-plate type.
2. Existing Piping: Split-casting, floor-plate type.
3.02 FIELD QUALITY CONTROL
A. Replace broken and damaged escutcheons and floor plates using new materials.
END OF SECTION 23 05 18

42204.004 23 05 29-1 Hangers and Supports for HVAC Piping Equipment
SECTION 23 05 29
HANGERS AND SUPPORTS FOR HVAC PIPING AND EQUIPMENT
PART 1 - GENERAL
1.01 RELATED DOCUMENTS
A. Drawings and general provisions of the Contract, including General and Supplementary Conditions and
Division 01 Specification Sections, apply to this Section.
1.02 SUMMARY
A. Section Includes:
1. Metal pipe hangers and supports.
2. Trapeze pipe hangers.
3. Fiberglass pipe hangers.
4. Metal framing systems.
5. Fiberglass strut systems.
6. Thermal-hanger shield inserts.
7. Fastener systems.
8. Pipe stands.
9. Equipment supports.
B. Related Sections:
1. Section 23 05 48.13 "Vibration Controls for HVAC" for vibration isolation devices.
2. Section 23 31 13 "Metal Ducts" and Section 23 31 16 "Nonmetal Ducts" for duct hangers and
supports.
1.03 DEFINITIONS
A. MSS: Manufacturers Standardization Society of The Valve and Fittings Industry Inc.
1.04 PERFORMANCE REQUIREMENTS
A. Structural Performance: Hangers and supports for HVAC piping and equipment shall withstand the
effects of gravity loads and stresses within limits and under conditions indicated according to
ASCE/SEI 7.
1. Design supports for multiple pipes, including pipe stands, capable of supporting combined weight
of supported systems, system contents, and test water.
2. Design equipment supports capable of supporting combined operating weight of supported
equipment and connected systems and components.
1.05 INFORMATIONAL SUBMITTALS
A. Welding certificates.
1.06 QUALITY ASSURANCE
A. Structural Steel Welding Qualifications: Qualify procedures and personnel according to
AWS D1.1/D1.1M, "Structural Welding Code - Steel."
B. Pipe Welding Qualifications: Qualify procedures and operators according to ASME Boiler and Pressure
Vessel Code.
PART 2 - PRODUCTS
2.01 METAL PIPE HANGERS AND SUPPORTS
A. Carbon-Steel Pipe Hangers and Supports:
1. Description: MSS SP-58, Types 1 through 58, factory-fabricated components.

42204.004 23 05 29-2 Hangers and Supports for HVAC Piping Equipment
2. Galvanized Metallic Coatings: Pregalvanized or hot dipped.
3. Nonmetallic Coatings: Plastic coating, jacket, or liner.
4. Hanger Rods: Continuous-thread rod, nuts, and washer made of carbon steel.
2.02 TRAPEZE PIPE HANGERS
A. Description: MSS SP-69, Type 59, shop- or field-fabricated pipe-support assembly made from structural
carbon-steel shapes with MSS SP-58 carbon-steel hanger rods, nuts, saddles, and U-bolts.
2.03 METAL FRAMING SYSTEMS
A. MFMA Manufacturer Metal Framing Systems:
1. Manufacturers: Subject to compliance with requirements, provide products by one of the
following:
a. Allied Tube & Conduit; a brand of Atkore International.
b. Cooper B-Line, Inc.; a division of Cooper Industries.
c. Thomas & Betts Corporation, A Member of the ABB Group.
d. Unistrut; an Atkore International company.
2. Description: Shop- or field-fabricated pipe-support assembly for supporting multiple parallel
pipes.
3. Standard: MFMA-4.
4. Channels: Continuous slotted steel channel with inturned lips.
5. Channel Nuts: Formed or stamped steel nuts or other devices designed to fit into channel slot and,
when tightened, prevent slipping along channel.
6. Hanger Rods: Continuous-thread rod, nuts, and washer made of carbon steel.
7. Metallic Coating: Electroplated zinc or Hot-dipped galvanized.
2.04 THERMAL-HANGER SHIELD INSERTS
A. Manufacturers: Subject to compliance with requirements, provide products by one of the following:
1. ERICO International Corporation.
2. National Pipe Hanger Corporation.
3. Pipe Shields Inc.
4. Piping Technology & Products, Inc.
B. Insulation-Insert Material for Cold Piping: ASTM C 552, Type II cellular glass with 100-psig or
ASTM C 591, Type VI, Grade 1 polyisocyanurate with 125-psig minimum compressive strength and
vapor barrier.
C. Insulation-Insert Material for Hot Piping: Water-repellent treated, ASTM C 533, Type I calcium silicate
with 140-psig minimum compressive strength.
D. For Trapeze or Clamped Systems: Insert and shield shall cover entire circumference of pipe.
E. For Clevis or Band Hangers: Insert and shield shall cover lower 180 degrees of pipe.
F. Insert Length: Extend 2 inches beyond sheet metal shield for piping operating below ambient air
temperature.
2.05 FASTENER SYSTEMS
A. Powder-Actuated Fasteners: Threaded-steel stud, for use in hardened portland cement concrete with pull-
out, tension, and shear capacities appropriate for supported loads and building materials where used.
B. Mechanical-Expansion Anchors: Insert-wedge-type, zinc-coated steel anchors, for use in hardened
portland cement concrete; with pull-out, tension, and shear capacities appropriate for supported loads and
building materials where used.
2.06 PIPE STANDS
A. General Requirements for Pipe Stands: Shop- or field-fabricated assemblies made of manufactured
corrosion-resistant components to support roof-mounted piping.
B. Compact Pipe Stand: One-piece plastic unit with integral-rod roller, pipe clamps, or V-shaped cradle to
support pipe, for roof installation without membrane penetration.

42204.004 23 05 29-3 Hangers and Supports for HVAC Piping Equipment
C. High-Type, Single-Pipe Stand:
1. Description: Assembly of base, vertical and horizontal members, and pipe support, for roof
installation without membrane penetration.
2. Base: Plastic.
3. Vertical Members: Two or more cadmium-plated-steel or stainless-steel, continuous-thread rods.
4. Horizontal Member: Cadmium-plated-steel or stainless-steel rod with plastic or stainless-steel,
roller-type pipe support.
D. High-Type, Multiple-Pipe Stand:
1. Description: Assembly of bases, vertical and horizontal members, and pipe supports, for roof
installation without membrane penetration.
2. Bases: One or more; plastic.
3. Vertical Members: Two or more protective-coated-steel channels.
4. Horizontal Member: Protective-coated-steel channel.
5. Pipe Supports: Galvanized-steel, clevis-type pipe hangers.
E. Curb-Mounted-Type Pipe Stands: Shop- or field-fabricated pipe supports made from structural-steel
shapes, continuous-thread rods, and rollers, for mounting on permanent stationary roof curb.
2.07 EQUIPMENT SUPPORTS
A. Description: Welded, shop- or field-fabricated equipment support made from structural carbon-steel
shapes.
2.08 MISCELLANEOUS MATERIALS
A. Structural Steel: ASTM A 36/A 36M, carbon-steel plates, shapes, and bars; black and galvanized.
B. Grout: ASTM C 1107, factory-mixed and -packaged, dry, hydraulic-cement, nonshrink and nonmetallic
grout; suitable for interior and exterior applications.
1. Properties: Nonstaining, noncorrosive, and nongaseous.
2. Design Mix: 5000-psi, 28-day compressive strength.
PART 3 - EXECUTION
3.01 HANGER AND SUPPORT INSTALLATION
A. Metal Pipe-Hanger Installation: Comply with MSS SP-69 and MSS SP-89. Install hangers, supports,
clamps, and attachments as required to properly support piping from the building structure.
B. Metal Trapeze Pipe-Hanger Installation: Comply with MSS SP-69 and MSS SP-89. Arrange for grouping
of parallel runs of horizontal piping, and support together on field-fabricated trapeze pipe hangers.
1. Pipes of Various Sizes: Support together and space trapezes for smallest pipe size or install
intermediate supports for smaller diameter pipes as specified for individual pipe hangers.
2. Field fabricate from ASTM A 36/A 36M, carbon-steel shapes selected for loads being supported.
Weld steel according to AWS D1.1/D1.1M.
C. Metal Framing System Installation: Arrange for grouping of parallel runs of piping, and support together
on field-assembled metal framing systems.
1. Install powder-actuated fasteners for use in lightweight concrete or concrete slabs less than 4
inches thick in concrete after concrete is placed and completely cured. Use operators that are
licensed by powder-actuated tool manufacturer. Install fasteners according to powder-actuated tool
manufacturer's operating manual.
2. Install mechanical-expansion anchors in concrete after concrete is placed and completely cured.
Install fasteners according to manufacturer's written instructions.
D. Pipe Stand Installation:
1. Curb-Mounted-Type Pipe Stands: Assemble components or fabricate pipe stand and mount on
permanent, stationary roof rail.
E. Install hangers and supports complete with necessary attachments, inserts, bolts, rods, nuts, washers, and
other accessories.

42204.004 23 05 29-4 Hangers and Supports for HVAC Piping Equipment
F. Equipment Support Installation: Fabricate from welded-structural-steel shapes.
G. Install hangers and supports to allow controlled thermal and seismic movement of piping systems, to
permit freedom of movement between pipe anchors, and to facilitate action of expansion joints,
expansion loops, expansion bends, and similar units.
H. Install lateral bracing with pipe hangers and supports to prevent swaying.
I. Install building attachments within concrete slabs or attach to structural steel. Install additional
attachments at concentrated loads, including valves, flanges, and strainers, NPS 2-1/2 and larger and at
changes in direction of piping. Install concrete inserts before concrete is placed; fasten inserts to forms
and install reinforcing bars through openings at top of inserts.
J. Load Distribution: Install hangers and supports so that piping live and dead loads and stresses from
movement will not be transmitted to connected equipment.
K. Pipe Slopes: Install hangers and supports to provide indicated pipe slopes and to not exceed maximum
pipe deflections allowed by ASME B31.9 for building services piping.
L. Insulated Piping:
1. Attach clamps and spacers to piping.
a. Piping Operating above Ambient Air Temperature: Clamp may project through insulation.
b. Piping Operating below Ambient Air Temperature: Use thermal-hanger shield insert with
clamp sized to match OD of insert.
c. Do not exceed pipe stress limits allowed by ASME B31.9 for building services piping.
2. Install MSS SP-58, Type 39, protection saddles if insulation without vapor barrier is indicated. Fill
interior voids with insulation that matches adjoining insulation.
a. Option: Thermal-hanger shield inserts may be used. Include steel weight-distribution plate
for pipe NPS 4 and larger if pipe is installed on rollers.
3. Install MSS SP-58, Type 40, protective shields on cold piping with vapor barrier. Shields shall
span an arc of 180 degrees.
a. Option: Thermal-hanger shield inserts may be used. Include steel weight-distribution plate
for pipe NPS 4 and larger if pipe is installed on rollers.
4. Shield Dimensions for Pipe: Not less than the following:
a. NPS 1/4 to NPS 3-1/2: 12 inches long and 0.048 inch thick.
b. NPS 4: 12 inches long and 0.06 inch thick.
5. Thermal-Hanger Shields: Install with insulation same thickness as piping insulation.
3.02 EQUIPMENT SUPPORTS
A. Fabricate structural-steel stands to suspend equipment from structure overhead or to support equipment
above floor.
B. Grouting: Place grout under supports for equipment and make bearing surface smooth.
C. Provide lateral bracing, to prevent swaying, for equipment supports.
3.03 METAL FABRICATIONS
A. Cut, drill, and fit miscellaneous metal fabrications for trapeze pipe hangers and equipment supports.
B. Fit exposed connections together to form hairline joints. Field weld connections that cannot be shop
welded because of shipping size limitations.
C. Field Welding: Comply with AWS D1.1/D1.1M procedures for shielded, metal arc welding; appearance
and quality of welds; and methods used in correcting welding work; and with the following:
1. Use materials and methods that minimize distortion and develop strength and corrosion resistance
of base metals.
2. Obtain fusion without undercut or overlap.
3. Remove welding flux immediately.
4. Finish welds at exposed connections so no roughness shows after finishing and so contours of
welded surfaces match adjacent contours.

42204.004 23 05 29-5 Hangers and Supports for HVAC Piping Equipment
3.04 ADJUSTING
A. Hanger Adjustments: Adjust hangers to distribute loads equally on attachments and to achieve indicated
slope of pipe.
B. Trim excess length of continuous-thread hanger and support rods to 1-1/2 inches.
3.05 PAINTING
A. Touchup: Clean field welds and abraded areas of shop paint. Paint exposed areas immediately after
erecting hangers and supports. Use same materials as used for shop painting. Comply with SSPC-PA 1
requirements for touching up field-painted surfaces.
1. Apply paint by brush or spray to provide a minimum dry film thickness of 2.0 mils.
B. Galvanized Surfaces: Clean welds, bolted connections, and abraded areas and apply galvanizing-repair
paint to comply with ASTM A 780.
3.06 HANGER AND SUPPORT SCHEDULE
A. Specific hanger and support requirements are in Sections specifying piping systems and equipment.
B. Comply with MSS SP-69 for pipe-hanger selections and applications that are not specified in piping
system Sections.
C. Use hangers and supports with galvanized metallic coatings for piping and equipment that will not have
field-applied finish.
D. Use nonmetallic coatings on attachments for electrolytic protection where attachments are in direct
contact with copper tubing.
E. Use carbon-steel pipe hangers and supports and attachments for general service applications.
F. Use stainless-steel or corrosion-resistant attachments for hostile environment applications.
G. Use copper-plated pipe hangers and copper attachments for copper piping and tubing.
H. Use thermal-hanger shield inserts for insulated piping and tubing.
I. Horizontal-Piping Hangers and Supports: Unless otherwise indicated and except as specified in piping
system Sections, install the following types:
1. Hangers:
a. Carbon steel, adjustable swivel ring, or adjustable clevis. MSS SP-69 Type 10 or Type 1.
1) All pipes 1-1/2" and under.
b. Carbon steel, adjustable clevis, MSS SP-69 Type 1.
1) Glycol, condenser, and make-up water: 2" and over.
2) Refrigerant: 2" and over.
2. Multiple or Trapeze Hangers:
a. Strut of structural steel channels with welded spacers and hanger rods.
1) Glycol, condenser, and make-up water.
2) Refrigerant.
3) Steam and condensate: 3" and under.
3. Wall Support:
a. Carbon steel hook.
1) All pipes 2" and under.
b. Welded steel bracket MSS SP-69 Type 32 or 33 and steel clamp.
1) Glycol, condenser, and make-up water: 2-1/2" and over.
2) Refrigerant: 2-1/2" and over.
4. Vertical Support: Steel riser clamp, MSS SP-69 Type 8.
5. Floor Support:
a. Cast iron adjustable pipe saddle, lock nut and nipple, MSS SP-69 Type 38, floor flange and
concrete pier or steel support.
1) Glycol, condenser, and make-up water.
2) Refrigerant.
6. Accessories:

42204.004 23 05 29-6 Hangers and Supports for HVAC Piping Equipment
a. Hanger Rods: Mild steel threaded both ends, threaded one end, or continuous threaded,
black or zinc plated finish with adjusting locknuts.
b. Structural and miscellaneous steel:
1) Angles, channels, and beams: ASTM A36 and A572 as required.
2) Tubing: ASTM A500 Grade B.
3) Unfinished bolts: ASTM A307, Grade A, length required with no threads in contact
with bearing surfaces, fitted with self-locking nuts and washers.
J. Building Attachments: Unless otherwise indicated and except as specified in piping system Sections,
install the following types:
1. Steel or Malleable Concrete Inserts (MSS Type 18): For upper attachment to suspend pipe hangers
from concrete ceiling.
2. Top-Beam C-Clamps (MSS Type 19): For use under roof installations with bar-joist construction,
to attach to top flange of structural shape.
3. Side-Beam or Channel Clamps (MSS Type 20): For attaching to bottom flange of beams,
channels, or angles.
4. Center-Beam Clamps (MSS Type 21): For attaching to center of bottom flange of beams.
5. Welded Beam Attachments (MSS Type 22): For attaching to bottom of beams if loads are
considerable and rod sizes are large.
6. C-Clamps (MSS Type 23): For structural shapes.
7. Top-Beam Clamps (MSS Type 25): For top of beams if hanger rod is required tangent to flange
edge.
8. Side-Beam Clamps (MSS Type 27): For bottom of steel I-beams.
9. Steel-Beam Clamps with Eye Nuts (MSS Type 28): For attaching to bottom of steel I-beams for
heavy loads.
10. Linked-Steel Clamps with Eye Nuts (MSS Type 29): For attaching to bottom of steel I-beams for
heavy loads, with link extensions.
11. Malleable-Beam Clamps with Extension Pieces (MSS Type 30): For attaching to structural steel.
12. Welded-Steel Brackets: For support of pipes from below or for suspending from above by using
clip and rod. Use one of the following for indicated loads:
a. Light (MSS Type 31): 750 lb.
b. Medium (MSS Type 32): 1500 lb.
c. Heavy (MSS Type 33): 3000 lb.
13. Side-Beam Brackets (MSS Type 34): For sides of steel or wooden beams.
14. Plate Lugs (MSS Type 57): For attaching to steel beams if flexibility at beam is required.
15. Horizontal Travelers (MSS Type 58): For supporting piping systems subject to linear horizontal
movement where headroom is limited.
K. Saddles and Shields: Unless otherwise indicated and except as specified in piping system Sections, install
the following types:
1. Steel-Pipe-Covering Protection Saddles (MSS Type 39): To fill interior voids with insulation that
matches adjoining insulation.
2. Protection Shields (MSS Type 40): Of length recommended in writing by manufacturer to prevent
crushing insulation.
3. Thermal-Hanger Shield Inserts: For supporting insulated pipe.
L. Spring Hangers and Supports: Unless otherwise indicated and except as specified in piping system
Sections, install the following types:
1. Restraint-Control Devices (MSS Type 47): Where indicated to control piping movement.
2. Spring Cushions (MSS Type 48): For light loads if vertical movement does not exceed 1-1/4
inches.
3. Spring-Cushion Roll Hangers (MSS Type 49): For equipping Type 41, roll hanger with springs.
4. Spring Sway Braces (MSS Type 50): To retard sway, shock, vibration, or thermal expansion in
piping systems.
5. Variable-Spring Hangers (MSS Type 51): Preset to indicated load and limit variability factor to 25
percent to allow expansion and contraction of piping system from hanger.

42204.004 23 05 29-7 Hangers and Supports for HVAC Piping Equipment
6. Variable-Spring Base Supports (MSS Type 52): Preset to indicated load and limit variability factor
to 25 percent to allow expansion and contraction of piping system from base support.
7. Variable-Spring Trapeze Hangers (MSS Type 53): Preset to indicated load and limit variability
factor to 25 percent to allow expansion and contraction of piping system from trapeze support.
8. Constant Supports: For critical piping stress and if necessary to avoid transfer of stress from one
support to another support, critical terminal, or connected equipment. Include auxiliary stops for
erection, hydrostatic test, and load-adjustment capability. These supports include the following
types:
a. Horizontal (MSS Type 54): Mounted horizontally.
b. Vertical (MSS Type 55): Mounted vertically.
c. Trapeze (MSS Type 56): Two vertical-type supports and one trapeze member.
M. Comply with MSS SP-69 for trapeze pipe-hanger selections and applications that are not specified in
piping system Sections.
N. Comply with MFMA-103 for metal framing system selections and applications that are not specified in
piping system Sections.
O. Use powder-actuated fasteners or mechanical-expansion anchors instead of building attachments where
required in concrete construction.
P. Roof Curb Installation: Install each roof curb so top surface is level.
Q. Equipment Support Installation: Install equipment supports so top surfaces are level with each other.
R. Pipe Support Installation: Comply with MSS SP-58 and MSS SP-89. Install supports and attachments as
required to properly support piping. Arrange for grouping of parallel runs of horizontal piping, and
support together.
1. Pipes of Various Sizes: Space supports for smallest pipe size or install intermediate supports for
smaller diameter pipes as specified for individual pipe hangers.
S. Preformed Flashing-Sleeve and Flashing Pipe Portal Installation: Secure flashing sleeve to roof
membrane according to flashing-sleeve manufacturer's written instructions; flash sleeve flange to
surrounding roof membrane according to roof membrane manufacturer's instructions.
END OF SECTION 23 05 29

42204.004 23 05 48-1 Vibration Controls for HVAC
SECTION 23 05 48
VIBRATION CONTROLS FOR HVAC
PART 1 - GENERAL
1.01 RELATED DOCUMENTS
A. Drawings and general provisions of the Contract, including General and Supplementary
Conditions and Division 01 Specification Sections, apply to this Section.
1.02 SUMMARY
B. Section Includes:
1. Bases.
2. Vibration isolators.
3. Flexible pipe connectors.
C. Related Requirements:
4. Section 21 05 48.13 "Vibration Controls for Fire Suppression" for devices for fire-
suppression equipment and systems.
5. Section 22 05 48.13 "Vibration Controls for Plumbing" for devices for plumbing
equipment and systems.
1.03 ACTION SUBMITTALS
D. Product Data: For each type of product.
6. Include rated load, rated deflection, and overload capacity for each vibration isolation
device.
7. Illustrate and indicate style, material, strength, fastening provision, and finish for each
type and size of vibration isolation device type required.
E. Shop Drawings:
8. Detail fabrication and assembly of equipment bases. Detail fabrication including
anchorages and attachments to structure and to supported equipment. Include adjustable
motor bases, rails, and frames for equipment mounting.
9. Vibration Isolation Base Details: Detail fabrication including anchorages and attachments
to structure and to supported equipment. Include adjustable motor bases, rails, and frames
for equipment mounting.
1.04 PERFORMANCE REQUIREMENTS
F. Use materials that will retain their isolation characteristics for the life of the equipment served.
Use industrial grade neoprene for elastomeric materials.
G. Hot dip galvanize, apply a neoprene coating on, or use stainless steel parts for isolation devices
exposed to the weather or used in high humidity areas; include limit stops to resist wind.
H. Select isolator deflection so the natural frequency is 40% or less than the lowest operating speed
of the equipment. Lowest operating speed shall take into account modulation of variable
frequency drives and two-speed motors.
I. Consider equipment weight distribution to provide uniform isolator deflections.
1.05 DESIGN REQUIREMENTS
J. Retain "Welding Qualifications" Paragraph below if shop or field welding is required. If
retaining, also retain "Welding certificates" Paragraph in "Informational Submittals" Article.

42204.004 23 05 48-2 Vibration Controls for HVAC
K. Select base and vibration isolation device as indicated below. Minimum deflection as listed and
not less than 95% isolation efficiency.
PART 2 - PRODUCTS
2.01 BASES
A. Manufacturers:
1. Peabody.
2. Mason.
3. Amber/Booth.
4. Vibration mountings and controls.
B. Curb Mounted Base (Type D):
1. Manufacturers:
a. Mason.
b. Thycurb.
2. Construction:
c. Lower member: Rectangular steel tube containing adjustable and removable
springs that support the upper floating section; springs shall rest on 1/4" neoprene
acoustical pad.
d. Upper frame: Designed to provide continuous support for the equipment.
e. Hardware: Cadmium plated or galvanized.
3. Continuous flexible aluminum weatherproofing seal joined at the corners by EPDM
bellows, and nailed to the curbs waterproofing.
4. Spring access ports with waterproof covers at the spring location.
2.02 VIBRATION ISOLATORS
A. Manufacturers:
1. Peabody
2. Mason
3. Amber/Booth
B. Neoprene Pads
1. Neoprene Pad (Type 1):
a. Stiffness: 40-45 durometer.
b. Ribbed or waffled on both surfaces.
c. Steel shim plates between layers when multiple layers are required.
C. Springs:
1. Spring lateral stiffness greater than .75 times the rated vertical stiffness.
2. Spring travel 50% beyond rated load.
3. Spring Isolator (Type 3):
a. Free standing, unhoused, laterally stable with neoprene friction base.
4. Leveling bolts for securing to the equipment.
5. Restrained Spring Isolators (Type 4):
a. Springs assembled into formed or welded steel housing assemblies designed to
limit vertical movement of the supported equipment, with a neoprene friction pad.
b. Leveling bolts for securing to equipment.
6. Spring Hanger (Type 5):
a. Steel spring in series with a minimum 0.3" elastomer insert assembled in a steel
bracket.

42204.004 23 05 48-3 Vibration Controls for HVAC
b. Hanger support rod misalignment through a 30° arc without metal-to-metal contact
or other short circuit.
7. Precompressed Spring Hanger (Type 6):
a. Same as Type 5 but spring preloaded with release mechanism to free the spring
after the installation is complete.
2.03 FLEXIBLE PIPE CONNECTORS
A. Metal Hose:
1. Manufacturers:
a. Flexonics.
b. Hyspan.
c. Metraflex.
d. Twin City Hose.
2. Joint: As specified for pipe joints.
3. Maximum Offset: 1 inch on each side of installed center line.
4. Length: Minimum 12" or as required to provide specified offset.
5. Steel Piping:
a. Inner Hose: Stainless steel.
b. Exterior Sleeve: Single or double braided stainless steel as required for pressure
rating.
c. Pressure Rating: 200 psi WOG and 250°F.
6. Copper Piping:
a. Inner Hose: Bronze.
b. Exterior Sleeve: Braided bronze.
c. Pressure Rating: 200 psi WOG and 250°F.
7. Applications:
a. Hot Water Systems
b. Glycol piping systems.
c. Refrigerant piping systems.
PART 3 - EXECUTION
3.01 EXAMINATION
A. Examine areas and equipment to receive vibration isolation control devices for compliance with
requirements for installation tolerances and other conditions affecting performance of the Work.
B. Examine roughing-in of reinforcement and cast-in-place anchors to verify actual locations
before installation.
C. Proceed with installation only after unsatisfactory conditions have been corrected.
3.02 VIBRATION CONTROL DEVICE INSTALLATION
A. Install vibration isolation devices in accordance with the manufacturer's instructions.
B. Install spring isolators without binding.
C. Installation shall not short circuit any isolation devices.
D. Install flexible pipe connectors on the equipment side of isolation valves.
E. Flexible pipe connectors shall be properly pre-extended as recommended by the manufacturer to
prevent additional elongation under pressure.
F. Prime and paint exposed structural steel of Type B and C bases.
END OF SECTION 23 05 48

42204.004 23 05 53-1 Identification for HVAC piping and Equipment
SECTION 23 05 53
IDENTIFICATION FOR HVAC PIPING AND EQUIPMENT
PART 1 - GENERAL
1.01 RELATED DOCUMENTS
A. Drawings and general provisions of the Contract, including General and Supplementary Conditions and
Division 01 Specification Sections, apply to this Section.
1.02 SUMMARY
A. Section Includes:
1. Equipment labels.
2. Warning signs and labels.
3. Pipe labels.
4. Duct labels.
5. Stencils.
6. Valve tags.
7. Warning tags.
1.03 ACTION SUBMITTALS
A. Product Data: For each type of product.
B. Samples: For color, letter style, and graphic representation required for each identification material and
device.
C. Equipment Label Schedule: Include a listing of all equipment to be labeled with the proposed content for
each label.
D. Valve numbering scheme.
E. Valve Schedules: For each piping system to include in maintenance manuals.
PART 2 - PRODUCTS
2.01 EQUIPMENT LABELS
A. Plastic Labels for Equipment:
1. Manufacturers: Subject to compliance with requirements, provide products by one of the
following:
a. Brady Corporation.
b. Seton Identification Products.
2. Material and Thickness: Multilayer, multicolor, plastic labels for mechanical engraving, 1/16 inch
thick, and having predrilled holes for attachment hardware.
3. Letter Color: White.
4. Background Color: Dark contrasting color.
5. Maximum Temperature: Able to withstand temperatures up to 160 deg F.
6. Minimum Label Size: Length and width vary for required label content, but not less than 2-1/2 by
3/4 inch.
7. Minimum Letter Size: 1/4 inch for name of units if viewing distance is less than 24 inches, 1/2
inch for viewing distances up to 72 inches, and proportionately larger lettering for greater viewing
distances. Include secondary lettering two-thirds to three-quarters the size of principal lettering.
8. Fasteners: Stainless-steel self-tapping screws.
9. Adhesive: Contact-type permanent adhesive, compatible with label and with substrate where not
feasible to attach plate with screws.
B. Label Content: Include equipment's Drawing designation or unique equipment number.

42204.004 23 05 53-2 Identification for HVAC piping and Equipment
2.02 PIPE LABELS
A. Manufacturers: Subject to compliance with requirements, provide products by one of the following:
1. Brady Corporation.
2. Seton Identification Products.
B. General Requirements for Manufactured Pipe Labels: Preprinted, color-coded, with lettering indicating
service, and showing flow direction according to ASME A13.1.
C. Self-Adhesive Pipe Labels: Printed plastic with contact-type, permanent-adhesive backing.
D. Underground Plastic Pipe Markers: Bright colored continuously printed plastic ribbon tape, minimum 6"
wide by 4 mil thick, manufactured for direct burial service.
E. Pipe Label Contents: Include identification of piping service using same designations or abbreviations as
used on Drawings; and an arrow indicating flow direction.
1. Flow-Direction Arrows: Integral with piping system service lettering to accommodate both
directions or as separate unit on each pipe label to indicate flow direction.
2. Lettering Size: Size letters according to ASME A13.1 for piping.
2.03 STENCILS
A. Stencils: With clean cut symbols and letters of following size:
1. 3/4 to 1-1/4" Outside Diameter of Insulation or Pipe: 8" long color field, 1/2" high letters.
2. 1-1/2 to 2" Outside Diameter of Insulation or Pipe: 8" long color field, 3/4" high letters.
3. 2-1/2 to 6" Outside Diameter of Insulation or Pipe: 12" long color field, 1-1/4" high letters.
4. 8 to 10" Outside Diameter of Insulation or Pipe: 24" long color field, 2-1/2" high letters.
5. Over 10" Outside Diameter of Insulation or Pipe: 32" long color field, 3-1/2" high letters.
6. Ductwork and Equipment: 2-1/2" high letters.
B. Stencil Paint: Semi-gloss enamel, colors conforming to ASME A13.1.
2.04 VALVE TAGS
A. Manufacturers: Subject to compliance with requirements, provide products by one of the following:
1. Brady Corporation.
2. Seton Identification Products.
B. Description: Stamped or engraved with 1/4-inch letters for piping system abbreviation and 1/2-inch
numbers.
1. Metal Tag Material: Brass, 0.032-inch minimum thickness, and having predrilled or stamped holes
for attachment hardware.
2. Plastic Tag Material: Multilayer, multicolor, plastic labels for mechanical engraving, 1/16 inch
thick, and having predrilled holes for attachment hardware. Color to match color used for pipe
markers.
3. Fasteners: Brass wire-link chain and S-hook.
C. Valve Schedules: For each piping system, on 8-1/2-by-11-inch bond paper. Tabulate valve number,
piping system, system abbreviation (as shown on valve tag), location of valve (room or space), normal-
operating position (open, closed, or modulating), and variations for identification. Mark valves for
emergency shutoff and similar special uses.
1. Valve-tag schedule shall be included in operation and maintenance data.

42204.004 23 05 53-3 Identification for HVAC piping and Equipment
PART 3 - EXECUTION
3.01 PREPARATION
A. Clean piping and equipment surfaces of substances that could impair bond of identification devices,
including dirt, oil, grease, release agents, and incompatible primers, paints, and encapsulants.
3.02 GENERAL INSTALLATION REQUIREMENTS
A. Coordinate installation of identifying devices with completion of covering and painting of surfaces where
devices are to be applied.
B. Coordinate installation of identifying devices with locations of access panels and doors.
C. Install identifying devices before installing acoustical ceilings and similar concealment.
3.03 EQUIPMENT LABEL INSTALLATION
A. Install or permanently fasten labels on each major item of mechanical equipment.
B. Locate equipment labels where accessible and visible.
3.04 PIPE LABEL INSTALLATION
A. Stenciled Pipe Label Option: Stenciled labels may be provided instead of manufactured pipe labels, at
Installer's option. Install stenciled pipe labels, complying with ASME A13.1, on each piping system.
1. Identification Paint: Use for contrasting background.
2. Stencil Paint: Use for pipe marking.
B. Pipe Label Locations: Locate pipe labels where piping is exposed or above accessible ceilings in finished
spaces; machine rooms; accessible maintenance spaces such as shafts, tunnels, and plenums; and exterior
exposed locations as follows:
1. Near each valve and control device.
2. Near each branch connection, excluding short takeoffs for fixtures and terminal units. Where flow
pattern is not obvious, mark each pipe at branch.
3. Near penetrations and on both sides of through walls, floors, ceilings, and inaccessible enclosures.
4. At access doors, manholes, and similar access points that permit view of concealed piping.
5. Near major equipment items and other points of origination and termination.
6. Spaced at maximum intervals of 50 feet along each run. Reduce intervals to 25 feet in areas of
congested piping and equipment.
7. On piping above removable acoustical ceilings. Omit intermediately spaced labels.
C. Directional Flow Arrows: Arrows shall be used to indicate direction of flow in pipes, including pipes
where flow is allowed in both directions.
D. Pipe Label Color Schedule:
1. Chilled-Water Piping: White letters on a safety-green background.
2. Heating Water Piping: White letters on a safety-green background.
3. Refrigerant Piping: Black letters on a safety-white background.
4. Steam Condensate Piping: White letters on a safety-purple background.
3.05 DUCT LABEL INSTALLATION
A. Locate labels near points where ducts enter into and exit from concealed spaces and at maximum
intervals of 50 feet in each space where ducts are exposed or concealed by removable ceiling system.
3.06 VALVE-TAG INSTALLATION
A. Install tags on valves and control devices in piping systems, except check valves, valves within factory-
fabricated equipment units, shutoff valves, faucets, convenience and lawn-watering hose connections, and
HVAC terminal devices and similar roughing-in connections of end-use fixtures and units. All valves
must be scheduled on valve schedule.
B. Valve-Tag Application Schedule: Tag valves according to size, shape, and color scheme and with
captions similar to those indicated in the following subparagraphs:
1. Valve-Tag Size and Shape:
a. Chilled Water: 1-1/2 inches minimum, round.
b. Refrigerant: 1-1/2 inches minimum, round.
c. Hot Water: 1-1/2 inches minimum, round.
2. Valve-Tag Colors:

42204.004 23 05 53-4 Identification for HVAC piping and Equipment
a. Potable and Other Water: White letters on a safety-green background.
END OF SECTION 23 05 53

42204.004 23 05 93-1 Testing, Adjusting, and Balancing for HVAC
SECTION 23 05 93
TESTING, ADJUSTING, AND BALANCING FOR HVAC
PART 1 - GENERAL
1.01 RELATED DOCUMENTS
A. Drawings and general provisions of the Contract, including General and Supplementary Conditions and
Division 01 Specification Sections, apply to this Section.
1.02 SUMMARY
A. Section Includes:
1. Testing, Adjusting, and Balancing of Air Systems:
2. Testing, Adjusting, and Balancing of Hydronic Piping Systems:
3. Testing, Adjusting, and Balancing Equipment:
a. Motors.
b. Chillers.
c. Condensing units.
4. Heat-transfer coils.
5. Testing, adjusting, and balancing existing systems and equipment.
1.03 DEFINITIONS
A. AABC: Associated Air Balance Council.
B. BAS: Building automation systems.
C. NEBB: National Environmental Balancing Bureau.
D. TAB: Testing, adjusting, and balancing.
E. TABB: Testing, Adjusting, and Balancing Bureau.
F. TAB Specialist: An independent entity meeting qualifications to perform TAB work.
G. TDH: Total dynamic head.
1.04 PREINSTALLATION MEETINGS
A. TAB Conference: If requested by the Owner, conduct a TAB conference at Project site after approval of
the TAB strategies and procedures plan to develop a mutual understanding of the details. Provide a
minimum of 14 days' advance notice of scheduled meeting time and location.
1. Minimum Agenda Items:
a. The Contract Documents examination report.
b. The TAB plan.
c. Needs for coordination and cooperation of trades and subcontractors.
d. Proposed procedures for documentation and communication flow.
1.05 INFORMATIONAL SUBMITTALS
A. Qualification Data: Within 30 days of Contractor's Notice to Proceed, submit documentation that the
TAB specialist and this Project's TAB team members meet the qualifications specified in "Quality
Assurance" Article.
B. Contract Documents Examination Report: Within 30 days of Contractor's Notice to Proceed, submit the
Contract Documents review report as specified in Part 3.
C. Strategies and Procedures Plan: Within 30 days of Contractor's Notice to Proceed, submit TAB strategies
and step-by-step procedures as specified in "Preparation" Article.
D. System Readiness Checklists: Within 30 days of Contractor's Notice to Proceed, submit system readiness
checklists as specified in "Preparation" Article.
E. Examination Report: Submit a summary report of the examination review required in "Examination"
Article.
F. Certified TAB reports.
G. Sample report forms.

42204.004 23 05 93-2 Testing, Adjusting, and Balancing for HVAC
H. Instrument calibration reports, to include the following:
1. Instrument type and make.
2. Serial number.
3. Application.
4. Dates of use.
5. Dates of calibration.
1.06 QUALITY ASSURANCE
A. TAB Specialists Qualifications: Certified by AABC or NEBB.
1. Contractor shall be an independent company specializing in the testing, adjusting, and balancing
of systems specified in this Section with minimum three years of experience and not associated
with the suppliers of equipment or the installing Contractor
2. TAB Field Supervisor: Employee of the TAB specialist and certified by AABC or NEBB.
3. TAB Technician: Employee of the TAB specialist and certified by AABC or NEBB as a TAB
technician.
B. Instrumentation Type, Quantity, Accuracy, and Calibration: Comply with requirements in ASHRAE 111,
Section 4, "Instrumentation."
C. ASHRAE Compliance: Applicable requirements in ASHRAE 62.1, Section 7.2.2 - "Air Balancing."
D. ASHRAE/IESNA Compliance: Applicable requirements in ASHRAE/IESNA 90.1, Section 6.7.2.3 -
"System Balancing."
1.07 FIELD CONDITIONS
A. Full Owner Occupancy: Owner will occupy the site and existing building during entire TAB period.
Cooperate with Owner during TAB operations to minimize conflicts with Owner's operations.
B. Partial Owner Occupancy: Owner may occupy completed areas of building before Substantial
Completion. Cooperate with Owner during TAB operations to minimize conflicts with Owner's
operations.
PART 2 - PRODUCTS (Not Applicable)
PART 3 - EXECUTION
3.01 EXAMINATION
A. Examine the Contract Documents to become familiar with Project requirements and to discover
conditions in systems designs that may preclude proper TAB of systems and equipment.
B. Examine installed systems for balancing devices, such as test ports, gage cocks, thermometer wells, flow-
control devices, balancing valves and fittings, and manual volume dampers. Verify that locations of these
balancing devices are applicable for intended purpose and are accessible.
C. Examine the approved submittals for HVAC systems and equipment.
D. Examine design data including HVAC system descriptions, statements of design assumptions for
environmental conditions and systems output, and statements of philosophies and assumptions about
HVAC system and equipment controls.
E. Examine ceiling plenums and underfloor air plenums used for supply, return, or relief air to verify that
they are properly separated from adjacent areas. Verify that penetrations in plenum walls are sealed and
fire-stopped if required.
F. Examine equipment performance data including fan and pump curves.
1. Relate performance data to Project conditions and requirements, including system effects that can
create undesired or unpredicted conditions that cause reduced capacities in all or part of a system.
2. Calculate system-effect factors to reduce performance ratings of HVAC equipment when installed
under conditions different from the conditions used to rate equipment performance. To calculate
system effects for air systems, use tables and charts found in AMCA 201, "Fans and Systems," or
in SMACNA's "HVAC Systems - Duct Design." Compare results with the design data and
installed conditions.

42204.004 23 05 93-3 Testing, Adjusting, and Balancing for HVAC
G. Examine system and equipment installations and verify that field quality-control testing, cleaning, and
adjusting specified in individual Sections have been performed.
H. Examine test reports specified in individual system and equipment Sections.
I. Examine HVAC equipment and verify that bearings are greased, belts are aligned and tight, filters are
clean, and equipment with functioning controls is ready for operation.
J. Examine terminal units, such as variable-air-volume boxes, and verify that they are accessible and their
controls are connected and functioning.
K. Examine strainers. Verify that startup screens have been replaced by permanent screens with indicated
perforations.
L. Examine control valves for proper installation for their intended function of throttling, diverting, or
mixing fluid flows.
M. Examine heat-transfer coils for correct piping connections and for clean and straight fins.
N. Examine system pumps to ensure absence of entrained air in the suction piping.
O. Examine operating safety interlocks and controls on HVAC equipment.
P. Report deficiencies discovered before and during performance of TAB procedures. Observe and record
system reactions to changes in conditions. Record default set points if different from indicated values.
3.02 PREPARATION
A. Prepare a TAB plan that includes the following:
1. Equipment and systems to be tested.
2. Strategies and step-by-step procedures for balancing the systems.
3. Instrumentation to be used.
4. Sample forms with specific identification for all equipment.
B. Perform system-readiness checks of HVAC systems and equipment to verify system readiness for TAB
work. Include, at a minimum, the following:
1. Airside:
a. Verify that leakage and pressure tests on air distribution systems have been satisfactorily
completed.
b. Duct systems are complete with terminals installed.
c. Volume, smoke, and fire dampers are open and functional.
d. Clean filters are installed.
e. Fans are operating, free of vibration, and rotating in correct direction.
f. Variable-frequency controllers' startup is complete and safeties are verified.
g. Automatic temperature-control systems are operational.
h. Ceilings are installed.
i. Windows and doors are installed.
j. Suitable access to balancing devices and equipment is provided.
2. Hydronics:
a. Verify leakage and pressure tests on water distribution systems have been satisfactorily
completed.
b. Piping is complete with terminals installed.
c. Water treatment is complete.
d. Systems are flushed, filled, and air purged.
e. Strainers are pulled and cleaned.
f. Control valves are functioning per the sequence of operation.
g. Shutoff and balance valves have been verified to be 100 percent open.
h. Pumps are started and proper rotation is verified.
i. Pump gage connections are installed directly at pump inlet and outlet flanges or in
discharge and suction pipe prior to valves or strainers.
j. Variable-frequency controllers' startup is complete and safeties are verified.
k. Suitable access to balancing devices and equipment is provided.
3.03 GENERAL PROCEDURES FOR TESTING AND BALANCING
A. Perform testing and balancing procedures on each system according to the procedures contained in
AABC's "National Standards for Total System Balance" or NEBB's "Procedural Standards for Testing,
Adjusting, and Balancing of Environmental Systems" and in this Section.
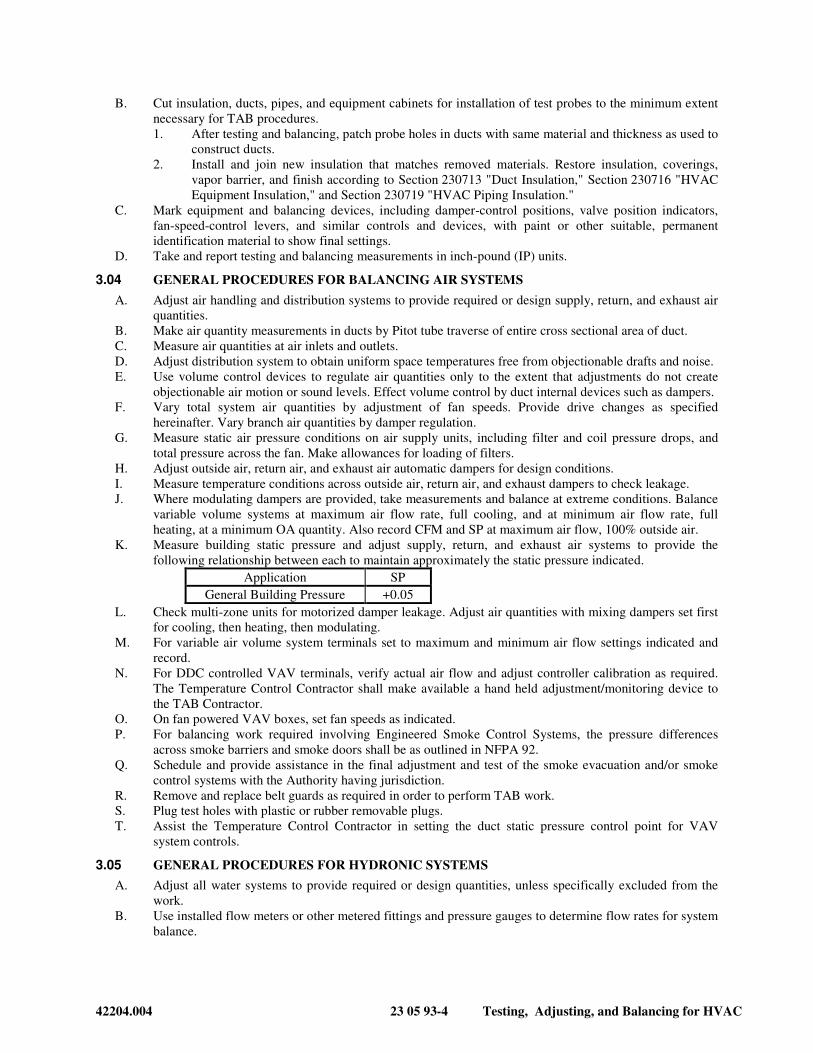
42204.004 23 05 93-4 Testing, Adjusting, and Balancing for HVAC
B. Cut insulation, ducts, pipes, and equipment cabinets for installation of test probes to the minimum extent
necessary for TAB procedures.
1. After testing and balancing, patch probe holes in ducts with same material and thickness as used to
construct ducts.
2. Install and join new insulation that matches removed materials. Restore insulation, coverings,
vapor barrier, and finish according to Section 230713 "Duct Insulation," Section 230716 "HVAC
Equipment Insulation," and Section 230719 "HVAC Piping Insulation."
C. Mark equipment and balancing devices, including damper-control positions, valve position indicators,
fan-speed-control levers, and similar controls and devices, with paint or other suitable, permanent
identification material to show final settings.
D. Take and report testing and balancing measurements in inch-pound (IP) units.
3.04 GENERAL PROCEDURES FOR BALANCING AIR SYSTEMS
A. Adjust air handling and distribution systems to provide required or design supply, return, and exhaust air
quantities.
B. Make air quantity measurements in ducts by Pitot tube traverse of entire cross sectional area of duct.
C. Measure air quantities at air inlets and outlets.
D. Adjust distribution system to obtain uniform space temperatures free from objectionable drafts and noise.
E. Use volume control devices to regulate air quantities only to the extent that adjustments do not create
objectionable air motion or sound levels. Effect volume control by duct internal devices such as dampers.
F. Vary total system air quantities by adjustment of fan speeds. Provide drive changes as specified
hereinafter. Vary branch air quantities by damper regulation.
G. Measure static air pressure conditions on air supply units, including filter and coil pressure drops, and
total pressure across the fan. Make allowances for loading of filters.
H. Adjust outside air, return air, and exhaust air automatic dampers for design conditions.
I. Measure temperature conditions across outside air, return air, and exhaust dampers to check leakage.
J. Where modulating dampers are provided, take measurements and balance at extreme conditions. Balance
variable volume systems at maximum air flow rate, full cooling, and at minimum air flow rate, full
heating, at a minimum OA quantity. Also record CFM and SP at maximum air flow, 100% outside air.
K. Measure building static pressure and adjust supply, return, and exhaust air systems to provide the
following relationship between each to maintain approximately the static pressure indicated.
Application SP
General Building Pressure +0.05
L. Check multi-zone units for motorized damper leakage. Adjust air quantities with mixing dampers set first
for cooling, then heating, then modulating.
M. For variable air volume system terminals set to maximum and minimum air flow settings indicated and
record.
N. For DDC controlled VAV terminals, verify actual air flow and adjust controller calibration as required.
The Temperature Control Contractor shall make available a hand held adjustment/monitoring device to
the TAB Contractor.
O. On fan powered VAV boxes, set fan speeds as indicated.
P. For balancing work required involving Engineered Smoke Control Systems, the pressure differences
across smoke barriers and smoke doors shall be as outlined in NFPA 92.
Q. Schedule and provide assistance in the final adjustment and test of the smoke evacuation and/or smoke
control systems with the Authority having jurisdiction.
R. Remove and replace belt guards as required in order to perform TAB work.
S. Plug test holes with plastic or rubber removable plugs.
T. Assist the Temperature Control Contractor in setting the duct static pressure control point for VAV
system controls.
3.05 GENERAL PROCEDURES FOR HYDRONIC SYSTEMS
A. Adjust all water systems to provide required or design quantities, unless specifically excluded from the
work.
B. Use installed flow meters or other metered fittings and pressure gauges to determine flow rates for system
balance.
42204.004 23 05 93-5 Testing, Adjusting, and Balancing for HVAC
C. Adjust systems to provide specified pressure drops and flows through heat transfer elements prior to
thermal testing. Perform balancing by measurement of temperature differential in conjunction with air
balancing.
D. Effect system balance with automatic control valves fully open to heat transfer elements.
E. Effect adjustment of water distribution systems by means of balancing valves. Do not use shut-off valves
for balancing.
F. Where available pump capacity is less than total flow requirements or individual system parts, full flow in
one part may be simulated by temporary restriction of flow to other parts.
G. Assist the Temperature Control Contractor in the setting of differential pressure sensor control point for
variable pumping systems.
H. Terminal devices, fitted with self-regulating flow control valves, do not require field balancing.
3.06 PROCEDURES FOR MOTORS
A. Motors 1/2 HP and Larger: Test at final balanced conditions and record the following data:
1. Manufacturer's name, model number, and serial number.
2. Motor horsepower rating.
3. Motor rpm.
4. Phase and hertz.
5. Nameplate and measured voltage, each phase.
6. Nameplate and measured amperage, each phase.
7. Starter size and thermal-protection-element rating.
8. Service factor and frame size.
B. Motors Driven by Variable-Frequency Controllers: Test manual bypass of controller to prove proper
operation.
3.07 PROCEDURES FOR CHILLERS
A. Balance water flow through each evaporator and condenser to within specified tolerances of indicated
flow with all pumps operating. With only one chiller operating in a multiple chiller installation, do not
exceed the flow for the maximum tube velocity recommended by the chiller manufacturer. Measure and
record the following data with each chiller operating at design conditions:
1. Evaporator-water entering and leaving temperatures, pressure drop, and water flow.
2. For water-cooled chillers, condenser-water entering and leaving temperatures, pressure drop, and
water flow.
3. Evaporator and condenser refrigerant temperatures and pressures, using instruments furnished by
chiller manufacturer.
4. Power factor if factory-installed instrumentation is furnished for measuring kilowatts.
5. Kilowatt input if factory-installed instrumentation is furnished for measuring kilowatts.
6. Capacity: Calculate in tons of cooling.
7. For air-cooled chillers, verify condenser-fan rotation and record fan and motor data including
number of fans and entering- and leaving-air temperatures.
3.08 PROCEDURES FOR CONDENSING UNITS
A. Verify proper rotation of fans.
B. Measure entering- and leaving-air temperatures.
C. Record fan and motor operating data.
3.09 PROCEDURES FOR HEAT-TRANSFER COILS
A. Measure, adjust, and record the following data for each water coil:
1. Entering- and leaving-water temperature.
2. Water flow rate.
3. Water pressure drop for major (more than 20 gpm) equipment coils, excluding unitary equipment
such as reheat coils, unit heaters, and fan-coil units.
4. Dry-bulb temperature of entering and leaving air.
5. Wet-bulb temperature of entering and leaving air for cooling coils.
6. Airflow.
B. Measure, adjust, and record the following data for each electric heating coil:

42204.004 23 05 93-6 Testing, Adjusting, and Balancing for HVAC
1. Nameplate data.
2. Airflow.
3. Entering- and leaving-air temperature at full load.
4. Voltage and amperage input of each phase at full load.
5. Calculated kilowatt at full load.
6. Fuse or circuit-breaker rating for overload protection.
C. Measure, adjust, and record the following data for each steam coil:
1. Dry-bulb temperature of entering and leaving air.
2. Airflow.
3. Inlet steam pressure.
D. Measure, adjust, and record the following data for each refrigerant coil:
1. Dry-bulb temperature of entering and leaving air.
2. Wet-bulb temperature of entering and leaving air.
3. Airflow.
3.10 INOPERABLE EQUIPMENT/SYSTEMS
A. If any is inoperable at time of testing, TAB Contractor shall return to the site and test such systems when
they become operable and submit the associated data at that time, as an amendment to the primary report.
3.11 PROCEDURES FOR TESTING, ADJUSTING, AND BALANCING EXISTING SYSTEMS
A. Perform a preconstruction inspection of existing equipment that is to remain and be reused.
1. Measure and record the operating speed, airflow, and static pressure of each fan.
2. Measure motor voltage and amperage. Compare the values to motor nameplate information.
3. Check the refrigerant charge.
4. Check the condition of filters.
5. Check the condition of coils.
6. Check the operation of the drain pan and condensate-drain trap.
7. Check bearings and other lubricated parts for proper lubrication.
8. Report on the operating condition of the equipment and the results of the measurements taken.
Report deficiencies.
B. Before performing testing and balancing of existing systems, inspect existing equipment that is to remain
and be reused to verify that existing equipment has been cleaned and refurbished. Verify the following:
1. New filters are installed.
2. Coils are clean and fins combed.
3. Drain pans are clean.
4. Fans are clean.
5. Bearings and other parts are properly lubricated.
6. Deficiencies noted in the preconstruction report are corrected.
C. Perform testing and balancing of existing systems to the extent that existing systems are affected by the
renovation work.
1. Compare the indicated airflow of the renovated work to the measured fan airflows, and determine
the new fan speed and the face velocity of filters and coils.
2. Verify that the indicated airflows of the renovated work result in filter and coil face velocities and
fan speeds that are within the acceptable limits defined by equipment manufacturer.
3. If calculations increase or decrease the airflow rates and water flow rates by more than 5 percent,
make equipment adjustments to achieve the calculated rates. If increase or decrease is 5 percent or
less, equipment adjustments are not required.
4. Balance each air outlet.
D. The following existing HVAC Systems shall be rebalanced:
1. Heating water.
2. Supply Air.
3. Return Air.
4. Outdoor Air.
3.12 TOLERANCES
A. Set HVAC system's airflow rates and water flow rates within the following tolerances:

42204.004 23 05 93-7 Testing, Adjusting, and Balancing for HVAC
1. Supply Fans and Equipment with Fans: Plus or minus 5 percent.
2. Return, and Exhaust Fans and Equipment with Fans: Plus or minus 10 percent.
3. Air Outlets and Inlets: Adjust total airflow to space within Plus 10 percent and minus 5 percent of
design to space. Adjust outlets and inlets in space to within Plus or minus 10 percent of design.
4. Heating-Water Flow Rate: Plus or minus 10 percent.
5. Cooling-Water Flow Rate: Plus or minus 5 percent.
B. Maintaining pressure relationships as designed shall have priority over the tolerances specified above.
3.13 PROGRESS REPORTING
A. Initial Construction-Phase Report: Based on examination of the Contract Documents as specified in
"Examination" Article, prepare a report on the adequacy of design for systems balancing devices.
Recommend changes and additions to systems balancing devices to facilitate proper performance
measuring and balancing. Recommend changes and additions to HVAC systems and general construction
to allow access for performance measuring and balancing devices.
3.14 FINAL REPORT
A. General: Prepare a certified written report; tabulate and divide the report into separate sections for tested
systems and balanced systems.
1. Include a certification sheet at the front of the report's binder, signed and sealed by the certified
testing and balancing engineer.
2. Include a list of instruments used for procedures,
3. along with proof of calibration.
4. Certify validity and accuracy of field data.
B. Final Report Contents: In addition to certified field-report data, include the following:
1. Pump curves.
2. Fan curves.
3. Manufacturers' test data.
4. Field test reports prepared by system and equipment installers.
5. Other information relative to equipment performance; do not include Shop Drawings and Product
Data.
C. General Report Data: In addition to form titles and entries, include the following data:
1. Title page.
2. Name and address of the TAB specialist.
3. Project name.
4. Project location.
5. Architect's name and address.
6. Engineer's name and address.
7. Contractor's name and address.
8. Report date.
9. Signature of TAB supervisor who certifies the report.
10. Table of Contents with the total number of pages defined for each section of the report. Number
each page in the report.
11. Summary of contents including the following:
a. Indicated versus final performance.
b. Notable characteristics of systems.
c. Description of system operation sequence if it varies from the Contract Documents.
12. Nomenclature sheets for each item of equipment.
13. Data for terminal units, including manufacturer's name, type, size, and fittings.
14. Notes to explain why certain final data in the body of reports vary from indicated values.
15. Test conditions for fans and pump performance forms including the following:
a. Settings for outdoor-, return-, and exhaust-air dampers.
b. Conditions of filters.
c. Cooling coil, wet- and dry-bulb conditions.
d. Face and bypass damper settings at coils.
e. Fan drive settings including settings and percentage of maximum pitch diameter.
f. Inlet vane settings for variable-air-volume systems.

42204.004 23 05 93-8 Testing, Adjusting, and Balancing for HVAC
g. Settings for supply-air, static-pressure controller.
h. Other system operating conditions that affect performance.
D. System Diagrams: Include schematic layouts of air and hydronic distribution systems. Present each
system with single-line diagram and include the following:
1. Quantities of outdoor, supply, return, and exhaust airflows.
2. Water and steam flow rates.
3. Duct, outlet, and inlet sizes.
4. Pipe and valve sizes and locations.
5. Terminal units.
6. Balancing stations.
7. Position of balancing devices.
E. Air-Handling-Unit Test Reports: For air-handling units with coils, include the following:
1. Unit Data:
a. Unit identification.
b. Location.
c. Make and type.
d. Model number and unit size.
e. Manufacturer's serial number.
f. Unit arrangement and class.
g. Discharge arrangement.
h. Sheave make, size in inches, and bore.
i. Center-to-center dimensions of sheave and amount of adjustments in inches.
j. Number, make, and size of belts.
k. Number, type, and size of filters.
2. Motor Data:
a. Motor make, and frame type and size.
b. Horsepower and rpm.
c. Volts, phase, and hertz.
d. Full-load amperage and service factor.
e. Sheave make, size in inches, and bore.
f. Center-to-center dimensions of sheave and amount of adjustments in inches.
3. Test Data (Indicated and Actual Values):
a. Total airflow rate in cfm.
b. Total system static pressure in inches wg.
c. Fan rpm.
d. Discharge static pressure in inches wg.
e. Filter static-pressure differential in inches wg.
f. Preheat-coil static-pressure differential in inches wg.
g. Cooling-coil static-pressure differential in inches wg.
h. Heating-coil static-pressure differential in inches wg.
i. Outdoor airflow in cfm.
j. Return airflow in cfm.
k. Outdoor-air damper position.
l. Return-air damper position.
m. Vortex damper position.
4. Provide basic system schematic for all air handling systems with SP profile
F. Apparatus-Coil Test Reports:
1. Coil Data:
a. System identification.
b. Location.
c. Coil type.
d. Number of rows.
e. Fin spacing in fins per inch o.c.
f. Make and model number.
g. Face area in sq. ft..
h. Tube size in NPS.

42204.004 23 05 93-9 Testing, Adjusting, and Balancing for HVAC
i. Tube and fin materials.
j. Circuiting arrangement.
2. Test Data (Indicated and Actual Values):
a. Airflow rate in cfm.
b. Average face velocity in fpm.
c. Air pressure drop in inches wg.
d. Outdoor-air, wet- and dry-bulb temperatures in deg F.
e. Return-air, wet- and dry-bulb temperatures in deg F.
f. Entering-air, wet- and dry-bulb temperatures in deg F.
g. Leaving-air, wet- and dry-bulb temperatures in deg F.
h. Water flow rate in gpm.
i. Water pressure differential in feet of head or psig.
j. Entering-water temperature in deg F.
k. Leaving-water temperature in deg F.
l. Refrigerant expansion valve and refrigerant types.
m. Refrigerant suction pressure in psig.
n. Refrigerant suction temperature in deg F.
o. Inlet steam pressure in psig.
G. Fan Test Reports: For supply, return, and exhaust fans, include the following:
1. Fan Data:
a. System identification.
b. Location.
c. Make and type.
d. Model number and size.
e. Manufacturer's serial number.
f. Arrangement and class.
g. Sheave make, size in inches, and bore.
h. Center-to-center dimensions of sheave and amount of adjustments in inches.
2. Motor Data:
a. Motor make, and frame type and size.
b. Horsepower and rpm.
c. Volts, phase, and hertz.
d. Full-load amperage and service factor.
e. Sheave make, size in inches, and bore.
f. Center-to-center dimensions of sheave, and amount of adjustments in inches.
g. Number, make, and size of belts.
3. Test Data (Indicated and Actual Values):
a. Total airflow rate in cfm.
b. Total system static pressure in inches wg.
c. Fan rpm.
d. Discharge static pressure in inches wg.
e. Suction static pressure in inches wg.
H. Round, Flat-Oval, and Rectangular Duct Traverse Reports: Include a diagram with a grid representing the
duct cross-section and record the following:
1. Report Data:
a. System and air-handling-unit number.
b. Location and zone.
c. Traverse air temperature in deg F.
d. Duct static pressure in inches wg.
e. Duct size in inches.
f. Duct area in sq. ft..
g. Indicated airflow rate in cfm.
h. Indicated velocity in fpm.
i. Actual airflow rate in cfm.
j. Actual average velocity in fpm.
k. Barometric pressure in psig.

42204.004 23 05 93-10 Testing, Adjusting, and Balancing for HVAC
I. Air-Terminal-Device Reports:
1. Unit Data:
a. System and air-handling unit identification.
b. Location and zone.
c. Apparatus used for test.
d. Area served.
e. Make.
f. Number from system diagram.
g. Type and model number.
h. Size.
i. Effective area in sq. ft..
2. Test Data (Indicated and Actual Values):
a. Airflow rate in cfm.
b. Air velocity in fpm.
c. Preliminary airflow rate as needed in cfm.
d. Preliminary velocity as needed in fpm.
e. Final airflow rate in cfm.
f. Final velocity in fpm.
g. Space temperature in deg F.
J. System-Coil Reports: For reheat coils and water coils of terminal units, include the following:
1. Unit Data:
a. System and air-handling-unit identification.
b. Location and zone.
c. Room or riser served.
d. Coil make and size.
e. Flowmeter type.
2. Test Data (Indicated and Actual Values):
a. Airflow rate in cfm.
b. Entering-water temperature in deg F.
c. Leaving-water temperature in deg F.
d. Water pressure drop in feet of head or psig.
e. Entering-air temperature in deg F.
f. Leaving-air temperature in deg F.
K. Instrument Calibration Reports:
1. Report Data:
a. Instrument type and make.
b. Serial number.
c. Application.
d. Dates of use.
e. Dates of calibration.
3.15 VERIFICATION OF TAB REPORT
A. The TAB specialist's test and balance engineer shall conduct the inspection in the presence of
Construction Manager.
B. Construction Manager shall randomly select measurements, documented in the final report, to be
rechecked. Rechecking shall be limited to either 10 percent of the total measurements recorded or the
extent of measurements that can be accomplished in a normal 8-hour business day.
C. If rechecks yield measurements that differ from the measurements documented in the final report by more
than the tolerances allowed, the measurements shall be noted as "FAILED."
D. If the number of "FAILED" measurements is greater than 10 percent of the total measurements checked
during the final inspection, the testing and balancing shall be considered incomplete and shall be rejected.
E. If TAB work fails, proceed as follows:
1. TAB specialists shall recheck all measurements and make adjustments. Revise the final report and
balancing device settings to include all changes; resubmit the final report and request a second
final inspection.

42204.004 23 05 93-11 Testing, Adjusting, and Balancing for HVAC
2. If the second final inspection also fails, Owner may contract the services of another TAB specialist
to complete TAB work according to the Contract Documents and deduct the cost of the services
from the original TAB specialist's final payment.
F. Prepare test and inspection reports.
END OF SECTION 23 05 93

42204.004 23 07 13-1 HVAC Insulation
SECTION 23 07 13
INSULATION
PART 1 - GENERAL
1.01 RELATED DOCUMENTS
A. Drawings and general provisions of the Contract, including General and Supplementary Conditions and
Division 01 Specification Sections, apply to this Section.
1.02 SUMMARY
A. Ductwork Insulation.
B. Piping Insulation.
C. Equipment insulation.
D. Insulation Jackets.
1.03 Referenced Standards:
A. ASTM C165 - Compressive Properties of Thermal Insulation.
B. ASTM C177 - Steady-State Heat Flux Measurements and Thermal Transmission Properties by Means of
Guarded Hot Plate Apparatus.
C. ASTM C195 - Mineral Fiber Thermal Insulating Cement.
D. ASTM C209 - Cellulosic Fiber Insulating Board.
E. ASTM C272 - Water Absorption of Core Materials for Structural Sandwich Construction.
F. ASTM C335 - Steady-State Heat Transfer Properties of Horizontal Pipe Insulation.
G. ASTM C411 - Hot Surface Performance of High Temperature Thermal Insulation.
H. ASTM C449 - Mineral Fiber Thermal Insulating and Finishing Cement.
I. ASTM C518 - Steady-State Thermal Transmission Properties by Means of the Heat Flow Meter
Apparatus.
J. ASTM C533 - Calcium Silicate Block and Pipe Thermal Insulation.
K. ASTM C534 - Preformed Flexible Elastomeric Cellular Thermal Insulation.
L. ASTM C547 - Mineral Fiber Preformed Pipe Insulation.
M. ASTM C553 - Mineral Fiber Block and Board Thermal Insulation.
N. ASTM C591 - Unfaced Preformed Rigid Cellular Polyisocyanurate Thermal Insulation.
O. ASTM C612 - Mineral Fiber Block and Board Thermal Insulation.
P. ASTM C680 - Estimate of Heat Gain or Loss.
Q. ASTM C1104 - Determining the Water Vapor Sorption of Unfaced Mineral Fiber Insulation.
R. ASTM D1056 - Flexible Cellular Materials.
S. ASTM E96 - Water Vapor Transmission of Materials.
T. UL 723/ASTM E84 - Surface Burning Characteristics of Building Materials.
U. NFPA 90A - Installation of Air Conditioning and Ventilating Systems.
V. MICA - National Commercial & Industrial Insulation Standards, Sixth Edition.
W. ASTM B209 - Aluminum and Aluminum-Alloy Sheet and Plate.
X. ASHRAE 90.1 - Energy Standard for Buildings.
1.04 ACTION SUBMITTALS
A. Product Data: For each type of product indicated. Include thermal conductivity, water-vapor permeance
thickness, and jackets (both factory- and field-applied if any).
B. Shop Drawings: Include plans, elevations, sections, details, and attachments to other work.
1. Detail application of protective shields, saddles, and inserts at hangers for each type of insulation
and hanger.
2. Detail insulation application at elbows, fittings, dampers, specialties and flanges for each type of
insulation.
3. Detail application of field-applied jackets.
4. Detail application at linkages of control devices.

42204.004 23 07 13-2 HVAC Insulation
C. Samples: For each type of insulation and jacket indicated. Identify each Sample, describing product and
intended use. Sample sizes are as follows:
1. Manufacturer's Color Charts: For products where color is specified, show the full range of colors
available for each type of finish material.
1.05 INFORMATIONAL SUBMITTALS
A. Qualification Data: For qualified Installer.
B. Material Test Reports: From a qualified testing agency acceptable to authorities having jurisdiction
indicating, interpreting, and certifying test results for compliance of insulation materials, sealers,
attachments, cements, and jackets, with requirements indicated. Include dates of tests and test methods
employed.
C. Field quality-control reports.
1.06 QUALITY ASSURANCE
A. Installer Qualifications: Skilled mechanics who have successfully completed an apprenticeship program
or another craft training program certified by the Department of Labor, Bureau of Apprenticeship and
Training.
B. Surface-Burning Characteristics: For insulation and related materials, as determined by testing identical
products according to ASTM E 84, by a testing agency acceptable to authorities having jurisdiction.
Factory label insulation and jacket materials and adhesive, mastic, tapes, and cement material containers,
with appropriate markings of applicable testing agency.
1. Insulation Installed Indoors: Flame-spread index of 25 or less, and smoke-developed index of 50
or less.
2. Insulation Installed Outdoors: Flame-spread index of 75 or less, and smoke-developed index of
150 or less.
C. Insulation systems shall meet ASHRAE 90.1 requirements.
1.07 DELIVERY, STORAGE, AND HANDLING
A. Packaging: Insulation material containers shall be marked by manufacturer with appropriate ASTM
standard designation, type and grade, and maximum use temperature.
B. Store insulation in original wrapping and protect from weather and construction traffic.
C. Protect insulation against dirt, water, chemical, and mechanical damage. Protect from exposure to UV
light from the sun.
1.08 COORDINATION
A. Coordinate sizes and locations of supports, hangers, and insulation shields specified in Section 230529
"Hangers and Supports for HVAC Piping and Equipment."
B. Coordinate clearance requirements with duct Installer for duct insulation application. Before preparing
ductwork Shop Drawings, establish and maintain clearance requirements for installation of insulation and
field-applied jackets and finishes and for space required for maintenance.
C. Coordinate installation and testing of heat tracing.
1.09 SCHEDULING
A. Schedule insulation application after pressure testing systems and, where required, after installing and
testing heat tracing. Insulation application may begin on segments that have satisfactory test results.
B. Complete installation and concealment of plastic materials as rapidly as possible in each area of
construction.
PART 2 - PRODUCTS
2.01 FIBERGLASS (F.G.) INSULATION
A. Manufacturers: Subject to compliance with requirements, provide products by one of the following:
1. Certainteed.
2. Knauf.
3. Owens Corning (O.C.) Fiberglass Corporation.
4. Schuller.

42204.004 23 07 13-3 HVAC Insulation
B. Material:
1. ASTM C547, ASTM C553 and ASTM C612 flexible, semi-rigid and rigid glass fiber insulation.
C. Flexible:
1. Maximum Service Temperature: ASTM C411, 250°F.
2. Maximum Moisture Adsorption: ASTM C1104, less than 3.0% by weight.
3. 'K' Value: ASTM C177, 0.30 at 75°F.
4. Density: 0.75 lb. /ft3.
5. Vapor Barrier Covering:
a. Kraft paper reinforced with glass fiber yarn and bonded to aluminized film.
b. Moisture vapor transmission: ASTM E96; 0.02 perm.
c. Pressure sensitive tape to match the covering.
D. Semi-Rigid:
1. Maximum Service Temperature: ASTM C411, 450°F.
2. Maximum Moisture Absorption: ASTM C1104, less than 5% by weight.
3. 'K' Value: ASTM C177, 0.27 at 100°F.
4. Compressive Strength at 10% Deformation: ASTM C165, minimum 125 lb. /ft2.
5. Density: 3 lb. /ft3.
6. Vapor Barrier Covering:
a. All service jacket.
b. Moisture vapor transmission: ASTM E96, 0.02 perm.
c. Pressure sensitive tape to match the covering.
E. Rigid:
1. Piping:
a. Maximum Service Temperature: ASTM C411, 850°F.
b. Maximum Moisture Adsorption: ASTM C553, 0.20 percent by volume.
c. 'K' Value: ASTM C335, 0.24 at 125°F.
d. Longitudinal Joint: Double pressure sensitive adhesive self-sealing lap system.
e. Vapor Barrier Covering:
1) All service jacket.
2) Moisture vapor transmission: ASTM E96, 0.02 perm.
3) Pressure sensitive tape to match the covering for butt joints.
f. Fittings:
1) Covers:
a) Material: High impact PVC.
b) Minimum Thickness: 0.006".
c) Color: White.
d) Vapor and moisture resistant.
2) Insulation:
a) Precut fiberglass inserts.
b) 'K' value: ASTM C177, 0.26 at 75°F.
2. Ductwork and equipment:
a. Maximum Service Temperature: ASTM C411, 450°F.
b. Maximum Moisture Absorption: ASTM C1104, less than 5% by weight.
c. 'K' Value: ASTM C177, 0.23 at 75°F.
d. Density:
1) Ductwork:
a) Indoor: 3.0 lb. /ft3.
b) Outdoor: 6.0 lb. /ft3.
2) Equipment: 6.0 lb. /ft3.
e. Vapor Barrier Covering:
1) Kraft paper reinforced with glass fiber yarn and bonded to aluminized film.
2) Moisture vapor transmission: ASTM E96, 0.02 perm.
3) Pressure sensitive tape to match the covering.
2.02 CLOSED CELL INSULATION
A. Manufacturers: Subject to compliance with requirements, provide products by one of the following:

42204.004 23 07 13-4 HVAC Insulation
1. Armacell.
2. Rubatex.
B. Material: ASTM C534, elastomeric insulation.
C. 'K' Value: ASTM C177 or ASTM C518, 0.27 at 75°F.
D. Density: ASTM D1622, 3.0 lb. /ft3.
E. Maximum Service Temperature: 200°F.
F. Maximum Water Vapor Permeability: ASTM E-96, 0.08 perm.
G. Maximum Moisture Absorption: ASTM C209, 0.2% by volume.
H. Adhesive: Synthetic rubber base with synthetic resins and fillers, compatible with insulation equal to
Armacell 520 adhesive.
2.03 POLYOLEFIN INSULATION
A. Manufacturers: Subject to compliance with requirements, provide products by one of the following:
a. Armacell LLC.
b. Nomaco Insulation.
B. Material: ASTM C 534 or ASTM C 1427, unicellular, polyethylene thermal plastic insulation.
C. 'K' Value: ASTM C177 or ASTM C518, 0.25 at 75°F.
D. Maximum Service Temperature: 210°F.
E. Maximum Water Vapor Permeability: ASTM E-96, 0.0 perm.
F. Adhesive: Comply with MIL-A-24179A, Type II, Class I, compatible with insulation.
2.04 POLYISOCYANURATE INSULATION
A. Manufacturers: Subject to compliance with requirements, provide products by one of the following:
1. Dow Chemical, Trymer 2000.
2. Approved equal.
B. Material: ASTM C591, rigid cellular polyisocyanurate insulation.
C. 'K' Value: ASTM C518, 0.19 at 75°F.
D. Density: ASTM D1622, 2.0 lb. /ft3.
E. Maximum Service Temperature: 300°F.
F. Maximum Water Vapor Permeability: ASTM E-96, 4 perm.
G. Maximum Moisture Absorption: ASTM C272, 0.15% by volume.
H. Vapor Retarder:
1. Saran 540 vapor retarder film.
2. Maximum water vapor permeability: ASTM E-96, 0.02 perm.
3. Thickness: 4 mils.
4. Color: White.
I. Fittings:
1. Insulation:
a. Pre-cut inserts of same type and thickness as adjacent pipe insulation.
2. Vapor retarder:
a. Saran vapor retarder tape.
b. Maximum Water Vapor Permeability: ASTM E-96, 0.03 perm.
c. Thickness: 2 mils.
d. Color: White.
2.05 JACKETS
A. Canvas:
1. Fabric: 9 oz. /yd2, plain weave cotton treated with dilute fire retardant lagging adhesive.
2. Lagging Adhesive and Finish Coat:
a. Manufacturers: Subject to compliance with requirements, provide products by one of the
following:
1) Chicago Mastic.
2) Childers.
3) Foster.
b. Compatible with insulation.
3. Outdoor application: Adhesive shall be a weather barrier mastic.

42204.004 23 07 13-5 HVAC Insulation
B. PVC:
1. Manufacturers: Subject to compliance with requirements, provide products by one of the
following:
a. Knauf.
b. Proto.
c. Schuller.
2. Material: High impact PVC.
3. Minimum thickness: 0.020".
4. Color: High gloss white.
5. Outdoor application:
a. Ultraviolet inhibited.
b. Minimum thickness: 0.030”.
C. Laminated jacket
1. Manufacturers: Subject to compliance with requirements, provide products by one of the
following:
a. Venture Tape.
b. Knauf, Redi-Klad 1000 (embossed aluminum).
c. Ideal Tape Co.
2. Material: Self-adhering membrane consisting of laminated reflective high density aluminum foil,
high density waterproof polymer films.
3. Adhesive:
a. Acrylic adhesive with release paper.
b. Application range -10°F to 248°F.
c. Minimum Adhesive Thickness: 2 mils.
4. Interior Applications – Venture Clad 1577CW-Tedlar
a. Minimum Material Thickness: 5.6 mils.
b. Flame Spread/Smoke Developed: 15/5.
c. Water Permeability: 0.0000 perm.
d. Maximum Elongation: 60%.
5. Exterior Applications – Venture Clad 1577CW-WE (white embossed):
a. Minimum Material Thickness: 6.0 mils.
b. Flame Spread/Smoke Developed: 10/20.
c. Water Permeability: 0.0000 perm.
d. Puncture Resistance: 35 lbs.
e. Maximum Elongation: 166%.
6. Exterior Applications – Venture Clad 1579CW-WE (white embossed):
a. Minimum Material Thickness: 15.5 mils.
b. Flame Spread/Smoke Developed: 25/20.
c. Water Permeability: 0.0000 perm.
d. Puncture Resistance: 80 lbs.
e. Maximum Elongation: 35%.
7. Service temperature:
a. Rated for continuous operating temperatures of -20°F to 150°F.
D. Aluminum jacket: ASTM B209.
1. Thickness: 0.024 inch.
2. Finish: Smooth.
3. Joining: Longitudinal slip joints and 3 inch laps. (Lap at 4 o'clock position facing down).
4. Fittings: 0.016 inch thick die shaped fitting covers with factory attached protective liner.
5. Metal Jacket Bands: 1/2 inch wide, 0.015 inch thick, on 12" centers (or pop rivets on 4" centers).
E. Closed Cell:
1. Two coats of manufacturers weatherproof finish.
2. Glass mesh adhered to insulation with commercially available mastic. WB/Armaflex or
equivalent.
F. 316 Stainless Steel Jacket:
1. Thickness: 0.024 inch.
2. Finish: No. 2B.

42204.004 23 07 13-6 HVAC Insulation
3. Joining: Longitudinal slip joints and 3 inch laps. (Lap at 4 o'clock position facing down).
4. Fittings: 0.024 inch thick die shaped fitting covers with factory attached protective liner.
5. Metal Jacket Bands: 1/2 inch wide, 0.015 inch thick, on 12" centers.
PART 3 - EXECUTION
3.01 EXAMINATION
A. Examine substrates and conditions for compliance with requirements for installation tolerances and other
conditions affecting performance of insulation application.
1. Verify that systems and equipment to be insulated have been tested and are free of defects.
2. Verify that surfaces to be insulated are clean and dry.
B. Proceed with installation only after unsatisfactory conditions have been corrected.
3.02 PREPARATION
A. Surface Preparation: Clean and dry surfaces to receive insulation. Remove materials that will adversely
affect insulation application.
B. Coordinate insulation installation with the trade installing heat tracing. Comply with requirements for
heat tracing that apply to insulation.
C. Mix insulating cements with clean potable water; if insulating cements are to be in contact with stainless-
steel surfaces, use demineralized water.
3.03 INSTALLATION
A. Install materials in accordance with manufacturer's instructions and MICA publication “Commercial and
Industrial Standards, Sixth Edition.”
B. Install insulation materials, accessories, and finishes with smooth, straight, and even surfaces; free of
voids throughout the length of piping including fittings, valves, and specialties.
C. Install insulation materials, forms, vapor barriers or retarders, jackets, and thicknesses required for each
item of pipe system as specified in insulation system schedules.
D. Install accessories compatible with insulation materials and suitable for the service. Install accessories
that do not corrode, soften, or otherwise attack insulation or jacket in either wet or dry state.
E. Install insulation with longitudinal seams at top and bottom of horizontal runs.
F. Install multiple layers of insulation with longitudinal and end seams staggered.
G. Do not weld brackets, clips, or other attachment devices to piping, fittings, and specialties.
H. Keep insulation materials dry during application and finishing.
I. Install insulation with tight longitudinal seams and end joints. Bond seams and joints with adhesive
recommended by insulation material manufacturer.
J. Install insulation with least number of joints practical.
K. Where vapor barrier is indicated, seal joints, seams, and penetrations in insulation at hangers, supports,
anchors, and other projections with vapor-barrier mastic.
1. Install insulation continuously through hangers and around anchor attachments.
2. For insulation application where vapor barriers are indicated, extend insulation on anchor legs
from point of attachment to supported item to point of attachment to structure. Taper and seal ends
at attachment to structure with vapor-barrier mastic.
3. Install insert materials and install insulation to tightly join the insert. Seal insulation to insulation
inserts with adhesive or sealing compound recommended by insulation material manufacturer.
4. Cover inserts with jacket material matching adjacent pipe insulation. Install shields over jacket,
arranged to protect jacket from tear or puncture by hanger, support, and shield.
L. Apply adhesives, mastics, and sealants at manufacturer's recommended coverage rate and wet and dry
film thicknesses.
M. Continue insulation without interruptions through walls, sleeves, and hangers.
N. Use full material as delivered from manufacturer wherever possible.
O. Maintain vapor barrier continuous through all penetrations.
P. If leaks or other defects develop after covering, remove insulation and (after repair of leaks or defects)
replace equal to original without additional cost to the Owner.

42204.004 23 07 13-7 HVAC Insulation
Q. Repair all insulation on existing ductwork and piping (to the same thickness as the existing insulation)
which is damaged due to connecting of new ductwork or piping. Maintain integrity of existing vapor
barrier.
R. Install insulation with factory-applied jackets as follows:
1. Draw jacket tight and smooth.
2. Cover circumferential joints with 3-inch-wide strips, of same material as insulation jacket. Secure
strips with adhesive and outward clinching staples along both edges of strip, spaced 4 inches o.c.
3. Overlap jacket longitudinal seams at least 1-1/2 inches. Clean and dry surface to receive self-
sealing lap. Staple laps with outward clinching staples along edge at 4 inches o.c.
a. For below ambient services, apply vapor-barrier mastic or tape over staples to match the
jacket.
4. Cover joints and seams with tape, according to insulation material manufacturer's written
instructions, to maintain vapor seal.
5. Where vapor barriers are indicated, apply vapor-barrier mastic on seams and joints.
S. Cut insulation in a manner to avoid compressing insulation more than 75 percent of its nominal thickness.
T. Finish installation with systems at operating conditions. Repair joint separations and cracking due to
thermal movement.
U. Repair damaged insulation facings by applying same facing material over damaged areas. Extend patches
at least 4 inches beyond damaged areas. Adhere, staple, and seal patches similar to butt joints.
V. For above ambient services, do not install insulation to the following:
1. Vibration-control devices.
2. Testing agency labels and stamps.
3. Nameplates and data plates.
4. Manholes.
5. Handholes.
6. Cleanouts.
W. Fiberglass Insulation:
1. Seal edges, joints, seams, penetrations, and punctures with white mastic with a #20 glass fabric
imbedded in the mastic, or tape to match the jacket.
2. Butt joints: Firmly butted and sealed with a 3" wide, reinforced pressure sensitive tape to match
insulation jacket.
3. Flexible insulation:
a. Maximum compression: 25%.
b. Staple a minimum 2” lap on 6” centers with outward clinching staples. Cover staples with
adhesive or tape to match the jacket.
c. For ducts over 18" wide, secure insulation to the bottom side with weld pins or anchors
maximum 18" centers.
4. Semi-rigid insulation: Staple a minimum 2” lap on 3” centers with outward clinching staples.
Cover staples with adhesive or tape to match the jacket.
5. Rigid insulation:
a. Piping: Position longitudinal lap downward.
b. Valves, fittings and flanges:
1) 14" and smaller:
a) Covered with PVC fitting jackets.
b) Insulate with pre-cut insulation inserts of the same type and thickness of
insulation as that on the adjacent pipe.
c) Apply vapor-barrier mastic on adjoining section of pipe insulation and on
overlapping edges of jacket and throat seam before applying jacket cover.
d) Tape joints between fitting cover and adjoining pipe insulation with
pressure-sensitive vapor-barrier tape; allow a 2" end overlap on tape joint
and with overlap facing down.
2) 16" and larger: Cover with insulating cement same thickness as adjoining
insulation.
c. Ductwork and equipment: Fasten with welded pins located on a maximum of 12" centers.
X. Closed Cell/Polyolefin Insulation:
1. Adhere to ductwork and equipment with full coverage of adhesive.

42204.004 23 07 13-8 HVAC Insulation
2. Butt and longitudinal joints: Seal with adhesive.
3. Standing seams: Cover with minimum 1/2" of insulation.
4. Stagger joints of multiple layers to meet thickness requirements.
Y. Polyisocyanurate Insulation:
1. Fill all voids in insulation with 2-part Dow Froth-Pak (aged R-value of 5.5, initial R-value of 6.0,
and insulation density of 1.75 pcf) or equivalent, expanding polyisocyanurate foam insulation
listed for use with polyisocyanurate insulation.
2. Piping:
a. Orient longitudinal joints between half-sections in the 3 o’clock and 9 o’clock position.
b. Provide vapor retarder film and tape for pipe service temperatures below 60°F.
c. Provide vapor retarder film and tape for pipe service temperatures above 60°F where a jacket
is not required.
d. For pipe service temperatures below 32°F cover joints with two layers of vapor retarder tape.
3. Elbows, Valves and Fittings:
a. Install pre-fabricated insulation inserts of same type and thickness of adjoining insulation.
b. Wrap with saran vapor retarder tape in a spiral configuration.
c. When factory applied vapor retarder film is used, seal joint with SSL tape. Apply vapor
retarder tape around joint with minimum ¼ circumference overlap.
d. For pipe service temperatures below 32°F, provide a minimum 50% overlap between
successive courses of spiral wrapped tape.
4. Apply full bead of silicone sealant as a vapor stop at all penetrations (thermometers, gauges, vent
and drain lines, etc.) and between pipe and insulation on both sides of valves,
expansion/contraction joints, flanges, etc.
Z. Cal-Sil:
1. Piping and segmented insulation:
a. Pipe insulation: Tightly butt circumferential and longitudinal joints and secure in place with
wire or bands.
b. Mitered segments: Secure in place with wire or bands, and provide a smoothing coat of
finishing cement.
c. Jacket: 6 oz. per square yard fiberglass cloth embedded in two (2) coats of weatherproof
mastic. 0.016 inch thick, aluminum jacket may be substituted for fiberglass cloth at
Contractor's option.
2. Block:
a. Secure with wire or bands.
b. Where required, provide welded studs, clips or angles to serve as anchors for wires and
bands.
c. Pack all voids between equipment surface and insulation with light density fiberglass.
d. Finish the insulation with 1" galvanized hexagonal wire mesh secured to bands or welded
pins.
e. Lace edges of wire mesh and apply 1/2" thickness of insulating cement in two coats.
f. Apply a pre-sized glass cloth adhered with lagging adhesive over the cement when dry.
g. Rectangular boiler breechings and flues:
1) The blocks shall be placed on expanded metal lath support wired to the breeching
with rib side toward the breeching to provide an air space.
h. Provide welded studs, clips or angles as anchors for wire and bands.
AA. Fire-Rated Insulation:
1. Install per manufacturer’s recommendation to provide a 2-hour rating.
2. Provide fire stop system at all wall, floor, ceiling, and roof penetrations classified in accordance
with ASTM E 814 and having an “F” and “T” rating equal to the fire resistance rating of the
assembly being penetrated.
3. Install grease access door system in accordance with manufacturer’s written instructions.
BB. Mineral Wool Insulation:
1. Install per manufacturer’s recommendations.
2. Secure insulation to pipe with 0.5” wide stainless steel bands.
3. Stagger joints when applying more than one layer.
CC. Canvas Jacket:

42204.004 23 07 13-9 HVAC Insulation
1. Apply glass cloth with lagging adhesive.
2. Apply finish coat of adhesive over cloth to completely cover cloth.
DD. Laminated jacket:
1. Apply per manufacturers written instructions.
2. Clean and dry surfaces prior to application.
3. Minimum 4” overlap on ends and 6” on longitudinal joints and align parallel to surface.
4. Remove release paper and rub entire surface for full adhesion and sealing at joint overlaps.
5. Provide bead of manufacture approved sealant along exposed edges.
3.04 PENETRATIONS
A. Insulation Installation at Roof Penetrations: Install insulation continuously through roof penetrations.
1. Seal penetrations with flashing sealant.
2. For applications requiring only indoor insulation, terminate insulation above roof surface and seal
with joint sealant. For applications requiring indoor and outdoor insulation, install insulation for
outdoor applications tightly joined to indoor insulation ends. Seal joint with joint sealant.
3. Extend jacket of outdoor insulation outside roof flashing at least 2 inches below top of roof
flashing.
4. Seal jacket to roof flashing with flashing sealant.
B. Insulation Installation at Underground Exterior Wall Penetrations: Terminate insulation flush with sleeve
seal. Seal terminations with flashing sealant.
C. Insulation Installation at Aboveground Exterior Wall Penetrations: Install insulation continuously through
wall penetrations.
1. Seal penetrations with flashing sealant.
2. For applications requiring only indoor insulation, terminate insulation inside wall surface and seal
with joint sealant. For applications requiring indoor and outdoor insulation, install insulation for
outdoor applications tightly joined to indoor insulation ends. Seal joint with joint sealant.
3. Extend jacket of outdoor insulation outside wall flashing and overlap wall flashing at least 2
inches.
4. Seal jacket to wall flashing with flashing sealant.
D. Insulation Installation at Interior Wall and Partition Penetrations (That Are Not Fire Rated): Install
insulation continuously through walls and partitions.
E. Insulation Installation at Fire-Rated Wall and Partition Penetrations: Terminate insulation at fire damper
sleeves for fire-rated wall and partition penetrations. Externally insulate damper sleeves to match adjacent
insulation and overlap duct insulation at least 2 inches.
1. Comply with requirements in Section 078413 "Penetration Firestopping" fire-resistive joint
sealers.
F. Insulation Installation at Floor Penetrations:
1. Duct: For penetrations through fire-rated assemblies, terminate insulation at fire damper sleeves
and externally insulate damper sleeve beyond floor to match adjacent duct insulation. Overlap
damper sleeve and duct insulation at least 2 inches.
G. Seal penetrations through fire-rated assemblies. Comply with requirements in Section 078413
"Penetration Firestopping."
3.05 DUCT INSULATION SCHEDULE
A. Insulate ductwork and plenums as follows:
1. Outside and Mixed Air (including any uninsulated AHU sections and bypasses):
a. Exposed Above 10 Feet: 2 inch thick Flexible Fiberglass.
b. Exposed Below 10 Feet: 2 inch thick Rigid Fiberglass.
c. Concealed: 2 inch thick Flexible Fiberglass.
2. Supply Air (not acoustically lined):
a. Exposed Above 10 Feet: 2 inch thick Flexible Fiberglass.
b. Exposed Below 10 Feet:
1) Rectangular Duct: 1 inch thick Rigid Fiberglass.
2) Round Duct: 2 inch thick Semi-Rigid Fiberglass.
c. Concealed: 2 inch thick Flexible Fiberglass.
3. Return Air (not acoustically lined):

42204.004 23 07 13-10 HVAC Insulation
a. Exposed Above 10 Feet: 2 inch thick Flexible Fiberglass.
b. Exposed Below 10 Feet:
1) Rectangular Duct: 1 inch thick Rigid Fiberglass.
2) Round Duct: 2 inch thick Semi-Rigid Fiberglass.
c. Concealed: 2 inch thick Flexible Fiberglass.
4. Exhaust and relief air (from backdraft damper or motor operated damper to the point where it exits
the building):
a. Exposed Above 10 Feet: 2 inch thick Flexible Fiberglass.
b. Exposed Below 10 Feet:
1) Rectangular Duct: 1 inch thick Rigid Fiberglass.
2) Round Duct: 2 inch thick Semi-Rigid Fiberglass.
c. Concealed: 2 inch thick Flexible Fiberglass.
B. Ductwork system in-line accessories, without internal lining/insulation: Insulate with same material and
thickness as specified for the duct system the device serves.
C. Insulation is not required on the following:
1. Factory insulated flexible ductwork.
2. Double wall flat oval or round insulated ductwork.
3. Branch ducts exposed in a room and serving only that room.
3.06 DUCT JACKETING SCHEDULE
A. Jacket ductwork insulation as follows:
1. Exposed above 10 feet and concealed: None Required.
3.07 PIPE INSULATION SCHEDULE
A. Insulate pipe as follows:
1. Hot Water and Pumped Condensate Return:
a. NPS 1-1/2 and smaller: 1-1/2 inch thick Rigid Fiberglass.
b. NPS 2 thru NPS 10: 2 inch thick Rigid Fiberglass.
c. NPS 12 and larger: 2 inch thick Semi-Rigid Fiberglass.
2. Steam Condensate:
a. NPS 1-1/2 and smaller: 2-1/2 inch thick Rigid Fiberglass.
b. NPS 2 thru NPS 6: 3 inch thick Rigid Fiberglass.
c. NPS 8 and larger: 3 inch thick Semi-Rigid Fiberglass.
3. Makeup Water: 1-1/2 inch thick Rigid Fiberglass/Closed Cell/Polyolefin
4. Chilled Water:
a. NPS 1-1/2 and smaller:
1) 1-1/2 inch thick Rigid Fiberglass/Closed Cell/Polyolefin.
2) 1 inch Polyisocyanurate.
b. NPS 2 thruu NPS 10:
1) 1-1/2 inch thick Rigid Fiberglass/Closed Cell/Polyolefin.
2) 1 inch Polyisocyanurate.
c. NPS 12 and larger: 1-1/2 inch thick Semi-Rigid Fiberglass/Closed
Cell/Polyolefin/Polyisocyanurate.
5. Chilled Water Exterior Application:
a. NPS 1 and smaller: 2 inch thick Polyisocyanurate
b. NPS 1-14 thru NPS 4: 2 inch thick Polyisocyanurate
c. NPS 5 thru NPS 10: 2 inch thick Polyisocyanurate
d. NPS 12 and larger: 2 inch thick Polyisocyanurate
6. Refrigerant Suction:
a. NPS 1-1/2 and smaller:
1) 1-1/2 inch thick Rigid Fiberglass/Closed Cell/Polyolefin.
2) 1 inch Polyisocyanurate.
b. NPS 2 and larger:
1) 1-1/2 inch thick Rigid Fiberglass/Closed Cell/Polyolefin.
2) 1 inch Polyisocyanurate.
7. Air Conditioning condensate drain piping:

42204.004 23 07 13-11 HVAC Insulation
a. 1-1/2 inch thick Rigid Fiberglass/Closed Cell/Polyolefin
b. 1 inch Polyisocyanurate
B. Outdoor piping above grade: Add 1" minimum of thickness to that listed, unless there is a specific
description for outdoor applications.
C. The following pipe line equipment does not require insulation:
1. Bodies of hot water auto valves, 2" and smaller.
2. Unions.
D. Insulate coil headers located outside air flow as specified for piping.
3.08 PIPE JACKETING SCHEDULE
A. Jacket insulation as follows:
1. Exposed above 10 feet and concealed: None Required.
2. Rigid and Semi-Rigid Fiberglass:
a. Exposed and below 10 feet in occupied rooms: Canvas/Laminated Jacket/Aluminum
Jacket/Stainless Steel Jacket.
b. Exposed and below 10 feet in mechanical rooms: NoneRequired.
3. Polyisocyanurate:
a. Exposed and below 10 feet in occupied rooms: PVC.
b. Exposed and below 10 feet in mechanical rooms: NoneRequired.
4. Outdoor Insulation:
a. Fiberglass: Canvas/Laminated Jacket/Aluminum Jacket/Stainless Steel Jacket
b. Closed Cell/Polyolefin: Paint Finish/Glass Mesh and paint finish
c. Polyisocyanurate: Canvas/Laminated Jacket/Aluminum Jacket/Stainless Steel Jacket
B. Comply with manufacturer’s maximum piping temperature ratings for laminated jackets.
END OF SECTION 23 07 13

42204.004 23 09 00-1 Temperature Controls
SECTION 23 09 00
TEMPERATURE CONTROLS
PART 1 - GENERAL
1.01 RELATED DOCUMENTS
A. Drawings and general provisions of the Contract, including General and Supplementary Conditions and
Division 01 Specification Sections, apply to this Section.
1.02 SUMMARY
A. Section includes:
1. Electric Controls.
2. Direct Digital Controls.
1.03 PRODUCTS INSTALLED BUT NOT FURNISHED UNDER THIS SECTION
A. Control components factory supplied as part of equipment controlled, unless specified otherwise.
1.04 PRODUCTS FURNISHED BUT NOT INSTALLED UNDER THIS SECTION
A. Control Dampers.
B. Valves.
1.05 DEFINITIONS
A. Analog: A continuously variable system or value not having discrete levels. Typically exists within a
defined range of limiting values.
B. Binary: A two-state system where an “ON” condition is represented by one discrete signal level and an
“OFF” condition is represented by a second discrete signal level each separated by a defined deadband
(also known as Digital).
C. Control Sequence: A programmed arrangement of software algorithms, logical computation, target
values, and limits as required to attain the defined operational control objectives.
D. Controller: A digitally programmable entity existing on the FMS network.
E. Derivative Control Algorithm: The method of control in which the output is proportional to the rate of
change of the input.
F. Direct Digital Control (DDC): The control algorithms and defined arrangements included in the FMS
software to provide direct closed-loop control for the designated equipment and controlled variables.
Inclusive of Proportional, Derivative, and Integral control algorithms together with target values, limits,
logical functions, arithmetic functions, constant values, timing considerations and the like.
G. Facilities Management System (FMS): The integrated system of operational and functional elements,
including equipment, software, programming, and associated materials, provided by the FMS Contractor
and interfaced to the work of other related trades.
H. Floating Control (Incremental Control): A form of modulating control where the controlled device is sent
an increase - hold - decrease signal from two binary outputs working as a pair. The controlled device is
driven from open to closed and back based on the time span the device is provided with an increase or
decrease signal.
I. FMS Contractor: The single Contractor to provide the work of this Division. The Contractor shall be the
primary manufacturer, installer, commissioner, and ongoing service provider for the FMS work.
J. FMS Integration: The functional, operational interconnections, and interfacing of all FMS work elements
and controllers in compliance with all applicable codes, standards, and ordinances to provide a single
coherent FMS as required by this Division.

42204.004 23 09 00-2 Temperature Controls
K. FMS Network (FMSN): The digital on-line real-time interconnected configuration of FMS digital
processing units, workstations, panels, sub-panels, controllers, devices and associated elements. May
exist as one or more fully interfaced and integrated sub-networks.
L. Furnish: The term “Furnish” and its derivatives when used in this Division shall mean supply at the FMS
Contractor’s cost to the designated third party trade contractor for installation. FMS Contractor shall
connect furnished items to the FMS, calibrate, test, commission, warrant, and document.
M. Install: The term “Install” and its derivatives when used in this Division shall mean receive at the jobsite
and mount.
N. Integral Control Algorithm: The method of control in which the cumulative output is either the time spent
out of setpoint or the amount out of setpoint.
O. Proportional Control Algorithm (P): The method of control in which the amount of corrective action
applied to a controlled device is relative to the amount of load sensed by the controller.
P. Proportional Plus Derivative Control (PD): A controller which has both a Proportional algorithm and a
Derivative algorithm. The algorithms operate in parallel to determine the control system response.
Q. Proportional Plus Integral Control (PI): A controller which has both a Proportional algorithm and an
Integral algorithm. The algorithms operate in parallel to determine the control system response.
R. Proportional plus Integral Plus Derivative Control (PID): A controller which has a Proportional
algorithm, an Integral algorithm, and a Derivative algorithm. The algorithms operate in parallel to
determine the control system response.
S. Protocol: A defined set of rules and standards governing the on-line exchange of data between FMS
controllers.
T. Provide: The term “Provide” and its derivatives when used in this Division shall mean to furnish, install
in place, connect, calibrate, test, commission, warrant, document, and supply the associated required
services ready for operation.
U. Wiring: The term “Wiring” and its derivatives when used in this Division shall mean provide the FMS
wiring and terminations.
V. The use of words in the singular in these Division documents shall not be considered as limiting when
other indications in these documents denote that more than one such item is being referenced.
W. Headings, paragraph numbers, titles, shading, bolding, underscores, clouds, and other symbolic
interpretation aids included in the Division documents are for general information only and are to assist in
the reading and interpretation of these Documents. They do not form a formal part of the Documents and
may not be consistent or complete in their use throughout the Documents.
X. The following abbreviations and acronyms may be used in describing the work of this Division:
1. ADC - Analog to Digital Converter.
2. AI - Analog Input.
3. ANSI - American National Standards Institute.
4. AO - Analog Output.
5. AWG - American Wire Gauge.
6. BI - Binary Input.
7. BO - Binary Output.
8. DAC - Digital to Analog Converter.
9. DDC - Direct Digital Control.
10. FMS - Facilities Management System.
11. FMSN - Facility Management System Network.
12. GUI - Graphical User Interface.
13. HOA - Hand-Off-Auto.
14. ID - Identification.
15. IEEE - Institute of Electrical and Electronics Engineers.
16. I/O - Input/Output.
17. LED - Light Emitting Diode.
18. MCC - Motor Control Center.
19. NC - Normally Closed.

42204.004 23 09 00-3 Temperature Controls
20. NIC - Not In Contract.
21. NO - Normally Open.
22. OWS - Operator Workstation.
23. OAT - Outdoor Air Temperature.
24. P - Proportional Control Algorithm.
25. PD - Proportional + Derivative Control Algorithm.
26. PI - Proportional + Integral Control Algorithm.
27. PID - Proportional + Integral + Derivative Control Algorithm.
28. RF - Radio Frequency.
29. RFI - Radio Frequency Interference.
30. RH - Relative Humidity.
31. RTD - Resistance Temperature Device.
32. SPDT - Single Pole Double Throw.
33. SPST - Single Pole Single Throw.
34. UPS - Uninterruptible Power Supply.
35. VAC - Volts, Alternating Current.
36. VAV - Variable Air Volume.
37. VDC - Volts, Direct Current.
1.06 REFERENCES
A. All work shall conform to the following Codes and Standards, as applicable:
1. ADA Americans Disability Act.
2. AMCA Air Movement and Control Association.
3. ANSI American National Standards Institute.
4. ASCII American Standard Code for Information Interchange.
5. ASHRAE American Society of Heating, Refrigerating and Air Conditioning
Engineers.
6. ASME American Society of Mechanical Engineer).
7. ASTM American Society for Testing and Materials.
8. CAN/ULC-S524 Installation of Fire Alarm Systems.
9. CAN/ULC-S536 Inspection and Testing Of Fire Alarm Systems.
10. CAN/ULC-S537 Verification of Fire Alarm Systems.
11. EIA Electronics Industries Association.
12. FCC Federal Communications Commission, including Part 15, Radio Frequency
Devices.
13. FM Factory Mutual.
14. IEEE Institute of Electrical and Electronic Engineers.
15. NEC National Electric Code and applicable local Electric Code.
16. NEMA National Electric Manufacturer’s Association.
17. NFPA 70 National Electrical Code.
18. NFPA 72 A/B/C/D/E/F/G/H Signaling System Standards.
19. NFPA 90A Standard For The Installation Of Air Conditioning And Ventilating
Systems.
20. NFPA 92A/B Smoke purge/control Equipment.
21. NFPA National Fire Protection Association Standards.
22. OSHA Occupational Safety and Health Administration.
23. UL 1480 Fire Alarm Signaling Devices.
24. UL 1971 Visual Fire Alarm Signaling Devices.
25. UL 268 Smoke Detectors.
26. UL 521 Heat Detectors.
27. UL 864 UOJZ Fire Protective Signaling Systems.
28. UL 864 UUKL Smoke Control.
29. UL 916 Energy Management.
30. UL Underwriters Laboratories listing and labels.
B. In the case of conflicts or discrepancies, the more stringent regulation shall apply.

42204.004 23 09 00-4 Temperature Controls
C. All work shall meet the approval of the Authorities Having Jurisdiction at the project site.
1.07 ACTION SUBMITTALS
A. Shop drawing title block information:
1. Project name.
2. Project address.
3. Subcontractor address.
4. Sheet number.
5. Subcontractor's in-house project identification number.
6. Mechanical system represented.
7. Latest revision date and number.
B. At a minimum submit the following:
1. Facilities Management System (FMS) network architecture diagrams including all Controllers and
interconnections.
2. Job-tailored schematics, sequences and flow diagrams.
3. Points schedule for each real and virtual (software) point in the FMS, including:
a. Tag.
b. Point Type.
c. System Name.
d. Object Name.
e. Expanded ID.
f. Display Units.
g. Address.
h. Cable Destination.
i. Terminal ID.
j. Panel.
4. A sample of each Graphic Display screen type and associated menu penetrations to show
hierarchy and functional interrelationships.
5. Detailed Bill of Material list for each Node, identifying quantity, part number, description, and
optional features.
6. Control Damper Schedule including a separate line for each damper and a column for each of the
damper attributes, including:
a. Tag.
b. Damper Manufacturer.
c. Damper Model.
d. Damper Operator.
e. Blade Type (Opposed Blade / Parallel Blade).
f. Duct Size.
g. Damper Size.
h. Actuator Type.
i. Fail Position.
7. Control Valve Schedules including a separate line for each valve and a column for each of the
valve attributes:
a. Tag.
b. Valve Manufacturer.
c. Valve Model.
d. Valve Type.
e. Valve Size.
f. Valve Pressure/Temperature Rating.
g. Valve Capacity.
h. Pressure Drop.
i. Valve CV.
j. Calculated CV.
k. Close-Off Pressure.
l. Actuator Type.
m. Fail Position.

42204.004 23 09 00-5 Temperature Controls
8. Room Schedule including a separate line for each VAV box and terminal unit indicating:
a. Minimum/Maximum CFM.
b. Pickup Gain.
c. Box Areas.
9. Details of all FMS interfaces and connections to the work of other trades.
10. Product data sheets for all products including software.
11. Equipment specific checklists to be used for commissioning.
12. Training provided, including outlines for each session.
13. Description of installation wire color coding.
14. For existing facilities, items B3 & B4 above shall be approved by the engineer and the owner.
C. At a maximum, no more than three (3) sets of submittals should be issued for example:
1. Valve / Damper Schedules.
2. Flow Diagrams, Point Schedules, Sequences, etc.
3. Graphics.
D. Mechanical system line diagram shall include:
1. Mechanical components (supply fans, heating coils, cooling coils, etc.).
2. Mechanical components present but not affected by the temperature control system (filters, etc.).
3. Motor operated dampers in their relative locations.
4. Control valves connected to their respective mechanical component.
5. All field-mounted automatic control system sensing and control components.
6. Controlled devices.
7. Starter electrical wiring line diagram showing interlocks between the automatic control system,
the respective starter, and any other interlocks not provided as part of the temperature control
system (fire alarm, smoke alarm, etc.)
8. List identifying each control system component shown on that drawing with the following
component information:
a. Name.
b. Catalog description and designation (to be used when purchasing repair parts).
1.08 CLOSEOUT SUBMITTALS
A. Include the following:
1. Shop drawing submittal revised to reflect the system in its as-built condition, along with first
phase submittals.
2. Set of operating instructions identifying the procedures to be employed to perform temperature
control system operations.
3. Information detailing preventive maintenance to be performed by the Owner.
4. Subcontractor's system guarantee and system component warranties.
5. Itemized list verifying that all equipment provided and installed per this contract has been set up to
operate according to the specification.
B. Provide in a three-ring binder labeled with the title of the project.
1.09 QUALITY ASSURANCE
A. All work shall be installed by mechanics and technicians employed by an installer representing the
manufacturer.
1.10 SEQUENCING AND SCHEDULING
A. Coordinate work and ensure system is completed and commissioned by Date of Substantial Completion.
B. Coordinate installation of system components with installation of mechanical systems equipment such as
air handling units and air terminal units.
PART 2 - PRODUCTS
2.01 MANUFACTURES
A. Manufacturers: Shall be an extension to or compatible with the existing system.

42204.004 23 09 00-6 Temperature Controls
2.02 CONTROLLERS
A. General:
1. Provide all monitoring, controlling, and information gathering/storage controllers for each specific
application in application dedicated control panels (for example: Control Panels - HVAC, Fire,
Security etc.).
2. Programmable and governed by the requirements of their applicable codes, approvals, and
regulations.
3. Designed, packaged, installed, programmed, and commissioned in consideration of their specific
service and prevailing operating conditions. Controllers shall be a proven standard product of their
original manufacturer and not a custom product for this Project.
4. Failure of a Controller shall not cause failures or non-normal operation at any other Controller
other than the possible loss of active real-time information from the failed Controller.
5. Ancillary Controller equipment, including interfaces and power supplies, shall not be operated at
more than 80% of their rated service capacity.
6. The Controller shall download and upload configuration data, both locally at the Controller and
via the FMS communications network.
B. HVAC Controllers:
1. Controllers shall provide both standalone and networked direct digital control of HVAC systems.
2. A dedicated HVAC Controller shall be configured and provided for each HVAC system device
(air handling unit, chiller, boiler, VAV Box, Unit Heater, Fan Coil Unit, Cabinet Heater, Heat
Pump, Fan Powered Box, etc).
3. Each dedicated Controller shall retain programs, control algorithms, and setpoint information for
at least 72 hours in the event of a power failure, and shall return to normal operation upon
restoration of power.
4. Each HVAC Controller shall report its communication status to the FMS. The FMS shall provide
a system advisory upon communication failure and restoration.
5. Ethernet Connection:
a. Provide an Ethernet connection on each controller for connection to a portable OWS.
b. Provide communication for the following functions, after passwords have been verified:
1) Indication of system performance and setpoints.
2) Adjustment of setpoints and starting/stopping of equipment.
2.03 INPUT DEVICES
A. Current – Binary:
1. Power Source: Induced by Electrical Load Monitored.
2. Rating: UL.
3. Mounting:
a. Conductor mounted.
b. Split or solid-core configuration.
4. Range: 1 to 135A continuous, 1.0A @ 30 VAC/DC.
5. Protection: 600VAC rms isolation.
6. Output: Non-polarity-sensitive Snap-acting NO SPDT contact.
7. Special:
a. 5 year limited warranty.
b. Sensor trip status LED and power status LED on unit.
c. Setpoint adjustment on unit.
B. Damper Position – Binary:
1. Switch Materials: Encapsulated mercury.
2. Rating: As required for proper system operation.
3. Mounting: Damper crank arm.
4. Range: 15° angle between circuit make and break.
5. Output: SPDT contact.
6. Special:
a. Maintenance free.
b. Adjustable.

42204.004 23 09 00-7 Temperature Controls
C. Duct Temperature – Single Point – Analog:
1. Materials: Thin film nickel, platinum, RTD, or thermistor.
2. Mounting: Duct insertion.
3. Range:
a. Probe Assembly: 50°F to 220°F (-46 to 82°C).
b. Conduit Box: 50°F to 122°F (-46 to 50°C).
4. Accuracy: ± 0.34°F at 70°F.
5. Protection:
a. Sensor: ¼” OD stainless steel probe.
b. Conduit Access Box: Rigid PVC plastic.
6. Output: Analog.
7. Special: Complete installation kit including sensor holder with retainer, mounting plate with
locknut, and conduit enclosure with cover.
D. Space Temperature – Single Point Monitoring – Analog:
1. Materials: Thin film nickel, platinum, RTD, or thermistor.
2. Mounting: Wall Mount.
3. Range:
a. Probe Assembly: -50°F to 220°F (-46°C to 82°C).
b. Conduit Box: -50°F to 122°F (-46°C to 50°C).
4. Accuracy: ± 0.34°F at 70°F.
5. Sensor Protection: ¼” OD stainless steel probe.
6. Output: Analog.
7. Special: Complete installation kit including cover, base, faceplate, drywall mounts and spacers.
E. Space Temperature – Single Point Monitoring and Control – Analog:
1. Materials: Thin film nickel, platinum, RTD, or thermistor.
2. Mounting: Standard Bases for surface mount or U. S. Wallbox mounting.
3. Range:
a. Probe Assembly: -50°F to 220°F (-46°C to 82°C).
b. Conduit Box: -50°F to 122°F (-46°C to 50°C).
4. Accuracy: ± 0.34°F at 70°F.
5. Protection:
a. Ambient Operating Conditions: 32°F to 131°F.
b. 0 to 100% RH, non-condensing.
c. 85°F (29°C) maximum dew point.
6. Output:
a. Space Temperature Setpoint: Analog.
b. Space Temperature: Analog.
7. Accessories:
a. Integral momentary pushbuttons for the following:
1) Override of unoccupied cycle.
2) Change to temperature setpoint.
b. LED indication of mode of operation.
c. LED indication of setpoint and room temperature.
8. Special: Complete installation kit including cover, base, faceplate, drywall mounts and spacers.
2.04 CONTROLLED DEVICES
A. Actuators
1. Damper – Two-Position – Electric:
a. Materials:
1) Enclosure: NEMA 2.
2) Actuator: UL873, CSA.
b. Mounting: Direct-mount on damper blade pin.
c. Range: 30° to 90°, CW or CCW, mechanically limited to 93°.
d. End to End Stroke:
1) 150 seconds at 24 VAC.

42204.004 23 09 00-8 Temperature Controls
2) 75 seconds at 120 VAC.
3) 25 seconds return to normal for spring return.
e. Protection: Electronic stall protection throughout entire operating range shall deactivate
actuator motor when overload is detected.
f. Duty cycle: Rated for 65,000 cycles.
g. Control Input: 24 VAC.
h. Power Input: 24 VAC / 120 VAC.
i. Output: Torque output of actuator matches needs of application to provide full closeoff and
complete opening against system pressures.
j. Options:
1) Spring return where specified.
2) [Two (2) SPDT auxiliary switches as required by Control Sequence.]
k. Special:
1) Manual override.
2) Field-selectable rotational/spring return direction.
3) Field-adjustable zero and span.
2. Valve – Modulating – Electric:
a. Materials:
1) Enclosure: NEMA 2 [4X] .
2) Actuator: UL873, CSA.
b. Mounting: Direct-mount on valve.
c. Motor: Permanent split-capacitor reversible, rated for continuous operation.
d. Range: 30° to 90°, CW or CCW, mechanically limited to 93°.
e. End to End Stroke: 60 seconds, 20 seconds return to normal for spring return.
f. Protection: Thermal overloads or electronic stall protection throughout entire operating
range shall deactivate actuator motor when overload is detected.
g. Duty cycle: Rated for 65,000 cycles.
h. Control Input: Analog.
i. Position Feedback: Analog matching Control Input.
j. Power Input: Nominal 24 VAC.
k. Output: Torque output of actuator matches needs of application to provide smooth
modulation, full closeoff and complete opening against system pressures.
l. Options:
1) Manual override handwheel.
2) Spring return where specified.
3) [Thermostat/heater kit for outdoor applications.]
4) [Two (2) SPDT auxiliary switches as required by Control Sequence.]
m. Special:
1) Manual override.
2) Field-selectable rotational/spring return direction.
3) Field-adjustable zero and span.
B. Dampers
1. Control – Non-Airfoil:
a. Materials:
1) Frame: Galvanized steel.
2) Blades: Double layer of galvanized steel, mechanically joined.
3) Linkage: Zinc plated rolled steel.
4) Bearings: Stainless steel.
5) Seals: Santoprene or silicone.
6) Jamb Seals: Self-compensating stainless steel.
b. Rating: Shall be tested according to AMCA Standard No. 500 Test Methods for Louvers,
Dampers and Shutters; Fully-open pressure drop shall not exceed 0.10” WC for a 48” by
48” damper with an air approach velocity of 2000 FPM
c. Mounting: Duct.
d. Accessories: Blade-to-blade linkage kits and pin-to-pin coupling kits required for proper
field assembly of multiple panel dampers.

42204.004 23 09 00-9 Temperature Controls
e. Special:
1) Individual damper blades not more than 8” in height.
2) Replaceable seals.
2. Control – Thermal Barrier/Outside Wall:
a. Manufacturers:
1) Arrow.
2) Ruskin.
3) T. A. Morrison & Co. Inc. (TAMCO).
b. Materials:
1) Frame:
a) Thickness: [0.080”] [0.125”] .
b) Width: 5”.
c) Extruded aluminum (6063T5 or 6063T6).
d) Polystyrene insulation.
e) [Thermally broken.]
2) Blades:
a) Thickness: 0.080”.
b) Width: 6”.
c) Extruded aluminum (6063T5 or 6063T6).
d) Airfoil profiles.
e) Internally insulated with non CFC expanded polyurethane foam.
f) Thermally broken.
3) Blade Gaskets: Extruded EPDM elastomer.
4) Jamb Seals: Polycarbonate.
5) Linkage: Corrosion resistant aluminum, zinc- and nickel-plated steel.
6) Inner Bearings: Celcon.
7) Outer Bearings: Polycarbonate.
8) Seals: Extruded silicone.
c. Rating: Complete blade shall have an insulating factor of R-1.2 according to ASTM C-
1363-97.
d. Operating Range: -40°F to 200°F.
e. Pressure Drop: Pressure drop of a fully open 48" x 48" damper shall not exceed 0.04" w.g.
at 1000 fpm.
f. Mounting: Wall or duct.
g. Leakage: Air leakage through a 48" x 48" damper shall not exceed 4.12 CFM/SF against 4"
w.g. differential static pressure at standard air. Standard air leakage data to be certified
under the AMCA Certified Ratings Program.
h. Accessories: Blade-to-blade linkage kits and pin-to-pin coupling kits required for proper
field assembly of multiple panel dampers.
C. Valves
1. Globe – NPS 2 and Smaller:
a. Materials:
1) Body: Cast bronze.
2) Bonnet: Brass.
3) Brass Trim Model:
a) Stem: Stainless Steel.
b) Plug: Brass.
c) Seat: Brass against molded elastomeric disk.
d) Packing: Self-adjusting ethylene propylene rubber (EPR) ring pack u cups.
4) Stainless Steel Trim Model:
a) Stem: Stainless steel.
b) Plug: Stainless steel.
c) Seat: Stainless steel.
d) Packing: Spring-loaded PTFE and elastomer v rings.
b. Rating:
1) Valve Body shall meet requirements of ANSI/FCI 16.15, Class 250.

42204.004 23 09 00-10 Temperature Controls
2) Closeoff Pressure: As required by application.
c. Mounting: Pipe.
d. Range:
1) Brass Trim Model:
a) Water at 400 PSIG up to 150°F.
b) Steam at 38 PSIG up to 284°F.
2) Stainless Steel Trim Model:
a) Water at 400 PSIG up to 150°F.
b) Steam at 100 PSIG up to 338°F.
e. Flow Characteristics:
1) Two-Way (NO and NC) Models: Equal percentage.
2) Three-way Models: Linear
f. Leakage: Maximum 0.05% of flow.
g. Protection:
1) Water:
a) Two-Way Models: 600 PSIG Working Pressure at 320°F.
b) Three-Way Models: 400 PSIG Working Pressure at 320°F.
2) Steam:
a) 150 PSIG Working Pressure at 320°F.
3) Minimum Ambient Operating Temperature: 35°F in water and steam applications
(limitation of valve).
4) Maximum Ambient Operating Temperature: 122°F in water applications, 100°F in
steam applications (limitations of actuator).
h. Special:
1) Sized for maximum 3 PSIG drop.
2) Electric actuator as specified.
2.05 OTHER DEVICES
A. Cable:
1. General: Plenum-rated, shielded, stranded, color-coded and labeled per application and point type.
2. Sensor Wiring: Minimum 24 AWG.
3. 24 VAC Power Wiring: Minimum 18 AWG.
B. Control Relays:
1. Materials: Contacts – Silver.
2. Rating:
a. UL Listed, UL916, UL864.
b. Contact Rating: As required for proper system operation.
3. Mounting:
a. Panel: DIN rail.
b. Field: Surface mount.
4. Protection (Operating Temperature Range): -30°F to 140°F.
5. Output: SPDT contacts.
6. Special:
a. LED indicating relay activation.
b. Built-in hand-off-automatic override switch.
C. Panels – Metal:
1. Materials: 6063-T5 aluminum alloy with non-removable piano hinge, spanning the entire height of
the panel.
2. Mounting: Wall, surface.
3. Rating: UL listed.
4. Protection: Lockable cover.
D. Panels – Non-Metal:
1. Rating: UL 916 Listed and CSA certified.
2. Mounting: Wall, surface.
3. Protection:

42204.004 23 09 00-11 Temperature Controls
a. Lockable cover.
b. Removable door.
c. Ground bonding plane inside panel.
PART 3 - EXECUTION
3.01 GENERAL
A. Coordinate location of all devices with other trades to maintain NEC required clearances.
3.02 FMS ARCHITECTURE
A. Coordinate tie-ins to Owner’s network infrastructure with Owner.
3.03 INSTALLATION PRATICES
A. Wiring – General:
1. Provide all conduit, wiring, accessories and wiring connections required for the installation of the
Facility Management System unless specifically shown on the Electrical Drawings under Division
27 Electrical.
2. All wiring shall comply with the requirements of applicable portions of Division 27 and all local
and national electric codes, unless specified otherwise in this section.
3. FMS wiring materials and installation methods shall comply with FMS manufacturer
recommendations.
4. The sizing, type, and provision of cable, conduit, cable trays, and trunking shall be the design
responsibility of the FMS Contractor.
5. If complications arise, due to the incorrect selection of cable, cable trays, trunking, and/or conduit
by the FMS Contractor, the Contractor shall be responsible for all costs incurred in replacing the
selected components.
6. Perform circuit tests using qualified personnel only.
7. Provide necessary instruments and equipment to demonstrate that all circuits are:
a. Continuous and free from short circuits and grounds.
b. Free from unspecified grounds.
c. Resistance to ground is no less than 50 megaohms.
d. Free from induced voltages.
8. Provide complete testing for all cables used under this Contract. Provide all equipment, tools, and
personnel as necessary to conduct these tests.
9. Install all wiring in conduit or raceway except as noted elsewhere in this specification. Minimum
control wiring conduit size 1/2”.
10. Where it is not possible to conceal raceways in finished locations, surface raceway (Wiremold)
may be used as approved by the Architect.
11. Install conduits and raceways level, plumb, at right angles to the building lines, and follow the
contours of the surface to which they are attached.
12. Flexible Metal Conduit:
a. Provide for vibration isolation.
b. Limit lengths to 3 feet when terminating to vibrating equipment.
c. May be used within partition walls.
d. Shall be UL listed.
13. Grounding:
a. Ground all signal and communications cables, panels and equipment.
b. Ground cabling and conduit at the panel terminations.
c. Avoid grounding loops.
B. Class 2 Wiring (24 VAC or less):
1. Conduit is not required for Class 2 wiring in concealed accessible locations.
2. Support Class 2 wiring not in conduit every 5’ from the building structure, utilizing metal hangers
designed for the application.
3. Install all wiring parallel to the building structural lines.
4. Install all wiring in accordance with local code requirements.

42204.004 23 09 00-12 Temperature Controls
5. Class 2 signal wiring and 24VAC power can be run in the same conduit.
6. Power wiring 120VAC and greater cannot share the same conduit with Class 2 signal wiring.
C. Line Voltage Power Source:
1. Take 120-volt AC circuits, used for the Facility Management System, from panelboards and
circuit breakers provided by Division 27.
2. Provide 120-volt AC power to any control panels not shown on drawings.
3. Circuits used for the FMS shall be dedicated to the FMS and shall not be used for any other
purposes.
D. Panels:
1. Mount panels on wall or floors and support from Unistrut (12 gauge steel metal framing channel).
2. Mount panels with a minimum of 3' clearance in front of panel.
3. Mount exposed panels with top of panel at 6' AFF and bottom of panel no lower then 1' AFF.
4. Mount concealed panels to maintain accessibility for servicing.
5. Do not mount panels on ductwork.
6. Panels mounted on units at factory are acceptable.
E. Penetrations:
1. Firestop all penetrations used by FMS. All other project firestopping to be performed by other
trades.
2. Close all openings in fire proofed or fire stopped components with approved fire resistive sealant.
3. Wiring passing through penetrations, including walls, shall be in conduit or enclosed raceway.
4. Penetrate floor slabs by core drilling. Penetrations shall be plumb, true, and square.
5. Make no penetrations in structural elements before receiving written approval from architect.
F. FMS Identification Standards:
1. Node Identification:
a. Identify all Controllers with a permanent label fastened to outside of enclosure.
b. Labels shall be suitable for the node location.
2. Label cable at the termination points, at a minimum.
3. Label cable at a minimum of every 18” with the FMS manufacturer’s name and the type of signal
carried within the cable, i.e. Analog Input, Analog Output, Binary Input, Binary Output, and 24
VAC.
4. Each signal type shall be a different color.
5. If there is a building standard color coding, use the building standard. If no color coding scheme
exists, the recommended color coding is as follows:
a. Analog Input: Yellow
b. Analog Output: Tan
c. Binary Input: Orange
d. Binary Output: Violet
e. 24 VAC (Class 2): Gray
f. General Purpose: Natural
g. Tier 1 Communications: Purple
h. Other Tier Communications: Blue
6. Raceway Identification: Paint all covers to junction and pull boxes of FMS raceways with the
appropriate color.
7. Wire Identification:
a. Identify all low and line voltage FMS wiring with a number at each end of conductor or
cable.
b. Reference number to associated shop drawing and as-built drawing.
c. Secure identification number to the conductor or cable and shall be typed.
3.04 INPUT DEVICES
A. Installed per the manufacturer recommendation.
B. Locate in accessible locations wherever possible.
C. Locate in accessible local control panels wherever possible.
D. Install as required to meet control sequences.

42204.004 23 09 00-13 Temperature Controls
E. Current Sensors:
1. Provide for each fan or pump specified, or shown on point list.
2. Set threshold adjustment to indicate belt or coupling loss. Readjust threshold for proper operation
after final balancing is completed.
3. Use the variable frequency drive (VFD) integrated relay output for motor status, if provided on the
VFD, in lieu of a discrete current switch. A separate current switch provided under this Section
shall be wired in parallel with the VFD motor status relay when a bypass starter is provided on the
VFD to prove motor status in the bypass mode.
F. Damper Position Sensors:
G. Duct Temperature Sensors:
1. Mount sensors in an electrical box through a hole in the duct.
2. Sensors shall be insertion type, constructed as a complete assembly with lock nut and mounting
plate.
3. Provide an averaging sensor for ductwork greater in any dimension than 48 inches or where air
temperature stratification exists.
4. Mount to suitable supports using factory approved holders.
H. Space Sensors:
1. Mount per ADA requirements.
2. Provide lockable tamper-proof covers in public areas and/or where indicated on the plans.
3.05 OUPUT DEVICES
A. A. Install per the manufacturer’s recommendations.
3.06 CONTROLLED DEVICES
A. Install per the manufacturer’s recommendations.
B. Electronic Signal Isolation Transducers:
1. Provide when analog output signal from FMS is connected to an external control system as an
input (such as a chiller control panel).
2. Provide when FMS receives an input a signal from a remote system.
3. Provide ground plane and optical isolation between systems.
C. Mechanical contractor shall install all in-line devices such as valves and dampers.
D. Actuators:
1. Size to close against the maximum system shut-off pressure.
2. Size to meet torque requirements of device served.
3. Size to modulate in a smooth fashion through entire stroke.
4. Floating control is not acceptable.
5. Provide spring return as indicated below:
Controlled
Device
Device Location Service Spring Return
Damper Exhaust Fan Exhaust Yes
Valve Terminal Unit Heating Coil Heating As Necessary
E. Control Dampers:
1. Provide opposed blade for modulating control of airflow.
2. Provide parallel blade for two position applications.
3. Use the following dampers for the following applications:
Service Damper Type Duct Velocity
(FPM)
Duct Static
Pressure (“ W.C.)
AMCA
Leakage
Rating
Return Air [Non-Airfoil] All All Class I
Exhaust Air Thermal Barrier All All Class I
F. Control Valves:

42204.004 23 09 00-14 Temperature Controls
1. Size for proper flow control.
2. General:
a. Water:
1) Maximum Pressure Drop: 5 psi.
2) Minimum Pressure Drop: 2 psi.
3. Globe Valves: Use for proportional control.
3.07 COMMISIONING
A. Commission all control systems detailed in this Specification, the Control Sequences, and the Points
Chart.
B. Commissioning shall include the following:
1. Verify proper installation practices by the FMS Contractor and subcontractors.
2. Point verification and calibration.
3. System/sequence of operation verification with respect to specified operation, and
network/workstation verification.
4. Present documentation to Engineer upon completion of each commissioning step and final
completion to ensure proper operation of the FMS.
5. Acceptance Check List:
a. Document compliance with each item of this Specification.
b. Complete the check list for all items and functions of the FMS.
c. Initial each entry with time/date as record of having fully calibrated and tested the FMS.
d. Submit to Engineer.
e. Engineer will use acceptance check list as the basis for acceptance testing with the FMS
Contractor.
6. Testing Procedure (upon completion of installation):
a. Start-up the system and perform diagnostic testing to ensure proper operation.
b. Generate all software and enter all database information to perform the sequences of
control specified.
7. Testing Documentation (prior to acceptance testing):
a. Create input and output points on an individual system basis:
8. Field Points Testing:
a. Verify all installed points receive or transmit the correct information prior to
loading/activating the system software.
b. Binary Inputs: Test using one of the following:
1) HAND/OFF/AUTOMATIC selector switch on the associated motor control center.
2) Jumper across the field device contacts.
c. Binary Outputs: Perform ON/OFF commands from the workstation to verify each point.
d. Analog Outputs: Send a command from the OWS to modulate the output device from
minimum calibrated signal to maximum calibrated output.
e. Analog Inputs: Compare reading obtained through OWS or portable OWS to the value of
an independent testing meter.
9. Provide all necessary specialist labor, materials and tools to demonstrate to the Engineer that the
FMS has been commissioned and is operating in compliance with the contract.
10. Prepare a list of noted deficiencies signed by both Engineer and FMS Contractor.
11. Promptly rectify all listed deficiencies and submit to Engineer completion report.
12. The Engineer may, at their option, choose to witness a retest of the deficiencies in conjunction
with the FMS Contractor.
13. Remove or replace, at FMS contractor expense, all items not in compliance with Specification
requirements.
3.08 FMS SPECIFIC REQUIREMENTS
A. FMS Reports:
1. Provide the following reports, at minimum:
a. Alarm.
b. Off Line.
c. Run Time Summaries.

42204.004 23 09 00-15 Temperature Controls
B. Data Visualization Displays:
1. Display Requirements:
a. Binary Bar Chart: Provide a single binary bar chart that includes all points as indicated on
Points List.
b. Analog Bar Chart: Provide an individual analog bar chart for each system including all
points as indicated on Points List. Provide Historical Data Viewer functionality.
c. Color Gradient Chart: Provide an individual color gradient chart for each system indicated
on Points List, including all points associated with that system as shown on Points List.
d. Pattern Display: Provide a set of pattern displays. Each pattern display shall contain
multiple systems and include all points as indicated on Points List. Provide Historical Data
Viewer functionality.
e. Psychometric Chart: Provide a set of psychometric charts, each to contain the points
indicated on Points List. Provide Historical Data Viewer functionality.
f. System Chart: Provide an individual system chart for each system indicated on Points List,
including all points associated with that system as shown on Points List. Provide Historical
Data Viewer functionality.
g. System Chart: Provide individually scaled analog points of each system indicated on Points
List along with their minimum and maximum values and rate of change, allowing all data
associated with the entire system to be concisely displayed on a single display. Provide
System Chart functionality.
h. Historical Data Viewer: Provide the means to view historical FMS data utilizing the same
displays used for real-time data, including dynamic graphics and charts. Provide Historical
Data Viewer functionality.
2. Provide two backup copies of the Data Visualization programming in Microsoft Excel or approved
equal on CD-R.
C. Alarms:
1. Program alarms for each system or sub-system in the FMS based on information provided by
Owner’s staff. Program the following alarms and alarm parameters, at a minimum (based on the
requirements of the Point List and the Control Sequence):
a. High Temperature.
b. Low Temperature.
c. High Humidity.
d. Low Humidity.
e. Low Limit Shutdown.
f. Fire/Smoke Shutdown.
g. High Positive or Negative Static Pressure.
D. Schedules:
1. Program schedules for each system or sub-system in the FMS based on information provided by
Owner’s staff. Program the following schedules at a minimum:
a. Weekly schedules.
b. Monthly schedules.
E. Historical trending and data collection: Program all trend and point history data storage for all FMS
points and values as directed by Points List and Control Sequence.
F. Internet/Intranet Browser: Provide a multi-user color graphics and textual interface to allow building staff
to access the FMS data via the Internet or Intranet.
G. Annunciation:
1. Provide the following means of automatic personnel annunciation for user-defined FMS events:
a. Paging.
b. Text messaging.
c. Email.
END OF SECTION 23 09 00

42204.004 23 21 13-1 Hydronic Piping and Valves
SECTION 23 21 13
HYDRONIC PIPING
PART 1 GENERAL
1.01 SECTION INCLUDES
A. Pipe and pipe fittings for:
1. Heating hot water piping system.
2. Glycol piping system.
3. Equipment drains and overflows.
4. Make-up water piping.
5. Vents.
B. Valves:
1. Ball valves.
2. Balance valves.
3. Drain valves.
1.02 PRODUCTS INSTALLED BUT NOT FURNISHED UNDER THIS SECTION
A. Section 23 09 00 – Temperature Controls: Control Valves, Sensor Wells, Flow
Switches and Water Flow Measuring Stations.
1.03 REFERENCES
A. ASME - Boiler and Pressure Vessel Codes, SEC 9 - Qualification Standard
for Welding and Brazing Procedures, Welders, Brazers, and Welding and Brazing
Operators.
B. ASME B16.3 - Malleable Iron Threaded Fittings Class 150 and 300.
C. ASME B16.18 - Cast Copper Alloy Solder Joint Pressure Fittings.
D. ASME B16.22 - Wrought Copper and Copper Alloy Solder Joint Pressure Fittings.
E. ASME B16.23- Cast copper drainage fittings.
F. ASME B16.29- Wrought copper solder drainage fittings.
G. ASME B31.9 - Building Services Piping.
H. ASTM A53 - Pipe, Steel, Black and Hot-Dipped, Zinc Coated Welded and
Seamless.
I. ASTM A234 - Piping Fittings of Wrought Carbon Steel and Alloy Steel for
Moderate and Elevated Temperatures.
J. ASTMB32 Solder Metal.
K. ASTM B88 - Seamless Copper Water Tube.
L. AWS A5.8 - Brazing Filler Metal.
M. AWS D1.1- Structural Welding Code.
1.04 DESIGN REQUIREMENTS
A. Construct piping systems for pressure and temperature indicated:
SYSTEM MAX.PRESS. (PSIG) MAX. TEMP. (°F)
Glycol Water 150 150
B. All piping systems not listed above shall be constructed for a minimum 150 psig at
200°F.

42204.004 23 21 13-2 Hydronic Piping and Valves
1.5 SUBMITTALS
A. Product Data: Provide data on pipe materials, pipe fittings, valves, and accessories.
Indicate valve data and ratings.
B. Welders Certificate: Include welders certification of compliance.
1.6 CONTRACT CLOSEOUT SUBMITTALS
A. Operation and Maintenance Data: Include installation instructions, spare parts lists,
exploded assembly views.
B. Submit piping system testing documentation.
1.7 QUALITY ASSURANCE
A. Welding Materials and Procedures: Conform to ASME SEC IX.
B. Conform to ASME B31.9 and certified welding procedures of the National Certified
Pipe Welding Bureau for installation of piping systems.
1.8 DELIVERY, STORAGE, AND HANDLING
A. Provide temporary protective coating on cast iron and steel valves.
B. Provide temporary end caps and closures on piping and fittings. Maintain in place until
installation.
C. Protect piping systems from entry of foreign materials by temporary covers,
completing sections of the work, and isolating parts of completed system.
D. Cover pipe to minimize rust and corrosion while allowing sufficient ventilation to
avoid condensation.
1.9 PRODUCTS FURNISHED UNDER THIS SECTION
A. Crimping tool accessories furnished include interchangeable jaws to allow for repair of
al fittings used during the installation. Re-conditioned crimping tool and accessories
used during construction shall be turned over to the owner. Tools provided shall be
same as pressed fitting manufacturers.
PART 2 PRODUCTS
2.1 PIPING (ABOVE GROUND)
A. Glycol and hot water systems:
1. Steel 2" and smaller:
a. Pipe: ASTM A53, Grade B, Type F, E, or S, Schedule 40, black steel.
b. Fittings: ASTM A126/ANSI B16.4, Class 125, standard weight cast iron
threaded fittings.
2. Copper:
a. Pipe: ASTM B88, Type L, hard drawn.
b. Fittings: ASME B16.22, solder wrought copper, or copper press fittings.
(Rigid/Viega ProPress, Rigid/Nibco Press System).
c. Tee Connections: Mechanically extracted collars with notched and dimpled
branch tube may be used for branch take-offs up to one-half (1/2) the
diameter of the main.
d. Soldered Joints: Lead free, ASTM B32, 95-5 tin-antimony, or tin and
42204.004 23 21 13-3 Hydronic Piping and Valves
silver, with melting range 430°F to 535°F. or Braze, AWS A5.8 BCuP
silver/phosphorus/copper alloy with melting range 1190°F - 1480°F.
e. Copper press fittings shall have EPDM seals, fitting beads, and stainless
steel grip rings for fittings 2-1/2” and larger and suitable for -20°F to 250°F
range.
B. Equipment Drains and Overflows:
1. Steel:
a. Pipe: ASTM A53, Schedule 40 galvanized.
b. Fittings: Galvanized cast iron, or ASTM B16.3 malleable iron, threaded
fittings.
2. Copper:
a. Pipe: ASTM B88, Type L, hard drawn.
b. Fittings: ASME B16.23, cast copper, or ASME/ANSI B16.29 wrought
copper solder drainage fittings.
c. Joints: Solder, lead free, ASTM B32, 95-5 tin-antimony, or tin and silver,
with melting range 430°F to 535°F.
C. Make-up Water:
1. Pipe: ASTM B88, Type L, hard drawn copper.
2. Fittings: ASME B16.22, solder wrought copper.
3. Tee Connections: Mechanically extracted collars with notched and dimpled
branch tube may be used for branch take-offs up to one-half (1/2) the diameter of
the main.
4. Joints: Solder, lead free, ASTM B32, 95-5 tin-antimony, or tin and silver, with
melting range 430°F to 535°F or Braze, AWS A5.8 BCuP
silver/phosphorus/copper alloy with melting range 1190°F – 1480°F.
D. Chemical Treatment: Use pipe and pipe fittings as specified for the system to which
the chemical treatment piping is connected. Plastic pipe furnished with the chemical
treatment materials may also be used if its pressure/temperature rating is acceptable for
the service.
E. Vents and Relief Valves Discharge Piping: Use pipe and pipe fittings as specified for
the system to which the relief valve or vent is connected.
2.2 UNIONS AND FLANGES
A. Unions for Pipe 2" and smaller:
1. Ferrous Pipe: 150 psig ASTM A197/ANSI B16.3 malleable iron, with brass
seats, threaded, (galvanized on galvanized pipe).
2. Copper Pipe: Bronze, 3 piece, threaded, with soldered joints.
2.3 VALVES
A. Shutoff Valves:
1. 2" and smaller (Ball Valves):
a. Manufacturers:
1). Apollo.
2). Hammond.
3). Milwaukee.
4). Nibco.
5). Nexus.
b. Body: Bronze two-piece body.
c. Ball: chrome plated brass
d. Seats and Stuffing Box Ring: Teflon.

42204.004 23 21 13-4 Hydronic Piping and Valves
e. Style: Conventional port.
f. Rating: 600 psi WOG.
g. Accessories:
1). Pressure tap extensions.
2). Valve stem extensions for insulated piping.
3). Solder or threaded ends.
4). Lever handle with balancing stops.
B. Balance Valves:
1. 2" and smaller:
a. Manufacturers:
1). Flowset Accusetter.
2). Armstrong.
3). Hydronic Components Inc.
4). Tour and Anderson.
5). Griswold.
6). Nexus.
7). Nibco.
b. Bronze body with calibrated brass orifice or venturi, memory stop, threaded
or soldered ends, pressure tap extensions, valve stem extensions; rated at
125 psig at 240°F. Valves which can be provided with multiple Cv ratings
for each valve size shall be affixed with a tag or other identifier indicating
Cv provided.
C. Drain Valves: Shutoff valves with threaded hose adapter and cap and chain.
PART 3 EXECUTION
3.1 PREPARATION
A. Ream pipe and tube ends. Remove burrs. Bevel plain end ferrous pipe.
B. Remove scale and dirt on inside and outside before assembly.
C. Prepare piping connections to equipment with flanges or unions.
D. Keep open ends of pipe free from scale and dirt. Whenever work is suspended during
construction, protect open ends with temporary plugs or caps.
3.2 PIPING INSTALLATION
A. Routing:
1. Drawings and diagrams show size and approximate location of piping. The
drawings are diagrammatic and shall not be scaled to determine exact location.
2. Maintain size and location of piping as indicated, with all piping run true, plumb
and straight.
3. Vertical and horizontal offsets are shown to indicate the general position
relationship of the piping systems. Provide additional offsets to coordinate with
installation requirements of other systems.
4. Install piping to avoid architectural framing, structural members, and other
obstructions, coordinate the piping location prior to placing pipe sleeves in floors
and walls.
5. Install piping to best suit the field conditions and coordinate with the installation
work of other trades.
6. Install piping to allow for expansion and contraction.
7. Route piping in orderly manner, parallel to building structure.
8. Install piping to conserve building space, and not interfere with use of space.

42204.004 23 21 13-5 Hydronic Piping and Valves
9. Group piping whenever practical at common elevations.
10. Use a minimum of two elbows separated by 24" section of pipe (min.) in each
branch pipe line to a piece of terminal equipment. Offset pipe connections at
equipment to allow for service, such as removal of the terminal device.
11. Use top connections for takeoffs to equipment above the mains and bottom
connections for takeoffs to equipment below the mains.
B. Material:
1. Use only new material, free of defects, rust and scale, and meeting the latest
revision of the ASTM specifications as listed in this specification.
2. "Weldolets" and "Threadolets" may be used for branch take-offs up to one-half
(1/2) the diameter of the main.
3. Use eccentric fittings for changes in horizontal pipe sizes to maintain top of pipe
level. Concentric fittings may be used for changes in vertical pipe sizes.
4. Use long radius elbows for all 90° elbows.
5. Where specified for service, Contractor may use either steel or copper pipe for
sizes 3" and smaller.
6. Where more than one piping system material is specified, ensure system
components are compatible and joined to ensure the integrity of the system is not
jeopardized. Provide necessary joining fittings. Ensure flanges, union, and
couplings for servicing are consistently provided.
7. Non-metallic piping will not be acceptable in occupied spaces and ventilation
plenum spaces including plenum ceilings.
8. Copper pressed fittings/seals installed in glycol systems shall be compatible with
glycol Ridgid Viega ProPress/Ridgid Viega. Ridgid Nibco Press system
fittings/seals may not be used for glycol water piping systems if Ridgid/Viega
ProPress/Ridgid Nibco Press system approved glycols manufacturer is not in
specification.
C. Make all connections to equipment installed by others where that equipment requires
piping services indicated in this section.
3.3 WELDED PIPE JOINTS
A. Fusion welded in accordance with ASME Codes, ANSI B31, and state codes where
applicable. Make sample welds on the job and test for strength and quality if required
by Architect/Engineer.
B. Electrodes: Lincoln, or equal, with coating and diameter as recommended by the
manufacturer for the type and thickness of work being done.
3.4 THREADED PIPE JOINTS
A. Apply thread lubricant or Teflon tape when making joints.
3.5 SOLDERED PIPE JOINTS
A. Remove all slivers and burrs remaining from the cutting operation by reaming and
filing both pipe surfaces. Clean fitting and tube with emery cloth or sandpaper.
Remove residue from the cleaning operation, apply flux, and assemble joint. Use 95-5
solder or brazing to secure joint as specified for the specific piping service.
B. Where mechanically formed tee fittings are allowed, form mechanically extracted
collars in a continuous operation, consisting of drilling a pilot hole and drawing out the
tube surface to form a collar having a height of not less than three times the thickness
of the tube wall. Use an adjustable collaring device. Notch and dimple the branch tube.

42204.004 23 21 13-6 Hydronic Piping and Valves
Braze the joint, applying heat properly so that pipe and tee do not distort; remove
distorted connections.
3.6 PRESSED PIPE JOINTS
A. Copper tubing shall be cut square with a wheeled tubing cutter or approved copper
tubing cutting tool.
3.7 UNIONS AND FLANGES
A. Install unions or flanges at each valve, control valve, piping specialty, and piece of
equipment which requires removal for maintenance, repair, or replacement. Locate the
flange or union connection on the equipment side of the valve.
3.8 PIPING PRESSURE TESTS
A. Provide temporary restraints at expansion joints or isolate them during the test.
B. Minimum test time is indicated in the table below; additional time may be necessary to
conduct an examination for leakage. Each test shall be witnessed by the owner's
representative. If leaks are found, repair the area with new materials and repeat the test.
C. Do not insulate pipe until it has been successfully tested.
D. Use clean water and remove all air from the piping being tested by means of air vents
or loosening of flanges/unions. Measure and record test pressure at the high point in
the system.
E. Test the systems to the pressures as follows:
SYSTEM TEST
PRESSURE MEDIUM DURATION
Glycol Water 150 psig Water 8 Hour
F. Where single terminal units are added on or replaced in an existing system, no testing
is required. After system has been put into operation, Contractor shall visually inspect
for any leaks.
3.9 VALVES
A. Shut-off Valves:
1. Provide at:
a. Inlet side of control valves.
b. Inlet of equipment.
c. Division of main or risers.
d. Where indicated and detailed.
2. Install valve stem between the vertical (upright) or horizontal position. Do not
support weight of piping on valve.
B. Balance Valves:
1. Provide at:
a. Outlet of equipment.
b. Division of main or risers.
c. Where indicated and detailed.
2. Install valve stem between the vertical (upright) or horizontal position. Install
butterfly valves with stem in horizontal position with bottom half of disk opening
in direction of flow. Do not support weight of piping on valve.
C. Drain Valves: Provide for complete system drainage, and where detailed.
D. Swing Check Valves: Provide where indicated and detailed.

42204.004 23 21 13-7 Hydronic Piping and Valves
E. Spring Check Valves: Provide at discharge of each pump where indicated.
END OF SECTION 23 21 13

42204.004 23 21 16-1 Hydronic Piping Specialties
SECTION 23 21 16
HYDRONIC PIPING SPECIALTIES
PART 1 - GENERAL
1.01 RELATED DOCUMENTS
A. Drawings and general provisions of the Contract, including General and Supplementary
Conditions and Division 01 Specification Sections, apply to this Section.
1.02 SUMMARY
A. Section includes special-duty valves and specialties for the following:
1. Air Vents.
2. Strainers.
3. Flow Control Valves.
4. Glycol System.
1.03 ACTION SUBMITTALS
A. Product Data: For each type of the following:
1. Valves: Include flow and pressure drop curves based on manufacturer's testing for
calibrated-orifice balancing valves and automatic flow-control valves.
2. Air-control devices.
3. Hydronic specialties.
1.04 CLOSEOUT SUBMITTALS
A. Operation and Maintenance Data: For air-control devices, hydronic specialties, and special-duty
valves to include in emergency, operation, and maintenance manuals.
1.05 MAINTENANCE MATERIAL SUBMITTALS
A. Differential Pressure Meter: For each type of balancing valve and automatic flow control valve,
include flowmeter, probes, hoses, flow charts, and carrying case.
PART 2 - PRODUCTS
2.01 AIR VENTS
A. Manual Type:
1. Manufacturers:
a. Bell & Gossett.
b. Taco.
c. Eaton/Dole.
2. Bronze body with nonferrous internal parts, screwdriver operated, designed to relieve air
from system when opened, rated for 125 psig at 220°F.
B. Automatic Type:
1. Manufacturers:
a. Bell & Gossett.
b. Amtrol Model.
c. Watson-McDaniel.
d. Taco.

42204.004 23 21 16-2 Hydronic Piping Specialties
2. Cast iron body and cover, float, bronze pilot valve mechanism, rated for 150 psig at
250°F.
2.02 STRAINERS
A. Manufacturers:
1. Mueller.
2. Keckly.
3. Hoffman.
4. Armstrong.
5. Sarco.
6. Metraflex.
7. Victaulic.
8. Hayward.
B. Body:
1. Y-Type: Bolted or threaded screen retainer tapped for blow-off valves.
2. Basket Type: Clamped cover, tapping for blow-off valve.
C. Pressure rating: 125 psig WOG.
D. Material:
1. Body: Cast iron.
2. Screen: Stainless steel.
E. Connections:
1. 2" and smaller: Threaded.
2. 2-1/2" and larger: Flanged or grooved.
F. Screens:
1. 2" and smaller: 20 mesh.
2. 2-1/2" thru 4": 0.125 perforations.
3. 5" and larger: 0.25" perforations.
2.03 FLOW CONTROL VALVES
A. Manufacturers:
1. Griswold.
2. Autoflow.
3. Nexus.
4. Hydronic Components Inc.
B. Construction:
1. 1" and smaller: Brass body with integral ball valve on inlet or outlet, removable 20 mesh
stainless steel "Y" type strainer, removable cartridge and integral unions.
2. 1-1/4" thru 2": Grey cast iron body with female NPT connections.
3. 2-1/2 and larger: Grey cast iron body mechanically compatible with 150 lb. steel flanges.
C. Calibration: Control flow within 5 percent of selected rating, over scheduled operating pressure.
D. Control Mechanism: Stainless steel or nickel plated brass piston or regulator cup, operating
against stainless steel helical spring.
E. Accessories: Dual pressure/temperature test ports, 3" x 3" aluminum valve tag indicating flow
rate, pressure drop, terminal unit identification and model number.
2.04 GLYCOL SYSTEM
A. Automatic glycol make-up system:
1. Manufacturers:
a. Wessels.
b. Armstrong.

42204.004 23 21 16-3 Hydronic Piping Specialties
2. Pre-packaged and pre-piped unit with storage tank, pump(s), starter and controls mounted
on steel frame.
3. Storage tank: 100 gallon polyethylene with lid designed to accommodate relief valve
piping.
4. Pump: ½ HP, 100V rated at 1.7 gpm at 70 psig head.
5. Control:
a. Magnetic starter.
b. Pressure switch with adjustable setpoint.
c. Low-level cut-out.
d. Remote alarm control.
6. Piping: ½” connection to system.
B. Hand Pump: 20 psi discharge pressure for filling system.
C. Glycol Solution:
1. Manufacturers:
a. Dow Chemical.
b. Wintrex.
2. Inhibited ethylene glycol and water solution pre-mixed 40 percent glycol - 60 percent
water (by weight), suitable for freeze protection from -20°F.
3. Water: Distilled or have a total hardness of less than 100 ppm with the following
maximum impurity levels:
D. IMPURITY E. LEVEL
F. Chlorides G. 25 ppm
H. Sulfates I. 25 ppm
J. Calcium K. 50 ppm
L. Magnesium M. 50 ppm
N. Furnish service and maintenance of glycol system for one (1) year from date of substantial
completion.
O. Semi-Annual visits to make glycol fluid concentration analysis on site with refractive index
measurement instrument. Detail findings in writing of corrective actions needed including
analysis and amounts of glycol or water added.
PART 3 - EXECUTION
3.01 AIR VENTS
A. Manual:
1. Install at all high points where air may collect and not be carried by system fluid, and
where indicated.
2. Provide soft Type L copper "pigtail" for positioning vent in an accessible location for
venting and collecting water.
B. Automatic:
1. Install on top of air separators and where indicated.
2. Provide shut-off valve upstream of vent.
3. Provide 1/2" hard Type L copper pipe from vent discharge to nearest floor drain.
3.02 STRAINERS
A. Install allowing sufficient space for screen removal; rotate screen retainer so that blowdown can
remove accumulated dirt from strainer body.
B. Install drain valve same size as tapping in the tapped screen retainer for strainers 2-1/2" and
larger.

42204.004 23 21 16-4 Hydronic Piping Specialties
3.03 FLOW CONTROL VALVES
A. Install so that integral strainer can be removed.
B. For valves with integral strainers and shutoff valves, install such that flow control valve can be
isolated from main system.
C. Install valves 1" and smaller in supply or return piping as recommended by manufacturer.
D. Where a shutoff valve is integral to flow control valve, a separate shutoff valve is not required.
3.04 GLYCOL SYSTEMS
A. Clean and flush glycol systems as specified in Section 23 25 00 before adding glycol. Verify
complete drainage by measuring initial fill versus amount actually drained.
B. Remove all traces of chloride from the system; test to verify and submit written results.
C. Provide 55 gallon tank of premixed glycol solution for owner's use. Mount hand pump on tank
and pipe air vent and relief valve back to tank. END OF SECTION 23 21 16

42204.004 23 31 13-1 Metal Ducts
SECTION 23 31 13
METAL DUCTS
PART 1 - GENERAL
1.01 RELATED DOCUMENTS
A. Drawings and general provisions of the Contract, including General and Supplementary
Conditions and Division 01 Specification Sections, apply to this Section.
1.02 SUMMARY
A. Section Includes:
1. Single-wall rectangular ducts and fittings.
2. Single-wall round ducts and fittings.
3. Sheet metal materials.
4. Sealants and gaskets.
5. Hangers and supports.
B. Related Sections:
1. Section 23 05 93 "Testing, Adjusting, and Balancing for HVAC" for testing, adjusting,
and balancing requirements for metal ducts.
2. Section 23 33 00 "Air Duct Accessories" for dampers, sound-control devices, duct-
mounting access doors and panels, turning vanes, and flexible ducts.
1.03 PERFORMANCE REQUIREMENTS
A. Delegated Duct Design: Duct construction, including sheet metal thicknesses, seam and joint
construction, reinforcements, and hangers and supports, shall comply with SMACNA's "HVAC
Duct Construction Standards - Metal and Flexible" and performance requirements and design
criteria indicated in "Duct Schedule" Article.
B. Airstream Surfaces: Surfaces in contact with the airstream shall comply with requirements in
ASHRAE 62.1.
1.04 ACTION SUBMITTALS
A. Product Data: For each type of the following products:
1. Liners and adhesives.
2. Sealants and gaskets.
1.05 QUALITY ASSURANCE
A. Welding Qualifications: Qualify procedures and personnel according to [AWS D1.1/D1.1M,
"Structural Welding Code - Steel," for hangers and supports.] [AWS D1.2/D1.2M, "Structural
Welding Code - Aluminum," for aluminum supports.] [AWS D9.1M/D9.1, "Sheet Metal
Welding Code," for duct joint and seam welding.]
B. Welding Qualifications: Qualify procedures and personnel according to the following:
1. AWS D1.1/D1.1M, "Structural Welding Code - Steel," for hangers and supports.
2. AWS D1.2/D1.2M, "Structural Welding Code - Aluminum," for aluminum supports.
3. AWS D9.1M/D9.1, "Sheet Metal Welding Code," for duct joint and seam welding.
C. ASHRAE Compliance: Applicable requirements in ASHRAE 62.1, Section 5 - "Systems and
Equipment" and Section 7 - "Construction and System Start-up."
D. ASHRAE/IESNA Compliance: Applicable requirements in ASHRAE/IESNA 90.1,
Section 6.4.4 - "HVAC System Construction and Insulation."

42204.004 23 31 13-2 Metal Ducts
PART 2 - PRODUCTS
2.01 SINGLE-WALL RECTANGULAR DUCTS AND FITTINGS
A. General Fabrication Requirements: Comply with SMACNA's "HVAC Duct Construction
Standards - Metal and Flexible" based on indicated static-pressure class unless otherwise
indicated.
B. Transverse Joints: Select joint types and fabricate according to SMACNA's "HVAC Duct
Construction Standards - Metal and Flexible," Figure 2-1, "Rectangular Duct/Transverse
Joints," for static-pressure class, applicable sealing requirements, materials involved, duct-
support intervals, and other provisions in SMACNA's "HVAC Duct Construction Standards -
Metal and Flexible."
C. Longitudinal Seams: Select seam types and fabricate according to SMACNA's "HVAC Duct
Construction Standards - Metal and Flexible," Figure 2-2, "Rectangular Duct/Longitudinal
Seams," for static-pressure class, applicable sealing requirements, materials involved, duct-
support intervals, and other provisions in SMACNA's "HVAC Duct Construction Standards -
Metal and Flexible."
D. Elbows, Transitions, Offsets, Branch Connections, and Other Duct Construction: Select types
and fabricate according to SMACNA's "HVAC Duct Construction Standards - Metal and
Flexible," Chapter 4, "Fittings and Other Construction," for static-pressure class, applicable
sealing requirements, materials involved, duct-support intervals, and other provisions in
SMACNA's "HVAC Duct Construction Standards - Metal and Flexible."
2.02 SINGLE-WALL ROUND DUCTS AND FITTINGS
A. General Fabrication Requirements: Comply with SMACNA's "HVAC Duct Construction
Standards - Metal and Flexible," Chapter 3, "Round, Oval, and Flexible Duct," based on
indicated static-pressure class unless otherwise indicated.
1. Manufacturers: Subject to compliance with requirements, available manufacturers
offering products that may be incorporated into the Work include, but are not limited to
the following:
a. Ductmate Industries, Inc.
b. Lindab Inc.
c. McGill AirFlow LLC.
d. SEMCO LLC.
B. Transverse Joints: Select joint types and fabricate according to SMACNA's "HVAC Duct
Construction Standards - Metal and Flexible," Figure 3-1, "Round Duct Transverse Joints," for
static-pressure class, applicable sealing requirements, materials involved, duct-support intervals,
and other provisions in SMACNA's "HVAC Duct Construction Standards - Metal and
Flexible."
1. Transverse Joints in Ducts Larger Than 60 Inches in Diameter: Flanged.
C. Longitudinal Seams: Select seam types and fabricate according to SMACNA's "HVAC Duct
Construction Standards - Metal and Flexible," Figure 3-2, "Round Duct Longitudinal Seams,"
for static-pressure class, applicable sealing requirements, materials involved, duct-support
intervals, and other provisions in SMACNA's "HVAC Duct Construction Standards - Metal and
Flexible."
1. Fabricate round ducts larger than 90 inches in diameter with butt-welded longitudinal
seams.
2. Fabricate flat-oval ducts larger than 72 inches in width (major dimension) with butt-
welded longitudinal seams.

42204.004 23 31 13-3 Metal Ducts
D. Tees and Laterals: Select types and fabricate according to SMACNA's "HVAC Duct
Construction Standards - Metal and Flexible," Figure 3-5, "90 Degree Tees and Laterals," and
Figure 3-6, "Conical Tees," for static-pressure class, applicable sealing requirements, materials
involved, duct-support intervals, and other provisions in SMACNA's "HVAC Duct
Construction Standards - Metal and Flexible."
2.03 SHEET METAL MATERIALS
A. General Material Requirements: Comply with SMACNA's "HVAC Duct Construction
Standards - Metal and Flexible" for acceptable materials, material thicknesses, and duct
construction methods unless otherwise indicated. Sheet metal materials shall be free of pitting,
seam marks, roller marks, stains, discolorations, and other imperfections.
B. Galvanized Sheet Steel: Comply with ASTM A 653/A 653M.
1. Galvanized Coating Designation: G90.
2. Finishes for Surfaces Exposed to View: Mill phosphatized.
C. Aluminum Sheets: Comply with ASTM B 209 Alloy 3003, H14 temper; with mill finish for
concealed ducts, and standard, one-side bright finish for duct surfaces exposed to view.
D. Reinforcement Shapes and Plates: ASTM A 36/A 36M, steel plates, shapes, and bars; black and
galvanized.
1. Where black- and galvanized-steel shapes and plates are used to reinforce aluminum
ducts, isolate the different metals with butyl rubber, neoprene, or EPDM gasket materials.
E. Tie Rods: Galvanized steel, 1/4-inch minimum diameter for lengths 36 inches or less; 3/8-inch
minimum diameter for lengths longer than 36 inches.
2.04 SEALANT AND GASKETS
A. General Sealant and Gasket Requirements: Surface-burning characteristics for sealants and
gaskets shall be a maximum flame-spread index of 25 and a maximum smoke-developed index
of 50 when tested according to UL 723; certified by an NRTL.
B. Two-Part Tape Sealing System:
1. Tape: Woven cotton fiber impregnated with mineral gypsum and modified
acrylic/silicone activator to react exothermically with tape to form hard, durable, airtight
seal.
2. Tape Width: 4 inches.
3. Sealant: Modified styrene acrylic.
4. Water resistant.
5. Mold and mildew resistant.
6. Maximum Static-Pressure Class: 10-inch wg, positive and negative.
7. Service: Indoor and outdoor.
8. Service Temperature: Minus 40 to plus 200 deg F.
9. Substrate: Compatible with galvanized sheet steel (both PVC coated and bare), stainless
steel, or aluminum.
10. For indoor applications, sealant shall have a VOC content of 250 g/L or less when
calculated according to 40 CFR 59, Subpart D (EPA Method 24).
C. Water-Based Joint and Seam Sealant:
1. Application Method: Brush on.
2. Solids Content: Minimum 65 percent.
3. Shore A Hardness: Minimum 20.
4. Water resistant.
5. Mold and mildew resistant.
6. VOC: Maximum 75 g/L (less water).
7. Maximum Static-Pressure Class: 10-inch wg, positive and negative.
8. Service: Indoor or outdoor.

42204.004 23 31 13-4 Metal Ducts
9. Substrate: Compatible with galvanized sheet steel (both PVC coated and bare), stainless
steel, or aluminum sheets.
D. Flanged Joint Sealant: Comply with ASTM C 920.
1. General: Single-component, acid-curing, silicone, elastomeric.
2. Type: S.
3. Grade: NS.
4. Class: 25.
5. Use: O.
6. For indoor applications, sealant shall have a VOC content of 250 g/L or less when
calculated according to 40 CFR 59, Subpart D (EPA Method 24).
7. Sealant shall comply with the testing and product requirements of the California
Department of Health Services' "Standard Practice for the Testing of Volatile Organic
Emissions from Various Sources Using Small-Scale Environmental Chambers."
E. Flange Gaskets: Butyl rubber, neoprene, or EPDM polymer with polyisobutylene plasticizer.
F. Round Duct Joint O-Ring Seals:
1. Seal shall provide maximum 3 cfm/100 sq. ft. at 1-inch wg and shall be rated for10-inch
wg static-pressure class, positive or negative.
2. EPDM O-ring to seal in concave bead in coupling or fitting spigot.
3. Double-lipped, EPDM O-ring seal, mechanically fastened to factory-fabricated couplings
and fitting spigots.
2.05 HANGERS AND SUPPORTS
A. Hanger Rods for Noncorrosive Environments: Cadmium-plated steel rods and nuts.
B. Hanger Rods for Corrosive Environments: Electrogalvanized, all-thread rods or galvanized rods
with threads painted with zinc-chromate primer after installation.
C. Strap and Rod Sizes: Comply with SMACNA's "HVAC Duct Construction Standards - Metal
and Flexible," Table 5-1, "Rectangular Duct Hangers Minimum Size," and Table 5-2,
"Minimum Hanger Sizes for Round Duct."
D. Steel Cables for Galvanized-Steel Ducts: Galvanized steel complying with ASTM A 603.
E. Steel Cables for Stainless-Steel Ducts: Stainless steel complying with ASTM A 492.
F. Steel Cable End Connections: Cadmium-plated steel assemblies with brackets, swivel, and bolts
designed for duct hanger service; with an automatic-locking and clamping device.
G. Duct Attachments: Sheet metal screws, blind rivets, or self-tapping metal screws; compatible
with duct materials.
H. Trapeze and Riser Supports:
1. Supports for Galvanized-Steel Ducts: Galvanized-steel shapes and plates.
2. Supports for Stainless-Steel Ducts: Stainless-steel shapes and plates.
3. Supports for Aluminum Ducts: Aluminum or galvanized steel coated with zinc chromate.
PART 3 - EXECUTION
3.01 DUCT INSTALLATION
A. Drawing plans, schematics, and diagrams indicate general location and arrangement of duct
system. Indicated duct locations, configurations, and arrangements were used to size ducts and
calculate friction loss for air-handling equipment sizing and for other design considerations.
Install duct systems as indicated unless deviations to layout are approved on Shop Drawings and
Coordination Drawings.
B. Install ducts according to SMACNA's "HVAC Duct Construction Standards - Metal and
Flexible" unless otherwise indicated.
C. Install round ducts in maximum practical lengths.

42204.004 23 31 13-5 Metal Ducts
D. Install ducts with fewest possible joints.
E. Install factory- or shop-fabricated fittings for changes in direction, size, and shape and for
branch connections.
F. Unless otherwise indicated, install ducts vertically and horizontally, and parallel and
perpendicular to building lines.
G. Install ducts close to walls, overhead construction, columns, and other structural and permanent
enclosure elements of building.
H. Install ducts with a clearance of 1 inch, plus allowance for insulation thickness.
I. Route ducts to avoid passing through transformer vaults and electrical equipment rooms and
enclosures.
J. Where ducts pass through non-fire-rated interior partitions and exterior walls and are exposed to
view, cover the opening between the partition and duct or duct insulation with sheet metal
flanges of same metal thickness as the duct. Overlap openings on four sides by at least 1-1/2
inches.
K. Where ducts pass through fire-rated interior partitions and exterior walls, install fire dampers.
Comply with requirements in Section 23 33 00 "Air Duct Accessories" for fire and smoke
dampers.
L. Protect duct interiors from moisture, construction debris and dust, and other foreign
materials.[ Comply with SMACNA's "IAQ Guidelines for Occupied Buildings Under
Construction," Appendix G, "Duct Cleanliness for New Construction Guidelines."]
3.02 DUCT SEALING
A. Seal ducts for duct static-pressure, seal classes, and leakage classes specified in "Duct
Schedule" Article according to SMACNA's "HVAC Duct Construction Standards - Metal and
Flexible."
B. Seal ducts to the following seal classes according to SMACNA's "HVAC Duct Construction
Standards - Metal and Flexible":
1. Comply with SMACNA's "HVAC Duct Construction Standards - Metal and Flexible."
2. Outdoor, Supply-Air Ducts: Seal Class A.
3. Conditioned Space, Supply-Air Ducts in Pressure Classes 2-Inch wg and Lower: Seal
Class B.
4. Conditioned Space, Supply-Air Ducts in Pressure Classes Higher Than 2-Inch wg: Seal
Class A.
5. Conditioned Space, Exhaust Ducts: Seal Class B.
3.03 HANGER AND SUPPORT INSTALLATION
A. Comply with SMACNA's "HVAC Duct Construction Standards - Metal and Flexible,"
Chapter 5, "Hangers and Supports."
B. Building Attachments: Concrete inserts, powder-actuated fasteners, or structural-steel fasteners
appropriate for construction materials to which hangers are being attached.
1. Where practical, install concrete inserts before placing concrete.
2. Install powder-actuated concrete fasteners after concrete is placed and completely cured.
3. Use powder-actuated concrete fasteners for standard-weight aggregate concretes or for
slabs more than 4 inches thick.
4. Do not use powder-actuated concrete fasteners for lightweight-aggregate concretes or for
slabs less than 4 inches thick.
5. Do not use powder-actuated concrete fasteners for seismic restraints.
C. Hanger Spacing: Comply with SMACNA's "HVAC Duct Construction Standards - Metal and
Flexible," Table 5-1, "Rectangular Duct Hangers Minimum Size," and Table 5-2, "Minimum
Hanger Sizes for Round Duct," for maximum hanger spacing; install hangers and supports
within 24 inches of each elbow and within 48 inches of each branch intersection.

42204.004 23 31 13-6 Metal Ducts
D. Hangers Exposed to View: Threaded rod and angle or channel supports.
E. Support vertical ducts with steel angles or channel secured to the sides of the duct with welds,
bolts, sheet metal screws, or blind rivets; support at each floor and at a maximum intervals of 16
feet.
F. Install upper attachments to structures. Select and size upper attachments with pull-out, tension,
and shear capacities appropriate for supported loads and building materials where used.
3.04 CONNECTIONS
A. Make connections to equipment with flexible connectors complying with Section 23 33 00 "Air
Duct Accessories."
B. Comply with SMACNA's "HVAC Duct Construction Standards - Metal and Flexible" for
branch, outlet and inlet, and terminal unit connections.
3.05 PAINTING
A. Paint interior of metal ducts that are visible through registers and grilles and that do not have
duct liner. Apply one coat of flat, black, latex paint over a compatible galvanized-steel primer.
Paint materials and application requirements are specified in Section 09 91 13 "Exterior
Painting" and Section 09 91 23 "Interior Painting."
3.06 FIELD QUALITY CONTROL
A. Perform tests and inspections.
B. Leakage Tests:
1. Comply with SMACNA's "HVAC Air Duct Leakage Test Manual." Submit a test report
for each test.
2. Test the following systems:
a. Supply Ducts with a Pressure Class of 2-Inch wg or Higher: Test representative
duct sections totaling no less than 25 percent of total installed duct area for each
designated pressure class.
b. Exhaust Ducts with a Pressure Class of 2-Inch wg or Higher: Test representative
duct sections totaling no less than 25 percent of total installed duct area for each
designated pressure class.
3. Disassemble, reassemble, and seal segments of systems to accommodate leakage testing
and for compliance with test requirements.
4. Test for leaks before applying external insulation.
5. Conduct tests at static pressures equal to maximum design pressure of system or section
being tested. If static-pressure classes are not indicated, test system at maximum system
design pressure. Do not pressurize systems above maximum design operating pressure.
6. Give seven days' advance notice for testing.
C. Duct System Cleanliness Tests:
1. Visually inspect duct system to ensure that no visible contaminants are present.
D. Duct system will be considered defective if it does not pass tests and inspections.
E. Prepare test and inspection reports.
3.07 START UP
A. Air Balance: Comply with requirements in Section 23 05 93 "Testing, Adjusting, and Balancing
for HVAC."
3.08 DUCT SCHEDULE
A. Fabricate ducts with galvanized sheet steel except as otherwise indicated and as follows:
B. Supply Ducts:
1. Ducts Connected to Fan Coil Units, Furnaces, Heat Pumps, and Terminal Units
a. Pressure Class: Positive 1-inch wg.

42204.004 23 31 13-7 Metal Ducts
b. Minimum SMACNA Seal Class: B.
2. Ducts Connected to Constant-Volume Air-Handling Units :
a. Pressure Class: Positive 2-inch wg.
b. Minimum SMACNA Seal Class: A.
3. Ducts Connected to Equipment Not Listed Above:
a. Pressure Class: Positive 2-inch wg.
b. Minimum SMACNA Seal Class: A.
C. Exhaust Ducts:
1. Ducts Connected to Air-Handling Units :
a. Pressure Class: Positive or negative 2-inch wg.
b. Minimum SMACNA Seal Class: B if negative pressure, and A if positive pressure.
2. Laundry Dryer Exhaust:
a. Material: Aluminum
b. Pressure Class: Positive or negative 1-inch wg.
c. Minimum SMACNA Seal Class: B if negative pressure, and A if positive pressure.
D. Intermediate Reinforcement:
1. Galvanized-Steel Ducts: Galvanized steel or carbon steel coated with zinc-chromate
primer.
E. Elbow Configuration:
1. Square or mitered elbows with turning vanes shall not be used in exhaust ductwork.
2. Rectangular Duct: Comply with SMACNA's "HVAC Duct Construction Standards -
Metal and Flexible," Figure 4-2, "Rectangular Elbows."
a. Velocity 1000 fpm or Lower:
1) Radius Type RE 1 with minimum 0.5 radius-to-diameter ratio.
2) Mitered Type RE 4 without vanes.
b. Velocity 1000 to 1500 fpm:
1) Radius Type RE 1 with minimum 1.0 radius-to-diameter ratio.
2) Radius Type RE 3 with minimum 0.5 radius-to-diameter ratio and two
vanes.
3) Mitered Type RE 2 with vanes complying with SMACNA's "HVAC Duct
Construction Standards - Metal and Flexible," Figure 4-3, "Vanes and Vane
Runners," and Figure 4-4, "Vane Support in Elbows."
c. Velocity 1500 fpm or Higher:
1) Radius Type RE 1 with minimum 1.5 radius-to-diameter ratio.
2) Radius Type RE 3 with minimum 1.0 radius-to-diameter ratio and two
vanes.
3) Mitered Type RE 2 with vanes complying with SMACNA's "HVAC Duct
Construction Standards - Metal and Flexible," Figure 4-3, "Vanes and Vane
Runners," and Figure 4-4, "Vane Support in Elbows."
3. Rectangular Duct: Comply with SMACNA's "HVAC Duct Construction Standards -
Metal and Flexible," Figure 4-2, "Rectangular Elbows."
a. Radius Type RE 1 with minimum 1.5 radius-to-diameter ratio.
b. Radius Type RE 3 with minimum 1.0 radius-to-diameter ratio and two vanes.
c. Mitered Type RE 2 with vanes complying with SMACNA's "HVAC Duct
Construction Standards - Metal and Flexible," Figure 4-3, "Vanes and Vane
Runners," and Figure 4-4, "Vane Support in Elbows."
4. Round Duct: Comply with SMACNA's "HVAC Duct Construction Standards - Metal and
Flexible," Figure 3-4, "Round Duct Elbows."
a. Minimum Radius-to-Diameter Ratio and Elbow Segments: Comply with
SMACNA's "HVAC Duct Construction Standards - Metal and Flexible," Table 3-

42204.004 23 31 13-8 Metal Ducts
1, "Mitered Elbows." Elbows with less than 90-degree change of direction have
proportionately fewer segments.
1) Velocity 1000 fpm or Lower: 0.5 radius-to-diameter ratio and three
segments for 90-degree elbow.
2) Velocity 1000 to 1500 fpm: 1.0 radius-to-diameter ratio and four segments
for 90-degree elbow.
3) Velocity 1500 fpm or Higher: 1.5 radius-to-diameter ratio and five segments
for 90-degree elbow.
4) Radius-to Diameter Ratio: 1.5.
b. Round Elbows, 12 Inches and Smaller in Diameter: Stamped or pleated.
F. Branch Configuration:
1. Rectangular Duct: Comply with SMACNA's "HVAC Duct Construction Standards -
Metal and Flexible," Figure 4-6, "Branch Connection."
a. Rectangular Main to Rectangular Branch: 45-degree entry.
b. Rectangular Main to Round Branch: Spin in.
2. Round and Flat Oval: Comply with SMACNA's "HVAC Duct Construction Standards -
Metal and Flexible," Figure 3-5, "90 Degree Tees and Laterals," and Figure 3-6, "Conical
Tees." Saddle taps are permitted in existing duct.
a. Velocity 1000 fpm or Lower: 90-degree tap.
b. Velocity 1000 to 1500 fpm: Conical tap.
c. Velocity 1500 fpm or Higher: 45-degree lateral.
END OF SECTION 23 31 13
42204.004 23 33 00-1 Air Duct Accessories
SECTION 23 33 00
AIR DUCT ACCESSORIES
PART 1 - GENERAL
1.01 RELATED DOCUMENTS
A. Drawings and general provisions of the Contract, including General and Supplementary
Conditions and Division 01 Specification Sections, apply to this Section.
1.02 SUMMARY
A. Section Includes:
1. Manual volume dampers.
2. Fire dampers.
3. Turning vanes.
4. Duct-mounted access doors.
5. Flexible connectors.
6. Flexible ducts.
7. Duct accessory hardware.
B. Related Requirements:
1. Section 28 31 11 "Digital, Addressable Fire-Alarm System" for duct-mounted fire and
smoke detectors.
2. Section 28 31 12 "Zoned (DC-Loop) Fire-Alarm System" for duct-mounted fire and
smoke detectors.
1.03 ACTION SUBMITTALS
A. Product Data: For each type of product.
B. Shop Drawings: For duct accessories. Include plans, elevations, sections, details and
attachments to other work.
1. Detail duct accessories fabrication and installation in ducts and other construction.
Include dimensions, weights, loads, and required clearances; and method of field
assembly into duct systems and other construction. Include the following:
a. Special fittings.
b. Manual volume damper installations.
c. Control-damper installations.
d. Fire-damper, smoke-damper, combination fire- and smoke-damper, ceiling, and
corridor damper installations, including sleeves; and duct-mounted access doors
and remote damper operators.
e. Wiring Diagrams: For power, signal, and control wiring.
1.04 CLOSEOUT SUBMITTALS
A. Operation and Maintenance Data: For air duct accessories to include in operation and
maintenance manuals.
PART 2 - PRODUCTS
2.01 ASSEMBLY DESCRIPTION
A. Comply with NFPA 90A, "Installation of Air Conditioning and Ventilating Systems," and with
NFPA 90B, "Installation of Warm Air Heating and Air Conditioning Systems."

42204.004 23 33 00-2 Air Duct Accessories
B. Comply with SMACNA's "HVAC Duct Construction Standards - Metal and Flexible" for
acceptable materials, material thicknesses, and duct construction methods unless otherwise
indicated. Sheet metal materials shall be free of pitting, seam marks, roller marks, stains,
discolorations, and other imperfections.
2.02 MATERIALS
A. Galvanized Sheet Steel: Comply with ASTM A 653/A 653M.
1. Galvanized Coating Designation: G90.
2. Exposed-Surface Finish: Mill phosphatized.
B. Reinforcement Shapes and Plates: Galvanized-steel reinforcement where installed on
galvanized sheet metal ducts; compatible materials for aluminum and stainless-steel ducts.
C. Tie Rods: Galvanized steel, 1/4-inch minimum diameter for lengths 36 inches or less; 3/8-inch
minimum diameter for lengths longer than 36 inches.
2.03 MANUAL VOLUME DAMPERS
A. Standard, Steel, Manual Volume Dampers:
1. Manufacturers: Subject to compliance with requirements, provide products by one of the
following:
a. McGill AirFlow LLC.
b. Ruskin Company.
c. Vent Products Co., Inc.
2. Standard leakage rating[, with linkage outside airstream].
3. Suitable for horizontal or vertical applications.
4. Frames:
a. Frame: Hat-shaped, 0.094-inch-thick, galvanized sheet steel.
b. Mitered and welded corners.
c. Flanges for attaching to walls and flangeless frames for installing in ducts.
5. Blades:
a. Multiple or single blade.
b. Parallel- or opposed-blade design.
c. Stiffen damper blades for stability.
d. Galvanized-steel, 0.064 inch thick.
6. Blade Axles: Galvanized steel.
7. Bearings:
a. Oil-impregnated bronze.
b. Dampers in ducts with pressure classes of 3-inch wg or less shall have axles full
length of damper blades and bearings at both ends of operating shaft.
8. Tie Bars and Brackets: Galvanized steel.
2.04 FIRE DAMPERS
A. Manufacturers: Subject to compliance with requirements, provide products by one of the
following:
1. Cesco Products; a divsion of MESTEK, Inc.
2. Greenheck Fan Corporation.
3. Prefco.
4. Ruskin Company.

42204.004 23 33 00-3 Air Duct Accessories
B. Type: Dynamic; rated and labeled according to UL 555 by an NRTL.
C. Closing rating in ducts up to 4-inch wg static pressure class and minimum 2000-fpm velocity.
D. Fire Rating: 1-1/2 hours.
E. Frame: Curtain type with blades outside airstream; fabricated with roll-formed, 0.034-inch-thick
galvanized steel; with mitered and interlocking corners.
F. Mounting Sleeve: Factory- or field-installed, galvanized sheet steel.
1. Minimum Thickness: 0.138 inch or 0.39 inch thick, as indicated, and of length to suit
application.
2. Exception: Omit sleeve where damper-frame width permits direct attachment of
perimeter mounting angles on each side of wall or floor; thickness of damper frame must
comply with sleeve requirements.
G. Mounting Orientation: Vertical or horizontal as indicated.
H. Blades: Roll-formed, interlocking, 0.034-inch- thick, galvanized sheet steel. In place of
interlocking blades, use full-length, 0.034-inch-thick, galvanized-steel blade connectors.
I. Horizontal Dampers: Include blade lock and stainless-steel closure spring.
J. Heat-Responsive Device: Integral re-settable UL 33 listed bi-metal releasing device, 165 deg F
rated, fusible links.
2.05 TURNING VANES
A. Manufacturers: Subject to compliance with requirements, available manufacturers offering
products that may be incorporated into the Work include, but are not limited to the following:
1. Aero-Dyne Sound Control Co.
2. SEMCO LLC.
B. Manufactured Turning Vanes for Metal Ducts: Curved blades of galvanized sheet steel; support
with bars perpendicular to blades set; set into vane runners suitable for duct mounting.
1. Acoustic Turning Vanes: Fabricate airfoil-shaped aluminum extrusions with perforated
faces and fibrous-glass fill.
C. Manufactured Turning Vanes for Nonmetal Ducts: Fabricate curved blades of resin-bonded
fiberglass with acrylic polymer coating; support with bars perpendicular to blades set; set into
vane runners suitable for duct mounting.
D. General Requirements: Comply with SMACNA's "HVAC Duct Construction Standards - Metal
and Flexible"; Figures 4-3, "Vanes and Vane Runners," and 4-4, "Vane Support in Elbows."
E. Vane Construction: Single wall for ducts up to 48 inches wide and double wall for larger
dimensions.
2.06 DUCT-MOUNTED ACCESS DOORS
A. Manufacturers: Subject to compliance with requirements, available manufacturers offering
products that may be incorporated into the Work include, but are not limited to the following:
1. Cesco Products; a divsion of MESTEK, Inc.
2. Flexmaster U.S.A., Inc.
3. McGill AirFlow LLC.
B. Duct-Mounted Access Doors: Fabricate access panels according to SMACNA's "HVAC Duct
Construction Standards - Metal and Flexible"; Figures 7-2, "Duct Access Doors and Panels,"
and 7-3, "Access Doors - Round Duct."
1. Door:

42204.004 23 33 00-4 Air Duct Accessories
a. Double wall, rectangular.
b. Galvanized sheet metal with insulation fill and thickness as indicated for duct
pressure class.
c. Vision panel.
d. Hinges and Latches: 1-by-1-inchbutt or piano hinge and cam latches.
e. Fabricate doors airtight and suitable for duct pressure class.
2. Frame: Galvanized sheet steel, with bend-over tabs and foam gaskets.
3. Number of Hinges and Locks:
a. Access Doors Less Than 12 Inches Square: No hinges and two sash locks.
b. Access Doors up to 18 Inches Square: Continuous and two sash locks.
c. Access Doors up to 24 by 48 Inches: Continuous and two compression latches with
outside and inside handles.
2.07 FLEXIBLE CONNECTORS
A. Materials: Flame-retardant or noncombustible fabrics.
B. Coatings and Adhesives: Comply with UL 181, Class 1.
C. Metal-Edged Connectors: Factory fabricated with a fabric strip 3-1/2 inches wide attached to
two strips of 2-3/4-inch-wide, 0.028-inch-thick, galvanized sheet steel or 0.032-inch-thick
aluminum sheets. Provide metal compatible with connected ducts.
D. Indoor System, Flexible Connector Fabric: Glass fabric double coated with neoprene.
1. Minimum Weight: 26 oz./sq. yd..
2. Tensile Strength: 480 lbf/inch in the warp and 360 lbf/inch in the filling.
E. Service Temperature: Minus 40 to plus 200 deg F.
2.08 FLEXIBLE DUCTS
A. Noninsulated, Flexible Duct: UL 181, Class 1, 2-ply vinyl film supported by helically wound,
spring-steel wire.
1. Pressure Rating: 10-inch wg positive and 1.0-inch wg negative.
2. Maximum Air Velocity: 4000 fpm.
3. Temperature Range: Minus 10 to plus 160 deg F.
B. Insulated, Flexible Duct: UL 181, Class 1, multiple layers of aluminum laminate supported by
helically wound, spring-steel wire; fibrous-glass insulation; polyethylene vapor-barrier film.
1. Pressure Rating: 10-inch wg positive and 1.0-inch wg negative.
2. Maximum Air Velocity: 4000 fpm.
3. Temperature Range: Minus 20 to plus 210 deg F.
4. Insulation R-value: Comply with ASHRAE/IESNA 90.1.
C. Insulated, Flexible Duct: UL 181, Class 1, aluminum laminate and polyester film with latex
adhesive supported by helically wound, spring-steel wire; fibrous-glass insulation; polyethylene
vapor-barrier film.
1. Pressure Rating: 10-inch wg positive and 1.0-inch wg negative.
2. Maximum Air Velocity: 4000 fpm.
3. Temperature Range: Minus 20 to plus 210 deg F.
4. Insulation R-value: Comply with ASHRAE/IESNA 90.1.
D. Flexible Duct Connectors:
1. Clamps: Nylon strap in sizes 3 through 18 inches, to suit duct size.
2.09 DUCT ACCESSORY HARDWARE
A. Instrument Test Holes: Cast iron or cast aluminum to suit duct material, including screw cap
and gasket. Size to allow insertion of pitot tube and other testing instruments and of length to
suit duct-insulation thickness.

42204.004 23 33 00-5 Air Duct Accessories
B. Adhesives: High strength, quick setting, neoprene based, waterproof, and resistant to gasoline
and grease.
PART 3 - EXECUTION
3.01 INSTALLATION
A. Install duct accessories according to applicable details in SMACNA's "HVAC Duct
Construction Standards - Metal and Flexible" for metal ducts and in NAIMA AH116, "Fibrous
Glass Duct Construction Standards," for fibrous-glass ducts.
B. Install duct accessories of materials suited to duct materials; use galvanized-steel accessories in
galvanized-steel and fibrous-glass ducts, stainless-steel accessories in stainless-steel ducts, and
aluminum accessories in aluminum ducts.
C. Install volume dampers at points on supply, return, and exhaust systems where branches extend
from larger ducts. Where dampers are installed in ducts having duct liner, install dampers with
hat channels of same depth as liner, and terminate liner with nosing at hat channel.
1. Install steel volume dampers in steel ducts.
D. Set dampers to fully open position before testing, adjusting, and balancing.
E. Install test holes at fan inlets and outlets and elsewhere as indicated.
F. Install fire and smoke dampers according to UL listing.
G. Install duct access doors on sides of ducts to allow for inspecting, adjusting, and maintaining
accessories and equipment at the following locations:
1. Adjacent to and close enough to fire or smoke dampers, to reset or reinstall fusible links.
Access doors for access to fire or smoke dampers having fusible links shall be pressure
relief access doors and shall be outward operation for access doors installed upstream
from dampers and inward operation for access doors installed downstream from dampers.
2. At each change in direction and at maximum 50-foot spacing.
3. Control devices requiring inspection.
4. Elsewhere as indicated.
H. Install access doors with swing against duct static pressure.
I. Access Door Sizes:
1. One-Hand or Inspection Access: 8 by 5 inches.
2. Two-Hand Access: 12 by 6 inches.
3. Head and Hand Access: 18 by 10 inches.
4. Head and Shoulders Access: 21 by 14 inches.
5. Body Access: 25 by 14 inches.
6. Body plus Ladder Access: 25 by 17 inches.
J. Label access doors according to Section 23 05 53 "Identification for HVAC Piping and
Equipment" to indicate the purpose of access door.
K. Install flexible connectors to connect ducts to equipment.
L. For fans developing static pressures of 5-inch w.g. and more, cover flexible connectors with
loaded vinyl sheet held in place with metal straps.
M. Connect terminal units to supply ducts directly. Do not use flexible ducts to change directions.
N. Connect diffusers or light troffer boots to ducts directly or with maximum 6 foot lengths of
flexible duct clamped or strapped in place.
O. Connect flexible ducts to metal ducts with adhesive plus draw bands.
P. Install duct test holes where required for testing and balancing purposes.
3.02 FIELD QUALITY CONTROL
A. Tests and Inspections:
1. Operate dampers to verify full range of movement.

42204.004 23 33 00-6 Air Duct Accessories
2. Inspect locations of access doors and verify that purpose of access door can be
performed.
3. Operate fire, smoke, and combination fire and smoke dampers to verify full range of
movement and verify that proper heat-response device is installed.
4. Inspect turning vanes for proper and secure installation.
END OF SECTION 23 33 00

42204.004 23 36 00-1 Air Terminal Units
SECTION 23 36 00
AIR TERMINAL UNITS
PART 1 - GENERAL
1.1 RELATED DOCUMENTS
A. Drawings and general provisions of the Contract, including General and Supplementary
Conditions and Division 01 Specification Sections, apply to this Section.
1.2 SUMMARY
A. Section Includes:
1. Single-duct air terminal units.
1.3 ACTION SUBMITTALS
A. Product Data: For each type of the following products, including rated capacities, furnished
specialties, sound-power ratings, and accessories.
1. Air terminal units.
2. Liners and adhesives.
3. Sealants and gaskets.
B. LEED Submittals:
1. Product Data for Prerequisite IEQ 1: Documentation indicating that units comply with
ASHRAE 62.1, Section 5 - "Systems and Equipment."
C. Shop Drawings: For air terminal units. Include plans, elevations, sections, details, and
attachments to other work.
1. Detail equipment assemblies and indicate dimensions, weights, loads, required
clearances, method of field assembly, components, and location and size of each field
connection.
2. Wiring Diagrams: For power, signal, and control wiring.
3. Hangers and supports, including methods for duct and building attachment and vibration
isolation.
D. Delegated-Design Submittal:
1. Materials, fabrication, assembly, and spacing of hangers and supports.
2. Design Calculations: Calculations for selecting hangers and supports

42204.004 23 36 00-2 Air Terminal Units
1.4 INFORMATIONAL SUBMITTALS
A. Coordination Drawings: Reflected ceiling plans, drawn to scale, on which the following items
are shown and coordinated with each other, using input from Installers of the items involved:
1. Ceiling suspension assembly members.
2. Size and location of initial access modules for acoustic tile.
3. Ceiling-mounted items including lighting fixtures, diffusers, grilles, speakers, sprinklers,
access panels, and special moldings.
B. Field quality-control reports.
1.5 CLOSEOUT SUBMITTALS
A. Operation and Maintenance Data: For air terminal units to include in emergency, operation, and
maintenance manuals. In addition to items specified in Section 017823 "Operation and
Maintenance Data," include the following:
1. Instructions for resetting minimum and maximum air volumes.
2. Instructions for adjusting software set points.
1.6 MAINTENANCE MATERIAL SUBMITTALS
A. Furnish extra materials that match products installed and that are packaged with protective
covering for storage and identified with labels describing contents.
1. Fan-Powered-Unit Filters: Furnish one spare filter(s) for each filter installed.
1.7 QUALITY ASSURANCE
A. ASHRAE Compliance: Applicable requirements in ASHRAE 62.1, Section 5 - "Systems and
Equipment" and Section 7 - "Construction and System Start-Up."
PART 2 - PRODUCTS
2.1 SHUTOFF, SINGLE-DUCT AIR TERMINAL UNITS
A. Manufacturers: Subject to compliance with requirements, provide products by one of the
following:
B. Basis-of-Design Product: Subject to compliance with requirements, provide [product indicated
on Drawings] <Insert manufacturer's name; product name or designation> or comparable
product by one of the following:
1. Tuttle & Bailey.
C. Duration: Volume-damper assembly inside unit casing with control components inside a
protective metal shroud.

42204.004 23 36 00-3 Air Terminal Units
D. Casing: 0.034-inch (0.85-mm) steel wall.
1. Casing Lining: Adhesive attached, [1/2-inch- (13-mm-)] [3/4-inch- (19-mm-)] [1-inch-
(25-mm-)] thick, coated, fibrous-glass duct liner complying with ASTM C 1071, and
having a maximum flame-spread index of 25 and a maximum smoke-developed index of
50, for both insulation and adhesive, when tested according to ASTM E 84.
a. Cover liner with nonporous foil.
b. Cover liner with nonporous foil and perforated metal.
2. Casing Lining: Adhesive attached, 1-inch- (25-mm-) thick, polyurethane foam insulation
complying with UL 181 erosion requirements, and having a maximum flame-spread
index of 25 and a maximum smoke-developed index of 50, for both insulation and
adhesive, when tested according to ASTM E 84.
3. Air Inlet: Round stub connection or S-slip and drive connections for duct attachment.
4. Air Outlet: S-slip and drive connections, size matching inlet size.
5. Access: Removable panels for access to parts requiring service, adjustment, or
maintenance; with airtight gasket.
6. Airstream Surfaces: Surfaces in contact with the airstream shall comply with
requirements in ASHRAE 62.1.
E. Regulator Assembly: System-air-powered bellows section incorporating polypropylene bellows
for volume regulation and thermostatic control. Bellows shall operate at temperatures from 0 to
140 deg F (minus 18 to plus 60 deg C), shall be impervious to moisture and fungus, shall be
suitable for 10-inch wg (2500-Pa) static pressure, and shall be factory tested for leaks.
F. Volume Damper: Galvanized steel with peripheral gasket and self-lubricating bearings.
1. Maximum Damper Leakage: ARI 880 rated, 2 percent of nominal airflow at 3-inch wg
(750-Pa) inlet static pressure.
2. Damper Position: Normally open.
G. Hydronic Coils: Copper tube, with mechanically bonded aluminum fins spaced no closer than
0.1 inch (2.5 mm), and rated for a minimum working pressure of 200 psig (1380 kPa) and a
maximum entering-water temperature of 220 deg F (104 deg C). Include manual air vent and
drain valve.
H. Electric Controls: Damper actuator and thermostat.
1. Damper Actuator: 24 V, powered closed, spring return open.
2. Thermostat: Wall-mounted electronic type with clock display, temperature display in
Fahrenheit and Celsius, and space temperature set point.
I. Control Sequence:
1. Suitable for operation with duct pressures between 0.25- and 3.0-inch wg (60- and 750-
Pa) inlet static pressure.
2. System-powered, wall-mounted thermostat.

42204.004 23 36 00-4 Air Terminal Units
PART 3 - EXECUTION
3.1 INSTALLATION
A. Install air terminal units according to NFPA 90A, "Standard for the Installation of Air
Conditioning and Ventilating Systems."
B. Install air terminal units level and plumb. Maintain sufficient clearance for normal service and
maintenance.
C. Install wall-mounted thermostats.
3.2 HANGER AND SUPPORT INSTALLATION
A. Comply with SMACNA's "HVAC Duct Construction Standards - Metal and Flexible,"
Chapter 5, "Hangers and Supports."
B. Building Attachments: Concrete inserts, powder-actuated fasteners, or structural-steel fasteners
appropriate for construction materials to which hangers are being attached.
1. Where practical, install concrete inserts before placing concrete.
2. Install powder-actuated concrete fasteners after concrete is placed and completely cured.
3. Use powder-actuated concrete fasteners for standard-weight aggregate concretes and for
slabs more than 4 inches (100 mm) thick.
4. Do not use powder-actuated concrete fasteners for lightweight-aggregate concretes and
for slabs less than 4 inches (100 mm) thick.
5. Do not use powder-actuated concrete fasteners for seismic restraints.
C. Hangers Exposed to View: Threaded rod and angle or channel supports.
D. Install upper attachments to structures. Select and size upper attachments with pull-out, tension,
and shear capacities appropriate for supported loads and building materials where used.
3.3 SEISMIC-RESTRAINT-DEVICE INSTALLATION
A. Install hangers and braces designed to support the air terminal units and to restrain against
seismic forces required by applicable building codes. Comply with [SMACNA's "Seismic
Restraint Manual: Guidelines for Mechanical Systems."] [ASCE/SEI 7.]
B. Select seismic-restraint devices with capacities adequate to carry present and future static and
seismic loads.
C. Install cables so they do not bend across edges of adjacent equipment or building structure.
D. Install cable restraints on air terminal units that are suspended with vibration isolators.
E. Install seismic-restraint devices using methods approved by [an evaluation service member of
the ICC Evaluation Service] [the Office of Statewide Health Planning and Development
for the State of California] [an agency acceptable to authorities having jurisdiction].

42204.004 23 36 00-5 Air Terminal Units
F. Attachment to Structure: If specific attachment is not indicated, anchor bracing and restraints to
structure, to flanges of beams, to upper truss chords of bar joists, or to concrete members.
G. Drilling for and Setting Anchors:
1. Identify position of reinforcing steel and other embedded items before drilling holes for
anchors. Do not damage existing reinforcement or embedded items during drilling.
Notify the Architect if reinforcing steel or other embedded items are encountered during
drilling. Locate and avoid prestressed tendons, electrical and telecommunications
conduit, and gas lines.
2. Do not drill holes in concrete or masonry until concrete, mortar, or grout has achieved
full design strength.
3. Wedge Anchors: Protect threads from damage during anchor installation. Install heavy-
duty sleeve anchors with sleeve fully engaged in the structural element to which anchor is
to be fastened.
4. Set anchors to manufacturer's recommended torque, using a torque wrench.
5. Install zinc-coated steel anchors for interior applications and stainless-steel anchors for
applications exposed to weather.
3.4 CONNECTIONS
A. Install piping adjacent to air terminal unit to allow service and maintenance.
B. Hot-Water Piping: In addition to requirements in Section 232113 "Hydronic Piping" and
Section 232116 Hydronic Piping Specialties," connect heating coils to supply with shutoff
valve, strainer, control valve, and union or flange; and to return with balancing valve and union
or flange.
C. Connect ducts to air terminal units according to Section 233113 "Metal Ducts."
D. Make connections to air terminal units with flexible connectors complying with requirements in
Section 233300 "Air Duct Accessories."
3.5 IDENTIFICATION
A. Label each air terminal unit with plan number, nominal airflow, and maximum and minimum
factory-set airflows. Comply with requirements in Section 230553 "Identification for HVAC
Piping and Equipment" for equipment labels and warning signs and labels.
3.6 FIELD QUALITY CONTROL
A. Testing Agency: Engage a qualified testing agency to perform tests and inspections.
B. Manufacturer's Field Service: Engage a factory-authorized service representative to inspect, test,
and adjust components, assemblies, and equipment installations, including connections.
C. Perform tests and inspections.

42204.004 23 36 00-6 Air Terminal Units
1. Manufacturer's Field Service: Engage a factory-authorized service representative to
inspect components, assemblies, and equipment installations, including connections, and
to assist in testing.
D. Tests and Inspections:
1. After installing air terminal units and after electrical circuitry has been energized, test for
compliance with requirements.
2. Leak Test: After installation, fill water coils and test for leaks. Repair leaks and retest
until no leaks exist.
3. Operational Test: After electrical circuitry has been energized, start units to confirm
proper motor rotation and unit operation.
4. Test and adjust controls and safeties. Replace damaged and malfunctioning controls and
equipment.
E. Air terminal unit will be considered defective if it does not pass tests and inspections.
F. Prepare test and inspection reports.
3.7 STARTUP SERVICE
A. Engage a factory-authorized service representative to perform startup service.
1. Complete installation and startup checks according to manufacturer's written instructions.
2. Verify that inlet duct connections are as recommended by air terminal unit manufacturer
to achieve proper performance.
3. Verify that controls and control enclosure are accessible.
4. Verify that control connections are complete.
5. Verify that nameplate and identification tag are visible.
6. Verify that controls respond to inputs as specified.
3.8 DEMONSTRATION
A. Engage a factory-authorized service representative to train Owner's maintenance personnel
to adjust, operate, and maintain air terminal units.
END OF SECTION 23 36 00

42204.004 23 37 13-1 Diffusers, Registers, and Grilles
SECTION 23 37 13
DIFFUSERS, REGISTERS, AND GRILLES
PART 1 - GENERAL
1.01 RELATED DOCUMENTS
A. Drawings and general provisions of the Contract, including General and Supplementary Conditions and
Division 01 Specification Sections, apply to this Section.
1.02 SUMMARY
A. Section Includes:
1. Rectangular and square ceiling diffusers.
2. Perforated diffusers.
3. Modular core supply grilles.
4. Fixed face [registers] [grilles] [registers and grilles].
B. Related Sections:
1. Section 089116 "Operable Wall Louvers" and Section 089119 "Fixed Louvers" for fixed and
adjustable louvers and wall vents, whether or not they are connected to ducts.
2. Section 233300 "Air Duct Accessories" for fire and smoke dampers and volume-control dampers
not integral to diffusers, registers, and grilles.
1.03 ACTION SUBMITTALS
A. Product Data: For each type of product indicated, include the following:
1. Data Sheet: Indicate materials of construction, finish, and mounting details; and performance data
including throw and drop, static-pressure drop, and noise ratings.
2. Diffuser, Register, and Grille Schedule: Indicate drawing designation, room location, quantity,
model number, size, and accessories furnished.
B. Samples for Initial Selection: For diffusers, registers, and grilles with factory-applied color finishes.
C. Samples for Verification: For diffusers, registers, and grilles, in manufacturer's standard sizes to verify
color selected.
1.04 INFORMATIONAL SUBMITTALS
A. Coordination Drawings: Reflected ceiling plans, drawn to scale, on which the following items are shown
and coordinated with each other, using input from Installers of the items involved:
1. Ceiling suspension assembly members.
2. Method of attaching hangers to building structure.
3. Size and location of initial access modules for acoustical tile.
4. Ceiling-mounted items including lighting fixtures, diffusers, grilles, speakers, sprinklers, access
panels, and special moldings.
5. Duct access panels.
B. Source quality-control reports.
PART 2 - PRODUCTS
2.01 CEILING DIFFUSERS
A. Rectangular and Square Ceiling Diffusers <S-1, 2, 3, 4, 5 >:
1. Manufacturers: Subject to compliance with requirements, provide products by one of the
following:
a. Carnes Company.

42204.004 23 37 13-2 Diffusers, Registers, and Grilles
b. Krueger.
c. Price Industries.
d. Titus.
2. Devices shall be specifically designed for variable-air-volume flows.
3. Material: Steel.
4. Finish: Baked enamel, white.
5. Face Size: 24 by 24 inches.
6. Face Style: Plaque.
7. Mounting: T-bar.
8. Pattern: Adjustable.
B. Rectangular and Square Ceiling Diffusers <S-3A >:
1. Manufacturers: Subject to compliance with requirements, provide products by one of the
following:
a. Carnes Company.
b. Krueger.
c. Price Industries.
d. Titus.
2. Devices shall be specifically designed for variable-air-volume flows.
3. Material: Aluminum.
4. Finish: Baked enamel, white.
5. Face Size: 24 by 24 inches.
6. Face Style: match existing
7. Mounting: T-bar.
8. Pattern: Adjustable.
2.02 REGISTERS AND GRILLES
A. Fixed Face Grille <R-1,2,3,4,5; E-1,E-2>
1. Manufacturers: Subject to compliance with requirements, available manufacturers offering
products that may be incorporated into the Work include, but are not limited to the following:
a. Carnes Company.
b. Price Industries.
c. Titus.
2. Material: Steel.
3. Finish: Baked enamel, white.
4. Core Construction: Integral.
5. Frame: 1 inch wide.
6. Mounting: Lay in.
B. Fixed Face Grille <R-5A>
1. Manufacturers: Subject to compliance with requirements, available manufacturers offering
products that may be incorporated into the Work include, but are not limited to the following:
a. Carnes Company.
b. Price Industries.
c. Titus.
2. Material: Aluminum.

42204.004 23 37 13-3 Diffusers, Registers, and Grilles
3. Finish: Baked enamel, white.
4. Core Construction: Integral.
5. Frame: 1 inch wide.
6. Mounting: Lay in.
2.03 SOURCE QUALITY CONTROL
A. Verification of Performance: Rate diffusers, registers, and grilles according to ASHRAE 70, "Method of
Testing for Rating the Performance of Air Outlets and Inlets."
PART 3 - EXECUTION
3.01 EXAMINATION
A. Examine areas where diffusers, registers, and grilles are to be installed for compliance with requirements
for installation tolerances and other conditions affecting performance of equipment.
B. Proceed with installation only after unsatisfactory conditions have been corrected.
3.02 INSTALLATION
A. Install diffusers, registers, and grilles level and plumb.
B. Ceiling-Mounted Outlets and Inlets: Drawings indicate general arrangement of ducts, fittings, and
accessories. Air outlet and inlet locations have been indicated to achieve design requirements for air
volume, noise criteria, airflow pattern, throw, and pressure drop. Make final locations where indicated, as
much as practical. For units installed in lay-in ceiling panels, locate units in the center of panel. Where
architectural features or other items conflict with installation, notify Architect for a determination of final
location.
C. Install diffusers, registers, and grilles with airtight connections to ducts and to allow service and
maintenance of dampers, air extractors, and fire dampers.
3.03 ADJUSTING
A. After installation, adjust diffusers, registers, and grilles to air patterns indicated, or as directed, before
starting air balancing.
END OF SECTION 23 37 13

42204.004 23 82 16.11-1 Hydronic Air Coils
SECTION 23 82 16.11
HYDRONIC AIR COILS
PART 1 - GENERAL
1.01 RELATED DOCUMENTS
A. Drawings and general provisions of the Contract, including General and Supplementary Conditions and
Division 01 Specification Sections, apply to this Section.
1.02 SUMMARY
A. Section includes hydronic heating air coils.
1.03 ACTION SUBMITTALS
A. Product Data: For each type of product.
1. Include construction details, material descriptions, dimensions of individual components and
profiles, and finishes for each air coil.
2. Include rated capacities, operating characteristics, and pressure drops for each air coil.
1.04 INFORMATIONAL SUBMITTALS
A. Coordination Drawings: Reflected ceiling plans, drawn to scale, on which coil location and ceiling-
mounted access panels are shown and coordinated with each other.
1.05 CLOSEOUT SUBMITTALS
A. Operation and Maintenance Data: For air coils to include in operation and maintenance manuals.
1.06 FIELD CONDITIONS
A. Altitude above Mean Sea Level: <500 feet>.
PART 2 - PRODUCTS
2.01 DESCRIPTION
A. ASHRAE Compliance: Comply with applicable requirements in ASHRAE 62.1, Section 5 - "Systems
and Equipment" and Section 7 - "Construction and Startup."
2.02 COILS
A. Manufacturers: Subject to compliance with requirements, available manufacturers offering products that
may be incorporated into the Work include, but are not limited to the following:
1. Aerofin.
2. Coil Company, LLC.
3. Trane.
B. Performance Ratings: Tested and rated according to AHRI 410 and ASHRAE 33.
C. Minimum Working-Pressure/Temperature Ratings: 200 psig, 325 deg F.
D. Source Quality Control: Factory tested to 300 psig.
E. Tubes: ASTM B 743 copper, minimum 0.035 inch thick.
F. Fins: Aluminum, minimum 0.010 inch thick.
G. Headers: Seamless copper tube with brazed joints, prime coated.
H. Frames: Galvanized-steel channel frame, minimum 0.052 inch thick for flanged mounting.

42204.004 23 82 16.11-2 Hydronic Air Coils
PART 3 - EXECUTION
3.01 EXAMINATION
A. Examine ducts, plenums, and casings to receive air coils for compliance with requirements for installation
tolerances and other conditions affecting coil performance.
B. Examine roughing-in for piping systems to verify actual locations of piping connections before coil
installation.
C. Proceed with installation only after unsatisfactory conditions have been corrected.
3.02 INSTALLATION
A. Install coils level and plumb.
B. Install coils in metal ducts and casings constructed according to SMACNA's "HVAC Duct Construction
Standards, Metal and Flexible."
C. Straighten bent fins on air coils.
D. Clean coils using materials and methods recommended in writing by manufacturers, and clean inside of
casings and enclosures to remove dust and debris.
3.03 CONNECTIONS
A. Piping installation requirements are specified in other Sections. Drawings indicate general arrangement of
piping, fittings, and specialties.
B. Install piping adjacent to coils to allow service and maintenance.
C. Connect water piping with unions and shutoff valves to allow coils to be disconnected without draining
piping. Control valves are specified in Section 230923.11 "Control Valves," and other piping specialties
are specified in Section 232116 "Hydronic Piping Specialties."
END OF SECTION 23 82 16.11

42204.004
26 05 00-1 General Electrical Provisions
SECTION 26 05 00
GENERAL ELECTRICAL PROVISIONS
PART 1 - GENERAL
1.01 RELATED REQUIREMENTS
A. Applicable provisions of Division 0 and Division 1 shall govern Work under this Section.
1.02 WORK INCLUDED IN THE ELECTRICAL CONTRACT
A. The mention of any Article, operation or method requires that the Contractor shall provide same
and perform each operation in complete accordance with the conditions stated. The Contractor
shall provide all material, labor, equipment and transportation as necessary to complete the project
in compliance with the Contract Documents. In general, this work includes everything essential
for a complete electrical system in operating order as shown on the drawings and indicated in the
specifications.
B. All work shall be installed in accordance with all State and Local Inspection Authorities having
jurisdiction together with the recommendations of the manufacturer whose equipment is to be
supplied and installed under this Contract.
C. Before submitting a bid, each bidder shall examine the drawings relating to their work and shall
become fully informed as to the extent and character of the work required and its relation to other
work in the building.
D. The Contractor, in conjunction with the Architect's representative, shall establish exact locations
of all materials and equipment to be installed. Consideration shall be given to construction
features, equipment of other trades and requirements of the equipment proper.
E. All materials shall be suitably stored and protected prior to installation and all work shall be
protected after installation, during construction and prior to acceptance.
F. The Contractor shall furnish all scaffolding, rigging, hoisting and services necessary for delivery,
erection and installation of all equipment and apparatus required to be installed by the Contractor.
All such equipment shall be removed by the Contractor upon completion of the project.
G. Refer to General Requirement for temporary electrical service.
1.03 DEFINITIONS
A. The Owner. The individual who the Owner selects as the project representative.
B. The Architect. Hagney Architects, LLC. Rockford, Illinois.
C. The Engineer. RTM Engineering Consultants, LLC. Milwaukee, Wisconsin.
D. This Contractor. The Electrical Contractor, also referred to as "The Contractor".
E. Provide. Furnish, install and wire complete and ready for service.
F. Exposed. Exposed to view in any room, corridor or stairway.
G. Code. National, State and Local Electrical codes including OSHA requirements.
H. Equals. Manufacturers or methods listed by name in the specifications, on the drawings or in an
addendum are considered to be equals.

42204.004
26 05 00-2 General Electrical Provisions
I. Substitution. Any manufacturer or method other than those listed by name in these specifications,
on the drawings, or in an addendum.
J. Signal Voltage. NEC class 1, 2, or 3 remote control, signaling, or power limited circuits.
K. Low Voltage. 50 to 600 volts.
L. Medium Voltage. 601 to 35,000 volts.
M. High Voltage. 35,001 volts and greater.
N. Electrical Ductbank. Assembly consisting of electrical conduits encased in concrete.
1.04 ABBREVIATIONS
A. A/E: Architect and/or Engineer
B. ENGR: Engineer
C. NEC: National Electrical Code
D. NEMA: National Electrical Manufacturer’s Association
E. NFPA: National Fire Protection Association
F. OSHA: Occupational Safety and Health Administration
G. UL: Underwriter’s Laboratories
1.05 PERMITS AND LICENSES A. The Contractor shall prepare and submit all applications and working drawings, as required, to
authorities having jurisdiction over the project. All licenses and permits required shall be secured
and paid for by the Contractor.
1.06 STANDARDS AND CODES A. All work shall be installed in accordance with National, State, and Local codes, ordinances, laws,
and regulations. Comply with all applicable OSHA regulations.
B. All materials shall have a UL or ETL label where a UL or ETL Standard and/or test exist.
1.07 DIMENSIONS AND DEFINITE LOCATIONS A. The drawings depicting electric work are diagrammatic and show, in their approximate location,
symbols representing electrical equipment and devices. The exact location of such equipment and
devices shall be established in the field in accordance with instructions from the Architect and/or
as established by manufacturer's installation drawings and details.
B. The Contractor shall refer to shop drawings and submittal drawings for all equipment requiring
electrical connections to verify rough-in and connection locations.
C. Unless specifically stated to the contrary, no measurement of an electric drawing derived by
scaling shall be used as a dimension to work by. Dimensions noted on the electric drawings are
subject to measurements of adjacent and previously completed work. All measurements shall be
performed prior to the actual installation of equipment.
1.08 DRAWINGS A. The Contractor shall keep a detailed up-to-date record, of the manner and location in which all
installations are actually made, indexing each feeder, pull box and protective device. Upon
completion of the project, the contractor shall modify the project electronic drawings in AutoCAD
and Revit MEP, and specification files to incorporate this information. Modified documents shall
be turned over to the Owner in both electronic and hard paper copy formats. Record drawings
shall also include:
1. Locations of all buried conduit or similar items. Include buried depth.

42204.004
26 05 00-3 General Electrical Provisions
2. Field changes of dimension or detail.
3. Changes made by field order or change order.
4. Details not on original contract drawings.
5. Changes to circuit numbers.
6. Junction box locations and conduit runs, with trade sizes indicated, for all lighting,
power, and electrical systems installed.
7. As Built Drawings - See General Requirements - Division 1.
B. In the event of a conflict between the drawings and specifications, this Contractor shall base their
bid on the greater quantity, cost or quality of the item in question, unless such conflict is resolved
by an addendum.
1.09 MATERIALS AND EQUIPMENT A. All materials and equipment required shall be new.
B. All equipment supplied shall be based on materials and equipment of manufacturers specified. No
substitutions will be allowed except as permitted in this specification.
C. All items specified shall be the latest type or model produced by the manufacturer specified. If
descriptive specification or model number is obsolete, substitute the current product.
1.10 SUBSTITUTIONS A. Substitutions shall not be allowed. In any case where the Contractor wishes to use equipment or
methods other then those listed by name, that equipment must be approved by the Engineer. To gain
approval for equipment not listed, the Contractor shall submit the following to the Engineer for his
review.
1. Documentation from the equipment manufacturer indicating where this equipment meets and
does not meet the specifications or drawings as written. This documentation shall state all
exceptions taken to the specification and the reasons for such exceptions. All documentation
relative to the request shall be submitted on the manufacturer's letterhead and signed by a
representative of the manufacturer.
2. Manufacturer's Cut Sheets: Provide manufacturers cut sheets with complete model number in
PDF format for review.
3. Lighting Fixtures: Request for substitutions shall include photometric test reports performed by
an independent testing laboratory.
4. The Contractor shall provide samples of the proposed equipment for the Engineer's review, if
requested by the Engineer.
5. The Contractor shall furnish any other information or materials as requested by the
Architect/Engineer to establish equality.
B. The Contractor shall acknowledge that they have reviewed the submission criteria for the request by
stamping the submission with a review stamp or acknowledgement by an accompanying letter.
C. Equipment and materials submitted for review without proper documentation will be rejected without
review.

42204.004
26 05 00-4 General Electrical Provisions
D. Any submittal, including samples, shall be received in the Engineer's office 5 days prior to bidding.
Equipment will only be approved “as equal” if there is adequate time to issue an addendum to notify
all bidders of the approval.
E. Materials, equipment, or methods of installation other than those named, will be accepted only if
such articles are in accordance with the general requirements and are similar in composition,
dimension, construction, capacity, finish and performance.
F. Contractors submitting equipment for approval as an equal, shall include in their bids all incidental
costs that may result from the use of approved equipment. Such costs shall include, but not be
limited to, additional costs that may be incurred by other contractors whose scope of work is affected
by use of the “equal” product. The Electrical Contractor shall be responsible for those costs even if
they do not become evident until after bidding.
1.11 SHOP DRAWINGS AND EQUIPMENT BROCHURES
A. Submit to Engineer for review, the manufacturer's shop drawings and/or equipment brochures in PDF
format for the following:
1. Section 260923 - Lighting Control Devices
2. Section 262726 – Wiring Devices
3. Section 262816 – Enclosed Switches and Circuit Breakers
4. Section 265100 – Interior Lighting
5. Section 271500 – Communications Horizontal Cabling
6. Section 283100 – Multiplexed Addressable Fire Alarm System
B. Shop drawings shall be submitted in advance of construction and installation so as to not cause delay
in other Contractor's work.
C. All data submitted for Engineer's review shall be numbered consecutively, shall be noted to correlate
with the electrical drawings and shall bear:
1. The name and location of the project.
2. The name of the Contractor.
3. The date of submittal.
4. The date of the drawings and the date of each correction and revision.
D. If more than one type of lighting fixture (or other material) is on a submitted PDF, the proposed
equipment shall be conspicuously highlighted or noted by the Electrical Contractor.
E. Shop drawings for different systems and equipment shall be combined into a separate PDF by
specification section and not by manufacturer. Submittals which contain different specification
section systems combined into one PDF will be returned for resubmittal.
F. Lighting Fixture shop drawings shall consist of a single submittal with all project light fixtures
included. Submittals grouped by manufacturer shall not be accepted. The contractor shall be
responsible for coordinating drawings from his various suppliers in order to comply with this
requirement.
G. The Contractor shall approve shop drawings and equipment brochures prior to submission. The
Contractor shall verify that the materials and equipment depicted will properly fit into the
construction. The Contractor shall also review all previously completed work related to the
installation of the equipment depicted to insure that it has been properly installed.

42204.004
26 05 00-5 General Electrical Provisions
H. Materials or equipment subject to prior review by the Engineer shall not be fabricated or installed by
the Contractor, without approval. The Engineer's review of shop drawings shall not relieve the
Contractor of responsibility for deviations from the requirements of the drawings and specifications,
unless prior approval for such deviations has been granted.
1.12 MAINTENANCE MANUALS
A. The Electrical Contractor shall assemble and submit to the Architect for subsequent submission to
the Owner, three complete sets of a Manual of Operation and Maintenance for each of the electrical
and communications systems.
B. Each manual shall consist of a loose leaf bound volume instructing the Owner's personnel in the use,
operation and maintenance of the system in question. The manual shall cover all phases of operation
of the equipment and shall be illustrated with photographs, drawings, wiring diagrams, etc. Manuals
shall accurately describe the operation, construction and adjustable features of the complete system
and its component parts. The manual shall be complete with an equipment parts listing to facilitate
the ordering of spare and replacement parts.
C. The engineer will give consideration to maintenance manuals being provided on computer compact
discs with maintenance manual files stored in a PDF format. If this is desired, the contractor shall
provide a written request prior to submitting the manuals indicating which equipment manuals they
propose to provide in this format.
D. Each manual shall contain two sets of final shop drawings depicting equipment as installed.
1.13 CLEANING AND PAINTING A. All rubbish resulting from this work shall be removed and disposed of on a daily basis in such
manner as to be acceptable to the Architect.
B. The Contractor shall clean all exposed iron work, the interior and exterior of cabinets and pull boxes,
etc., and remove all rubbish and debris resulting from the work.
C. Where painted surfaces of equipment have been damaged or rusted during construction, the
Contractor shall paint same to match final.
D. Clean other equipment as indicated in other sections of the specification for specific equipment.
1.14 TESTS AND ACCEPTANCE A. The operation of the equipment and electrical systems does not constitute an acceptance of the work
by the Owner. The final acceptance is to be made after the Contractor has adjusted his equipment
and demonstrated that it fulfills the requirements of the drawings and the specifications.
B. After the work is completed and prior to acceptance, the Contractor shall conduct the following tests,
tabulate data, date, sign and submit to the Engineer:
1. Standard megger insulation test on each feeder.
2. Ground resistance test.
3. Clamp ammeter test on each feeder conductor with all utilization equipment energized. The
load current in each phase conductor of the feeder or the portion thereof supplying the panel
shall not differ from the average connected load currents in the feeder conductors by more than
7½%. If the load current does differ by more than 7½%, the Contractor shall change phase
loading to same or receive written approval from the Engineer that this is not required due to the
nature of the load.
C. Upon completion of the installation, the Contractor shall furnish certificates of approval from all
authorities having jurisdiction. The Contractor shall demonstrate that all work is complete and in

42204.004
26 05 00-6 General Electrical Provisions
perfect operating condition, with race way and conduit system properly grounded, all wiring free
from grounds, shorts, and that the entire installation is free from any physical defects.
D. In the presence of the Engineer and the Owner, the Contractor shall demonstrate the proper operation
of all miscellaneous systems.
E. Perform other test as specifically directed in other sections of the specification for specific
equipment.
1.15 GUARANTEE
A. See General Conditions.
1.16 IDENTIFICATION
A. Each distribution and lighting panel shall be equipped with an electronically printed directory
describing the loads served. Directory shall be contained in a steel frame mounted on the inside face
of the panel's door and shall be covered with a sheet of clear plastic.
B. Panels and cabinets shall be provided with 1/8" minimum thickness 5 ply lamecoid plastic
nameplates indicating usage, plan designation and voltage where applicable. For Switchboards,
transfer switches, transformers and panel boards label shall include branch, voltage, phase,
ampere rating, power source designation and source room location. Refer to specification 26 24
16 for panel labels. In Equipment and Mechanical Rooms this identification may be on the exterior
of the unit, in other areas identification shall be inside the door or cover. Nameplates shall be black
with white engraved lettering. Lettering shall be ½" high minimum. Fasten nameplates with
escutcheon pins.
C. Junction and pullboxes smaller than 12” X 12” shall be identified by using a permanent marker on
the coverplate indicating originating panelboard and circuit(s) or system served.
D. Junction and pull boxes with dimensions 12” X 12” and larger shall be stenciled or provided with
permanent labels as follows:
1. Lighting and power feeders and branch circuits - 120, 208, 277, 480. Add "EM" for emergency
circuits, ex. 120EM, etc.
2. Voice/Data communications - V/D COM
3. Fire Alarm - FA
4. Signal voltage lighting controls - LVLC
5. Card Access System - CA
E. Branch wiring shall be color coded per industry standards. Where wires of different systems junction
in a common box each cable shall be grouped with its own system and identified using tags or
identification strips.
F. On all 3-phase systems, each phase shall be identified at all terminals using code markers.
G. All cover plates for control stations controlling remote equipment shall be engraved to identify the
device being controlled.
H. All motor starters, remote control stations, etc., shall be identified with engraved lamecoid
nameplates fastened to the equipment with escutcheon pins. Nameplates shall be 1/8" 5 ply lamecoid
with ¼" white letters on a black background. Adhesive cloth labels, similar to those manufactured

42204.004
26 05 00-7 General Electrical Provisions
by Brady Label Co., may be used on motor switches and controls only, indicating the number,
designation, size and usage of the motor.
I. On the OUTSIDE of coverplates for light switches, occupancy sensors, receptacles, and special
purpose outlets, provide a permanent label identifying the panel and circuit number feeding the
device. Clear adhesive plastic tape with black lettering will be permitted for this use.
J. On light fixtures at the wiring entrance point, provide a permanent label identifying the panel and
circuit number feeding the fixture. Adhesive plastic tape will be permitted for this use.
K. Refer to individual specification sections for more specific or additional identification requirements.
1.17 ACCESS PANELS
A. All access panels required by code or otherwise to electrical service equipment shall be supplied and
installed by Electrical Contractor.
1.18 SPARE PARTS
A. Requirements for spare parts are outlines in individual specification sections. Spare parts shall be
turned over, unopened, to the Owner as part of the maintenance manual submittal.
1.19 PREBID SURVEY A. Before submitting his bid the Contractor shall tour the job site to review the following:
1. The exact configuration of areas requiring demolition, temporary power, relocating, etc.
2. Site conditions such as material storage, staging areas, parking, etc.
3. Problems with work sequence.
B. Any conditions found that are not shown on the documents but that may affect the scope of the work
shall be reported to the Engineer.
PART 2 - PRODUCTS
2.01 FIRESTOPPING
A. Refer to Division 7 for fire stopping requirements.
2.02 SLEEVES
A. Schedule 40 galvanized steel pipe.
2.03 ACCESS PANELS A. Access panels shall be of size required to provide adequate access to equipment. Minimum size shall
be 12” X 12” for hand access or 24” X 24” for body access.
B. Panels shall be as manufactured by Milcor or equivalent.
C. Panels shall include concealed hinges, cam type locking devices, and shall have a frame border type
necessary for the particular wall or ceiling construction in which they are installed. Access panels
shall be flush mounted, recessed frame type units. Access panels shall be prime coated steel, suitable
for field painting for general applications and stainless steel for use in toilet rooms, shower rooms,
and similar wet locations.
D. Refer to architectural room finish schedule for wall and ceiling surfaces and finishes.
E. Panel construction shall be as follows:

42204.004
26 05 00-8 General Electrical Provisions
1. Minimum 16 gauge frame, not less than 18 gauge hinged door panel. Door locks shall be
screwdriver operated for panels in general location applications and shall be key locked for public
area applications.
PART 3 - EXECUTION
3.01 FIRE STOPPING
A. Refer to division 7 for fire stopping requirements.
B. Openings in fire rated construction and annular spaces around conduits, cable trays, and other
penetrating items shall be protected in accordance with NEC article 300-21. The fire rating of the
protective seal shall be at least that of the floor or wall into which it is installed, so that the original
fire rating of the construction is maintained.
C. All wall or floor penetrations openings shall be as small as possible.
D. All openings and annular spaces required by code to be protected shall be protected whether
specifically indicated on the plans or not.
E. Installation of materials and assemblies shall be in strict accordance with the manufacturer’s
instructions.
3.02 SLEEVES A. Where conduits, cables trays, or other electrical raceways must pass through floors or walls that are
to be constructed of poured in place concrete, the contractor shall provide sleeves in the formwork
prior to the concrete pour. For low voltage systems Hilt speed sleeves shall be provided. It shall be
the Electrical Contractor's responsibility to provide all sleeves for his work unless specifically
indicated otherwise on the plans. Prior to installing the sleeves the contractor shall prepare drawings
indicating the locations, quantities, sizes, and spacings of all sleeves anticipated. The drawings shall
be forwarded to the structural engineer for approval.
B. Floor sleeves shall extend a minimum of 2 inches above the finished floor.
END OF SECTION 26 05 00

42204.004
26 05 01-1 Electrical Demolition and Alterations
SECTION 26 05 01
ELECTRICAL DEMOLITION AND ALTERATIONS
PART 1 - GENERAL
1.01 RELATED REQUIREMENTS
A. Applicable requirements of Division 00 and Division 01 shall govern work in this section.
1.02 JOB CONDITIONS
A. The existing buildings shall remain in service during construction. Power outages and
interruptions in building systems shall be held to a minimum and shall be done at a time
convenient to the Owner. The time of all outages shall be scheduled with the Owner and all other
trades affected by the outage at least ten working days in advance. All demolition work shall be
scheduled at periods and times acceptable to the Owner.
B. Refer to Division 02 - Existing Conditions for areas and equipment being remodeled.
C. Prior to demolition or alteration of structures, the following shall be accomplished:
1. Owner release of such structure.
2. Disconnection of electrical power to equipment and circuits removed or affected by
demolition work.
3. Electrical services rerouted or shut off outside area of demolition.
4. Coordinate sequencing with Owner and other Contractors.
5. Survey and record condition of existing facilities to remain in place that may be affected
by demolition operations. After demolition operations are completed, survey conditions
again and restore existing facilities to their predemolition condition.
D. Contractor shall dispose of all obsolete material.
E. Contractor shall notify the Engineer of any existing code violations observed during the course of
performing his work. The Engineer will decide if corrective action needs to be taken. Corrective
actions that change the scope of the work will be considered a change order and will be processed
accordingly.
PART 2 - PRODUCTS
Not used.
PART 3 - EXECUTION
3.01 MODIFICATIONS A. Feeders, branch circuits, and other system wiring which are to remain in service but which are
presently routed through areas being demolished shall be rerouted around demolition area.
3.02 REMOVAL A. Electrical equipment in conflict with construction shall be removed or relocated as indicated on
drawings, as directed, or required.
B. Remove or relocate conduit, wire, boxes, fixtures that are in the way of construction.

42204.004
26 05 01-2 Electrical Demolition and Alterations
C. Reconnect circuits and equipment to be continued in service.
D. Provide temporary wiring to any equipment that is to remain in operation during demolition and
whose power would be interrupted as a result of demolition.
E. Remove electrical equipment released from service as a result of construction or as indicated on
drawings.
F. Do not reuse removed electrical equipment except as specifically directed on the drawings.
G. Where the plans require existing equipment to be removed or relocated, removal shall include all
equipment associated with the device. Associated equipment shall include but not be limited to
coverplates, backboxes, conduit, fittings, de-energized conductors, etc. In instances where a
device is removed but active conductors remain in the backbox and the box is mounted in a wall
which is remaining, the backbox may remain and a blank coverplate provided. If removal of the
box is specifically indicated on the plans the active conductors shall be intercepted at convenient,
accessible locations and rerouted to allow existing box to be removed. When boxes are removed
from existing walls which will remain, it shall be the Electrical Contractor's responsibility to fill in
openings and sand as required flush with adjacent surfaces. The General Contractor shall be
responsible for final finish work unless specifically indicated otherwise on the plans.
3.03 DISPOSAL A. Dispose of equipment that is removed unless specifically indicated on the drawings.
B. Raceway, conductors, boxes, cabinets and supporting devices shall become the property of the
Contractor and shall be removed from the site and disposed of by the Contractor.
C. The Contractor shall tour demolition areas with the Owner to determine the status of all other
equipment to be removed during demolition. All equipment that is to be salvaged for reuse by the
Owner shall be removed by the Contractor and transported to an owner designated storage area on
the site. The Owner shall be responsible for removal of salvaged equipment from the storage area.
D. Contractor, at his option, may install new conductors in existing raceways provided that the raceways
are in place and are properly sized and supported. Existing conduits that are removed from their
existing location shall not be reinstalled.
3.04 LIGHTING FIXTURE LAMP DISPOSAL A. The Contractor shall be responsible for the proper removal and recycling of all existing fixture
lamps being removed from service in accordance with EPA and State of Illinois DNR
requirements. Lamps shall not be disposed of in any way except as described herein.
B. The Contractor shall be responsible for arranging for recycling of lamps by a licensed waste lamp
and bulb recycler. The cost for recycling of removed lamps shall be included in the Contractor's
bid.
C. The Contractor shall carefully package removed lamps to prevent breakage. The Contractor shall
store waste lamps in a secure area, either in the container that the lamps are shipped in or in other
ways so as to eliminate breakage. Both the lamp storage area and individual containers should be
labeled as hazardous waste. Store lamps in covered containers to prevent lamps from being
broken as a result of other debris being placed on top of them.
3.05 ALTERATIONS A. The Contractor shall be responsible for work of other trades to facilitate installation of electrical
work in the existing building.

42204.004
26 05 01-3 Electrical Demolition and Alterations
B. Work required by Electrical Contractor which is normally performed by other trades shall be done
under direction and at the expense of Electrical Contractor.
END OF SECTION 26 05 01

42204.004 26 05 19-1 Low Voltage Electrical Power Conductors and Cables
SECTION 26 05 19
LOW-VOLTAGE ELECTRICAL POWER CONDUCTORS AND CABLES
PART 1 - GENERAL
1.1 RELATED DOCUMENTS
A. Drawings and general provisions of the Contract, including General and Supplementary Conditions and
Division 01 Specification Sections, apply to this Section.
1.2 SUMMARY
A. This Section includes the following:
1. Building wires and cables rated 600 V and less.
2. Connectors, splices, and terminations rated 600 V and less.
3. Sleeves and sleeve seals for cables.
1.3 DEFINITIONS
A. EPDM: Ethylene-propylene-diene terpolymer rubber.
B. NBR: Acrylonitrile-butadiene rubber.
1.4 QUALITY ASSURANCE
A. Electrical Components, Devices, and Accessories: Listed and labeled as defined in NFPA 70,
Article 100, by a testing agency acceptable to authorities having jurisdiction, and marked for intended
use.
B. Comply with NFPA 70.
1.5 COORDINATION
A. Set sleeves in cast-in-place concrete, masonry walls, and other structural components as they are
constructed.
PART 2 - PRODUCTS
2.1 CONDUCTORS AND CABLES
A. Available Manufacturers: Subject to compliance with requirements, manufacturers offering products that
may be incorporated into the Work include, but are not limited to, the following:
1. Alcan Products Corporation; Alcan Cable Division.

42204.004 26 05 19-2 Low Voltage Electrical Power Conductors and Cables
2. American Insulated Wire Corp.; a Leviton Company.
3. General Cable Corporation.
4. Senator Wire & Cable Company.
5. Southwire Company.
B. Copper Conductors: Comply with NEMA WC 70.
C. Conductor Insulation: Comply with NEMA WC 70 for Types THHN-THWN.
2.2 CONNECTORS AND SPLICES
A. Available Manufacturers: Subject to compliance with requirements, manufacturers offering products that
may be incorporated into the Work include, but are not limited to, the following:
1. AFC Cable Systems, Inc.
2. Hubbell Power Systems, Inc.
3. O-Z/Gedney; EGS Electrical Group LLC.
4. 3M; Electrical Products Division.
5. Tyco Electronics Corp.
B. Description: Factory-fabricated connectors and splices of size, ampacity rating, material, type, and class
for application and service indicated.
2.3 SLEEVES FOR CABLES
A. Steel Pipe Sleeves: ASTM A 53/A 53M, Type E, Grade B, Schedule 40, galvanized steel, plain ends.
B. Cast-Iron Pipe Sleeves: Cast or fabricated "wall pipe," equivalent to ductile-iron pressure pipe, with plain
ends and integral waterstop, unless otherwise indicated.
C. Sleeves for Rectangular Openings: Galvanized sheet steel with minimum 0.052- or 0.138-inch (1.3- or
3.5-mm) thickness as indicated and of length to suit application.
D. Coordinate sleeve selection and application with selection and application of firestopping specified in
Division 07 Section "Penetration Firestopping."
2.4 SLEEVE SEALS
A. Available Manufacturers: Subject to compliance with requirements, manufacturers offering products that
may be incorporated into the Work include, but are not limited to, the following:
B. Manufacturers: Subject to compliance with requirements, provide products by one of the following:
1. Advance Products & Systems, Inc.
2. Calpico, Inc.
3. Metraflex Co.
4. Pipeline Seal and Insulator, Inc.
C. Description: Modular sealing device, designed for field assembly, to fill annular space between sleeve
and cable.

42204.004 26 05 19-3 Low Voltage Electrical Power Conductors and Cables
1. Sealing Elements: EPDM or NBR interlocking links shaped to fit surface of cable or conduit.
Include type and number required for material and size of raceway or cable.
2. Pressure Plates: Stainless steel. Include two for each sealing element.
3. Connecting Bolts and Nuts: Stainless steel of length required to secure pressure plates to sealing
elements. Include one for each sealing element.
PART 3 - EXECUTION
3.1 CONDUCTOR MATERIAL APPLICATIONS
A. Feeders: Copper. Stranded.
B. Branch Circuits: Copper. Stranded.
3.2 CONDUCTOR INSULATION AND MULTICONDUCTOR CABLE APPLICATIONS AND
WIRING METHODS
A. Service Entrance: Type THHN-THWN, single conductors in raceway.
B. Exposed Feeders: Type THHN-THWN, single conductors in raceway.
C. Feeders Concealed in Ceilings, Walls, Partitions, and Crawlspaces: Type THHN-THWN, single
conductors in raceway.
D. Feeders Concealed in Concrete, below Slabs-on-Grade, and Underground: Type THHN-THWN, single
conductors in raceway.
E. Feeders Installed below Raised Flooring: Type THHN-THWN, single conductors in raceway.
F. Exposed Branch Circuits, Including in Crawlspaces: Type THHN-THWN, single conductors in
raceway.
G. Branch Circuits Concealed in Ceilings, Walls, and Partitions: Type THHN-THWN, single conductors
in raceway for homeruns to panelboards and circuits runs containing three or more circuits.
H. Branch Circuits Concealed in Concrete, below Slabs-on-Grade, and Underground: Type THHN-
THWN, single conductors in raceway.
I. Branch Circuits Installed below Raised Flooring: Type THHN-THWN, single conductors in raceway.
J. Branch Circuits in Cable Tray: Type THHN-THWN, single conductors in raceway or Metal-clad
cable, Type MC.
K. Cord Drops and Portable Appliance Connections: Type SO, hard service cord with stainless-steel, wire-
mesh, strain relief device at terminations to suit application.
L. Class 1 Control Circuits: Type THHN-THWN, in raceway.
M. Class 2 Control Circuits: Type THHN-THWN, in raceway.
N. Provide separate neutrals for all branch circuits. Shared neutral for multi-wire branch circuits shall not be
permitted.

42204.004 26 05 19-4 Low Voltage Electrical Power Conductors and Cables
3.3 INSTALLATION OF CONDUCTORS AND CABLES
A. Conceal cables in finished walls, ceilings, and floors, unless otherwise indicated.
B. Use manufacturer-approved pulling compound or lubricant where necessary; compound used must not
deteriorate conductor or insulation. Do not exceed manufacturer's recommended maximum pulling
tensions and sidewall pressure values.
C. Use pulling means, including fish tape, cable, rope, and basket-weave wire/cable grips, that will not
damage cables or raceway.
D. Install exposed cables parallel and perpendicular to surfaces of exposed structural members, and follow
surface contours where possible.
E. Support cables according to Division 26 Section "Hangers and Supports for Electrical Systems."
F. Identify and color-code conductors and cables according to Division 26 Section "Identification for
Electrical Systems."
3.4 CONNECTIONS
A. Tighten electrical connectors and terminals according to manufacturer's published torque-tightening
values. If manufacturer's torque values are not indicated, use those specified in UL 486A and UL 486B.
B. Make splices and taps that are compatible with conductor material and that possess equivalent or better
mechanical strength and insulation ratings than unspliced conductors.
1. Use oxide inhibitor in each splice and tap conductor for aluminum conductors.
C. Wiring at Outlets: Install conductor at each outlet, with at least 6 inches (150 mm) of slack.
3.5 SLEEVE INSTALLATION FOR ELECTRICAL PENETRATIONS
A. Coordinate sleeve selection and application with selection and application of firestopping specified in
Division 07 Section "Penetration Firestopping."
B. Concrete Slabs and Walls: Install sleeves for penetrations unless core-drilled holes or formed openings
are used. Install sleeves during erection of slabs and walls.
C. Use pipe sleeves unless penetration arrangement requires rectangular sleeved opening.
D. Rectangular Sleeve Minimum Metal Thickness:
1. For sleeve rectangle perimeter less than 50 inches (1270 mm) and no side greater than 16 inches
(400 mm), thickness shall be 0.052 inch (1.3 mm).
2. For sleeve rectangle perimeter equal to, or greater than, 50 inches (1270 mm) and 1 or more sides
equal to, or greater than, 16 inches (400 mm), thickness shall be 0.138 inch (3.5 mm).
E. Fire-Rated Assemblies: Install sleeves for penetrations of fire-rated floor and wall assemblies unless
openings compatible with firestop system used are fabricated during construction of floor or wall.
F. Cut sleeves to length for mounting flush with both wall surfaces.

42204.004 26 05 19-5 Low Voltage Electrical Power Conductors and Cables
G. Extend sleeves installed in floors 2 inches (50 mm) above finished floor level.
H. Size pipe sleeves to provide 1/4-inch (6.4-mm) annular clear space between sleeve and cable unless
sleeve seal is to be installed.
I. Seal space outside of sleeves with grout for penetrations of concrete and masonry and with approved
joint compound for gypsum board assemblies.
J. Interior Penetrations of Non-Fire-Rated Walls and Floors: Seal annular space between sleeve and cable,
using joint sealant appropriate for size, depth, and location of joint according to Division 07 Section
"Joint Sealants."
K. Fire-Rated-Assembly Penetrations: Maintain indicated fire rating of walls, partitions, ceilings, and floors
at cable penetrations. Install sleeves and seal with firestop materials according to Division 07 Section
"Penetration Firestopping."
L. Roof-Penetration Sleeves: Seal penetration of individual cables with flexible boot-type flashing units
applied in coordination with roofing work.
M. Aboveground Exterior-Wall Penetrations: Seal penetrations using sleeves and mechanical sleeve seals.
Size sleeves to allow for 1-inch (25-mm) annular clear space between pipe and sleeve for installing
mechanical sleeve seals.
N. Underground Exterior-Wall Penetrations: Install cast-iron "wall pipes" for sleeves. Size sleeves to allow
for 1-inch (25-mm) annular clear space between cable and sleeve for installing mechanical sleeve seals.
3.6 SLEEVE-SEAL INSTALLATION
A. Install to seal underground exterior-wall penetrations.
B. Use type and number of sealing elements recommended by manufacturer for cable material and size.
Position cable in center of sleeve. Assemble mechanical sleeve seals and install in annular space between
cable and sleeve. Tighten bolts against pressure plates that cause sealing elements to expand and make
watertight seal.
3.7 FIRE STOPPING
A. Apply fire stopping to electrical penetrations of fire-rated floor and wall assemblies to restore original
fire-resistance rating of assembly according to Division 07 Section "Penetration Fire stopping."
END OF SECTION 26 05 19
42204.004
26 05 26-1 Grounding and Bonding for Electrical Systems
SECTION 26 05 26
GROUNDING AND BONDING FOR ELECTRICAL SYSTEMS
PART 1 - GENERAL
1.1 RELATED DOCUMENTS
A. Drawings and general provisions of the Contract, including General and Supplementary Conditions and
Division 01 Specification Sections, apply to this Section.
1.2 SUMMARY
A. This Section includes methods and materials for grounding systems and equipment.
1.3 QUALITY ASSURANCE
A. Testing Agency Qualifications: An independent agency, with the experience and capability to conduct
the testing indicated, that is a member company of the InterNational Electrical Testing Association or is a
nationally recognized testing laboratory (NRTL) as defined by OSHA in 29 CFR 1910.7, and that is
acceptable to authorities having jurisdiction.
1. Testing Agency's Field Supervisor: Person currently certified by the InterNational Electrical
Testing Association to supervise on-site testing specified in Part 3.
B. Electrical Components, Devices, and Accessories: Listed and labeled as defined in NFPA 70,
Article 100, by a testing agency acceptable to authorities having jurisdiction, and marked for intended
use.
C. Comply with UL 467 for grounding and bonding materials and equipment.
PART 2 - PRODUCTS
2.1 CONDUCTORS
A. Insulated Conductors: Copper wire or cable insulated for 600 V unless otherwise required by applicable
Code or authorities having jurisdiction.
B. Bare Copper Conductors:
1. Solid Conductors: ASTM B 3.
2. Stranded Conductors: ASTM B 8.
3. Tinned Conductors: ASTM B 33.
4. Bonding Cable: 28 kcmil, 14 strands of No. 17 AWG conductor, 1/4 inch (6 mm) in diameter.
5. Bonding Conductor: No. 4 or No. 6 AWG, stranded conductor.
6. Bonding Jumper: Copper tape, braided conductors, terminated with copper ferrules; 1-5/8 inches
(41 mm) wide and 1/16 inch (1.6 mm) thick.

42204.004
26 05 26-2 Grounding and Bonding for Electrical Systems
2.2 CONNECTORS
A. Listed and labeled by a nationally recognized testing laboratory acceptable to authorities having
jurisdiction for applications in which used, and for specific types, sizes, and combinations of conductors
and other items connected.
B. Bolted Connectors for Conductors and Pipes: Copper or copper alloy, bolted pressure-type, with at least
two bolts.
1. Pipe Connectors: Clamp type, sized for pipe.
C. Cable connections and joints shall be connected utilizing irreversible compression system such as Burndy
HyGround system or approved equal.
PART 3 - EXECUTION
3.1 APPLICATION
A. Conductors: Install solid conductor for No. 8 AWG and smaller, and stranded conductors for No. 6
AWG and larger, unless otherwise indicated.
B. Conductor Terminations and Connections:
1. Pipe and Equipment Grounding Conductor Terminations: Bolted connectors.
2. Underground Connections: Irreversible compression.
3. Connections to Ground Rods and structural steel: Irreversible compression
3.2 EQUIPMENT GROUNDING
A. Install insulated equipment grounding conductors with all feeders and branch circuits.
B. Install insulated equipment grounding conductors with the following items, in addition to those required
by NFPA 70:
1. Feeders and branch circuits.
2. Lighting circuits.
3. Receptacle circuits.
4. Single-phase motor and appliance branch circuits.
5. Three-phase motor and appliance branch circuits.
6. Flexible raceway runs.
7. Armored and metal-clad cable runs.
8. Computer and Rack-Mounted Electronic Equipment Circuits: Install insulated equipment
grounding conductor in branch-circuit runs from equipment-area power panels and power-
distribution units.
9. X-Ray Equipment Circuits: Install insulated equipment grounding conductor in circuits supplying
x-ray equipment.
C. Air-Duct Equipment Circuits: Install insulated equipment grounding conductor to duct-mounted
electrical devices operating at 120 V and more, including air cleaners, heaters, dampers, humidifiers, and
other duct electrical equipment. Bond conductor to each unit and to air duct and connected metallic
piping.

42204.004
26 05 26-3 Grounding and Bonding for Electrical Systems
D. Water Heater, Heat-Tracing, and Antifrost Heating Cables: Install a separate insulated equipment
grounding conductor to each electric water heater and heat-tracing cable. Bond conductor to heater units,
piping, connected equipment, and components.
E. Signal and Communication Equipment: For telephone, alarm, voice and data, and other communication
equipment, provide No. 6 AWG minimum insulated grounding conductor in raceway from grounding
electrode system to each service location, terminal cabinet, wiring closet, and central equipment location.
1. Service and Central Equipment Locations and Wiring Closets: Terminate grounding conductor on
a 1/4-by-2-by-12-inch (6-by-50-by-300-mm) grounding bus.
2. Terminal Cabinets: Terminate grounding conductor on cabinet grounding terminal.
F. Panelboard Bonding: for panelboards serving the same patient care location the equipment
grounding buses shall be bonded together. Provide a minimum #8 AWG insulated copper
conductor to bond the panelbords from the normal and essential equipment branches that serve
the same patient location.
3.3 INSTALLATION
A. Grounding Conductors: Route along shortest and straightest paths possible, unless otherwise indicated or
required by Code. Avoid obstructing access or placing conductors where they may be subjected to strain,
impact, or damage.
B. Bonding Straps and Jumpers: Install in locations accessible for inspection and maintenance, except
where routed through short lengths of conduit.
1. Bonding to Structure: Bond straps directly to basic structure, taking care not to penetrate any
adjacent parts.
2. Bonding to Equipment Mounted on Vibration Isolation Hangers and Supports: Install so vibration
is not transmitted to rigidly mounted equipment.
3. Use exothermic-welded connectors for outdoor locations, but if a disconnect-type connection is
required, use a bolted clamp.
C. Grounding and Bonding for Piping:
1. Metal Water Service Pipe: Install insulated copper grounding conductors, in conduit, from
building's main service equipment, or grounding bus, to main metal water service entrances to
building. Connect grounding conductors to main metal water service pipes, using a bolted clamp
connector or by bolting a lug-type connector to a pipe flange, using one of the lug bolts of the
flange. Where a dielectric main water fitting is installed, connect grounding conductor on street
side of fitting. Bond metal grounding conductor conduit or sleeve to conductor at each end.
2. Water Meter Piping: Use braided-type bonding jumpers to electrically bypass water meters.
Connect to pipe with a bolted connector.
3. Bond each aboveground portion of gas piping system downstream from equipment shutoff valve.
D. Bonding Interior Metal Ducts: Bond metal air ducts to equipment grounding conductors of associated
fans, blowers, electric heaters, and air cleaners. Install bonding jumper to bond across flexible duct
connections to achieve continuity.
END OF SECTION 26 05 26

42204.004
26 05 29-1 Hangers and Supports for Electrical Systems
SECTION 26 05 29
HANGERS AND SUPPORTS FOR ELECTRICAL SYSTEMS
PART 1 - GENERAL
1.1 RELATED DOCUMENTS
A. Drawings and general provisions of the Contract, including General and Supplementary Conditions and
Division 01 Specification Sections, apply to this Section.
1.2 SUMMARY
A. This Section includes the following:
1. Hangers and supports for electrical equipment and systems.
2. Construction requirements for concrete bases.
1.3 DEFINITIONS
A. EMT: Electrical metallic tubing.
B. IMC: Intermediate metal conduit.
C. RMC: Rigid metal conduit.
1.4 PERFORMANCE REQUIREMENTS
A. Design supports for multiple raceways capable of supporting combined weight of supported systems and
its contents.
B. Design equipment supports capable of supporting combined operating weight of supported equipment
and connected systems and components.
1.5 QUALITY ASSURANCE
A. Welding: Qualify procedures and personnel according to AWS D1.1/D1.1M, "Structural Welding Code -
Steel."
B. Comply with NFPA 70.
1.6 COORDINATION
A. Coordinate size and location of concrete bases. Cast anchor-bolt inserts into bases. Concrete,
reinforcement, and formwork requirements are specified in Division 03.

42204.004
26 05 29-2 Hangers and Supports for Electrical Systems
B. Coordinate installation of roof curbs, equipment supports, and roof penetrations. These items are
specified in Division 07 Section "Roof Accessories."
PART 2 - PRODUCTS
2.1 SUPPORT, ANCHORAGE, AND ATTACHMENT COMPONENTS
A. Steel Slotted Support Systems: Comply with MFMA-4, factory-fabricated components for field
assembly.
1. Available Manufacturers: Subject to compliance with requirements, manufacturers offering
products that may be incorporated into the Work include, but are not limited to, the following:
2. Manufacturers: Subject to compliance with requirements, provide products by one of the
following:
a. Allied Tube & Conduit.
b. Cooper B-Line, Inc.; a division of Cooper Industries.
c. ERICO International Corporation.
d. GS Metals Corp.
e. Thomas & Betts Corporation.
f. Unistrut; Tyco International, Ltd.
g. Wesanco, Inc.
3. Metallic Coatings: Hot-dip galvanized after fabrication and applied according to MFMA-4.
4. Channel Dimensions: Selected for applicable load criteria.
B. Raceway and Cable Supports: As described in NECA 1 and NECA 101.
C. Conduit and Cable Support Devices: Steel and malleable-iron hangers, clamps, and associated fittings,
designed for types and sizes of raceway or cable to be supported.
D. Support for Conductors in Vertical Conduit: Factory-fabricated assembly consisting of threaded body
and insulating wedging plug or plugs for non-armored electrical conductors or cables in riser conduits.
Plugs shall have number, size, and shape of conductor gripping pieces as required to suit individual
conductors or cables supported. Body shall be malleable iron.
E. Structural Steel for Fabricated Supports and Restraints: ASTM A 36/A 36M, steel plates, shapes, and
bars; black and galvanized.
F. Mounting, Anchoring, and Attachment Components: Items for fastening electrical items or their supports
to building surfaces include the following:
1. Powder-Actuated Fasteners: Threaded-steel stud, for use in hardened portland cement concrete,
steel, or wood, with tension, shear, and pullout capacities appropriate for supported loads and
building materials where used.
a. Available Manufacturers: Subject to compliance with requirements, manufacturers
offering products that may be incorporated into the Work include, but are not limited to,
the following:
1) Hilti Inc.
2) ITW Ramset/Red Head; a division of Illinois Tool Works, Inc.
3) MKT Fastening, LLC.

42204.004
26 05 29-3 Hangers and Supports for Electrical Systems
4) Simpson Strong-Tie Co., Inc.; Masterset Fastening Systems Unit.
2. Mechanical-Expansion Anchors: Insert-wedge-type, zinc-coated or stainless steel, for use in
hardened portland cement concrete with tension, shear, and pullout capacities appropriate for
supported loads and building materials in which used.
a. Available Manufacturers: Subject to compliance with requirements, manufacturers
offering products that may be incorporated into the Work include, but are not limited to,
the following:
1) Cooper B-Line, Inc.; a division of Cooper Industries.
2) Empire Tool and Manufacturing Co., Inc.
3) Hilti Inc.
4) ITW Ramset/Red Head; a division of Illinois Tool Works, Inc.
5) MKT Fastening, LLC.
3. Concrete Inserts: Steel or malleable-iron, slotted support system units similar to MSS Type 18;
complying with MFMA-4 or MSS SP-58.
4. Clamps for Attachment to Steel Structural Elements: MSS SP-58, type suitable for attached
structural element.
5. Through Bolts: Structural type, hex head, and high strength. Comply with ASTM A 325.
6. Toggle Bolts: All-steel springhead type.
7. Hanger Rods: Threaded steel.
2.2 FABRICATED METAL EQUIPMENT SUPPORT ASSEMBLIES
A. Description: Welded or bolted, structural-steel shapes, shop or field fabricated to fit dimensions of
supported equipment.
B. Materials: Comply with requirements in Division 05 Section "Metal Fabrications" for steel shapes and
plates.
PART 3 - EXECUTION
3.1 APPLICATION
A. Comply with NECA 1 and NECA 101 for application of hangers and supports for electrical equipment
and systems except if requirements in this Section are stricter.
B. Maximum Support Spacing and Minimum Hanger Rod Size for Raceway: Space supports for EMT,
IMC, and RMC as required by NFPA 70. Minimum rod size shall be 1/4 inch (6 mm) in diameter.
C. Multiple Raceways or Cables: Install trapeze-type supports fabricated with steel slotted support system,
sized so capacity can be increased by at least 25 percent in future without exceeding specified design load
limits.
1. Secure raceways and cables to these supports with single-bolt conduit clamps.
D. Spring-steel clamps designed for supporting single conduits without bolts may be used for 1-1/2-inch (38-
mm) and smaller raceways serving branch circuits and communication systems above suspended ceilings
and for fastening raceways to trapeze supports.

42204.004
26 05 29-4 Hangers and Supports for Electrical Systems
3.2 SUPPORT INSTALLATION
A. Comply with NECA 1 and NECA 101 for installation requirements except as specified in this Article.
B. Raceway Support Methods: In addition to methods described in NECA 1, EMT, IMC, and RMC may
be supported by openings through structure members, as permitted in NFPA 70.
C. Strength of Support Assemblies: Where not indicated, select sizes of components so strength will be
adequate to carry present and future static loads within specified loading limits. Minimum static design
load used for strength determination shall be weight of supported components plus 200 lb (90 kg).
D. Mounting and Anchorage of Surface-Mounted Equipment and Components: Anchor and fasten electrical
items and their supports to building structural elements by the following methods unless otherwise
indicated by code:
1. To Wood: Fasten with lag screws or through bolts.
2. To New Concrete: Bolt to concrete inserts.
3. To Masonry: Approved toggle-type bolts on hollow masonry units and expansion anchor
fasteners on solid masonry units.
4. To Existing Concrete: Expansion anchor fasteners.
5. Instead of expansion anchors, powder-actuated driven threaded studs provided with lock washers
and nuts may be used in existing standard-weight concrete 4 inches (100 mm) thick or greater. Do
not use for anchorage to lightweight-aggregate concrete or for slabs less than 4 inches (100 mm)
thick.
6. To Steel: Beam clamps (MSS Type 19, 21, 23, 25, or 27) complying with MSS SP-69.
7. To Light Steel: Sheet metal screws.
8. Items Mounted on Hollow Walls and Nonstructural Building Surfaces: Mount cabinets,
panelboards, disconnect switches, control enclosures, pull and junction boxes, transformers, and
other devices on slotted-channel racks attached to substrate.
E. Drill holes for expansion anchors in concrete at locations and to depths that avoid reinforcing bars.
3.3 INSTALLATION OF FABRICATED METAL SUPPORTS
A. Comply with installation requirements in Division 05 Section "Metal Fabrications" for site-fabricated
metal supports.
B. Cut, fit, and place miscellaneous metal supports accurately in location, alignment, and elevation to
support and anchor electrical materials and equipment.
C. Field Welding: Comply with AWS D1.1/D1.1M.
3.4 CONCRETE BASES
A. Construct concrete bases of dimensions indicated but not less than 4 inches (100 mm) larger in both
directions than supported unit, and so anchors will be a minimum of 10 bolt diameters from edge of the
base.
B. Use 3000-psi (20.7-MPa), 28-day compressive-strength concrete. Concrete materials, reinforcement, and
placement requirements are specified in Division 03 Section "Cast-in-Place Concrete."
C. Anchor equipment to concrete base.

42204.004
26 05 29-5 Hangers and Supports for Electrical Systems
1. Place and secure anchorage devices. Use supported equipment manufacturer's setting drawings,
templates, diagrams, instructions, and directions furnished with items to be embedded.
2. Install anchor bolts to elevations required for proper attachment to supported equipment.
3. Install anchor bolts according to anchor-bolt manufacturer's written instructions.
3.5 PAINTING
A. Touchup: Clean field welds and abraded areas of shop paint. Paint exposed areas immediately after
erecting hangers and supports. Use same materials as used for shop painting. Comply with SSPC-PA 1
requirements for touching up field-painted surfaces.
1. Apply paint by brush or spray to provide minimum dry film thickness of 2.0 mils (0.05 mm).
B. Touchup: Comply with requirements in Division 09 painting Sections for cleaning and touchup painting
of field welds, bolted connections, and abraded areas of shop paint on miscellaneous metal.
C. Galvanized Surfaces: Clean welds, bolted connections, and abraded areas and apply galvanizing-repair
paint to comply with ASTM A 780.
END OF SECTION 26 05 29

42204.004
26 05 33-1 Raceways and Boxes for Electrical Systems
SECTION 26 05 33
RACEWAY AND BOXES FOR ELECTRICAL SYSTEMS
PART 1 - GENERAL
1.1 SUMMARY
A. This Section includes raceways, fittings, boxes, enclosures, and cabinets for electrical wiring.
1.2 QUALITY ASSURANCE
A. Electrical Components, Devices, and Accessories: Listed and labeled as defined in NFPA 70,
Article 100, by a testing agency acceptable to authorities having jurisdiction, and marked for intended
use.
B. Comply with NFPA 70.
PART 2 - PRODUCTS
2.1 METAL CONDUIT AND TUBING
A. Rigid Steel Conduit: ANSI C80.1.
B. IMC: ANSI C80.6.
C. EMT: ANSI C80.3.
D. FMC: Zinc-coated steel.
E. LFMC: Flexible steel conduit with PVC jacket.
F. Fittings for Conduit (Including all Types and Flexible and Liquidtight), EMT, and Cable: NEMA FB 1;
listed for type and size raceway with which used, and for application and environment in which installed.
1. Conduit Fittings for Hazardous (Classified) Locations: Comply with UL 886.
2. Fittings for EMT: Steel, set-screw or compression type.
2.2 METAL WIREWAYS
A. Available Manufacturers: Subject to compliance with requirements, manufacturers offering products that
may be incorporated into the Work include, but are not limited to, the following:
B. Manufacturers: Subject to compliance with requirements, provide products by one of the following:
1. Cooper B-Line, Inc.
2. Hoffman.
3. Square D; Schneider Electric.

42204.004
26 05 33-2 Raceways and Boxes for Electrical Systems
C. Description: Sheet metal sized and shaped as indicated, NEMA 250, Type 1, unless otherwise indicated.
D. Fittings and Accessories: Include couplings, offsets, elbows, expansion joints, adapters, hold-down
straps, end caps, and other fittings to match and mate with wireways as required for complete system.
E. Wireway Covers: Hinged type.
F. Finish: Manufacturer's standard enamel finish.
2.3 SURFACE RACEWAYS
A. Surface Metal Raceways: Galvanized steel with snap-on covers. Manufacturer's standard enamel
finish in color selected by Architect.
1. Manufacturers: Subject to compliance with requirements, provide products by one of the
following:
a. Thomas & Betts Corporation.
b. Walker Systems, Inc.; Wiremold Company (The).
c. Wiremold Company (The); Electrical Sales Division.
2.4 BOXES, ENCLOSURES, AND CABINETS
A. Sheet Metal Outlet and Device Boxes: NEMA OS 1.
B. Cast-Metal Outlet and Device Boxes: NEMA FB 1, aluminum, Type FD, with gasketed cover.
C. Metal Floor Boxes: Cast or sheet metal, semi-adjustable, rectangular.
D. Nonmetallic Floor Boxes: Nonadjustable, round.
E. Small Sheet Metal Pull and Junction Boxes: NEMA OS 1.
F. Cast-Metal Access, Pull, and Junction Boxes: NEMA FB 1, cast aluminum with gasketed cover.
G. Hinged-Cover Enclosures: NEMA 250, Type 1, with continuous-hinge cover with flush latch, unless
otherwise indicated.
1. Metal Enclosures: Steel, finished inside and out with manufacturer's standard enamel.
PART 3 - EXECUTION
3.1 RACEWAY APPLICATION
A. Outdoors: Apply raceway products as specified below, unless otherwise indicated:
1. Exposed Conduit: Rigid steel conduit or IMC.
2. Connection to Vibrating Equipment (Including Transformers and Hydraulic, Pneumatic, Electric
Solenoid, or Motor-Driven Equipment): LFMC.
3. Boxes and Enclosures, Aboveground: NEMA 250, Type 3R.
4. Within 5’-0” of building foundation for underground conduits: Rigid steel or IMC

42204.004
26 05 33-3 Raceways and Boxes for Electrical Systems
B. Comply with the following indoor applications, unless otherwise indicated:
1. Exposed, Not Subject to Physical Damage: EMT.
2. Exposed, Not Subject to Severe Physical Damage: EMT.
3. Exposed and Subject to Severe Physical Damage: Rigid steel conduit or IMC.
4. Concealed in Ceilings and Interior Walls and Partitions: EMT.
5. Connection to Vibrating Equipment (Including Transformers and Hydraulic, Pneumatic, Electric
Solenoid, or Motor-Driven Equipment): FMC, except use LFMC in damp or wet locations.
6. Damp or Wet Locations: EMT.
7. Raceways for Optical Fiber or Communications Cable: EMT.
8. Boxes and Enclosures: NEMA 250, Type 1, except use NEMA 250, Type 4, stainless steel in
damp or wet locations.
9. Separate raceway systems shall be provided for each wiring system in the following solid
color conduit systems: Verify colors with CSM OZ Brian Weyker
a. Critical branch power – Orange
b. Life Safety branch power – Yellow
c. Equipment branch power – green
d. UPS power – Black
e. Fire alarm system – Red
f. Normal power – no color
C. Minimum Raceway Size: 1/2-inch (16-mm) trade size.
D. Raceway Fittings: Compatible with raceways and suitable for use and location.
1. Rigid and Intermediate Steel Conduit: Use threaded rigid steel conduit fittings, unless otherwise
indicated.
3.2 INSTALLATION
A. Comply with NECA 1 for installation requirements applicable to products specified in Part 2 except
where requirements on Drawings or in this Article are stricter.
B. Keep raceways at least 6 inches (150 mm) away from parallel runs of flues and steam or hot-water pipes.
Install horizontal raceway runs above water and steam piping.
C. Complete raceway installation before starting conductor installation.
D. Support raceways as specified in Division 26 Section "Hangers and Supports for Electrical Systems."
E. Arrange stub-ups so curved portions of bends are not visible above the finished slab.
F. Install no more than the equivalent of three 90-degree bends in any conduit run except for
communications conduits, for which fewer bends are allowed.
G. Conceal conduit and EMT within finished walls, ceilings, and floors, unless otherwise indicated.
H. Raceway Terminations at Locations Subject to Moisture or Vibration: Use insulating bushings to protect
conductors, including conductors smaller than No. 4 AWG.
I. Install pull wires in empty raceways. Use polypropylene or monofilament plastic line with not less than
200-lb (90-kg) tensile strength. Leave at least 12 inches (300 mm) of slack at each end of pull wire.

42204.004
26 05 33-4 Raceways and Boxes for Electrical Systems
J. Raceways for Optical Fiber and Communications Cable: Install as follows:
1. 3/4-Inch (19-mm) Trade Size and Smaller: Install raceways in maximum lengths of 50 feet
(15 m).
2. 1-Inch (25-mm) Trade Size and Larger: Install raceways in maximum lengths of 75 feet (23 m).
3. Install with a maximum of two 90-degree bends or equivalent for each length of raceway unless
Drawings show stricter requirements. Separate lengths with pull or junction boxes or terminations
at distribution frames or cabinets where necessary to comply with these requirements.
K. Install raceway sealing fittings at suitable, approved, and accessible locations and fill them with listed
sealing compound. For concealed raceways, install each fitting in a flush steel box with a blank cover
plate having a finish similar to that of adjacent plates or surfaces. Install raceway sealing fittings at the
following points:
1. Where conduits pass from warm to cold locations, such as boundaries of refrigerated spaces.
2. Where otherwise required by NFPA 70.
L. Expansion-Joint Fittings for RNC: Install in each run of aboveground conduit that is located where
environmental temperature change may exceed 30 deg F (17 deg C), and that has straight-run length that
exceeds 25 feet (7.6 m).
1. Install expansion-joint fittings for each of the following locations, and provide type and quantity
of fittings that accommodate temperature change listed for location:
a. Outdoor Locations Not Exposed to Direct Sunlight: 125 deg F (70 deg C) temperature
change.
b. Outdoor Locations Exposed to Direct Sunlight: 155 deg F (86 deg C) temperature change.
c. Indoor Spaces: Connected with the Outdoors without Physical Separation: 125 deg F (70
deg C)] temperature change.
d. Attics: 135 deg F (75 deg C) temperature change.
2. Install fitting(s) that provide expansion and contraction for at least 0.00041 inch per foot of length
of straight run per deg F (0.06 mm per meter of length of straight run per deg C) of temperature
change.
3. Install each expansion-joint fitting with position, mounting, and piston setting selected according
to manufacturer's written instructions for conditions at specific location at the time of installation.
M. Flexible Conduit Connections: Use maximum of 72 inches (1830 mm) of flexible conduit for recessed
and semirecessed lighting fixtures, equipment subject to vibration, noise transmission, or movement;
and for transformers and motors.
1. Use LFMC in damp or wet locations subject to severe physical damage.
2. Use LFMC or LFNC in damp or wet locations not subject to severe physical damage.
N. Recessed Boxes in Masonry Walls: Saw-cut opening for box in center of cell of masonry block, and
install box flush with surface of wall.
O. Set metal floor boxes level and flush with finished floor surface.
P. Set nonmetallic floor boxes level. Trim after installation to fit flush with finished floor surface.

42204.004
26 05 33-5 Raceways and Boxes for Electrical Systems
3.3 FIRESTOPPING
A. Apply firestopping to electrical penetrations of fire-rated floor and wall assemblies to restore original
fire-resistance rating of assembly. Firestopping materials and installation requirements are specified in
Division 07 Section "Penetration Firestopping."
END OF SECTION 26 05 33

42204.004 26 05 44-1 Sleeves and Sleeve Seals for Electrical Raceways and Cabling
SECTION 26 05 44
SLEEVES AND SLEEVE SEALS FOR ELECTRICAL RACEWAYS AND CABLING
PART 1 - GENERAL
1.01 RELATED DOCUMENTS
A. Drawings and general provisions of the Contract, including General and Supplementary
Conditions and Division 01 Specification Sections, apply to this Section.
1.02 SUMMARY
A. Section Includes:
1. Sleeves for raceway and cable penetration of non-fire-rated construction walls and floors.
2. Sleeve-seal systems.
3. Sleeve-seal fittings.
4. Grout.
5. Silicone sealants.
B. Related Requirements:
1. Section 078413 "Penetration Firestopping" for penetration firestopping installed in fire-
resistance-rated walls, horizontal assemblies, and smoke barriers, with and without
penetrating items.
PART 2 - PRODUCTS
2.01 SLEEVES
A. Wall Sleeves:
1. Steel Pipe Sleeves: ASTM A 53/A 53M, Type E, Grade B, Schedule 40, zinc coated,
plain ends.
2. Cast-Iron Pipe Sleeves: Cast or fabricated "wall pipe," equivalent to ductile-iron pressure
pipe, with plain ends and integral waterstop unless otherwise indicated.
B. Sleeves for Conduits Penetrating Non-Fire-Rated Gypsum Board Assemblies: Galvanized-steel
sheet; 0.0239-inch (0.6-mm) minimum thickness; round tube closed with welded longitudinal
joint, with tabs for screw-fastening the sleeve to the board.
C. PVC-Pipe Sleeves: ASTM D 1785, Schedule 40.
D. Molded-PVC Sleeves: With nailing flange for attaching to wooden forms.
E. Molded-PE or -PP Sleeves: Removable, tapered-cup shaped, and smooth outer surface with
nailing flange for attaching to wooden forms.
F. Sleeves for Rectangular Openings:

42204.004 26 05 44-2 Sleeves and Sleeve Seals for Electrical Raceways and Cabling
1. Material: Galvanized sheet steel.
2. Minimum Metal Thickness:
a. For sleeve cross-section rectangle perimeter less than 50 inches (1270 mm) and
with no side larger than 16 inches (400 mm), thickness shall be 0.052 inch (1.3
mm).
b. For sleeve cross-section rectangle perimeter 50 inches (1270 mm) or more and one
or more sides larger than 16 inches (400 mm), thickness shall be 0.138 inch (3.5
mm).
2.02 SLEEVE-SEAL SYSTEMS
A. Description: Modular sealing device, designed for field assembly, to fill annular space between
sleeve and raceway or cable.
1. Sealing Elements: EPDM rubber interlocking links shaped to fit surface of pipe. Include
type and number required for pipe material and size of pipe.
2. Pressure Plates: Carbon steel.
3. Connecting Bolts and Nuts: Carbon steel, with corrosion-resistant coating of length
required to secure pressure plates to sealing elements.
2.03 SLEEVE-SEAL FITTINGS
A. Description: Manufactured plastic, sleeve-type, waterstop assembly made for embedding in
concrete slab or wall. Unit shall have plastic or rubber waterstop collar with center opening to
match piping OD.
2.04 GROUT
A. Description: Nonshrink; recommended for interior and exterior sealing openings in non-fire-
rated walls or floors.
B. Standard: ASTM C 1107/C 1107M, Grade B, post-hardening and volume-adjusting, dry,
hydraulic-cement grout.
C. Design Mix: 5000-psi (34.5-MPa), 28-day compressive strength.
D. Packaging: Premixed and factory packaged.
2.05 SILICONE SEALANTS
A. Silicone Sealants: Single-component, silicone-based, neutral-curing elastomeric sealants of
grade indicated below.
1. Grade: Pourable (self-leveling) formulation for openings in floors and other horizontal
surfaces that are not fire rated.
2. Sealant shall have VOC content of 250g/L or less when calculated according to
40 CFR 59, Subpart D (EPA Method 24).

42204.004 26 05 44-3 Sleeves and Sleeve Seals for Electrical Raceways and Cabling
3. Sealant shall comply with the testing and product requirements of the California
Department of Health Services' "Standard Practice for the Testing of Volatile Organic
Emissions from Various Sources Using Small-Scale Environmental Chambers."
B. Silicone Foams: Multicomponent, silicone-based liquid elastomers that, when mixed, expand
and cure in place to produce a flexible, nonshrinking foam.
PART 3 - EXECUTION
3.01 SLEEVE INSTALLATION FOR NON-FIRE-RATED ELECTRICAL PENETRATIONS
A. Comply with NECA 1.
B. Comply with NEMA VE 2 for cable tray and cable penetrations.
C. Sleeves for Conduits Penetrating Above-Grade Non-Fire-Rated Concrete and Masonry-Unit
Floors and Walls:
1. Interior Penetrations of Non-Fire-Rated Walls and Floors:
a. Seal annular space between sleeve and raceway or cable, using joint sealant
appropriate for size, depth, and location of joint. Comply with requirements in
Section 079200 "Joint Sealants."
b. Seal space outside of sleeves with mortar or grout. Pack sealing material solidly
between sleeve and wall so no voids remain. Tool exposed surfaces smooth;
protect material while curing.
2. Use pipe sleeves unless penetration arrangement requires rectangular sleeved opening.
3. Size pipe sleeves to provide 1/4-inch (6.4-mm) annular clear space between sleeve and
raceway or cable unless sleeve seal is to be installed.
4. Install sleeves for wall penetrations unless core-drilled holes or formed openings are
used. Install sleeves during erection of walls. Cut sleeves to length for mounting flush
with both surfaces of walls. Deburr after cutting.
5. Install sleeves for floor penetrations. Extend sleeves installed in floors 2 inches (50 mm)
above finished floor level. Install sleeves during erection of floors.
D. Sleeves for Conduits Penetrating Non-Fire-Rated Gypsum Board Assemblies:
1. Use circular metal sleeves unless penetration arrangement requires rectangular sleeved
opening.
2. Seal space outside of sleeves with approved joint compound for gypsum board
assemblies.
E. Roof-Penetration Sleeves: Seal penetration of individual raceways and cables with flexible
boot-type flashing units applied in coordination with roofing work.
F. Aboveground, Exterior-Wall Penetrations: Seal penetrations using steel pipe sleeves and
mechanical sleeve seals. Select sleeve size to allow for 1-inch (25-mm) annular clear space
between pipe and sleeve for installing mechanical sleeve seals.

42204.004 26 05 44-4 Sleeves and Sleeve Seals for Electrical Raceways and Cabling
G. Underground, Exterior-Wall and Floor Penetrations: Install cast-iron pipe sleeves. Size sleeves
to allow for 1-inch (25-mm) annular clear space between raceway or cable and sleeve for
installing sleeve-seal system.
3.02 SLEEVE-SEAL-SYSTEM INSTALLATION
A. Install sleeve-seal systems in sleeves in exterior concrete walls and slabs-on-grade at raceway
entries into building.
B. Install type and number of sealing elements recommended by manufacturer for raceway or
cable material and size. Position raceway or cable in center of sleeve. Assemble mechanical
sleeve seals and install in annular space between raceway or cable and sleeve. Tighten bolts
against pressure plates that cause sealing elements to expand and make watertight seal.
3.03 SLEEVE-SEAL-FITTING INSTALLATION
A. Install sleeve-seal fittings in new walls and slabs as they are constructed.
B. Assemble fitting components of length to be flush with both surfaces of concrete slabs and
walls. Position waterstop flange to be centered in concrete slab or wall.
C. Secure nailing flanges to concrete forms.
D. Using grout, seal the space around outside of sleeve-seal fittings.
END OF SECTION 26 05 44

42204.004
26 05 53-1 Identification for Electrical Systems
SECTION 26 05 53
IDENTIFICATION FOR ELECTRICAL SYSTEMS
PART 1 - GENERAL
1.1 RELATED DOCUMENTS
A. Drawings and general provisions of the Contract, including General and Supplementary Conditions,
Division 01 Specification Sections, and General Electrical Provisions 260500 apply to this Section.
1.2 SUMMARY
A. This Section includes the following:
1. Identification for raceway and metal-clad cable.
2. Identification for conductors and communication and control cable.
3. Warning labels and signs.
4. Instruction signs.
5. Equipment identification labels.
6. Miscellaneous identification products.
1.3 QUALITY ASSURANCE
A. Comply with ANSI A13.1 and ANSI C2.
B. Comply with NFPA 70.
C. Comply with 29 CFR 1910.145.
1.4 COORDINATION
A. Coordinate identification names, abbreviations, colors, and other features with requirements in the
Contract Documents, Shop Drawings, manufacturer's wiring diagrams, and the Operation and
Maintenance Manual, and with those required by codes, standards, and 29 CFR 1910.145. Use consistent
designations throughout Project.
B. Coordinate installation of identifying devices with completion of covering and painting of surfaces where
devices are to be applied.
C. Coordinate installation of identifying devices with location of access panels and doors.
D. Install identifying devices before installing acoustical ceilings and similar concealment.

42204.004
26 05 53-2 Identification for Electrical Systems
PART 2 - PRODUCTS
2.1 CONDUCTOR AND COMMUNICATION- AND CONTROL-CABLE IDENTIFICATION
MATERIALS
A. Marker Tapes: Vinyl or vinyl-cloth, self-adhesive wraparound type, with circuit identification legend
machine printed by thermal transfer or equivalent process.
2.2 WARNING LABELS AND SIGNS
A. Comply with NFPA 70 and 29 CFR 1910.145.
B. Self-Adhesive Warning Labels: Factory printed, multicolor, pressure-sensitive adhesive labels,
configured for display on front cover, door, or other access to equipment, unless otherwise indicated.
C. Warning label and sign shall include, but are not limited to, the following legends:
1. Multiple Power Source Warning: "DANGER - ELECTRICAL SHOCK HAZARD -
EQUIPMENT HAS MULTIPLE POWER SOURCES."
2. Workspace Clearance Warning: "WARNING - OSHA REGULATION - AREA IN FRONT OF
ELECTRICAL EQUIPMENT MUST BE KEPT CLEAR FOR 36 INCHES (915 MM)."
2.3 EQUIPMENT IDENTIFICATION LABELS
A. Engraved, Laminated Acrylic or Melamine Label: Punched or drilled for screw mounting. White letters
on a dark-gray background for normal power equipment and white letters on a red background for
emergency power. Include equipment designation, power source and location. Minimum letter height
shall be 3/8 inch (10 mm).
2.4 MISCELLANEOUS IDENTIFICATION PRODUCTS
A. Cable Ties: Fungus-inert, self-extinguishing, 1-piece, self-locking, Type 6/6 nylon cable ties.
1. Minimum Width: 3/16 inch (5 mm).
2. Tensile Strength: 50 lb (22.6 kg), minimum.
3. Temperature Range: Minus 40 to plus 185 deg F (Minus 40 to plus 85 deg C).
4. Color: Black, except where used for color-coding.
B. Paint: Paint materials and application requirements are specified in Division 09 painting Sections.
C. Fasteners for Labels and Signs: Self-tapping, stainless-steel screws or stainless-steel machine screws
with nuts and flat and lock washers.

42204.004
26 05 53-3 Identification for Electrical Systems
PART 3 - EXECUTION
3.1 APPLICATION
A. Branch-Circuit Conductor Identification: Where there are conductors for more than three branch circuits
in same junction or pull box, use marker tape. Identify each ungrounded conductor according to source
and circuit number.
B. Locations of Underground Lines: Identify with underground-line warning tape for power, lighting,
communication, and control wiring and optical fiber cable.
C. Equipment Identification Labels: On each unit of equipment, install unique designation label that is
consistent with wiring diagrams, schedules, and Operation and Maintenance Manual. Apply labels to
disconnect switches and protection equipment, central or master units, control panels, control stations,
terminal cabinets, and racks of each system. Systems include power, lighting, control, communication,
signal, monitoring, and alarm systems unless equipment is provided with its own identification.
1. Labeling Instructions:
a. Indoor Equipment: Engraved, laminated acrylic or melamine label. Unless otherwise
indicated, provide a single line of text with 1/2-inch- (13-mm-) high letters on 1-1/2-inch-
(38-mm-) high label; where 2 lines of text are required, use labels 2 inches (50 mm) high.
b. Outdoor Equipment: Engraved, laminated acrylic or melamine label 4 inches (100
mm) high.
c. Elevated Components: Increase sizes of labels and letters to those appropriate for viewing
from the floor.
2. Equipment to Be Labeled:
a. Panelboards, electrical cabinets, and enclosures.
b. Access doors and panels for concealed electrical items.
c. Electrical switchgear and switchboards.
d. Transformers.
e. Emergency system boxes and enclosures.
f. Disconnect switches.
g. Enclosed circuit breakers.
h. Motor starters.
i. Push-button stations.
j. Power transfer equipment.
k. Contactors.
l. Remote-controlled switches, dimmer modules, and control devices.
m. Power-generating units.
n. Voice and data cable terminal equipment.
o. Intercommunication and call system master and staff stations.
p. Fire-alarm control panel and annunciators.
3.2 INSTALLATION
A. Verify identity of each item before installing identification products.
B. Location: Install identification materials and devices at locations for most convenient viewing without
interference with operation and maintenance of equipment.

42204.004
26 05 53-4 Identification for Electrical Systems
C. Apply identification devices to surfaces that require finish after completing finish work.
D. Self-Adhesive Identification Products: Clean surfaces before application, using materials and methods
recommended by manufacturer of identification device.
E. Attach nonadhesive signs and plastic labels with screws and auxiliary hardware appropriate to the
location and substrate.
F. System Identification Color Banding for Raceways and Cables: Each color band shall completely
encircle cable or conduit. Place adjacent bands of two-color markings in contact, side by side. Locate
bands at changes in direction, at penetrations of walls and floors, at 50-foot (15-m) maximum intervals in
straight runs, and at 25-foot (7.6-m) maximum intervals in congested areas.
G. Color-Coding for Phase and Voltage Level Identification, 600 V and Less: Use the colors listed below
for ungrounded service, feeder, and branch-circuit conductors.
1. Color shall be factory applied.
2. Colors for 208/120-V Circuits:
a. Phase A: Black.
b. Phase B: Red.
c. Phase C: Blue.
3. Colors for 480/277-V Circuits:
a. Phase A: Brown.
b. Phase B: Orange.
c. Phase C: Yellow.
4. Field-Applied, Color-Coding Conductor Tape: Apply in half-lapped turns for a minimum distance
of 6 inches (150 mm) from terminal points and in boxes where splices or taps are made. Apply
last two turns of tape with no tension to prevent possible unwinding. Locate bands to avoid
obscuring factory cable markings.
END OF SECTION 26 05 53
42204.004
26 09 23-1 Lighting Control Devices
SECTION 26 09 23
LIGHTING CONTROL DEVICES
PART 1 - GENERAL
1.1 RELATED DOCUMENTS
A. Drawings and general provisions of the Contract, including General and Supplementary Conditions and
Division 01 Specification Sections, apply to this Section.
1.2 SUMMARY
A. This Section includes the following lighting control devices:
1. Indoor occupancy sensors.
B. Related Sections include the following:
1. Division 26 Section "Wiring Devices" for wall-box dimmers, wall-switch occupancy sensors, and
manual light switches.
1.3 DEFINITIONS
A. LED: Light-emitting diode.
B. PIR: Passive infrared.
1.4 QUALITY ASSURANCE
A. Electrical Components, Devices, and Accessories: Listed and labeled as defined in NFPA 70,
Article 100, by a testing agency acceptable to authorities having jurisdiction, and marked for intended
use.
1.5 COORDINATION
A. Coordinate layout and installation of ceiling-mounted devices with other construction that penetrates
ceilings or is supported by them, including light fixtures, HVAC equipment, smoke detectors, fire-
suppression system, and partition assemblies.
PART 2 - PRODUCTS
2.1 INDOOR OCCUPANCY SENSORS
A. Available Manufacturers: Subject to compliance with requirements, manufacturers offering products that
may be incorporated into the Work include, but are not limited to, the following:
1. Hubbell Lighting.

42204.004
26 09 23-2 Lighting Control Devices
2. Leviton Mfg. Company Inc.
3. Lithonia Lighting; Acuity Lighting Group, Inc.
4. RAB Lighting, Inc.
5. Sensor Switch, Inc.
6. TORK.
7. Watt Stopper (The).
8. Cooper Lighting
B. General Description: Wall mounting type “A”, Ceiling-mounting, type “B” solid-state units with a
separate relay unit.
1. Operation: Unless otherwise indicated, turn lights on when covered area is occupied and off when
unoccupied; with a time delay for turning lights off, adjustable over a minimum range of 1 to 15
minutes.
2. Sensor Output: Contacts rated to operate the connected relay, complying with UL 773A. Sensor
shall be powered from the relay unit.
3. Relay Unit: Dry contacts rated for 20-A ballast load at 120- and 277-V ac, for 13-A tungsten at
120-V ac, and for 1 hp at 120-V ac. Power supply to sensor shall be 24-V dc, 150-mA, Class 2
power source as defined by NFPA 70.
4. Mounting:
a. Sensor: Suitable for mounting in any position on a standard outlet box.
b. Relay: Externally mounted through a 1/2-inch (13-mm) knockout in a standard electrical
enclosure.
c. Time-Delay and Sensitivity Adjustments: Recessed and concealed behind hinged door.
5. Indicator: LED, to show when motion is being detected during testing and normal operation of the
sensor.
6. Bypass Switch: Override the on function in case of sensor failure.
7. Automatic Light-Level Sensor: Adjustable from 2 to 200 fc (21.5 to 2152 lx); keep lighting off
when selected lighting level is present.
C. Dual-Technology Type: Wall mounting type “A”, Ceiling mounting, type “B”; detect occupancy by
using a combination of PIR and ultrasonic or microphonic detection methods in area of coverage.
Particular technology or combination of technologies that controls on-off functions shall be selectable in
the field by operating controls on unit.
1. Sensitivity Adjustment: Separate for each sensing technology.
2. Detector Sensitivity: Detect occurrences of 6-inch- (150-mm-) minimum movement of any
portion of a human body that presents a target of not less than 36 sq. in. (232 sq. cm), and detect a
person of average size and weight moving not less than 12 inches (305 mm) in either a horizontal
or a vertical manner at an approximate speed of 12 inches/s (305 mm/s).
3. Detection Coverage (Standard Room): Detect occupancy anywhere within a circular area of 1000
sq. ft. (93 sq. m) when mounted on a 96-inch- (2440-mm-) high ceiling.
2.2 CONDUCTORS AND CABLES
A. Power Wiring to Supply Side of Remote-Control Power Sources: Not smaller than No. 12 AWG.
Comply with requirements in Division 26 Section "Low-Voltage Electrical Power Conductors and
Cables."

42204.004
26 09 23-3 Lighting Control Devices
PART 3 - EXECUTION
3.1 SENSOR INSTALLATION
A. Install and aim sensors in locations to achieve not less than 90 percent coverage of areas indicated. Do
not exceed coverage limits specified in manufacturer's written instructions.
3.2 WIRING INSTALLATION
A. Wiring Method: Comply with Division 26 Section "Low-Voltage Electrical Power Conductors and
Cables." Minimum conduit size shall be 1/2 inch (13 mm).
B. Wiring within Enclosures: Comply with NECA 1. Separate power-limited and nonpower-limited
conductors according to conductor manufacturer's written instructions.
C. Size conductors according to lighting control device manufacturer's written instructions, unless otherwise
indicated.
D. Splices, Taps, and Terminations: Make connections only on numbered terminal strips in junction, pull,
and outlet boxes; terminal cabinets; and equipment enclosures.
3.3 IDENTIFICATION
A. Identify components and power and control wiring according to Division 26 Section "Identification for
Electrical Systems."
1. Identify controlled circuits in lighting contactors.
2. Identify circuits or luminaries controlled by photoelectric and occupancy sensors at each sensor.
B. Label time switches and contactors with a unique designation.
3.4 FIELD QUALITY CONTROL
A. Perform the following field tests and inspections and prepare test reports:
1. After installing time switches and sensors, and after electrical circuitry has been energized, adjust
and test for compliance with requirements.
2. Operational Test: Verify operation of each lighting control device, and adjust time delays.
B. Lighting control devices that fail tests and inspections are defective work.
3.5 ADJUSTING
A. Occupancy Adjustments: When requested within 12 months of date of Substantial Completion, provide
on-site assistance in adjusting sensors to suit occupied conditions. Provide up to two visits to Project
during other-than-normal occupancy hours for this purpose.

42204.004
26 09 23-4 Lighting Control Devices
3.6 DEMONSTRATION
A. Coordinate demonstration of products specified in this Section with demonstration requirements for low-
voltage, programmable lighting control system specified in Division 26 Section "Network Lighting
Controls."
B. Engage a factory-authorized service representative to train Owner's maintenance personnel to adjust,
operate, and maintain lighting control devices. Refer to Division 01 Section "Demonstration and
Training."
END OF SECTION 26 09 23

42204.004 26 27 26-1 Wiring Devices
SECTION 26 27 26
WIRING DEVICES
PART 1 - GENERAL
1.1 RELATED DOCUMENTS
A. Drawings and general provisions of the Contract, including General and Supplementary Conditions and
Division 01 Specification Sections, apply to this Section.
1.2 SUMMARY
A. This Section includes the following:
1. Receptacles, receptacles with integral GFCI, and associated device plates.
2. Snap switches
1.3 DEFINITIONS
A. EMI: Electromagnetic interference.
B. GFCI: Ground-fault circuit interrupter.
C. Pigtail: Short lead used to connect a device to a branch-circuit conductor.
D. RFI: Radio-frequency interference.
E. TVSS: Transient voltage surge suppressor.
F. UTP: Unshielded twisted pair.
1.4 QUALITY ASSURANCE
A. Source Limitations: Obtain each type of wiring device and associated wall plate through one source from
a single manufacturer. Insofar as they are available, obtain all wiring devices and associated wall plates
from a single manufacturer and one source.
B. Electrical Components, Devices, and Accessories: Listed and labeled as defined in NFPA 70,
Article 100, by a testing agency acceptable to authorities having jurisdiction, and marked for intended
use.
C. Comply with NFPA 70.
1.5 COORDINATION
A. Receptacles for Owner-Furnished Equipment: Match plug configurations.

42204.004 26 27 26-2 Wiring Devices
1. Cord and Plug Sets: Match equipment requirements.
PART 2 - PRODUCTS
2.1 MANUFACTURERS
A. Manufacturers' Names: Shortened versions (shown in parentheses) of the following manufacturers'
names are used in other Part 2 articles:
1. Cooper Wiring Devices; a division of Cooper Industries, Inc. (Cooper).
2. Hubbell Incorporated; Wiring Device-Kellems (Hubbell).
3. Leviton Mfg. Company Inc. (Leviton).
4. Pass & Seymour/Legrand; Wiring Devices & Accessories (Pass & Seymour).
2.2 STRAIGHT BLADE RECEPTACLES
A. Convenience Receptacles, 125 V, 20 A: Comply with NEMA WD 1, NEMA WD 6 configuration 5-20R,
and UL 498.
1. Available Products: Subject to compliance with requirements, products that may be incorporated
into the Work include, but are not limited to, the following:
2. Products: Subject to compliance with requirements, provide one of the following:
a. Hubbell; HBL5351 (single), CR5352 (duplex).
b. Leviton; 5891 (single), 5352 (duplex).
c. Pass & Seymour; 5381 (single), 5352 (duplex).
B. Hospital-Grade, Duplex Convenience Receptacles, 125 V, 20 A: Comply with NEMA WD 1,
NEMA WD 6 configuration 5-20R, and UL 498 Supplement SD.
1. Available Products: Subject to compliance with requirements, products that may be incorporated
into the Work include, but are not limited to, the following:
2. Products: Subject to compliance with requirements, provide one of the following:
a. Hubbell; HBL8310 (single), HBL8300H (duplex).
b. Leviton; 8310 (single), 8300 (duplex).
c. Pass & Seymour; 9301-HG (single), 9300-HG (duplex).
C. Tamper-Resistant Convenience Receptacles, 125 V, 20 A: Comply with NEMA WD 1, NEMA WD 6
configuration 5-20R, and UL 498.
1. Available Products: Subject to compliance with requirements, products that may be incorporated
into the Work include, but are not limited to, the following:
2. Products: Subject to compliance with requirements, provide one of the following:
a. Hubbell; HBL8300SG.
b. Leviton; 8300-SGG.
c. Pass & Seymour; 63H.
3. Description: Labeled to comply with NFPA 70, "Health Care Facilities" Article, "Pediatric
Locations" Section.

42204.004 26 27 26-3 Wiring Devices
D. USB Tamper-Resistant Convenience Receptacles, 125 V, 20 A: Comply with NEMA WD 1,
NEMA WD 6 configuration 5-20R, UL 498, Ivory color.
1. Products: Subject to compliance with requirements, provide one of the following:
a. Cooper; TR8355.
b. Leviton; T5832-HGI.
c. Pass & Seymour; TR8300HUSB.
2. Description: Labeled to comply with NFPA 70, "Health Care Facilities" Article, "Pediatric
Locations" Section.
2.3 GFCI RECEPTACLES
A. General Description: Straight blade, non-feed-through type. Comply with NEMA WD 1, NEMA WD 6,
UL 498, and UL 943, Class A, and include indicator light that is lighted when device is tripped.
B. Duplex GFCI Convenience Receptacles, 125 V, 20 A:
1. Available Products: Subject to compliance with requirements, products that may be incorporated
into the Work include, but are not limited to, the following:
2. Products: Subject to compliance with requirements, provide one of the following:
a. Cooper; GF20.
b. Pass & Seymour; 2084.
C. Hospital-Grade, Duplex GFCI Convenience Receptacles, 125 V, 20 A: Comply with UL 498
Supplement SD.
1. Available Products: Subject to compliance with requirements, products that may be incorporated
into the Work include, but are not limited to, the following:
2. Products: Subject to compliance with requirements, provide one of the following:
a. Hubbell; GFR8300.
b. Leviton; 6898-HG.
c. Pass & Seymour; 2091-SHG.
D. Hospital-Grade, Duplex GFCI Tamper resistant Convenience Receptacles, 125 V, 20 A: Comply with
UL 498 Supplement SD.
1. Available Products: Subject to compliance with requirements, products that may be incorporated
into the Work include, but are not limited to, the following:
2. Products: Subject to compliance with requirements, provide one of the following:
a. Hubbell; GFR8300.
b. Leviton; 6898-HG.
c. Pass & Seymour; 2091-SHG.
42204.004 26 27 26-4 Wiring Devices
2.4 SNAP SWITCHES
A. Comply with NEMA WD 1 and UL 20.
B. Switches, 120/277 V, 20 A:
1. Available Products: Subject to compliance with requirements, products that may be incorporated
into the Work include, but are not limited to, the following:
2. Products: Subject to compliance with requirements, provide one of the following:
a. Cooper; 2221 (single pole), 2222 (two pole), 2223 (three way), 2224 (four way).
b. Hubbell; CS1221 (single pole), CS1222 (two pole), CS1223 (three way), CS1224 (four
way).
c. Leviton; 1221-2 (single pole), 1222-2 (two pole), 1223-2 (three way), 1224-2 (four way).
d. Pass & Seymour; 20AC1 (single pole), 20AC2 (two pole), 20AC3 (three way), 20AC4
(four way).
C. Pilot Light Switches, 20 A: For control of patient room night lights
1. Available Products: Subject to compliance with requirements, products that may be incorporated
into the Work include, but are not limited to, the following:
2. Products: Subject to compliance with requirements, provide one of the following:
a. Cooper; 2221PL for 120 V and 277 V.
b. Hubbell; HPL1221PL for 120 V and 277 V.
c. Leviton; 1221-PLR for 120 V, 1221-7PLR for 277 V.
d. Pass & Seymour; PS20AC1-PLR for 120 V.
3. Description: Single pole, with neon-lighted handle, illuminated when switch is "OFF."
2.5 WALL PLATES
A. Single and combination types to match corresponding wiring devices.
1. Plate-Securing Screws: Metal with head color to match plate finish.
2. Material for Finished Spaces: high impact thermoplastic, ivory in color.
3. Material for Unfinished Spaces: Galvanized steel.
4. Material for Damp Locations: Cast aluminum with spring-loaded lift cover, and listed and
labeled for use in "wet locations."
B. Wet-Location, Weatherproof Cover Plates: NEMA 250, complying with type 3R weather-resistant,
thermoplastic with lockable cover.
2.6 FINISHES
A. Color: Wiring device catalog numbers in Section Text do not designate device color.
1. Wiring Devices Connected to Normal Power System: Ivory, unless otherwise indicated or
required by NFPA 70 or device listing.
2. Wiring Devices Connected to Emergency Power System: Red.
42204.004 26 27 26-5 Wiring Devices
PART 3 - EXECUTION
3.1 INSTALLATION
A. Comply with NECA 1, including the mounting heights listed in that standard, unless otherwise noted.
B. Coordination with Other Trades:
1. Take steps to insure that devices and their boxes are protected. Do not place wall finish materials
over device boxes and do not cut holes for boxes with routers that are guided by riding against
outside of the boxes.
2. Keep outlet boxes free of plaster, drywall joint compound, mortar, cement, concrete, dust, paint,
and other material that may contaminate the raceway system, conductors, and cables.
3. Install device boxes in brick or block walls so that the cover plate does not cross a joint unless the
joint is troweled flush with the face of the wall.
4. Install wiring devices after all wall preparation, including painting, is complete.
C. Conductors:
1. Do not strip insulation from conductors until just before they are spliced or terminated on devices.
2. Strip insulation evenly around the conductor using tools designed for the purpose. Avoid scoring
or nicking of solid wire or cutting strands from stranded wire.
3. The length of free conductors at outlets for devices shall meet provisions of NFPA 70, Article 300,
without pigtails.
4. Existing Conductors:
a. Cut back and pigtail, or replace all damaged conductors.
b. Straighten conductors that remain and remove corrosion and foreign matter.
c. Pigtailing existing conductors is permitted provided the outlet box is large enough.
D. Device Installation:
1. Replace all devices that have been in temporary use during construction or that show signs that
they were installed before building finishing operations were complete.
2. Keep each wiring device in its package or otherwise protected until it is time to connect
conductors.
3. Do not remove surface protection, such as plastic film and smudge covers, until the last possible
moment.
4. Connect devices to branch circuits using pigtails that are not less than 6 inches (152 mm) in
length.
5. When there is a choice, use side wiring with binding-head screw terminals. Wrap solid conductor
tightly clockwise, 2/3 to 3/4 of the way around terminal screw.
6. Use a torque screwdriver when a torque is recommended or required by the manufacturer.
7. When conductors larger than No. 12 AWG are installed on 15- or 20-A circuits, splice
No. 12 AWG pigtails for device connections.
8. Tighten unused terminal screws on the device.
9. When mounting into metal boxes, remove the fiber or plastic washers used to hold device
mounting screws in yokes, allowing metal-to-metal contact.
E. Receptacle Orientation:
1. Install ground pin of vertically mounted receptacles up, and on horizontally mounted receptacles
to the right.

42204.004 26 27 26-6 Wiring Devices
2. Install hospital-grade receptacles in patient-care areas with the ground pin or neutral blade at the
top.
F. Device Plates: Do not use oversized or extra-deep plates. Repair wall finishes and remount outlet boxes
when standard device plates do not fit flush or do not cover rough wall opening.
G. Arrangement of Devices: Unless otherwise indicated, mount flush, with long dimension vertical and with
grounding terminal of receptacles on top. Group adjacent switches under single, multigang wall plates.
H. Adjust locations of floor service outlets and service poles to suit arrangement of partitions and
furnishings.
I. All receptacles shall be hospital grade.
J. Provide hospital grade GFCI tamper resistant receptacles in all public spaces, waiting, corridors, patient,
and exam rooms.
K. Where GFI protected receptacles are indicated on the plans, each receptacle indicated shall be a GFI
receptacle. Standard receptacles protected with an upstream GFI receptacle shall not be approved.
L. All devices shall be provided with tamper resistant hardware.
3.2 FIELD QUALITY CONTROL
A. Perform tests and inspections and prepare test reports.
1. In healthcare facilities, prepare reports that comply with recommendations in NFPA 99.
2. Test Instruments: Use instruments that comply with UL 1436.
3. Test Instrument for Convenience Receptacles: Digital wiring analyzer with digital readout or
illuminated LED indicators of measurement.
B. Tests for Convenience Receptacles:
1. Line Voltage: Acceptable range is 105 to 132 V.
2. Percent Voltage Drop under 15-A Load: A value of 6 percent or higher is not acceptable.
3. Ground Impedance: Values of up to 2 ohms are acceptable.
4. GFCI Trip: Test for tripping values specified in UL 1436 and UL 943.
5. Using the test plug, verify that the device and its outlet box are securely mounted.
6. The tests shall be diagnostic, indicating damaged conductors, high resistance at the circuit breaker,
poor connections, inadequate fault current path, defective devices, or similar problems. Correct
circuit conditions, remove malfunctioning units and replace with new ones, and retest as specified
above.
C. Test straight blade hospital-grade convenience outlets for the retention force of the grounding blade
according to NFPA 99. Retention force shall be not less than 4 oz. (115 g).
D. The effectiveness of the grounding system in patient care areas shall be determined by voltage and
impedance measurements as indicated in NFPA-99. Voltage and impedance measurements shall be
recorded in each patient area by taking measurements with respect to a reference point. Voltage
measurements shall be made under non-fault conditions between a reference point and exposed fixed
electrical equipment. Impedance measurements shall be made between the reference point and the
grounding contact of 10 percent of all receptacles in each patient care vicinity. The voltage limit shall be
20 mV. The impedance limit shall be 0.1 ohms. A tabulated report shall be prepared and given to the
Owner which shall include all measurements recorded at each location in each room or area.

42204.004 26 27 26-7 Wiring Devices
END OF SECTION 26 27 26

42204.004 26 28 16-1 Enclosed Switches and Circuit Breakers
SECTION 26 28 16
ENCLOSED SWITCHES AND CIRCUIT BREAKERS
PART 1 - GENERAL
1.01 RELATED DOCUMENTS
A. Drawings and general provisions of the Contract, including General and Supplementary
Conditions and other Division 01 Specification Sections, apply to this Section.
1.02 SUMMARY
A. Section Includes:
1. Nonfusible switches.
2. Shunt trip switches.
3. Molded-case circuit breakers (MCCBs).
4. Enclosures.
1.03 DEFINITIONS
A. NC: Normally closed.
B. NO: Normally open.
C. SPDT: Single pole, double throw.
1.04 ACTION SUBMITTALS
A. Product Data: For each type of enclosed switch, circuit breaker, accessory, and component
indicated. Include dimensioned elevations, sections, weights, and manufacturers' technical data
on features, performance, electrical characteristics, ratings, accessories, and finishes.
1. Enclosure types and details for types other than NEMA 250, Type 1.
2. Current and voltage ratings.
3. Short-circuit current ratings (interrupting and withstand, as appropriate).
4. Include evidence of NRTL listing for series rating of installed devices.
5. Detail features, characteristics, ratings, and factory settings of individual overcurrent
protective devices, accessories, and auxiliary components.
1.05 CLOSEOUT SUBMITTALS
A. Operation and Maintenance Data: For enclosed switches and circuit breakers to include in
emergency, operation, and maintenance manuals. In addition to items specified in
Section 017823 "Operation and Maintenance Data," include the following:
42204.004 26 28 16-2 Enclosed Switches and Circuit Breakers
1. Manufacturer's written instructions for testing and adjusting enclosed switches and circuit
breakers.
1.06 MAINTENANCE MATERIAL SUBMITTALS
A. Furnish extra materials that match products installed and that are packaged with protective
covering for storage and identified with labels describing contents.
1. Fuses: Equal to 10 percent of quantity installed for each size and type, but no fewer than
three of each size and type.
2. Fuse Pullers: Two for each size and type.
1.07 QUALITY ASSURANCE
A. Testing Agency Qualifications: Member company of NETA or an NRTL.
1. Testing Agency's Field Supervisor: Currently certified by NETA to supervise on-site
testing.
B. Source Limitations: Obtain enclosed switches and circuit breakers, overcurrent protective
devices, components, and accessories, within same product category, from single source from
single manufacturer.
C. Product Selection for Restricted Space: Drawings indicate maximum dimensions for enclosed
switches and circuit breakers, including clearances between enclosures, and adjacent surfaces
and other items. Comply with indicated maximum dimensions.
D. Electrical Components, Devices, and Accessories: Listed and labeled as defined in NFPA 70, by
a qualified testing agency, and marked for intended location and application.
E. Comply with NFPA 70.
1.08 PROJECT CONDITIONS
A. Environmental Limitations: Rate equipment for continuous operation under the following
conditions unless otherwise indicated:
1. Ambient Temperature: Not less than minus 22 deg F (minus 30 deg C) and not exceeding
104 deg F (40 deg C).
2. Altitude: Not exceeding 6600 feet (2010 m).
1.09 COORDINATION
A. Coordinate layout and installation of switches, circuit breakers, and components with equipment
served and adjacent surfaces. Maintain required workspace clearances and required clearances
for equipment access doors and panels.
PART 2 - PRODUCTS
2.01 NONFUSIBLE SWITCHES
A. Type GD, General Duty, Single Throw, 600 A and Smaller: UL 98 and NEMA KS 1,
horsepower rated, lockable handle with capability to accept two padlocks, and interlocked with
cover in closed position.
42204.004 26 28 16-3 Enclosed Switches and Circuit Breakers
B. Type HD, Heavy Duty, Single Throw, 240-V ac, 1200 A and Smaller: UL 98 and NEMA KS 1,
horsepower rated, lockable handle with capability to accept three padlocks, and interlocked with
cover in closed position.
C. Type HD, Heavy Duty, Six Pole, Single Throw, 240-V ac, 200 A and Smaller: UL 98 and
NEMA KS 1, horsepower rated, lockable handle with capability to accept three padlocks, and
interlocked with cover in closed position.
D. Type HD, Heavy Duty, Double Throw, 240-V ac, 1200 A and Smaller: UL 98 and
NEMA KS 1, horsepower rated, lockable handle with capability to accept three padlocks, and
interlocked with cover in closed position.
E. Accessories:
1. Equipment Ground Kit: Internally mounted and labeled for copper and aluminum ground
conductors.
2. Neutral Kit: Internally mounted; insulated, capable of being grounded and bonded;
labeled for copper and aluminum neutral conductors.
3. Isolated Ground Kit: Internally mounted; insulated, capable of being grounded and
bonded; labeled for copper and aluminum neutral conductors.
4. Auxiliary Contact Kit: One NO/NC (Form "C") auxiliary contact(s), arranged to activate
before switch blades open.
5. Hookstick Handle: Allows use of a hookstick to operate the handle.
6. Lugs: Mechanical type, suitable for number, size, and conductor material.
7. Accessory Control Power Voltage: Remote mounted and powered; 24-V dc.
2.02 SHUNT TRIP SWITCHES
A. Show voltage and ampere ratings of shunt trip switches and fuses on Drawings. See Editing
Instruction No. 4 and "Shunt Trip Switches" Article in the Evaluations for guidance on using
shunt trip switches.
B. General Requirements: Comply with ASME A17.1, UL 50, and UL 98, with 200-kA
interrupting and short-circuit current rating when fitted with Class J fuses.
C. Switches: Three-pole, horsepower rated, with integral shunt trip mechanism and Class J fuse
block; lockable handle with capability to accept three padlocks; interlocked with cover in closed
position.
D. Control Circuit: 120-V ac; obtained from integral control power transformer, with primary and
secondary fuses, with a control power transformer of enough capacity to operate shunt trip,
connected pilot, and indicating and control devices.
2.03 MOLDED-CASE CIRCUIT BREAKERS
A. General Requirements: Comply with UL 489, NEMA AB 1, and NEMA AB 3, with
interrupting capacity to comply with available fault currents.

42204.004 26 28 16-4 Enclosed Switches and Circuit Breakers
B. Thermal-Magnetic Circuit Breakers: Inverse time-current element for low-level overloads and
instantaneous magnetic trip element for short circuits. Adjustable magnetic trip setting for
circuit-breaker frame sizes 250 A and larger.
C. Adjustable, Instantaneous-Trip Circuit Breakers: Magnetic trip element with front-mounted,
field-adjustable trip setting.
D. Electronic Trip Circuit Breakers: Field-replaceable rating plug, rms sensing, with the following
field-adjustable settings:
1. Instantaneous trip.
2. Long- and short-time pickup levels.
3. Long- and short-time time adjustments.
4. Ground-fault pickup level, time delay, and I2t response.
E. Current-Limiting Circuit Breakers: Frame sizes 400 A and smaller, and let-through ratings less
than NEMA FU 1, RK-5.
F. Integrally Fused Circuit Breakers: Thermal-magnetic trip element with integral limiter-style
fuse listed for use with circuit breaker and trip activation on fuse opening or on opening of fuse
compartment door.
G. Ground-Fault, Circuit-Interrupter (GFCI) Circuit Breakers: Single- and two-pole configurations
with Class A ground-fault protection (6-mA trip).
H. Ground-Fault, Equipment-Protection (GFEP) Circuit Breakers: With Class B ground-fault
protection (30-mA trip).
I. Features and Accessories:
1. Standard frame sizes, trip ratings, and number of poles.
2. Lugs: Mechanical type, suitable for number, size, trip ratings, and conductor material.
3. Application Listing: Appropriate for application; Type SWD for switching fluorescent
lighting loads; Type HID for feeding fluorescent and high-intensity discharge lighting
circuits.
4. Ground-Fault Protection: Comply with UL 1053; integrally mounted, self-powered type
with mechanical ground-fault indicator; relay with adjustable pickup and time-delay
settings, push-to-test feature, internal memory, and shunt trip unit; and three-phase, zero-
sequence current transformer/sensor.
5. Communication Capability: Integral communication module with functions and features
compatible with power monitoring and control system, specified in Section 260913
"Electrical Power Monitoring and Control."
6. Shunt Trip: Trip coil energized from separate circuit, with coil-clearing contact.
7. Undervoltage Trip: Set to operate at 35 to 75 percent of rated voltage without intentional
time delay.

42204.004 26 28 16-5 Enclosed Switches and Circuit Breakers
2.04 ENCLOSURES
A. Enclosed Switches and Circuit Breakers: NEMA AB 1, NEMA KS 1, NEMA 250, and UL 50,
to comply with environmental conditions at installed location.
1. Indoor, Dry and Clean Locations: NEMA 250, Type 1.
2. Outdoor Locations: NEMA 250, Type 3R.
3. Other Wet or Damp, Indoor Locations: NEMA 250, Type 4.
4. Indoor Locations Subject to Dust, Falling Dirt, and Dripping Noncorrosive Liquids:
NEMA 250, Type 12.
5. Hazardous Areas Indicated on Drawings: NEMA 250, Type 7.
PART 3 - EXECUTION
3.01 EXAMINATION
A. Examine elements and surfaces to receive enclosed switches and circuit breakers for compliance
with installation tolerances and other conditions affecting performance of the Work.
B. Proceed with installation only after unsatisfactory conditions have been corrected.
3.02 INSTALLATION
A. Install individual wall-mounted switches and circuit breakers with tops at uniform height unless
otherwise indicated.
B. Temporary Lifting Provisions: Remove temporary lifting eyes, channels, and brackets and
temporary blocking of moving parts from enclosures and components.
C. Comply with NECA 1.
3.03 IDENTIFICATION
A. Comply with requirements in Section 260553 "Identification for Electrical Systems."
1. Identify field-installed conductors, interconnecting wiring, and components; provide
warning signs.
2. Label each enclosure with engraved metal or laminated-plastic nameplate.
3.04 FIELD QUALITY CONTROL
A. Testing Agency: Engage a qualified testing agency to perform tests and inspections.
B. Manufacturer's Field Service: Engage a factory-authorized service representative to inspect, test,
and adjust components, assemblies, and equipment installations, including connections.
C. Perform tests and inspections.
1. Manufacturer's Field Service: Engage a factory-authorized service representative to
inspect components, assemblies, and equipment installations, including connections, and
to assist in testing.

42204.004 26 28 16-6 Enclosed Switches and Circuit Breakers
D. Acceptance Testing Preparation:
1. Test insulation resistance for each enclosed switch and circuit breaker, component,
connecting supply, feeder, and control circuit.
2. Test continuity of each circuit.
E. Tests and Inspections:
1. Perform each visual and mechanical inspection and electrical test stated in NETA
Acceptance Testing Specification. Certify compliance with test parameters.
2. Correct malfunctioning units on-site, where possible, and retest to demonstrate
compliance; otherwise, replace with new units and retest.
3. Perform the following infrared scan tests and inspections and prepare reports:
a. Initial Infrared Scanning: After Substantial Completion, but not more than 60 days
after Final Acceptance, perform an infrared scan of each enclosed switch and
circuit breaker. Remove front panels so joints and connections are accessible to
portable scanner.
b. Follow-up Infrared Scanning: Perform an additional follow-up infrared scan of
each enclosed switch and circuit breaker 11 months after date of Substantial
Completion.
c. Instruments and Equipment: Use an infrared scanning device designed to measure
temperature or to detect significant deviations from normal values. Provide
calibration record for device.
4. Test and adjust controls, remote monitoring, and safeties. Replace damaged and
malfunctioning controls and equipment.
F. Enclosed switches and circuit breakers will be considered defective if they do not pass tests and
inspections.
3.05 ADJUSTING
A. Adjust moving parts and operable components to function smoothly, and lubricate as
recommended by manufacturer.
END OF SECTION 26 28 16
42204.004
26 51 00-1 Interior Lighting with LED
SECTION 26 51 00
INTERIOR LIGHTING
PART 1 – GENERAL
1.01 DESCRIPTION
A. This section specifies the furnishing, installation, and connection of the interior lighting systems. The
terms “lighting fixture,” “fixture,” and “luminaire” are used interchangeably.
1.02 RELATED WORK
A. Section 01 74 19, CONSTRUCTION WASTE MANAGEMENT: Disposal of lamps.
B. Section 02 41 00, DEMOLITION: Removal and disposal of lamps and ballasts.
C. Section 26 05 11, REQUIREMENTS FOR ELECTRICAL INSTALLATIONS: Requirements that
apply to all sections of Division 26.
D. Section 26 05 21, LOW-VOLTAGE ELECTRICAL POWER CONDUCTORS AND CABLES: Low-
voltage conductors.
E. Section 26 05 26, GROUNDING AND BONDING FOR ELECTRICAL SYSTEMS: Requirements for
personnel safety and to provide a low impedance path to ground for possible ground fault currents.
F. Section 26 27 26, WIRING DEVICES: Wiring devices used for control of the lighting systems.
1.03 QUALITY ASSURANCE
A. Refer to Paragraph, QUALIFICATIONS (PRODUCTS AND SERVICES), in Section 26 05 11,
REQUIREMENTS FOR ELECTRICAL INSTALLATIONS.
1.04 SUBMITTALS
A. Submit an electronic copy of the following in accordance with Section 26 05 11, REQUIREMENTS
FOR ELECTRICAL INSTALLATIONS.
1. Shop Drawings:
a. Submit the following information for each type of lighting fixture designated on the
LIGHTING FIXTURE SCHEDULE, arranged in order of lighting fixture designation.
b. Material and construction details, include information on housing and optics system.
c. Physical dimensions and description.
d. Wiring schematic and connection diagram.
e. Installation details.
f. Energy efficiency data.
g. Photometric data based on laboratory tests complying with IES Lighting Measurements
testing and calculation guides.
h. For LED lighting fixtures, submit US DOE LED Lighting Facts label, and IES L70 rated life.
2. Manuals:
a. Submit, simultaneously with the shop drawings, complete maintenance and operating
manuals, including technical data sheets, wiring diagrams, and information for ordering
replacement parts.
b. If changes have been made to the maintenance and operating manuals originally submitted,
submit updated maintenance and operating manuals two weeks prior to the final inspection.
3. Certifications: Two weeks prior to final inspection, submit the following.
a. Certification by the Contractor that the interior lighting systems have been properly installed
and tested.

42204.004
26 51 00-2 Interior Lighting with LED
1.05 APPLICABLE PUBLICATIONS
A. Publications listed below (including amendments, addenda, revisions, supplements, and errata) form a part
of this specification to the extent referenced. Publications are referenced in the text by designation only.
B. American National Standards Institute (ANSI):
C78.1-91 ..........................................Fluorescent Lamps - Rapid-Start Types - Dimensional and Electrical
Characteristics
C78.376-01 ......................................Chromaticity of Fluorescent Lamps
C. American Society for Testing and Materials (ASTM):
C635-07 ...........................................Manufacture, Performance, and Testing of Metal Suspension Systems
for Acoustical Tile and Lay-in Panel Ceilings
D. Environmental Protection Agency (EPA):
40 CFR 261 .....................................Identification and Listing of Hazardous Waste
E. Federal Communications Commission (FCC):
CFR Title 47, Part 15 ......................Radio Frequency Devices
CFR Title 47, Part 18 ......................Industrial, Scientific, and Medical Equipment
F. Illuminating Engineering Society (IES):
LM-79-08 ........................................Electrical and Photometric Measurements of Solid-State Lighting
Products
LM-80-08 ........................................Measuring Lumen Maintenance of LED Light Sources
LM-82-12 ........................................Characterization of LED Light Engines and LED Lamps for Electrical
and Photometric Properties as a Function of Temperature
G. Institute of Electrical and Electronic Engineers (IEEE):
C62.41-91 ........................................Surge Voltages in Low Voltage AC Power Circuits
H. International Code Council (ICC):
IBC-12 .............................................International Building Code
I. National Fire Protection Association (NFPA):
70-11 ...............................................National Electrical Code (NEC)
101-12 .............................................Life Safety Code
J. National Electrical Manufacturer's Association (NEMA):
C82.1-04 ..........................................Lamp Ballasts – Line Frequency Fluorescent Lamp Ballasts
C82.2-02 ..........................................Method of Measurement of Fluorescent Lamp Ballasts
C82.4-02 ..........................................Lamp Ballasts - Ballasts for High-Intensity Discharge and Low-
Pressure Sodium (LPS) Lamps (Multiple-Supply Type)
C82.11-11 ........................................Lamp Ballasts - High Frequency Fluorescent Lamp Ballasts
LL-9-09 ...........................................Dimming of T8 Fluorescent Lighting Systems
SSL-1-10 .........................................Electronic Drivers for LED Devices, Arrays, or Systems
K. Underwriters Laboratories, Inc. (UL):
496-08 .............................................Lampholders
542-0599 .........................................Fluorescent Lamp Starters
844-12 .............................................Luminaires for Use in Hazardous (Classified) Locations
924-12 .............................................Emergency Lighting and Power Equipment
935-01 .............................................Fluorescent-Lamp Ballasts
1029-94 ...........................................High-Intensity-Discharge Lamp Ballasts
1029A-06................Ignitors and Related Auxiliaries for HID Lamp Ballasts
1598-08 ...........................................Luminaires
1574-04.................Track Lighting Systems

42204.004
26 51 00-3 Interior Lighting with LED
2108-04.................Low-Voltage Lighting Systems
8750-09.................Light Emitting Diode (LED) Light Sources for Use in Lighting Products
PART 2 - PRODUCTS
2.01 LIGHTING FIXTURES
A. Shall be in accordance with NFPA, UL, as shown on drawings, and as specified.
B. Sheet Metal:
1. Shall be formed to prevent warping and sagging. Housing, trim and lens frame shall be true, straight
(unless intentionally curved), and parallel to each other as designed.
2. Wireways and fittings shall be free of burrs and sharp edges, and shall accommodate internal and
branch circuit wiring without damage to the wiring.
3. When installed, any exposed fixture housing surface, trim frame, door frame, and lens frame shall be
free of light leaks.
4. Hinged door frames shall operate smoothly without binding. Latches shall function easily by finger
action without the use of tools.
G. Mechanical Safety: Lighting fixture closures (lens doors, trim frame, hinged housings, etc.) shall be
retained in a secure manner by captive screws, chains, aircraft cable, captive hinges, or fasteners such that
they cannot be accidentally dislodged during normal operation or routine maintenance.
G. Metal Finishes:
1. The manufacturer shall apply standard finish (unless otherwise specified) over a corrosion-resistant
primer, after cleaning to free the metal surfaces of rust, grease, dirt and other deposits. Edges of pre-
finished sheet metal exposed during forming, stamping or shearing processes shall be finished in a
similar corrosion resistant manner to match the adjacent surface(s). Fixture finish shall be free of
stains or evidence of rusting, blistering, or flaking, and shall be applied after fabrication.
2. Interior light reflecting finishes shall be white with not less than 85 percent reflectances, except where
otherwise shown on the drawing.
3. Exterior finishes shall be as shown on the drawings.
H. Lighting fixtures shall have a specific means for grounding metallic wireways and housings to an
equipment grounding conductor.
2.02 LED EXIT LIGHT FIXTURES
A. Exit light fixtures shall meet applicable requirements of NFPA and UL.
B. Housing and door shall be thermoplastic.
C. For general purpose exit light fixtures, door frame shall be hinged, with latch. For vandal-resistant exit
light fixtures, door frame shall be secured with tamper-resistant screws.
D. Finish shall be white.
E. There shall be no radioactive material used in the fixtures.
F. Fixtures:
1. Inscription panels shall be cast or stamped aluminum a minimum of 2.25 mm (0.090 inch) thick,
stenciled with 150 mm (6 inch) high letters, baked with red color stable plastic or fiberglass. Lamps

42204.004
26 51 00-4 Interior Lighting with LED
shall be luminous Light Emitting Diodes (LED) mounted in center of letters on red color stable plastic
or fiberglass.
2. Double-Faced Fixtures: Provide double-faced fixtures where required or as shown on drawings.
3. Directional Arrows: Provide directional arrows as part of the inscription panel where required or as
shown on drawings. Directional arrows shall be the "chevron-type" of similar size and width as the
letters and meet the requirements of NFPA 101.
F. Voltage: Multi-voltage (120 – 277V).
2.03 LED LIGHT FIXTURES
A. General:
1. LED light fixtures shall be in accordance with IES, NFPA, UL, as shown on the drawings, and as
specified.
2. LED light fixtures shall be Reduction of Hazardous Substances (RoHS)-compliant.
3. LED drivers shall include the following features unless otherwise indicated:
a. Minimum efficiency: 85% at full load.
b. Minimum Operating Ambient Temperature: -20˚ C. (-4˚ F.)
c. Input Voltage: 120 - 277V (±10%) at 60 Hz.
d. Integral short circuit, open circuit, and overload protection.
e. Power Factor: ≥ 0.95.
f. Total Harmonic Distortion: ≤ 20%.
g. Comply with FCC 47 CFR Part 15.
4. LED modules shall include the following features unless otherwise indicated:
a. Comply with IES LM-79 and LM-80 requirements.
b. Minimum CRI 80 and color temperature 3000˚ K unless otherwise specified in LIGHTING
FIXTURE SCHEDULE.
c. Minimum Rated Life: 50,000 hours per IES L70.
d. Light output lumens as indicated in the LIGHTING FIXTURE SCHEDULE.
B. LED Downlights:
1. Housing, LED driver, and LED module shall be products of the same manufacturer.
C. LED Troffers:
1. LED drivers, modules, and reflector shall be accessible, serviceable, and replaceable from below the
ceiling.
2. Housing, LED driver, and LED module shall be products of the same manufacturer.
PART 3 - EXECUTION
3.01 INSTALLATION
A. Installation shall be in accordance with the NEC, manufacturer's instructions, and as shown on the drawings
or specified.
B. Align, mount, and level the lighting fixtures uniformly.
C. Wall-mounted fixtures shall be attached to the studs in the walls, or to a 20 gauge metal backing plate that
is attached to the studs in the walls. Lighting fixtures shall not be attached directly to gypsum board.
D. Lighting Fixture Supports:

42204.004
26 51 00-5 Interior Lighting with LED
1. Shall provide support for all of the fixtures. Supports may be anchored to channels of the ceiling
construction, to the structural slab or to structural members within a partition, or above a suspended
ceiling.
2. Shall maintain the fixture positions after cleaning and relamping.
3. Shall support the lighting fixtures without causing the ceiling or partition to deflect.
4. Surface mounted lighting fixtures:
a. Fixtures shall be bolted against the ceiling independent of the outlet box at four points spaced near
the corners of each unit. The bolts (or stud-clips) shall be minimum 6 mm (1/4 inch) bolt, secured
to main ceiling runners and/or secured to cross runners. Non-turning studs may be attached to the
main ceiling runners and cross runners with special non-friction clip devices designed for the
purpose, provided they bolt through the runner, or are also secured to the building structure by 12
gauge safety hangers. Studs or bolts securing fixtures weighing in excess of 25 kg (56 pounds)
shall be supported directly from the building structure.
b. Where ceiling cross runners are installed for support of lighting fixtures, they must have a carrying
capacity equal to that of the main ceiling runners and be rigidly secured to the main runners.
c. Fixtures less than 6.8 kg (15 pounds) in weight and occupying less than 3715 sq cm (two square
feet) of ceiling area may, when designed for the purpose, be supported directly from the outlet box
when all the following conditions are met.
1) Screws attaching the fixture to the outlet box pass through round holes (not key-hole slots) in
the fixture body.
2) The outlet box is attached to a main ceiling runner (or cross runner) with approved hardware.
3) The outlet box is supported vertically from the building structure.
d. Fixtures mounted in open construction shall be secured directly to the building structure with
approved bolting and clamping devices.
5. Single or double pendant-mounted lighting fixtures:
a. Each stem shall be supported by an approved outlet box mounted swivel joint and canopy which
holds the stem captive and provides spring load (or approved equivalent) dampening of fixture
oscillations. Outlet box shall be supported vertically from the building structure.
6. Outlet boxes for support of lighting fixtures (where permitted) shall be secured directly to the building
structure with approved devices or supported vertically in a hung ceiling from the building structure
with a nine gauge wire hanger, and be secured by an approved device to a main ceiling runner or cross
runner to prevent any horizontal movement relative to the ceiling.
D. Furnish and install the new lamps as specified for all lighting fixtures installed under this project, and for
all existing lighting fixtures reused under this project.
E. The electrical and ceiling trades shall coordinate to ascertain that approved lighting fixtures are furnished in
the proper sizes and installed with the proper devices (hangers, clips, trim frames, flanges, etc.), to match
the ceiling system being installed.
F. Bond lighting fixtures to the grounding system as specified in Section 26 05 26, GROUNDING AND
BONDING FOR ELECTRICAL SYSTEMS.
3.02 ACCEPTANCE CHECKS AND TESTS
A. Perform the following:
1. Visual Inspection:
a. Verify proper operation by operating the lighting controls.
b. Visually inspect for damage to fixtures, lenses, reflectors, diffusers, and louvers. Clean fixtures,
lenses, reflectors, diffusers, and louvers that have accumulated dust, dirt, or fingerprints during
construction.

42204.004
26 51 00-6 Interior Lighting with LED
2. Electrical tests:
a. Exercise dimming components of the lighting fixtures over full range of dimming capability by
operating the control devices(s) in the presence of the owner. Observe for visually detectable
flicker over full dimming range, and replace defective components at no cost to the owner.
3.03 FOLLOW-UP VERIFICATION
A. Upon completion of acceptance checks and tests, the Contractor shall show by demonstration in service
that the lighting systems are in good operating condition and properly performing the intended function.
END OF SECTION 26 51 00

42204.004 27 05 00-1 Requirements for Communications Installations
SECTION 27 05 00
REQUIREMENTS FOR COMMUNICATIONS INSTALLATIONS
PART 1 - GENERAL
1.01 SCOPE
A. All requirements of the entire RFP govern work under this Section.
1.02 GENERAL PROVISIONS
A. In general, the work includes: All work and kindred materials and operations as indicated on the
drawings and as specified in the following articles of Section 27 05 00.
B. Job Information: Obtain at building including:
1. Conditions affecting this Section of the Work.
2. Accessibility.
3. Storage space.
1.03 DEFINITIONS
A. Certain terms used herein; on the drawings; and in the contract documents, shall be defined as
follows:
1. Provide: Furnish and install complete and ready for service.
2. Exposed: Exposed to view in any room, hallway, passageway, or outside.
3. Approval: The approval of the Engineer in writing or by signed rubber stamp applied to
drawings, illustrations, etc.
1.04 INTENT OF DRAWINGS AND SPECIFICATIONS
A. These specifications and attendant drawings are intended to cover a complete installation of
systems. The omission of expressed reference to any item of labor or material necessary for the
proper execution of the work in accordance with present practice of the trade shall not relieve the
Vendor from providing such additional labor and materials.
1.05 DRAWINGS
A. The drawings do not attempt to show the complete details of building construction, which affect
the installation. The Vendor shall visit the site to understand details which affect the proper
installation of this work. The Vendor is cautioned that diagrams showing electrical connections
and/or circuiting are diagrammatic only and must not be used for obtaining lineal runs of wire or
conduit. Wiring diagrams do not necessarily show the exact physical arrangement of the
equipment.
1.06 MATERIAL AND EQUIPMENT
A. All material and equipment shall be new and of the quality used for the purpose in good
commercial practice, and shall be standard product of reputable manufacturers. Each major
component of equipment shall have the manufacturer's name, catalog number, and capacity or
rating on a nameplate, securely affixed on the equipment in a conspicuous place.
1.07 SUBSTITUTION AND APPROVAL OF MATERIAL
A. Once a purchase order is issued based on the RFP, no substitutions will be accepted.
1.08 DAMAGE TO OTHER WORK
A. The Vendor will be held rigidly responsible for all damages to the work of his own or any other
trade resulting from the execution of his work. It shall be the Vendor's responsibility to
adequately protect his work at all times. All damages resulting from his operations shall be

42204.004 27 05 00-2 Requirements for Communications Installations
repaired or the damaged portions replaced by the party originally performing the work, (to the
entire satisfaction of the Engineer), and all cost thereof shall be borne by the Vendor responsible
for the damage.
1.09 FIELD CHANGES
A. Should any change in drawings or specifications be required to comply with local regulations
and/or field conditions, the Vendor shall refer same to Engineer for approval before any work,
which deviates from the original requirements of the drawings and specifications, is started. In the
event of disagreements as to the necessity of such changes, the decision of the Engineer shall be
final.
1.10 STANDARDS, CODES AND PERMITS
A. All work shall be installed in accordance with National, State and Local electrical codes, laws,
ordinances and regulations. Comply with all applicable OSHA regulations.
B. All materials shall have a U.L. label where a U.L. standard and/or test exists.
C. Prepare and submit to all authorities having jurisdiction, for their approval, all applications and
working drawings required by them.
D. Secure and pay for all permits and licenses required.
1.11 CLEAN-UP
A. This Vendor shall at all times keep the premises free from excessive accumulation of waste
material or rubbish resulting from his work, including tools and surplus materials, and he shall
leave his work broom clean or its equivalent.
B. In case of dispute, Engineer may order the removal of such rubbish and charge the cost to the
responsible Vendor as determined by the Engineer. At the time of final clean-up all fixtures and
equipment shall be thoroughly cleaned and left in proper condition for their intended use.
1.12 SHOP DRAWINGS
A. Submit to Engineer for review, the manufacturer's shop drawings and/or equipment brochures in
PDF format for the following:
1. Section 271000 – Structured Cabling
B. Shop drawings shall be submitted in advance of construction and installation so as to not cause
delay in other Contractor's work.
C. All data submitted for Engineer's review shall be numbered consecutively, shall be noted to
correlate with the electrical drawings and shall bear:
1. The name and location of the project.
2. The name of the Contractor.
3. The date of submittal.
4. The date of the drawings and the date of each correction and revision.
D. Shop drawings for different systems and equipment shall be combined into a separate PDF by
specification section and not by manufacturer. Submittals which contain different specification
section systems combined into one PDF will be returned for resubmittal.

42204.004 27 05 00-3 Requirements for Communications Installations
E. The Contractor shall approve shop drawings and equipment brochures prior to submission. The
Contractor shall verify that the materials and equipment depicted will properly fit into the
construction. The Contractor shall also review all previously completed work related to the
installation of the equipment depicted to insure that it has been properly installed.
F. Materials or equipment subject to prior review by the Engineer shall not be fabricated or installed
by the Contractor, without approval. The Engineer's review of shop drawings shall not relieve the
Contractor of responsibility for deviations from the requirements of the drawings and
specifications, unless prior approval for such deviations has been granted.
1.13 WORKMANSHIP
A. The installation of all work shall be made so that its several component parts will function as a
workable system complete with all accessories necessary for its operation, and shall be left with all
equipment properly adjusted and in working order. The work shall be executed in conformity
with the best-accepted standard practice of the trade so as to contribute to efficiency and
appearance. It shall also be executed so that the installation will conform and adjust itself to the
building structure, its equipment and its usage.
1.14 FIELD MEASUREMENTS
A. The Vendor shall take all field measurements necessary for his work and shall assume the full
responsibility for their accuracy.
1.15 STRUCTURAL INTERFERENCES
A. Should any structural interference prevent the installation of the outlets, etc., at points shown on
drawings, the necessary minor deviation there from, as determined by the Engineer, may be
permitted. Minor changes in the position of the outlets or equipment if decided upon before any
work has been done by the Vendor shall be made without additional charge.
1.16 EXAMINATION OF PLANS, SPECIFICATIONS AND SITE
A. Before submitting a bid, the Vendor shall visit the site and familiarize himself with all features of
the building and site, which may affect the execution of his work. No extra payment will be
allowed for the failure to obtain this information. If in the opinion of the Vendor there are
omissions or errors in the plans or specifications, the Vendor shall clarify these points with the
Engineer before submitting his bid. In lieu of written clarification by addendum, resolve all
conflicts in favor of the greater quantity or better quality.
1.17 GUARANTEE
A. The Vendor shall unconditionally guarantee his work and all components thereof, for a period of
one year from the date of his final payment. He shall remedy any defects in workmanship and
repair or replace any faulty equipment, which shall appear within the guarantee period to the entire
satisfaction of the Engineer at no additional charge.
1.18 IDENTIFICATION
A. General:
1. Materials and equipment installed under this Section shall be clearly identified as listed
below.
2. Locate identification conspicuously.
3. Terminology to be approved by Engineer.
4. See plans for any additional items to be identified.
B. Conductor Identification:

42204.004 27 05 00-4 Requirements for Communications Installations
1. Identify each conductor at each wiring device, connector or splice point with permanently
attached wrap-around adhesive markers as manufactured by Brady Co. or 3M.
2. This identification shall include loop number, control circuit, or any other appropriate number
or lettering that will expedite future tracing and trouble shooting.
1.19 1.20 SEALING AND FIREPROOFING
A. Sealing and fireproofing of openings between conduit, and sleeves and fire rated surfaces shall be
the responsibility of the Vendor whose work penetrates the opening.
B. Sealing and fireproofing shall use materials and methods complying with ASTM E814
requirements appropriate to the rating of the material penetrated.
C. Materials by Dow-Corning, 3M, Specified Technologies, Inc., and Chase-Foam are acceptable if
in accordance with (B) above.
D. Submit manufacturer’s penetration details to authority having jurisdiction. Details shall confirm
method’s compliance with ASTM E814.
E. Include copies of penetration details in Project Operation and Maintenance Manuals.
1.20 DEMOLITION, RENOVATION AND DISPOSITION OF EXISTING EQUIPMENT
A. This Vendor shall note that the existing building will remain in service during the project. Areas
of the building will be vacated as required to facilitate construction.
B. This Vendor shall proceed with the completion of his work in such a manner as to cause the lease
possible interference with the Owner’s operation. All work required in the existing building shall
be done in a manner and time acceptable to the Owner. Outages and other work rendering existing
equipment inoperative shall be held to a minimum, prior arrangements for each shall be made with
the Owner and shall be acceptable as to time and duration.
C. This Vendor shall be responsible for the work of other trades as may be necessary to facilitate the
installation. Such work necessary shall be done under the direction and at the expense of the
Vendor. This work shall include but is not limited to, cutting, patching and refinishing and all
work necessary and required to leave existing building in condition acceptable to the Engineer.
D. All coring that is required for the installation shall be by this Vendor.
E. All new conduit and wiring shall be concealed where possible to do so without extensive cutting
and patching. All exposed work shall be run in wiremold and installed only where approved by
Engineer. Routing shall be subject to Engineer’s approval. Make use of all standard wiremold
colors to match surfaces as closely as possible.
END OF SECTION 27 05 00

42204.004 27 05 28-1 Voice/Data Communications Raceway System
SECTION 27 05 28
VOICE/DATA COMMUNICATIONS RACEWAY SYSTEM
PART 1 - GENERAL
1.01 RELATED REQUIREMENTS
A. Applicable provisions of Division 0 and Division 1 shall govern work in this Section.
1.02 SCOPE A. Provide rough in for communications outlets consisting of outlet boxes, conduits, sleeves,
communication backboards and service entrance facilities.
1.03 RELATED WORK
A. Section 26 05 33 – Raceways and boxes
1.04 DESCRIPTION
A. Provide a raceway system for telephone and computer data communications cabling as indicated on the
drawings.
B. Communications outlets shall refer to computer terminal data outlets as well as telephone outlets.
C. Outlet boxes and conduits for communications outlets shall be provided under this contract.
D. Telephone and computer instruments, switching equipment, cabling, terminal blocks and other
accessories shall be furnished and installed by the communications systems vendor(s).
E. All conduits shall be complete with fish wire by Electrical Contractor.
PART 2 - PRODUCTS
2.01 EQUIPMENT A. Outlet boxes for telephone and computer terminal outlets shall be 4-11/16" square box, 2½" deep with
extension ring for a one-gang device.
B. Covers shall be full sized blank plastic plates.
PART 3 - EXECUTION
3.01 GENERAL A. Provide a 1" empty conduit with pull string from each communications outlet to the nearest accessible
corridor ceiling cavity space or cable tray.
B. Provide blank covers over all unused system outlet boxes.
END OF SECTION 27 05 28

42204.004 27 15 00-1 Communications Horizontal Cabling
SECTION 27 15 00
COMMUNICATIONS HORIZONTAL CABLING
PART 1 - GENERAL
1.01 RELATED DOCUMENTS
A. Drawings and general provisions of the Contract, including General and Supplementary
Conditions and Division 01 Specification Sections, apply to this Section.
1.02 SUMMARY
A. Section Includes:
1. Pathways.
2. UTP cabling.
3. Coaxial cable.
4. Multiuser telecommunications outlet assemblies.
5. Cable connecting hardware, patch panels, and cross-connects.
6. Telecommunications outlet/connectors.
7. Wireless Access Points
8. Cabling system identification products.
9. Cable management system.
1.03 HORIZONTAL CABLING DESCRIPTION
A. Horizontal cable and its connecting hardware provide the means of transporting signals between
the information outlet/connector and the horizontal cross-connect located in the
communications equipment room. This cabling and its connecting hardware are called
"permanent link," a term that is used in the testing protocols.
1. TIA/EIA-568-B.1 requires that a minimum of two telecommunications outlet/connectors
be installed for each work area.
2. Horizontal cabling shall contain no more than one transition point or consolidation point
between the horizontal cross-connect and the telecommunications outlet/connector.
3. Bridged taps and splices shall not be installed in the horizontal cabling.
4. Splitters shall not be installed as part of the optical fiber cabling.
B. A work area is approximately 100 sq. ft. (9.3 sq. m), and includes the components that extend
from the telecommunications outlet/connectors to the station equipment.
C. The maximum allowable horizontal cable length is 295 feet (90 m). This maximum allowable
length does not include an allowance for the length of 16 feet (4.9 m) to the workstation
equipment. The maximum allowable length does not include an allowance for the length of 16
feet (4.9 m) in the horizontal cross-connect.

42204.004 27 15 00-2 Communications Horizontal Cabling
D. Standard information outlet location shall have two (2) white category 5e cables with (2) two
jacks. Non-standard locations are noted on the plans.
E. Standard TV locations shall have one (1) RG6 Quad-Shield CATV cable and one (1) 1071XL
Blue Category 6E cable to all TV locations from the IDF as specified on the plans. Install as
follows:
1. Terminate the RG6 Quad-Shield CATV cable to compression type Male F connectors at
the user location and insert into an M81C adapter. Terminate the Category 6E cable to an
MGS400-112 Orange jack. Install the M81C adapter into the top port and the MGS400-
112 jack into the bottom port of an M12L-246 2-port face plate.
1.04 SUBMITTALS
A. Product Data: For each type of product indicated.
1. For coaxial cable, include the following installation data for each type used:
a. Nominal OD.
b. Minimum bending radius.
c. Maximum pulling tension.
B. Shop Drawings:
1. Provide a hard copy floor plan with cable numbers and an electronic floor plan in PDF
format with cable numbers to UWHP-WRMC.
C. Qualification Data: For Installer, qualified layout technician, installation supervisor, and field
inspector.
D. Source quality-control reports.
E. Field quality-control reports.
F. Maintenance Data: For splices and connectors to include in maintenance manuals.
1.05 DELIVERY, STORAGE, AND HANDLING
A. Test cables upon receipt at Project site.
1. Test copper cables with a Fluke DTX-1800 cable analyzer.
1.06 PROJECT CONDITIONS
A. Environmental Limitations: Do not deliver or install cables and connecting materials until wet
work in spaces is complete and dry, and temporary HVAC system is operating and maintaining
ambient temperature and humidity conditions at occupancy levels during the remainder of the
construction period.

42204.004 27 15 00-3 Communications Horizontal Cabling
1.07 COORDINATION
A. Coordinate layout and installation of telecommunications pathways and cabling with Owner's
telecommunications and LAN equipment and service suppliers.
B. Coordinate telecommunications outlet/connector locations with location of power receptacles at
each work area.
1.08 ACCEPTABLE VENDOR:
A. CommScope
B. General Cable
C. Panduit
D. Verify with Cook County IT Department.
PART 2 - PRODUCTS
2.01 PATHWAYS
A. General Requirements: Comply with TIA/EIA-569-A.
B. All horizontal cabling shall be in conduit.
C. Conduit and Boxes: Comply with requirements in Division 26 Section "Raceway and Boxes for
Electrical Systems."
1. Outlet boxes shall be no smaller than 2 inches (50 mm) wide, 3 inches (75 mm) high, and
2-1/2 inches (64 mm) deep.
2.02 UTP CABLE
A. Manufacturers: Subject to compliance with requirements, provide products the following:
1. CommScope, Inc. brand.
B. Description: 100-ohm, 4-pair UTP, 24 AWG
1. Comply with ICEA S-90-661 for mechanical properties.
2. Comply with TIA/EIA-568-B.1 for performance specifications.
3. Comply with TIA/EIA-568-B.2, Category 5e.
4. Listed and labeled by an NRTL acceptable to authorities having jurisdiction as complying
with UL 444 and NFPA 70 for the following types:

42204.004 27 15 00-4 Communications Horizontal Cabling
a. Communications, Riser Rated: Type CMR, complying with UL 1666.
2.03 UTP CABLE HARDWARE
A. General Requirements for Cable Connecting Hardware: Comply with TIA/EIA-568-B.2, IDC
type, with modules designed for punch-down caps or tools. Cables shall be terminated with
connecting hardware of same category or higher.
B. Connecting Blocks: 110-style IDC for Category 5e. Provide blocks for the number of cables
terminated on the block, plus 25 percent spare. Integral with connector bodies, including plugs
and jacks where indicated.
C. Cross-Connect: Modular array of connecting blocks arranged to terminate building cables and
permit interconnection between cables.
1. Number of Terminals per Field: One for each conductor in assigned cables.
D. Patch Panel: 19” rack mountable, category 5e high density modular to 110 type connections
wired T568B and utilized for the termination of data cables.
1. Number of Jacks per Field: One for each four-pair UTP cable indicated.
2. Terminate the Category 5E cables to Panduit DP485E88 TGY (48 Ports) or
CPPL48WBL (48 Port modular snap-in panel) patch panels in the IDF or MDF racks.
E. Jacks and Jack Assemblies: Pandiut CJ5E88TGOR or CJ5E88TGRD color to match Cook
County standards.
F. Patch Cords: Factory-made, four-pair cables in 36-inch (900 mm) lengths; terminated with
eight-position modular plug at each end.
1. Patch cords shall have bend-relief-compliant boots and color-coded icons to ensure
Category 5 performance. Patch cords shall have latch guards to protect against snagging.
2. Patch cords shall have color-coded boots for circuit identification.
2.04 COAXIAL CABLE
A. Manufacturers: Subject to compliance with requirements, provide products by the following:
1. CommScope, Inc.
B. Cable Characteristics: Broadband type, recommended by cable manufacturer specifically for
broadband data transmission applications. Coaxial cable and accessories shall have 75-ohm
nominal impedance with a return loss of 20 dB maximum from 7 to 806 MHz.
C. RG-11/U: NFPA 70, Type CATV.
1. No. 14 AWG, solid, copper-covered steel conductor.
2. Gas-injected, foam-PE insulation.
3. Quad shielded with 100 percent aluminum polyester tape and 60 percent aluminum braid.
4. Jacketed with sunlight-resistant, black PVC or PE.

42204.004 27 15 00-5 Communications Horizontal Cabling
5. Suitable for outdoor installations in ambient temperatures ranging from minus 40 to plus
85 deg C.
D. RG-6/U: NFPA 70, Type CATV or CM.
1. No. 16 AWG, solid, copper-covered steel conductor; gas-injected, foam-PE insulation.
2. Quad shielded with 100 percent aluminum-foil shield and 60 percent aluminum braid.
3. Jacketed with black PVC or PE.
4. Suitable for indoor installations.
2.05 COAXIAL CABLE HARDWARE
A. Manufacturers: Subject to compliance with requirements, provide products by one of the
following:
1. Aim Electronics; a brand of Emerson Electric Co.
2. Leviton Voice & Data Division.
3. Siemon Co. (The).
B. Coaxial-Cable Connectors: Type F, 75 ohms.
2.06 WIRELESS ACCESS POINTS
A. For wireless access points install one (1) CommScope CAT 5E Yellow cable (55N4R) which
will be terminated onto a CAT 5E yellow jack (CJ5E88TGYL) on each end. In the IDF/MDF
closet the CAT 5E jack will be snapped into a separate 24 port blank patch panel (Panduit
CPPL24WBLY) which is clearly marked as “Wireless Access Points”.
2.07 GROUNDING
A. Comply with requirements in Division 26 Section "Grounding and Bonding for Electrical
Systems" for grounding conductors and connectors.
B. Comply with ANSI-J-STD-607-A.
2.08 IDENTIFICATION PRODUCTS
A. Comply with TIA/EIA-606-A and UL 969 for labeling materials, including label stocks,
laminating adhesives, and inks used by label printers.
B. Comply with requirements in Division 26 Section "Identification for Electrical Systems."
2.09 SOURCE QUALITY CONTROL
A. Factory test UTP cables according to TIA/EIA-568-B.1.

42204.004 27 15 00-6 Communications Horizontal Cabling
B. Factory-sweep test coaxial cables at frequencies from 5 MHz to 1 GHz. Sweep test shall test
the frequency response, or attenuation over frequency, of a cable by generating a voltage whose
frequency is varied through the specified frequency range and graphing the results.
C. Cable will be considered defective if it does not pass tests and inspections.
D. Prepare test and inspection reports.
PART 3 - EXECUTION
3.01 WIRING METHODS
A. Wiring Method: Install cables in raceways. Conceal raceway and cables except in unfinished
spaces.
1. Comply with requirements for raceways and boxes specified in Division 26 Section
"Raceway and Boxes for Electrical Systems."
B. Wiring within Enclosures: Bundle, lace, and train cables to terminal points with no excess and
without exceeding manufacturer's limitations on bending radii. Provide and use lacing bars and
distribution spools.
3.02 INSTALLATION OF PATHWAYS
A. Comply with TIA/EIA-569-A for pull-box sizing and length of conduit and number of bends
between pull points.
B. Comply with requirements in Division 26 Section "Raceway and Boxes for Electrical Systems"
for installation of conduits and wireways.
C. Install manufactured conduit sweeps and long-radius elbows whenever possible.
D. Pathway Installation in Communications Equipment Rooms:
1. Position conduit ends adjacent to a corner on backboard where a single piece of plywood
is installed, or in the corner of room where multiple sheets of plywood are installed
around perimeter walls of room.
2. Secure conduits to backboard when entering room from overhead.
3. Extend conduits 3 inches (76 mm) above finished floor.
4. Install metal conduits with grounding bushings and connect with grounding conductor to
grounding system.
3.03 INSTALLATION OF CABLES
A. Comply with NECA 1.
B. General Requirements for Cabling:

42204.004 27 15 00-7 Communications Horizontal Cabling
1. Comply with TIA/EIA-568-B.1.
2. Comply with BICSI ITSIM, Ch. 6, "Cable Termination Practices."
3. Install 110-style IDC termination hardware unless otherwise indicated.
4. Terminate conductors; no cable shall contain unterminated elements. Make terminations
only at indicated outlets, terminals, cross-connects, and patch panels.
5. Cables may not be spliced. Secure and support cables at intervals not exceeding 30
inches (760 mm) and not more than 6 inches (150 mm) from cabinets, boxes, fittings,
outlets, racks, frames, and terminals.
6. Install lacing bars to restrain cables, to prevent straining connections, and to prevent
bending cables to smaller radii than minimums recommended by manufacturer.
7. Bundle, lace, and train conductors to terminal points without exceeding manufacturer's
limitations on bending radii, but not less than radii specified in BICSI ITSIM, "Cabling
Termination Practices" Chapter. Install lacing bars and distribution spools.
8. Do not install bruised, kinked, scored, deformed, or abraded cable. Do not splice cable
between termination, tap, or junction points. Remove and discard cable if damaged
during installation and replace it with new cable.
9. Cold-Weather Installation: Bring cable to room temperature before dereeling. Heat
lamps shall not be used for heating.
10. In the communications equipment room, install a 10-foot- (3-m-) long service loop on
each end of cable.
11. Pulling Cable: Comply with BICSI ITSIM, Ch. 4, "Pulling Cable." Monitor cable pull
tensions.
C. UTP Cable Installation:
1. Comply with TIA/EIA-568-B.2.
2. Do not untwist UTP cables more than 1/2 inch (12 mm) from the point of termination to
maintain cable geometry.
D. Open-Cable Installation:
1. Install cabling with horizontal and vertical cable guides in telecommunications spaces
with terminating hardware and interconnection equipment.
E. Group connecting hardware for cables into separate logical fields.
F. Separation from EMI Sources:
1. Comply with BICSI TDMM and TIA/EIA-569-A for separating unshielded copper voice
and data communication cable from potential EMI sources, including electrical power
lines and equipment.
2. Separation between open communications cables or cables in nonmetallic raceways and
unshielded power conductors and electrical equipment shall be as follows:
a. Electrical Equipment Rating Less Than 2 kVA: A minimum of 5 inches (127
mm).
b. Electrical Equipment Rating between 2 and 5 kVA: A minimum of 12 inches (300
mm).
c. Electrical Equipment Rating More Than 5 kVA: A minimum of 24 inches (610
mm).

42204.004 27 15 00-8 Communications Horizontal Cabling
3. Separation between communications cables in grounded metallic raceways and
unshielded power lines or electrical equipment shall be as follows:
a. Electrical Equipment Rating Less Than 2 kVA: A minimum of 2-1/2 inches (64
mm).
b. Electrical Equipment Rating between 2 and 5 kVA: A minimum of 6 inches (150
mm).
c. Electrical Equipment Rating More Than 5 kVA: A minimum of 12 inches (300
mm).
4. Separation between communications cables in grounded metallic raceways and power
lines and electrical equipment located in grounded metallic conduits or enclosures shall
be as follows:
a. Electrical Equipment Rating Less Than 2 kVA: No requirement.
b. Electrical Equipment Rating between 2 and 5 kVA: A minimum of 3 inches (76
mm).
c. Electrical Equipment Rating More Than 5 kVA: A minimum of 6 inches (150
mm).
5. Separation between Communications Cables and Electrical Motors and Transformers, 5
kVA or HP and Larger: A minimum of 48 inches (1200 mm).
6. Separation between Communications Cables and Fluorescent Fixtures: A minimum of 5
inches (127 mm).
3.04 FIRESTOPPING
A. Comply with requirements in Division 07 Section "Penetration Firestopping."
B. Comply with TIA/EIA-569-A, Annex A, "Firestopping."
C. Comply with BICSI TDMM, "Firestopping Systems" Article.
D. Fire-stop all sleeves with HILTI brand fire-stop materials on both ends of sleeves at smoke and
fire walls.
E. Label the wall and floor penetrations with an approved identification label and the date installed
or the date cables are installed through the sleeve.
3.05 GROUNDING
A. Install grounding according to BICSI TDMM, "Grounding, Bonding, and Electrical Protection"
Chapter.
B. Comply with ANSI-J-STD-607-A.
C. Bond metallic equipment to the grounding bus bar, using not smaller than No. 6 AWG
equipment grounding conductor.

42204.004 27 15 00-9 Communications Horizontal Cabling
3.06 IDENTIFICATION
A. Label all cables within 6” of each end, label all wall plates, and label all patch panels with
machine-made labels to Sinai standards.
3.07 WARRANTY
B. Provide a Fifteen-Year Application Warranty for both parts and labor, the duration of warrantee
periods following the date of acceptance of the work.
3.08 FIELD QUALITY CONTROL
A. Perform tests and inspections.
B. Tests and Inspections:
1. Visually inspect UTP materials for NRTL certification markings. Inspect cabling
terminations in communications equipment rooms for compliance with color-coding for
pin assignments, and inspect cabling connections for compliance with TIA/EIA-568-B.1.
2. Visually confirm Category 5e, marking of outlets, cover plates, outlet/connectors, and
patch panels.
3. Visually inspect cable placement, cable termination, grounding and bonding, equipment
and patch cords, and labeling of all components.
4. Final Verification Tests: Perform verification tests for UTP systems after the complete
communications cabling and workstation outlet/connectors are installed.
a. Voice Tests: These tests assume that dial tone service has been installed. Connect
to the network interface device at the demarcation point. Go off-hook and listen
and receive a dial tone. If a test number is available, make and receive a local,
long distance, and digital subscription line telephone call.
b. Data Tests: These tests assume the Information Technology Staff has a network
installed and is available to assist with testing. Connect to the network interface
device at the demarcation point. Log onto the network to ensure proper connection
to the network
C. Test UTP copper cabling with a Fluke DTX-1800 Cable Analyzer.
END OF SECTION 27 15 00

42204.004 27 52 23-1 Audio Visual Nurse Call
SECTION 27 52 23
AUDIO VISUAL NURSE CALL SYSTEM
PART 1 - GENERAL
1.01 SCOPE OF WORK
A. Provide a new Rauland Responder 5 series nurse call system located in the changing
area located on the 3rd Floor.
B. Nurse call dome lights shall be ceiling mounted (as shown on the plans). On rooms with
recessed doors, the lights shall be mounted far enough into the corridor to allow visual
recognition from any place in the corridor.
1.02 RELATED WORK AND REQUIREMENTS
A. Section 26 05 33 – Raceways and Boxes
B. Section 26 05 19A – Low Voltage Wires, Cables, and Connectors
1.03 REFERENCES
A. Underwriter’s Laboratories UL-1069
B. Canadian Standards Association
C. National Electrical Code
D. U.S. Dept. of Labor / Occupational Safety and Health Administration
E. State Hospital Code / Joint Commission of Hospitals - Nurses Call Requirements
1.04 QUALIFICATIONS
A. Authorized Distributor for product supplied. Authorized Distributor Letter from
manufacturer required upon request of specifying authority.
B. Applicable state licenses
C. Certificate of successful completion of manufacturer’s installation/training school for
installing technicians of the equipment being proposed.
1.05 GENERAL PROVISIONS
A. The contractor shall furnish and install all equipment, accessories, and materials
necessary for a complete operating system in accordance with the specifications and
applicable drawings.
B. All components and the system as a whole shall meet or exceed the minimum standards
issued by the EIA. All work in conjunction with this installation shall meet the provisions of
the National Electrical Code, the Canadian Electrical Code, and other applicable codes.
C. The system shall conform to the current NFPA standards and shall be listed as a total
system by Underwriter's Laboratories, Inc. Listing shall be under NBRZ Hospital
Signaling and Nurse Call Equipment, conforming to UL1069 standards.
D. Each major component shall bear the manufacturer's name, catalog number, and UL
label.
E. The contractor shall be responsible for providing a complete functional system
including all necessary components, whether included in this specification or not.

42204.004 27 52 23-2 Audio Visual Nurse Call
1.06 SCHEDULING
A. It is the responsibility of the contractor to coordinate all work with the other trades for
scheduling, rough-in, and finishing all work specified. The owner will not be liable for any
additional costs due to missed dates or poor coordination of the supplying contractor with
other trades.
1.07 WARRANTY
A. The warranty shall include all necessary labor and equipment to maintain the system(s) in
full operation for a period of two years from the date of acceptance. Contractor shall
maintain a service department, necessary spare parts, telephone answering services and
call dispatching required to implement the service standard stated below as part of this
contract. After the acceptance of the system(s) service shall be provided on the following
basis:
1. Emergency Service
a. Provided 24 hours a day. When a total or catastrophic failure of
equipment is reported, within 4 hours of notification to contractor, a
service person will be on site. (An example of a catastrophic failure would
be a hub failure or a nurse console failure.)
2. Routine Serivce
a. Provide within 24 business hours (9 a.m. to 5 p.m., Monday through
Friday, excluding holidays) of notification. When a minor failure or
equipment is reported a service will be on site within 24 hours of
notification to contractor. (An example of minor failure includes peripheral
equipment such as control stations, entertainment speakers, corridor
lights, pull-cord stations, etc. which normally affect only one patient or
patient room.)
1.08 MAINTENANCE
A. Provide necessary spare parts, noted in specification, after commissioning of system(s)
and prior to final payment.
B. The owner may choose to have the supplying contractor maintain the system(s). The level
of service provided during the maintenance contract period would be the same as the
warranty period for routine and emergency service. All labor and equipment costs would
be covered under this contract. Supplying contractor must state exact billing amounts,
billing periods and all costs associated with this maintenance agreement and list any
items that would not be covered under the service/maintenance agreement.
1.09 SHOP DRAWINGS AND SUBMITTALS
A. All drawings provided must be laid out for this particular job. No typical drawings will be
accepted.
B. Provide floor plans depicting actual locations and wiring requirements.
C. Manufacturer’s data sheets showing physical dimensions and electrical characteristics.
D. Drawings showing the physical arrangement of equipment.
E. Custom wiring diagrams showing complete equipment interconnection of all equipment.
F. Bill of Materials
G. Complete set of O&M Manuals.
PART 2 – PRODUCT

42204.004 27 52 23-3 Audio Visual Nurse Call
2.01 ACCEPTABLE MANUFACTURER
A. Rauland Responder 5. Head end wall mounted cabinet shall be mounted in the nearest
Tele Closet. Model #351102
2.02 ANNUNCIATOR-STAFF CONSOLE
A. Where shown on the plans provide a Responder 5 nurse console annunciator Model
#351200. These stations shall be used to annunciate all incoming calls and have the
ability for wireless device assignments.
2.03 SINGLE PATIENT STATION
A. Where shown on the plans, provide a new Responder 5 device, Model #353001.
2.04 STAFF ASSISTANCE
A. Where shown on the plans, provide a Staff Emergency Station. Where the station is not
connected to an intelligent controller, furnish a dome light with coupler, for tie into the
addressable system.
2.05 DUTY STATION
A. Where shown on the plans, provide a new Responder 5 device with pull cord. These
stations shall be used to annunciate all incoming calls
2.06 CORRIDOR DOME LIGHT
A. Provide LED dome lights. Responder 5 Model #352000
2.07 SPARE PARTS
A. Provide one of each type of station installed in the facility.
PART 3 - EXECUTION
3.01 SYSTEM RESPONSIBILITY
A. The manufacturer shall be responsible for testing the system as well as instructing the
user in the operation of the system. The manufacturer shall also instruct the Owner on
maintenance of the system.
B. EC shall obtain all rough-in requirements for devices from the vendor’s nurse call system
shop drawings.
3.02 INSTALLATION
A. All in room wiring associated with this system shall be installed in conduit.
B. Install in accordance with the manufacturers recommendations.
3.03 DEVICE MOUNTING HEIGHT
A. All devices shall be mounted at the following heights unless noted otherwise on the
system drawings, room elevation drawings, or specified within:
1. Patient Stations .......................................................................................... 48" AFF.
2. Duty Stations .............................................................................................. 48" AFF.
3. Push-For-Help Stations .............................................................................. 48" AFF.
4. Pull Stations ............................................................................................... 48" AFF.
5. Staff Register .................................................... As shown on the plans or 48" AFF.
B. Dome Lights ........................................................................ Ceiling mounted or at 7'6" AFF.
1. Mount all shower emergency stations at five feet and extend the pull cord to

42204.004 27 52 23-4 Audio Visual Nurse Call
within 4 inches of the bottom of the shower.
3.04 FIELD QUALITY CONTROL
A. All systems shall test free from grounds, shorts and open circuits.
B. The manufacturers trained service technician shall perform a complete functional test of
each system.
C. Provide signed documentation certifying the system has been tested and is completely
functional.
3.05 PRODUCT DELIVERY STORAGE AND HANDLING
A. Receive equipment at the jobsite and verify applicable components and quantities
delivered per invoice.
B. Handle equipment to prevent internal component damage, breakage, denting or scoring
of enclosures and finishes.
C. Do not install damaged equipment.
D. Store equipment in a clean, dry space and protect from dirt, fumes, water, and physical
damage.
E. Protect work from damage by other trades.
3.06 SUPERVISION
A. Only factory certified installers should install, service, and maintain the specified network
system.
B. Manufacturer shall have the equipment manufacturer’s engineer or their designated agent
inspect the installation and operation of this network to determine that the network
complies with all standards listed in Par. 1.02.
3.07 TRAINING OF PERSONNEL
A. Nursing staff of the hospital as well as maintenance staff shall be thoroughly instructed in
the use of the System by authorized distributor personnel. Such service shall be provided
in conjunction with the Nurse call equipment.
B. The Nurse Call supplier shall provide instructions to the staff by means of an actual
instructional system which shall be set up in the conference room or auditorium and allow
hands on experience by the staff without disrupting the staff on duty. The instructional
system shall consist of a Nurse Console, patient stations, staff, duty and emergency
stations. The instructor shall demonstrate each function of the system with all lamps,
screens, and tones in operation. Maintenance instruction shall be performed in the same
manner as described above.
C. Training shall include a minimum of (2) three hours classes. One class shall be directed at
maintenance personnel and the other at system users.
3.08 WIRING
A. All wiring shall be Cat V cabling.
B. Contractor shall terminate all wiring with manufacturer approved connectors. The use of
wire nuts is prohibited.
C. All wiring shall be free from shorts and faults. Wiring shall be UL listed, NEC and NFPA
70, Article 25 approved.

42204.004 27 52 23-5 Audio Visual Nurse Call
D. Nurse patient communications network wiring shall not be run in the same conduit with
other systems (i.e. Class 1 AC power distribution, fire alarm, entertainment systems,
lighting controls, etc.)
E. Provide a partial conduit system consisting of a ¾ conduit from each wall-mounted device
to the television, and one main conduit from the patient station to the corridor.
3.09 ENVIRONMENTAL PROTECTION
A. Make certain that all network hub control equipment is accessible for service. Contractor
shall notify specifying authority if designated equipment closet does not meet
manufacturer’s requirements for heat, radiation or static electricity.
3.10 PROTECTION OF NETWORK DEVICES
A. Contractor shall protect network devices during unpacking and installation by wearing
manufacturer approved ESD wrist straps tied to chassis ground. The wrist strap shall
meet OSHA requirements for prevention of electrical shock, should technician come in
contact with high voltage.
3.11 CLEANING AND PATCHING
A. It shall be the responsibility of the contractor to keep their work area clear of debris and
daily clean area at completion of work.
B. It shall be the responsibility of the contractor to patch and paint any wall or surface that
has been disturbed by the execution of this work.
C. Clean cabinets and equipment of dirt and debris prior to turning over to the Owner.
3.12 DRAWINGS
A. Provide as built drawings of all installed network components and associated wiring on
building plans. Final payment for work will not be authorized unless these drawings are
supplied.
END OF SECTION
42204.004
28 13 00-1 Electronic Access Control
SECTION 28 13 00
ELECTRONIC ACCESS CONTROL
PART 1 - GENERAL
1.1 SECTION INCLUDES
A. Readers.
B. Request To Exit Devices.
C. Magnetic Alarm Contacts.
1.2 RELATED WORK
A. Section 26 05 00 – General Electrical Provisions.
B. Section 26 05 33 – Raceways and Boxes for Electrical Systems
C. Section 26 05 13 - Wire and Cable.
D. Section 28 31 00 – Multiplexed Addressable Fire Alarm System
1.3 QUALITY ASSURANCE
A. Manufacturer: The manufacturer shall have a minimum of five (5) years documented experience. The
software developer shall be at the minimum, a Microsoft Gold Certified Integrator and Partner for those
systems that reside in a Microsoft environment.
B. Installer: The installing dealer must be a factory-authorized service and support company specializing in
the selected manufacturer’s product, with demonstrated prior experience with the selected manufacturer’s
system installation and programming. The Installer shall retain a Microsoft MCSE or equivalent technician
for the purposes of server deployment, software configuration and system integration for those systems that
reside in a Microsoft environment.
C. Servicing Contractor: The manufacturer of the system must have local service representatives within 60
miles of the project site. The Servicing Contractor shall carry and retain a complete stock of all parts used
in this project.
1.4 REFERENCES
A. NFPA 70 - National Electrical Code.
B. UL 294 - Standard for Access Control Systems.
1.5 SUBMITTALS
A. Submit shop drawings and product data under provisions of Section 26 05 00.
B. Product Data Submittal: Provide manufacturer’s technical product specification sheet for each individual
component type. Submitted data shall show the following:
1. Compliance with each requirement of these documents. The submittal shall acknowledge each
requirement of this section, item-by-item.
2. All component options and accessories specific to this project.
3. Wiring requirements.
1.6 SYSTEM DESCRIPTION
A. This specification section describes the furnishing, installation, commissioning and programming of an
extension to the electronic access control system.
B. B. Performance Statement: This specification section and the accompanying access control-specific design
documents are performance based, describing the minimum material quality, required features, and
operational requirements of the system. These documents do not convey every wire that must be installed
and every equipment connection that must be made. Based on the equipment constraints described and the
performance required of the system, as presented in these documents, the vendor and the Contractor are
solely responsible for determining all wiring, programming and miscellaneous equipment required. The
Contractor shall be responsible for determining quantities of materials required for a complete and
42204.004
28 13 00-2 Electronic Access Control
operational system. Floor plan drawings and schedules have been developed to aid the Contractor in
determining device quantities and installation locations, but where discrepancies between floor plans and
schedules arise, the greater number shall govern.
C. Basic System Description: The security management system (SMS) shall provide an integrated hardware
and software solution for access control and additional modules as described herein.
1.7 WARRANTY
A. Unless otherwise noted, provide warranty for one (1) year after Date of Substantial Completion for all
materials and labor.
B. Operation: Upon the performance of any scheduled adjustments or repairs, Contractor shall verify
operation of the SMS.
C. Emergency Service: The Owner will initiate service calls when the SMS is not functioning properly.
Qualified personnel shall be available to provide service within the distance defined above. The Owner
shall be furnished with telephone number(s) where service personnel can be reached 24/7/365. Service
personnel shall be at site within 24 hours after receiving a request for service.
D. Records and Logs: The Contractor shall keep records and logs of each task completed under warranty. The
log shall contain all initial settings at substantial completion. Complete logs shall be kept and shall be
available for review on site, demonstrating that planned and systematic adjustments and repairs have been
accomplished for the SMS.
E. Work Requests: The Contractor shall separately record each service call request on a service request form.
The form shall include the model and serial number identifying the component involved, its location, date
and time the call was received, specific nature of trouble, names of service personnel assigned to the task,
instructions describing what has to be done, the amount and nature of the materials used, the time and date
work started, and the time and date of completion. The Contractor shall deliver a record of the work
performed within five (5) days after work is accomplished.
F. System Modifications: The Contractor shall make any recommendations for system modification in writing
to the Owner. No system modifications shall be made without prior approval of the Owner. Any
modifications made to the system shall be incorporated into the operations and maintenance manuals, and
other documentation affected. To the fullest extent possible, the Owner shall be provided with electronic
restorable versions of all configurations prior to the modifications being made.
G. H. Software: The Contractor shall provide all software updates during the period of the warranty and verify
operation of the system upon installation. These updates shall be accomplished in a timely manner, fully
coordinated with SMS operators, shall include training for the new changes/features, and shall be
incorporated into the operations and maintenance manuals, and software documentation.
H. Refer to the individual product sections for further warranty requirements of individual system
components.
PART 2 - PRODUCTS
2.1 ELECTRONIC ACCESS CONTROL SYSTEM MANUFACTURERS
A. S2 Security
B. Johnson Controls
2.2 READERS
A. Contactless smart readers: Operable at 13.56MHz with combination 125 kHz Proximity.
1. Manufacturer and model number:
a. HID – RP40
2. ISO 15693, 14443A (CSN) and 14443B compliant.
3. Contactless smart card readers shall output credential data in compliance with the SIA AC-01
Wiegand standard as follows:
a. Reads standard proximity format data from iClass cards and outputs data as
encoded.

42204.004
28 13 00-3 Electronic Access Control
b. Reads card serial number (CSN) of MIFARE cards with configurable outputs of
26-bit, 32-bit, 34-bit, 40-bit or 56-bit.
4. Data security between smart readers and cards shall use 64-bitauthentication keys. The reader and
cards shall require matching keys in order to function together. All RF transmission between the
reader and card shall be encrypted. Readers shall be provided with keys that are compatible with
iClass cards.
a. Readers with site specific custom keys shall be provided.
5. Provide with the following audio/visual indication:
a. Audio transducer to provide various tone sequences to indicate: access granted, access
denied, power up, and diagnostics.
b. High-intensity light bar to provide clear visual status (red/green/amber) that is visible
even in bright sunlight.
6. All readers shall perform an internal self-diagnostic procedure at power-up.
7. Provide tamper switch for notification to the system of reader tampering.
8. Readers shall employ compensation circuitry or other process that allows it to be mounted directly
to metal surfaces. The reader shall be immune to metallic distortion from keys, coins and other
metallic objects.
9. Operating Range: -30°F to 150°F.
10. Read range of 2”-3” standard.
11. Readers shall be constructed in a weatherproof Lexan or Polycarbonate housing suitable for indoor
or outdoor use.
12. Readers shall be provided with a lifetime warranty.
2.3 REQUEST TO EXIT DEVICES
A. Motion Sensors: Passive infrared type designed for hands-free operation.
1. Coverage Pattern: Provide adjustable coverage pattern using masking kit. Sensor shall have
adjustable aiming of 14 degrees vertically.
2. Provide a walk test/activation LED indicator.
3. Relay latch time adjustable to 60 seconds. Provide two (2) Form C contacts rated 1 amp at 30
VDC for resistive loads.
4. Sensors shall be RFI immune in the 26-900 MHz range.
B. Pushbutton: Momentary contact input to access controller to shunt door contacts.
1. Mounting: Button shall be provided in a brushed stainless steel plate mounted in the mullion of the
door frame in a single gang junction box in the wall adjacent to the door.
2. Indication: Button shall be illuminated and marked with “Exit” or “Push to Exit” on the button
face.
3. 3. Ratings: Momentary SPDT contact rated 4 amps minimum.
C. REX devices that are part of the electrified hardware will be provided by others. This Contractor shall
completely wire (power and control) hardware to the access control system.
2.4 MAGNETIC ALARM CONTACTS
A. Contacts shall be single-pole, double-throw (SPDT) suitable for use in a line supervision circuit. Gap length
shall be 1" on the latch side.
B. Provide magnetic alarm contacts at each door (recessed in the door header) where shown on the plans.
Contacts shall provide a signal to the controller when the contact status changes.
C. The contacts shall have the capability of being shunted by a request-to-exit device. When the SMS system
grants access at a controlled point, the system shall shunt the door alarm input for that point.
PART 3 - EXECUTION
3.1 INSTALLATION

42204.004
28 13 00-4 Electronic Access Control
A. Comply with the manufacturer’s instructions and recommendations for installation of all products.
B. Provide all system wiring between all components as directed by the manufacturer.
C. Mount all readers where shown on plans in accordance with Americans with Disabilities Act (ADA)
requirements.
D. Locate all request to exit motion detectors directly above the door frame, centered on the door opening.
Adjust sensitivity to permit operation on motion of persons within 2'-0" of door. Avoid false activation by
persons passing by where possible.
E. Provide wiring to the request-to-exit devices located in the electrified door hardware.
F. Install, terminate and test all door alarm contacts. Contacts shall be recessed in the door header.
G. Install and configure all workstations, servers, badging workstations and other user interfaces.
H. All low voltage security shall be routed and supported separately from all other telecommunications
cabling.
I. Cabling shall be plenum rated when installed outside of conduit in plenum ceilings.
3.2 FIELD QUALITY CONTROL
A. Where these specifications require a product or assembly without the use of a brand or trade name, provide
a product that meets the requirements of the specifications, as supplied and warranted by the system
vendor. If the product or assembly is not available from the system vendor, provide product or assembly as
recommended by the system vendor.
B. Periodic observations will be performed during construction to verify compliance with the requirements of
the specifications. These services do not relieve the Contractor of responsibility for compliance with the
Contract Documents.
3.3 MANUFACTURER’S FIELD SERVICES
A. Installation shall be performed by a factory-trained and certified Contractor Installer.
B. The Installer shall provide a comprehensive, site-specific customer planning guide for the system. The
installer shall conduct a conference with the Owner prior to any installation to discuss the programming
options of the system and the planning guide. The result of this planning guide shall be the determination of
the system access policies for each point.
C. The Installer shall include labor for all planning and all programming activities required to implement the
Owner’s access policies for each system point. Any software programmable access policy, within the
bounds of the hardware specified, shall be included. It shall be the responsibility of the Contractor/Installer
to provide a complete, functional system as described by the design documents. These responsibilities
include:
1. Complete hardware setup, installation, wiring and software configuration of the system server, all
workstations and all peripheral hardware.
2. Complete programming of all operator software in accordance with the Owner’s access policies
determined by the planning guide conference.
3.4 SYSTEM ACCEPTANCE
A. The SMS Vendor shall submit for review a formal acceptance and system checkout program. The system
checkout procedures shall include all system components and software, including but not limited to all
system computers, field controllers, card reader devices, biometric readers and remote system interfaces.
The Contractor shall perform the tests and document all results under the supervision of the manufacturer’s
systems engineer.
B. All operational scenarios, as defined by the customer planning guide, shall be tested to simulate the actual
use of the system in the normal operating environment. The successful completion of these operational
scenarios shall be documented.
3.5 SYSTEM DOCUMENTATION
A. Complete documentation shall be provided for the system. The documentation shall describe:
1. All operational parameters of the system.

42204.004
28 13 00-5 Electronic Access Control
2. Complete documentation of programming and access policies.
3. All data sets.
4. Complete operating instructions for all hardware and software.
B. The following sections shall be provided in the system documentation:
1. System Administrator Manual: Provides an overview and a step-by-step guide and instructions
detailing all system administrator responsibilities and functions.
2. User Manual: A step-by-step guide and instructions detailing all system user functions.
3. Alarm Monitoring Manual: A step-by-step guide and instructions detailing all alarm monitoring
system functions and responsibilities.
4. Technical Maintenance Manual: A comprehensive document providing all maintenance actions,
system testing schedules, troubleshooting flowcharts, functional system layout, wiring diagrams,
block diagrams and schematic diagrams.
END OF SECTION 28 13 00

42204.004 28 31 00-1 Multiplexed Addressable Fire Alarm System
SECTION 28 31 00
MULTIPLEXED ADDRESSABLE FIRE ALARM SYSTEM
PART 1 - GENERAL
1.01 DESCRIPTION
A. Applicable requirements of Division 1 shall govern work in this section.
1.02 SCOPE
A. The existing fire alarm detection system will be utilized for this project.
B. The work covered by this section of the specifications includes the furnishing of
all labor, equipment, materials, and performing all operations in connection with
the installation of the multiplexed/intelligent Fire Alarm System as shown on the
drawings, and as hereinafter specified.
1.03 RELATED WORK AND REQUIREMENTS
A. Section 26 05 33 - Conduits
B. Section 26 05 19 - Low Voltage Wires, Cables and Connectors
1.04 SYSTEMS DESCRIPTION
A. The Fire Alarm System shall consist of all necessary hardware and software
equipment to perform or initiate functions as a Multiplexed Fire Alarm and
Detection System.
B. The Fire Alarm System, as installed within this facility, shall consist of a single
Fire Alarm Control Panel (FACP), and any specified required remote panels.
Each item of the Fire Alarm System shall be listed as a product of a single fire
alarm system manufacturer under the appropriate category by the Underwriters'
Laboratories, Inc. (UL), and shall bear the UL label, unless specified otherwise.
Notification Appliances may be products of a single, different manufacturer –
provided that the Primary Equipment Provider or Manufacturer provides written
documentation of compatibility, and agrees to assume any and all responsibility
for compatibility with the Control Equipment. The Control Equipment for all
Systems shall be listed under UL category UOJZ as a Single Control Unit. Each
piece of equipment shall contain the manufacturer's name. Each initiating device
shall be the product of a single manufacturer and be cross-listed with the fire
alarm panel.
C. The system shall use the latest intelligent and intelligent analog, addressable
technology currently available from the manufacturer. All new panels shall be
fully modular to allow for expansion of any required modules. Non-intelligent
addressable devices shall be unacceptable.
D. In order to clarify the intent of this specification, and in order to provide defined
equivalence between different technologies, which are used by different system
vendors, the following definitions shall be incorporated into this specification
section.

42204.004 28 31 00-2 Multiplexed Addressable Fire Alarm System
1. “Analog Addressable Sensor” technology – non-intelligent or semi-
intelligent sensors report analog values to the FACP. Where this
technology is employed, historical data and/or floating average values
associated with each sensor – such as the average, peak, and current
obscuration values, shall be maintained within the memory of the FACP.
Where analog addressable sensors are utilized, alarm conditions shall be
determined by the FACP, based upon readings reported by the various
sensors.
2. “Intelligent Addressable Smoke Detector” – intelligent detectors shall
contain processing and memory circuits within each detector unit. If
desired, the analog smoke obscuration value at any such detector can be
manually retrieved to the FACP for report or adjustment purposes.
Where intelligent addressable detectors are utilized, historical data and /
or floating average values associated with each sensor – such as the
average, peak, and current obscuration values, shall be maintained within
the memory of detector itself. Where intelligent addressable smoke
detectors are utilized, alarm conditions shall be determined locally, at the
detectors.
1.05 PERFORMANCE REQUIREMENTS
A. Comply with NFPA 72 and Chicago Fire Prevention Bureau
1.06 SYSTEM ALARM FUNCTIONS
A. Standby Mode.
1. Under normal condition the front panel shall display a, "SYSTEM IS
NORMAL", or similar message, the current time and date, and a GREEN
LED, which shall indicate that Primary AC Power is present.
2. When an abnormal condition is detected, the appropriate LED (Alarm,
Supervisory or Trouble) shall flash, and a corresponding unique audible
signal shall sound for each of the three possible abnormal conditions.
B. Trouble Sequence Mode
1. A Trouble status condition, originating from any of the following device
types, shall cause initiation of the Supervisory Status Condition Sequence
of Operation:
a. Disconnection, disarrangement, or Ground Fault of any
Supervised Fire Alarm Circuit.
b. Partial / Component Failures sensed via Fire Alarm On-Board
Diagnostics.
c. Loss of power used for shunt-trip actuation.
d. Failure of Primary Power Source.
e. Failure of any Remote Fire Alarm Power Supplies / NAC Booster
Panels.

42204.004 28 31 00-3 Multiplexed Addressable Fire Alarm System
f. Fire Pump Controller Trouble (where Fire Pumps are monitored
via Fire Alarm System).
g. Trouble status condition, originating from any other monitored
sub-system (kitchen hood suppression, sprinkler system shut off
valves, etc.).
2. When a Trouble status condition has been determined by the system, the
following responses shall be automatically initiated. The following events
are not required to occur in the stated order.
a. The Trouble status condition shall be both audibly and visually
indicated at the fire alarm control panel (FACP), and all
annunciators.
b. A programmed Trouble message shall appear on the LCD
displays, in a manner that is similar to the Alarm messages.
c. The Trouble status condition shall be automatically logged to the
FACP internal history log file, which shall reside within a non-
volatile memory.
d. The Trouble status condition shall be logged to the Fire Alarm
System Printer.
e. Each Trouble status condition shall continue to be indicated, until
acknowledged or cleared.
f. A “Trouble Reminder” feature shall cause re-sounding of the
Trouble indication at the FACP and at all Annunciators at least
once every 24 hours, until the condition causing the Trouble is
corrected and / or until the system is Reset.
C. Alarm sequence mode – non-smoke sensing initiation devices.
1. An Alarm status condition originating from any of the following device
types shall cause initiation of the Fire Alarm Sequence:
a. All manual pull stations.
b. All ceiling and wall mounted heat detectors, regardless of type.
c. Sprinkler system flow switches.
d. Sprinkler system pressure switches that are used as flow/release
indicators.
2. When a valid fire alarm condition has been determined by the system, the
following responses shall be automatically initiated. The following events
are not required to occur in the stated order.

42204.004 28 31 00-4 Multiplexed Addressable Fire Alarm System
a. The fire alarm status condition shall be both audibly and visually
indicated at the fire alarm control panel (FACP), and all
annunciators.
b. A programmed alarm message shall appear on the LCD displays.
This message shall be field programmable and consist of the
point description, the device address, the alarm type, and the
associated date and time.
c. All audible notification appliances shall activate, and emit an
ANSI S3.41 fire alarm evacuation, Temporal Code 3 pattern,
until silenced by the signal silence switch.
d. All visible notification appliances shall flash continuously until
the system is manually reset. All visible notification appliances
shall be synchronized.
e. Air handlers shall be shut down on general alarm via addressable
control module. All required dampers shall also be closed on
general alarm via addressable control module. The fire alarm
supplier shall provide all control modules at the HVAC
Temperature Control Panel.
f. All magnetically held open doors shall release on general alarm.
g. All electric security locks shall release on general alarm. The fire
alarm vendor shall be responsible for coordinating with the
security vendor to verify all locks are released. Lock release shall
be done at each lock power supply via addressable control
module.
h. The Alarm status condition shall be automatically logged to the
FACP internal history log file, which shall reside within a non-
volatile memory.
i. The Alarm status condition shall be logged to the Fire Alarm
System Printer.
D. Alarm sequence mode – smoke sensing initiation devices.
1. Alarm Verification. Except for duct mounted smoke detectors, the
activation of any system smoke detector shall initiate an Alarm
Verification operation whereby the panel shall reset the activated detector
and wait for a second alarm to occur. If, within one (1) minute after
resetting, a second alarm is reported from the same or any other smoke
detector, the system shall process the alarm as described for non-smoke
sensing initiation devices. If no second alarm occurs within one minute
the system shall resume normal operation. The Alarm Verification mode
shall operate only on smoke detector alarms. Alarms initiated by other
initiating devices shall be processed immediately. The control panel shall

42204.004 28 31 00-5 Multiplexed Addressable Fire Alarm System
have the capability to display the number of times a device has gone into
a verification mode.
2. Activation of any duct detector shall immediately activate the alarm
sequence of events as described for non-smoke sensing initiation devices.
B. Alarm sequence mode – device specific operations.
1. Elevator Recall. Locate the smoke detectors as shown on the plans.
Control modules shall be used for elevator recall, four wire bases and
relays will not be accepted. One control module shall be provided for
primary floor recall, one for alternate floor recall, and one for activating a
separate distinct visual alarm to notify the fire department of an unsafe
elevator condition (upon activation of the smoke detector in the elevator
machine room or shaft). Elevator recall operation shall meet all NFPA 72
requirements.
2. Elevator Shunt Trip. Locate heat detectors as shown on the plans; within
two feet of the sprinkler head (detectors shall have a lower temperature
rating and lower rate-of-rise than the sprinkler head). A control module
shall be used to activate the elevator shunt trip, four wire detectors and
relays will not be accepted. This control module shall be located within
three feet of the shunt trip device. A monitor module shall be provided to
monitor the power to the shunt trip breaker circuit.
C. System alarm acknowledgement function.
1. The system shall have an alarm list key to allow the operator to display all
alarms, troubles, and supervisory service conditions with the time of
occurrence. This shall allow for the determination of not only the most
recent alarm but may also allow tracing the path of the fire.
2. Pressing the appropriate acknowledge button shall globally acknowledge
every point in alarm.
3. As points have been acknowledged, the associated control panel and
annunciator LED's shall cease flashing and shall glow steady. After all
alarms have been acknowledged the panel audible signal shall be
silenced. The total number of alarms, supervisory, and trouble conditions
shall be displayed along with a prompt to review each list chronologically.
The end of the list shall be indicated by the message "END OF LIST".
4. Provision shall be made for passcode protection of: Acknowledge Alarm
Silence, System Reset, and Manual Control functions. Four (4) access
levels shall be provided. Passcodes shall consist of up to ten (10) digits.
Changes to passcodes shall only be made by authorized personnel.
D. System Reset
1. The "System Reset" button shall be used to return the system to its normal
state after an alarm condition has been remedied. The LCD display shall
step the user through the reset process with simple English language
messages.

42204.004 28 31 00-6 Multiplexed Addressable Fire Alarm System
2. Visual signals shall cease operation upon System Reset.
3. System reset function shall be ineffective until all system initiation
device(s) have been reset to their normal, standby condition. Should an
alarm condition continue to exist, the system shall remain in an alarm
state and system control relays shall not reset. The display shall indicate
the total number of alarms and troubles present, along with a prompt to
review the points.
4. When the Alarm Silence Inhibit function is active, the message,
"SYSTEM RESET INHIBITED", shall be displayed.
1.02 SYSTEM SERVICE FUNCTIONS
A. Walktest. The system shall have multiple levels of passcode protected walktest
groups, such that only a portion of the system need be disabled during testing.
When the walktest mode is activated the control unit shall perform the following
functions:
1. The DACT and suppression release circuits shall be bypassed.
2. Control relay functions shall be bypassed.
3. The control unit shall indicate a trouble condition.
4. The alarm activation of any initiation device in the testing group shall
cause the audible notification appliances to sound a code to identify the
device.
5. The unit shall automatically reset itself after signaling is complete.
6. Any momentary opening of an initiating or notification appliance circuit
wiring shall cause the audible signals to sound for 4 seconds indicating
the trouble condition.
B. System Override Functions. Bypass Switches shall be configured such that
whenever any bypass function is active, a Trouble status condition shall be
reported by the system, per the Trouble Sequence. The trouble message shall
indicate the active function(s). Bypass LEDs shall be configured such that LEDs
corresponding to the active function(s) shall illuminate, and shall remain lit until
the associated bypass function is de-activated (until the system is restored to
normal operating status). A General Trouble Condition shall also be reported to
any required Supervising Station where any “Bypass” function is active. This
Trouble condition shall continue to be reported, as long as any Trouble status
condition continues to exist. At each FACP, Switches and LEDs shall be
provided for the following functions:
1. Central Monitoring Bypass. When this bypass function is active, the
reporting of various status conditions to the Supervising Station (Central
Station Monitoring Service, via DACT) shall be disabled. (Actuation of
the relay outputs, Control Modules, or Pseudo-Points, which are tied to
the DACT, shall be prevented.) This function is primarily intended to
reduce nuisance activity at the Supervising Station, while testing the
system. (It shall be acceptable to use standard “city circuit” features of

42204.004 28 31 00-7 Multiplexed Addressable Fire Alarm System
systems, and / or keypads built into separate DACT units, provided that
they will operate as required and associated switches are properly labeled)
2. Elevator Interface bypass. When this bypass function is active, the
actuation of the Control Modules or Supervised Relays, which interface to
the Elevator Controls and to the Shunt-Trip Circuit Breaker(s) shall be
prevented. This function is primarily intended to allow testing of the
Smoke and Heat Detectors / Sensors, which are associated with the
Elevator, without interrupting normal operation of the elevators.
3. HVAC / Fan Interface bypass. When this bypass function is active, the
actuation of the Control Modules or Supervised Relays, which interface to
the AHU / Fan starters / Temperature Controls and to any Smoke
Dampers shall be prevented. This function is primarily intended to allow
testing of the Fire Alarm System – particularly the Duct Smoke Detectors,
which are associated with HVAC functions, without interrupting normal
operation of the HVAC systems.
4. Door Holder Release bypass. When this bypass function is active, the
actuation of the Control Modules or Relays, which cause release of the
Door Holders, shall be prevented. This function is primarily intended to
allow testing of the Fire Alarm System, without causing door holders to
be released.
C. Access Levels.
1. The FACP shall be capable of providing a means of securing access to
critical operator functions. This security shall be a multi-tiered method
such as to allow multiple groups of users access to the system, while
restricting user access to features for which they are trained.
2. The following Operator Function Access Restrictions shall be adhered to
as closely as possible. Where system limitations do not allow for the
restrictions to be configured exactly as listed, alternate methods will be
considered, and shall be brought to the attention of the Engineer and
owner.
3. Basic Operator Functions. The following Basic Operator functions are
essential to typical event processing. These functions shall simply require
a key – either to access the controls, which are located behind a locked
door.
a. Acknowledge – Acknowledge ALARM, TROUBLE, and
SUPERVISORY conditions, and to view the lists / logs
associated with these functions.
b. Signal Silence – Silence the audible signals.
c. System Reset – Reset the Fire Alarm System.
4. High Security Functions. Access to the highest level of system operation
shall require proper password entry before access to these functions are

42204.004 28 31 00-8 Multiplexed Addressable Fire Alarm System
allowed. Areas of system operation which require this level of protection
include:
a. System Programming – Making any changes to system operation
programming.
b. Passcode Protection – Changing a user’s password or access
level.
5. Other Functions. Access to the following functions shall be limited.
Access levels for these functions shall be between Basic Operator
Functions and High Security Functions.
a. Enable / Disable Points
b. Perform Bypass / Override Functions / Features
c. Generate Hard-Copy, Printed Reports
d. Add / Delete / Change Pass codes, and associated links to system
features
e. Set / Change System Clock
f. Set / Change Sensitivity of Detectors
g. Clear History Logs
h. Walktest
D. Historical Logging. The system shall be capable of logging and storing the last 600 events (alarm & trouble) in a history log. These events shall be stored in a battery protected random access memory (non-volatile memory). Each recorded event shall include the time and date of that event's occurrence. Historical logs shall be configured to utilize “Stack Management”, such that once such memory is filled, the oldest information shall be automatically discarded, maximizing the amount of relatively current information stored and available for retrieval.
1. The following historical alarm log events shall be stored:
2. Alarms
3. Alarm Acknowledgment
4. Alarm Silence
5. System Reset
6. Alarm Historical log cleared
7. The following historical trouble log events shall be stored:
8. Trouble conditions and Return to Normal
9. Supervisory conditions and Return to Normal

42204.004 28 31 00-9 Multiplexed Addressable Fire Alarm System
10. Trouble acknowledgment
11. Supervisory acknowledgment
12. Automatic Verification tallies
13. Walk Test results
14. Trouble Historical log cleared
1.03 QUALITY ASSURANCE
A. Applicable sections of the following codes and standards shall be considered to be
an integral part of these specifications. All vendors and installers are required to
meet all applicable sections of these codes.
1. NFPA-70 National Electrical Code (NEC)
2. NFPA-72 National Fire Alarm Code
3. NFPA-90A Standard for the Installation of Air Conditioning and
Ventilating Systems.
4. NFPA-101 Code for Safety to Life
5. Underwriters' Laboratories, Inc. (UL)
6. Chicago Building Code
7. Illinois Department of Public Health (IDPH)
1.04 MANUFACTURER’S SERVICES
A. The system manufacturer shall provide an authorized representative to supervise
the installation. Supervision shall be provided by a trained service technician from
the manufacturer of the fire alarm equipment. The Technician shall possess a
minimum of NICET (National Institute for Certification in Engineering
Technology) Level 3 certification. The technician's name shall appear on
equipment submittals and a letter of certification from the fire alarm manufacturer
shall be made available to the engineer, upon request. The manufacturer's service
technician shall be responsible for the following items:
1. Pre-installation visit to the job site to review equipment submittals and
verify method by which the system should be wired.
2. During job progress, make periodic job site visits to verify installation and
wiring of system.
3. Upon completion of wiring, final connections shall be made under the
supervision of this technician.
4. Final checkout and certification of the system shall be completed.

42204.004 28 31 00-10 Multiplexed Addressable Fire Alarm System
5. At the time of final checkout, technician shall give operational
instructions to the Owner and/or his representative on the system.
B. All job site visits shall be dated and documented in writing and signed by the
Electrical Contractor. Any discrepancy shall be noted on this document and a
copy kept in the system job folder shall be available to the Project Engineer any
time during the project.
1.05 SHOP DRAWING SUBMITTALS
A. Shop drawing submittal shall include the following as minimum.
1. Shop drawings shall be prepared by persons with the following
qualifications:
a. Trained and certified by manufacturer in fire alarm system
design.
b. Fire alarm certified by NICET, minimum Level III.
2. Qualification Data: For Installer.
3. Cover sheet including the submittal date, specification section, contractor
name, fire alarm vendor name, and the project name.
4. Equipment list, including quantities, manufacturer, manufacturer part
number, and equipment description. Spare parts shall be listed separately
and labeled as spares. Vendors utilizing equipment from other
manufacturers shall provide both the vendor part number and the
manufacturer’s part number as it would appear on the packing lists. Both
part numbers shall be listed on the individual data sheets as well. A
separate equipment list shall be provided for each specification section.
5. Manufacturer’s Data Sheets for each piece of equipment provided. Data
sheets shall be bound in the order they occur in the equipment list. If an
item occurs more than once in the equipment list, only one data sheet is
needed. All data sheets shall be clearly marked, noting which item or
items on that sheet are being provided.
6. Sequence of Operation shall be provided giving a complete description of
all functions of the system. The sequence of operation shall be in a
narrative form or a matrix form. The System Operation section, of this
specification shall be acceptable providing any changes be highlighted on
the original copy and the new operation inserted. If there are no changes
to the original system operation then each paragraph shall be labeled “No
Change”.
7. Addressable Device List showing device address, device type, and room
number / name.

42204.004 28 31 00-11 Multiplexed Addressable Fire Alarm System
8. Floor Plan Drawing shall be provided at the time of submittal and shall be
job specific. All floor plan drawings shall show panel locations, device
locations, device addresses, and wire types.
9. Riser diagrams shall be provided to illustrate fire alarm circuits. Each
riser diagram shall be job specific and show the point of origin for each
circuit, areas served by each circuit, circuit type and wire type.
10. Standby battery calculations showing current draw for every device and
module during standby, alarm, and trouble conditions. Battery
calculations shall be provided for each fire alarm and NAC panel.
Maximum load calculations shall be acceptable. The required spare
battery capacity shall be indicated.
11. Voltage Drop Calculations for each signal circuit. All voltage drops shall
be calculated using the voltage supplied by the batteries after a period of
24 hours of standby. The listed minimum operating voltage for each
signaling device shall be provided.
B. A completed version of the Addressable Device List, as stated above, shall be
provided to the owner, for review, a minimum of 20 (twenty) days prior to
acceptance testing. This version shall include all device types, addresses, and
proposed custom labels, as they are to be programmed into the system.
1.06 SUBMITTALS TO AUTHORITIES HAVING JURISTDICTION
A. In addition to distribution requirements for submittals specified in Division 1
Section “Submittals”, make and identical submittal to authorities having
jurisdiction. To facilitate review, include copies of annotated Contract Drawings
as needed to depict component locations. Resubmit if required to make
clarifications or revisions to obtain approval. On receipt of comments from
authorities having jurisdiction, submit them to Architect for review.
1.07 AS BUILT DRAWING SUBMITTAL
A. Approval and Acceptance:
1. Provide the “Record of Completion” form according to NFPA 72 to
Owner, Architect, and authorities having jurisdiction.
B. Record of Completion Documents:
1. Provide the “Permanent Records” according to NFPA 72 to Owner,
Architect, and authorities having jurisdiction. Format of the written
sequence of operations shall be the optional input/output matrix.
C. As-Built Drawings shall be provided to the owner within 25 days of final
acceptance. Drawings shall consist of:
1. Full, final floor plan layout showing all devices, addresses, wire types,
circuiting and conduit runs.
2. Panel module drawings showing all wiring terminations inside the fire
alarm panels.

42204.004 28 31 00-12 Multiplexed Addressable Fire Alarm System
3. Final version of the Addressable Device List, as programmed.
4. A full set of Operation and Maintenance manuals, to include full
operation and maintenance information for all equipment provided.
5. Field quality-control test reports.
1.08 PRODUCT DELIVERY, STORAGE AND HANDLING
A. The contractors and suppliers involved in the installation and checkout of the fire
alarm system shall, as a minimum, observe the following material handling
precautions:
1. Receive equipment at job site; verify applicable components and quantity
delivered.
2. Handle equipment to prevent internal components' damage and breakage,
as well as denting and scoring of enclosure finish.
3. Do not install damaged equipment.
4. Store equipment in a clean, dry space and protect from dirt, fumes, water,
construction debris and physical damage.
5. After installation, protect equipment from damage by work of other
trades.
PART 2 - PRODUCTS
3.01 GENERAL
A. Being listed as an acceptable Manufacturer in no way relieves obligation to
provide all equipment and features in accordance with these specifications.
3.02 ACCEPTABLE MANUFACTURERS
A. Honeywell Notifier
3.03 NAC BOOSTER PANEL
A. A NAC Booster Panel as defined within this specification is a remote power
supply and notification appliance circuit panel. Where they are used, NAC
booster panels shall be individually supervised. Interconnecting panels in a
manner which does not allow individual panel troubles to be identified shall not
be accepted, unless multiple units are located in the same room.
B. Where NAC booster panels are not located adjacent to the FACP, the location of
such panels shall be carefully coordinated by the EC and shall be submitted to the
engineer for approval. The EC shall be responsible for providing dedicated power
for each panel, complete with circuit breaker. The EC shall also be responsible
for adding complete smoke or heat detector coverage to each room with a NAC
panel.

42204.004 28 31 00-13 Multiplexed Addressable Fire Alarm System
3.04 INTELLIGENT ADDRESSABLE DETECTORS
A. Detectors shall utilize addressable, analog communication. Detectors shall have a
flashing status indicating LED for visual supervision. When the detector is
actuated, the flashing LED will latch on steady and at full brilliance.
B. Detectors shall only transmit analog information to the fire alarm panel; the panel
shall be responsible for determining the alarm condition.
C. Detectors shall be furnished with a means of remote testing without the use of
smoke or heat (magnetic contact point). This test will send an alarm condition to
the fire alarm panel.
D. The detector head or base shall provide a binary address for each addressable
loop. The combination of the addressable loop number and device address shall
uniquely identify each device in the system. System that use jumpers or rely on
electrical positioning will not be accepted.
3.05 ADDRESSABLE BASES FOR AUTOMATIC DETECTORS
A. Bases shall be common, twist-lock mounts for all photoelectric, ionization, and
thermal detectors. The connection between the head and the base shall be
completed via bifurcated, self-wiping contacts. All wiring shall be terminated at
the detector base. Detector heads shall be interchangeable without disconnecting
any wiring.
B. Bases must include a method of locking the detector head to the base. The
locking feature shall be removable when not required.
C. Bases shall work such that the removal of any head shall send a trouble signal to
the fire alarm control panel.
D. Detector bases shall be sealed to prevent rear airflow.
3.06 PHOTOELECTRIC SMOKE HEAD
A. Smoke detector heads shall be of the photoelectric type which utilizes the light
scattering principal to measure smoke density.
B. All smoke detectors shall work in an alarm verification mode.
3.07 ADDRESSABLE HEAT DETECTORS
A. Automatic heat detectors shall be programmable to be a combination rate-of-rise
and fixed-temperature type or straight fixed temperature (as indicated on the
plans). Detectors shall be capable of being programmed to sense temperatures
from 32 – 158 degrees. The rate-of-rise function shall be adjustable from 15 to 20
degrees per minute.
3.08 ADDRESSABLE DUCT MOUNTED SMOKE DETECTORS
A. Duct smoke detectors shall be of the photoelectric type. Duct tubes shall be sized
for each location. The smoke detector heads must be removable from the housing
itself. Removal of the detector head shall indicate a trouble at the main panel.

42204.004 28 31 00-14 Multiplexed Addressable Fire Alarm System
The duct detector housing shall have a clear cover to allow the owner to easily
verify dirt build up.
B. When duct detectors are mounted above a drop ceiling or in a concealed location,
provide a remote test switch/indicators for each detector. Locate these devices in
a logical location.
3.09 MANUAL PULLSTATIONS – DOUBLE ACTION
A. Manual stations shall be double action and shall be constructed of high impact,
red lexan with raised white lettering and a smooth high gloss finish. Stations shall
be furnished with a hinged cover with key lock. Stations, which utilize
screwdrivers, allen wrenches, or other commonly available tools will not be
accepted. When the station is operated, the handle shall lock in a protruding
manner to facilitate quick visual identification of the activated station.
3.10 ADDRESSABLE MODULES
A. Addressable modules shall be used where needed for monitoring of non-
addressable initiation devices or control / interface to other systems or equipment.
B. Where versions or accessory mounting plates are available, which provide status
indicator LEDs, such versions or accessories shall be provided.
C. Addressable Modules shall be labeled in a manner, which indicates the associated
equipment being monitored and/ or the status being monitored, wherever such
function is not obvious due to the placement of the device, or to visible
connection to the monitored device.
1. Monitor Modules shall be provided as needed, for monitoring of non-
addressable equipment. The type of Monitor Module provided shall be
appropriate for the type of monitored equipment. Monitor Modules shall
essentially provide an interface between an IDC and the SLC, such that
the status of the IDC is communicated as an equivalent addressable point.
In most cases, both module power and communications with the FACP
shall be obtained via the SLC. (Where Monitor Modules are used to
support 4-wire type non-addressable detectors or 2-wire type non-
addressable, electronic detectors, separate 24 VDC connections shall be
acceptable).
a. Mini-Monitor Modules (Mini-MMs) shall be miniature devices,
and shall be used primarily for monitoring of single, non-
addressable, N.O. contact type devices or points – such as
Sprinkler System Flow and Tamper Switches. Mini-MMs shall
receive their operating power directly from the SLC, to which
they are connected. Connections from each Mini-MM to the
contacts which they are used to monitor shall be supervised.
b. Where Mini-MMs are installed within the back box, immediately
behind associated devices – the outside of the device shall be
labeled with “MM” and the address of the associated Mini-MM.
c. Where Mini-MMs are installed inside electrical junction boxes –
the j-box covers shall be painted RED, and shall be clearly

42204.004 28 31 00-15 Multiplexed Addressable Fire Alarm System
marked with “MM” and the address(s) of the Mini-MM(s)
contained within.
2. Control modules will be addressable and individually controllable from
the FACP. This type of module will provide double pole double throw
relay switching for 2 A @ 28 VDC resistive, power limited and at 1/2 A
@ 120 VAC resistive, non-power limited. It shall contain easily
replaceable 2 amp fuses, one on each common leg of the relay. The
system shall be capable of energizing 100% of the relays connected to the
signaling line circuit. Where loads exceed the contact rating of the
module, a relay should be provided with adequate contact ratings.
3. Isolator Modules (FIM) shall be provided for isolation of Signaling Line
Sub-Circuits or isolated branches, as indicated within the Scope portion
of this specification. The SLC segment protected by each FIM shall be
separated from the SLC in a manner such that a single short-circuit
condition may only affect the Addressable Field Devices / Detectors,
which are served by the isolated SLC segment.
4. Several types of FIM units shall be acceptable, as indicated within the
“Products - FACP – Signaling Line Circuits” portion of this specification.
(Also refer to Bases for Intelligent Addressable Detectors.)
5. Each FIM shall automatically re-connect the isolated section of the SLC
upon correction of the fault conditions. The FIM shall not require any
address setting, and its operations shall be totally automatic. It shall not
be necessary to replace or reset an FIM after its normal operation.
6. Each FIM shall include an LED, which shall flash under normal operation
and shall illuminate steady, or shall change color to indicate a short
circuit.
7. FIMs shall be located as close as practical to the point where the isolated
SLC sub-circuit branches off of the main SLC, and shall also be located at
an accessible location. Their locations shall be clearly indicated both on
the floor plan drawing, on the system riser drawing, and on permanently-
affixed labeling, which shall be attached to the device itself.
3.11 NOTIFICATION APPLIANCES
A. The use of Notification Appliances, where Audible and Visible functions are
served via a single pair of conductors, shall be acceptable, provided that all of the
following conditions are met:
1. The Audible Signal Tone shall be synchronized, as specified within the
“Audible Notification Appliance” requirements.
2. The Visible flashing shall be synchronized, as specified within the
“Visible Notification Appliance” requirements.

42204.004 28 31 00-16 Multiplexed Addressable Fire Alarm System
3. Audible and Visible functions shall be independently controllable, such
that when “Signal Silence” is actuated, production of the Audible Signal
Tone shall cease, while the strobes shall continue to flash until reset.
B. Where all of the conditions above cannot be met, separate Audible and Visible
NACs shall be provided.
C. Audible Notification Appliances, and the audible portion of combination Audible
/ Visible Notification Appliances shall have the following characteristics.
1. Audible notification appliances shall consist of electronic or electro-
mechanical speaker-type units and support synchronized operation, which
shall be independent of Visible Notification, such that the Audible Signal
Tone produced shall consist of a 3-pulse temporal pattern, compliant with
ANSI S3.41, as described in NFPA-72 A.11.3.4.
2. Temporal Pattern sounds, which are generated individually, by each
Audible Notification Appliance and are not synchronized, shall be
unacceptable.
3. Audible Notification Appliances, and the Audible portion of combination
Audible / Visible Notification Appliances shall all produce a minimum
audible output of 90 dBA at 10-feet, as tested per UL Standard 464.
4. Unless specified otherwise, all Audible Notification Appliances provided
shall be designed for either flush or semi-flush mounting.
D. Visible notification appliances.
1. All Visible Notification Appliances, and the Visible portion of Audible /
Visual combination units, shall consist of Xenon Strobe units. All
Notification Appliances shall be listed by UL for Fire Alarm usage.
2. Each strobe shall be provided with the minimum UL 1971 Listed
intensity, as indicated on the drawings. Units used in corridors and small
spaces (identified as minimum of 15 Candela on the drawings) shall
comply with the 75 Candela minimum output requirements of ADAAG /
UL-1638. (These units are generally referred to as “15/75” candela
strobe-lens patterns – 15 Cd per UL-1971 / 75 Cd per UL-1638.)
3. Unless specified otherwise, all strobes shall be designed for synchronized
flash operation at one flash per second (1 Hz) minimum over the device’s
listed input voltage range. Strobes shall be synchronized such that all
strobes units within the building shall flash simultaneously (As a
minimum, all devices on each floor shall flash simultaneously, with flash
timing within the limits established by current UL standards.).
E. Combination Audible / Visible Notification Appliances shall comply with both
the audible and visible notification requirements, as specified above. Mounting
heights of these devices shall be determined, based upon the location of the
Visible (Strobe) portion of the device.

42204.004 28 31 00-17 Multiplexed Addressable Fire Alarm System
3.12 DOOR HOLDERS
A. Door holders shall be provided by the fire alarm vendor.
PART 3 - EXECUTION
3.01 INSTALLATION
A. The Contractor shall provide and install the system in accordance with the plans
and specifications, all national and state applicable codes, NEC wiring criteria,
and the manufacturer's recommendations. All communications wiring shall be
twisted and shielded cables.
B. All wiring shall be in a conduit system separate from other building wiring. All
junction boxes shall be sprayed red and labeled "Fire Alarm". Wiring color code
shall be maintained throughout the scope of the work.
C. Wiring shall be identified at terminal and junction locations, in a manner that will
prevent unintentional interference with the signaling circuit during testing and
servicing.
D. Installation of equipment and devices that pertain to other work in the Contract
shall be closely coordinated with the appropriate subcontractors.
E. The manufacturer's authorized representative shall provide all on-site software
modifications and supervision of installation of the complete Fire Alarm System
installation, perform a complete functional test of the system, and submit a written
report to the Contractor attesting to the proper operation of the completed system.
F. Typically control and monitor modules are represented by symbols on the
drawings. Required signal addressable modules are not indicated by symbol on
the drawings.
G. It is assumed that any 120-volt power required for system operation will be
derived at the system control panel. If the Contractor, at his option, chooses to use
distributed power supplies, the cost for any additional circuit breakers and branch
wiring associated with these, shall be included in his bid. Distributed power
supplies shall derive their 120VAC from the same branch circuit as the main fire
alarm control panel. Spare breakers have not been provided for this eventuality.
The contractor shall be responsible for providing and installing a smoke detector
in any room with a remote power supply.
H. All mechanical spaces shall be furnished with a minimum of 90dBA throughout
the space.
I. DACT / associated phone lines. Unless phone lines are specifically indicated for
this purpose within the telecom drawings, the EC shall coordinate installation of
two (2) telephone lines to either the FACP (if an internal DACT is provided), or
to the externally-mounted DACT. The EC shall provide any required
coordination with the Owner, and with the Owner’s Telecom provider, by sub-
contract, if necessary.

42204.004 28 31 00-18 Multiplexed Addressable Fire Alarm System
3.02 WIRING INTEGRITY
A. Signaling Line Circuits (SLC), for intelligent addressable devices, shall be Class
B, Style 4. Each SLC shall incorporate isolator modules or isolation devices
which shall provide independently isolated SLC sub-circuits. Sub-circuits shall
operate such that a short circuit occurring on any isolated sub-circuit shall not
interfere with proper operation of the devices on any other sub-circuit.
B. Where conventional devices are to be monitored by addressable monitor modules,
the wiring between the module and the conventional device shall be a Class B,
Style B Initiation Device Circuit.
C. Notification Appliance Circuits shall be Class B, Style Y, as defined by NFPA 72,
6.7. Strobes and audible devices shall operate separately.
3.03 CONDUCTORS
A. All cable shall be installed as per NEC Article 760.
B. All cables and wires size #14 AWG and larger shall be stranded.
C. Install wiring according to the following:
1. NECA 1.
2. TIA/EIA 568-A.
D. All wiring shall be completely supervised. In the event of a primary power failure, disconnected standby battery, disarrangement of any components, any open circuits or grounds in the system, an audible and visual trouble signal shall be activated until the system is restored to normal.
E. All conductors shall be color-coded. Coding shall be consistent through out the facility.
Green wire shall be used only for equipment ground.
F. Fire Alarm Control Panel shall be connected to separate dedicated branch circuit from the building emergency panel, maximum 20 amperes. Circuit shall be labeled as "FIRE ALARM".
G. Power wiring for Fire Alarm Control Panel shall be #12 AWG.
H. Fire Alarm Control Panel shall have #12 AWG green equipment ground wire.
I. Leave 8-inch wire tails at each device box and 36-inch wire tails at the Fire Alarm Control Panel and Remote Annunciator Panel(s).
J. Cable for Intelligent Detector Loops shall be #18 to #12 AWG twisted/shielded pair.
Shield continuity must be maintained and connected to earth ground only at the control panel. Intelligent detector wiring must not be in the same conduit with 120/240 VAC power wiring or other high current circuits. T-taps or branch circuit connections are allowed for all class B intelligent loop circuits.
42204.004 28 31 00-19 Multiplexed Addressable Fire Alarm System
K. All splices or connections shall be made within approved junction boxes and with approved fittings. Boxes shall be red and/or labeled "FIRE ALARM SYSTEM" by decal or other approved markings.
L. The EC shall provide two separate phone lines for DACT use. The EC shall be
responsible for coordinating all phone requirements with the owner’s phone system provider.
M. NAC panel wiring shall be #14 AWG minimum.
N. Strobe wiring shall be #12 AWG minimum.
O. Speaker wiring shall be #14AWG minimum.
3.04 DEVICE MOUNTING
A. The electrical contractor and fire alarm vendor are responsible for mounting all
devices according to code. The following comments are to be used as guidelines
to supplement the codes where required.
B. Fire Alarm Control Panel (FACP): The FACP shall be mounted such that all
LCD readouts are 60 inches above finished floor (AFF). Use only identified
conduit entries or request approval for other penetration in the cabinet. Cabinets
shall be grounded per code.
C. Remote Annunciators: Mount annunciators such that LCD readouts are 60 inches
above finished floor (AFF). All annunciators are to be flush mounted unless
otherwise noted on the plans.
D. Smoke and Heat Detectors: Detectors shall be ceiling mounted unless otherwise
noted. Detectors shall be a minimum of 3 feet from any HVAC supply or return
vent.
E. Duct Smoke Detectors: Duct smoke detectors shall be mounted by the electrical
contractor and all locations shall be coordinated with the HVAC contractor.
F. Addressable Control Modules and Relays: All control modules and relays shall
be mounted within three (3) feet of the device being controlled, unless wired for
fail safe operation.
G. Notification Appliances: All wall mounted strobes shall be mounted per ADA
requirements (80 inches AFF to the bottom of the device). Ceiling mounted
strobes shall be approved by the engineer and local AHJ.
H. Manual Stations: All pull stations shall be mounted per ADA requirements (48
inches AFF to the operable part of the station).
3.05 DEVICE IDENTIFICATION
A. Each intelligent device must be uniquely identified by an address code entered on
each device at the time of installation. This address, along with the SLC loop
number shall be indicated on a permanent, machine-generated label. The label
shall be affixed to the device such that it is readable from the ground.

42204.004 28 31 00-20 Multiplexed Addressable Fire Alarm System
B. Each end of line device shall be identified with a permanent, machine-generated
label.
3.06 WARRANTY
A. Written warranty, executed by manufacturer agency to repair or replace
equipment, devices, and auxiliary components that fail in material or
workmanship within specified warranty period.
1. Warranty Period: One year from the date of substantial completion.
3.07 TESTING
A. The completed fire alarm system shall be fully tested by the Contractor in the
presence of the Owner's representative, the Architect, the Consulting Engineer,
and the manufacturer's technical representative. Upon completion of a successful
test, the Contractor shall so certify in writing to the Owner, Architect and General
Contractor using a form similar to the standard NFPA Fire Alarm System Record
of Completion Form found in NFPA 72 Chap. 1. Any form submitted must
provide the same information as required in the NFPA Record of Completion
Form.
B. The vendor shall perform a complete pre-test of the system before final testing
with the AHJ. All peripheral interface equipment (air handlers, electric locks, and
DACT operation shall be part of the pre-test. The vendor shall be responsible for
all retesting fees due to inoperable fire alarm equipment at the time of final
testing.
3.08 TRAINING
A. The equipment manufacturer's representative shall provide, as part of this
Contract, a minimum of six (6) hours system operating training for the building
Owner, the Consulting Engineer, and fire department personnel. Training
sessions shall be broken up into two parts: System Operation and System
Maintenance. These sessions shall be set up at the owner’s convenience.
3.09 INSTRUCTION MANUALS
A. The contractor shall supply, in a three ring binder, three sets of O&M manuals to
include: one approved copy of the original submittal (including all corrected
items from shop drawing review), complete operating instructions and any system
service and testing documentation. All manuals shall be furnished prior to, or
during training.
END OF SECTION 28 31 00

ARCHITECTURE& DESIGN
TJHJW

ARCHITECTURE& DESIGN
TJHJW

ARCHITECTURE& DESIGN
TJHJW

GENERAL NOTES
”
”
” ”
PIPE INSULATION NOTES
SLOPE OF HORIZONTAL DRAINAGE PIPE
PIPE MATERIALS
PLUMBING FIXTURE ROUGH-IN SCHEDULE
ARCHITECTURE& DESIGN

PTS
CRASHCART
CONSULT4G420
EXAM4G419
EXAM4G418
EXAM4G416
EXAM4G415
DISCHARGE4G435
EXAM4G439
CONSULT4G442
GYNE EXAM4G422
GYNE EXAM4G423
DISCHARGE4G413
EXAM4G431
MULTI-PURPOSEROOM4G429
EXAM4G444
EXAM4G443
EXAM4G417
GYNE EXAM4G462
EXAM4G414
CONSULT4G445
EXAM4G440
SOILEDSTORAGE
4G432.1
WORKROOM4G427
EXAM4G421
CLEAN4G422
OFFICE4G438
STORAGE4G429.1
MEDICALSTORAGE
4G428
WAITING4G403
GYNE WAITING4G446
RECEPTION4G447
CORRIDOR4G441
CORRIDOR4G441.1
CORRIDOR4G430.1
OFFICE4G434
CORRIDOR4G441.2
GYNE EXAM4G463
CLEANSTORAGE &
EQUIP.4G432
PROCEDURE4G433
VITALS4G448
VITALS4G425
EXAM4G464
EXAM4G465
CORRIDOR4G430.4
CORRIDOR4G403.1
CORRIDOR4G430.3
TOILET4G466
TOILET4G467
21.5 22.5 23.5 24232221
B.7
C.1
D.5
E
D
C
A.8
B
EXAM4E497.1
EXAM4E497.2
EXAM4E497.3
EXAM4E498.1
EXAM4E498.2
EXAM4E490.3
EXAM4E490.4
EXAM4E490.5
EXAM4E491.1EXAM
4E491.2EXAM
4E491.3
EXAM4E494.1 EXAM
4E494.2EXAM
4E495.1 EXAM4E495.2
EXAM4E496.1
EXAM4E496.2
EXAM4E491.5
EXAM/SOCIALWORKER4E492.2
EXAM4E492.3
EXAM4E491.4
CORRIDOR4E490.2
CORRIDOR4E489.1
SOILEDSTORAGE
4E488.4INJECTION
4E487.2
ISOLATION/INFUSION
4E492.4
VITALS4E486.2
PAT. TOILET4E488.3
OFFICE4E488.2
MED & CLEANSTORAGE
4E487.3OFFICE4E488.1
CORRIDOR4E487.1
CORRIDOR4E493.1
WAITING4E486.1
CORRIDORA486.5
CORRIDOR4E492.1
CORRIDOR4E488.5
CORRIDOR4E490.1
17.5 18.5 191817
B.7
C.1
D.5
E
D
C
A.8
B
ARCHITECTURE& DESIGN
TJHJW

EXAM &TREATMENT
4F367
EQUIP.STORAGE
4F368
SOILEDSTORAGE
4F369
LACTATION4F371
JC4F372
MEDS &STORAGE
4F362
NURSE4F360
NURSERY4F364
WORK /CONFRENCE
ROOM4F366
CLEANUTILITY
4F363
GOWNING4F361
NURSESTATION
4F365
CORRIDOR4F370
CORRIDOR4F359
G.2
G.5
H.5
J
H
G
161514
FIRM ACHARTING
4C159.1
FIRM ANURSES4C159.2 FIRM B
NURSES4C160.1
EXAM4C158.1
EXAM4C157.2
EXAM4C157.1
EXAM4C156.2
EXAM4C156.1
EXAM4C155.2
EXAM4C155.1
STAIR #34C-ST3 CONFERENCE
4C154 STAIR #54C-ST5
WAITING4C145
EXAM4C165.2
VITALS4C165.1
EXAM4C164.2
EXAM4C167.1
EXAM4C167.2
EXAM4C164.1
PROCEDURE4C168.1
EXAM4C163.1
EXAM4C168.2
EXAM4C180.2
EXAM4C175.1 EXAM
4C174.2
EXAM4C169.1
EXAM4C174.1
EXAM4C170.1
EXAM4C173.1
EXAM4C170.2
EXAM4C172.2
EXAM4C172.1
EXAM4C171.2
EXAM4C177.2
EXAM4C178.1
EXAM4C178.2
EXAM4C176.2EXAM
4C179.1
EXAM4C179.2
EXAM4C176.1
EXAM4C180.1
RECEPTION4C146
EXAM4C158.2
PHONETRIAGE
A436
CLINIC MGR4C153.1
DISCHARGE4C149.1
EXAM4C166.1
PROCEDURE4C166.2
EXAM4C173.2
PEDS PSYCH.4D214.4
PEDS PSYH.4D214.3
PEDS PSYCH.4D214.2
PEDS PSYCHGROUP4D214.1
CORRIDOR4D222
MED STORAGE4C190.2
VITALS4C171.1
CONSULT4C153.3
CONSULT4C153.2
PROCEDURE4C162.1
EXAM4C162.2
VITALS4C151.1
VITALS4C151.2
VITALS4C151.3
GMCDIETICIAN
4D195PEDS
PSYCH4D194.1
FIRM CCHARTING
4C161.2
FIRM CNURSES4C161.1FIRM B
CHARTING4C160.2
PEDSPSYCH4D194.2
GMCOPEN OFFICE
4D193
T/C4C148
ELEC4C147.1
ELEC4C147
COLONSCREENING
4C190.3
SOILEDSTORAGE
4C190.1
DISCHARGE4C149.2
CORRIDOR4C150.1
COORIDOR4C150.3
CORRIDOR4C150.4 CORRIDOR
4C150.6 CORRIDOR4C150.7
CORRIDOR4C150.2
CORRIDOR4C150.5
CORRIDOR4G430
VITALS4C177.1
10.5 11.5 14131211109
B.7
C.1
D.5
E.4
E.5
F.3
E
F
D
C
A.8
B
ARCHITECTURE& DESIGN
TJHJW

FAMILYWAITING
4B096
RESIDENTWORK ROOM
4B098
PATIENTROOM4B099
PATIENTROOM4B100
PATIENTROOM4B102
PATIENTROOM4B104
PATIENTROOM4B106
PATIENTROOM4B108
PATIENTROOM4B110
PATIENTROOM4B112
PATIENTROOM4B113
PATIENTROOM4B114
STAFF TOILET4B118
EQUPMENTSTORAGE
4B117
ATTENDINGWORKROOM
4B119
PT/OT4B122.1
CORRIDOR4B137.1
CORRIDOR4B134
CORRIDOR4B135.1
SOILEDUTILITY4B127CLEAN UTILITY
4B132CONSULT
4B128
NOUR.4B133
DICTATION4B133.1
NURSESTATION
4B130
CORRIDOR4B137
CORRIDOR4B136
CORRIDOR4B135
PATIENTROOM4B078
JC4B093TOILET
4B079
CORRIDOR4A043
CORRIDORA451
ON-CALL4A043.3
ON-CALL4A043.4
ON-CALL4A043.2
ON-CALL4A043.1
E.4
E.5
F.3
F.5
G.2
G.5
H.5
K
J
H
G
E
F
4.5 5.7 6.7 7.7 8765
ARCHITECTURE& DESIGN
TJHJW

PTS
CRASHCART
CONSULT4G420
EXAM4G419
EXAM4G418
EXAM4G416
EXAM4G415
DISCHARGE4G435EXAM
4G439
CONSULT4G442
GYNE EXAM4G422
GYNE EXAM4G423
DISCHARGE4G413
EXAM4G431
MULTI-PURPOSEROOM4G429
STAIR #94C-ST270
EXAM4G444
EXAM4G443
EXAM4G417
GYNE EXAM4G462
EXAM4G414
CONSULT4G445
EXAM4G440
SOILEDSTORAGE
4G432.1
WORKROOM4G427
EXAM4G421
CLEAN4G422
OFFICE4G438
STORAGE4G429.1
MEDICALSTORAGE
4G428
WAITING4G403
GYNE WAITING4G446
RECEPTION4G447
CORRIDOR4G441
CORRIDOR4G441.1
CORRIDOR4G430.1
OFFICE4G434
CORRIDOR4G441.2
GYNE EXAM4G463
CLEANSTORAGE &
EQUIP.4G432
PROCEDURE4G433
VITALS4G448
VITALS4G425
EXAM4G464
EXAM4G465
CORRIDOR4G430.4
CORRIDOR4G403.1
CORRIDOR4G430.3
TOILET4G466
TOILET4G467
21.5 22.5 23.5 24232221
B.7
C.1
D.5
E
D
C
A.8
B
EXAM4E497.1
EXAM4E497.2
EXAM4E497.3
EXAM4E498.1
EXAM4E498.2
EXAM4E490.3
EXAM4E490.4
EXAM4E490.5
EXAM4E491.1EXAM
4E491.2EXAM
4E491.3
EXAM4E494.1 EXAM
4E494.2EXAM
4E495.1 EXAM4E495.2
EXAM4E496.1
EXAM4E496.2
EXAM4E491.5
EXAM/SOCIALWORKER4E492.2
EXAM4E492.3
EXAM4E491.4
CORRIDOR4E490.2
CORRIDOR4E489.1
SOILEDSTORAGE
4E488.4INJECTION
4E487.2
ISOLATION/INFUSION
4E492.4
VITALS4E486.2
PAT. TOILET4E488.3
OFFICE4E488.2
MED & CLEANSTORAGE
4E487.3OFFICE4E488.1
CORRIDOR4E487.1
CORRIDOR4E493.1
WAITING4E486.1
CORRIDORA486.5
CORRIDOR4E492.1
CORRIDOR4E488.5
CORRIDOR4E490.1
17.5 18.5 2019181716
B.7
C.1
D.5
E
D
C
A.8
B
ARCHITECTURE& DESIGN
TJHJW

EXAM &TREATMENT
4F367
EQUIP.STORAGE
4F368
SOILEDSTORAGE
4F369 LACTATION4F371
JC4F372
MEDS &STORAGE
4F362
NURSE4F360
NURSERY4F364
WORK /CONFRENCE
ROOM4F366
CLEANUTILITY4F363
GOWNING4F361
NURSESTATION
4F365
CORRIDOR4F370
CORRIDOR4F359
161514
G.2
G.5
H.5
J
H
G
FIRM ACHARTING
4C159.1
FIRM ANURSES4C159.2 FIRM B
NURSES4C160.1
EXAM4C158.1
EXAM4C157.2
EXAM4C157.1
EXAM4C156.2
EXAM4C156.1
EXAM4C155.2
EXAM4C155.1
STAIR #34C-ST3 CONFERENCE
4C154 STAIR #54C-ST5
WAITING4C145
EXAM4C165.2
VITALS4C165.1
EXAM4C164.2
EXAM4C167.1
EXAM4C167.2
EXAM4C164.1
PROCEDURE4C168.1
EXAM4C163.1
EXAM4C168.2
EXAM4C180.2
EXAM4C175.1
EXAM4C174.2
EXAM4C169.1
EXAM4C174.1
EXAM4C170.1
EXAM4C173.1
EXAM4C170.2
EXAM4C172.2
EXAM4C172.1
EXAM4C171.2
EXAM4C177.2
EXAM4C178.1
EXAM4C178.2
EXAM4C176.2EXAM
4C179.1
EXAM4C179.2
EXAM4C176.1
EXAM4C180.1
RECEPTION4C146
EXAM4C158.2
PHONETRIAGE
A436
CLINIC MGR4C153.1
DISCHARGE4C149.1
EXAM4C166.1
PROCEDURE4C166.2
EXAM4C173.2
PEDS PSYCH.4D214.4
PEDS PSYH.4D214.3
PEDS PSYCH.4D214.2
PEDS PSYCHGROUP4D214.1
CORRIDOR4D222
MED STORAGE4C190.2
VITALS4C171.1
CONSULT4C153.3
CONSULT4C153.2
PROCEDURE4C162.1
EXAM4C162.2
VITALS4C151.1
VITALS4C151.2
VITALS4C151.3
GMCDIETICIAN
4D195PEDS
PSYCH4D194.1
FIRM CCHARTING
4C161.2
FIRM CNURSES4C161.1FIRM B
CHARTING4C160.2
PEDSPSYCH4D194.2
GMCOPEN OFFICE
4D193
T/C4C148
ELEC4C147.1
ELEC4C147
COLONSCREENING
4C190.3
SOILEDSTORAGE
4C190.1
DISCHARGE4C149.2
CORRIDOR4C150.1
COORIDOR4C150.3
CORRIDOR4C150.4
CORRIDOR4C150.6 CORRIDOR
4C150.7
CORRIDOR4C150.2
CORRIDOR4C150.5
CORRIDOR4G430
VITALS4C177.1
10.5 11.5 131211109
B.7
C.1
D.5
E.4
E.5
F.3
F.5
E
F
D
C
B
ARCHITECTURE& DESIGN
TJHJW

FAMILYWAITING
4B096
RESIDENTWORK ROOM
4B098
PATIENTROOM4B099
PATIENTROOM4B100
PATIENTROOM4B102
PATIENTROOM4B104 PATIENT
ROOM4B106
PATIENTROOM4B108
PATIENTROOM4B110
PATIENTROOM4B112
PATIENTROOM4B113
PATIENTROOM4B114
STAFF TOILET4B118
EQUPMENTSTORAGE
4B117
ATTENDINGWORKROOM
4B119
PT/OT4B122.1
CORRIDOR4B137.1
CORRIDOR4B134
CORRIDOR4B135.1
SOILEDUTILITY4B127
CLEAN UTILITY4B132
CONSULT4B128
NOUR.4B133
DICTATION4B133.1
NURSESTATION
4B130
CORRIDOR4B137
CORRIDOR4B136
CORRIDOR4B135
PATIENTROOM4B078
JC4B093
TOILET4B079
CORRIDOR4A043
CORRIDORA451
ON-CALL4A043.3
ON-CALL4A043.4
ON-CALL4A043.2
ON-CALL4A043.1
4.5 5.7 6.7 7.7 87654
E.4
E.5
F.3
F.5
G.2
G.5
H.5
K
J
H
G
E
F
ARCHITECTURE& DESIGN
TJHJW

PLUMBING FIXTURE SCHEDULEDESIG. COMPONENT LOCATION MANUFACTURER MODEL REMARKS
WC-1 WATER CLOSET TOILETS CRANE 1.5 PLACIDUS3-446
WALL MOUNTED, WHITE, ELONGATED BOWL WITH EVERCLEAN, VITREOUS CHINA, 1 1/2" TOP INLET SPUD,LOW CONSUMPTION 1.6 GPF (SEE ARCH. DRAWINGS FOR MOUNTING HEIGHT). PROVIDE WITH ELONGATEDOPEN FRONT SEAT AND COMMERICAL GRADE CARRIER.
SLOAN REGALL-1 LAVATORY TOILETS CRANE HARWICH
1-41220" X 18" WALL MOUNTED SINK, VITREOUS CHINA, WHITE, CONCEALED ARM SUPPORTS, FRONT OVERFLOW,FAUCET LEDGE WITH BACK AND SIDE SPLASH SHIELDS WITH 4" ON CENTER HOLES. PROVIDE WITHCOMMERICAL GRADE FLOOR MOUNTED CONCEALED ARM CARRIER. (SEE ARCH. DRAWINGS FOR MOUNTINGHEIGHT).
CHICAGO FAUCETS 404-V317ABCP MANUAL FAUCET, 8" FIXED CENTERS, 5" CENTER TO CENTER RIGID BRASS SPOUT, 4" VANDAL PROOFWRISTBLADE HANDLE, CHROME FINISH.
WATTS LFUSG-B THERMOSTATIC MIXING VALVE, LEAD FREE, BRONZE BODY WITH DUAL CHECK VALVES. SET OUTLETTEMPERATURE TO 110°F.
MCGUIRE 155A OPEN GRID STRAINER.MCGUIRE PW2150WC 1 1/4" X 1 1/2" PRE-WRAPPED OFFSET DRAIN AND P-TRAP, TAIL PIECE COVER, TWO SUPPLY COVERS, AND
CHROME PLATED ESCUTCHEONS.
MCGUIRE LF2167LK 1/2" X 1/2" LEAD FREE LOOSE KEY STOPS AND SUPPLIES WITH CHROME PLATED ESCUTCHEONS.
HS-1 HAND SINK REFER TO PLANS CRANE HARWICH1-412
18" X 15" WALL MOUNTED SINK, VITREOUS CHINA, WHITE, CONCEALED ARM SUPPORTS, FRONT OVERFLOW,FAUCET LEDGE WITH BACK AND SIDE SPLASH SHIELDS WITH 4" ON CENTER HOLES. PROVIDE WITHCOMMERICAL GRADE FLOOR MOUNTED CONCEALED ARM CARRIER. (SEE ARCH. DRAWINGS FOR MOUNTINGHEIGHT).
CHICAGO FAUCETS 404-V317ABCP MANUAL FAUCET, 8" FIXED CENTERS, 5" CENTER TO CENTER RIGID BRASS SPOUT, 4" VANDAL PROOFWRISTBLADE HANDLE, CHROME FINISH.
WATTS LFUSG-B THERMOSTATIC MIXING VALVE, LEAD FREE, BRONZE BODY WITH DUAL CHECK VALVES. SET OUTLETTEMPERATURE TO 110°F.
MCGUIRE 155A OPEN GRID STRAINER.MCGUIRE PW2150WC 1 1/4" X 1 1/2" PRE-WRAPPED OFFSET DRAIN AND P-TRAP, TAIL PIECE COVER, TWO SUPPLY COVERS, AND
CHROME PLATED ESCUTCHEONS.
MCGUIRE LF2167LK 1/2" X 1/2" LEAD FREE LOOSE KEY STOPS AND SUPPLIES WITH CHROME PLATED ESCUTCHEONS.
S-1 SINK REFER TO PLANS DUPONT CORIAN871
INTEGRAL SOLID SURFACE SINK. REFER TO ARCH DRAWINGS FOR PROPER SIZING.
ELKAY LK-99 CHROME PLATED 3-1/2" BASKET STRAINER AND TAILPIECE.CHICAGO FAUCETS 626-FC CHROME PLATED DECK MOUNT GOOSENECK FAUCET WITH 5" RIGID SWING SPOUT.
CHICAGO FAUCETS 834-EP WALL MOUNTED COMBINATION PEDAL VALVE, LOOSE KEY STOPS, CHROME PLATED.
MCGUIRE 8912C 1 1/2" X 1 1/2" CHROME PLATED CAST BRASS ADJUSTABLEP P-TRAP WITH CLEANOUT.
MCGUIRE LF2167CC 1/2" X 1/2" LEAD FREE ANGLE STOPS AND SUPPLIES.S-2 SINK PANTRY DUPONT CORIAN
871INTEGRAL SOLID SURFACE SINK. REFER TO ARCH DRAWINGS FOR PROPER SIZING.
CHICAGO FAUCETS 201-AGNAE3-319AB
DECK MOUNTED 8" FIXED CENTERS, SWING GOOSENECK SPOUT, 2.2 GPM AERATOR, 6" ELBOW BLADEHANDLE.
MCGUIRE 8912C 1 1/2" X 1 1/2" CHROME PLATED CAST BRASS ADJUSTABLEP P-TRAP WITH CLEANOUT.
MCGUIRE LF2167CC 1/2" X 1/2" LEAD FREE ANGLE STOPS AND SUPPLIES.SH-1 SHOWER TOILETS BY OTHERS BY OTHERS SHOWER STALL BY-OTHERS
SYMMONS TEMPTROLC-96-500-B30-V
POLISHED CHROME PLATED, PRESSURE BALANCING, 1.5 GPM, 1/4 TURN STOPS, 24" SLIDE BAR AND 59"METAL HOSE SHOWER SYSTEM. ROUND TOP, DOUBLE CHECK VALVES, DRAIN.
MB-1 MOP BASIN JANITORSCLOSET
FIAT TSB 3624 FLOOR MOUNTED TERRAZO BASIN 36"x24 WITH RAISE DRAIN SHELF AND 3" DRAIN.
CHICAGO FAUCETS 814VP-E8 WALL MOUNTED 8" BODY, ADJUSTABLE ARMS WITH PAIL HOOK AND PIPE SUPPORT.
FD-1 FLOOR DRAIN TOILETS ZURN Z415B CAST IRON BODY, ADJUSTABLE STRAINER HEAD, COMBINATION INVERTIBLE MEMBRANE CLAMP ANDADJUSTABLE COLLAR WITH NICKEL BRONZE STRAINER.
FCO FLOOR CLEANOUT REFER TO PLANS ZURN Z1400-BP CAST IRON BODY, ADJUSTABLE FLOOR CLEANOUT WITH NICKEL BRONZE TOP AND GAS AND WATERTIGHTABS TAPERED BRONZE PLUG (USE IN FINISHED AREAS).
Z1474 CAST IRON BODY, HEAVY DUTY CLEANOUT HOUSING WITH NICKEL BROZE TOP AND INTERGRAL ANCHORFLANGE AND INTERNAL BRONZE CLEANOUT PLUG (USE IN UNFINISHED AREAS, MECHANICAL ROOMS,JANITOR CLOSETS, ETC.).
WCO WALL CLEANOUT REFER TO PLANS ZURN Z1468 ROUND STAINLESS STEEL WALL ACCESS COVER WITH SECURING SCREW, BRONZE RAISED HEX HEAD PLUG.
CO CLEANOUT PLUG REFER TO PLANS ZURN Z1440-BP CAST IRON BODY FERRULE WITH BRONZE PLUG.
CS-1 CLINICAL SINK REFER TO PLANS KOHLER CAMERTONK-12867
WALL HUNG, VITREOUS CHINA, 1 1/2" TOP SPUD, BLOW-OUT ACTION FLUSH RIM AND STAINLESS STEEL RIMGAURD. PROVIDE WITH WALL MOUNTED SINK FAUCET WITH ATMOSPHERIC VACUUM BREAKER SPOUT,CHROME FINISH, 3/4" MALE GARDEN HOSE THREADED OUTLET AND PAIL HOOK - CHICAGO FAUCETS#815-VBCP. PROVIDE WITH WALL MOUNTED EXPOSED FOOT PEDAL FLUSHOMETER FOR TOP SPUD BOWLS,LOOSE KEY STOPS, CHROME FINISH AND VACUUM BREAKER - ROYAL #310. PROVIDE HANGER - ZURN #Z1218. ARCHITECTURE
& DESIGN


