
UPGRADING YOUR 2012 SCCM
Prepared By
DIS APSCN/LAN Support
Finding your Site
Number………………………………………………………………………………01
Setup Site Backup……………………………………………………………………02-03
Match Your Build Number to Illustration on page 04-05…..……………………… 04-05
Uninstall ADK………………………………………………………………………06-08
Install ADK version needed for next install………………………………………...07-09
Install the next build number in the sequence given on page 04……………………10-16
(ADK 10 covers 2012r2sp2 and 2012sp2 – SCCM 1602)
Install the next build number in the sequence (SCCM_1511) given on pages 04-05.17-23
Completed install of SCCM 1602………………………………………………….. 25
Things to Note……………………………………………………………………….26
Repeat the Process for each build number previous to SCCM 1511.
Please read the “Things to Note” Portion at the end of this document before
Installing and or upgrading.
Page 01
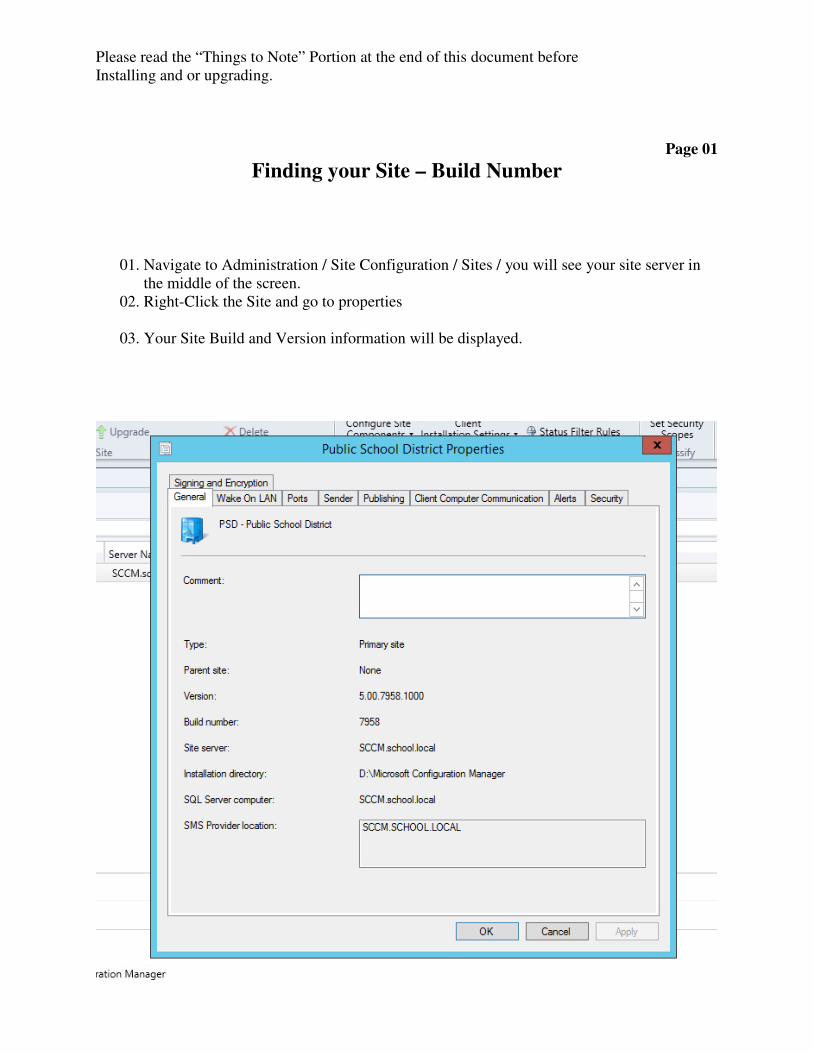
Finding your Site – Build Number
01. Navigate to Administration / Site Configuration / Sites / you will see your site server in
the middle of the screen.
02. Right-Click the Site and go to properties
03. Your Site Build and Version information will be displayed.
Page 02
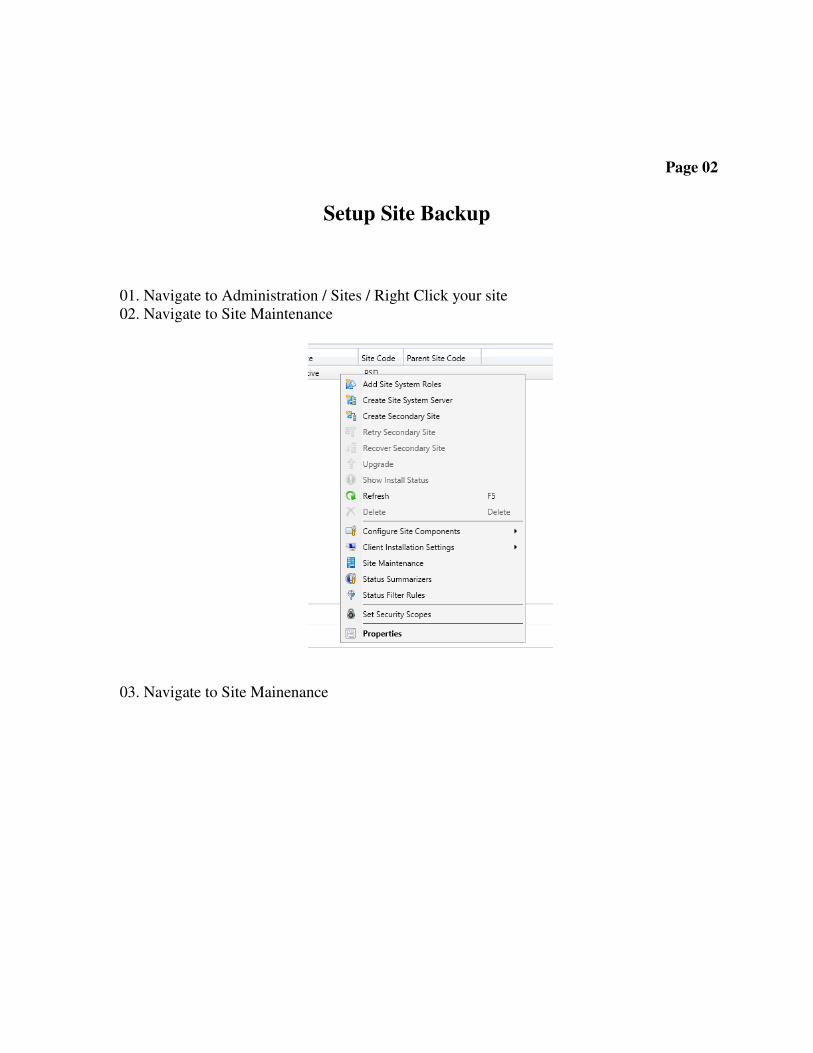
Setup Site Backup
01. Navigate to Administration / Sites / Right Click your site
02. Navigate to Site Maintenance
03. Navigate to Site Mainenance

04. Click on Edit and change the value “Backup Site Server” From NO to
“ENABLE THIS TASK”
Page 03
Setup Site Backup
05. Set the FQDN to an area on the SCCM server itself or in a custom backup location
06. Set the Days that you want to back up your site.
07. Initially set the start time for 5 minutes after you have configured the times set for the
back up to start.
08. Click Apply and Ok – wait 5 minutes and check your backup location to make sure you
have a good backup.
09. The Start Time and End Times must have atleast an hour between them.

10. After the backup is complete you should see a folder similar to the below illustration.
The backup will create the following folders and file on the server or share you chose for
the backup( PSDBackup, SiteDRServer, CM_PSD.mdf )
Page 04
Match Your Build Number to Illustration on page 04 and 05
Release Version Build Download
Link Our Guides
SCCM 2012 RTM 5.00.7711.0000 7711 N/A N/A

Release Version Build Download
Link Our Guides
SCCM 2012 RTM – CU1 5.00.7711.0200 7711 KB2717295 N/A
SCCM 2012 RTM – CU2 5.00.7711.0301 7711 KB2780664 N/A
SCCM 2012 SP1 5.00.7804.1000 7804 N/A N/A
SCCM 2012 SP1 – CU1 5.00.7804.1202 7804 KB2817245 N/A
SCCM 2012 SP1 – CU2 5.00.7804.1300 7804 KB2854009 N/A
SCCM 2012 SP1 – CU3 5.00.7804.1400 7804 KB2882125 N/A
SCCM 2012 SP1 – CU4 5.00.7804.1500 7804 KB2922875 N/A
SCCM 2012 SP1 – CU5 5.00.7804.1600 7804 KB2978017 N/A
SCCM 2012 R2 5.00.7958.1000 7958 N/A Installation guide
SCCM 2012 R2 – CU1 5.00.7958.1203 7958 KB2938441 N/A
SCCM 2012 R2 – CU2 5.00.7958.1303 7958 KB2970177 Upgrade guide
SCCM 2012 R2 – CU3 5.00.7958.1401 7958 KB2994331 Upgrade guide
SCCM 2012 R2 – CU4 5.00.7958.1501 7958 KB3026739 Upgrade guide
SCCM 2012 R2 – CU5 5.00.7958.1604 7958 KB3054451 Upgrade guide
SCCM 2012 R2 SP1 5.00.8239.1000 8239 N/A Upgrade guide
SCCM 2012 R2 SP1 – CU1 5.00.8239.1203 8239 KB3074857 Upgrade guide
SCCM 2012 R2 SP1 – CU2 5.00.8239.1301 8239 KB3100144 Upgrade guide
SCCM 2012 R2 SP1 – CU3 5.00.8239.1403 8239 KB3135680 Upgrade guide
SCCM 1511 5.00.8325.1000 8325 N/A Installation guide / Upgrade guide
SCCM 1602 5.00.8355.1000 8355 N/A Upgrade guide
NOTES: ADK needs to match your version of SCCM. Sccm 2012 is initially installed with
Windows Assesment and Deployment kit 8.0 As seen in the build numbers listed above the
server being upgraded is running SCCM 2012 R2. SCCM 2012 and SCCM 2012 R2 can and
have been running ADK 8.0 or 8.1. ADK 10 is needed for the Management of Windows 10
Machines.
The Update Process is as follows:
Uninstall ADK 8 with config manager closed
Install ADK 8.1
2012 and 2012R2 – initial upgrade to 2012SP1 and 2012r2Sp1
2012sp1 and 2012R2SP1 with ADK 8.1
Uninstall ADK 8.1
Install ADK 10
2012r2SP2 2012sp2 With ADK 10
SCCM 1511 With ADK 10
SCCM 1602 With ADK 10
ISO Name for upgrading to sp1 – ADK 8.1
SW_DVD5_Sys_Ctr_2012w_SP1_Config_Mgr_EndPt_Protection_MultiLang_-2_X18-
84756.iso
ISO Name for upgrading to sp2 – ADK 10
SW_DVD5_Sys_Ctr_ConfigMgr_and_Endpnt_Prtctn_2012w_SP2_MultiLang_MLF_X20-
21849.ISO
ISO Name for uppgrading to SCCM 1511 – ADK 10
SW_DVD5_Sys_Ctr_ConfigMgrClt_ML_1511_MultiLang_ConfMgr_MLF_X20-81134.ISO
NO Iso needed to upgrade to SCCM 1602 - ADK 10
Sccm 1602 is updated via the web
Page 6
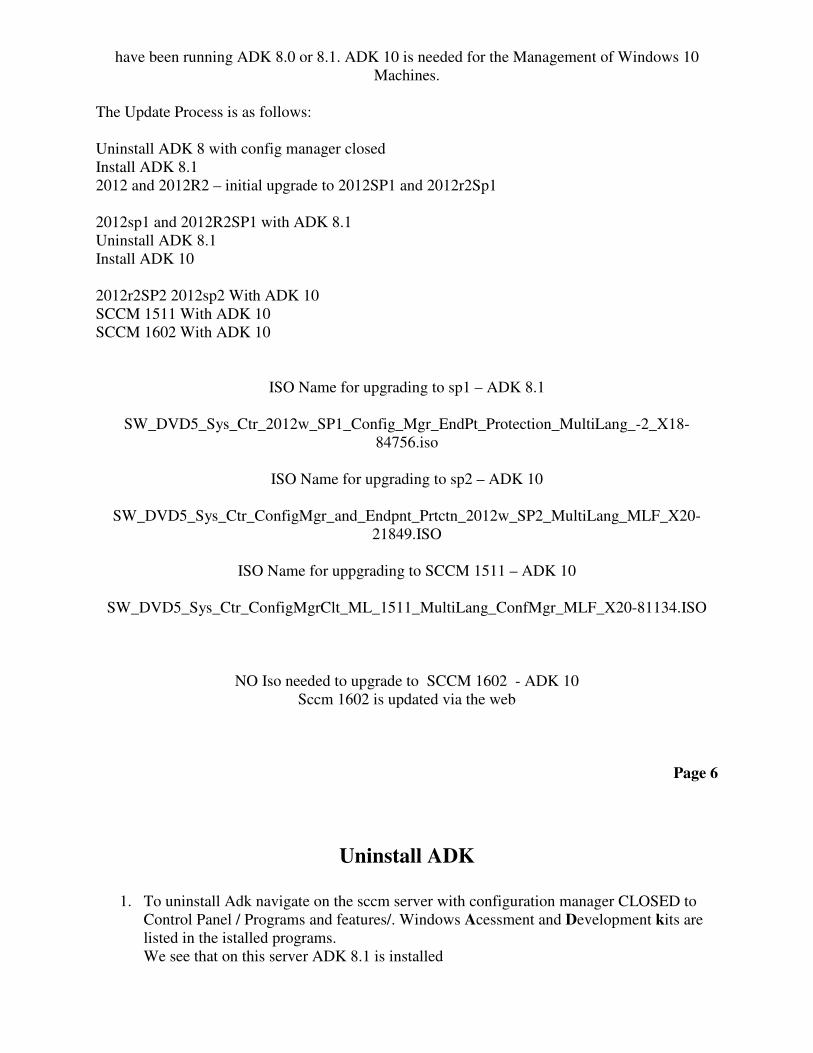
Uninstall ADK
1. To uninstall Adk navigate on the sccm server with configuration manager CLOSED to
Control Panel / Programs and features/. Windows Acessment and Development kits are
listed in the istalled programs.
We see that on this server ADK 8.1 is installed
You will be prompted if your sure that you want to uninstall
Choose “Yes”
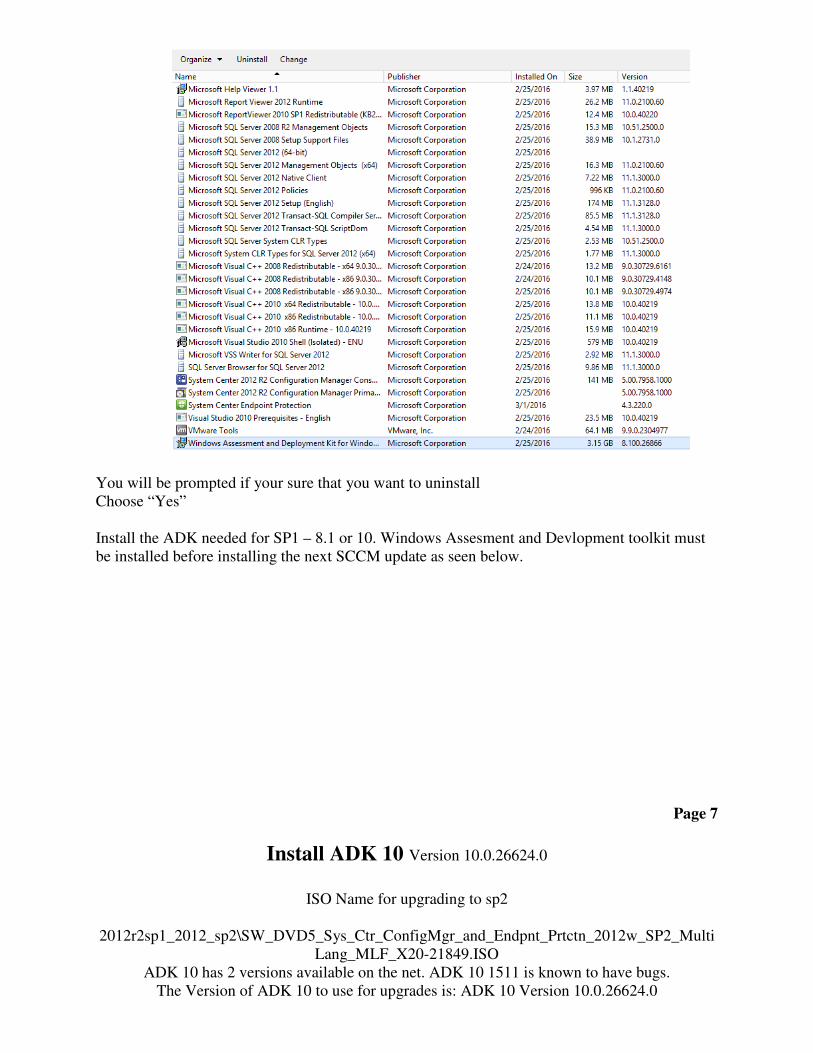
Install the ADK needed for SP1 – 8.1 or 10. Windows Assesment and Devlopment toolkit must
be installed before installing the next SCCM update as seen below.
Page 7
Install ADK 10 Version 10.0.26624.0
ISO Name for upgrading to sp2
2012r2sp1_2012_sp2\SW_DVD5_Sys_Ctr_ConfigMgr_and_Endpnt_Prtctn_2012w_SP2_Multi
Lang_MLF_X20-21849.ISO
ADK 10 has 2 versions available on the net. ADK 10 1511 is known to have bugs.
The Version of ADK 10 to use for upgrades is: ADK 10 Version 10.0.26624.0

Next….
No / Next
Page 8

Accept Licence Agreement
UNCHECK – the first and last two check boxes and click install
Page 9
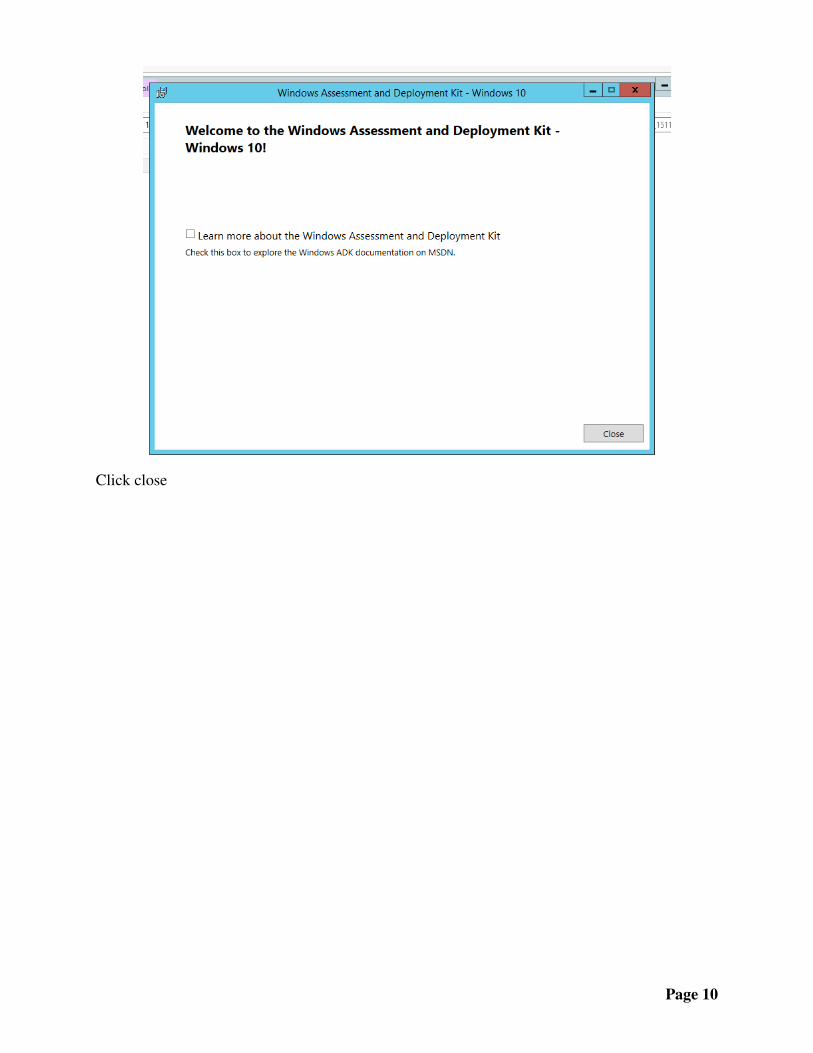
Click close
Page 10

Install the next build number in the sequence given on page 04 In this instance we are grading to Sccm 2012 SP2 2012R2
Click “install”
Click “next”
Make sure ‘Upgrade this Confugation Manager Site) is checked and click “next”
Page 11
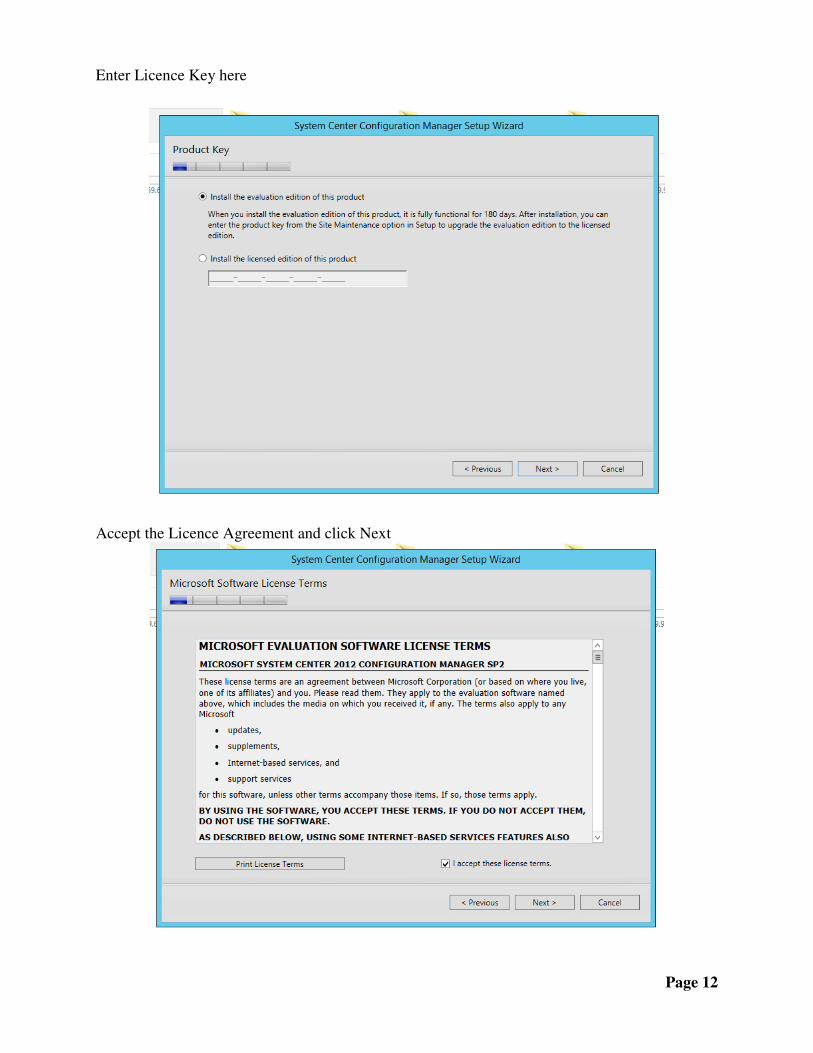
Enter Licence Key here
Accept the Licence Agreement and click Next
Page 12

Accept the 3 License And Term agreements and click next
Create a folder on your SCCM drive called downlaoads to enter here
Click Next
Page 13
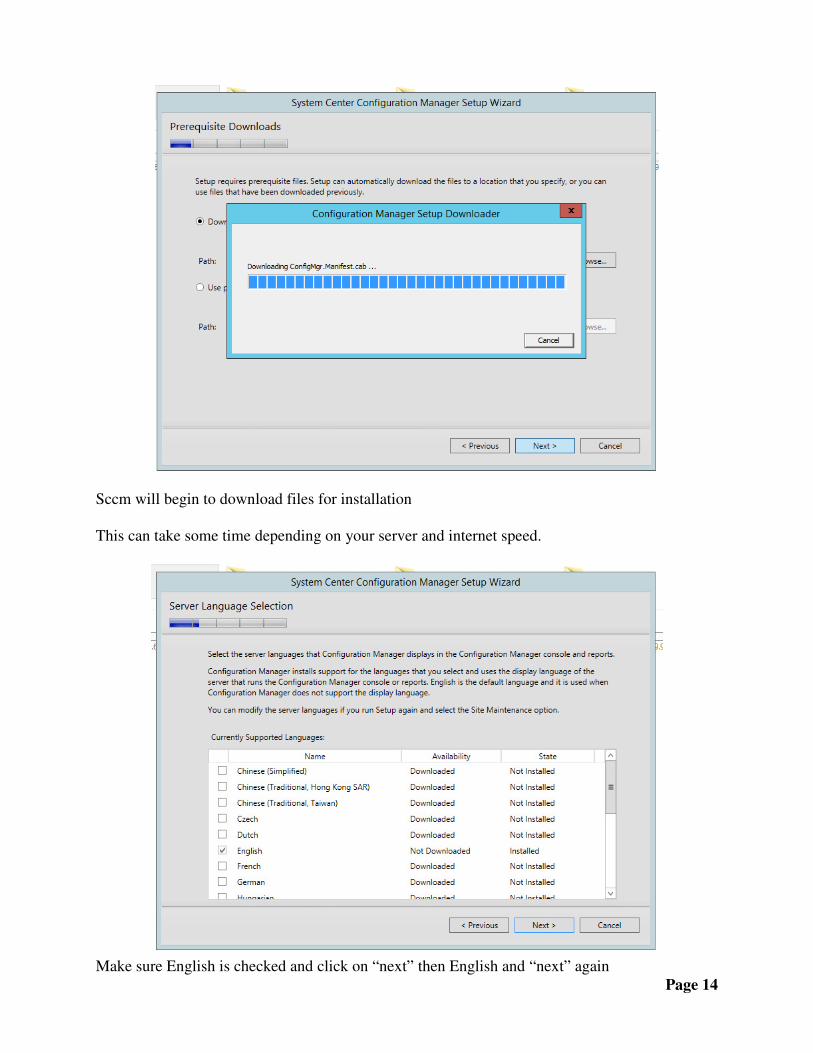
Sccm will begin to download files for installation
This can take some time depending on your server and internet speed.
Make sure English is checked and click on “next” then English and “next” again
Page 14

Make sure “Setup Type” is “upgrade” then click “Next”
The system will run a Prerequiste Check – The warning above is the most common.
As long as you do not have errors or more than one or two warnings click “Begin Install”
Page 15

You will get a “Core Setup Completed” and “View Log” as well as “Close”.
Click “View Log”
Make Sure =====Completed Configuration Manager 2012 Server Setup Upgrade======
Click Close and open Configuration manager
Use the directions listed in Page 01 to check the new Build Number
Match The Build number up with the information on pages four and five.
In this example we are at build 2012R2sp2
Page 16
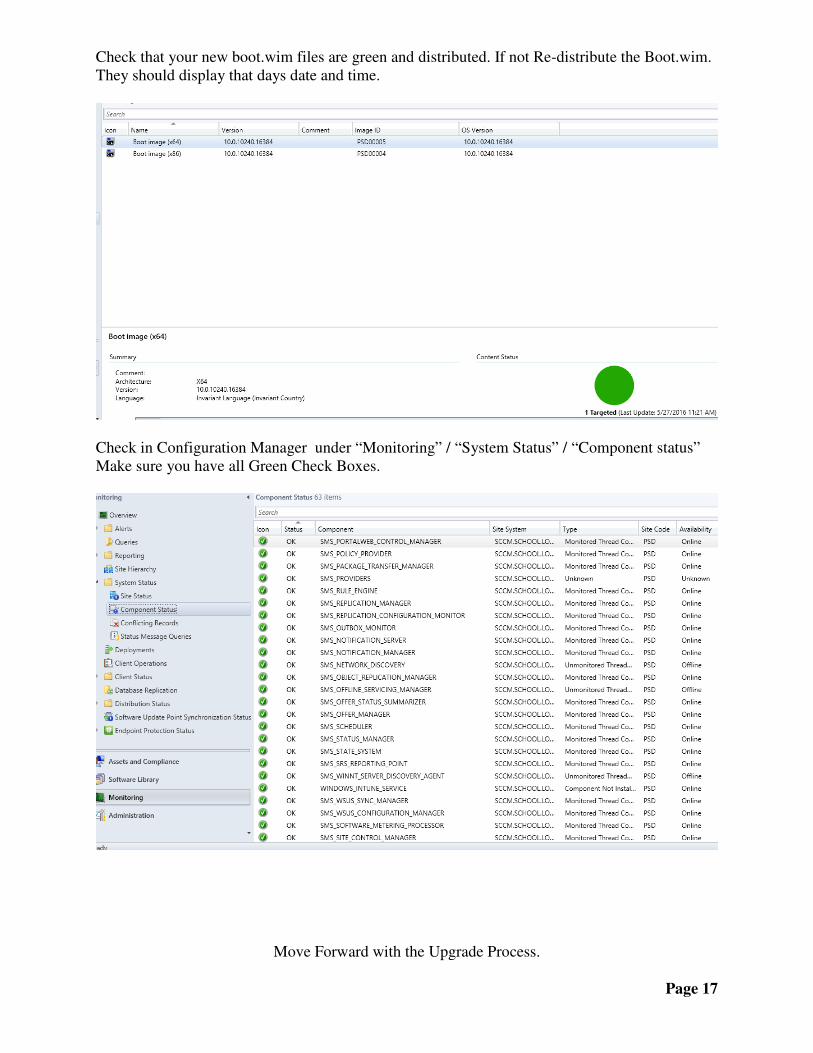
Check that your new boot.wim files are green and distributed. If not Re-distribute the Boot.wim.
They should display that days date and time.
Check in Configuration Manager under “Monitoring” / “System Status” / “Component status”
Make sure you have all Green Check Boxes.
Move Forward with the Upgrade Process.
Page 17

Close Configuration Manager and load the .iso for SCCM_1511
Click “Install”
Click “Next”
Page 18

Make sure that “Upgrade this Confguration Manager Site” is checked
Click “Next”
Enter the Product Key and click “Next”
Page 19

Accept all Licence Agreements
Page 20
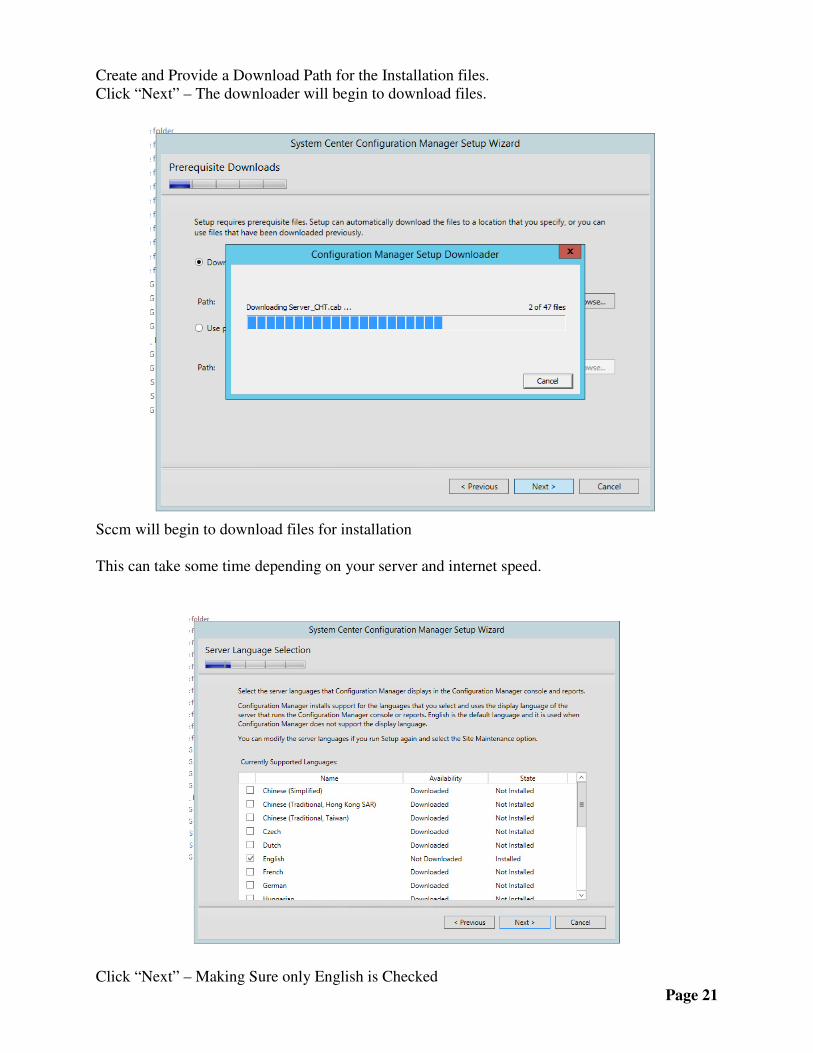
Create and Provide a Download Path for the Installation files.
Click “Next” – The downloader will begin to download files.
Sccm will begin to download files for installation
This can take some time depending on your server and internet speed.
Click “Next” – Making Sure only English is Checked
Page 21

Click “Next” – Making Sure only English is Checked
Click “Next” – Cleck Next Until You Get to the Screen Below
Make Sure Your Server Is Listed and “Yes” is Checked, Click “Next”
Page 22

Make sure “Setup Type” is “upgrade” then click “Next”
The system will run a Prerequiste Check – The warning above is the most common.
As long as you do not have errors or more than one or two warnings click “Begin Install”
Page 23

Page 24
As seen on pages four and five, 5.00.8325.1000 = SCCM 1511
After the install has completed, repeat the same processes as on pages 15 and 16.
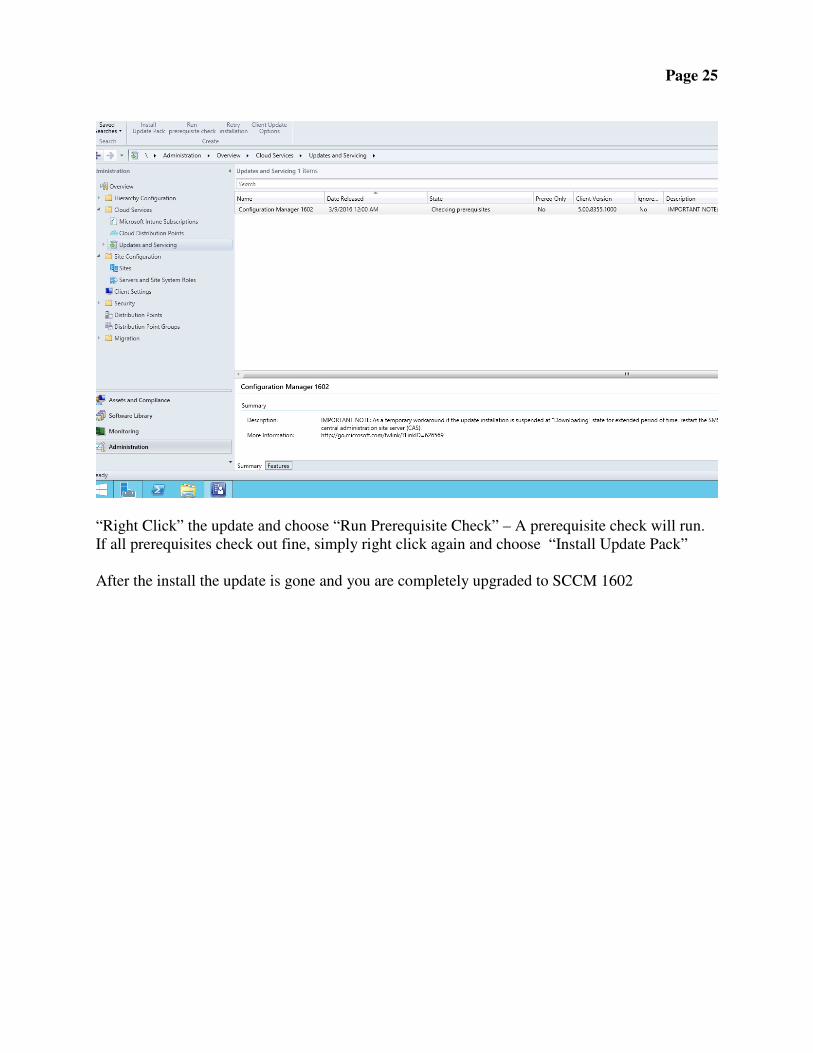
All Updates after SCCM 1511 are done through the Configuration Manager Console
- Administration / Cloud Services / Updates and Servicing
Page 25
“Right Click” the update and choose “Run Prerequisite Check” – A prerequisite check will run.
If all prerequisites check out fine, simply right click again and choose “Install Update Pack”
After the install the update is gone and you are completely upgraded to SCCM 1602

Page 26
THINGS TO NOTE
SCCM2012 or SCCM2012R2, ADK 8
-Uninstall ADK 8. Install ADK 8.1. Install the Next version above your build number.
-Check the view log button to make sure the install is completed.
-Open up configuration manager and check your applications and boot.wim files.
-Make sure they now have the new build number as well as the date of install.
-Open a device collection and right click in the columns, choose Client Version to be seen beside
the devices.
-Make sure that under Monitoring / You see all Green Checks
-Uninstall ADK 8.1 Install ADK 10.02 (DO NOT USE ADK 10_1511).
- Install the Next Version which should be SP2 or higher.
-Do NOT uninstall ADK 10.02
- Install SCCM_1511
-Check the view log button to make sure the install is completed.
-Open up configuration manager and check your applications and boot.wim files.
-Make sure they now have the new build number as well as the date of install.
After SCCM 1511 has successfully installed ALL UPDATES ARE DONE THROUGH
ADMINISTRATION / SOFTWARE UPDATES
-Use the software update that is now included under “Administration”
-Right Click the software update and run Prequiste check
-If the Prerequisite check passes, right click and go to update.


