

MOSCOW 2015
CORPORATE BIM STANDARDFor Infrastructure Projects
TEMPLATE
Revision 1.01

ABOUT THIS STANDARDDeveloped by KONKURATOR
AUTHORS
Igor RogachevAutodesk Certified InstructorAutodesk Elite ExpertAutodesk Civil 3D Certified Professional
Danil Pozhidayev, BIM-projektLead Engineer
Sergey Benklyan, KonkuratorSenior Project Manager
REVIEWERS
Andrey Zhukov, AutodeskInfrastructure Solutions
Ilya Yemelyanov, Autodesk ConsultingAEC Solutions
This standard is based on the experience of Autodesk Consulting.Autodesk Consulting team has been developed both national (NBIMS, PAS) and corporate BIM standards for companies from Europe, Middle East, Asia, USA and Russia in AEC, mining and infrastructure industries.
II

DISCUSSION FORUM
If you have any questions or comments on this standard, please visit forum.autodesk.ru.
If you want to adopt this standard in your organization, please do not hesitate to contact us [email protected] .
BIM STANDARD FOR BUILDINGS
We have also developed the BIM standard for buildings. For more information, visit www.autodesk.ru/bim or download BIM standard for buildings
AUTOCAD CIVIL 3D AND REVIT TEMPLATES
Revit templates, aka Autodesk Community Templates, were updated to comply with this standard.Civil 3D templates are available within the software. Revit templates are available on the Community website.
Download templates
TERMS OF USE
This standard may be freely distributed and used in any format necessary, for the purpose of development corporate BIM standards.
Autodesk, Inc. © 2015. All rights reserved.
III
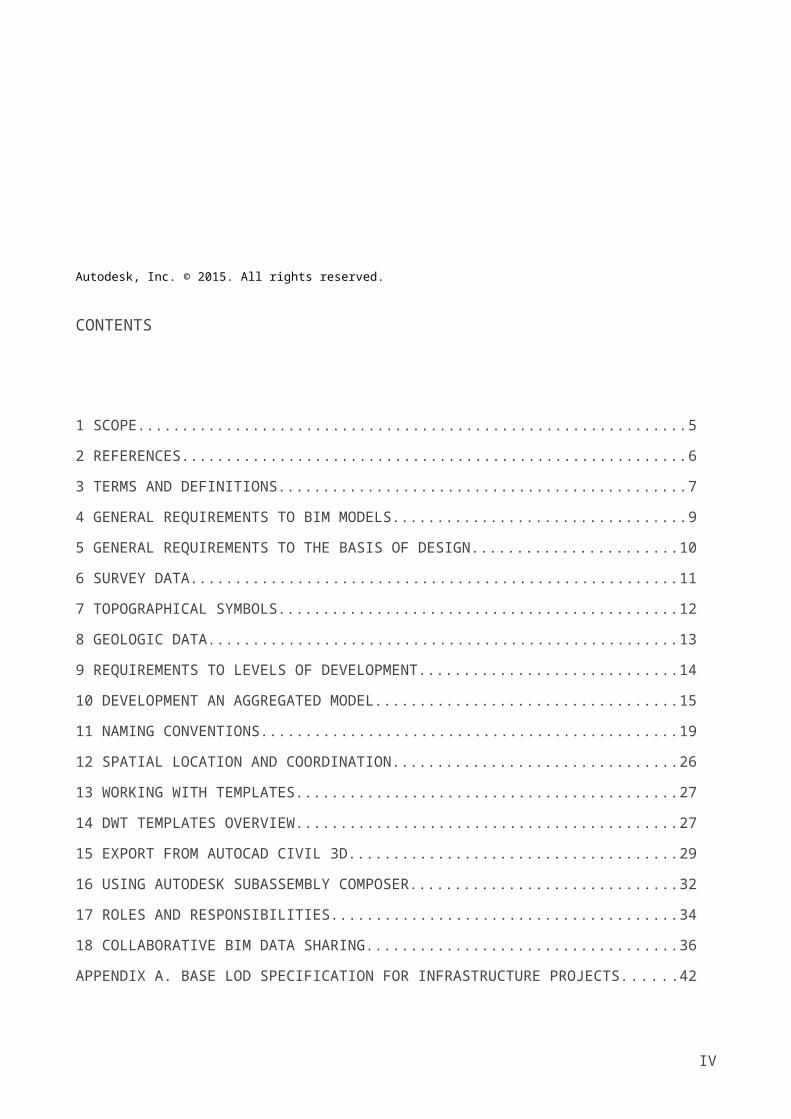
CONTENTS
1 SCOPE.......................................................................................................................................5
2 REFERENCES...........................................................................................................................6
3 TERMS AND DEFINITIONS.......................................................................................................7
4 GENERAL REQUIREMENTS TO BIM MODELS.......................................................................9
5 GENERAL REQUIREMENTS TO THE BASIS OF DESIGN....................................................10
6 SURVEY DATA........................................................................................................................11
7 TOPOGRAPHICAL SYMBOLS................................................................................................12
8 GEOLOGIC DATA....................................................................................................................13
9 REQUIREMENTS TO LEVELS OF DEVELOPMENT..............................................................14
10 DEVELOPMENT AN AGGREGATED MODEL......................................................................15
11 NAMING CONVENTIONS......................................................................................................19
12 SPATIAL LOCATION AND COORDINATION........................................................................26
13 WORKING WITH TEMPLATES.............................................................................................27
14 DWT TEMPLATES OVERVIEW.............................................................................................27
15 EXPORT FROM AUTOCAD CIVIL 3D...................................................................................29
16 USING AUTODESK SUBASSEMBLY COMPOSER..............................................................32
17 ROLES AND RESPONSIBILITIES.........................................................................................34
18 COLLABORATIVE BIM DATA SHARING..............................................................................36
APPENDIX A. BASE LOD SPECIFICATION FOR INFRASTRUCTURE PROJECTS...............42
IV

CORPORATE BIM STANDARD For Infrastructure Projects Using Autodesk Infrastructure Design Suite
1 SCOPE
1.1 This standard is intended to support organizations involved in the process of creation and use BIM models for infrastructure projects, and focuses primarily on adaptation the best practices for efficient application of Autodesk Infrastructure Design Suite (AutoCAD Civil 3D, AutoCAD Map 3D, Autodesk InfraWorks, and Autodesk Navisworks) as well as other Autodesk solutions. However, this Standard does not restrict the use of any other software tools.
1.2 This standard contains general requirements for BIM models in infrastructure and their levels of development (LOD), as well as general requirements for coordinate systems.
1.3 The provisions of this Standard are indicative only and may be freely used as a template for development corporate standards.
1.4 The objectives of this Standard are:
To maximize production efficiency through adopting a coordinated and consistent approach to working in BIM.
To define the standards, settings and best practices that ensure delivery of high quality and uniform drawing output across an entire project.
To ensure that digital BIM files are structured correctly to enable efficient data sharing whilst working in a collaborative environment across multidisciplinary teams both internally and in external BIM environments.
1.5 It is expected that this Standard will be used by experts with the requisite experience and qualifications.
1.6 All the advice outlined in this document is for information only. The authors and contributing companies take no responsibility for the utilization of these procedures and guidelines. Their suitability should be considered carefully before embarking upon any integration into your current working practices.
V

2 REFERENCES
This standard is written with reference to the following documents:
ISO/TS 12911:2012 Framework for building information modeling (BIM) guidance.
BS 1192:2007 Collaborative production of architectural, engineering and construction information. Code of practice.
Common InfraBIM requirements YIV2015 Vol. 1 – 3, Vol. 5.2.
INTERIM ADVICE NOTE 184/14. Highways Agency Data & CAD Standard. Instructions on naming conventions, file types and data structures for the delivery and transfer of CAD / BIM files to the Highways Agency and its supply chain.
Building Component Catalogue with Level of Development Specification (LOD), Version 2.0 / June 2015, MT Højgaard.
Topo Map Symbols. Scales 1:5000, 1:2000, 1:1000, 1:500. – Moscow: Nedra, 1989.
GOST R 1.4-2004 «Standardization in Russian Federation. Standards of organizations. General».
GOST R 21.1101-2013 «System of design documents for construction. Main requirements for design and working documents».
VI

3 TERMS AND DEFINITIONS
Building Information Model - BIM (for infrastructure projects): Digital representation of physical and functional characteristics of the infrastructure asset in the form of a set of graphic and non-graphic information serving as a common knowledge base of the of the infrastructure asset during its lifecycle (design, construction, operation and modernization) and presented in a structured and interconnected manner.
BIM Model: Design of the infrastructure asset, created using Building Information Modeling (BIM) technology.
Infrastructure Project: Terrain, road, pipe network, pier.
Level of Development (LOD): The level of development of a building information model (BIM) for an infrastructure asset.
Element: Part of the building information model representing the component, system or assembly (alignment, corridor, slope, profile, curb, roadway component, etc.).
Federated Building Information Model: Assembly of distinct models to create a single, complete model of the infrastructure asset.
Common Data Environment (CDE): The single source of information for the project, used to collect, manage and disseminate documentation, the graphical model and non-graphical data for the whole project team (i.e. all project information whether created in a BIM environment or in a conventional data format). Creating this single source of information facilitates collaboration between project team members and helps avoid duplication and mistakes.
Work in Progress Area: Component of the CDE. Data described as Work in Progress is that which is currently in production and has not yet been checked and verified for use outside of the authoring team.
Shared Area: Component of the CDE. The shared area of the CDE is where information can be made available to others in a “safe” environment.
Published Area: Component of the CDE for drawing renditions that have been approved as suitable for a specific purpose – for example, suitable for construction. 2D DWF or PDF drawings and sheets shall be stored here.
Archive Area: Component of the CDE. Archiving of all output data from the BIM shall be stored in the Archive area, including published, superseded and „As Built‟ drawings and data.
Collision Detection: Process of finding design errors resulting geometric intersections such as the intersection of two or more objects, violations of tolerances or logical dependencies between elements, etc.
Coding of information: The information conversion process and/or data presentation. It is used in organizations that have a system of classification/coding of objects and elements of infrastructure assets.
VII

Code: Set of symbols and rules for assigning values to them.
Surface: Digital representation of the terrain relief (existing or planned).
Alignment: Geometric position of the road axis in space.
Subassembly: AutoCAD Civil 3D drawing object (AECCSubassembly) that defines the geometry of a component used in a corridor section.
Corridor: 3D model of roads, highways, or railways.
Digital Terrain Model (DTM): Topographic model of the bare earth – terrain relief – that can be manipulated by computer programs.
Custom Subassembly: AutoCAD Civil 3D subassembly that meet your specific design requirements, created by using Autodesk Subassembly Composer or by using programming tools.
Autodesk Subassembly Composer (SAC): Add-in to AutoCAD Civil 3D. Provides an interface for composing and modifying complex subassemblies, without a need for programming.
PKT: Files created using Autodesk Subassembly Composer (SAC) which contain information about custom elements. PKT files are then imported into AutoCAD Civil 3D software.
SAC Flowchart: Set of SAC elements, located in the Flowchart or Sequence. Determines the behavior of custom elements.
SAC Codes: Codes for the flowchart elements. The syntax is (‘CODE’).
AutoCAD Solid: 3D objects in AutoCAD, created by AutoCAD-based software.
LandXML: Standard XML data format for civil engineering and survey data used in the land development and transportation industries. LandXML provides a data format suitable for long-term data archiving and offers a standard format for electronic design submission. LandXML files are based on the LandXML schema, an XML schema definition for civil and survey data.
DWG: The native file format for AutoCAD data files. It contains all the pieces of information a user enters, such as designs, geometric data, maps, etc.
NWC: Enables project teams using Navisworks software to generate whole-project models for simulation and analysis. Team members can generate the optimized NWC file directly from design applications without the need for a licensed seat of Navisworks. The NWC exporter utility works with a range of products, including AutoCAD and Revit software-based products, as well as 3ds Max software. The NWC file format supports transfer of both object geometry and associated metadata.
ADSK: Files for the exchange of information between Autodesk Revit / AutoCAD Civil 3D and Autodesk Inventor / Autodesk Revit.
DWT: Template file in AutoCAD Civil 3D.
VIII

4 GENERAL REQUIREMENTS TO BIM MODELS
4.1 All BIM models must be developed using only the object-oriented elements such as alignments, corridors, slopes, etc., containing the appropriate parametric information.
4.2 Classification of objects and elements shall be executed by encoding these objects and elements (if the organization has the system for classifying and coding of objects and elements of infrastructure projects).
4.3 All objects and elements of the BIM model must have dimensions corresponding to the actual construction elements (except elements shown schematically in the form of symbols).
4.4 Objects from different disciplines need to be coordinated with respect to reference points.
4.5 Units must be the same for all BIM models. As a standard, the metric system is adopted.
IX

5 GENERAL REQUIREMENTS TO THE BASIS OF DESIGN
5.1 All basis material must be within the agreed data formats, allowing full operation with them on reading, printing and editing.
5.2 As a basic format of data in AutoCAD Civil 3D, use LandXML.
5.3 Baseline data should be available in formats that compatible with AutoCAD Civil 3D. They have to be coordinated with respect to the project’s global coordinate system.
5.4 If data cannot be obtained in the correct format, they must be converted.
X

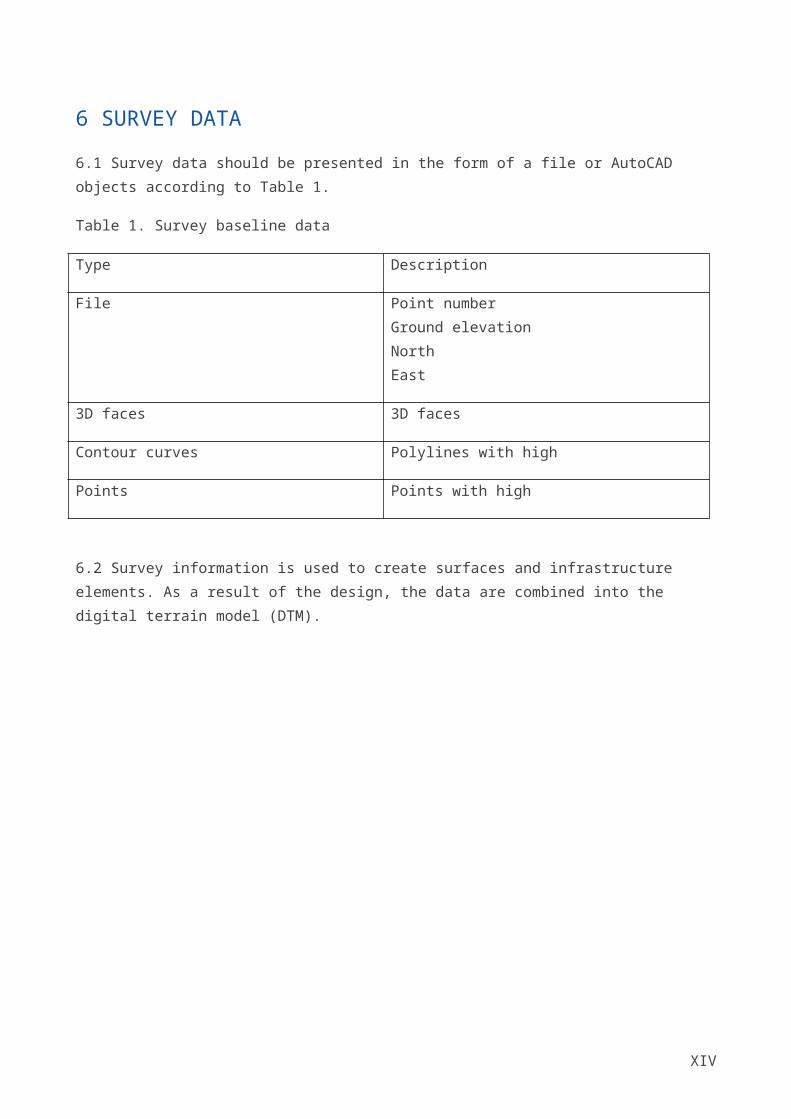
6 SURVEY DATA
6.1 Survey data should be presented in the form of a file or AutoCAD objects according to Table 1.
Table 1. Survey baseline data
Type Description
File Point numberGround elevationNorthEast
3D faces 3D faces
Contour curves Polylines with high
Points Points with high
6.2 Survey information is used to create surfaces and infrastructure elements. As a result of the design, the data are combined into the digital terrain model (DTM).
XI

7 TOPOGRAPHICAL SYMBOLS
7.1 The data should be presented in the form of text files.
7.2 Topographical symbols are coded according to the document “Topo Map Symbols. Scales 1:5000, 1:2000, 1:1000, 1:500. – Moscow: Nedra, 1989.”
7.3 Each sign must include the following information.
Table 2. Baseline data for topo symbols.
Type Description
Point Point numberGround elevationNorthEastCode
Object (contour) Point numberReference
NorthEastElevation
7.4 Data on topo symbols can come in the same file as the survey data.
XII
8 GEOLOGIC DATA
8.1 Geological data should be presented in the form of surfaces.
8.2 The following baseline data are required:
Column number/ name
The top of the layer (deepening)
The bottom of the layer (deepening)
North
East
Earth level
Ground water level.
8.3 Additional data:
Column depth
Layers of soil (clay, chalk, sand etc.).
8.4 A unique color must be assigned to each layer of soil. Colors are described in additional document.
8.5 Geological surface should be formed for the bottom and top of the column element (soil).
8.6 Surface naming conventions:
<Field1> _<Field2> _<Field3>
Field1 – Code (optional)
Field2 – Name. You can use spaces.
Field3 – Designation indicating the bottom or the top soil layer.
Example:
6001_ Clunch_Bottom
XIII
9 REQUIREMENTS TO LEVELS OF DEVELOPMENT
9.1 Information models are developed in stages, listed in Table 3.
9.2 Completion of BIM model is determined by the level of development according to the LOD specification (see Appendix A).
9.3 Completion of aggregated model, consisting of discipline-specific BIM models determined by the stage of development for the aggregated model.
9.4 Each stage corresponds to a certain type(s) of BIM models, according to Table 3.
9.5 Each stage is considered complete when the objects of the aggregated model are corresponded to LOD (see Table 3).
XIV

10 DEVELOPMENT AN AGGREGATED MODEL
The table below shows model progression (road as an example).
Table 3. Model Progression Specification (in relation to stages, BIM uses and LODs).
Stage Model Type Use(for roads)
Export Data(for roads)
Level of Development (LOD)
Surface Road Pipework Pier
Preliminary Design Stage
Preliminary /concept BIM model
Territory analysis and selection of possible sites for the road in accordance with its category Alternative study Collision analysis (in plan view) Assessment of the situation in the road reservation The preliminary cost estimate The preliminary quantities estimate The combination of BIM models of objects from different disciplines Visualization of the road options Selection and approval of optimal variant for the road
Road reservation Road plan DTM
200 100 100 100
15

Stage Model Type Use(for roads)
Export Data(for roads)
Level of Development (LOD)
Surface Road Pipework Pier
Design Stage
Refined BIM model
Collision analysis (in plan view/profile) Selection of preliminary design The preliminary quantities estimate
Preliminary calculations of culverts and storm sewer systems Visualizations The combination of BIM models of objects from different disciplines
Generation of schedules Design decision making
Plan and alignment Road model Road surface Refined DTM Schedules
300 200-300 100 100
Design BIM model
Collision analysis (in plan view/profile) Quantities estimation Visualizations The combination of BIM models of objects from different disciplines
Generation of schedules Design decision making Cost estimation Design drawings generation
Road model at LOD 300 Custom road surface Schedules
300 350 200 200
Detailed Design Stage
Detailed BIM model
Quantities estimation on all objects Creation of high quality video presentations Schedules generation Accurate collision detection Construction schedule visualization
Detailed drawing generation
300+ 350+ 300+ 300+
16

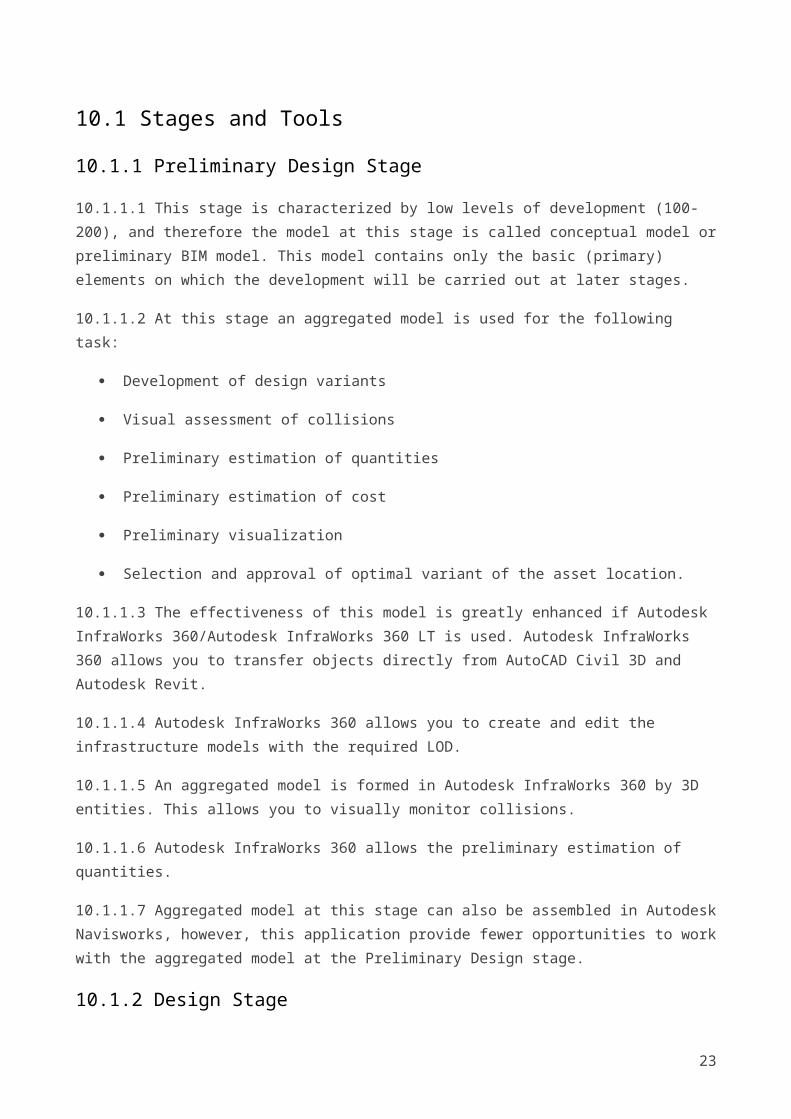
10.1 Stages and Tools
10.1.1 Preliminary Design Stage
10.1.1.1 This stage is characterized by low levels of development (100-200), and therefore the model at this stage is called conceptual model or preliminary BIM model. This model contains only the basic (primary) elements on which the development will be carried out at later stages.
10.1.1.2 At this stage an aggregated model is used for the following task:
Development of design variants
Visual assessment of collisions
Preliminary estimation of quantities
Preliminary estimation of cost
Preliminary visualization
Selection and approval of optimal variant of the asset location.
10.1.1.3 The effectiveness of this model is greatly enhanced if Autodesk InfraWorks 360/Autodesk InfraWorks 360 LT is used. Autodesk InfraWorks 360 allows you to transfer objects directly from AutoCAD Civil 3D and Autodesk Revit.
10.1.1.4 Autodesk InfraWorks 360 allows you to create and edit the infrastructure models with the required LOD.
10.1.1.5 An aggregated model is formed in Autodesk InfraWorks 360 by 3D entities. This allows you to visually monitor collisions.
10.1.1.6 Autodesk InfraWorks 360 allows the preliminary estimation of quantities.
10.1.1.7 Aggregated model at this stage can also be assembled in Autodesk Navisworks, however, this application provide fewer opportunities to work with the aggregated model at the Preliminary Design stage.
10.1.2 Design Stage
10.1.2.1 At this stage shall be used objects developed at the Preliminary Design stage.
10.1.2.2 The objects are enhanced to the correspondent LOD requirements.
10.1.2.3 At this stage there are two types of aggregated model: refined model and design model.
10.1.2.4 The refined BIM model is characterized by a higher (relative to the model at the Preliminary stage) LOD for the surfaces and corridors. The LOD for pipeworks and piers does not change.
17

10.1.2.5 The refined BIM model is used for the same tasks as the conceptual BIM model, however, with higher accuracy of calculating quantities and detecting collisions.
10.1.2.6 Design BIM model contains objects of higher LOD (relative to the refined BIM model).
10.1.2.7 Infrastructure objects in the design BIM model are developed entirely.
10.1.2.8 Pipeworks and piers in the design BIM model are refined to LOD 200, which allows to identify a greater number of collisions.
10.1.2.9 On the basis of design models it is possible to calculate quantities to generate schedules and drawings.
10.1.2.10 Aggregated design model if assembled in Autodesk Navisworks.
10.1.2.11 When assembling the design BIM model, the data from AutoCAD Civil 3D (and/or from Autodesk Revit) is transferred to Autodesk Navisworks in full, while maintaining consistency and accuracy. This allows to obtain information about all objects involved in the development of the aggregated model from a single software (Autodesk Navisworks), generate reports and identify collisions.
10.1.3 Detailed Design Stage
10.1.3.1 At this stage, the objects designed at the Design stage, are updated with all the elements set in the customer's requirements.
10.1.3.2 Detailed BIM model reflects the objects in the form in which they will be built.
10.1.3.3 Based on the detailed model, the detailed drawings can be generated.
10.1.3.4 At this stage an aggregated model is assembled in Autodesk Navisworks.
10.1.3.5 BIM tasks at this stage are:
Obtain accurate quantities
Visualize construction schedule
Create high quality video presentations and detail views.
10.1.3.6 This stage allows:
Generate schedules
Obtain accurate quantities
Generate the detailed drawings.
10.1.3.7 This model can be further refined for use during construction and operation.
18

11 NAMING CONVENTIONS
The following rules and naming schemes are a common approach and recommendations for the development of naming conventions.
11.1 General Recommendations
11.1.1 It is recommended to create a list of objects and items that need to assign codes, and to agree on this list with the customer. The list must include the following objects and elements:
Terrain models
Alignment models
Corridor models
Pipe networks models
Custom models.
11.1.2 The codes are specified in the form set out in Table 4 below.
Table 4. The form for the list of codes.
CodeType of an object or element
Description
1 2 3
Example:
CodeType of an object or element
Description
1 2 3
1000 Existing terrain Surface representing the existing terrain
2000 Centerline Centerline of road
11.1.3 Code conventions should be agreed with the customer.
19

11.2 Rules for Naming Objects and Elements
11.2.1 This section describes the basic rules for naming objects and elements.
11.2.2 Surface:
<Field1>_<Field2>_<Field3>
Field1 – Code (optional)
Field2 – Number of surface
Field3 – Name of surface.
Example:
1000_1_Existing
11.2.3 Corridor:
<Field1>_<Field2>_<Field3>
Field1 – Code (optional)
Field2 – Number of corridor
Field3 – Name of corridor.
Example:
3001_1_Main
11.2.4 Alignment:
<Field1>_<Field2>_<Field3>_<Field4>
Field1 – Code of the corridor (optional)
Field2 – Code (optional)
Field3 – Number of alignment
Field4 – Name of alignment.
Example:
3001_3011_1_Main
11.2.5 Pipe network:
<Field1>_<Field2>
20

Field1 – Code (optional)
Field2 – Number of pipe network.
Example:
4001_1
11.2.6 Requirements for naming objects and other elements must be agreed with the customer.
11.3 Layer Naming
11.3.1 The naming is preserved in all templates designed for different disciplines.
11.3.2 The layer name of an object or element must contain the code and number of the object.
Example:
<Field1>_<Field2>_<Field3>
Field1 – Code of the corridor (optional)
Field2 – Number of the corridor.
11.3.3 Data included to the <Field 3> must be in accordance with the layer naming convention. In the absence of such a convention the <Field3> should include a description of the elements in the layer.
Example: 3001_1_Centerline
11.4 Style Naming
11.4.1 In the process of developing an AutoCAD Civil 3D template, new styles should be given new names.
11.4.2 The names are formed by adding a prefix to the short name of the company for which a template is developed. Use the emphasis as a separator between the prefix and the style name:
<Field1>_<Field2>
Field1 – Company name
Field2 – Style name. You can use spaces.
Example:
XXX_ Contours
21

11.4.3 If you need to make changes to a style, it is not allowed to edit an existing style. To do this, you must copy the most appropriate style and give it a new name. The name is formed by adding the name of the author between the company name and the style name:
<Field1>_<Field2>_<Field3>
Field1 – Company name
Field2 – Author name
Field3 – Style name. You can use spaces.
Example:
XXX_ Smith_Contours
11.4.4 If you need to create a new style, it is not allowed to edit an existing style. To do this, you must copy the most appropriate style and give it a new name. The name is formed by adding the name of the author between the company name and the style name:
<Field1>_<Field2>_<Field3>_<Field4>
Field1 – Company name
Field2 – Author name
Field3 – Style name. You can use spaces.
Field4 – Description.
Example:
XXX_ Smith_Contours_0.1m
11.5 Subassembly Naming (PKT files)
11.5.1 Three types of names are used:
names in the line Subassembly Name in SAC
Names in the PKT file names
Names in the AutoCAD Civil 3D Tool Palette.
11.5.2 For all three types of names is recommended to use the base name.
11.5.3 Rules for a base name:
<Field1>_<Field2>
Field1 – A brief description (use underscore instead of spaces) or code (in the case you include these elements in the list for coding)
22
Field2 – Subassembly version.
Example without code: DitchedConnectionToExistingTerrain_v1.01
Example with code:
6011_v1.01
11.5.4 For names under Subassembly Name in SAC (Packet Settings tab) the base name should be changed in accordance with the technical limitations of SAC. In particular, you cannot use spaces, periods, commas, etc. Therefore, the base name must be converted into the following form: DitchedConnectionToExistingTerrain_v101. If the code is used, no changes are required.
11.5.5 The common operating system restrictions are applied to the PKT file names. This means that the base name can be used as is.
11.5.6 For AutoCAD Civil 3D Tool Palette, the names are inherited from Subassembly Name of SAC. It is recommended to change the names of the Tool Palette by replacing underscores with spaces:
Example without code: Ditched connection to existing terrain v1.01
Example with code:
6011 v1.01
11.6 Survey Data Naming
11.6.1 Survey data is represented by Civil 3D Point objects. All points must be formed into groups.
For group:
<Field1>_<Field2>
Field1 – Number of group
Field2 – Description of group.
For point:
<Field1>_<Field2>
Field1 – Number of group
Field2 – Number of point.
The number of group corresponds to a group in which the point is located.
11.7 Property Naming
23

11.7.1 Any custom properties that are added to the element of a BIM model should be named according to their content:
<Field1>
Field1 – Name of property.
Example:
FloorsHigh
11.7.2 AutoCAD Civil 3D properties are standard properties.
11.8 Material Naming
11.8.1 Material library has a tree structure:
First level:
<Field1>
Field1 – Library section.
Example:
Main libraryAdditional library
Second level:
<Field1>
Field1 – Category.
Example without code:
ConcreteGrass
11.8.2 Instead of names, codes can be used at the second level:
<Field1>
Field1 – Code.
Example with code:
24

41114211
11.8.3 Within the category, several categories can be created.
Third level:
<Field1>
Field1 – Name.
Example without code:
LuggedBlock
11.8.4 In case of using codes of a second level, the elements of the third level inherit the codes:
<Field1>_<Field2>
Field1 – Code
Field2 – Name.
Example with code:
4111_ Lugged4211_ Block
25

12 SPATIAL LOCATION AND COORDINATION
12.1 BIM projects shall use real world coordinate systems required by the customer (the SK-42, SK-63, SK-95 and MSK-xx coordinate systems and Baltic 77 vertical datum).
12.2 Currently, official coordinate systems in the Russian Federation are SK-95 – for survey works and MSK-xx – for cadastral works.
12.3 Transitions between Coordinate Systems
12.3.1 To go from the different coordinate systems you need to use functionality AutoCAD Map 3D, embedded into AutoCAD Civil 3D.
12.3.2 The algorithm of transition from one coordinate system to another should be done in the following sequence:
a) Create a source coordinate system in the AutoCAD Map 3D coordinate library.
b) Create a target coordinate system in the AutoCAD Map 3D coordinate library.
c) Assign the current coordinate system to the current drawing.
d) Assign the target coordinate system to an empty drawing.
e) Insert the data from the source drawing in the empty drawing using the AutoCAD Map 3D query tool.
12.3.3 Note that copying the data between the drawings with different coordinate systems does not work. Only an AutoCAD Map 3D query is allowed.
26

13 WORKING WITH TEMPLATES
13.1 All AutoCAD Civil 3D project data is stored in drawing files (DWG). Therefore storage scheme for AutoCAD Civil 3D settings has the same structure as AutoCAD and is based on DWT files.
13.2 The key point is to set the location of DWT templates when creating a new drawing.
13.3 It is not allowed to store DWT templates on local workstations.
13.4 All templates should be located in a shared network folder. The editing privileges may have only BIM Manager / Coordinator.
13.5 In AutoCAD global settings on each workstation you must set a network folder where DWT templates are located.
13.6 The AutoCAD global settings you must specify a template will be used by default when creating a new drawing (QNEW command).
14 DWT TEMPLATES OVERVIEW
14.1 It is recommended to create templates using templates included in AutoCAD Civil 3D Russian Country Kit.
14.2 Templates should be discipline-specific:
Survey – SV;
General layout – GL
Roads – RD
Railways – RW
Pipe networks – PN
Basic – No prefix
General – No prefix.
14.3 It is recommended to use the following templates provided by AutoCAD Civil 3D Russian Country Kit:
Survey – Survey_RUS.dwt
General layout – GP_Roads_RUS.dwt
Roads – GP_Roads_RUS.dwt
Railways – Rails_RUS.dwt
Pipe networks – Pipes_RUS.dwt
27

14.4 Each block should include one or more templates. Templates should include only those styles and settings that are needed for a discipline.
14.5 The General template includes all styles. Not recommended for use; it is used only for project management.
14.6 The Basic template is necessary for the BIM manager’s individual tasks aimed to obtain custom data. For this purpose, in the Basic template, all styles are located on the layer "0". BIM manager creates custom layers and objects based on this template.
28

15 EXPORT FROM AUTOCAD CIVIL 3D
15.1 Export from AutoCAD Civil 3D to Autodesk Navisworks
15.1.1 AutoCAD Civil 3D data can be exported to Autodesk Navisworks by:
Method 1. Import a DWG file from Navisworks.
Method 2. Export an NWC file from AutoCAD Civil 3D using the command NWCOUT.
15.1.2 Method 1 is not recommended, because AutoCAD Civil 3D objects may be not correctly handled. Instead, use the method 2.
15.1.3 If AutoCAD Civil 3D does not recognize the NWCOUT command, the free Autodesk Navisworks NWC export utility must be installed.
15.1.4 Before executing the command NWCOUT you should:
Turn off all AutoCAD Civil 3D data you don’t want to export by applying the style "Nothing" or through the AutoCAD layers
All AutoCAD data should be turned off or frozen through the AutoCAD layers.
15.1.5 Be sure your DWG file contains only data you want to export.
15.1.6 It is not allowed to create a single NWC file that contains all objects. For example, for pipe networks you should create several individual NWC files by system (drainage, water, gas, etc.). If the infrastructure asset is too large, it is recommended to separate these files by zones or stations.
15.2 Export from Civil 3D to AutoCAD
15.2.1 Do not open AutoCAD Civil 3D drawings directly in AutoCAD. Instead, use AutoCAD Civil 3D export utility and then open the exported file in AutoCAD.
15.2.2 It is recommended to use AutoCAD Civil 3D 2015 or later.
15.2.3 After exporting the size of the drawing is reduced, and AutoCAD Civil 3D data is converted into a set of AutoCAD 3D objects.
15.3 Export from Civil 3D to Revit
You can export:
Civil 3D surfaces
Pipes and corridors.
29

15.3.1 Exporting AutoCAD Civil 3D Surfaces
There are three methods of exporting surfaces from Civil 3D to Revit: surfaces as contours, surfaces as 3D faces, exporting using COGO points.
15.3.1.1 Exporting surfaces as contours
You apply a surface style to represent a surface as a set of contour lines, and then export to DWG (or extract contours from the surface).
The resulting surface has a very low accuracy. Complex terrain elements and retaining walls cannot be modeled. Therefore, this method is not recommended, although can be used for visualizations.
15.3.1.2 Exporting surfaces as 3D faces
You apply a surface style to represent a surface as a set of 3D faces, and then export to DWG (or extract 3D faces from the surface).
If your surface is not complex, the resulting surface will have enough accuracy. Complex terrain elements and retaining walls cannot be modeled.
15.3.1.3 Exporting surfaces using COGO points
This method requires polylines, lines or break lines.
Do the following:
Convert the surface into a set of 3D faces.
Create COGO points on lines denoting a complex terrain. Increment should be less than 1 m. The smaller the increment, the higher the precision of the surface in the Autodesk Revit.
Create a surface and convert it into 3D faces.
Export 3D faces in Autodesk Revit using DWG.
This method is recommended in case of a complex terrain.
15.3.2 Exporting Pipe Networks and Corridors
15.3.2.1 Corridors and pipe networks should be exported as AutoCAD 3D solids.
15.3.2.2 Converting AutoCAD Civil 3D corridors into AutoCAD solids is possible, starting with AutoCAD Civil 3D Release 2015.
15.3.2.3 You can use AutoCAD Civil 3D Productivity Pack to convert pipe networks into AutoCAD solids but this software may work incorrectly in some cases. If your AutoCAD Civil 3D Productivity Pack doesn’t work correctly or not available in your company, you can do the following:
Select the pipe elements and execute the command EXPLODE. This creates an instance of AutoCAD block.
30

Execute the command EXPLODE again. This creates an AutoCAD solid.
Export the drawing to AutoCAD and then to Revit.
15.3.3 Data Exchange between AutoCAD Civil 3D and Revit Using ADSK
15.3.3.1 ADSK file format makes a data exchange between Civil 3D and Revit easier.
15.3.3.2 Using the ADSK format is recommended only if you double-check coordinates.
15.3.4 Export from AutoCAD Civil 3D to Autodesk InfraWorks 360
15.3.4.1 Exporting surfaces, alignments, profiles, pipe networks, corridors and corridor surfaces from AutoCAD Civil 3D to Autodesk InfraWorks 360 should be done through the IMX format.
15.3.4.2 Ensure that coordinate systems in AutoCAD Civil 3D and Autodesk InfraWorks are the same.
15.3.4.3 You can use formats other than IMX when you work in Autodesk InfraWorks.
15.3.4.4 To export loops from AutoCAD it is recommended to create AutoCAD Civil 3D parcels using loops. Parcels should be transmitted through the ODF file format by exporting AutoCAD Civil 3D objects to SDF files (_AeccExportToSDF command).
31

16 USING AUTODESK SUBASSEMBLY COMPOSER
16.1.1 It is recommended to use Autodesk Subassembly Composer (SAC).
16.1.2 Each closed shapes of a subassembly for which you want to calculate the volume, should be established in a separate Sequence or Flowchart.
16.1.3 Codes for each top subassembly elements (links) are required.
16.1.4 Codes for Links / Points should reflect the purpose of the corresponding elements in the road model.
16.1.5 Codes for the Shapes should match the hatch style for the Civil 3D subassembly shapes, created in AutoCAD Civil 3D code sets.
16.1.6. If you intend to create custom subassemblies in SAC in the future, it is recommended that you create in AutoCAD Civil 3D code sets, taking into account existing and future codes.
16.1.7 It is recommended to create a coding convention for custom subassemblies, which would take into account all the needs of the project / organization. Using this convention should be mandatory for all subassemblies of the project / organization.
16.1.8 Target and Input / Output parameters are named according to their purpose.
16.1.9 The names for all objects created in SAC, must be in Russian or other official language of the project. The use of multiple languages in naming is prohibited. In the names for points, links and shapes it is allowed to use software-generated acronyms in English. For example:
For points: P1, P2, P3…
For additional points: AP1, AP2, AP3…
For links: L1, L2, L3…
For additional links: AL1, AL2, AL3…
For shapes: S1, S2, S3…
For offset geometry: O1, O2, O3…
For loops: LO1, LO2, LO3…
At the same time, all these elements must have codes in Russian or other official language of the project.
16.1.10 For subassemblies included in the library, it is not allowed to have the points, links and shapes without codes.
16.1.11 Naming convention for points, links and shapes should be developed by BIM Manager / Coordinator.
32

16.1.12 The Decision element may be True or False. Both of them must have script names, indicating an event occurred.
16.1.13 Due to technical limitations of SAC you should use "_" instead of spaces in the names of the target parameters as well as input / output parameters. Therefore, it is always required to fill in the DisplayName fields using full parameter names without underscores.
16.2 Grouping SAC Objects
16.2.1 The SAC objects must be grouped. In particular, the objects with branching and other complex elements should be placed into the Flowchart. The objects with strictly consecutive elements should be placed to Sequence.
It is not recommended to place the following elements to the basic Subassembly Flowchart:
Geometry
Advanced Geometry
Auxiliary.
They should be grouped in Flowchart or Sequence.
16.3 Storage and Sorting of Subassembly Elements
16.3.1 Subassemblies can be created by BIM Manager / Coordinator or by team members.
It is not allowed to add subassemblies that have any warning message in the EventViewer tab in SAC!
Before adding to the library, any subassembly must be tested by BIM Manager / Coordinator and checked for compliance with the naming convention.
16.3.2 Subassemblies should be stored in a shared folder on a local network. The edit privileges are assigned only to BIM Manager / Coordinator.
Each seat should have a separate palette. It is recommended to split the elements by the type of tasks and place each type to a separate palette.
33

17 ROLES AND RESPONSIBILITIES
17.1 There are three primary functions in BIM process:
Strategic
Management
Production.
17.2 The main functions should be distributed among the Roles.
17.3 The figure below shows the roles (BIM Manager, BIM Coordinator, and BIM Author) and correspondent responsibilities. In small projects and small companies, most of responsibilities can be performed by one person or a group of persons.
Fig.1 Roles and Responsibilities
17.4 Strategic Function
34

17.4.1 Execution of this function is assigned to the BIM Manager. Primary responsibilities:
Developing the corporate BIM strategy
Best practice / research
Creating BIM processes and workflows
Creating and supporting BIM standards and protocols
BIM implementation
Training strategy.
17.4.2 It is important to understand how vital a BIM Manager’s role is. It is not simply a rebranded CAD Manager, nor does it replace the CAD Manager’s role. It is about understanding what BIM can achieve: vision, engaging external stakeholders, collaborating partners. Somebody credible has to be responsible for the BIM strategy, the process change and the cultural impact. In-house or outsourced, successful models cannot be built without a strategic manager.
17.5 Management Function
17.5.1 Execution of this function is assigned to the BIM Manager and/or BIM Coordinator. This is a project focused role, primary responsibilities being:
BIM Execution Plan
Auditing the project data and modeling principles
Participating in multidisciplinary coordination meetings
Content creation and distribution, content quality control.
17.5.2 Each project needs Coordinator(s) to help set up the project, audit the model and co-ordinate with all collaborators. Multi-disciplinary coordination with BIM is essential. Coordinator(s) may manage several small projects.
17.6 Production Function
17.6.1 Execution of the function is assigned to the BIM Authors. They are discipline-specific designers working on different parts of the project with skill and experience in BIM software.
17.6.2 This is a project focused role, primary responsibilities being information creation.
17.6.3 BIM experience is not essential to produce the model but technology skills are. Therefore all the employees at this level should have the appropriate skills.
35

18 COLLABORATIVE BIM DATA SHARING
A “Common Data Environment” (CDE) approach should be adopted to allow information to be shared between all members of the project team. A major constituent of collaborative environments is the ability to communicate, re-use and share data efficiently without loss or misinterpretation.
18.1 This Standard is aligned with BS1192:2007 Collaborative Working, which defines the process for project collaboration and efficient data sharing.
18.2 The CDE is a means of allowing information to be shared efficiently and accurately between all members of the project team, and enables multi-disciplinary design teams to collaborate in a managed environment.
18.3 There are four phases to CDE:
Work In Progress (WIP)
Shared
Published / Issued
Archive.
18.4 BIM information, once prepared, should be placed into the WORK-IN-PROGRESS (WIP) area and then passed through the areas where the information is:
authored, checked, reviewed and approved for use outside of the authoring team (Work In Progress (WIP) area)
shared with other disciplines to use as reference material for their own design development and authorized to publish (Shared area)
published (in non-changeable formats) for use by the total project team (Published / Issued area)
stored and maintained for knowledge, regulatory and legal requirements (Archive area).
18.5 The phases of CDE are illustrated on Fig. 2.
18.6 The CDE can be implemented in a number of ways, depending on organizational preference: as a standard project folder structure located on central network servers, a project extranet, or an appropriate PDM system, such as Autodesk Vault.
18.7 When using a PDM system, it is recommended, for each area, that you maintain status information and version control in the project files.
36

Fig. 2. CDE structure
18.8 Work In Progress (WIP)
18.8.1 WIP model files shall be developed in isolation and contain information for which each stakeholder is responsible.
18.8.2 These shall be stored in, and worked on from the team’s WIP section of the filing system.
18.8.3 Each stakeholder has access only to its own area of CDE.
18.8.4 Prior to sharing, the data shall be checked, approved and validated.
18.8.5 WIP model files are reviewed and approved by the task team manager and BIM Manager/Coordinator.
37

18.9 Shared
18.9.1 To facilitate coordinated, efficient working, each party shall make their design data available for project-wide formal access through a shared repository. These files shall be accessible by all from a central location, or replicated in the Shared Area of the project folder structure of each party.
18.9.2 Sharing of models shall be carried out on a regular basis in order that other disciplines are working to latest validated information.
18.9.3 Files that are stored in this area must be protected from changes.
18.9.4 Changes to the shared data shall be effectively communicated to the team through drawing issue, change register or other suitable notice, such as e-mail.
18.9.5 The SHARED area of CDE should also serve as a repository of data that is available for sharing across BIM project and were officially issued/received to/from the Customer or other external stakeholders. In the absence of shared resources, the Customer can receive files via email or use a cloud storage to place them in its own CDE.
18.9.6 BIM model copied into the SHARED area can be used by BIM Manager/Coordinator to build aggregated multidisciplinary BIM models (e.g., using Autodesk Navisworks) and to carry out collision checks.
18.10 Published / Issued
18.10.1 2D DWF or PDF drawings and sheets shall be stored in the Published Area of the folder structure once formally checked, approved and authorized in accordance with corporate quality procedures.
18.10.2 A record of all issued deliverables shall be maintained in softcopy and hardcopy where appropriate.
18.10.3 Only those drawings which it has been deemed necessary to revise will be reissued following modification work.
18.11 Archive
18.11.1 Archiving of all output data from the BIM shall be stored in the Archive section of the project folder, including published, superseded and „As Built‟ drawings and data.
18.11.2 Additionally, at key stages of the design process, a complete version of the BIM data and associated drawing deliverables shall be copied into an archive location.
18.11.3 Archived data shall reside in logical folder repositories that clearly identify the archive status e.g. 09-12-11 Stage D Design.
38

18.12 BIM Data Exchange
18.12.1 Before exchanging BIM data you must ensure the following:
File formats, AutoCAD Civil 3D version, and naming conventions match corporate BIM standard
The elements used in the model correspond to the classification of data in accordance with the corporate classification system (coding)
Model files are up to date and contain all the local changes made by all users
Linked data necessary to load the models are available
All reference files are deleted
Project team notified of all changes since the last release.
18.13 Naming Conventions
This section defines a unified approach to the identification of objects across the BIM project.
18.13.1 Structure of Names, General Naming Conventions and Character Restrictions
All fields shall be separated by a hyphen character “-”.
Do NOT use spaces.
Within a field, CamelCase shall be used instead of a space to separate words.
Abbreviations and codes shell be written in uppercase.
It is not recommended to use the following symbols:
, . ! £ $ % ^ & ( ) { }[ ] + = @ ’ ~ # ¬ ` ‘
Do NOT use the following symbols:\ / ? : * ” < >
18.13.2 Naming of model files shall be based on BS1192:2007.
< Field1> - < Field2> - < Field3> - < Field4> - < Field5> - < Field6> - < Field7>
Field 1: Project Code
An abbreviated code or number identifying the project.
Field 2: Originator Code
An abbreviated code identifying the originating stakeholder.
Field 3: System
Identifier of which system the model file relates to (terrain, road, pipeworks, pier).
39

Field 4: place
Data in the field can point to a specific structure of the project.
Field 5: Type
Document type, which will be M3 for 3D model files.
Field 6: Role
Discipline identifier code.
Field 7: Number
Is used to generate a unique file name. Drawing Numbering protocols should be established for the project.
18.13.3 All fields in the file name are optional.
18.13.4 Example: 123-XXX-DE-PP21-M3-AR-0001.dwg
Project Code 123
Originator Code XXX
Type Design elevation
Place PP21
Type M3
Role AR
Number 0001
18.14 Project Folder Structure
18.14.1 All project data shall be held within the standard project folder structure located on central network servers.
18.14.2 The folder structure is developed inside the company.
18.14.3 It is recommended to provide a separate folder for projects and models of infrastructure assets. This folder must contain subfolders that store data of various types.
18.14.4 In particular, the following subfolders should be created:
“Data from other projects”
“Model”
“Shared data”
“Archive”
40

18.14.5 The subfolder “Data from other projects” keeps the drawings and data from other projects necessary for the development of this project. If a file from another project required only as a reference and will not be used to the resulting drawings, it is stored in this folder.
18.14.6 All data about the models developed during the project, should be stored in the "Model" subfolder. This folder contains only the current versions of files. The images and office documents directly related to the model file must also be stored in this folder. Creation of subfolders is allowed, if necessary for the operation of AutoCAD Civil 3D and other software.
18.14.7 The "Shared data" subfolder contains the files needed for communication with other disciplines of the project. It may contain a copy of model files that are open to shared access. Files in this subfolder cannot be directly used in the models.
18.14.8 If the file has multiple versions, all versions other than the actual are be stored in the "Archive" subfolder.
41

APPENDIX A. BASE LOD SPECIFICATION FOR INFRASTRUCTURE PROJECTS
Table A.1. Baseline data. Existing terrain, geology.LOD 100 LOD 200 LOD 300 LOD 350
Geometry:Existing terrain is displayed as a 2D surface (plane) with a reference point which is average for the area. If large elevation differences occur, then several surfaces (planes) on different levels are allowed.
Geometry:Existing terrain is displayed as a 3D surface based on points, contours and triangles, without any complex elements and further editing. Open access data may be used.
Geometry:Existing terrain is displayed as a 3D surface, complex elements are included. The surface does not require further editing.
Geometry:Existing terrain is displayed as a set of 3D surfaces, complex elements are included. Geological survey data and auxiliary surfaces are added.
Object type(s):2D/3D surface.
Object type(s):3D surface.
Object type(s):3D surface, breaklines (feature lines, polylines, solids)
Object type(s):3D surfaces, breaklines (feature lines, polylines, solids), AutoCAD solids, point clouds
Properties:Layer, name of surface, mean elevation.
Properties:Layer, name of surface, surface elevations.
Properties:Layer, name of surface, surface elevations.
Properties:Layer, name of surface, surface elevations, solid volumes. Volume between surfaces.
Where used:Conceptual design, initial studies.
Where used:Conceptual design, preliminary design, feasibility study
Where used:Preliminary design, basic design, design documentation, construction management planning, implementation planning
Where used:Basic design, design documentation, construction, construction management planning, implementation planning
42

Table A.2. Slope modeling
LOD 100 LOD 200 LOD 300 LOD 350
Geometry:Excavation outline is displayed as a 2D surface (plane) with a reference point which is average for the area. If large elevation differences occur, then several surfaces (planes) on different levels are allowed.
Geometry:Excavation outline is connected to the target surface through a slope (approximate) or a retaining wall. The slope or retaining wall is determined by the low-accuracy breaklines or grading objects.
Geometry:3D surface (without complex elements) with 3D breaklines and grading objects. Slope and elevation values are accurate and can be modified; the whole object is then rebuilt accordingly.
Geometry:Detailed 3D surface with complex elements, 3D breaklines and grading objects. Slope and elevation values are accurate and can be modified; the whole object is then rebuilt accordingly.
Object type(s):2D/3D surface
Object type(s):3D surfaces, 3D breaklines
Object type(s):3D surfaces, 3D breaklines, grading objects
Object type(s):3D surfaces, 3D breaklines, grading objects
Properties:Layer, name of surface, mean elevation
Properties:Layer, name of surface, surface elevations, breakline elevations
Properties:Layer, name of surface, surface elevations, breakline elevations, slope values, volumes
Properties:Layer, name of surface, surface elevations, breakline elevations, slope values, volumes
Where used:Conceptual design, initial studies.
Where used:Conceptual design, preliminary design, feasibility study
Where used:Preliminary design, basic design, design documentation, construction management planning, implementation planning
Where used:Basic design, design documentation, construction, construction management planning, implementation planning
43

Table A.3. Excavation for foundations
LOD 100 LOD 200 LOD 300 LOD 350
Geometry:Rough excavation (foundation not included) is displayed as a 2D surface (plane) with a bottom reference point which is average for the area. If large elevation differences occur, then several surfaces (planes) on different levels are allowed.
Geometry:Rough excavation (foundation not included) is displayed as a 2D surface (plane) with a bottom reference point which is average for the area. Connection to the existing surface is made through the vertical walls or arbitrary near-vertical slopes.
Geometry:3D excavation with foundation cuts and correct outcropping. Foundation cuts have vertical walls or near-vertical slopes.Surface inside the excavation is approximate.
Geometry:Detailed 3D surface with foundation cuts and grading objects. Slope and elevation values are accurate and can be modified; the whole object is then rebuilt accordingly.
Object type(s):2D/3D surface
Object type(s):3D surfaces, 3D breaklines, low-accuracy grading objects
Object type(s):3D surfaces, 3D breaklines, low-accuracy grading objects
Object type(s):3D surfaces, 3D breaklines, grading objects
Properties:Layer, name of surface, mean elevation
Properties:Layer, name of surface, surface elevations, breakline elevations, approximate volumes
Properties:Layer, name of surface, surface elevations, breakline elevations, slope values, volumes
Properties:Layer, name of surface, surface elevations, breakline elevations, slope values, volumes
Where used:Conceptual design, initial studies.
Where used:Conceptual design, preliminary design, feasibility study
Where used:Preliminary design, basic design, construction management planning, implementation planning
Where used:Basic design, design documentation, construction, construction management planning, implementation planning
44

Table A.4. Excavation for pipe network
LOD 100 LOD 200 LOD 300 LOD 350
Geometry:Rough excavation along a 3D line. The depths are determined by rules, design requirements are ignored. The width of excavation is arbitrary.
Geometry:Rough excavation along a pipe network. The depths are determined by piping profile or by rules. The width of excavation is determined by rules with low accuracy.
Geometry:Excavation along the pipe object, correct width but no slopes. Width and profile correspond with the design values.
Geometry:Detailed 3D surface with consideration for all network features. Using corridors is allowed.
Object type(s):3D line (3D polyline, feature line)
Object type(s):Pipe network elements
Object type(s):Pipe network elements, 3D surfaces, 3D breaklines
Object type(s):3D surfaces, 3D breaklines, grading objects and/or corridors
Properties:Layer, elevation, slope, tentative volume
Properties:Layer, elevation, slope, diameter, approximate volume
Properties:Layer, elevation, slope, diameter, volumes
Properties:Layer, elevation, slope, diameter, volumes
Where used:Conceptual design, initial studies.
Where used:Conceptual design, preliminary design, feasibility study
Where used:Preliminary design, basic design, construction management planning, implementation planning
Where used:Basic design, design documentation, construction, construction management planning, implementation planning
45

Table A.5. Roads and railways
LOD 100 LOD 200 LOD 250 LOD 300 LOD 350 LOD 400
Geometry:Centerline of road (2D).
Geometry:Corridor is a plane with an expected width of the track or the ROW. Corridor profile coincides with the existing terrain.
Geometry:The same as the LOD 200, but corridor profile coincides with the approximate grade surface.
Geometry:The corridor has the alignment and the profile. The design represents the plane of the top of the road with cross-slope and outcrops.The top surface of the roadway and slopes.
Geometry:The same as the LOD 300, but elaborated in detail and representing the complete road profile with outcropping, ditches etc. The top and bottom surfaces of the road.
Geometry:The complete road model with full assembly, sawtooth profile elevations, structural elements, fences, screens, pillars, culverts etc.
Object type(s):Alignment (2D)
Object type(s):Alignment, corridor, assembly
Object type(s):Alignment, corridor, assembly, layout profile, surface
Object type(s):Alignment, corridor, assembly, layout profile, surfaces
Object type(s):Alignment, corridor, assembly, layout profile, surfaces
Object type(s):Alignment, corridor, assembly, layout profile, surfaces, AutoCAD solids
Properties:Layer, stations, criteria
Properties:Layer, stations, area
Properties:Layer, stations, area, layout profile
Properties:Layer, stations, area, layout profile, volumes, cross-sections
Properties:Layer, stations, area, layout profile, volumes, cross-sections
Properties:Layer, stations, area, layout profile, volumes, cross-sections
Where used:Planning
Where used:Planning, area calculation
Where used:Conceptual design, preliminary design, feasibility study
Where used:Preliminary design, basic design, construction management planning, implementation planning
Where used:Basic design, design documentation, construction, construction management planning, implementation planning
Where used:Design documentation, construction, construction management planning, implementation planning
46

Table A.6. Intersections. Single-level intersection modeling with AutoCAD Civil 3D corridors
LOD 100 LOD 200 LOD 300 LOD 350 LOD 400
Geometry:Alignment centerline intersection (2D). May be numbered.
Geometry:Corridor intersection is not formed. Corridor boundaries may stay apart.Assembly may either only include the top of the roadway or be complete. Corridors are not vertically matched.
Geometry:Corridors do touch but there are no additional matching areas. Assembly is complete. Corridors are vertically matched.
Geometry:Complete single-level intersection. Corridors have additional matching areas.
Geometry:The complete road intersection model with full assembly, sawtooth profile elevations, structural elements, fences, screens, pillars, culverts etc.
Object type(s):Alignment (2D)
Object type(s):Alignment, corridor, assembly
Object type(s):Alignment, corridor, assembly, layout profile, surfaces
Object type(s):Alignment, corridor, assembly, layout profile, surfaces
Object type(s):Alignment, corridor, assembly, layout profile, surfaces, AutoCAD solids
Properties:Layer, stations, criteria.
Properties:Layer, stations, area.
Properties:Layer, stations, area, layout profile, volumes, cross-sections.
Properties:Layer, stations, area, layout profile, volumes, cross-sections.
Properties:Layer, stations, area, layout profile, volumes, cross-sections.
Where used:Planning
Where used:Planning, area calculation
Where used:Preliminary design, basic design, construction management planning, implementation planning
Where used:Basic design, design documentation, construction, construction management planning, implementation planning
Where used:Design documentation, construction, construction management planning, implementation planning
47
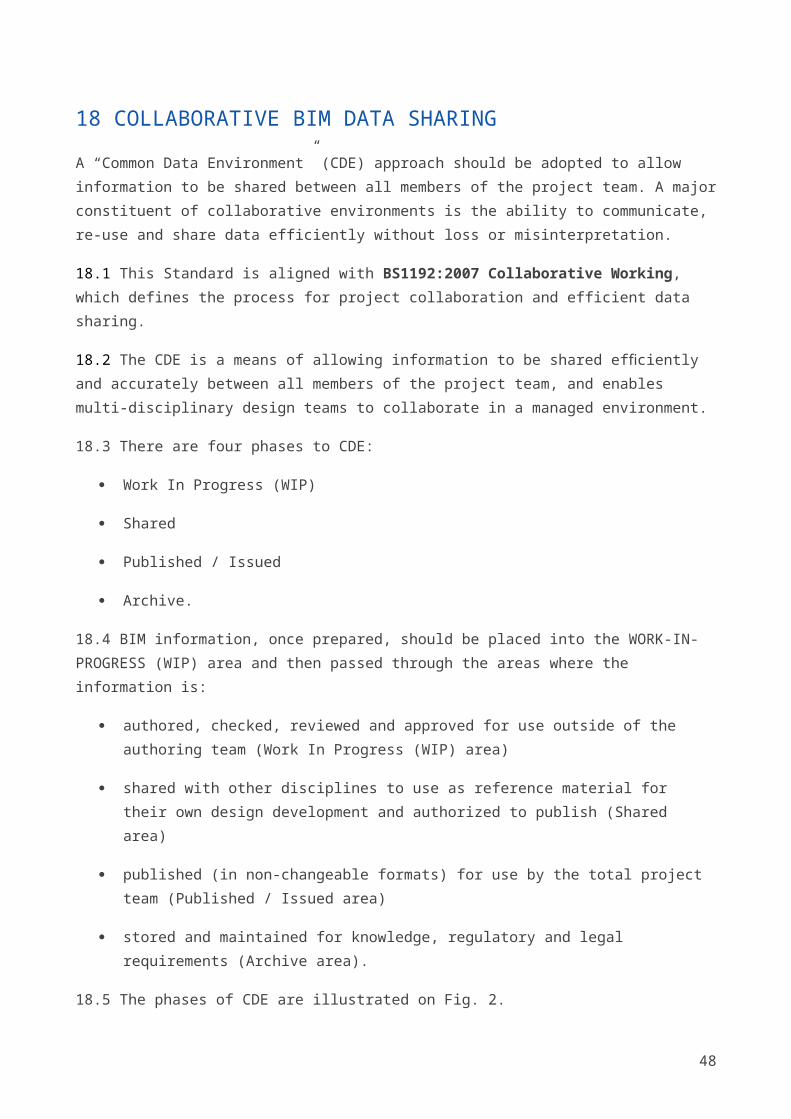
Table A.7. Road and railway objects modeled outside AutoCAD Civil 3D (incl. man-made objects)
LOD 100 LOD 200 LOD 300 LOD 350 LOD 400
Geometry:Asset’s line or outline.
Geometry:3D volume representing the overall dimensions.
Geometry:3D model with main elements for collision checking and accurate dimensions. Solids are classified by type and by layer for calculation and visualization.
Geometry:3D model containing all elements (incl. those that are invisible). Solids are classified by type and by layer for calculation and visualization.
Geometry:Asset modeled in full detail; the model can be passed to production.
Object type(s):2D polyline
Object type(s):AutoCAD solids
Object type(s):AutoCAD solids
Object type(s):AutoCAD solids
Object type(s):AutoCAD solids
Properties:Layer, length, area
Properties:Layer, dimensions, volume
Properties:Layer, dimensions, volumes
Properties:Layer, dimensions, volumes
Properties:Layer, accurate dimensions, volumes
Where used:Planning
Where used:Conceptual design, preliminary design, feasibility study
Where used:Preliminary design, basic design, construction management planning, implementation planning
Where used:Basic design, design documentation, construction, construction management planning, implementation planning
Where used:Production drawings
48
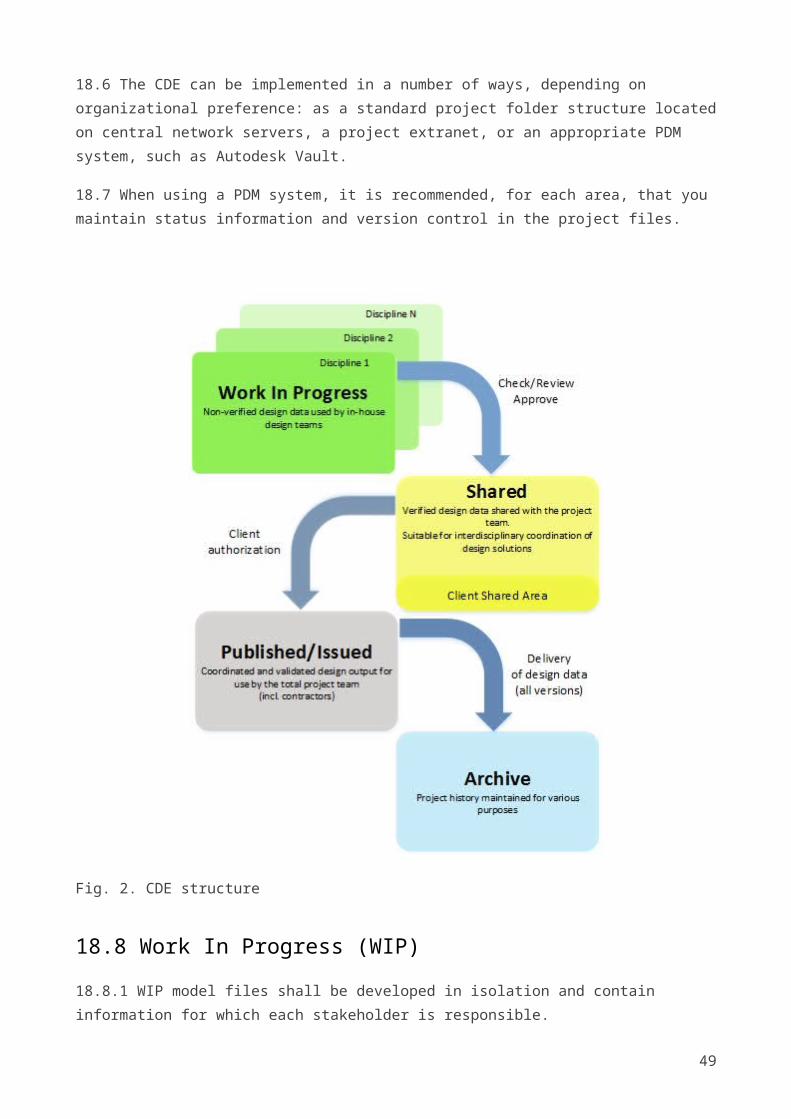
Table A.8. Water development assets
LOD 100 LOD 200 LOD 300 LOD 350 LOD 400
Geometry:Asset centerline
Geometry:3D volume roughly corresponding to overall dimensions. May be represented by feature lines, an AutoCAD® solid or a corridor.
Geometry:3D model with an accurate top surface. Outcrops are prepared.
Geometry:3D model with accurate surfaces for all layers and construction stages.
Geometry:Asset modeled in full detail with consideration for all auxiliary assets
Object type(s):2D alignment
Object type(s):AutoCAD solids, surface
Object type(s):Surfaces, corridors
Object type(s):Surfaces, corridors
Object type(s):Surfaces, corridors, AutoCAD solids
Properties:Layer, stations, radii
Properties:Layer, dimensions, volume
Properties:Layer, dimensions, volumes
Properties:Layer, dimensions, volumes
Properties:Layer, accurate dimensions, volumes
Where used:Planning
Where used:Conceptual design, preliminary design, feasibility study
Where used:Preliminary design, basic design, construction management planning, implementation planning
Where used:Basic design, design documentation, construction, construction management planning, implementation planning
Where used:Design documentation, construction, construction management planning, implementation planning
49

Table A.9. Existing pipework
LOD 100 LOD 200 LOD 300 LOD 350 LOD 400
Geometry:2D lines in plan view
Geometry:3D lines with consideration for depth values. Missing depth are calculated based on rules.
Geometry:3D model of the AutoCAD Civil 3D pipe network. Missing depth are calculated based on rules. Structures may be omitted; tentative or void structures are allowed.
Geometry:3D model of the AutoCAD Civil 3D pipe network. Contains properties such as materials, capacity etc. All fittings are present. Depths as accurate as possible.
Geometry:Most accurate and actual data, additional survey in order to refine locations.
Object type(s):2D polylines
Object type(s):3D polylines, feature lines
Object type(s):AutoCAD Civil 3D pipe networks
Object type(s):AutoCAD Civil 3D pressure and non-pressure networks
Object type(s):AutoCAD Civil 3D pressure and non-pressure networks
Properties:Layer, length
Properties:Layer, elevation
Properties:Layer, quantity, depth, diameter, slope, type
Properties:Layer, quantity, depth, diameter, slope, type, network parameters
Properties:Layer, quantity, depth, diameter, slope, type, network parameters
Where used:Planning
Where used:Conceptual design, preliminary design, feasibility study
Where used:Preliminary design, basic design, construction management planning, implementation planning
Where used:Basic design, design documentation, construction, construction management planning, implementation planning
Where used:Design documentation, construction, construction management planning, implementation planning
50

Table A.10. Designed pipework
LOD 100 LOD 200 LOD 300 LOD 350 LOD 400
Geometry:3D feature lines in plan view
Geometry:Approximate locations and dimensions. Structures may be omitted; tentative or void structures are allowed.
Geometry:3D model of the AutoCAD Civil 3D pipe network. Structure dimensions and depths are approximate
Geometry:3D model of the AutoCAD Civil 3D pipe network. Contains properties such as materials, capacity etc. All fittings are present. The model only contains pipes and structures.
Geometry:Most accurate and actual data, including wall thickness, material types etc. All auxiliary network objects are also modeled.
Object type(s):Feature lines
Object type(s):AutoCAD Civil 3D pipe networks
Object type(s):AutoCAD Civil 3D pipe networks
Object type(s):AutoCAD Civil 3D pipe networks
Object type(s):AutoCAD Civil 3D pipe networks
Properties:Layer, length, slope, elevation
Properties:Layer, length, slope, elevation, linetype
Properties:Layer, quantity, depth, diameter, slope, type
Properties:Layer, quantity, depth, diameter, slope, type, network parameters
Properties:Layer, quantity, depth, diameter, slope, type, network parameters. AutoCAD solids
Where used:Planning
Where used:Conceptual design, preliminary design, feasibility study
Where used:Preliminary design, basic design, construction management planning, implementation planning
Where used:Basic design, design documentation, construction, construction management planning, implementation planning
Where used:Design documentation, construction, construction management planning, implementation planning
51

DISCUSSION FORUM
If you have any questions or comments on this standard, please visit forum.autodesk.ru.
If you want to adopt this standard in your organization, please do not hesitate to contact us [email protected].
BIM STANDARD FOR BUILDINGS
We have also developed the BIM standard for buildings. For more information, visit www.autodesk.ru/bim or download BIM standard for buildings.
AUTOCAD CIVIL 3D AND REVIT TEMPLATES
Revit templates, aka Autodesk Community Templates, were updated to comply with this standard.
Civil 3D templates are available within the software.
Revit templates are available on the Community website. Download templates
TERMS OF USE
This standard may be freely distributed and used in any format necessary, for the purpose of development corporate BIM standards.
Autodesk, Inc. © 2015. All rights reserved.
52


