The Complete Guide to Luminosity Masks Sean Bagshaw The following document is a set of notes to accompany my tutorials that deal with luminosity masks developed by Tony Kuyper. Many thanks to Rick Sorensen for compiling the notes and to Allan Vasenius for help with editing. Table of Contents 01 – Titles and Contents 02 - Forward by Tony Kuyper 03 - Introduction to the Complete Guide to Luminosity Masks 04 - Luminosity Mask Requirements 05 - Creating a Custom Luminosity Masking Workspace in Photoshop 06 - Necessary Paired Color Settings 07 - Understanding Luminosity Selections Part 1 08 - Understanding Luminosity Selections Part 2 How do you make a Luminosity Selection? What exactly is being selected? Once Luminosity Selection is made, how does it become a Luminosity Mask? Is a Luminosity Selection like any other selection? 09- Creating Lights Selections 10 - Creating Darks Selections 11 - Creating Midtone Selections 12 - Using the TK Actions and Panel 13 - Selecting the Right Mask 14 - Understanding Contrast 15 - Adjustment Possibilities - Introduction 16 - Tonal Balance Adjustments 17 - Brightness-Contrast 1
Transcript
The Complete Guide to Luminosity Masks
Sean Bagshaw
The following document is a set of notes to accompany my tutorials that deal with luminosity masks developed by Tony Kuyper.
Many thanks to Rick Sorensen for compiling the notes and to Allan Vasenius for help with editing.
Table of Contents
01 – Titles and Contents
02 - Forward by Tony Kuyper
03 - Introduction to the Complete Guide to Luminosity Masks
04 - Luminosity Mask Requirements
05 - Creating a Custom Luminosity Masking Workspace in Photoshop
06 - Necessary Paired Color Settings
07 - Understanding Luminosity Selections Part 1
08 - Understanding Luminosity Selections Part 2
How do you make a Luminosity Selection?
What exactly is being selected?
Once Luminosity Selection is made, how does it become a Luminosity Mask?
Is a Luminosity Selection like any other selection?
09- Creating Lights Selections
10 - Creating Darks Selections
11 - Creating Midtone Selections
12 - Using the TK Actions and Panel
13 - Selecting the Right Mask
14 - Understanding Contrast
15 - Adjustment Possibilities - Introduction
16 - Tonal Balance Adjustments
17 - Brightness-Contrast
1
18 - Saturation Adjustments
19 - Color Balance Adjustments
20 - Clarity and Sharpening Adjustments
21 - Blending Mode Adjustments
22 - Custom Masks - Introduction
23 - Custom Masks - Magic Mid-tones
24 - Custom Masks - Increased Tone Separation
25 - Custom Masks - Burn or Dodge a Mask
26 - Custom Masks - Painting an Enhanced Mask
27 - Localized Adjustments - Introduction
28 - Localized Adjustments - Painting a Mask
29 - Localized Adjustments - Masking the Mask
30 - Localized Adjustments - Luminosity Painting
31 - The Triple Play - Introduction
32 - The Triple Play - In Action
33 - The Triple Play - Fine Tuning
34 - Workflow – Tips
35 - Workflow - What Does the Image Need
36 - Exposure Blending With Luminosity Masks Part 1
37 - Exposure Blending With Luminosity Masks Part 2
38 - Additional Actions - Saturation Masks
39 - Additional Actions - Make-It-Glow
40 - Additional Actions - Cloud Sharpening
41 - Additional Actions - Color Clone
42 - Additional Actions - Web Sharpening
2
01 – Titles and ContentsBefore and after images are shown to demonstrate how the use of luminosity masks can be used to personalize a photo.
02 - Forward by Tony Kuyper
Tony describes why he developed luminosity masks. Luminosity masks create targeted, self-blending selections based on the tones in the image. They offer a precise method to make specific adjustments tospecific tones. Sample images are shown in the video.
03 - Introduction to the Complete Guide to Luminosity Masks
As a beginning photographer I struggled to produce images that lived up to what I was experiencing in the field and what I hoped to communicate through my images. Tony Kuyper’s images of the Southwest mesmerized me with their richness, balance, and depth. His skill in image development took his images to a different level. I became an avid student of his techniques.
Like Tony, my photography is a two-step process. The first part is taking the photograph. The second, as Ansel Adams said, is performing it. It is in the second part that the photographer has the opportunity to make the image his or her own. Tony’s luminosity masks provided me with the fine control over image adjustments that I was looking for.
These tutorials do not teach the basics of Photoshop. They require an intermediate level of understanding of the software. You need to know how to use Photoshop tools, filters and adjustments as well as knowledge of how to work with selections, layers and masks.
04 - Luminosity Mask Requirements You need a version of Photoshop CS, any version will work. You need a computer that is powerful enough to run your version of CS and can handle the file sizes created by your camera. You need to know how to uses layers, masks and selections in Photoshop. You need to know how to use adjustment layers and filters within Photoshop. Also your workflow should be non-destructive. Tutorials describing these techniques can be found on my web site, www.OutdoorExposurePhoto.com.
05 - Creating a Custom Luminosity Masking Workspace in Photoshop
I use a customized Photoshop workspace for much of my work. Photoshop provides a set of workspace. You can choose from those workspaces or create your own by clicking the Select a Workspace button in the upper right corner of the Photoshop window.
3
While working with luminosity masks, it is helpful to create a workspace in which the Channels and Layers palettes are split out.
1. Click the Channels palette and drag it away from the Layers palette.2. Place the Channels palette between the Layers palette and the Navigator.3. Leave a little extra space between the Channels palette and the Layers palette.4. Click the Select a Workspace button and choose New Workspace.5. Give the workspace an appropriate name and click Save.6. You now have quick access to your personal workspace and a luminosity workspace.
06 - Necessary Paired Color Settings
When TKActions were initially released, they were based around the default color settings in Photoshop which was Adobe RGB (1998) and dot gain of 20% for the gray space. It turned out that the dot gain was not perfectly matched to the RBG color space. Luminosity masks could be created in this color space but they were not symmetrical which required some extra steps to get luminosity masks that were balanced. Later Tony observed that gray gamma 2.2 produced perfectly symmetrical and more finely detailed luminosity masks. Photoshop guru Mac Holbert confirmed that gray gamma 2.2 was specifically designed to match the gray scale tonal values to corresponding color tonal values of Adobe RGB (1998). He also noted that gray gamma 1.8 was paired with ProPhoto RBG color space. Therefore to get the bestluminosity masks, it is recommended that you establish one of the correct color space/gray space pairings in Photoshop. Also you should update to the most recent version of Tony’s Luminosity masks.
First you need to pick a color space. The Adobe RGB (1998) has been and still is a viable color space. The expanded ProPhoto RBG color space has advantages now and in the future. If you choose ProPhoto RGB color space, be sure to use the 16 bit mode. Once you pick the color space, set up Lightroom and/or Adobe Camera Raw to open images in the correct color space.
Lightroom1. Choose Preferences from the Edit menu.2. On the External Editing tab, select the file format, color space and bit depth. Set the Color Space
to Adobe RGB (1998) or ProPhoto RGB.
Adobe Camera Raw1. Click the blue link at the bottom of the screen. The Workflow Options dialog box will appear.2. Set the Space (Adobe RGB 1998 or ProPhoto RGB) and depth.
Now let’s set the correct color space and gray space pairing in Photoshop.1. Choose Color Settings from the Edit menu.2. In the Color Settings dialog box set the correct pair. For Adobe RBF (1998) set Gray to Gray
Gamma 2.2. For ProPhoto RGB set Gray to Gray Gamma 1.83. Click OK.
4
07 - Understanding Luminosity Selections Part 1I discuss the advantages of using layers, selections and masks. Initially I had a hard time understanding luminosity masks. I then realized that luminosity masks are simply another way of creating selections and masks to control adjustments. If you are already familiar with layers, selections and masks in Photoshop, luminosity masks are simply an extension of what you already know how to do.
The Channels panel is the key to making luminosity selections and masks. The Channels panel contains three channels, red, green and blue. In combination these channels create an RGB color image. Each channel is a map of the luminosity values for that color. The lightest colors in the channel indicate the highest luminosity for that color. Darkest areas in the channel correspond to the least luminosity for that color. The individual channels in the Channel panel do not contain color. They simply contain black, white and shades of gray. Layer masks in Photoshop also contain black, white and shades of gray. We can use the luminosity values in the Channels panel to create very detailed luminosity masks. The Channels panel allows us to create selections based on the luminosity values within the image. These selections will allow us to guide and constrain adjustments and filters.
08 - Understanding Luminosity Selections Part 2
How do you make a Luminosity Selection?Here are two methods.
Method 1 - Hold down the Ctrl key on a PC (Cmd key on a Mac) and click a channel in the Channel Panel.
Method 2 – Click on a channel to highlight it. Next click the Load Channel as a Selection icon at the bottom of the Channels Panel.
What exactly is being selected?The selection is indicated by marching ants (moving dots) in the image. The selection may be difficult to see because of all the marching ants. A tone gradient makes it easier to see the selection. Start by creating a new white image document.
1. From the File menu choose New.2. Any size will work, but 1000 pixels on the long side should work for most screens.3. Set the Color Mode to RGB Color. I usually set the bit depth to 16 bit.4. Set the Background Contents option to White.5. Click OK.6. Select the Gradient Tool.7. Set Foreground Color to white and Background Color to black.8. Drag a gradient from one side of the image to the other. 9. To simplify this for future work, save the tone gradient as an image, e.g. TIFF or PSD, and then
open it up whenever you want to visualize a luminosity selection. (A tone gradient is also included in the sample images folder that came with this video.)
10. Make a luminosity selection of the RGB channel for the tone gradient by holding down the Ctrl or Cmd key and clicking the RGB channel. Notice that the brightest portion of the gradient has been selected. Tony calls this selection the “Lights”. Since half of the lightest tones are selected, I often refer to it is the “50% Lights”.
5
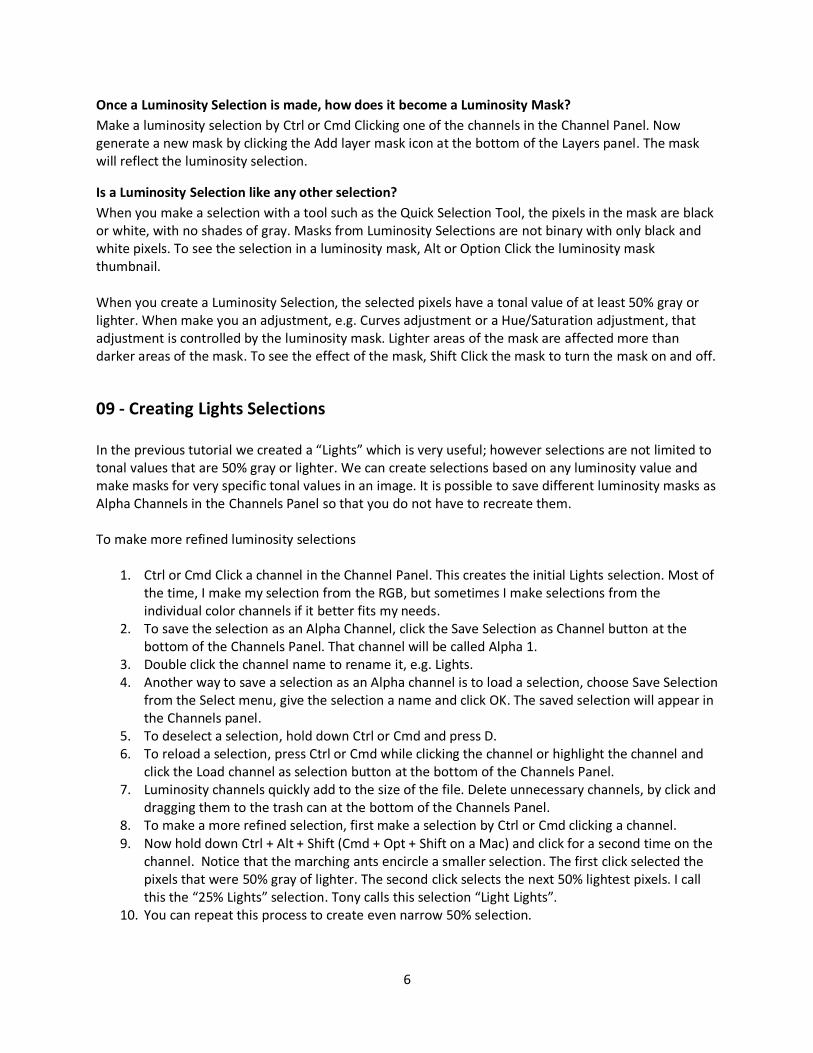
Once a Luminosity Selection is made, how does it become a Luminosity Mask?Make a luminosity selection by Ctrl or Cmd Clicking one of the channels in the Channel Panel. Now generate a new mask by clicking the Add layer mask icon at the bottom of the Layers panel. The mask will reflect the luminosity selection.
Is a Luminosity Selection like any other selection?When you make a selection with a tool such as the Quick Selection Tool, the pixels in the mask are black or white, with no shades of gray. Masks from Luminosity Selections are not binary with only black and white pixels. To see the selection in a luminosity mask, Alt or Option Click the luminosity mask thumbnail.
When you create a Luminosity Selection, the selected pixels have a tonal value of at least 50% gray or lighter. When make you an adjustment, e.g. Curves adjustment or a Hue/Saturation adjustment, that adjustment is controlled by the luminosity mask. Lighter areas of the mask are affected more than darker areas of the mask. To see the effect of the mask, Shift Click the mask to turn the mask on and off.
09 - Creating Lights Selections
In the previous tutorial we created a “Lights” which is very useful; however selections are not limited to tonal values that are 50% gray or lighter. We can create selections based on any luminosity value and make masks for very specific tonal values in an image. It is possible to save different luminosity masks asAlpha Channels in the Channels Panel so that you do not have to recreate them.
To make more refined luminosity selections
1. Ctrl or Cmd Click a channel in the Channel Panel. This creates the initial Lights selection. Most of the time, I make my selection from the RGB, but sometimes I make selections from the individual color channels if it better fits my needs.
2. To save the selection as an Alpha Channel, click the Save Selection as Channel button at the bottom of the Channels Panel. That channel will be called Alpha 1.
3. Double click the channel name to rename it, e.g. Lights.4. Another way to save a selection as an Alpha channel is to load a selection, choose Save Selection
from the Select menu, give the selection a name and click OK. The saved selection will appear in the Channels panel.
5. To deselect a selection, hold down Ctrl or Cmd and press D.6. To reload a selection, press Ctrl or Cmd while clicking the channel or highlight the channel and
click the Load channel as selection button at the bottom of the Channels Panel.7. Luminosity channels quickly add to the size of the file. Delete unnecessary channels, by click and
dragging them to the trash can at the bottom of the Channels Panel.8. To make a more refined selection, first make a selection by Ctrl or Cmd clicking a channel.9. Now hold down Ctrl + Alt + Shift (Cmd + Opt + Shift on a Mac) and click for a second time on the
channel. Notice that the marching ants encircle a smaller selection. The first click selected the pixels that were 50% gray of lighter. The second click selects the next 50% lightest pixels. I call this the “25% Lights” selection. Tony calls this selection “Light Lights”.
10. You can repeat this process to create even narrow 50% selection.
6
11. Tony takes a more aggressive approach and he creates “Bright Lights” selection which is an intersection of two Light Lights masks. He does this by Ctrl + Alt + Shift (Cmd + Opt + Shift on a Mac) on the Lights Lights channel twice. Save that channel as the Bright Lights channel. This selection very quickly isolates the very brightest portions of an image from the darker portions of the image.
12. Tony’s final lights mask is called “Super Lights” and it is made by intersecting two Bright Lights selection, i.e. Ctrl + Alt + Shift (Cmd + Opt + Shift on a Mac) on the Bright Lights channel twice.
13. With the correct matching of the gray gamma with a color space, Tony has been able to create an “Utra Lights” selection and it is make by intersecting two Super Lights selection, i.e. Ctrl + Alt + Shift (Cmd + Opt + Shift on a Mac) on the Super Lights channel twice. This process generates awarning from Photoshop about no pixels being selected. Click OK.
14. In the video I use the gradient to show the generation of the Lights selections.
10 - Creating Darks Selections
Masks for the dark values can be created, but an extra step is needed. To create the Darks masks
1. Start by creating a Lights selection by Ctrl or Cmd Click the RGB channel to make a 50% Lights Selection.
2. Now invert the selection by pressing Ctrl + Shift + I (Cmd + Shift +I on Mac) or select Inverse from the Select menu. The inverse of a 50% Lights selection is a 50% Darks selection.
3. Save this selection as a channel and name it Darks. This selection will target the dark pixels.4. Hold down the Ctrl + Alt + Shift keys (Cmd + Opt + Shift on Mac) and click again on the Darks
channel. Save this selection and name it Dark Darks.5. Hold down the Ctrl + Alt + Shift keys (Cmd + Opt + Shift on Mac) and click again on the Dark
Darks channel. Save this selection and name it Shadow Darks.6. Hold down the Ctrl + Alt + Shift keys (Cmd + Opt + Shift on Mac) and click again on the Shadow
Darks channel. Save this selection and name it Super Darks.7. We now have an entire range of darks mask. Each selection has shifted to the darker tones.8. As with the lights mask, the updated version of Tony’s Actions create an Ultra Darks mask.9. These masks let you target specific dark tonal ranges of the image. Ctrl or Cmd click a Darks
channel to select it. Then make an adjustment, e.g. curves adjustment to target those pixels.
11 - Creating Midtone Selections
You can make masks for light tones and masks for dark tones. Now all that remains is to make masks of mid tones. This is the most challenging set to create. You need to start by having the lights and darks channels saved. The following describes how to make mid-tone masks; however please note that in the current version of TKActions, Expanded Darks and Expanded Lights have been removed and Ultra Lights and Ultra Darks have been added.
1. Select the entire image by pressing Ctrl +A (Cmd +A on a Mac) or choose All from the Select menu.
2. Mid tones in an image are all the tones except for the light tones and except for the dark tones. We need to subtract out those tones.
7
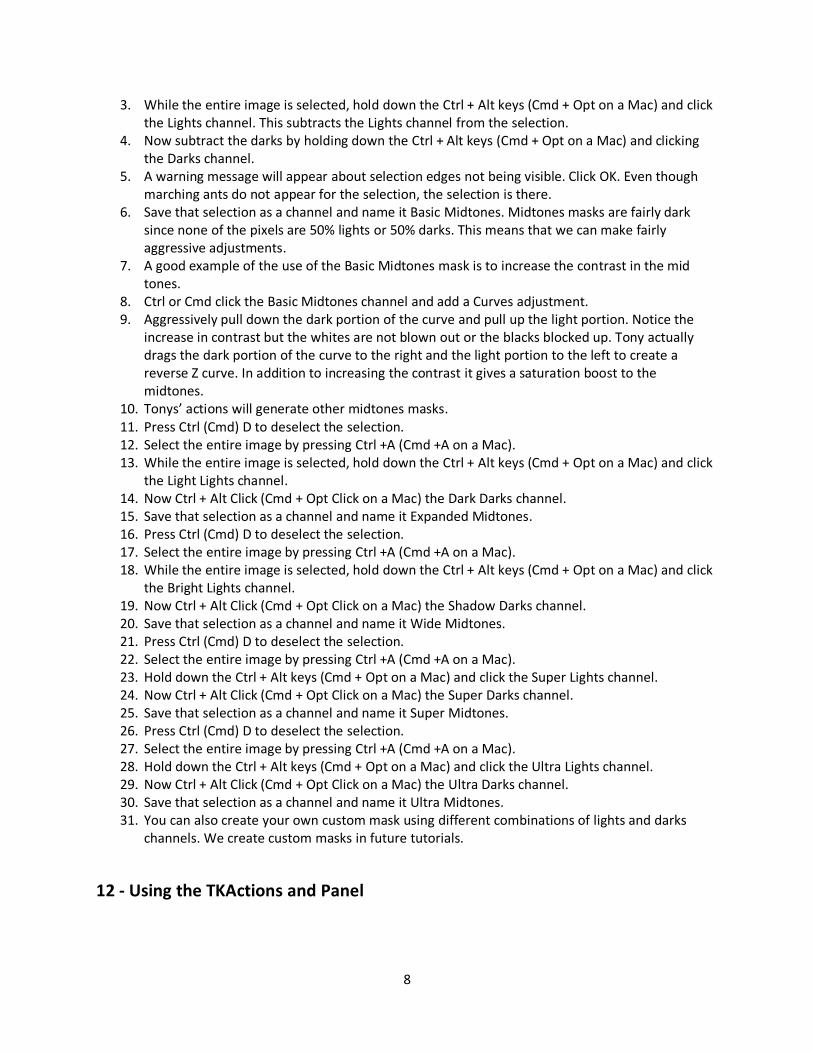
3. While the entire image is selected, hold down the Ctrl + Alt keys (Cmd + Opt on a Mac) and click the Lights channel. This subtracts the Lights channel from the selection.
4. Now subtract the darks by holding down the Ctrl + Alt keys (Cmd + Opt on a Mac) and clicking the Darks channel.
5. A warning message will appear about selection edges not being visible. Click OK. Even though marching ants do not appear for the selection, the selection is there.
6. Save that selection as a channel and name it Basic Midtones. Midtones masks are fairly dark since none of the pixels are 50% lights or 50% darks. This means that we can make fairly aggressive adjustments.
7. A good example of the use of the Basic Midtones mask is to increase the contrast in the mid tones.
8. Ctrl or Cmd click the Basic Midtones channel and add a Curves adjustment.9. Aggressively pull down the dark portion of the curve and pull up the light portion. Notice the
increase in contrast but the whites are not blown out or the blacks blocked up. Tony actually drags the dark portion of the curve to the right and the light portion to the left to create a reverse Z curve. In addition to increasing the contrast it gives a saturation boost to the midtones.
10. Tonys’ actions will generate other midtones masks.11. Press Ctrl (Cmd) D to deselect the selection.12. Select the entire image by pressing Ctrl +A (Cmd +A on a Mac).13. While the entire image is selected, hold down the Ctrl + Alt keys (Cmd + Opt on a Mac) and click
the Light Lights channel. 14. Now Ctrl + Alt Click (Cmd + Opt Click on a Mac) the Dark Darks channel.15. Save that selection as a channel and name it Expanded Midtones.16. Press Ctrl (Cmd) D to deselect the selection.17. Select the entire image by pressing Ctrl +A (Cmd +A on a Mac).18. While the entire image is selected, hold down the Ctrl + Alt keys (Cmd + Opt on a Mac) and click
the Bright Lights channel. 19. Now Ctrl + Alt Click (Cmd + Opt Click on a Mac) the Shadow Darks channel.20. Save that selection as a channel and name it Wide Midtones.21. Press Ctrl (Cmd) D to deselect the selection.22. Select the entire image by pressing Ctrl +A (Cmd +A on a Mac).23. Hold down the Ctrl + Alt keys (Cmd + Opt on a Mac) and click the Super Lights channel. 24. Now Ctrl + Alt Click (Cmd + Opt Click on a Mac) the Super Darks channel.25. Save that selection as a channel and name it Super Midtones.26. Press Ctrl (Cmd) D to deselect the selection.27. Select the entire image by pressing Ctrl +A (Cmd +A on a Mac).28. Hold down the Ctrl + Alt keys (Cmd + Opt on a Mac) and click the Ultra Lights channel. 29. Now Ctrl + Alt Click (Cmd + Opt Click on a Mac) the Ultra Darks channel.30. Save that selection as a channel and name it Ultra Midtones.31. You can also create your own custom mask using different combinations of lights and darks
channels. We create custom masks in future tutorials.
12 - Using the TKActions and Panel
8
You now know how to create your own mask. You also know that it is a multi-step process that takes some time. It is possible to create your own mask and necessary when you want to create customized masks; however Tony’s actions will quickly and effortlessly generate most of the masks that you’ll need. In this tutorial I’ll demonstrate how to use TKActions and how to play them using the TKPanel. If you areusing a version of Photoshop before CS5, you’ll need to play them in the Photoshop Actions Panel.
The Channels button in the TKActions panel will create the corresponding channel or channels. The Curves and Levels buttons create adjustment layers with the corresponding masks attached. The channels will be deleted as part of the action to keep the file size down. Please remember that luminosity masks can be used with any adjustment layer. Tony has included Curves and Levels since theyare so often used.
The All Actions tab contains many actions that I will use throughout the tutorials. From that tab you can create all the lights masks, darks masks and basic mid-tones masks. The Triple Play section contains actions used in advanced luminosity techniques which I will cover in a later segment. The Saturation/Vibrance section creates masks that allow you to focus adjustments to portions of an image based on the level of saturation. The Web – Sharpening actions optimize images for the web. The Miscellaneous section contains actions that create a burn/dodge layer, allow you to perform saturation painting, apply actions called Make it Glow, Cloud Sharpening, and Color Clone. Another action is called Clear Channels panel, which clears all channels that you have created in your photo processing.
The Luminosity Masks tab lets you play all the actions used to create luminosity masks. There are buttons that let you create the masks as channels, Curves adjustment layers, or Levels adjustment layers. The panel lets you create all the lights masks, darks masks, or mid-tones masks. You can also create masks individually. Tony has also added a button that allows you to create all the masks in theChannels panel for evaluation purposes. A button at the bottom of the tab creates a Dodge/Burn layer which is very valuable technique. A Clear Channels panel button at the bottom of the tab will clear all channels; however, it is faster to simply shift click the channels and drag them to the trash can.
To see the panel in action, create a Curves adjustment layer with the Lights mask.1. Click the Play button in the Curves column for the row labeled “Lights”. 2. A Curves adjustment layer is created with a Lights mask attached and the Lights channel is
deleted from the Channels panel to keep the file small.
To see another example of the panel in action, create Levels adjustment layer for all the Darks masks.1. Click the Play button in the Levels column for the row labeled “All Darks masks”. 2. All the Levels adjustment layer are created with a Darks masks and all the corresponding
channels are deleted from the Channels panel to keep the file small.
In one final example, see how easy it is to create all the Luminosity channels by simply clicking the Play button in the Channels column for the row labeled “All Masks”.
From here on out, as much as I can, I will use the TKActions instead of hand building the actions.
13 - Selecting the Right Mask
9
Since each image is different, selecting the right luminosity mask for an image takes a lot of practice andtrial and error. Don’t be afraid to get creative and experiment. I usually begin by identifying two factors. (1) What part of the image do I want to adjust? (2) What type of adjustment will I make? Even after years of practice, I find it helpful to generate an entire series of Luminosity masks in the Channels panel and then compare them to help me make the right selection.
In the tutorial I have an image for which I want to adjust the brightest portion of the sky. I performed these steps.
1. I would begin by using the TKActions Panel to generate all the Lights masks. 2. Now I can look at each mask to see areas which show white or light gray in areas that I want to
adjust and black or dark gray in areas where I do not want to adjust. 3. If I can’t tell by the small thumbnails, I can click each channel one at a time to get a complete
preview. 4. In my example the Light Lights mask looks like the one that targets the areas that I want to work
on; however I choose the next more restrictive mask, the Bright Lights. I do this to prevent the adjustment from bleeding into the areas that I don’t want to change.
5. I can then select the channel that I want by Ctrl or Cmd clicking it. With the selection active, I click on the RGB Channel to go back to the color image.
6. Now I can create an adjustment layer, in this case a Curves adjustment layer. The layer comes with the luminosity mask attached. I name the layer Bright Lights.
7. To accomplish this even faster, I could use the TKActions panel to create a Curves adjustment layer of the Bright Lights. Please note that when you use the TKActions panel to create masks and adjustment layers when you already have the Luminosity channels in the Channels panel, the luminosity channels may get out of order. Remember that if the Channels panel ever gets too disorganized with channels, you can shift click each channel and then drag the channel to the Channels panel trash can. You can then use the TKActions panel to rebuild an organized set of the luminosity masks.
8. I can now open up the Curves dialog and darken the image. Since I’m using a restrictive mask, I can be aggressive with my adjustment. In more recent versions of CS, I can use the Contextual Adjustment tool to adjust the curve by simply dragging on the correct portion of the image.
9. Another technique that I like to use with the Curves adjustment layer is to darken the image by using the Multiply blending mode. I start with a linear curve and adjust the curve to increase contrast. It is always interesting to see what the image looks like without the mask. I do that by Shift clicking the mask. I can see that the adjustment had its greatest effect on the portion of theimage that I wanted to adjust and the adjustment perfectly feathered itself because the mask is not a simple black and white mask.
Now let’s adjust darker portions of this image.1. Start by creating all the Darks in the Channels panel.2. Click on each one to see which one will target the areas that I want to adjust.3. In my example the Dark Darks mask looks best, so I’ll pick the more restrictive Shadow Darks
mask.4. Return to the RGB image by clicking the RGB channel. 5. Use the TKActions panel to create the Shadow Darks Curves adjustment layer.6. Open up the Curve adjustment panel and lighten the shadows by pulling the curve up.7. However when lightening an image, I like to use the Screen blending mode and then adjust the
curve to increase the contrast in my lightening adjustment.
10
Finally let’s work with the mid tones.1. I’d like to increase the contrast and saturation a little bit.2. Mid-tone masks can be harder to evaluate. Using the tone gradient can help you visualize how
each of the masks will work. The Basic Mid-tone mask is the most restrictive and I usually start there and proceed to less restrictive masks if necessary.
3. In my example I used a Curves adjustment layer with a Basic Mid-tones mask. 4. To increase the contrast and saturation, I can pull the shadows and highlight sliders in from the
edges.5. I can pull the middle of the curve up and down to adjust the overall brightness of the mid tones.
Again I can be pretty aggressive with my Curves adjustment.6. As I work through the luminosity adjustments in an image, I like to individually turn each layer
on and off to see how it is affecting the image and make further fine-tuned adjustments. For example I can work with the Opacity to adjust the amount of the effect.
7. If I Alt or Opt Click on the Background image eye, I can turn off all the adjustments at once and turn them back on to get before and after views.
14 - Understanding Contrast
Contrast, as it applies to photography, is the proportion of dark and light tonal values as compared to the middle tonal values. An image with a greater concentration of bright and dark tones has higher contrast while an image with a greater concentration of middle tones has a lower contrast. You can evaluate the contrast in an image by looking at its histogram.
Images shot in the fog have low contrast. The histogram of a low contrast image contains no tonal values in the highlights and shadows. Rather the tonal values are gathered together in a mid-tone peak.
Higher contrast scenes have a histogram that shows dark shadow tones and bright highlight tones. The middle of the histogram has a mid-tone valley instead of a mid-tone peak.
Since luminosity masks are based on light and dark tonal values, it is important to understand the basic principles of contrast, especially when luminosity masks are being used to lighten or darken areas withinan image.
We can use our tone gradient and a Curves adjustment layer to visualize the basics of contrast. If I use the contextual tool to darken darks and lighten lights, I increase contrast. The gradient now has a greater concentration of light tones and dark tones and fewer mid tones, and we can see this tonal shift in the histogram.
Alternately, if I darken the light tones and lighten the dark tones I am decreasing contrast. The gradient now has a greater concentration of mid tones as the tones have shifted away from the lightest and darkest values. The histogram also confirms this.
Let's see how this principle looks when applied to actual photographs. The histogram in my first sample image indicates that it is somewhat low in contrast. It doesn't have any of the brightest or darkest tonal
11
values. Most of the tonal values are gathered in a peak of middle tones. Using a Curves adjustment layer I can increase contrast by darkening the darker tones and lightening the lighter tones, resulting in what we commonly refer to as an S curve in Photoshop. The histogram indicates that the mid tones have been shifted toward darker and lighter values.
The histogram of the second sample image indicates that it is higher in contrast. The histogram stretches from the darkest values all the way to the brightest values and, instead of a peak in the mid tones, there is a valley. Using a Curves adjustment layer I can decrease contrast by lightening the dark tones and darkening the light tones. This results in a reverse S curve. The histogram indicates that some of the darker and lighter tones have been shifted toward the middle.
Luminosity masks can be very helpful for creating better tonal balance within an image as well as revealing or enhancing shadow and highlight detail. However, such adjustments often result in an unwanted loss of contrast.
For example, if I lighten the shadows through a darks mask and darken the highlights through a lights mask I have created better tonal balance, but I also decrease contrast in a way similar to making a reverse S curve in a single Curves adjustment.
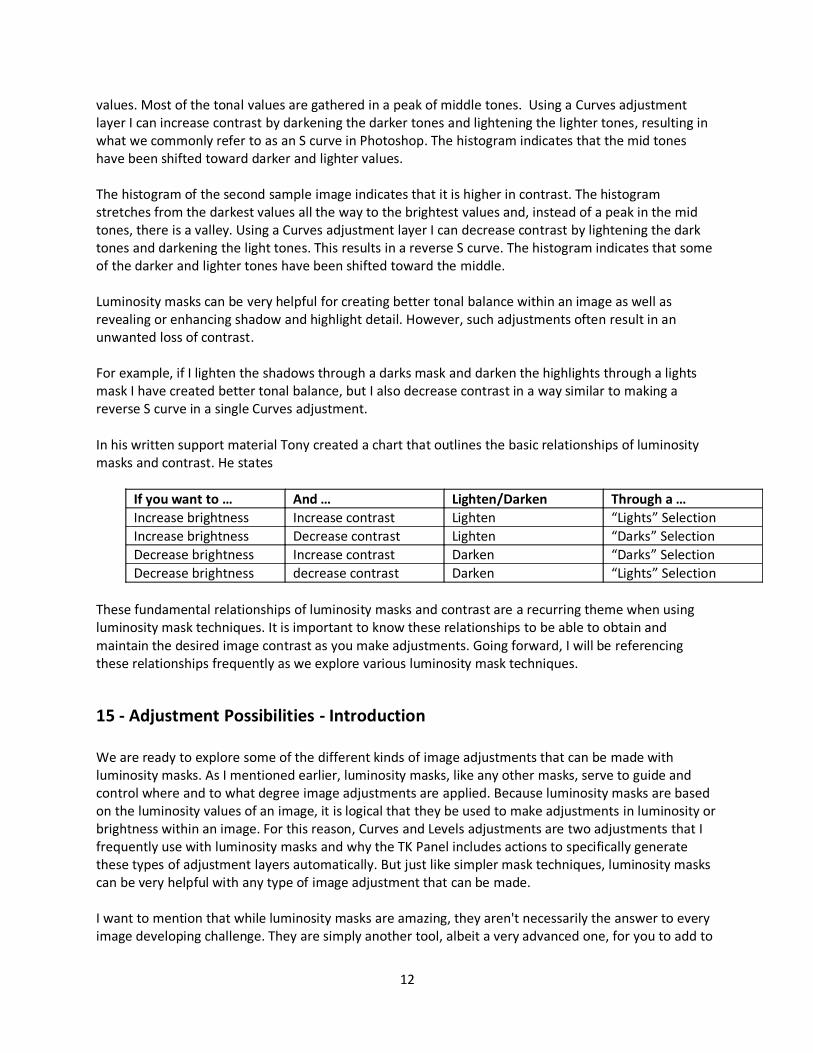
In his written support material Tony created a chart that outlines the basic relationships of luminosity masks and contrast. He states
If you want to … And … Lighten/Darken Through a …Increase brightness Increase contrast Lighten “Lights” SelectionIncrease brightness Decrease contrast Lighten “Darks” SelectionDecrease brightness Increase contrast Darken “Darks” SelectionDecrease brightness decrease contrast Darken “Lights” Selection
These fundamental relationships of luminosity masks and contrast are a recurring theme when using luminosity mask techniques. It is important to know these relationships to be able to obtain and maintain the desired image contrast as you make adjustments. Going forward, I will be referencing these relationships frequently as we explore various luminosity mask techniques.
15 - Adjustment Possibilities - Introduction
We are ready to explore some of the different kinds of image adjustments that can be made with luminosity masks. As I mentioned earlier, luminosity masks, like any other masks, serve to guide and control where and to what degree image adjustments are applied. Because luminosity masks are based on the luminosity values of an image, it is logical that they be used to make adjustments in luminosity orbrightness within an image. For this reason, Curves and Levels adjustments are two adjustments that I frequently use with luminosity masks and why the TK Panel includes actions to specifically generate these types of adjustment layers automatically. But just like simpler mask techniques, luminosity masks can be very helpful with any type of image adjustment that can be made.
I want to mention that while luminosity masks are amazing, they aren't necessarily the answer to every image developing challenge. They are simply another tool, albeit a very advanced one, for you to add to
12
your image developing repertoire. I don't use luminosity masks with every adjustment I make. In Photoshop I start with simple techniques that will work and bring in more complex techniques when necessary. Some adjustments are intended to be global and affect the entire image uniformly. Such global adjustments don't require any mask at all. Many of the localized adjustments I make require a mask but can be accomplished just fine by free hand painting on a mask or with very simple selections or gradients. That said, the detailed and feathered selections and fine control luminosity masks offer make them the best tool for many adjustments and the only option for some.
In the next several tutorial segments, I will demonstrate how luminosity masks can be used to make a variety of different types of adjustments. In addition to Curves and Levels, I will also show how to use luminosity masks to make adjustments in saturation, contrast, color balance, clarity and sharpening. These demonstrations are intended to introduce you to some of the possibilities, but are not a step-by-step manual for how you should develop any particular image. My demonstrations are also, by no means a complete list of all the possibilities. The beauty of Photoshop is that it encourages you to experiment and invent. As you incorporate these luminosity mask adjustment ideas into your workflow and become proficient with them I encourage you to expand on them, modify them and combine them to develop your own types of adjustments and techniques.
16 - Tonal Balance Adjustments
We have already dabbled with making luminosity mask tonal adjustments, specifically with Curves. Levels can also be used to make tonal adjustments. Because luminosity masks are generated using the luminosity values in an image, adjusting tones in the shadows, highlights and mid tones is logical and probably one of the most commonly used type of luminosity mask adjustments.
Previously I talked about selecting the next more restrictive mask than the one that looks like the one that you need. This is a great technique for localizing your adjustment where you want it without it bleeding into other areas. Another technique that often works with Curves tonal adjustments is to selecta fairly broad mask and use an S curve to darken or lighten with contrast.
In my sample image, I want to tone down the highlights and open up the shadows of this image, but I want to maintain contrast. I'll start with the highlights by creating a Curves adjustment layer with a Lights mask. The contrast relationship chart indicates that darkening through a Lights mask will reduce contrast; however, the less restrictive Lights mask has selected a fairly broad tonal range within which I can make an S curve, darkening the darker highlights more than the brighter highlights. This enables me to darken the highlights while still maintaining contrast.
Next I will open up the shadows. The same principle holds true. Instead of selecting a more restrictive mask that only lightens the very darkest shadows, I'll select the broader Darks mask for my Curves adjustment layer. The chart indicates that lightening through a Darks mask will decrease contrast. But just like with the lights I can use an S curve to lighten while darkening the darkest darks and lightening the lightest darks. This enables me to lighten the shadows while still maintaining contrast.
Next I'll use a Levels adjustment layer with a Basic Mid Tones mask to further increase and retain contrast in the mid tones. By just working with basic masks for lights, darks and mid tones this image hasmuch better overall tonal balance and maintains good contrast as well.
13
My second example has the opposite challenge. It has lower overall contrast. I want to introduce contrast by darkening the shadows and lightening the brighter tones to create better dimension in the rock shapes.
We can see in the chart that darkening the darker areas and lightening the lighter areas will increase contrast, so I won't need to be as concerned with maintaining contrast with my Curves adjustments.
I'll start with the darks. I'll generate all the darks masks and select one that is fairly restrictive. I think that the Shadow Darks mask will target the right tones. I create a Curves adjustment layer with the Shadow Darks mask. I can darken the darks by pulling down the curve. Since I’m darkening through a Darks mask, there isn’t an issue with loss of contrast.
This image is dark to begin with so I'll need a fairly broad Lights mask. I generate all the Lights masks and evaluate them which led to my choosing the Lights Curves adjustment layer. I brighten the Lights, but since I want to maintain contrast, I darken the darker areas within the Lights by pulling down the curve.
Finally, for this particular image, I would add a Levels Adjustment layer without a mask. I set a global black and global white point and fine-tuned the mid tones to achieve the right overall contrast.
These are the basics of how I use luminosity masks to make adjustments to improve tonal balance. As you can see, there would be limitless ways to approach such tonal adjustments depending on your intentions, the masks you select and the adjustments you make.
17 - Brightness-Contrast
A Brightness/Contrast adjustment layer can offer a quick and simple option for making tonal adjustments even though it is somewhat limited in features when compared to Levels or Curves. I show the use of this adjustment with an image that I previously adjusted with luminosity masks, Curves adjustments and Levels adjustments. I’ll make further tonal refinements using a Brightness/Contrast adjustment layer.
When we darkened the lightest tones in the image and lightened the darker tones in the image, we reduced contrast which is what we wanted to do since the image had lots of overall contrast; however we might want to introduce a little more contrast in those areas to give it more pop. I start by generate all of the Lights and Darks masks. As I evaluate the Lights masks, it appears that the Lights masks will reach too much into the shadows, while the Bright Lights mask is too restrictive in the high lights that I want to work on. It appeared that the Light Lights mask might work best so I give this one a try.
1. Ctrl or Cmd Click on the Light Lights channel.2. Go back to the color RGB channel.3. Create a Brightness/Contrast adjustment layer.4. I can bring a little more contrast into the highlights by adjusting the Contrast slider.5. I can also control the amount by adjusting the Brightness slider.
14
That brought contrast back into the brightest highlights. Now apply such an adjustment to the shadows.
1. I previously lightened the shadows with an S curve Curves adjustment layer. I‘d like to see more contrast and brightness in the shadows.
2. Evaluate the Darks masks.3. Shadow Darks look to be the best choice.4. Ctrl or Cmd Click on the Shadow Darks channel.5. Go back to the color RGB channel.6. Create another Brightness/Contrast adjustment layer.7. I start with the Brightness slider to open up the shadows.8. Then I use the Contrast slider to reintroduce contrast into the shadows.
18 - Saturation Adjustments
Now I'm going to shift away from using luminosity masks to control luminosity centered adjustments and explore how to use them with other types of adjustments. It is useful to get in the habit of considering the use of luminosity masks with any image adjustment you make. While they are not always the right option, they often are, even in situations that may not seem so on the surface.
Let's take a look at making very controlled saturation and vibrance adjustments with luminosity masks. My sample image is a great candidate. I really like the yellow highlights on the tips of the grasses and theway filtered light is just brushing the tips. I'd like to bring out the yellows in the highlights of the grasses without over saturating the shadows or the color in other parts of the image. I can see that the highlights and shadows in the grasses in the foreground will enable to use a luminosity mask.
I’m not going to use the TK Action Panel to create a whole series of lights masks. I’ll explore an individualcolor channel to target the yellow. I know that yellow is a big component of the red channel. When I compare the luminosity masks made from the RGB and Red channels, I see that the Red channel has more contrast between the highlights and shadows in the grasses, which provides better separation between the shadows and highlights.
1. Ctrl or Cmd click on the Red Channel to create the Red Lights selection. 2. Save the selection as a channel and label it Lights Red.3. Ctrl or Cmd Click on the Lights Red channel.4. Go back to the color RGB channel.5. Create a Hue/Saturation adjustment layer.6. As I increase the saturation through this mask, I’m increasing the saturation in the highlights
without the shadows becoming overly saturated, which would happen if there were no luminosity mask.
7. The sky is being oversaturated with this adjustment, so I select Yellow from the list of color channels in the Hue/Saturation dialog box. Now when I make the adjustment, only the yellow highlights in the grasses are affected.
Now let’s work with the color in the sky.
1. Start by evaluating each Color channel individually to see which one best guides our adjustment.
15
2. The Blue channel provides the best separation between the sky, which has lots of blue, and the landscape, which has little blue.
3. It is important to realize that the TK Action panel builds masks from the RGB color channel. In the adjustments that I want to make here, I need to use the Red and Blue channels to build the masks that I want.
4. Ctrl or Cmd click on the Blue Channel to create the Blue Lights selection. 5. Save the selection as a channel and label it Lights Blue.6. Ctrl Alt Shift or Cmd Opt Shift Click on the Lights Blue channel.7. Save the selection and call it Light Lights Blue. 8. Deselect the selection by press Ctrl or Cmd D.9. When I compare the Lights Blue mask and the Light Lights Blue mask, it appears that the Light
Lights Blue mask will provide the separation that I need, so I won’t create the next most restrictive mask.
10. Ctrl or Cmd Click the Light Lights Blue channel to load that selection. 11. Create a Hue/Saturation adjustment layer. When you generate a new adjustment layer from a
luminosity channel instead of the composite RGB channel, the new adjustment layer shows up in Quick Mask mode, which is a red overlay on the mask. You click on the layer to get rid of the color overlay.
12. To ensure that I’m affecting only the blues in the sky, I select the Blue channel in the Hue/Saturation dialog box. I can increase the saturation with the Saturation slide. I can also darken the sky by adjusting the Lightness slider.
Finally I’d like to make a vibrance adjustment using a Luminosity mask.
1. The Vibrance adjustment layer allows you to affect colors that are not very pure in any one of the color values. These will be colors that may contain a mix of color values. I want to target this adjustment to the mid tones of the grasses and mountains.
2. I use the TK Action Panel to create a mask of the Basic Mid-tones.3. Ctrl or Cmd Click on the Basic Mid-tones mask.4. Create a Vibrance adjustment layer.5. Adjust the Vibrance slider to boost the color in the non-saturated or non-pure parts of the
image.6. I like the final result.7. Now I Shift Click each of the Luminosity Channels that I created and delete them from the
Channels Palette to reduce the file size.
19 - Color Balance Adjustments
In addition to being helpful for providing control with adjustments for saturation, luminosity masks are also great for working with color balance. When an image has an overall color balance issue, for example a global color cast, it can be neutralized with white balance adjustments in Camera Raw or witha variety of color balance adjustments in Photoshop. The Color Balance adjustment is made just for this purpose.
My sample image has an overall blue color cast. I can work with a Color Balance adjustment layer. Starting with the Mid-tones, bring in some yellows and reds. Then move on to the Shadows to make
16
adjustments for yellows and reds. In the highlights I might adjust the magenta. We have made a global color adjust to make the colors more neutral.
There are times when a color cast isn't global. Areas with different light sources, such as shadows and brightly lit areas may have different color casts. You also may want to adjust color balance in different portions of an image for creative affect.
The color balance adjustment, as well as Curves, Levels, Selective Color and Hue/Saturation all allow various methods for targeting color balance adjustments to particular color or tonal ranges, and often one of these methods does a great job. But it can be difficult to get color adjustments to be confined to just the areas you want. This is where using a luminosity mask to help direct the adjustment is so helpful.
My sample image has a variety of color balance issues. I don’t want to make a global color balance and aColor Balance adjustment layer does not give me the control that I need.
1. I start off by using the TKActions panel to make all the Lights masks and Darks masks.2. I evaluate the Lights mask to find the best Lights mask to target the tonal values that I want
to adjust.3. The Lights mask looks best. Ctrl or Cmd Click the Lights channel. 4. Create a Color Balance adjustment layer.5. Click on the layer to make the Quick Mask go away.6. Work with the Blue slider to shift toward yellow to some of the blues out of the highlights.7. I also might want to add is some magenta and red.8. These adjustments have been applied to the Midtones, but it is being applied to the
Midtones of the lightest areas as being controlled by the mask. 9. I can also work with the shadows or highlights as controlled by the luminosity mask.
Next I want to work with the shadow areas.
1. Evaluate the Darks masks.2. The Shadow Darks or Super Darks will make the adjustments into the shadow parts of the
image.3. I choose to go with the more restrictive Super Darks to make sure that adjustments don’t bleed
into the highlights.4. Ctrl or Cmd Click on the Super Darks mask.5. Go back to the RGB Channel so that I don’t get the Quick Mask.6. Create another Color Balance adjustment layer.7. The sage in the shadows appears a little purple/blue but I want it to more of a steely gray.8. Start with Midtones. Move the color toward yellow and toward cyan to get more of the steely
gray color.9. I then move to the Shadows in the dialog box to get the color that I want.
In the second example I like the color balance in the highlights but there are a lot of blues in the shadows.
1. Even when I adjust the Shadows portion of the Color Balance adjustment layer, I end up altering the color of the highlights. Let’s apply the adjustment through a luminosity mask.
17
2. Generate all the Darks masks using the TKAction panel.3. Evaluate those masks.4. The Super Darks may do the best job of directing the adjustments to shadows and not adjusting
my highlights.5. Ctrl or Cmd Click on the Super Darks.6. Go back to the RGB Color Channel.7. Create a Color Balance adjustment layer.8. Starting with the Shadows selection in the dialog box, I will try to neutralize the color cast.9. I can also work with the Midtones.
Finally I want to make a very localized color adjustment using the Photo Filter adjustment which applies a virtual color filter over your image. I want to warm up the brightest highlights in the sunlit portion of the waterfall.
1. Use the TKActions panel to generate the Lights masks.2. Evaluate the Lights masks.3. The Super Lights looks best.4. Ctrl or Cmd Click the Super Lights Channel.5. Go back to the RGB Channel.6. Create a Photo Filter adjustment layer.7. Choose the Warming Filter in the dialog box. 8. I can turn up the Density because the adjustment is being constrained by the mask. 9. If the adjustment is too strong, you can decrease the layer’s opacity to get the desired effect.
In my opinion color balance along with contrast is one of the most important foundational adjustments to get right in your images.
20 - Clarity and Sharpening Adjustments
Luminosity Masks can also be great for targeting sharpening adjustments. Sharpening can be used to enhance texture, emphasize a feature or increase clarity and definition. I also often use luminosity masks to constrain sharpening adjustments to the landscape, leaving areas of sky and water un-sharpened.
As is the case with everything Photoshop, there are many tools for applying sharpening type adjustments to images. However, sharpening adjustments are made using filters on pixel containing layers instead of with non-pixel containing adjustment layers. Applying luminosity masks to sharpening adjustments requires first creating a layer that is a copy of the background pixels of the image.
For an example, let's use a luminosity mask for sharpening the details in the trees, grasses and reflections of this image, but not sharpening the sky or water. The only detail we could sharpen in the sky and water would be noise and other digital artifacts and we don't want that.
1. First we’ll create a copy of the Background layer upon which we’ll apply the sharpening by typing Ctrl or Cmd J or by choosing Duplicate Layer from the Layer menu.
18
2. Because the sample image has so much blue in the sky and in the water, I guess that the Blue channel will give us the best tonal separation.
3. When I look at the Blue Channel I see that it will work best; however this mask will affect the skyand water the most so I need to invert the selection.
4. Cmd or Ctrl Click the Blue Channel.5. Hold down Ctrl Shift I or Cmd Shift I to invert the selection.6. Save that selection and name it Darks Blue. It appears that this selection will not keep the
adjustment out of the sky and water.7. Ctrl Alt Shift or Cmd Opt Shift Click on the Darks Blue Channel again.8. Save that channel and call it Dark Darks Blue.9. Go back to the RGB Channel. 10. Add a mask to the Background Image Copy. When I do so, the Luminosity Mask will be
generated.11. Click on the mask. Notice that the mask will not restrict the adjustment to all of the water. To fix
that, select the Brush tool. Make sure that the foreground color is black.12. Now carefully paint black in the areas that we don’t want affected. I adjust the brush size as
necessary. The mask does not have to be perfect because the dark gray largely restricts the adjustment.
13. Select the pixel-containing layer in the color image.14. Select Sharpen from the Filter menu and then select Smart Sharpen.15. Adjust the Radius and Amount in the Smart Sharpen dialog box. I normally leave the Radius and
Amount low.
Other types of sharpening can be used to enhance texture. In my sample image I want to enhance the texture in the portion of the image being struck by low angle light, but I don’t want to enhance texture in the shadows.
1. First type Ctrl or Cmd J or to duplicate the Background layer.2. I look at the Red channel since the portion of the image that I want to adjust contains red.3. The Red Channel will work; however the shadows in the Red Channel are not restrictive enough.4. Ctrl or Cmd Click the Red Channel.5. Save the selection as a channel and call it Lights Red.6. Ctrl Alt Shift or Cmd Opt Shift Click a second time.7. Save that selection as Light Lights Red. The next selection would be too restrictive so I stay with
that selection.8. Return to the RGB Color Channel.9. Add a new layer mask to the copy layer.10. Highlight the pixel containing layer. I zoom in to get a close look at the area I’m working in.11. Select Sharpen from the Filter Menu and then select Smart Sharpen.12. The window in the dialog box shows the overall effect of the adjustment. The enlarged image in
the main view shows the effect through the mask.
In some situations you do want to create sharpness in shadow areas. Backlit often lack clarity in the shadow areas. In my sample image I want to increase the definition and clarity in the shadows and open up the shadows to show more detail. I’ll start with the sharpening first.
1. First type Ctrl or Cmd J or to duplicate the Background layer.2. Use the TKActions panel to create a series of Darks Masks.
19
3. Evaluate each mask.4. Shadow Darks appear to be the best selection. Realize that it is sometimes hard to know ahead
of time which mask will work best and you may have to experiment.5. Ctrl or Cmd Click on the Shadow Darks Channel.6. Click on the RGB Channel.7. Go back to the color image and add a layer mask to the Background Copy layer.8. Click on the Layer Thumbnail and zoom in to see the sharpening up close.9. There are a number of ways to introduce clarity into shadows. In this example I’ll make a double
pass with the Unsharpen Mask.10. Select Sharpen from the Filter Menu and then select Smart Sharpen. In the first pass I’ll use a
high Radius and a lower Amount. Finding the right amount is tricky.11. Return to the Filter menu and choose Unsharpen Mask from the Sharpen menu. This time I use
a lower Radius and a much higher Amount.12. Unfortunately the adjustment created a halo around the edges. The mask is keeping the halos
from bleeding into the sky, but it is not preventing the dark halo from bleeding into the shadow area.
13. This halo is fixed by painting with a 50% opacity black brush along the edges of the mask.
If I wanted to lighten the shadows and bring out more detail, I would
1. Return to the Darks masks and select an appropriate mask.2. In this example the Shadow Darks looks best.3. Ctrl or Cmd Click the Shadow Darks Channel.4. Go back to the RGB Color Channel.5. Create a Curves adjustment layer.6. Pull the curve up to lighten the shadows.
21 - Blending Mode Adjustments
You can add another dimension to your luminosity mask adjustments with the use of blending modes. Blending modes determine how any particular layer will be blended with the layers below it. There are many different blending modes that you can experiment with, but the main blending modes I use are Multiply, Screen, Overlay, Soft Light, Color and Luminosity. We can observe the effect of each of these blending modes using a gradient. You can change the blending mode of any layer, both pixel layers and adjustment layers. For now I'll use a Curves layer.
● The default blending mode setting is Normal. This doesn't apply any changes to how the layer is blended.
● Changing the blending mode to Multiply causes the layer to darken the image, shifting luminosity values toward the darker tones.
● The Screen blending mode lightens the image, shifting the luminosity values toward the lighter tones.
● The Soft Light blending mode increases contrast, shifting luminosity values toward both the darks and lights, but weighted toward the darks. This produces a more subtle contrast.
● Overlay blending mode increases contrast but it does so more aggressively and shifts the tones toward both the lights and darks evenly, producing a brighter contrast.
20
I also use the Color and Luminosity blending modes, but we will need a color image to see how they work. Now let’s apply blending mode to some image adjustments.
Blending modes are excellent for giving your adjustments a two pronged approach. I first use the blending mode to make a desired luminosity adjustment. Then I use the controls of the adjustment layerto make a second adjustment. For example, with a Curves adjustment layer and a Lights mask I can use the Multiply blending mode to darken the lights and then I can use the curve to adjust the contrast in the Lights. I could also use a Curves adjustment layer with a Darks mask and use the Screen blending mode to lighten the darks and then adjust contrast in the darks with the curve.
In a low-contrast image I could generate a Lights selection and create a Hue/Saturation adjustment layerwith the Lights mask attached. Then use the Soft Light blending mode to increase contrast in the lights, followed by the use of the Saturation slider to also increase the saturation.
Considering all the blending modes and adjustment layers in Photoshop, there are quite a few blending mode/adjustment layer combinations available and when you add in luminosity masks, the options become unlimited. You can experiment with various combinations to find ones that work best for you.
I also want to demonstrate the Color and Luminosity blending modes. We think of certain adjustments as being luminosity adjustments and others as being color adjustments, but most adjustments actually affect both color and luminosity. For example, when I use a Levels adjustment to increase contrast thereis also a boost in saturation. When I make a Hue/Saturation adjustment there is also a change in contrast or luminosity.
The Color and Luminosity blending modes are great for getting individual control over color and luminosity adjustments. For example, I could darken the highlights in this image with a Curves adjustment layer with a Lights luminosity mask. In the Normal mode this will also increase saturation, but I can't separately control the saturation and the brightness. However, if I set the blending mode to Luminosity, I can darken the highlights much more aggressively without causing the saturation to increase.
Then I can create a Hue/Saturation layer with a Light luminosity mask and set the blending mode to Color. Now I can adjust the color in the lights just how I want it without it changing the brightness.
I use blending modes all the time, and they have many uses outside of Luminosity mask techniques as well. You can see that in conjunction with Luminosity masks, blending modes give you another level of variables and flexibility allowing for even more creativity and fine control in your image developing.
22 - Custom Masks - Introduction
So far in these tutorials I have been mostly utilizing the basic light, dark and mid-tone luminosity masks as generated by Tony Kuyper's actions and these masks are quite often all that you need. But in a few places already, I have shown that beyond the basic masks it is possible to make your own custom masks.Custom masks can be made for more specialized and targeted adjustments. The more adept you get at generating your own custom masks, the more powerful and flexible a tool they become.
21
I have already shown several cases in which generating masks from the individual Red, Green or Blue color channels may allow you to create a custom mask more suited to the particular color or tonal rangeyou want to isolate, so you already have a good idea of how to do this. Now let's explore some other ways to generate specialized custom masks.
I briefly demonstrated one of the simple ways to generate custom masks in one of the very first tutorial segments. As we saw, the TKActions generate each more restrictive mask by intersecting the previous mask with itself, so each successive mask is twice as restrictive as the previous one. In many cases this works fine. But in certain situations it can be helpful to generate masks with finer steps between them. To do this for Lights selections you can simply Ctrl Alt Shift Click or Cmd Opt Shift Click on the RGB channel, any of the color channels or the Lights mask multiple times to create masks in roughly restrict the selection in 50% increments. The first Ctrl Alt Shift Click or Cmd Opt Shift Click is the same as a Lightsmask. The second is the same as a Light Lights, but the third click is actually in between a Light Lights and a Bright Lights since a Bright Lights is equivalent to four 50% selections. Four clicks are equal to a Bright Lights but five, six and seven clicks are all steps between a Bright Lights and a Super Lights, which is equivalent to eight clicks.
This same procedure also works for Darks. Generate the initial Darks selection in the TK Action panel. Now you can Ctrl Alt Shift Click or Cmd Opt Shift Click on the Darks mask any number of times to make more restrictive darks masks in roughly 50% increments. Further, these more finely stepped lights and darks masks can be used to generate more finely stepped midtone masks.
I almost always begin by using the TK Panel to generate the basic Lights and Darks masks, but if I feel that I need a mask for an intermediate tonal step, let's say between Bright Lights and Super Lights, I can quickly generate it by Ctrl Alt Shift Click or Cmd Opt Shift Click on the RGB channel three times and saving it. This mask will fit between Bright Lights and Super Lights masks.
In the following segments I will demonstrate more advanced ways of creating custom masks.
23 - Custom Masks - Magic Mid-tones
Another type of custom mask that can be made is one that I have already hinted at in a previous tutorialsegment, an off-center Mid-tone mask. In his written tutorials Tony refers to this type of custom mask as Magic Mid-tones. The Mid-tone masks that the TKActions generate are all symmetrical. If you recall, they are created by selecting the entire image and then subtracting balanced ranges of light and dark tones, leaving a selection of centered mid-tones.
But the subtractions don't have to be centered. By typing Ctrl or Cmd A to select the entire image and Ctrl Alt or Cmd Opt Clicking on a Darks to subtract it and Super Lights to subtract it, you can create a Mid-tones mask that is shifted toward the lighter tones. Depending on the particular image and your adjustment intentions you can experiment with different combinations of light and dark subtractions to create a variety of different off center midtone masks.
For example if you want to create a mask for darkening the lights, but not dulling the very brightest lights you can create this mask by selecting the Light Lights and then subtracting the Super Lights or
22
Ultra Lights from it. When making Magic Mid-tone masks in this way it is important to first select the less restrictive mask and then subtract the more restrictive mask from it.
Following that same concept, to create a mask for darkening the lighter darks, but not over darkening the darkest darks, you could first load a Dark Darks selection and then subtract a Super Darks or Ultra Darks from it. Let's apply adjustments to images using these shifted midtone masks.
For the first example I will darken the highlights in this image with a Light Lights mask with the Super Lights subtracted. This enables me to darken the highlights without losing the brilliance of the brightest highlights.
In this image I want to darken some of the darker midtones, but I don't want to lose detail in the areas that are in the shadow areas. First I would generate all the Lights masks and then all of the Darks masks. Then I’d type Ctrl or Cmd A and then subtract a Lights selection and then subtract from it by typing Ctrl Alt or Cmd Opt a Dark Darks. Now I’d create a Curves adjustment layer. For this mask I can see that it will target those light to middle midtones, the darkest areas will be protected.
In this image I want to tone down some of those highlights but I don’t want to dull the brightest highlights. I’ll generate all the Lights masks, select a Lights selection, subtract from it the Bright Lights, and make a Curves adjustment layer. As I pull down the curve, I darken the highlights but the brightest highlights are staying brilliant.
Creating custom Mid-tone masks is one more way to create masks for a specialize purpose. Since there are many luminosity masks, there are many ways they can be combined to target specific tones. Subtracting selections is a good way to create mid-tone-like masks for different parts of the tonal spectrum. These masks work well for making adjustments that enhance or maintain image contrast.
24 - Custom Masks - Increased Tone Separation
Sometimes I wish that an image would allow me to generate a mask that has better separation betweencertain tonal values. For example, in this image I want to make adjustments to the lighter areas in the water but it isn't tonally that different from the slightly darker sand around it. A Lights mask will allow adjustments to bleed into the sand. A more restrictive Lights mask restricts the light areas of the water almost as much as the darker sand. In such cases it is possible to make a temporary adjustment to the image to create better separation between similar tonal values.
I haven't mentioned it until now, but the RGB and individual color channels always reflect the current state of the image. With every adjustment, the channels change, and this will affect the masks that are generated. If I use a Levels adjustment layer to darken the image, you can see the Channels in the Channels Panel are darkening with it. If I generate a Lights selection, the Lights mask it creates reflects that darkened state. If I now lighten the image with that same adjustment layer, the channels get lighter. And if I generate a new Lights mask, it reflects that lightened state. If I turn off the visibility of the adjustment layer and generate a Lights mask, this Lights mask is the Lights mask that we would haveexpected without any adjustment.
23
Let me take a moment to explore the implications of this and then we will get back to adjusting the image. The main implication is that every time you make an adjustment to an image and then generate new masks, those masks will reflect the current tonal values in the image, not the tonal values the image started with. Sometimes this is helpful and sometimes it isn't.
For example, if I darken the sky in an image, subsequent Lights masks will reveal the sky less. If I want to create a mask that maximizes sky adjustments then I should generate that mask without the sky darkening layer visible. If I want adjustments to have less of an effect in the sky, then I should make masks with the darkening sky adjustment layer visible.
You’ll notice that as I change the exposure in the sky, the luminosity values are changing the RGB and Color channels, but not in the mask that I previously generated. Once you create a mask from the current state of an image, those luminosity values remain fixed in the mask. Making adjustments will alter the luminosity values of the RGB and color channels, but any previously generated masks remain the same. Again, this may be helpful or not depending on whether you want the masks you are using to reflect the current luminosity values of the image or not. You can always generate new masks as neededat any point.
Ok, now back to using this principle to create custom masks to better suit your needs. As I said, in this image I want to adjust the foamy water but not the surrounding sand that is only a slightly darker tone. To get better separation of the tones I'll add a temporary Curves adjustment layer and use the contextual tool to lighten the foam and darken the sand. Now I’ll turn the adjustment layer off and generate a Lights mask. Now I’ll turn the layer back on and generate another Lights mask.
Comparing the two masks we can see the unadjusted Lights mask is significantly different from the modified Lights mask. In the unadjusted Lights mask the foam is not very white and it would not be as affected as I’d like. The sand is fairly light so it will be adjusted more than I want. In the modified lights mask the sand areas are much darker and the foam areas are much lighter. Now let’s make adjustmentswith the two masks.
Go back to the Color image. Delete the adjustment layer to return the image to its original state. I want to generate a more restrictive mask so I’ll generate a Light Lights from the unmodified mask. Ctrl Alt Shift or Cmd Opt Shift Click on the Lights mask once and then twice. Save that as Light Lights. I’ll do the same with the modified Lights mask. Save that as Light Lights Modified. Create a Curves adjustment layer with each of those.
With my modified Lights mask I can now generate additional masks with the increased tonal separation. I think a Light Lights selection is what I actually want to use to make my adjustment. I'll generate a Light Lights from each of the Lights masks for comparison. Ctrl or Cmd Click on the Light Lights and create a Curves adjustment layer. Ctrl or Cmd Click on the Light Lights Modified and create a Curves adjustment layer. Now when I compare the effect there is more tonal separation with the modified mask.
The ability to customize masks with temporary adjustments to the image for tonal separation can really help you generate the specific mask you need. In addition to increasing tone separation, you could experiment with modifying masks by temporarily darkening or lightening the image, increasing or decreasing saturation, changing the hue, or utilizing any other type of image adjustment to change how the masks will be generated.
24
25 - Custom Masks - Burn or Dodge a Mask
There are times when the feathered nature of a luminosity mask is helpful in one part of an image adjustment, but I want the adjustment to be entirely revealed or concealed in another part of the image. Sometimes the Burn/Dodge Tool can be used to quickly customize a mask for this purpose. Before I show you how to do this, I should point out that this technique doesn't work for all images and if you aren't careful, it can produce some of the halos and unrefined mask edges that the feathered nature of luminosity masks are intended to avoid. In future segments, I will be demonstrating better andmore advanced techniques for localized luminosity masks adjustments, but this technique can work in a pinch.
In this image, I want to brighten the exposure of the dark landscape. I want to do this through a Darks mask. I use the Darks mask because I will be lightening through the Darks mask which reduces contrast. By using the expanded Darks mask, I have enough tonal range left over that I can make an S curve in my Curves adjustment layer to maintain contrast. Ctrl Click on the Darks channel. Create the Curves adjustment layer. Set the Mode to Screen to lighten the image through that mask. I can still work with the curve to get the contrast that I want; however the adjustment is bleeding into the sky. This Darks mask targets the main areas of the landscape that I want to adjust, but the gray areas in the sky indicate that the adjustment will cause unwanted bleeding of the adjustment into that area. To conceal the sky from the adjustment it needs to be as black as possible in the mask.
Click on the mask to view it. Now, using the Burn tool, set to Shadows and 60% opacity, carefully burn the dark areas of the mask. The Burn tool will darken the darkest areas of the mask but not darken the light areas. Being careful not to darken portions of the mask in the landscape, this mask can be modifiedto localize the adjustment and keep it from bleeding into the sky.
You can also use the Dodge tool set to Highlights to dodge the lightest areas in a Lights mask. I can generate other masks from the modified mask that I previously created. I could intersect this mask with itself to target darker tones in the landscape while completely concealing adjustments in the sky. I can also Ctrl Click or Cmd Click on the modified Darks mask to select it, and the type Ctrl Shift or Cmd Shift I to invert the mask. Then save the inverted mask which is essentially a Lights mask which will reveal some degree of adjustments to the lightest portion of the landscape. Since the sky in the mask is completely white, the adjustment will be applied full strength to the sky.
So another way create a custom modified mask is to use the Burn tool to burn the darkest portions of a Darks mask or to use the Dodge tool to dodge the brightest portions of a Lights mask. This may not be the most elegant way to create localized luminosity masks adjustments, but it is quick and easy and in the right situation it can work well.
26 - Custom Masks - Painting an Enhanced MaskAnother way to customize a mask is to paint on it with a black or white brush through another luminosity selection.
For example, I want to darken the highlights but also maintain contrast. To darken and increase contrastI would need to darken through a Darks mask so I'm darkening just the darkest areas of the lights. I load a Darks selection, create a Curves adjustment layer, and set the layer mode to Multiply to darken
25
through that selection. That darkens the highlights while maintaining contrast. But using a Darks mask means that however much I darken the lights, I darken the darks even more. And because it's a Darks mask, it doesn't darken the lightest lights, like in the clouds, very much at all. I'd like to modify or enhance this mask so that it better suits my needs.
The simplest way to do this is to load the Darks selection again, and now, with the mask selected, paint on the image. Because you will be painting through a selection that will restrict the flow of paint it is usually necessary to use a fairly high opacity brush.
In the shadows, where I don't want the darkening I will paint black to conceal the adjustment. The Darksselections allow more paint in the shadows so I'm able to lighten the shadows more quickly than the lighter areas. The selection also makes sure that my painting is feathered to match the tones and textures of the image and look natural. The adjustment to the mask darkens the highlights with contrast and thanks to the enhancement to the mask it is not darkening the shadows. When actually enhancing amask in this way, I’d use a lower opacity brush and incrementally work with the mask to get better quality. When we compare the basic mask and enhanced mask, the darker regions of the enhanced mask shows less of the darkening adjustment than it originally did in the basic Darks mask. Because I painted on the mask through the selection, all the detail of the mask is preserved. I'd also like to see more of the darkening adjustment in the clouds. With the Darks selection still loaded, I will now paint on the clouds with white paint. With repeated passes of the brush at high opacity I can push more white paint through the darks selection allowing those areas to become whiter in the enhanced mask than they were in the original mask, and this allows the adjustment to be revealed in those areas even more.
Now when we view the original Darks mask and compare it to the enhanced mask, we can see the areas that have been enhanced to conceal the darkening adjustment and we can also see the areas that have been enhanced to further reveal the darkening adjustment. Please note that for best results it is important to paint carefully along sky/rock boundary or paint through a different selection to avoid darkening the rocks.
Now I would like to add some more punch to the brightest highlights in the rocks. If I lighten through a Lights selection I can lighten with increased contrast. I'll load a fairly restrictive Bright Lights selection and create a Curves adjustment layer set to Screen. It provides a slight brightness increase to the highlights while not lightening or decreasing contrast in the shadows. By loading the Bright Lights selection again, I can further lighten certain areas by pushing more white paint on to the mask through the selection. I can also push black paint through the selection to reveal the lightening adjustment in areas of the clouds that I do not want to be affected by this adjustment. When you compare the original Bright Lights mask and the enhanced mask, you can see where I painted with white through the selection to give the highlights more punch. You can see where I’ve darkened the mask to hold back the highlights in the clouds.
In addition to painting on a mask through its own selection you can also paint on a mask through different selections or even combinations of selections, depending on how detailed you want to be in creating an enhanced mask.
26
Again, like so many other aspects of luminosity masks, this technique has unlimited potential and is only restricted by your imagination. It takes some time and skill, but an enhanced mask could be created for just about any purpose.
27 - Localized Adjustments - Introduction
If you have made it this far in the tutorials and feel that you are developing an understanding of luminosity masks, congratulations! In making it this far you have probably also noticed that, for the mostpart, the techniques we have learned create adjustments that are global. That is to say that luminosity masks cause adjustments to be applied across the entire image. Even though the adjustments are controlled by the masks, being revealed or concealed to varying degrees across an image, all similar luminosity values across the image receive the same amount of adjustment.
For example, using a Darks luminosity mask attached to a Curves adjustment layer, I can adjustment the darkest values of the sky, but the mask also allows the same adjustment to affect similar luminosity values in the landscape. Often, such a global adjustment is what I want. But there are many cases in which I would like to be able to apply a luminosity-based adjustment only to very specific areas within the image. In the case of this image, I would want to make certain luminosity adjustments to the sky and make completely different luminosity adjustments to the landscape without them bleeding over into each other.
I have already demonstrated in previous segments that somewhat localized adjustments are possible through the creation of custom masks using the dodge and burn tools or by enhancing a mask by painting on it with white or black through other luminosity selections. These are perfectly viable techniques and are often the right ones for the job, but there are also other more flexible and precise ways of creating localized adjustments with luminosity masks.
In the upcoming segments I will show you how to make localized luminosity guided adjustments using three different techniques: Painting a Mask, Masking a Mask and Luminosity Painting. I have found that being able to localize luminosity mask adjustments expands their usefulness almost more than any othertechnique.
28 - Localized Adjustments - Painting a Mask
Painting a Mask is the first method of localizing luminosity adjustments that I'll cover. It is actually just a variation of something you already know: enhancing a mask by painting through a selection. In that technique we started with a basic luminosity mask on an adjustment layer and then customized it by painting with black and white paint through additional luminosity selections. This enabled us to further conceal or reveal adjustments beyond the limitations of the original mask.
This is actually that very same technique, but instead of beginning with a luminosity mask on an adjustment layer, we will begin with a completely black mask that will entirely conceal the adjustment Then we will paint through a luminosity selection with a white brush to reveal the adjustment only in
27
specific areas of the image, leaving the rest of the mask entirely black. This will allow the adjustment to be completely localized and yet still be guided and feathered by the luminosity selection.
I have been demonstrating a lot of Curves adjustments but remember that luminosity masks work with any adjustment. So, for this example I'll make a saturation adjustment. In this photo I'd like to work withthe color saturation where the patches of sun are hitting the grasses and flowers. I'll start by make a Hue/Saturation adjustment layer. I’ll boost the saturation all the way. This makes for a very extreme adjustment. Next type Ctrl or Cmd I to invert the mask, turning it black, completely concealing the saturation adjustment. After generating the Lights masks, select one that will reveal the area I want to adjust but also separate it from other areas. This is a time when it is good to select the next more restrictive mask. With repeated passes of a high opacity white brush you can push increasingly more paint through the lighter areas of the selection making them even whiter on the mask than the channel itself shows. The Bright Lights channel looks like it will do a good job of revealing the adjustment in the brightest sunlit areas and concealing the adjustment in the shadows. Ctrl or Cmd Click the Bright Lights channel to load the selection and go back to the color image.
This brings up something I need to point out. In the past we have always loaded a luminosity selection first and then generated the layer mask second, which creates a mask that mirrors the selection for the entire image. In this case, by making the mask first on the Hue/Saturation adjustment layer and then making the selection second, the mask doesn't show any of the selection until we paint on it. This is the key to creating a localized mask.
To summarizeSelection first + mask second = mask that shows the selectionMask first + selection second = mask that does not show the selection
Make sure that the mask is selected and the selection is active. Choose a soft edge brush with a white foreground. Paint on the image through the selection onto the mask. Using different brush opacities andsizes and you can control where the adjustment gets brought in.
To view the mask Alt click on it. The mask is completely localized to the areas where I want the adjustment to take place. Because we are painting white through that luminosity selection, it is a very detailed mask that we are creating and it allows the adjustment to take place just where I want it. If I gettoo much adjustment in some areas, I can use a black brush to paint back over those areas to reduce theadjustment. I can also work with the opacity of the layer or go back to the adjustment itself to change the saturation.
One of the benefits of creating a localized mask is that you can use different luminosity selections to create different parts of the same mask. If I now want to apply some of that color adjustment to the shadow areas, I type Ctrl or Cmd D to deselect the current selection. Now find a selection that will work for the shadow areas. In this example the Super Darks mask looks like it will allow me to make adjustments into the shadows. Ctrl or Cmd click on the Super Darks channel. Go back to the color image.Mask sure that the mask is selected. Now paint through this selection. In this example lots of marching ants appear in the area I plan to adjust. Type Ctrl or Cmd H to hide the ants. Just remember that the selection is hidden and remember to deselect it so that it does not affect future adjustments. Now paint with a white brush into the shadow areas.
28
When you look at the mask you can see the highlight areas where I painted with the first selection to add saturation in the highlights. You can also see areas where I painted through a Darks selection to add saturation to the dark areas.
Let’s look at a different image. When painting a localized mask to make contrast or brightness adjustments, the contrast relationship still holds true. To lighten or darken with more contrast, you lighten through a Lights selection or darken through a Darks selection. In this image let’s tone down some of the highlights but I don’t want to lose contrast by darkening through a Lights mask. But I also can’t darken through a Darks mask because that will darken the shadow which is not what I want to do. This is a great time to use one of the off-center midtone masks. I’ll darken through a Lights selection to darken the highlights but I’ll subtract a lighter selection from it first to protect the brightest highlights and maintain contrast.
Create a Curves adjustment layer and set the blending mode to Multiply to darken. With the mask selected, type Ctrl or Cmd I to invert the mask, making it black and completely concealing that adjustment. Next find the right mask to subtract and create the off-center Magic Mid-tone selection. I start with the broadest Lights selection first. Choose the Light Lights by Ctrl or Cmd clicking it. Next Ctrl Alt or Cmd Option click the Bright Lights channel to subtract that selection. Since those selections are so close together there are no pixels selected that are 50% gray, but that is OK. There’s still a selection there. Go back to the color image. Activate that black mask. Paint with a white brush in the areas where I want to tone down the highlights but not the brightest highlights. This is a painterly way to approach this adjustment. I paint all the areas where I want to bring them down just a little bit. I also paint in the glowing areas of the cactus where I want the reds to come through. I want to darken them down to increase their saturation but not lose their overall brilliance. In this example I even paint the adjustment into the sky.
As I have pointed out with previous techniques, the options for creating targeted adjustments with this technique are unlimited. Only your imagination, understanding of the technique and willingness to experiment would stop you from being able to create any perfect localized adjustment.
29 - Localized Adjustments - Masking the Mask
In his written tutorials Tony explains a technique called Masking the Mask as another way of making off-center magic mid-tone adjustments that protect contrast in the lightest or darkest tones. The difference is that the Masking the Mask technique allows the two subtracted tonal ranges that create the Magic Mid-tone to be controlled by separate masks allowing for even more flexibility.
I have found that the Masking the Mask technique is most effective as another way making luminosity masked adjustments to localized portions of an image. Masking the mask in this way involves using a basic luminosity mask to make an initial global adjustment and then using the second mask, called a controlling mask, to control precisely where the initial adjustment will be applied.
In my sample image, I’d like to darken some of the bright highlights in the sky. I'll begin by making a Levels adjustment with a Lights mask attached. Set the Blending mode to Multiply to darken the image. Use the Levels adjustment layer to adjust the highlights, midtone and shadows and get the desired
29
affect that I want. It has the intended effect in the sky, but I can immediately see that it is bleeding over into my landscape and I don't like what it is doing there.
When applying an adjustment with a Luminosity mask and discovering that the adjustment affects areasof the image you don't want it to, it is tempting to simply paint with black on the mask to conceal the adjustment in those areas. However, if you decide you went too far or want some of the adjustment back and you paint with a white brush, you’ll find that the intricate luminosity selection has been lost. Itwould be nice to be able to add a second controlling mask to that layer, but Photoshop doesn't allow it. The second mask added to a layer is called a vector mask and it functions differently than a regular mask.
A solution that works is to place the adjustment layer inside a Group. This can be done automatically by highlighting the layer then holding down the Shift key while clicking on the layer group icon. Alternately you can click on the icon to create an empty group and then drag the layer into it manually. Either way you’ll know that the layer has been added to the group because it is slightly indented underneath the group. You can close the group to hide that layer.
Now, with the group highlighted, hold the Alt or Opt key and click on the mask icon to add a black mask to the group. The black mask on the group conceals the adjustment and this is why it is called Masking the Mask.
With the mask on the group active, I can now paint with a white brush on the black mask to reveal the luminosity adjustment only in the parts of the image that I want. Because I'm painting on the controllingmask, the detail of the layer mask is still maintained. Its feathered quality means that even though the controlling mask has a crude edge, the adjustment below still blends perfectly. If I find that I have revealed the adjustment in areas I don't want, I can now paint black back on the controlling mask to finetune the adjustment.
Let’s apply this technique to a second example. In the first example I free hand painted on the controlling mask, but you can also use the Painting a Mask technique to make a more refined controllingmask. To demonstrate I'll start by making a basic mid-tone adjustment to this image. Use the Overlay blending mode to add midtone contrast. I’ll use the curve to fine tune the adjustment. I like the contrastand vibrance it adds to the leaves, but I don't like how the adjustment is blocking up the darker portions of the image. I'd like to apply this midtone adjustment only to the lightest areas of the leaves and trees. Masking the Mask is perfect for this.
With the layer highlighted I'll Shift Click on the Group icon, placing the layer in a group. Next with the group highlighted I will Alt or Opt Click on the mask icon to create a black controlling mask. Finally I will load a Lights selection and paint through it with a white brush on the black mask bringing the adjustment through in lighter areas while protecting the shadows. I have to use a 100% opacity brush since I have a lot of mask controlling the adjustment. It will take a lot of paint to have the adjustment show through.
I find that I very frequently use Masking the Mask techniques like these. The advantages are that it is a very quick technique for localizing adjustments. If I make a global adjustment and realize I don't like its affect in all parts of the image it is very easy to place the layer in a group and use a controlling mask to reveal it just where I intend. However, the technique isn't as flexible as the Painting a Mask technique
30
when it comes to creating very specialized masks or using combinations of selections within the same mask.
30 - Localized Adjustments - Luminosity Painting
The final method of creating localized adjustments with luminosity masks that I will show you is something Tony calls Luminosity Painting. Luminosity Painting is a specialized form of burning and dodging using a blended 50% Gray Burn/Dodge layer. The use of a Gray Burn/Dodge layer to lighten or darken areas of an image is a Photoshop technique that many people are already familiar with.A Gray Burn/Dodge layer is created by holding down the Alt or Opt key and clicking on the new layer icon. In the dialog, name the layer Burn/Dodge and set the blending mode to either Soft Light or Overlay. When either of these modes is selected a check box appears allowing you to fill the new layer with neutral 50% gray. Check the box, click OK and the new Burn/Dodge layer will be generated.If you own the TKActions, there is an action that will generate a Soft Light Burn/Dodge layer automatically.
Both the Soft Light and Overlay blending modes increase contrast by making light tones lighter and dark tones darker. However, they have no effect on the exactly neutral 50% gray tone, so with the entire layer filled with 50% gray no adjustment is visible at all. By painting on the gray layer with either white or black you can introduce gray tones that are lighter or darker than 50% gray. Anywhere the layer is painted with white will cause the image to be lightened and anywhere the layer is painted with black the image will be darkened. The less aggressive soft light mode will burn and dodge with less contrast and the Overlay blending mode will burn and dodge with more contrast. At any time you can switch between the two to compare how they affect the image differently and choose the one you like. I find that I most often use the Overlay mode.
Painting on a Burn/Dodge layer with a brush creates somewhat indistinct blotchy areas. For general, non-specific dodging and burning this can work fine.
Of course, painting on a Burn/Dodge layer through luminosity selections completely changes the game. The selection controls how much paint is deposited on each pixel. Because the selection is based on the image's tonal values, painting through a luminosity selection can confine burning or dodging to specific tones in the image, making it possible to burn or dodge specific highlights, mid-tones or shadows separately.
In my example I generate all the Lights and Darks masks and a Burn/Dodge layer. I'll begin by darkening some highlights by painting black through a Lights mask. Ctrl or Cmd click on the Lights channel to load the selection. I normally use a very soft brush and begin with a low opacity brush, often 10% or less. Ctrl H to hide the marching ants. Begin painting to darken highlights. The low opacity brush may or may not provide much of an adjustment. Use a higher opacity if you don’t see much of an adjustment. Hold down the Alt key and click on the eye of the Burn/Dodge layer to see how painting through the selectionwith black is controlling our burning. Everything darker than 50% gray is being darkened. Each pass will push more paint through the selection and increase the adjustment. Now I can deselect the Lights selection and load a Darks selection. Setting the paint color to white, I can now dodge (lighten) the shadows.
31
For the most control when Luminosity Painting, it is important to refer to the contrast relationships chart and make use of subtracted magic mid-tone selections. For example, if I wanted to lighten the darks while maintaining contrast I would want to lighten through a Lights mask. However, if I'm not careful where I paint this, dodging will bleed over into the light areas as well. Another approach that maintain contrasts and also helps ensure that my dodging is restricted to the darker tones would be to use a Magic Mid-tone Selection. In this case I want to lighten the lightest tones in the darks while maintain good dark contrast in the darker dark tones.
Using the gradient I can see that lightening through a Darks selection with one of the darker selections subtracted from it will limit the dodging to only the lightest areas of the dark tones, but still leaving some contrast in the darkest darks. Let's try it on the image.
Type Ctrl D to make sure that I do not have a hidden selection. Load a Darks selection. Ctrl Alt or Cmd Opt click the Dark Darks to subtract them from the Darks selection. This is a narrow selection so no pixels are shown. I started with Darks selection so that I can lighten the lightest areas of the shadows. I subtracted the Dark Darks because it will protect all the other darks except for the lightest darks.
Similarly, if I wanted to darken the lights and maintain contrast I could use a Magic Mid-tone that was targeted toward the Middle Lights by loading a Lights selection, and subtracting one of the more restrictive Lights from it. Make a Lights selection. Subtract a Bright Lights from it. Then I would paint through the selection with black to darken the highlights.
It is a good idea to compare these adjustments with the Soft Light and Overlay blending modes. I find that the Overlay mode is best for dodging adjustments and the Soft Light mode is better for burning. Sometimes I’ll create two different Burn/Dodge layers. One will be just for burning set to the Soft Light mode and the other one for dodging set to the Overlay mode.
Luminosity painting can be used to dodge and burn very small areas of an image or you can get very painterly and build up a variety of different tonal and contrast adjustment across the entire image. In this image I spent quite a bit of time burning and dodging through different luminosity selections. Here is how the image looked before. And here is what the result of all my work looks like on the Burn/Dodge layer. Everything darker than 50% gray is being darkened in the image and everything lighter than 50% gray is being lightened.
For a more detailed discussion of all the advantages and nuances of luminosity painting in this way, make sure to read, or re-read Tony's article titled Luminosity Painting: Lessons Learned. If you own his PDF's you can find it there, or read it on his site by going to this link (goodlight.us/writing/luminositypainting/luminositypainting-7.html) or simply by going to the tutorial page at goodlight.us and looking under Luminosity Painting.
Luminosity painting is a great way to be very creative when working with the local tonalities and contrast in an image. It has the flexibility of the Painting a Mask technique when it comes to being able to use combinations of luminosity selections and subtracted magic mid-tone selections in a single adjustment. However, unlike the Painting a Mask or Masking the Mask techniques, which can be used tocreate any kind of image adjustment, the use of the Burn/Dodge layer means that luminosity painting can only be used to make adjustments to brightness and contrast.
32
31 - The Triple Play - Introduction
Tony's complete set of actions and tutorials include a technique called the Triple Play. The Triple Play is an advanced and somewhat unusual way to use luminosity masks, but the results they make possible can be excellent. Due to the complexity of the actions used to create the Triple Play layers and the challenging concepts behind how they work, I won't spend a lot of time deconstructing them for you. Instead, I'll demonstrate how to use the TK panel and Triple Play actions to quickly and efficiently apply them to your image developing workflow.
Let's begin by understanding what the Triple Play is for. Tony calls the technique Triple Play because it has the ability to address three important factors in an image: brightness, contrast and detail. While these are concepts that we have been addressing throughout these videos, Triple Play has the ability to affect brightness, contrast and detail in exciting new ways.
The time to use the Triple Play varies from image to image. It can be used at the start of the workflow tohelp set the foundation for brightness, contrast and detail in an image. It is also very useful at the end ofthe workflow to provide a finishing touch of brightness, contrast and detail. The TK Panel and Triple Play actions make it easy to experiment with, so trying it at various places in the workflow can sometimes open up new possibilities for an image.
Looking at the All Actions tab in the TK Panel we see that there are a variety of triple play options. The "Lights" triple play affects the light tones of the image and the "Darks" triple play affects the dark tones. You can use Triple Play to work with either light tones or dark tones or both.
Curves and Levels options are available for the Triple Play. Which to use depends on which type of adjustment layer you're most comfortable with. However, in reality, when using the Triple Play, making adjustments to adjustment layers is pretty rare. The Triple Play uses blending modes to handle most of the adjustment so further adjustments to the layers are rarely necessary.
As a general rule, Tony suggests using a blur of 5-, 10- or 15-pixels for a Lights Triple Play and 15-, 20- or 30-pixels for a Darks Triple Play. These are general guidelines based on his experience, but you should experiment with others. The larger the pixel radius, the more detail enhancement will occur. The darks can generally handle more detail enhancement than the lights, so that's why it's OK to start with a higher pixel blur for the darks Triple Play. Too high of a blur value can sometimes create too much detail enhancement along edges, though this can be mitigated later on if it occurs. A larger blur radius sometimes also creates a more artistic effect.
For this example I’ll create a 15 pixel blur lights Triple Play on Curves adjustment layers and a 30 pixel blur darks Triple Play on Curves adjustment layers.
As I said, instead of making adjustments to the adjustment layers in the Triple Play, the layers in the layer group are set to either Screen or Multiply blending mode. Screen lightens the image and Multiply darkens it. The layers in the layer group have an (S) for Screen or (M) for Multiply to indicate the blending mode. So the tonal change is generally affected by the blending mode as opposed to actually making adjustments to an adjustment layer, although further fine tuning can be made with the adjustment layer if desired.
33
The layers in the Triple Play layer group have the necessary series of luminosity masks already attached to the layers. Before actually running an action, it best to remove any luminosity masks from the Channels panel so they don't actually get incorporated when the action runs. The action creates all the necessary masks and then deletes them from the Channels at the end.
The blue layers in the Triple Play layer group have a luminosity mask blurred to the chosen pixel radius as indicated in the action's name.
The luminosity mask masking the layer is also named on the layer. So for example, a layer named: "(S) Super Darks, 10-px blur" means the layer is set to Screen blending mode, it has a Super Darks mask masking the layer, and the mask has been Gaussian blurred 10-pixels. A layer named: "(M) Shadow Darks" is set to Multiply blending mode and has a Shadow Darks mask which is unblurred.
The blue layers in the Triple Play layer group are the primary adjustment to the image. For a Darks Triple Play the blue layers are set to Screen blending to lighten the darker tones in the image. For the Lights Triple Play the blue layers are set to Multiply blending mode to darken the lighter tones in the image. The blue layer, with its blurred luminosity mask, is also responsible for the detail enhancement seen with the Triple Play.
After the action finishes running, the image will appear unchanged. The adjustment is made by turning on the visibility of various layers in the group.
After running a Triple Play action, the first choice is to figure out which blue layer helps the image the most. Usually it's just one, but sometimes it is more than one. It all depends on the image. Clicking different layer eyeballs on and off will quickly help you decide which layer works best.
Depending on which blue layer is chosen, it will sometimes provide a bit of an over-correction for the desired adjustment: the dark tones will be a bit too light or the light tones a bit too dark.
The layers above the blue layers are meant to pull back on the adjustment. Their blending mode is the opposite of the blue layers. In the Darks Triple Play, the blue layers lighten the image (Screen blending mode) and the red layers above re-darken it (Multiply blending mode). For the Lights Triple Play, the blue layers darken the image (Multiply blending mode) and the yellow layers re-lighten it (Screen blending mode).
So to complete a Triple Play, first choose a blue layer to make the correction, then choose either a red layer in the Darks Triple Play or a yellow layer in the Lights Triple Play to mitigate that correction. Click the visibility of the various layers on and off to figure out which combination works best. Because the masks on blue layers are blurred and the layers above are unblurred, turning on layers containing the same mask don't cancel each other out. There will still be an increase in contrast and detail.
Clicking the visibility of the group layer on and off (green layer for Lights Triple Play and Purple layer for Darks Triple Play) toggles the visibility of all the layers in the group so that the total effect of the Triple Play can be seen for the image.
This covers the basics of the Triple Play. In the next segment I’ll apply the Triple Play in a workflow.
34
32 - The Triple Play - In Action
Now that you know what all the elements of the Triple Play are for, I'll use the Triple Play from the beginning so you can see how it is applied within the workflow. For this image I am going to use the Triple Play at the beginning of the workflow to establish the brightness, contrast and detail I envision forthe image. I want to work with both the light tones and the dark tones but I start with Lights Triple Play. I begin with a 15 pixel blur with Curves adjustment layers.
I’ll start with the Lights Triple Play to increase brightness, contrast and detail in the lighter areas of the image. I start by seeing which of the blue layers has the effect on the areas that I want. It is either the Light Lights or the Lights. I’ll start with the Lights but we can always change it later.
The contrast and detail that that layer adds to the lights is great but it over darkens the lights as well. This is where the yellow layers come into play. I’ll try different yellow layers to mitigate the effect darkening layer. It is just a matter of trying different combination until you find what you like. After finding a combination that I think will work, I turn the entire group on and off to see the before and after and add or subtract layers as necessary.
Now I will make a Triple Play adjustment for the dark tones. I try a 30 pixel blur Darks Triple Play with Curves adjustment layers. I may not want to darken the Darks too much but I want to increase contrast and detail. I try different blue layers to see which one will have the effect that I think will work. The Super Darks may target the areas of shadows that I like. Now I try the red layers to make sure that I don’t over lighten the shadows and to introduce more detail into the shadows. I find a combination that works. I then go to the Background Layer and Alt or Opt Click on the Background layer eye ball to see the before and after images. These adjustments have done an excellent job of setting the foundation forthis image and any additional adjustments that I want to make.
Once the Triple Play is complete, the layers where the visibility is still turned off can be deleted to reduce file size and simplify the layers panel. The group can also be collapsed using the arrow on the group layer. Finally, the "Separator/halo mask" layer can also be deleted if it's not used, but it's generally best to have at least one layer above the group before doing this to make it easier to add other layers above the group.
I have completely developed this image and will now use the Triple Play to give it some final polish for best print output. The Lights in this image a fairly light. I’ll start with a 10 pixel blur Lights Triple Play witha Curves adjustment layers. Try the different blue layers to see which one will target the area of the lights that I want to work on. Next go to the yellow layers to mitigate the darkening of the lights and increase detail. Turn the entire group on and off to see how the adjustment looks. It’s lightening too much so I try another blue layer. I like the detail but it is darkening too much so I try another yellow layer.
Now I’ll do a Triple Play for the darks. I’ll try a 20 pixel blur. Again start with the blue layers to see which one targets the shadows that I want to work on. Now work with the red layers to see which one mitigates the lightening of the shadows while maintaining contrast and detail. Again I have to try different combinations of layers to get the effect that I want.
I collapse both groups and then turn each on and off to evaluate their effect.
35
33 - The Triple Play - Fine Tuning
In this final triple play segment let's look at some ways to further customize or fine-tune Triple Play adjustments.
The first way to further tune the Triple Play is to change a layer's opacity. Generally it's the non-blurred layers where this will come into play. Opacities from 50 to 100% can be used. For opacities of less than 50%, it is usually easiest just to turn off the visibility of the current layer and turn on the visibility of the layer below. You can also adjust the opacity of the entire Triple Play group.
The second way to fine-tune the Triple Play involves the "Separator/halo mask" layer. It's turned off by default when the action runs but its purpose is two-fold. The first is to make it easier to add more layersabove the Triple Play group. When a layer group is the top layer in the layer stack, Photoshop wants to add new layers to the group instead of adding them above the group. Clicking on the "Separator/halo mask" layer to make it the active layer makes it easier to add additional layers above the group instead of having them added into the group.
The section function of "Separator/halo mask" layer is as halo mask. The layer contains a very special mask that targets just the pixels that are different between the blurred and unblurred luminosity masks in the layers in the group below. It comes into play when detail or contrast from the adjustment in the group is a bit too strong or if halos become visible as part of the adjustment. To mitigate these effects, turn on the visibility of the "Separator/halo mask" layer. Then make an adjustment to the mid-tones in the same direction as the group name. For a Darks Triple Play, darken the mid-tones; for a Lights Triple Play, lighten the mid-tones. Only a small adjustment is needed since the mask on the "Separator/halo mask" layer very accurately targets the right tones in the image to overcome any excess enhancement indetail, contrast, or if there are visible halos.
The third way to fine-tune the Triple Play is to add a layer mask to the group layer and then paint black at the appropriate opacity to conceal the adjustment from areas where it's not desired. Alternately, you can add a black mask and then use a white brush to paint in the Triple Play adjustment just where you want it. If I wanted to make an adjustment to the dark areas of the image, I’d first make the Triple Play adjustment, then select the group layer, hold down the Alt or Opt key while clicking on the Mask icon to create a black mask to make the adjustment go away. Now paint on the mask with a white brush. To paint in that adjustment.
The TK panel also has an option for generating Triple Play adjustments with your own custom blur amounts. When you run the action, it allows you to enter the blur amount. You can choose a different blur amount for each layer in the Triple Play for blurs higher than 80 pixels.
Another option for experimentation is the "No blur" actions. The actions create the layers in Screen andMultiply blending modes with no blur on the blue layers so they affect brightness and contrast, but not much detail. This can allow you to quickly get a feel for how different luminosity masks affect brightnessand contrast and enable you to choose the right mask for non-triple play luminosity mask adjustments. For example, if you have difficulty pre-visualizing which mask to use, this can quickly show you what it would look like to lighten or darken through different light or dark masks and allow you to identify the one you want.
36
The Triple Play is another excellent application of luminosity masks as an image developing tool. They are a great option to enable to lighten or darken either shadows or highlights while maintaining or increasing contrast and enhancing detail.
34 - Workflow – Tips
When working with layer-based adjustments in Photoshop, with or without luminosity masks, I feel it is important to establish an approach that takes full advantage of the image quality and flexibility that Photoshop can deliver.
For a workflow to take full advantage of Photoshop's capabilities it should be flexible and non-destructive. Flexible means that layers are used in a way that any adjustment can be added, removed or fine-tuned at any time. Non-destructive means that adjustments are not made to the pixels of the background image itself, which would change the content of the image in a way that can't be reversed inthe future.
I have a few recommendations that will allow you to maximize the function and flexibility of your layer based adjustments. These tips are helpful regardless if you have made use of luminosity masks in your developing or not, but they are especially important with luminosity masked adjustments.
1. Make all your pixel altering adjustments before doing anything else to an image. ● Clean up all dust spots● Do any cloning that is needed● Make alignment and perspective changes – especially warps and content aware
transformations
● If you alter the pixels of the image after you have luminosity masks in place, the pixels of themasks will no longer match the pixels of the image and the altered areas will stand out.
2. Make necessary global adjustments to the image before working with more targeted adjustments. Correct color balance is the most important. Attempting to correct image wide color contamination after more localized and targeted color adjustments have been made can be difficult to near impossible.
3. Avoid flattening layers as you work on an image and save images in the tiff or psd file format with all layers intact. Once layers have been flattened the adjustments they contained are now permanently fixed within the pixels of the image. New adjustments can cause previous adjustments to become stronger than desired. I find that maintaining the ability to fine tune previous adjustment layers as new adjustments are added above them is critical for keeping all your adjustments working in concert to achieve precisely the affect you desire. In addition, if a particular problem arises intact layers allow go back and turn adjustments off one by one until you can isolate the adjustment or combination of adjustments that caused it. As your developing skills advance and the software adds new tools, leaving layers intact it is also possible to remove old adjustments and replace them with better ones.
37
4. Avoid placing opaque pixel layers in the middle of your layer stack. Opaque layers, whether theyare flattened image copies or layers created by third party plug in software, completely block the ability to make visible adjustments to layers below them. For all intents you might as well just flatten the image instead of inserting opaque layers. If you need to use a filter or adjustment that isn't available as an adjustment layer, I suggest that you keep those layers at the bottom of the stack where they won’t affect adjustments below them. Or keep them at the very top of the stack so that they can be deleted, adjustments made to the layers below it and then it can be recreated at the top again.
The layer stack is your record book of the developing history of an image. Naming layers and groups can be very helpful in remembering what each layer and group does. Tony's Actions automatically name the layers they generate but any custom generated luminosity masks layers will have generic names until you change them.
If you would like more in depth instruction on establishing a flexible and non-destructive workflow, check out my Digital Processing Workflow tutorial set. Employing a workflow that is flexible and non-destructive will allow you to take advantage of Photoshop's capabilities and give you the greatest ability to work with your images over time and refine your adjustments as you go.
35 - Workflow - What Does the Image Need
Developing images is an artistic skill that takes time and practice to acquire. When it comes to achieving your creative intent with an image it is important to recognize that every image is different and will require its own approach. The sequence of steps to develop an image in Photoshop will change with each image and even each time you develop the same image. The important thing is to be able figure out what an image needs and then to find a way to respond to that need. While I can readily tell you what kinds of adjustments CAN be made on any given image, it is much more difficult to say what kinds of adjustments SHOULD be made. However, I'll provide some general concepts that I have found useful.
Optimize the image carefully in the RAW converter. (I use Adobe Lightroom 4 but Camera Raw or the software that came with your camera works as well). I'm careful not to take raw adjustments too far. I like to bring a fairly bland image into Photoshop and do most of my creative adjustments there. If the RAW conversion is minimalistic, the pixels are actually more plastic than one might imagine. I try to only make what I call “foundation adjustments” to white balance, exposure, input-sharpening, noise reduction if needed and correcting alignment and chromatic aberration. I use Exposure, Highlights, Shadows, Whites and Blacks to make sure that I prevent clipping at either end of the histogram so I bring as much tonal information into Photoshop as possible.
Next I spend some time evaluating the image to identify what types of adjustments will improve it. This is not easy and for most people it isn't intuitive, but it's important to practice to develop this skill. Think in terms of color balance, brightness, contrast, and saturation. Think about trying to achieve the proper balance of these across the entire frame. In his writing, Tony astutely points out that while perception is vital when taking a photograph, it's equally critical when developing it. Look hard for ways to improve the image in Photoshop with the same kind of concentration you used while searching for the right composition. Here is the list of adjustments I initially identified for this image.
38
● Spot Clean-up● Fine tune color balance● Better tonal balance between sky and land● Increase saturation in clouds and reflection● Increase contrast and definition in landscape● Luminosity paint to locally adjust brightness and contrast● Add a vignette to draw focus into the scene
As I work I often identify additional needs along the way.
Now that I have a basic plan of approach it is time to begin making the adjustments. I begin with pixel altering work first such as dust spot clean-up, cloning, warping or transforming that needs to be done and then I move to the most global adjustments first before narrowing in on the smaller areas.
When adjusting the image, work incrementally. Identify and solve one problem at a time. Sometimes the changes can be quite dramatic, other times very subtle. It may take several layers and the effects can add up slowly. Experimentation is the key. I often spend several hours over multiple days working on my best images. Developing images is something I really enjoy. Don't be afraid to get a little aggressive in your efforts to improve the image. The self-feathering character of the masks insures that even big changes to the image can still blend in and look natural. As long as you have kept your layers intact you can go back and fine tune your adjustments at any time.
Just as it was in the traditional darkroom, developing an image in Photoshop is where you have the opportunity to impart your creative vision and personal style. In my mind, developing an image is an adventure and an experiment. While it may be possible to approach image developing as a static, repeatable procedure, such an approach wouldn't hold my interest or motivate me. For me, developing an image is a very artistic, personal and fulfilling experience.
36 - Exposure Blending With Luminosity Masks Part 1
Another image developing technique that can benefit from the use of luminosity masks is exposure blending. The ability to use layer masks to blend properly exposed areas of bracketed exposures to overcome high contrast light has been one of the major revelations of digital photography. Many HDR processing programs available now provide an automated approach to creating images with high dynamic range. For my work I can achieve higher quality and more realistic results from hand blending exposures in Photoshop. There are many techniques for hand blending images without luminosity masks, but for the most precise and realistic looking blends, they can be invaluable.
The topic of exposure blending, with or without luminosity masks, is expansive. In these videos I will quickly demonstrate a couple of ways that luminosity masks can be useful in exposure blending so you can see what is possible. For a more complete look into the topic of extended dynamic range imaging and techniques for exposure blending make sure the check out my Extending Dynamic Range video tutorial series.
39
I'll start with a basic two exposure blend for a bright sky and darker landscape. This is a common situation in landscape photography. To make the blend look realistic the critical area is the transition zone between the light and dark areas. This is where luminosity masks come in handy.
First I will make raw foundational adjustments to the two exposures. From Lightroom I can open them as stacked layers in Photoshop. For this image I am going to place the lighter exposure on top. I could also achieve the same results by placing the darker layer on top and just perform the inverse of all the steps. Do it whichever way makes sense to you.
Before beginning it is always a good idea to select both layers and perform an auto-align, just in case there was some movement in my tripod. Choose Auto Align Layers from the Edit menu. Select the Auto option and click OK.
With the light exposure visible I'll generate a series of lights and darks masks.
Now I will add a white mask to the top layer and paint with a high opacity black brush to conceal the lighter exposure and bring the properly exposed sky through. At this point I am painting over the transition zone and feathering down into the landscape. This creates a gradient mask similar to what you’d get with a graduated neutral density filter.
Next, I'm going to look for a Darks Mask that will isolate the dark landscape from the lighter sky. The Darks Mask is going to do the best job to reveal the lighter exposure in the landscape. Before I use it I’ll make a modification to it so that my blending does not bleed into the sky. I may want to use the Darks mask later, so I’m not going to modify it. Hold down Ctrl or Cmd and click on the Darks Channel. I’ll save that channel which is an exact copy of the Darks Channel, but I’ll name it Darks Modified. Deselect that selection and use the Burn tool to burn the shadows in the sky. I can modify the mask so that my adjustment does not bleed over into the sky. Load that selection by Ctrl or Cmd clicking on it. Go back tothe color image, highlight the mask and hide the marching ants. Now I can paint with a white brush through that selection to create a better transition zone and incrementally reveal the properly exposed landscape. It is important that the skyline doesn’t become too light so that it matches the brightness of the sky and looks more natural. If necessary I can switch back to a black brush to make sure that things stay dark on the horizon so the sky looks natural.
With the mask visible I can deselect my selection and then paint with a high opacity brush on the portions of the foreground away from the transition zone that I don’t want to be affected.
The cactus sticking up looks too dark. I experimented with a variety of selections and found that if I started with a Light Lights selection and then subtracted a Lights from it I could make multiple passes with a 100% opacity white brush to lighten the cactus without it bleeding over into the sky or surrounding mountains. I can also paint directly on the mask through that selection to make sure that I’m getting white paint pushed through onto the cactus.
This has been a quick demonstration. Depending on the image, creating the perfect mask for blending a transition zone can take quite a bit of time and concentration. Once the blend is complete I'm ready to move on through my regular workflow, making adjustments just like I would with a single exposure image. If I was completely confident in my blend I may choose to flatten the blended layers at this point.However, if I do, I will lose the ability to come back and adjust the blend if I find mistakes. For
40
particularly challenging blends I will often leave the layers intact so I can fine tune the blend mask in the future.
37 - Exposure Blending With Luminosity Masks Part 2
Now let's look at a situation in which there isn't a simple transition zone along which to blend. I'm still only going to use two exposures, one light and one dark, but the areas that need to be blended are much more detailed than sky and land. In my extended dynamic range videos I show an example with a similar image in which I blend four different exposures.
I’ll move my dark image to the top this time. Select both layers and auto-align them. Much of the light exposure looks fine, but I need to rescue the overexposed highlights around the street lights. I also wantto create more mood and contrast in the darker areas of the image. In situations like this I approach the blending much more like luminosity painting on a gray layer or painting a custom mask from scratch.
The light exposure in this case forms the foundation of my scene, so I have placed it on the bottom. With the darker exposure on top I can add a black mask to entirely conceal it. Now I can paint white on the mask through a variety of luminosity selections to reveal the dark exposure in the areas that I want.
I generate all the Lights masks and all the Darks masks. I'll begin with the overexposed lights. It looks likethe Super Lights mask will restrict blending to just the brightest overexposed areas while protecting the surrounding areas. Make sure that the black mask is active, hide the ants, and then use a high opacity white brush to making multiple passes in those over exposed areas and bring in the proper exposure. I can create the right exposure without my painting bleeding over into the darker areas. The mask makes a very challenging blend not only possible, but also very natural looking.
Now I would like to increase mood and contrast in other areas. I'm going to begin by targeting the darker midtones by loading a Darks selection and then subtracting a Shadow Darks from it. Hide the antsand then paint with white through the selection to reveal those darker tones from the top exposure just where I want them.
I'll increase the shadow contrast by darkening the darkest tones in some areas. I'll load a Super Darks selection and paint through that.
For my final blending adjustment, I’d like to bring back the pop in some of the upper mid-tones. I’ll makea Light Lights selection and subtract the Bright Lights from that so that I don’t over brighten those brightest highlights that we’ve already rescued. I’ll paint black so that I can conceal that darker exposureon the top.
Blending in this way, as I mentioned earlier, is much like luminosity painting, but instead of lightening and darkening by painting white or black on a gray layer you are actually selectively blending the lighter and darker tones from the two exposures. All the same principles apply. Blending in this way makes it possible to blend almost any range of exposures no matter how challenging the light may be.
41
38 - Additional Actions - Saturation Masks
In addition to all of the luminosity mask based actions that Tony has developed, his action set also includes several other very useful actions. These video tutorials are focused on luminosity mask techniques, but I wanted to give a quick overview of the other actions as well. For more complete instruction in these techniques you should refer to Tony's PDFs or the tutorials on his website.
On the All Actions tab of the TK Panel you will find the non-luminosity mask based actions.
The first is the Saturation/Vibrance actions. These actions also utilize masks, but instead of masks basedon luminosity values they build masks based on the saturation of the colors in an image. The actions canbuild Hue/Saturation adjustment layers in the layers panel or it can also build the saturation channels in the Channels panel.
The Saturation masks target adjustments to the areas of an image that already have saturated colors. The Vibrance masks target adjustments toward areas of the image that are less saturated. Generating the Hue/Saturation adjustment layers with saturation and vibrance masks allows you to increase or decrease the saturation in the more saturated areas or in the less saturated areas. They provide a great tool for decreasing saturation in over saturated areas and increasing saturation in under saturated areas. The Vibrance mask targets adjustments toward the less saturated portions of the image and the Focused Vibrance mask even more so. The Saturation mask focuses adjustments towards the more saturated portions of the image the Focused Saturation mask even more so
The Vibrance adjustment layer in Photoshop works in a similar way, but doesn't allow the same degree of control.
Generating the saturation and vibrancy masks in the Channels panel opens up a couple of options. First,like with luminosity selections, it enables you to load saturation selections and use them to make masks on other types of adjustment layers. For example if you wanted to make a contrast adjustment in the most saturated areas of the image, you’d use this mask with a brightness and contrast adjustment.
Second, it enables you to customize saturation masks, as I demonstrated with luminosity masks, for example by dodging and burning the mask. It also allows you to intersect the masks, if you find you needthem, to be even more restrictive.
Third, and most importantly, generating the masks as channels allows them to be used for saturation painting. Saturation painting is similar to luminosity painting, with a couple of differences. Once the saturation masks have been created as channels the next step is to run the Saturation Painting action. This generates a transparent layer set to the saturation blending mode. As we know, painting on a 50% gray overlay or soft light blended layer can lighten or darken an image. Painting on a layer set to the Saturation Blending mode will increase or decrease saturation. To increase saturation paint with a saturated color, like red. To decrease saturation paint with an unsaturated color, like gray. When the action creates the saturation painting layer it also sets the foreground/background colors to red and gray. To paint more saturation into areas that are lower in saturation I would load a vibrance selection and then paint with red on the saturation painting layer. You have to be careful when using the less focused vibrance mask because it is easy to paint saturation into areas that are already saturated. To paint less saturation into areas with too much saturation I would deselect the current selection and load
42
a saturation selection. Then I would paint through the selection with gray in the areas I wanted to reduce saturation.
It is important to use a low opacity brush and incrementally add adjustments.
Saturation masks offer many possibilities and can be almost as flexible and multifaceted as luminosity masks. This has been a quick introduction. I recommend reviewing Tony's written materials to learn more.
39 - Additional Actions - Make-It-Glow
The Make-It-Glow action affects contrast and saturation to create a subtle warm glow through the use of blurred layers and blending modes. It doesn't work well with all images, but when it does work it can add a very pleasing enhancement. The technique usually creates the greatest adjustment in bright areasand areas that have a lot of yellows and reds.
When the action is run it creates the Smart Glow layer as a smart object with a Gaussian blur filter. The blur radius you choose affects the strength of the glow. Use a smaller radius for more effect and a largerradius for less. If you don't get it right you can double-click the smart filter and fine tune it.
If the adjustment is too strong or is bleeding into areas where you don't want it you can adjust the opacity of the Make it Glow layer or add a mask to the layer and paint the effect in or out where you like.
You can load one of the saturation masks or luminosity masks as a selection and paint through that to further control where the glow is applied.
Tony’s tutorials contain more information about how the glow is created and you might want to apply it to your image developing.
40 - Additional Actions - Cloud Sharpening
Clouds are naturally soft, often without fine detail or sharp edges, so sharpening them is usually ineffective or inappropriate. However, clouds in an image can often benefit from enhancing their texture and contours, giving them more definition and visual weight.
The Cloud Sharpening action is designed just for this task. Again, visit Tony's PDF's or the tutorial on his website for a more in depth explanation of how cloud sharpening works.
To make a cloud sharpening adjustment with the TK Action simply click the cloud sharpening button in the TK Panel. The action will generate the Cloud Sharpening layer as a smart object with two smart filters, High Pass and Reduce Noise. Toggling the visibility of the layer shows the effect of the adjustment. At this point the adjustment is global, not just on the clouds, but we will come back to that.
43
To fine tune the amount of cloud sharpening you can adjust the opacity of the layer. You can also doubleclick on the high pass smart filter and fine tune the default setting. A smaller pixel radius will provide less contour and a larger radius will provide more contour. Modifying the high pass radius may also make the clouds look grainy. If so you may also need to adjust the noise reduction filter as well.
Once you have the cloud sharpening tuned, it is time to mask it off in areas where you don't want it. In this image it is easiest to simply select the sky and then add a layer mask to the layer. The mask will reflect the selection, revealing the sharpening in the sky and concealing it everywhere else. If you find that the adjustment left halos along the horizon, you may want to further refine the mask by painting onit. Of course, any other method of masking that serves your needs would also work.
It is important to point out that this kind of contour and texture enhancement can be useful for other parts of a scene. It can have a nice effect on water and snow as well. It is also another method that can work for adding definition in shaded or back-lit objects, as I showed with a different technique in a previous segment.
41 - Additional Actions - Color Clone
Color cloning is a simple concept that has many potential applications. There are many times when it can be useful to change the color of an area but not the texture. The Content Aware Fill, Patch and Brush options in the more recent versions of Photoshop do a remarkable job of removing dust spots andother unwanted objects from images, replacing them with content that matches the area in both color and texture. However, it can sometimes take a few tries and some careful touch up with the clone tool to get the texture to blend seamlessly.
In some cases this is necessary, but there are times when it would be nice to just clone the color of an area but leave the texture unchanged. For example in this image, suppose that I wanted remove red coloration in a rock.
Running the Color Clone action creates a simple transparent layer set to the color blending mode. Using the eye dropper, set to a 5 by 5 sample area, select a region of the image that has the desired color. Now, paint that color at an opacity of 10% or less with a low opacity brush onto the color clone layer.
This technique could be modified for many potential applications and is another situation where painting through a luminosity or saturation selection can target the color cloning to very specific areas within the image.
42 - Additional Actions - Web Sharpening
Properly preparing an image for the best quality web viewing can be challenging. It is important that web based images are converted to the sRGB color space so that colors will be rendered correctly. Images that are intended for web viewing must also be significantly downsized, especially with today's high resolution cameras. But downsizing an image can create issues with apparent image sharpness. Fine details and edges often become soft or indistinct. The TK web sharpening actions use a two-step
44
sizing and sharpening approach that helps maintain excellent fine detail even in smaller images on the web.
The actions have a selection of default web sizes. The number represents the height in pixels the image will be sized to. If I wanted to size this image to be 500 pixels high I would just run the “500” action. When the action runs it duplicates the image and renames it before sizing it so the master image file is left unchanged. The master file can now be closed with its original dimensions preserved.
When the image sizing is complete the sized image file contains four layers.
Holding the Alt or Opt key and clicking on the eye of the background turns off the other layers allowing you to see the image before the sharpening and after. The #1 Sharpen layer is the sharpening that was applied on the first sizing pass. The #2 Sharpen layer is the sharpening that was applied on the second sizing pass. It contains a special mask that helps minimize halos that can sometimes form along edges when sharpening a web sized image.
You can work with the opacity of both layers to dial in just the amount of sharpening you want.
The Option Curves adjustment layer is there so you can make any final adjustments to brightness or contrast that may have been altered in the sizing process.
The Pick action allows you to reduce your image to a custom size. When this action is run you get to select the size in each of the two downsizing steps. The general rule is that the first sizing pass should beroughly 67% larger than the final size of the image. So, if you want the final image to be 500 pixels high, multiply 500 x .67 which equals about 333, which means that the first sizing pass should be roughly 833 pixels high. Enter 830 for the height dimension and press OK. Now enter 500 as the height dimension forthe second sizing pass and the action will complete.
Once you have made any final adjustments to the layers of the sized image, flatten the layers and then go to File>Save For Web. In the Save for Web dialog select jpeg as your file type, check the Optimized and Embed Color Profile boxes, check the Convert to sRGB box and select Internet Standard for your preview mode. You can choose what meta data you want to be included in the file. I always include at least my copyright and contact info. Finally, set the compression quality you want. Keep an eye on the image preview and final file size in the Optimized tab as you choose your quality setting to get the combination of file size and image quality that you want.
The image has already been sized so don't do anything in the Image Size section. Now click Save and choose the location you want to save the image to and name it accordingly.
In my opinion Tony’s actions for sizing and web sharpening do a better job of preparing images to look good on the web is better than any other solution I’ve found.