AutoCASE for Civil 3D (2015 or 2016) Welcome to AutoCASE for Civil 3D! In order to install this app, you must have a stable internet connection, Civil 3D 2015 or 2016 must be installed, and you must have registered for an AutoCASE account (www.autocase.com). Follow the instructions below to get started! If you have any questions, email [email protected], or call 18004401592. Instructions to run AutoCASE for Civil 3D (2015 or 2016) 1. First, you’ll have to download the MSI file for the Civil 3D extension. Go to www.autocase.com/resources to find the extension link. 2. Next, you’ll need to download the installer. You may get a warning that the .msi file could be dangerous – click the arrow to the right and select “Keep”.
Transcript
AutoCASE for Civil 3D (2015 or 2016) Welcome to AutoCASE for Civil 3D! In order to install this app, you must have a stable internet connection, Civil 3D 2015 or 2016 must be installed, and you must have registered for an AutoCASE account (www.autocase.com). Follow the instructions below to get started! If you have any questions, e-‐mail [email protected], or call 1-‐800-‐440-‐1592. Instructions to run AutoCASE for Civil 3D (2015 or 2016)
1. First, you’ll have to download the MSI file for the Civil 3D extension. Go to www.autocase.com/resources to find the extension link.
2. Next, you’ll need to download the installer. You may get a warning that the .msi file could be dangerous – click the arrow to the right and select “Keep”.
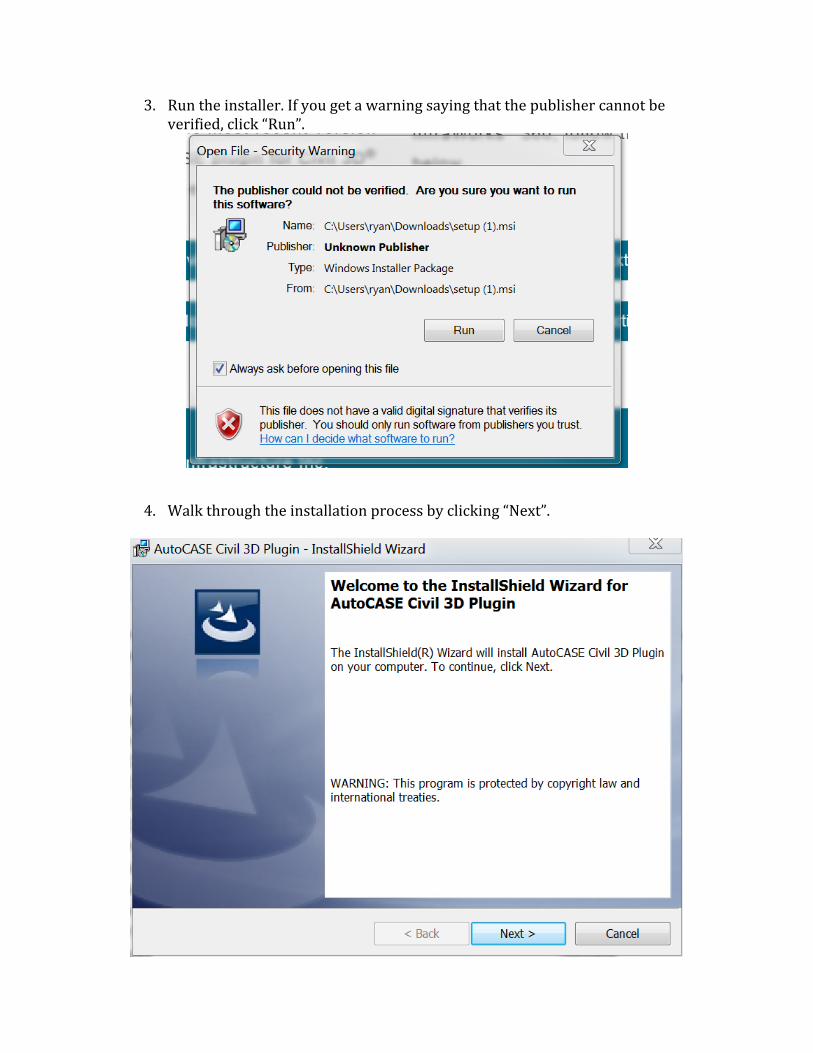
3. Run the installer. If you get a warning saying that the publisher cannot be verified, click “Run”.
4. Walk through the installation process by clicking “Next”.
5. AutoCASE for Civil 3D is now ready to install. Click “Install”.
6. The installation is now complete. Click “Finish” to exit the installation.
7. AutoCASE for Civil 3D is now all set to run! Open Civil 3D.
8. The AutoCASE ribbon should load automatically after opening a drawing.
9. Click “Assign to Project” in the top left to connect the drawing file to AutoCASE. Select a design alternative to connect the drawing file to, then click “Ok”. Note that projects and design alternatives must be created in AutoCASE prior to connecting them within Civil 3D. To learn more, see the AutoCASE Documentation.
10. You are now ready to start using AutoCASE in Civil 3D! Start tagging your design objects by using the “Label Feature” and “Label Entire Layer” buttons.
11. Quick View results can be seen on the right hand side of the ribbon. More results can be seen by clicking the button “Update Results” in the top right of the ribbon. Contact us at [email protected] or 1-‐800-‐440-‐1592 with any questions or comments!