The article on the pages below is reprinted by permission from United Service (the journal of the Royal United Services Institute of New South Wales), which seeks to inform the defence and security debate in Australia and to bring an Australian perspective to that debate internationally. The Royal United Services Institute of New South Wales (RUSI NSW) has been promoting informed debate on defence and security issues since 1888. To receive quarterly copies of United Service and to obtain other significant benefits of RUSI NSW membership, please see our online Membership page: www.rusinsw.org.au/Membership Jump TO Article Jump TO Article
Transcript
The article on the pages below is reprinted by permission from United Service(the journal of the Royal United Services Institute of New South Wales),
which seeks to inform the defence and security debate in Australia and to bring anAustralian perspective to that debate internationally.
The Royal United Services Institute of New South Wales (RUSI NSW) has been promoting informed debate ondefence and security issues since 1888. To receive quarterly copies of United Service and to obtain other
significant benefits of RUSI NSW membership, please see our online Membership page:www.rusinsw.org.au/Membership
Jump TO Article
Jump TO Article
ANZAC-15 Australia in the Second Anglo-Boer WarJohn Howells – April 2015
With ANZAC commemorations upon us, it behoves us to look at our nation in the years that led up toits involvement in World War 1.
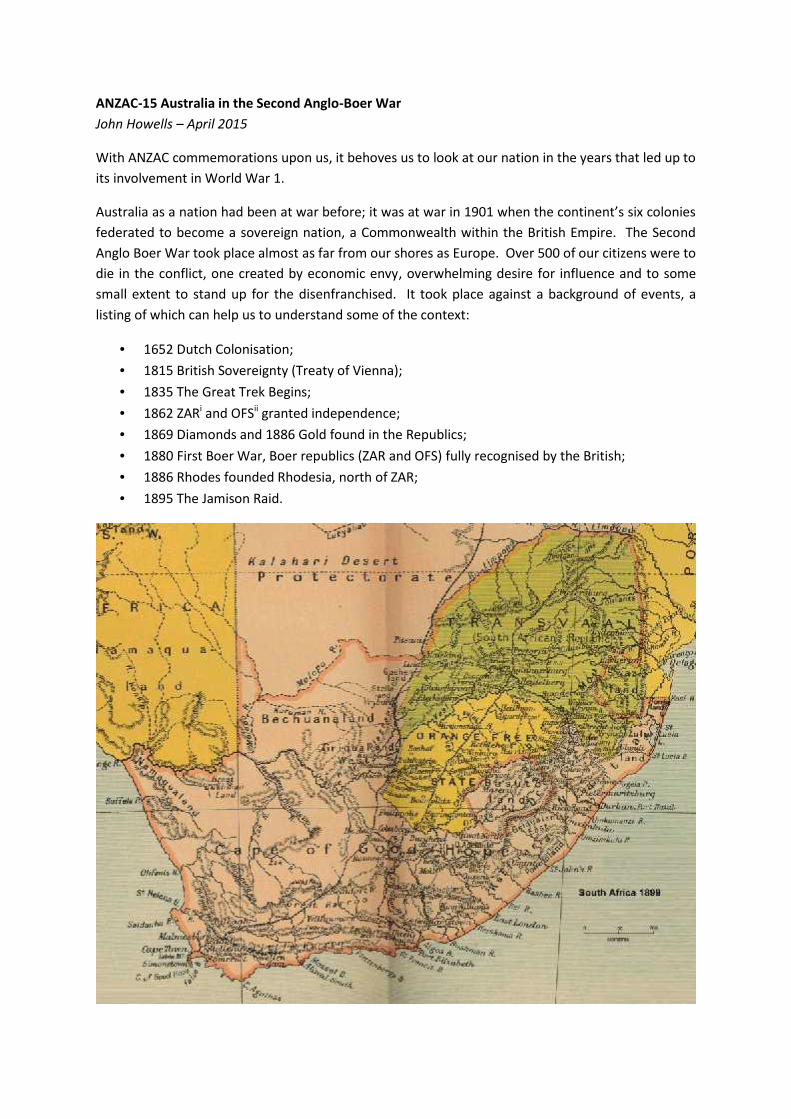
Australia as a nation had been at war before; it was at war in 1901 when the continent’s six coloniesfederated to become a sovereign nation, a Commonwealth within the British Empire. The SecondAnglo Boer War took place almost as far from our shores as Europe. Over 500 of our citizens were todie in the conflict, one created by economic envy, overwhelming desire for influence and to somesmall extent to stand up for the disenfranchised. It took place against a background of events, alisting of which can help us to understand some of the context:
1652 Dutch Colonisation; 1815 British Sovereignty (Treaty of Vienna); 1835 The Great Trek Begins; 1862 ZARi and OFSii granted independence; 1869 Diamonds and 1886 Gold found in the Republics; 1880 First Boer War, Boer republics (ZAR and OFS) fully recognised by the British; 1886 Rhodes founded Rhodesia, north of ZAR; 1895 The Jamison Raid.
- 2 -
It is of particular interest to note that the British possession of the Cape came out of the treaty thatended the Napoleonic Wars. The Netherlands had an arrangement with the elected despot whichmeant it lost the prize. And prize it was, the main stopover on the valuable route to India, and onthe way to visit a few convicts in the antipodes.
Discovery and subsequent exploitation of the mineral resources was the ultimate trigger for theconflict. The Boer Republics had confirmed their right to exist in the first Boer War where the Britishwere soundly defeated. Boer society, however, was rural and exclusive. Farmers were free to worktheir properties, and it was only they who were free to take part in the democratic process ofgovernment. Indigenous black and yellow people were regarded as “drawers of water and hewersof wood”, foreigners (utilanders) as outsiders, both categories were disenfranchised. It was theforeigners who exploited the gold and diamonds. By 1890, there were more people in Johannesburgmore economic activity generated there than in the rest of the Transvaal; those involved weredisenfranchised. Those outside the borders (mainly in the British colonies) looked in with envy; theywanted a piece of the action.
After the failure of the Jamison raid, the British reinforced garrisons in their surroundingpossessions, in response the two Boer Republics entered a formal alliance. Then on 10 October1899 the British Government received an ultimatum from the Boers demanding that additionalBritish forces be removed from the British colonies of the Cape and Natal. The ultimatum gave theBritish 48 hours to act or the Boers would declare war.
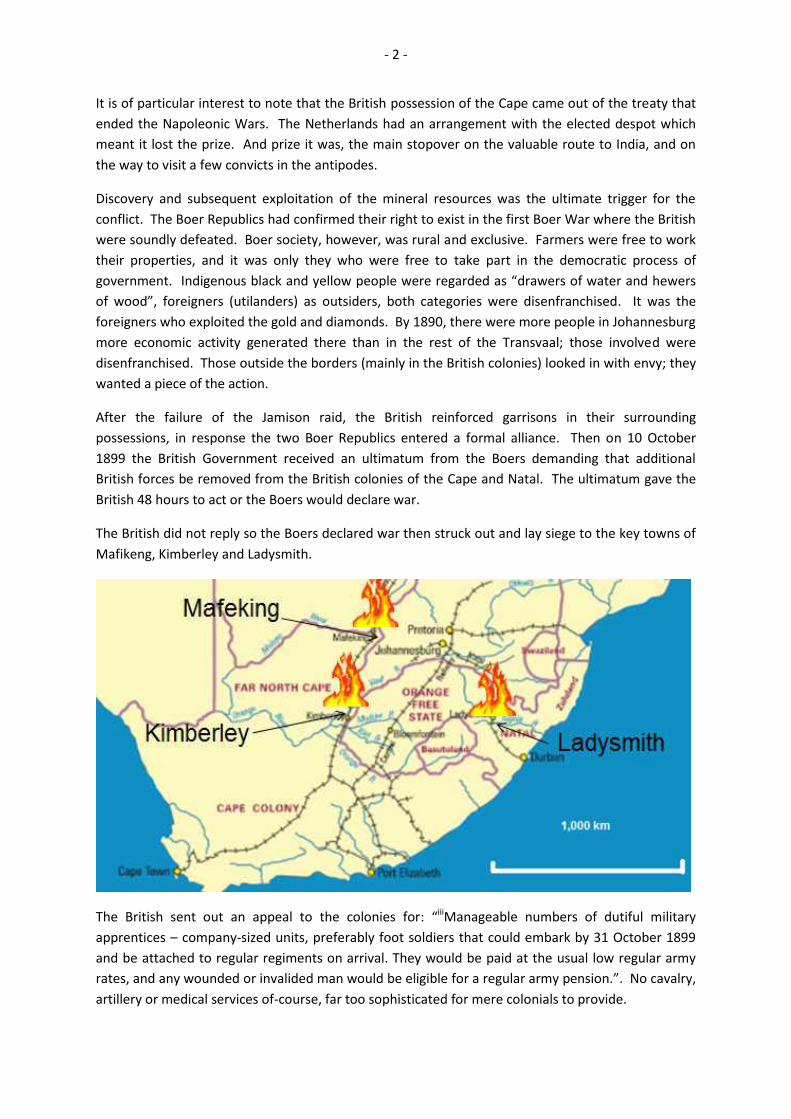
The British did not reply so the Boers declared war then struck out and lay siege to the key towns ofMafikeng, Kimberley and Ladysmith.
The British sent out an appeal to the colonies for: “iiiManageable numbers of dutiful militaryapprentices – company-sized units, preferably foot soldiers that could embark by 31 October 1899and be attached to regular regiments on arrival. They would be paid at the usual low regular armyrates, and any wounded or invalided man would be eligible for a regular army pension.”. No cavalry,artillery or medical services of-course, far too sophisticated for mere colonials to provide.
- 3 -
The forces used fell into these categories:
Infantry, the “dutiful military apprentices” requested. Australian colonies all sent an infantrycompany. Within two months of arrival, their British commanders recognised the men were alsocompetent horsemen so commandeered cape ponies and mounted them.
Light Cavalry. By the end of the 19th century, cavalry, horse mounted with a shock weapon thatscouted and could be used against infantry were deemed “Light”. Since their introduction to theBritish Army in the 1820s Lancers were the best of the light cavalry, with their long reach weaponsthey could break up infantry in squares. Even in the Boer war they did have some use againstinfantry that was in open ground and not dug-in. Australia sent one light cavalry sub-unit, the NewSouth Wales Lancer Squadron.
Heavy Cavalry. Mounted on substantial steeds for use against other cavalry, they were not of greatuse; the Boers did not have conventional cavalry. Australia sent a squadron of the Australian Horsea NSW unit who were trained and equipped as heavy cavalry. They soon gave up carrying theirswords and worked as mounted infantry albeit with their Martini Enfield carbines and no bayonets.
Mounted Infantry. Horse mounted soldiers who dismounted when they approached the point ofbattle, one in four taking the mounts, the others fighting on foot. Other than the single artillerybattery, lancer squadron, heavy cavalry squadron and medical services; all Australian units and sub-units sent to South Africa were mounted infantry. The particular skills Australians were able to bringto the field were honed by years working in the dry Australian “bush” where navigation, riding andshooting were part of life. As the war passed into the guerrilla phase, “Bushmen” were specificallyrecruited, most with little formal military training. Initially funded by colonial citizens and theirgovernments (the “Citizens’ Bushmen”) these particular mounted infantry units with scoutingcapability proved successful. The UK government paid for more (the “Imperial Bushmen”). Whenour new federated nation sent its first soldiers overseas in the first months of 1902, they weremounted infantry again with scouting capability, the “Australian Commonwealth Horse”. Theexperience of the Boer War meant that when the Australian Commonwealth Military Force (theAustralian Army) was organised in 1903, all mounted units were to be mounted infantry withscouting capability, the Light Horse.
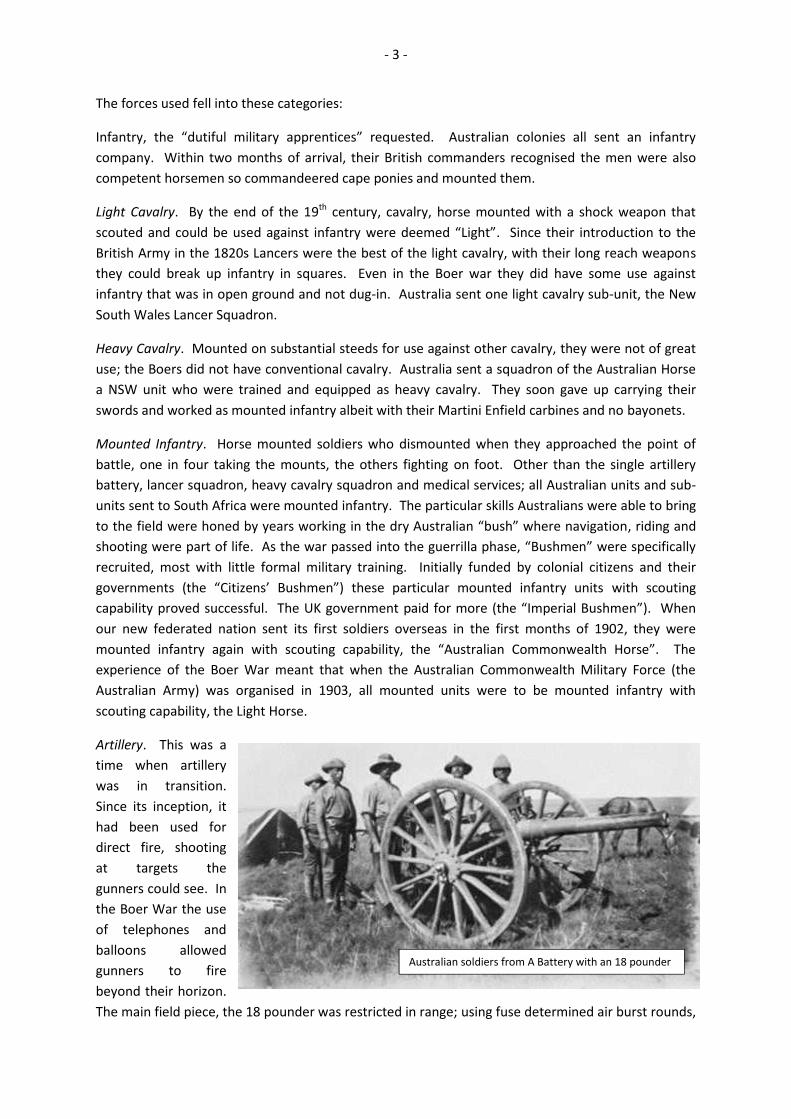
Artillery. This was atime when artillerywas in transition.Since its inception, ithad been used fordirect fire, shootingat targets thegunners could see. Inthe Boer War the useof telephones andballoons allowedgunners to firebeyond their horizon.The main field piece, the 18 pounder was restricted in range; using fuse determined air burst rounds,
Australian soldiers from A Battery with an 18 pounder
- 4 -
4,200 metres was the maximum range. Our contribution, A Battery, New South Wales permanentArtillery had its skill diluted being split into sections to work with British sub-units. Kept out of muchof the action, on occasion they like most other Australian contributions were used as mountedinfantryiv. Both sides also used “Pom Poms” capable of firing 300 half a kilo explosive shells aminute, and siege guns mounted on gun carriages as heavy artillery, the British guns having beenstripped from the fortress at Malta.
Logistics. Transport for troops and supplies was primarily by metre (3 foot six inch) gauge railsupplemented by horses and ox wagons. Protection of the life blood railways became paramount inthe latter guerrilla phase of the conflict. Australia’s specific logistic commitment was to the medicalservices. Nurses were sent from South Australia, Victoria and New South Wales, New South Walesand later the Commonwealth sent medical teams consisting of surgeons, nurses and orderlies withtheir own equipment and administration.
For the British there were two enemies, the Boer soldiers, and the terrain.
The Boer army was not conventional. As with the Australian colonial forces, Artillery was seen asrequiring professional skill. The Staatsartillerie was manned by permanent soldiers withconventional uniforms and ranks who spent their careers studying their artv. The other soldierswere recruited from the citizenry using the kommando system, the Kommandowet (Commando Act)19 February 1866 of the Orange Free State Republic stipulating “viAll residents between 16 and 60years who had no legal reasons for excuse were compelled to do commando duty. All residents,provided they had sufficient means thereto, had to be ready at all times with a horse, saddle, reins, aweapon, half a pound (250 g) of gunpowder, thirty bullets and food for eight days.” By 1899, the agewas 18 (with those younger permitted to volunteer) and the gunpowder requirement replaced bythirty rounds the government having purchase and supplied 7 mm “Spanish” Mauser rifles. The menwere recruited by locally appointed field cornets and grouped under district commandants. Whitemen were compelled to be part of the system, blacks could be conscripted in emergencies. When inthe field, a general would command a number of commandants and their commandos. Unit andsub-unit sizes varied. At full strength a Field Cornet commanded a company with assistantscommanding at lower levels; a commandant, a battalion; few units and sub-units reached andcertainly did not maintain full strength. There were no uniforms or badges of rank, at least untiltheir civilian clothes wore out and were replaced with readily available khaki taken from prisonersand their enemy’s field casualties.
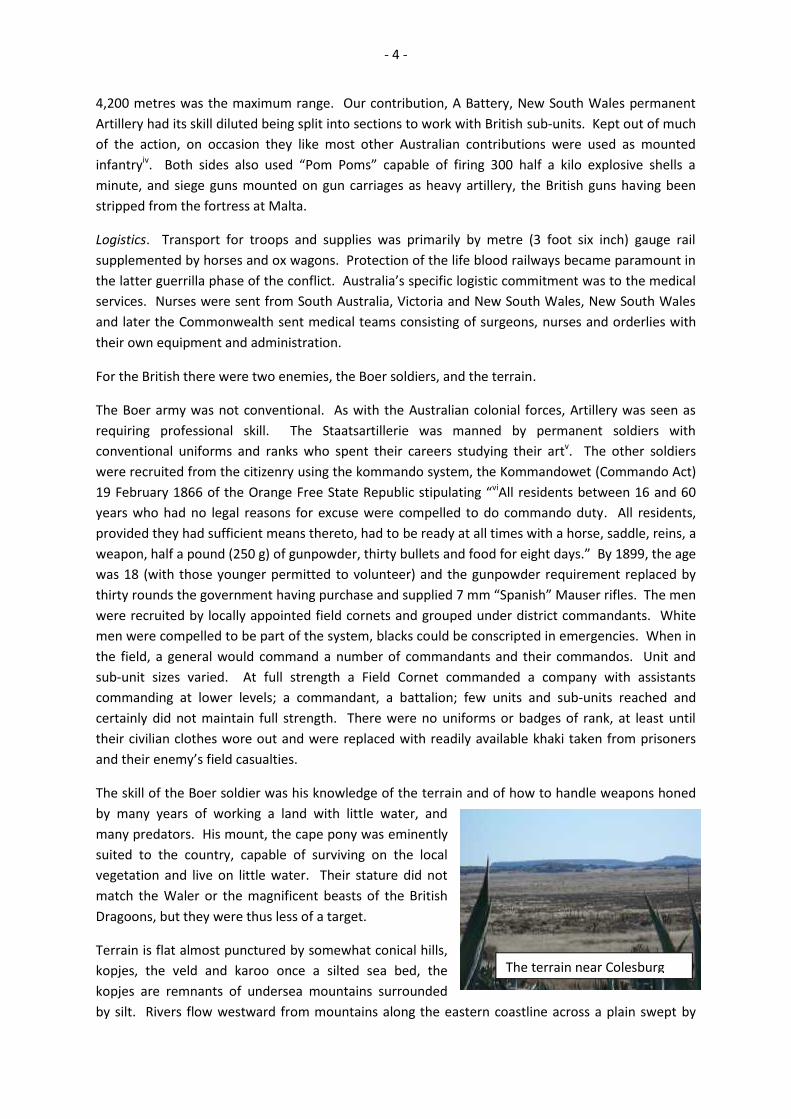
The skill of the Boer soldier was his knowledge of the terrain and of how to handle weapons honedby many years of working a land with little water, andmany predators. His mount, the cape pony was eminentlysuited to the country, capable of surviving on the localvegetation and live on little water. Their stature did notmatch the Waler or the magnificent beasts of the BritishDragoons, but they were thus less of a target.
Terrain is flat almost punctured by somewhat conical hills,kopjes, the veld and karoo once a silted sea bed, thekopjes are remnants of undersea mountains surroundedby silt. Rivers flow westward from mountains along the eastern coastline across a plain swept by
The terrain near Colesburg
- 5 -
violent monsoonal storms. Water holes only fill by summer rains, in the winter they dry and werereadily polluted. Typhoid (enteric) responsible for half the war’s casualties was endemic, and wellrecognised, most towns had signs warning of the problem and advising citizens to boil their water. Apatrol striking a water-hole after three days dry, however, usually did not take the necessaryprecautions and paid the price. Camps in the driving rain of summer became quagmires wherewater was readily contaminated. Imported horses found the sparse greenery of the veld and karoounpalatable. Fodder for horses became a logistics nightmare.
To put Australia’s involvement into perspective we need to consider these figuresvii:
116,500 26,000 viii20,000The average official death rate, caused by medical neglect, exposure, infectious diseases and malnutrition inside the campswas 350 per thousand per annum, peaking at 436 per thousand per annum in certain Free State camps. Eighty-one percent
of the fatalities were children.
Horses Total served: 500,000 (approx); Total deaths: 300,000 (approx)
There were some 150 engagements involving Australians in this hapless conflict, I will discuss but afew illustrative examples starting with Lieutenant General Lord Methuen’s advance along the line ofthe western railway to relieve Kimberley. A squadron of New South Wales Lancers had been trainingwith British cavalry in the UK since April 1899 mostly at their own expense. As the prospect of war inSouth Africa loomed, their commander Captain Cox had lobbied the British and New South Walesgovernments for permission to take part. The squadron left the UK as war was declared and arrivedin Cape Town to the news that they could stay and fight. With no horses and little equipment thesquadron quickly assembled a troop of 29 (one officer Lieutenant FS Osborne and 28 other ranks)mounted them on cape ponies and sent them north. They de-trained at the rail centre of de Aar andwere sent to join Lord Methuen’s force.
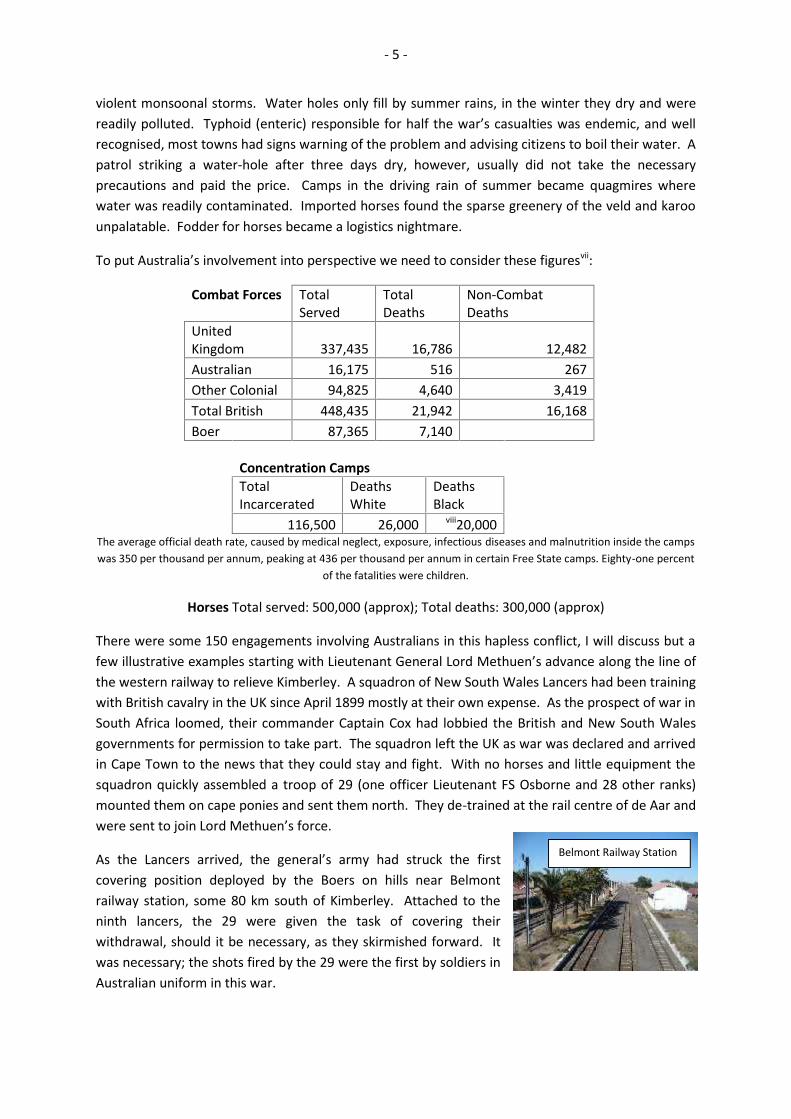
As the Lancers arrived, the general’s army had struck the firstcovering position deployed by the Boers on hills near Belmontrailway station, some 80 km south of Kimberley. Attached to theninth lancers, the 29 were given the task of covering theirwithdrawal, should it be necessary, as they skirmished forward. Itwas necessary; the shots fired by the 29 were the first by soldiers inAustralian uniform in this war.
Belmont Railway Station
- 6 -
The troop then took part in the subsequent covering force battles of Grasspan and Modder Riverbefore lining up to take the main position at Magersfontein; a line of kopjes covering the rail line toKimberley. It was de la Rey who came up with the innovative layout. Commandos were entrenchedat the base of the kopjes taking advantage of the flat trajectory of their Mauser rounds, theirsmokeless powder making it difficult for the British to target, and the deep trenches difficult for theFree Staters to slip away from as they had tended to do in the covering force engagements.
The Boer battle plan was a success. The 29 were the only Australians at this Black Week battle.Their task was to guard the guns of the Royal Horse Artillery who even with a balloon spotting forthem found it difficult to target the Boer tranches.
The other lancers joined by the Australian infantry companies now mounted were soon in action 500km east at Colesberg. Tom Morris, a farm labourer from Singleton became the first Australiannominated for the VC when he rescued his mate Harrison after his horse was shot from under him.With General French in command the Stormberg (another Black Week battle) defeat was avengedand the Boers pushed from Colesberg. Casualities rose, the first Australian in an Australian uniformto die was Victor Jones, a trooper of the Queensland Mounted Infantry at Sunnyside 20 km west ofBelmont on 1 January 1900. The next casualties were at Colesberg where a single patrol on 17January saw the deaths of the first New South Welshman Troop Sergeant Major Griffin and firstLancer Corporal Kilpatrick. The Australians started to make their name here as the casualtiesmounted the first Victorian, South Australian and Western Australian also died here.
The successful French was soon rushed off to take a more iconic prize. Taking many of his mountedcolonials with him he joined Methuen south of the Magersfontein feature. Kimberley was to berelieved by a wide flanking move to the east. At the time there was no video to show the folks athome, only verbal imagery.
“ixThe Boers were down on Kimberley with siege and Maxim gun;The Boers were down on Kimberley, their numbers ten to one!
The very hill and rocks where the first Australian shots were fired
- 7 -
Faint were the hopes the British had to make the struggle goodDefenceless in an open plain the Diamond City stood.They built them forts with bags of sand, they fought from roof and wall,They flashed a message to the south, ‘Help! or the town must fall’
Then down our ranks the order ran to march at dawn of day,And French was off to Kimberley to drive the Boers away.He made no march along the line; he made no front attackUpon those Magersfontein heights that held the Seaforths back;But eastward over pathless plains, by open veldt and vley.Across the front of Cronje's force his troopers held their way.” AB Patterson
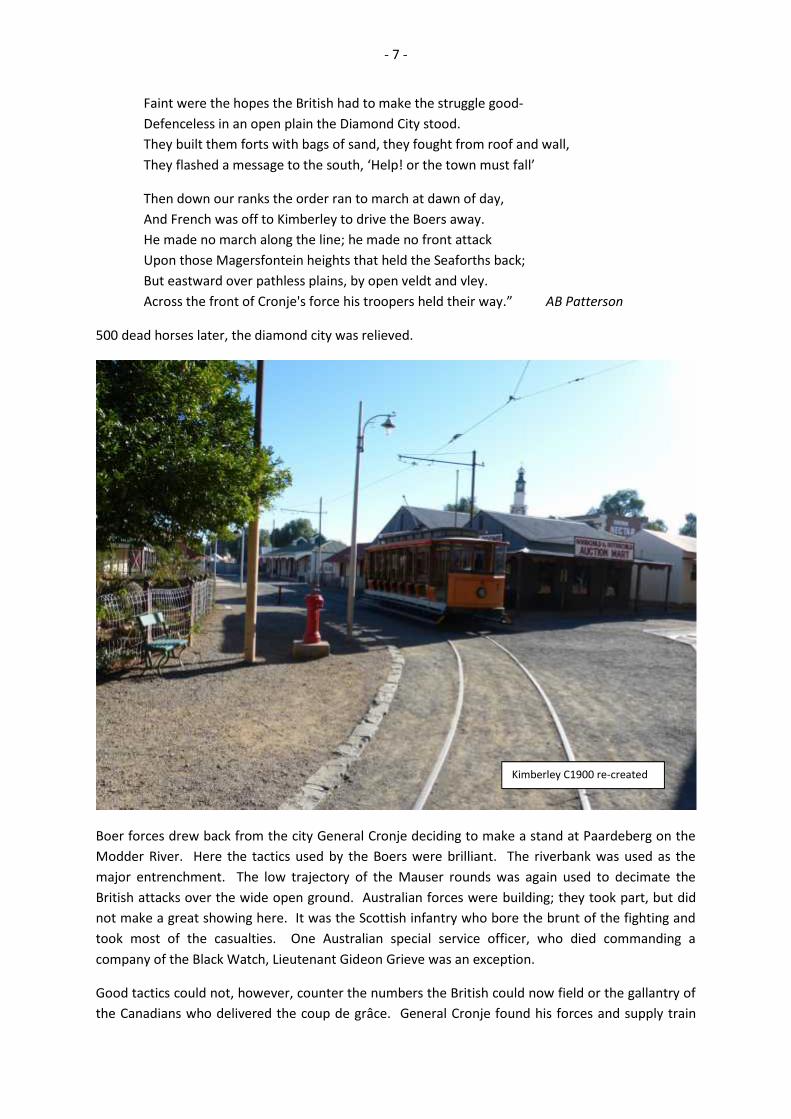
500 dead horses later, the diamond city was relieved.
Boer forces drew back from the city General Cronje deciding to make a stand at Paardeberg on theModder River. Here the tactics used by the Boers were brilliant. The riverbank was used as themajor entrenchment. The low trajectory of the Mauser rounds was again used to decimate theBritish attacks over the wide open ground. Australian forces were building; they took part, but didnot make a great showing here. It was the Scottish infantry who bore the brunt of the fighting andtook most of the casualties. One Australian special service officer, who died commanding acompany of the Black Watch, Lieutenant Gideon Grieve was an exception.
Good tactics could not, however, counter the numbers the British could now field or the gallantry ofthe Canadians who delivered the coup de grâce. General Cronje found his forces and supply train
Kimberley C1900 re-created
- 8 -
surrounded; surrender was the only alternative. On 27 February 1900 surrender he did, and soended the last conventional battle.
What followed was a fighting withdrawal, first to Bloemfontein, capital of the OFS, thence toPretoria capital of the ZAR. The Boer forces were eventually seen off in the battle of Diamond Hill11-12 June 1900. The war should have been over, Ladysmith had been relieved on 1 March, andMafikeng 11 May. Even in May, Queensland Bushmen fresh for the fray having spent weeks on thenarrow gauge railway and dusty roads from Beira in what is now Mozambique were so eager to takepart in the war before it ended they rushed forward without orders to attempt to fight for Mafikeng.
Now began the guerrilla campaign. Boer Forces seeking to disrupt and demoralise the occupiers.
On 22 July 1900, De Wet had derailed and looted a train, before moving towards the Orange FreeState village of Vredefort. Part of a nearby British force, accompanied by members of the NSWMedical team, were sent to investigate. Among the first to fall in the forward line was a youngtrumpeter, who lay shot through the bladder and bleeding severely as his comrades were forced toretreat.
Lieutenant Howse did not hesitate. Digging his spurs into his horse, he charged through literally ahail of bullets to the wounded man. The brave doctor's horse dropped dead under him. UndauntedHowse grabbed his medical bag and ran forward on foot. Reaching the trumpeter, he dressed hiswound and while bullets flew round him, lifted the man onto his shoulders and carried him to safety.For his courage, Lieutenant Howse was awarded the Victoria Cross - the first ever awarded tosomeone in an Australian unit, and the only one ever awarded to an Australian medical officer.
With Pretoria and Mafikeng secure, a supply depot was established mid-way between where theroad crossed the Elands River (site of the present day town of Swartruggens). It was garrisoned byAustralian Bushmen from all colonies, Queensland Mounted Infantry, 200 Rhodesian volunteers andsome other horsemen; 500 defenders in all. It was a prize the Boers could not resist. From 4 – 16August 1900 Boer General de la Rey lay siege. Attempts were made by forces led by Carrington andBaden-Powell to relieve the post. With communications cut, Kitchener was advised the post waslost. Not so, the garrison held out, eventually whilst on another task and the C in C South Africahimself with an overwhelming 10,000 strong relief force stumbled on the position. The story of thesiege is the stuff of legend. They had been outnumbered by four or five to one, they had beenmassively out-gunned but had not shown the slightest sign of surrendering. They had lost heavily inhorses, over 1400 of the 1550 in the post were killed. Among the men the casualties had beenamazingly light; of the seventy seven casualties only eight Australians had died.
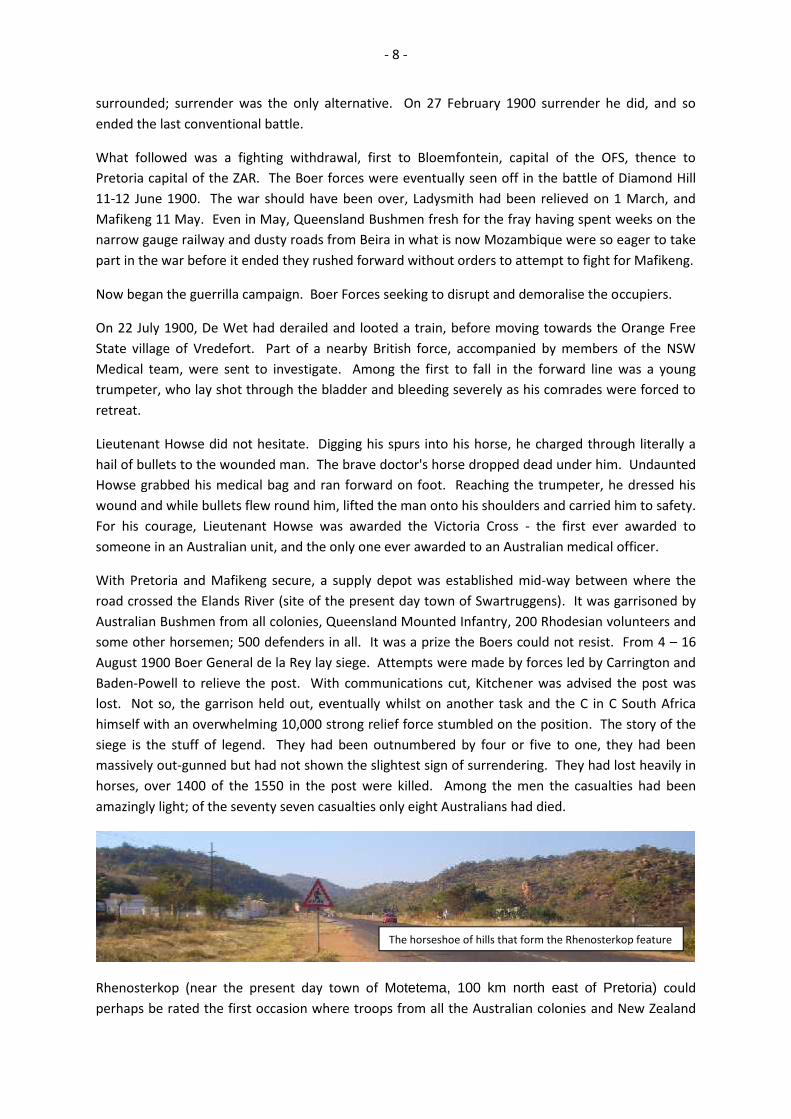
Rhenosterkop (near the present day town of Motetema, 100 km north east of Pretoria) couldperhaps be rated the first occasion where troops from all the Australian colonies and New Zealand
The horseshoe of hills that form the Rhenosterkop feature
- 9 -
were involved. Fought against Boer General Viljoen on 29 November 1900, it was mainly theAustralian Bushmen contingents that took part. The Australians had 12 casualties (theQueenslanders having the majority) and the New Zealanders had 28 casualties. The horseshoeshaped position with the horns facing the British advance, and Boer laager behind was classic.General Paget in command of the force embodying the ANZAC troops attacked the position’s frontdoor; the fighting was fierce. However, as Viljoen recognised the British were massing their forcesto a point where the 5,000 he could field would be substantially outnumbered, he withdrew fromthe position. General Paget achieved one of the many pyrrhic victories that were to plague thedeveloping guerrilla phase of the war.
The British had a problem, the Boer forces were mobile and very hard to pin. Victories likeRhenosterkop could but sap their manpower, not defeat them. They were supported by everyfamily, on every farm. Faced with an unwinnable war, Roberts and Kitchener like many others whenfaced with an insoluble situation came up with a strategy that had inexcusable consequences:
detach the Boer fighters from their support bases; raze their farms – destroy crops and kill stock; concentrate their families in camps; set-up lines of block houses and barbed wire to restrict the fighters’ movement kraal and
capture them.
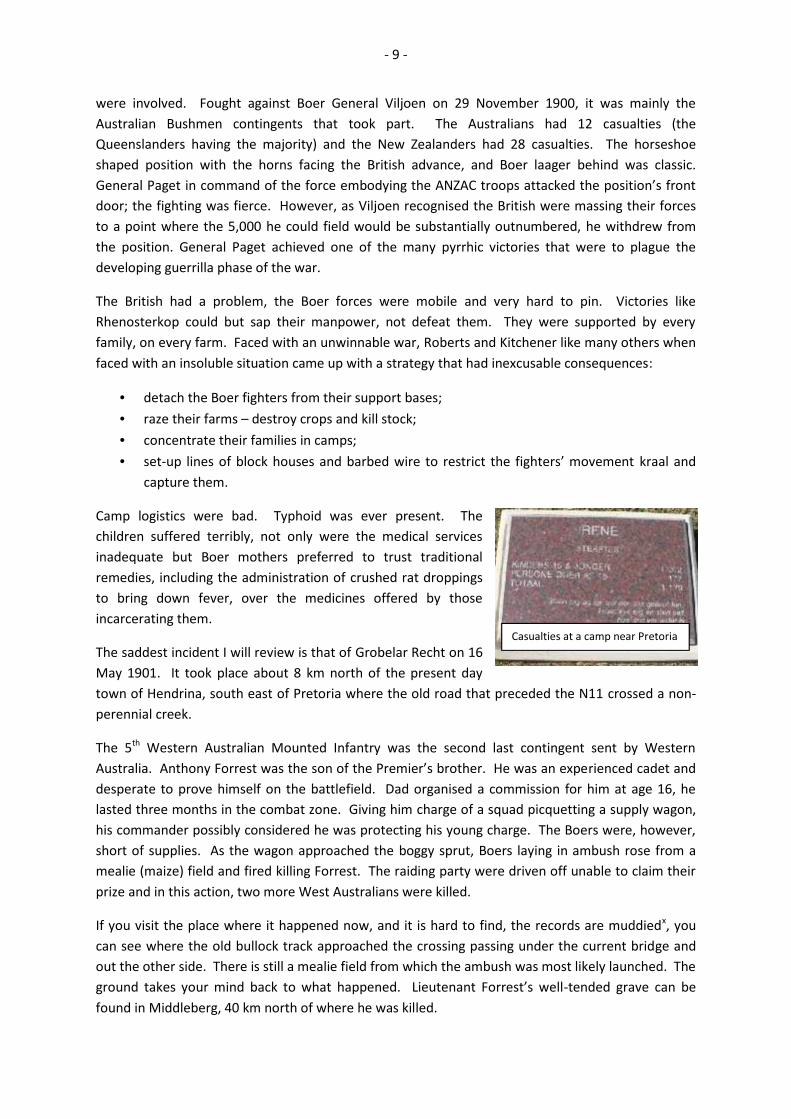
Camp logistics were bad. Typhoid was ever present. Thechildren suffered terribly, not only were the medical servicesinadequate but Boer mothers preferred to trust traditionalremedies, including the administration of crushed rat droppingsto bring down fever, over the medicines offered by thoseincarcerating them.
The saddest incident I will review is that of Grobelar Recht on 16May 1901. It took place about 8 km north of the present daytown of Hendrina, south east of Pretoria where the old road that preceded the N11 crossed a non-perennial creek.
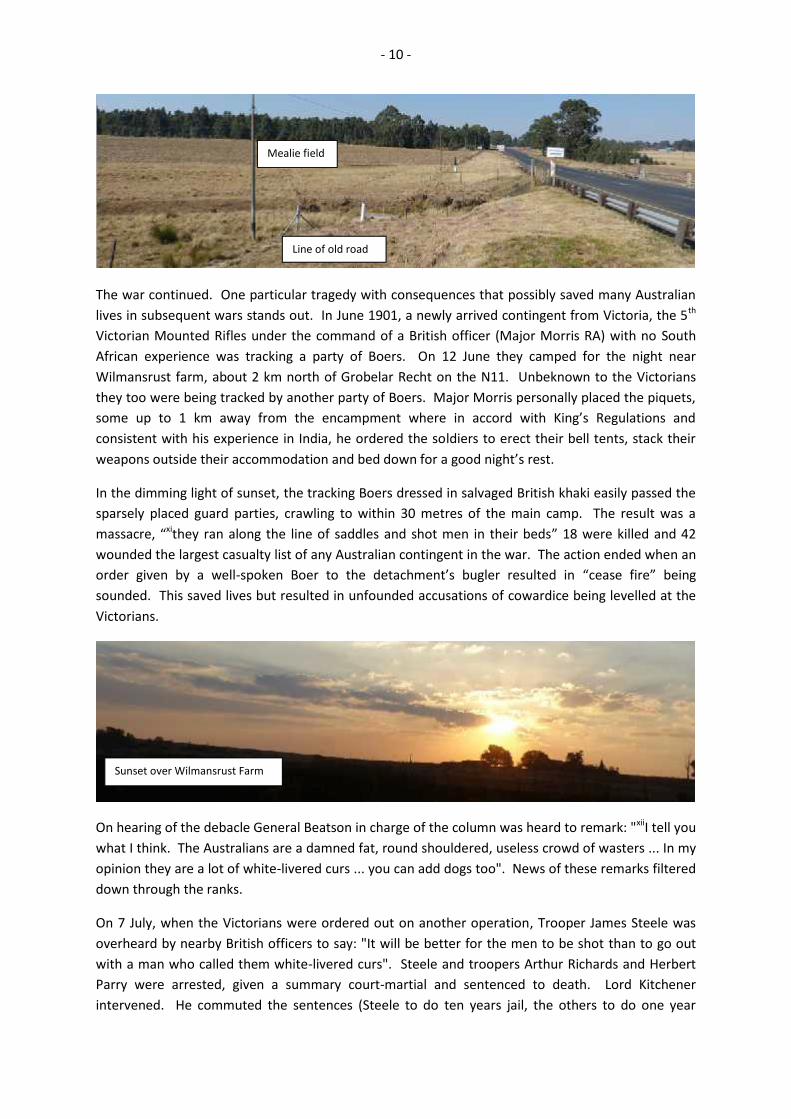
The 5th Western Australian Mounted Infantry was the second last contingent sent by WesternAustralia. Anthony Forrest was the son of the Premier’s brother. He was an experienced cadet anddesperate to prove himself on the battlefield. Dad organised a commission for him at age 16, helasted three months in the combat zone. Giving him charge of a squad picquetting a supply wagon,his commander possibly considered he was protecting his young charge. The Boers were, however,short of supplies. As the wagon approached the boggy sprut, Boers laying in ambush rose from amealie (maize) field and fired killing Forrest. The raiding party were driven off unable to claim theirprize and in this action, two more West Australians were killed.
If you visit the place where it happened now, and it is hard to find, the records are muddiedx, youcan see where the old bullock track approached the crossing passing under the current bridge andout the other side. There is still a mealie field from which the ambush was most likely launched. Theground takes your mind back to what happened. Lieutenant Forrest’s well-tended grave can befound in Middleberg, 40 km north of where he was killed.
Casualties at a camp near Pretoria
- 10 -
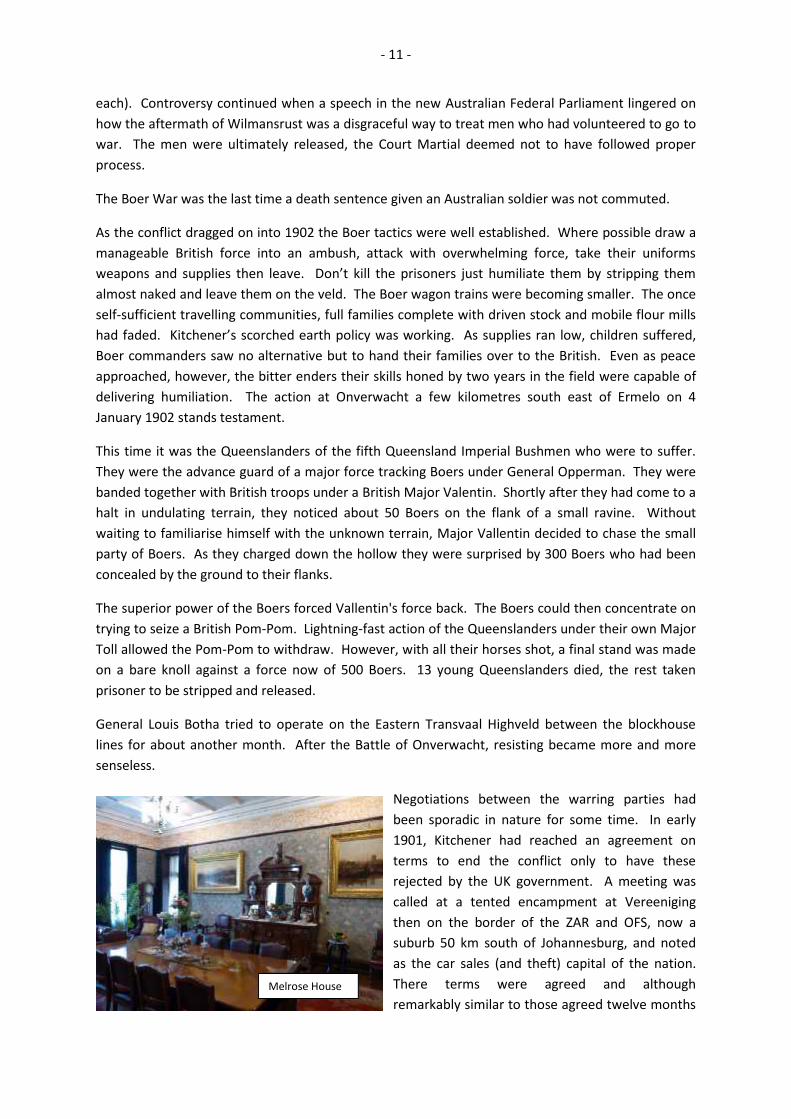
The war continued. One particular tragedy with consequences that possibly saved many Australianlives in subsequent wars stands out. In June 1901, a newly arrived contingent from Victoria, the 5th
Victorian Mounted Rifles under the command of a British officer (Major Morris RA) with no SouthAfrican experience was tracking a party of Boers. On 12 June they camped for the night nearWilmansrust farm, about 2 km north of Grobelar Recht on the N11. Unbeknown to the Victoriansthey too were being tracked by another party of Boers. Major Morris personally placed the piquets,some up to 1 km away from the encampment where in accord with King’s Regulations andconsistent with his experience in India, he ordered the soldiers to erect their bell tents, stack theirweapons outside their accommodation and bed down for a good night’s rest.
In the dimming light of sunset, the tracking Boers dressed in salvaged British khaki easily passed thesparsely placed guard parties, crawling to within 30 metres of the main camp. The result was amassacre, “xithey ran along the line of saddles and shot men in their beds” 18 were killed and 42wounded the largest casualty list of any Australian contingent in the war. The action ended when anorder given by a well-spoken Boer to the detachment’s bugler resulted in “cease fire” beingsounded. This saved lives but resulted in unfounded accusations of cowardice being levelled at theVictorians.
On hearing of the debacle General Beatson in charge of the column was heard to remark: "xiiI tell youwhat I think. The Australians are a damned fat, round shouldered, useless crowd of wasters ... In myopinion they are a lot of white-livered curs ... you can add dogs too". News of these remarks filtereddown through the ranks.
On 7 July, when the Victorians were ordered out on another operation, Trooper James Steele wasoverheard by nearby British officers to say: "It will be better for the men to be shot than to go outwith a man who called them white-livered curs". Steele and troopers Arthur Richards and HerbertParry were arrested, given a summary court-martial and sentenced to death. Lord Kitchenerintervened. He commuted the sentences (Steele to do ten years jail, the others to do one year
Mealie field
Line of old road
Sunset over Wilmansrust Farm
- 11 -
each). Controversy continued when a speech in the new Australian Federal Parliament lingered onhow the aftermath of Wilmansrust was a disgraceful way to treat men who had volunteered to go towar. The men were ultimately released, the Court Martial deemed not to have followed properprocess.
The Boer War was the last time a death sentence given an Australian soldier was not commuted.
As the conflict dragged on into 1902 the Boer tactics were well established. Where possible draw amanageable British force into an ambush, attack with overwhelming force, take their uniformsweapons and supplies then leave. Don’t kill the prisoners just humiliate them by stripping themalmost naked and leave them on the veld. The Boer wagon trains were becoming smaller. The onceself-sufficient travelling communities, full families complete with driven stock and mobile flour millshad faded. Kitchener’s scorched earth policy was working. As supplies ran low, children suffered,Boer commanders saw no alternative but to hand their families over to the British. Even as peaceapproached, however, the bitter enders their skills honed by two years in the field were capable ofdelivering humiliation. The action at Onverwacht a few kilometres south east of Ermelo on 4January 1902 stands testament.
This time it was the Queenslanders of the fifth Queensland Imperial Bushmen who were to suffer.They were the advance guard of a major force tracking Boers under General Opperman. They werebanded together with British troops under a British Major Valentin. Shortly after they had come to ahalt in undulating terrain, they noticed about 50 Boers on the flank of a small ravine. Withoutwaiting to familiarise himself with the unknown terrain, Major Vallentin decided to chase the smallparty of Boers. As they charged down the hollow they were surprised by 300 Boers who had beenconcealed by the ground to their flanks.
The superior power of the Boers forced Vallentin's force back. The Boers could then concentrate ontrying to seize a British Pom-Pom. Lightning-fast action of the Queenslanders under their own MajorToll allowed the Pom-Pom to withdraw. However, with all their horses shot, a final stand was madeon a bare knoll against a force now of 500 Boers. 13 young Queenslanders died, the rest takenprisoner to be stripped and released.
General Louis Botha tried to operate on the Eastern Transvaal Highveld between the blockhouselines for about another month. After the Battle of Onverwacht, resisting became more and moresenseless.
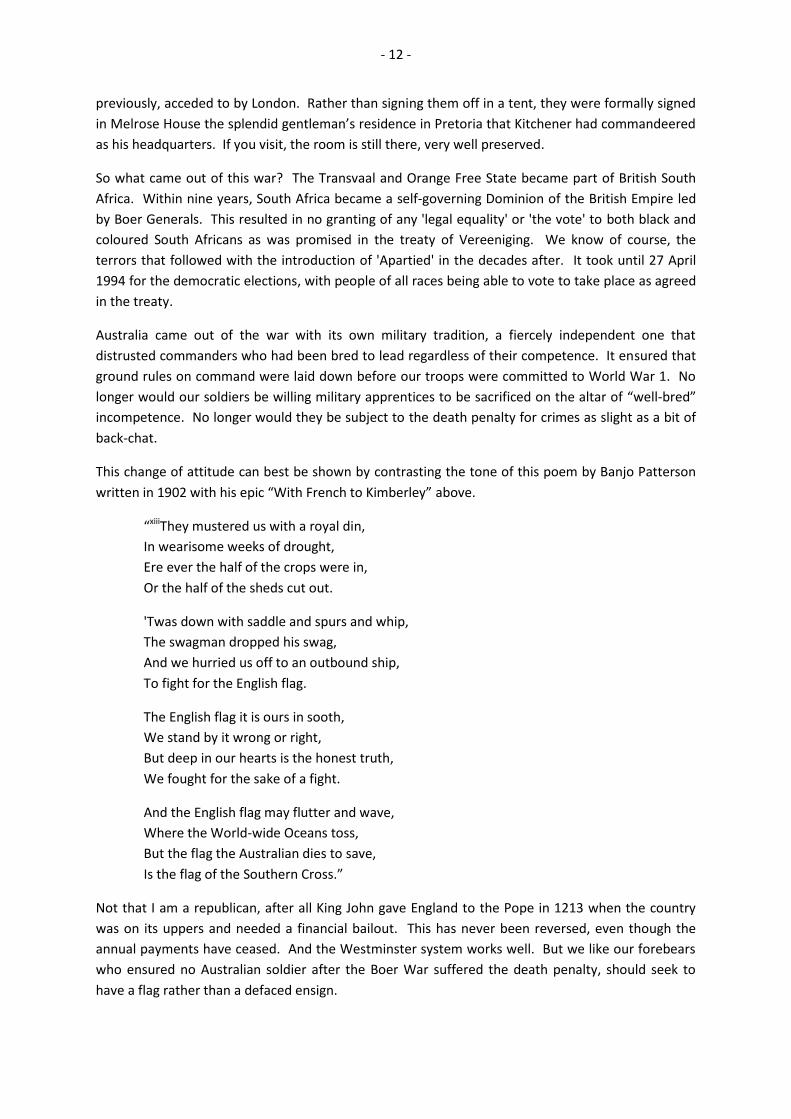
Negotiations between the warring parties hadbeen sporadic in nature for some time. In early1901, Kitchener had reached an agreement onterms to end the conflict only to have theserejected by the UK government. A meeting wascalled at a tented encampment at Vereenigingthen on the border of the ZAR and OFS, now asuburb 50 km south of Johannesburg, and notedas the car sales (and theft) capital of the nation.There terms were agreed and althoughremarkably similar to those agreed twelve months
Melrose House
- 12 -
previously, acceded to by London. Rather than signing them off in a tent, they were formally signedin Melrose House the splendid gentleman’s residence in Pretoria that Kitchener had commandeeredas his headquarters. If you visit, the room is still there, very well preserved.
So what came out of this war? The Transvaal and Orange Free State became part of British SouthAfrica. Within nine years, South Africa became a self-governing Dominion of the British Empire ledby Boer Generals. This resulted in no granting of any 'legal equality' or 'the vote' to both black andcoloured South Africans as was promised in the treaty of Vereeniging. We know of course, theterrors that followed with the introduction of 'Apartied' in the decades after. It took until 27 April1994 for the democratic elections, with people of all races being able to vote to take place as agreedin the treaty.
Australia came out of the war with its own military tradition, a fiercely independent one thatdistrusted commanders who had been bred to lead regardless of their competence. It ensured thatground rules on command were laid down before our troops were committed to World War 1. Nolonger would our soldiers be willing military apprentices to be sacrificed on the altar of “well-bred”incompetence. No longer would they be subject to the death penalty for crimes as slight as a bit ofback-chat.
This change of attitude can best be shown by contrasting the tone of this poem by Banjo Pattersonwritten in 1902 with his epic “With French to Kimberley” above.
“xiiiThey mustered us with a royal din,In wearisome weeks of drought,Ere ever the half of the crops were in,Or the half of the sheds cut out.
'Twas down with saddle and spurs and whip,The swagman dropped his swag,And we hurried us off to an outbound ship,To fight for the English flag.
The English flag it is ours in sooth,We stand by it wrong or right,But deep in our hearts is the honest truth,We fought for the sake of a fight.
And the English flag may flutter and wave,Where the World-wide Oceans toss,But the flag the Australian dies to save,Is the flag of the Southern Cross.”
Not that I am a republican, after all King John gave England to the Pope in 1213 when the countrywas on its uppers and needed a financial bailout. This has never been reversed, even though theannual payments have ceased. And the Westminster system works well. But we like our forebearswho ensured no Australian soldier after the Boer War suffered the death penalty, should seek tohave a flag rather than a defaced ensign.
- 13 -
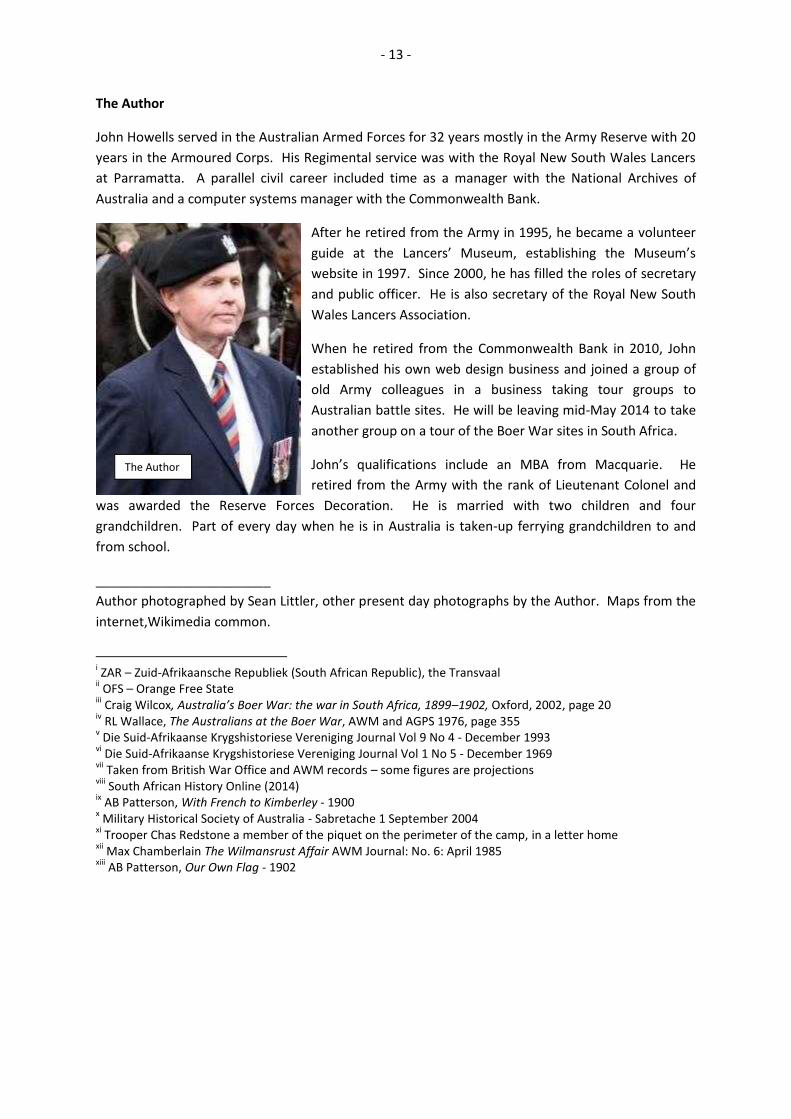
The Author
John Howells served in the Australian Armed Forces for 32 years mostly in the Army Reserve with 20years in the Armoured Corps. His Regimental service was with the Royal New South Wales Lancersat Parramatta. A parallel civil career included time as a manager with the National Archives ofAustralia and a computer systems manager with the Commonwealth Bank.
After he retired from the Army in 1995, he became a volunteerguide at the Lancers’ Museum, establishing the Museum’swebsite in 1997. Since 2000, he has filled the roles of secretaryand public officer. He is also secretary of the Royal New SouthWales Lancers Association.
When he retired from the Commonwealth Bank in 2010, Johnestablished his own web design business and joined a group ofold Army colleagues in a business taking tour groups toAustralian battle sites. He will be leaving mid-May 2014 to takeanother group on a tour of the Boer War sites in South Africa.
John’s qualifications include an MBA from Macquarie. Heretired from the Army with the rank of Lieutenant Colonel and
was awarded the Reserve Forces Decoration. He is married with two children and fourgrandchildren. Part of every day when he is in Australia is taken-up ferrying grandchildren to andfrom school.
________________________Author photographed by Sean Littler, other present day photographs by the Author. Maps from theinternet,Wikimedia common.
i ZAR – Zuid-Afrikaansche Republiek (South African Republic), the Transvaalii OFS – Orange Free Stateiii Craig Wilcox, Australia’s Boer War: the war in South Africa, 1899–1902, Oxford, 2002, page 20iv RL Wallace, The Australians at the Boer War, AWM and AGPS 1976, page 355v Die Suid-Afrikaanse Krygshistoriese Vereniging Journal Vol 9 No 4 - December 1993vi Die Suid-Afrikaanse Krygshistoriese Vereniging Journal Vol 1 No 5 - December 1969vii Taken from British War Office and AWM records – some figures are projectionsviii South African History Online (2014)ix AB Patterson, With French to Kimberley - 1900x Military Historical Society of Australia - Sabretache 1 September 2004xi Trooper Chas Redstone a member of the piquet on the perimeter of the camp, in a letter homexii Max Chamberlain The Wilmansrust Affair AWM Journal: No. 6: April 1985xiii AB Patterson, Our Own Flag - 1902


![[Argus] - Wargaming in History - The Second Anglo-Boer War](https://static.documents.pub/doc/80x56/547e6e75b4af9f414c8b45a0/argus-wargaming-in-history-the-second-anglo-boer-war.jpg)