7. Guarantee and After sales service ···················································· 9
1
1. Preface
� Thank you very much for purchasing the V-cut solder machine.
� The V-cut solder machine is effective to prevent solder balls & flux scattering
by making V-groove onto a solder wire.
� If your solder wire originally have solder ball prevention effect, this machine
may not provide you with a sufficient effect.
� Read below “ 2. Notes for safety ” before use.
� Keep this manual after read.
2. Notes for safety
BeBeBeBe sure to read this manual before use the machine.sure to read this manual before use the machine.sure to read this manual before use the machine.sure to read this manual before use the machine.
� Never touch the machine with wet hands.
� Never dampen the machine with water or liquid.
� Do not overhaul this machine.
! CAUTION !
2
3. Notes for installation and use
For safety, For safety, For safety, For safety, make sure to observe the following matters.make sure to observe the following matters.make sure to observe the following matters.make sure to observe the following matters.
� This machine is designed with ground specification. For safety, be sure to use a
grounded electrical outlet.
If you do not have such outlet, install it separately.
� Do not place where the machine would be exposed such as too much moisture,
direct sunshine, much dust and vibration.
� Be sure to pull out the power plug when the machine is not used.
� Be sure to grab the power plug when plugging or unplugging.
� Please check your using voltage before use.
� Before adjustment and cleaning of V-blade, Guide pulley and so on, be sure to
turn the power off and pull out the power plug from the electrical outlet.
� Do not use the machine for purpose other than the original purpose.
� Never touch V-blade during the operation.
� Please use single-core solder wire in order to obtain sufficient effect.
� Be sure to make V-groove just before the soldering work in order to obtain
sufficient effect.
� This machine is designed for micro fine solder wire exclusive use. Strong shock
or rough handling may cause setting and adjustment trouble and reduction of
the effect.
� Default of adjustment lever setting is DIA.0.5 mm when no request at
ordering.
3
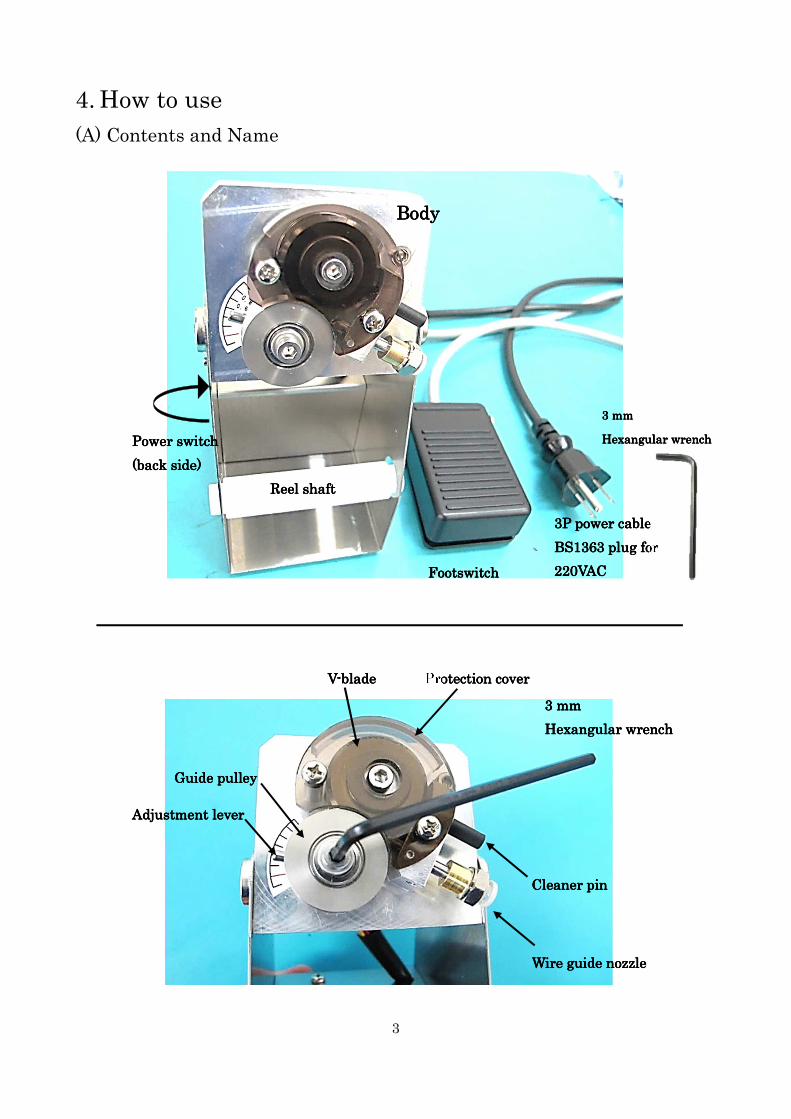
4. How to use
(A) Contents and Name
FootswitchFootswitchFootswitchFootswitch
3P power cable3P power cable3P power cable3P power cable
BS1363 plug forBS1363 plug forBS1363 plug forBS1363 plug for