13
Assembly and Installation of NSK Linear Guides

Assembly andInstallation of NSK Linear Guides
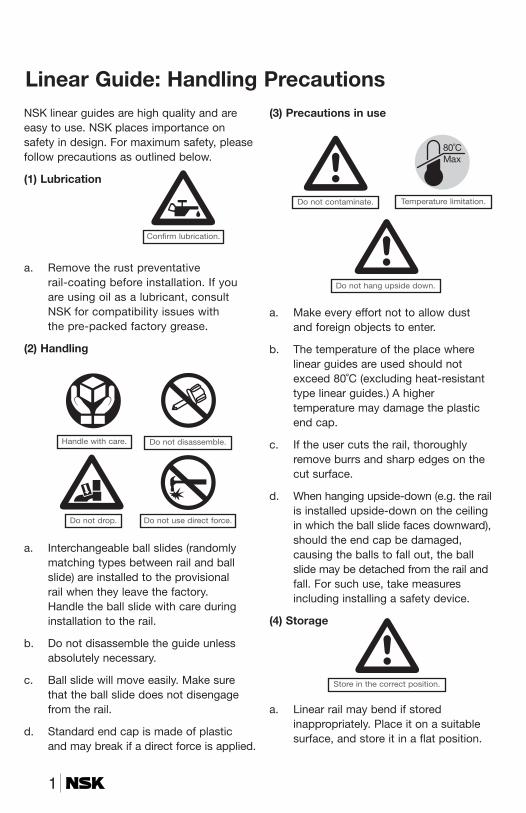
Linear Guide: Handling PrecautionsNSK linear guides are high quality and areeasy to use. NSK places importance onsafety in design. For maximum safety, pleasefollow precautions as outlined below.
(1) Lubrication
a. Remove the rust preventative rail-coating before installation. If you are using oil as a lubricant, consult NSK for compatibility issues with the pre-packed factory grease.
(2) Handling
a. Interchangeable ball slides (randomlymatching types between rail and ballslide) are installed to the provisional rail when they leave the factory. Handle the ball slide with care duringinstallation to the rail.
b. Do not disassemble the guide unlessabsolutely necessary.
c. Ball slide will move easily. Make surethat the ball slide does not disengagefrom the rail.
d. Standard end cap is made of plastic and may break if a direct force is applied.
(3) Precautions in use
a. Make every effort not to allow dustand foreign objects to enter.
b. The temperature of the place wherelinear guides are used should notexceed 80˚C (excluding heat-resistanttype linear guides.) A highertemperature may damage the plasticend cap.
c. If the user cuts the rail, thoroughlyremove burrs and sharp edges on thecut surface.
d. When hanging upside-down (e.g. the railis installed upside-down on the ceilingin which the ball slide faces downward),should the end cap be damaged,causing the balls to fall out, the ballslide may be detached from the rail andfall. For such use, take measuresincluding installing a safety device.
(4) Storage
a. Linear rail may bend if storedinappropriately. Place it on a suitablesurface, and store it in a flat position.
1
Confirm lubrication.
Handle with care.
Do not drop.
Do not disassemble.
Do not use direct force.
Do not contaminate.
Do not hang upside down.
Temperature limitation.
Store in the correct position.
2
Thank you for choosing NSK linear guides. This manual briefly describes the recommended handling and installation of NSK linear guides for generalindustrial use.
There are two methods of installing linear guides. The first uses a datumshoulder on the mounting base and provides accurate horizontal alignmentin the same way used for machine tools. The other method uses the first railas a reference for the second rail and is generally used when smooth motionversus high accuracy is required.
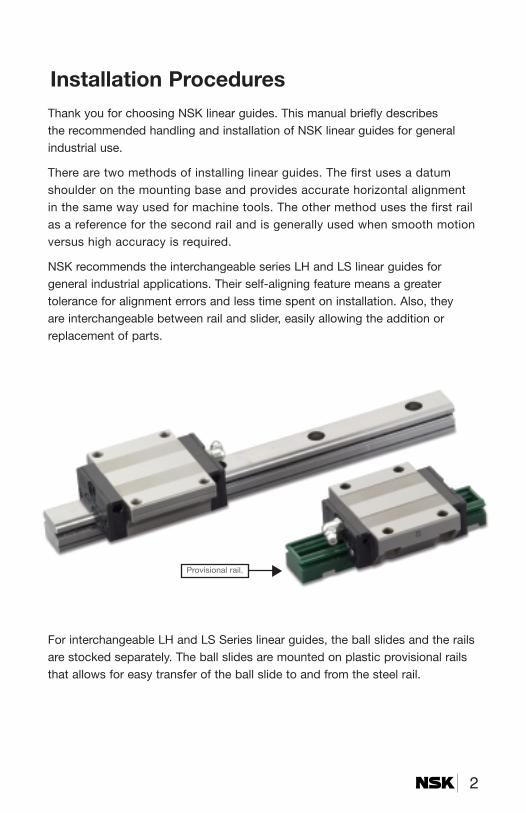
NSK recommends the interchangeable series LH and LS linear guides forgeneral industrial applications. Their self-aligning feature means a greatertolerance for alignment errors and less time spent on installation. Also, they are interchangeable between rail and slider, easily allowing the addition orreplacement of parts.
For interchangeable LH and LS Series linear guides, the ball slides and the railsare stocked separately. The ball slides are mounted on plastic provisional railsthat allows for easy transfer of the ball slide to and from the steel rail.
Provisional rail.
Installation Procedures

When transferring the ball slide from the provisional rail onto the rail, or viceversa, butt the provisional rail up against the rail and slide the ball slide directlyfrom one onto the other. It is a good idea to secure the ball slide onto theprovisional rail with a rubber band after removal from the rail.
The following is a description of how the ball slide should be removed from and replaced on the linear guide rail.
The ball slide is held on the provisional rail using a rubber band. The rubberband should catch the bottom channel in the provisional rail and then twistaround to secure the ball slide.
The ball slides are designed withretaining wires to prevent the ballsfrom falling out when they areremoved from the rail. However,NSK recommends that the ballslides should be stored on aprovisional rail prior to installationto prevent contamination from dust and other foreign objects.
3
Linear guide rail.
Provisional rail.

4
If a ball is accidentally droppedfrom the ball slide, it should becleaned and replaced to theappropriate groove. The correctgroove can be determined by thesize of the clearance between theballs (the groove missing the ballwill have greater clearance thanthe other grooves). It is normal to have a gap of 1.5 balldiameters in each groove.
The following section describes how to install the linear guides on the machine.
Ball slides and rails are supplied separately. Each is wrapped in vinyl sheet, andpacked in a container.
Plastic and brass rail caps are an available option for use in high contamination areas toprevent debris build-up in the bolt holes which may damage the slider. Please request these at time of order. Brass cap.
Plastic cap.

The rail is always shipped with rust preventive oil, which should be wiped offbefore use. LH and LS Series ball slides are pre-packed with grease, so nocleaning is required prior to installation.
Now the linear guide is ready for installation. Place it carefully on the mounting surface.
Then tighten the bolts with atorque wrench to the specifiedtorque starting from one end.
In NSK linear guides, the mounting bolt holes are processed after heattreatment using a precision machining center; therefore, the bolt hole pitchaccuracy is as good as the positioning accuracy of the machine, which isconsidered very good.
When tightening the bolts, be sure to start at one end and work in order to theother end. If the bolts are tightened at the middle first, it tends to leave the railcurved. If you suspect this has happened, loosen the bolts and start again.
5
For Smooth Motion of General Machinery
Snugly tighten the mounting bolts temporarily so that the rail is firmly against the bed.

6
The rail that has been tightened can now be used as a reference rail. Using avernier calipers or other accurate tool, measure the distance between the tworails, and adjust each end until they are the same. Tighten a bolt snugly at eachend of the rail.
The next step is to install thetable, and to use the table toalign the rails.
Firmly bolt the table to ball slides 1 and 2 on the firmly secured railas shown in the diagram. Thenposition ball slide 3 at the left endof the adjusting rail, and bolt thetable to this ball slide. Move theball slide 3 to right and bolt thetable to the ball slide 4.
Move the table to one end of therails, and start tightening theadjusting rail bolt sequentially tothe specified torque while checkingexcessive friction of tablemovement. Continue moving thetable down the rail tightening eachadjacent bolt until they have allbeen tightened.
This method of assembly is for general industrial machinery where smoothlinear motion is the overall objective. When precision accuracy is required, read on to the following procedure.

For Greater Accuracy of General Machinery
When bolting the first rail on themachine base, align it straight usinga straightedge and a dial indicator.
Bolt on the rail at the both endslightly, and position a straightedgebeside it. Set the straightedgeparallel to the rail measuringdistance A1 and A2 by a verniercalipers or some other accuratemeasuring tool.
Move the dial indicator along the straightedge, and take readings at everybolt hole along the rail. Make fine adjustment of the rail to the straightedgeuntil the desired reading is made, and tighten the bolt to the specified torque.
When all of the bolts have been tightened, slide the dial indicator from one end of the rail to the other to ensure that the desired straightness has been achieved.
Position the dial indicator on two ballslides on the reference rail as shownin the diagram. Tighten bolts of theadjusting side rail sequentially fromthe one end while noting the readingof the dial indicator.
Straightness of NSK linear guidesis controlled so that it can beeasily adjusted manually for easy installation.
During installation, it is recommended that accuracy is checked to ensuresmooth operation.
7

8
This section describes the allowable tolerances for installation in order tomaximize the performance of NSK linear guides.
We recommend that the mounting errors e1 or e2 do not exceed the valuesshown in the table below.
If the error readings are equal to or less than the above values, you havecorrectly assembled the parts. For maximum accuracy, keep the readingsbelow what is shown in the table.
If your readings are greater than these values, it is necessary to remove the parts and start over. Please contact your local NSK office with anyquestions or for assistance. Visit www.nsk.com for contact information.
Clearance
Z0, ZT
Preload
Z1, ZZ
Item
Recommended allowable installation error of the LH Series (Maximum) Unit: µm
Model No.
30 40 45 5 65 85 110
20 25 30 35 45 55 65
375/500mm
20 25 30 35 45 55 70
150/500mm
Permissible values of parallelismin two rails : e1
Permissible values of parallelism(height) in two rails : e2
Permissible values of parallelismin two rails : e1
Permissible values of parallelism(height) in two rails : e1
Clearance
Z0, ZT
Preload
Z1, ZZ
Item
Recommended allowable installation error of the LS Series (Maximum) Unit: µm
Model No.
20 22 30 35 40
15 20 25 30 35
375/500mm
15 17 20 25 30
150/500mm
Permissible values of parallelismin two rails : e1
Permissible values of parallelism(height) in two rails : e2
Permissible values of parallelismin two rails : e1
Permissible values of parallelism(height) in two rails : e1

9
K1™ Handling InstructionsTo maintain the NSK K1™ lubrication unit over a long period of time, please follow these instructions.
1. Max. operating temperature: 50°C (122°F) Max. peak temperature: 80°C (176°F)If not installed immediately, they should be kept refrigerated.Avoid storage in direct sunlight.
2. Never leave the linear guide in close proximity to grease-removing organicsolvents such as hexane, thinners, etc. Never immerse the linear guide inkerosene or rust preventative oils which contain kerosene.
Note
Other oils such as: water-based cutting oil, oil-based cutting oil, grease (mineral oil-AS2, ester-PS2) present no problems to the K1™ lubricating units performance.
NSK K1™
Ball Slide
Rail
End (rubber) seal
End (rubber) seal

10
Assembly Instructions for the K1™Lubricating Unit1. Slide linear bearing on to the linear rail, using the plastic
provisional rail supplied.
2. Remove the grease fitting from the end of the bearing.
3. Remove the Phillips screws (2 pieces).
4. Remove the end lubrication unit from end of bearing.
5. For maintenance free operation, install threaded plug; for re-greasingoption, see points 10 & 11 below.
6. Install the cover plate from the K1™ lubricating unit kit to the end ofbearing, against the end cap.
7. Install K1™ lubricating unit without fixing rings, so it can be expanded over the rail.
8. Put the three (3) fixing rings in position on the K1™ lubricating unit.
9. Replace the end seal , in front of the K1™ lubricating unit.
10. Install connector screw for grease fitting.
11. Replace the grease fitting in connector screw.
12. Install the extension Phillips screws (2 pieces, supplied with the K1™ lubricating unit kit).
Note
The K1™ lubricating unit has a shelf life. They should be installed immediately upon receipt. It is important to avoid direct sunlight and extreme heat conditions.

40
There are two types of lubricating methods – grease and oil –for ball screws and linear guides.
Use a lubricant agent and method most suitable to conditionrequirements and purpose to optimize functions of the ballscrews and linear guides.
In general, lubricants with low base oil kinematic viscosity areused for high speed operation.
Lubrication with high base oil kinematic viscosity is used foroscillating operations, low speed and high temperature.
The following are lubrication methods by grease and by oil.
Note: Please consult NSK Engineering for grease replenishment interval.
Grease LubricationGrease lubrication is widely used because it does not requirespecial oil supply system or piping. Grease lubricants madeby NSK are:
• Various types of grease in bellowed container whichcan be instantly attached to the grease pump;
• NSK Grease Unit which comprises a hand grease pump and various nozzles. The units are compact and easy to use.
NSK grease lubricantsTable 9 shows the marketed general grease widely used for linear guides and ball screws for various applications,conditions and purposes.
Lubrication
Type Thickener Base oil Base oil kinematic viscosity Range of use Purposemm2/s (40˚C) temperature (˚C)
AS2 Lithium type Mineral oil 130 –10~110 For ball screws and linear guidesfor general use at high load.
PS2 Lithium type Synthetic oil 15 –50~110 For ball screws and linear guides for low+ mineral oil temperature and high frequency operation.
LR3 Lithium type Synthetic oil 30 –30~130 For ball screws at high speed,medium load.
LG2 Lithium type Synthetic oil 30 –10~80 For ball screws and linear+ synthetic guides for clean
hydrocarbon oil environment.
LGU Diurea Synthetic 100 –30~120 For ball screws and linear guides for clean environment.
NF2 Urea composite type Synthetic oil 27 –40~100 For fretting resistant ballscrews and linear guides.
Intervals of checks Items to check Intervals of replenishment
3-6 months Dirt, foreign matters such as cutting chip Usually once per year. Every 3000 km for material handling system which travels more than 3000 km per year. Replenish if checking results warrant it.
Table 9 Grease lubricant for linear guides and ball screws
Intervals of checks and replenishments for grease lubrication

LG Handbook Printed in Canada © NSK 2005.
NSK Ltd. has a basic policy not to export any products or technology designated as controlled items by export-related laws. When exporting the products in thisbrochure, the laws of the exporting country must be observed. Specifications are subject to change without notice and without any obligation on the part of themanufacturer. Every care has been taken to ensure the accuracy of the data contained in this brochure, but no liability can be accepted for any loss or damage sufferedthrough errors or omissions. We will gratefully acknowledge any additions or corrections.
NSK Ltd.-Headquarters, Tokyo, Japan www.nsk.comAmericas & Europe Department tel: 03-3779-7120Asia Marketing & Sales Department tel: 03-3779-7121
AfricaSouth Africa:NSK South Africa (Pty) Ltd.Johannesburg tel: (011) 458 3600
Asia and OceaniaAustralia: www.nskaustralia.com.auNSK Australia Pty. Ltd.Melbourne tel: (03) 9764-8302China:NSK Hong Kong Ltd.Hong Kong tel: 2739-9933Kunshan NSK Co., Ltd.Kunshan tel: 0520-7305654Guizhou HS NSK Bearings Co., Ltd.Anshun tel: 0853-3521505NSK (Shanghai) Trading Co., Ltd.Shanghai tel: 021-62099051NSK representative officeBeijing tel: 010-6590-8161NSK representative officeShanghai tel: 21-6209-9051NSK representative officeGuangzhou tel: 020-8732-0583NSK representative officeAnshun tel: 0853-3522522India:Rane NASTECH Ltd.Chennai tel: 04114-65313, 65314, 65365, 66002NSK representative officeChennai tel: 044-4334732Indonesia:P.T. NSK Bearings Manufacturing IndonesiaJakarta tel: 021-898-0155Korea:NSK Korea Co., Ltd.Seoul tel: 02-3287-0300NSK Korea Co., Ltd., Changwon PlantChangwon tel: 0551-287-6001Malaysia:NSK Bearings (Malaysia) Sdn. Bhd.Kuala Lumpur tel: 03-7958-4396NSK Micro Precision (M) Sdn. Bhd.Kuala Lumpur tel: 03-961-6288
New Zealand: www.nsk-rhp.co.nzNSK New Zealand Ltd.Auckland tel: (09) 276-4992Philippines:NSK representative officeManila tel: 02-759-6246Singapore:NSK International (Singapore) Pte Ltd.Singapore tel: (65) 273 0357NSK Singapore (Pte) Ltd.Singapore tel: (65) 278 1711Taiwan:Taiwan NSK Precision Co., Ltd.Taipei tel: 02-2591-0656Thailand:NSK Bearings (Thailand) Co., Ltd.Bangkok tel: 02-6412150~58NSK Safety Technology (Thailand) Co., Ltd.Chonburi tel: (038) 214-317-8Siam NASTECH Co., Ltd.Chachoengsao tel: (038) 522-343~350
EuropeNSK Europe Ltd. (European Headquarters) www.eu.nsk.comMaidenhead, England tel: 0162-850-9800France:NSK France S.A.Paris tel: 01 30 57 39 39Germany:NSK Deutschland GmbhDüsseldorf tel: 02102-481-0NSK Steering Systems Europe Ltd.Stuttgart tel: 0771-79082-277Neuweg Fertigung GmbhMunderkingen tel: 07393-540Italy:NSK Italia S.P.A.Milano tel: 02-995-191Poland:NSK Europe Ltd. Warsaw Liaison OfficeWarsaw tel: 48-22-645-1525, 1526NSK Iskra S.A.Kielce tel: 48-41-366-6111Spain:NSK Spain S.A.Barcelona tel: 93-575-4041
Worldwide Sales OfficesSwitzerland:Waelzlager Industriewerke Bulle AG (W.I.B.)Bulle tel: 026-9191100Turkey:NSK Bearings Middle East Trading Co., Ltd.Istanbul tel: 90-216-442-7106United Kingdom:NSK Bearings Europe Ltd.Peterlee, England tel: 0191-586-6111NSK European Technology Co., Ltd.Ruddington, England tel: 0115-940-5409NSK UK Ltd.Newark, England tel: 0163-660-5123NSK Steering Systems Europe Ltd.Coventry, England tel: 024-76-588588
North and South AmericaNSK Americas, Inc. (American Headquarters)Ann Arbor, Michigan, U.S.A. tel: 734-913-7500Argentina:NSK Argentina SRLBuenos Aires tel: 011-4762-6556Brazil: www.br.nsk.comNSK Brasil Ltda.São Paulo tel: 011-3269-4700Canada: www.ca.nsk.comNSK Canada Inc.Toronto tel: 905-890-0740Mexico:NSK Rodamientos Mexicana, S.A. de C.V.Mexico City tel: 5-301-2741United States of America: www.us.nsk.comNSK CorporationAnn Arbor, Michigan tel: 734-913-7500
Sales Offices:Ann Arbor, Michigan tel: 734-913-7500Cerritos, California tel: 562-926-2975
NSK American Technical CenterAnn Arbor, Michigan tel: 734-913-7500NSK Precision America, Inc.Bloomingdale, Illinois tel: 630-924-8000NASTECHBennington, Vermont tel: 802-442-5448NSK Latin America Inc. www.la.nsk.comMiami, Florida tel: (305) 477-0605


