1 Automation Testbed for 3Com Internet Protocol Testing Suites Adam Fairbanks Advisor: Professor Mark Claypool Major Qualifying Project MQP-MLC-AT00 Computer Science Department, WPI Terms E 2000 Abstract 3Com's Software Quality Assurance group needs automation, especially in the Internet Protocol tests that are part of the SmartBits testing library. We designed and implemented a 3Com Internet Protocol Automation Suite that was created as both an aid for Test Engineers at 3com and as part of an Automated Testing System with other protocols' automated tests. Our two- part automation testbed solution satisfies all of the requirements and goals for the project.
Transcript
1
Automation Testbed for 3Com Internet Protocol Testing Suites
Adam Fairbanks Advisor: Professor Mark Claypool
Major Qualifying Project MQP-MLC-AT00 Computer Science Department, WPI
Terms E 2000 Abstract
3Com's Software Quality Assurance group needs automation, especially in the Internet Protocol tests that are part of the SmartBits testing library. We designed and implemented a 3Com Internet Protocol Automation Suite that was created as both an aid for Test Engineers at 3com and as part of an Automated Testing System with other protocols' automated tests. Our two-part automation testbed solution satisfies all of the requirements and goals for the project.
2
1 Introduction
The Software Quality Assurance (SQA) Group of any networking company tests the
software released by the Development group of the company and reports bugs in the software
when they run a series of well set-up and documented tests on the hardware the software runs
on. These tests are set up in bundles for specific protocols, and are designed to not only show
that the protocols works for some of the protocols capabilities, but that they perform under all
conditions right up to the limits of what the hardware capabilities are as well. The SQA group is
usually divided into teams for the different protocols that run on the specific hardware,
regardless of the networking layer they use. Then the Development group that coincides with
the group for SQA will work with them to try and resolve the bugs that occur for that protocol
or platform. An example of this would be the Open Shortest Path First (OSPF) teams from
both Development and SQA working together to resolve a bug in which the OSPF packet
coming out of the router does not advertise the right routes of its network.
A problem that arises in SQA testing is that some of the commands and procedures
used are both tedious and monotonous, so that it takes up much of a testers day simply typing in
commands, waiting for the result, then typing in more commands and so on. Multitasking in
testing then becomes hard to do, as you are waiting for a response from an input to continue on
one test, but it is not really enough time to setup another test before the response comes back,
so the person must wait. Automating these procedures can solve multiple problems and it also
allows for new avenues in testing.
The amount of time saved can be so great that it cuts testing from weeks to hours. A
script used at 3Com developed by Ben Douglas, an alumnus of WPI, helped 3Com
3
Employees download the latest version of beta code from the directories they were in onto the
hardware. Normally half an employee’s day would be taken up if they had 20 or so pieces of
hardware to download the new code. The script’s main feature is that is dynamic, and can
“look” at the individual blades using SNMP, determine what type of hardware it was (a router,
a switch, how many ports, etc) and download the appropriate code for them. This takes a
maximum of 2 hours, so it saves each individual person around 4 hours (assuming it took 6
originally). Multiplied by the number of people in SQA using the script at the time, which was
around 80, which comes to 320 man-hours per beta code release saved. Beta code releases
happened every two weeks, and the time saved can be quite substantial and well worth the time
to develop the automation.
Multitasking with automation becomes increasingly easy, as you can either have the
scripts do multiple tasks, or set off multiple scripts. You can even have scripts that set off
scripts, and this is where the opportunities for huge time saving takes place. The time saved by
automation can be used for other things such as non-automatable tests (physical network
configurations, line switches, etc.) or to create or run other scripts.
1.1Networking
The main focus of the SQA group mentioned earlier is to test the routers and switches
and other hardware that will later be used by consumers and businesses to create and maintain
connections to the Internet. Networking, and more specifically the Internet, has been around
since 1969, when the Advanced Research Projects Agency Network (ARPANET) was first
formed by the U.S. government [Ner00]. The idea was to have a decentralized network for
4
electronic communication that would not only allow for remote access to computers in other
parts of the country, but could also function the same if parts of it were destroyed, for example,
in a nuclear bombing attack. This worked well for the government, and soon a select group of
universities were given permission to use the network as well to exchange files for educational
use. Eventually this led to more schools using it, and soon non-educational and for-profit
agencies began to use the Internet, as protocols and formats for communication such as ftp and
the World Wide Web made communication rich and easier to use. Throughout the entire life of
the Internet, there have been companies who have created and improved upon the infrastructure
of hardware and software that is used. Therefore, having testing procedures and more
specifically automation tools that are complimentary to this goal of improvement of hardware
help to further the growth of the infrastructure of the Internet.
1.2 3Com Corporation
Currently networking is among the most rapidly expanding industries in the world, with
annual sales expected to surpass US$50 billion by 2001 [3c100]. 3Com holds leading market
positions in solutions for both consumers and business applications, all with the common benefits
of simplicity and reliability. They include fixed-port and stackable Ethernet switches, Ethernet
hubs, multi-services access platforms, desktop modems, LAN and modem PC Cards, desktop
and server network interface cards (NICs), and handheld organizers. This coverage of
solutions gives customers the ability to buy complete networking solutions from 3Com for any
network application.
5
Total network availability is what 3Com strives to produce. Providing customers with
reliable networking solutions that support mission-critical voice, video and data E-business
applications. 3Com provides users with secure access to those applications, regardless of their
physical location.
3Com is a leader in the industry for Ethernet, Fast Ethernet, and Gigabit Ethernet
connectivity, specifically NICs, switches, and hubs.
1.3 Approach
A very time consuming testing environment with the potential for streamlined automation
is the area of IP packet testing using hardware packet generators to simulate network traffic. IP
packet testing requires complicated tests that require many hours of user manipulated functions
that are very repetitive.
Besides the ability to increase the speed of testing with automation, there is a need to
integrate these tests into the UNIX based Automated Test Simulation environment at 3Com.
Basically, many different types of automated tests are joined in this environment consisting of
many different types of routers and switches, and they are run over these devices for each
release of beta code, making it easier to find some of the more critical bugs in the releases
faster. By using software to automate the hardware that generates traffic into the routers and
switches, a highly controlled and specific test can be performed for various types of protocols.
Having an IP automation Testbed in this environment will be a useful tool to diversify the testing
in the automation environment, and help with test coverage over a larger area.
6
2 Background
The IP protocol is very large and is complex in design, but one that is the basis for much
of Internet traffic today. An explanation into how the Internet Protocol works is detailed in
section 2.3. However, the IP packet tests that will be automated are the Packet Loss Rate Test
and the Throughput Test, both of which are included in Netcom's Smart Applications for the
SmartBits 2000 packet generator as stand alone tests for large core networking hardware.
To understand the automation of the hardware, some concepts must first be explained.
This section will introduce networking models and hardware, as well as both software that runs
the networking hardware and the software that will automate it.
2.1 Models of Networking
Within the world of networking, there are two models that generally describe the scope
of the different protocols and the hardware and software that use them.
7
2.1.1 TCP/IP Model
Figure 2.1: OSI and TCP/IP models
OSI Model TCP/IP (Internet Model)
Source: [Tan96]
The TCP/IP model was invented to help explain how different virtual layers of
networking could be put on top of one-another in order to be useful [Tan96]. The TCP/IP
model has there are four distinct layers, representing the major groups of networking. They are
virtual because each layer has to go down to the physical layer before it goes out to another
piece of hardware, but it will come back up to the same layer that started in order to understand
what the first piece of hardware was transmitting. As illustrated in Figure 2.1, the lowest level
represents the physical wire and some of the very basic protocols that are used at that level. On
top of that is the Internet level, upon which the protocols that drive the Internet such as IP are
located. This layer is where the data is transported, and where computers and hardware
Presentation
Session
Transport
Network
Data Link
Physical
Application Application
Transport
Internet
Network Interface Physical
8
communicate with each other. The transport layer above it is used to primarily have protocols
that manage the ones on the Internet level for such things as managing errors, quality of service
(the ability to have connections as at a guaranteed rate), and other such tasks. The final level is
the application level, where the computer uses the information from the transport layer to
communicate with its programs and present it to the user.
This model, although beneficial in its simplicity, has limited descriptive powers for the
complex world of networking, and some protocols simply don’t fit right. An example of this
would be a protocol called Ethernet at the Network Interface level, which needs a protocol
below it to go across a wire. However, since the lower two levels are joined in the TCP/IP
model, Ethernet can not have anything below it.
2.1.2 Open Systems Interconnection model
Although more complicated, the OSI model is flexible model for understanding the
virtual layers of networking, and where hardware, software and the protocols that make them
connect are [Tan96]. OSI stands for Open Systems Interconnection, and it is divided up into
seven virtual layers.
9
Figure 2.2: OSI model with protocols
Source: [Wha00]
As can be seen in Figure 2.2, there are many different protocols within the seven layers.
An example that could show some of these would be if there were a TCP connection going on
between a computer and a networking hardware, which is the Transport layer. A packet would
originate from computer on layer four, but it would be split up into IP packets (Network layer).
These packets would then be split up into Ethernet packets (Data Link layer), which would then
be split up into any number of Physical layer packet designs, and go out over the wire to the
networking hardware. The hardware would then receive these packets, and assemble them to
10
form Ethernet packets, which would assemble to form IP packets, which would finally form
TCP packets, which would give the hardware the packets the computer sent out on the original
level it was sending on. From both the hardware and computer’s perspectives, the layers do
not really exist, as a layer 4 packet gets from the computer to the hardware as if it’s directly
going layer 4 the entire time, even though in reality it’s going all the way down to layer 1 before
it goes out.
2.2 Routing and Switching
Since the IP protocol is in the Network Layer as can be seen in Figure 2.2, and the fact
that there are many different types of hardware that do functions in both Data Link Layer and
the Network Layer, it is important to understand specifically what is the function of both routers
and switches.
2.2.1 Switches
A switch directs Data Link Layer traffic from different Media Access Control (MAC)
addresses to their respective destinations [Dav00]. The job of a switch is fairly simple: it reads
the Data Link Layer packet’s destination MAC address, looks up the address in a table it has
stored on the hardware, and then sends the packet out the port that that address is associated
with.
11
Figure 2.3: Data Link Layer Switching
Client 1 Sends: Client 2’s MAC:
Source 00:00:00:00:00:01 00:00:00:00:00:12
Destination 00:00:00:00:00:12
Switches
1 2 3 4 5 6 7
Client 1 Client 2
Switch 1 MAC table: Switch 4 MAC table: 00:00:00:00:00:03 port 1 00:00:00:00:00:23 port 1 00:00:00:00:00:05 port 2 00:00:00:00:00:12 port 3 ... ... 00:00:00:00:00:12 port 5 ...
Switch 7 MAC table: ... 00:00:00:00:00:12 port 9 …
Source: [Dav00]
Figure 2.3 shows how the address tables do not necessarily tell the switch where the
end point destination of the packet will be, but rather tells it the port to send the packet out,
possibly to another switch (each table above is for its own respective switch labeled in the
12
diagram). So following the example above, Client 1 sends out a packet with a destination
address of 00:00:00:00:00:12 to switch 1. Switch 1 sees that that address should go out port 5
(look at MAC table for switch 1), and forwards that packet out that port. In the diagram we
see that port 5 goes on to switch 4, which determines based on its table that the packet should
be forwarded out port 3. Port 3 leads to switch 7, who forwards the packet out port 9 (again,
based on its MAC table). This final forward sends it to the second client, the packets final
destination. As you can see, this system is simple and effective, as the entire route does not need
to be known by every switch, and works very effectively in forwarding the packets to their
proper place. Typically, a switch is only concerned with addresses that are inside its own Local
Area Network (LAN).
2.2.2 Routers
A router is similar to what a switch would be if it involved Network Layer packet
movement, only much more complex (in fact that movement of packets is sometimes referred to
as Layer 3 switching). The router's job is to move a Network Layer packet to the destination
IP address of the packet [Say00]. This is nowhere near as easy as it seems however, as the IP
packets are constrained by more than just their address. To better understand how a router
works, the Internet Protocol needs to be better understood.
2.3 The Internet Protocol
The early ARPANET protocols were very slow and subject to crashes, and a new
more dependable protocol was needed to remedy the situation [Fei97]. By 1974, a new set of
13
protocols had been developed, and over the next 6 years, hardware that ran the networks were
converted over to run the Transmission Protocol and Internet Protocol (TCP/IP). TCP/IP has
characteristics that make it an ideal choice for networks to use, as it connects different networks
together seamlessly, so that to the end user, it appears as though the entire Internet is one giant
network directly connected. The TCP portion of TCP/IP is the Transmission Control Protocol,
which is on the Transmission Layer, the layer that connects clients together in peer-to-peer,
reliable connection oriented communications. However, this is the Layer above the one that we
will test, the Network Layer, on which IP resides. IP is the carrier of most of the traffic on the
Internet today and is the basis for many other protocols on levels above and below it.
IP works in many different ways but there are a few general ideas. Unlike the Data Link
Layer, which is typically concerned with MAC addresses, the Internet Protocol uses IP
addresses, which are used to make connections from one point to another, based on those
addresses. For example, if one client with an IP address of 150.1.1.19 connects to one at
200.1.1.14, all the packets from the first client will have a source address in the packet of
150.1.1.19 and a destination of 200.1.1.14. The reverse would then be true of the second
client. During communication, packets would go back and forth for different reasons, from
transmitting data or reestablishing connections to managing flow as sometimes packets are going
too fast for the hardware to handle, so some get dropped and have to be resent. So the packets
contain IP addresses in them and varying amounts of data after. But generally speaking, the two
IP addresses are what the connection is based on, and determines where the connection is.
14
3 Approach
Now that the background information has been introduced and explained, this next
section discusses the approach that will be used to create the automation, and how the software
and hardware will be used.
3.1 Software
The automation is using Tcl/Tk 8.0 as the platform. This scripting language was chosen
both for its ease of writing and debugging but also because it will be easy to integrate into the
ATS that 3Com has in its current state, as all of the scripts there are currently in Tcl [Rou00].
The scripts for the automation is set up into two different parts, a backend in Tcl and a
front-end in Tk. The front-end is in Tk, because it is graphical and has the ability to configure
which parts of the scripts will run, the different addresses for the hardware, and other
configuration information for the user to set up and run the tests. All of this information is stored
in a file that the backend uses. The back-end will be written in Tcl, which is command line
oriented, and uses the text file saved by the front-end to determine how to connect, what tests
to run, and other configurations told to it by the file. Both of the parts of the automation are
bundled together by a shell script that simply runs them in succession with some environment
variables set up to allow for multiple users to run the Testbed at once, from the same location.
The two-part approach allows for the back-end to only need the text file written by the
front-end to run. Therefore, by simply editing that file for the configuration needed, the back-
end can run stand alone without the front-end, and can then be easily integrated into the
15
Automated Testing System (ATS) at 3Com (which tries to use no graphical configuration, just
straight command line scripting).
3.2 Hardware
The hardware used will comprise of three distinct groups of devices:
Workstations/Clients, Packet Generators, and Routers/Switches. Each group has different
connections physically linked by different types of media.
3.3.1 Workstations
There are several different types of computers that could be used to perform the task of
setting off the automation, but the platform of choice is UNIX. The specific workstation used is
a Sun Microsystems Ultra 60 running Solaris 2.6, which will allow for ease of use with Tcl/Tk.
3.3.2 Packet Generators
The Packet Generators that will be used are the SmartBits 2000 Multi-User Family.
Figure 3.1 SmartBits 2000 Packet Generator
16
Source: [Net00]
Figure 3.1 shows the generator, which uses multiple slots in which SmartCards slide into and
lock in place. Different cards can have different media speeds: Ethernet, Fast Ethernet and
Gigabit Ethernet (10, 100 and 1000 Megabits per second respectively). The ability to switch
between different cards allows for more flexibility when testing. A console connection or a
telnet connection controls the SmartBits Generator, with the generator able to have its own IP
address. These features coupled with the SmartBits library, a bundle of software that allows for
direct communication between the generator and a Sun Workstation in Tcl or C++ , allow for
this hardware to be automated with relative ease.
3.3.3 Routers and Switches
The 3Com hardware that will be tested is fairly complex, as it combines both switches
and routers into one self contained unit.
17
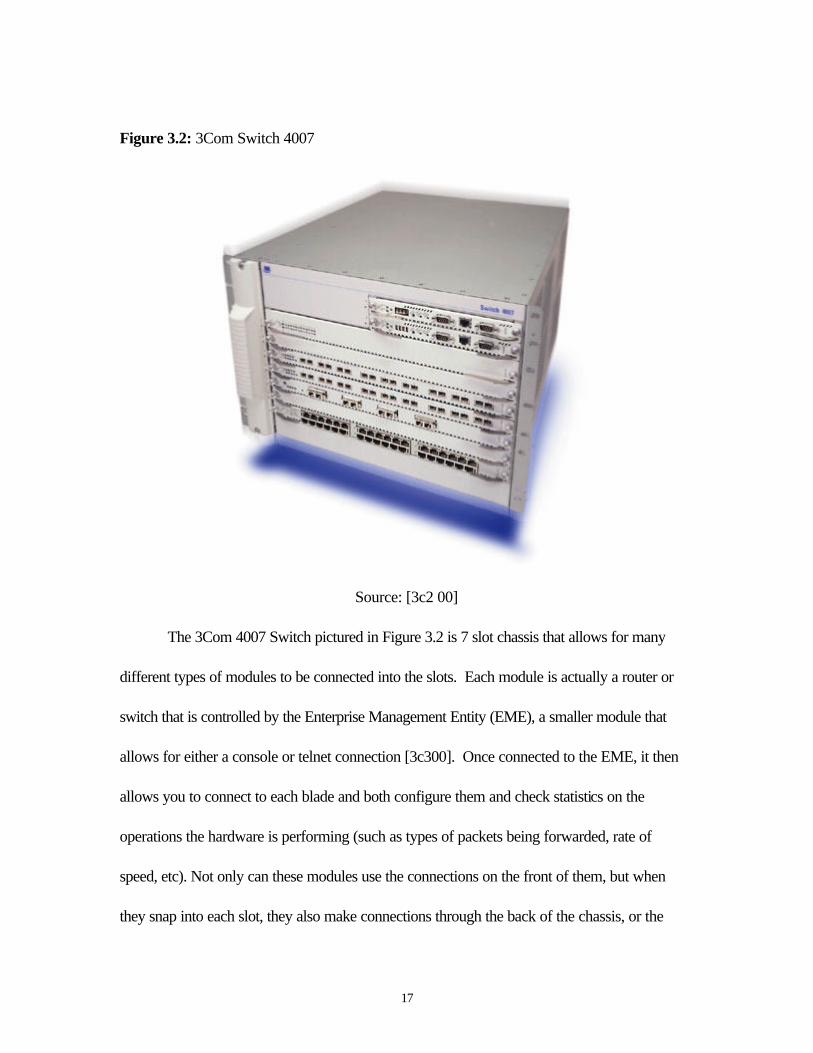
Figure 3.2: 3Com Switch 4007
Source: [3c2 00]
The 3Com 4007 Switch pictured in Figure 3.2 is 7 slot chassis that allows for many
different types of modules to be connected into the slots. Each module is actually a router or
switch that is controlled by the Enterprise Management Entity (EME), a smaller module that
allows for either a console or telnet connection [3c300]. Once connected to the EME, it then
allows you to connect to each blade and both configure them and check statistics on the
operations the hardware is performing (such as types of packets being forwarded, rate of
speed, etc). Not only can these modules use the connections on the front of them, but when
they snap into each slot, they also make connections through the back of the chassis, or the
18
backplane, that can also be configured and controlled through a special module called a fabric.
The fabric is also controlled by the EME, and allows for configuration similar to any other blade.
3.3.4 Networking Media
For the different connections that will be made, RJ45 connectors (for Ethernet
standards) on Category 5 twisted pair copper wire cables is used. They vary in length, but all
of them are able to transmit in speeds over 100 Megabits per second. These are used both for
the console connection from the Sun Workstation to the SmartBits Packet Generator but also
from the SmartBits to the Switch 4007 Network.
19
4 Introduction to Methodology
Now that the general groundwork for both the networking protocols and the hardware
and software that will be used has been completed, the general way the tests are performed can
now be explained.
4.1 Network Setup
Next is a general example of how the test setup will be, including the hardware and
software.
Figure 4.1: General Test Network Setup
Console connection SmartBits Packet Generator
Cat. 5/RJ45 wires to and from SmartBits and Telnet connection switch 4007
Sun Workstation
(where the Tcl and Tk 3Com Switch 4007 will be created and set off)
The flow of the script dynamics can be seen in Figure 4.1. The script connects to the
SmartBits Packet Generator from the Sun Workstation, communicate it and starts the packet
flow from the SmartBits to the Switch 4007. At the same time, it communicates with the 3Com
SmartBits 2000
20
Switch 4007 through a telnet connection, and monitor different information from it such as
packet loss rate (if any), speed of transmission, if all packets are being received, etc.
4.2 Test Methodology
The following sections introduce how the tests will work, and what limits and boundaries
they have for both normal and abnormal behavior for the hardware being tested.
4.2.1 Throughput Test Methodology
The Throughput test finds the fastest rate at which a device can forward packets without
dropping any. If a single packet is dropped the test fails and the test is repeated at a lower
throughput rate.
The throughput test satisfies the terminology criteria of RFC 1242 and the test
methodology specified in RFC 1944. From RFC 1242, throughput is "the maximum rate at
which none of the offered packets are dropped by the device." From RFC 1944, the
methodology to measure throughput is to "Send a specific number of packets at a specific rate
through the Device Under Test (DUT) and then count the packets that are transmitted by the
DUT."
If the initial rate is 100%, the first throughput test trial packet rate for a given packet
length is the maximum rate at for the topology and speed of the transmitting SmartCard. If the
receiving port receives all packets from the transmitting SmartBits port, no further trials are
attempted and the maximum packet rate is recorded as the throughput.
21
If the first trial fails (if even a single packet is lost), the second trial packet rate drops to
20% lower than the rate at which it failed. The third and each subsequent trail use a binary
search to determine a rate that is halfway between the failed rate and the last successful rate.
The does not finish until the packet loss percent is less than or equal to the resolution value in the
test setup.
Results of the test are logged to a file showing the maximum data rate by port and the
packet data rate. The percentage of the maximum possible packet data rate is also recorded.
4.2.2 Packet Loss Rate Test Methodology
This test measures the percentage of packets lost by the Device Under Test (DUT) that
should have been forwarded.
The Packet Loss Rate test satisfies the terminology criteria of RFC 1242 and the test
methodology specified in RFC 1944. From RFC 1242, Packet Loss Rate is the “Percentage of
packets that should have been forwarded by a network device under steady state (constant)
load that were not forwarded due to a lack of resources.” The test allows for varying packet
sizes from 64 bytes to 1518 bytes. From RFC 1944, the methodology to measure packet loss
is to "Send a specific number of packets at a specific rate through the DUT to be tested and
count the packets that are transmitted by the DUT.
Packets are validated by counting only packets generated by the sending port, not any
packets sent by the switch. Keep-alive and routing update packets are not counted as received
packets.
22
The Packet Loss Rate test operates by a packet burst being sent out at the maximum
possible rate for a user-specified period of time. After all packets are sent, the receiving port is
queried to determine how many packets were received. The number of packets not received is
determined and the percentage of loss is calculated. The results for this test are recorded in the
same manner as the ones for the Throughput test.
23
5 Execution and Results
The following sections discuss how the task of automation was accomplished, as well as
the results and any future enhancements that could be made to the system.
5.1 Interface
The Interface for the automation was made using Tcl and Tk as previously mentioned,
with three main scripts run in succession from a shell script. They are explained here in the
order that they are run.
5.1.1 Automation Setup Window
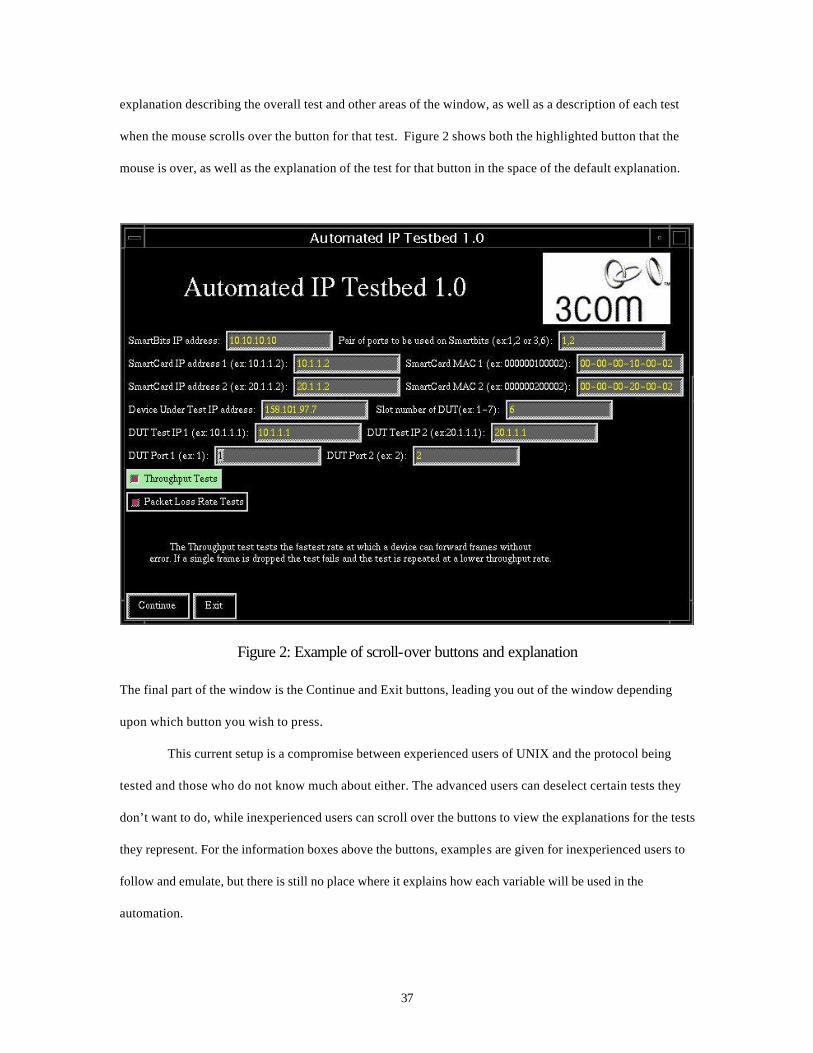
The first script run is a setup screen in Tk as pictured in Figure 5.1.
Figure 5.1 Automation Setup Screenshot
24
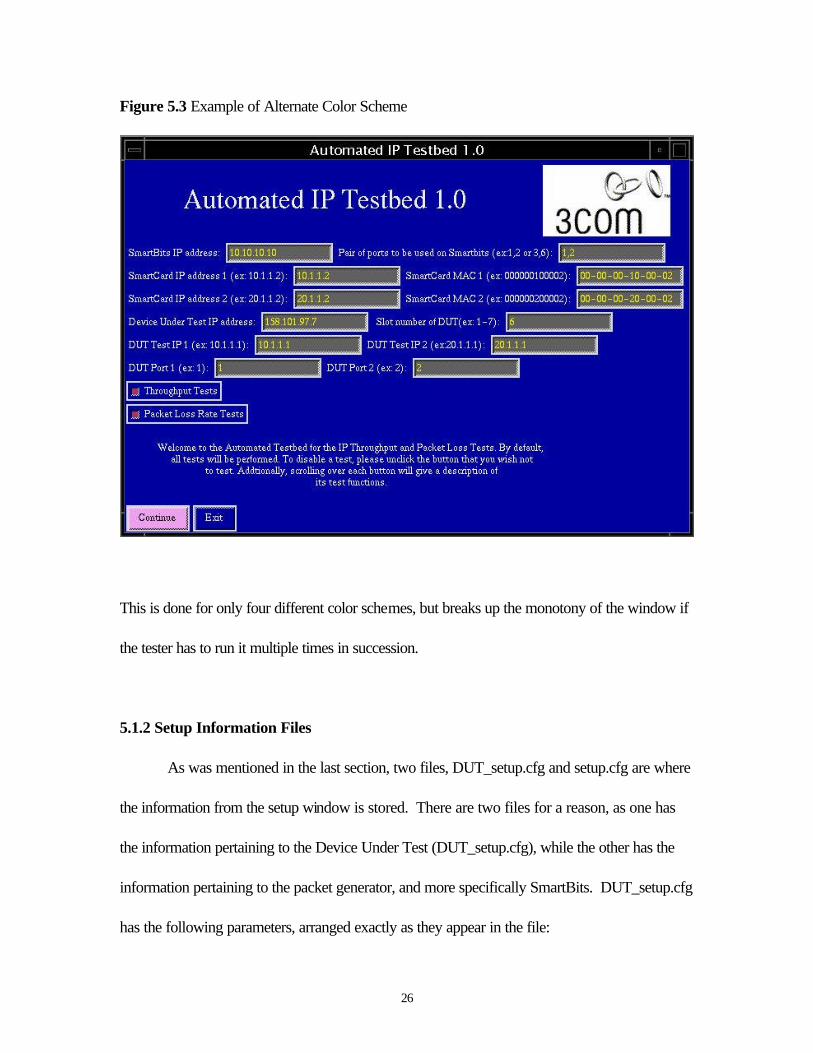
As you can see, the screen is composed of several different parts. First, the title and 3Com
logo, to differentiate it from other setup screens that may be used for other programs running on
a user’s workstation. Next are the text boxes with information such as IP addresses, MAC
addresses and other necessary data. The values are loaded from the text files named setup.cfg
and DUT_setup.cfg, where the values will be stored again when the user presses the continue
button. If the files do not exist, the textboxes default to “????” and when the user presses
continue, the files are created with the new information entered. The buttons below the text
boxes are the two tests that will be run with information provided from the boxes, and can be
selected or deselected depending upon which ones are desired to be performed (they are
defaulted to be run). The status of what tests will be run are also saved in the files.
25
Figure 5.2 Example of scroll-over for test buttons
To better help with the understanding of what each of the tests do, scrolling over the buttons will
give an explanation of the tests that will be performed, as shown in Figure 5.2. The explanation
for the test replaces the regular greeting and general explanation for the setup window. When
the mouse moves off of the button, the default explanation returns. There is also the added
feature of having different color schemes randomly load each time the automation in run, as
Figure 5.3 shows an alternate scheme.
26
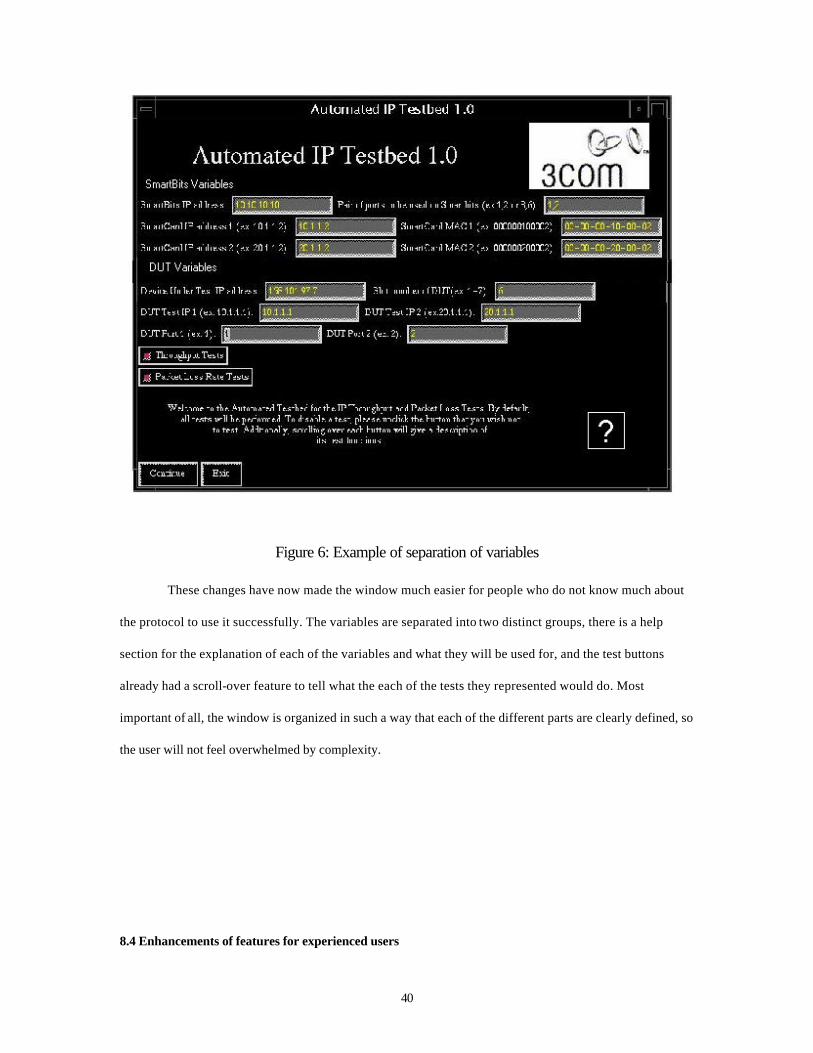
Figure 5.3 Example of Alternate Color Scheme
This is done for only four different color schemes, but breaks up the monotony of the window if
the tester has to run it multiple times in succession.
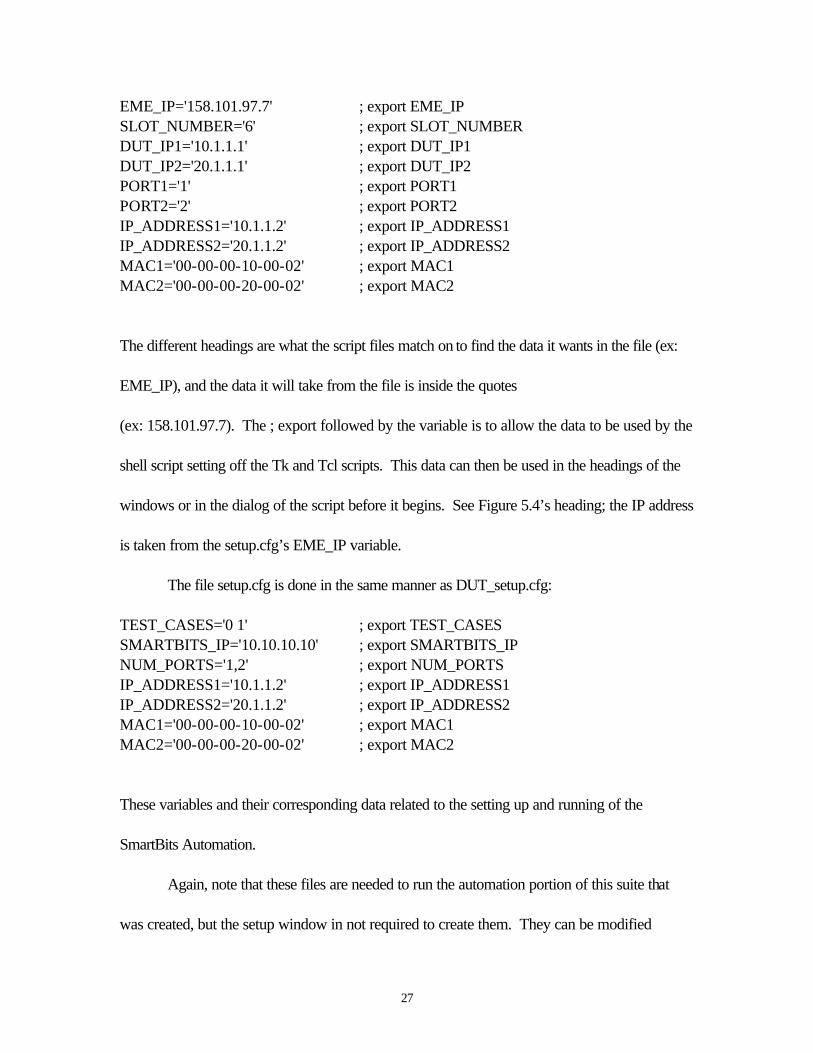
5.1.2 Setup Information Files
As was mentioned in the last section, two files, DUT_setup.cfg and setup.cfg are where
the information from the setup window is stored. There are two files for a reason, as one has
the information pertaining to the Device Under Test (DUT_setup.cfg), while the other has the
information pertaining to the packet generator, and more specifically SmartBits. DUT_setup.cfg
has the following parameters, arranged exactly as they appear in the file:
[Wha00]WhatIs?.com, http://www.whatis.com/osifig.htm, 6/15/00. Appendix A: Calculations for Conversion of Percent Utilization to Inter-packet Gap 1. Calculate the time it takes for a packet to be transmitted, including inter-packet gap and
preamble: Given GAPmin = 12 Bytes Preamble = 8 Bytes Packet Time (usec) = [PacketSize(Bytes) + Preamble][8bits/Byte][Bit Time (usec)]+ GAP [1] 2. Bit Time = 1/Speed(Bits/Sec) [2]
4. To calculate Packets/sec, it is simply the inverse of the packet time [Equation 1]:
Rate (Packets/Sec) = 1/(Packet Time (Sec)) [3]
5. If we consider Pecent Utilization to be the percent of the maximum packet rate (as SmartBits does), then we are stating: Rate(Packets/Sec) = (% utilization (as fraction)[1/Packet Timemin (sec)] [4]
48
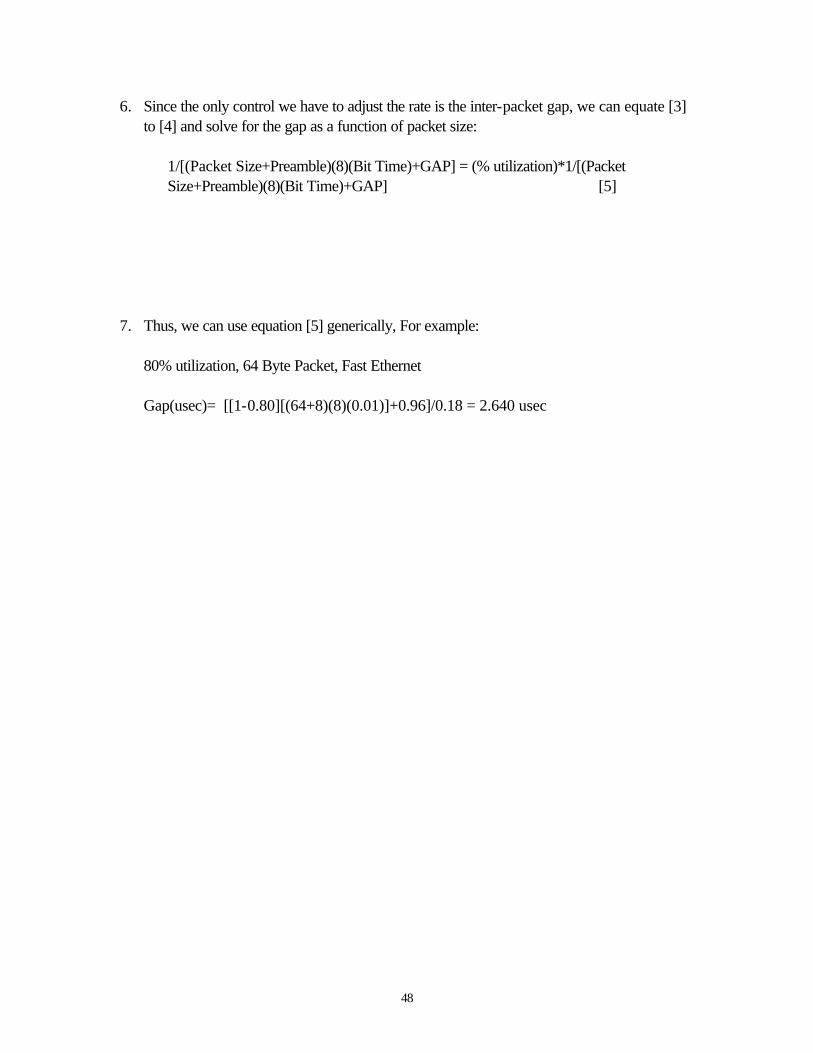
6. Since the only control we have to adjust the rate is the inter-packet gap, we can equate [3] to [4] and solve for the gap as a function of packet size:
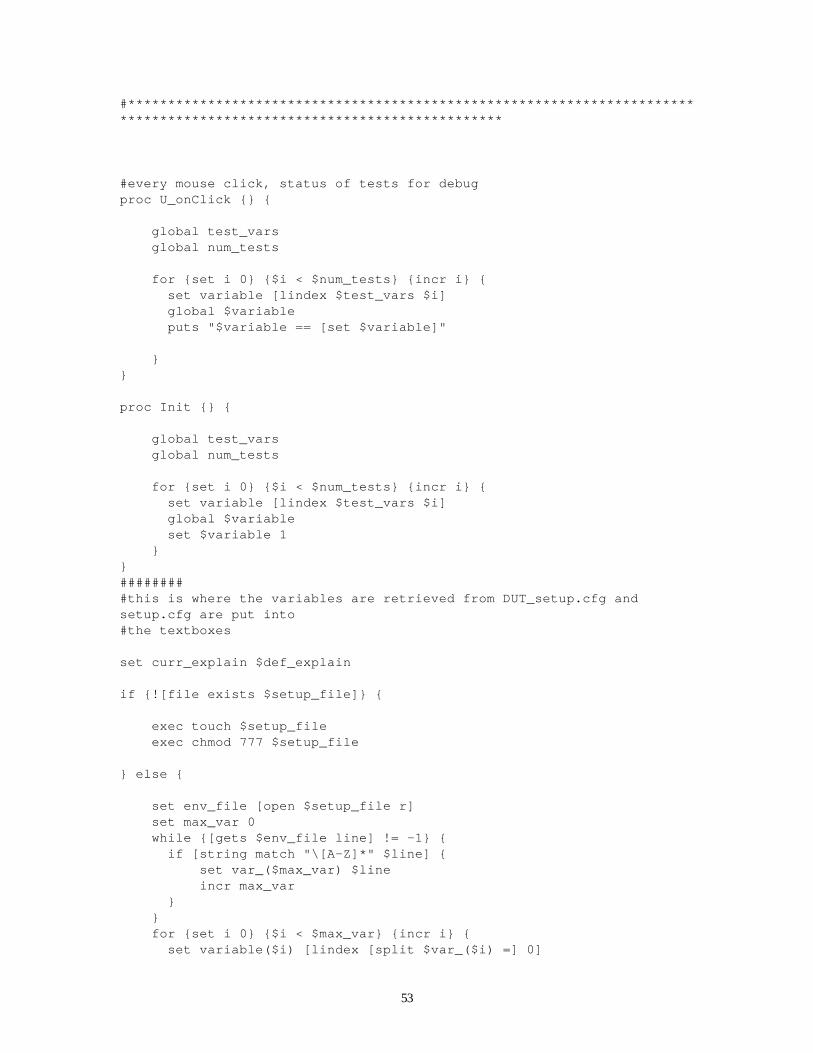
Appendix B: Source Code for Automation Testbed setup_ip.tk #!/usr/local/bin/expect -f ######################################################################################################################## # # File Name: begin_ip.tk # Revision History: Revision Date Author Remarks # 0.1 20 JUN 2000 Adam Fairbanks First Version # .2 25 JUN 2000 Adam Fairbanks made more input variables # # 1.01 02 JUL 2000 Adam Fairbanks two different out # put files, setup. # cfg for smartbits # use and DUTsetup. # cfg for DUT setup # 1.05 20 JUL 2000 Finished automation for # DUT_cfg.tcl and ip_auto.tcl # Fully Working Version! # Release: MQP # Description: Automated Test Menu for Internet Protocol Tests # - Packet Loss # - Throughput # - Interacts with DUT to set up environment # - Interacts with Packet Generator (SmartBits), creates # traffic for tests
50
######################################################################################################################## # # Files in automation: the following files make up the automation suite begin_ip.tk: what we are in now, tk setup window for the automation DUT_cfg.tcl: the Device Under test setup scipt (automation) ip_auto.tcl: the Packet Generator automations script setup.cfg where the variables form this window are stored for the ip_auto.tcl DUT_setup.cfg where the variables from this window are stored in for DUT_cfg.tcl 64IPf.txt: the 64 byte packet( without source and destination MAC preamble) 128IPf.txt: the 128 byte packet ( without the source and destination MACs) 256IPf.txt: etc...... results.txt: where the results of the automation go # ######################################################################################################################## source /sqa/test/scripts/co_op_files/common_lib/common.lib ######################################################################################################################## # #setup variables set DUT_setup_file "DUT_setup.cfg" set setup_file "setup.cfg" set test_var "TEST_CASES" set title "Automated IP Testbed" set numports NUM_PORTS set smart_ip SMARTBITS_IP set sb_ip1 IP_ADDRESS1 set sb_mac1 MAC1 set sb_ip2 IP_ADDRESS2 set sb_mac2 MAC2 set eme_ip_var EME_IP set slot_num SLOT_NUMBER set DUT_ip1 DUT_IP1 set DUT_ip2 DUT_IP2 set Port1 PORT1 set Port2 PORT2 set notes_dir /sqa/test/scripts/co_op_files/afairban/multi_firewall/Release_Notes global 3CL_DEBUG set 3CL_DEBUG 1
51
3CL_getRelNotes $notes_dir ###################################################################### # Setup the window with the colors, and the correct title proc 3CL_formatWindows {title args} { global bg_color; global fg_color; global select_color; global entry_bg_color; global act_bg_colors; global highlite_colors; global font; if {![llength $args]} { set window . set sub_win . set border 0 } elseif {[llength $args] == 1} { set window [lindex $args 0] set sub_win "$window\." set border 0 } else { set window [lindex $args 0] set sub_win "$window\." set border [lindex $args 1] } set title_font "-Adobe-Times-Medium-R-Normal--*-320-*-*-*-*-*-*" set directory "/sqa/test/scripts/co_op_files/bdouglas/run_files" if {![info exists bg_color]} { readColors; } wm title $window "$title" $window configure -bg \#$bg_color(0); if {$border} { frame $sub_win\_top -bg \#$bg_color(0) -borderwidth 5 -relief groove; } else { frame $sub_win\_top -bg \#$bg_color(0) -borderwidth 0; } pack $sub_win\_top -in $window -side top label $sub_win\_top.l -font $title_font -bg \#$bg_color(0) -fg \#$fg_color(0) -text "$title" -width 30 -height 1 pack $sub_win\_top.l -padx 0 -pady 0 -anchor center -in $sub_win\_top -fill x -side left image create photo 3com -file "$directory\/3com_logo.gif" label $sub_win\_top.3com -borderwidth 0 -bg \#$bg_color(0) -width 200 -height 99 -image 3com -bd 0 pack $sub_win\_top.3com -padx 0 -pady 0 -anchor nw -side left -in $sub_win\_top
52
} 3CL_formatWindows "$title $v_num" 3CL_getNextColor wm geometry . +90+5 ###################################################################### # every time button is clicked or unclicked, status of tests is shown in window for debugging use set widget ".bottom.right" bind . <Button-1> {+ set widget %W U_onClick } bind . <Key> {+ set widget %W U_onClick } ##################################################################### #titles, variables and explanations for buttons set def_explain "Welcome to the Automated Testbed for the IP Throughput and Packet Loss Tests. By default,\n all tests will be performed. To disable a test, please unclick the button that you wish not\n to test. Addtionally, scrolling over each button will give a description of\n its test functions." set test_strings "" set test_vars "" set test_explains "" lappend test_strings "Throughput Tests" lappend test_vars "TEST_1" lappend test_explains "The Throughput test tests the fastest rate at which a device can forward frames without\nerror. If a single frame is dropped the test fails and the test is repeated at a lower throughput rate." lappend test_strings "Packet Loss Rate Tests" lappend test_vars "TEST_2" lappend test_explains "This test measures the percentage of frames lost by the Device Under Test that should\nhave been forwarded." #*********************************************************************************************************************** # Procedures
53
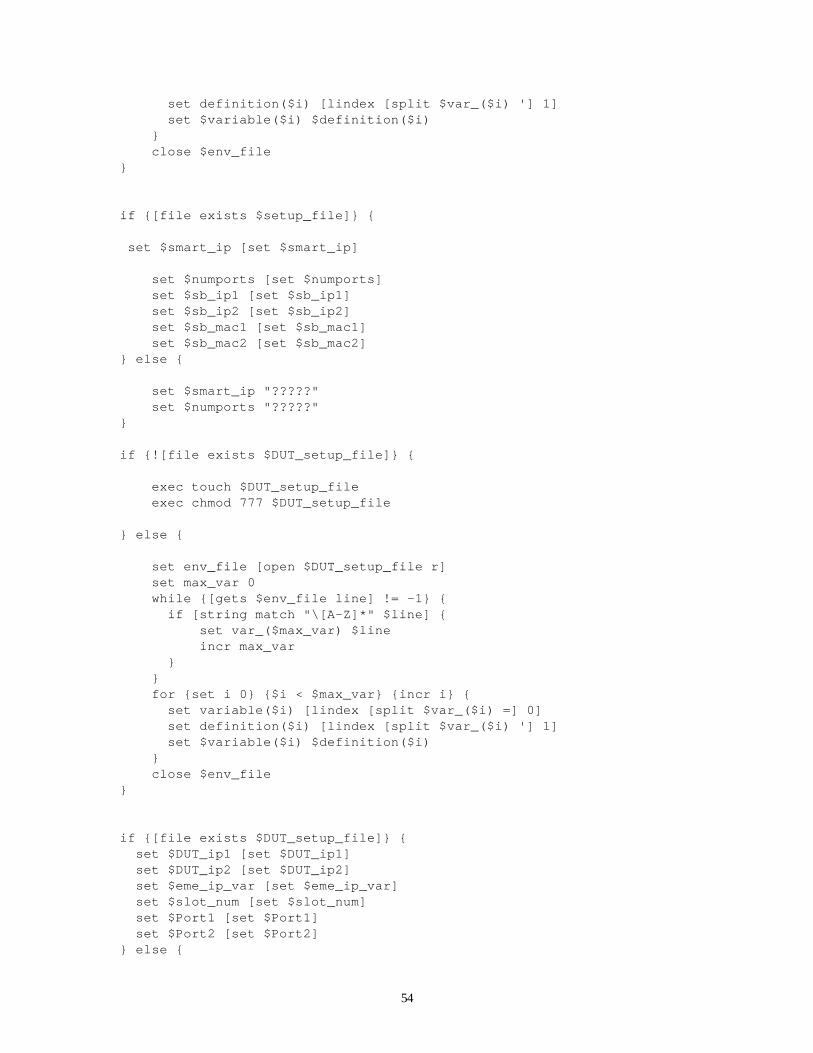
#*********************************************************************************************************************** #every mouse click, status of tests for debug proc U_onClick {} { global test_vars global num_tests for {set i 0} {$i < $num_tests} {incr i} { set variable [lindex $test_vars $i] global $variable puts "$variable == [set $variable]" } } proc Init {} { global test_vars global num_tests for {set i 0} {$i < $num_tests} {incr i} { set variable [lindex $test_vars $i] global $variable set $variable 1 } } ######## #this is where the variables are retrieved from DUT_setup.cfg and setup.cfg are put into #the textboxes set curr_explain $def_explain if {![file exists $setup_file]} { exec touch $setup_file exec chmod 777 $setup_file } else { set env_file [open $setup_file r] set max_var 0 while {[gets $env_file line] != -1} { if [string match "\[A-Z]*" $line] { set var_($max_var) $line incr max_var } } for {set i 0} {$i < $max_var} {incr i} { set variable($i) [lindex [split $var_($i) =] 0]
54
set definition($i) [lindex [split $var_($i) '] 1] set $variable($i) $definition($i) } close $env_file } if {[file exists $setup_file]} { set $smart_ip [set $smart_ip] set $numports [set $numports] set $sb_ip1 [set $sb_ip1] set $sb_ip2 [set $sb_ip2] set $sb_mac1 [set $sb_mac1] set $sb_mac2 [set $sb_mac2] } else { set $smart_ip "?????" set $numports "?????" } if {![file exists $DUT_setup_file]} { exec touch $DUT_setup_file exec chmod 777 $DUT_setup_file } else { set env_file [open $DUT_setup_file r] set max_var 0 while {[gets $env_file line] != -1} { if [string match "\[A-Z]*" $line] { set var_($max_var) $line incr max_var } } for {set i 0} {$i < $max_var} {incr i} { set variable($i) [lindex [split $var_($i) =] 0] set definition($i) [lindex [split $var_($i) '] 1] set $variable($i) $definition($i) } close $env_file } if {[file exists $DUT_setup_file]} { set $DUT_ip1 [set $DUT_ip1] set $DUT_ip2 [set $DUT_ip2] set $eme_ip_var [set $eme_ip_var] set $slot_num [set $slot_num] set $Port1 [set $Port1] set $Port2 [set $Port2] } else {
55
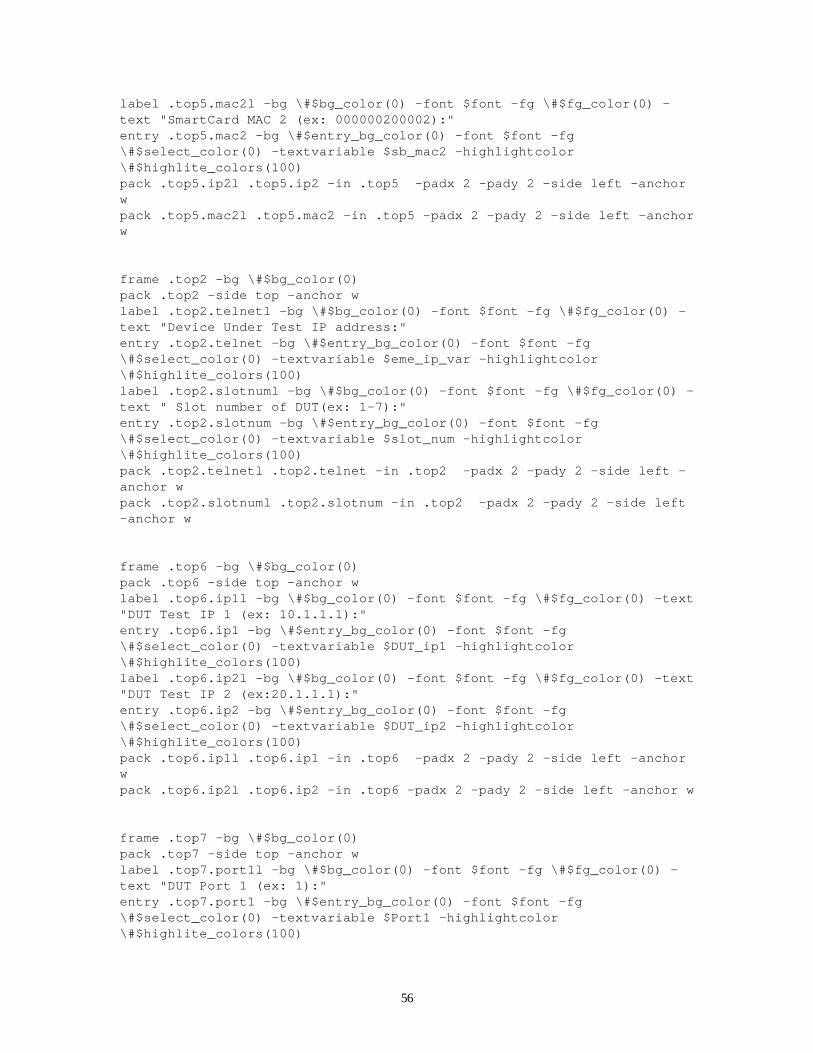
set $DUT_ip1 "?????" set $DUT_ip2 "?????" set $eme_ip_var "?????" set $slot_num "?????" } set num_tests [llength $test_strings] #this is where the labels and textboxes and buttons are packed into the tk window for display frame .top3 -bg \#$bg_color(0) pack .top3 -side top -anchor w label .top3.telnetl -bg \#$bg_color(0) -font $font -fg \#$fg_color(0) -text "SmartBits IP address:" entry .top3.telnet -bg \#$entry_bg_color(0) -font $font -fg \#$select_color(0) -textvariable $smart_ip -highlightcolor \#$highlite_colors(100) label .top3.numportsl -bg \#$bg_color(0) -font $font -fg \#$fg_color(0) -text "Pair of ports to be used on Smartbits (ex:1,2 or 3,6):" entry .top3.numports -bg \#$entry_bg_color(0) -font $font -fg \#$select_color(0) -textvariable $numports -highlightcolor \#$highlite_colors(100) pack .top3.telnetl .top3.telnet -in .top3 -padx 2 -pady 2 -side left -anchor w pack .top3.numportsl .top3.numports -in .top3 -padx 2 -pady 2 -side left -anchor w frame .top4 -bg \#$bg_color(0) pack .top4 -side top -anchor w label .top4.ip1l -bg \#$bg_color(0) -font $font -fg \#$fg_color(0) -text "SmartCard IP address 1 (ex: 10.1.1.2):" entry .top4.ip1 -bg \#$entry_bg_color(0) -font $font -fg \#$select_color(0) -textvariable $sb_ip1 -highlightcolor \#$highlite_colors(100) label .top4.mac1l -bg \#$bg_color(0) -font $font -fg \#$fg_color(0) -text "SmartCard MAC 1 (ex: 000000100002):" entry .top4.mac1 -bg \#$entry_bg_color(0) -font $font -fg \#$select_color(0) -textvariable $sb_mac1 -highlightcolor \#$highlite_colors(100) pack .top4.ip1l .top4.ip1 -in .top4 -padx 2 -pady 2 -side left -anchor w pack .top4.mac1l .top4.mac1 -in .top4 -padx 2 -pady 2 -side left -anchor w frame .top5 -bg \#$bg_color(0) pack .top5 -side top -anchor w label .top5.ip2l -bg \#$bg_color(0) -font $font -fg \#$fg_color(0) -text "SmartCard IP address 2 (ex: 20.1.1.2):" entry .top5.ip2 -bg \#$entry_bg_color(0) -font $font -fg \#$select_color(0) -textvariable $sb_ip2 -highlightcolor \#$highlite_colors(100)
56
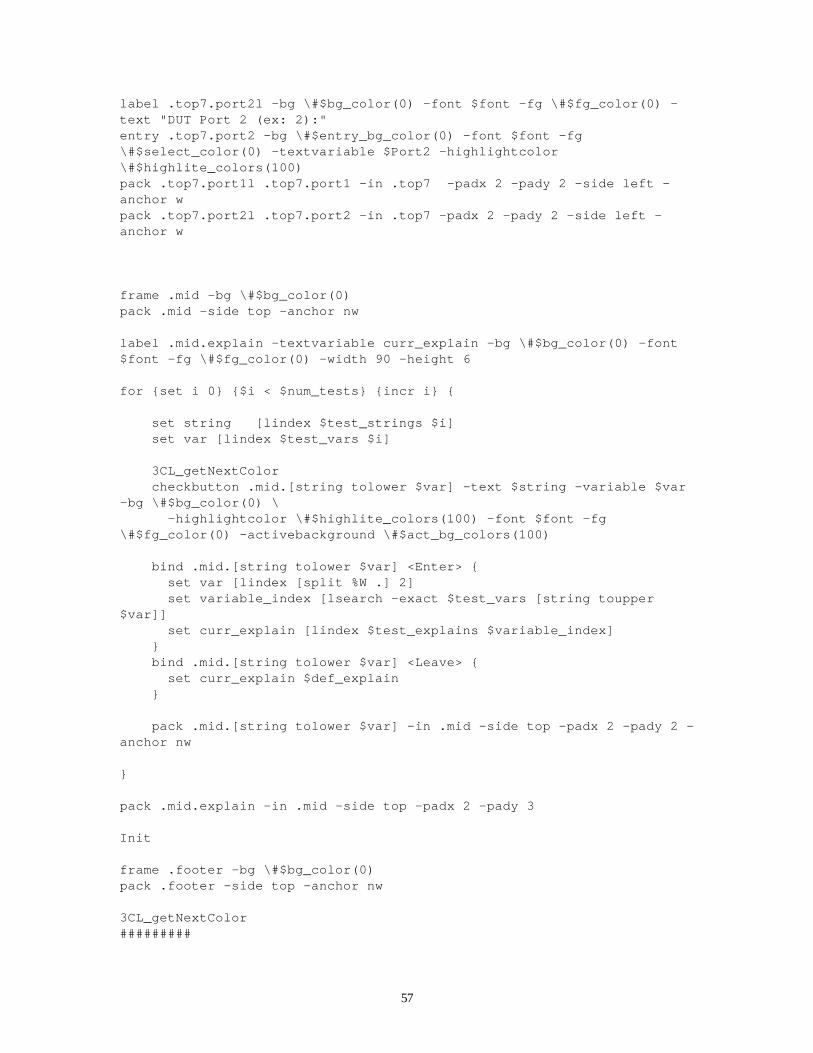
label .top5.mac2l -bg \#$bg_color(0) -font $font -fg \#$fg_color(0) -text "SmartCard MAC 2 (ex: 000000200002):" entry .top5.mac2 -bg \#$entry_bg_color(0) -font $font -fg \#$select_color(0) -textvariable $sb_mac2 -highlightcolor \#$highlite_colors(100) pack .top5.ip2l .top5.ip2 -in .top5 -padx 2 -pady 2 -side left -anchor w pack .top5.mac2l .top5.mac2 -in .top5 -padx 2 -pady 2 -side left -anchor w frame .top2 -bg \#$bg_color(0) pack .top2 -side top -anchor w label .top2.telnetl -bg \#$bg_color(0) -font $font -fg \#$fg_color(0) -text "Device Under Test IP address:" entry .top2.telnet -bg \#$entry_bg_color(0) -font $font -fg \#$select_color(0) -textvariable $eme_ip_var -highlightcolor \#$highlite_colors(100) label .top2.slotnuml -bg \#$bg_color(0) -font $font -fg \#$fg_color(0) -text " Slot number of DUT(ex: 1-7):" entry .top2.slotnum -bg \#$entry_bg_color(0) -font $font -fg \#$select_color(0) -textvariable $slot_num -highlightcolor \#$highlite_colors(100) pack .top2.telnetl .top2.telnet -in .top2 -padx 2 -pady 2 -side left -anchor w pack .top2.slotnuml .top2.slotnum -in .top2 -padx 2 -pady 2 -side left -anchor w frame .top6 -bg \#$bg_color(0) pack .top6 -side top -anchor w label .top6.ip1l -bg \#$bg_color(0) -font $font -fg \#$fg_color(0) -text "DUT Test IP 1 (ex: 10.1.1.1):" entry .top6.ip1 -bg \#$entry_bg_color(0) -font $font -fg \#$select_color(0) -textvariable $DUT_ip1 -highlightcolor \#$highlite_colors(100) label .top6.ip2l -bg \#$bg_color(0) -font $font -fg \#$fg_color(0) -text "DUT Test IP 2 (ex:20.1.1.1):" entry .top6.ip2 -bg \#$entry_bg_color(0) -font $font -fg \#$select_color(0) -textvariable $DUT_ip2 -highlightcolor \#$highlite_colors(100) pack .top6.ip1l .top6.ip1 -in .top6 -padx 2 -pady 2 -side left -anchor w pack .top6.ip2l .top6.ip2 -in .top6 -padx 2 -pady 2 -side left -anchor w frame .top7 -bg \#$bg_color(0) pack .top7 -side top -anchor w label .top7.port1l -bg \#$bg_color(0) -font $font -fg \#$fg_color(0) -text "DUT Port 1 (ex: 1):" entry .top7.port1 -bg \#$entry_bg_color(0) -font $font -fg \#$select_color(0) -textvariable $Port1 -highlightcolor \#$highlite_colors(100)
##this is where the new information entered by the is stored back in the two setup files to be # used by the scripts button .footer.continue -text "Continue" -bg \#$bg_color(0) -highlightcolor \#$highlite_colors(100) -font $font -fg \#$fg_color(0) \ -activebackground \#$act_bg_colors(100) -command { if [file exists $setup_file] { exec rm $setup_file } exec touch $setup_file exec chmod 777 $setup_file set temp_file [open $setup_file w] set tests_to_run "" for {set i 0} {$i < $num_tests} {incr i} { if [set [lindex $test_vars $i]] { lappend tests_to_run $i } } puts $temp_file "[set test_var]='[set tests_to_run]'\t\t;export [set test_var]" puts $temp_file "$smart_ip=\'[set $smart_ip]\'\t\t\t; export $smart_ip" puts $temp_file "$numports=\'[set $numports]\'\t\t\t; export $numports" puts $temp_file "$sb_ip1=\'[set $sb_ip1]\'\t\t\t; export $sb_ip1" puts $temp_file "$sb_ip2=\'[set $sb_ip2]\'\t\t\t; export $sb_ip2" puts $temp_file "$sb_mac1=\'[set $sb_mac1]\'\t\t\t; export $sb_mac1" puts $temp_file "$sb_mac2=\'[set $sb_mac2]\'\t\t\t; export $sb_mac2" close $temp_file if [file exists $DUT_setup_file] { exec rm $DUT_setup_file } exec touch $DUT_setup_file exec chmod 777 $DUT_setup_file set temp_file2 [open $DUT_setup_file w] puts $temp_file2 "$eme_ip_var=\'[set $eme_ip_var]\'\t\t\t; export $eme_ip_var" puts $temp_file2 "$slot_num=\'[set $slot_num]\'\t\t\t; export $slot_num" puts $temp_file2 "$DUT_ip1=\'[set $DUT_ip1]\'\t\t\t; export $DUT_ip1" puts $temp_file2 "$DUT_ip2=\'[set $DUT_ip2]\'\t\t\t; export $DUT_ip2" puts $temp_file2 "$Port1=\'[set $Port1]\'\t\t\t; export $Port1" puts $temp_file2 "$Port2=\'[set $Port2]\'\t\t\t; export $Port2" puts $temp_file2 "$sb_ip1=\'[set $sb_ip1]\'\t\t\t; export $sb_ip1"
59
puts $temp_file2 "$sb_ip2=\'[set $sb_ip2]\'\t\t\t; export $sb_ip2" puts $temp_file2 "$sb_mac1=\'[set $sb_mac1]\'\t\t\t; export $sb_mac1" puts $temp_file2 "$sb_mac2=\'[set $sb_mac2]\'\t\t\t; export $sb_mac2" close $temp_file2 exit 1 destroy . } 3CL_getNextColor button .footer.exit -bg \#$bg_color(0) -font $font -fg \#$fg_color(0) -text "Exit" -highlightcolor \#$highlite_colors(100) \ -activebackground \#$act_bg_colors(100) -command { exit 0 destroy . } pack .footer.continue .footer.exit -in .footer -padx 2 -pady .5 -side left pack .footer -side top -anchor sw focus .footer.continue DUT_cfg.tcl #!/sqa/usr/local/bin/expect/ -- #environment variables global env spawn $env(SHELL) set setup_file "DUT_setup.cfg" #variables to be used to store information from the DUT_setup.cfg file set slot_num SLOT_NUM set eme_ip_var EME_IP set slot_num SLOT_NUMBER set dut_ip1 DUT_IP1 set dut_ip2 DUT_IP2 set port1 PORT1 set port2 PORT2 set ip_address1 IP_ADDRESS1 set ip_address2 IP_ADDRESS2 set mac1 MAC1 set mac2 MAC2 ############################################################################# ### # start to get information from file either stored in DUT_setup.cfg ###
60
############################################################################# if {![file exists $setup_file]} { exec touch $setup_file exec chmod 777 $setup_file } else { set env_file [open $setup_file r] set max_var 0 while {[gets $env_file line] != -1} { if [string match "\[A-Z]*" $line] { set var_($max_var) $line incr max_var } } for {set i 0} {$i < $max_var} {incr i} { set variable($i) [lindex [split $var_($i) =] 0] set definition($i) [lindex [split $var_($i) '] 1] set $variable($i) $definition($i) } close $env_file } if {[file exists $setup_file]} { set $eme_ip_var [set $eme_ip_var] set $slot_num [set $slot_num] set dut_ip1 [set $dut_ip1] set dut_ip2 [set $dut_ip2] set port1 [set $port1] set port2 [set $port2] set mac1 [set $mac1] set mac2 [set $mac2] set ip_address1 [set $ip_address1] set ip_address2 [set $ip_address2] } else { puts "setup file does not exist!!!!" } puts "Starting IP Automation..." #check to see if DUT responds, login to DUT and connect to appropriate blade send "ping [set $eme_ip_var]\r" expect " [set $eme_ip_var] is alive" send "telnet [set $eme_ip_var]\r" expect "Login:" send "CB9000DEBUG\r" expect "Password:" send "\r" expect ">"
61
send "connect [set $slot_num].1\r" #setup vlan for ip interface one expect ":" send "bri vlan def 2\r" expect "(1-13|all|?):" send "$port1\r" expect "):" send "ip\r" expect "):" send "q\r" expect "(n,y)" send "n\r" expect "(n,y)" send "n\r" expect "Name {?}" send "ip_vlan1\r" #setup vlan for ip interface two expect ":" send "bri vlan def 3\r" expect "(1-13|all|?)" send "$port2\r" expect "):" send "ip\r" expect "):" send "q\r" expect "(n,y)" send "n\r" expect "(n,y)" send "n\r" expect "Name {?}" send "ip_vlan2\r" #setup ip interfaces on DUT for use with Smartbits packets expect ":" send "ip int def [set dut_ip1] 255.255.255.0 vlan 2\r" expect ":" send "ip int def [set dut_ip2] 255.255.255.0 vlan 3\r" # setup static arps for smartbits and DUT to communicate through expect ":" send "ip arp static 1 [set ip_address1] [set mac1]\r" expect ":" send "ip arp static 2 [set ip_address2] [set mac2]\r" expect ":" send "ip routing enable\r" #set eth portspeed at 100 full duplex (fast ethernet) expect ":" send "eth portmode a\r" expect "(n,y)"
62
send "y\r" expect ":" send "100full\r" #disable autonegotiation since port speed already at fast ethernet 100m full expect ":" send "eth autoneg a dis\r" #disable spanning tree packets (for stats to not count other packets) expect ":" send " bri spann stpState dis\r" #disable dvmrp (for statistics to not count other packets) expect ":" send " ip multi dvmrp int mod a dis dis\r" #disable igmp querying (for statistics to not count other packets) expect ":" send "ip multi igmp query dis\r" #disable backplane port expect ":" send "eth portState 13 dis\r" #logout of blade and DUT expect ":" send "dis\r" expect ">" send "logout\r" expect "bash" ip_auto.tcl #!/sqa/usr/local/bin/expect/ -- global env spawn $env(SHELL)
63
set result_file "results.txt" set setup_file "setup.cfg" set numports NUM_PORTS set slot_num SLOT_NUM set eme_ip_var EME_IP set smart_ip SMARTBITS_IP set slot_num SLOT_NUMBER set mac1 MAC1 set mac2 MAC2 ############################################################################# ### # start to get information from file either stored by begin_ip.tk or manual ### ############################################################################# if {![file exists $setup_file]} { exec touch $setup_file exec chmod 777 $setup_file } else { set env_file [open $setup_file r] set max_var 0 while {[gets $env_file line] != -1} { if [string match "\[A-Z]*" $line] { set var_($max_var) $line incr max_var } } for {set i 0} {$i < $max_var} {incr i} { set variable($i) [lindex [split $var_($i) =] 0] set definition($i) [lindex [split $var_($i) '] 1] set $variable($i) $definition($i) } close $env_file } if {[file exists $setup_file]} { set $smart_ip [set $smart_ip] set $numports [set $numports] set $mac1 [set $mac1] set $mac2 [set $mac2] } else { puts "setup file does not exist!!!!" } #################################################################### #start throughput test #################################################### #starts at 64 bit packet size, 100% util (defaults at 96 usec)
64
puts "[set $numports]" puts "Starting IP Automation..." send "/sqa/tools/PacketBuilder2.0/pb.9.2.98 -i\r" expect "pbCommand>" send "pb -l\r" expect "pbCommand>" send "pb -ht1 -n100000 -vs[set $mac2] -vs[set $mac1] -f 64IPf.txt\n" expect "pbCommand>" send "pb -ht1\n" expect "pbCommand>" sleep 10 send "pb -ht2 -scr" if { expect "RX Packet count for slot 2 is 100000 packets" } { if [file exists $results_file] { exec rm $results_file } exec touch $results_file exec chmod 777 $results_file set temp_file [open $results_file w] puts temp_file "Passed 64 byte test at 100% utilization\n" puts temp_file "100000 packets sent from [set $mac1] to [set $mac2] with .0960 interpacket gap" close $temp_file ################################################################# #if first trial fails at 100%, tries again at 80 (-g272 for 272 usec gap) } else { send "/sqa/tools/PacketBuilder2.0/pb.9.2.98 -i\r" expect "pbCommand>" send "pb -l\r" expect "pbCommand>" send "pb -ht1 -g272 -n100000 -vs[set $mac2] -vs[set $mac1] -f 64IPf.txt\n" expect "pbCommand>" send "pb -ht1\n" expect "pbCommand>" sleep 10 send "pb -ht2 -scr" if {expect "RX Packet count for slot 2 is 100000 packets"} { if [file exists $results_file] { exec rm $results_file } exec touch $results_file exec chmod 777 $results_file set temp_file [open $results_file w]
65
puts temp_file "Passed 64 byte test at 80% utilization\n" puts temp_file "100000 packets sent from [set $mac1] to [set $mac2] with .0272 interpacket gap" close $temp_file } else { #finally tries at 60% ( 565 usec gap) send "/sqa/tools/PacketBuilder2.0/pb.9.2.98 -i\r" expect "pbCommand>" send "pb -l\r" expect "pbCommand>" send "pb -ht1 -g565 -n100000 -vs[set $mac2] -vs[set $mac1] -f 64IPf.txt\n" expect "pbCommand>" send "pb -ht1\n" expect "pbCommand>" sleep 10 send "pb -ht2 -scr" if {expect "RX Packet count for slot 2 is 100000 packets"} { if [file exists $results_file] { exec rm $results_file } exec touch $results_file exec chmod 777 $results_file set temp_file [open $results_file w] puts temp_file "Passed 64 byte test at 60% utilization\n" puts temp_file "100000 packets sent from [set $mac1] to [set $mac2] with .565 interpacket gap" close $temp_file } else { puts " You're router stinks....it can't even do 60% utilization!!!!\r Now exiting......" sleep 5 exit 0 } } } #################################################################### #continue with 128 byte packets #################################################### #128 byte packet size, 100% util (defaults at 96 usec) puts "[set $numports]" puts "Starting IP Automation..." send "/sqa/tools/PacketBuilder2.0/pb.9.2.98 -i\r" expect "pbCommand>" send "pb -l\r" expect "pbCommand>"
66
send "pb -ht1 -n100000 -vs[set $mac2] -vs[set $mac1] -f 128IPf.txt\n" expect "pbCommand>" send "pb -ht1\n" expect "pbCommand>" sleep 10 send "pb -ht2 -scr" if { expect "RX Packet count for slot 2 is 100000 packets" } { exec touch $results_file exec chmod 777 $results_file set temp_file [open $results_file a] puts temp_file "Passed 128 byte test at 100% utilization\n" puts temp_file "100000 packets sent from [set $mac1] to [set $mac2] with .0960 interpacket gap" close $temp_file ################################################################# #if first trial fails at 100%, tries again at 80 (-g400 for 400 usec gap) } else { send "/sqa/tools/PacketBuilder2.0/pb.9.2.98 -i\r" expect "pbCommand>" send "pb -l\r" expect "pbCommand>" send "pb -ht1 -g400 -n100000 -vs[set $mac2] -vs[set $mac1] -f 128IPf.txt\n" expect "pbCommand>" send "pb -ht1\n" expect "pbCommand>" sleep 10 send "pb -ht2 -scr" if {expect "RX Packet count for slot 2 is 100000 packets"} { exec touch $results_file exec chmod 777 $results_file set temp_file [open $results_file a] puts temp_file "Passed 128 byte test at 80% utilization\n" puts temp_file "100000 packets sent from [set $mac1] to [set $mac2] with .4 interpacket gap" close $temp_file } else { #finally tries at 60% ( 906 usec gap) send "/sqa/tools/PacketBuilder2.0/pb.9.2.98 -i\r" expect "pbCommand>" send "pb -l\r"
67
expect "pbCommand>" send "pb -ht1 -g906 -n100000 -vs[set $mac2] -vs[set $mac1] -f 128IPf.txt\n" expect "pbCommand>" send "pb -ht1\n" expect "pbCommand>" sleep 10 send "pb -ht2 -scr" if {expect "RX Packet count for slot 2 is 100000 packets"} { exec touch $results_file exec chmod 777 $results_file set temp_file [open $results_file a] puts temp_file "Passed 128 byte test at 60% utilization\n" puts temp_file "100000 packets sent from [set $mac1] to [set $mac2] with .906 interpacket gap" close $temp_file } else { puts " You're router stinks....it can't even do 60% utilization!!!!\rNow exiting....." sleep 5 exit 0 } } } #################################################################### #continue with 256 byte packets #################################################### #256 byte packet size, 100% util (defaults at 96 usec) puts "[set $numports]" puts "Starting IP Automation..." send "/sqa/tools/PacketBuilder2.0/pb.9.2.98 -i\r" expect "pbCommand>" send "pb -l\r" expect "pbCommand>" send "pb -ht1 -n100000 -vs[set $mac2] -vs[set $mac1] -f 256IPf.txt\n" expect "pbCommand>" send "pb -ht1\n" expect "pbCommand>" sleep 10 send "pb -ht2 -scr" if { expect "RX Packet count for slot 2 is 100000 packets" } { exec touch $results_file exec chmod 777 $results_file
68
set temp_file [open $results_file a] puts temp_file "Passed 256 byte test at 100% utilization\n" puts temp_file "100000 packets sent from [set $mac1] to [set $mac2] with .096 interpacket gap" close $temp_file ################################################################# #if first trial fails at 100%, tries again at 80 (-g656 for 656 usec gap) } else { send "/sqa/tools/PacketBuilder2.0/pb.9.2.98 -i\r" expect "pbCommand>" send "pb -l\r" expect "pbCommand>" send "pb -ht1 -g656 -n100000 -vs[set $mac2] -vs[set $mac1] -f 256IPf.txt\n" expect "pbCommand>" send "pb -ht1\n" expect "pbCommand>" sleep 10 send "pb -ht2 -scr" if {expect "RX Packet count for slot 2 is 100000 packets"} { exec touch $results_file exec chmod 777 $results_file set temp_file [open $results_file a] puts temp_file "Passed 256 byte test at 80% utilization\n" puts temp_file "100000 packets sent from [set $mac1] to [set $mac2] with .656 interpacket gap" close $temp_file } else { #finally tries at 60% ( 1589 usec gap) send "/sqa/tools/PacketBuilder2.0/pb.9.2.98 -i\r" expect "pbCommand>" send "pb -l\r" expect "pbCommand>" send "pb -ht1 -g1589 -n100000 -vs[set $mac2] -vs[set $mac1] -f 256IPf.txt\n" expect "pbCommand>" send "pb -ht1\n" expect "pbCommand>" sleep 10 send "pb -ht2 -scr" if {expect "RX Packet count for slot 2 is 100000 packets"} { exec touch $results_file exec chmod 777 $results_file set temp_file [open $results_file a] puts temp_file "Passed 256 byte test at 60% utilization\n"
69
puts temp_file "100000 packets sent from [set $mac1] to [set $mac2] with 1.589 interpacket gap" close $temp_file } else { puts " You're router stinks....it can't even do 60% utilization!!!!\rNow exiting....." sleep 5 exit 0 } } ########################################################################## ######Packet Loss test #########currently does it for 64 byte packet at 100 % utilization send "/sqa/tools/PacketBuilder2.0/pb.9.2.98 -i\r" expect "pbCommand>" send "pb -l\r" expect "pbCommand>" send "pb -ht1 -n100000 -vs[set $mac2] -vs[set $mac1] -f 64IPf.txt\n" expect "pbCommand>" send "pb -ht1\n" expect "pbCommand>" sleep 10 send "pb -ht2 -scr" if {expect "RX Packet count for slot 2 is [set $packet1] packets"} { $final_packet= $packet1-100000 exec touch $results_file exec chmod 777 $results_file set temp_file [open $results_file a] puts temp_file "Packet Loss Test for 64 bytes:\n" puts temp_file "100000 packets sent from [set $mac1] to [set $mac2] at 100% utilization: " puts temp_file " [set $final_packet] dropped by DUT\n close $temp_file exit 0 } }