28
Backcountry Horsemen of California
Who We Are and What We Do!
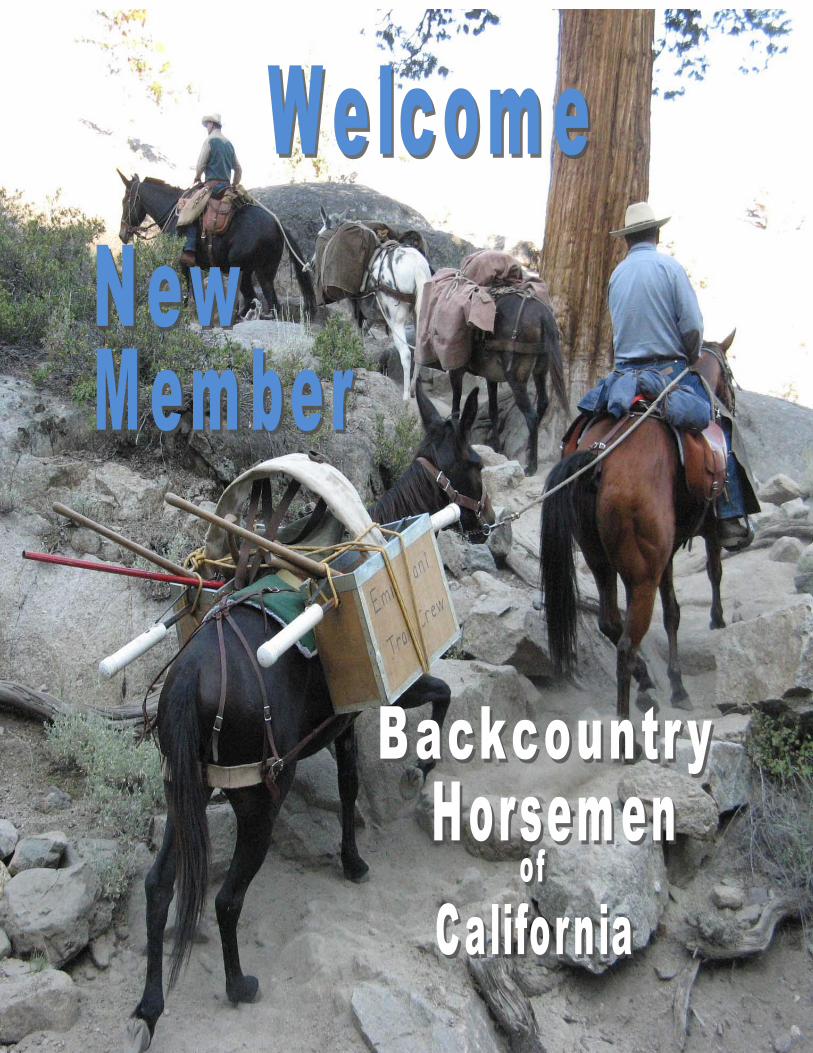
Backcountry Horsemen of California (BCHC) is a group of dedicated men and women working to preserve the historic use of trails with recreational pack and saddle stock. BCHC members perform public service activities for numerous land management agencies and are continually working to educate other members and the general public on how to be “Gentle Users.”
The use of livestock has played an important role in the American culture. California and the western states have particularly had a long tradition of using pack and saddle stock. BCHC carries on this tradition in modern times. With this use comes the responsibility and obligation to care for our public lands in order to ensure their use for future generations.
Backcountry Horsemen of California works in cooperation with government agencies to help clear trails, maintain historic sites, construct new facilities, sponsor educational seminars and clinics, and assist with service projects as requested. Members also strive to stay current on relevant issues and to provide input on management plans, access and activities that pertain to trails on public lands with pack and saddle stock.
Membership in Backcountry Horsemen of California is open to any individual or family sharing the concerns of the organization. There are numerous units throughout the state of California. Our organizational structure starts with BCHC, Inc., holding the non-profit status. Each of the local units is a subsidiary of the parent organization. Each unit has its own governing board and conducts activities of its choice, while operating under broad guidelines established by the state BCHC Board of Directors.
BCHC focuses its efforts in three key areas: Service Projects Education Public Lands Issues
Backcountry Horsemen of California has a well-established educational program offering tips and techniques for the backcountry. Our “Gentle Use” Program along with the Center for Outdoor Ethics’ Leave No Trace Program are principles BCHC hopes you will consider following while enjoying your time on the trail.
BCHC officer contact information may be found on both state and local unit web sites.
BCHC web site: http://www.bchcalifornia.org
The content of this written material has been officially approved for distribution by
Backcountry Horsemen of California, P.O. Box 40007 Bakersfield, CA 93384-0007 www.bchcalifornia.org 2/11

Unit
Information
Here

Unit
Information
Here

Unit
Information
Here
Backcountry Horsemen of California
Web Site Resource Guide
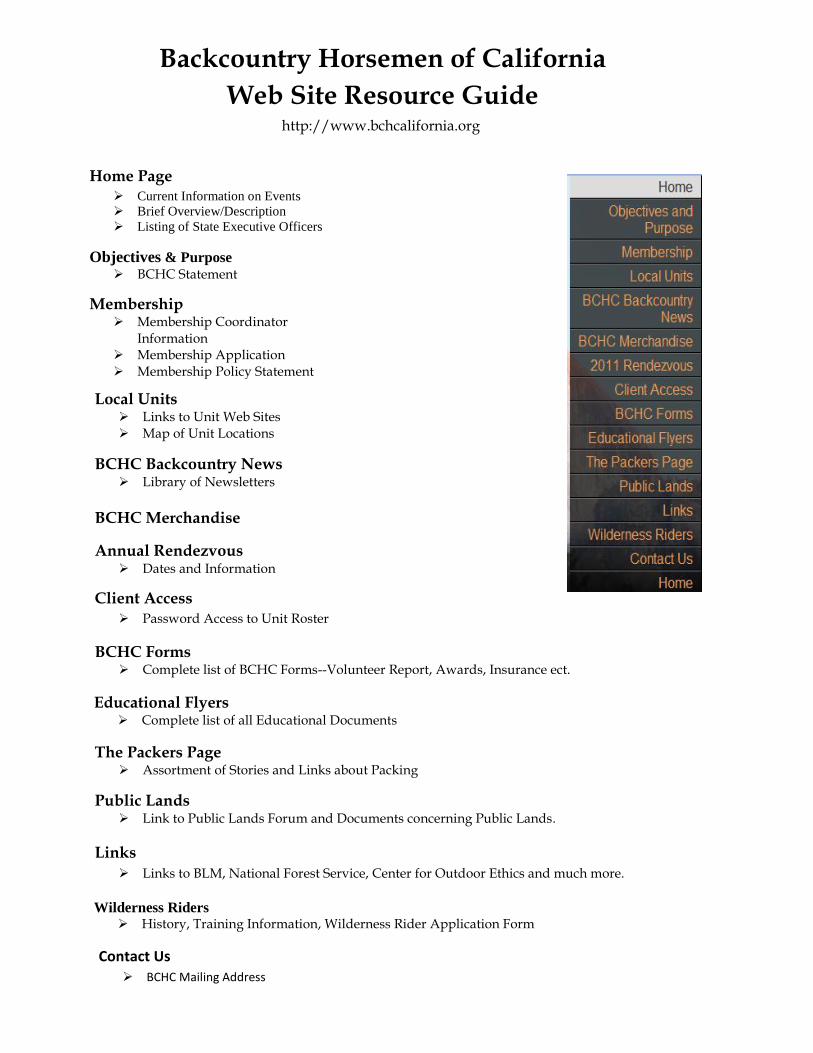
Home Page Current Information on Events
Brief Overview/Description
Listing of State Executive Officers
Objectives & Purpose
BCHC Statement
Membership Membership Coordinator
Information Membership Application Membership Policy Statement
Local Units Links to Unit Web Sites Map of Unit Locations
BCHC Backcountry News Library of Newsletters
Annual Rendezvous Dates and Information
Client Access Password Access to Unit Roster
BCHC Forms Complete list of BCHC Forms--Volunteer Report, Awards, Insurance ect.
Educational Flyers Complete list of all Educational Documents
The Packers Page Assortment of Stories and Links about Packing
Public Lands Link to Public Lands Forum and Documents concerning Public Lands.
Links
Links to BLM, National Forest Service, Center for Outdoor Ethics and much more.
Wilderness Riders History, Training Information, Wilderness Rider Application Form
BCHC Merchandise
Contact Us BCHC Mailing Address
http://www.bchcalifornia.org
BACKCOUNTRY HORSEMEN OF CALIFORNIA
Bare Bottom Basics A COMMON SENSE GUIDE FOR
PROPER SANITATION
Imagine— it's late afternoon, high in the backcountry. You gently check the heat beneath your cook pot in drooling anticipation of your evening feast as you begin to relax with a sense of achievement in the extra effort it required to get here. The awe-inspiring vista laid out before you is truly splendid as the sun gently dips behind the magnificent granite peaks. The serenity of the mountain meadow, the beauty of the alpine lake, the majestic grandeur of the stately pines and the errant strand of double-ply toilet tissue wafting delicately in the breeze through your camp! HUH!!? Sadly, this scenario (or one equally disgusting) is played out all too frequently. In many areas there is no such thing as complete isolation in our backcountry any longer. If you are there, chances are someone else has been there too and how we deal with our waste is of prime concern. Many folks don’t have a clue when it comes to dealing with the most basic of human functions in the backcountry, away from the friendly confines of their personal, porcelain throne! While difficult and uncomfortable for many to discuss, the subject of bowels is one that is common to us all. Please take the time to learn these Gentle Use Techniques to properly dispose of your waste and toilet items. They are easy to master and will help to make you a better backcountry visitor. Everyone will appreciate the proper disposal of human waste as we enjoy our time in the backcountry. Whether you use the term Gentle Use, Tread Lightly, Minimum Impact, or Leave No Trace, the principles are all the same.
It is a simple fact that humans regularly consume both food and water and the end product is the production of urine and feces . Urine attracts wildlife. Animals may defoliate plants because of salt in urine. Therefore, urinating on non-vegetated soils away from any water source is a simple solution. Solid waste is a bit different. The problem is that fecal waste is the medium for disease. Some of the most common means of transmission are direct contact with feces, contact with a contaminated insect, or ingestion of contaminated water. Improper disposal of human waste can produce significant health hazards. The most common problem being a severe diarrhea with dehydration. This can be very dangerous to you and others.
Proper disposal should ultimately accomplish the following objectives:
Avoid pollution of the water source
Avoid negative response of others finding it
Minimize the possibility of spreading disease
Maximize the rate of feces decomposition

No means of human waste disposal is without problems. No single recommendation is correct for every situation. Use toilets where they have been provided. If these are not available, then you must consider all factors and use other methods: catholes, latrine, or pack it out. In popular areas one method to consider is the use of catholes. Decomposition is slow, but the prime objective is to decrease contact with others. The main idea behind the use of catholes is to disperse the waste, not concentrate it. Always choose a site out of the way, where others are unlikely to walk, and more than 200 feet from any water source, trails and camps. Dig your hole six to eight inches deep. It should have at least two inches of topsoil. Camouflage the surface when you are finished. Latrines are another suitable option of human waste disposal. They may be necessary when disposal sites are limited. They are appropriate for large groups in popular areas during long stays. This is especially true if you have inexperienced campers or young children. If you dig a latrine, make it wider than it is deep, but a minimum of twelve inches deep. After each use cover the feces with soil and compress with shovel to help with decomposition. When the waste is four inches from the surface, fill it in. For group use during an extended stay, modification of the latrine is advisable. Dig a shallow trench or a series of catholes. The advantages are an appropriate site and the feces are not concentrated in one hole. This should only be used in an area which is non-vegetated or has exposed mineral soil.
Now for the toilet paper (T.P.) topic. Toilet paper that is discarded or uncovered can linger. This is disgusting to others and a health hazard. When you use T.P. try to get by with the smallest amount possible. Please consider non-perfumed and non-ink printed products. The best option is to put it in a plastic zip-lock bag and pack it out. One alternative is to burn it later in a hot fire. (A hot fire does sterilize and incinerate). At the bare minimum, bury it deep in the cathole with the feces. Remember in a dry or cold environment the paper lasts a long time. At some point you may run out of
that great modern invention! At that time you may have to consider another source such as leaves, grass, rocks, pine cones, sticks or snow. Feminine hygiene articles are another story. The best solution is to double or triple bag them and carry them out with your trash. You may pack them with crushed aspirin, used tea bag, baking soda to reduce odor. Never bury them in latrines
or catholes as animals will dig them up. They are difficult to burn and you need a really hot campfire for complete combustion. Ladies —your cycle may begin one week earlier due to change in altitude, increase in exercise or change in daily routine. Please go prepared! Extra precautions are needed in bear country. Sometimes it is uncomfortable for people to talk about these subject so we hope this information has been of help and that you will take the time to consider how you have managed your waste in the past and how you will in the future.
Please Be A Gentle User
The content of this written material has been officially approved for distribution by
Backcountry Horsemen of California P.O. Box 40007 Bakersfield, CA 93384-0007 www.bchcalifornia.org 12/08

PLANNING ♦ Research the area using maps, guidebooks, and various online and computer-
based resources, to become familiar with trails, streams, mountains, roads, and other features.
♦ Plan your route using US Geological Survey (USGS) topographical maps — especially if you are traveling long distances through wilderness - bring the map with you.
♦ Just prior to leaving obtain current locations for livestock water and safe/unsafe water crossings, trails to avoid, and any potential new hazards. Know the hazards in the area you are going into: animals that could be dangerous, edible and poisonous plants, etc.
♦ Get a current weather forecast for the area, and wear appropriate clothes and equipment. Bring additional clothing layers for unexpected weather.
♦ Leave your trip information, including the time you’re planning to return, with a responsible person and/or with the local Ranger Station. Don’t change the route without notifying your contacts.
♦ It’s wise to travel with a friend and sign the register at trailheads. ♦ BE PREPARED! ♦ Communications can save a life. Carry a list of emergency and contact phone
numbers for that area. Consider these options: ◊ Bring a cell phone, you might be able to get a signal. Text messages and
GPS phone signals can be picked up by satellite. ◊ Consider a satellite phone in the backcountry, where there is often no cell
service. ◊ Stay in touch with others in your group using FRS or GMRS 2-way radios. ◊ If venturing into a remote area, consider renting a PLB (Personal Locator
Beacon), which allows you to activate a satellite-based distress signal to send help.
♦ Accidents, injury, and illness may need to be addressed. Consider, at minimum: ◊ First Aid or Wilderness First Aid training. ◊ Basic survival training, such as building a shelter.
♦ Are the CHILDREN in the group prepared? ◊ Provide children with camp and trail safety instructions, including what to
do if lost. (Lost is an exception where they ARE allowed to talk with a stranger.) Provide appropriate gear, with training on use.
◊ Consider participating in the Hug-A-Tree program, providing training for children lost in the wilderness. www.hugatree.com
BASIC SURVIVAL! Consider carrying basic survival items on you, not your horse. Lightweight essential items can fit in a small waist pack, be attached to your belt, etc. Don’t leave camp without them, even for a short walk! Child waist pack (minimum):
1. Water 2. Clean, bright color bandana (dust blocker, scarf, bandage or
sling, washing, signal flag, etc.) 3. Pack of gum, hard candy, energy bar (replenish as needed) 4. 2 trash bags (use as emergency rain gear or groundsheet) 5. A plastic whistle (three regular repeated tones means help) 6. Pocket size emergency blanket (great for shelter, warmth or
light-reflecting signal) 7. Small palm size flash light (with fresh batteries) 8. Chemical light stick(s) 9. 2-way radio (with fresh batteries)
Adult waist pack (add to the above): 1. Compass (and map of the area) 2. Knife 3. Condoms (un-lubricated) for water storage 4. Water proof matches, flint and steel or a metal match 5. Water purification tablets or water bottle with filtration 6. Long strip of folded aluminum foil for cooking 7. Fishing kit (hooks, sinkers, and some line) 8. Small back-packing first aid kit (with instructions) 9. Cell phone and other communications devices (turn on if lost) 10. Spare fresh batteries for GPS, flashlight, cell phone, radio, etc.
LOST and SEPARATED FROM YOUR HORSE? ♦ STOP! (Stop, Think, Observe, Plan.) ♦ If injured, apply first aid. Clean off blood as much as
possible. Bury anything with blood on it, away from your location.
♦ Don’t go looking for your horse. STAY where you are! ♦ Take inventory of what you have for food, water, etc. ♦ Try to get your bearings using map and compass, GPS. ♦ Try to backtrack yourself to a familiar location. STOP if
you lose your back trail or not sure of your route. ♦ Your biggest threats are probably dehydration and
hypothermia. Find water (be prepared to purify/filter), and stay warm and dry.
♦ Water is a priority— you can go a longer time without food. Do not eat anything you are unsure of. Wild berries, fruit, mushrooms, etc., may make you sick.
♦ Try to stay as clean as you can. (Dirty clothing loses insulating properties. Good sanitary conditions will assist your body in fighting infections from cuts.)
♦ Help rescuers find you! ◊ Stay put after you find water and shelter. If you
keep moving, you will be harder to find. ◊ Gather wood and start a small fire (use extreme
caution in the dry season.) ◊ Be visible. Find an open space, make a sign of
wood ‘SOS’ or ‘HELP’. Spread out the reflective emergency blanket and secure the corners.
◊ If circumstances force you to move, leave obvious CLUES such as frequent clear footprints, directional arrow made of rock or sticks, a message with name, date and time, break some branches along the trail (particularly at an intersection), etc.
◊ Stay on the trail, since searchers will usually search trails first, or others may be traveling that trail who can provide help.
◊ Make noise—use your whistle (3 long blows) —to help rescuers locate you. Listen for voices calling, helicopters, vehicles, etc.
LOST and YOUR HORSE IS STILL WITH YOU? (Do all of the above, plus): ♦ Stay calm. Your panic can panic your horse. ♦ Injured horse? Apply equine first aid. ♦ If you turn your horse and start on your back trail, the
horse may instinctively return to the camp or trailer area. Mark the trail as you go. While riding, look ahead 20-40 feet to try and spot your own back trail. If the route doesn’t look familiar soon, STOP.
♦ Secure your horse. ♦ Find food and water for your horse, after you have
taken care of yourself. ♦ Pay attention to your horse. His behavior may tell you
if someone is nearby before you hear or see them, or locate a water source.
REDUCE THE POTENTIAL FOR BECOMING LOST! ♦ Know how to use the topographical map and compass to
locate yourself, and to navigate. ♦ Carry a GPS and know how to use it. ♦ Orient yourself to landmarks when you start your trip,
and continue to orient yourself throughout the trip. Turn often to look at your back trail so a return on that trail will look familiar, particularly at trail junctions.
♦ Learn some tracking basics so you can follow your own shoe prints or horse’s hoof prints on your own back trail.
♦ Stay on the trail.
Backcountry Horsemen of California
LOST RIDER PLAN “If you don't know how to get where you are going, or how to return from where you came; YOU ARE LOST“
“Being lost can be a state of mind; denial and panic are your enemies.”

♦ Stay calm, get organized, and HAVE A PLAN before you act! Someone needs to take charge. Perhaps the Trail Boss? Does anyone there have training as a Search Manager? Your objective is to help, not inadvertently cause problems. Do NOT simply dash off to start searching. Assess the situation. Plan!
♦ Attempt to Communicate! Can you reach that overdue person by cell phone, 2-way radio, etc., to determine status? If you yell, blow a whistle, and try to draw attention to your location, is there a response? If at a vehicle, try honking the horn periodically to act as an audible guide back to that location.
♦ Assess the Situation! If communications efforts fail, information must be gathered and assessed before any search is planned or performed by the riding group or by Search and Rescue (SAR) professionals. ◊ Who, What, When, Where? When and where was the person last seen, and what was the direction of
travel? What was the destination, by what route? When was this person due back? How long would it take this person to ride … or hike if dismounted … to the most likely destination if there are problems? How prepared and experienced is this person, and what survival gear is carried? Are horse and rider experienced in this terrain? What else might be pertinent?
◊ Is there anything to suggest a life threatening situation to create a high level of urgency? Are there any known major health issues that require medicine … and where is the medicine? Are there potential problems based on the current weather forecast, or new hazards in the vicinity?
◊ Document known information for easy reference when reporting to local authorities, including name, age, description, and any available emergency contact information. It may also be advantageous to describe the missing rider’s vehicle and location, or describe the horse and other livestock.
♦ Protect Clues! Trained searchers look for CLUES. Stay away from all areas where experienced trackers might find that person’s shoe print, the horse’s hoof print, etc. If a search dog is available, is there an item (clothing, sleeping bag, etc.) that would carry that specific person’s scent? DO NOT TOUCH, simply know where it is for SAR personnel to collect.
♦ Report the Incident! This is a great time to have emergency communication capabilities, like a satellite phone. If necessary, travel to call the county Sheriff’s department and report the overdue person. (Better to alert the authorities now, and cancel response later if the person is found safe!) Provide concise information. Use USGS map location names and latitude-longitude when available. Provide your call-back number. Be prepared to meet responding agency or SAR personnel at a designated location.
A Rider is Overdue?
STOP! THINK! Be part of the SOLUTION, not part of the Problem!
The content of this material has been officially approved by the Backcountry Horsemen of California P.O. Box 40007 Bakersfield, CA 93384-0007 www.bchcalifornia.org 12/08
♦ Assess available resources. How many people are there, available to search, appropriately equipped and physically capable? Does anyone there have SAR training, or substantial tracking experience, or training in protecting CLUES? In case of injury, what medical supplies are available? What is the highest level of medical training present? Is anyone there trained to perform mounted rescue or evacuation using a saddled horse or mule? What survival supplies, food, water, etc., are available if people from the group go search? What methods of communication are available within the group, and with outside resources? What other issues should be addressed?
♦ Would it make more sense to wait for trained searchers, or quickly perform your own untrained search? Reach logical, safe, and common sense decisions regarding performing any initial search. Consider the known degree of urgency (injury not assumed), capabilities and preparedness of the overdue person, available resources, safety issues for searchers, weather, time estimated to follow the most likely trail to the known destination, etc. If you don’t have a known destination, or if a loose horse returned, do you have at least one experienced tracker available to track or back track the horse?
♦ PLAN the search based on available resources. If circumstances appear to require an immediate prelimi-nary search, key locations to quickly check are the known destination using the most obvious route (stay on the trail!), and to monitor the most likely destinations in case the loose horse and/or rider go there. ◊ Can you safely send a team of people out (minimum 2), or should the search wait until daylight? Should
the searchers go on foot, by vehicle, or riding? Do you have riders and livestock experienced traveling in that terrain after dark, or in inclement weather, with appropriate gear and equipment to also perform a search? What extra gear or supplies should you send with them? Should you send along an extra saddled mount? A pack animal? Remember the more new hoof prints there are on that trail, the harder it will be to track the overdue rider later!
◊ Prioritize search missions. Everyone deployed—even to monitor elsewhere—is considered a searcher. Are all aware of the critical importance of spotting and protecting possible CLUES found on the trail and at monitoring locations? (On the trail, flag and protect any found clue, note the latitude and longitude or triangulate an approximate location to report to SAR management.)
◊ Coordinate communications and rendezvous plans before deployment. Keep a record of what searchers are assigned where, and other pertinent information to share with SAR management. Leave at least 2 people (buddy system) at the initial rendezvous point, or an obvious note for the overdue person to stay there until you return. Can you safely leave a method of communication and some basic supplies?
Searchers look for CLUES! Hoof prints, boot prints, small or large items that may/may not belong to
the overdue person, etc. A trained professional can see what
the untrained eye won’t see. Don’t trample those clues!
NEVER put others in jeopardy! Search team of up to 4 people. For
safety, all searchers must be appropriately skilled, equipped, and experienced in that terrain.
You don’t want any missing searchers!
When searching, be alert for CLUES. Continue to try to contact that person using communications devices,
shouting his/her name, blowing a whistle, etc. Make NOISE, then
LISTEN and LOOK!
To Search, or Not to Search? Every situation is different!
A critical concern is the potential destruction of CLUES. If valuable clues are destroyed by untrained searchers, this can seriously handicap the SAR professionals later. If the decision is to search anyway,
understanding the problems this action is likely to create, minimize the damage by minimizing the number of untrained searchers involved.
Limit to people with some tracking experience. Do NOT allow uncontrolled or mass searching!
LOST PERSON or LOST RIDER? ♦ Did the horse come back
without the rider? ◊ If so, the rider may be
injured. ◊ Definitely he/she is on foot. ◊ Any CLUES from the horse’s
direction of travel, or condi-tion of the horse or tack?
◊ Where is the closest “help” destination for the overdue rider?
♦ Are horse and rider both missing? ◊ The horse might still bring the
lost rider back to … where? ◊ The rider, horse, or both
could be injured. ◊ The horse may have a
problem resulting in the rider hiking to … where?
◊ Horse and rider may be separated.
◊ The rider may be looking for his/her horse.
◊ A loose horse may return to … where?
The horse is a search partner. The horse is indicating someone or something is straight ahead.
Pay attention!
Does SAR interest you? Ask your Sheriff’s department about joining local volunteer Mounted SAR, or assisting SAR as Packers.

BACKCOUNTRY HORSEMEN OF CALIFORNIA
ARE YOU A Mountain Lion LUNCH?
A COMMON SENSE GUIDE TO UNDERSTANDING MOUNTAIN LIONS Pumas are like a light breeze: When one is present, you know it;
You can feel it, but you don’t see it. John Seidensticker, 1991
The mountain lion, also known as puma, panther or cougar, is the largest carnivore (meat eater) of California. The
generally secretive and solitary nature of lions makes it possible for humans to live in mountain lion country without
ever seeing a mountain lion. The chance of being attacked is quite low compared to many other natural hazards. Attacks
to humans are rare. A dozen people have been killed in the U.S. since 1890—though over half have occurred in the last
fifteen years, indicating they are on the rise.
Generally, mountain lions are calm, quiet and elusive. They are usually found in areas that have adequate cover for
ambushing and plentiful prey. These conditions exist in mountain subdivisions, urban fringes and open spaces, from
deserts to coastal areas and to 10,000 foot elevations in the mountains. About half of California is prime mountain lion
country!
The coloration of these lions is usually a tawny-yellowish but may also be a gray-brown to red-brown with black tipped
ears and tail. The kittens, or cubs, are covered with blackish-brown spots and have dark rings around their tails. Adult
males may be more than eight feet long from nose to end of tail and an average weight between 130 and 150 pounds.
Adult females can be seven feet long and average between 65 and 90 pounds.
Think how quick, athletic and strong these animals are! They must be in excellent physical condition to survive. Lions
are very powerful and normally prey upon large animals, such as deer, bighorn sheep and elk. However, they will prey on
smaller animals as well, such as coyotes, skunks, raccoons and opossum. Domestic animals are also acceptable to their
pallet, such as sheep, goats, cattle, horses, llamas, dogs, cats, ducks, and chickens. Mountain lions have excellent night
vision and depth perception, prefer to stalk and ambush their prey, often from behind. The usual attack is with a power-
ful bite below the base of the skull, breaking the neck, or by suffocation. The carcass is often covered with dirt, leaves or
snow and the lion comes back to feed on it over a course of a few days.
A lion’s home range will often span over 100 square miles with many adults occupying the same area. Lion populations
appear to be regulated not by social interactions but by the density of their principal prey. Competition for habitat is
intense, especially in the western Sierra-Nevada where as many as 10 adult lions per 100 square miles has been recorded.
The lion population has grown from an estimate of 600 in 1920 to a better field study of 2,000 in 1970. The 1990’s
show a population estimate ranging from 4,000 to 6,000.
Despite differences in opinions about mountain lions there is a common desire for proper scientific management of this
magnificent animal. We must consider the regional diversity of the animals habitat, prey availability and human popula-
tions. Conflicts between mountain lions and humans vary regionally for different reasons. Minimizing your risk of
becoming a mountain lion lunch is the main objective.
The content of this written material has been officially approved for distribution by Backcountry Horsemen of California P.O. Box 40007 Bakersfield, CA 93384-0007 www.bchcalifornia.org 12/08
The following are some helpful hints to remember while visiting the forests and parks or maybe your own backyard.
You Must Be Alert Remember Wild Animals Can Be Dangerous Each Situation is Different Hiking Alone Can Be Dangerous. Statistics show that nearly all recorded attacks in California involved lone trail runners and children. Keep Children Close To You. Mountain lions seem especially drawn to children. Keep children within your sight at all times. Avoid Confrontations. Most lions will try to avoid you approaching them. Give them a way to escape. Never corner a wild animal. If You Smell A Dead Carcass, be extremely alert and get out of the area. Animals will protect their food supply. Please Do Not Crouch or Bend Over. A person squatting or bending over looks a lot like a four-legged prey animal. If you must bend over, get quickly back to an up-right position. Please Do Not Run. Running stimulates the lion’s instinct to chase. Stand still and face the animal. Maintain constant eye contact. If you have children with you, pick them up if possible so they do not panic and run. Try To Look Big. Raise your arms and speak firmly in a loud voice. Throw rocks or branches without crouching or turning your back. Fight Back If Attacked. Protect your head and neck area. Remain standing and face the animal.
We hope this information gives you a better understanding of how
the California Mountain Lion thinks and appreciate the animal’s abilities.
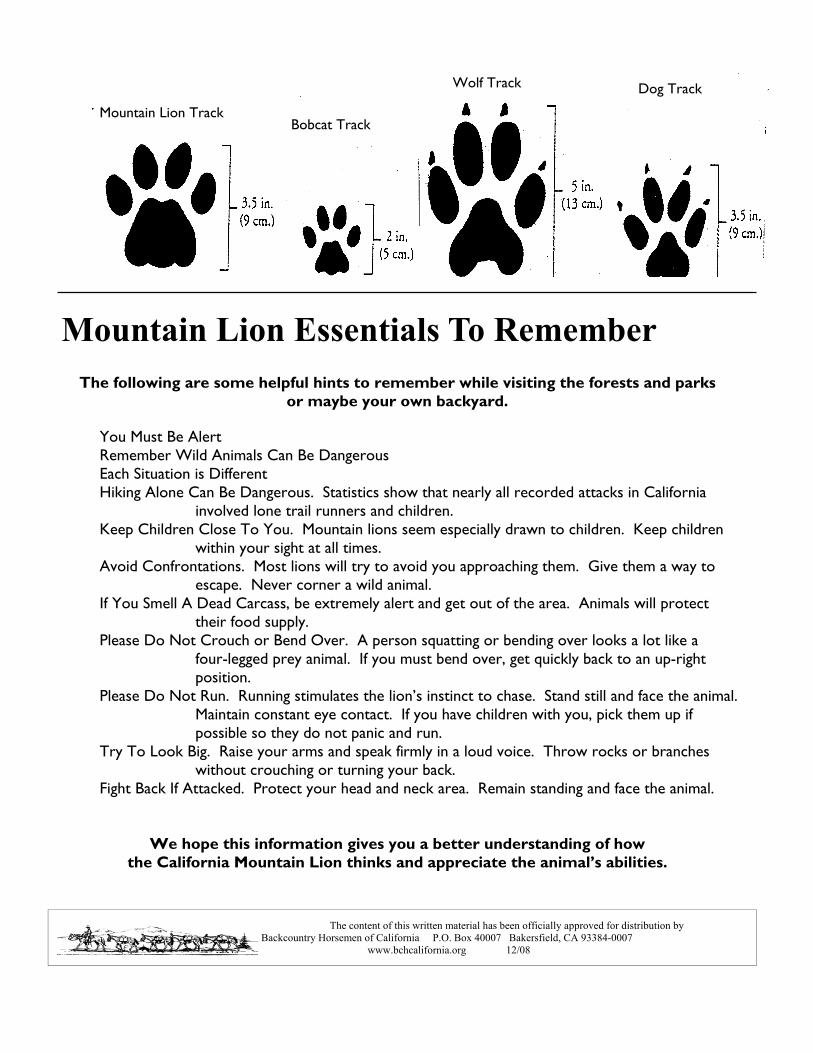
Mountain Lion Essentials To Remember
Mountain Lion Track Bobcat Track
Wolf Track Dog Track
BACKCOUNTRY HORSEMEN OF CALIFORNIA
A COMMON SENSE GUIDE FOR A
Safe And Enjoyable Trail Ride SAFETY is PRIORITY
♦ Crossing water, the first horses are allowed to drink, then move up the trail, stop! Allow more horses to drink. The group does not leave until all have watered.
♦ In difficult or steep terrain, allow more space and keep moving. If you need to stop for any reason, wait until the trail leader finds a suitable place where all can safely stop.
♦ Be courteous and friendly to other trail users. While passing - safety for all parties is the priority. Greet other users to initiate a conversation so the animals can identify a non-threatening situation. If possible, a hiker should step to the downhill side. This provides a safer passing for both hiker and stock.
♦ Stay on the trail; obey agency rules; respect private property.
♦ When riding along a road, ride with the traffic. When crossing roads, cross abreast rather than single file, post riders in front and post riders behind the group to alert traffic.
♦ Riding side by side is permissible when passing in the same or opposite direction, if the trail is wide enough, and all trail rules are observed.
♦ No smoking allowed on trails.
TIPS FOR
BREAKS OR LUNCH STOPS ♦ Water your stock during breaks or stops. Be cautious as to
the amount of water given because some animals that are overheated can ty-up. Animals, while working, need as much as they will drink.
♦ Smoking is allowed during breaks in a safe area.
♦ Tie your horse safely. Loosen the cinch slightly during a long break. Do a safety check before remounting.
♦ When tying your horse, be sure there is ample room for other users to pass safely by your stock. Be sure you are not blocking the trail.
♦ If there is no garbage can, pack your trash out.
♦ Alcohol use can make riding dangerous, use discretion.
♦ The drag rider needs to remove trail flagging at the end of ride.
STAGING AREA ♦ Be on time and park considerately. Latecomers hold
up everyone else. ♦ Tack up, bring halter with lead rope, water, lunch,
jacket, or whatever else you need. ♦ Clean up manure, hay or litter in staging or
camping area. ♦ Use ribbons to denote special situations: red
ribbon if your stock tends to kick, green ribbon to signify a novice stock or rider, and a blue ribbon should be used to denote a stallion.
♦ Use of helmets is a personal choice of the rider.
WHILE ON A TRAIL
♦ Trail boss is the boss. If you are riding in any way which the trail boss feels poses a danger to other riders, you will be asked to modify your behavior or leave the ride.
♦ Stay behind the trail leader (usually but not always the trail boss) and in front of the designated drag rider. If you are having problems call out for a stop.
♦ The use of a helmet is a personal safety choice of the rider.
♦ When mounting to ride, keep your horse still until everyone is mounted.
♦ You must have permission from the trail boss before bringing a dog or a stallion.
♦ Most Group rides are walk only, an exception would be bees, etc… but as needed, rides will be divided into the ‘Slow Group’ which walks only and the ‘Fast Group’ which includes gaited and endurance type horses. Ride in the group that fits your horse’s type and conditioning.
♦ Please don't crowd the horse in front of you. Try to leave a horse length of open space between horses, even at stops. Be sure to ask riders in front and back of you about their animal’s comfort level.
♦ Call back trail obstacles and/or low branches to riders behind you.
♦ Leave gates as you find them. When a rider dismounts to open a gate, at least a portion of the other riders wait until he/she has remounted before leaving.
The content of this material has been approved by the Backcountry Horsemen of California P.O. Box 40007 Bakersfield, CA 93384-0007
www.bchcalifornia.org 12/08
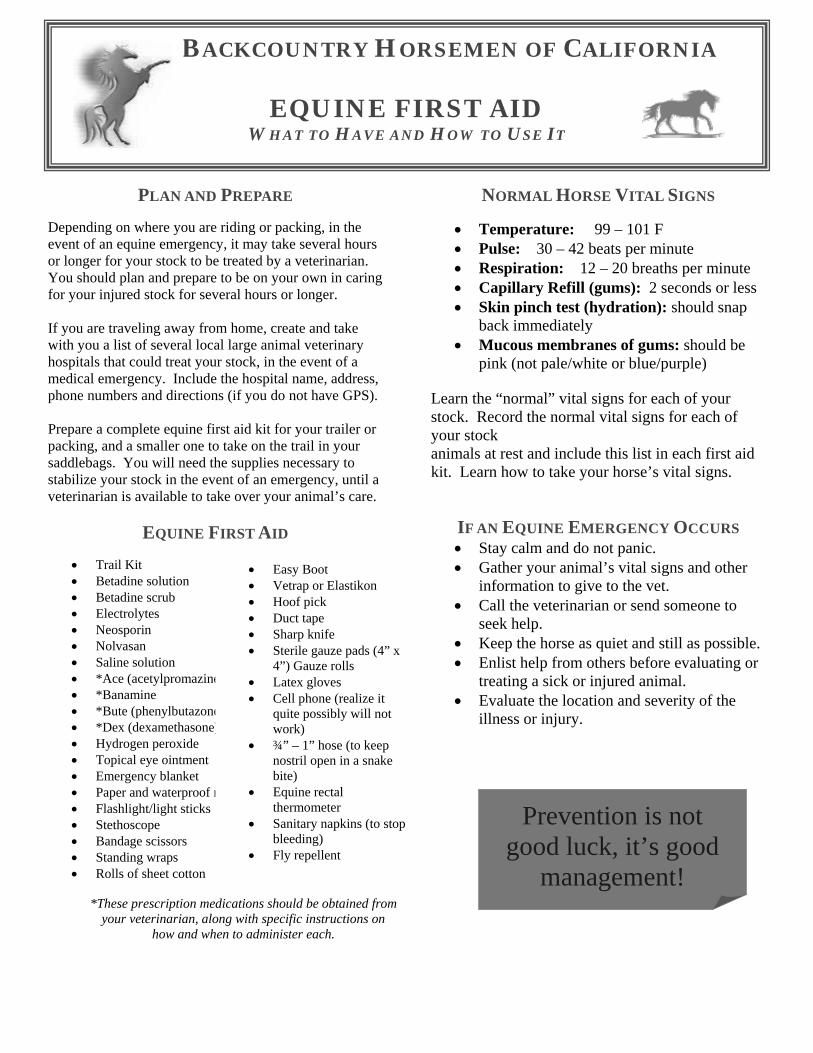
Prevention is not good luck, it’s good
management!
0BPLAN AND PREPARE
Depending on where you are riding or packing, in the event of an equine emergency, it may take several hours or longer for your stock to be treated by a veterinarian. You should plan and prepare to be on your own in caring for your injured stock for several hours or longer. If you are traveling away from home, create and take with you a list of several local large animal veterinary hospitals that could treat your stock, in the event of a medical emergency. Include the hospital name, address, phone numbers and directions (if you do not have GPS). Prepare a complete equine first aid kit for your trailer or packing, and a smaller one to take on the trail in your saddlebags. You will need the supplies necessary to stabilize your stock in the event of an emergency, until a veterinarian is available to take over your animal’s care.
1BEQUINE FIRST AID
• Trail Kit • Betadine solution • Betadine scrub • Electrolytes • Neosporin • Nolvasan • Saline solution • *Ace (acetylpromazine) • *Banamine • *Bute (phenylbutazone) • *Dex (dexamethasone) • Hydrogen peroxide • Topical eye ointment • Emergency blanket • Paper and waterproof marker to leave notes • Flashlight/light sticks • Stethoscope • Bandage scissors • Standing wraps • Rolls of sheet cotton
2BNORMAL HORSE VITAL SIGNS
• Temperature: 99 – 101 F • Pulse: 30 – 42 beats per minute • Respiration: 12 – 20 breaths per minute • Capillary Refill (gums): 2 seconds or less • Skin pinch test (hydration): should snap
back immediately • Mucous membranes of gums: should be
pink (not pale/white or blue/purple)
Learn the “normal” vital signs for each of your stock. Record the normal vital signs for each of your stock animals at rest and include this list in each first aid kit. Learn how to take your horse’s vital signs.
IF AN EQUINE EMERGENCY OCCURS • Stay calm and do not panic. • Gather your animal’s vital signs and other
information to give to the vet. • Call the veterinarian or send someone to
seek help. • Keep the horse as quiet and still as possible. • Enlist help from others before evaluating or
treating a sick or injured animal. • Evaluate the location and severity of the
illness or injury.
• Easy Boot• Vetrap or Elastikon • Hoof pick • Duct tape • Sharp knife • Sterile gauze pads (4” x
4”) Gauze rolls • Latex gloves • Cell phone (realize it
quite possibly will not work)
• ¾” – 1” hose (to keep nostril open in a snake bite)
• Equine rectal thermometer
• Sanitary napkins (to stop bleeding)
• Fly repellent
*These prescription medications should be obtained from your veterinarian, along with specific instructions on
how and when to administer each.
BACKCOUNTRY HORSEMEN OF CALIFORNIA
EQUINE FIRST AID WHAT TO HAVE AND HOW TO USE IT
COLIC Colic is a general term for pain in the gut of a horse or mule. Colic is the number one cause of death in the equine world. It has many causes and its symptoms range from mild to fatal. You cannot look at a horse at the beginning of a colic episode and accurately assess the severity of the situation. If you observe the symptoms of colic in your stock: 1. Note and write down the time initial symptoms were observed. 2. Contain the horse in an area free of manure for observation. 3. Remove all feed, but leave water available. 4. Take and record your horse’s vital signs. 5. Consult with a vet by telephone, if possible. 6. Be prepared to immediately transport your stock to veterinary care, if necessary.
TYING UP AZOTURIA Symptoms of “tying up” may include: sudden reluctance or inability to move; excessive sweating; resting heart rate over 60 BPM; resting respiration rate over 30 BPM; hard, tense hindquarter muscles; a painful and stiff gait and swishing tail. “Tying up” is exercise-related muscle degeneration due to the build-up of lactic acid in the blood, resulting in severe cramping and pain. If you notice these signs, stop and dismount immediately. To continue moving your horse may cause further muscle damage. Do not attempt to walk your horse out of it. Prescription medications may be administered under the orders of a vet. Horses that have a tied up once are prone to do so again. Consult with your vet about condition-ing and diet factors that may help to prevent tying up.
ELECTROLYTE IMBALANCE OR DEHYDRATION
Tying that occurs well into a ride may be associated with electrolyte imbalance or dehydration. This condition needs to be addressed differently than azoturia. Keep the horse moving to avoid cramping and attempt to correct any imbalances that have occurred.
CUTS, LACERATIONS, ABRASIONS, PUNCTURES, ROPE BURNS
First, evaluate the wound or injury carefully. If there is enough loss of blood, a horse may go into shock. Stopping profuse bleeding is extremely important. To stop profuse bleeding: 1. Start with an inch-thick wad of clean gauze, a whole role of gauze or a sanitary napkin and press that on the wound. 2. Wrap a roll of gauze to keep the initial wad in place. 3. Then add a layer of padding (sheet cotton, standing wrap or a towel). 4. Hold that in place with Vet Wrap or Elastikon. 5. If the wound bleeds through, DO NOT remove the bandage! Instead, add more pressure with another layer of gauze pads and another snug layer of Elastikon or Vet Wrap. If your stock suffered a puncture wound, flush the wound with dilute Betadine solution and consult with your vet as soon as possible. If an animal’s eye is injured, seek veterinary care immediately.
LAMENESS AND HOOF INJURIES
If your horse or mule suddenly becomes lame, you must assess the degree of lameness to see if the stock can continue on. Any equine that is non-weight bearing should be evaluated by a veterinarian as soon as possible. All other lamenesses should be evaluated to see if you can identify the source of the problem. Always carry an Easy Boot or
other shoe replacement, in the event of a shoe lost on the trail. First, carefully evaluate your animal’s lame leg, looking for heat, swelling and obvious wounds. 2. Check the foot for rocks or debris and remove any you find. 3. If you find a nail, call your vet before removing it. The vet may want to evaluate the injury before removing the nail. 4. If you find heat or swelling and you feel qualified to put on a correct wrap, apply a support bandage. You can cause more damage with an incorrectly applied wrap. 5. If your horse refuses to bear weight on the limb, keep him still and send someone for help. Continued exercise on a severe injury can cause permanent damage.
The content of this written material has been officially approved for distribution by Backcountry Horsemen of California P.O. Box 40007 Bakersfield, CA 93384-0007 3/2010
www.bchcalifornia.org

BACKCOUNTRY HORSEMEN OF CALIFORNIA
HELLOOO CAMP! A COMMON SENSE GUIDE FOR SELECTING
A CAMPSITE AND USE OF FIRE
EXISTING CAMPSITES Many times on public lands, campsites are already established. These sites have been used traditionally many times over the years and should be utilized whenever available. All campsites should be 100 feet from water. Of course, before deciding whether or not to use a particular campsite, you should consider several things — how much use is the area already receiving? What kind of impact will your group have on the area? How fragile is the soil and surrounding vegetation? You also need to consider the impact your livestock will have on the availabil-ity of winter feed for local wildlife. Choose an area that is large enough to comfortably accommodate the number of animals in your party without compromising the resources. In order to recover from grazing pressures, meadows should be left in the best possible condition. The rule of thumb is, when plant height has been removed by 50 percent, it’s time to relocate. Processed and pelletized feed can be used not only to supplement feeding but also to decrease the impact on grazing. Animals should become accustomed to pelletized feed a few days before going into the backcountry, to minimize the possibility of colic.
NEW CAMPSITES In camping in a pristine area, it is essential that you not only allow adequate time to select an appropriate camping spot, but also try to avoid previously used campsites in order for them to have sufficient time to recover. You should locate your camp at least 100 feet from water. Consider this a minimal guideline, but check for any local regulations in your planned destination for the best information. As with existing campsites, you should locate areas that will provide feed for your livestock and which is still well-suited for low impact camping. Look for a durable surface when selecting areas to place kitchen and tents. Such areas include exposed bedrock or dry grassy areas. In high desert locations, gravelly areas with minimum vegetation are ideal. When using a campsite in a pristine area, vary the routes you take to water or to use the bathroom in order to prevent formation of permanent trails. Be aware of any activity that might endanger or harm the existing natural features of the site, especially those that regenerate slowly, such as trees, mosses, or lichens. Impact on the area can many times be avoided if you limit your stay to only one night. Water for your livestock is another key factor in choosing a good campsite. The banks of small streams and vegetated lakeshores can be relatively fragile, so care should be taken in selecting stock watering areas preferably located at fords or even low gravel banks where damage will be minimal if any.
It’s been a long day and you’ve been in the saddle for most of it. Now it’s time to find a good campsite, take care of your animals, and make camp for the night.
What kind of place will suit your needs and the needs of your livestock?
WHAT MAKES A GOOD CAMPSITE ? When camping with livestock, one of your primary considerations in selecting a place to camp should naturally be the well-being of your animals. Is there adequate grazing, water, and possible shelter? Before leaving, it is a good idea to make inquiries as to the availability of feed, accessibility to water, and potential impact on the resources. You should also be aware in selecting an area where your impact will be minimal. All of these things require awareness on your part and prior planning before your trip.
Organization
BACKCOUNTRY HORSEMEN OF CALIFORNIA
Black Bear Sense A COMMON SENSE GUIDE TO UNDERSTANDING BEARS
A leaf fell in the woods. The deer heard it. The eagle saw it. And the bear smelled it.
You humans have me figured to be just like Yogi, BooBoo or your cuddly stuffed Teddy Bear. Please remember; I am a
wild animal. Statistically, you are quite safe from us bears. We do add a risk to you visiting the backcountry but you take a
much greater risk driving to the trailhead. Even if you should die in the wilderness, you are much more likely to fall off a
cliff, drown, suffer heart failure or succumb to hypothermia than you are to be attacked by one of us bears.
My eyesight is not perfect but my sense of smell and hearing are very keen. I can smell you humans coming for quite some
distance and I’ll usually be gone at the first whiff of human intrusion. There are some of us bears you have invited in for
milk and cookies. To some of my fellow bears, the smell of humans in the woods works like a dinner bell.
All of us bears remember where our meals come from. We aren’t dumb and our stomachs rule. We have a road map
sketched in our minds. All the best restaurants (campsites, berry patches, cars, oak groves, etc.) are located on this map
and we will visit them again in a couple of days.
We bears are intelligent and opportunistic critters and when we become accustomed to the idea that humans share our
space, we readily take advantage of everything that association has to offer — such as helping ourselves to your
delicious pork and beans, granola bars, bacon, toothpaste, soap. Some of us have even cultivated a taste for chocolate. We
will also eat chapstick and deodorant. With noses like ours, it is impossible to hide the fact that you are keeping all that
good stuff in your tent, your car, or your camper! Our noses lead us to the food and our incredible strength gets us past
almost any obstacle. We are able to open the side of your trailer as though we had can openers for claws. We will open
cans of spaghetti sauce and ravioli. The fact is, when we bears are offered the choice, we will almost always opt for the
easiest meal at hand; we have discovered that beef stew with milk and cookies tastes better than grubs!
If we gain access to your food, we become habituated. That means we become dependent on human food sources and are
less afraid of humans. Therefore, it is critical that we never gain access to human food. You humans need to mind your
manners while you are visiting the forests and parks. Take time to store your food properly at the campground and in the
backcountry. It is your moral and legal responsibility. Proper food storage makes the difference between a wild bear and
a dead bear because problem bears are often destroyed. The following suggestions may make the
difference of having a good time during your visit or going home angry and upset. Please help us both stay alive.
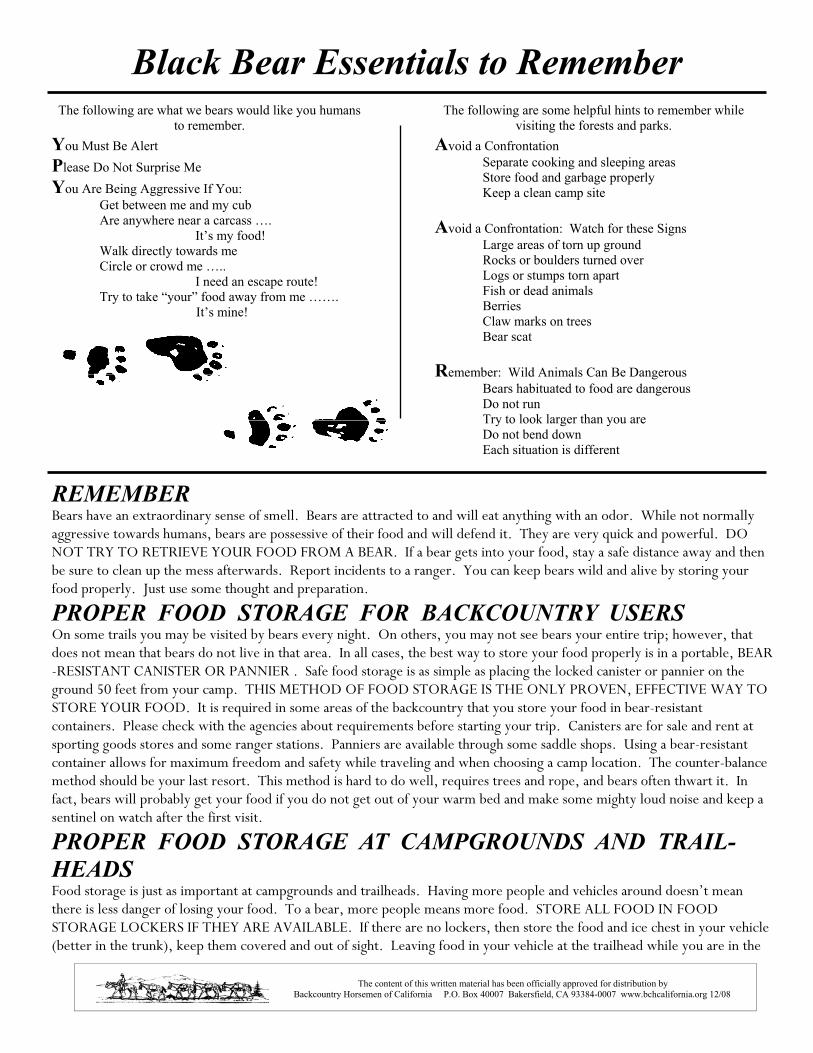
Black Bear Essentials to Remember The following are what we bears would like you humans
to remember. You Must Be Alert Please Do Not Surprise Me You Are Being Aggressive If You: Get between me and my cub Are anywhere near a carcass …. It’s my food! Walk directly towards me Circle or crowd me ….. I need an escape route! Try to take “your” food away from me ……. It’s mine!
The following are some helpful hints to remember while visiting the forests and parks.
Avoid a Confrontation Separate cooking and sleeping areas Store food and garbage properly Keep a clean camp site Avoid a Confrontation: Watch for these Signs Large areas of torn up ground Rocks or boulders turned over Logs or stumps torn apart Fish or dead animals Berries Claw marks on trees Bear scat Remember: Wild Animals Can Be Dangerous Bears habituated to food are dangerous Do not run Try to look larger than you are Do not bend down Each situation is different
REMEMBER Bears have an extraordinary sense of smell. Bears are attracted to and will eat anything with an odor. While not normally aggressive towards humans, bears are possessive of their food and will defend it. They are very quick and powerful. DO NOT TRY TO RETRIEVE YOUR FOOD FROM A BEAR. If a bear gets into your food, stay a safe distance away and then be sure to clean up the mess afterwards. Report incidents to a ranger. You can keep bears wild and alive by storing your food properly. Just use some thought and preparation.
PROPER FOOD STORAGE FOR BACKCOUNTRY USERS On some trails you may be visited by bears every night. On others, you may not see bears your entire trip; however, that does not mean that bears do not live in that area. In all cases, the best way to store your food properly is in a portable, BEAR-RESISTANT CANISTER OR PANNIER . Safe food storage is as simple as placing the locked canister or pannier on the ground 50 feet from your camp. THIS METHOD OF FOOD STORAGE IS THE ONLY PROVEN, EFFECTIVE WAY TO STORE YOUR FOOD. It is required in some areas of the backcountry that you store your food in bear-resistant containers. Please check with the agencies about requirements before starting your trip. Canisters are for sale and rent at sporting goods stores and some ranger stations. Panniers are available through some saddle shops. Using a bear-resistant container allows for maximum freedom and safety while traveling and when choosing a camp location. The counter-balance method should be your last resort. This method is hard to do well, requires trees and rope, and bears often thwart it. In fact, bears will probably get your food if you do not get out of your warm bed and make some mighty loud noise and keep a sentinel on watch after the first visit.
PROPER FOOD STORAGE AT CAMPGROUNDS AND TRAIL-HEADS Food storage is just as important at campgrounds and trailheads. Having more people and vehicles around doesn’t mean there is less danger of losing your food. To a bear, more people means more food. STORE ALL FOOD IN FOOD STORAGE LOCKERS IF THEY ARE AVAILABLE. If there are no lockers, then store the food and ice chest in your vehicle (better in the trunk), keep them covered and out of sight. Leaving food in your vehicle at the trailhead while you are in the
The content of this written material has been officially approved for distribution by Backcountry Horsemen of California P.O. Box 40007 Bakersfield, CA 93384-0007 www.bchcalifornia.org 12/08
• Explain to hikers that it would be helpful to speak in a calm voice to the animals as they pass, thus assuring the stock that the colorful hiker is not a bear. Remind them not to touch the animals as they go by and to please wait a few seconds before starting along the trail.
• Leaving any equipment in the middle of the trail, near a water crossing or bridge is like leaving your suitcase in the middle of the highway. Your equipment may get run over.
• Dogs can be good companions where permitted on the trail. Dogs not familiar with livestock can be intimidated and scare the stock. Remember to keep dogs under
control at all times so they are not a threat to the safety of other visitors or to wildlife. • An “encounter “ session with local llamas and their handlers before you enter the backcountry might be worthwhile.
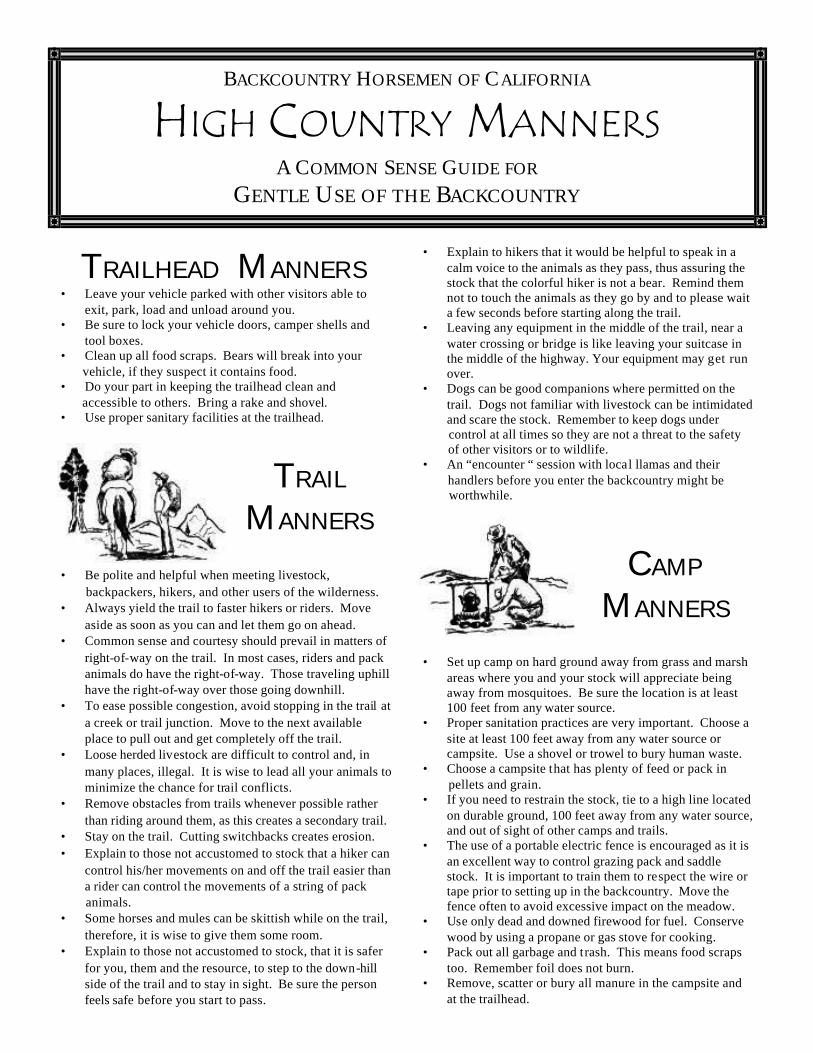
TRAIL
MANNERS
• Be polite and helpful when meeting livestock, backpackers, hikers, and other users of the wilderness. • Always yield the trail to faster hikers or riders. Move
aside as soon as you can and let them go on ahead. • Common sense and courtesy should prevail in matters of
right-of-way on the trail. In most cases, riders and pack animals do have the right-of-way. Those traveling uphill have the right-of-way over those going downhill.
• To ease possible congestion, avoid stopping in the trail at a creek or trail junction. Move to the next available place to pull out and get completely off the trail.
• Loose herded livestock are difficult to control and, in many places, illegal. It is wise to lead all your animals to minimize the chance for trail conflicts.
• Remove obstacles from trails whenever possible rather than riding around them, as this creates a secondary trail.
• Stay on the trail. Cutting switchbacks creates erosion. • Explain to those not accustomed to stock that a hiker can
control his/her movements on and off the trail easier than a rider can control the movements of a string of pack
animals. • Some horses and mules can be skittish while on the trail,
therefore, it is wise to give them some room. • Explain to those not accustomed to stock, that it is safer
for you, them and the resource, to step to the down-hill side of the trail and to stay in sight. Be sure the person feels safe before you start to pass.
TRAILHEAD MANNERS • Leave your vehicle parked with other visitors able to
exit, park, load and unload around you. • Be sure to lock your vehicle doors, camper shells and
tool boxes. • Clean up all food scraps. Bears will break into your vehicle, if they suspect it contains food. • Do your part in keeping the trailhead clean and accessible to others. Bring a rake and shovel. • Use proper sanitary facilities at the trailhead.
CAMP
MANNERS
• Set up camp on hard ground away from grass and marsh areas where you and your stock will appreciate being away from mosquitoes. Be sure the location is at least 100 feet from any water source.
• Proper sanitation practices are very important. Choose a site at least 100 feet away from any water source or campsite. Use a shovel or trowel to bury human waste.
• Choose a campsite that has plenty of feed or pack in pellets and grain. • If you need to restrain the stock, tie to a high line located
on durable ground, 100 feet away from any water source, and out of sight of other camps and trails.
• The use of a portable electric fence is encouraged as it is an excellent way to control grazing pack and saddle stock. It is important to train them to respect the wire or tape prior to setting up in the backcountry. Move the fence often to avoid excessive impact on the meadow.
• Use only dead and downed firewood for fuel. Conserve wood by using a propane or gas stove for cooking.
• Pack out all garbage and trash. This means food scraps too. Remember foil does not burn.
• Remove, scatter or bury all manure in the campsite and at the trailhead.
BACKCOUNTRY HORSEMEN OF CALIFORNIA
HIGH COUNTRY MANNERS A COMMON SENSE GUIDE FOR
GENTLE USE OF THE BACKCOUNTRY
PROPER PREPARATION One of the most important aspects to consider when planning any trip is proper planning and preparation. This is especially true of backcountry trips. Try to be prepared for any eventuality.
• Consider the goals and needs of the group: scenery, lakes, fishing, moving camp, ages and experiences, etc.
• Know where you are going. Ask those who have been there before. Know how long it will take you to get to your destination each day of your trip.
• Know what maps you will need, study them and know how to use them. Have a compass along.
• Find out if you need to have a wilderness and/or campfire permit. Ask if there are any restricted areas you will be going through.
• Find out if you stay overnight at the trailhead. Learn what facilities are available: corrals, water, one night stay limit, manure dumps, etc.
• Know how many people are in your group and what kind of appetites/restrictions they may have.
• Determine if there is enough feed, water and proper campsite for each day’s destination.
• Have first-aid kits for both people and animals, directions for use and a flashlight.
• Have at least one emergency light-weight meal along for the group.
• Be sure to have the appropriate clothing and equipment for the season.
• Have “strike anywhere matches” or a lighter in water-proof containers.
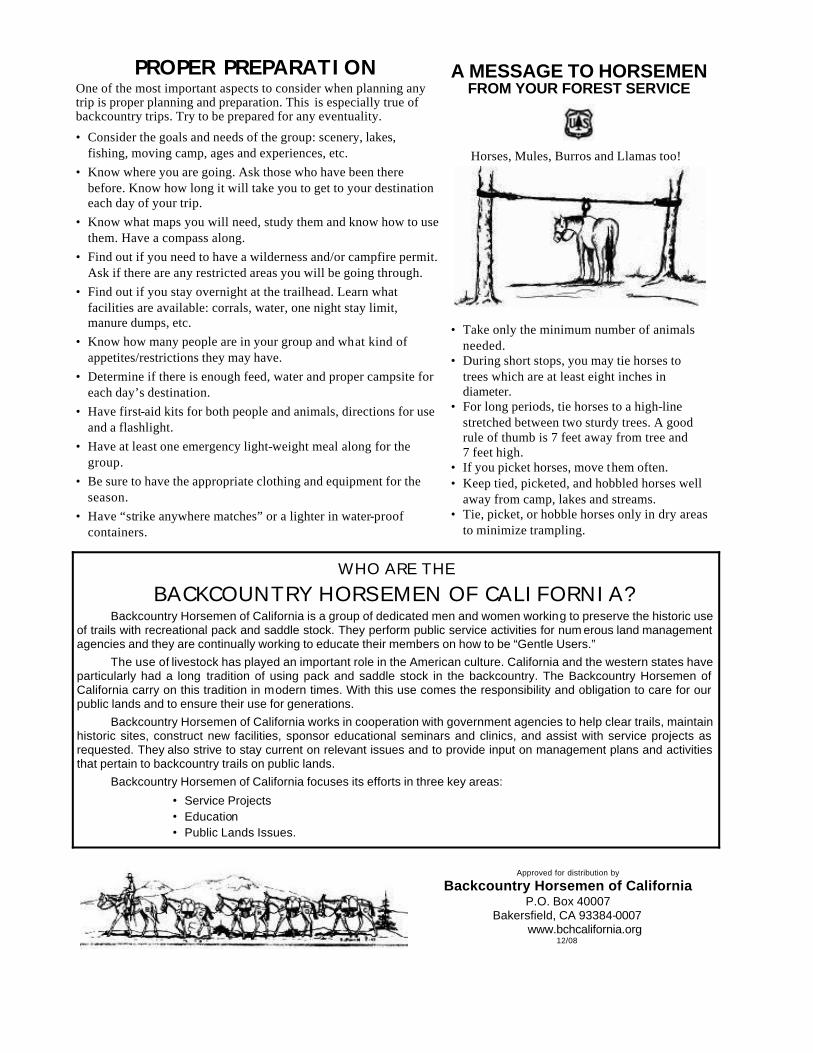
A MESSAGE TO HORSEMEN FROM YOUR FOREST SERVICE
Horses, Mules, Burros and Llamas too!
• Take only the minimum number of animals needed.
• During short stops, you may tie horses to trees which are at least eight inches in diameter.
• For long periods, tie horses to a high-line stretched between two sturdy trees. A good rule of thumb is 7 feet away from tree and 7 feet high.
• If you picket horses, move them often. • Keep tied, picketed, and hobbled horses well
away from camp, lakes and streams. • Tie, picket, or hobble horses only in dry areas
to minimize trampling.
WHO ARE THE BACKCOUNTRY HORSEMEN OF CALIFORNIA?
Backcountry Horsemen of California is a group of dedicated men and women working to preserve the historic use of trails with recreational pack and saddle stock. They perform public service activities for num erous land management agencies and they are continually working to educate their members on how to be “Gentle Users.”
The use of livestock has played an important role in the American culture. California and the western states have particularly had a long tradition of using pack and saddle stock in the backcountry. The Backcountry Horsemen of California carry on this tradition in modern times. With this use comes the responsibility and obligation to care for our public lands and to ensure their use for generations.
Backcountry Horsemen of California works in cooperation with government agencies to help clear trails, maintain historic sites, construct new facilities, sponsor educational seminars and clinics, and assist with service projects as requested. They also strive to stay current on relevant issues and to provide input on management plans and activities that pertain to backcountry trails on public lands.
Backcountry Horsemen of California focuses its efforts in three key areas:
• Service Projects
• Education
• Public Lands Issues.
Approved for distribution by
Backcountry Horsemen of California P.O. Box 40007
Bakersfield, CA 93384-0007 www.bchcalifornia.org
12/08
Step 3
Backcountry Horsemen
of California
Concerned Men and
Women Dedicated to
Gentle Use of California
Trails and Back Country
Redwood Unit: Po box 6023, Eureka, ca 95502
www.redwoodunit.com
Highlines
in the
Backcountry
Redwood
Unit
The Highline:
The highline rule of
sevens:
A. Tree Considerations:
B. Turf Considerations:
C. Easy to Tie, Adjust and Untie:
D. Animal Considerations:
E. Versatile Uses of Components:
1. Use tree saver straps.
2. Use on trees 8” diameter or larger.
3. Tie stock away from tree trunk to avoid root
damage.
1. Use on durable surfaces.
2. Rake area free of pine cones and debris
before stock use. Rake back into place
afterwards.
3. Move stock at first sign of over-use or
damage.
1. Basic Prussic loops.
2. Coupling loops with carabiners and pulleys:
mechanical advantage.
1. Secure system: All components are strong.
2. Easily adjust distance between animals after
the highline is tightened.
3. In an Emergency simply cut loops to free
animals.
1. Highline used as lash rope.
2. Loops can be used for rope extenders, etc.
3. Carabiners can be used to hang lanterns to
a dining fly, etc.
4. Safety and rescue applications. Use loops
on vertical rope for foot and hand holds.
Carabiner and Prussic loop Come-along.
5. Carabiners can be used for pack hitches.
1. The highline should be about seven feet high.
2. The animals should be at least seven feet
from any tree trunk.
3. The animals should be at least seven feet
apart.
4. The length of leadrope from highline to halter
should be about seventeen inches.
A versatile system that protects the
resources, your stock and your gear!
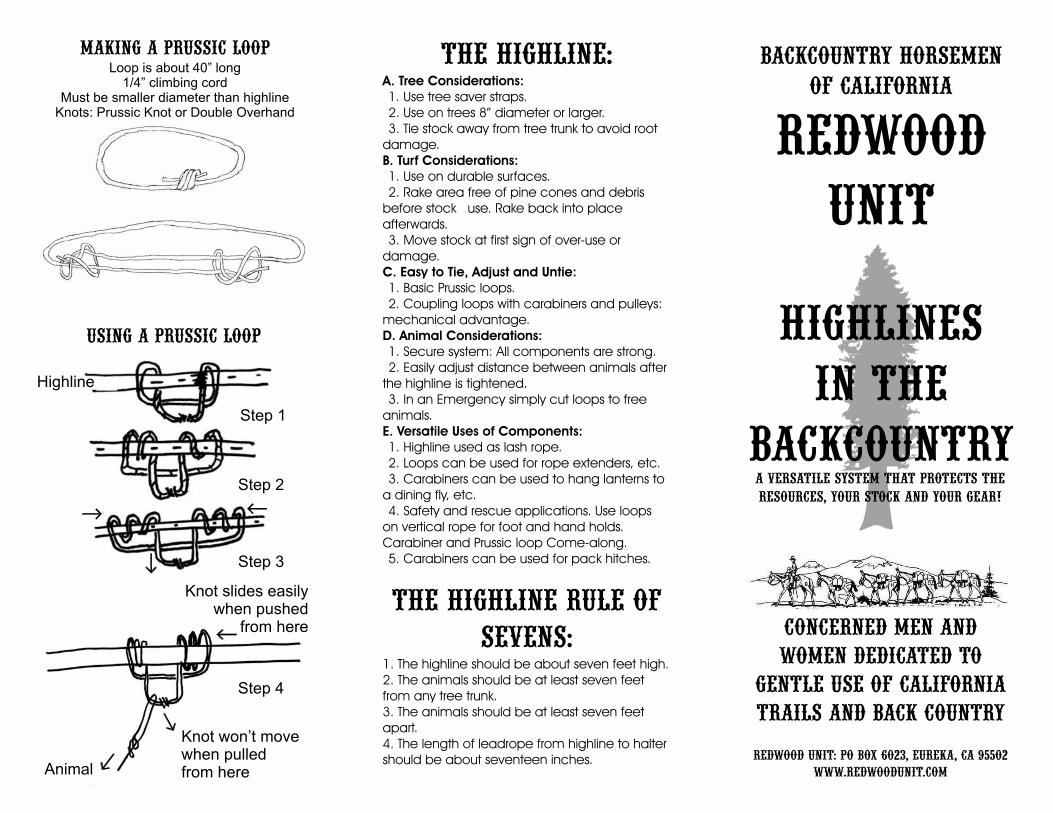
Using a Prussic Loop
Making a Prussic LoopLoop is about 40” long
1/4” climbing cordMust be smaller diameter than highline
Knots: Prussic Knot or Double Overhand
Knot slides easilywhen pushed
from here
Highline
Step 1
Step 2
Step 4
Animal
Knot won’t movewhen pulledfrom here
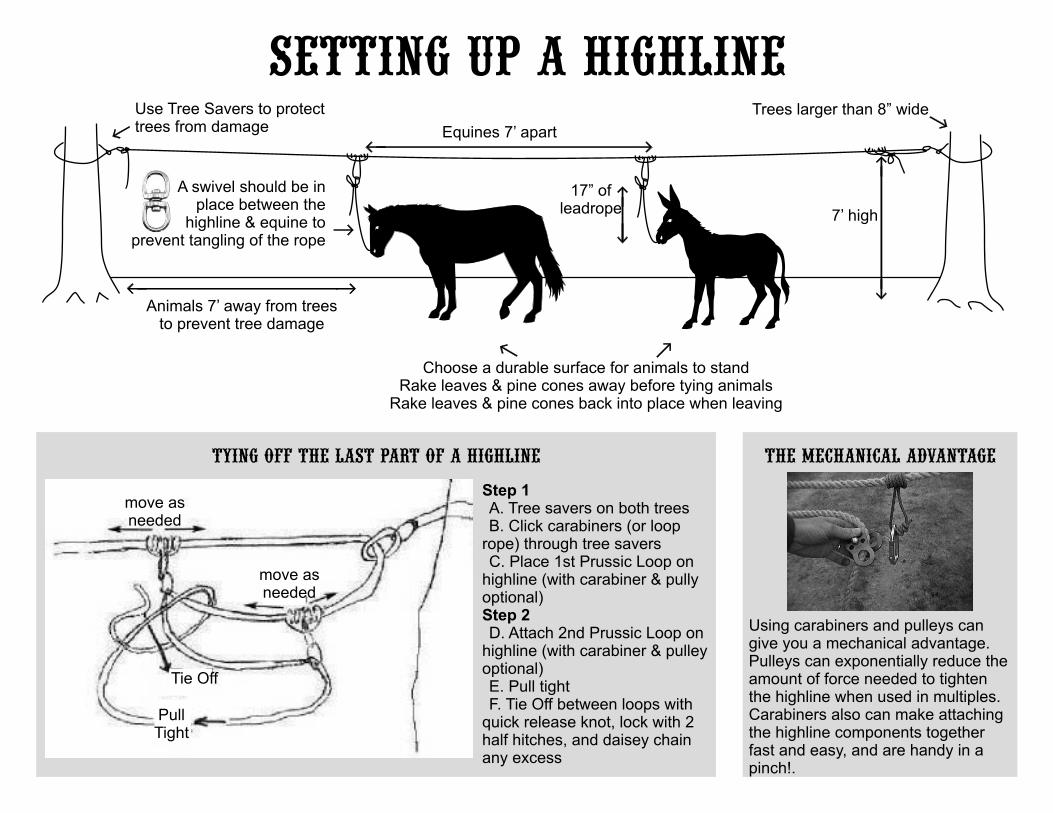
The mechanical Advantage
Using carabiners and pulleys cangive you a mechanical advantage.Pulleys can exponentially reduce theamount of force needed to tightenthe highline when used in multiples.Carabiners also can make attachingthe highline components togetherfast and easy, and are handy in apinch!.
Step 1
Step 2
A. Tree savers on both treesB. Click carabiners (or loop
rope) through tree saversC. Place 1st Prussic Loop on
highline (with carabiner & pullyoptional)
D. Attach 2nd Prussic Loop onhighline (with carabiner & pulleyoptional)E. Pull tightF. Tie Off between loops with
quick release knot, lock with 2half hitches, and daisey chainany excess
Tying off the last part of a highline
move asneeded
move asneeded
Tie Off
PullTight
Setting up a highline
7’ high
17” ofleadrope
A swivel should be inplace between the
highline & equine toprevent tangling of the rope
Animals 7’ away from treesto prevent tree damage
Choose a durable surface for animals to standRake leaves & pine cones away before tying animals
Rake leaves & pine cones back into place when leaving
Use Tree Savers to protecttrees from damage
Trees larger than 8” wide
Equines 7’ apart
Bees and wasps can be a serious nuisance problem especially in the late summer when the populations are high and the food source is low. In the balance of nature, however, these insects are beneficial in their activities, particularly as pollinators and predators of pest insects. Bees sustain themselves on nectar or pollen. Wasps develop by feeding primarily on insects, and in the late season are drawn to human food and garbage. There are honey bees, bumble bees, carpenter bees, mining bees, sweat bees, leaf cutter bees and parasite bees. There are hornets, paper wasps, yellow jackets “meat bees”, cicada killer wasps, spider wasps, and parasite wasps. The yellow jacket, commonly known as “meat bee” is attributed to most of the “bee stings” in mountainous areas. According to entomologist George Poinar, “one sting is enough to kill a hypersensitive human and 50 to 75 stings is enough to kill a normal human.” Weather is a factor with yellow jacket populations. A mild winter in the mountains allows more queens to survive and set up new nests in the spring. Fall is when the workers become more assertive in their quest to obtain protein to stock the queen’s winter nest. Anything that resembles meat or sugar is what the workers want and will be aggressive to take to the nest. They tend to defend their nests vigorously when disturbed. Their mandibles are how they bite and can take a piece of your flesh, but the venom is contained in the stinger and they can sting repeatedly. Their nests are similar to paper wasps, building paper cylinders from chewed organic materials and using sticky saliva to mold the cylinders together in organized cells. Nests can usually be found in the ground or at ground level in fallen logs, tree stumps, rodent tunnels and natural cavities along meadow edges, trails, etc.
PREVENTATIVE MEASURES: Forget the perfume and fragrances while in the wilderness. Wear light or natural colored clothing. Flowers are bright and you don’t want to attract bees. Insect repellent may help. IN CAMP: Keep your camp CLEAN. Minimize your trash/garbage and keep it sealed. Keep all food covered. Traps may help to lure meat bees away from the camp. Meat bees seem to like meat and fruits best. The use of spray is best done in the early morning or at night when it is cooler. Meat bees do not move as fast and your chances of getting stung are reduced. Those mosquito net tents are very nice and light weight to pack. ON THE TRAIL: Be alert! You must be aware of your surroundings and what is happening at all times. Be certain your group knows the plan of action should you encounter an aggressive hive. Watch for that little flying flicker of activity that is either coming or going from a hole in the ground, rotten wood or natural cavities that you and your animals must go past. Watch the animal in front of you. Does he drop his head to get something off his nose? Aggressively swish his tail and stomp his feet? You had better not miss these warning signs! If you believe you are among the stinging critters: give a loud holler “bees” and have everyone pick up a trot and move through the area. (A lope is a greater danger to everyone and harder to control the situation). Continue to trot until the entire group is at a safe distance from the nest. Check for any stings on both humans and animals. Take appropriate measures for first-aid treatment.
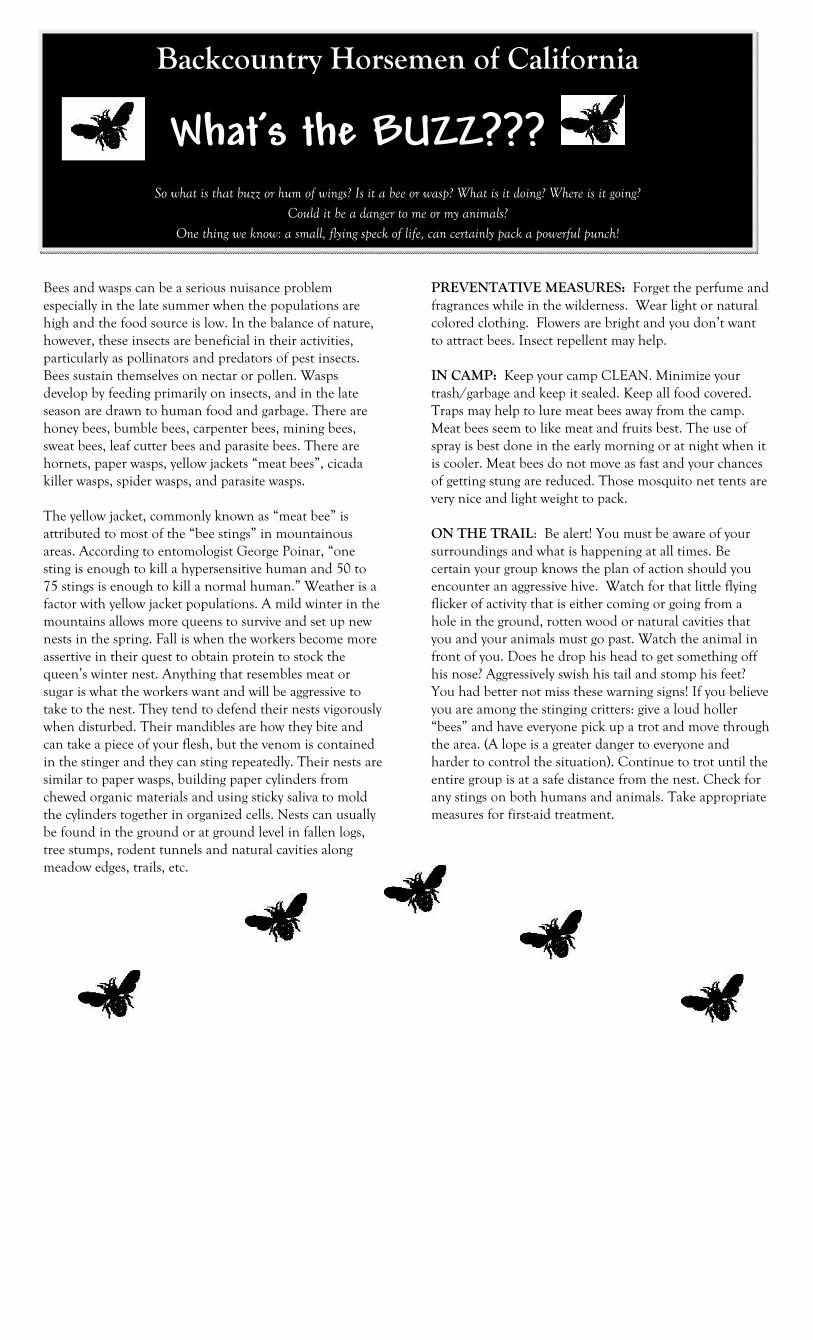
Backcountry Horsemen of California
What’s the BUZZ??? So what is that buzz or hum of wings? Is it a bee or wasp? What is it doing? Where is it going?
Could it be a danger to me or my animals? One thing we know: a small, flying speck of life, can certainly pack a powerful punch!

FIRST AID MEASURES Honey bees—but not other bees or wasps—generally leave the stinger embedded in the skin. Remove the stinger as soon as possible. Honey bee stingers are best removed by scraping (not crushing) the stinger with a finger nail or knife blade. Wasps do not leave a stinger but instead can bite several times. Localized swelling and pain are typical reactions. In most people, these symptoms will gradually disappear. Wash the area with soapy water or alcohol. Apply antiseptic to area to help prevent possible infection. Cool lotions or compresses can help relieve pain and swelling. Various materials applied to site may also reduce pain such as: crushed aspirin, a paste made of baking soda or meat tenderizer. If multiple stings are received oral antihistamines can be helpful. A small percentage of humans are hypersensitive to stings. A systemic allergic reaction can involve difficulty in breathing, dizziness, nausea, and development of hives. These symptoms may require immediate medical attention from a physician. Most hypersensitive individuals carry an injectable antidote and know how to administer the medicine. They should be evacuated immediately.
LURE TRAPS: Available at many retail stores. These are easy to use. Best used to catch the queen in late winter and spring. They may help reduce but not eliminate large populations. Change the bait every 2-4 weeks and more often when temperature is high.
WATER TRAPS: Generally homemade and consist of a 5 gallon bucket, string and protein bait such as turkey, ham or fish. (Do not use cat food). The bucket is filled with soapy water and the protein bait is suspended 1-2 inches above the water. (The use of a wide mesh screen over the bucket will prevent other animals from taking the bait). After the yellow jacket takes the protein, it flies down and becomes trapped in the water and drowns. Place the traps away from your eating area.
NEST SPRAYS: Aerosol formulations of insecticides which are labeled for wasps and hornets and must be used with extreme caution. Wasps will attack when sensing a poison applied to their nests. Always wear protective clothing. Underground nests can be quite a distance from the visual entrance and the spray may not reach far enough to hit the wasps. Partially intoxicated, agitated wasps can still be stinging you at some distance from the nest.
The content of this written material has been officially approved for distribution by Backcountry Horsemen of California P.O. Box 40007 Bakersfield, CA 93384-0007 www.bchcalifornia.org 2/11
Name Nest/Location Colony Permanence &
Size Food Habits Stinger
Honey Bee wax comb loc: large hollows, hives
perennial > 10,000 nectar, pollen sweet foods
barbed left during sting
Bumble Bee wax comb loc: rodent burrows, small hollow spaces with lots of
insulated debris
annually 50—500 nectar, pollen no barb
Paper Wasp paper comb, no envelope loc: under eaves in small voids
annually < 100 live insects no barb
Yellow Jacket “Meat
Bee”
paper comb, covered with paper envelope loc: usually underground
annually 100’s dead insects garbage, meats,
sweet foods
no barb
Hornet paper comb, covered with paper envelope loc: above ground in trees, shrubs and under eaves
annually 100’s live insects no barb

GENERAL INFORMATION
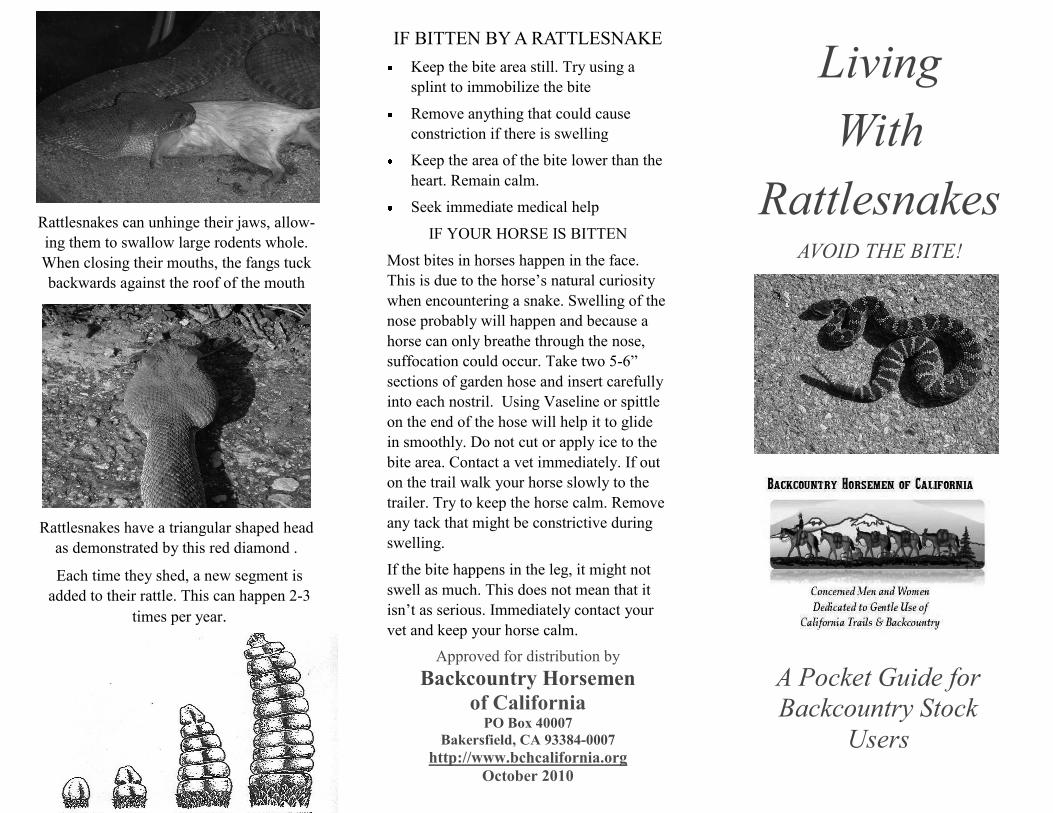
The heads of rattlesnakes found in Cali-
fornia are different from other snake spe-
cies. Most snake species have heads that
are the same width as their bodies. How-
ever, our rattlesnakes have bulges at the
base of their head, giving them a triangu-
lar shape. These bulges are where the
venom sacks are located. Rattlesnakes are
very thick and heavy bodied which
makes their tracks easy to distinguish in
dirt . They move very slowly with their
rattles held up off the ground .
During days of extreme heat, rattlesnakes
will seek shelter in the shade, venturing
out in the cooler evenings to hunt for
food.
Even though it is a dangerous animal,
rattlesnakes are not without predators of
their own. Raptors consider them fair
game and, after killing them with pierc-
ing talons, will eat rattlesnakes. Roadrun-
ners also feed on rattlesnakes and will
beat them to death with their strong
beaks. Opossums are immune to the rat-
tlesnake venom and can help keep them
out of your yard. King snakes will imi-
tate a rattlesnake to scare humans away,
which usually ends in the snake’s death.
However, king snakes will often make a
meal out of a rattlesnake!
Rattlesnakes will hibernate during cold
weather, emerging in the Spring to hunt
for food. This is also when you’ll see
more babies, which are born live in late
Fall or early Spring.
THE BITE
Rattlesnakes are members of the pit viper fam-
ily. They have heat sensors, or pits, on each
side of their head below the nostrils that detect
infrared. These sensors allow the snake to find
its warm blooded prey. The rattlesnake can also
follow the trail of its prey by flicking its tongue
along the ground. The rattlesnake uses this
hunting technique as well as ambushing its
prey. When it is within striking distance, which
is 1/3 to 1/2 of its body length, it quickly lunges
forward and aims for the prey. While in the for-
ward motion, the snake’s jaws will open, ex-
tending the two top front fangs that are tucked
backwards under its upper jaw. These fangs act
as hypodermic needles and inject the venom
directly into the snake’s target. The venom not
only subdues the prey, but also begins breaking
down the tissue of the prey to make it easier to
digest. Usually it is a strike and release, how-
ever in some cases the snake will hang on to
the victim until the struggling ceases.
One important note to remember is that one
should never handle a dead rattlesnake. Al-
though dead, the snake could still have a jerk
reaction and bite you. If you kill a rattlesnake
for food, be certain to remove the head first and
bury it.
AVOID THE BITE!
Rattlesnakes are not out to get you. Their
venom is strictly designed for subduing prey
and for protection, and they don’t want to
waste it on humans. By following a few
simple rules you can avoid a painful inci-
dent.
Use trails that are cleared enough to al-
low complete visibility.
Don’t allow children and pets to run
ahead of you.
Do not reach under rocks; be aware of
where you put your hands and feet.
Check the area thoroughly before setting
up camp or staking out your stock
When clearing brush or doing trail work,
consider wearing ‘gators’ for protection,
especially if running equipment.
If you encounter a rattlesnake on the
trail, give it a wide berth.
Always be aware of your surroundings
and the trail ahead of you.
Did you know more people die from rodent
related causes than from rattlesnake bites? A
rattlesnake’s main prey is rodents!
IF BITTEN BY A RATTLESNAKE
Keep the bite area still. Try using a
splint to immobilize the bite
Remove anything that could cause
constriction if there is swelling
Keep the area of the bite lower than the
heart. Remain calm.
Seek immediate medical help
IF YOUR HORSE IS BITTEN
Most bites in horses happen in the face.
This is due to the horse’s natural curiosity
when encountering a snake. Swelling of the
nose probably will happen and because a
horse can only breathe through the nose,
suffocation could occur. Take two 5-6”
sections of garden hose and insert carefully
into each nostril. Using Vaseline or spittle
on the end of the hose will help it to glide
in smoothly. Do not cut or apply ice to the
bite area. Contact a vet immediately. If out
on the trail walk your horse slowly to the
trailer. Try to keep the horse calm. Remove
any tack that might be constrictive during
swelling.
If the bite happens in the leg, it might not
swell as much. This does not mean that it
isn’t as serious. Immediately contact your
vet and keep your horse calm.
Approved for distribution by
Backcountry Horsemen
of California
PO Box 40007
Bakersfield, CA 93384-0007
http://www.bchcalifornia.org
October 2010
Rattlesnakes can unhinge their jaws, allow-
ing them to swallow large rodents whole.
When closing their mouths, the fangs tuck
backwards against the roof of the mouth
Living
With
Rattlesnakes
AVOID THE BITE!
A Pocket Guide for
Backcountry Stock
Users
Rattlesnakes have a triangular shaped head
as demonstrated by this red diamond .
Each time they shed, a new segment is
added to their rattle. This can happen 2-3
times per year.
RendezvousOnce a year, Backcountry Horsemen of California holds a Rendezvous, a three day event , Friday,
Saturday and Sunday for members and their families. This annual event is held in a different location in
the state each year.
On Friday we have our state board business meetings. The Public Lands Committee and The Education
Committee meetings are in the morning with the full Board of Directors meeting in the afternoon.
Friday at Noon gates open for an assortment of classes and demonstrations. Friday Evening a Dinner
and Awards Presentation.
Saturday Morning continues with classes and demonstrations. Saturday Noon is a parade. Saturday
afternoon there are contests. Saturday Evening a Members Dinner, Dance and Auction.
Sunday Morning starts with Cowboy Church and continues with classes and demonstrations until noon.
Below are just a few of the seminars, classes, contests & trainers that have been available at Rendezvous
Seminars:
Packing 101
US Forest Service wilderness Packing
Equine Dentistry
General Equine Health
Poison Plants
Natural Hoof Care
Tool School
Plan Ahead & Prepare (GU/LNT)
Other Users (GU/LNT)
Waste Materials (GU/LNT)
Stock Care (GU/LNT)
Trailhead Horse Camping
Pack Saddle Fitting
Pack Stock & Packing Techniques
Military Packing Techniques
Kids Classes:
Parents Taking Kids in the Wilderness
What Kids Should Know in an
Emergency
LNT for Kids
Iron Mules for Kids
Kids Safety around Stock
Contests:
Dutch Oven Cooking Contest
Pack Scramble & Unscramble Contests
Odd Load Packing Contest
Kids Art Contest
Trainers:
Jerry Tindell Horse Trainer
Pack Stock & Packing Techniques
Barry Krohn
We also have lots of vendors and a good time for all. Rendezvous is a time to meet with fellow members
and friends from all over the state who share a common interest.
SIERRA FREEPACKERS
MOTHER LODE
MID VALLEY
OHLONE RIDERS
EASTERN SIERRA
SAN JOAQUIN SIERRA
HIGH SIERRA
SEQUOIA
KERN RIVER VALLEY
TOP OF THE STATE
REDWOOD
HIGH COUNTRY
SHASTA TRINITY
LAKE- MENDO
NORTH BAY
SUTTER BUTTES
KERN SIERRA
LOS PADRES
ANTELOPE VALLEY
SANTA ANA RIVER
SAN GORGONIO PASS
REDSHANK RIDERS
SAN DIEGO
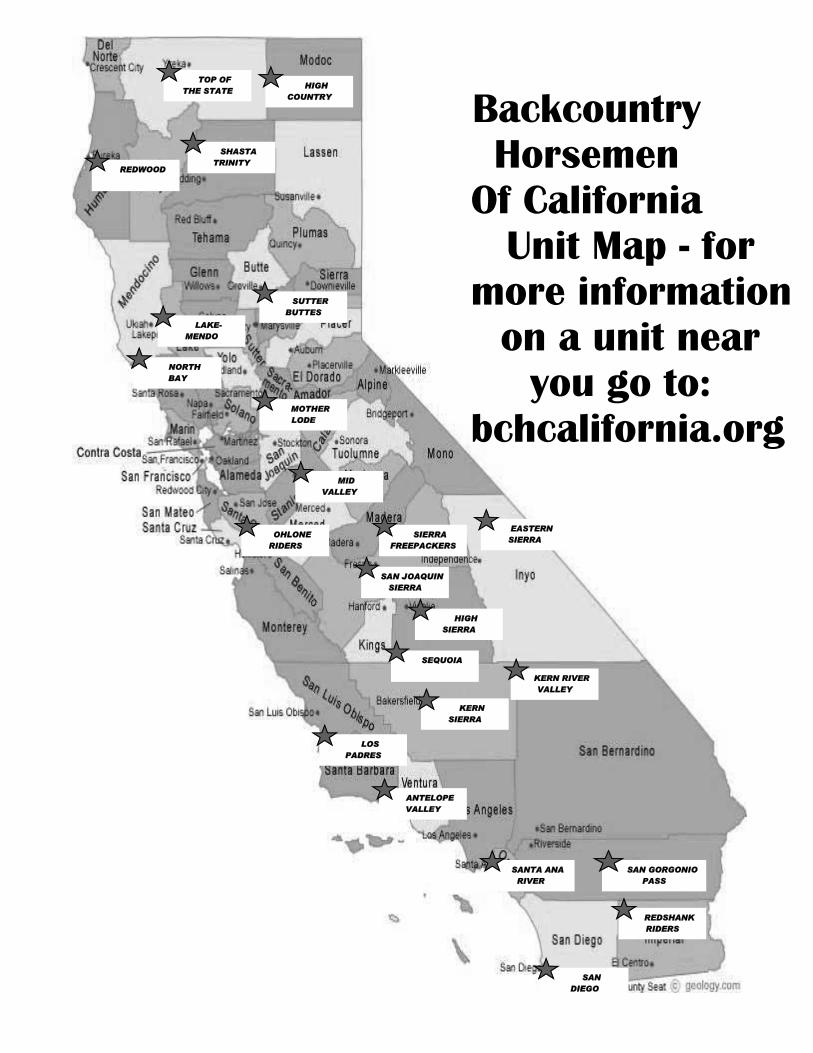
Backcountry Horsemen
Of California Unit Map - for
more informationon a unit near
you go to:bchcalifornia.org


