34
Chapter 15 Dimensioning
| Date post: | 22-Dec-2015 |
| Category: |
Documents |
| View: | 226 times |
| Download: | 2 times |
Chapter 15
Dimensioning

Objectives• Use the concept of dimensioning• Explain the idea of tolerance in
dimensioning• Recall the fundamental rules and apply the
techniques for dimensioning• Select appropriate dimensions for a
moderately complex part and correctly apply them to a drawing of that part

Introduction• Dimensioning is much like creating
constraint-based solid models– Define the size and location of the features
within the software– Part is created “virtually” to your size and
location specifications• Develop strategy for determining the types
of dimensions required to define apart

Is the Dimension I See on a Drawing Exact?
• Tolerance: amount of variation• Tolerance dimensions on a detail drawing:
FIGURE 15.07. The detail drawing of the SHAFT.

What Are the Rules for Dimensioning?
• National standard: ASME Y14.5M-1994 (ANSI Y14.5)– Published by American Society of Mechanical
Engineers– Outlines uniform practices for displaying and
interpreting dimensions
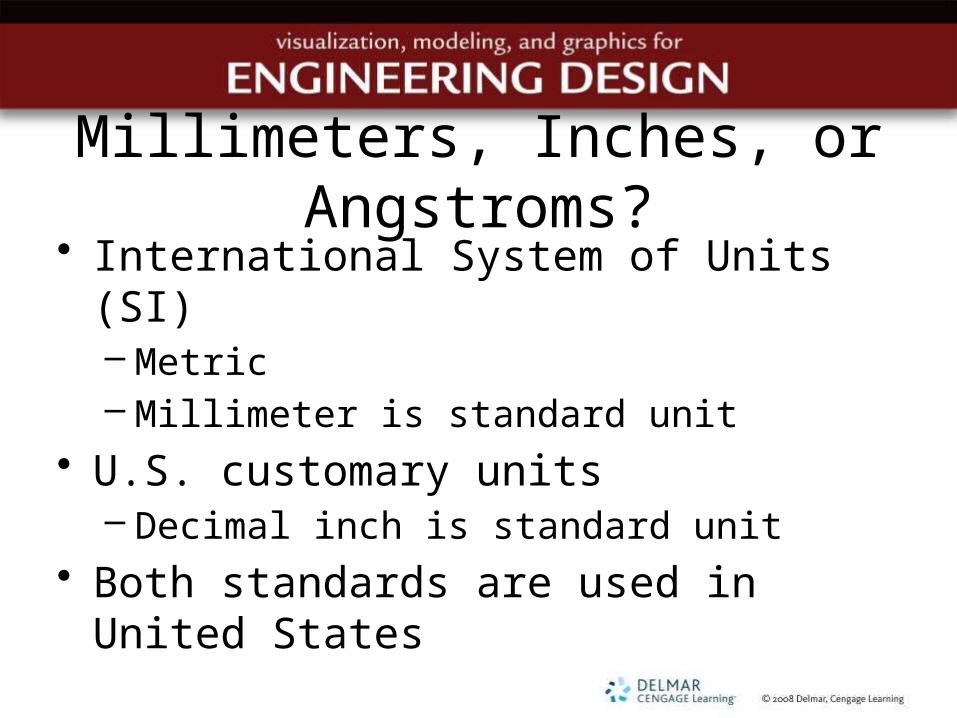
Millimeters, Inches, or Angstroms?• International System of Units (SI)
– Metric– Millimeter is standard unit
• U.S. customary units– Decimal inch is standard unit
• Both standards are used in United States
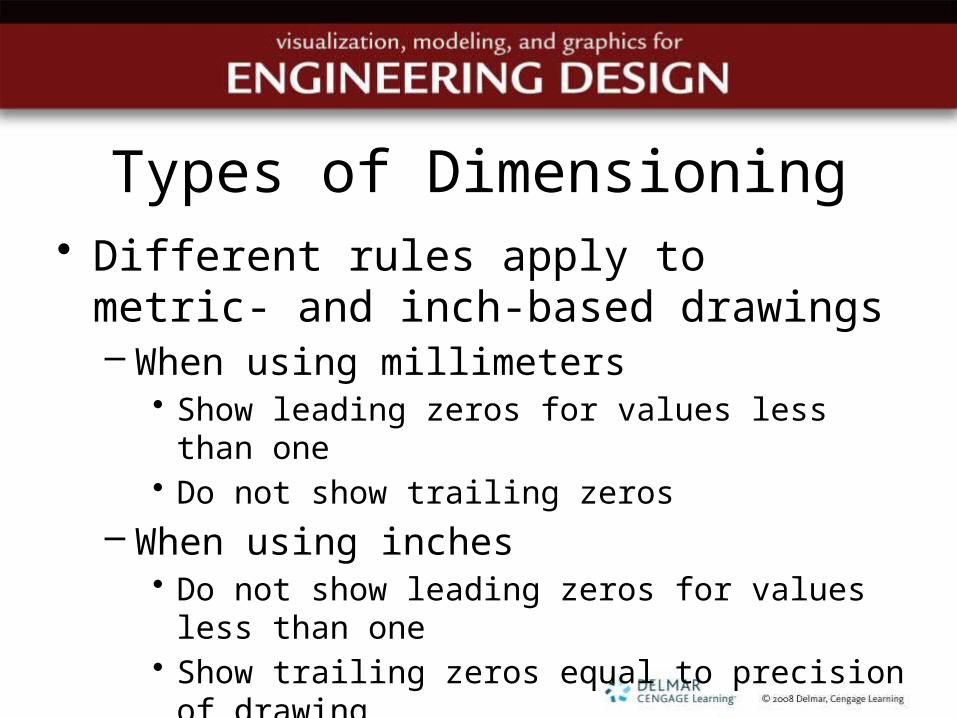
Types of Dimensioning• Different rules apply to metric- and inch-
based drawings– When using millimeters
• Show leading zeros for values less than one• Do not show trailing zeros
– When using inches• Do not show leading zeros for values less than one• Show trailing zeros equal to precision of drawing

Fundamental Rules for Dimensioning
• Standards ensure consistency• Examples of fundamental rules
– Each dimension shall have a tolerance– Each necessary dimension of an end product
shall be shown; show no more dimensions than those necessary for complete definition
– The drawing should define a part without specifying manufacturing methods

Definitions
FIGURE 15.10. Dimensioning terminology.

Redundancy is Dumb• Dimensions should appear only once
– Placed according to contour rule
FIGURE 15.11. Redundant dimensions in (a) are poor practice. Dimensions in (b) are shown once in the view best suited for viewing.
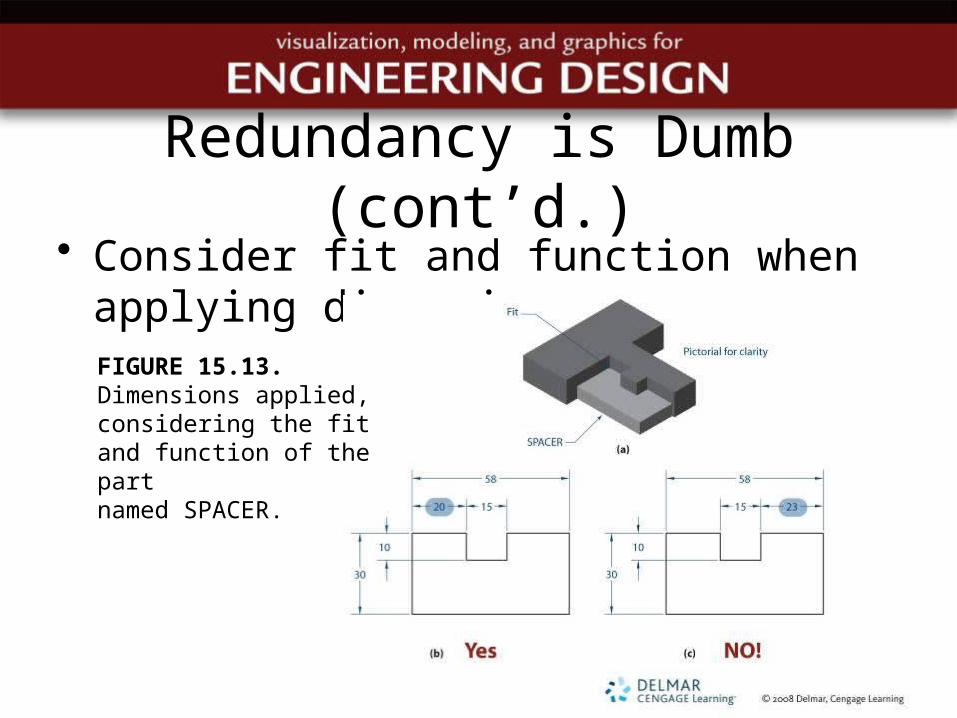
Redundancy is Dumb (cont’d.)• Consider fit and function when applying
dimensionsFIGURE 15.13. Dimensions applied, considering the fit and function of the partnamed SPACER.
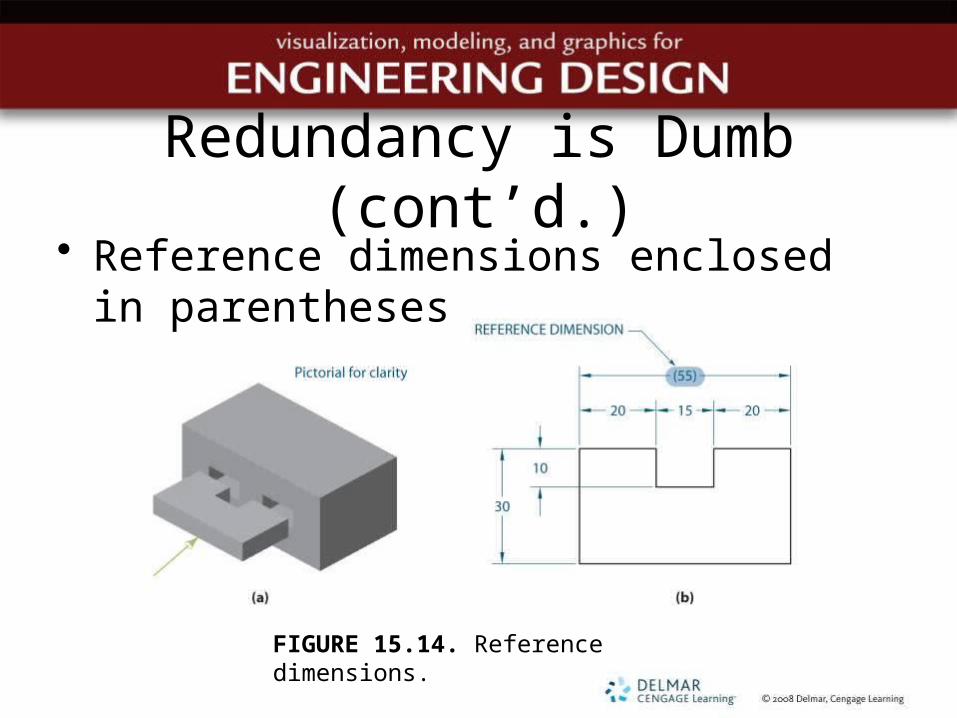
Redundancy is Dumb (cont’d.)
FIGURE 15.14. Reference dimensions.
• Reference dimensions enclosed in parentheses

Geometrically Correct, but Still Wrong!
• When drawings are being used to document parts for manufacture– Accepted rules and practices must be followed
to ensure acceptable results
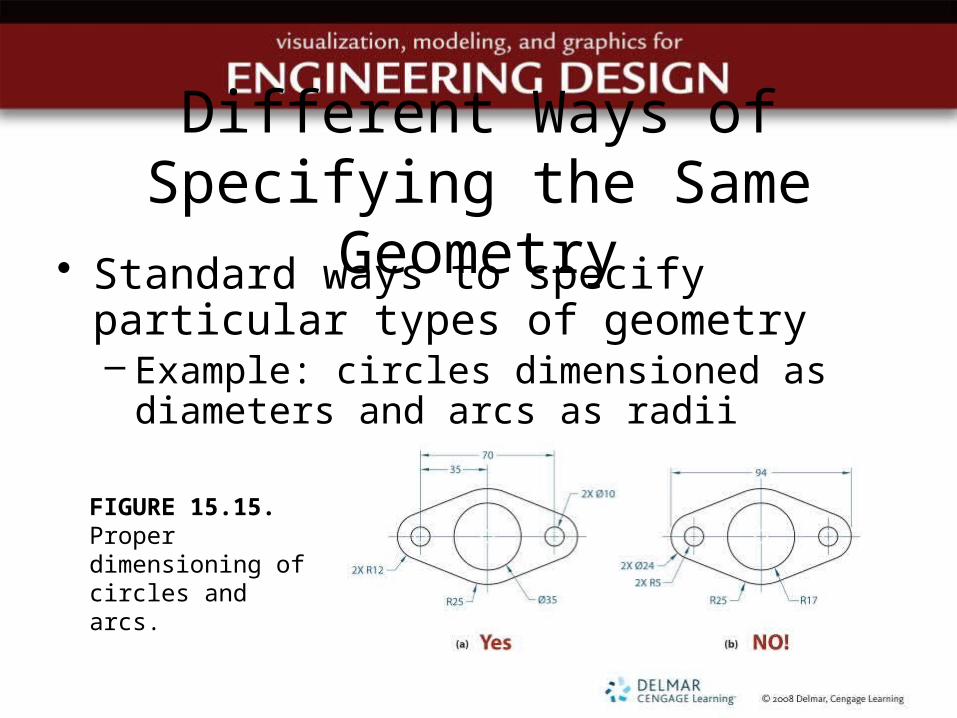
Different Ways of Specifying the Same Geometry
• Standard ways to specify particular types of geometry– Example: circles dimensioned as diameters
and arcs as radii
FIGURE 15.15. Proper dimensioning of circles and arcs.

Identifying and Specifying the Critical Dimensions for Part
Function• In the SPACER, most
important dimensions are:– Size of machined holes– Distance between the
two holes FIGURE 15.16. The vise assembly SPACER.
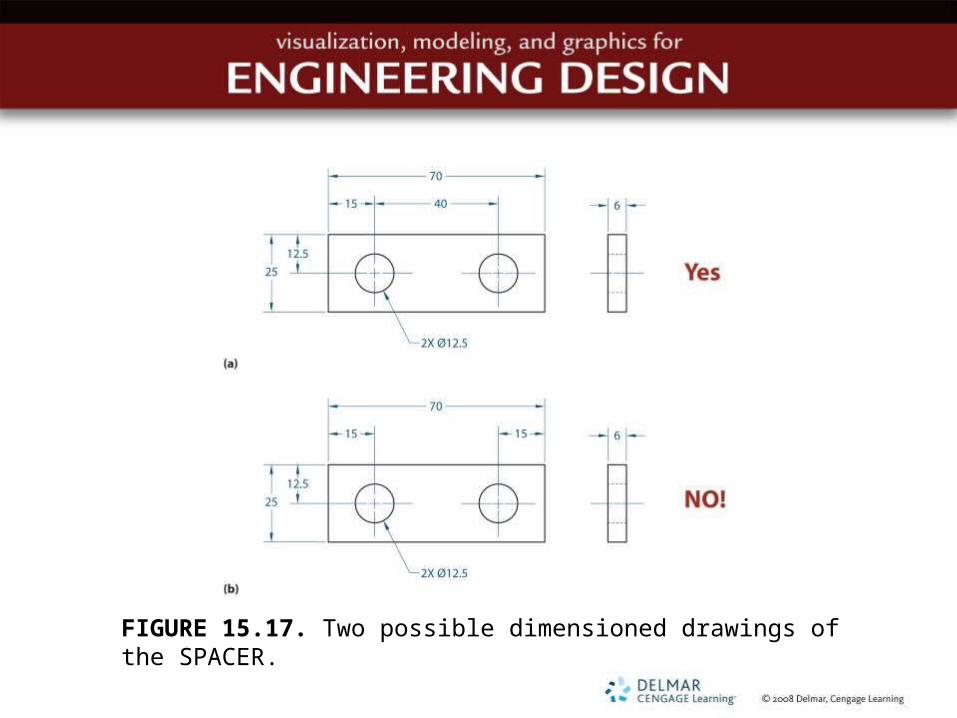
FIGURE 15.17. Two possible dimensioned drawings of the SPACER.

Baseline versus Chain Dimensioning
FIGURE 15.19. Baseline dimensioning.
FIGURE 15.20. Chain dimensioning.

What Types of Dimensions Can Be Measured and Checked?
FIGURE 15.21. Checking the location of an arc center.

Guidelines to Guide Your Lines
FIGURE 15.22. Contour dimensioning.
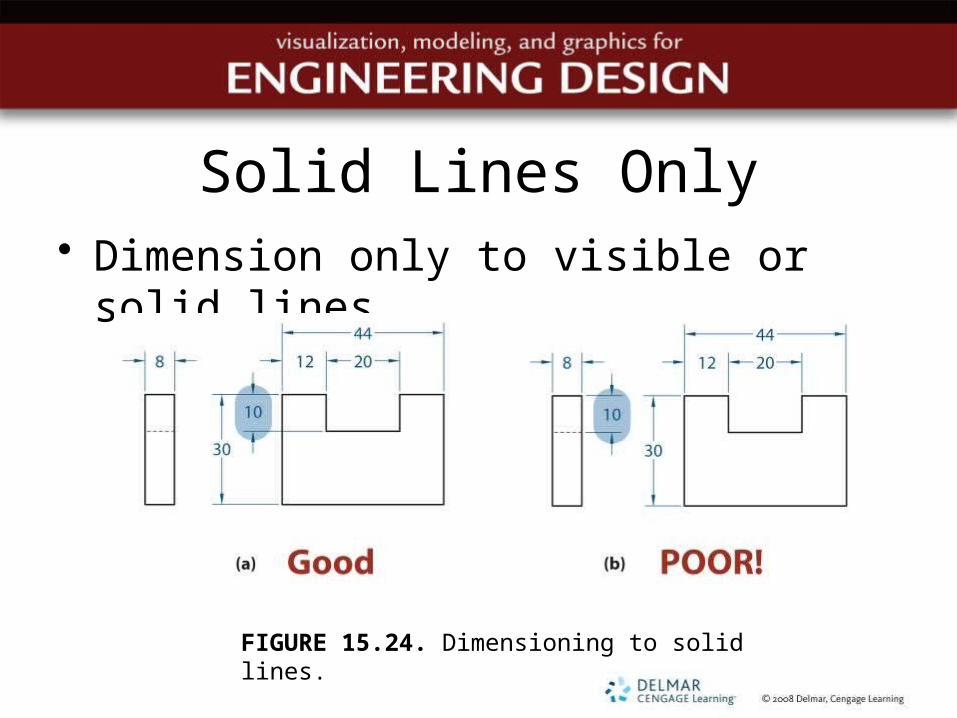
Solid Lines Only• Dimension only to visible or solid lines
FIGURE 15.24. Dimensioning to solid lines.
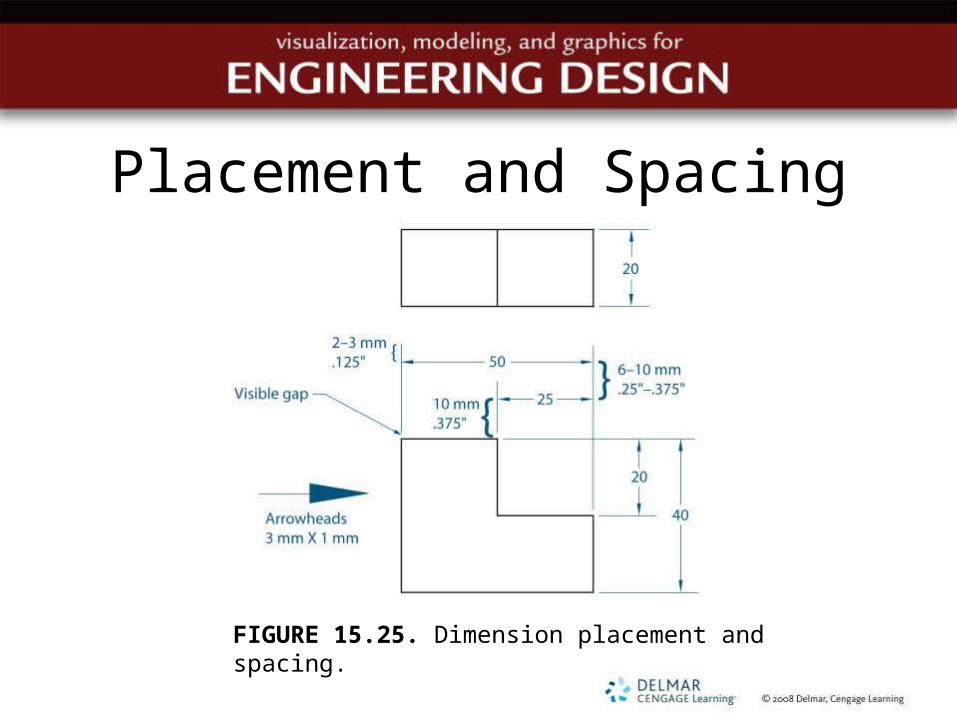
Placement and Spacing
FIGURE 15.25. Dimension placement and spacing.

Font• Single-stroke gothic lettering• Uppercase • Typical fonts used in CAD software
– Century Gothic and Romans.shx
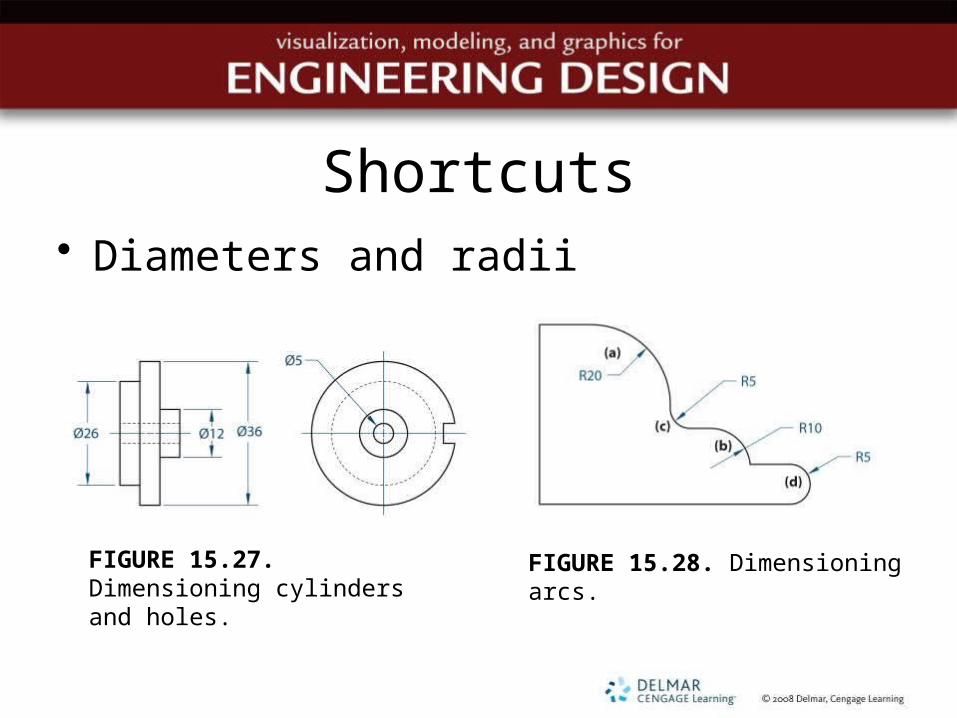
Shortcuts• Diameters and radii
FIGURE 15.27. Dimensioning cylinders and holes.
FIGURE 15.28. Dimensioning arcs.

Shortcuts• Chamfers
FIGURE 15.29. Dimensioning chamfers.

Shortcuts (cont’d.)• Standard machined holes: countersinks
and counterbores
FIGURE 15.30. Dimensioningthe sizes of machined holes. (a) drill (b) blind (c) counterbore (d) countersink (e) spotface

Shortcuts (cont’d.)• Slots are dimensioned by their
diameters
FIGURE 15.32. Dimensioning slots.

Notes• General notes apply to entire drawing
• Local notes specified with leader line
FIGURE 15.33. Using local notes.
Considerations for 3-D Modeling• Drawings sometimes require more
dimensions than models– Geometric relations imbedded in a model must
be pointed out explicitly on a drawing• Drawings with dimensions for
manufacturing done at end of design process

Considerations for 3-D Modeling (cont’d.)
• Software points out when drawing underdimensioned or overdimensioned– If underdimensioned, grab entities and move
them– If overdimensioned, delete a dimension or
geometric constraint
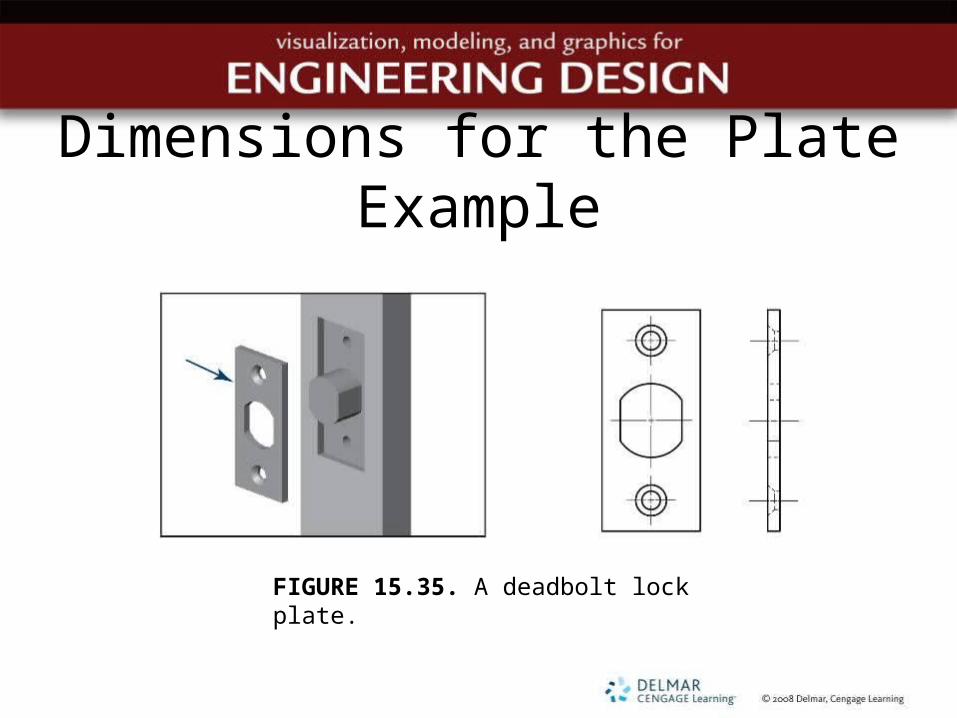
Dimensions for the Plate Example
FIGURE 15.35. A deadbolt lock plate.

Dimensions for the Plate Example (cont’d.)
FIGURE 15.36. Plate dimensions.

Fundamental Rules for Dimensioning
• Found in ASME Y14.5M-1994 standards for Dimensioning and Tolerancing
• Examples– All dimensions and tolerances apply in a free
state condition– Unless otherwise specified, all geometric
tolerances apply for full depth, length, and width of the feature
Summary• Provided an introduction to dimensioning• Discussed how all dimensions have a
tolerance and how tolerances are important for the function of designs
• Discussed specific standards or rules that must be followed whether dimensioning in inches or millimeters

Summary (cont’d.)• Covered techniques for dimensioning
different features, such as standard parts, machined holes, and notes


