21
Chapter 5 Architectural Lines and Lettering
| Date post: | 31-Dec-2015 |
| Category: |
Documents |
| Upload: | rosemary-franklin |
| View: | 250 times |
| Download: | 0 times |
Chapter 5
Architectural Lines and Lettering

2
Links for Chapter 5
Types of Lines
Line Techniques
Lines with CADD
Lettering
3
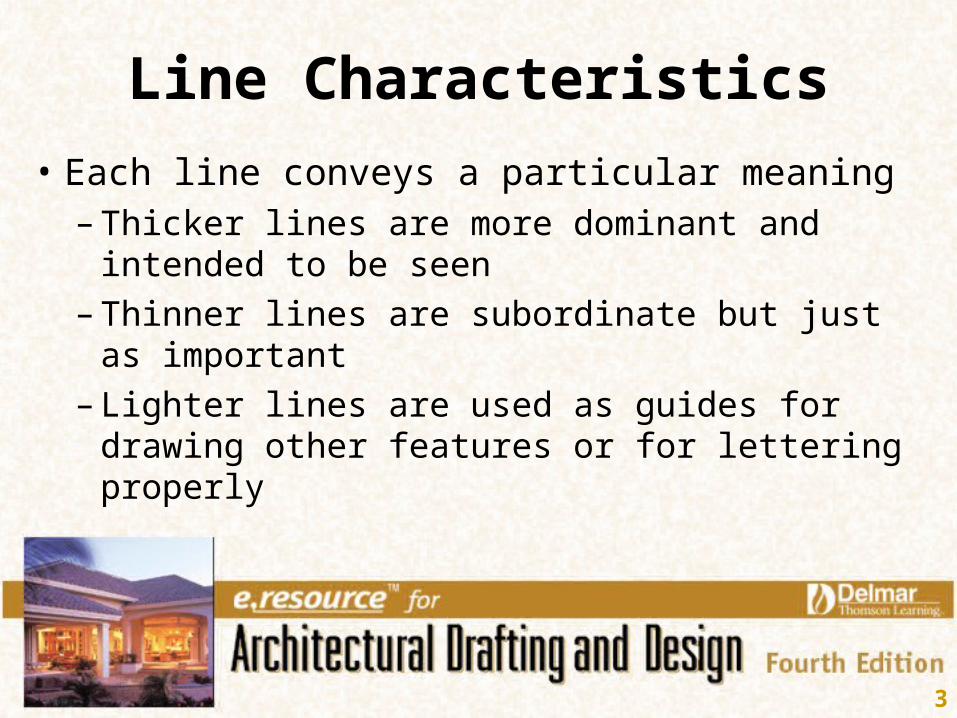
Line Characteristics
• Each line conveys a particular meaning– Thicker lines are more dominant and
intended to be seen
– Thinner lines are subordinate but just as important
– Lighter lines are used as guides for drawing other features or for lettering properly
4
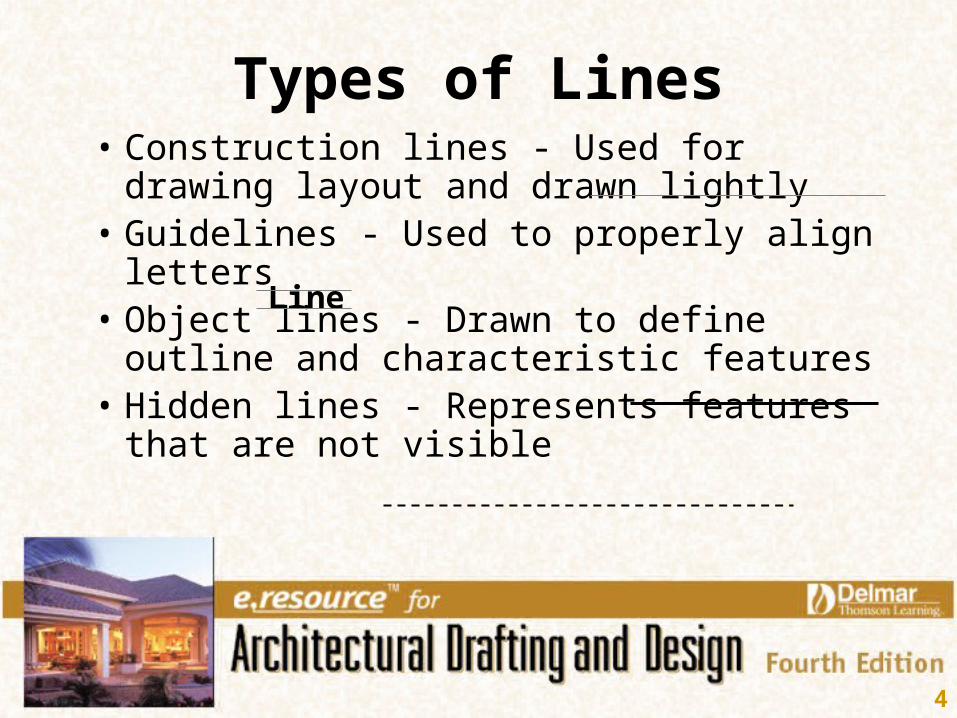
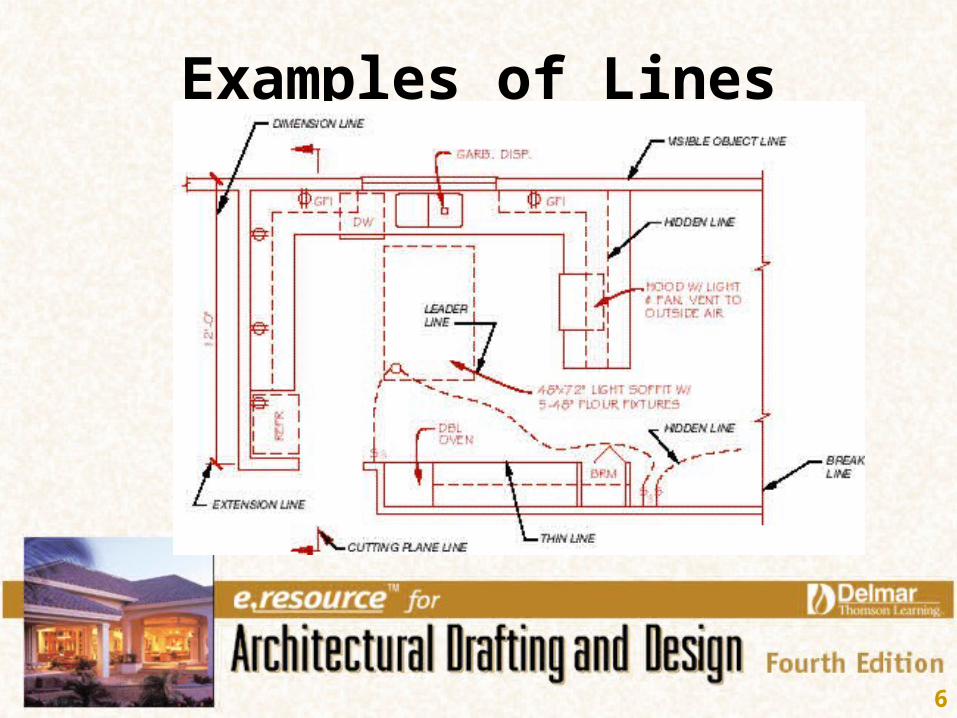
Types of Lines• Construction lines - Used for drawing
layout and drawn lightly• Guidelines - Used to properly align
letters• Object lines - Drawn to define outline
and characteristic features• Hidden lines - Represents features that
are not visible
Line
5
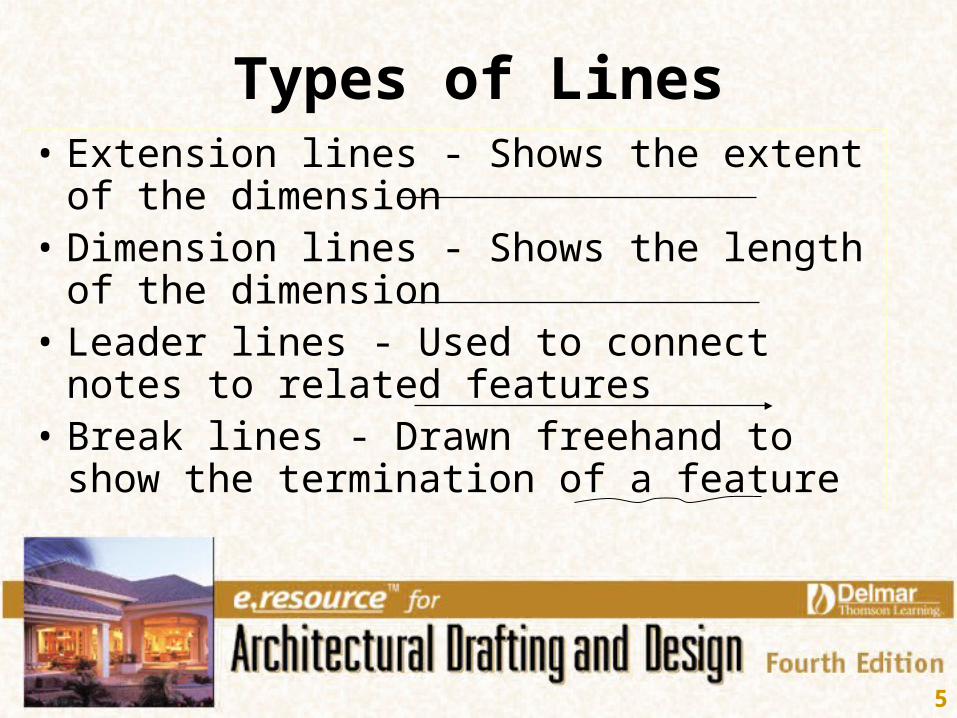
Types of Lines• Extension lines - Shows the extent of the
dimension• Dimension lines - Shows the length of the
dimension• Leader lines - Used to connect notes to
related features• Break lines - Drawn freehand to show the
termination of a feature
6
Examples of Lines
7
Line Techniques• Prepare sketches before beginning drawing• Do layout with construction lines• Make all horizontal lines on drawing first• Draw all vertical lines• Place symbols on accordingly• Add lettering and keep drawing clean
8
Pencil Line Methods on Vellum
• All lines should be consistently dark and crisp– Use a lead of proper hardness
– Rotate mechanical pencil and hold at 45°
– Maintain a constant pressure on the pencil
– Draw all lines only once or double lines may occur
9
Polyester Lead Methods on Film
• Polyester lead is faster than ink and is better quality– Always draw on the mat side
– Draw lines in one direction
– Use a light touch to reduce smearing and embossing
– Use a vinyl eraser to remove lines
10
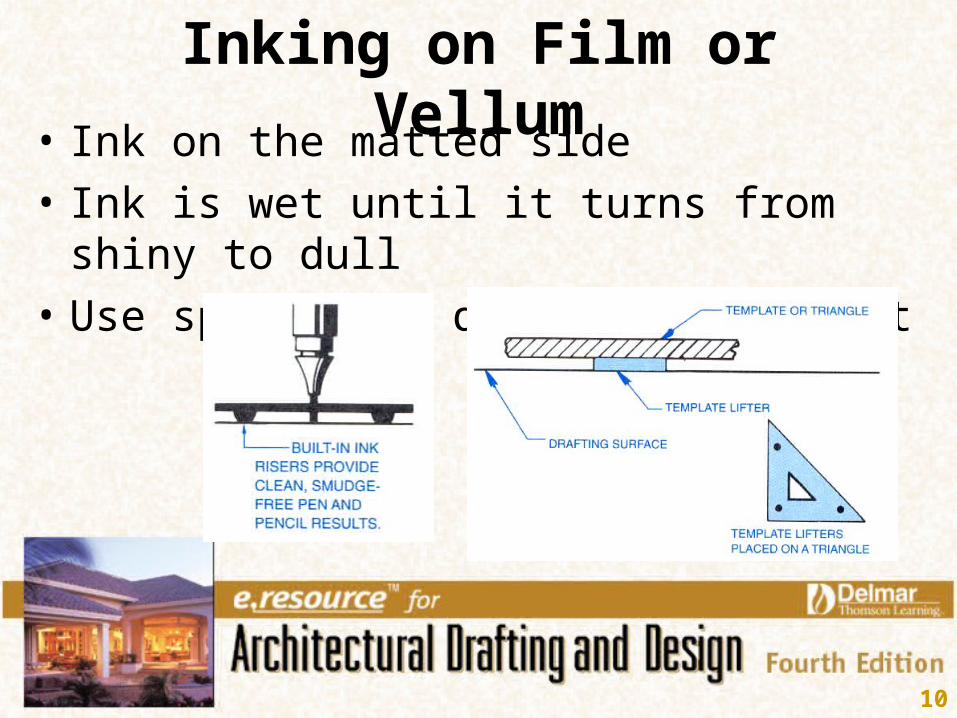
Inking on Film or Vellum• Ink on the matted side
• Ink is wet until it turns from shiny to dull
• Use spacers on drafting equipment

11
Hints for Inking• Hold the pen perpendicular• Move pen at a constant speed• Allow the pen to flow easily• Use spacer under the drafting tools• Periodically check the pen for leaks• Keep reservoir 1/4 to 3/4 full• Shake pen lightly to get the ink flowing
12
Lines with CADD• Lines are drawn using the LINE command
between two Cartesian coordinate points• The Cartesian Coordinate System
– Grid with one unit blocks
– The “Y” axis is vertical
– The “X” axis is horizontal
– X=0 and Y=0 is the origin

13
Coordinate Systems• Absolute Coordinate System
– All points are measured from the origin (0,0)
• Relative Coordinate System– Points are located from the previous points– Use the @ symbol to add these coordinates– @-3,1 - draw line to the left three units and down one unit

14
Coordinate Systems• Polar Coordinate System
– Points are located from the previous points as a distance and an angle– Use the @ symbol to indicate the distance– Use the < symbol to indicate the angle– @3<45 - draw line three units long at 45°

15
Picking Points with Cursor
• GRID show the grid layout on the screen
• SNAP forces the cursor to “snap” to a designated distance
• Coordinates are displayed for quick reference in the coordinate display window
16
Lettering Terms
• Composition - Spacing, layout, and appearance of the text
• Justify - Text alignment
• Font - An assortment of one size and style of lettering or text
• Style - A set of text characters
17
Metric Lettering Rules
• Give unit names in lower case (mm, m, kg)
• Give proper names in upper case (K, Pa, N)
• Leave space between symbol and number (21 mm)
• Do not use plural metric symbols (m not ms)
• Do not mix names and symbols
18
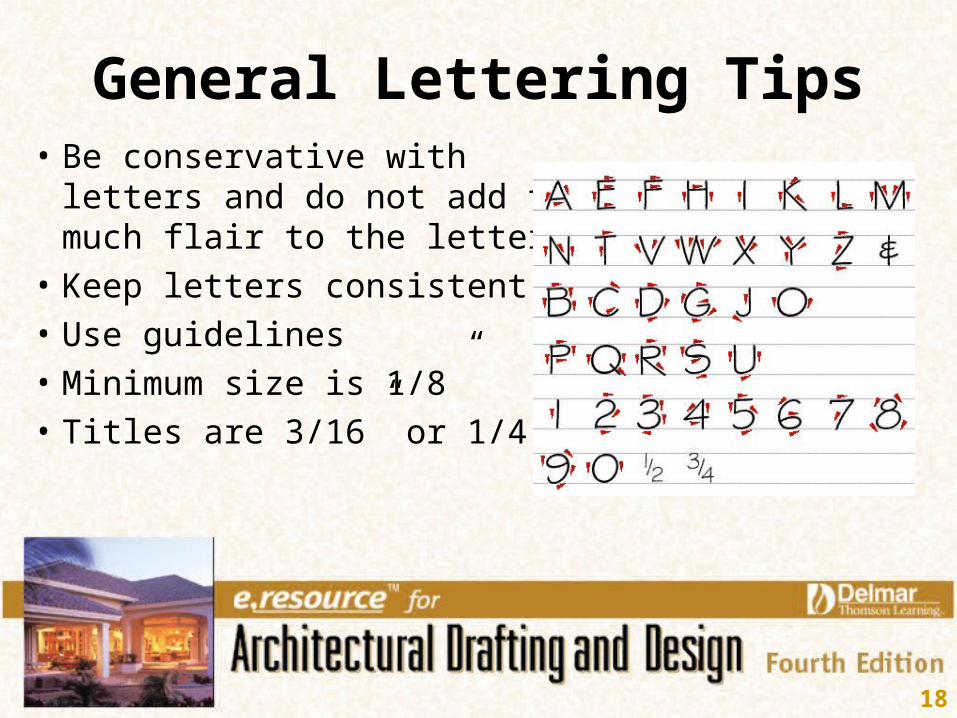
General Lettering Tips• Be conservative with letters
and do not add to much flair to the letters
• Keep letters consistent• Use guidelines• Minimum size is 1/8” • Titles are 3/16” or 1/4”
19
More Lettering Tips• Use 0.5mm automatic pencil with H, F, or HB
lead• Rest hand on clean protective sheet• Keep vertical lines farther apart than angles or
curved lines• Relax and be comfortable• Slanted letters should be at about 68°

20
Lettering Equipment
• Use an Ames Lettering Guide for guidelines• Lettering machines can be used to produce
drawing titles, labels, or special headings• Transfer letters and symbols are individually
burnished onto the drawing • Sticky back letters are produced on a
computer and adhered to the drawing
21
CADD Lettering
• Text is consistently placed in shape and size• Text is easily modified• TEXT command is used to specify the text
characteristics• Scale factor establishes the scale between the
drawing and the text• Insertion point indicates where the text starts


![Chapter 6.ppt [Read-Only]...Chapter 6 Architectural Lines and Lettering Introduction • Drafting – Universal graphic language – Uses lines, symbols, dimensions, and notes to describe](https://static.documents.pub/doc/80x56/606c2f80e064ae73e40f3718/chapter-6ppt-read-only-chapter-6-architectural-lines-and-lettering-introduction.jpg)


