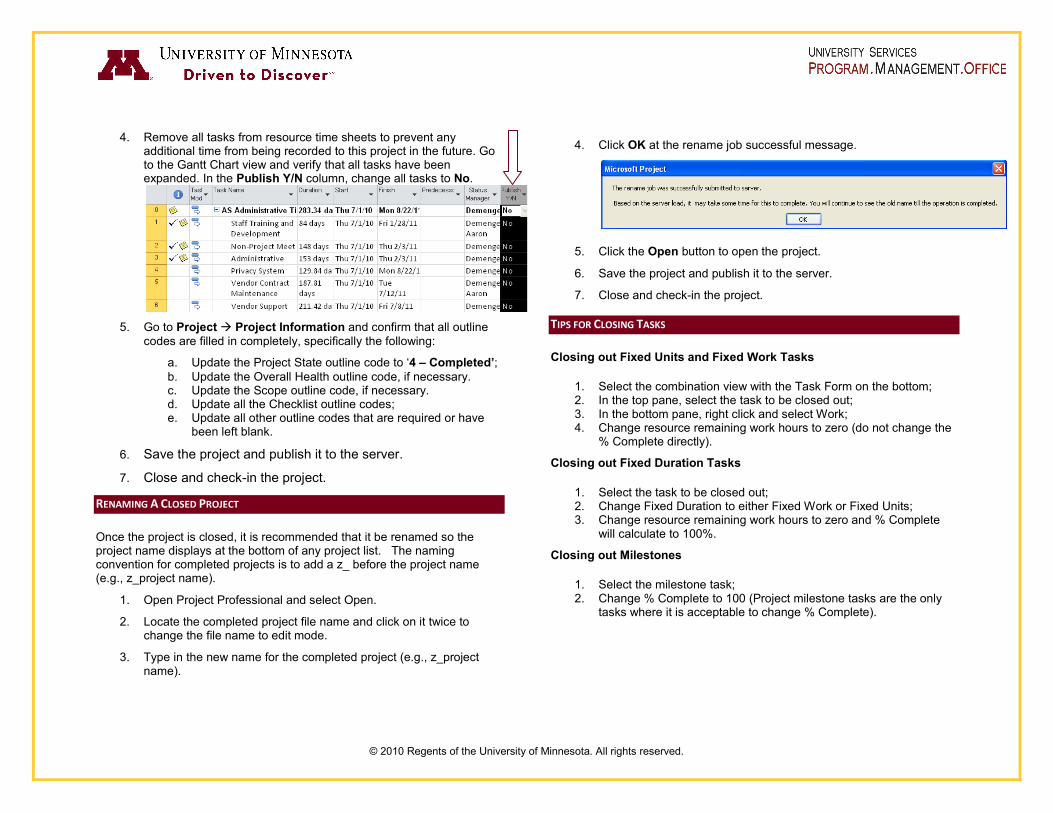
2
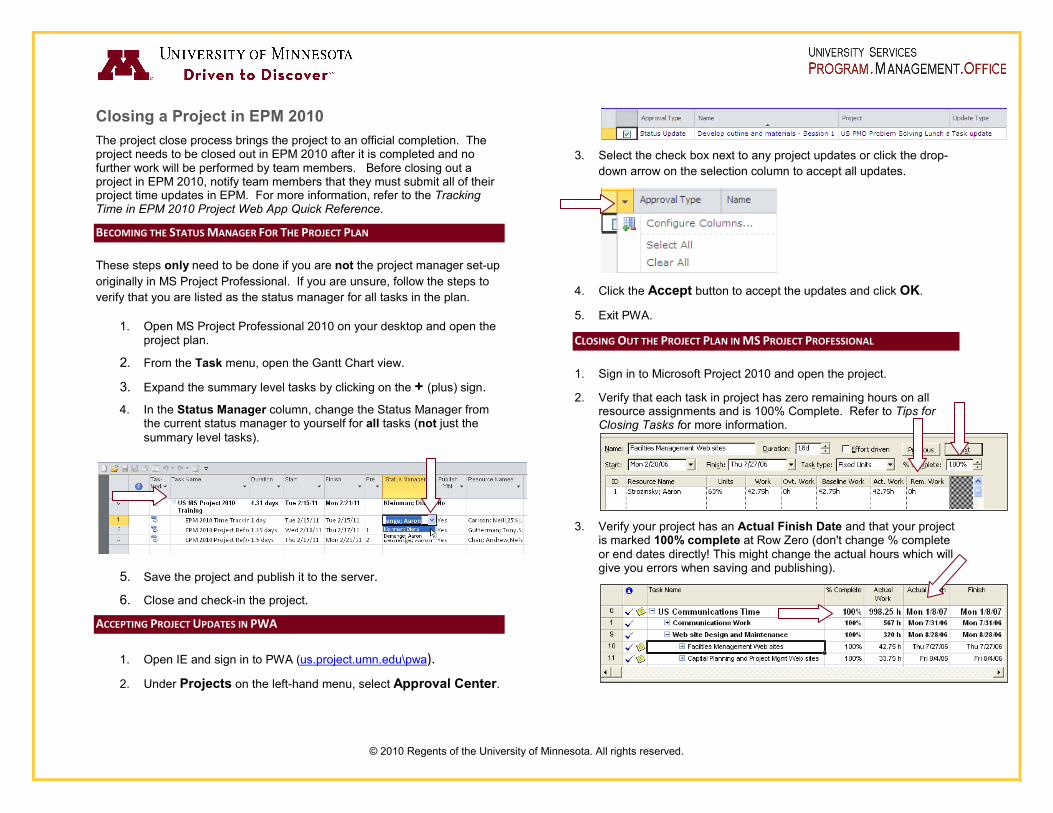
© 2010 Regents of the University of Minnesota. All rights reserved. Closing a Project in EPM 2010 The project close process brings the project to an official completion. The project needs to be closed out in EPM 2010 after it is completed and no further work will be performed by team members. Before closing out a project in EPM 2010, notify team members that they must submit all of their project time updates in EPM. For more information, refer to the Tracking Time in EPM 2010 Project Web App Quick Reference. BECOMING THE STATUS MANAGER FOR THE PROJECT PLAN These steps only need to be done if you are not the project manager set-up originally in MS Project Professional. If you are unsure, follow the steps to verify that you are listed as the status manager for all tasks in the plan. 1. Open MS Project Professional 2010 on your desktop and open the project plan. 2. From the Task menu, open the Gantt Chart view. 3. Expand the summary level tasks by clicking on the + (plus) sign. 4. In the Status Manager column, change the Status Manager from the current status manager to yourself for all tasks (not just the summary level tasks). 5. Save the project and publish it to the server. 6. Close and check-in the project. ACCEPTING PROJECT UPDATES IN PWA 1. Open IE and sign in to PWA (us.project.umn.edu\pwa). 2. Under Projects on the left-hand menu, select Approval Center. 3. Select the check box next to any project updates or click the drop- down arrow on the selection column to accept all updates. 4. Click the Accept button to accept the updates and click OK. 5. Exit PWA. CLOSING OUT THE PROJECT PLAN IN MS PROJECT PROFESSIONAL 1. Sign in to Microsoft Project 2010 and open the project. 2. Verify that each task in project has zero remaining hours on all resource assignments and is 100% Complete. Refer to Tips for Closing Tasks for more information. 3. Verify your project has an Actual Finish Date and that your project is marked 100% complete at Row Zero (don't change % complete or end dates directly! This might change the actual hours which will give you errors when saving and publishing).