trophy means someone else beat you! Trophies also say nothing aboutthe level of competition in the respective Cub Scout pack or racingorganization.
Listen very carefully to what I’m about to say! MY SONS HAVETAKEN FIRST PLACE in every Pinewood Derby we have ever raced in! We don’t have any second place trophies! We have raced in four
packs in Texas and Wisconsin. Some of the derbies we have raced inhave sported over 100 cars! Our cars have always won!
So, how do we do it? The answer is simple. We build The UltimateCar! People show up at the Pinewood Derby every year with cars they
built using advice they found on the internet, and every year we go homefirst place winners!
A few years ago, a friend jokingly told me that he thought that year wasthe year we were finally going to get beat, because there were several
people who had vowed to end our winning streak. I chuckled, and thenin a half joking/half serious manner asked him a simple question. “So,
how are they going to accomplish this? What exactly are they going todo to build a faster car? We already build the Ultimate Car”, I said.
So, in a nutshell the Ultimate Car is exactly what its name implies. It isa collection of car design and speed tips which have enabled us to build a fleet of Pinewood Derby cars which have won race after race, year after year. I call it the Ultimate Car because I’m not aware of anythingyou can legally do to improve it. Some of the speed tips and designhints I will share with you can ONLY BE FOUND IN THIS BOOK!
Many of the other books out there just skip over these important tips likethey don’t even matter, but they do matter and that’s the difference
between the Ultimate Car and the other cars out there.
So hang on tight and get ready to learn how we build cars that leave all
the others in the dust… No matter what they’ve done…No matter what book they have read… No matter how many other cars are in the race.This is the Ultimate Car!
Note: The author does not guarantee that you will be able to duplicate his success.
He is not guaranteeing that you will win your Pinewood Derby. The tips and suggestions in this book are simply a collection of methods, which have enabled the author and his sons to consistently win over many years. The author does believe that success can be achieved by applying these tips correctly.
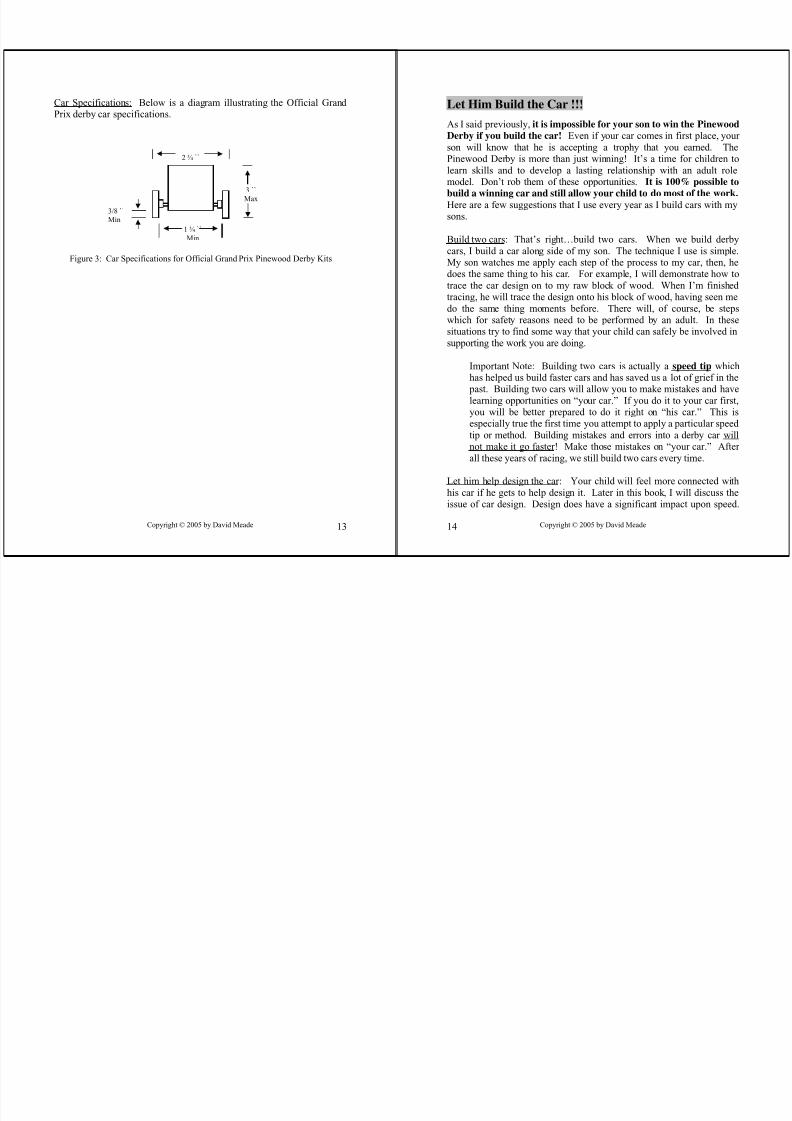
Let Him Build the Car !!!As I said previously, it is impossible for your son to win the Pinewood
Derby if you build the car! Even if your car comes in first place, your son will know that he is accepting a trophy that you earned. ThePinewood Derby is more than just winning! It’s a time for children tolearn skills and to develop a lasting relationship with an adult rolemodel. Don’t rob them of these opportunities. It is 100% possible to
build a winning car and still allow your child to do most of the work.
Here are a few suggestions that I use every year as I build cars with my
sons.
Build two cars: That’s right…build two cars. When we build derbycars, I build a car along side of my son. The technique I use is simple.My son watches me apply each step of the process to my car, then, hedoes the same thing to his car. For example, I will demonstrate how totrace the car design on to my raw block of wood. When I’m finished tracing, he will trace the design onto his block of wood, having seen medo the same thing moments before. There will, of course, be steps
which for safety reasons need to be performed by an adult. In thesesituations try to find some way that your child can safely be involved insupporting the work you are doing.
Important Note: Building two cars is actually a speed tip whichhas helped us build faster cars and has saved us a lot of grief in the
past. Building two cars will allow you to make mistakes and havelearning opportunities on “your car.” If you do it to your car first,you will be better prepared to do it right on “his car.” This is
especially true the first time you attempt to apply a particular speed tip or method. Building mistakes and errors into a derby car willnot make it go faster! Make those mistakes on “your car.” After all these years of racing, we still build two cars every time.
Let him help design the car: Your child will feel more connected withhis car if he gets to help design it. Later in this book, I will discuss theissue of car design. Design does have a significant impact upon speed.
However, within the guidelines I lay out, there is room for individualityand creativity. Let your child be creative and influential in the design of the car.
Let him pick the color and detail options: Once again, let your child pick the color of their car. If they decide to use stickers or decals, letthem do the choosing. Color and stickers will not affect the speed of thecar, so let your child have as much say in this part of the car design as
possible. One year I remember our car was really quite interesting tosay the least. My son just had to put non-matching stickers all over his
car. I let him do just exactly what he wanted to do. The car looked kind of messy, but he liked it… thought it was great…and we still took first
place.
Teach principles while you work:As you work on this project together,take the opportunity to teach your child. Make sure they understand why each step of the process is important. Help them learn
woodworking and tool skills. If you ask my sons why we polish our car axles, they can tell you! The more they understand, the more they willfeel a part of the process.
I always help my boys draw a pattern on a sheet of paper. They cut that pattern out and then transfer the design to the pine block, see Figure 5.We then use either a coping saw or a ban saw to cut the design into the
block. By doing this, my son is learning how to create and transfer a pattern. He also learns how to properly and safely use a saw to cutwood. I oversee this entire process and ensure that proper safety skillsare adhered to. It’s so important that your child be involved in the work and that they learn skills as they build their car.
Figure 5: Tracing car design on to pine block. Inthis photo Tanner is using a pattern cut from blue
paper. He then traces the pattern onto his pine block using a pencil.
5: Remember to let your child help design the car! This isn’t“Your” car. It’s theirs.
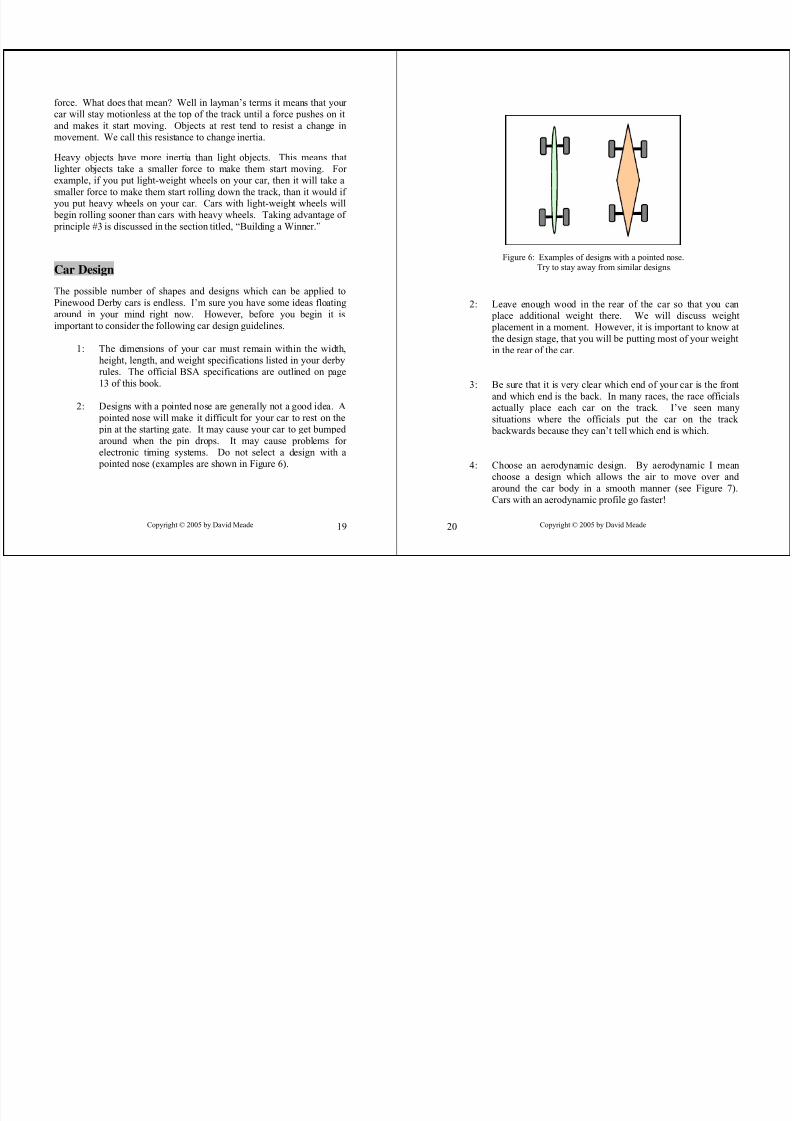
Figure 7: Illustration of Aerodynamics
Note: The most basic aerodynamic design is the simplewedge. Figure 8 illustrates a basic wedge shaped car.If you don’t have a lot of time available, this is a time
proven design used by many Pinewood Derby winners.
Once you have selected your design, you will need to make a template,which can be used when cutting the block. Most designs will requirethat you make a template for the top view of the car and another template for the side view, as shown in Figure 9.
Figure 9: Car design template
Cut your design template out and attach it to the block of wood withclear tape. To not glue it on. Glue will just create a mess that needs to
be sanded off later. I normally begin by attaching the side view first.However, whether you attach the side view or the top view first willdepend upon which makes the most sense when cutting out the car, seeFigure 10. In the example below, I have colored the template to make iteasier to see. This is probably a good idea for you as well. Whencutting the block you need to be able to clearly see where you arecutting.
With the template attached, you are ready to cut the block. I recommend using either a power ban saw or a hand held coping saw. Be sure toobey all safety rules and exercise caution when cutting the block. Find a way your child can safely help in this process. Figure 11 illustrates the
block being cut using a ban saw. Figures 12 and 13 illustrate the same process using a coping saw.
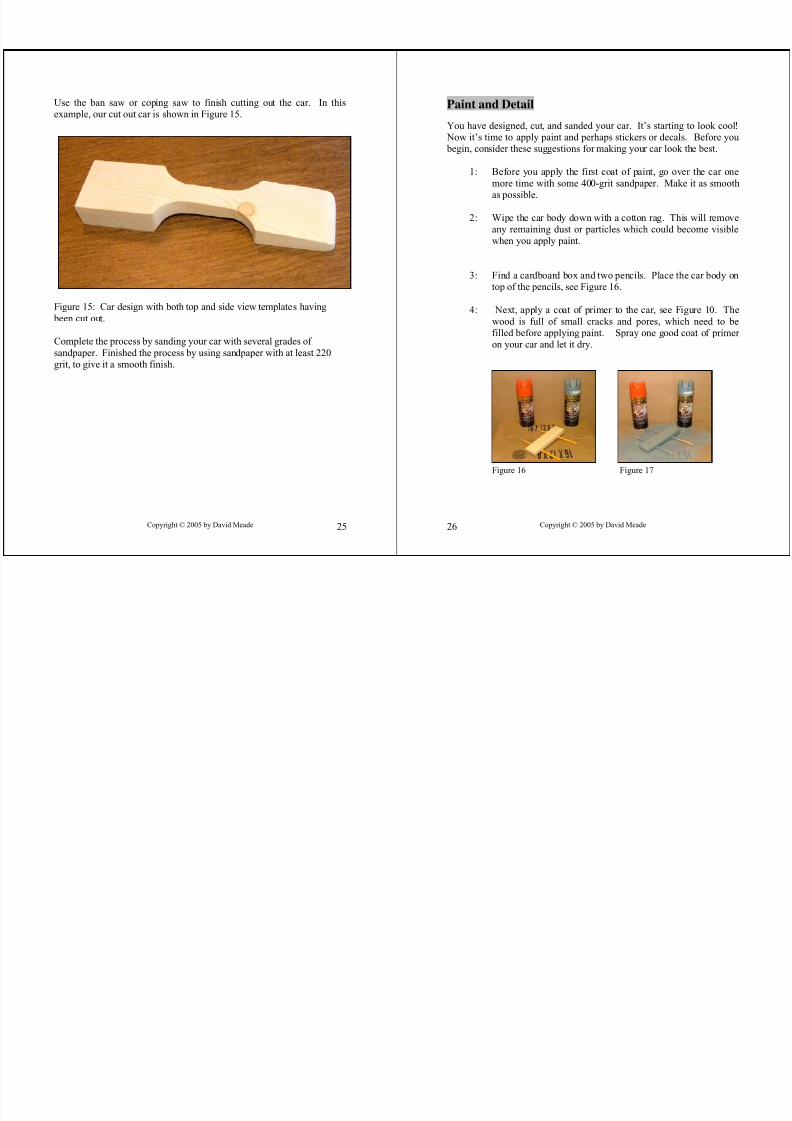
Use the ban saw or coping saw to finish cutting out the car. In thisexample, our cut out car is shown in Figure 15.
Figure 15: Car design with both top and side view templates having
been cut out.
Complete the process by sanding your car with several grades of sandpaper. Finished the process by using sandpaper with at least 220grit, to give it a smooth finish.
Next, attach each wheel as shown in Figure 19. Use the wheel spacer tocontrol the amount of space left between the wheel and the car body.Figures 20 and 21 illustrate wheels which have been spaced properly.
Figure 19: Using wheel spacer to attach wheel
Figure 20: Wheel properly spaced 1/32nd of an inch from car bodywhen using standard axle slots.
Figure 21: Wheel properly spaced from car body when using drilled axle holes. Drilled axle holes are
Do you have all four wheels attached to the car? Good! Place the car ona flat surface. The kitchen table or a counter top will work well. Get onyour knees and look directly underneath the car, as shown in Figure 22.Each wheel should be resting flat and square on the table. If any of thewheels are not flat and square you will need to adjust them until all four wheels are properly positioned, see Figure 23.
Figure 22: Place car on flat surface Figure 23: Wheel not resting flat onsurface… Needs to be adjusted.
The final step is to glue the axles so that your wheels stay attached and don’t come off duringthe race. Turn your car over on its back and apply one or two drops of glue in the center of each axle, as shown in Figure 24. Allow the glueto dry before turning your car back over. If usingthe standard axle slots, do not use instant glue.
Being very thin and runny, it tends to run downthe axle and get on the wheel hub. I prefer to usesome type of quick drying cement or epoxy. Note:If you decided to use drilled axle holes then see
page 54 for instructions on gluing the wheels properly.
little more weight, then we can just add a little more putty. If I need
more weight moved toward the back I can do that too.
You could also use the hole configuration shown in Figure 19 to allowfor adjustable weights. Simply put fishing weights in the center hole.Cover that hole with a piece of cork or modeling clay. If you need toadd or remove weight you simply open the hole and make the weightadjustment.
You can be creative in how you accomplish this part of the process. Just be sure to do it! A small part of the weight needs to be free and adjustable.
Figure 25: Holes drilled in side of car. Lead wire or fishing weights fit into eachhole. The holes are then covered with wood putty before painting.
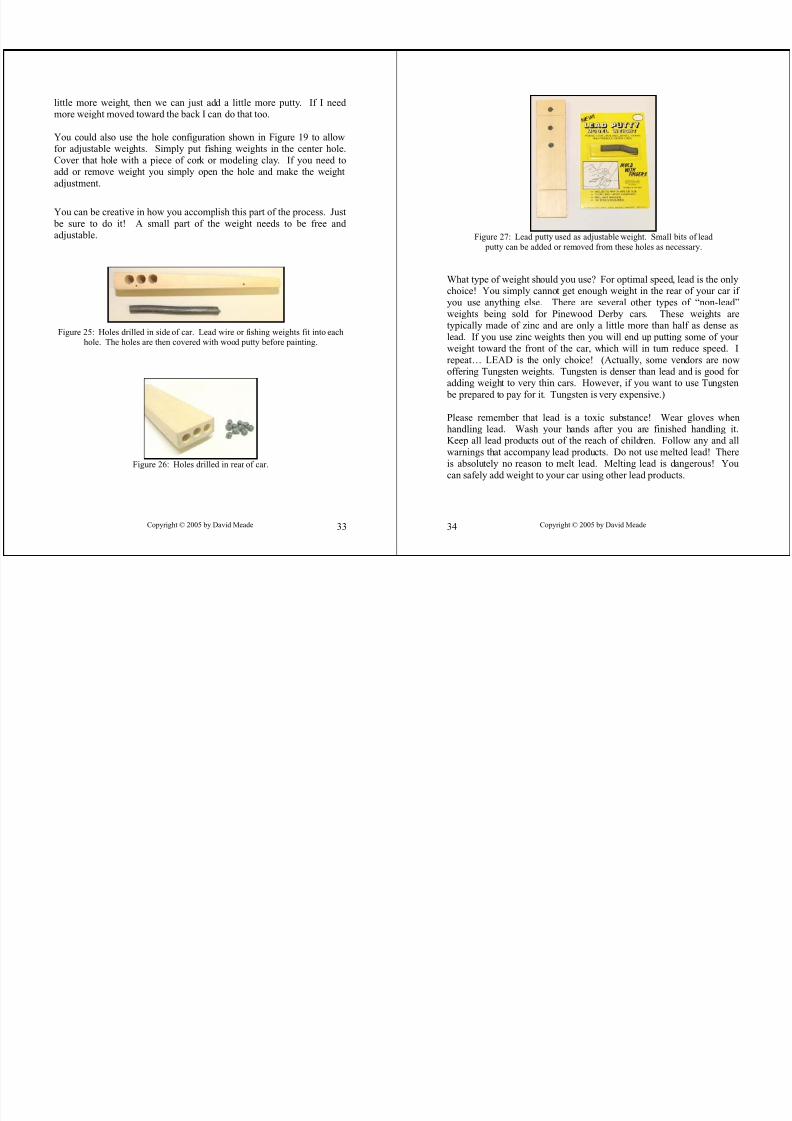
Figure 27: Lead putty used as adjustable weight. Small bits of lead putty can be added or removed from these holes as necessary.
What type of weight should you use? For optimal speed, lead is the onlychoice! You simply cannot get enough weight in the rear of your car if you use anything else. There are several other types of “non-lead”weights being sold for Pinewood Derby cars. These weights are
typically made of zinc and are only a little more than half as dense aslead. If you use zinc weights then you will end up putting some of your weight toward the front of the car, which will in turn reduce speed. Irepeat… LEAD is the only choice! (Actually, some vendors are nowoffering Tungsten weights. Tungsten is denser than lead and is good for adding weight to very thin cars. However, if you want to use Tungsten
be prepared to pay for it. Tungsten is very expensive.)
Please remember that lead is a toxic substance! Wear gloves when
handling lead. Wash your hands after you are finished handling it.Keep all lead products out of the reach of children. Follow any and allwarnings that accompany lead products. Do not use melted lead! Thereis absolutely no reason to melt lead. Melting lead is dangerous! Youcan safely add weight to your car using other lead products.
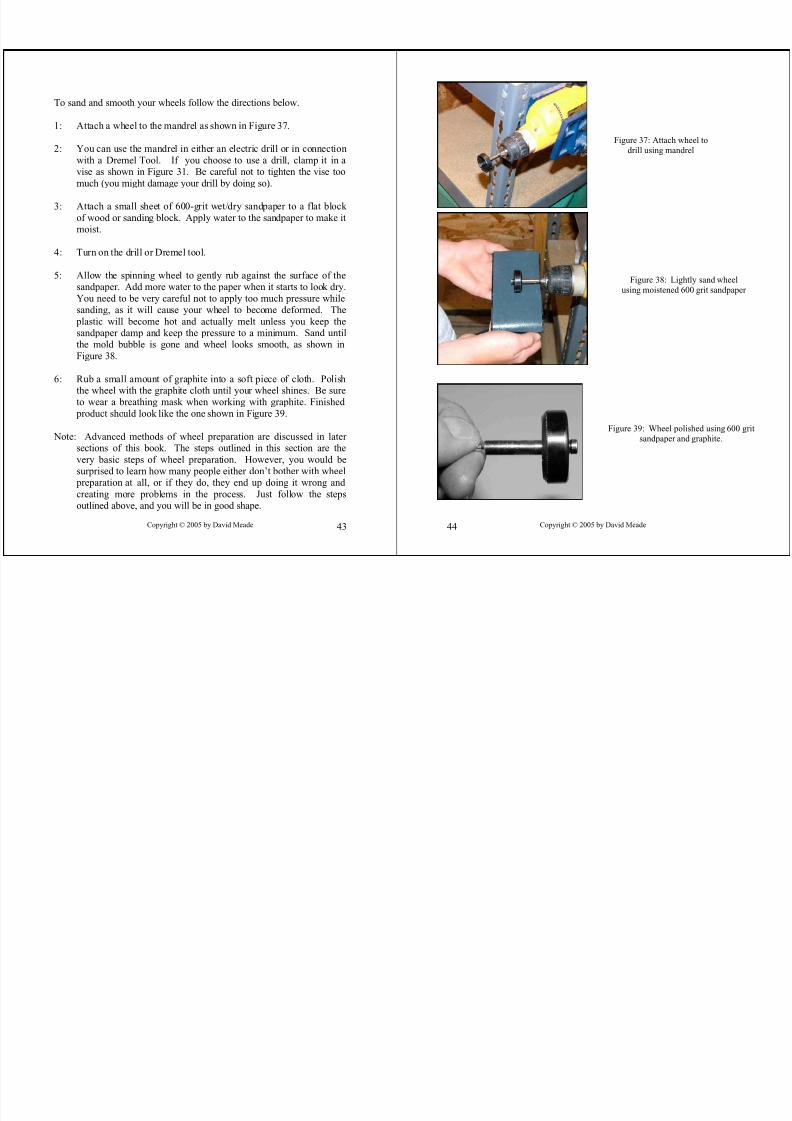
To sand and smooth your wheels follow the directions below.
1: Attach a wheel to the mandrel as shown in Figure 37.
2: You can use the mandrel in either an electric drill or in connectionwith a Dremel Tool. If you choose to use a drill, clamp it in avise as shown in Figure 31. Be careful not to tighten the vise toomuch (you might damage your drill by doing so).
3: Attach a small sheet of 600-grit wet/dry sandpaper to a flat block
of wood or sanding block. Apply water to the sandpaper to make itmoist.
4: Turn on the drill or Dremel tool.
5: Allow the spinning wheel to gently rub against the surface of thesandpaper. Add more water to the paper when it starts to look dry.You need to be very careful not to apply too much pressure whilesanding, as it will cause your wheel to become deformed. The
plastic will become hot and actually melt unless you keep thesandpaper damp and keep the pressure to a minimum. Sand untilthe mold bubble is gone and wheel looks smooth, as shown inFigure 38.
6: Rub a small amount of graphite into a soft piece of cloth. Polishthe wheel with the graphite cloth until your wheel shines. Be sureto wear a breathing mask when working with graphite. Finished
product should look like the one shown in Figure 39.
Note: Advanced methods of wheel preparation are discussed in later sections of this book. The steps outlined in this section are thevery basic steps of wheel preparation. However, you would besurprised to learn how many people either don’t bother with wheel
preparation at all, or if they do, they end up doing it wrong and creating more problems in the process. Just follow the stepsoutlined above, and you will be in good shape.
time, until it becomes virtually impossible for someone else to beat us.
We have done the little things, and they haven’t. It’s as simple as that!
Keep in mind that if anyone at your derby has studied up on the winningsecrets of Pinewood Derby cars, you will still need to take your car to aneven higher level of performance if you want to take home the first placetrophy. These exclusive secrets that turn a winning car into Champion,are found in the last section of this book.
OK, let’s learn how to build a winner!
Modifications to the Body
To build a winner you need to prepare the body of your car for maximum speed. Below are four speed tips that will help you do justthat… design your car for maximum speed!
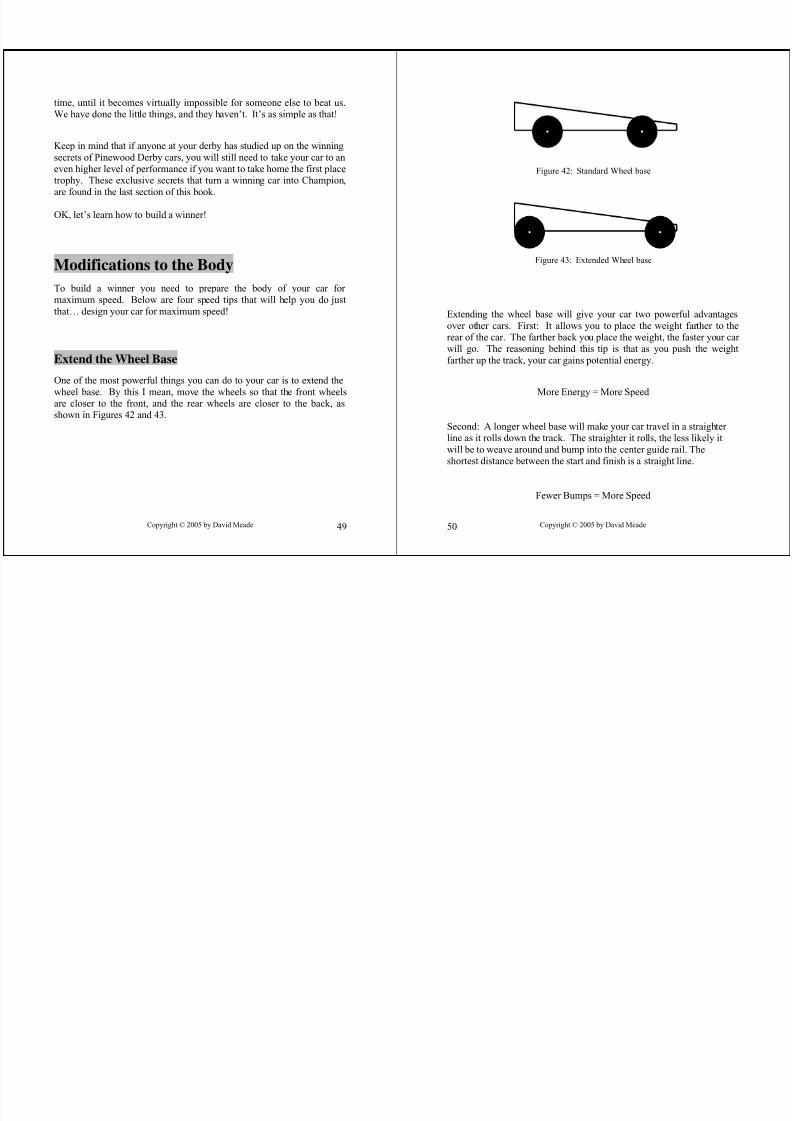
Extend the Wheel Base
One of the most powerful things you can do to your car is to extend thewheel base. By this I mean, move the wheels so that the front wheelsare closer to the front, and the rear wheels are closer to the back, asshown in Figures 42 and 43.
Extending the wheel base will give your car two powerful advantages
over other cars. First: It allows you to place the weight farther to therear of the car. The farther back you place the weight, the faster your car will go. The reasoning behind this tip is that as you push the weightfarther up the track, your car gains potential energy.
More Energy = More Speed
Second: A longer wheel base will make your car travel in a straighter line as it rolls down the track. The straighter it rolls, the less likely itwill be to weave around and bump into the center guide rail. Theshortest distance between the start and finish is a straight line.
3: You can call a local machine shop and ask them if they will helpyou turn your wheels. My experience suggests that most shopswill be happy to work with you. However, in many cases it willcost a significant amount of money. They will want to charge youtheir normal work rate to do the job.
4: If you have no friends and no money, then I would suggest youconsider purchasing lathe turned wheels off the internet. There arenumerous web sites that offer Official BSA wheels, which have
been turned on a lathe. In most cases, these wheel sets areaffordable and cost a lot less than having a local machine shop doit. www.derbychamp.com has a good selection of lathed wheels)
Note: If your local rules will not allow lathe turned wheels then besure to use the basic wheel preparation steps outlined on pages 42through 44.
Lathe Turned Wheels (H and V Configurations)
You can take lathe turned wheels to an even higher level of performance by machining the wheel to an H or V configuration.
Remember: Friction is the enemy of speed, and wheels that weighless are faster off the starting line than heavy wheels.
V and H configured wheels will reduce the amount of friction the wheelhas with the track by reducing the surface area of the wheel. It also
reduces the weight (or inertia) of the wheel. Check your local rules.
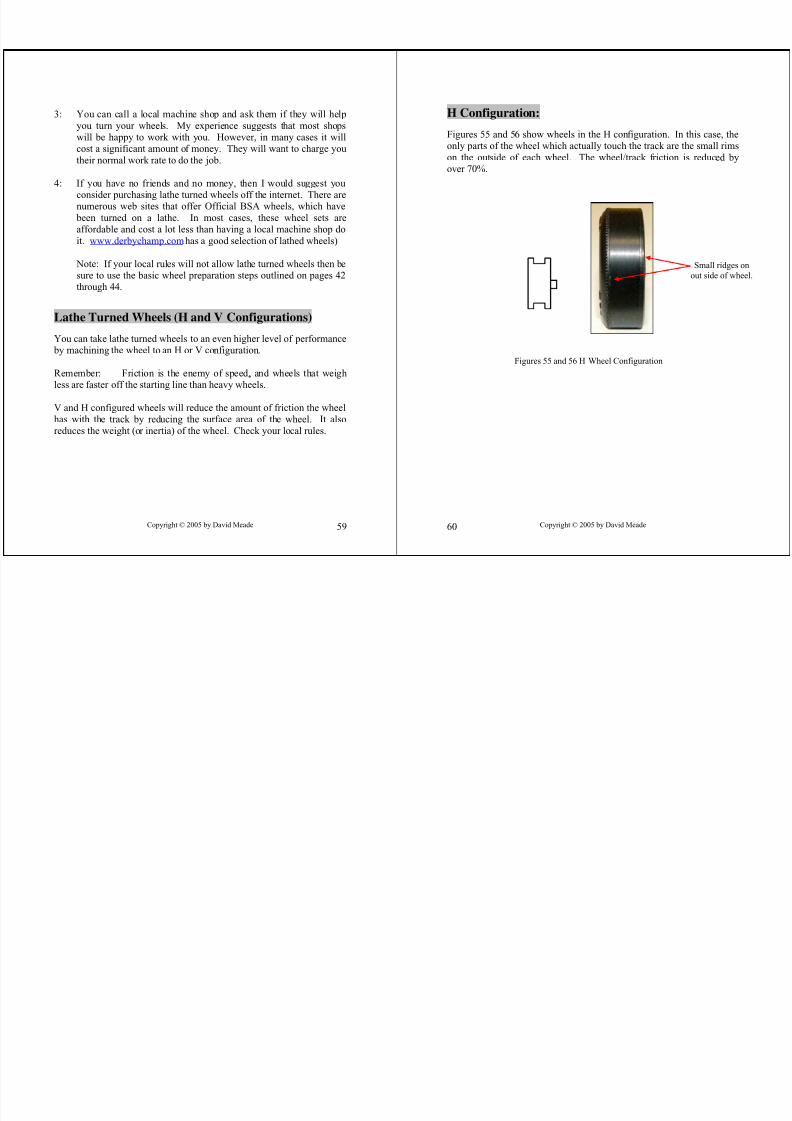
Figures 55 and 56 show wheels in the H configuration. In this case, theonly parts of the wheel which actually touch the track are the small rimson the outside of each wheel. The wheel/track friction is reduced byover 70%.
Figures 57 and 58 show wheels in the V configuration. In this case, theonly part of the wheel which actually touches the track is the small pointin the middle of the each wheel. The wheel/track friction is easilyreduced by over 90%.
Figures 57 and 58: V Wheel Configuration
Taper the Wheel Hub
One of the largest sources of friction is the spot where the wheel hubrubs on the car body. Anything you can do to reduce friction at thislocation will help your car go faster. To this end, one of the very bestthings you can do is to taper the wheel hub. This little trick reduces thecontact surface area by over 50%. Tapering the wheel hubs can beaccomplished using a small flat file or buy using the Derby Worx ProHub Tool. Both methods are describe below.
5: The final product should look something similar to Figure 61.
Using the Derby Worx Pro Hub Tool
The Pro Hub Tool is designed to help you put a smooth uniform bevelon the hub of each wheel. The tool itself is shown in Figure 62. Thishandy tool will enable you to accomplish the task in much less time and leave you with wheel hub that looks very professional. For complete
instructions on using the Pro Hub Tool see Appendix 2.
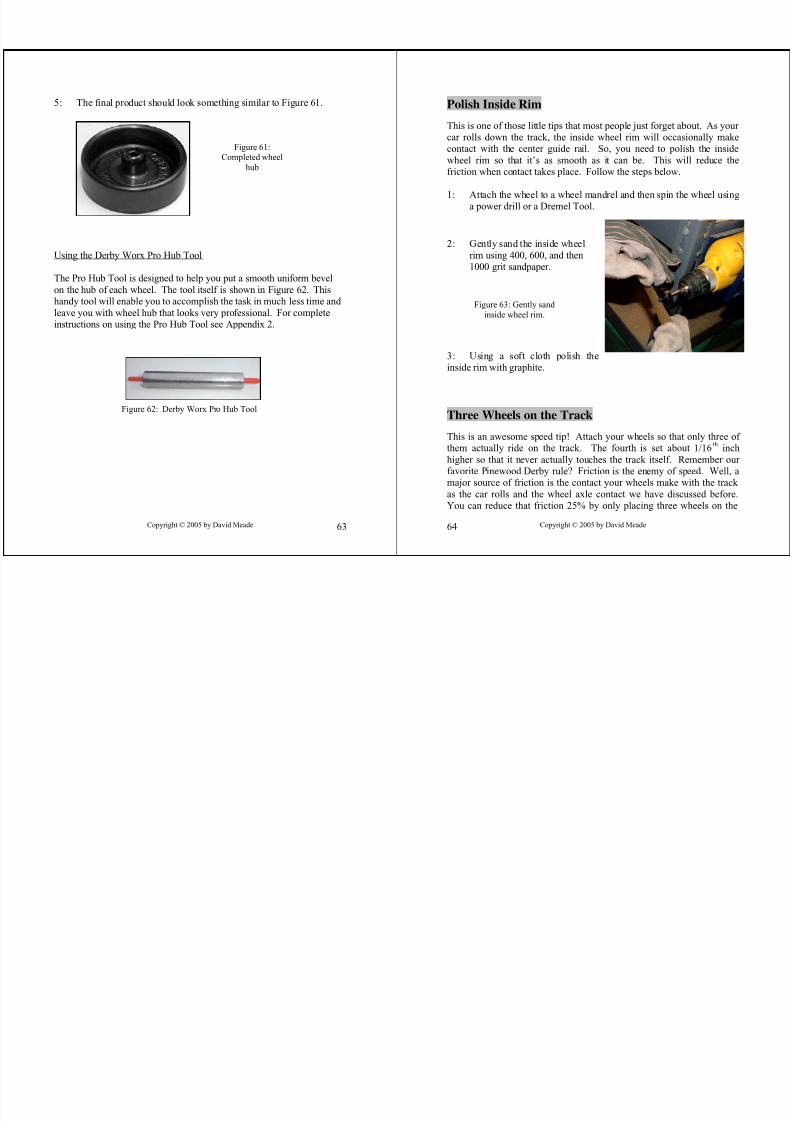
This is one of those little tips that most people just forget about. As your car rolls down the track, the inside wheel rim will occasionally makecontact with the center guide rail. So, you need to polish the insidewheel rim so that it’s as smooth as it can be. This will reduce thefriction when contact takes place. Follow the steps below.
1: Attach the wheel to a wheel mandrel and then spin the wheel usinga power drill or a Dremel Tool.
2: Gently sand the inside wheelrim using 400, 600, and then1000 grit sandpaper.
3: Using a soft cloth polish theinside rim with graphite.
Three Wheels on the Track
This is an awesome speed tip! Attach your wheels so that only three of them actually ride on the track. The fourth is set about 1/16
th inch
higher so that it never actually touches the track itself. Remember our favorite Pinewood Derby rule? Friction is the enemy of speed. Well, amajor source of friction is the contact your wheels make with the track as the car rolls and the wheel axle contact we have discussed before.You can reduce that friction 25% by only placing three wheels on the
track to begin with. If the wheels on your car are aligned and balanced,
then you only need three wheels. The fourth wheel is just there to slowyour car down, so get rid of it! The wheel you elevate needs to be oneof the front wheels. Figure 64 shows a car with one wheel riding abovethe track.
To accomplish this do one of the following:
1: If you are using a standard wheel base, then simply cut thestandard wheel grooves a little deeper so that the axle can beinserted higher up on the block.
2: If you are using an extended wheel base, then simply drillone of the front axle holes a little higher .
3: Use the front wheel that spins theworst. Every car has one wheel that
just doesn’t spin as well as the others.Use that wheel as the one you elevate.This will make your car go even faster
because you have totally eliminated your worst wheel from consideration.
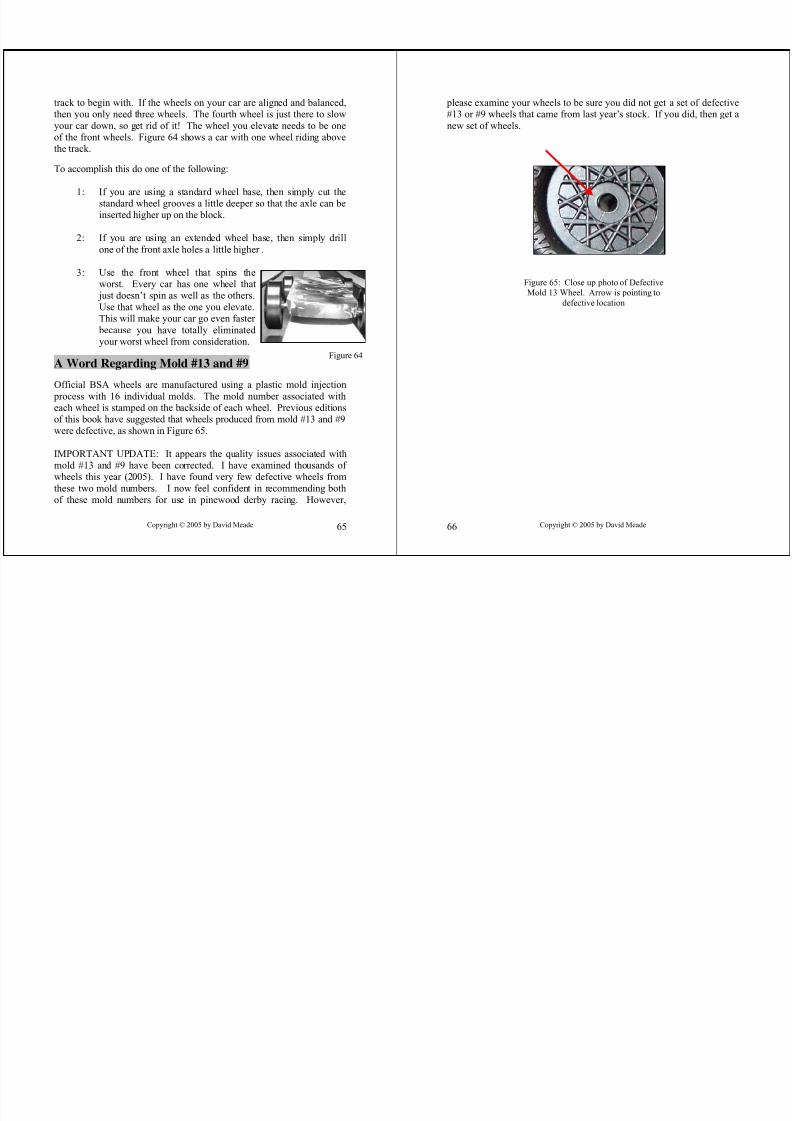
A Word Regarding Mold #13 and #9
Official BSA wheels are manufactured using a plastic mold injection process with 16 individual molds. The mold number associated witheach wheel is stamped on the backside of each wheel. Previous editionsof this book have suggested that wheels produced from mold #13 and #9
were defective, as shown in Figure 65.
IMPORTANT UPDATE: It appears the quality issues associated withmold #13 and #9 have been corrected. I have examined thousands of wheels this year (2005). I have found very few defective wheels fromthese two mold numbers. I now feel confident in recommending bothof these mold numbers for use in pinewood derby racing. However,
Another very powerful set of speed tips involve reducing the friction between the axle and the wheel. There are two contact points betweenthe wheel and the axle.
Polishing your axles until they shine like mirrors, see pages 35 - 38, willhelp reduce friction at both contact points. But, don’t stop there! Youcan do more… much more! Just take a look at these killer speed tips!
Taper the Axle Head
The idea here is to reduce the amount of surface area available to rub atcontact point #1. By tapering the axle head, we reduce the area so thatonly a small portion of the head can make contact with the wheel.
1: This step should be done prior to polishing your axles. Ideally youwill taper the axle head and remove the unwanted burrs at the sametime.
2: Clamp your power drill into a vise.
3: Insert and secure an axle in the drill. Be sure the axle is secured tightly.
4: Using smooth tooth file, gently file the axle head to an angle of about 30 degrees.
5: Follow the steps on pages 39-42 to polish the axle until it shineslike a mirror.
Reducing Contact Surface AreaAnother important thing you can do to improve the performance of your car is to reduce the contact surface area between the wheel and the axle.This is especially important if you are using a liquid lubricant. This isaccomplished by altering the axle so that it looks like Figure 69.
The part of the axle where the groove is cut never touches the wheel.This feature significantly improves the performance, especially whenusing liquid lubricants but also has benefits when dry lubricants are used as well.
Follow these steps to create lightning speed axles:
1: This speed tip is best accomplished with a drill press. However, if you are very careful and precise you can do it with a power drill as
well. The cuts you make in the axle must be absolutely straight. If you cut the groove on an angle then the wheel will tend to wobbleas it turns.
2: Place a dark mark on the axle at 1/16th
of an inch from the head. Place a second mark at 1/4
th of an inch, as shown in
Figure 70.
3: Clamp the axle in your drill press or power drill.
Figure 69: Measurementsshown are those to be used when racing with standard
4: If using a drill press, line up the press table with the marks youmade on the axle, as shown in Figure 64. Using a flat file, gentlycut a groove in the axle to a depth of about 1/16
th of an inch. Don’t
cut the groove too deep, as it will weaken the axle.
5: Polish the axle using the method shown on pages 39-42. The final product should look similar to the one shown in Figure 72.
This little speed tip, also has a hidden advantage. The groove you cut inthe axle becomes a secret trough where graphite gets stored. Later onduring the race, some of that graphite will work it’s way out of thetrough and be used to lubricate the inside of your wheels.
5: Allow the car to roll 2 or 3 feet. As it rolls, watch each wheel.
Take special note of whether each wheel tends to move inward toward the car body, outward toward the axle head, or whether it
just rolls in the middle of the axle. Repeat this process severaltimes until you are confident that you understand how each wheelis moving as the car rolls.
6: If a wheel moves inward toward the car body, then the axle needsto be adjusted up.
If a wheel moves outward toward the axle head, then the axleneeds to be adjusted down.
7: Making adjustments to the axles is the most important part of this process. YOU MUST DO IT CORRECTLY. The idea is toslightly bend the axle so that it angles up or down as needed.However, the bend needs to be done in such a way as to leave the
portion of the axle where the wheel rides, absolutely straight.
Follow the steps below to adjust the axle.
A: Before removing the axle from thecar body, place a mark on the axle atexactly 12 O’clock. This willensure that you always know theoriginal orientation of the axle.
B: Before removing the axle, place amark at the exact location where theaxle meets the car body, see Figures 75 and 76.
C: Carefully remove the axle from the car body. Be verycareful. Do not damage the wheels in the process.
D: Clamp the axle in a vise or an axle press. If the axle needs to be adjusted up, then make sure the 12 O’clock mark is awayfrom you, as shown in Figure 77. If the axle needs to beadjusted down, then make sure the 12 O’clock mark istoward you. The mark you made in step B should be located slightly above the edge of the vise as shown in Figure 77.
Figure 77: Clamp and align axle.
In this example, the axle needs to beadjusted “UP” so we have the mark facing away from us. The bend will
be made in the direction of the mark.
If the axle needs to be adjusted “DOWN” then the mark would be
180 degrees from what it is shown inthis picture. It would be facing you.
Second mark slightly above edge of vise. This is where the bend will be
screwdriver squarely at the base of the axle, slightly belowthe mark you made in step B,as shown in Figure 78
F: Gently tap on the screwdriver with a small hammer or rubber mallet. This will create a slight bend at the marked location,see Figure 79. You don’t want to bend the axle too much.Small adjustments are the key to the process.
G: Remove the axle from the vise and reattach the axle and wheel to the car body. Be sure the 12 O’clock mark is
pointing straight up.
H: Place the car on the ramp and allow the car to roll down theramp 2 or 3 feet. If the wheel stays pretty much in the center of the axle, then you are finished with “Up/Down”adjustments for that axle. If the axle continues to move intoward the body or out toward the axle head, then you need
1: Go outside or in the garage and apply graphite to each wheel(outside because we don’t want to get graphite all over thefurniture or carpet). Spin the wheels a little bit.
2: Find a good movie and put it in your DVD player.
3: Sit down and start spinning your wheels. Hold the car level and spin them. Turn the car on its side and spin them. Turn the car over on the other side and spin them.
4: After 5 or 10 minutes, go back outside and apply some moregraphite.
5: Watch your movie and spin your wheel some more! Spin themand spin them. Keep spinning the wheels until the movie is over.Periodically go outside and apply graphite.
6: By the time the movie is over, your car will have been in about 100
races. It will be a fine tuned racing machine!
Method #2 (Using a Dremel Tool):
1: Obtain a Dremel Tool with a large felt disk attachment.
2: Apply graphite to the wheels.
3: Turn the Dremel Tool on high speed. Gently touch the spinningfelt disk to one of the wheels. Let it spin and spin.
4: Turn the car over on it side and spin the wheels. Turn it over onthe other side and spin the wheels, see Figures 81 and 82 and 83.Every minute or so apply more graphite.
5: Spin each wheel for about 5 minutes on high speed.
6: When you are finished, your car will have run a good 100 races or more. It will be a fine tuned racing machine!
Figures 81, 82, and 83: Spin the wheels in all three positions.
The 20 Second Test
Basically, the 20 second test is the final test you will give your car to besure everything is correct and ready to go. After the wheels have beenlubricated, aligned, and broken in, you should perform the 20 second test. Spin each wheel as fast as you can. Time how long each wheelspins. Repeat this procedure 5 or 6 times for each wheel. If everythingis “right” your wheels should spin for at least 20 seconds. If you find
one wheel that just doesn’t measure up, then try adding more graphite.Spin that wheel again for a minute or so to break it in. When finished,try the 20 second test again. If the wheel now spins for 20 seconds,great! If it’s still slow, I would recommend you remove that wheel/axle
pair and replace them with another set. We have replaced wheel/axlesets many times over the years when they didn’t pass the 20 second test(if you end up replacing a wheel then you will need to re-align your car).
When it comes to derby racing, car design is a controversial topic… butit shouldn’t be! There are car designs which produce faster cars than
others, and that’s a fact! If you want to build the Ultimate Car, then youneed to select a fast design. So, what are the key factors of a fast car design?
Design Factor #1: Choose an aerodynamic design. We have discussed this principle in a previous section, see pages 20 and 21. However, Iwish to emphasize this point again. Use a design which has a low,aerodynamic profile. Aerodynamics does make a difference in speed.
Design Factor #2: Maximize the amount of weight placed in the rear of the car. This means removing as much wood from the middle and frontof the car as possible. Remember, any weight placed in the middle or front of the car is badly placed weight. Moving that weight to the rear of the car will increase speed!
This is seriously, one of those speed tips to which almost no-one paysattention. Think back to last year, or pay attention when you see all of the cars this year. How many people made any attempt whatsoever toremove wood from the middle or front of the car? Every sliver of wood
or pinch of saw dust that you move from the middle to the back of thecar will increase the speed!
Figure 85 shows one car design which adheres to the design factorsoutlined above. Notice this car is aerodynamic and contains very littlewood in the center or front of the car. This is just an example. Please be
creative and find your own ways to incorporate these design tips. It
could make the difference between taking home first or second place!
Figure 85: Aerodynamic, very little wood in center or front of car
Polish the Wheel Bore
You may think that you have polished every single location on your car that can possibly be polished. However, there is still one place thatneeds to be polished! That location is the wheel bore, see Figure 86.
I have actually looked down inside the wheel bore using some powerfulmagnifying equipment. Take my word for it… it’s not a pretty sight!
The inside of the wheel bore is anything but smooth! Some wheels even
have long deep scratches down the bore.
You spend tons of time polishing your axles and now you are supposed to insert them into a wheel bore that looks like sandpaper? I don’t think so!
I’ve spent years experimenting with methods for polishing the wheel bore. I’ve tried every method I can find! The method I’m going toteach you is the best. Some of the other methods being pushed on theinternet don’t work. They sound really good, but they don’t work. I
know because I’ve tried them all.
Follow the instructions below to obtain an ultra fine polish:
1: Things you will need:
A: Power drill
B: A pipe cleaner with moderately stiff bristles. You don’twant to use a pipe cleaner with really smooth soft bristles. Ilike to use the type of pipe cleaners that are actually madefrom twisting two smaller pipe cleaners together.
This is very different from the advice you find on mostinternet sites. Most other people tell you to use a very soft
pipe cleaner. Some people even suggest you go down to atobacco store and buy an ultra fine smooth pipe cleaner.Ultra soft pipe cleaners don’t work! Think about it. Youneed to use something that can polish scratches out of plastic.
C: A tube of whitening toothpaste. You MUST use whitening
toothpaste. Most whitening toothpaste products contain afine abrasive polish. We will use the toothpaste as our polishing compound.
2: Secure the drill in a vise, as discussed previously
3: Insert and secure a 5 inch section of pipecleaner in the drill, as shown in Figure 87
4: Coat the pipe cleaner with whiteningtoothpaste.
5: Feed the pipe cleaner down through the
wheel bore of one wheel, as shown inFigure 88.
6: Hold the wheel between your fingers and then turn on the drill using medium speed.Slowly move the wheel up and down the
pipe cleaner as it spins. Polish each wheelfor about 45 seconds. Don’t over polish. 45seconds will do just fine.
7: Turn off the drill and remove the wheel from the pipe cleaner.Using warm water and a clean pipe cleaner, wash the wheelthoroughly. You must remove ALL of the toothpaste from inside
the wheel bore. Wash and rise, Wash and rinse! Get the wheel
totally cleaned out.
8: Using a third clean, dry pipe cleaner make sure you dry the insideof the bore. Do not leave water droplets inside the bore. As theydry, residue may be left behind. The idea is to completely cleanand dry the wheel after polishing.
9: Repeat this process with all 4 wheels.
10: If you have a really good magnifying glass you may be able tohold a wheel up to the light and look down inside the wheel bore.If you do, you should be able to see a very smooth polished surface. Perfect for Racing!
I’ve tested many other methods. This one works the best! It will leavethe wheel bore with a mirror-like finish.
Quick Start
How would you like it if your car had already rolled 1 full inch down thetrack before any of the other cars even started moving? To the casualobserver it will simply look like your car is just really really fast off of the starting line. However, the truth is that your car really does start
rolling down the track before the others even have the chance to move.
This is accomplished by cutting a channel in the nose of the car. A bar is then positioned above that channel. As soon as the starting pin drops
below that bar, the car becomes free to start rolling. Figures 89 - 93illustrate this technique.
We have raced in 4 Cub Scout packs in two states. Every single one of
these packs has allowed us to use this speed tip. We have never beenquestioned. It’s been a wonderfully powerful speed advantage! Try tomake the channel and bar look like a natural part of your car design.However, if for some reason you discover that your local pack will notallow you to implement this technique as described above, there is asimplified version that will still give you a quick start and should belegal anywhere.
Instead of cutting a channel in the nose, simply undercut the nose asshown in figures 94 and 95. As soon as the starting pin drops below thelip, the car will begin to roll.
All Axles are Not Created Equal
The title of this section pretty much says it all. Simply stated, there’s nosuch thing as a straight Official Scout Axle, but some are muchstraighter than others. This is very important to understand. If you useaxles which are curved or bent your wheels will wobble as they go downthe track. It will also affect the alignment of your wheels.
Bent Axles = Less Speed
Front of Car
Figure 94: Alternateway to use quick
start.
Figure 95: Alternate way touse quick start. You are
The difference between a good axle and a bad axle is not normallyvisible to the naked eye. Can you tell the difference between the axlesets in Figures 96 and 97? The axles in Figure 96 are NOT straight.Your car will have less speed if you use these axles. The axles in Figure97 are actually quite close to being straight. They’re about as good asyou can get straight out of the box. Your car will go faster if you usethis set of axles.
In order to find a good set of straight axles you will need to start withabout 20 raw axles.
• Take each axle and put a small mark on it about one half inchdown from the sharp pointed end.
• Clamp your power drill in a vise, as discussed previously.
• Insert one axle into the drill, clamping the axle at the previouslymarked location. This will ensure that each axle is clamped atthe same relative location during this process.
• Turn on the drill. Observe the spinning axle. Bent axles will
wobble as they turn in the drill, making them appear similar tothe axle shown in Figure 98. Relatively straight axles will look more like the axle shown in Figure 99.
o Please note that all axles will wobble to some degree. Theidea here is to pick the four axles which appear to wobble theleast amount. These will be the four axles which are thestraightest. If you start with 20 axles you will be able to find 4 that are really quite good.
• Once you have identified the 4 best axles, place them aside to beused later. You will need to prepare this set of axles for topspeed using the speed tips found on pages 36 through 42.
Figure 98: Bent axlespinning in drill
Figure 99: Relatively straightaxle spinning in drill
You can further straighten and improve your axles by using the DerbyWorx Pro Axle Press. This nifty tool enables you straighten bent BSAaxles. The tool is shown in Figure 100. You put your axle in the press,tap it with a mallet, and presto you have straight axles. It works best if you start out with the best axles you can find, so be sure to follow theinstructions outlined on the previous page before you use the Pro AxlePress. I’ve used this tool for several years and find it to be everything itclaims to be. For complete instructions on how to use the Pro Axle
Bake The BlockI have said this several times now. The more weight you put in the rear of the car, the faster the car will go. However, did you know that evenafter you have done all of the other things I have suggested, there is stillmore weight located in the front half your car which can be moved to therear? All wood blocks contain water. Water is a very heavy substance.Just a little bit of it can weigh a lot, relatively speaking. All of the water locked up in the front half of your car, is badly placed weight, so moveit!
Before you add weights or paint your car, put the wood block in your kitchen oven and bake it. Baking will cause most of the water locked upinside the wood to evaporate. With that water gone, you will be free to
put more weight near the back of the car. Children should not performthis task without adult supervision.
I would recommend that you bake the block at about 250 degrees for about 2 hours (You will need to experiment and find what works best for
you). The impact this speed tip has upon the weight of the block will beaffected by the humidity in your local area. However, even in theSahara Desert, a wood block will have some water in it. Every gram of weight you move to the rear of the car will make your car go faster.
Safety Note: When baking a block you need to keep a closeeye on what’s going on in the oven. If you neglect the block you could start a fire or over bake the wood.
Use Premium Wheels
We discussed earlier the fact that BSA wheels are manufactured using a16-mold plastic injection process. Wheels are numbered 1-18. Mold numbers 6 and 7 are not included. Wheels coming from die molds 2, 5,
and 17 are better than other wheels. These wheels are normally defect
free. They are also the most truly round wheels, and have a larger wheel bore size. A larger bore size means these wheels generate less frictionwith the axles.
You can purchase extra wheels at your local BSA Scout Shop. Sortthrough the wheels and select those from mold numbers 2, 5, and 17.Set these wheels aside and use them to build your car.
Here is an example design we have used several times. It brought homethe gold every time it raced!
You are free to copy this design and use it yourself. However, don’t feellike you have to use this design. Be creative! Find ways to incorporatespeed tips into your own car designs.
Wheel bore polished Lathe turned wheels Wheels tread and rims polished Wheel hub tapered and polished Axle diameter reduced Graphite-Moly applied to all contact
points Wheel base extended Body/Axle contact area polished Three wheels on the track
Used wheel mold number 2, 5, or 17 Wheels broken in for at least 50 races Wheels pass 20 second test Maximum wood removed from
middle of car body Block baked to remove water Used straight axles Quick start design
FIRST PLACE TROPHY
This car has beaten over 100 other
cars, winning every single heat it hasever raced in. We have a fleet of other cars for which similar stories can betold!
ConclusionSo, there you have it… The Ultimate Car! You are free to use anycombination of speed tips you wish. If you follow the instructions Ihave outlined, you will have a fast car! I cannot guarantee that you willwin. However, I can say with 100% certainty, that these speed tips haveenabled my sons to win every single race they have competed in, over aracing career that spans many years! Some of those Pinewood Derbieshave sported over 100 cars and we beat them all! However, I’ll have to
admit that I was not completely truthful in my introduction to this book.We do have one second place trophy. Yes, I’ll have to admit it. We gotthat trophy the year both of my sons were racing at the same time. Thatyear we took first and second place! We have had some wonderfultimes together building cars!
In closing, please remember that the most important aspect of thePinewood Derby is to have fun! Have fun by being safe, being honest,and in showing good sportsmanship. Even though we have spent a lot of
time talking about principles that will help you win the Pinewood Derby,don’t forget that your derby experience is only a success if you enjoy theride.
One important principle everyone should understand is that some car designs are better than others. They have the features that maximize
potential energy and reduce wind drag, while at the same time look good. Below are examples of three winning car designs in both standard and extended wheel base configurations.
Figure 103: Three Winning Designs in Both Extended and Standard Wheel Base
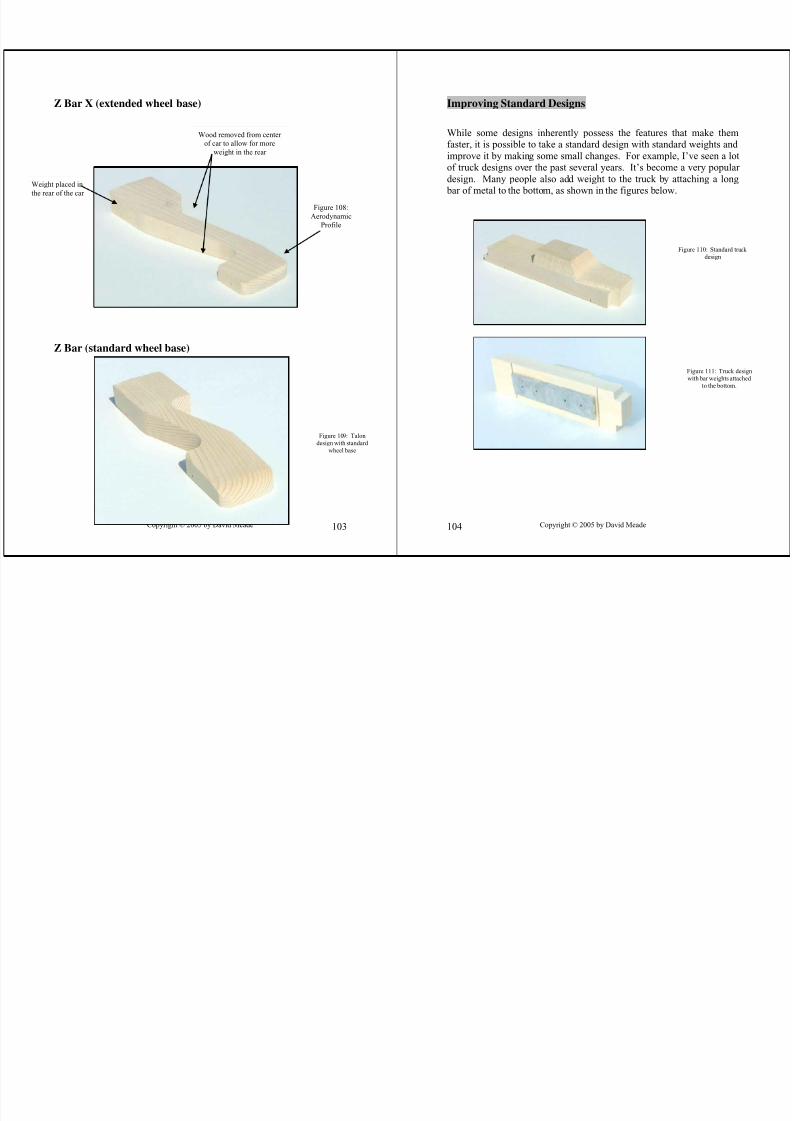
While some designs inherently possess the features that make themfaster, it is possible to take a standard design with standard weights and improve it by making some small changes. For example, I’ve seen a lotof truck designs over the past several years. It’s become a very popular design. Many people also add weight to the truck by attaching a long
bar of metal to the bottom, as shown in the figures below.
Drill out Wood In Center of the Body: Fast cars have as muchwood removed from the center of the car as possible. This allowsfor more weight to be placed in the rear of the car. In the figure
below we have used a drill to remove wood from the center of thetruck. All of this weight is now free to be relocated to the rear of the truck.
Put the Weight in the Rear: Remove the metal weight from the bottom of the truck and drill three holes in the rear. Fill theseholes with lead. If you use a 25/64
th inch drill bit then you will be
able to easily slide standard lead wire into the holes.
Appendix 2Derby Worx Pro Tools(Available at www.derbychamp.com)
Pro Body Tool
The Pro-Body Tool II is designed to accurately create pilot holes in existing axleslots or to create new axle holes using a hand drill on BSA and PineCar kits. Therequired #44 drill bit is included.
1: Test fit the tool on the bottom of the block with the two ‘ears’ positioned on
the sides of the block. If the tool will not fit onto the block, use coarse gritsandpaper to reduce the width of the block until the tool fits snuggly. If thetool is loose, tighten the fit by placing a piece of paper - folded as needed - between one ‘ear’ of the tool and the block, see Figure 1.
Figure 1: Test Fit Pro
Body Tool on Block
Use holes on either end todrill holes at the standard
2: Use a square to draw a straight line on the side of the car starting at themiddle of the axle slot, and extending to the top of the car (or measure thedistance from one end of the block to the middle of an axle slot and transfer that measurement to the top-side of the block. Then use a ruler to draw a linefrom that measurement to the center of the axle slot), in a similar manner tothat shown in Figure 2.
Repeat step 2 for the other slot. Then continue with step 3.
If Adding Holes New Holes Where Slots Do Not Exist:
2: Measure and mark the desired position of the newaxle holes on the side of the block. Extend the mark from the bottom of the block to the top of the block using a square (or measure and mark near the bottomof the block and near the top of the block, and then join the line with a pencil and ruler). Holes for
extended wheel bases are typically positioned 5/8"from the end of the block, see Figure 2.
Repeat step 2 for the other end of the block. Then continue with step 3.
3: Position the tool on the bottom of the car with the two ‘ears’ on the sides of the block. Align the index mark on the tool with the line corresponding tothe rear axle slot or hole on the block. Clamp the tool in place, see Figure 3.
4: Hold the block firmly, position the drill bit in the hole, and slowly drill ¾”into the block, see Figure 3. Without releasing the clamp, turn the tool and
block over, and drill the second hole.
5: Repeat these steps for the other holes in the block. If a raised hole isdesired, drill only one of the front holes (either one) and proceed to step 6:
If Drilling a Raised Hole Only:
6: Transfer the line on the side of the block to the bottom of the block. Positionthe tool on the desired side of the block, and align the index mark on the tool
with the line on the bottom of the block. Make sure that the third hole on thetool is positioned near the bottom of the block. Clamp the tool in place and drill the raised hole, see Figure 4.
1: Identify the features of your tool. The Pro Hub Tool comes with a protective plastic cover on both ends. Remove the protective cover and view bothends. One end is flat as shown in Figure 6. The other end is coned, asshown in Figure 7.
2: Remove the protective cover from the flat side of the tool. Test fit eachwheel by sliding it onto the tool pin. If the wheel bore is too small for thetool, use steady hand pressure and a twisting motion to work the wheel on tothe tool. Remove the wheel and repeat 3 times, see Figure 8.
3: Dip the coarse-grit sandpaper in a cup of tap water. Remove the protectivecap from the square end of the tool, pierce the sandpaper (grit facing
outwards) and slide the sandpaper until it contacts the body of the tool. Tominimize the risk of a hand injury, leave the protective cap on the coned end of the tool, see Figure 9
4: Place a wheel onto the square end of the tool, hub side first. With one hand hold the tool and the sandpaper, and with the other hand press the wheelagainst the sandpaper. Rotate the wheel back and forth for about 10 seconds.
5: Replace the protective cap on the flat end of the tool. Remove the protectivecap from the coned end of the tool.
6: Repeat steps 3 and 4 using course sandpaper on the coned end of the tool.Repeat the process until the hub has a nice defined cone shape.
7: Repeat steps 3 and 4 using fine sandpaper on the coned end of the tool.When finished the hub should look like Figure 11.
1: Insert an axle into the chuck of a drill, and use a file to remove the burr under the nail head, and any crimp marks on the axle shaft.
2: Make a mark on the head of the axle, as shown in Figure 11.
3: Fully insert the axle - point first - into the Pro-Axle Press. Rotate the axlehead such that the mark is located at the top (12 o'clock), and close the press,see Figure 12.
4: Place the Pro-Axle Press on a solid surface, hold it in place, and strike thetop of the press 4-6 times with a hammer. Don't strike too hard - mediumstrikes are fine, see Figure 13.
5: Open the press and repeat steps 3 and 4 with the mark at the 4 o'clock position
6: Open the press and repeat steps 3 and 4 with the mark at the 8 o'clock position
7: After the last strike at the 8 o'clock position, lay the press on its back (axlehead upward) and strike the axle head 2-4 times. This ensures that the axlehead is square to the axle shaft, see Figure 14.
8: Repeat for the other three axles, and then polish the axles to the desired finish.
Figure 14: Lay press on itsback and strike axle head.