26
DESIGN DRAWING WORKSHOP Combining Traditional Hand Drawing Techniques with Advanced Digital Tools June 19, 2013 / Jim Leggitt, FAIA / AIA National Convention
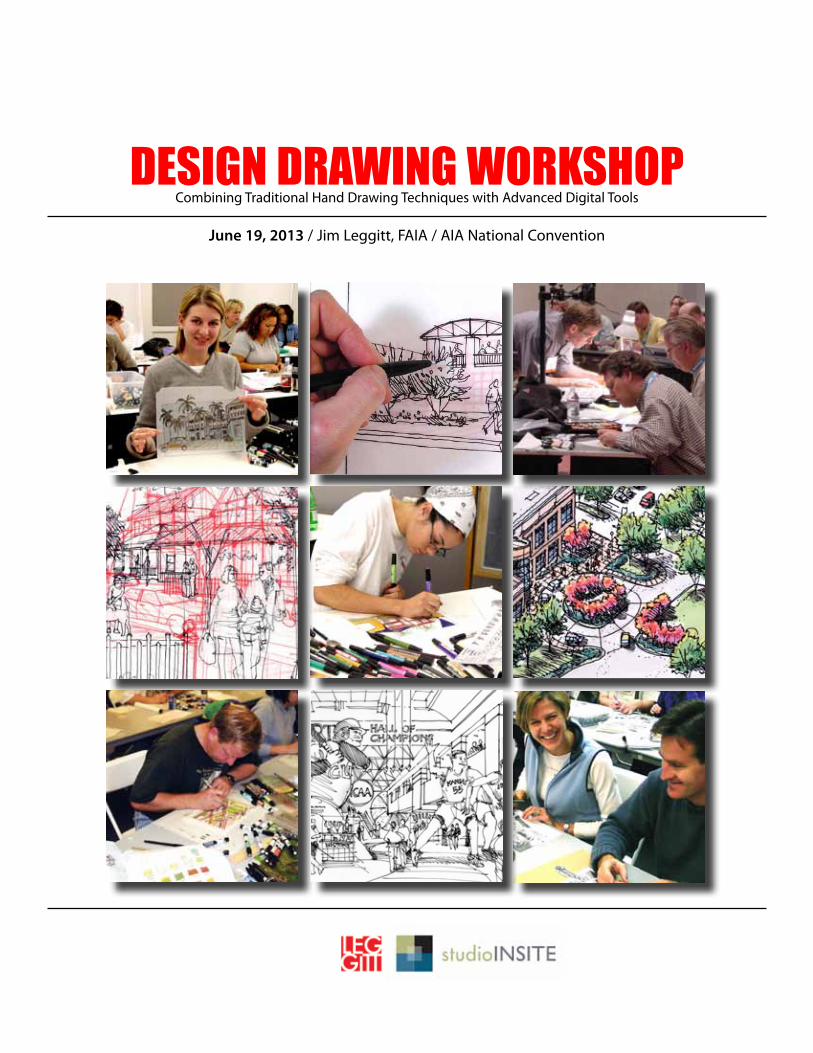
DESIGN DRAWING WORKSHOPCombining Traditional Hand Drawing Techniques with Advanced Digital Tools
June 19, 2013 / Jim Leggitt, FAIA / AIA National Convention
2DESIGN DRAWING WORKSHOP : Combining Traditional Hand Drawing Techniques with Advanced Digital ToolsWednesday June 19, 2013 / AIA National Convention / Jim Leggitt, FAIA
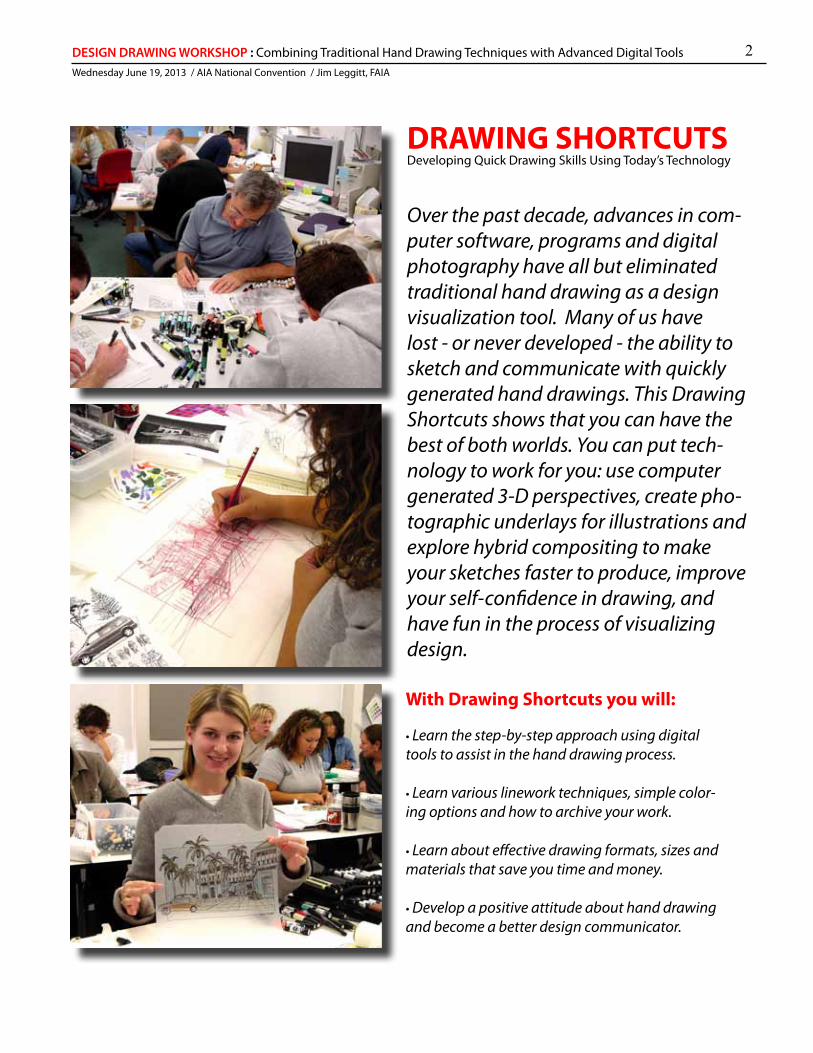
DRAWING SHORTCUTSDeveloping Quick Drawing Skills Using Today’s Technology
Over the past decade, advances in com-puter software, programs and digital photography have all but eliminated traditional hand drawing as a design visualization tool. Many of us have lost - or never developed - the ability to sketch and communicate with quickly generated hand drawings. This Drawing Shortcuts shows that you can have the best of both worlds. You can put tech-nology to work for you: use computer generated 3-D perspectives, create pho-tographic underlays for illustrations and explore hybrid compositing to make your sketches faster to produce, improve your self-confidence in drawing, and have fun in the process of visualizing design.
With Drawing Shortcuts you will:
• Learn the step-by-step approach using digital tools to assist in the hand drawing process.
• Learn various linework techniques, simple color-ing options and how to archive your work.
• Learn about effective drawing formats, sizes and materials that save you time and money.
• Develop a positive attitude about hand drawing and become a better design communicator.
3DESIGN DRAWING WORKSHOP : Combining Traditional Hand Drawing Techniques with Advanced Digital ToolsWednesday June 19, 2013 / AIA National Convention / Jim Leggitt, FAIA
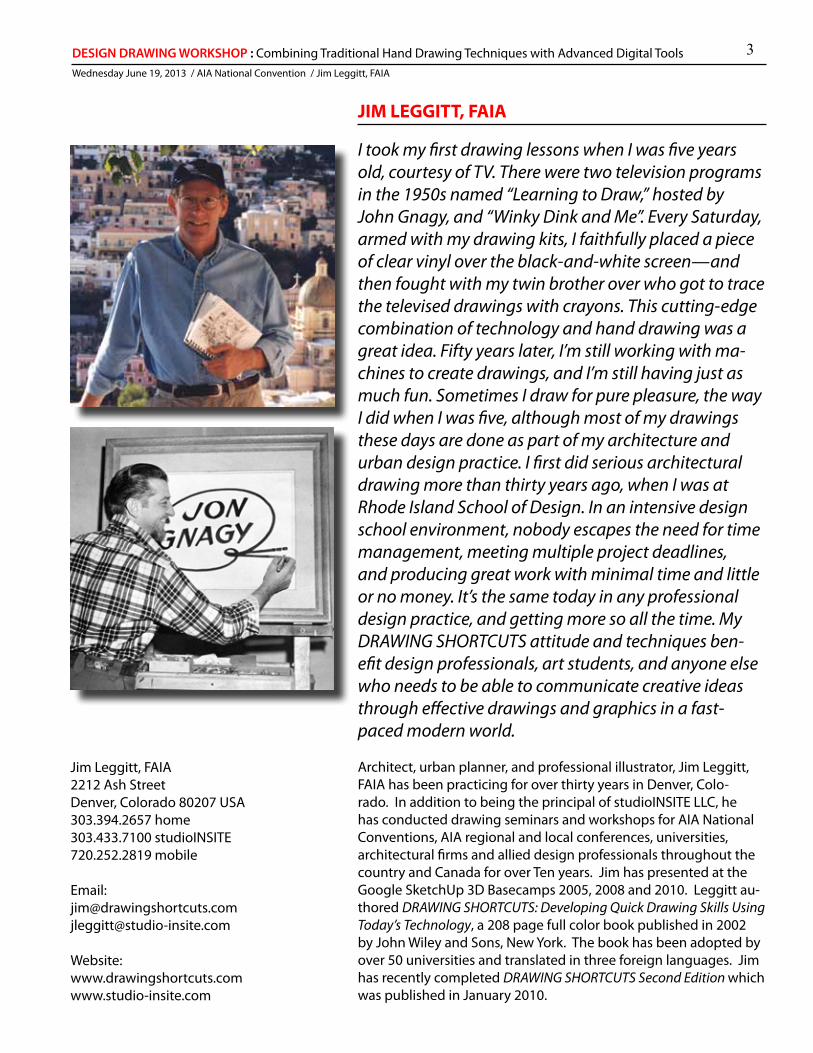
JIM LEGGITT, FAIA
I took my first drawing lessons when I was five years old, courtesy of TV. There were two television programs in the 1950s named “Learning to Draw,” hosted by John Gnagy, and “Winky Dink and Me”. Every Saturday, armed with my drawing kits, I faithfully placed a piece of clear vinyl over the black-and-white screen—and then fought with my twin brother over who got to trace the televised drawings with crayons. This cutting-edge combination of technology and hand drawing was a great idea. Fifty years later, I’m still working with ma-chines to create drawings, and I’m still having just as much fun. Sometimes I draw for pure pleasure, the way I did when I was five, although most of my drawings these days are done as part of my architecture and urban design practice. I first did serious architectural drawing more than thirty years ago, when I was at Rhode Island School of Design. In an intensive design school environment, nobody escapes the need for time management, meeting multiple project deadlines, and producing great work with minimal time and little or no money. It’s the same today in any professional design practice, and getting more so all the time. My DRAWING SHORTCUTS attitude and techniques ben-efit design professionals, art students, and anyone else who needs to be able to communicate creative ideas through effective drawings and graphics in a fast-paced modern world.
Architect, urban planner, and professional illustrator, Jim Leggitt, FAIA has been practicing for over thirty years in Denver, Colo-rado. In addition to being the principal of studioINSITE LLC, he has conducted drawing seminars and workshops for AIA National Conventions, AIA regional and local conferences, universities, architectural firms and allied design professionals throughout the country and Canada for over Ten years. Jim has presented at the Google SketchUp 3D Basecamps 2005, 2008 and 2010. Leggitt au-thored DRAWING SHORTCUTS: Developing Quick Drawing Skills Using Today’s Technology, a 208 page full color book published in 2002 by John Wiley and Sons, New York. The book has been adopted by over 50 universities and translated in three foreign languages. Jim has recently completed DRAWING SHORTCUTS Second Edition which was published in January 2010.
Jim Leggitt, FAIA2212 Ash StreetDenver, Colorado 80207 USA303.394.2657 home303.433.7100 studioINSITE 720.252.2819 mobile
Email:[email protected]@studio-insite.com
Website: www.drawingshortcuts.comwww.studio-insite.com
4DESIGN DRAWING WORKSHOP : Combining Traditional Hand Drawing Techniques with Advanced Digital ToolsWednesday June 19, 2013 / AIA National Convention / Jim Leggitt, FAIA
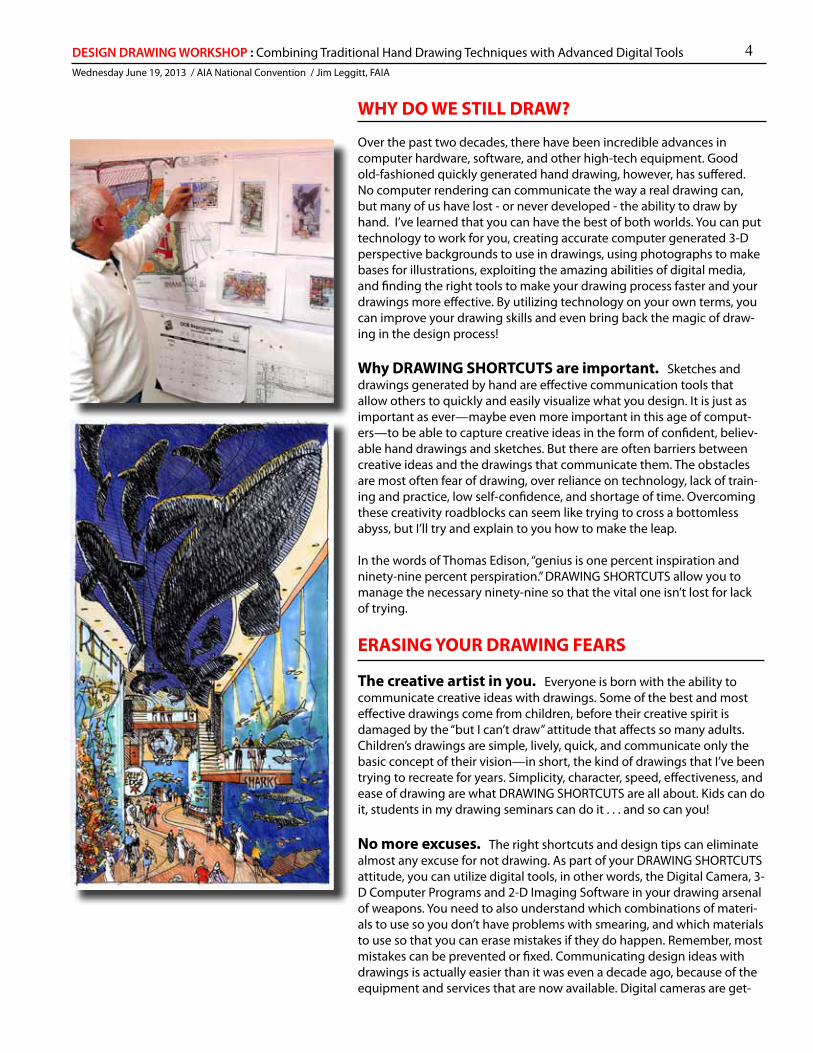
WHY DO WE STILL DRAW?
Over the past two decades, there have been incredible advances in computer hardware, software, and other high-tech equipment. Good old-fashioned quickly generated hand drawing, however, has suffered. No computer rendering can communicate the way a real drawing can, but many of us have lost - or never developed - the ability to draw by hand. I’ve learned that you can have the best of both worlds. You can put technology to work for you, creating accurate computer generated 3-D perspective backgrounds to use in drawings, using photographs to make bases for illustrations, exploiting the amazing abilities of digital media, and finding the right tools to make your drawing process faster and your drawings more effective. By utilizing technology on your own terms, you can improve your drawing skills and even bring back the magic of draw-ing in the design process!
Why DRAWING SHORTCUTS are important. Sketches and drawings generated by hand are effective communication tools that allow others to quickly and easily visualize what you design. It is just as important as ever—maybe even more important in this age of comput-ers—to be able to capture creative ideas in the form of confident, believ-able hand drawings and sketches. But there are often barriers between creative ideas and the drawings that communicate them. The obstacles are most often fear of drawing, over reliance on technology, lack of train-ing and practice, low self-confidence, and shortage of time. Overcoming these creativity roadblocks can seem like trying to cross a bottomless abyss, but I’ll try and explain to you how to make the leap.
In the words of Thomas Edison, “genius is one percent inspiration and ninety-nine percent perspiration.” DRAWING SHORTCUTS allow you to manage the necessary ninety-nine so that the vital one isn’t lost for lack of trying.
ERASING YOUR DRAWING FEARS
The creative artist in you. Everyone is born with the ability to communicate creative ideas with drawings. Some of the best and most effective drawings come from children, before their creative spirit is damaged by the “but I can’t draw” attitude that affects so many adults. Children’s drawings are simple, lively, quick, and communicate only the basic concept of their vision—in short, the kind of drawings that I’ve been trying to recreate for years. Simplicity, character, speed, effectiveness, and ease of drawing are what DRAWING SHORTCUTS are all about. Kids can do it, students in my drawing seminars can do it . . . and so can you!
No more excuses. The right shortcuts and design tips can eliminate almost any excuse for not drawing. As part of your DRAWING SHORTCUTS attitude, you can utilize digital tools, in other words, the Digital Camera, 3-D Computer Programs and 2-D Imaging Software in your drawing arsenal of weapons. You need to also understand which combinations of materi-als to use so you don’t have problems with smearing, and which materials to use so that you can erase mistakes if they do happen. Remember, most mistakes can be prevented or fixed. Communicating design ideas with drawings is actually easier than it was even a decade ago, because of the equipment and services that are now available. Digital cameras are get-
5DESIGN DRAWING WORKSHOP : Combining Traditional Hand Drawing Techniques with Advanced Digital ToolsWednesday June 19, 2013 / AIA National Convention / Jim Leggitt, FAIA
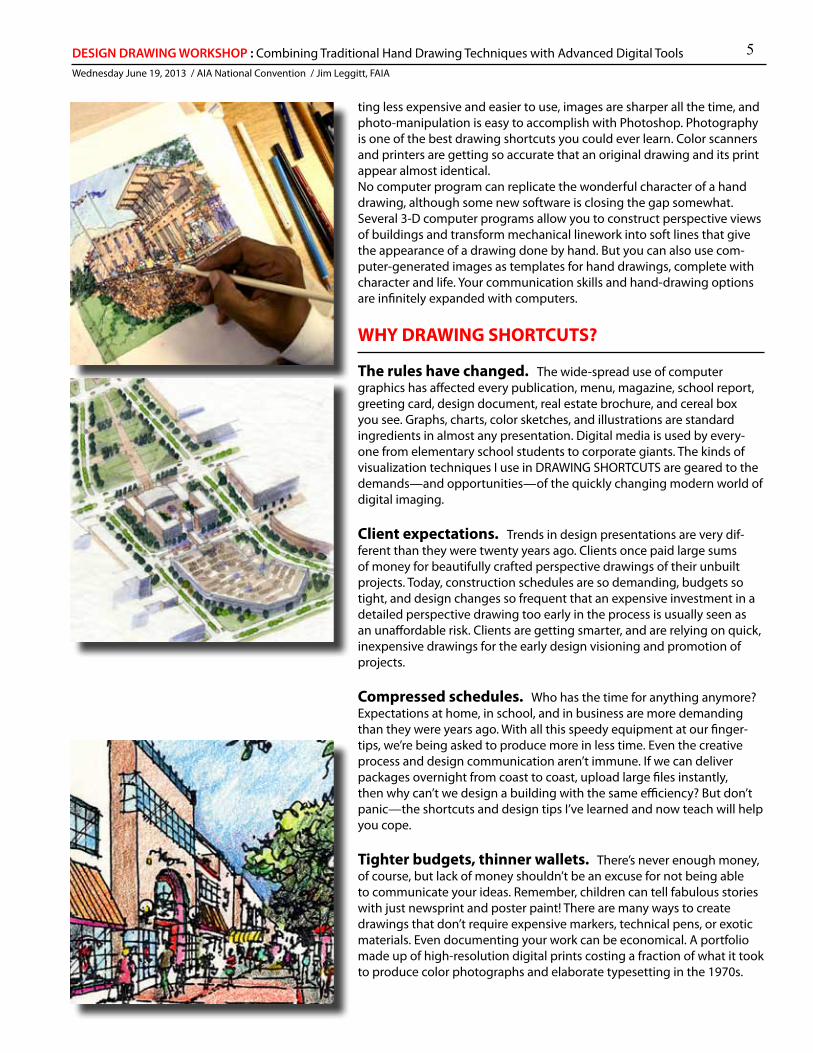
ting less expensive and easier to use, images are sharper all the time, and photo-manipulation is easy to accomplish with Photoshop. Photography is one of the best drawing shortcuts you could ever learn. Color scanners and printers are getting so accurate that an original drawing and its print appear almost identical. No computer program can replicate the wonderful character of a hand drawing, although some new software is closing the gap somewhat. Several 3-D computer programs allow you to construct perspective views of buildings and transform mechanical linework into soft lines that give the appearance of a drawing done by hand. But you can also use com-puter-generated images as templates for hand drawings, complete with character and life. Your communication skills and hand-drawing options are infinitely expanded with computers.
WHY DRAWING SHORTCUTS?
The rules have changed. The wide-spread use of computer graphics has affected every publication, menu, magazine, school report, greeting card, design document, real estate brochure, and cereal box you see. Graphs, charts, color sketches, and illustrations are standard ingredients in almost any presentation. Digital media is used by every-one from elementary school students to corporate giants. The kinds of visualization techniques I use in DRAWING SHORTCUTS are geared to the demands—and opportunities—of the quickly changing modern world of digital imaging.
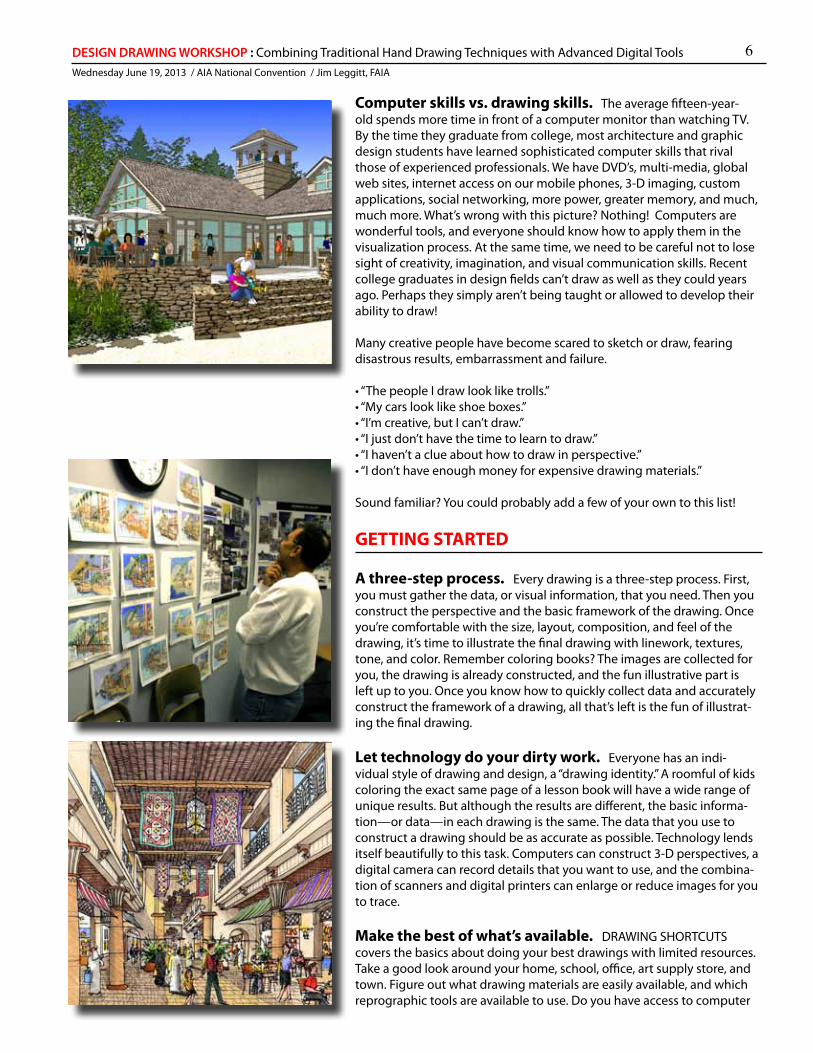
Client expectations. Trends in design presentations are very dif-ferent than they were twenty years ago. Clients once paid large sums of money for beautifully crafted perspective drawings of their unbuilt projects. Today, construction schedules are so demanding, budgets so tight, and design changes so frequent that an expensive investment in a detailed perspective drawing too early in the process is usually seen as an unaffordable risk. Clients are getting smarter, and are relying on quick, inexpensive drawings for the early design visioning and promotion of projects.
Compressed schedules. Who has the time for anything anymore? Expectations at home, in school, and in business are more demanding than they were years ago. With all this speedy equipment at our finger-tips, we’re being asked to produce more in less time. Even the creative process and design communication aren’t immune. If we can deliver packages overnight from coast to coast, upload large files instantly, then why can’t we design a building with the same efficiency? But don’t panic—the shortcuts and design tips I’ve learned and now teach will help you cope.
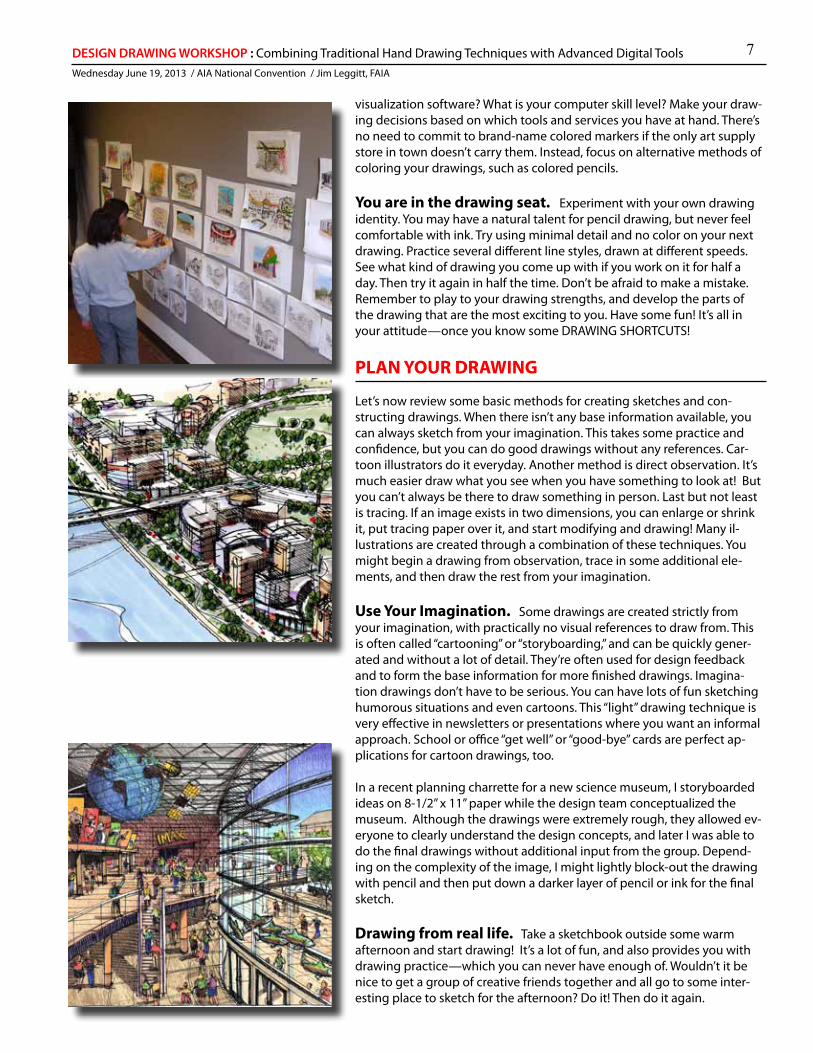
Tighter budgets, thinner wallets. There’s never enough money, of course, but lack of money shouldn’t be an excuse for not being able to communicate your ideas. Remember, children can tell fabulous stories with just newsprint and poster paint! There are many ways to create drawings that don’t require expensive markers, technical pens, or exotic materials. Even documenting your work can be economical. A portfolio made up of high-resolution digital prints costing a fraction of what it took to produce color photographs and elaborate typesetting in the 1970s.
6DESIGN DRAWING WORKSHOP : Combining Traditional Hand Drawing Techniques with Advanced Digital ToolsWednesday June 19, 2013 / AIA National Convention / Jim Leggitt, FAIA
Computer skills vs. drawing skills. The average fifteen-year-old spends more time in front of a computer monitor than watching TV. By the time they graduate from college, most architecture and graphic design students have learned sophisticated computer skills that rival those of experienced professionals. We have DVD’s, multi-media, global web sites, internet access on our mobile phones, 3-D imaging, custom applications, social networking, more power, greater memory, and much, much more. What’s wrong with this picture? Nothing! Computers are wonderful tools, and everyone should know how to apply them in the visualization process. At the same time, we need to be careful not to lose sight of creativity, imagination, and visual communication skills. Recent college graduates in design fields can’t draw as well as they could years ago. Perhaps they simply aren’t being taught or allowed to develop their ability to draw!
Many creative people have become scared to sketch or draw, fearing disastrous results, embarrassment and failure.
• “The people I draw look like trolls.”• “My cars look like shoe boxes.”• “I’m creative, but I can’t draw.”• “I just don’t have the time to learn to draw.”• “I haven’t a clue about how to draw in perspective.”• “I don’t have enough money for expensive drawing materials.”
Sound familiar? You could probably add a few of your own to this list!
GETTING STARTED
A three-step process. Every drawing is a three-step process. First, you must gather the data, or visual information, that you need. Then you construct the perspective and the basic framework of the drawing. Once you’re comfortable with the size, layout, composition, and feel of the drawing, it’s time to illustrate the final drawing with linework, textures, tone, and color. Remember coloring books? The images are collected for you, the drawing is already constructed, and the fun illustrative part is left up to you. Once you know how to quickly collect data and accurately construct the framework of a drawing, all that’s left is the fun of illustrat-ing the final drawing.
Let technology do your dirty work. Everyone has an indi-vidual style of drawing and design, a “drawing identity.” A roomful of kids coloring the exact same page of a lesson book will have a wide range of unique results. But although the results are different, the basic informa-tion—or data—in each drawing is the same. The data that you use to construct a drawing should be as accurate as possible. Technology lends itself beautifully to this task. Computers can construct 3-D perspectives, a digital camera can record details that you want to use, and the combina-tion of scanners and digital printers can enlarge or reduce images for you to trace.
Make the best of what’s available. DRAWING SHORTCUTS covers the basics about doing your best drawings with limited resources. Take a good look around your home, school, office, art supply store, and town. Figure out what drawing materials are easily available, and which reprographic tools are available to use. Do you have access to computer
7DESIGN DRAWING WORKSHOP : Combining Traditional Hand Drawing Techniques with Advanced Digital ToolsWednesday June 19, 2013 / AIA National Convention / Jim Leggitt, FAIA
visualization software? What is your computer skill level? Make your draw-ing decisions based on which tools and services you have at hand. There’s no need to commit to brand-name colored markers if the only art supply store in town doesn’t carry them. Instead, focus on alternative methods of coloring your drawings, such as colored pencils.
You are in the drawing seat. Experiment with your own drawing identity. You may have a natural talent for pencil drawing, but never feel comfortable with ink. Try using minimal detail and no color on your next drawing. Practice several different line styles, drawn at different speeds. See what kind of drawing you come up with if you work on it for half a day. Then try it again in half the time. Don’t be afraid to make a mistake. Remember to play to your drawing strengths, and develop the parts of the drawing that are the most exciting to you. Have some fun! It’s all in your attitude—once you know some DRAWING SHORTCUTS!
PLAN YOUR DRAWING
Let’s now review some basic methods for creating sketches and con-structing drawings. When there isn’t any base information available, you can always sketch from your imagination. This takes some practice and confidence, but you can do good drawings without any references. Car-toon illustrators do it everyday. Another method is direct observation. It’s much easier draw what you see when you have something to look at! But you can’t always be there to draw something in person. Last but not least is tracing. If an image exists in two dimensions, you can enlarge or shrink it, put tracing paper over it, and start modifying and drawing! Many il-lustrations are created through a combination of these techniques. You might begin a drawing from observation, trace in some additional ele-ments, and then draw the rest from your imagination.
Use Your Imagination. Some drawings are created strictly from your imagination, with practically no visual references to draw from. This is often called “cartooning” or “storyboarding,” and can be quickly gener-ated and without a lot of detail. They’re often used for design feedback and to form the base information for more finished drawings. Imagina-tion drawings don’t have to be serious. You can have lots of fun sketching humorous situations and even cartoons. This “light” drawing technique is very effective in newsletters or presentations where you want an informal approach. School or office “get well” or “good-bye” cards are perfect ap-plications for cartoon drawings, too.
In a recent planning charrette for a new science museum, I storyboarded ideas on 8-1/2” x 11” paper while the design team conceptualized the museum. Although the drawings were extremely rough, they allowed ev-eryone to clearly understand the design concepts, and later I was able to do the final drawings without additional input from the group. Depend-ing on the complexity of the image, I might lightly block-out the drawing with pencil and then put down a darker layer of pencil or ink for the final sketch.
Drawing from real life. Take a sketchbook outside some warm afternoon and start drawing! It’s a lot of fun, and also provides you with drawing practice—which you can never have enough of. Wouldn’t it be nice to get a group of creative friends together and all go to some inter-esting place to sketch for the afternoon? Do it! Then do it again.
8DESIGN DRAWING WORKSHOP : Combining Traditional Hand Drawing Techniques with Advanced Digital ToolsWednesday June 19, 2013 / AIA National Convention / Jim Leggitt, FAIA
Drawing from photographs. Since you usually don’t actually have the luxury of drawing from real life, take a picture instead! You can always grab a digital camera and take a series of reference photographs to draw from back in the studio. Study the pictures, and block out your drawing using the photographic information that you see.
Overlay and trace. Tracing is easy, useful, and fun, but creating drawings by tracing has a few limitations. First, you have to shrink or enlarge a base image to the exact size of your final drawing. You may have difficulty tracing details if your mylar or tracing paper is not transparent enough, but there are ways around these obstacles, such as using a thin-ner material or working on a light table.
DRAWING WITH OR WITHOUT DETAIL The look of a drawing—and amount of time it takes you to do it—de-pends a great deal on what linework technique you use. Scribble lines are the fastest and sketchiest. Most drawings are done with a casual or informal line style, but occasionally a more formal linework technique is called for. Most design drawings fall into just three categories: 1) thumb-nail drawings, 2) concept drawings, and 3) presentation drawings. The vast majority of design drawings fall into the concept drawing type.
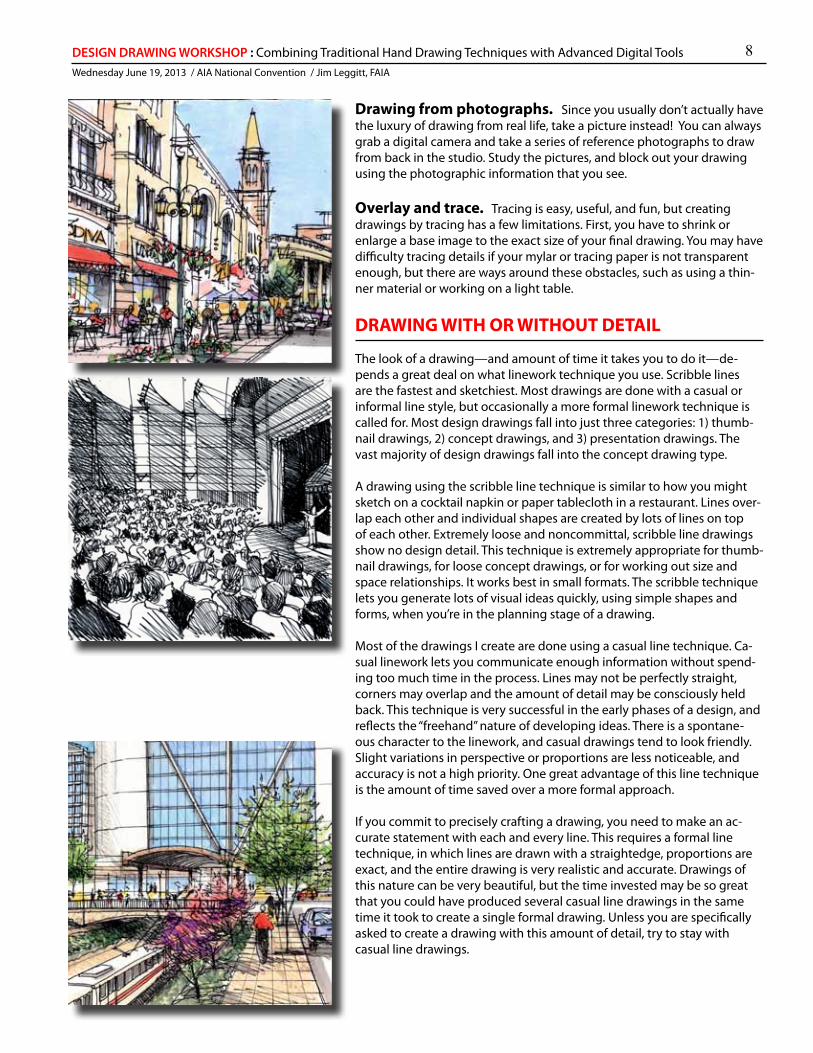
A drawing using the scribble line technique is similar to how you might sketch on a cocktail napkin or paper tablecloth in a restaurant. Lines over-lap each other and individual shapes are created by lots of lines on top of each other. Extremely loose and noncommittal, scribble line drawings show no design detail. This technique is extremely appropriate for thumb-nail drawings, for loose concept drawings, or for working out size and space relationships. It works best in small formats. The scribble technique lets you generate lots of visual ideas quickly, using simple shapes and forms, when you’re in the planning stage of a drawing.
Most of the drawings I create are done using a casual line technique. Ca-sual linework lets you communicate enough information without spend-ing too much time in the process. Lines may not be perfectly straight, corners may overlap and the amount of detail may be consciously held back. This technique is very successful in the early phases of a design, and reflects the “freehand” nature of developing ideas. There is a spontane-ous character to the linework, and casual drawings tend to look friendly. Slight variations in perspective or proportions are less noticeable, and accuracy is not a high priority. One great advantage of this line technique is the amount of time saved over a more formal approach.
If you commit to precisely crafting a drawing, you need to make an ac-curate statement with each and every line. This requires a formal line technique, in which lines are drawn with a straightedge, proportions are exact, and the entire drawing is very realistic and accurate. Drawings of this nature can be very beautiful, but the time invested may be so great that you could have produced several casual line drawings in the same time it took to create a single formal drawing. Unless you are specifically asked to create a drawing with this amount of detail, try to stay with casual line drawings.

9DESIGN DRAWING WORKSHOP : Combining Traditional Hand Drawing Techniques with Advanced Digital ToolsWednesday June 19, 2013 / AIA National Convention / Jim Leggitt, FAIA
CHOOSING THE RIGHT DRAWING SIZE
Keep it small. Thumbnail drawings are the smallest and easiest draw-ings to create. Due to their tiny, stamplike size, detail has to be kept to a minimum. They tend to be pure line drawings, very simple, without color or even much variation in tone. They’re often used in the margins of re-ports in order to help readers visualize. Sometimes they illustrate objects or icons, and they can be used to embellish word documents.
Either as a single image or in a series of multiple images, thumbnail draw-ings are best used to support text documents. Imagine a formal report or a newsletter. Text alone is dull, boring, and unimaginative, but often limited layout space doesn’t allow for large drawings. Perhaps the print-ing process precludes photographs. One good solution is to incorporate thumbnail drawings that break up the text and add a personal touch to the graphics. The best size for drawing a thumbnail is 3” x 3” or less; any larger and you need more detail and drawing time. If you reduce the image by 50%, the image will be sharper and will fit much better on the page. Use ink linework, because you won’t get a good reduction with color or pencil tones on the drawing.
Try to keep your drawing time on thumbnails to a minimum. Thumbnail drawings aren’t supposed to be information-rich; they just support the text and add character to the document. Try not to spend any more than 15 minutes on each thumbnail. Remember, less time spent per drawing can really shorten the overall process!
Visualize the concept. A concept drawing is an illustrative repre-sentation of a design direction, motif, or theme. Concept drawings have a broad range of applications, from design presentations to reports and publications. A concept drawing can portray the spirit of an urban space, evoke the excitement of an interior, or tell the story of your design idea. Because of the standard glass size of copiers and digital scanners, concept drawings should be drawn at 11” x 17” or smaller. Unlike sketchy, black-and-white thumbnail drawings, conceptual drawings begin to define materials, include some detail as well as people and objects that are more carefully drawn, and are probablly in color.
Making it big. There are many instances when you need to create drawings larger than 11” x 17”. These oversized drawings take much lon-ger to produce and require a different type of reproduction other than the standard copier and scanner. With urban design projects, drawings often have great detail, representing views of large land areas. These drawings may be sized to fit typical 24” x 36” or 30” x 40” paper formats. There are large format color scanners available that can scan large drawings into electronic files for various forms of reproduction. You can also draw big and reduce your black and white image down to 11” x 17” before add-ing color. This method enables you to bypass the expensive large format scanning process altogether.
SELECTING THE RIGHT VIEW
Ground, Roof and Aerial Views. Before jumping into a perspec-tive drawing, first select what point of view the drawing will have. Three simple alternatives are your best choices: 1) eye level view, drawn from
10DESIGN DRAWING WORKSHOP : Combining Traditional Hand Drawing Techniques with Advanced Digital ToolsWednesday June 19, 2013 / AIA National Convention / Jim Leggitt, FAIA
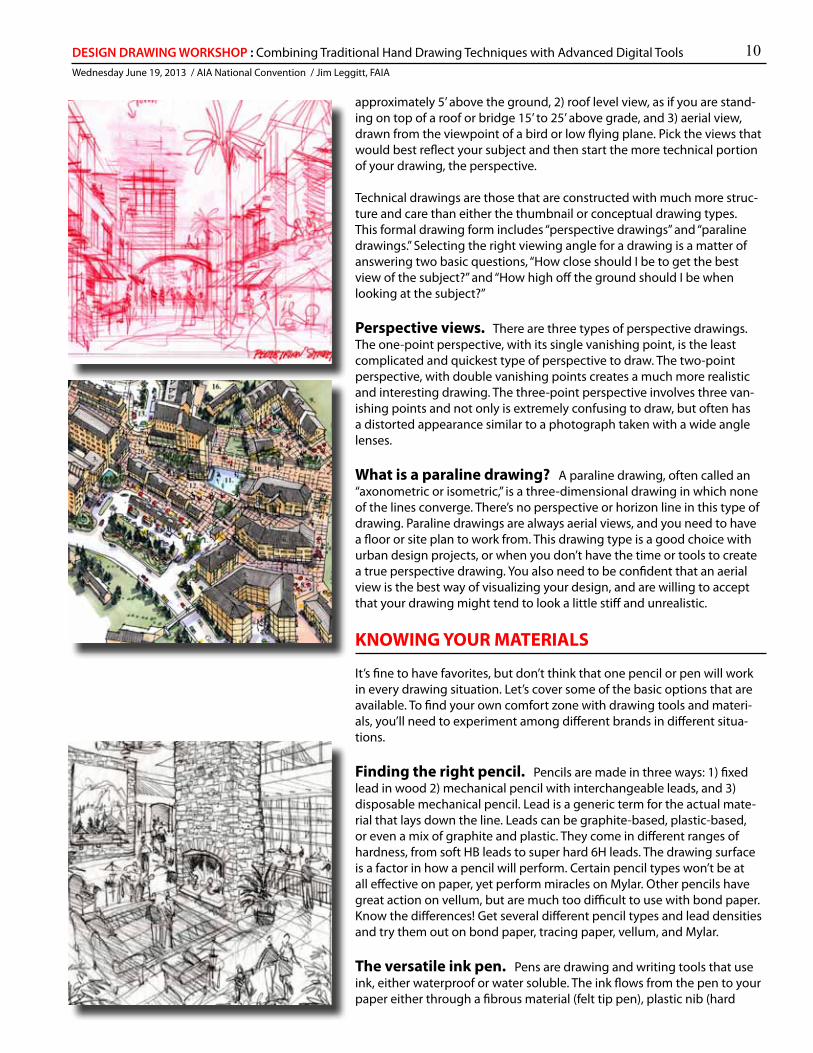
approximately 5’ above the ground, 2) roof level view, as if you are stand-ing on top of a roof or bridge 15’ to 25’ above grade, and 3) aerial view, drawn from the viewpoint of a bird or low flying plane. Pick the views that would best reflect your subject and then start the more technical portion of your drawing, the perspective.
Technical drawings are those that are constructed with much more struc-ture and care than either the thumbnail or conceptual drawing types. This formal drawing form includes “perspective drawings” and “paraline drawings.” Selecting the right viewing angle for a drawing is a matter of answering two basic questions, “How close should I be to get the best view of the subject?” and “How high off the ground should I be when looking at the subject?”
Perspective views. There are three types of perspective drawings. The one-point perspective, with its single vanishing point, is the least complicated and quickest type of perspective to draw. The two-point perspective, with double vanishing points creates a much more realistic and interesting drawing. The three-point perspective involves three van-ishing points and not only is extremely confusing to draw, but often has a distorted appearance similar to a photograph taken with a wide angle lenses.
What is a paraline drawing? A paraline drawing, often called an “axonometric or isometric,” is a three-dimensional drawing in which none of the lines converge. There’s no perspective or horizon line in this type of drawing. Paraline drawings are always aerial views, and you need to have a floor or site plan to work from. This drawing type is a good choice with urban design projects, or when you don’t have the time or tools to create a true perspective drawing. You also need to be confident that an aerial view is the best way of visualizing your design, and are willing to accept that your drawing might tend to look a little stiff and unrealistic.
KNOWING YOUR MATERIALS
It’s fine to have favorites, but don’t think that one pencil or pen will work in every drawing situation. Let’s cover some of the basic options that are available. To find your own comfort zone with drawing tools and materi-als, you’ll need to experiment among different brands in different situa-tions.
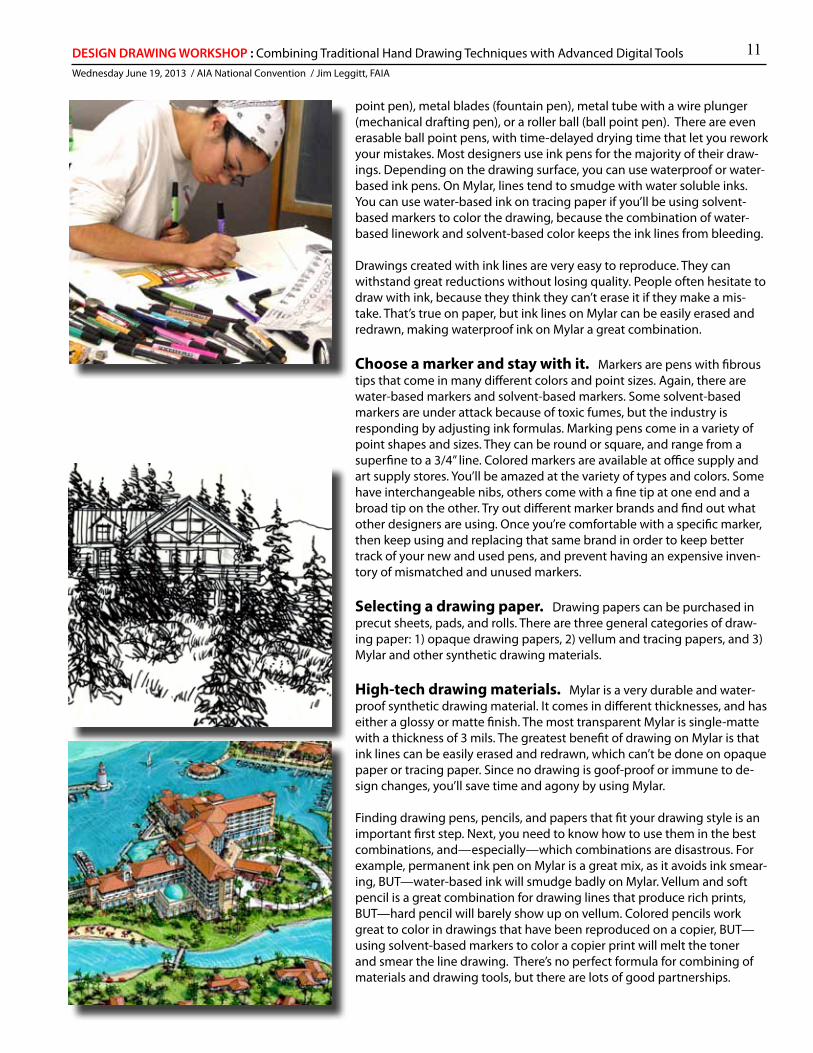
Finding the right pencil. Pencils are made in three ways: 1) fixed lead in wood 2) mechanical pencil with interchangeable leads, and 3) disposable mechanical pencil. Lead is a generic term for the actual mate-rial that lays down the line. Leads can be graphite-based, plastic-based, or even a mix of graphite and plastic. They come in different ranges of hardness, from soft HB leads to super hard 6H leads. The drawing surface is a factor in how a pencil will perform. Certain pencil types won’t be at all effective on paper, yet perform miracles on Mylar. Other pencils have great action on vellum, but are much too difficult to use with bond paper. Know the differences! Get several different pencil types and lead densities and try them out on bond paper, tracing paper, vellum, and Mylar.
The versatile ink pen. Pens are drawing and writing tools that use ink, either waterproof or water soluble. The ink flows from the pen to your paper either through a fibrous material (felt tip pen), plastic nib (hard
11DESIGN DRAWING WORKSHOP : Combining Traditional Hand Drawing Techniques with Advanced Digital ToolsWednesday June 19, 2013 / AIA National Convention / Jim Leggitt, FAIA
point pen), metal blades (fountain pen), metal tube with a wire plunger (mechanical drafting pen), or a roller ball (ball point pen). There are even erasable ball point pens, with time-delayed drying time that let you rework your mistakes. Most designers use ink pens for the majority of their draw-ings. Depending on the drawing surface, you can use waterproof or water-based ink pens. On Mylar, lines tend to smudge with water soluble inks. You can use water-based ink on tracing paper if you’ll be using solvent-based markers to color the drawing, because the combination of water-based linework and solvent-based color keeps the ink lines from bleeding.
Drawings created with ink lines are very easy to reproduce. They can withstand great reductions without losing quality. People often hesitate to draw with ink, because they think they can’t erase it if they make a mis-take. That’s true on paper, but ink lines on Mylar can be easily erased and redrawn, making waterproof ink on Mylar a great combination.
Choose a marker and stay with it. Markers are pens with fibrous tips that come in many different colors and point sizes. Again, there are water-based markers and solvent-based markers. Some solvent-based markers are under attack because of toxic fumes, but the industry is responding by adjusting ink formulas. Marking pens come in a variety of point shapes and sizes. They can be round or square, and range from a superfine to a 3/4” line. Colored markers are available at office supply and art supply stores. You’ll be amazed at the variety of types and colors. Some have interchangeable nibs, others come with a fine tip at one end and a broad tip on the other. Try out different marker brands and find out what other designers are using. Once you’re comfortable with a specific marker, then keep using and replacing that same brand in order to keep better track of your new and used pens, and prevent having an expensive inven-tory of mismatched and unused markers.
Selecting a drawing paper. Drawing papers can be purchased in precut sheets, pads, and rolls. There are three general categories of draw-ing paper: 1) opaque drawing papers, 2) vellum and tracing papers, and 3) Mylar and other synthetic drawing materials.
High-tech drawing materials. Mylar is a very durable and water-proof synthetic drawing material. It comes in different thicknesses, and has either a glossy or matte finish. The most transparent Mylar is single-matte with a thickness of 3 mils. The greatest benefit of drawing on Mylar is that ink lines can be easily erased and redrawn, which can’t be done on opaque paper or tracing paper. Since no drawing is goof-proof or immune to de-sign changes, you’ll save time and agony by using Mylar.
Finding drawing pens, pencils, and papers that fit your drawing style is an important first step. Next, you need to know how to use them in the best combinations, and—especially—which combinations are disastrous. For example, permanent ink pen on Mylar is a great mix, as it avoids ink smear-ing, BUT—water-based ink will smudge badly on Mylar. Vellum and soft pencil is a great combination for drawing lines that produce rich prints, BUT—hard pencil will barely show up on vellum. Colored pencils work great to color in drawings that have been reproduced on a copier, BUT—using solvent-based markers to color a copier print will melt the toner and smear the line drawing. There’s no perfect formula for combining of materials and drawing tools, but there are lots of good partnerships.
12DESIGN DRAWING WORKSHOP : Combining Traditional Hand Drawing Techniques with Advanced Digital ToolsWednesday June 19, 2013 / AIA National Convention / Jim Leggitt, FAIA
• Learn to avoid the mistake of combining the wrong materials• Get comfortable with some of the choices and practice them• Keep entourage files• Make and use your own sample boards
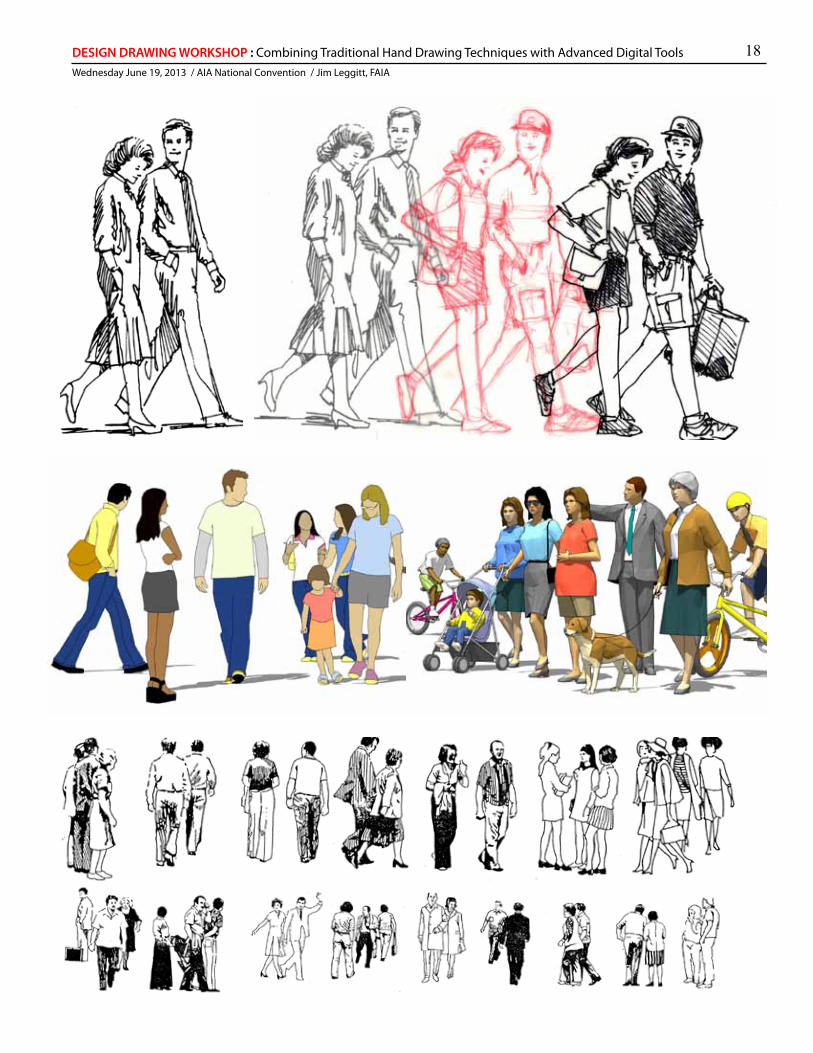
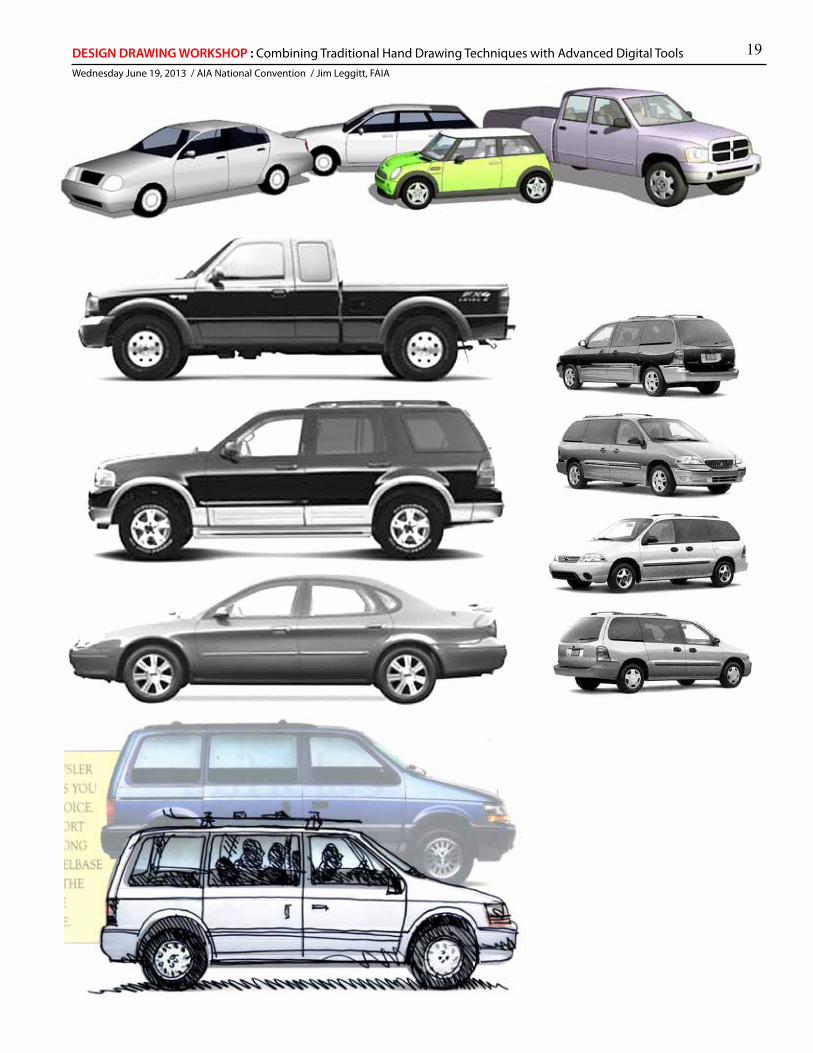
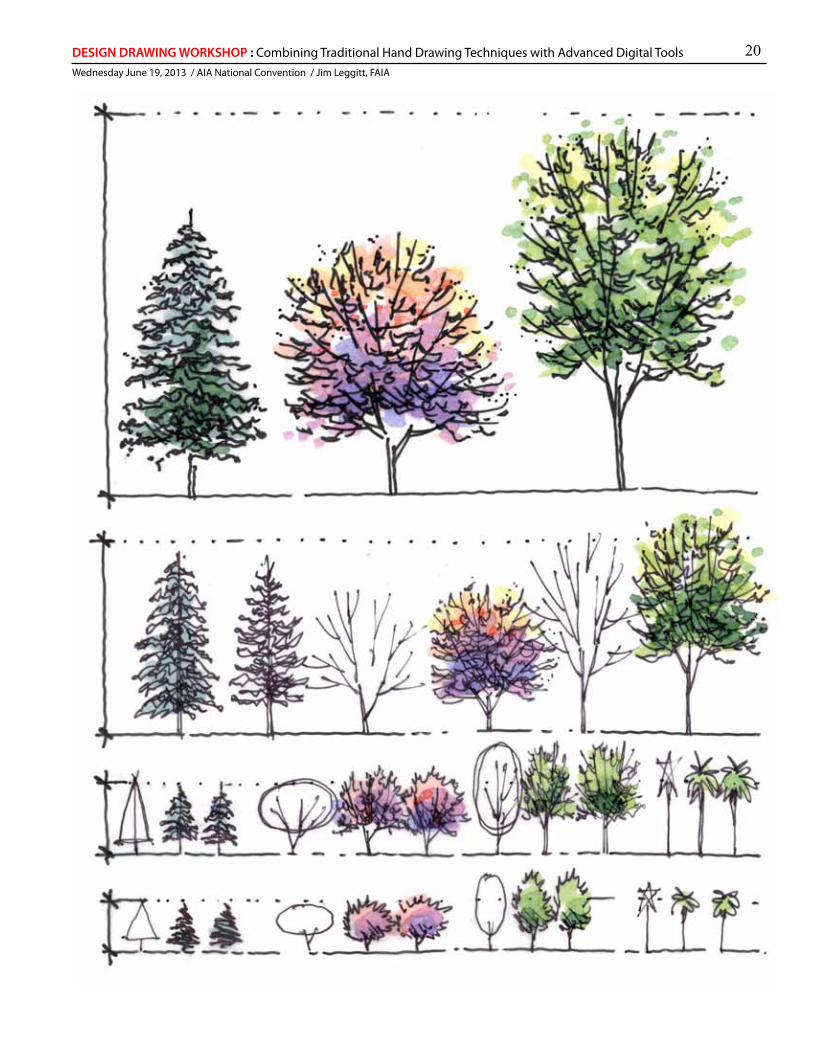
DRAWING PEOPLE, CARS AND TREES
You have lots of options for finding images to trace into your drawings, so you should never allow yourself to be in a situation in which you have to illustrate a car or person from your imagination—unless you have experience drawing these two difficult subjects. Good drawings can be ruined with ugly people and awful cars. You can avoid this drawing trap by knowing where to find sources for difficult subjects and learning how to customize the images in your drawing.
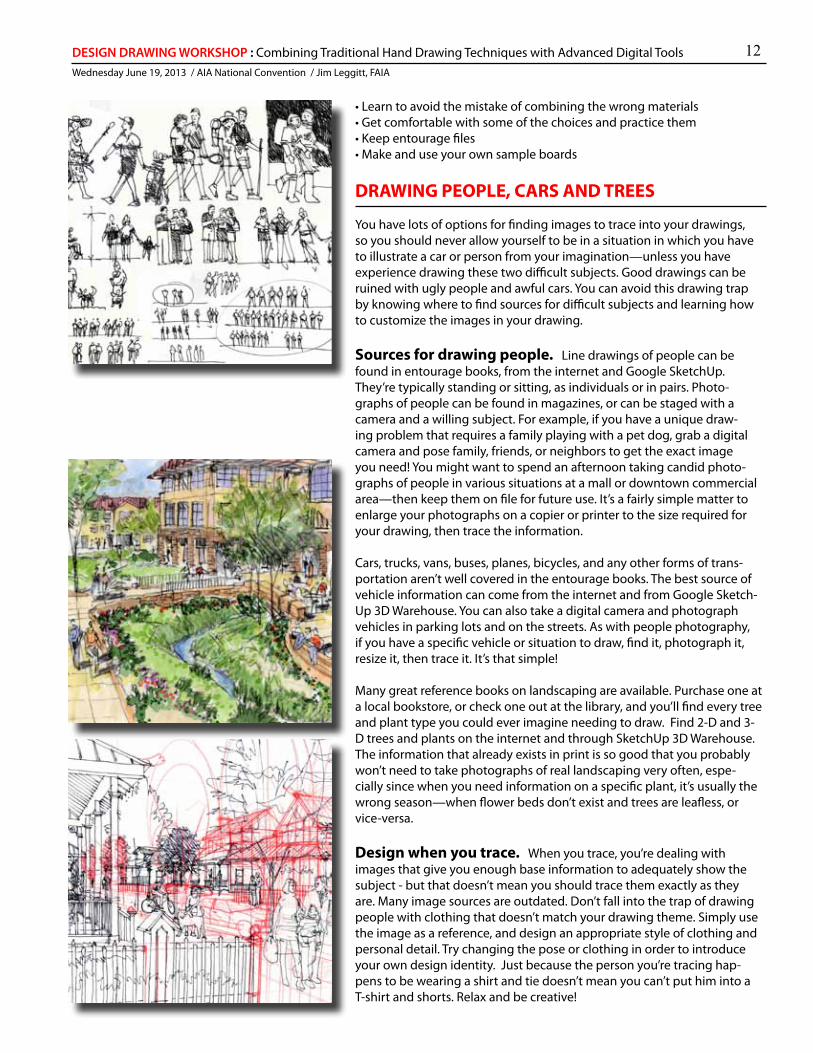
Sources for drawing people. Line drawings of people can be found in entourage books, from the internet and Google SketchUp. They’re typically standing or sitting, as individuals or in pairs. Photo-graphs of people can be found in magazines, or can be staged with a camera and a willing subject. For example, if you have a unique draw-ing problem that requires a family playing with a pet dog, grab a digital camera and pose family, friends, or neighbors to get the exact image you need! You might want to spend an afternoon taking candid photo-graphs of people in various situations at a mall or downtown commercial area—then keep them on file for future use. It’s a fairly simple matter to enlarge your photographs on a copier or printer to the size required for your drawing, then trace the information.
Cars, trucks, vans, buses, planes, bicycles, and any other forms of trans-portation aren’t well covered in the entourage books. The best source of vehicle information can come from the internet and from Google Sketch-Up 3D Warehouse. You can also take a digital camera and photograph vehicles in parking lots and on the streets. As with people photography, if you have a specific vehicle or situation to draw, find it, photograph it, resize it, then trace it. It’s that simple!
Many great reference books on landscaping are available. Purchase one at a local bookstore, or check one out at the library, and you’ll find every tree and plant type you could ever imagine needing to draw. Find 2-D and 3-D trees and plants on the internet and through SketchUp 3D Warehouse. The information that already exists in print is so good that you probably won’t need to take photographs of real landscaping very often, espe-cially since when you need information on a specific plant, it’s usually the wrong season—when flower beds don’t exist and trees are leafless, or vice-versa.
Design when you trace. When you trace, you’re dealing with images that give you enough base information to adequately show the subject - but that doesn’t mean you should trace them exactly as they are. Many image sources are outdated. Don’t fall into the trap of drawing people with clothing that doesn’t match your drawing theme. Simply use the image as a reference, and design an appropriate style of clothing and personal detail. Try changing the pose or clothing in order to introduce your own design identity. Just because the person you’re tracing hap-pens to be wearing a shirt and tie doesn’t mean you can’t put him into a T-shirt and shorts. Relax and be creative!
13DESIGN DRAWING WORKSHOP : Combining Traditional Hand Drawing Techniques with Advanced Digital ToolsWednesday June 19, 2013 / AIA National Convention / Jim Leggitt, FAIA
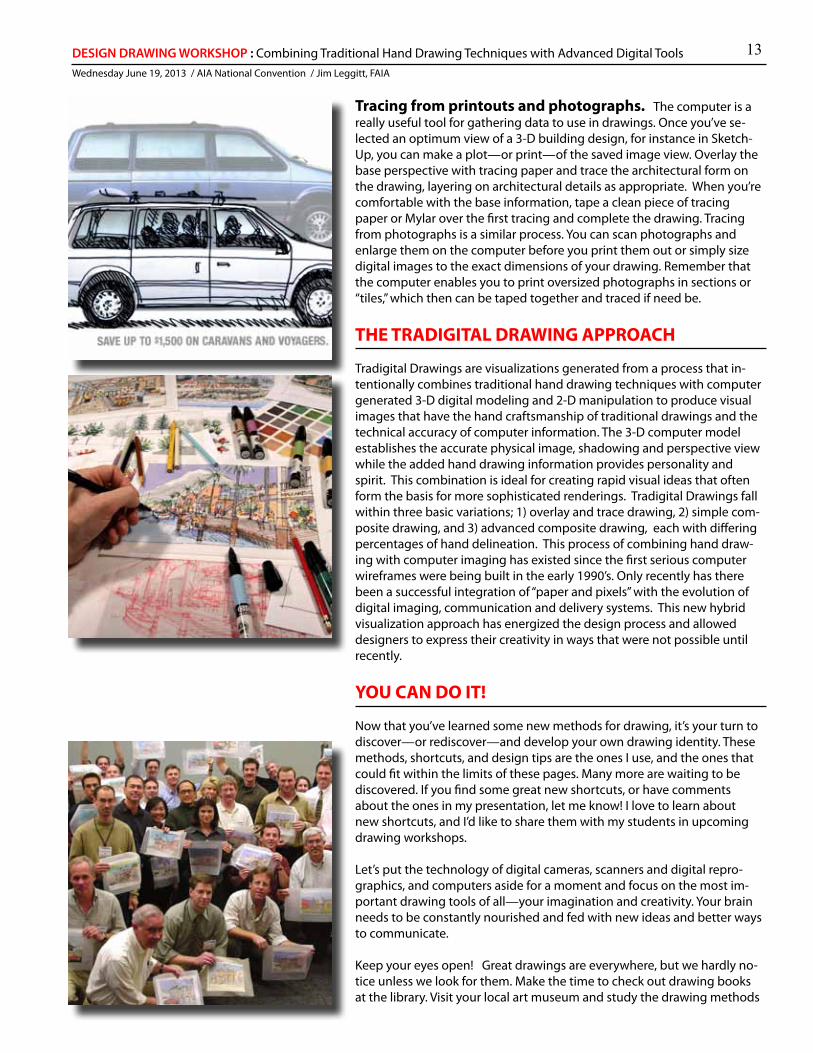
Tracing from printouts and photographs. The computer is a really useful tool for gathering data to use in drawings. Once you’ve se-lected an optimum view of a 3-D building design, for instance in Sketch-Up, you can make a plot—or print—of the saved image view. Overlay the base perspective with tracing paper and trace the architectural form on the drawing, layering on architectural details as appropriate. When you’re comfortable with the base information, tape a clean piece of tracing paper or Mylar over the first tracing and complete the drawing. Tracing from photographs is a similar process. You can scan photographs and enlarge them on the computer before you print them out or simply size digital images to the exact dimensions of your drawing. Remember that the computer enables you to print oversized photographs in sections or “tiles,” which then can be taped together and traced if need be.
THE TRADIGITAL DRAWING APPROACH
Tradigital Drawings are visualizations generated from a process that in-tentionally combines traditional hand drawing techniques with computer generated 3-D digital modeling and 2-D manipulation to produce visual images that have the hand craftsmanship of traditional drawings and the technical accuracy of computer information. The 3-D computer model establishes the accurate physical image, shadowing and perspective view while the added hand drawing information provides personality and spirit. This combination is ideal for creating rapid visual ideas that often form the basis for more sophisticated renderings. Tradigital Drawings fall within three basic variations; 1) overlay and trace drawing, 2) simple com-posite drawing, and 3) advanced composite drawing, each with differing percentages of hand delineation. This process of combining hand draw-ing with computer imaging has existed since the first serious computer wireframes were being built in the early 1990’s. Only recently has there been a successful integration of “paper and pixels” with the evolution of digital imaging, communication and delivery systems. This new hybrid visualization approach has energized the design process and allowed designers to express their creativity in ways that were not possible until recently.
YOU CAN DO IT!
Now that you’ve learned some new methods for drawing, it’s your turn to discover—or rediscover—and develop your own drawing identity. These methods, shortcuts, and design tips are the ones I use, and the ones that could fit within the limits of these pages. Many more are waiting to be discovered. If you find some great new shortcuts, or have comments about the ones in my presentation, let me know! I love to learn about new shortcuts, and I’d like to share them with my students in upcoming drawing workshops.
Let’s put the technology of digital cameras, scanners and digital repro-graphics, and computers aside for a moment and focus on the most im-portant drawing tools of all—your imagination and creativity. Your brain needs to be constantly nourished and fed with new ideas and better ways to communicate.
Keep your eyes open! Great drawings are everywhere, but we hardly no-tice unless we look for them. Make the time to check out drawing books at the library. Visit your local art museum and study the drawing methods
14DESIGN DRAWING WORKSHOP : Combining Traditional Hand Drawing Techniques with Advanced Digital ToolsWednesday June 19, 2013 / AIA National Convention / Jim Leggitt, FAIA
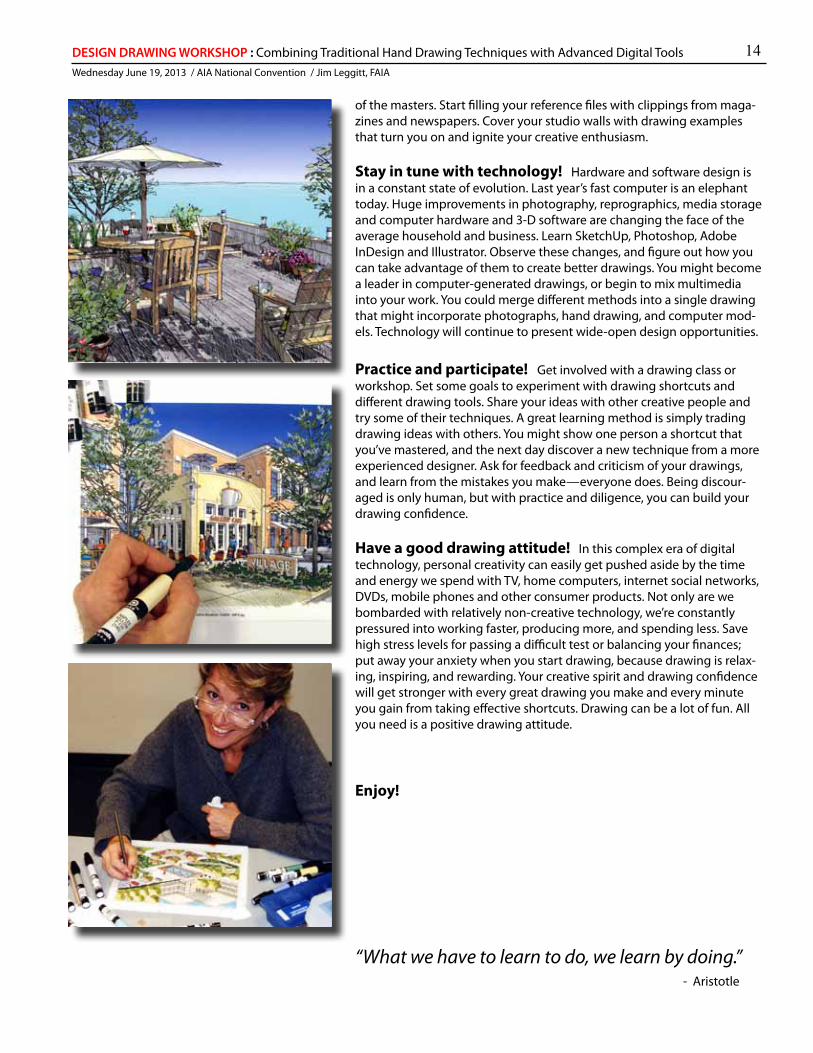
of the masters. Start filling your reference files with clippings from maga-zines and newspapers. Cover your studio walls with drawing examples that turn you on and ignite your creative enthusiasm.
Stay in tune with technology! Hardware and software design is in a constant state of evolution. Last year’s fast computer is an elephant today. Huge improvements in photography, reprographics, media storage and computer hardware and 3-D software are changing the face of the average household and business. Learn SketchUp, Photoshop, Adobe InDesign and Illustrator. Observe these changes, and figure out how you can take advantage of them to create better drawings. You might become a leader in computer-generated drawings, or begin to mix multimedia into your work. You could merge different methods into a single drawing that might incorporate photographs, hand drawing, and computer mod-els. Technology will continue to present wide-open design opportunities.
Practice and participate! Get involved with a drawing class or workshop. Set some goals to experiment with drawing shortcuts and different drawing tools. Share your ideas with other creative people and try some of their techniques. A great learning method is simply trading drawing ideas with others. You might show one person a shortcut that you’ve mastered, and the next day discover a new technique from a more experienced designer. Ask for feedback and criticism of your drawings, and learn from the mistakes you make—everyone does. Being discour-aged is only human, but with practice and diligence, you can build your drawing confidence.
Have a good drawing attitude! In this complex era of digital technology, personal creativity can easily get pushed aside by the time and energy we spend with TV, home computers, internet social networks, DVDs, mobile phones and other consumer products. Not only are we bombarded with relatively non-creative technology, we’re constantly pressured into working faster, producing more, and spending less. Save high stress levels for passing a difficult test or balancing your finances; put away your anxiety when you start drawing, because drawing is relax-ing, inspiring, and rewarding. Your creative spirit and drawing confidence will get stronger with every great drawing you make and every minute you gain from taking effective shortcuts. Drawing can be a lot of fun. All you need is a positive drawing attitude.
Enjoy!
“What we have to learn to do, we learn by doing.” - Aristotle
15DESIGN DRAWING WORKSHOP : Combining Traditional Hand Drawing Techniques with Advanced Digital ToolsWednesday June 19, 2013 / AIA National Convention / Jim Leggitt, FAIA
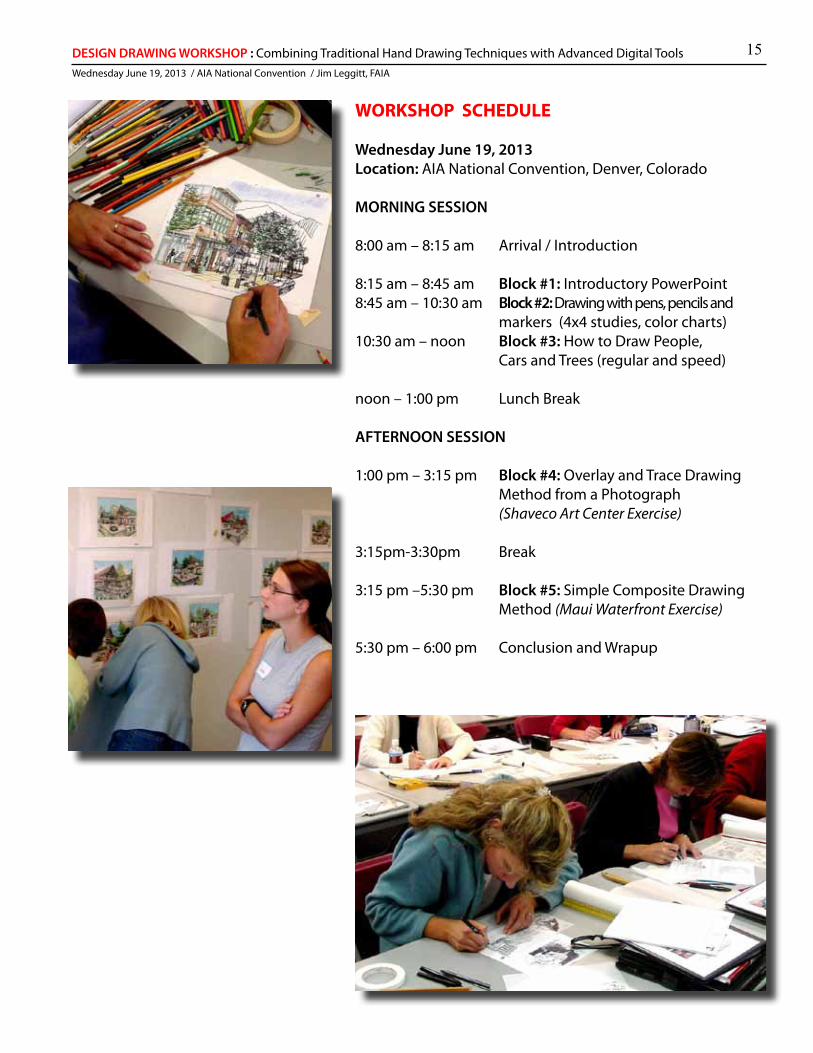
WORKSHOP SCHEDULE
Wednesday June 19, 2013Location: AIA National Convention, Denver, Colorado
MORNING SESSION
8:00 am – 8:15 am Arrival / Introduction
8:15 am – 8:45 am Block #1: Introductory PowerPoint8:45 am – 10:30 am Block #2: Drawing with pens, pencils and markers (4x4 studies, color charts)10:30 am – noon Block #3: How to Draw People, Cars and Trees (regular and speed)
noon – 1:00 pm Lunch Break
AFTERNOON SESSION
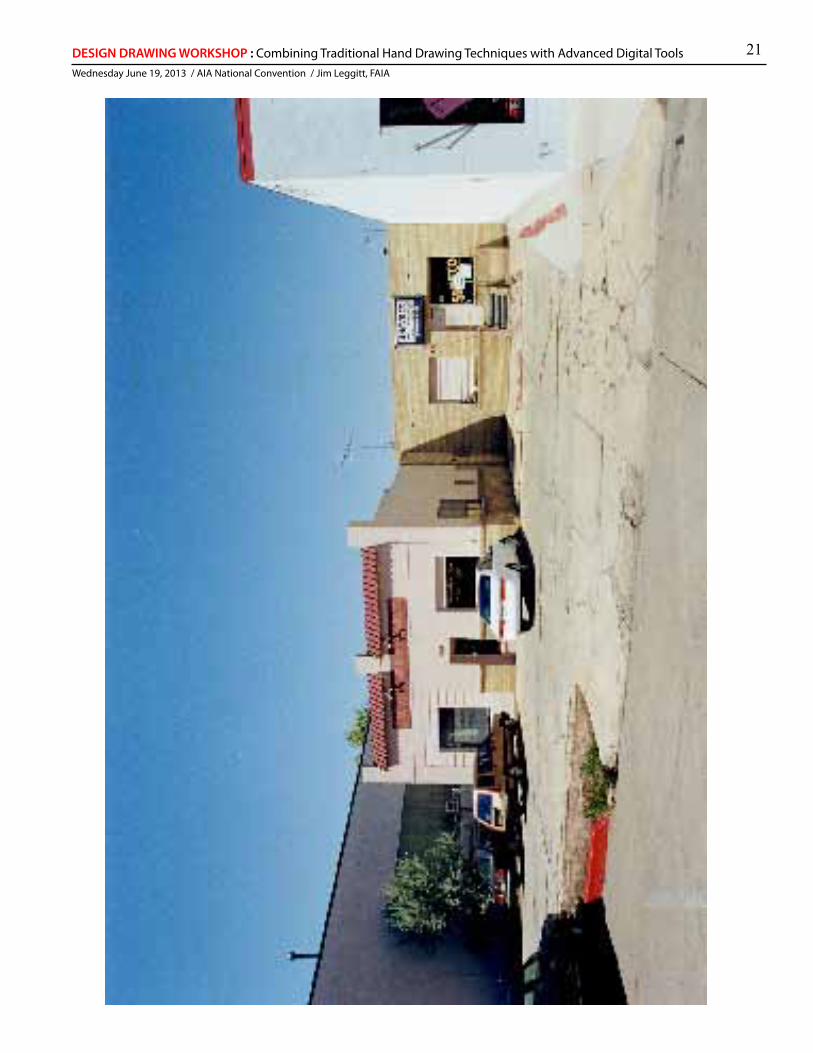
1:00 pm – 3:15 pm Block #4: Overlay and Trace Drawing Method from a Photograph (Shaveco Art Center Exercise)
3:15pm-3:30pm Break
3:15 pm –5:30 pm Block #5: Simple Composite Drawing Method (Maui Waterfront Exercise) 5:30 pm – 6:00 pm Conclusion and Wrapup
16DESIGN DRAWING WORKSHOP : Combining Traditional Hand Drawing Techniques with Advanced Digital ToolsWednesday June 19, 2013 / AIA National Convention / Jim Leggitt, FAIA
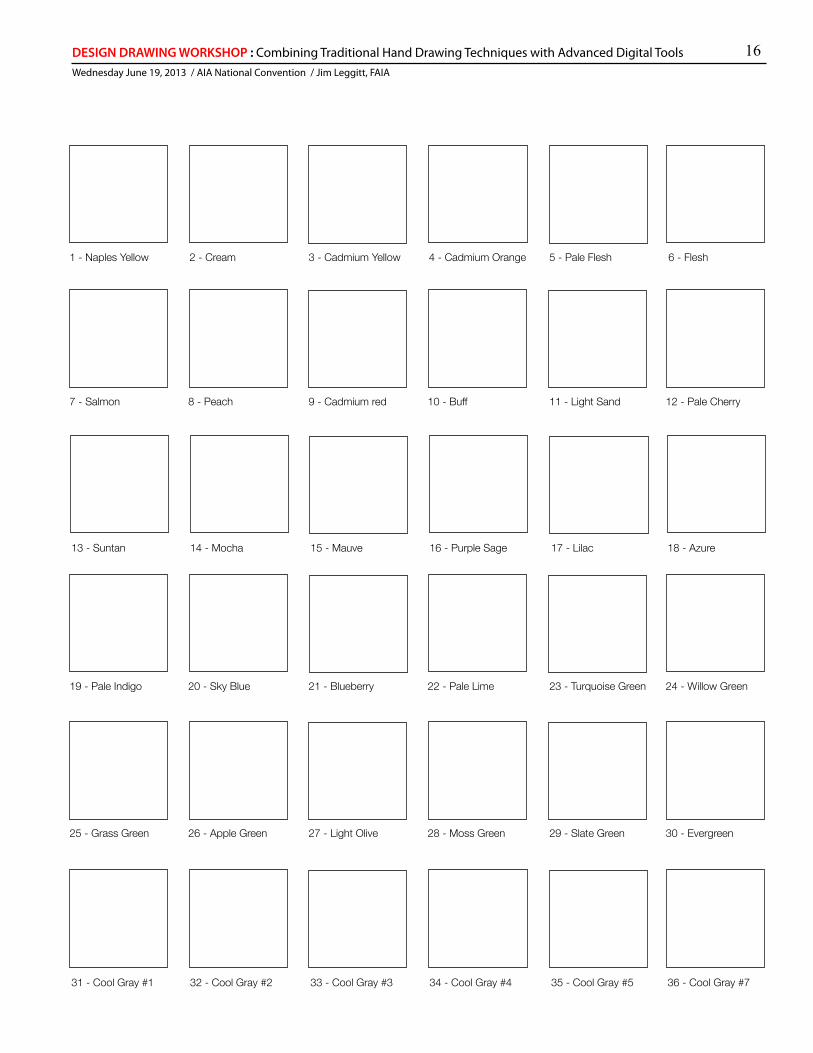
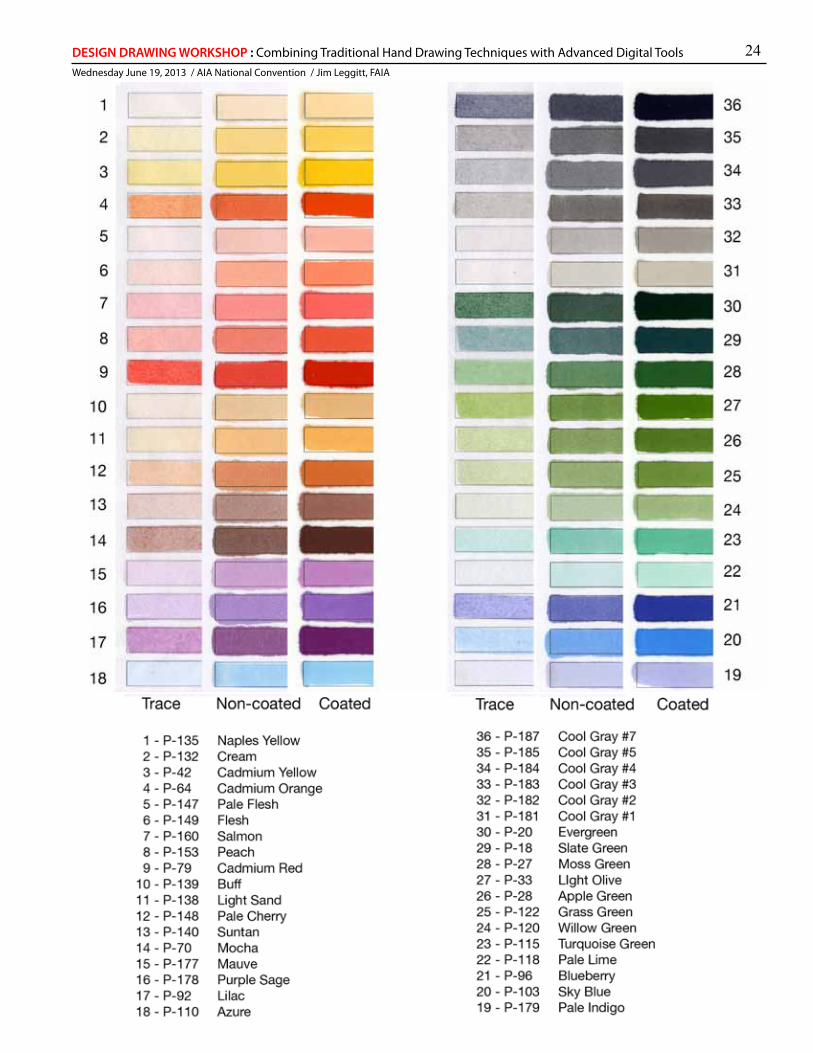
1 - Naples Yellow 2 - Cream 3 - Cadmium Yellow 4 - Cadmium Orange 5 - Pale Flesh 6 - Flesh
7 - Salmon 8 - Peach 9 - Cadmium red 10 - Buff 11 - Light Sand 12 - Pale Cherry
13 - Suntan 14 - Mocha 15 - Mauve 16 - Purple Sage 17 - Lilac 18 - Azure
19 - Pale Indigo 20 - Sky Blue 21 - Blueberry 22 - Pale Lime 23 - Turquoise Green 24 - Willow Green
25 - Grass Green 26 - Apple Green 27 - Light Olive 28 - Moss Green 29 - Slate Green 30 - Evergreen
31 - Cool Gray #1 32 - Cool Gray #2 33 - Cool Gray #3 34 - Cool Gray #4 35 - Cool Gray #5 36 - Cool Gray #7
17DESIGN DRAWING WORKSHOP : Combining Traditional Hand Drawing Techniques with Advanced Digital ToolsWednesday June 19, 2013 / AIA National Convention / Jim Leggitt, FAIA
18DESIGN DRAWING WORKSHOP : Combining Traditional Hand Drawing Techniques with Advanced Digital ToolsWednesday June 19, 2013 / AIA National Convention / Jim Leggitt, FAIA
19DESIGN DRAWING WORKSHOP : Combining Traditional Hand Drawing Techniques with Advanced Digital ToolsWednesday June 19, 2013 / AIA National Convention / Jim Leggitt, FAIA
20DESIGN DRAWING WORKSHOP : Combining Traditional Hand Drawing Techniques with Advanced Digital ToolsWednesday June 19, 2013 / AIA National Convention / Jim Leggitt, FAIA
21DESIGN DRAWING WORKSHOP : Combining Traditional Hand Drawing Techniques with Advanced Digital ToolsWednesday June 19, 2013 / AIA National Convention / Jim Leggitt, FAIA

22DESIGN DRAWING WORKSHOP : Combining Traditional Hand Drawing Techniques with Advanced Digital ToolsWednesday June 19, 2013 / AIA National Convention / Jim Leggitt, FAIA
23DESIGN DRAWING WORKSHOP : Combining Traditional Hand Drawing Techniques with Advanced Digital ToolsWednesday June 19, 2013 / AIA National Convention / Jim Leggitt, FAIA
24DESIGN DRAWING WORKSHOP : Combining Traditional Hand Drawing Techniques with Advanced Digital ToolsWednesday June 19, 2013 / AIA National Convention / Jim Leggitt, FAIA

25DESIGN DRAWING WORKSHOP : Combining Traditional Hand Drawing Techniques with Advanced Digital ToolsWednesday June 19, 2013 / AIA National Convention / Jim Leggitt, FAIA
WORKSHOP SUPPLIES
- (5) sheets of 8½”x11” white paper - 1 roll 12” white trace (no colored trace)- (5) sheets of 11”x17” white paper - Standard plastic eraser- (2) Fine point felt tip pens (black) - Draft dots or white artist tape - (2) Regular soft graphite pencils - Architectural scale & large (10”)triangle - (2) Red pencils - Battery powered pencil sharpener (optional)- (1) Set Colored Markers - (1) Set Colored Pencils
COLORED MARKERS (36 recommended individual Chartpak AD colors) Chartpak AD Markers -(24 essencial colors “on a limited budget”) : Cool Gray #1, #2, #4, #5, #7, Naples Yellow, Cadmium Yellow, Cadmium Orange, Cadmium Red, Willow, Grass Green, Light Olive, Moss Green, Slate Green, Azure, Sky Blue, Blueberry, Buff, Light Sand, Suntan, Mocha, Pale Cherry, Lilac, Pale Flesh.
Chartpak AD Markers - (additional 12 recommended markers if budget allows): Cool Gray #3, Salmon, Flesh, Apple Green, Evergreen, Turquoise Green, Peach, Purple Sage, Cream, Pale Indigo, Pale Lime, Mauve.
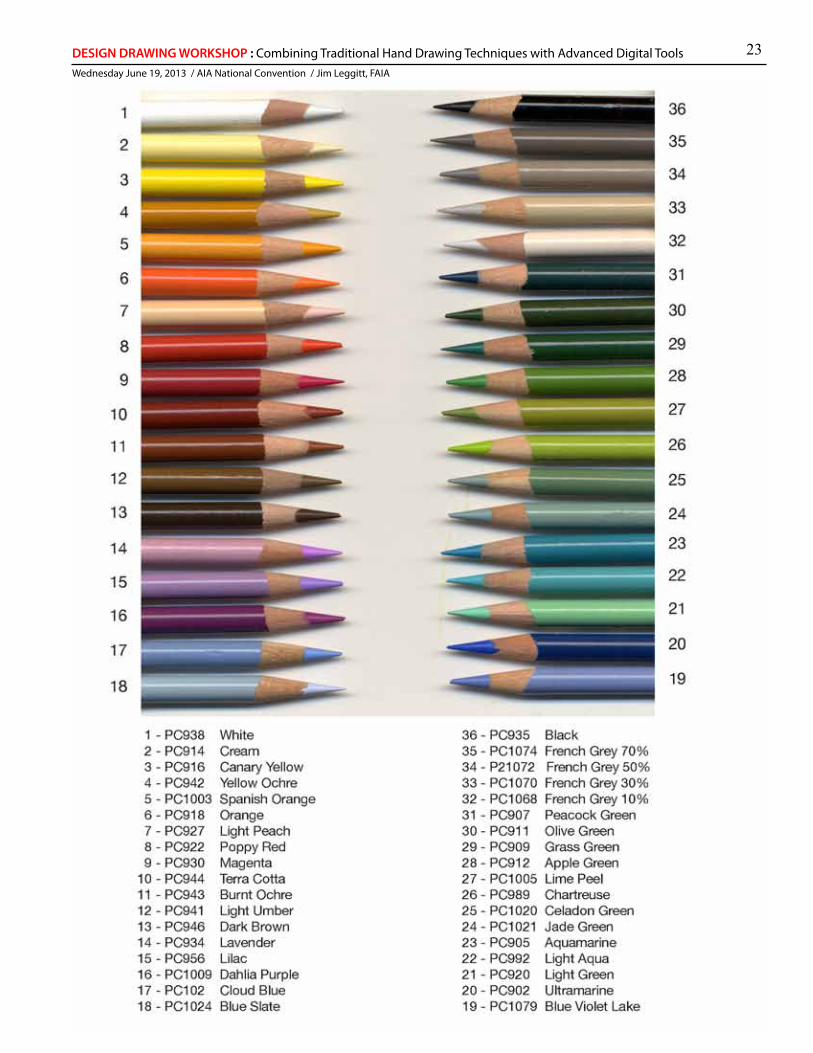
COLORED PENCILS (36 recommended individual Prismacolor Pencil colors)
Set of Berol Prismacolor pencils - If you cannot order individual pencils, I recommend buy-ing either the 36 or the 48 Color Pencil set.
If you can order individual colors online or at a local art supply store, I recommend pur-chasing the following individual colors: White, Cream, Canary Yellow, Yellow Ochre, Spanish Orange, Orange, Light Peach, Poppy Red, Magenta, Terra Cotta, burnt ochre, Light Umber, Dark Brown, Lavender, Lilac, Dahlia Purple, cloud blue, Blue Slate, Blue Biolet lake, Ultramarine, Light Green, Light Aqua, Aquamarine, Jade Green, Celadon Green, Chartreuse, Lime Peel, Apple Green, Grass Green, Olive Green, Peacock Green, French Grey 10%, French Grey 30%, French Grey 50%, French Grey 70%, Black.
Online Art Supplies: www.carpediemstore.com, www.dickblick.com, www.meininger.com
PARTICIPANTS: Try to bring most of the materials identified on this list. Two individuals can share a single set of supplies. If you own a large set of markers and pencils, it is not necessary to purchase any more. Page 26 of this document identifies Prismacolor markers similar in color to Chartpak AD markers.
26DESIGN DRAWING WORKSHOP : Combining Traditional Hand Drawing Techniques with Advanced Digital ToolsWednesday June 19, 2013 / AIA National Convention / Jim Leggitt, FAIA
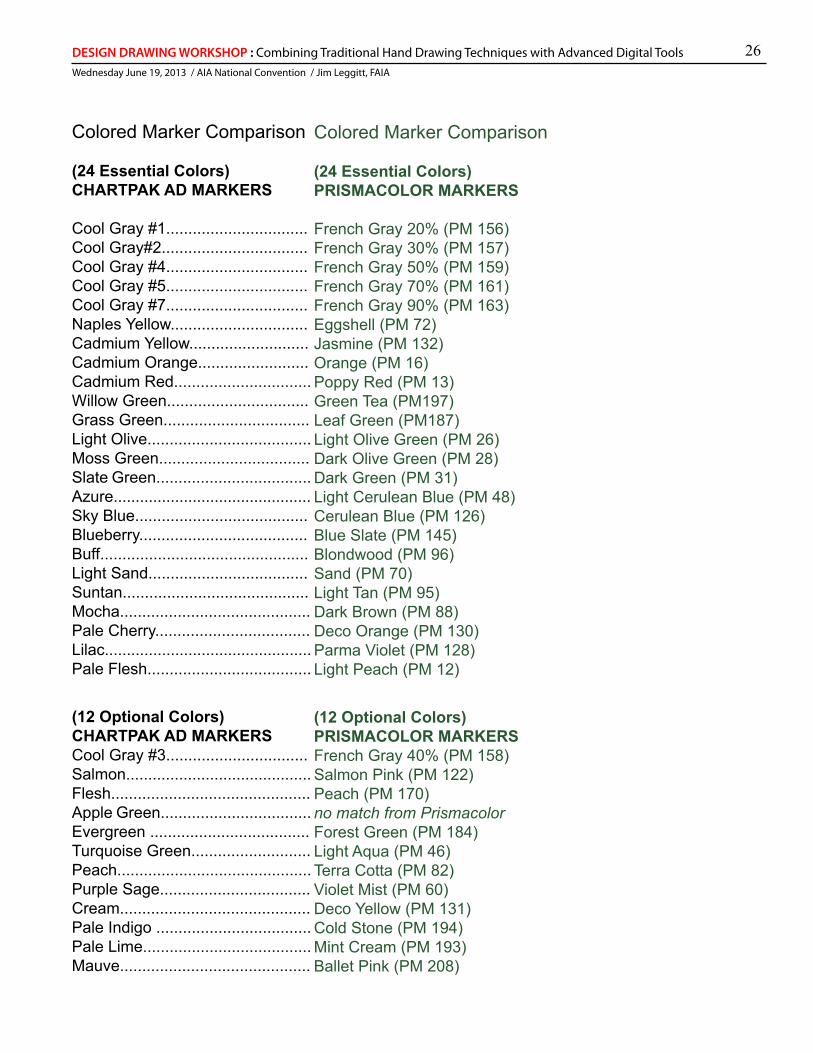
Colored Marker Comparison (24 Essential Colors)CHARTPAK AD MARKERS
Cool Gray #1................................ Cool Gray#2.................................Cool Gray #4................................ Cool Gray #5................................Cool Gray #7................................Naples Yellow............................... Cadmium Yellow...........................Cadmium Orange.........................Cadmium Red............................... Willow Green................................Grass Green................................. Light Olive..................................... Moss Green..................................Slate Green...................................Azure............................................. Sky Blue....................................... Blueberry......................................Buff...............................................Light Sand.................................... Suntan..........................................Mocha...........................................Pale Cherry................................... Lilac...............................................Pale Flesh.....................................
(12 Optional Colors)CHARTPAK AD MARKERSCool Gray #3................................Salmon..........................................Flesh.............................................Apple Green..................................Evergreen ....................................Turquoise Green...........................Peach............................................Purple Sage..................................Cream...........................................Pale Indigo ...................................Pale Lime......................................Mauve...........................................
Colored Marker Comparison (24 Essential Colors)PRISMACOLOR MARKERS
French Gray 20% (PM 156)French Gray 30% (PM 157)French Gray 50% (PM 159)French Gray 70% (PM 161)French Gray 90% (PM 163)Eggshell (PM 72) Jasmine (PM 132)Orange (PM 16)Poppy Red (PM 13)Green Tea (PM197)Leaf Green (PM187)Light Olive Green (PM 26) Dark Olive Green (PM 28)Dark Green (PM 31)Light Cerulean Blue (PM 48) Cerulean Blue (PM 126) Blue Slate (PM 145)Blondwood (PM 96)Sand (PM 70)Light Tan (PM 95)Dark Brown (PM 88)Deco Orange (PM 130)Parma Violet (PM 128)Light Peach (PM 12)
(12 Optional Colors)PRISMACOLOR MARKERSFrench Gray 40% (PM 158)Salmon Pink (PM 122)Peach (PM 170)no match from PrismacolorForest Green (PM 184) Light Aqua (PM 46)Terra Cotta (PM 82)Violet Mist (PM 60)Deco Yellow (PM 131)Cold Stone (PM 194) Mint Cream (PM 193)Ballet Pink (PM 208)


