F5 VPN Setup Guide for Windows 10 At the desktop screen, open the Micorosft Store. If it is not on your taskbar, hit the windows key and search for it. The store app will pop up. In the search bar, type in “F5 Access” and select the app by F5 Networks.
Transcript
F5 VPN Setup Guide for Windows 10
At the desktop screen, open the Micorosft Store. If it is not on your taskbar, hit the windows key and search for it.
The store app will pop up. In the search bar, type in “F5 Access” and select the app by F5 Networks.
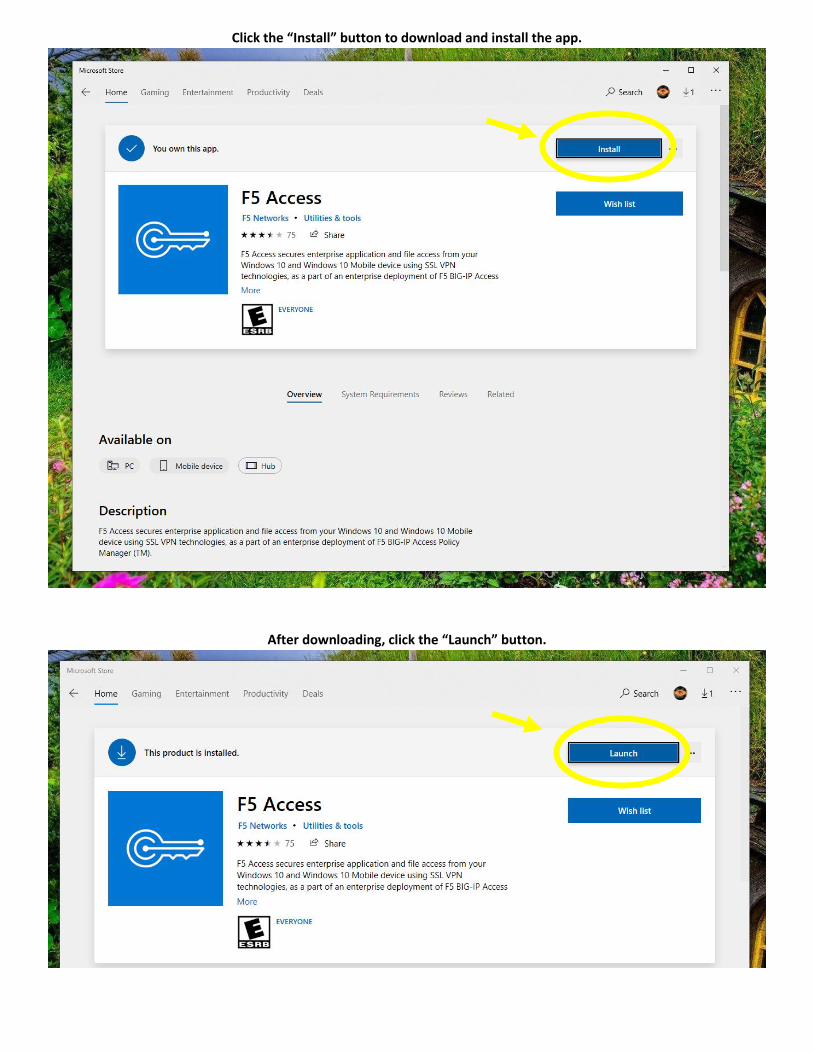
Click the “Install” button to download and install the app.
After downloading, click the “Launch” button.
A new window should pop up. Click the “Manage VPN Connections” button.
A new settings window will pop up. Click the “Add a VPN Connection” button.
A new blue window should pop up.
Under VPN provider, fill in “F5 Access”. Put in a Connection name of your choosing. Type “vpn.olivet.edu” under Server
name or address. After it looks like the below picture, click the “Save” button.
The settings window should reappear with the new connection listed. Click the created connection button.
There should be an option to connect. Click it.
A login window should pop up. Enter your ONU username(without the @olivet.edu) and password, then hit OK.
The VPN connection should now be connected.
When you are done using the connection simply click the disconnect button.