FNR-575 Trees of the Midwest LESSON PLAN This lesson will teach students all about trees, including the life cycle of a tree, the function of different parts of a tree, and the use for and value of different wood products. Overview 2 Teachers’ Notes 3 Lesson 1: Tree Life Cycle 4 Lesson 2: Tree ID 7 Lesson 3: Wood is Good- Why We Need Trees 32 AUTHORS Molly Clark, Michael Carney, Amy Wetzel, Rebecca Koetz, Rod Williams Department of Forestry and Natural Resources, Purdue University, West Lafayette, Indiana
Transcript
FNR-575
Trees of the Midwest
LESSON PLAN
This lesson will teach students all about trees, including the life cycle of a tree, the function of different parts of a tree, and the use for and value of different wood products.
Overview 2
Teachers’ Notes 3
Lesson 1: Tree Life Cycle 4
Lesson 2: Tree ID 7
Lesson 3: Wood is Good- Why We Need Trees 32
AUTHORS
Molly Clark, Michael Carney, Amy Wetzel, Rebecca Koetz, Rod Williams Department of Forestry and Natural Resources, Purdue University, West Lafayette, Indiana
2
OVERVIEW Trees of the MidwestLESSON PLAN
It is the policy of the Purdue University Cooperative Extension Service that all persons have equal opportunity and access to its educational programs, services, activities, and facilities without regard to race, religion, color, sex, age, national origin or ancestry, marital status, parental status, sexual orientation, disability or status as a veteran. Purdue University is an Affirmative Action institution. This material may be available in alternative formats.
REQUIRED MATERIALS Teacher Provides• 6 copies of Tree Need Cards• 1 Tree Field Guide printed on cardstock (Total of 12 Pages,
plus 1 clear plastic page for specimen collection) per student• 1 three-hole puncher • 1 spool of yarn• Enough newspaper and books for each student to press
leaf specimens
• 1 With Wood Story Board sheets per group of 4-6 students• 1 Without Wood Story Board sheets per group of 4-6 students
Each Student Provides• 1 pair of scissors • 1 glue stick 1 pen or pencil • Coloring utensils
ACTIVITY ICONSUse these icons — located at the top of each lesson plan — to indicate the disciplines to which certain activities belong. These disciplines include:
TREE LIFE CYCLE Tree seeds can be spread by wind, water, or animals. If conditions are favorable (adequate sunlight, water, and nutrients), seedlings will start to grow wherever the seeds land. When trees reach a certain size, they become saplings, and then adult trees. A good way to explain the tree life cycle is to relate it to an animal life cycle (ex: seeds are eggs, seedlings are babies, saplings are teenagers, and full-grown trees are adults).
Seed: a small hard fruit from which a plant or tree grows.
Seedling: what sprouts from the seed.
Sapling: a young, slender tree.
Adult tree: adult trees continue to grow their entire lives. They develop far-reaching root systems to collect water and nutrients, and tall branches to absorb sunlight. Adult trees produce seeds.
Photosynthesis: the process through which plants produce energy in the form of glucose using sunlight, carbon dioxide, and water. Oxygen is a byproduct of photosynthesis. Trees capture sunlight with their leaves. Leaves are green because they are full of chloroplasts, an organelle inside plant cells. These chloroplasts are full of chlorophyll, which is a green plasma. The chlorophyll is what captures sunlight in the leaves. Learn more at (http://www.biology4kids.com/files/plants_photosynthesis.html).
TREE PARTS Blade: the green fleshy part of the leaf where most photosynthesis occurs. What many people think of as a leaf.
Lobe: projection or division of a blade. Lobes are major divisions of the leaf; minor divisions (bumpy edges as on maple and oak) are not lobes.
Petiole: stem of a leaf; it attaches the leaf to the twig.
Fascicle: attachment points of pine leaves/needles to the twig.
Explain the different tree parts. The roots act like straws and bring water and nutrients to the tree. The trunk of the tree is made of two parts: the outer bark and the inner wood. The bark acts like a shield from things like weather, animals, and fire. The inner wood is like a highway; xylem take water and nutrients up from the roots and to other parts of the plant, while phloem take sugar made from photosynthesis down from the leaves to other parts of the plant. The leaves gather sunlight and make energy. Leaves are made of many parts and students can identify trees based on the shape of the leaf parts. Leaves consist of a blade, lobes, and a petiole or stem (fascicle on pines). Note that not all leaves have lobes, and not all lobes are the same shape.
DICHOTOMOUS KEYS The Tree Field Guide in Lesson 2 includes a page with both a simplified seed and leaf key. Dichotomous keys operate by having the user make a decision about a two-part question. Always start at number 1. Read 1a and 1b, follow the instructions and provide the most appropriate answer until you reach the name of the target species.
For example: following the provided Dichotomous Key in the Tree Field Guide (looking at an oak seed). Since oak seeds are singular (not in groups of more than 2), 1b is the correct choice; go to #3. Oak seeds are rounded and have a cap on top, so 3a is the correct choice; you have identified an oak seed.
Scientists, natural resource professionals, and nature enthusiasts use field guides to better understand their natural surroundings. Field guides are visual representations of dichotomous keys. Dichotomous keys are used to identify species in the field. Dichotomous keys can be very long and complex, focusing on details that only an expert would recognize, or they can be short and simple focusing on broad differences that give the user a good idea of what species they are observing.
WOOD PRODUCTS Trees are a natural resource (i.e., substances that occur in nature and can be purchased, sold, or traded). Different types of trees have different looking wood and can be used for different projects. Trees like oak, maple and walnut are popular for making furniture. Trees like pine are good for making boards that are used to build houses, electric utility poles, and even used to make paper. There are other trees that are used just for decoration in yards; these trees usually have pretty flowers or pretty fall colors. Other trees are grown to make some type of food, like fruit and nuts. All trees are good for making the air cleaner and giving animals a place to live and/or something to eat.
A story board is a series of drawings with directions and dialogue, typically used to write films.
A skit is a short comedy sketch.
Common Tree Products: • Beds• Chairs• Benches• Tables• Desks • Floor
• Doors• Pencils• Boxes
(cardboard)• Paper • Mulch
• Electric poles• Fruit: apples,
oranges, lemons, limes, etc.
• Fruit Juice• Nuts
(not peanuts)
• Shade trees• House
(built with lumber)
• Tools with wooden handles
RECOMMENDED RESOURCEFifty Trees of Indiana Book https://mdc.itap.purdue.edu/item.asp?item_number=4-H-15-80
This lesson is designed to teach students about the life cycle of a tree and the functions of different parts of a tree.
ESTIMATED TIME45 minutes
REQUIRED MATERIALS
• 6 copies of Tree Need Cards
PROCEDURE
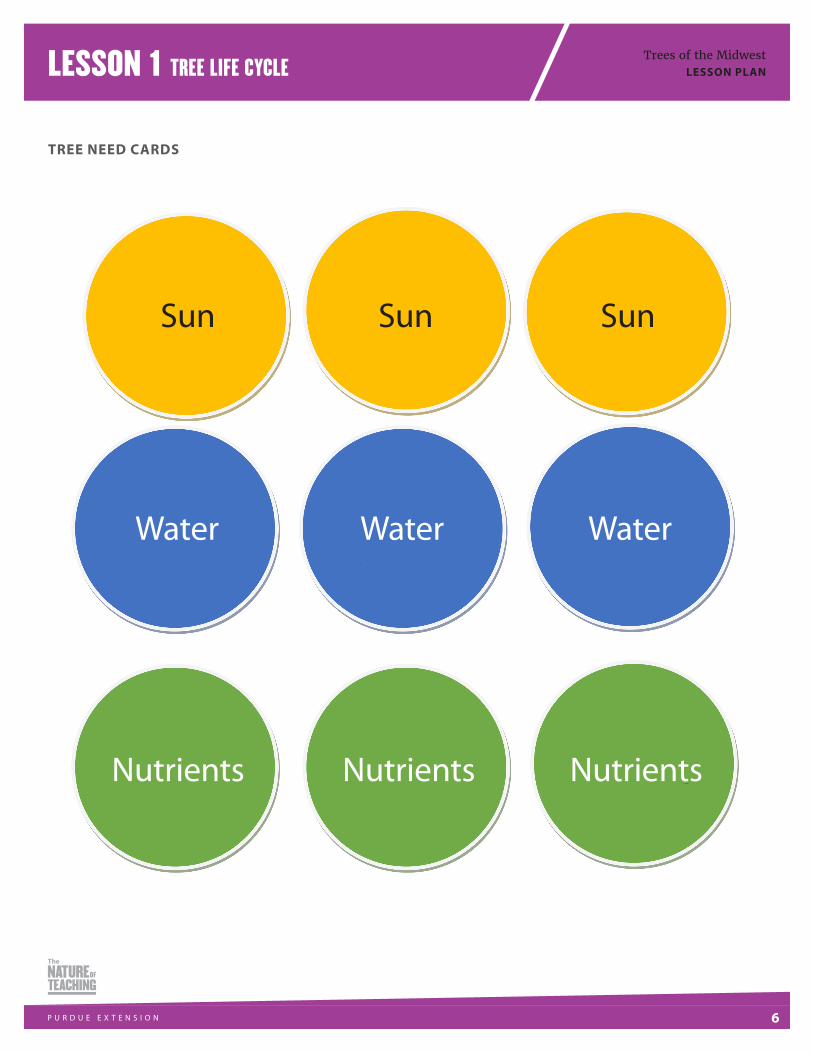
1. In preparation for this lesson, cut out the circles from the 6 copies of the Tree Need Cards sheet. You will need these in Activity 2.
2. Introduce students to the following terms: seed, seedling, sapling, adult tree, photosynthesis (see Teacher Notes).
3. Guide students through Activity 1: “Grow Like a Tree”.
4. Guide students through Activity 2: “Tree Cycles”.
5. Review with students by asking: What do trees need to survive? How are seedlings and saplings different and similar to adult trees? Where does the water, nutrients, and sunlight trees use go when an animal eats the bark or leaves of a tree?
ACTIVITY 1 GROW LIKE A TREE
This activity allows the instructor to guide students through the life cycle of a tree using an interactive story.
• While you talk about seeds have the students sit on the ground with their knees tucked up to their chest. Read the following story lines: “Like an egg, seeds are fragile. Sometimes trees come up with ways to protect their seeds. Some seeds grow fast so animals don’t have time to eat them. Some taste bad or make you sick. Some trees make a lot of seeds at once so animals cannot eat them all. Sometimes trees need animals to eat their seeds or get them caught on their fur for the seeds to disperse and grow. Seeds produce their own nutrients to provide plants with energy that will grow them into seedlings. This is similar to the yolk inside a baby animal’s egg.”
• While you talk about seedlings have the students sit on their feet. Read the following story lines: “Like babies, seedlings are really small trees that just grew out of their
seeds. They are very fragile and need exactly the right amount of water, nutrients, and sun to keep growing. They look a lot like adult trees but are not exactly the same.”
• While you talk about saplings have the students kneel with their arms in the air. Read the following story lines: “Like children, saplings are big enough to do some things but are not fully grown. Saplings are kind of like you. They cannot produce seeds like adult trees can. They are taller than seedlings and are starting to reach their branches and roots out away from their trunks. They look a lot like adult trees but are not exactly the same.”
• While you talk about adult trees have the students stand up tall with their arms up in the air like tree branches. Read the following story lines: “Like grown-up people, adult trees can do everything. They are usually big and tall. They can make seeds. Unlike people, trees keep growing even when they are adults.”
ACTIVITY 2 TREE CYCLES
• This activity also takes students through the life cycle of a tree. It introduces them to different parts of a tree and has them work together as a single tree to collect light, water, and nutrients to grow from a seed into an adult.
• Create a large open space on the floor in your classroom or go outside if the weather permits.
• Place all of the Sun Tree Need Cards at one end of the open space, and all of the Water and Nutrient Tree Need Cards at the other end of the open space.
• Have one student act as a seed and sit in the middle of the space with their knees tucked up to their chest, facing the water and nutrient cards (Fig. 1).
• Have two other students join in; one will sit in front of the student who was a seed and the other will sit behind. The student in front, facing the water and nutrients, will be the roots; the student in the middle is now the trunk; the student in back is the branches. The students together are a seedling (Fig. 2).
• Have the root student grab a water or nutrients card and pass it behind them to the trunk student, and the trunk pass it to the branches behind them. This will represent water or nutrients being passed up the tree from the roots to the leaves. Then have the branches set the water/nutrients card aside, which is not to be reused.
LESSON 1 TREE LIFE CYCLEACTIVITY ICONSUse these icons — located at the top of each lesson plan — to indicate the disciplines to which certain activities belong. These disciplines include:
ACTIVITY ICONSUse these icons — located at the top of each lesson plan — to indicate the disciplines to which certain activities belong. These disciplines include:
• Have the branches grab a sun card and pass it to the trunk in front of them. The trunk will then set this card aside not to be reused. This will represent tree leaves capturing sunlight and using what water and nutrients the roots have sent up to them to make energy with the sun to send to the rest of the tree. This process is called photosynthesis.
• Once the students have passed a few cards each way, have a few more students join in, sitting behind the branches and extending the trunk. Only the one student in the far back is the branches (Fig. 3). The students together are now a sapling. Continue passing cards in each direction.
• After a couple more rounds, add more students to the tree. Allow some students to sit off to the side of the trunk to show more extending branches. Also allow the students acting as roots to branch out farther from the base of the tree. Your tree should look something like a real adult tree (Fig. 4).
• Once you have several students in the tree, start adding a few used cards back to their respective sides of the space.
• Continue adding students until all the students have been added to the tree.
• Tell students that all the energy that trees gather from sunlight, water and nutrients is passed on to animals and decomposers that consume them. Many animals like deer like to eat the bark and leaves of trees.
OTHER SITUATIONS• Do the activity as explained above, but let the cards run
out. This shows that a tree has to be in an area with enough light, water and nutrients to support its growth. What happens if the tree does not get enough sunlight, water, or nutrients?
• Make the tree taller by moving some of the lower-branch students to the top of the highest branches. This shows that branches not getting enough light to make energy die and the tree grows new branches that are higher and longer. This can happen in a crowded forest with small canopy openings.
LESSON 1 TREE LIFE CYCLE
FIGURESFigure 1
Figure 2
Figure 3
Figure 4
6
Trees of the MidwestLESSON PLANLESSON 1 TREE LIFE CYCLE
TREE NEED CARDS
Sun Sun Sun
Water Water Water
Nutrients Nutrients Nutrients
7
Trees of the MidwestLESSON PLAN
This activity will teach students how to identify common tree families by their seeds and leaves, using a dichotomous key.
ESTIMATED TIME45 minutes
REQUIRED MATERIALS
• 1 Tree Field Guide printed on cardstock per student• 1 clear plastic sleeve per student• 1 three-hole puncher• 1 spool of yarn• 1 pair of scissors per student• 1 glue stick per student• 1 pen or pencil per student• Enough newspaper and books for each student to
press leaf specimens
PROCEDURE
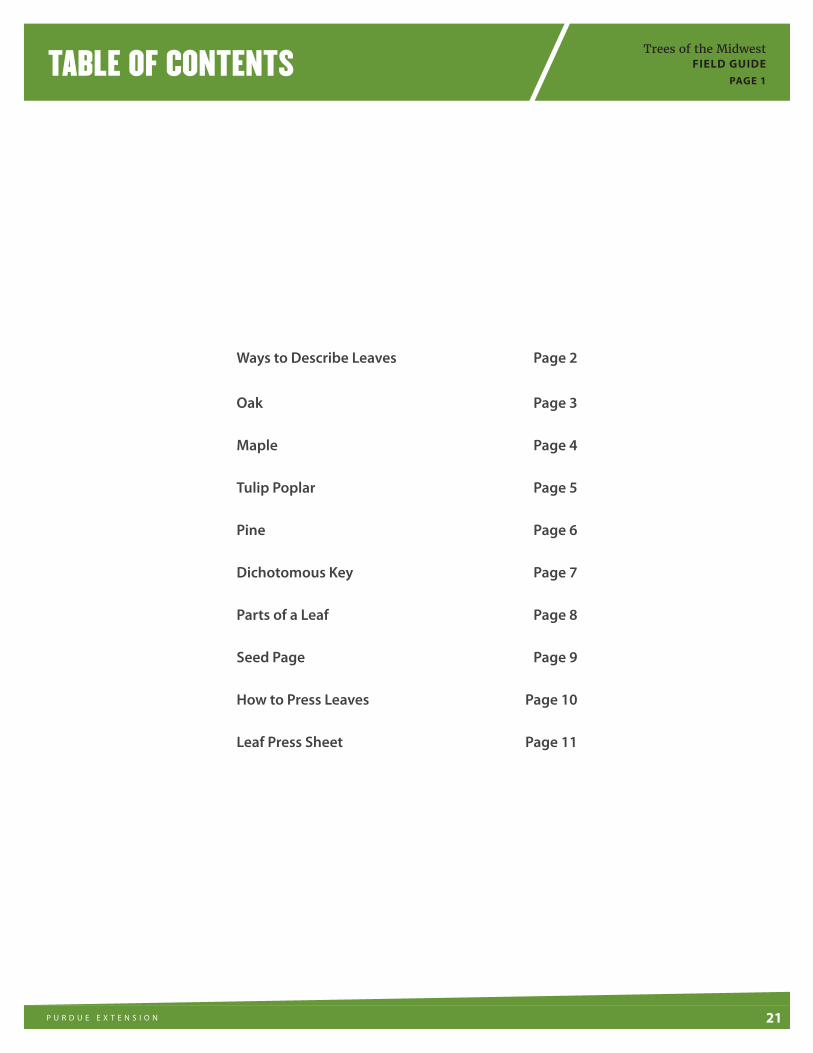
1. In preparation for this activity, have students bind the pages of the Tree Field Guide together (pages 8-19) by punching holes in the paper and tying them together with yarn. Include one clear plastic page sleeve at the end of the packet to collect seeds and leaves.
2. Introduce the following terms: blade, lobe, petiole, fascicle, needle, dichotomous key (see Teachers’ Notes).
3. Divide students into groups of 4-6.
4. Pass out one Tree Field Guide per student.
5. Have students examine each page of the Tree Field Guide and discuss unique characteristics of each tree species in their groups. Have the students write down these characteristics in the “description” places on the bottom of pages 3-6 using the words from the Ways to Describe Leaves on page 2 of the Tree Field Guide. Have students use complete sentences.
6. Have students cut out the seed pictures on the Seed Page and glue the pictures to the correct page (pages 3-6) in the Tree ID Packet. Refer students to the dichotomous key on page 7 of their Tree Field Guide to determine which seed goes with which tree.
7. Walk students through the “How to Press Leaves” activity on page 10 of the Tree Field Guide.
LESSON 2 TREE IDACTIVITY ICONSUse these icons — located at the top of each lesson plan — to indicate the disciplines to which certain activities belong. These disciplines include:
ACTIVITY ICONSUse these icons — located at the top of each lesson plan — to indicate the disciplines to which certain activities belong. These disciplines include:
Wider than it is long. 3 big lobes on top, 2 small lobes on bottom.
Longer than it is wide. Divided into several lobes.
Leaves are needle-shaped. Needles grouped onto the fascicle instead of individual petioles.
About the same length as width. Both sides are the same. 4 lobes, two on each side.
Trees of the Midwest FIELD GUIDE
PAGE 2
11
OAK
FUN FACT #1 Wildlife can eat the seeds, but cattle will get sick if they eat too many.
FUN FACT #2 Very good wood for building furniture
DESCRIPTION
Glue Picture of Seed Here
Trees of the Midwest FIELD GUIDE
PAGE 3
12
FUN FACT #1 Some seeds are produced in the spring and others in the fall. This allows animals to eat the seeds year-round.
FUN FACT #2 Maple syrup can be made from maple sap.
DESCRIPTION
MAPLE
Glue Picture of Seed Here
Trees of the Midwest FIELD GUIDE
PAGE 4
13
FUN FACT #1 Hummingbirds and insects drink the nectar (a sugary liquid) from the tree’s flowers.
FUN FACT #2 State tree of Indiana, Kentucky, and Tennessee.
DESCRIPTION
TULIP POPLAR
Glue Picture of Seed Here
Trees of the Midwest FIELD GUIDE
PAGE 5
14
FUN FACT #1 Important cover for animals from wind, rain and snow. It keeps its needles in the winter unlike the other trees in this guide.
FUN FACT #2 People plant pine trees to block their home from wind.
DESCRIPTION
PINE
Glue Picture of Seed Here
Trees of the Midwest FIELD GUIDE
PAGE 6
15
KEY TO MIDWESTERN TREE SEEDS
1a. Seeds are found in groups of more than 2. ....................................................................................................................................... Go to Question #2
1b. Seeds are found in pairs or individually. .............................................................................................................................................. Go to Question #3
2a. Individual parts are longer than wide. .................................................................................................................................... Tulip Poplar (Page _5__)
2b. Individual parts are wider than long. ....................................................................................................................................................... Pine (Page _6__)
3a. Seeds are rounded with a cap on top. ..................................................................................................................................................... Oak (Page _3__)
3b. Seeds are rounded at one end with a flat wing on the other side. ........................................................................................... Maple (Page _4__)
KEY TO MIDWESTERN TREE LEAVES
1a. Leaves flat and wide. Each leaf attaches individually. ................................................................................................................... Go to Question #2
1b. Leaves long and thin. Attaches to tree in clumps. .............................................................................................................................. Pine (Page _6__)
2a. Leaves wider than long. ............................................................................................................................................................................ Go to Question #3
2b. Leaves longer than wide. .............................................................................................................................................................................. Oak (Page _3__)
3a. Leaves have 5 lobes, 3 large and 2 smalls with pointy edges. ................................................................................................... Maple (Page _4__)
3b. Leaves have 4 lobes with smooth edges. ................................................................................................................................ Tulip Poplar (Page _5__)
DICHOTOMOUS KEY Trees of the Midwest FIELD GUIDE
PAGE 7
16
PARTS OF A LEAF
Blade: the green fleshy part of the leaf where most photosynthesis occurs. What many people think of as a leaf.
Lobe: projection or division of a blade. Lobes are major divisions of the leaf; minor divisions (bumpy edges as on maple and oak) are not lobes.
Petiole: stem of a leaf; attaches the leaf to the twig.
Fascicle: attachment points of pine leaves/needles to the twig.
Seed: a small hard fruit from which a plant or tree grows.
Seedling: what sprouts from the seed.
Sapling: a young, slender tree.
Adult tree: adult trees continue to grow their entire lives. They develop far-reaching root systems to collect water and nutrients, and tall branches to absorb sunlight. Adult trees produce seeds.
Trees of the Midwest FIELD GUIDE
PAGE 8
17
Cut out each of these seeds and glue them to the appropriate box on pages 3-6. Use the Dichotomous Key on page 7 if you are not sure which seed goes with which tree.
SEED PAGE
Trees of the Midwest FIELD GUIDE
PAGE 9
18
This process will work for leaves of all kinds of plants and flowers.
STEP #1 Collect leaves from trees from around your schoolyard. Gather leaves that look fresh, not rotten or moldy.
STEP #2 Make sure the surfaces of the leaves are dry. Place a single leaf in between two pieces of newspaper. Place the newspaper and leaves onto a hard, flat surface (like your desk).
STEP #3 Set flat, heavy objects (like a book) on top of the newspaper and leaves. Do not touch the press for several days to allow the leaves to dry and press.
STEP #4 When your leaves are dried and pressed you can glue them to the Leaf Press Sheet on page 10 of this Tree Field Guide. Write a small description underneath each leaf on the Leaf Press Sheet.
HOW TO PRESS LEAVES Trees of the Midwest FIELD GUIDE
Wider than it is long. 3 big lobes on top, 2 small lobes on bottom.
Longer than it is wide. Divided into several lobes.
Leaves are needle-shaped. Needles grouped onto the fascicle instead of individual petioles.
About the same length as width. Both sides are the same. 4 lobes, two on each side.
Trees of the Midwest FIELD GUIDE
PAGE 2
23
OAK
FUN FACT #1 Wildlife can eat the seeds, but cattle will get sick if they eat too many.
FUN FACT #2 Very good wood for building furniture
DESCRIPTION
Glue Picture of Seed Here
Longer than it is wide. Divided into several lobes.
Trees of the Midwest FIELD GUIDE
PAGE 3
24
FUN FACT #1 Some seeds are produced in the spring and others in the fall. This allows animals to eat the seeds year-round.
FUN FACT #2 Maple syrup can be made from maple sap.
DESCRIPTION
MAPLE
Wider than it is long. 3 big lobes on top, 2 small lobes on bottom.
Glue Picture of Seed Here
Trees of the Midwest FIELD GUIDE
PAGE 4
25
FUN FACT #1 Hummingbirds and insects drink the nectar (a sugary liquid) from the tree’s flowers.
FUN FACT #2 State tree of Indiana, Kentucky, and Tennessee.
DESCRIPTION
TULIP POPLAR
Glue Picture of Seed Here
About the same length as width. Both sides are the same. 4 lobes, two on each side.
Trees of the Midwest FIELD GUIDE
PAGE 5
26
FUN FACT #1 Important cover for animals from wind, rain and snow. It keeps its needles in the winter unlike the other trees in this guide.
FUN FACT #2 People plant pine trees to block their home from wind.
DESCRIPTION
PINE
Glue Picture of Seed Here
Leaves are needle-shaped. Needles grouped onto the fascicle instead of individual petioles.
Trees of the Midwest FIELD GUIDE
PAGE 6
27
KEY TO MIDWESTERN TREE SEEDS
1a. Seeds are found in groups of more than 2. ....................................................................................................................................... Go to Question #2
1b. Seeds are found in pairs or individually. .............................................................................................................................................. Go to Question #3
2a. Individual parts are longer than wide. .................................................................................................................................... Tulip Poplar (Page _5__)
2b. Individual parts are wider than long. ....................................................................................................................................................... Pine (Page _6__)
3a. Seeds are rounded with a cap on top. ..................................................................................................................................................... Oak (Page _3__)
3b. Seeds are rounded at one end with a flat wing on the other side. ........................................................................................... Maple (Page _4__)
KEY TO MIDWESTERN TREE LEAVES
1a. Leaves flat and wide. Each leaf attaches individually. ................................................................................................................... Go to Question #2
1b. Leaves long and thin. Attaches to tree in clumps. .............................................................................................................................. Pine (Page _6__)
2a. Leaves wider than long. ............................................................................................................................................................................ Go to Question #3
2b. Leaves longer than wide. .............................................................................................................................................................................. Oak (Page _3__)
3a. Leaves have 5 lobes, 3 large and 2 smalls with pointy edges. ................................................................................................... Maple (Page _4__)
3b. Leaves have 4 lobes with smooth edges. ................................................................................................................................ Tulip Poplar (Page _5__)
DICHOTOMOUS KEY Trees of the Midwest FIELD GUIDE
PAGE 7
28
PARTS OF A LEAF
Blade: the green fleshy part of the leaf where most photosynthesis occurs. What many people think of as a leaf.
Lobe: projection or division of a blade. Lobes are major divisions of the leaf; minor divisions (bumpy edges as on maple and oak) are not lobes.
Petiole: stem of a leaf; attaches the leaf to the twig.
Fascicle: attachment points of pine leaves/needles to the twig.
Seed: a small hard fruit from which a plant or tree grows.
Seedling: what sprouts from the seed.
Sapling: a young, slender tree.
Adult tree: adult trees continue to grow their entire lives. They develop far-reaching root systems to collect water and nutrients, and tall branches to absorb sunlight. Adult trees produce seeds.
Trees of the Midwest FIELD GUIDE
PAGE 8
29
Cut out each of these seeds and glue them to the appropriate box on pages 3-6. Use the Dichotomous Key on page 7 if you are not sure which seed goes with which tree.
SEED PAGE
Trees of the Midwest FIELD GUIDE
PAGE 9
30
This process will work for leaves of all kinds of plants and flowers.
STEP #1 Collect leaves from trees from around your schoolyard. Gather leaves that look fresh, not rotten or moldy.
STEP #2 Make sure the surfaces of the leaves are dry. Place a single leaf in between two pieces of newspaper. Place the newspaper and leaves onto a hard, flat surface (like your desk).
STEP #3 Set flat, heavy objects (like a book) on top of the newspaper and leaves. Do not touch the press for several days to allow the leaves to dry and press.
STEP #4 When your leaves are dried and pressed you can glue them to the Leaf Press Sheet on page 10 of this Tree Field Guide. Write a small description underneath each leaf on the Leaf Press Sheet.
HOW TO PRESS LEAVES Trees of the Midwest FIELD GUIDE
PAGE 10
31
LEAF PRESS SHEET Trees of the Midwest FIELD GUIDE
PAGE 11
32
Trees of the MidwestLESSON PLAN
ESTIMATED TIME45 minutes
REQUIRED MATERIALS
• 1 With Wood Story Board Sheet per group of 4-6 students• 1 Without Wood Story Board sheet per group of 4-6
students • Enough writing and coloring utensils for each group of
students
PROCEDURE
1. Divide the students into groups of 4-6. Give each group 1 With Wood Story Board sheet and 1 Without Wood Story Board sheet.
2. Introduce the following terms: natural resource, wood product.
3. Ask the students what they think people use trees for. See the Teacher Notes for examples.
4. Introduce the term “story board.” Have each group write a story using the With Wood Story Board sheet about how they use trees every day in different settings. If students are having trouble, go over the list of Common Tree Products again. Students may add additional story boxes and lines on the back of the sheet.
5. Have a couple of groups volunteer to share their stories.
6. Now have the groups write a story using their Without Wood Story Board sheet about how their day would go without wood products. Students may add additional story boxes and lines on the back of the sheet.
7. Introduce the term “skit.” Have the students perform their stories as skits in front of the class. Give the students 10 minutes to plan their skits.
LESSON 3 WOOD IS GOOD – WHY WE NEED TREESACTIVITY ICONSUse these icons — located at the top of each lesson plan — to indicate the disciplines to which certain activities belong. These disciplines include:
ACTIVITY ICONSUse these icons — located at the top of each lesson plan — to indicate the disciplines to which certain activities belong. These disciplines include:
ACTIVITY ICONSUse these icons — located at the top of each lesson plan — to indicate the disciplines to which certain activities belong. These disciplines include:
Draw the rooms listed in each box. Use the lines below each box to write a story using those rooms. Use complete sentences. Think about the wood products typically found in each room.
LESSON 3 WOOD IS GOOD – WHY WE NEED TREES
Bedroom
Dining Room
Kitchen
School
34
Trees of the MidwestLESSON PLAN
WITHOUT WOOD STORY BOARD
Draw each room. Use the lines below each box to write a story using those rooms. Use complete sentences. This time do not draw anything made of wood. Those items are missing from the story.