22
ProSphere NMS Version 6.0.1 for MSPx Applications Software Installation & Release Notes 032R906-V601, Issue 1 - July 2016

ProSphere NMS Version 6.0.1for MSPx ApplicationsSoftware Installation & Release Notes032R906-V601, Issue 1 - July 2016

Copyright©2016 General DataComm, Inc. ALL RIGHTS RESERVED.This publication and the software it describes contain proprietary and confidential information. No part of this document may be copied, photocopied, reproduced, translated or reduced to any electronic or machine-readable format without prior written permission of General DataComm, Inc. The information in this document is subject to change without notice. General DataComm assumes no responsibility for any damages arising from the use of this document, including but not limited to, lost revenue, lost data, claims by third parties, or other damages. If you have comments or suggestions concerning this manual, please contact:
General DataComm, Inc. Technical Publications 353 Christian Street, Suite 4, Oxford, CT 06478Telephone: 1 203 729 0271
TrademarksAll brand or product names are trademarks or registered trademarks of their respective companies or organizations.
DocumentationRevision History: GDC P/N 032R906-V601
Related Publications
-REV is the hardware revision (-000, -001, etc.) -VREV is the most current software version (-V510, -V620, -V720, etc.) In addition to the publications listed above, always read the Patch Release Notes supplied with your products.
Issue Date Release Description
1 July 2016 Unconditional Release of ProSphere NMS Version 6.0.1
Description Part Number
Xedge / ProSphere Deployment Guide (for military applications only) Contact GDC
Xedge / ProSphere Security Administration Guide (for all Xedge 6000 systems) 032R298-000
Xedge / ProSphere Quick Reference (for all Xedge 6000 systems) 032R299-000
Xedge 6000 Hardware Setup Guide (for all Xedge 6000 systems) 032R440-000
Xedge 6000 for MSPx Applications Version 7.4.X Software Configuration GuideXedge 6000 for MSPx Applications Version 7.4.X Release Notes and Cumulative Patch Notes
032R401-V74X032R901-V74X
Xedge 6000 for ATM Applications Version 6.2.X Software Configuration & Status GuideXedge 6000 for ATM Applications Version 6.2.X Release Notes and Cumulative Patch Notes
032R400-V62X032R901-V62X
ProSphere NMS Version 6.0.X User Guide (for all Xedge 6000 systems) 032R610-V60X
ProSphere NMS Version 6.0.X Installation and Release Notes 032R906-V60X
ProSphere NMS Version 6.0.1 Publication No. 032R906-V601Issue 1 - July 2016
Install for GD
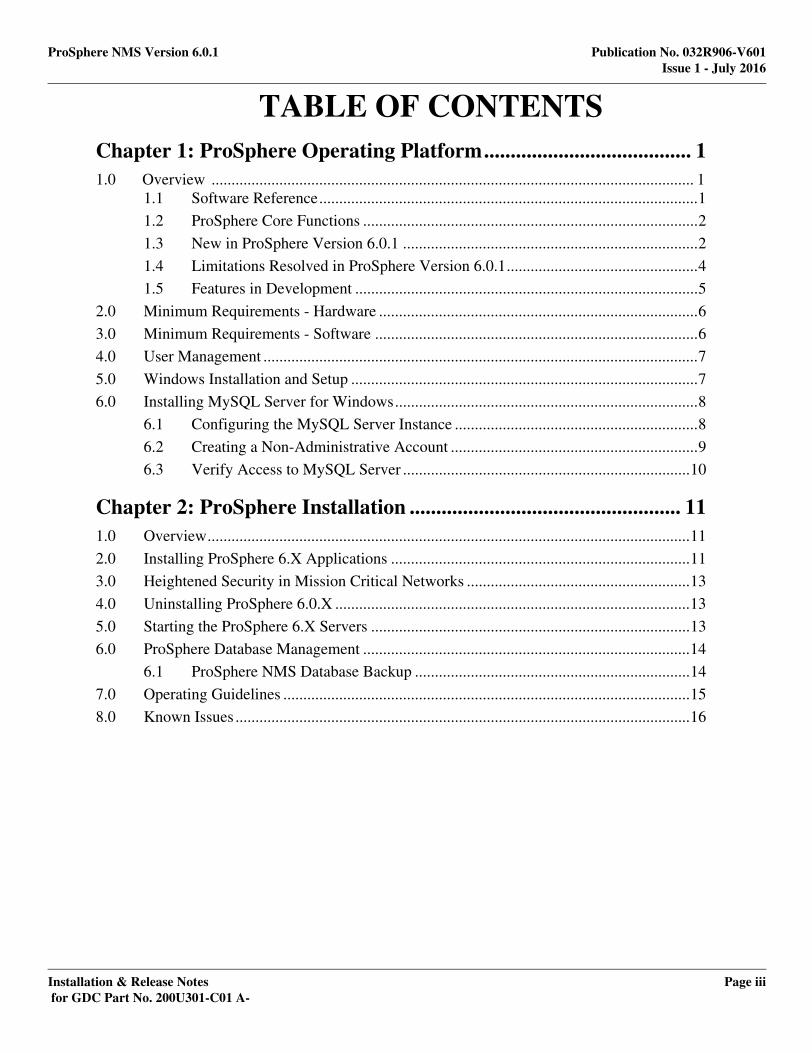
TABLE OF CONTENTS
Chapter 1: ProSphere Operating Platform....................................... 11.0 Overview ......................................................................................................................... 11.1 Software Reference...............................................................................................1
1.2 ProSphere Core Functions ....................................................................................2
1.3 New in ProSphere Version 6.0.1 ..........................................................................2
1.4 Limitations Resolved in ProSphere Version 6.0.1................................................4
1.5 Features in Development ......................................................................................5
2.0 Minimum Requirements - Hardware ................................................................................6
3.0 Minimum Requirements - Software .................................................................................6
4.0 User Management .............................................................................................................7
5.0 Windows Installation and Setup .......................................................................................7
6.0 Installing MySQL Server for Windows............................................................................8
6.1 Configuring the MySQL Server Instance .............................................................8
6.2 Creating a Non-Administrative Account ..............................................................9
6.3 Verify Access to MySQL Server ........................................................................10
Chapter 2: ProSphere Installation ................................................... 111.0 Overview.........................................................................................................................11
2.0 Installing ProSphere 6.X Applications ...........................................................................11
3.0 Heightened Security in Mission Critical Networks ........................................................13
4.0 Uninstalling ProSphere 6.0.X .........................................................................................13
5.0 Starting the ProSphere 6.X Servers ................................................................................13
6.0 ProSphere Database Management ..................................................................................14
6.1 ProSphere NMS Database Backup .....................................................................14
7.0 Operating Guidelines ......................................................................................................15
8.0 Known Issues ..................................................................................................................16
ation & Release Notes Page iiiC Part No. 200U301-C01 A-

Publication No. 032R906-V601 ProSphere NMS Version 6.0.1Issue 1 - July 2016
Page iv
Installation & Release Notesfor GDC Part No. 200U301-C01 A-
ProSphere NMS Version 6.0.1 Publication No. 032R906-V601Issue 1 - July 2016
Installfor GD
Chapter 1: ProSphere Operating Platform
1.0 OverviewThis version of the ProSphere Network Management System (NMS) supports Xedge 6000 nodes (Version 6.0.1 and higher). ProSphere NMS may discover older versions of Xedge Switch code, with alarms and configurations screens functioning normally, however not all parts of ProSphere NMS applications are known to work with those older versions.
This document is intended for qualified engineers who are familiar with the Xedge 6000 family of multiservice switches, Xedge network architecture and management, and related terminology. A thorough understanding of hardware/software requirements and a proficiency in the relevant operating environments are assumed.
This section provides the installation instructions for these workstation environments. To install the ProSphere software, refer to later sections of this document. For the latest information, contact your GDC representative or go to http://www.gdc.com.
1.1 Software ReferenceThis version of ProSphere NMS has been tested and is supported on Microsoft Windows platforms listed below. The following table describes software modules relevant to ProSphere NMS. In this document, short forms of the software product names are used.
Note: IMPORTANT! ProSphere NMS is supported on the 32- and 64-bit platform. Note that this version of ProSphere NMS has been tested for installation on, and operation with 32-bit versions of Windows and MySQL software.
Table 1: Software Reference
Software Components Product Name/No. Version Provided
ProSphere NMS Software
200U301-C01 Version 6.0.1 Yes
MySQL Database Software (for Windows)
MySQL Server 5.0 Release 5.0.77 (32/64 bit) Yes
MySQL Enterprise Version 5.5 No
Windows Operating System
Windows 7, SP1 32-bit Professional Edition No
Windows Server 2008 R2 64-bit Standard Edition No
ation & Release Notes Page 1C Part No. 200U301-C01 A-

Publication No. 032R906-V601 ProSphere NMS Version 6.0.1Issue 1 - July 2016
Page 2
1.2 ProSphere Core FunctionsProSphere NMS is comprised of the following core functions. Note that not all functions may be required for your network environment.
• User Management provides for the addition/removal of users, changing passwords for existing users, and defining access privileges to users.
• Topology Management performs Auto-Discovery of the Xedge network, maintains network topology, and displays a map of nodes, cards, links and connections.
• Alarm Management polls each discovered device for its current active alarms, and receives alarms from Xedge slot controllers configured to send SNMP traps to the Network Management station.
• Configuration Management generates the Explorer tree or the shelf GUI that represents the entire topology for the purpose of adding, deleting or modifying a node, slot, link or connection in the network.
• Service Provisioning Management configures Pseudowires and ATM connections.
• Routing Management generates deterministic routing tables for the Xedge ATM.
• File Management provides backup/restoral of configuration, trap/alarm logs, etc.
Note: Detailed operating information and procedures are provided in the ProSphere User Guide listed in the front of this document.
1.3 New in ProSphere Version 6.0.1• Added SNMPv3 support.
• Added discovery of the PCE controller and its LIMs.
• Added discovery of MOLN connection over atmport over Pseudowire (Dry Matini or MPLS).
• Added MOLN over Pseudowire connections via wizard page.
• Enhanced Discovery by adding scrollbar and status message to Poll Status table.
• Enhanced RTM Route Table to allow selective columns to be exported.
• Enhanced RTM Route Table by adding horizontal scroll bar for viewing columns with long string.
• Enhanced RTM Route Table to allow sorting for tables in Route View tab and Route Generation tab.
• Added tunnel matching to tie head-tail, transit-transit for static tunnel so that the setup/start/stop service can be done correctly.
• Added range check for all numeric fields in PW services.
• Added DM and IP tunnels.
• Combined ATM and PW services. SPVC and PVC are now transport type of Cross connect service.
• Added Link Configuration support for DS1 & E1 for PCE and PCX.
• Added new "IP Configuration" screen and moved over all IP related tables from Slot Configuration.
• Changed SPM Service creation to semi-wizard type.
Installation & Release Notesfor GDC Part No. 200U301-C01 A-

ProSphere NMS Version 6.0.1 Publication No. 032R906-V601Issue 1 - July 2016
Installfor GD
• Allow dynamic arp tunnel to create head and tail (from service create)
• Added CE service.
• Allow Remove, lock and release multiple service group in SPM at one time (Highlight and hold shift key while select Lock or Release)
• Added Windows 7 support.
• Added Import of legacy CE services.
• Allows only user with appropriate privileges to configure SSH.
• In User Manager, allows access to Add/Modify button even when ProAdmin is selected (but not allow to modify ProAdmin).
• Added a check for ETH/VLAN cross-connect so that ProSphere does not send setup or start if admin state is up.
• Added notice to user dialog after login.
• Added File Transfer dialog in explorer for each slot controller.
• Added error message for SNMP password length smaller than eight characters.
• Changed Auth Name label to Security Name.
• Comprehensive and configurable control of passwords used to access ProSphere NMS, including:
• enforce password expiration after the user-configured interval
• require a password change after the user-configured interval
• require passwords to conform to customer’s security policies, e.g., minimum of alphanumeric characters in length; mix of upper/lower case letters, numbers, and special characters.
• enforce a limit on the reuse of account passwords within the last n password changes.
• enforce a limit on user changes to their account passwords to once every 24 hours.
• Automatic termination of a session and log out (or lock out) after the system defined session idle time limit is exceeded.
• User notification of important login information: Last Successful Login, Last Unsuccessful Login Attempt, and Password Expiration Date.
• Customizable click-through logon banner prevents further activity on the information system unless and until the user agrees to manifest agreement by clicking "OK.”
• Configurable number of consecutive unsuccessful logon attempts allowed before the user account is locked; configurable lockout interval. A locked account can only be unlocked by the ProSphere Administrator.
• Comprehensive Audit Trail that stores information on key events including: • successful and unsuccessful logons.• denial of access resulting from excessive number of logon attempts.• privileged activities and other system-level access.• session logout, lockout, or timeout.• deletion/adddition of networks, nodes, slot controller, LIMS, and links.• deletion/addition or modification of services (PVC's, SPVC,s, LSP
Tunnels, PWE3, etc.
ation & Release Notes Page 3C Part No. 200U301-C01 A-
Publication No. 032R906-V601 ProSphere NMS Version 6.0.1Issue 1 - July 2016
Page 4
• Audit records include the user ID, date and time of the event, type of event, and the name of data object modified or deleted.
• Audit records are stored online for a minimum of 30 days and offline for at least one year (user configurable).
• Supports email alarm notification.
1.4 Limitations Resolved in ProSphere Version 6.0.1• DB - Fixed lim object for P-series modules that did not get deleted from database,
causing database confusion in subsequent add/update of new objects.
• RTM - Fixed rtm file generator create files with routes that are more than 10 hops. Fixed so that only 10 hops or less routes can be saved to file.
• (MR10717) SAP premapped to ATM port was displayed with the wrong SAP number. Fixed so that the SAP mapped from the ATM port is discovered correctly.
• (MR10721) Fixed a problem where an IMA Link and Group read returned “null” after setting the Group ID. This was caused when auto poll and manual read occurred at the same time.
• (MR10728) IMA connections were invalid in RTM. Fixed by associating SAPs with IMA links.
• (MR10770) Resolved ProSphere SPM lock up after SNMP timeout.
• (MR10776) Resolved problem with vpi/vci modification for spvc circuits.
• (MR10762) Supports mib branch change in switch code.
• (MR10777) Supports vlan xconnect table index change in switch code.
• Added spm sorting based on connection state.
• (MR10778) Resolved PW creation causing exceptions.
• Added AVM ENM lim discovery.
• Fixed ProSphere client lockup when sorting active alarm table.
• Fixed various lockups in ProSphere client SPM when using Groups screen.
• Fixed ProSphere client replicated import of SPVC caused when importing a node that has N slots and ProSphere client sending N import request to each slot.
• Fixed ProSphere client which did not stop when spvc import reached passive connections.
• Added SPVC Half-Connect Checker to SPM. User can now right click on service set to check for or remove half-connects on spvc connections.
• (MR10787) Changed RTM to allow user to specify maximum number of hop per route. If maximum hop is less than 10, only routes that have up to maximum hops will be added to dtl.bin file. If maximum hop is greater than 10, only routes that have 10 or less hops will be added. The viewer may show routes with more than the specified number, this may be useful for network design. This change requires removing RTMDB database when upgrading.
• (MR10788) RTM independent routings now provide the IR plus Depend Routes up to the required route.
• Complete support in XEM for AVM E&M LIM
Installation & Release Notesfor GDC Part No. 200U301-C01 A-

ProSphere NMS Version 6.0.1 Publication No. 032R906-V601Issue 1 - July 2016
Installfor GD
• (MR10741) Fixed Ctrl-E in active alarms which only deleted eight items at a time.
• (MR10808) RTM now creates more than 10 routes.
• (MR10805) Fixed Telnet to AVM LIM which was directed to PCX.
• Fixed exceptions when loading profile for email notification.
• (MR10815) Fixed duplicate link discovery problem.
• Added Inventory into Explorer.
• Increased maximum memory size from 1024 Mbps to 1408 Mbps.
• Cosmetic fixes for Inventory.
• Fixed the "Internal error at state:1".
• (MR10825) Resolved Bandwidth not being updated.
• (MR10329) Resolved Tunnel Mgt Import getting stuck after a LSP is re-routed.
• Fixed various display issues with Inventory.
• Fixed a lockup in Inventory when user performs a "Get Information" on an empty topology.
• Fixed database access problem when installing new Prosphere caused by the db port number being defaulted to 3607 (should be 3307).
• Fixed "Next" button display issue found by customer.
• Added option to install XPM Collector.
• Fixed problem where IMA and APS alarms were not displayed.
• Fixed discovery of multiple connection between two nodes.
• (MR10856) Resolved error when loading RTM configuration from database. Saved configuration.
• (MR10857) Resolved problem of not being able to import SPVC from CE cards.
• (MR10858) Resolved "No ckt Selected" when removing ckts using 'Provisioning" drop down.
1.5 Features in DevelopmentGDC continues to enhance the Xedge/ProSphere platform with new features, especially those that add heightened security features to the ProSphere/Xedge platform. Contact your GDC representative for information on new features in developement.
ation & Release Notes Page 5C Part No. 200U301-C01 A-
Publication No. 032R906-V601 ProSphere NMS Version 6.0.1Issue 1 - July 2016
Page 6
2.0 Minimum Requirements - Hardware The following are minimum requirements for Windows workstations. Higher processor speed and more memory can significantly increase application performance. When managing more than 30 nodes, a faster processor or more memory may be required.
• Intel Pentium Processor, 2GHz; 2 GB RAM; 200 GB disk space; CDROM/DVD Drive
Note: Consult your authorized ProSphere/Xedge representative for advice on specific hardware/software requirements other than the ones mentioned above.
3.0 Minimum Requirements - Software1. Windows Operating System
• Windows Server 2008 R2 (64-bit Standard Edition)
• Windows 7 / Service Pack 1 (32- or 64-bit Professional Edition)
2. MySQL Database Software
• MySQL Server 5.0 Release 5.0.77 (32- or 64-bit)
• MySQL Enterprise Version 5.5
3. ProSphere NMS Version 6.0.1
Note: The MySQL database server system is required for object persistence and for RTM and SPM applications. The MySQL software must be acquired and installed by the user.
Installation & Release Notesfor GDC Part No. 200U301-C01 A-

ProSphere NMS Version 6.0.1 Publication No. 032R906-V601Issue 1 - July 2016
Installfor GD
4.0 User ManagementThe default usernames and passwords for ProSphere client applications are listed below.
Note: In mission critical networks with strigent security requirements, the factory default usernames and passwords should be disabled before connecting Xedge controllers and Smart LIMs to the network. Consult the Security Administration Guide or contact your GDC representative for details.
5.0 Windows Installation and SetupThe following installation instructions are for Windows Operating Systems. You must perform the following procedure in the order given.
Before you begin:
• Refer to the hardware specifications accompanying your PC to ensure that processor speed and memory capacity meet ProSphere requirements.
• Contact your System Administrator for loading the Windows Operating System and the associated Service Pack.
• The MySQL Server for Windows must be installed before the ProSphere software, as described in this document.
• For mission critical networks, the Windows workstation should be security hardened by heightening password policies, disabling unneeded host applications, closing ports, disabling unneeded services, etc. Contact your System Administrator to configure the workstation with an appropriate hardware/software profile that suits your network’s security requirements.
• After performing the installation procedures in this document, ProSphere can be configured for operation in mission critical networks by setting all of the application, user, and security preferences as recommended in the Xedge/ProSphere Security Administration Guide (GDC P/N 032R298-000).
User Types and Privileges Default Username Default Password
Super User has all network management privi-leges, including user management.
ProAdmin manager
Administrator has all network management privileges, but cannot create/delete users.
nmsadmin nmsadmin
Operator has all alarm and circuit privileges. Cannot change configuration or topology.
nmsoper nmsoper
Monitor has read-only access to modules. prospher prospher
ation & Release Notes Page 7C Part No. 200U301-C01 A-
Publication No. 032R906-V601 ProSphere NMS Version 6.0.1Issue 1 - July 2016
Page 8
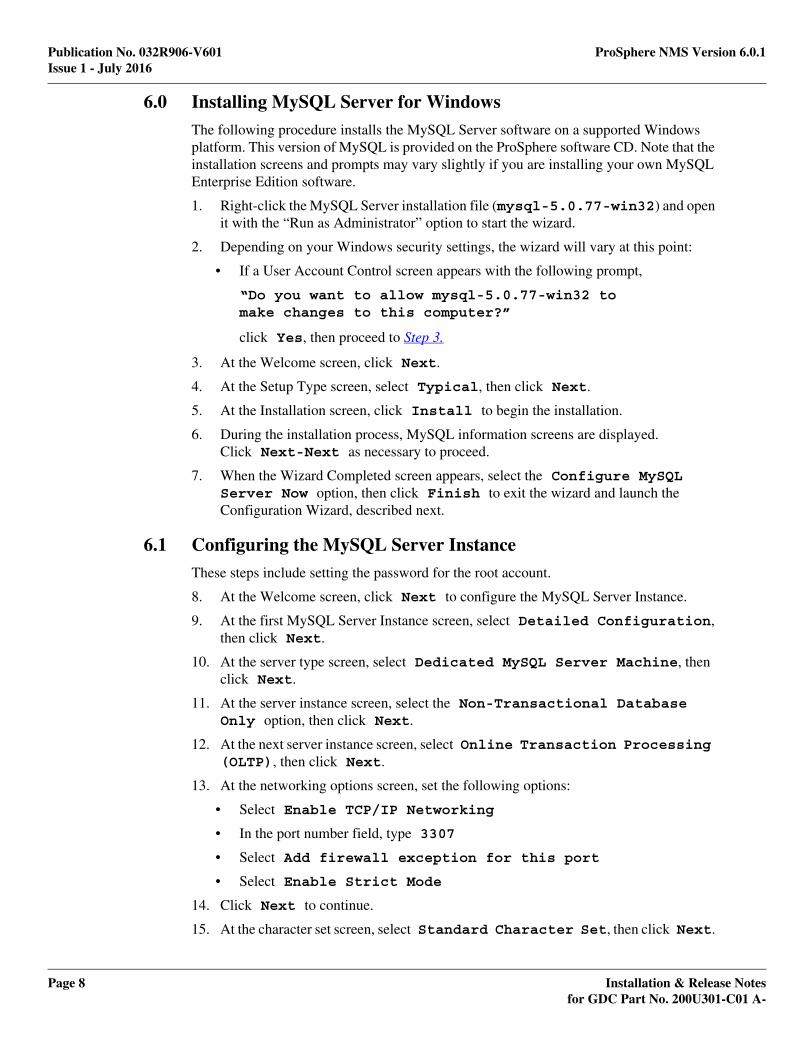
6.0 Installing MySQL Server for WindowsThe following procedure installs the MySQL Server software on a supported Windows platform. This version of MySQL is provided on the ProSphere software CD. Note that the installation screens and prompts may vary slightly if you are installing your own MySQL Enterprise Edition software.
1. Right-click the MySQL Server installation file (mysql-5.0.77-win32) and open it with the “Run as Administrator” option to start the wizard.
2. Depending on your Windows security settings, the wizard will vary at this point:
• If a User Account Control screen appears with the following prompt,
“Do you want to allow mysql-5.0.77-win32 to make changes to this computer?”
click Yes, then proceed to Step 3.
3. At the Welcome screen, click Next.
4. At the Setup Type screen, select Typical, then click Next.
5. At the Installation screen, click Install to begin the installation.
6. During the installation process, MySQL information screens are displayed. Click Next-Next as necessary to proceed.
7. When the Wizard Completed screen appears, select the Configure MySQL Server Now option, then click Finish to exit the wizard and launch the Configuration Wizard, described next.
6.1 Configuring the MySQL Server InstanceThese steps include setting the password for the root account.
8. At the Welcome screen, click Next to configure the MySQL Server Instance.
9. At the first MySQL Server Instance screen, select Detailed Configuration, then click Next.
10. At the server type screen, select Dedicated MySQL Server Machine, then click Next.
11. At the server instance screen, select the Non-Transactional Database Only option, then click Next.
12. At the next server instance screen, select Online Transaction Processing (OLTP), then click Next.
13. At the networking options screen, set the following options:
• Select Enable TCP/IP Networking
• In the port number field, type 3307
• Select Add firewall exception for this port
• Select Enable Strict Mode
14. Click Next to continue.
15. At the character set screen, select Standard Character Set, then click Next.
Installation & Release Notesfor GDC Part No. 200U301-C01 A-

ProSphere NMS Version 6.0.1 Publication No. 032R906-V601Issue 1 - July 2016
Installfor GD
16. At the Windows options screen, set the following options:
• Select Install As Windows Service
• For the Service Name, select MySQL
• Select the option that will Launch the MySQL Server automatically
• Select Include Bin Directory in Windows PATH
17. Click Next to continue.
18. At the security options screen, set the following options. Be sure to remember the root password exactly as entered at this screen.
• Select Modify Security Settings
• Type the root password (at least 8 strong characters)
• Retype the root password (at least 8 strong characters)
• Deselect Enable root access from remote machines
• Deselect Create An Anonymous Account
Note: For heightented security, do not enable root access from remote machines and do not create an anonymous account. Be sure these options are deselected (unchecked) in the security options screen.
19. Click Next to continue.
20. At the Ready to Execute screen, click Execute to start the MySQL Instance configuration. Each task is marked with a check as the configuration sequence proceeds. When all four fields are checked, click Finish to close the wizard, then proceed to the next steps to create a non-administrative account.
6.2 Creating a Non-Administrative AccountIn this section you will need to enter a password that will be used to access MySQL via the “ProAdmin” username. If your system is security hardened, be sure that the password entered is a strong password that complies with your security policy.
21. In the MySQL Server 5.0 folder, locate and run the MySQL Command Line Client.
22. At the password prompt, use the password entered in Step 18.
23. At the next MySQL prompt, create a non-administrative user account and user account password as follows:
create user 'ProAdmin'@'localhost' identified by '[ProAdmin password]';
24. At the MySQL prompt, grant privileges as follows:grant all privileges on *.* to 'ProAdmin'@'localhost' with grant option;
25. Type exit to close the MySQL Command line Client and then proceed to the next step to verify access.
ation & Release Notes Page 9C Part No. 200U301-C01 A-
Publication No. 032R906-V601 ProSphere NMS Version 6.0.1Issue 1 - July 2016
Page 1
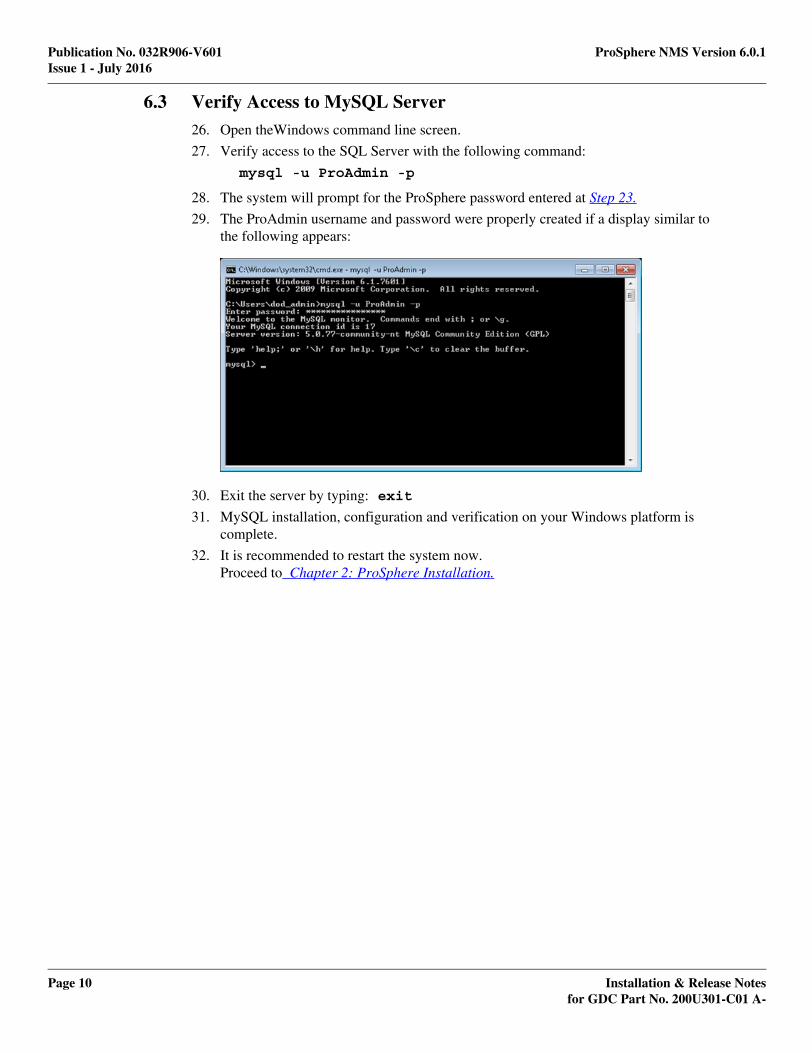
6.3 Verify Access to MySQL Server26. Open theWindows command line screen.
27. Verify access to the SQL Server with the following command:
mysql -u ProAdmin -p
28. The system will prompt for the ProSphere password entered at Step 23.
29. The ProAdmin username and password were properly created if a display similar to the following appears:
30. Exit the server by typing: exit
31. MySQL installation, configuration and verification on your Windows platform is complete.
32. It is recommended to restart the system now.Proceed to Chapter 2: ProSphere Installation.
0 Installation & Release Notesfor GDC Part No. 200U301-C01 A-

ProSphere NMS Version 6.0.1 Publication No. 032R906-V601Issue 1 - July 2016
Installfor GD
Chapter 2: ProSphere Installation
7.0 OverviewThis section describes the installation of all ProSphere Core applications, listed below. These ProSphere applications allow for the management of users, topology, alarms, configuration, routing and file control.
• Core Topology Engine
• Xedge Element Manager
• Global Fault Manager (GFM)
• Service Provisioning Manager (SPM)
• Routing Manager (RTM)
• ProSphere Performance Manager (XPM)
Note: IMPORTANT! You must have a valid ProSphere serial number to install applications. Depending on the serial number, the appropriate ProSphere applications will be installed. Contact your GDC representative for instructions on obtaining the serial number.
Note: IMPORTANT! You must provision your ProSphere environment with MySQL. Return to Chapter 1: ProSphere Operating Platform for the installation and setup procedures.
Note: For network environments that require heightened security, a security hardened PC is required. Refer to Chapter 1: Section 5.0 Windows Installation and Setup as needed.
8.0 Installing ProSphere 6.X ApplicationsProSphere applications are installed using GDCInstaller. The instructions given below serve as a general guide; please follow any on-screen instructions as displayed.
1. Acquire the ProSphere NMS Install CD or download the software from an FTP site as instructed by your GDC representative.
2. Right-click the ProSphere installation file (SetupWin32) and open it with the “Run as Administrator” option to start the wizard.
3. Depending on your Windows security settings, the wizard will vary at this point:
• If the ProSphere flash screen appears, proceed to Step 4.
• If a User Account Control screen appears with the following prompt, click Yes, then proceed to Step 4.
“Do you want to allow SetupWin32.exe to make changes to this computer?”
4. When the ProSphere Welcome screen appears, read the information then click Next.
ation & Release Notes Page 11C Part No. 200U301-C01 A-

Publication No. 032R906-V601 ProSphere NMS Version 6.0.1 Issue 1 - July 2016
Page 1
5. At the Select Bundle screen, select one of the following bundles, then click Next
• ProSphere Servers/Clients
• ProSphere Clients only
• ProSphere Application(required for secured installations on a security hardened PC)
Note: If you are installing the Clients Only bundle, you must have installed the Servers on another workstation or PC, and you must have the IP Address of that machine available now. You should also be able to ping that IP Address from your machine.
For each Client and Server machine, the hosts file must have an entry that refers to the IP address and hostname of the opposite machine.
For example: In the Server hosts file, add the following entry: [client ipaddress] [client hostname]In the Client hosts file, add the following entry: [server ipaddress] [server hostname]
Windows hosts file is found on c:\windows\system32\drivers\etc\hosts
6. Enter your Serial Number, then click Next.
7. At the Install Set screen, the Install set associated with the Serial Number you entered is displayed. Click Next.
• If you selected ProSphere Clients Only, enter your ProSphere Server IP Address.
• If you selected ProSphere Servers/Clients or ProSphere Application, continue to next step.
8. At the Installation Directory & Shortcuts screen:
• Select the Installation folder location (default recommended)
• Choose a Shortcut/Links Folder (default recommended)
9. At the Security screen, if you plan to use Secure Shell (SSH) rather than Telnet, enable SSH access mode by selecting Enable SSH, then click Next.
Note: IMPORTANT! You can only enable SSH during ProSphere installation. To avoid having to reinstall ProSphere later and restore your database and connections, enable SSH now.
10. At the MySQL Server Access information screen, enter the following information:
• Port number (see note below)
• User name: ProAdmin
• Password (see note below)
Note: The user name must be ProAdmin. The port number and the password must match entries made during MySQL installation and setup. Refer to Section 6.0 Installing MySQL Server for Windows as needed.
11. Review the Pre-Installation Summary, then click Install to proceed. The File Copying... screen shows the progress of the automatic installation scripts.
12. When displayed, read the Important Information screen, then click Next.
2 Installation & Release Notesfor GDC Part No. 200U301-C01 A-
ProSphere NMS Version 6.0.1 Publication No. 032R906-V601Issue 1 - July 2016
Installfor GD
13. At the Install Complete screen, click Finish to quit the installer. Log out and reboot the PC.
14. If you have enabled SSH, you must perform the SSH configuration procedures as described in the Xedge/ProSphere Security Administration Guide (GDC P/N 032R298-000).
15. You can now use the ProSphere applications.
9.0 Heightened Security in Mission Critical NetworksIf you are installing MySQL and ProSphere on a security hardened Windows workstation, ProSphere should be configured for secure operation by setting all of the recommended application, user, and security preferences.
An Xedge packet controller (PCX2, ISG2, PCE, PCL, etc.) supports several security protocols: Secure Copy (SCP), Secure Shell (SSH), SNMPv3, Internet Access Security (INET), and many security features.
Be sure to perform all recommended security settings as necessary for your network environment. Refer to the Xedge/ProSphere Security Administration Guide (GDC P/N 032R298-000) for recommendations and procedures on all Xedge/ProSphere security protocols and features.
10.0 Uninstalling ProSphere 6.0.XThe Uninstall program will intentionally leave certain files (log files, databases, etc.) on the workstation and will show a list of the files not deleted. If desired, back up these files, then delete them manually.
To uninstall ProSphere from a PC:
1. Select Add/Remove Programs from the control panel.
2. Select the ProSphere application, then click Remove. This starts the Uninstall program.
3. When the uninstall process is complete, click Done. Reboot the PC.
11.0 Starting the ProSphere 6.X ServersBefore you start ProSphere servers and perform network discovery for the first time, you must ensure that the your workstation has a route table that points to the external IP address of the node’s slot-0 controller. Consult your IT personnel as needed.
1. From Start>Programs, click on ProSphere 6.X Servers.
2. After the Servers have started, click on the Explorer Icon found on the ProSphere Process Service window. The Logon Screen will be displayed.
3. Log on using a default User ID and Password (as described in Section 4.0). The Explorer window is displayed.
ation & Release Notes Page 13C Part No. 200U301-C01 A-

Publication No. 032R906-V601 ProSphere NMS Version 6.0.1 Issue 1 - July 2016
Page 1
12.0 ProSphere Database ManagementProSphere NMS is designed around a centralized database which allow the individual ProSphere applications to share common data. This includes the necessary database files, registry files, executable binaries, libraries, and other files. It is strongly recommended to back up the entire ProSphere directory and MySQL data directory as described below for archival purposes, or to save a copy of these directories to a backup machine.
12.1 ProSphere NMS Database BackupBacking up ProSphere on a Windows-based PC simply involves copying two directory in their entirety from the source machine to the destination machine as described below.
1. Halt the ProSphere process.
2. Browse to C:\Program Files (See detail at right.)
3. Copy the entire \ProSphere6.0 directory andsave that directory to the destination machine.
4. Copy the entire \MySQL\data directory and save that directory to the destination machine.
Program Files Directory
_ ProSphere6.0+ backupdata
bin_ data
_ alarms
_ logs
2012-02-17
2012-02-23
2012-02-24
configs
database
ProLogs
XPM
property
registry
sql
topology_ jre
+ bin
+ lib
lib
+ UninstallerData
_ MySQL
+ share
Docs
+ data
bin
MySQL Server 5.0_
(Windows detail)
4 Installation & Release Notesfor GDC Part No. 200U301-C01 A-
ProSphere NMS Version 6.0.1 Publication No. 032R906-V601Issue 1 - July 2016
Installfor GD
13.0 Operating Guidelines• In the case of a Multicast, if the root circuit is killed after startup, the leaf circuits
will also go down. In this situation, it may be necessary to stop the entire conference and restart it.
• When a node has two packet controllers with IP addresses configured for the same Ethernet network, Discovery will work but Telnet could fail due to a split MOLN condition. To resolve this, change the IP address of the non-slot 0 packet controller to a different network, and configure a static route for the non-slot 0 packet controller, using the interface of 40.
• It may be necessary to maximize the ProSphere window to view all fields.
• (MR9679) By default, ProSphere NMS receives alarm traps when configuration has been changed and saved in the slot. The received trap causes ProSphere to automatically save the updated config.cfg file from the switch via TFTP. Be aware that if ProSphere Alarm ID #9 is masked (Mask Alarm =Yes), these traps are ignored and any configuration updates saved to the slot will not be saved to ProSphere. To save configuration changes without displaying every trap in the Active Alarms display, set Alarm ID #9 to Mask Alarm=No and AutoClear=Yes.
• Be aware that setting any alarm to AutoClear =Yes will cause the system to regularly poll for that alarm. This can result in excessive polling traffic and may overflow the log file. As a general rule, alarms should remain at the default settings.
• In the ProSphere/bin/ProClient.lax file, if the server hostname is longer than 15 characters, the name is truncated and Client<>Server updates cease working. To resolve this, edit the file to restore the truncated characters.An example ProClient.lax file is shown below:
lax.nl.java.option.additional=Dprosphere.server.host=localhos -Dprosphere.slot0ipbase=16 -Djava.rmi.server.hostname=h-hq-hub-hpov-nu
where a host name with more than 15 characters, h-hq-hub-hpov-nu, has been edited to restore the truncated characters. Once edited, save the file and restart ProSphere.
• (MR10177) If intermittent authentication failure events are being logged in the Xedge Events Log, check for a difference in the community name in the Xedge switches and in the XPM /data/properties/oidlist file. If a discrepancy is found, change the community definition in the XPM file.
ation & Release Notes Page 15C Part No. 200U301-C01 A-

Publication No. 032R906-V601 ProSphere NMS Version 6.0.1 Issue 1 - July 2016
Page 1
14.0 Known Issues• When the Network Timing Module is set to Line Timing (that is, no clock is
attached at the NTM “IN” connector), a NO NTM BITS CLOCK LINE INPUT trap will always be sent to the ProSphere Alarm window and to the Xedge Event Log. Timing is not adversely affected.
• When a ISG2 slot controller is installed in an Xedge 6280 chassis (also known as the IMX chassis), a trap reports that the “Secondary BITS Clock” isn’t good. This chassis model doesn’t have a secondary BITS clock, hence, this is an erroneous report. The ISG2 and the system timing is not adversely affected.
• (9723) To get a read from the switch, the Read button needs to be clicked twice.
6 Installation & Release Notesfor GDC Part No. 200U301-C01 A-