Disassembly Instructions Freedom Task Chair Tools Required Components for Breakdown Safety Glasses Knife Pliers Torx T-20, T-30 Driver Standard Hex Key Set Snap Ring Pliers Hammer Flat Screwdriver Phillips Screwdriver 7/16” Socket Metal Frame Base Gas Cylnder Cushions Plastics Disassembly Instructions Freedom Task Chair REV-00 Some components may not be recyclable in your area.
Transcript
Disassembly InstructionsFreedom Task Chair
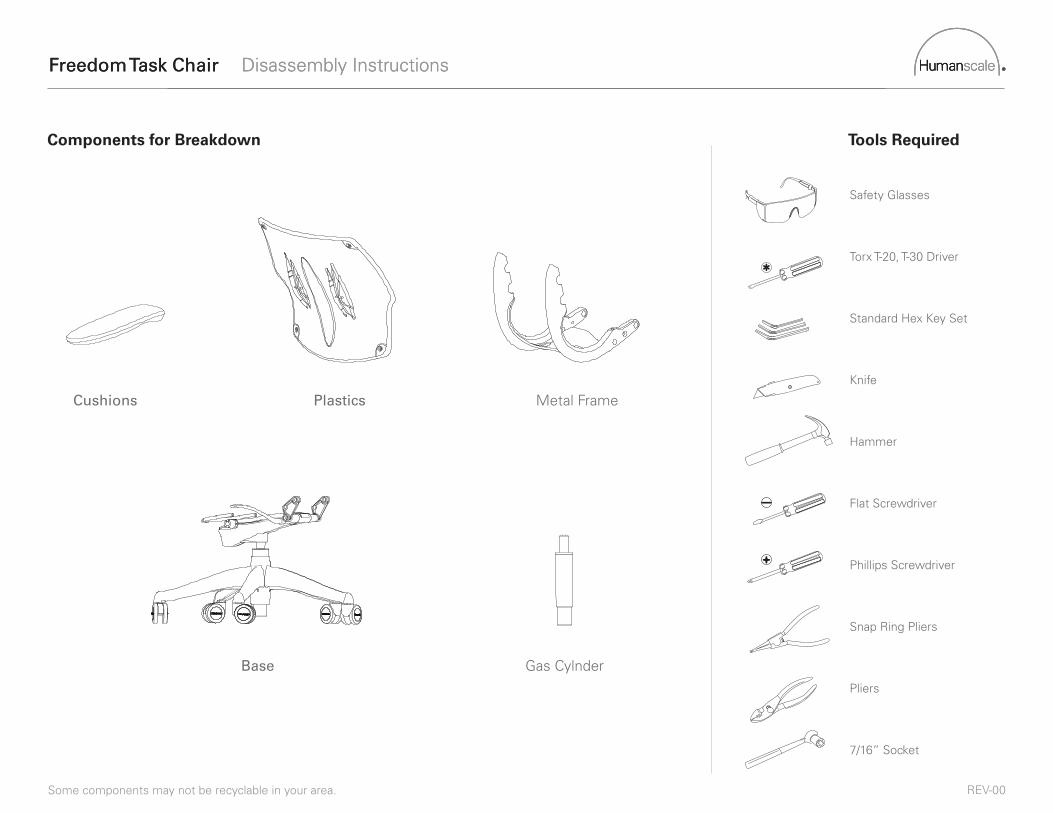
Tools RequiredComponents for Breakdown
Safety Glasses
Knife
Pliers
Torx T-20, T-30 Driver
Standard Hex Key Set
Snap Ring Pliers
Hammer
Flat Screwdriver
Phillips Screwdriver
7/16” Socket
Metal Frame
Base Gas Cylnder
Cushions Plastics
Disassembly InstructionsFreedom Task Chair
REV-00Some components may not be recyclable in your area.
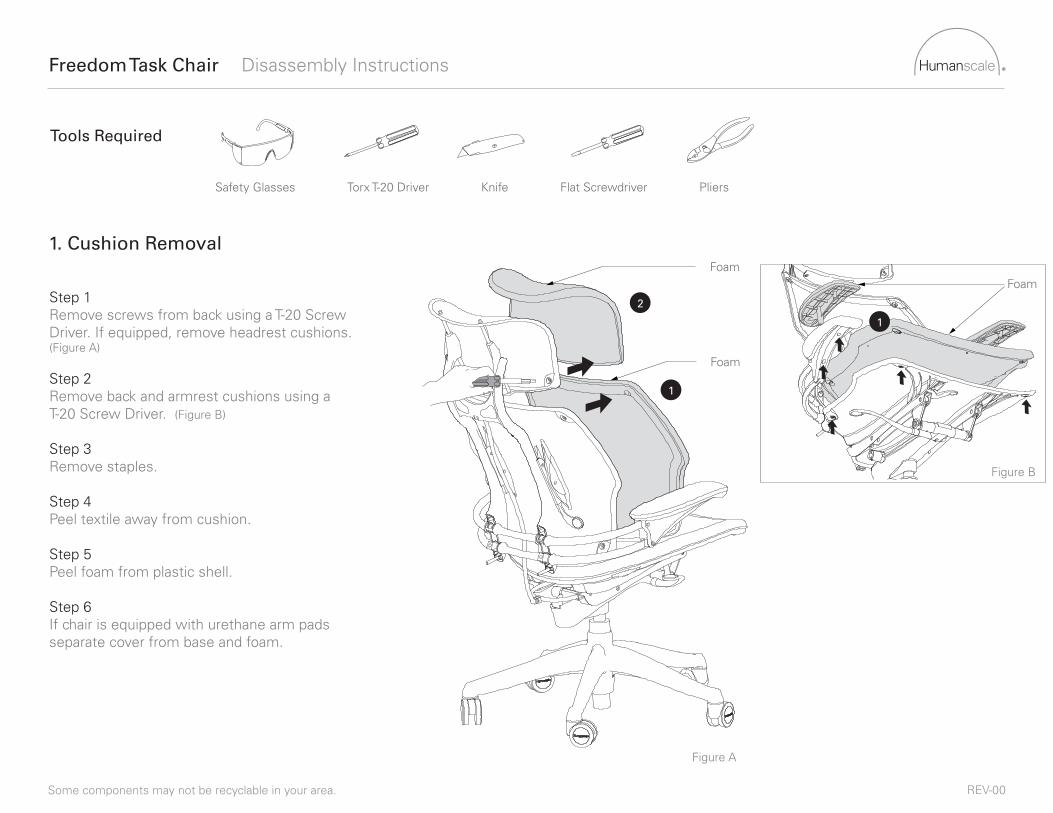
1. Cushion Removal
Step 1Remove screws from back using a T-20 Screw Driver. If equipped, remove headrest cushions.(Figure A)
Step 2Remove back and armrest cushions using a T-20 Screw Driver. (Figure B)
Step 3Remove staples.
Step 4Peel textile away from cushion.
Step 5Peel foam from plastic shell.
Step 6If chair is equipped with urethane arm pads separate cover from base and foam.
REV-00Some components may not be recyclable in your area.
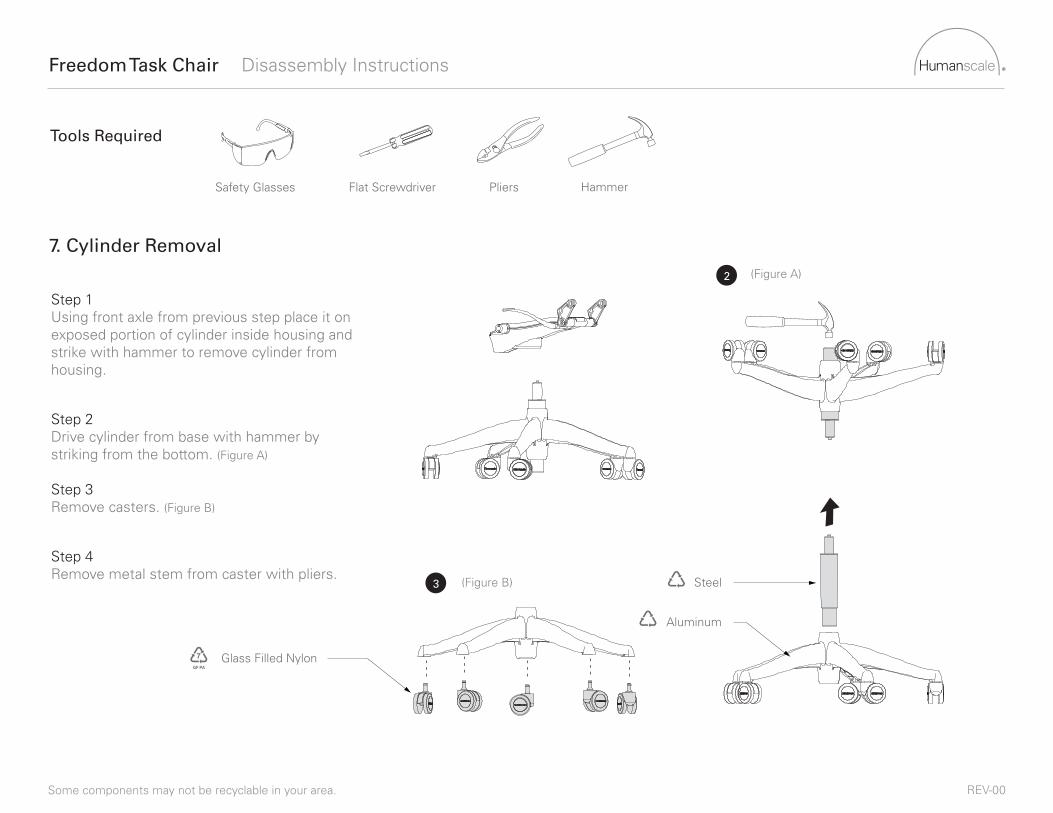
7. Cylinder Removal
Step 1Using front axle from previous step place it on exposed portion of cylinder inside housing and strike with hammer to remove cylinder from housing.
Step 2Drive cylinder from base with hammer by striking from the bottom. (Figure A)
Step 3Remove casters. (Figure B)
Step 4Remove metal stem from caster with pliers.
Tools Required
Safety Glasses PliersFlat Screwdriver
(Figure A)
(Figure B)
Hammer
2
3
Glass Filled Nylon
Aluminum
Steel
GF
Disassembly InstructionsFreedom Task Chair
REV-00Some components may not be recyclable in your area.