Fork this Repo! GitHub 102 Tutorial Justin Longo, Assistant Professor & Cisco Systems Research Chair in Big Data and Open Government Johnson-Shoyama Graduate School of Public Policy University of Regina slides etc. available at http://jlphd.wordpress.com GitHub: @JustinLongo Twitter: #GitHub102 @whitehallpolicy
Transcript
Fork this Repo!GitHub 102 Tutorial
Justin Longo, Assistant Professor & Cisco Systems Research Chair in Big Data and Open Government
Johnson-Shoyama Graduate School of Public PolicyUniversity of Regina
slides etc. available at http://jlphd.wordpress.com GitHub: @JustinLongo Twitter: #GitHub102 @whitehallpolicy
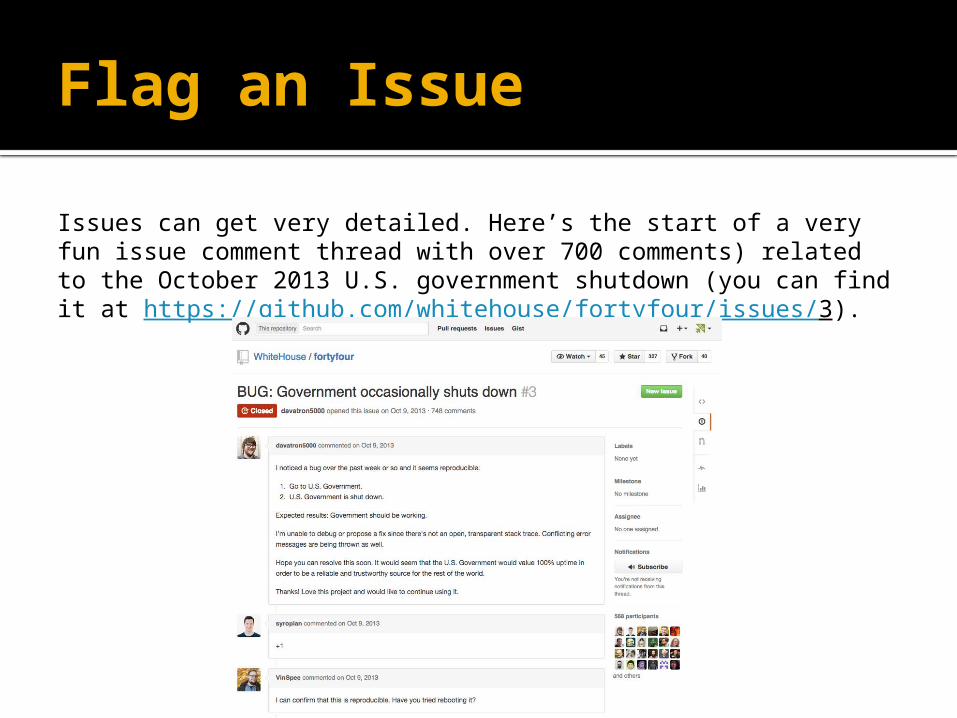
To complete the issue flag, you would describe the issue (title, message) and then click on “Submit new issue”.
The owner will review the issue and respond.
Flag an Issue
Issues can get very detailed. Here’s the start of a very fun issue comment thread with over 700 comments) related to the October 2013 U.S. government shutdown (you can find it at https://github.com/whitehouse/fortyfour/issues/3).
Pull Requests: Making a Simple ContributionTo propose a change to someone else’s file, navigate to the page you want to change and click on the pen icon
By editing directly through the GitHub.com interface, you are quickly borrowing a copy of the master. This is a simple way of proposing a change.
No need to “Fork the Repo” to propose a simple change.
You will see this notice:
Pull Requests: Making a Simple ContributionEnter any changes you want to propose:
When you’re done, scroll to the bottom of the page, label your change and describe it, and then click on “Propose file change”
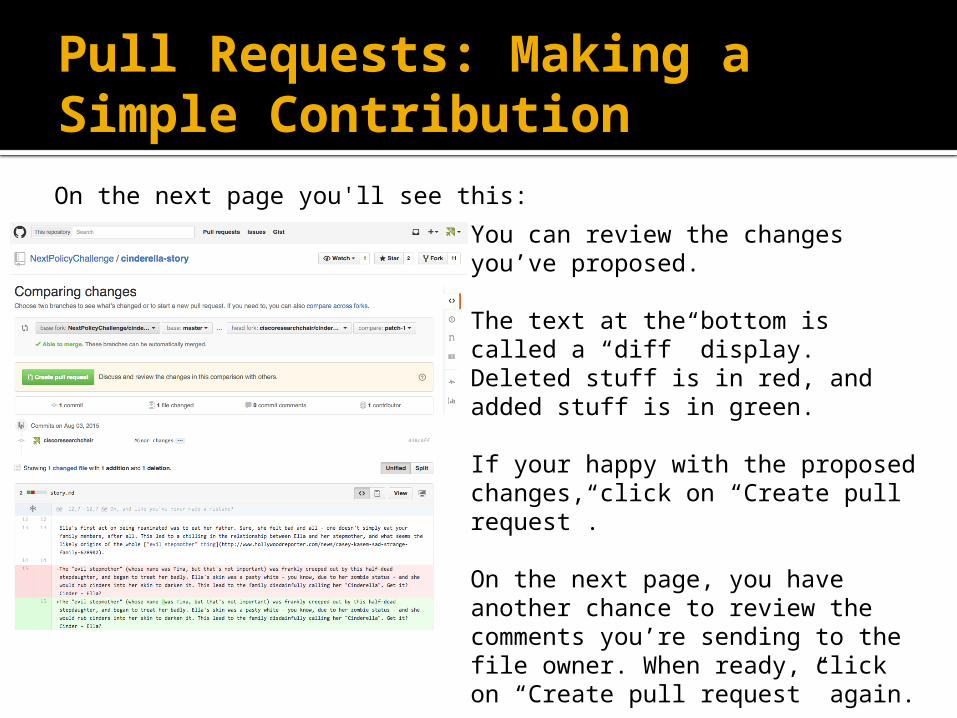
Pull Requests: Making a Simple ContributionOn the next page you'll see this:
You can review the changes you’ve proposed.
The text at the bottom is called a “diff” display. Deleted stuff is in red, and added stuff is in green.
If your happy with the proposed changes, click on “Create pull request”.
On the next page, you have another chance to review the comments you’re sending to the file owner. When ready, click on “Create pull request” again.
The owner of the file will receive your suggested changes.
Managing Pull Requests
• If someone else sends you a pull request, you’ll receive a notification. • Navigate to the open issue and review what was proposed.
• Once you’re satisfied with the pull request – and if it can be automatically merged – click the "Merge pull request" button, and click then "Confirm merge”.
• This button merges the pull request into the original, sends a notification to the person who initiated the pull request, and closes the pull request.
Create your GitHub Webpage First, you need to create a special repo in your account dedicated to only the Pages
files. On your profile page, in the top-right corner, select the + icon and click on “New
repository” to get to this page:• choose a “Repository name”. You
must use the username/username.github.io naming scheme
• write a short description (“My GitHub webpage” works)
• mark the repo as “Public”
• mark the check-box “Initialize this repository with a README”
• “.gitignore” = None
• <-- Choose license
• <-- Click on “Create Repository”.
Create your GitHub Webpage Go to the main page for this dedicated repo you just created, and then click on “Settings” in the
right-hand column. Scroll down to “GitHub Pages” and click on the magical “Launch automatic Page Generator” button. You’ll see a page like this:
• <-- Edit the page name and tagline
• <-- Edit the page body
• <-- Click on “Continue to layouts”.
Create your GitHub Webpage Pick your favorite layout and click on the green “Publish page” box to publish your page. You’ll find your awesome page at http://yourusername.github.io (It may take a few minutes to show up.) Edit the file index.html to edit the home page (requires knowledge of html).
This material is based upon work supported by the National Science Foundation under Grant No. 1322296 (VOSS: Managing Hybrid Challenge Platforms to Promote Innovation). Any opinion, findings, and conclusions or recommendations expressed in this material are those of the author and do not necessarily reflect the views of the National Science Foundation.