Page 1
GPTW: A WEB-BASED TOOL FOR EVENTS SCHEDULING
A Project
Presented to the faculty of the Department of Computer Science
California State University, Sacramento
Submitted in partial satisfaction of the requirements for the degree of
MASTER OF SCIENCE
in
Computer Science
by
Mona Hariri
SPRING 2012
Page 2
ii
GPTW: A WEB-BASED TOOL FOR EVENTS SCHEDULING
A Project
by
Mona Hariri Approved by:
__________________________________, Committee Chair Du Zhang, Ph.D. __________________________________, Second Reader Robert A. Buckley ____________________________ Date
Page 3
iii
Student: Mona Hariri I certify that this student has met the requirements for format contained in the University
format manual, and that this project is suitable for shelving in the Library and credit is to
be awarded for the project.
__________________________, Graduate Coordinator ___________________ Nikrouz Faroughi, Ph.D. Date Department of Computer Science
Page 4
iv
Abstract
of
GPTW: A WEB-BASED TOOL FOR EVENTS SCHEDULING
by
Mona Hariri
Nowadays saving time and increasing performance are crucial components for
companies. Using the latest, greatest, and fastest technology should be a goal for
companies towards success. Technology is there to help us complete our job in a more
efficient, accurate and faster manner.
The purpose of this project is to provide a web-based tool to help administrators
dynamically control the upcoming events scheduled at my workplace. The problem I
have observed is that the tool used to manage the GPTW program was based on old and
inefficient technology. In most cases the registration and the managing of events were
done manually which was very time consuming. Administrators on my workplace used
mainly PHP or SharePoint based tools in order to manage the GPTW events. In this
project, I have provided a dynamic web-based tool which interacts directly with SQL
Page 5
v
Server 2008 and the .NET Framework 2010. The design is increases performance and
saves time.
The application has been developed using ASP.Net 4.0. The application is browser
independent and could be developed on World Wide Web. One of the new features on
this tool is to give ability to administrators to upload pictures for any events. The GPTW
web based tool will provide various new features such as being user friendly, easy to use,
easy to learn, and more appealing to the user. In addition, administrators now will have
more ability to control and manage the upcoming events at workplace than before.
_______________________, Committee Chair Du Zhang, Ph.D. _______________________ Date
Page 6
vi
DEDICATION
I dedicate this to my wonderful fiancé Steve Sheehan. Without his unwavering support,
patience, tolerant, and most of all love, the completion of this work would have not been
possible.
Page 7
vii
ACKNOWLEDGEMENTS
I would like to extend my special gratitude and thanks to my supervisor, Dr. Du Zhang
for his endless support and encouragement in making this project a success. I thank him
for his time and understanding for guiding me throughout the project.
In addition, my sincere thanks to Professor Robert A. Buckley, in agreeing to be the
second reader for this project and for his willingness to serve on the committee. I
benefited very much from the professor’s course offerings and advice.
I would like to thank my manager Brent Yager for providing me all the requirements and
support while working on this project and helped me to pass this critical phase of my
graduation. I could not accomplish this project without his support and kindness.
Lastly, I would like to thank the entire faculty and staff of the Department of Computer
Science at California State University, Sacramento.
Page 8
viii
TABLE OF CONTENTS
Page
Dedication .......................................................................................................................... vi
Acknowledgements ........................................................................................................... vii
List of Tables ..................................................................................................................... xi
List of Figures ................................................................................................................... xii
Chapter
1. INTRODUCTION ....................................................................................................... 1
1.1 Background .......................................................................................................... 1
1.2 Purpose and Primary Goals: ................................................................................. 2
2. REQUIREMENTS ANALYSIS .................................................................................. 5
2.1 Product Perspective .............................................................................................. 5
2.2 Product Features .................................................................................................. 5
2.3 Hardware and Software Requirements ................................................................. 6
2.4 Operating Environment ........................................................................................ 6
2.5 Assumptions and Dependencies ........................................................................... 7
2.6 Functional Requirements...................................................................................... 8
2.7 Non-functional Requirements .............................................................................. 9
3. TECHNIQUES AND TECHNOLOGIES OVERVIEW ........................................... 11
Page 9
ix
3.1 ASP.NET ............................................................................................................ 11
3.2 C# ....................................................................................................................... 12
3.3 CSS ..................................................................................................................... 12
3.4 Gridview ............................................................................................................. 13
3.5 Try - catch .......................................................................................................... 14
3.6 Stored Procedures ............................................................................................... 15
3.7 Views .................................................................................................................. 17
3.8 SqlConnection .................................................................................................... 19
4. THE GPTW DESIGN AND IMPLEMENTATION ................................................. 21
4.1 Data Flow Diagrams........................................................................................... 21
4.2 User Interface Design ......................................................................................... 25
5. PERFORMANCE ANALYSIS ................................................................................. 42
5.1 The Visual Appeal of the Event and Scheduling Before and After ................... 42
5.2 Measurement Scale ............................................................................................ 44
5.3 Number of Tasks Users Need to Complete Before and After ............................ 45
5.4 Average Time Administrators Use to Set up an Event and Registrations ......... 46
5.5 Number of Users the Tool Supports Before and After ....................................... 46
6. LESSONS LEARNED............................................................................................... 48
6.1 Handler.ashx ....................................................................................................... 48
6.2 ChartImageHandler in the web.config ............................................................... 49
Page 10
x
6.3 PostBackUrl ....................................................................................................... 49
7. CONCLUSION AND FUTURE WORK .................................................................. 51
7.1 Summary ............................................................................................................ 51
7.2 Future Work ....................................................................................................... 51
Appendix A How to present directive in ASP.NET ....................................................... 53
Appendix B The New Version of C# (4.0) ..................................................................... 54
Appendix C Creating a Cascade Style Sheet .................................................................. 55
Appendix D How to Create And Call a Gridview .......................................................... 56
Appendix E Build up a Try-catch Class ......................................................................... 57
Appendix F Create a Stored Procedure in Database ....................................................... 58
Appendix G Calling The Stored Procedure in Code Behind .......................................... 59
Appendix H Views .......................................................................................................... 60
Appendix I Having Sqlconnection With Using of Sql Queries ...................................... 64
Appendix J IHttpHandler interface: ................................................................................ 65
Appendix K ChartImageHandler .................................................................................... 68
Appendix L PostBackUrl ................................................................................................ 69
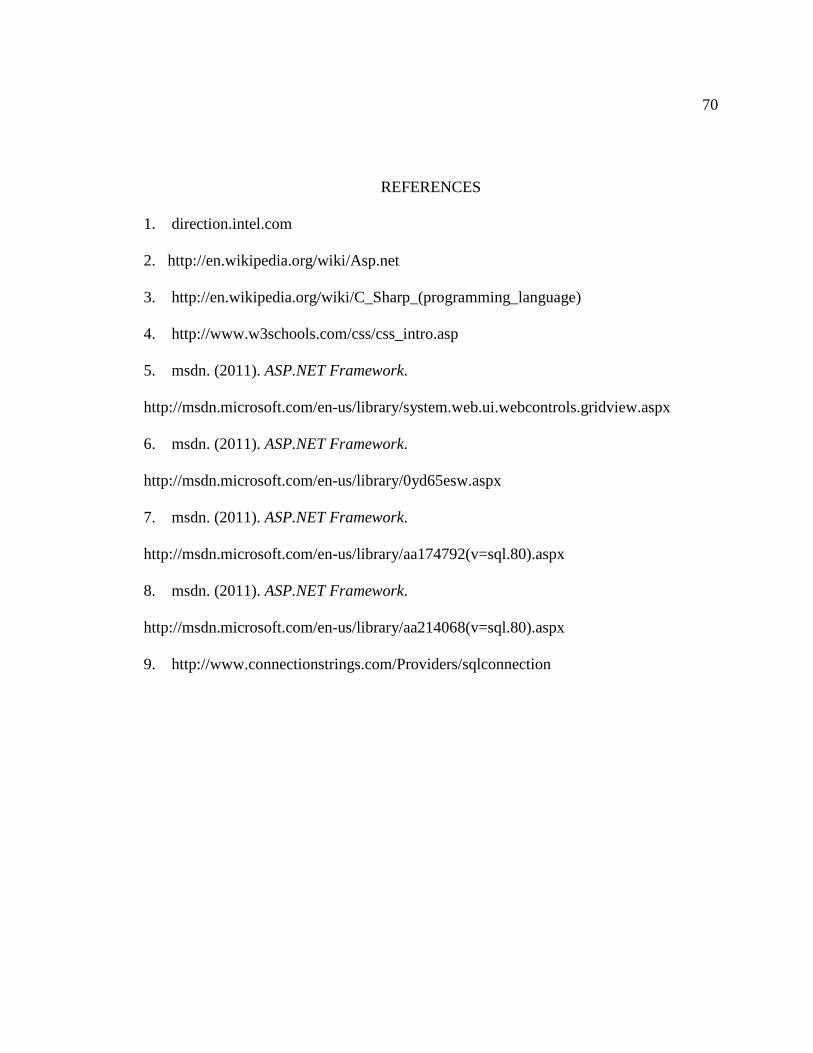
References ......................................................................................................................... 70
Page 11
xi
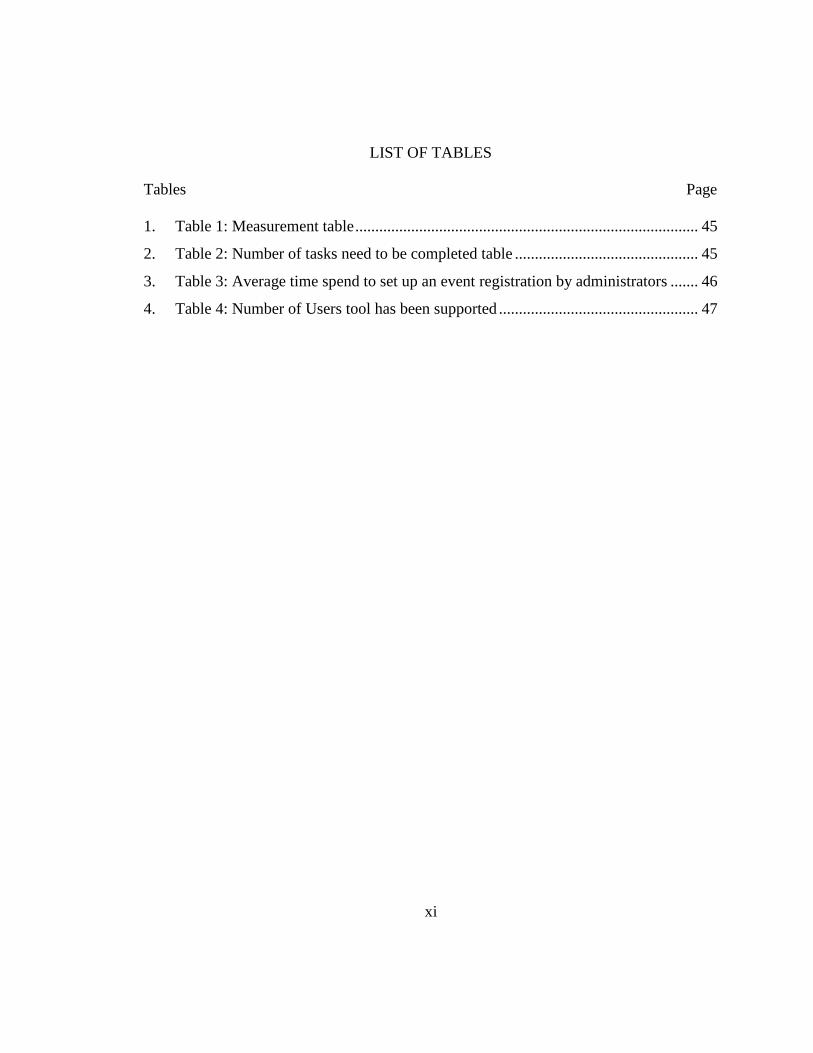
LIST OF TABLES
Tables Page
1. Table 1: Measurement table ...................................................................................... 45
2. Table 2: Number of tasks need to be completed table .............................................. 45
3. Table 3: Average time spend to set up an event registration by administrators ....... 46
4. Table 4: Number of Users tool has been supported .................................................. 47
Page 12
xii
LIST OF FIGURES
Figures Page
1. Figure 1: Gridview screen ......................................................................................... 14
2. Figure 2: Back- end View ......................................................................................... 18
3. Figure 3: Register for an event .................................................................................. 22
4. Figure 4: Remove/Update an event by a registered user .......................................... 23
5. Figure 5: Sending emails to users ............................................................................. 24
6. Figure 6: Admin/Sponsor deletes an event, a sponsor, or a user .............................. 25
7. Figure 7: GPTW Home Screen ................................................................................. 26
8. Figure 8: GPTW Web supporter ............................................................................... 27
9. Figure 9: View approved events screen .................................................................... 28
10. Figure 10: Register for an event screen .................................................................... 29
11. Figure 11: Update your event screen ........................................................................ 30
12. Figure 12: Administrator report screen ..................................................................... 32
13. Figure 13: Detail of attendees ................................................................................... 33
14. Figure 14: Detail of an event..................................................................................... 33
15. Figure 15: Sponsors report screen ............................................................................. 34
16. Figure 16: Regular users report page ........................................................................ 35
17. Figure 17: Upload pictures screen ............................................................................ 36
18. Figure 18: Demostration of event pictures ................................................................ 37
19. Figure 19: Feedback screen....................................................................................... 38
20. Figure 20: Become a sponsor screen ........................................................................ 39
21. Figure 21: Program guidelines screen ....................................................................... 40
22. Figure 22: How it works screen ................................................................................ 41
23. Figure 23: Visual appeal afterwards ......................................................................... 43
24. Figure 24: Visual appeal before ................................................................................ 44
Page 13
1
Chapter 1
INTRODUCTION
This chapter introduces the project. A background of what GPTW, identifies the problem,
and gives an outline of the project objectives.
1.1 Background
About GPTW:
There are six core values at Intel Corporation: customer orientation, discipline, results
orientation, risk taking, great place to work, and quality. At Intel, the value GPTW (Great
Place To Work) means being open and direct, promote a challenging work environment
that develops its diverse workforce, work as a team with respect and trust for each other,
win and have fun, recognize and reward accomplishments, manage performance fairly
and firmly, and be an asset to Intel’s communities worldwide[1].
Therefore Intel comes up with an idea of planning fun events for its employees once a
year. GPTW events take place from March to September every year. During this cycle (6
months) employees can do activities that they have never done before or they want to
experience again. The code name at Intel for this is: "Do What’cha like" or DWL events.
Each employee can register for one and only one event during this cycle. GPTW will pay
up to $100 for each employee in each event. Also one or more sponsors will coordinate
each event.
GPTW has been established by Ed Lilya on 2008 on the Folsom site. It was a share point
based tool to run scheduled events. GPTW used to have one admin to coordinate
everything manually, get the list of the employees who wanted to attend an event and
Page 14
2
pass them around to the sponsors. All the emails would go to one admin and she/he had
the responsibility to distribute the emails to corresponding sponsors or other attendees.
Any modification during the process of registration such as removing employees name,
changing the location or time of the event or any changes in sponsorship of the events
had been done by administrator of the GPTW. In most of the cases administrators had to
contact developers to add, edit, remove or change any data due to update GPTW.
1.2 Purpose and Primary Goals:
The GPTW share point tool wasn’t sufficient for Intel. Registration for each single event
had been done manually by the administrators of the group. Administrators needed to
spend an average of four hours daily to categorize the events and attendees. Also there
was a need to send individual emails to each sponsor to notify them of any updates. For
any event’s updates administrator had to send a request to the developers to add, change
the number of attendees, location and applicable extra fees of the events. Finally, the
administrators would notify each attendee of each change via email.
My web based tool not only provides the same functionalities but offers more features for
administrators, sponsors, and other users who can accomplish the required task in fifteen
minutes rather than in four hours. This tool can improve service to Intel’s employees in
less time without the need to increase staff.
The scope of this project is to build an application to resolve the registration issues for
administrators, sponsors and other employees in my work place. The tool is an ASP.NET
4.0 based tool which integrated with the back end code for the bundle application. This
Page 15
3
tool is a dynamic and hard coded C#, XML pages by embedding SQL Server 2008
features.
This tool will fulfill the following primary goals for my workplace:
• The application will provide a more flexible way to add, remove, modify, update
and manage any upcoming events for admin, sponsors and attendees.
• Each employee can visit all the available events and register for one without the
need of contacting his/her administrator.
• Attendees gain the following abilities: being able to cancel a previous event and
register for a new one, remove themselves from the list, contact the sponsor
directly and leave any feedback or comment to the sponsor and the administrator
of the group.
• The tool will not allow registered attendees to remove themselves from the event
after the deadline of the event.
• The application will not allow users to register for more than one event and any
time conflict of events will be reported to the users.
• The application gives the ability to admins to delete any events, sponsors or
registered users directly without a need of contacting developers. After each
modification an email will be sent to sponsors or registered users to notify them of
the modification.
• The tool allows the sponsors to delete any registered users, but not the event. An
email will be sent to users whom have been removed from the list as well.
Page 16
4
• All the users can have access to a grid in order to see all the approved events, their
time, deadline, location, extra fee and sponsor for each event.
• The application will provide all the necessary information for each event after
users select the events from the list. All the information will be displayed in one
page in addition to an active link to the sponsor’s email address and registration
link.
• The most important feature in this tool is that there is no need to sign in, sign out
or creating username or password for users in order to use the tool. Users’
information will be retrieved from the database as long as users are logged in to
their computer at work. They can be identified by my tool. There is no form to fill
out to register for an event either.
Page 17
5
Chapter 2
REQUIREMENTS ANALYSIS
2.1 Product Perspective
The goal of this project is to provide a web based tool GPTW to be used by admins,
sponsors and employees at my workplace on a daily basis. This project is developed to
bring more consistency, flexibility, and efficiency to a fun event scheduling. This
application should be easy to use, easy to learn, user-friendly, and reliable. There are no
dependencies in this tool of other software. It also should run on both UNIX and
Windows-based platforms.
2.2 Product Features
The dynamic GPTW web-based application provides more flexibility to administrators in
addition to better control of event scheduling and time savings. The attendees of the
program have ability to edit, update, and delete their registrations without the need of
contacting their administrators. Registrations have been done by a simple click on a
registration button in the application. In case of any modifications such as deleting an
event or deleting a user, attendees will be notified by an email which will be auto
generated and sent to the sponsors and the attendees of the event. The employees have the
option to visit all the displayed events and registered for any. Administrators now have
the ability to upload pictures to the tool. After the administrators upload pictures, they
will accessible to the users. Each sponsor can have a quick report of what he/she is going
Page 18
6
to sponsor; where it is, how many people are registered and the attendees details. Also
each sponsor can delete a user of his/her group, following by an auto generated email
send to the user.
2.3 Hardware and Software Requirements
2.3.1 Hardware Requirements
Pentium-IV Processor with 500MHZ or above
40 GB of Free hard disk space 1 GB RAM
LAN Network (for remote sources)
Network interface card or modem (for remote access)
2.3.2 Software Requirements
WINDOWS XP | Windows 2008
Microsoft Visual Studio .Net 2010 Enterprise Edition or
Dreamweaver CS5
Microsoft .Net Framework 4.0
Internet Information Services (IIS)
Microsoft SQL Server 2008
Programming Languages Used – C#.NET, ASP.NET
2.4 Operating Environment
The application needs to be hosted on an ASP.NET-compatible site since the system has
been implemented in Microsoft ASP.NET technology. Also SQL database is embedded
Page 19
7
into the tool; therefore it should be a host space to create a database for the system.
Moreover any additional software or webservers are required for sending email to users
of the system. The users of the software need to have access to an Internet connection
with any browser that fully supports Microsoft ASP.NET technology.
2.5 Assumptions and Dependencies
2.5.1 Assumptions
• The security of the website will be based on ASP. NET.
• It is assumed the system will be developed using the ASP.NET technology.
• It is assumed the system will be able to interface with an email server in order to
send the page or email to the users in the system.
• It is assumed the system will interface with a SQL Server 2008 database.
2.5.2 Dependencies
• Microsoft Windows Server 2008 R2 Service Pack 1
• Microsoft Visual Studio 2010
• Microsoft Internet Information Services V7
• Asp.Net 4.0
• The tool should be able to interface with an email server in order to
send emails
• Microsoft SQL Server 2008 database
Page 20
8
2.6 Functional Requirements
The functional requirements define the intended behavior of the system in a complete and
unambiguous form. Following are the tasks that can be achieved through this application:
Administrators of this application can view a full report of all the available
upcoming events in detail.
Details of each event are provided in a tree view mode.
Administrators have ability to delete any events or sponsors.
Deleting events will send an email to sponsors and attendees of the event to notify
them of changes.
Sponsors have ability to delete attendees.
Only administrators have access to visit sponsors report page and user report
page.
Only administrators and sponsors have access to the sponsor report page.
Each employee can see details of an approval event by selecting one.
Each event will be presented with all the necessary details to users such as time of
the event, location of the event, extra fee, picture and a link to have access to
sponsors email for further question.
Each employee will be allowed to register for only one event. if the users try to
register for another event, an error message will be displayed notifying the users
about the conflict.
Each user of the GPTW program can remove, delete, edit, or update his/her
existing event.
Page 21
9
Employees can register for an approved event without filling up any registration
form. All the necessary data will be auto generated for the users and will be
presented as a web form.
Administrators have ability to upload pictures for each event.
Each employee can leave feedback, comment, or send questions to the sponsors or
administrators of the events.
Each employee can send a request to the administrators to become a sponsor for
next event.
Each employee or sponsor can send their pictures of the event to administrators
with their comments on them.
Each user can select an approved event to visit the pictures of the event among
with attendees’ comments for each picture.
2.7 Non-functional Requirements
2.7.1 Security Requirements
Proper log in is required from each employee. They need to get logged in in their
own computer station at work and use their authentication username and
password properly.
2.7.2 Software Quality Attributes
Reliability: The GPTW tool is considered as a reliable tool. The need of entering
data by users is reduced to the minimum in this tool. Data must be correctly stored
Page 22
10
in the database. In addition, data must be retrieved as entered and saved on the
web page.
Maintainability: The code should be heavily commented and the design needs to
be documented in detail and designed in a way that a new project member with
the same amount of academic and co-op experience can easily ramp up the
project.
Availability: The application needs to be available 24/7 as the customer needs to
know whom to contact if there is a critical issue.
Page 23
11
Chapter 3
TECHNIQUES AND TECHNOLOGIES OVERVIEW
3.1 ASP.NET
ASP.NET is a Web application framework developed and marketed by Microsoft to
allow programmers to build dynamic Web sites, Web applications and Web services. It
was first released in January 2002 with version 1.0 of the .NET Framework, and is the
successor to Microsoft's Active Server Pages (ASP) technology. ASP.NET is built on the
Common Language Runtime (CLR), allowing programmers to write ASP.NET code
using any supported .NET language [2].
ASP.NET pages are the web form pages which are contained in files with ".aspx"
extension. Although ASP.NET contains static web servers, you can embed dynamic
codes in your static front end. To do so you need to put your dynamic code in the format
such as this one: <% --- your dynamic code --- %>.
The purpose of having a dynamic feature of the code in a static page is to give access to
developers to controls their code behind from their front end.
ASP.NET pages are also contained of directive which is the instruction of how an
ASP.NET page should process the page. The directive can specify many attributes that
used by ASP.NET complier and parser.
Page 24
12
3.2 C#
C# is a multi-paradigm programming language encompassing strong typing, imperative,
declarative, functional, generic, object-oriented (class-based), and component-oriented
programming disciplines. It was developed by Microsoft within its .NET initiative and
later approved as a standard by Ecma (ECMA-334) and ISO (ISO/IEC 23270:2006). C#
is one of the programming languages designed for the Common Language Infrastructure
[3].The most recent version is C# 4.0 which I am using in my tool which came out
around April 2010.
3.3 CSS
When tags like <font>, and color attributes were added to the HTML 3.2 specification, it
started a nightmare for web developers. Development of large web sites, where fonts and
color information were added to every single page, became a long and expensive process.
To solve this problem, the World Wide Web Consortium (W3C) created Cascading Style
Sheet (CSS) [4].
Cascading Style Sheets (CSS) are used in order to describe the presentation semantic.
This approach is designed primarily to enable the separation of document content from
the presentation view. This includes the layout, font and colors on web pages.
Using CSS allows developers to apply any changes in fonts, colors or layout of their
application by using one line of code instead of going line by line. By defining a desired
font, size, color, or location in a CSS file you can call them as a class anywhere in your
front end, on XML/HTML page by the name of the class. Usually CSS files are created
Page 25
13
as an external file in solution explorer in visual studio. Using CSS file in this tool helped
to bring consistency to all XML pages. By creating CSS file in my solution explorer I
was able to define color, font, size and location of attributes in the file and call them in
my XML. What CSS does is basically defines how XML/HTML elements are to be
displayed.
3.4 Gridview
Grid view is used to display the value of a data source in a table where each column
represents a field and each row represents a record. The gridview control enables
developers to select, sort, and edit these items [5]. Gridview allows developers to retrieve
and display data from database in a table. As you can see in the sample code below, the
gridview contains different attributes such as DataKeyNames, OnRowDeleting, font, and
size. Each of these attributes provides more flexibility to developers in order to use
gridview. By defining your DataKeyNames in the grid you as a developer have access to
your ID column of your desire table and have ability to hard code that column in code
behind. For example you can make your ID column be Null or invisible for your users.
Also developers have the control of modifying fonts, size, and location of the data. By
using gridview developers have fully access to control of displaying data in the front
page. As you can see in this part of the code you can define your desire font such as
"Arial" or any other fonts you prefer. Also you have the control of spacing in your grid
by using "CellPadding" attributes. Moreover you can decide where exactly you want the
data to be displayed which would be programmable by using "ItemStyle-
Page 26
14
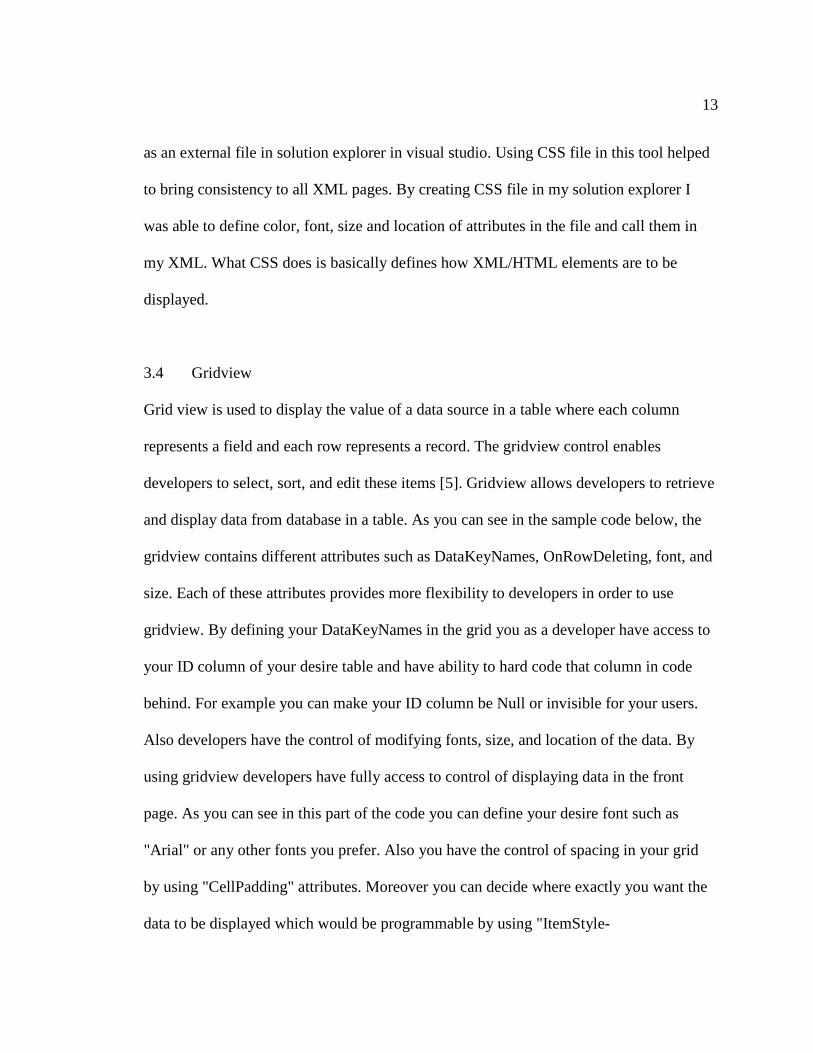
HorizontalAlign". The other feature of gridview is letting developer to embed links to get
access to other web pages from their table. In the figure 1 retrieved the "EventID" from
the back end, and simply embedded in a link to send to the other web pages. Therefore I
will have access to other web pages of my tool while passing an ID from a table.
Figure 1: Gridview screen
3.5 Try - catch
The try-catch statement consists of a try block followed by one or more catch clauses,
which specify handlers for different exceptions. When an exception is thrown, the
common language runtime (CLR) looks for the catch statement that handles this
exception. If the currently executing method does not contain such a catch block, the
CLR looks at the method that called the current method, and so on up the call stack. If no
catch block is found, then the CLR displays an unhandled exception message to the user
and stops execution of the program [6].
In the GPTW web based tool try-catch statements are handled by sending an email to a
developer and notifies the developer of the current issue. In the try block the issues is
Page 27
15
detected and then sent to the catch clause. What catch clause will do is showing users a
page which contains an error notification. The error is a standard error notification to let
users know there is an issue with the tool and simply guide them to the home page of the
tool. In this tool, catch will call another procedure which is designed to handle the issue
by sending an email to developer. An example of "errorNotification" class is provided
below. This class contains the following attributes: mail.To, mail.From, mail.Subject and
mail.body. The values of the mail.To is developers email addresses. The value of the
mail.From is the email of the GPTW web site. What mail.Subject does is getting the
detail of the error and trims it to fit in the email standard size to be visible for the
developer. Developer can see the full size of detail of the current error in the body of the
message. This would help the developer to know where issue happened, which part of
the design it is, and in which line he/she can find it. Emails have been sent by using a
web service at my work place "mail.intel.com".
3.6 Stored Procedures
A stored procedure is a group of Transact-SQL statements compiled into a single
execution plan. Stored procedures assist in achieving a consistent implementation of logic
across applications. The SQL statements and logic needed to perform a commonly
performed task can be designed, coded, and tested once in a stored procedure. Each
application needing to perform that task can then simply execute the stored procedure.
Coding business logic into a single stored procedure also offers a single point of control
for ensuring that business rules are correctly enforced.
Page 28
16
Stored procedures can also improve performance. Many tasks are implemented as a series
of SQL statements. Conditional logic applied to the results of the first SQL statements
determines which subsequent SQL statements are executed. If these SQL statements and
conditional logic are written into a stored procedure, they become part of a single
execution plan on the server. The results do not have to be returned to the client to have
the conditional logic applied; all of the work is done on the server.
Stored procedures can return data in four ways:
• Output parameters, which can return either data (such as an integer or character
value) or a cursor variable (cursors are result sets that can be retrieved one row at
a time).
• Return codes, which are always an integer value.
• A result set for each SELECT statement contained in the stored procedure or any
other stored procedures called by the stored procedure.
• A global cursor that can be referenced outside the stored procedure [7].
Stored procedures have been used in this tool to avoid the cost of network
communication. One of the advantages of having stored procedures is that they can run
directly within the database engine. Applying stored procedures in the tool minimizes the
need of having business layer in this application which reduces the network traffic.
Moreover the database system can ensure the data integrity and consistency with the help
of stored procedures.
To create a stored procedure you simply can use the code provided below:
CREATE PROCEDURE sp_myStoredProcedure AS
Page 29
17
Select column1, column2 From Table1 Go
After creating your stored procedure in your database you can simply call your stored
procedure by its name
sp_myStoredProcedure
Applications do not need to transmit all of the SQL statements in the procedure: they
have to transmit only an EXECUTE or CALL statement containing the name of the
procedure and the values of the parameters.
In the code below you will find a stored procedure named [Registration]. You can
simply create your stored procedure in your back end and call the stored procedure in the
code behind in front end which I present the example of the code behind for you as well.
In the code behind after connecting to the database I called my stored procedure in the
way I defined it "Registration".
3.7 Views
A view can be thought of as either a virtual table or a stored query. The data accessible
through a view is not stored in the database as a distinct object. What is stored in the
database is a SELECT statement. The result set of the SELECT statement forms the
virtual table returned by the view. A user can use this virtual table by referencing the
view name in Transact-SQL statements the same way a table is referenced. A view is
used to do any or all of these functions:
• Restrict a user to specific rows in a table.
• Restrict a user to specific columns.
Page 30
18
• Join columns from multiple tables so that they look like a single table.
• Aggregate information instead of supplying details [8].
Table views allow developers to have ability to join different tables in order to collect
desire data from each table. After creating a view in database, the developers can apply
basic operations such as SELECT, INSERT, UPDATE, or DELETE on the views and
treat the views like a new data table. Views are usually called as a virtual table because
the result of the view is dynamically incorporated into the logic of the statement and the
result set is built dynamically at run time.
Figure 2 shows how your view will look in the back end.
Figure 2: Back- end View
Page 31
19
3.8 SqlConnection
SqlConnection is a .NET Framework Class Library provided by Microsoft. The .NET
Framework Data Provider for SQL Server uses its own protocol to communicate with
SQL Server. It is lightweight and performs well because it is optimized to access a SQL
Server directly without adding an Open Database Connectivity (ODBC) layer.
This is the number one to use if you want your .NET application or website to connect to
an SQL Server.
A SqlConnection object represents a unique session to a SQL Server data source. With a
client/server database system, it is equivalent to a network connection to the server.
SqlConnection is used together with SqlDataAdapter and SqlCommand to increase
performance when connecting to a Microsoft SQL Server database.
When you create an instance of SqlConnection, all properties are set to their initial
values.
If the SqlConnection goes out of scope, it won't be closed. Therefore, you must explicitly
close the connection by calling Close or Dispose. Close and Dispose are functionally
equivalent. If the connection pooling value Pooling is set to true or yes, the underlying
connection is returned back to the connection pool. On the other hand, if Pooling is set to
false or no, the underlying connection to the server is actually closed.
To ensure that connections are always closed, open the connection inside of a using
block. Doing so ensures that the connection is automatically closed when the code exits
the block [9].
Page 32
20
GPTW is based on SqlConnection also. Instead of using Data Access Layer or DAL
which would of decrease the performance of the tool SqlConnection has been used.
How to provide a SqlConnection in the application is to add a reference to the assembly
System.Data and then include the System.Data.SqlClienet namespace. Prior to access to
SqlClient the application needs to points to the correct database which would be the
GPTW database in this application. At this point the developer has ability to apply Sql
queries in his/her C# environment. As it has been mentioned before open and close the
connection is very important in this kind of design.
Page 33
21
Chapter 4
THE GPTW DESIGN AND IMPLEMENTATION
4.1 Data Flow Diagrams
A Data Flow Diagram is used for the visualization of data processing of a system. It is a
graphical representation of the "flow" of data through a system. What a Data Flow
Diagram does is to show a detail of how the data is transformed to output results through
a sequence of functional transformations. DFDs can also represent relationship between
the different components of a system. The purpose of using the DFDs in this report is to
make the flow easier to understand by technical and non-technical audiences. Also the
readers can visualize the boundaries and connections between internal components and
external components of the GPTW system.
4.1.1 Register for an Event
This module discusses the data flow for an event registration. The user can select any
events from the list of the event list. To bring up the details of the event the first step is to
retrieve data from the GPTW database. To register for the desire event a “Register”
button has been provided to users. By clicking on the register button GPTW will get
connected to the main database available in my workplace to retrieve user’s necessary
information. Collected data will pass to the GPTW and will be stored in there for future
needs. Also in this step a valuation will be done. The purpose of the validation is to
protect any conflict.
Page 34
22
Figure 3: Register for an event
4.1.2 Remove/Update an Event by a Registered User
This module discusses the data flow of when a registered user wants to delete his/her
registration. GPTW can detect any users who visit the tool, therefore when a user is using
the tool to delete the event which he/she has been registered for, GPTW will retrieve all
the data from the database. Information will be displayed in a format of a form for the
user. The deadline of the event will be checked against the current date. If the user tries to
remove his/her name from the event after meeting deadlines, the system will not allow
the user to do that. Otherwise the user has been successfully removed from the database
and the GPTW will get updated.
Page 35
23
Figure 4: Remove/Update an event by a registered user
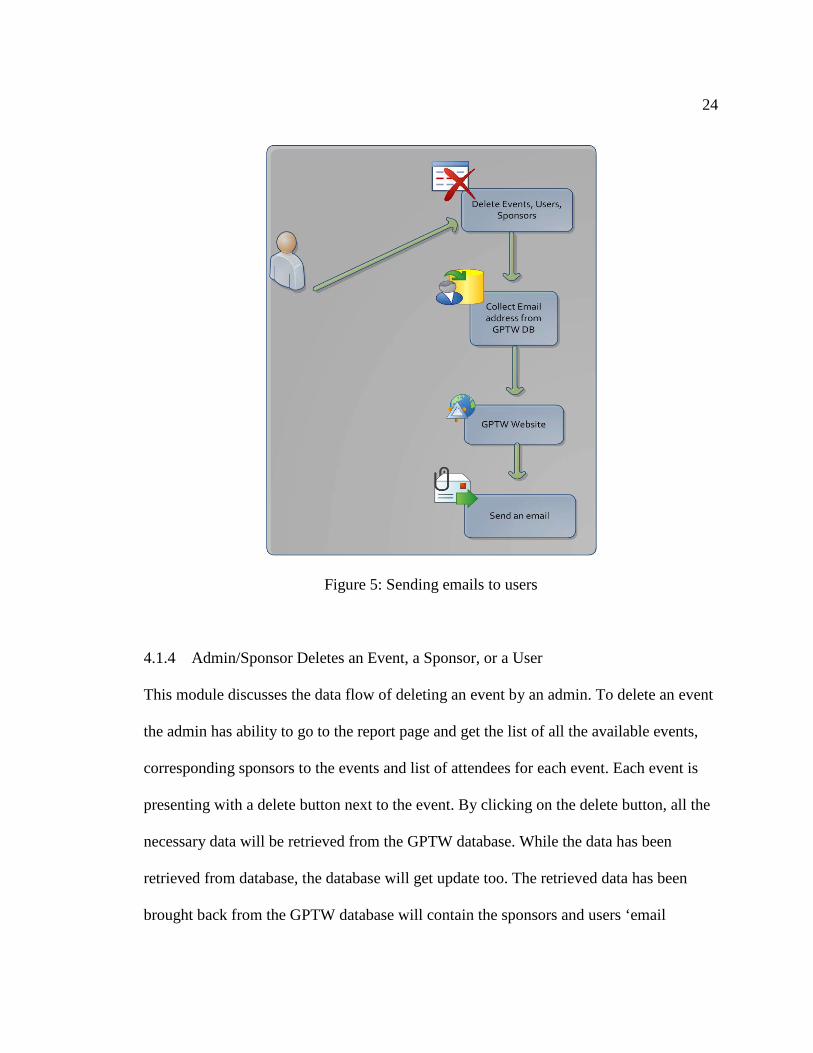
4.1.3 Sending Emails to Users
This module discusses the data flow of sending emails to users. If any events or users get
deleted, the email address of the corresponding users will be retrieved from the GPTW
database. The email addresses will send to GPTW front page and from there, the tool will
send an email to each individual user.
Page 36
24
Figure 5: Sending emails to users
4.1.4 Admin/Sponsor Deletes an Event, a Sponsor, or a User
This module discusses the data flow of deleting an event by an admin. To delete an event
the admin has ability to go to the report page and get the list of all the available events,
corresponding sponsors to the events and list of attendees for each event. Each event is
presenting with a delete button next to the event. By clicking on the delete button, all the
necessary data will be retrieved from the GPTW database. While the data has been
retrieved from database, the database will get update too. The retrieved data has been
brought back from the GPTW database will contain the sponsors and users ‘email
Page 37
25
address. By having access to email addresses the GPTW tool will send emails to sponsors
and users of the event to notify them of the cancelation.
Figure 6: Admin/Sponsor deletes an event, a sponsor, or a user
4.2 User Interface Design
This section provides the flow of the system in screenshots. Each of the screenshots
presents the user interaction with the GPTW web based tool. The left navigation bar is
Page 38
26
implemented in the Master page of ASP.NET and will remain the same for every page for
consistency purposes.
4.2.1 GPTW Home Screen
In the home page of the GPTW users can find all the information they need at once.
They will be provided a brief description of what GPTW is and how it works. On the left
the navigation bar provides the links to each page with a proper name to minimize the
confusion for users.
Figure 7: GPTW Home Screen
Page 39
27
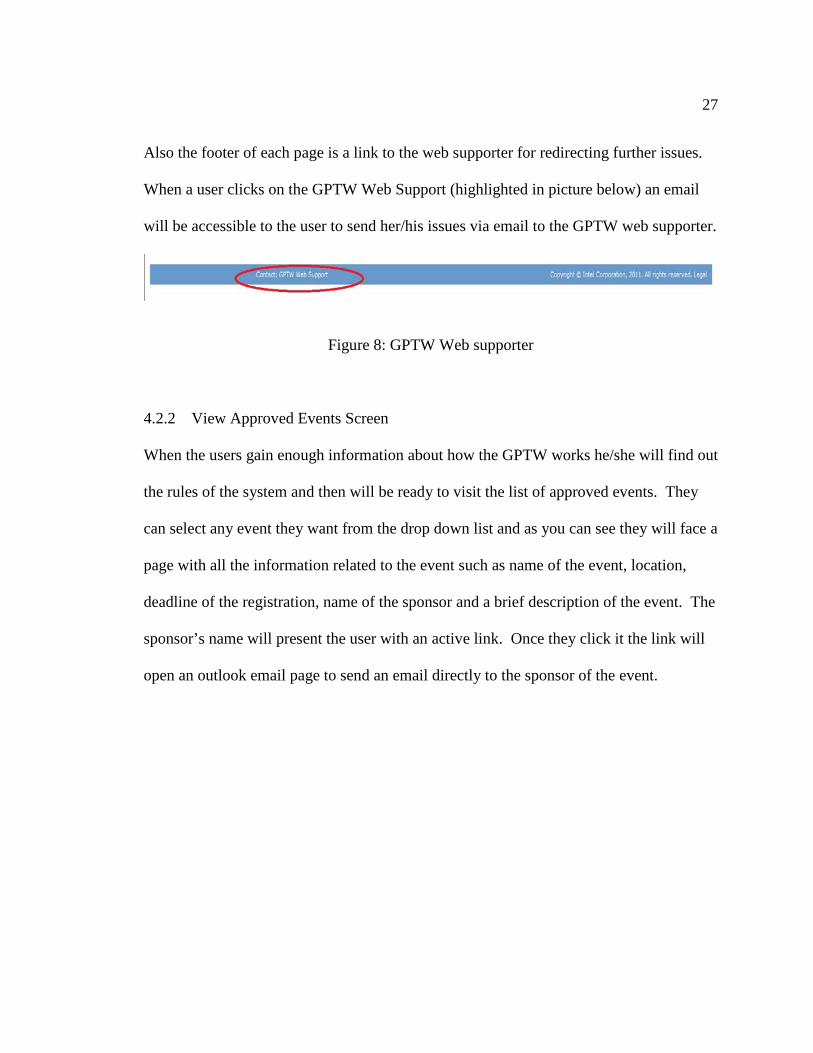
Also the footer of each page is a link to the web supporter for redirecting further issues.
When a user clicks on the GPTW Web Support (highlighted in picture below) an email
will be accessible to the user to send her/his issues via email to the GPTW web supporter.
Figure 8: GPTW Web supporter
4.2.2 View Approved Events Screen
When the users gain enough information about how the GPTW works he/she will find out
the rules of the system and then will be ready to visit the list of approved events. They
can select any event they want from the drop down list and as you can see they will face a
page with all the information related to the event such as name of the event, location,
deadline of the registration, name of the sponsor and a brief description of the event. The
sponsor’s name will present the user with an active link. Once they click it the link will
open an outlook email page to send an email directly to the sponsor of the event.
Page 40
28
Figure 9: View approved events screen
4.2.3 Register for an Event Screen
The screenshot shows in the figure 10 is what users should see when they click on the
registration link. There is no need for users to fill out any forms in order to register for an
event. All the necessary information will be retrieved from the database. To register for
the event a user needs to simply click on the "submit" button. Then the new data that
includes the event’s name will be stored in the database. If any of the provided data was
wrong the user can click on a link to notify the web supporter. An automatic email will be
sent to the web supporters.
Page 41
29
The eventID will be passed by a link from the previous page (approved event page) to the
current page (registration page) and that is how the tool can detect what user is selected
for his/her event and stored into the database.
Figure 10: Register for an event screen
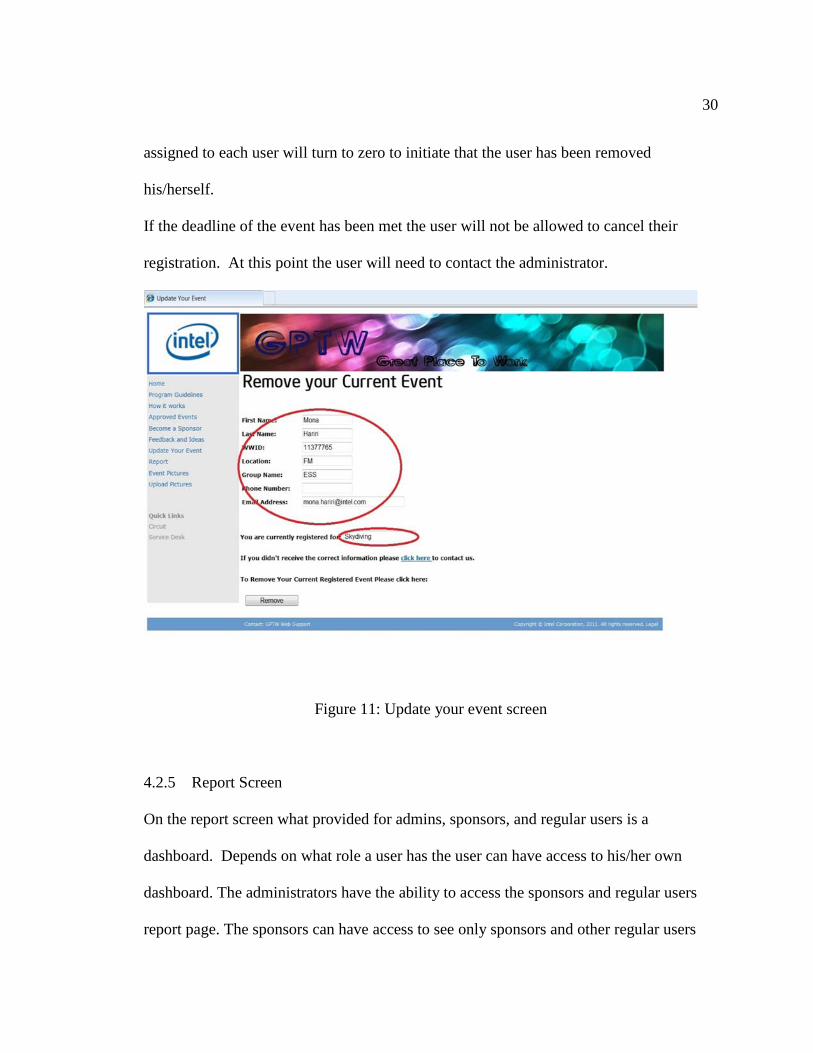
4.2.4 Update Your Event Screen
If for any reason a user decides to remove his registration they can do so by clicking on
the "Update Your Event" page. Included on this page will be the name of the event that
the user registered for. Clicking on the "Remove" button will remove the user from the
database. Technically the user will not be deleted from the database, but the status flag
Page 42
30
assigned to each user will turn to zero to initiate that the user has been removed
his/herself.
If the deadline of the event has been met the user will not be allowed to cancel their
registration. At this point the user will need to contact the administrator.
Figure 11: Update your event screen
4.2.5 Report Screen
On the report screen what provided for admins, sponsors, and regular users is a
dashboard. Depends on what role a user has the user can have access to his/her own
dashboard. The administrators have the ability to access the sponsors and regular users
report page. The sponsors can have access to see only sponsors and other regular users
Page 43
31
report pages and regular users have only the ability to visit the report page which belongs
to regular users. Also each sponsors report page has been filtered by the sponsor of that
event only. This filtering allows the sponsors to have a clearer and less confused report
page.
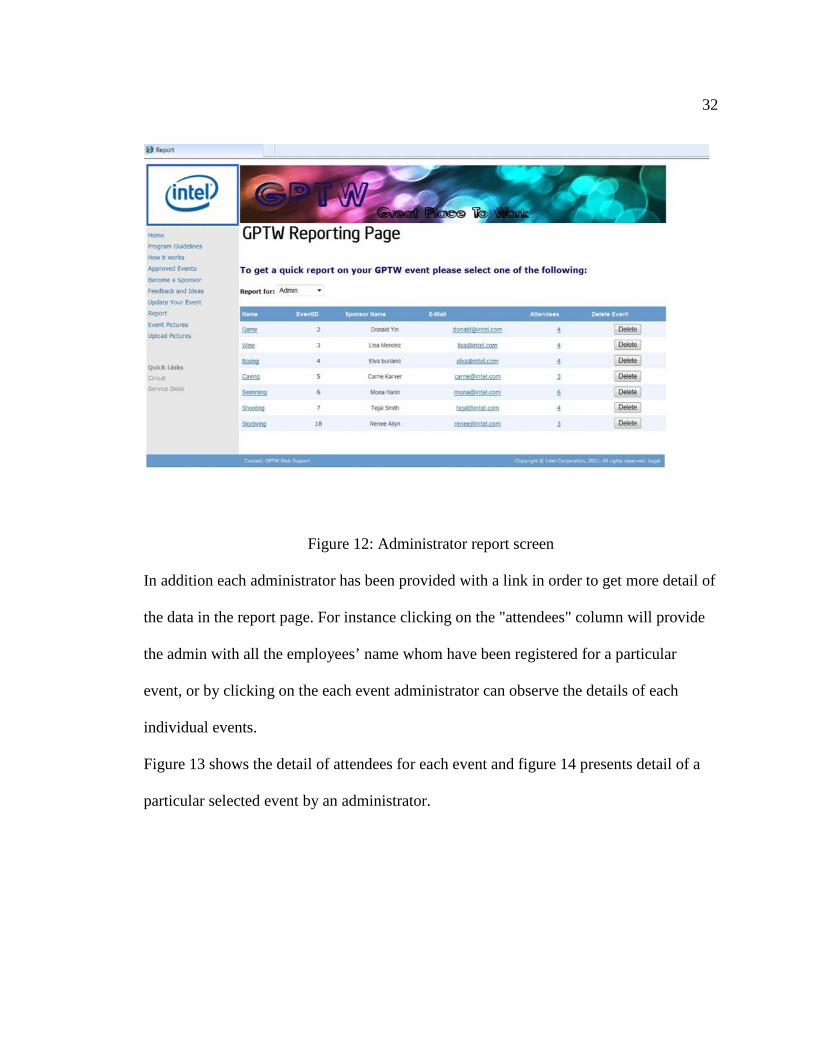
4.2.5.1 Administrator Report Screen
The screenshot in figure 12 is the administrators report page. This report page can
provide everything an administrator needs in one simple page. An administrator is able to
view all the current and upcoming events with their details; also he/she has the ability to
delete an event. Deleting an event will delete all the corresponding sponsors and
attendees of the event. An automatic email will be sent to the sponsors and attendees for
the further notification.
Page 44
32
Figure 12: Administrator report screen
In addition each administrator has been provided with a link in order to get more detail of
the data in the report page. For instance clicking on the "attendees" column will provide
the admin with all the employees’ name whom have been registered for a particular
event, or by clicking on the each event administrator can observe the details of each
individual events.
Figure 13 shows the detail of attendees for each event and figure 14 presents detail of a
particular selected event by an administrator.
Page 45
33
Figure 13: Detail of attendees
Figure 14: Detail of an event
Page 46
34
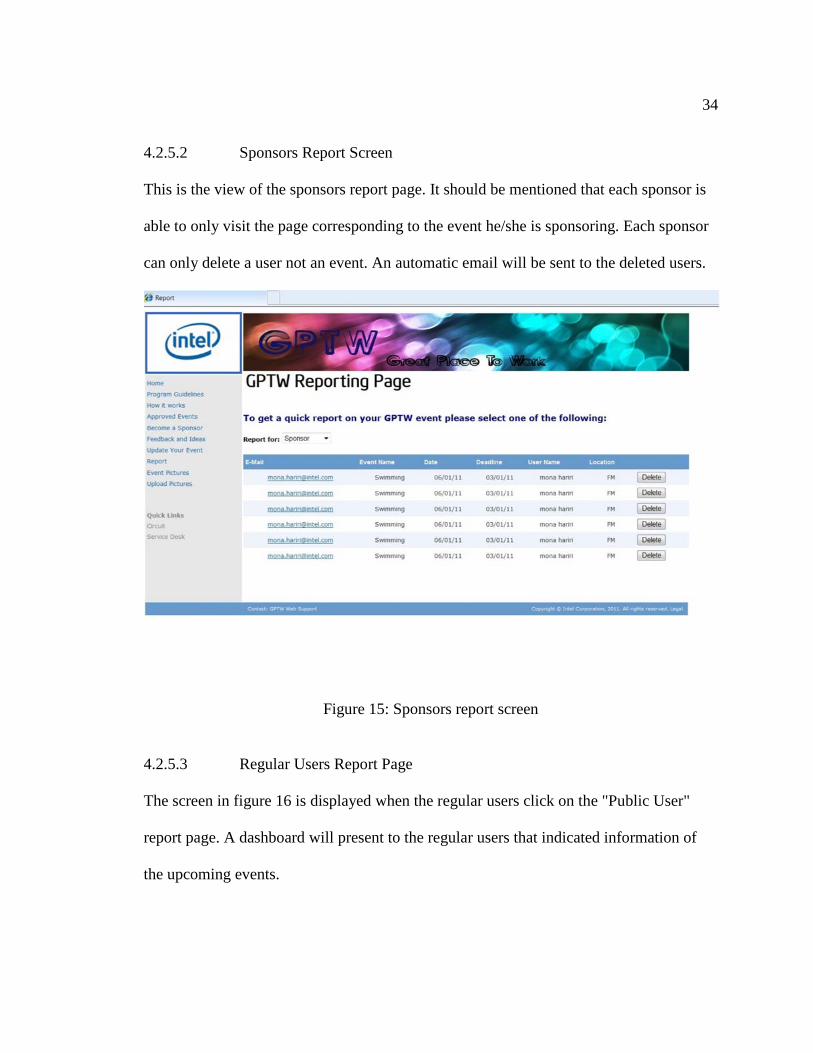
4.2.5.2 Sponsors Report Screen
This is the view of the sponsors report page. It should be mentioned that each sponsor is
able to only visit the page corresponding to the event he/she is sponsoring. Each sponsor
can only delete a user not an event. An automatic email will be sent to the deleted users.
Figure 15: Sponsors report screen
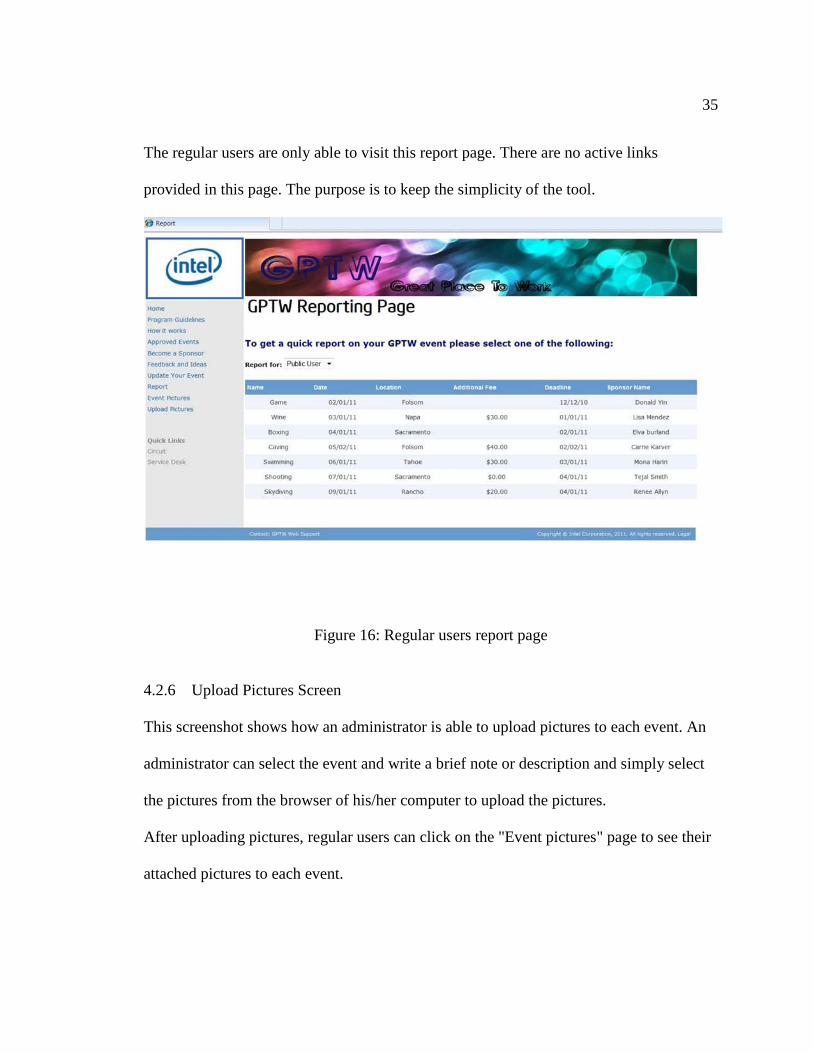
4.2.5.3 Regular Users Report Page
The screen in figure 16 is displayed when the regular users click on the "Public User"
report page. A dashboard will present to the regular users that indicated information of
the upcoming events.
Page 47
35
The regular users are only able to visit this report page. There are no active links
provided in this page. The purpose is to keep the simplicity of the tool.
Figure 16: Regular users report page
4.2.6 Upload Pictures Screen
This screenshot shows how an administrator is able to upload pictures to each event. An
administrator can select the event and write a brief note or description and simply select
the pictures from the browser of his/her computer to upload the pictures.
After uploading pictures, regular users can click on the "Event pictures" page to see their
attached pictures to each event.
Page 48
36
Figure 17: Upload pictures screen
Page 49
37
Figure 18: Demostration of event pictures
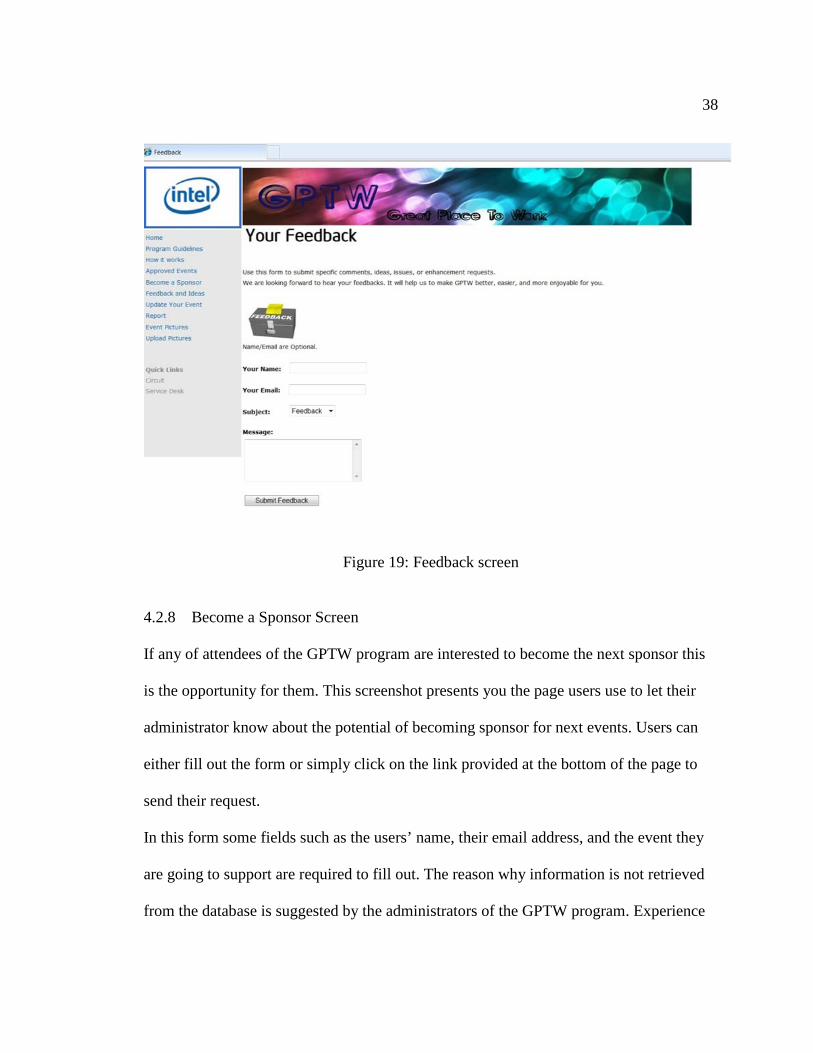
4.2.7 Feedback Screen
This is a screenshot of the feedback page. The purpose of having feedback is to gather
more ideas, comments or questions from attendess. It is very important for the GPTW
group to receive comments from the attendees. Users can simply click on the "Feedback"
icon located in the left navigator bar on the GPTW web page. Then the feedback page
will be presented to them. As you can see for the respect of the attendees privacy, the
name and email address in this form are optional. It would be up to users if they are
willing to leave their name or email address. They can select the title of their feedback
from the drop down list such as questions, new ideas, comment, or other categories. The
message box is a required field. Now the form is ready to send to the administrators
which is done by clicking on the "Submit Feedback" button.
Page 50
38
Figure 19: Feedback screen
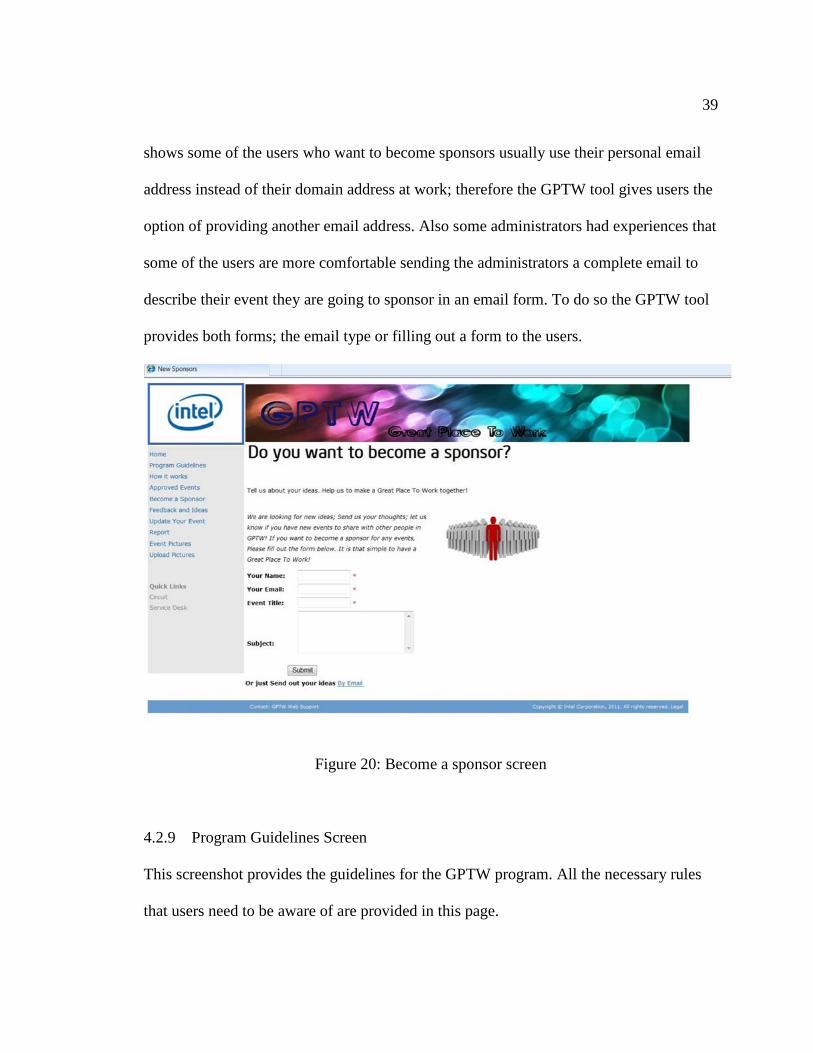
4.2.8 Become a Sponsor Screen
If any of attendees of the GPTW program are interested to become the next sponsor this
is the opportunity for them. This screenshot presents you the page users use to let their
administrator know about the potential of becoming sponsor for next events. Users can
either fill out the form or simply click on the link provided at the bottom of the page to
send their request.
In this form some fields such as the users’ name, their email address, and the event they
are going to support are required to fill out. The reason why information is not retrieved
from the database is suggested by the administrators of the GPTW program. Experience
Page 51
39
shows some of the users who want to become sponsors usually use their personal email
address instead of their domain address at work; therefore the GPTW tool gives users the
option of providing another email address. Also some administrators had experiences that
some of the users are more comfortable sending the administrators a complete email to
describe their event they are going to sponsor in an email form. To do so the GPTW tool
provides both forms; the email type or filling out a form to the users.
Figure 20: Become a sponsor screen
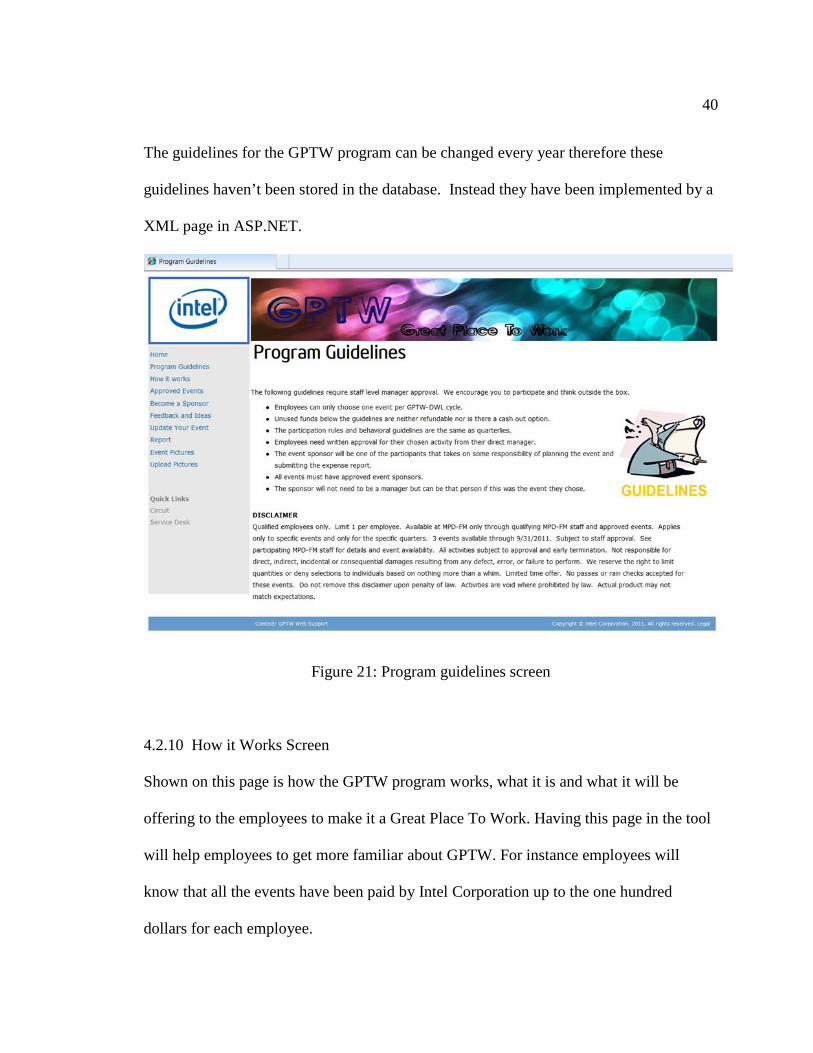
4.2.9 Program Guidelines Screen
This screenshot provides the guidelines for the GPTW program. All the necessary rules
that users need to be aware of are provided in this page.
Page 52
40
The guidelines for the GPTW program can be changed every year therefore these
guidelines haven’t been stored in the database. Instead they have been implemented by a
XML page in ASP.NET.
Figure 21: Program guidelines screen
4.2.10 How it Works Screen
Shown on this page is how the GPTW program works, what it is and what it will be
offering to the employees to make it a Great Place To Work. Having this page in the tool
will help employees to get more familiar about GPTW. For instance employees will
know that all the events have been paid by Intel Corporation up to the one hundred
dollars for each employee.
Page 53
41
More detail about the program can be found in this page.
Figure 22: How it works screen
Page 54
42
Chapter 5
PERFORMANCE ANALYSIS
In this chapter I demonstrated the performance of the GPTW tool in order to get more
familiar of the abilities and qualitative of my dynamic web-based tool.
5.1 The Visual Appeal of the Event and Scheduling Before and After
As you can see in figure 23 the visual appealing of the tool has been improved in a way
that is more likable, understandable and easier for users to work with. Figure 23 shows
that how users can simply select their desired event from a drop down list and have
access to all the necessary information about the event in the exact same page. In addition
they can send email to the sponsor of the event for any questions and also have direct
access to register for the event.
Page 55
43
Figure 23: Visual appeal afterwards
In the past it was only a one page site including the list of all the events. The users had to
click on each event to get to the event description and scroll back up to choose another
event. Also if they were interested in registering for any events they had to send an email
to the administrators of the group separately. You can find the look of the GPTW before
in figure 24
Page 56
44
Figure 24: Visual appeal before
5.2 Measurement Scale
I interviewed 15 people at my workplace in order to measure the satisfaction of using my
tool compare to the tool that was offered before. From a scale of 1 to 5 I got an average
of 4.5. They all agreed that the new GPTW tool is much easier and more useful than
before. Their feedbacks were great; for instance: “Using this tool doesn’t make me
confused. It is straight forward to use. Everything is in the place which it should be;
Page 57
45
therefore my eyes can find it very easy”. They all agreed that my tool makes the process
of registration much easier. I provided the result of my interview in the table below.
Table 1
Measurement table
Average Grade
Before 1.2
After 4.5
5.3 Number of Tasks Users Need to Complete Before and After
In this table you can see the number of steps users need to take in order to complete
certain tasks. As you can see the number of steps has been reduced. The result shows less
steps needed to take in order to be able to accomplish the same task in my tool than what
had been provided before in the previous tool.
Table 2
Number of tasks need to be completed table
Step to Register for
an Event
Step to Remove
from an Event
Step to see the
pictures of the
Event
Before 4 5 5
After 1 1 2
Page 58
46
5.4 Average Time Administrators Use to Set up an Event and Registrations
This table shows the difference between the times administrators used to spend on the
previous tool in order to get the registration done with the time they need to spend in
order to finish the same task using the GPTW I provided.
Table 3
Average time spend to set up an event registration by administrators
Average Time Spend to Set up an Event Registration
Before 4 hours
After 20 – 25 minutes
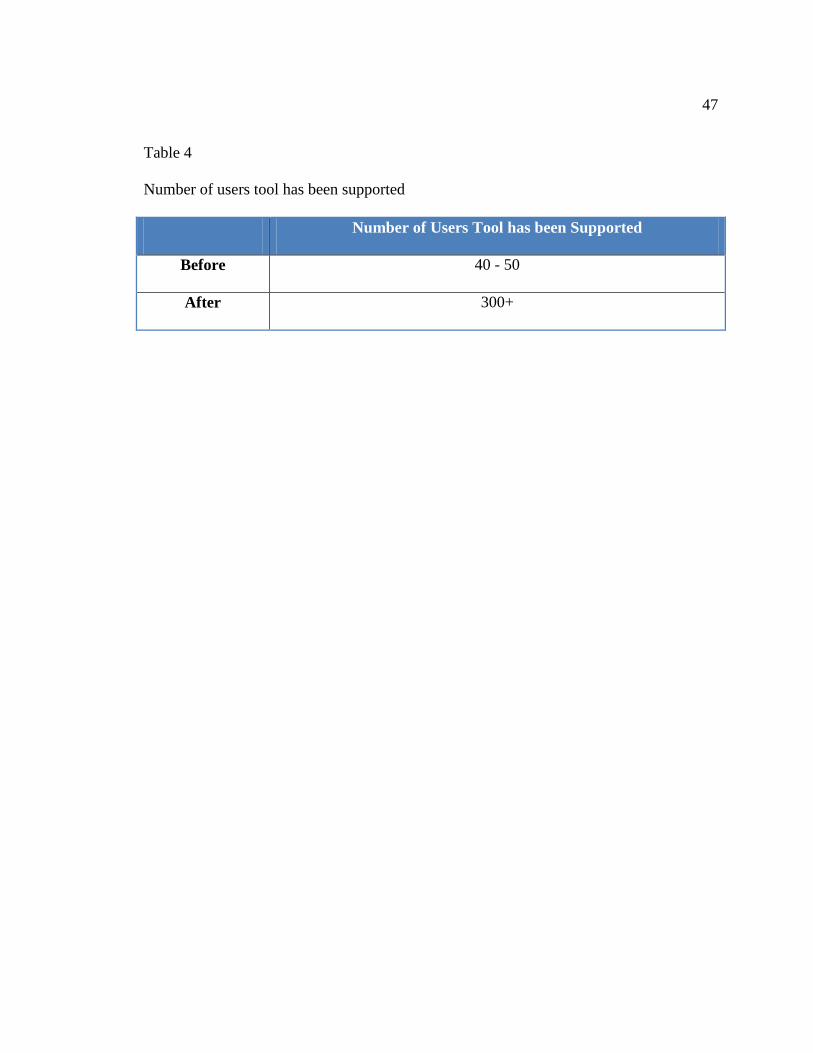
5.5 Number of Users the Tool Supports Before and After
The impact of my GPTW tool on increasing the number of users is pretty impressive.
Before this tool had been implemented the number of people that were using it was
limited to only my group which it was about 40 to 50 people. This number has been
increased to about 300+ people supporting all the Folsom site team. Also the manager
levels are negotiating to extend the use of this tool up to more than only the Folsom site
and expand it Oregon, Santa Clara and perhaps our Austin site.
Page 59
47
Table 4
Number of users tool has been supported
Number of Users Tool has been Supported
Before 40 - 50
After 300+
Page 60
48
Chapter 6
LESSONS LEARNED
In this section I would like to share some of my personal experiences I gained during
developing the GPTW application. What I provided for you in this section are codes and
hints that might help you in your software application development field. They might
solve your questions as well. In order to resolve some of these problems I spent days,
sometimes about a week, to find a proper and correct answer for a particular problem. I
hope you find them useful and helpful.
6.1 Handler.ashx
One of the problems I faced during developing the GPTW application was how to upload
pictures to my webpages. I wanted to uploading pictures in a way that all the pictures
present themselves next to each other with a standard thumbnail size. The solution for my
problem was Handler.ashx. It defines two parts of the IHttpHandler interface. The
important part is ProcessRequest(), which will be invoked whenever the Handler.ashx file
is requested or pointed to. You shouldn't modify the interface inheritance or remove
either of the members.
A SHX is a generic handler that you can find in your Visual Studio. By right clicking on
the very first menu and clicking on "Add New Item" you can achieve this. This will
present the Add New Item dialog box. Select the "Generic Handler" item and you will get
a new file with some autogenerated code in it called Handler.ashx. Some ASP.NET files
Page 61
49
are dynamically generated. They are generated with the C# code. These files do not
require web forms. Instead, an ASHX generic handler is ideal. It can dynamically return
an image from a query string, write XML, or any other data.
I wanted to provide you the code I used and it might help you to use in your application if
you have faced the same issue.
In my case I must give ID to each image to be able to separate them for each individual
event. In this application each image can be stored with a specific name and under a
specific category for each individual event within a description. It also will be able to
present itself all at once for the corresponding event.
6.2 ChartImageHandler in the web.config
If you are willing to use any charts in your ASP.NET based tool be aware of a hidden
handler that will create in your web.config file. This handler would cause some
references errors. Adding the references into your library or into your name system will
not solve the problem.
The handlers are usually will be stored in the web.config files. What you need to do is
find your web.config file in the solution explorer and manually comment out all the
ChartImageHandler that have been generated in there.
6.3 PostBackUrl
There are so many different ways to pass data within a link among a web page address.
The easiest and shortest one is the one I used in my tool. This one line of code helps you
Page 62
50
to retrieve data from the database and wrap it in a dynamic code into your HTML or
XML file.
This could have been done with four or five lines of coding in code behind and two or
three lines of code in your XML page, but this one line of code can take care of the whole
scenario and do the same job.
All you need is using a "PostBackUrl" in your XML code. This line of code will be
dynamically passed IDs, names and any other data you need to pass on the web browser.
But instead of declaring it in your code behind you can initialize it in an XML page. In
order to use your XML as a dynamic code you can apply you code in " '< %#------%>' ".
Page 63
51
Chapter 7
CONCLUSION AND FUTURE WORK
7.1 Summary
The goal of this project was to build a web-based tool for my workplace that employees
can use it in order to schedule and register for upcoming events in a more flexible way.
Implementing this project as a web-based application made it a very flexible, scalable,
and a platform independent solution. Using the web interface the users could upload,
register, modify, and get direct contact with their administrators or sponsors by email.
This project was a success at my workplace because of being user friendly, easy to
access, easy to learn and easy to use. It also saved money and increased the productivity
at my workplace without the need of increasing staff. More of what the tool has provided
is mentioned at the functional requirement section.
In this tool there is no need of creating and memorizing username and password in order
to securely use the tool. Moreover the privilege of having access to the administrators and
sponsors report page has been done by the tool in the code behind.
7.2 Future Work
This project provided good results of using a dynamic web – based tool for event
registration instead of having a static tool at my workplace. But there could be more
enhancements and extended features to provide even better features into this tool. This
project can be enhanced to allow users to have access to the tool on their tablets and
Page 64
52
smartphones. The use of smart phones and tablets are growing more and more; having
access to Wi-Fi is getting easier as well. Therefore I believe a possible project extension
could be applying the tool on tablets and smartphones.
One of the goals during implementing the GPTW was focusing on the user – goal design.
My goal was to eliminate the excise users pay in order to use my tool. This project has
been successful to reduce the human interaction with the tool in a big way but still leaves
a scope to make more progress in this direction.
One of the achievements in this project was giving the ability to users to upload pictures
to the GPTW web tool. Future work will be coming up with a method that allows users to
upload multiple pictures at the same time or giving them the ability to upload a short
video of their event to their GPTW web tool.
Page 65
53
APPENDIX A
How to Present Directive in ASP.NET
<%@ Page Title="UploadPIcturesToDatabase" Language="C#" MasterPageFile="~/MasterPage.master" AutoEventWireup="true" CodeFile="UploadPictures.aspx.cs" Inherits="GPTW.UploadPictures" %>
Page 66
54
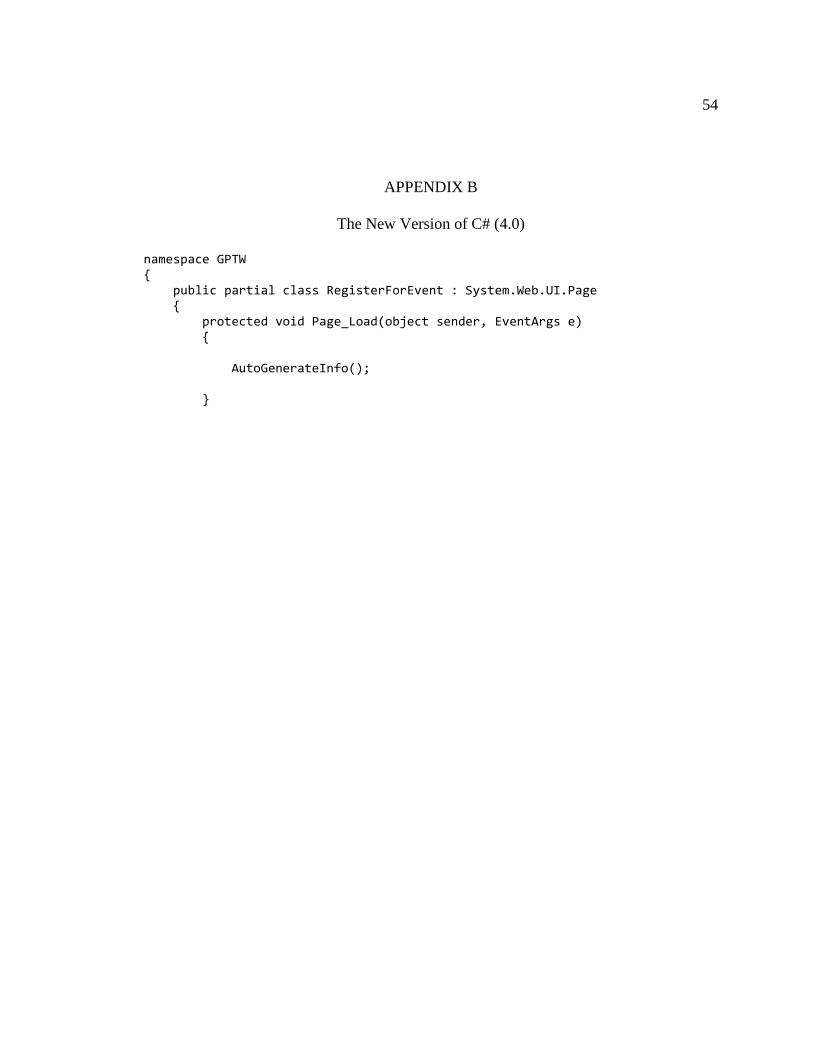
APPENDIX B
The New Version of C# (4.0)
namespace GPTW { public partial class RegisterForEvent : System.Web.UI.Page { protected void Page_Load(object sender, EventArgs e) { AutoGenerateInfo(); }
Page 67
55
APPENDIX C
Creating a Cascade Style Sheet
.TopLeftNav A.LeftNavMenu { PADDING-RIGHT: 0px; BACKGROUND-POSITION: right 50%; PADDING-LEFT: 13px; FONT-SIZE: 10px; BACKGROUND-IMAGE: url(../images/arrow_nav_left_V3.gif); PADDING-BOTTOM: 0px; MARGIN: 0px 0px 1px; BEHAVIOR: url(SiteScripts/popupmenuV3.htc); BORDER-LEFT: #f1ab00 7px solid; CURSOR: default; COLOR: #808284; PADDING-TOP: 0px; BACKGROUND-REPEAT: no-repeat; BACKGROUND-COLOR: #e7e7e7; TEXT-DECORATION: none }
<style type="text/css"> .TopLeftNav A.LeftNavMenu { height: 20px; } </style>
Page 68
56
APPENDIX D
How to Create And Call a Gridview
<asp:Panel ID="PanelAdmin" runat="server" Visible="true"> <asp:GridView ID="GridView1" DataKeyNames="EventID" Font-Names="Arial" Width="100%" OnRowDeleting="GridView1_RowDeleting" runat="server" AutoGenerateColumns="False" CellPadding="4" ForeColor="#333333" GridLines="None"> <AlternatingRowStyle BackColor="White" /> <Columns> <asp:TemplateField HeaderText="Name" ItemStyle-HorizontalAlign="Center"> <ItemTemplate> <asp:LinkButton ID="lnkname" runat="server" Font-Names="Arial" PostBackUrl='<%#"~/DetailofEventForAdmin.aspx?EventID="+Eval("EventID") %>' Text='<%#Eval("EventName") %>'> </asp:LinkButton> </ItemTemplate> <ItemStyle Font-Names="Arial" HorizontalAlign="Center" /> </asp:TemplateField>
Page 69
57
APPENDIX E
Build up a Try-catch Class
private void getViewForPublicUser(string Info) { try { string connectionInfo = ConfigurationManager.ConnectionStrings["GPTW"].ConnectionString; System.Data.SqlClient.SqlConnection dbConn = new System.Data.SqlClient.SqlConnection(connectionInfo); System.Data.SqlClient.SqlCommand dbCommand = new System.Data.SqlClient.SqlCommand("select * from [PublicUserView]", dbConn); dbCommand.CommandType = System.Data.CommandType.Text; dbCommand.Connection = dbConn; dbConn.Open();
catch (Exception ex) { pnlError.Visible = true; pnlMain.Visible = false; errorNotification(ex); //Response.Redirect("gptwErrorPage.aspx"); } } private void errorNotification(Exception ErrorDetail) { MailMessage mail = new MailMessage(); mail.To = "[email protected] "; mail.From = "[email protected] "; mail.Subject = "GPTW Web Error - " + ErrorDetail.ToString().Substring(0, 64) + "..."; mail.Body = ErrorDetail.ToString(); SmtpMail.SmtpServer = "mail.intel.com"; SmtpMail.Send(mail); }
Page 70
58
APPENDIX F
Create a Stored Procedure in Database
USE [GPTW] GO /****** Object: StoredProcedure [dbo].[Registration] Script Date: 02/09/2012 20:53:07 ******/ SET ANSI_NULLS ON GO SET QUOTED_IDENTIFIER ON GO -- ============================================= -- Author: <Mona Hariri> -- Create date: <Create Date,,> -- Description: <Description,,> -- ============================================= CREATE PROCEDURE [dbo].[Registration] -- Add the parameters for the stored procedure here @UserName varchar (100), @UserWWID varchar(100), @UserLocation varchar (50), @UserGroupName varchar(100), @UserPhoneNumber varchar(100)=null, @UserEmail varchar(100), @CreateBy varchar(50)=null,@CreateDateTime varchar(50)=null, @LastUpdate varchar(50)=null,@LastUpdateTime varchar(50)=null,@EventID int AS BEGIN -- SET NOCOUNT ON added to prevent extra result sets from -- interfering with SELECT statements. SET NOCOUNT ON; -- Insert statements for procedure here insert into Users ( [UserName] ,[WWID] ,[UserLocation] ,[UserGroupName] ,[UserPhoneNumber] ,[UserEmail] ,[EventID]) values (@UserName,@UserWWID, @UserLocation,@UserGroupName, @UserPhoneNumber,@UserEmail, @EventID) END
Page 71
59
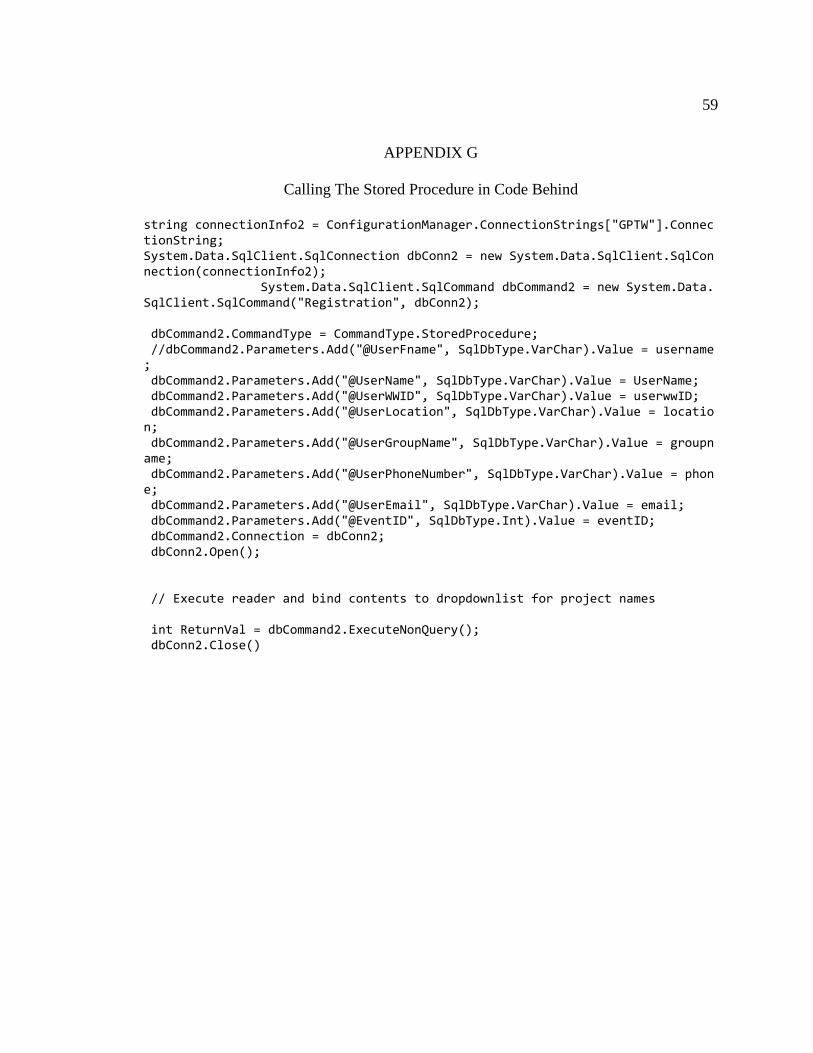
APPENDIX G
Calling The Stored Procedure in Code Behind
string connectionInfo2 = ConfigurationManager.ConnectionStrings["GPTW"].ConnectionString; System.Data.SqlClient.SqlConnection dbConn2 = new System.Data.SqlClient.SqlConnection(connectionInfo2); System.Data.SqlClient.SqlCommand dbCommand2 = new System.Data.SqlClient.SqlCommand("Registration", dbConn2); dbCommand2.CommandType = CommandType.StoredProcedure; //dbCommand2.Parameters.Add("@UserFname", SqlDbType.VarChar).Value = username; dbCommand2.Parameters.Add("@UserName", SqlDbType.VarChar).Value = UserName; dbCommand2.Parameters.Add("@UserWWID", SqlDbType.VarChar).Value = userwwID; dbCommand2.Parameters.Add("@UserLocation", SqlDbType.VarChar).Value = location; dbCommand2.Parameters.Add("@UserGroupName", SqlDbType.VarChar).Value = groupname; dbCommand2.Parameters.Add("@UserPhoneNumber", SqlDbType.VarChar).Value = phone; dbCommand2.Parameters.Add("@UserEmail", SqlDbType.VarChar).Value = email; dbCommand2.Parameters.Add("@EventID", SqlDbType.Int).Value = eventID; dbCommand2.Connection = dbConn2; dbConn2.Open(); // Execute reader and bind contents to dropdownlist for project names int ReturnVal = dbCommand2.ExecuteNonQuery(); dbConn2.Close()
Page 72
60
APPENDIX H
Views
USE [GPTW] GO /****** Object: View [dbo].[AdminView] Script Date: 02/10/2012 17:09:27 ******/ SET ANSI_NULLS ON GO SET QUOTED_IDENTIFIER ON GO CREATE VIEW [dbo].[AdminView] AS SELECT dbo.Event.EventName, dbo.Event.EventID, dbo.Sponsor.SponsorName, dbo.Sponsor.SponsorEmail, (SELECT COUNT(UserID) AS Expr1 FROM dbo.Users AS Users WHERE (EventID = dbo.Event.EventID) AND (ActiveStatus = 1)) AS NumberOfAttend, Users.ActiveStatus FROM dbo.Sponsor INNER JOIN dbo.Event ON dbo.Sponsor.EventID = dbo.Event.EventID INNER JOIN dbo.Users AS Users ON dbo.Event.EventID = Users.EventID WHERE (dbo.Sponsor.ActiveStatus = 1) GROUP BY dbo.Event.EventName, dbo.Event.EventID, dbo.Sponsor.SponsorName, dbo.Sponsor.SponsorEmail, Users.ActiveStatus GO EXEC sys.sp_addextendedproperty @name=N'MS_DiagramPane1', @value=N'[0E232FF0-B466-11cf-A24F-00AA00A3EFFF, 1.00] Begin DesignProperties = Begin PaneConfigurations = Begin PaneConfiguration = 0 NumPanes = 4 Configuration = "(H (1[40] 4[20] 2[20] 3) )" End Begin PaneConfiguration = 1 NumPanes = 3 Configuration = "(H (1 [50] 4 [25] 3))" End Begin PaneConfiguration = 2 NumPanes = 3 Configuration = "(H (1 [50] 2 [25] 3))" End Begin PaneConfiguration = 3
Page 73
61
NumPanes = 3 Configuration = "(H (4 [30] 2 [40] 3))" End Begin PaneConfiguration = 4 NumPanes = 2 Configuration = "(H (1 [56] 3))" End Begin PaneConfiguration = 5 NumPanes = 2 Configuration = "(H (2 [66] 3))" End Begin PaneConfiguration = 6 NumPanes = 2 Configuration = "(H (4 [50] 3))" End Begin PaneConfiguration = 7 NumPanes = 1 Configuration = "(V (3))" End Begin PaneConfiguration = 8 NumPanes = 3 Configuration = "(H (1[56] 4[18] 2) )" End Begin PaneConfiguration = 9 NumPanes = 2 Configuration = "(H (1 [75] 4))" End Begin PaneConfiguration = 10 NumPanes = 2 Configuration = "(H (1[66] 2) )" End Begin PaneConfiguration = 11 NumPanes = 2 Configuration = "(H (4 [60] 2))" End Begin PaneConfiguration = 12 NumPanes = 1 Configuration = "(H (1) )" End Begin PaneConfiguration = 13 NumPanes = 1 Configuration = "(V (4))" End Begin PaneConfiguration = 14 NumPanes = 1 Configuration = "(V (2))" End ActivePaneConfig = 0 End Begin DiagramPane = Begin Origin = Top = 0 Left = 0
Page 74
62
End Begin Tables = Begin Table = "Event" Begin Extent = Top = 7 Left = 48 Bottom = 148 Right = 251 End DisplayFlags = 280 TopColumn = 5 End Begin Table = "Users" Begin Extent = Top = 173 Left = 271 Bottom = 332 Right = 472 End DisplayFlags = 280 TopColumn = 0 End Begin Table = "Sponsor" Begin Extent = Top = 7 Left = 299 Bottom = 148 Right = 521 End DisplayFlags = 280 TopColumn = 0 End End End Begin SQLPane = End Begin DataPane = Begin ParameterDefaults = "" End Begin ColumnWidths = 9 Width = 284 Width = 1200 Width = 1200 Width = 1200 Width = 1200 Width = 1200 Width = 1200 Width = 1200 Width = 1200 End End Begin CriteriaPane = Begin ColumnWidths = 12
Page 75
63
Column = 1440 Alias = 900 Table = 1176 Output = 720 Append = 1400 NewValue = 1170 SortType = 1356 SortOrder = 1416 GroupBy = 1350 Filter = 1356 Or = 1350 Or = 1350 Or = 1350 End End End ' , @level0type=N'SCHEMA',@level0name=N'dbo', @level1type=N'VIEW',@level1name=N'AdminView' GO EXEC sys.sp_addextendedproperty @name=N'MS_DiagramPaneCount', @value=1 , @level0type=N'SCHEMA',@level0name=N'dbo', @level1type=N'VIEW',@level1name=N'AdminView' GO
Page 76
64
APPENDIX I
Having Sqlconnection With Using of Sql Queries
private void getViewForSponsor(string Info) { String LogOnUser = Request.ServerVariables["LOGON_USER"]; String LogOnUserIDSID = LogOnUser.Substring(4, LogOnUser.Length - 4); string connectionInfo = ConfigurationManager.ConnectionStrings["GPTW"].ConnectionString; System.Data.SqlClient.SqlConnection dbConn = new System.Data.SqlClient.SqlConnection(connectionInfo); System.Data.SqlClient.SqlCommand dbCommand = new System.Data.SqlClient.SqlCommand( "select UserID,EventID,SponsorID,EventName,EventDate,Eventdeadline,EventLocation,UserName,UserLocation, '<a href= mailTo:'+UserEmail+'>'+UserEmail+'</a>' as UserEmail from [SponsorView] where SID='" + LogOnUserIDSID + "' and ActiveStatus=1", dbConn); dbCommand.CommandType = System.Data.CommandType.Text; dbCommand.Connection = dbConn; dbConn.Open(); dbConn.Close();
Page 77
65
APPENDIX J
IHTTPHANDLER Interface:
<%@ WebHandler Language="C#" Class="Handler" %> using System; using System.Web; using System.Configuration; using System.Data.SqlClient; public class Handler : IHttpHandler { public void ProcessRequest (HttpContext context) { string connectionInfo = ConfigurationManager.ConnectionStrings["GPTW"].ConnectionString; System.Data.SqlClient.SqlConnection dbConn = new System.Data.SqlClient.SqlConnection(connectionInfo); System.Data.SqlClient.SqlCommand dbCommand = new System.Data.SqlClient.SqlCommand("Select Image from Images where ID = @ID", dbConn); dbCommand.CommandType = System.Data.CommandType.Text; //int intImg = Convert.ToInt32(context.Request.QueryString["Image"]); dbCommand.Connection = dbConn; SqlParameter ImageID = new SqlParameter("@ID", System.Data.SqlDbType.Int); ImageID.Value = Convert.ToInt32(context.Request.QueryString["ID"]); dbCommand.Parameters.Add(ImageID); dbConn.Open(); SqlDataReader dReader = dbCommand.ExecuteReader(); dReader.Read(); // if (intImg == 1) // { // context.Response.BinaryWrite((byte[])dReader["Image"]); // } //else if (intImg == 2) // { context.Response.BinaryWrite((byte[])dReader["Image2"]); //} context.Response.BinaryWrite((byte[])dReader["Image"]); dReader.Close();
Page 78
66
dbConn.Close(); } public bool IsReusable { get { return false; } } }
Second part that you need to define in your regular aspx files: protected void btnUpload_Click(object sender, EventArgs e) { string strImageName = ddlEvents.SelectedItem.ToString(); if (FileUpload1.PostedFile != null && FileUpload1.PostedFile.FileName != "") { string strExtension = System.IO.Path.GetExtension(FileUpload1.FileName); if ((strExtension.ToUpper() == ".JPG") | (strExtension.ToUpper() == ".GIF")) { // Resize Image Before Uploading to DataBase System.Drawing.Image imageToBeResized = System.Drawing.Image.FromStream(FileUpload1.PostedFile.InputStream); int imageHeight = imageToBeResized.Height; int imageWidth = imageToBeResized.Width; int maxHeight = 240; int maxWidth = 320; imageHeight = (imageHeight * maxWidth) / imageWidth; imageWidth = maxWidth; if (imageHeight > maxHeight) { imageWidth = (imageWidth * maxHeight) / imageHeight; imageHeight = maxHeight; } Bitmap bitmap = new Bitmap(imageToBeResized, imageWidth, imageHeight); System.IO.MemoryStream stream = new MemoryStream(); bitmap.Save(stream, System.Drawing.Imaging.ImageFormat.Jpeg); stream.Position = 0; byte[] image = new byte[stream.Length + 1]; stream.Read(image, 0, image.Length);
Page 79
67
// Create SQL Command string connectionInfo = ConfigurationManager.ConnectionStrings["GPTW"].ConnectionString; System.Data.SqlClient.SqlConnection dbConn = new System.Data.SqlClient.SqlConnection(connectionInfo); System.Data.SqlClient.SqlCommand dbCommand = new System.Data.SqlClient.SqlCommand(@"INSERT INTO Images(ImageName,Image, EventName, Note) VALUES (@ImageName,@Image, @EventName,@txtNote); SELECT ID FROM Images ORDER BY ID DESC", dbConn); dbCommand.CommandType = System.Data.CommandType.Text; dbCommand.Connection = dbConn; SqlParameter ImageName = new SqlParameter("@ImageName", SqlDbType.VarChar, 50); ImageName.Value = strImageName.ToString(); dbCommand.Parameters.Add(ImageName); SqlParameter UploadedImage = new SqlParameter("@Image", SqlDbType.Image, image.Length); UploadedImage.Value = image; dbCommand.Parameters.Add(UploadedImage); //dbCommand.Parameters.AddWithValue("@txtEventID",Int32.Parse(txtEventID.Text)); dbCommand.Parameters.AddWithValue("@txtNote", txtNote.Text); dbCommand.Parameters.AddWithValue("@EventName", ddlEvents.SelectedItem.ToString()); dbConn.Open(); //string result = Convert.ToString((dbCommand.ExecuteScalar())); int result = Convert.ToInt32(dbCommand.ExecuteScalar()); //Image1.ImageUrl = "Handler.ashx?ID=context.Request.QueryString['ID']"; Image1.ImageUrl = "Handler.ashx?ID=" + result.ToString(); //Image1.ImageUrl = "Handler.ashx?EventName=" + result; Image1.Visible = true; dbConn.Close(); if (result > 0) //if (result!= null) lblMessage.Text = "File Uploaded"; // GridView1.DataSource=uploadPic; //GridView1.DataBind();}
Page 80
68
APPENDIX K
CHARTIMAGEHANDLER
<!--<system.webServer> <handlers> <remove name="ChartImageHandler" /> <add name="ChartImageHandler" preCondition="integratedMode" verb="GET,HEAD,POST" path="ChartImg.axd" type="System.Web.UI.DataVisualization.Charting.ChartHttpHandler, System.Web.DataVisualization, Version=4.0.0.0, Culture=neutral, PublicKeyToken=31bf3856ad364e35" /> </handlers> </system.webServer>-->
Page 81
69
APPENDIX L
POSTBACKURL
PostBackUrl='<%#"~/DetailofEventForAdmin.aspx?EventID="+Eval("EventID") %>' Text='<%#Eval("EventName") %>'>
Page 82
70
REFERENCES
1. direction.intel.com
2. http://en.wikipedia.org/wiki/Asp.net
3. http://en.wikipedia.org/wiki/C_Sharp_(programming_language)
4. http://www.w3schools.com/css/css_intro.asp
5. msdn. (2011). ASP.NET Framework.
http://msdn.microsoft.com/en-us/library/system.web.ui.webcontrols.gridview.aspx
6. msdn. (2011). ASP.NET Framework.
http://msdn.microsoft.com/en-us/library/0yd65esw.aspx
7. msdn. (2011). ASP.NET Framework.
http://msdn.microsoft.com/en-us/library/aa174792(v=sql.80).aspx
8. msdn. (2011). ASP.NET Framework.
http://msdn.microsoft.com/en-us/library/aa214068(v=sql.80).aspx
9. http://www.connectionstrings.com/Providers/sqlconnection