20
HARDWIRE TL-2 METAL DISTORTION OWNER’S MANUAL

HARDWIRE TL-2METAL DISTORTIONOWNER’S MANUAL
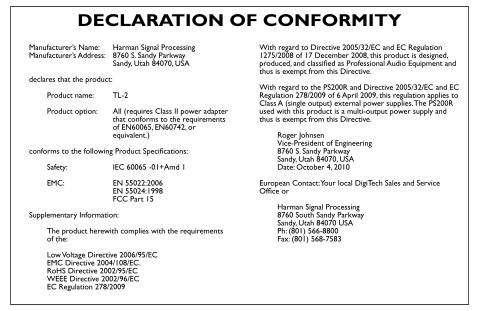
DECLARATION OF CONFORMITYManufacturer’s Name: Harman Signal ProcessingManufacturer’s Address: 8760 S. Sandy Parkway Sandy, Utah 84070, USA
declares that the product:
Product name: TL-2
Product option: All (requires Class II power adapter that conforms to the requirements of EN60065, EN60742, or equivalent.)
conforms to the following Product Specifications:
Safety: IEC 60065 -01+Amd 1 EMC: EN 55022:2006 EN 55024:1998 FCC Part 15
Supplementary Information:
The product herewith complies with the requirements of the:
Low Voltage Directive 2006/95/ECEMC Directive 2004/108/EC.RoHS Directive 2002/95/ECWEEE Directive 2002/96/EC EC Regulation 278/2009
With regard to Directive 2005/32/EC and EC Regulation 1275/2008 of 17 December 2008, this product is designed, produced, and classified as Professional Audio Equipment and thus is exempt from this Directive. With regard to the PS200R and Directive 2005/32/EC and EC Regulation 278/2009 of 6 April 2009, this regulation applies to Class A (single output) external power supplies. The PS200R used with this product is a multi-output power supply and thus is exempt from this Directive.
Roger Johnsen Vice-President of Engineering8760 S. Sandy Parkway Sandy, Utah 84070, USA Date: October 4, 2010
European Contact: Your local DigiTech Sales and Service Office or
Harman Signal Processing8760 South Sandy ParkwaySandy, Utah 84070 USAPh: (801) 566-8800Fax: (801) 568-7583
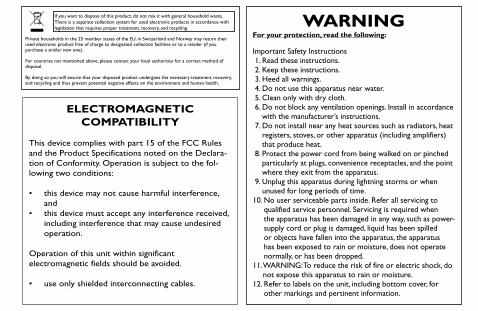
WARNINGFor your protection, read the following:
Important Safety Instructions 1. Read these instructions. 2. Keep these instructions. 3. Heed all warnings. 4. Do not use this apparatus near water. 5. Clean only with dry cloth. 6. Do not block any ventilation openings. Install in accordance
with the manufacturer’s instructions. 7. Do not install near any heat sources such as radiators, heat
registers, stoves, or other apparatus (including amplifiers) that produce heat.
8. Protect the power cord from being walked on or pinched particularly at plugs, convenience receptacles, and the point where they exit from the apparatus.
9. Unplug this apparatus during lightning storms or when unused for long periods of time.
10. No user serviceable parts inside. Refer all servicing to qualified service personnel. Servicing is required when the apparatus has been damaged in any way, such as power-supply cord or plug is damaged, liquid has been spilled or objects have fallen into the apparatus, the apparatus has been exposed to rain or moisture, does not operate normally, or has been dropped.
11. WARNING: To reduce the risk of fire or electric shock, do not expose this apparatus to rain or moisture.
12. Refer to labels on the unit, including bottom cover, for other markings and pertinent information.
ELECTROMAGNETICCOMPATIBILITY
This device complies with part 15 of the FCC Rules and the Product Specifications noted on the Declara-tion of Conformity. Operation is subject to the fol-lowing two conditions:
• this device may not cause harmful interference, and
• this device must accept any interference received, including interference that may cause undesired operation.
Operation of this unit within significant electromagnetic fields should be avoided.
• use only shielded interconnecting cables.
If you want to dispose of this product, do not mix it with general household waste. There is a separate collection system for used electronic products in accordance with legislation that requires proper treatment, recovery, and recycling.
Private households in the 25 member states of the EU, in Switzerland and Norway may return their used electronic product free of charge to designated collection facilities or to a retailer (if you purchase a similar new one).
For countries not mentioned above, please contact your local authorities for a correct method of disposal.
By doing so you will ensure that your disposed product undergoes the necessary treatment, recovery, and recycling and thus prevent potential negative effects on the environment and human health.
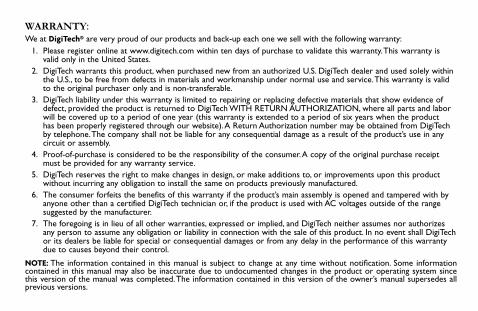
WARRANTY: We at DigiTech® are very proud of our products and back-up each one we sell with the following warranty:
1. Please register online at www.digitech.com within ten days of purchase to validate this warranty. This warranty is valid only in the United States.
2. DigiTech warrants this product, when purchased new from an authorized U.S. DigiTech dealer and used solely within the U.S., to be free from defects in materials and workmanship under normal use and service. This warranty is valid to the original purchaser only and is non-transferable.
3. DigiTech liability under this warranty is limited to repairing or replacing defective materials that show evidence of defect, provided the product is returned to DigiTech WITH RETURN AUTHORIZATION, where all parts and labor will be covered up to a period of one year (this warranty is extended to a period of six years when the product has been properly registered through our website). A Return Authorization number may be obtained from DigiTech by telephone. The company shall not be liable for any consequential damage as a result of the product’s use in any circuit or assembly.
4. Proof-of-purchase is considered to be the responsibility of the consumer. A copy of the original purchase receipt must be provided for any warranty service.
5. DigiTech reserves the right to make changes in design, or make additions to, or improvements upon this product without incurring any obligation to install the same on products previously manufactured.
6. The consumer forfeits the benefits of this warranty if the product’s main assembly is opened and tampered with by anyone other than a certified DigiTech technician or, if the product is used with AC voltages outside of the range suggested by the manufacturer.
7. The foregoing is in lieu of all other warranties, expressed or implied, and DigiTech neither assumes nor authorizes any person to assume any obligation or liability in connection with the sale of this product. In no event shall DigiTech or its dealers be liable for special or consequential damages or from any delay in the performance of this warranty due to causes beyond their control.
NOTE: The information contained in this manual is subject to change at any time without notification. Some information contained in this manual may also be inaccurate due to undocumented changes in the product or operating system since this version of the manual was completed. The information contained in this version of the owner’s manual supersedes all previous versions.

1
IntroductionMore than a remarkable achievement, DigiTech’s HardWire® series represents a collection of significant improvements in guitar effects pedals. The HardWire series pedals provide a suite of well-known effects, each with superior tone and control. But these pedals go above and beyond their peers to provide such distinguishing features as true bypass and high voltage operation, making them essential additions to the signal chain of players who know about sound quality and demand the utmost in performance.
Included Items• HardWire TL-2 Metal Distortion • StompLock™
• Foot Switch Glow Sticker• Hook-and-loop Pedalboard Pad• Online Warranty Registration Information Card
2
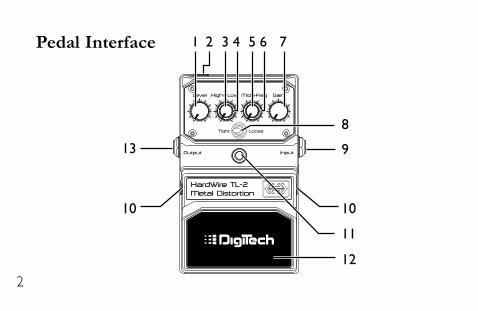
Pedal Interface
9
8
11
1 4 7
1010
13
12
32 65
3
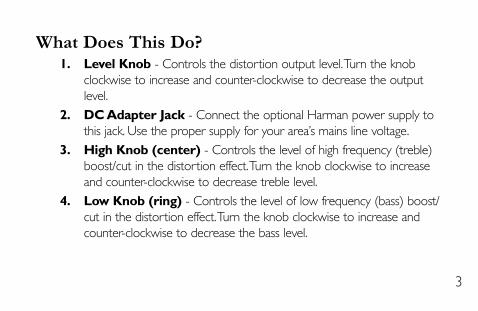
What Does This Do?1. Level Knob - Controls the distortion output level. Turn the knob
clockwise to increase and counter-clockwise to decrease the output level.
2. DC Adapter Jack - Connect the optional Harman power supply to this jack. Use the proper supply for your area’s mains line voltage.
3. High Knob (center) - Controls the level of high frequency (treble) boost/cut in the distortion effect. Turn the knob clockwise to increase and counter-clockwise to decrease treble level.
4. Low Knob (ring) - Controls the level of low frequency (bass) boost/cut in the distortion effect. Turn the knob clockwise to increase and counter-clockwise to decrease the bass level.
4
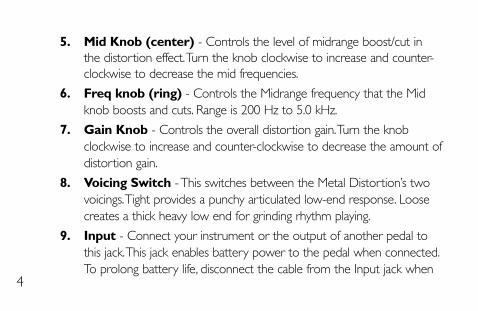
5. Mid Knob (center) - Controls the level of midrange boost/cut in the distortion effect. Turn the knob clockwise to increase and counter-clockwise to decrease the mid frequencies.
6. Freq knob (ring) - Controls the Midrange frequency that the Mid knob boosts and cuts. Range is 200 Hz to 5.0 kHz.
7. Gain Knob - Controls the overall distortion gain. Turn the knob clockwise to increase and counter-clockwise to decrease the amount of distortion gain.
8. Voicing Switch - This switches between the Metal Distortion’s two voicings. Tight provides a punchy articulated low-end response. Loose creates a thick heavy low end for grinding rhythm playing.
9. Input - Connect your instrument or the output of another pedal to this jack. This jack enables battery power to the pedal when connected. To prolong battery life, disconnect the cable from the Input jack when
5
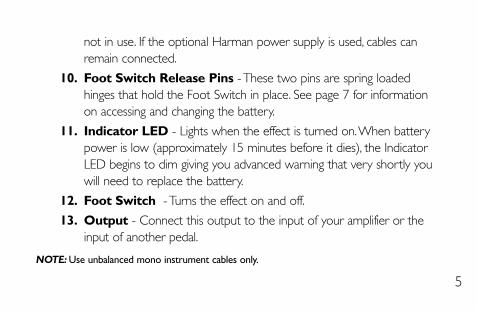
not in use. If the optional Harman power supply is used, cables can remain connected.
10. Foot Switch Release Pins - These two pins are spring loaded hinges that hold the Foot Switch in place. See page 7 for information on accessing and changing the battery.
11. Indicator LED - Lights when the effect is turned on. When battery power is low (approximately 15 minutes before it dies), the Indicator LED begins to dim giving you advanced warning that very shortly you will need to replace the battery.
12. Foot Switch - Turns the effect on and off.
13. Output - Connect this output to the input of your amplifier or the input of another pedal.
Note: Use unbalanced mono instrument cables only.
6
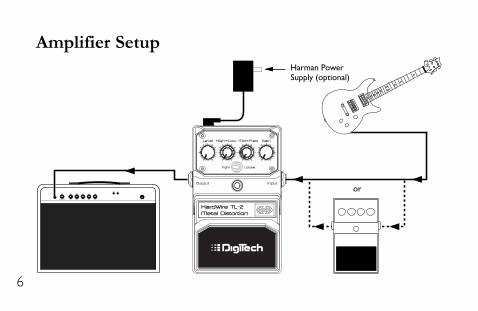
Amplifier SetupHarman PowerSupply (optional)
or
7
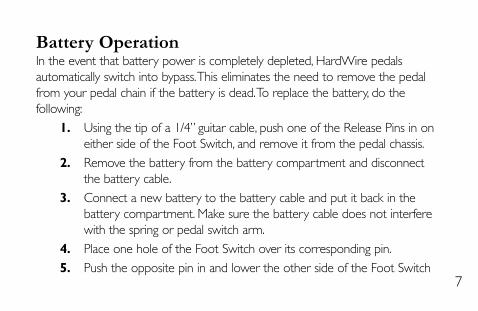
Battery OperationIn the event that battery power is completely depleted, HardWire pedals automatically switch into bypass. This eliminates the need to remove the pedal from your pedal chain if the battery is dead. To replace the battery, do the following:
1. Using the tip of a 1/4” guitar cable, push one of the Release Pins in on either side of the Foot Switch, and remove it from the pedal chassis.
2. Remove the battery from the battery compartment and disconnect the battery cable.
3. Connect a new battery to the battery cable and put it back in the battery compartment. Make sure the battery cable does not interfere with the spring or pedal switch arm.
4. Place one hole of the Foot Switch over its corresponding pin.
5. Push the opposite pin in and lower the other side of the Foot Switch
8
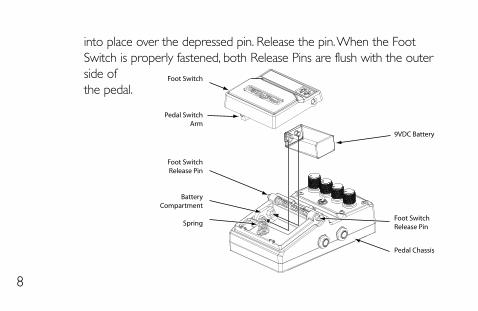
into place over the depressed pin. Release the pin. When the Foot Switch is properly fastened, both Release Pins are flush with the outer side of the pedal.
Foot Switch
Pedal SwitchArm
Foot SwitchRelease Pin
9VDC Battery
Foot SwitchRelease Pin
Pedal Chassis
BatteryCompartment
Spring
9
Performance AccessoriesThe performance accessories make integrating a HardWire pedal into any pedal board a snap. The following accessories are included:
• Hook-and-loop Pedalboard Pad (designed to attach to the surfaces found on most commercial pedalboards)
• Foot Switch Glow Sticker (easily visible on dark stages)• StompLock™ (keeps your settings where you want them)

10
Hook-and-loop Pedalboard PadTo attach the Pedalboard Pad, do the following:
1. Peel off the existing rubber skid pad from the bottom of the pedal.
2. Peel the adhesive protector from the back of the Pedalboard Pad.
3. Apply the Pedalboard Pad to the bottom of the pedal.
11
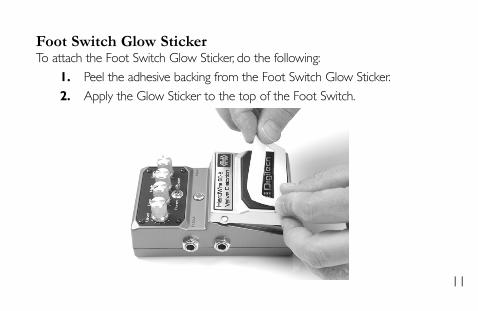
Foot Switch Glow StickerTo attach the Foot Switch Glow Sticker, do the following:
1. Peel the adhesive backing from the Foot Switch Glow Sticker.
2. Apply the Glow Sticker to the top of the Foot Switch.
12
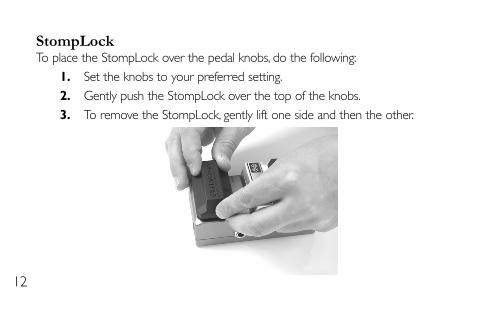
StompLockTo place the StompLock over the pedal knobs, do the following:
1. Set the knobs to your preferred setting.
2. Gently push the StompLock over the top of the knobs.
3. To remove the StompLock, gently lift one side and then the other.
13
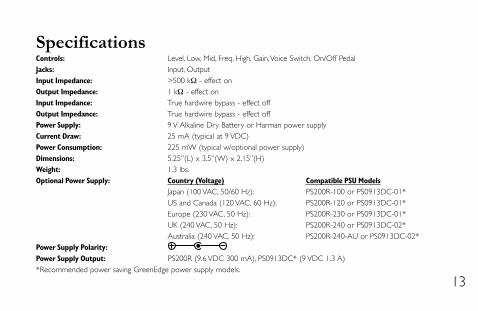
SpecificationsControls: Level, Low, Mid, Freq, High, Gain, Voice Switch, On/Off PedalJacks: Input, OutputInput Impedance: >500 kΩ - effect onOutput Impedance: 1 kΩ - effect onInput Impedance: True hardwire bypass - effect offOutput Impedance: True hardwire bypass - effect offPower Supply: 9 V Alkaline Dry Battery or Harman power supplyCurrent Draw: 25 mA (typical at 9 VDC)Power Consumption: 225 mW (typical w/optional power supply)Dimensions: 5.25”(L) x 3.5”(W) x 2.15”(H)Weight: 1.3 lbs.Optional Power Supply: Country (Voltage) Compatible PSU Models Japan (100 VAC, 50/60 Hz): PS200R-100 or PS0913DC-01* US and Canada (120 VAC, 60 Hz): PS200R-120 or PS0913DC-01* Europe (230 VAC, 50 Hz): PS200R-230 or PS0913DC-01* UK (240 VAC, 50 Hz): PS200R-240 or PS0913DC-02* Australia (240 VAC, 50 Hz): PS200R-240-AU or PS0913DC-02*Power Supply Polarity: Power Supply Output: PS200R (9.6 VDC 300 mA), PS0913DC* (9 VDC 1.3 A)*Recommended power saving GreenEdge power supply models.


8760 South Sandy ParkwaySandy, Utah 84070PH (801) 566-8800
FAX (801) 566-7005
DigiTech® and HardWire® are registered trademarks of Harman
Designed in the USA
Copyright - HarmanPrinted in China
HardWire TL-2Owners Manual 5024342-B
Please visit our website at:
www.digitech.com


