50
| Date post: | 09-Jan-2017 |
| Category: |
Services |
| Upload: | nerissa-marcos |
| View: | 401 times |
| Download: | 0 times |

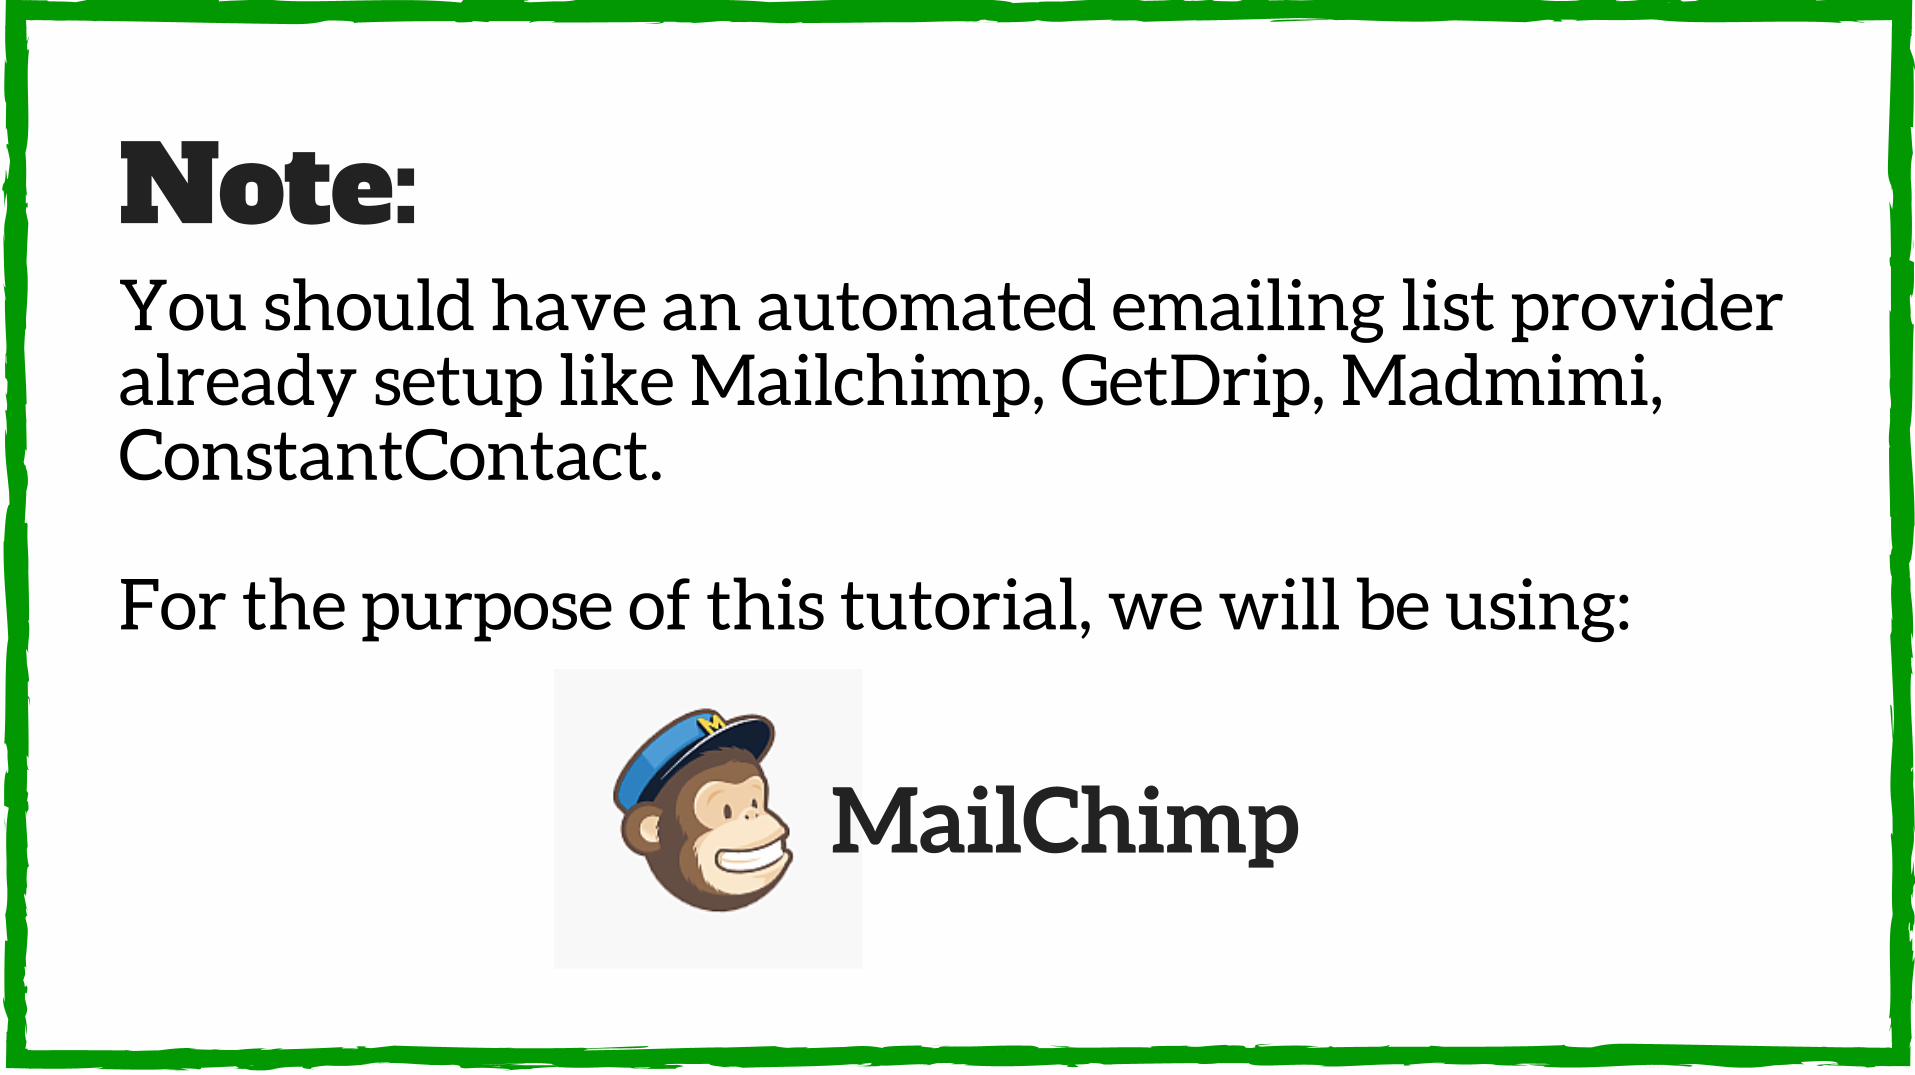
You should have an automated emailing list provideralready setup like Mailchimp, GetDrip, Madmimi,ConstantContact.
For the purpose of this tutorial, we will be using:
Note:
MailChimp
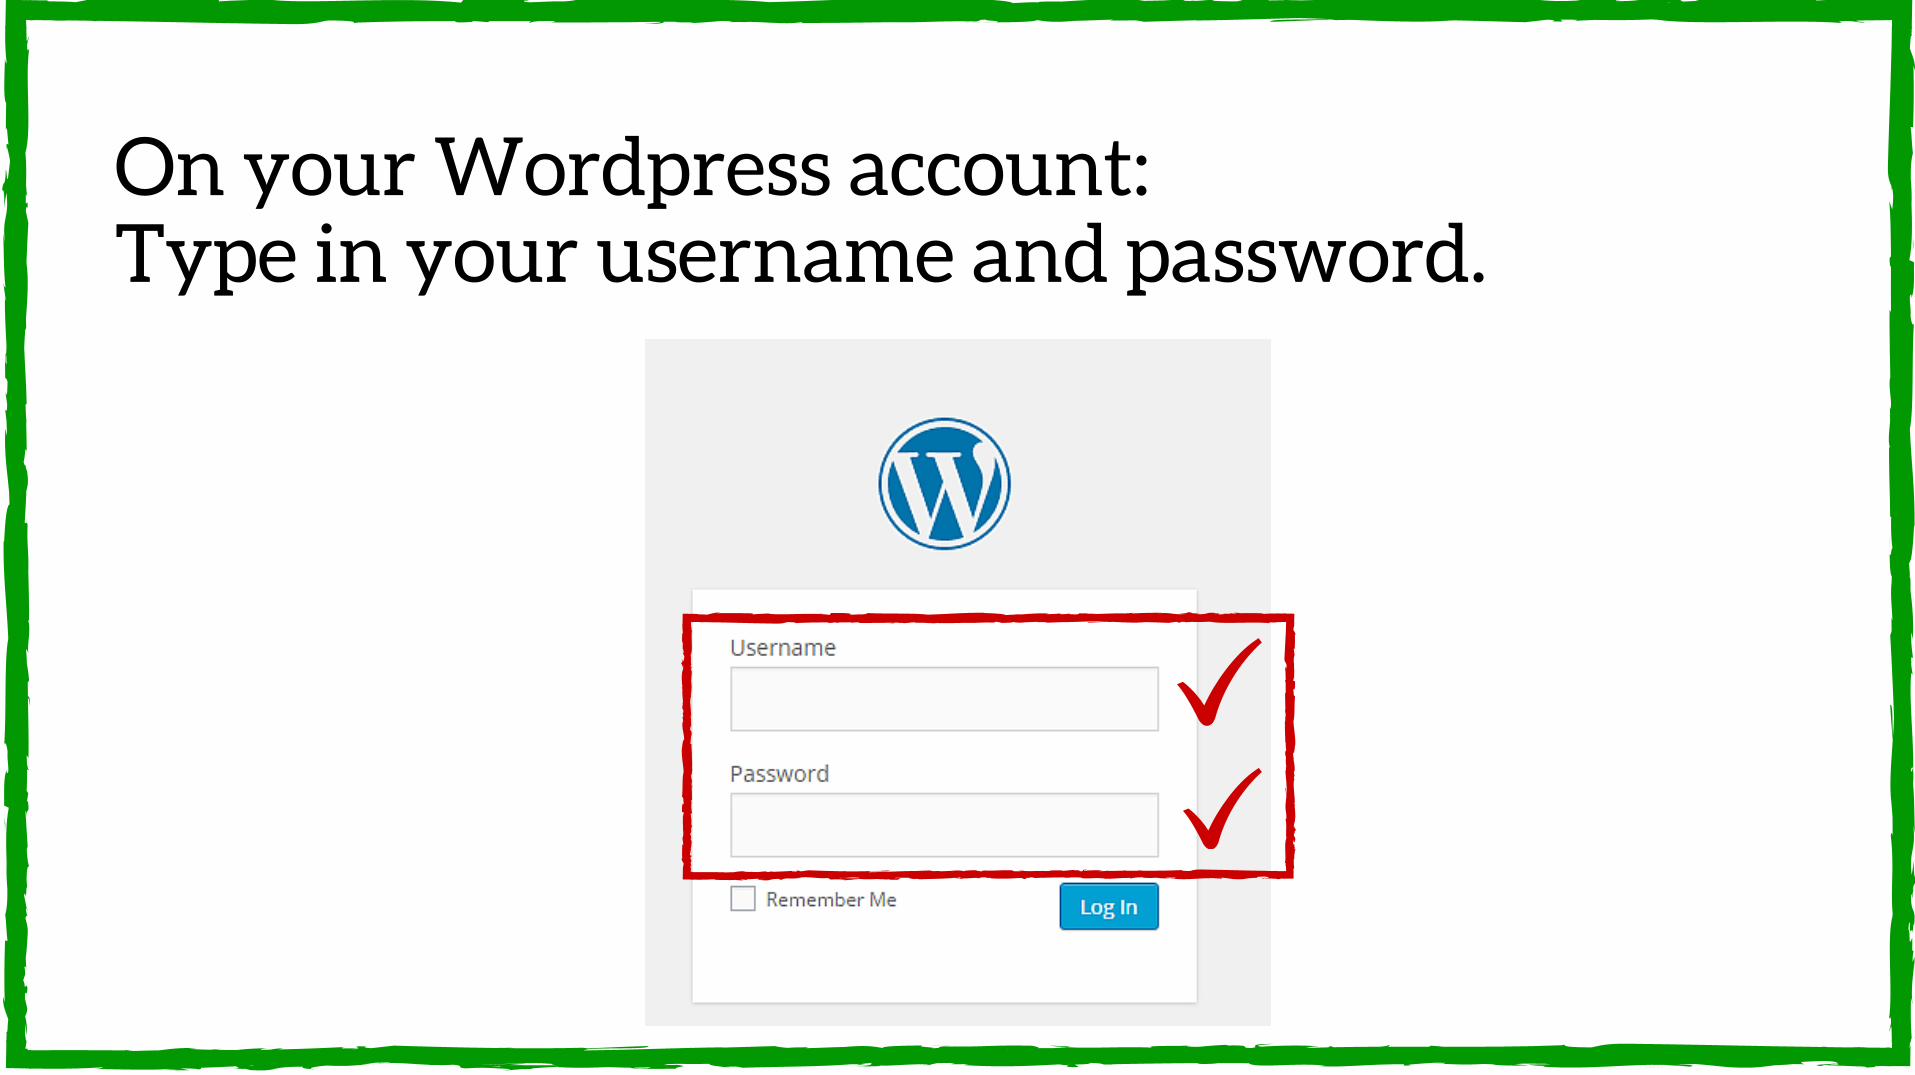
On your Wordpress account:Type in your username and password.
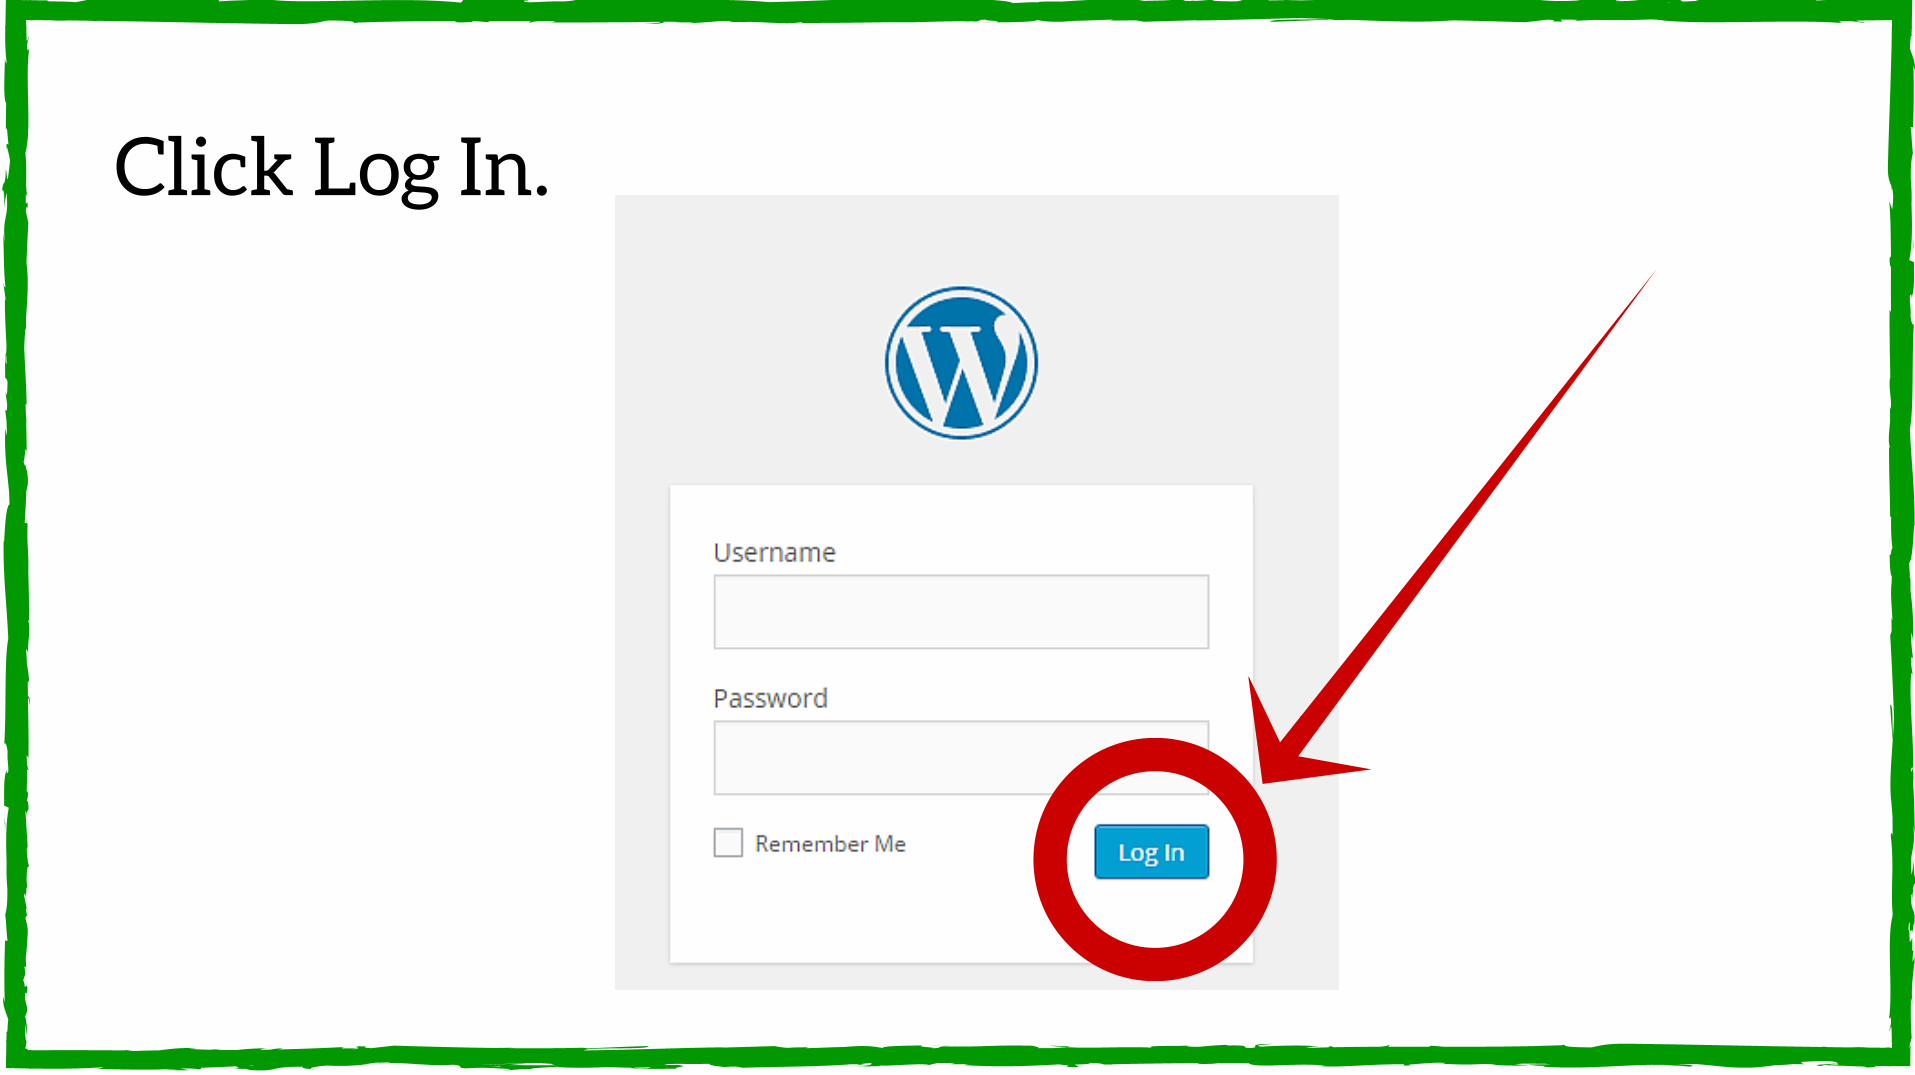
Click Log In.
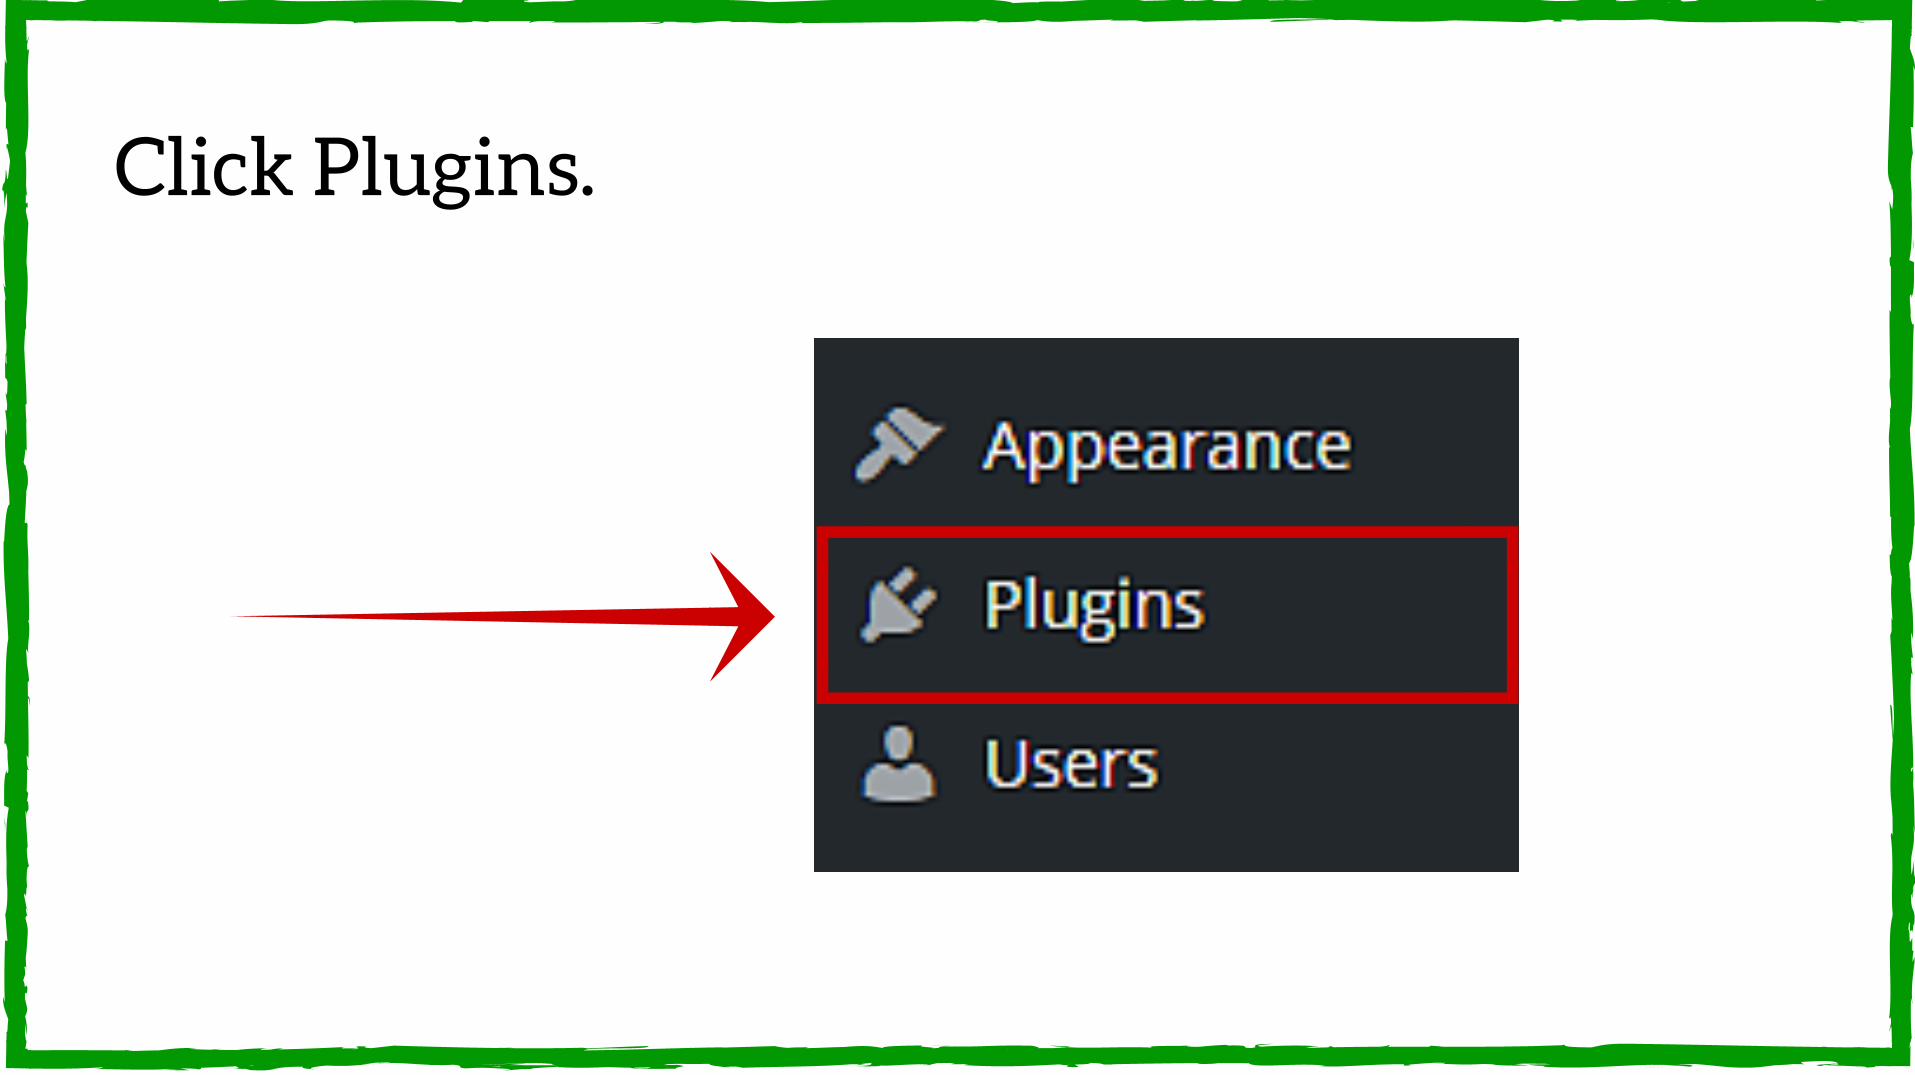
Click Plugins.
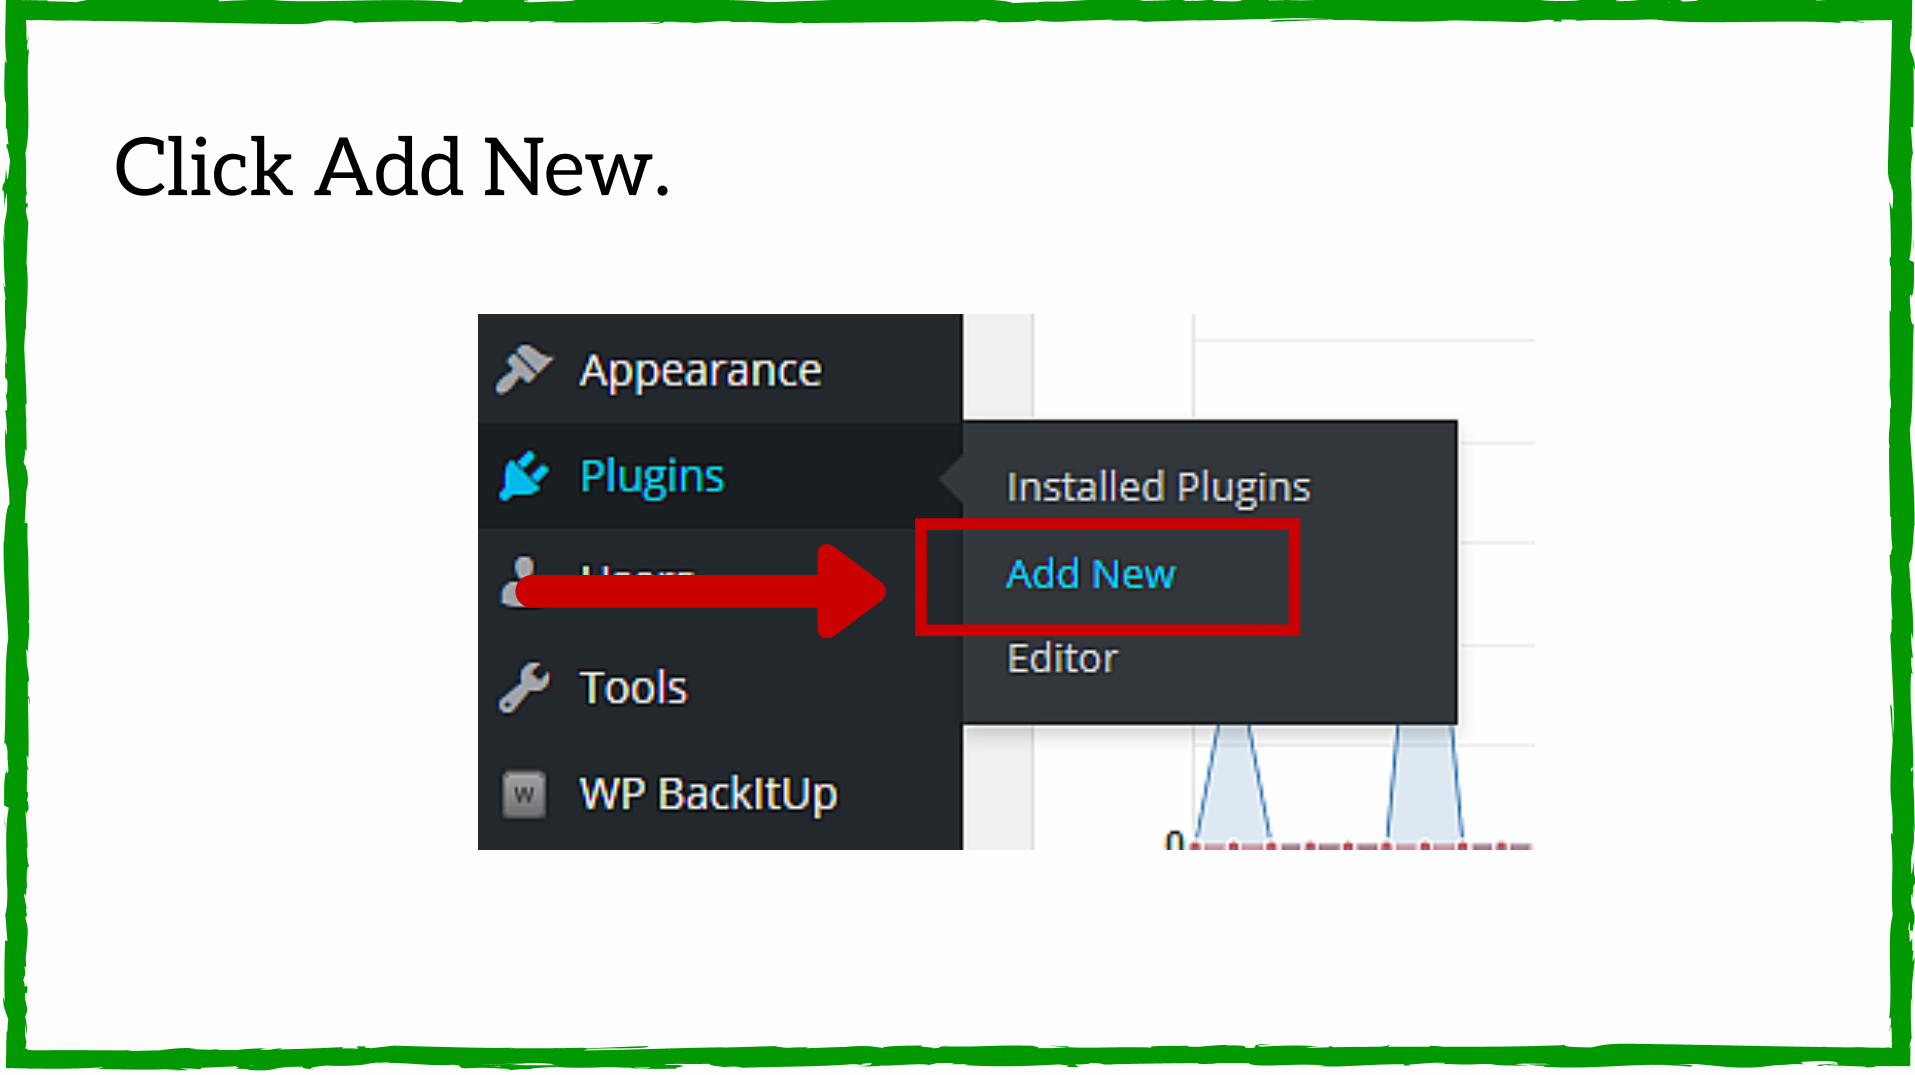
Click Add New.
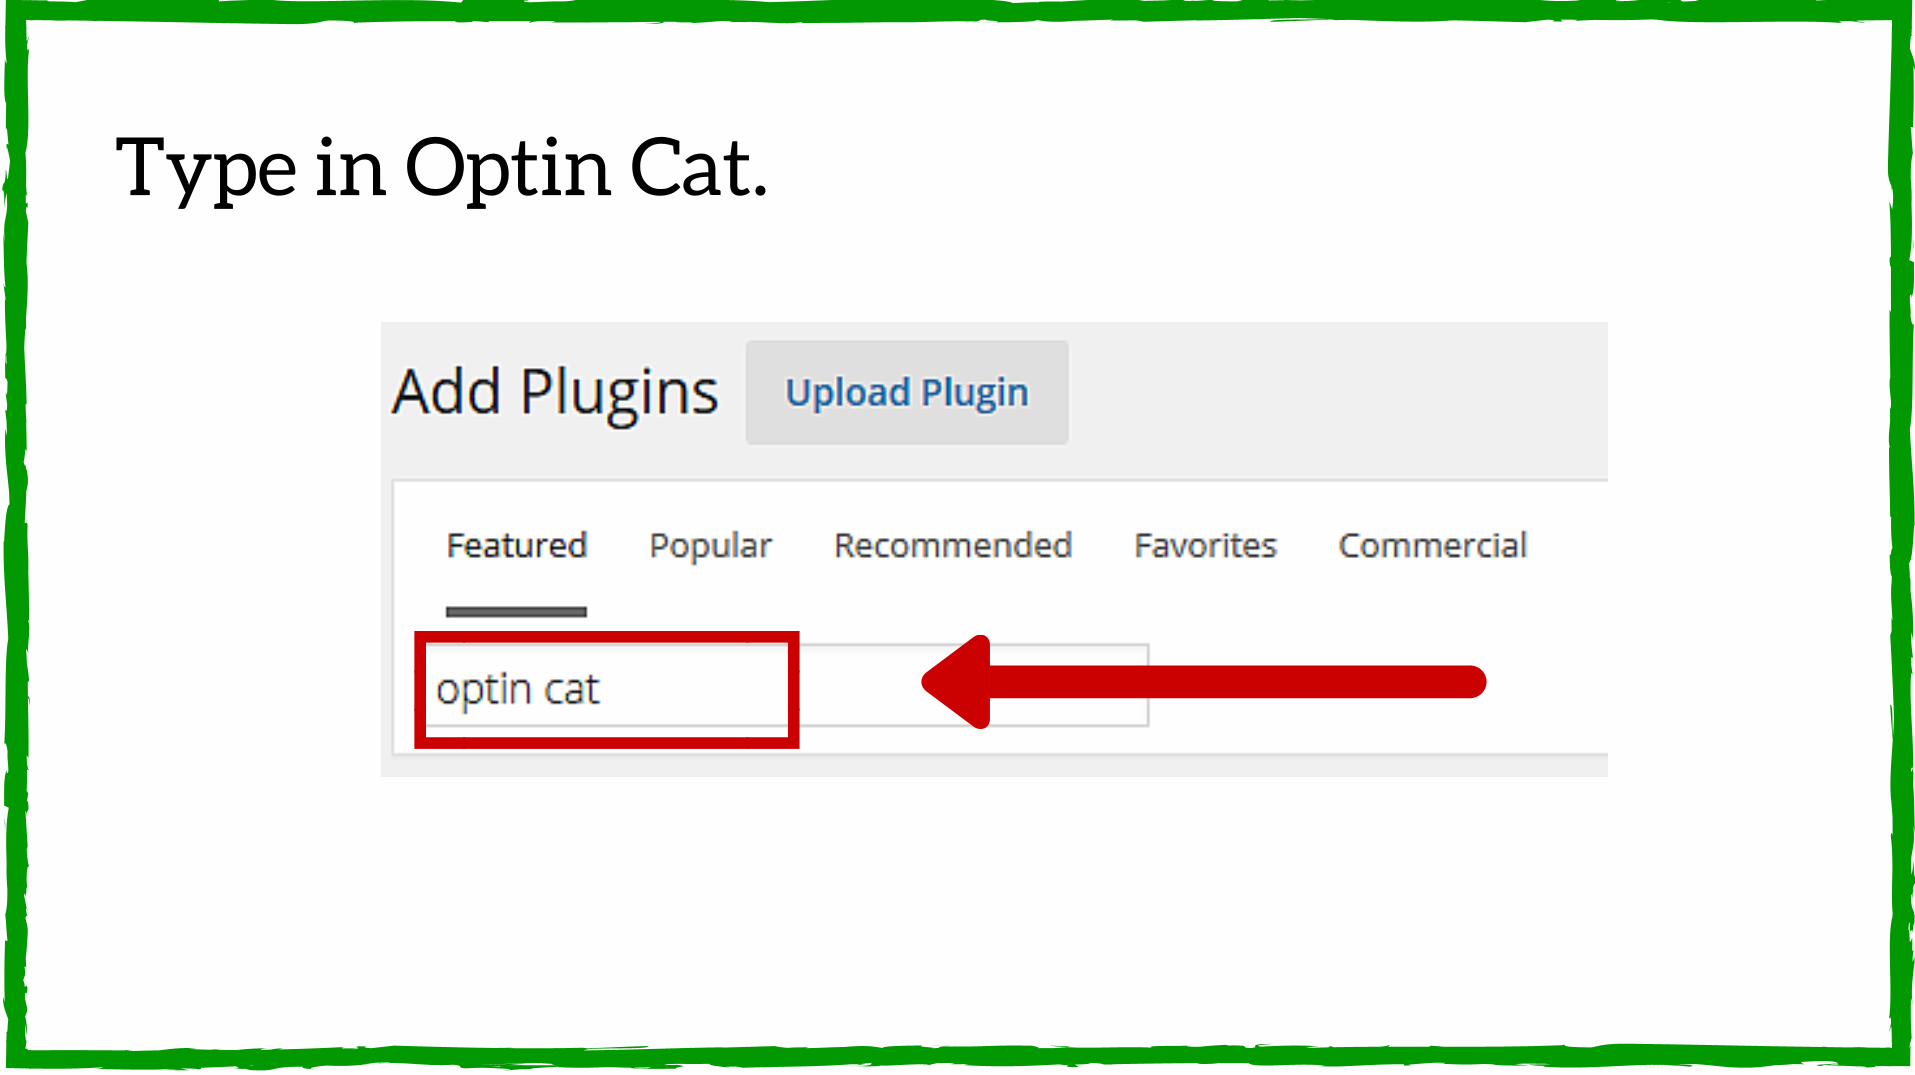
Type in Optin Cat.
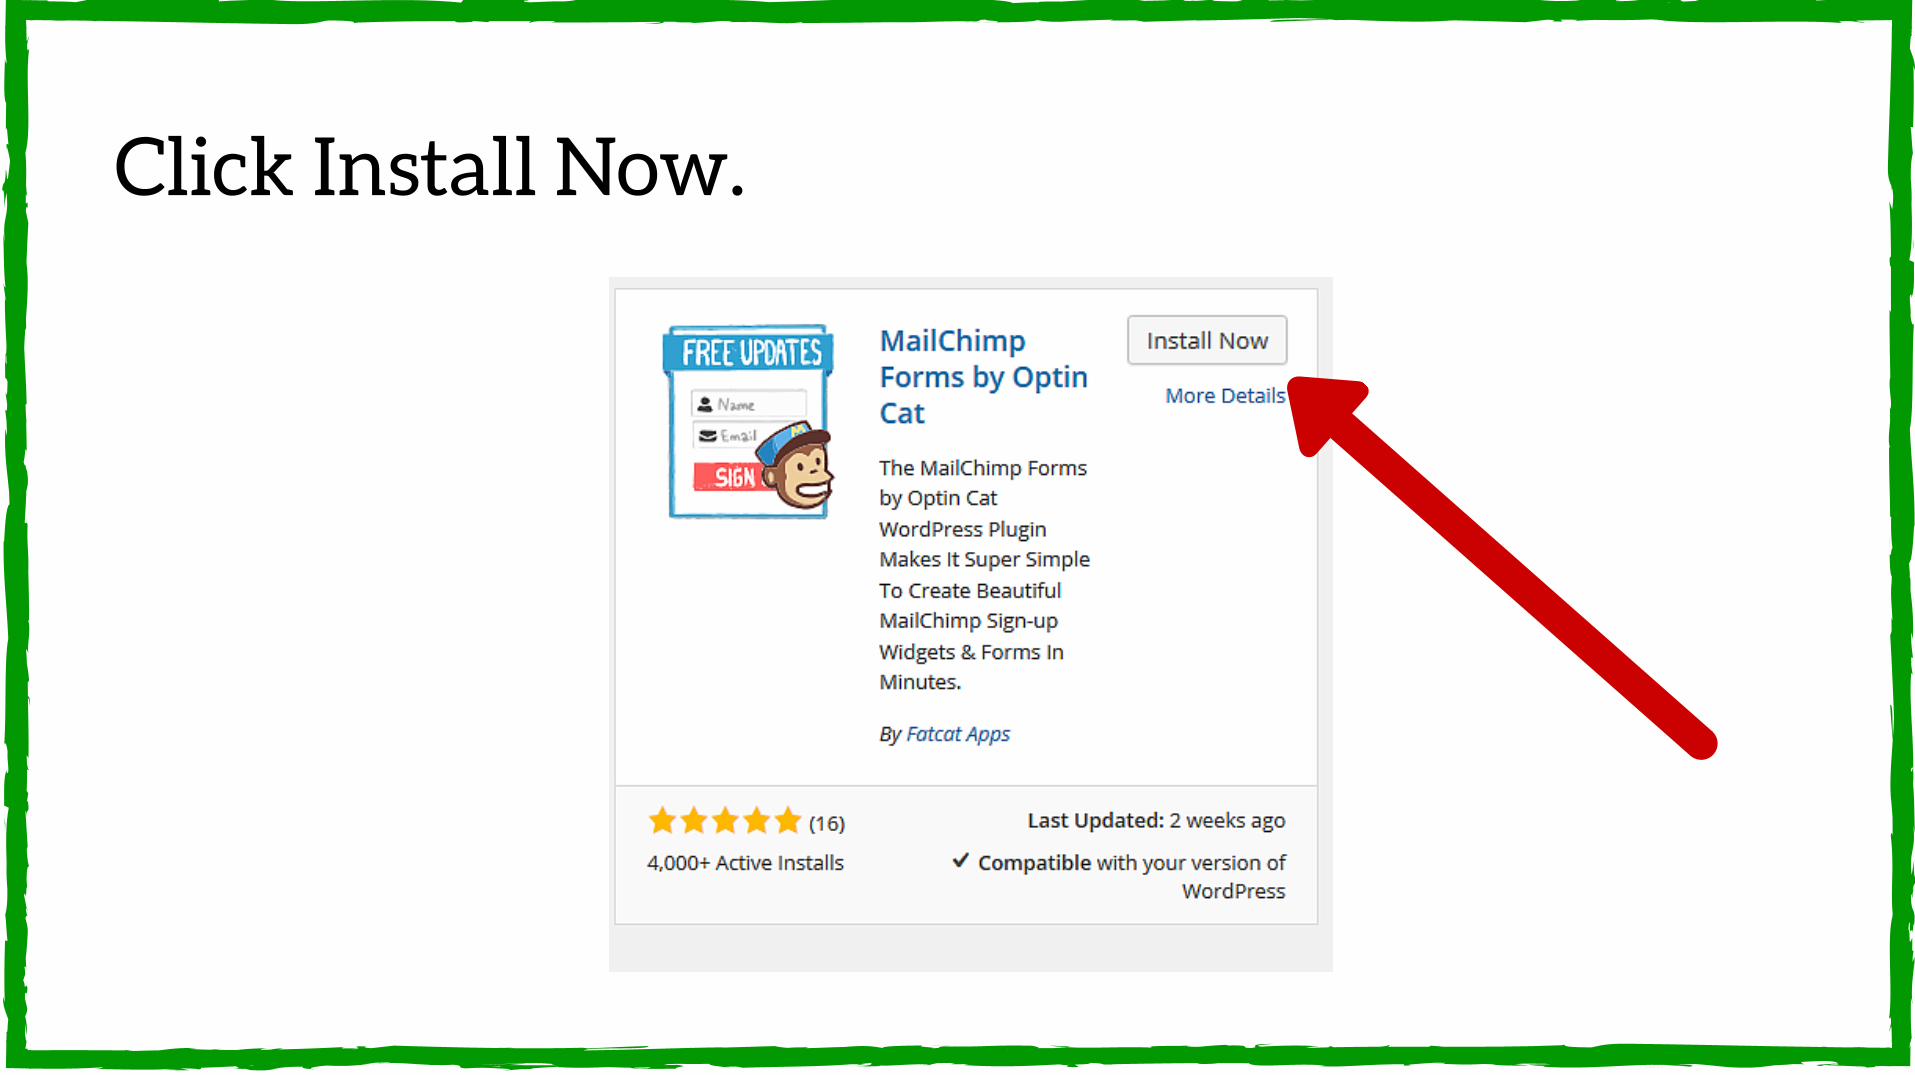
Click Install Now.
Click the Activate button and update the settings.
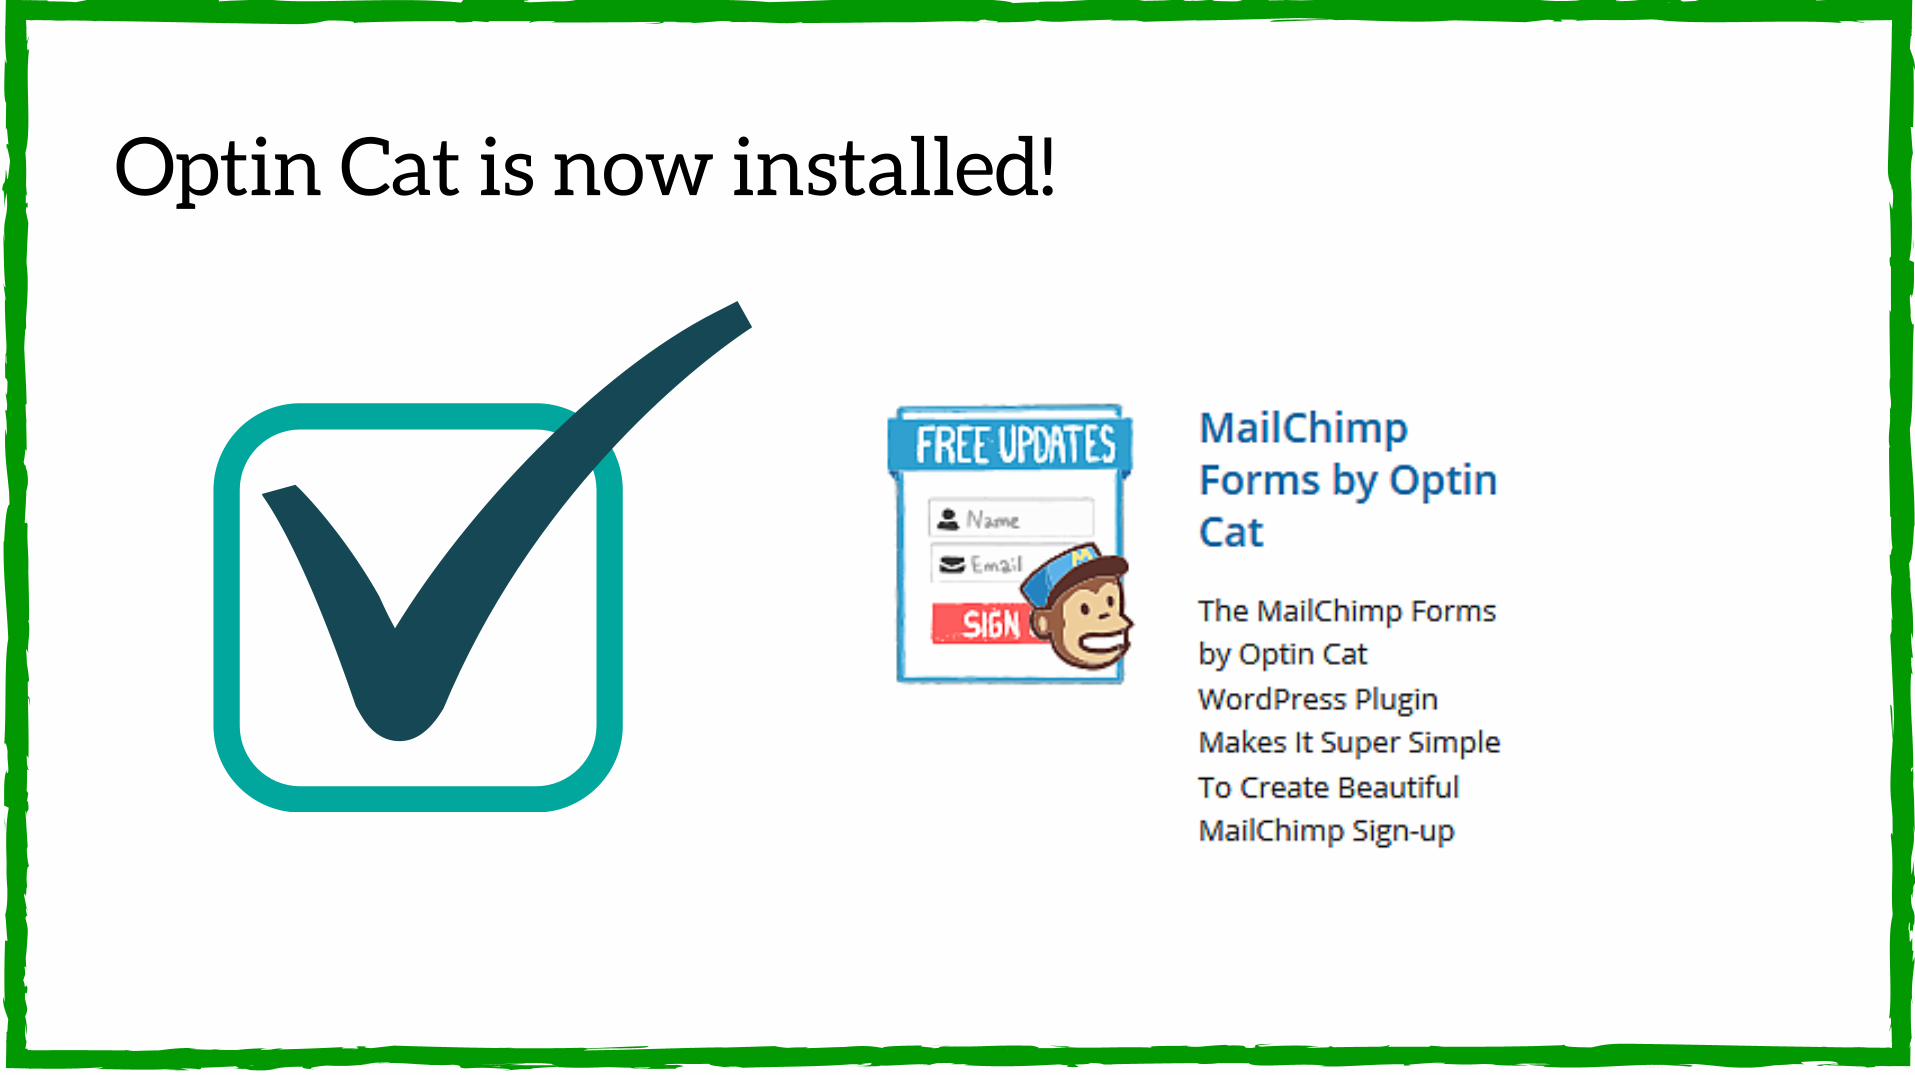
Optin Cat is now installed!
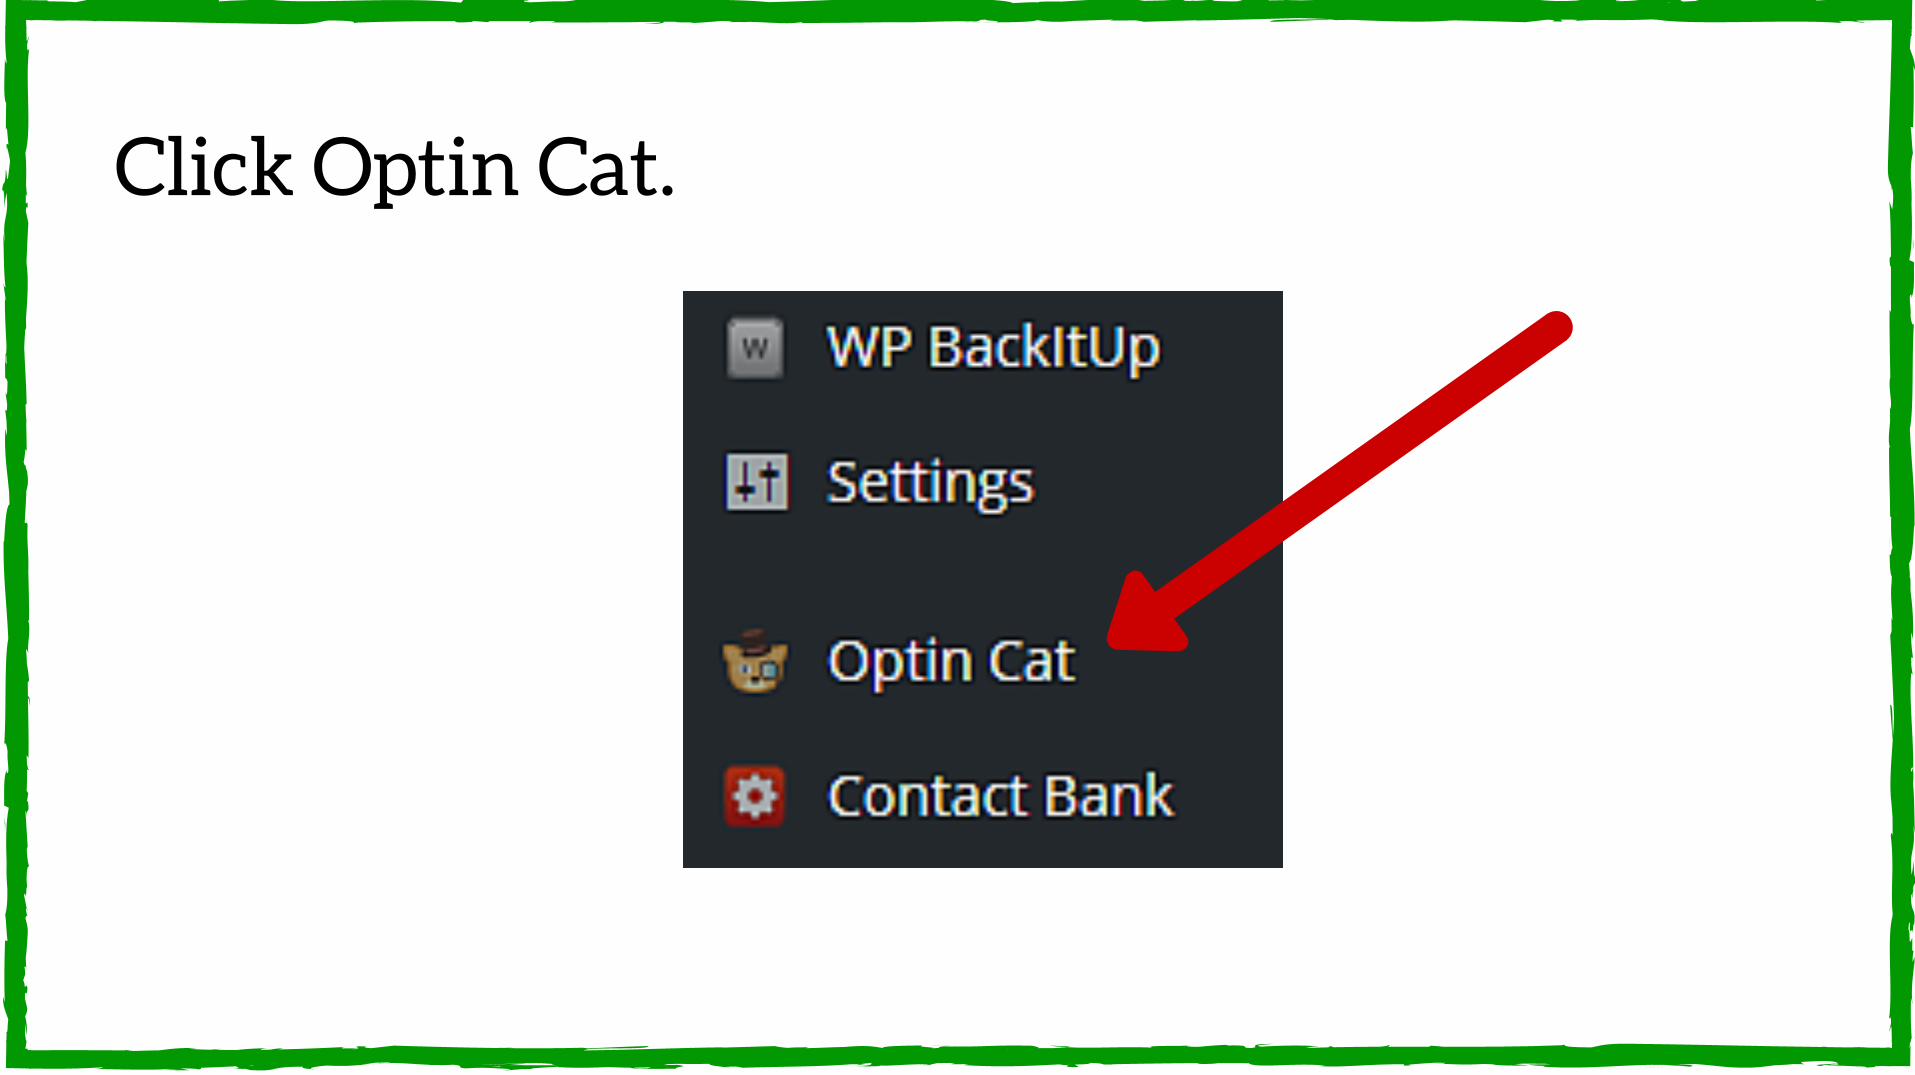
Click Optin Cat.

Click Add New.
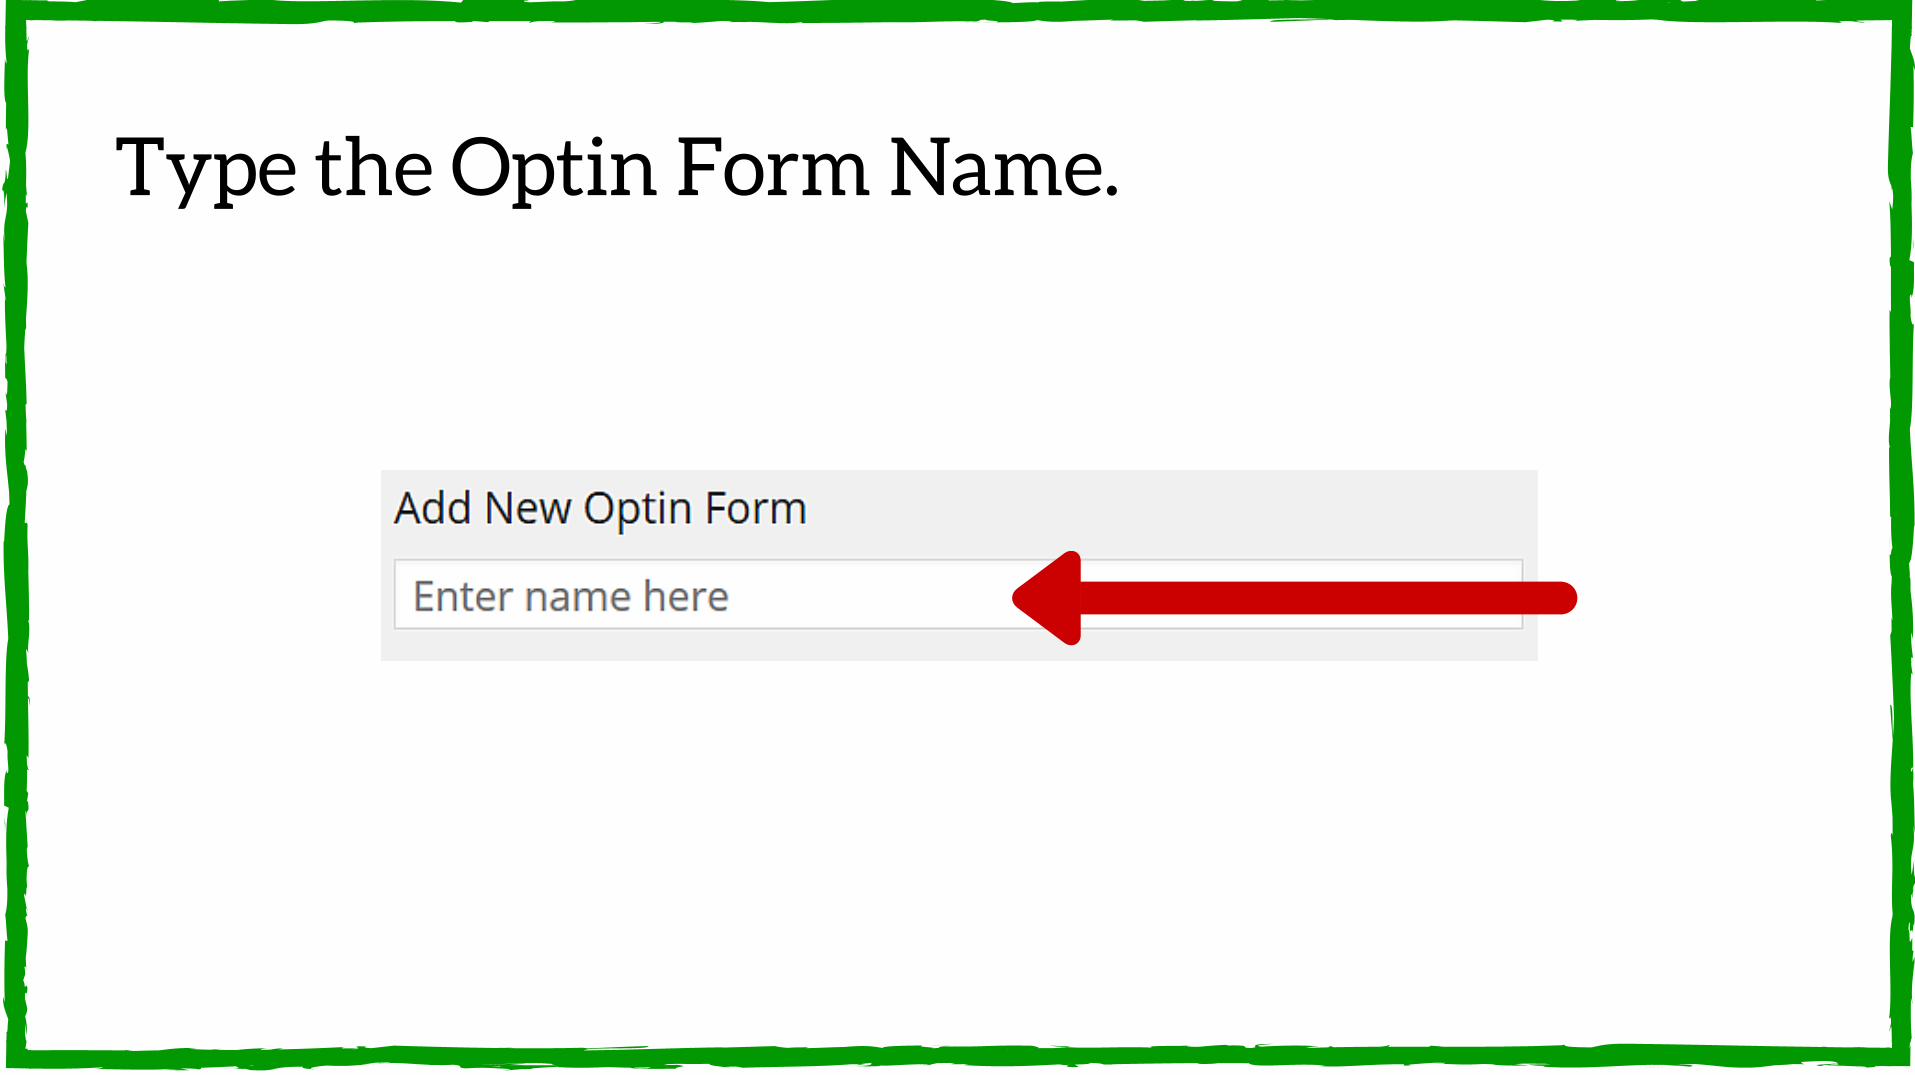
Type the Optin Form Name.
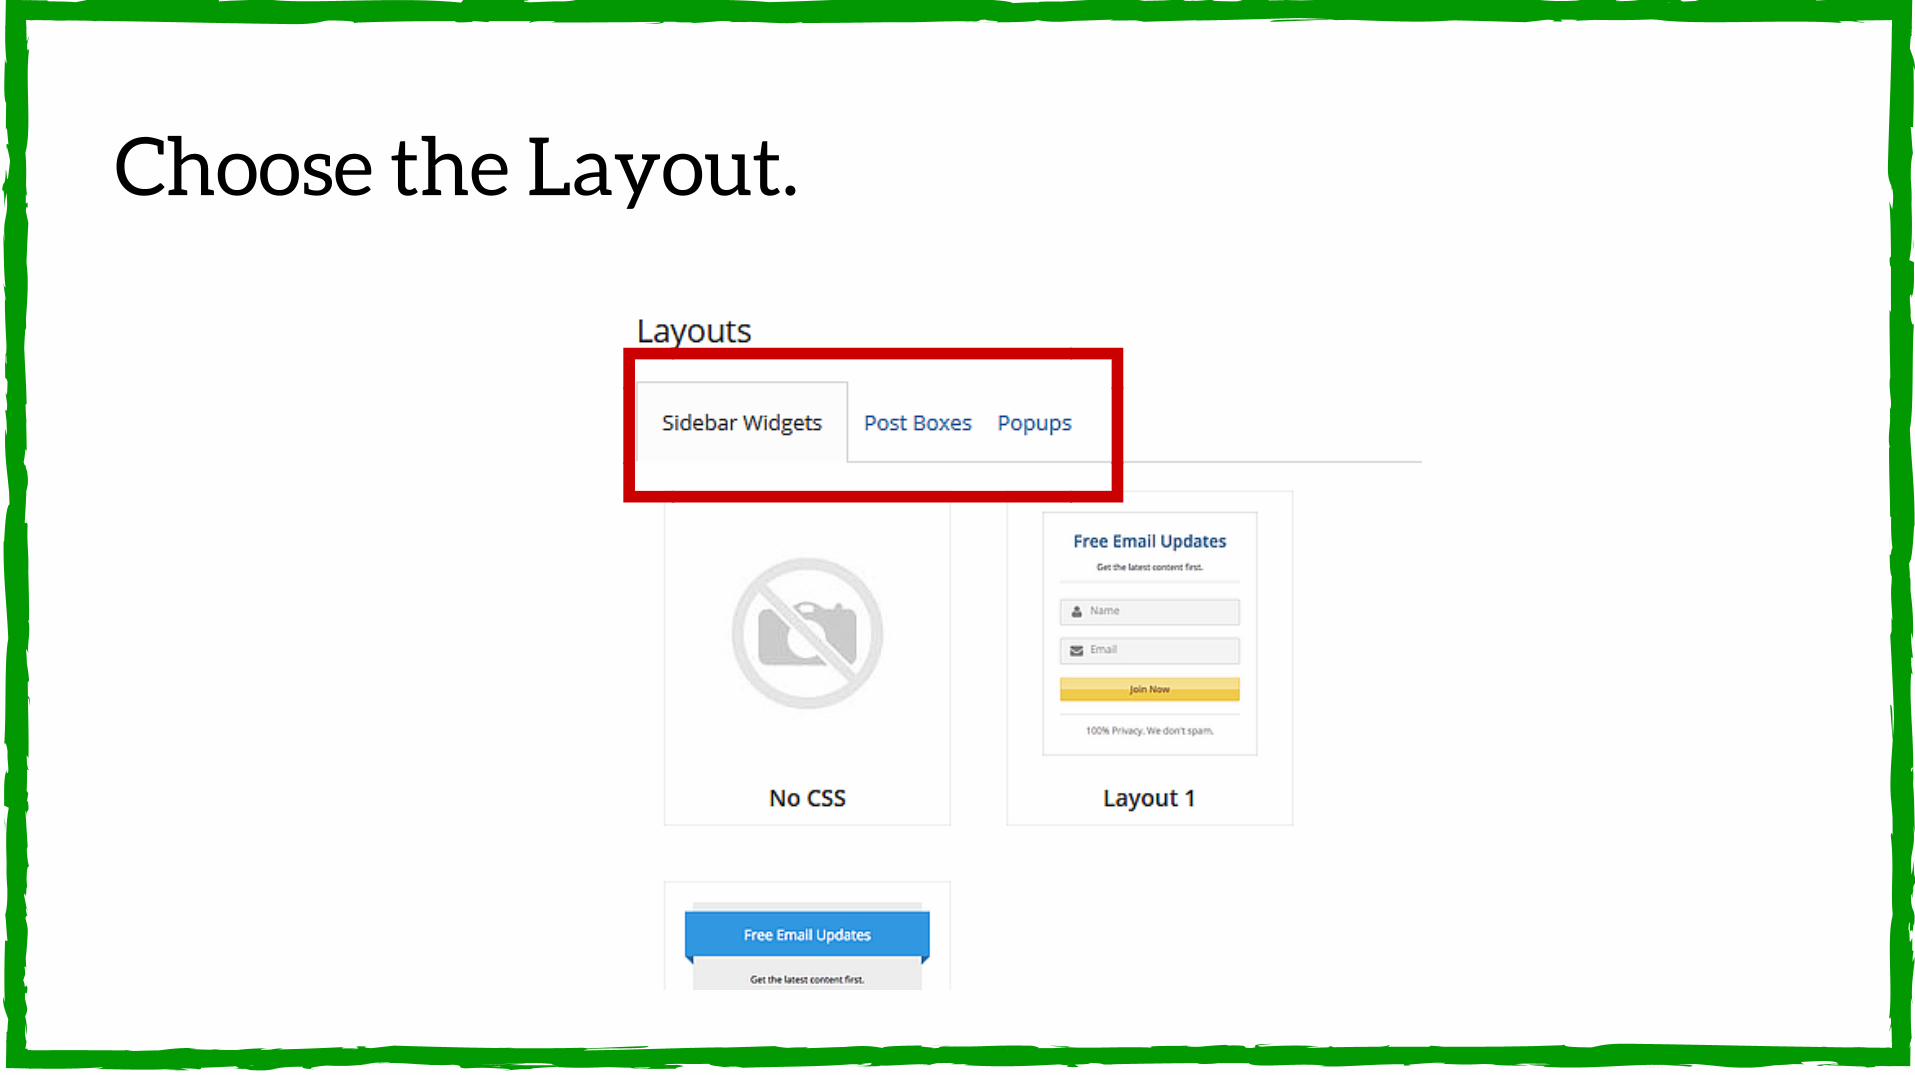
Choose the Layout.
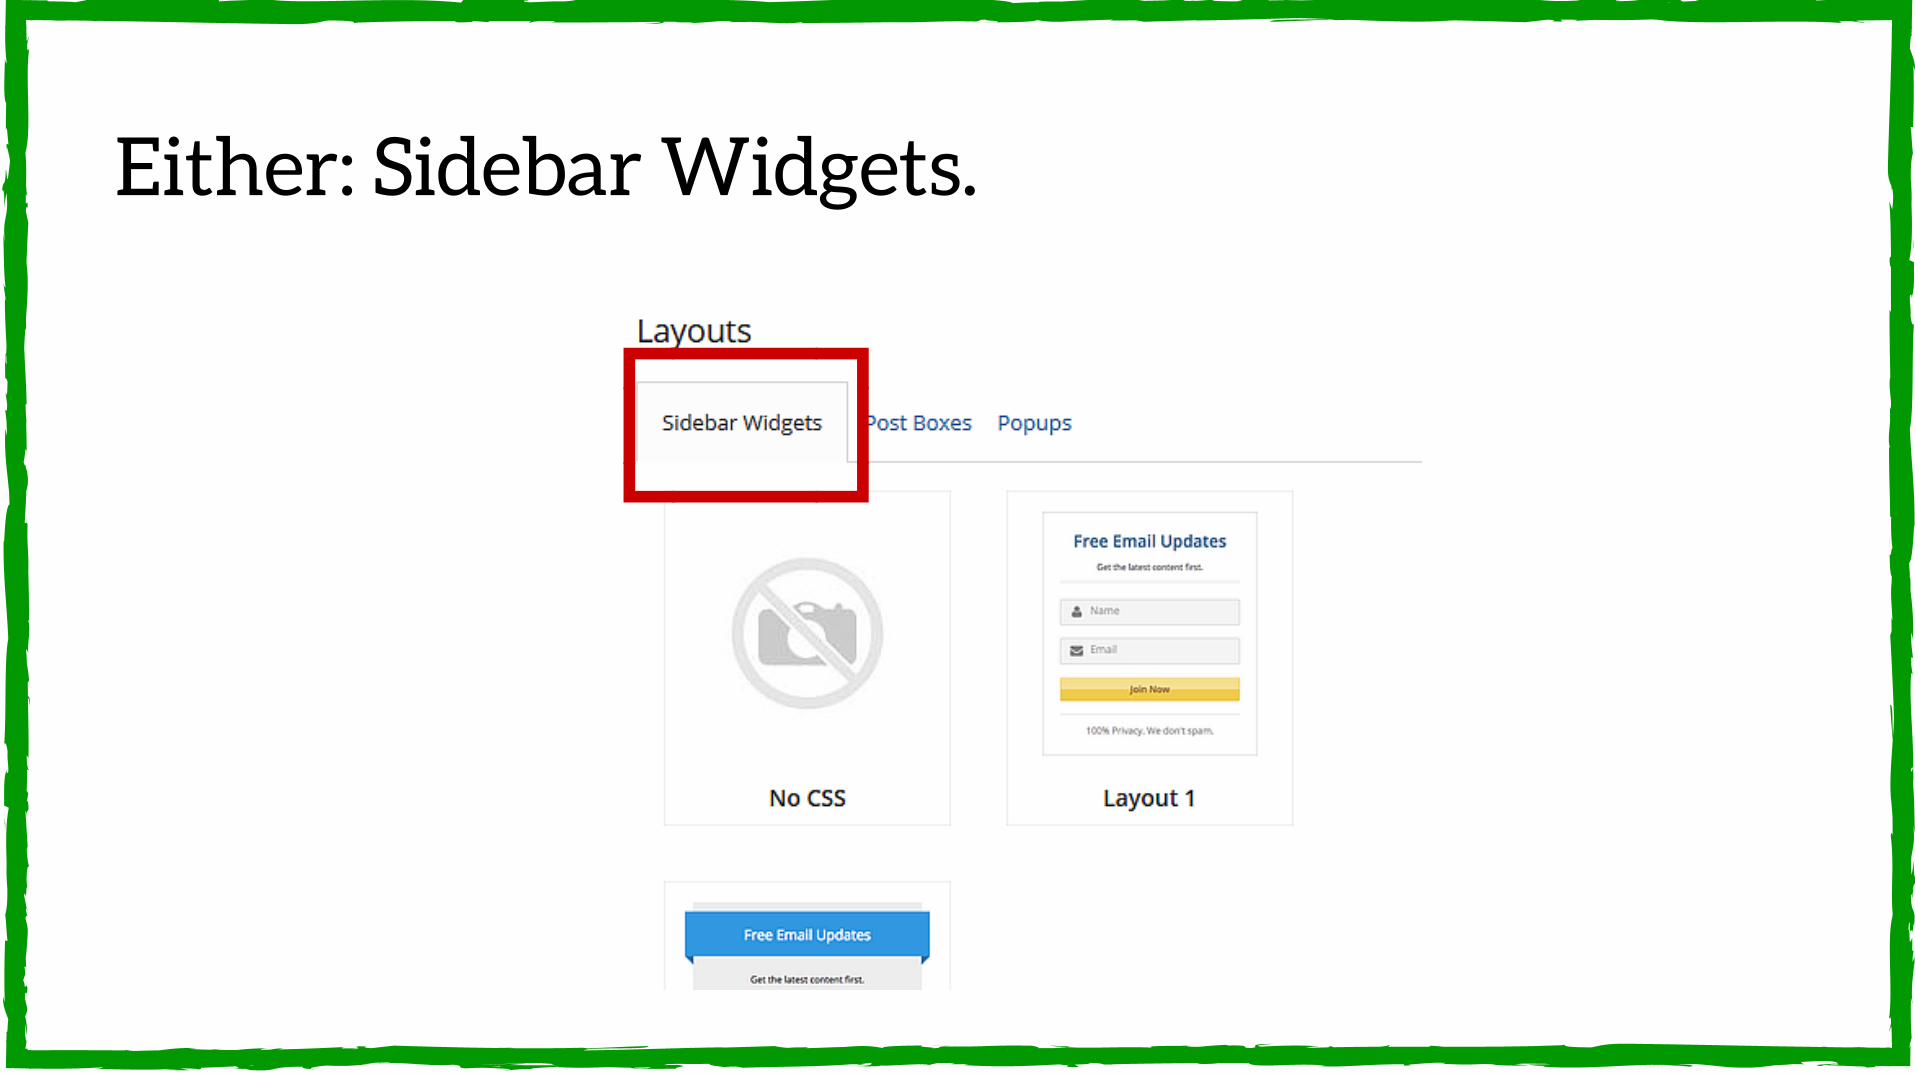
Either: Sidebar Widgets.
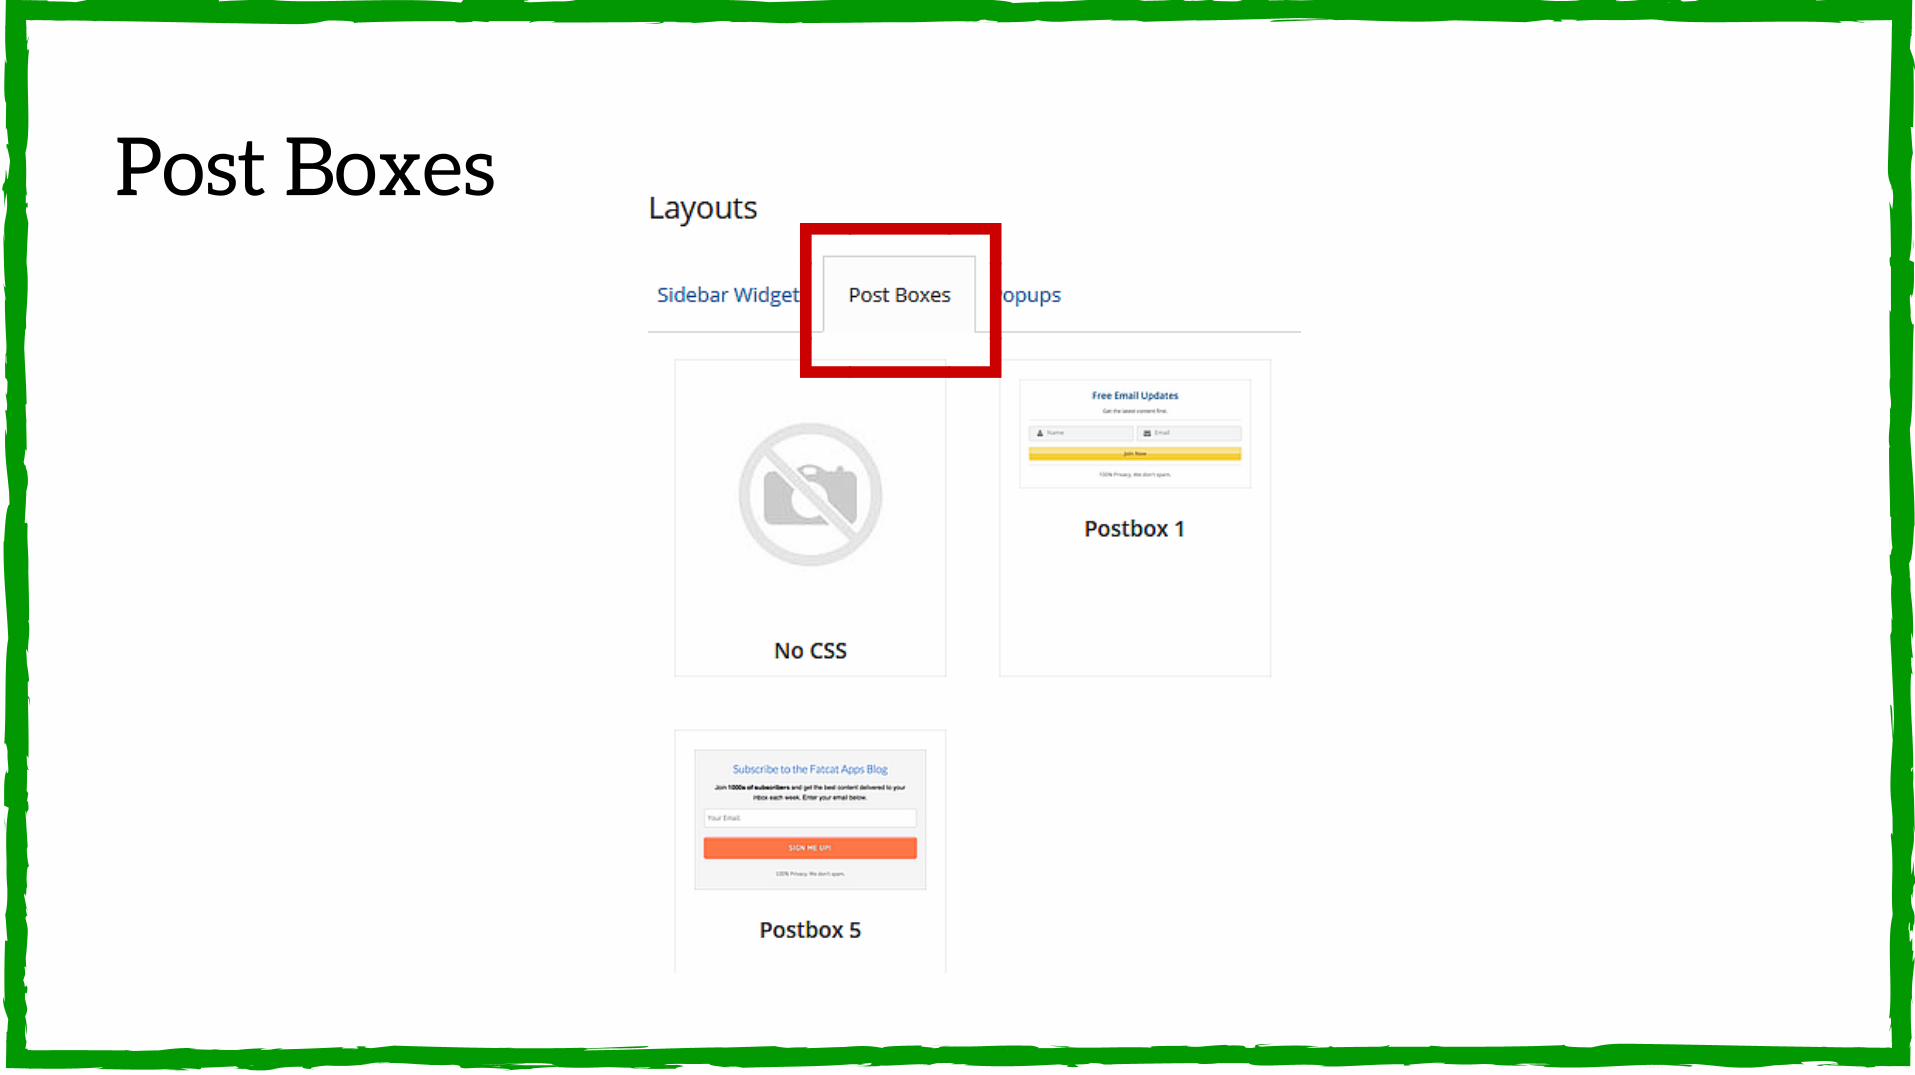
Post Boxes
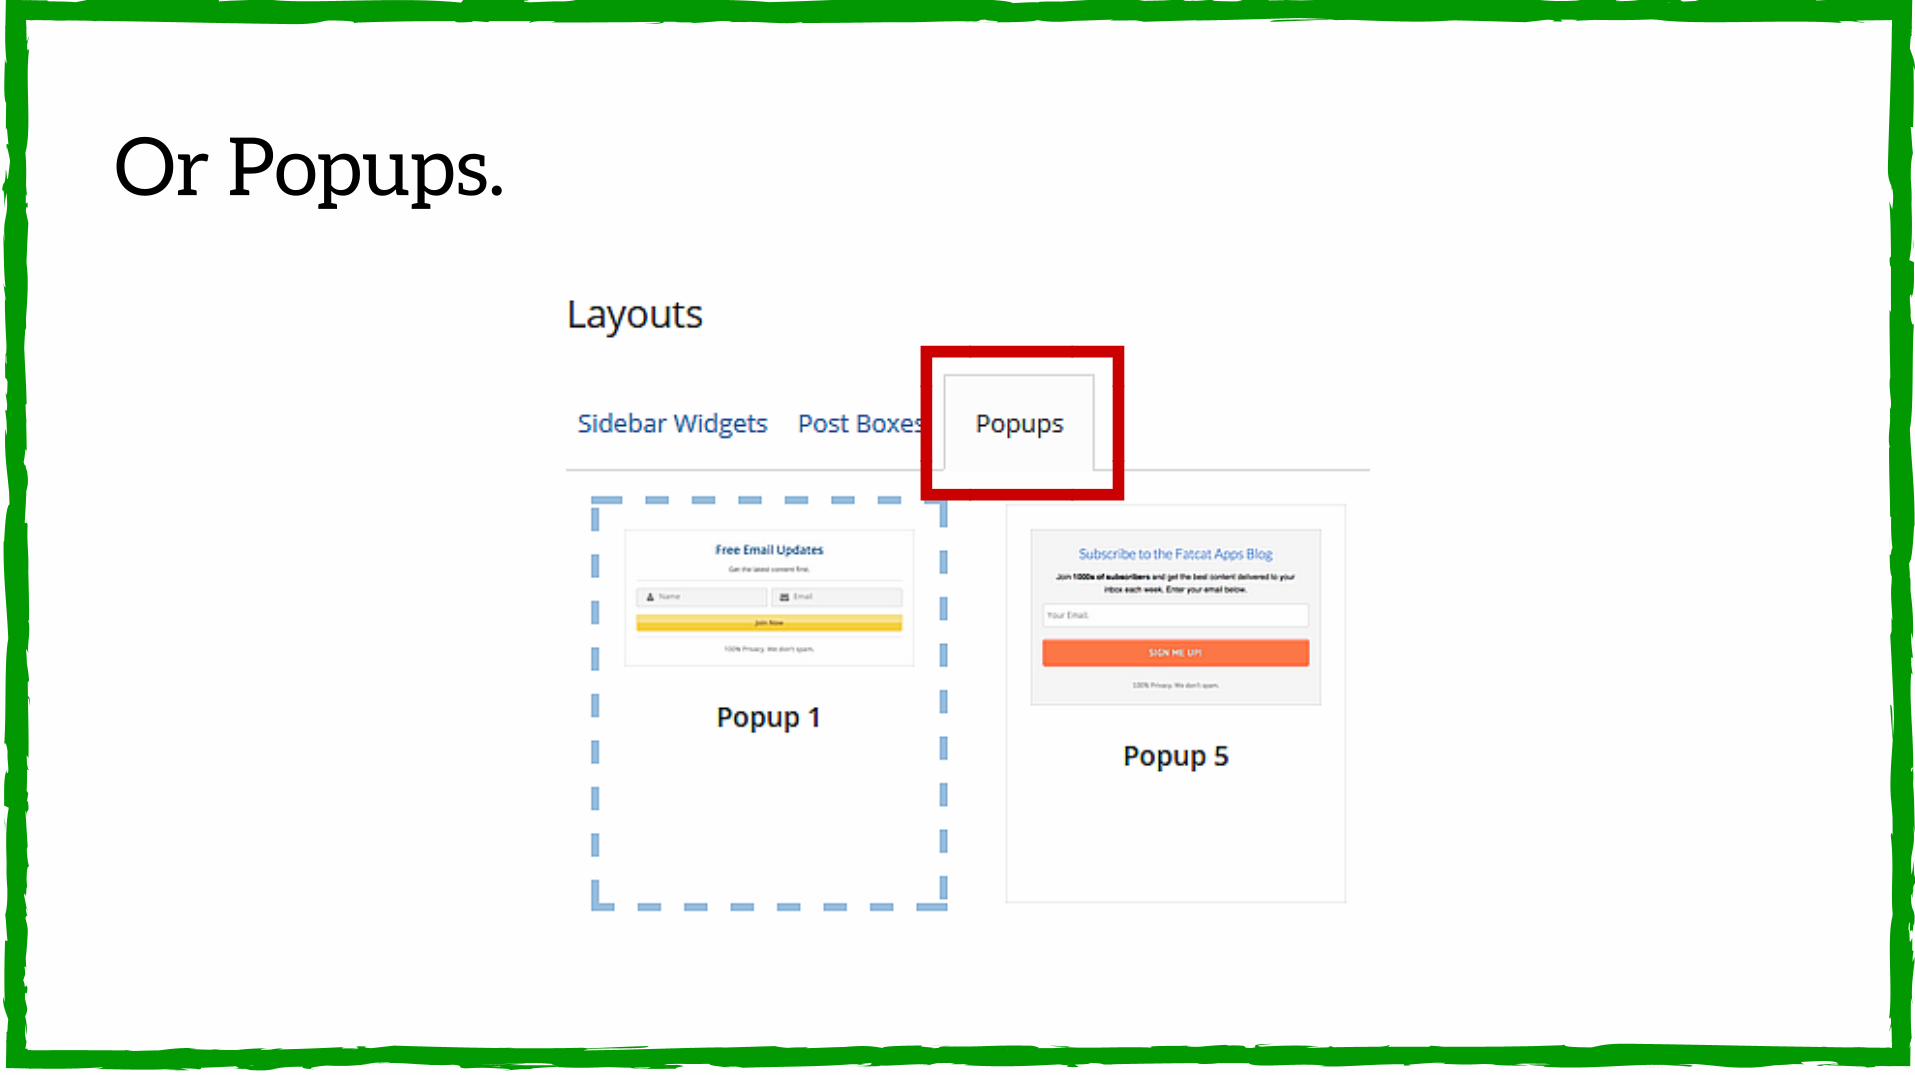
Or Popups.

For this tutorial, we'll be using Post Boxes.
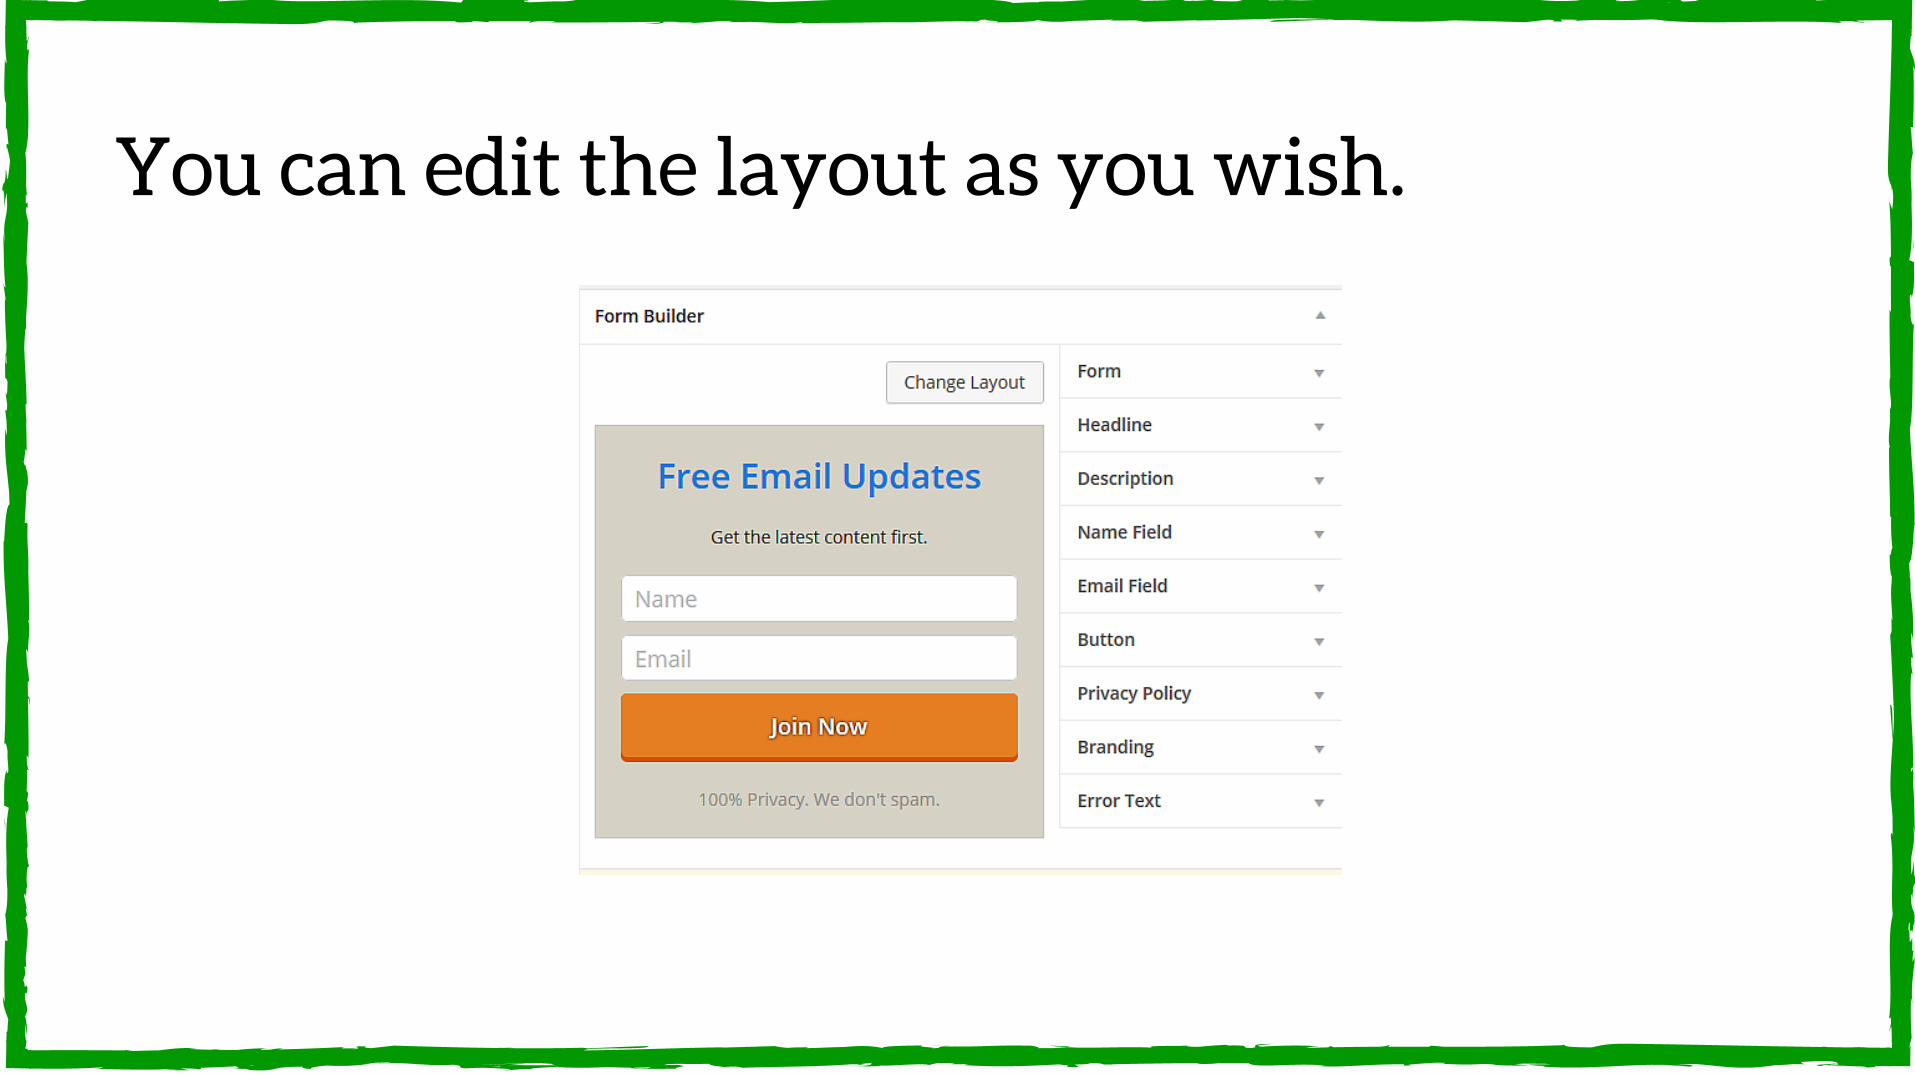
You can edit the layout as you wish.

Change the for background color and border.

Type in the headline copy.
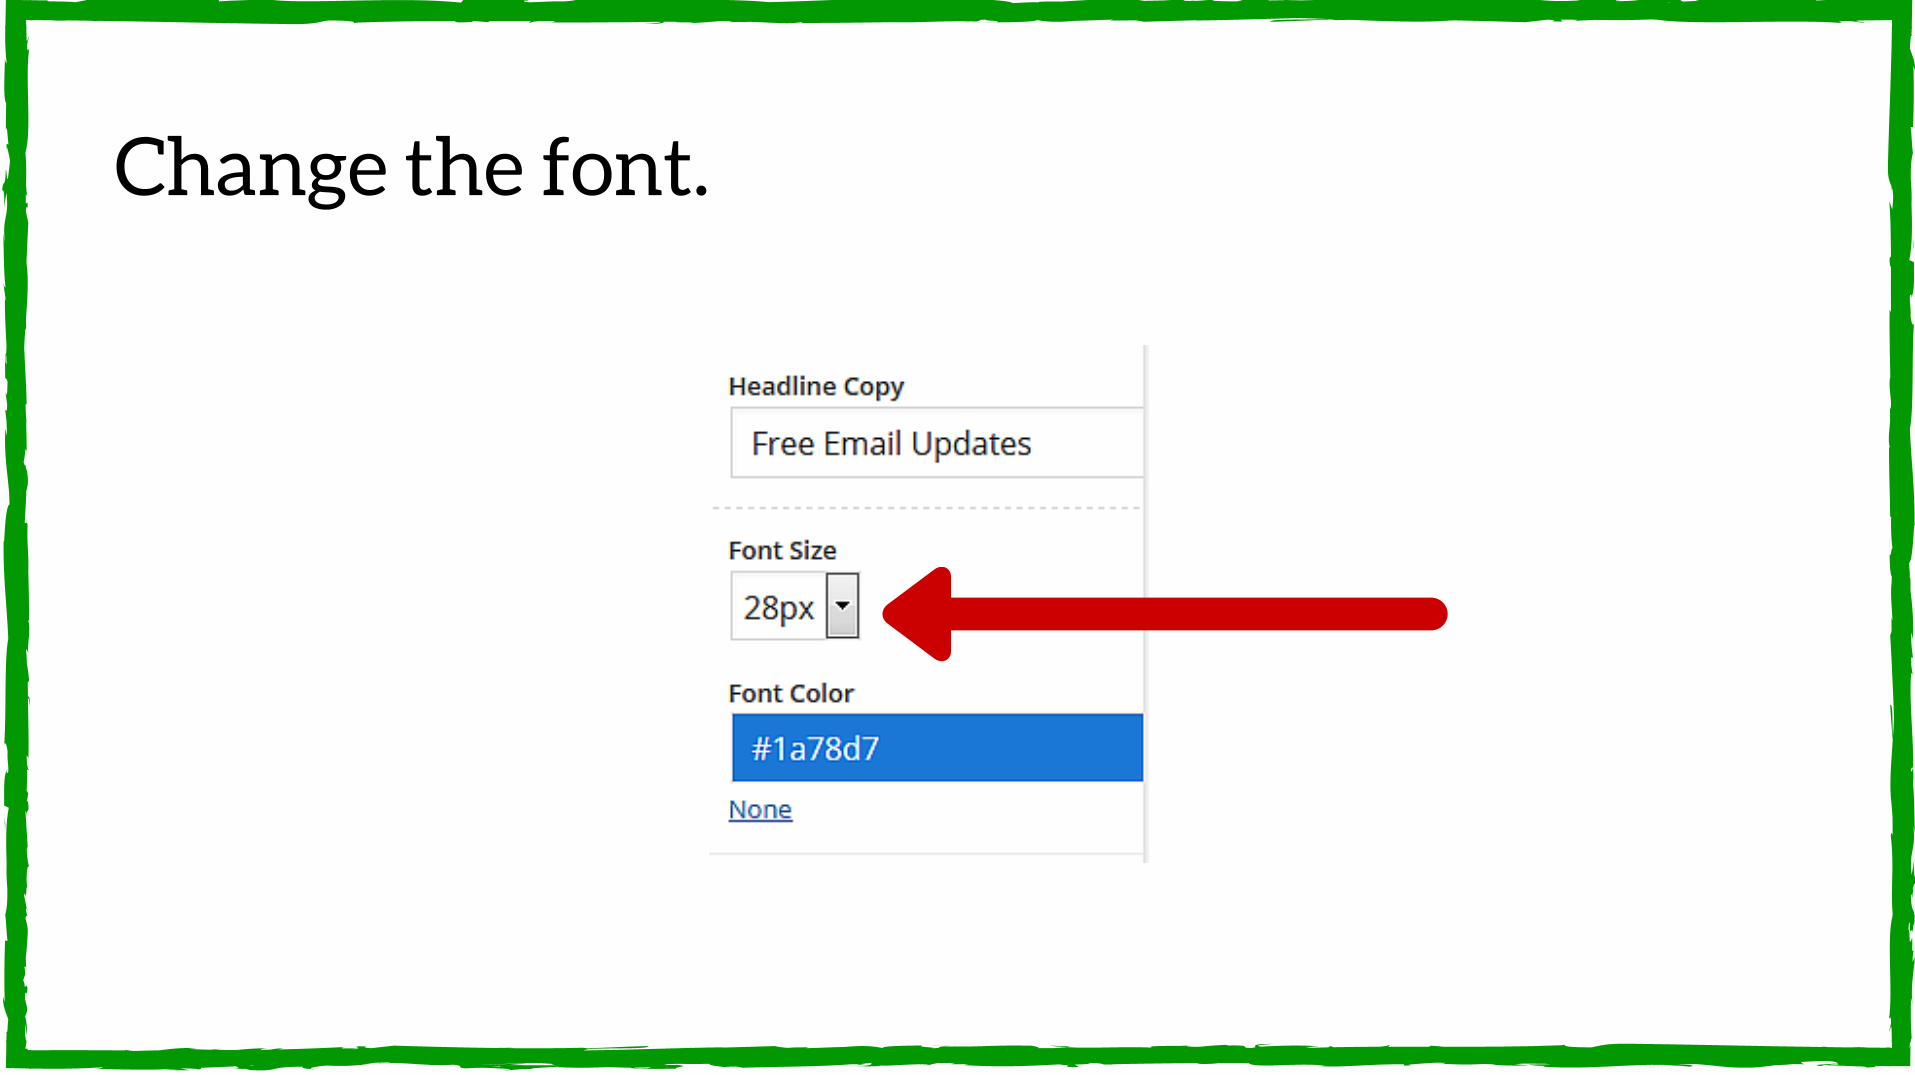
Change the font.
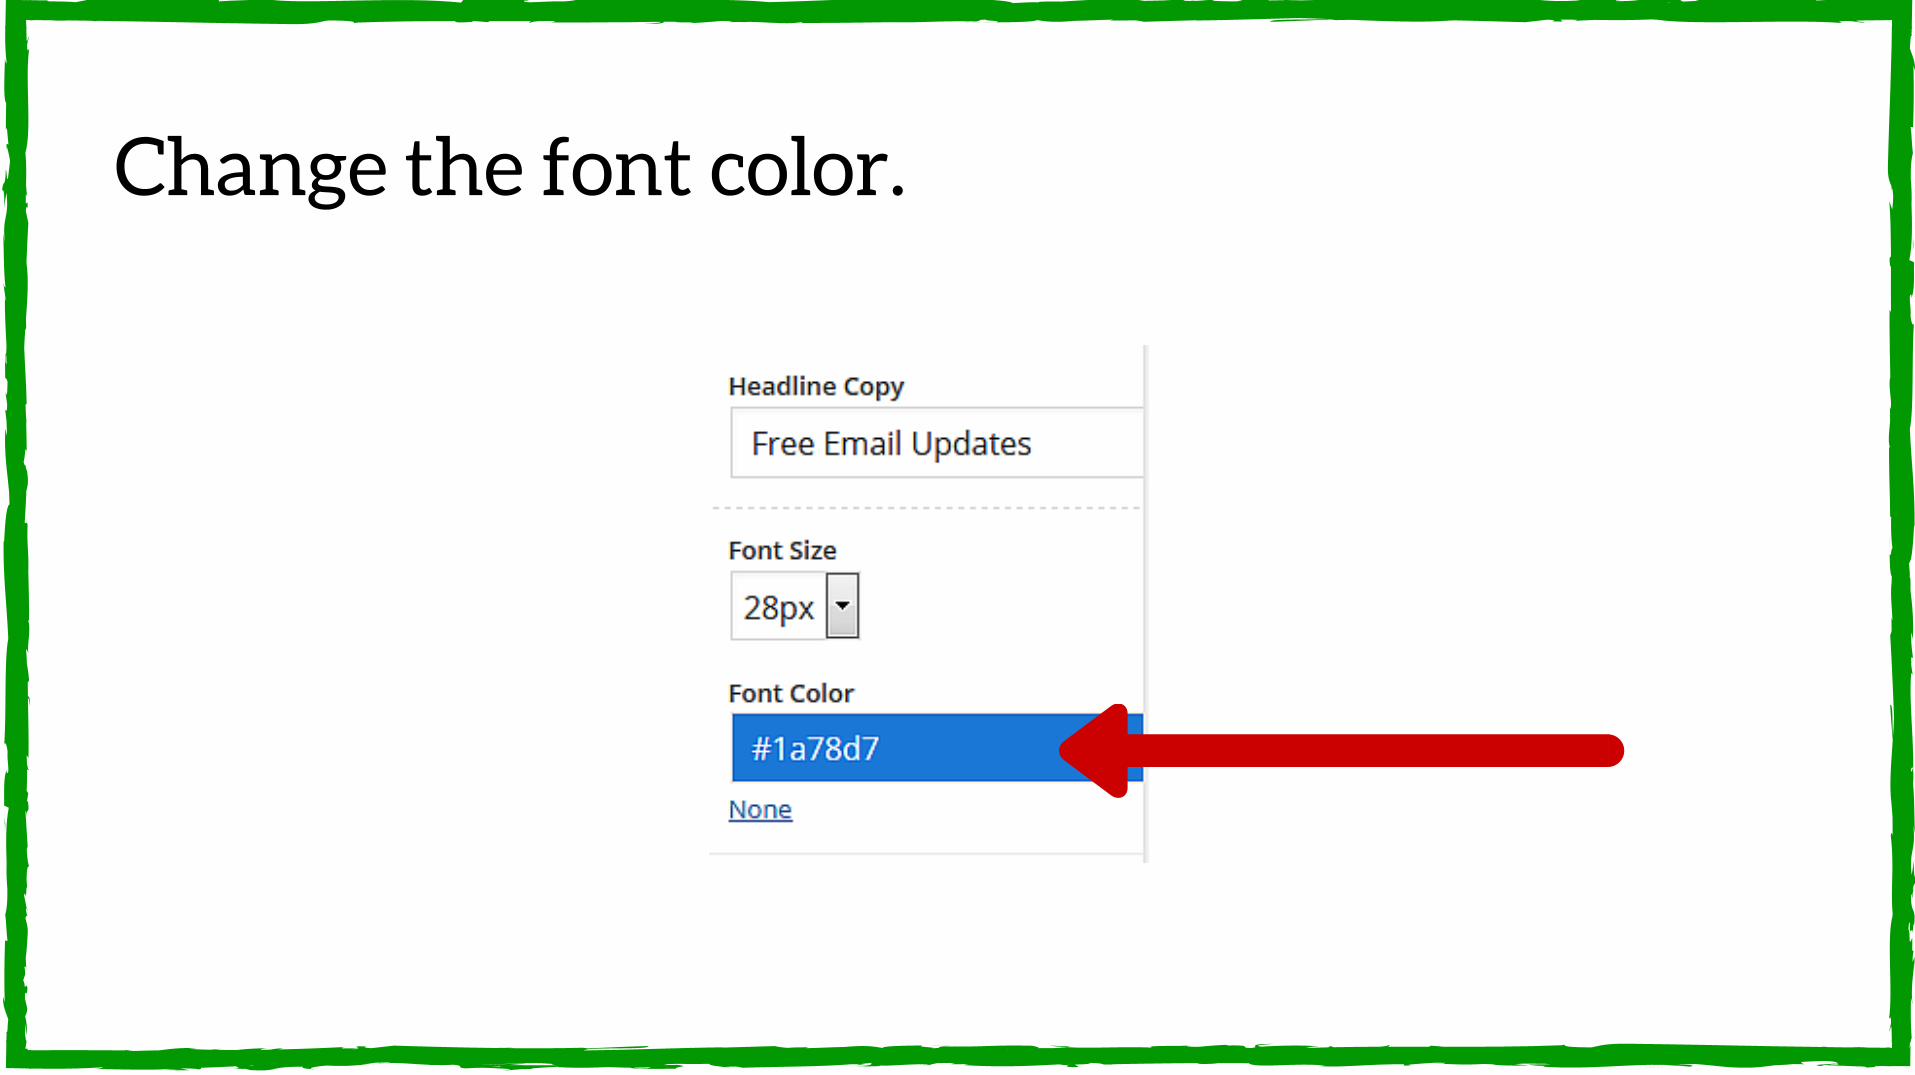
Change the font color.
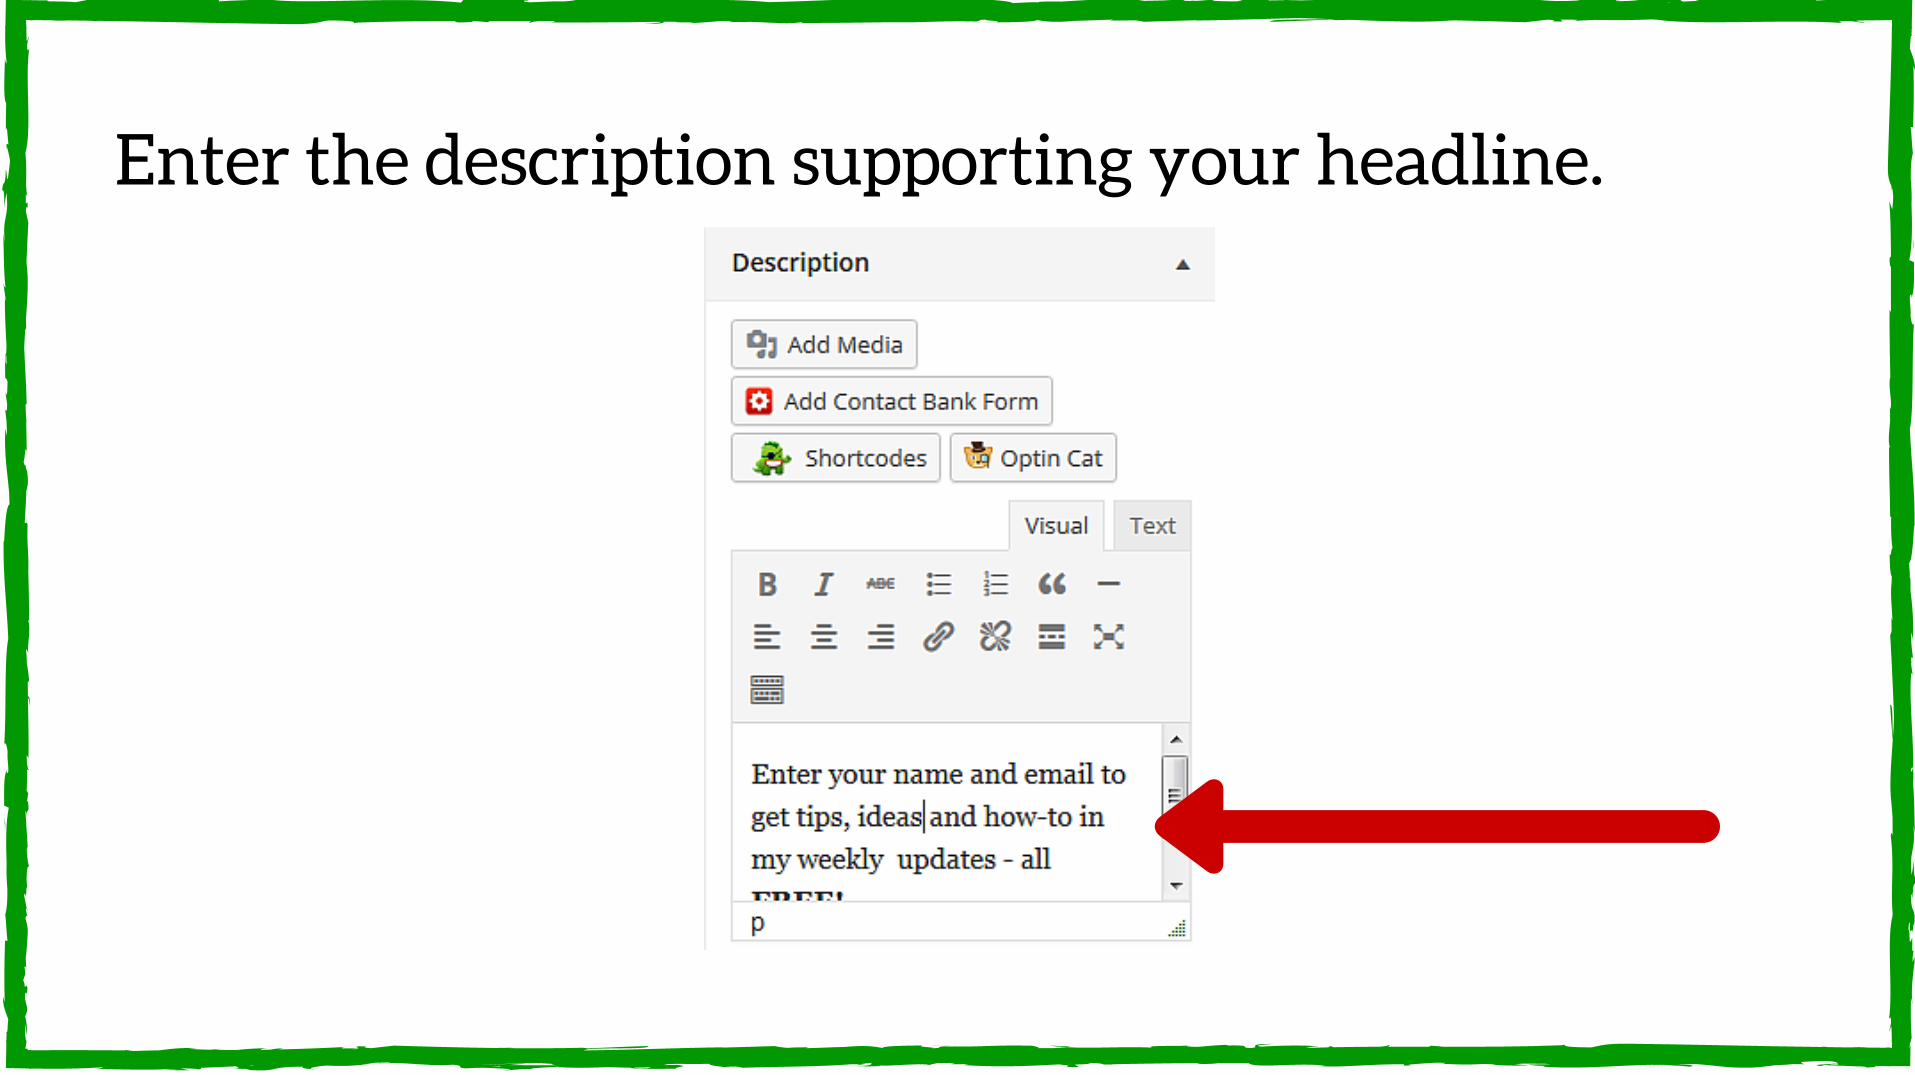
Enter the description supporting your headline.
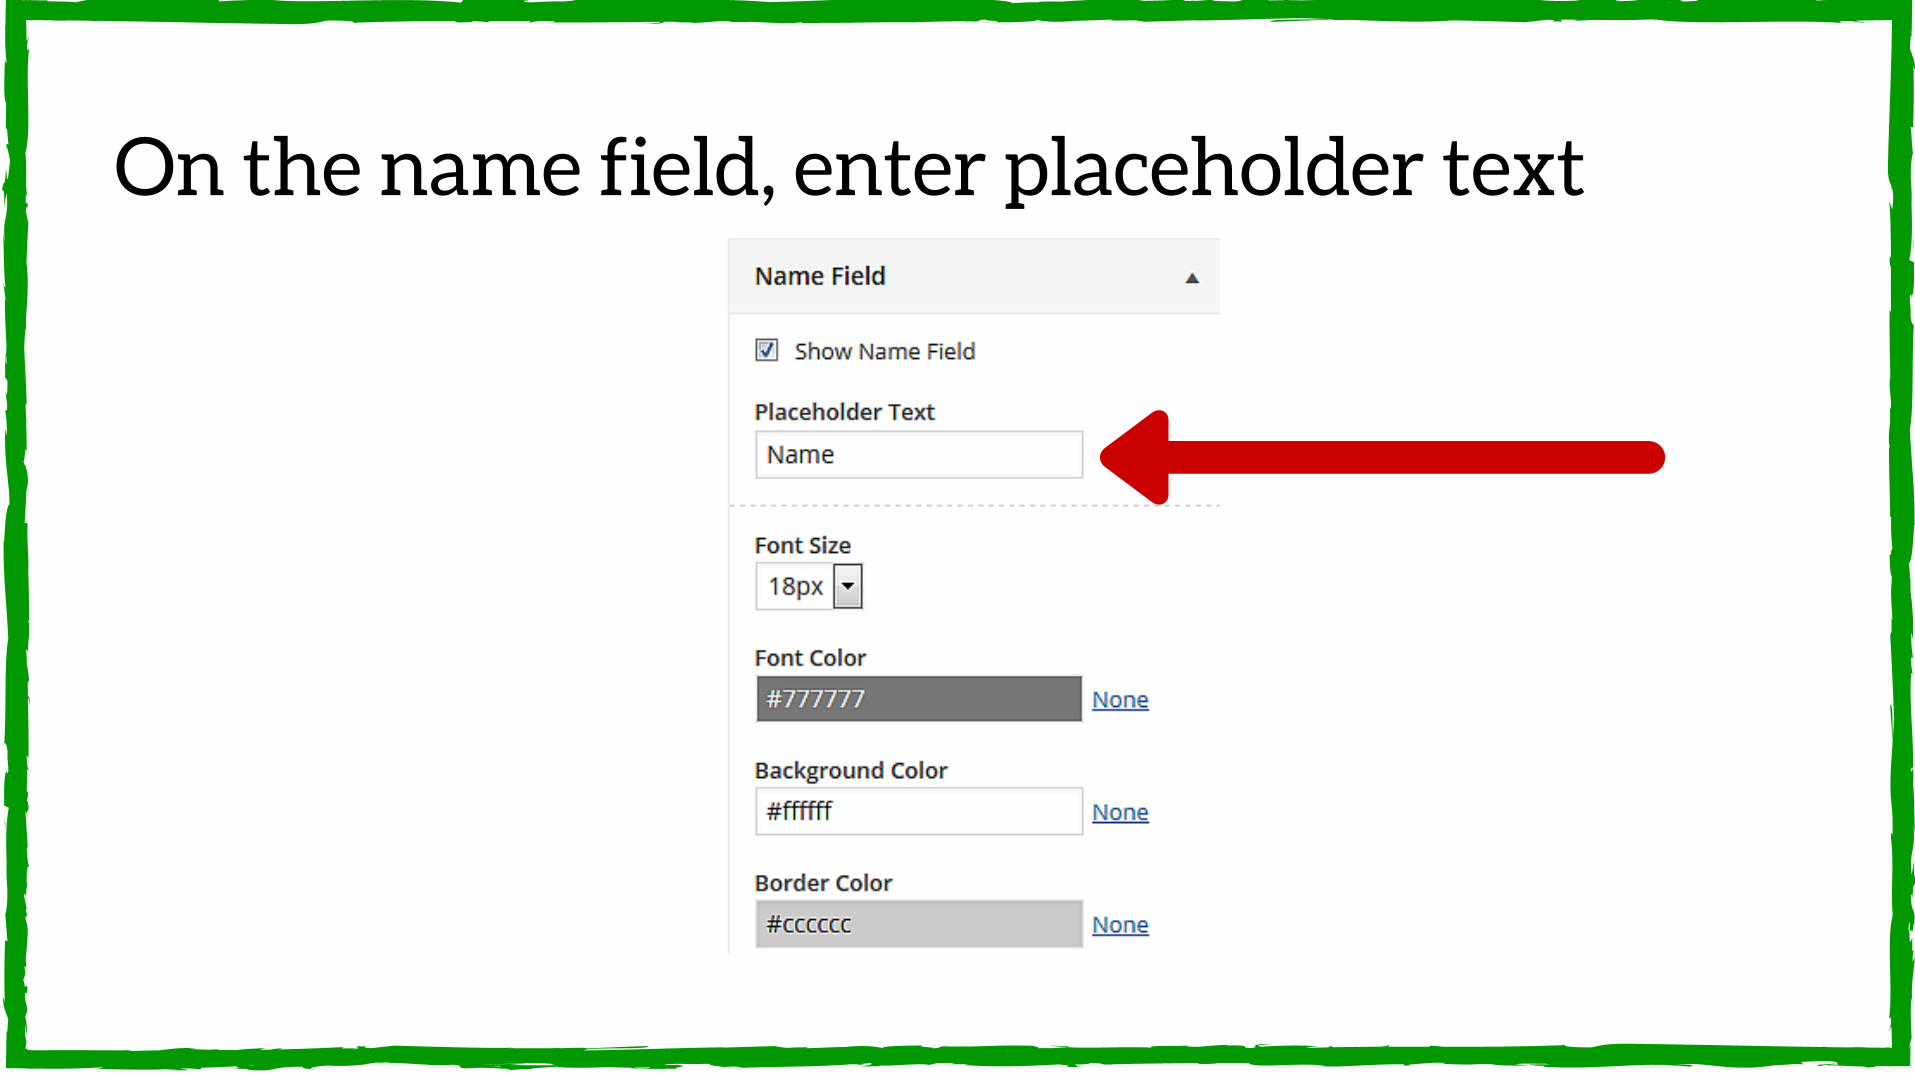
On the name field, enter placeholder text
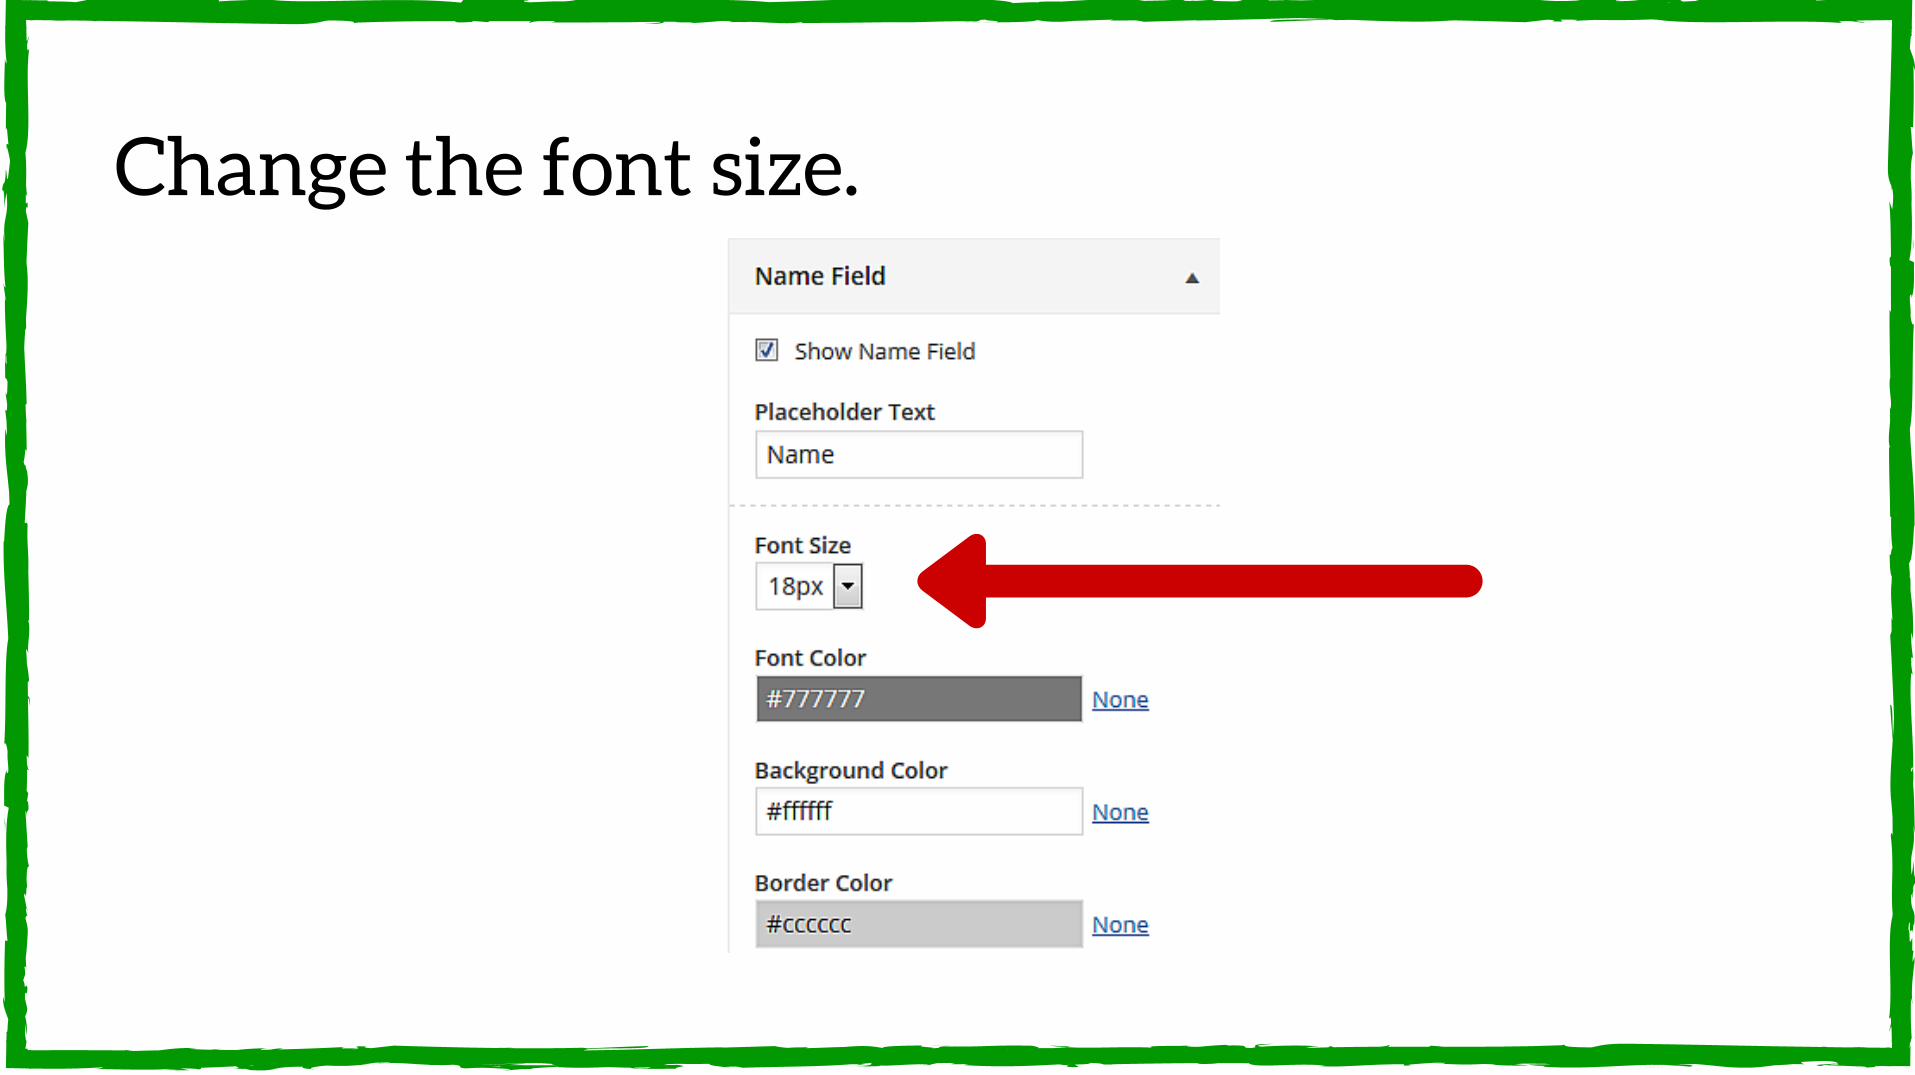
Change the font size.

Change the font color.
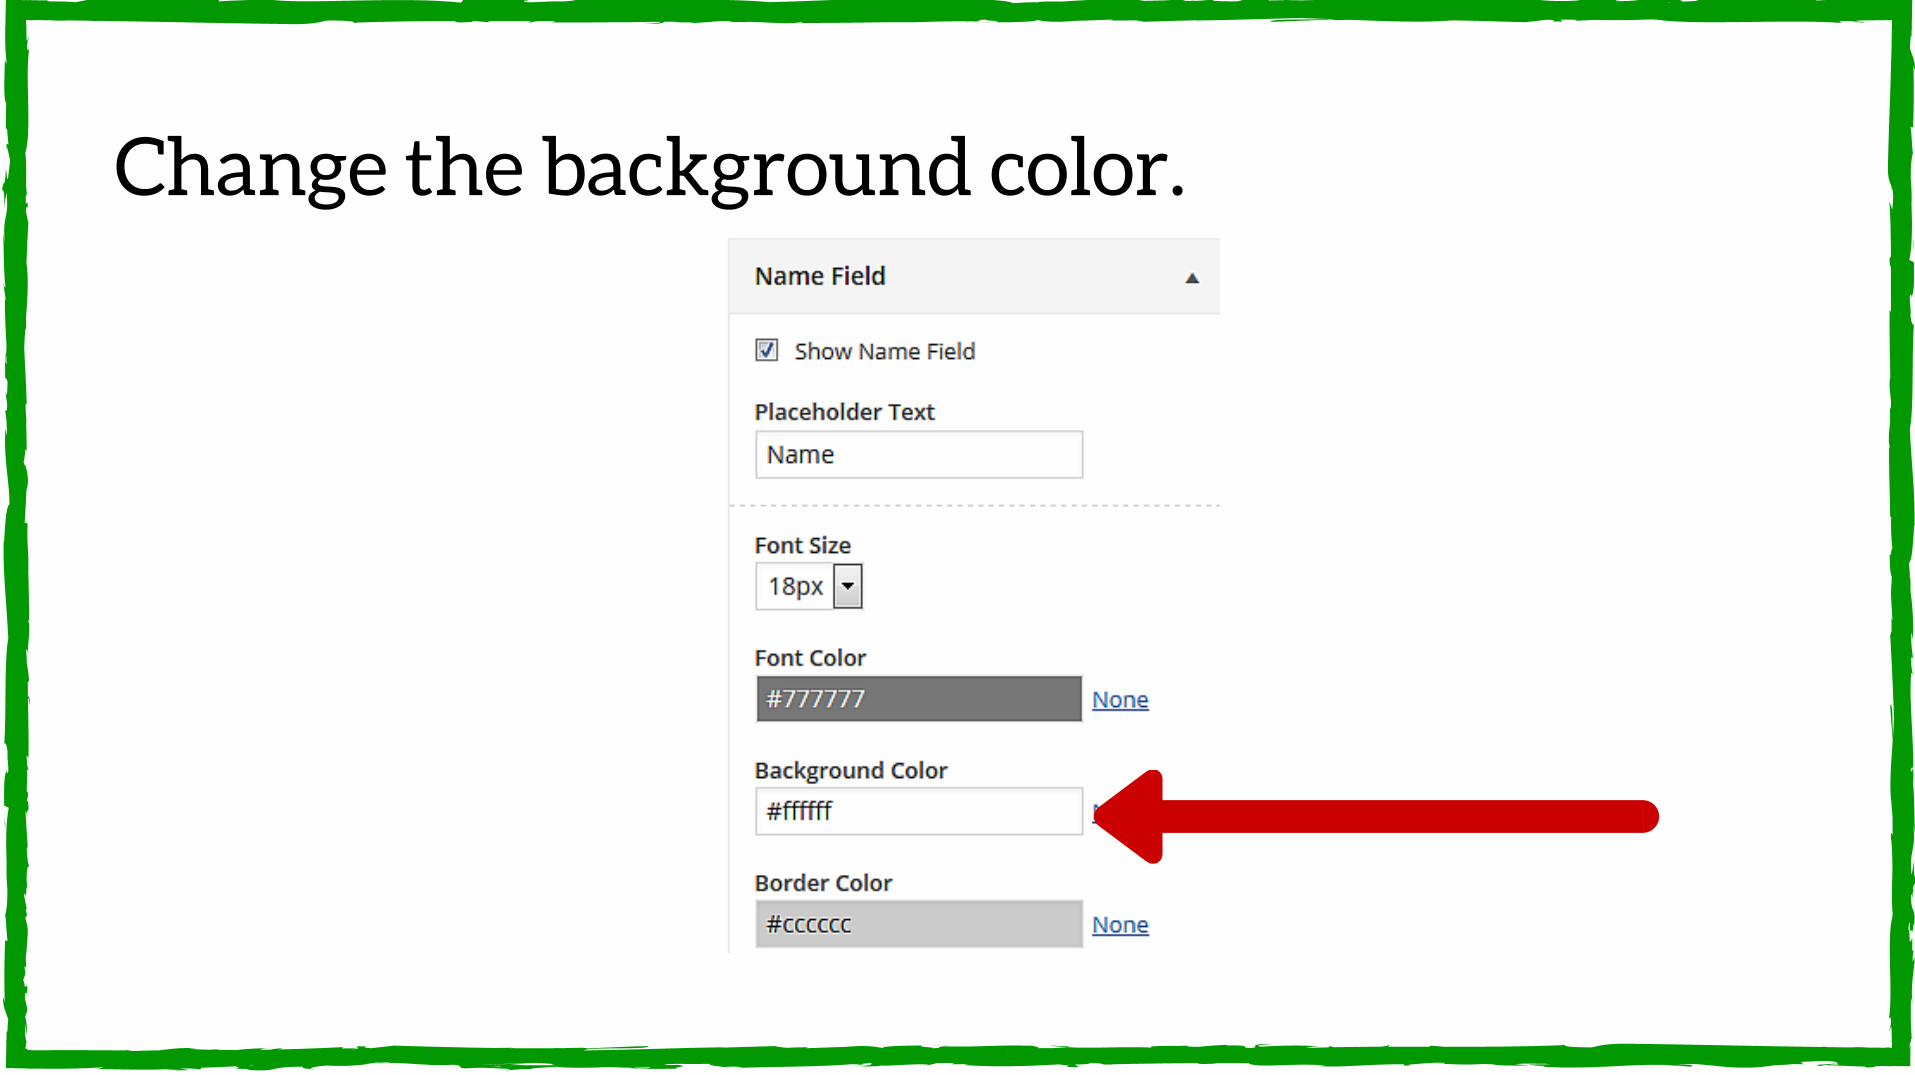
Change the background color.
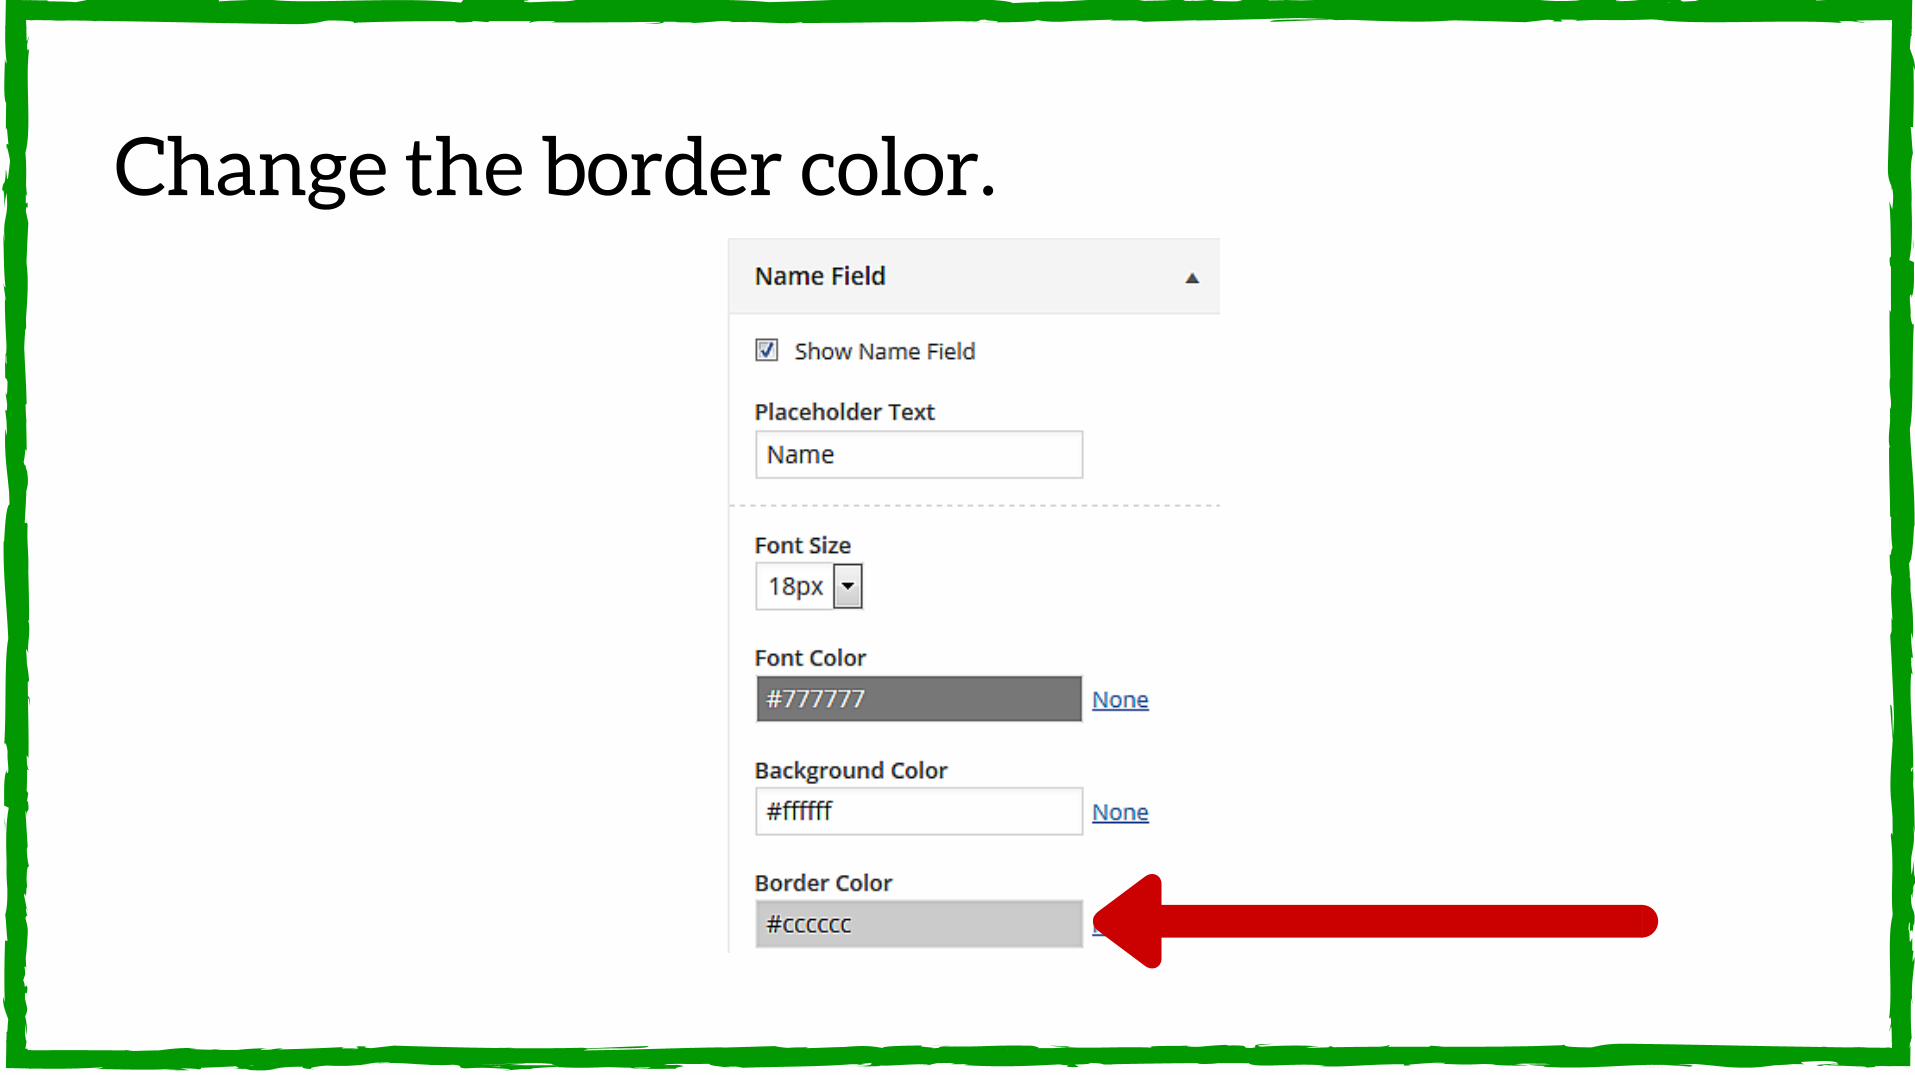
Change the border color.

In the Email field, enter the Placeholder text.

Change the font size.
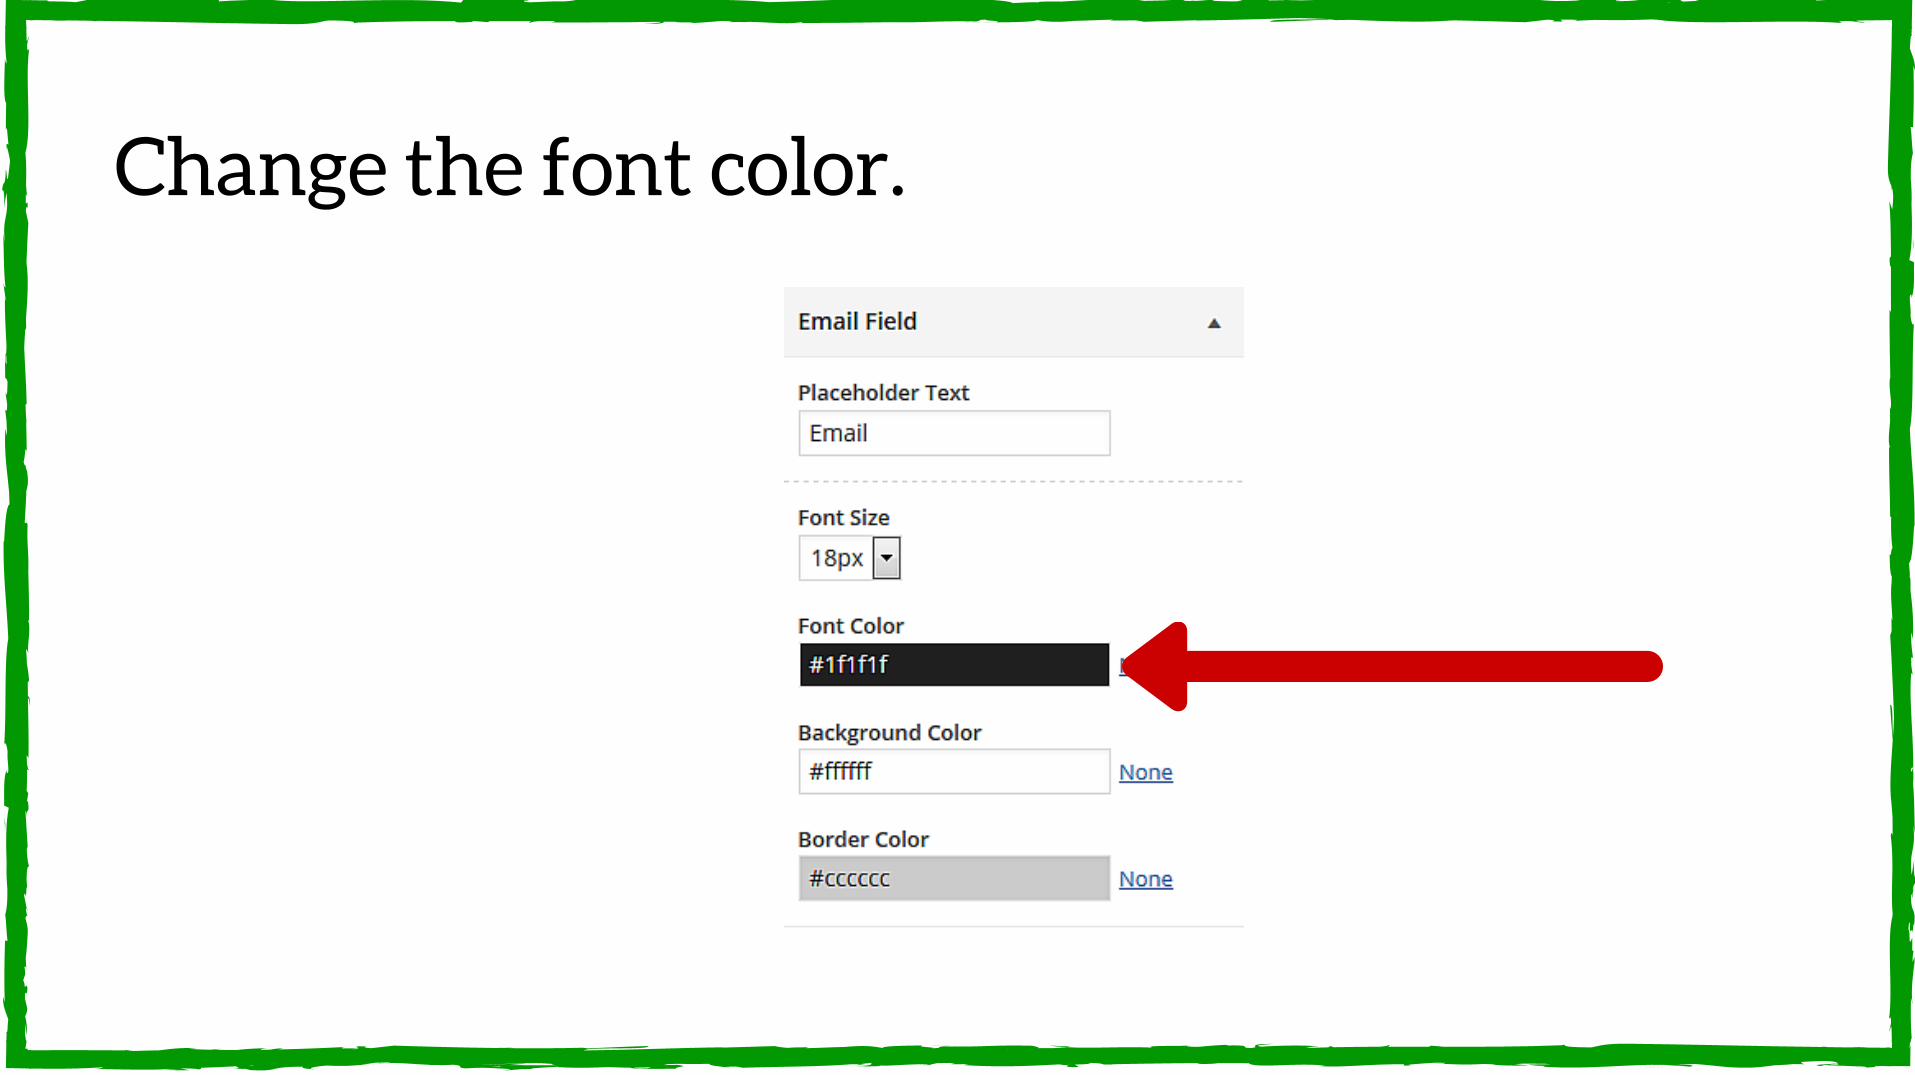
Change the font color.
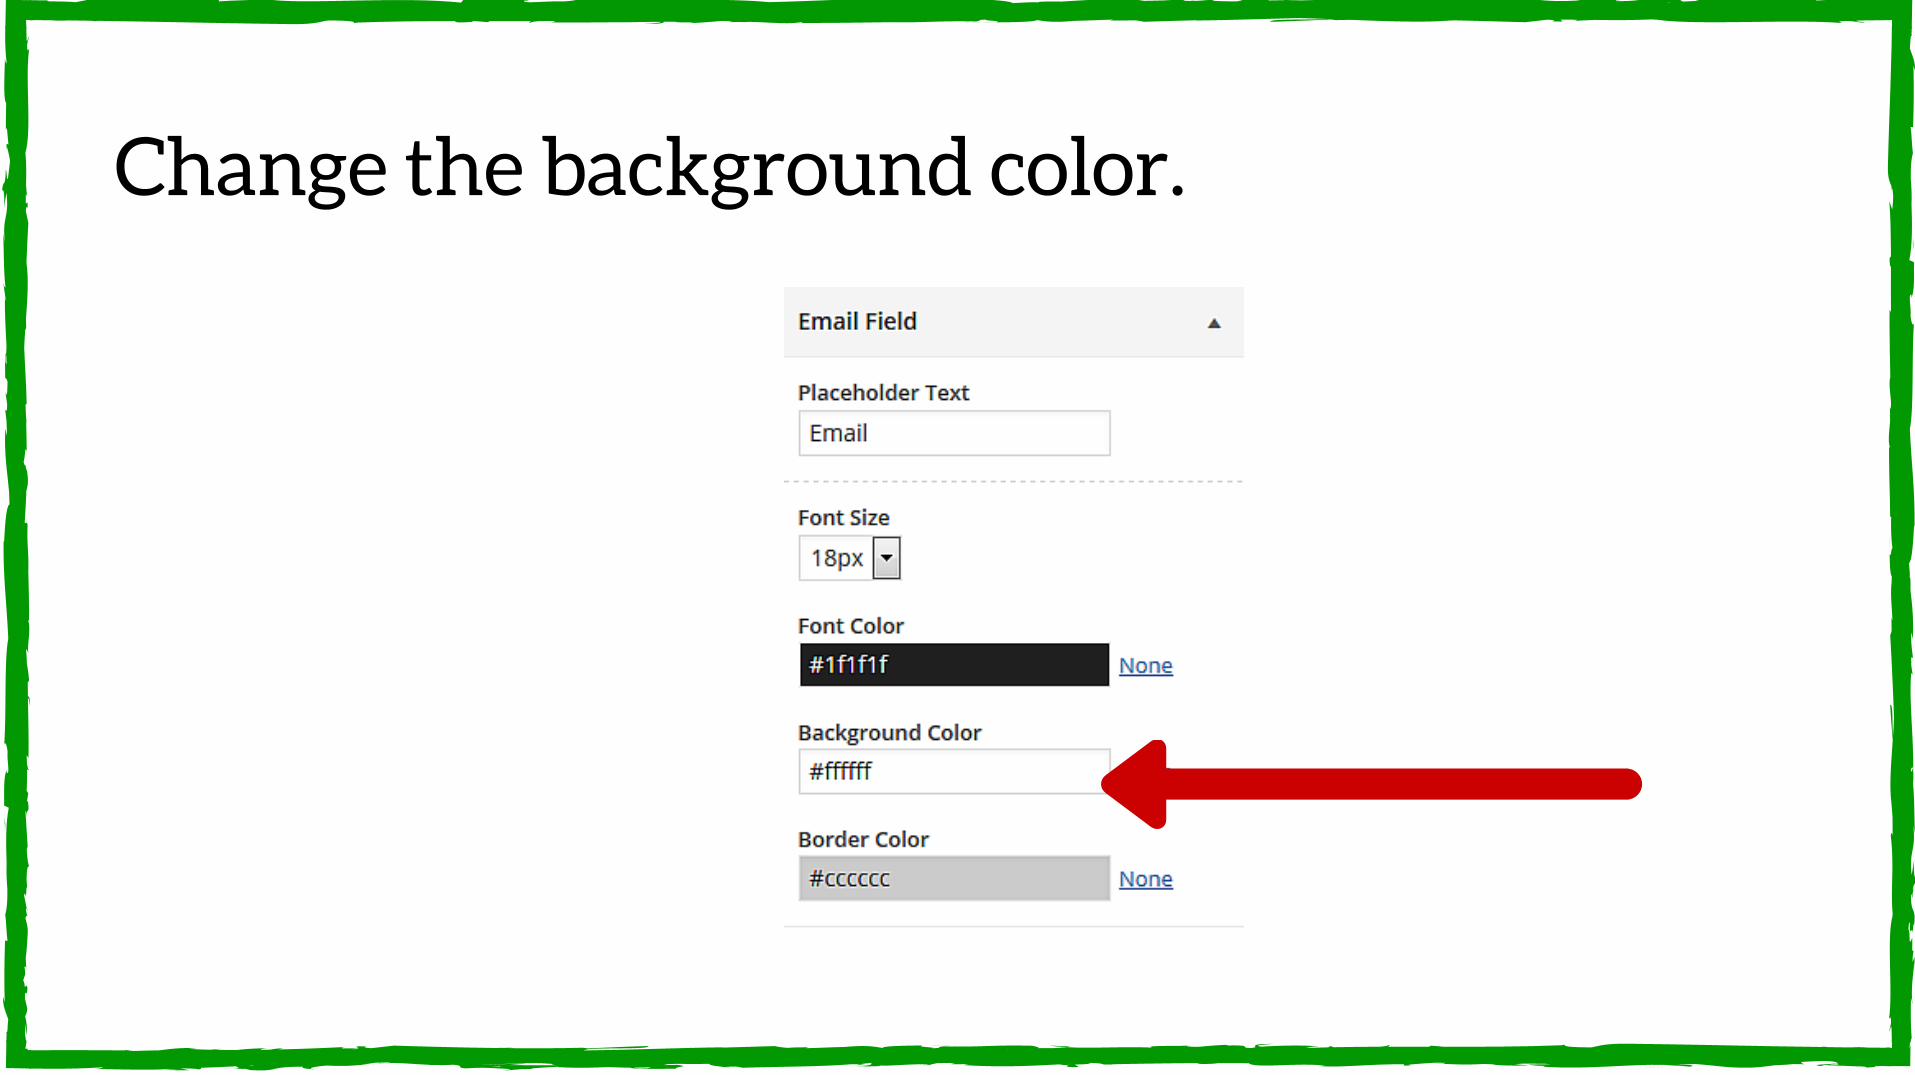
Change the background color.

Change the border color.

Enter the button copy name.

Change the font size.
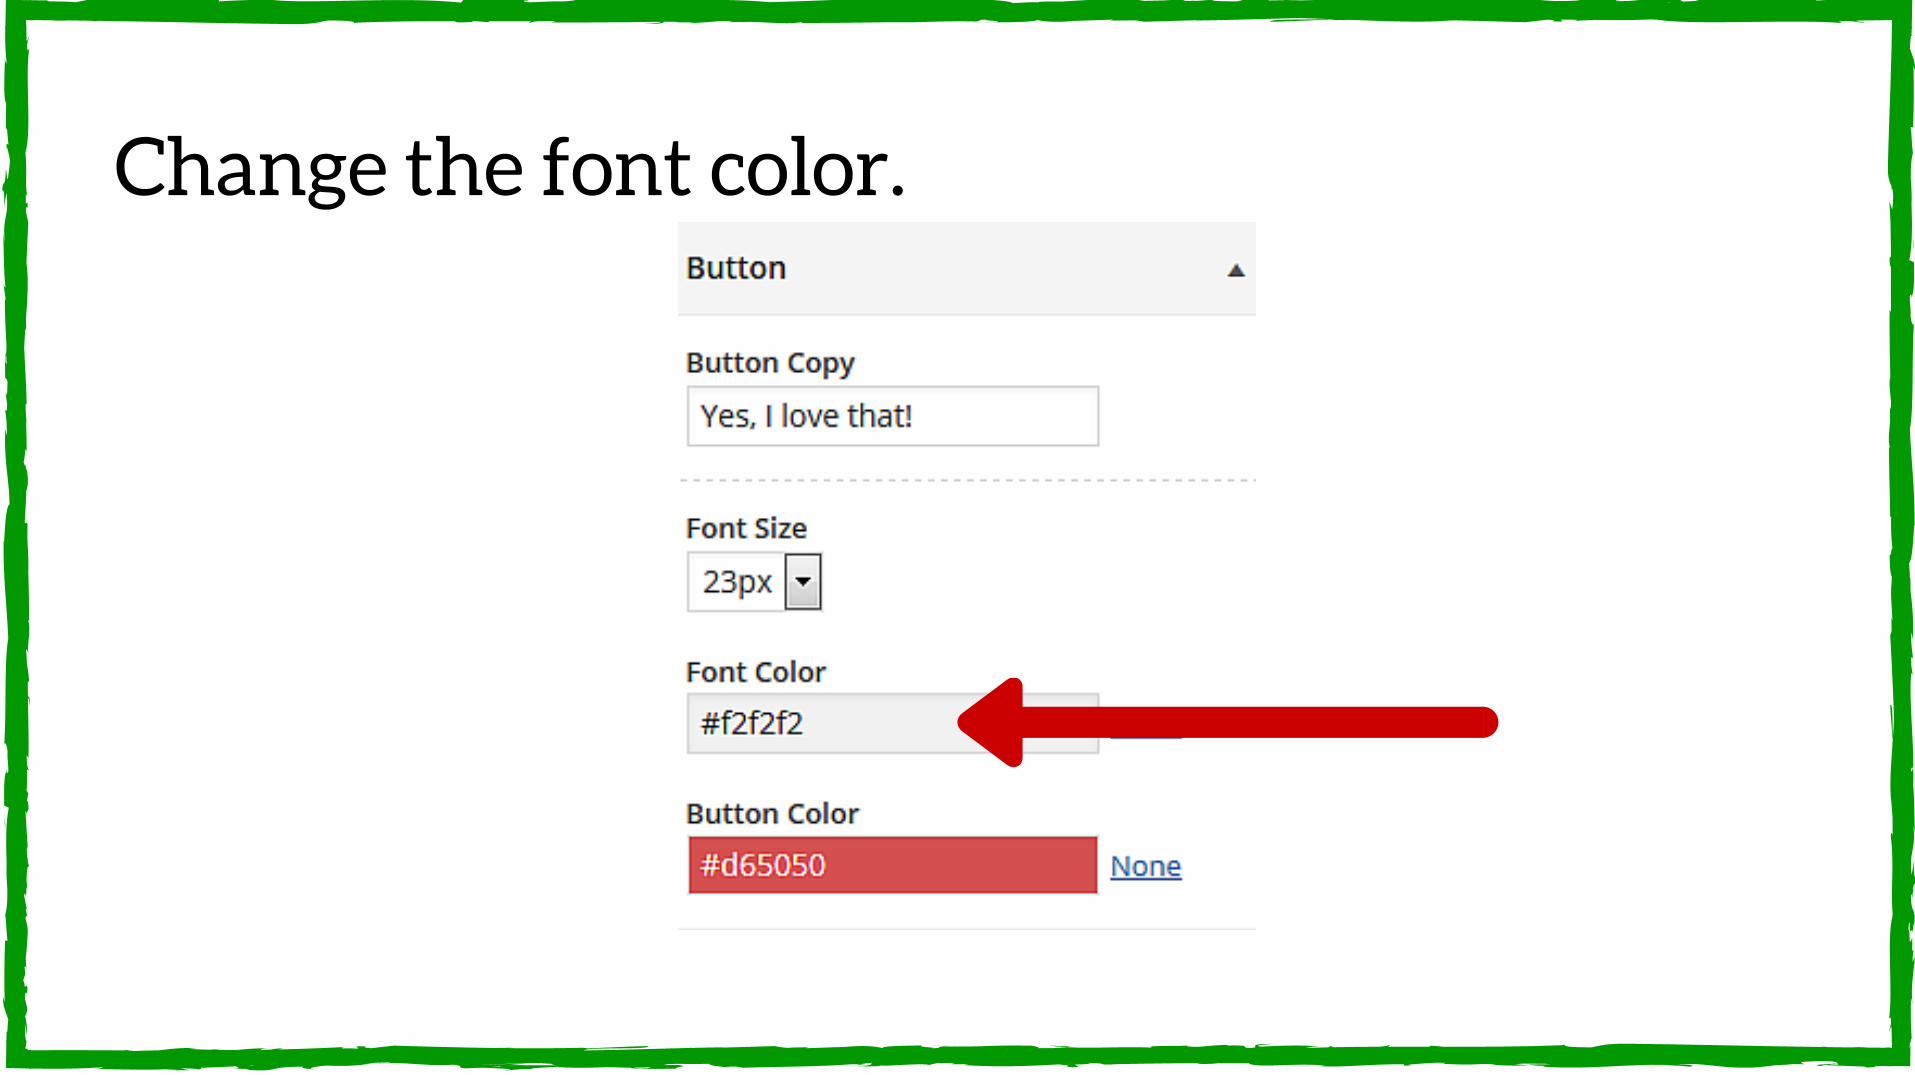
Change the font color.
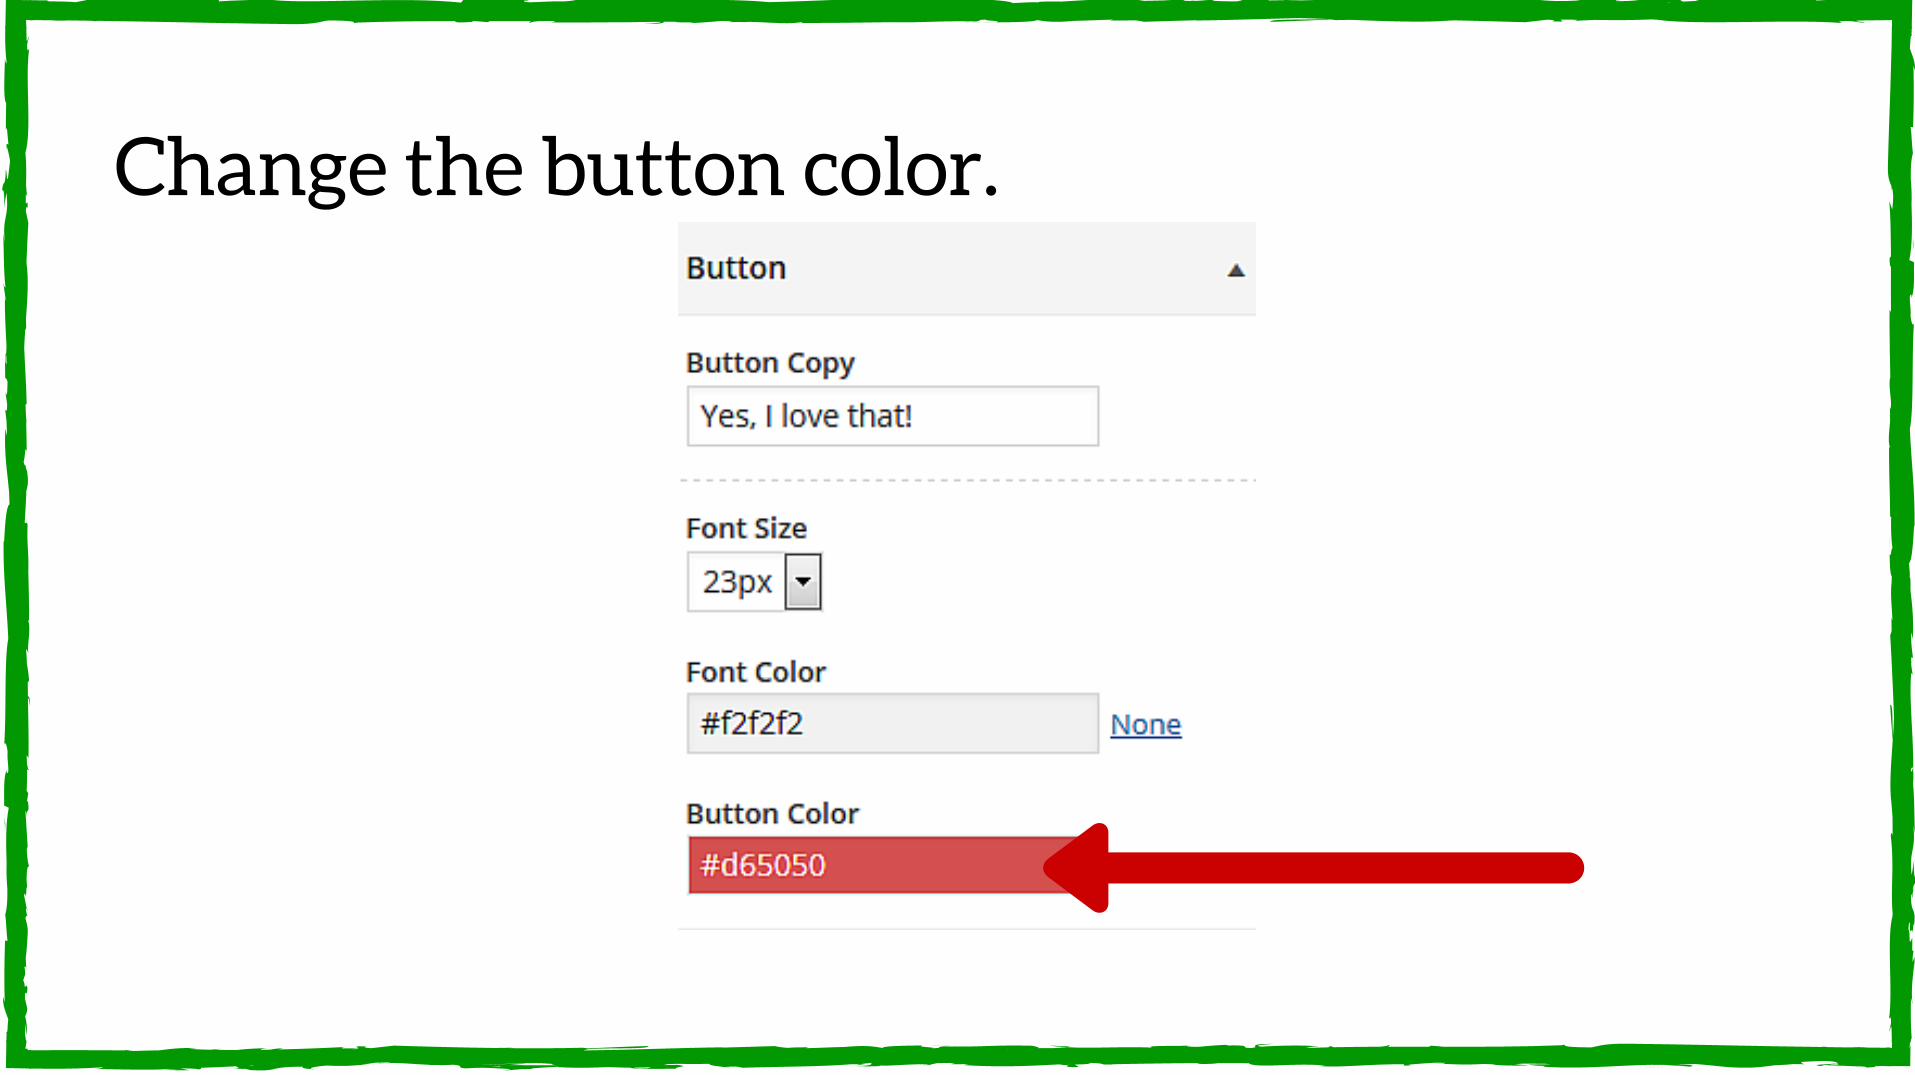
Change the button color.
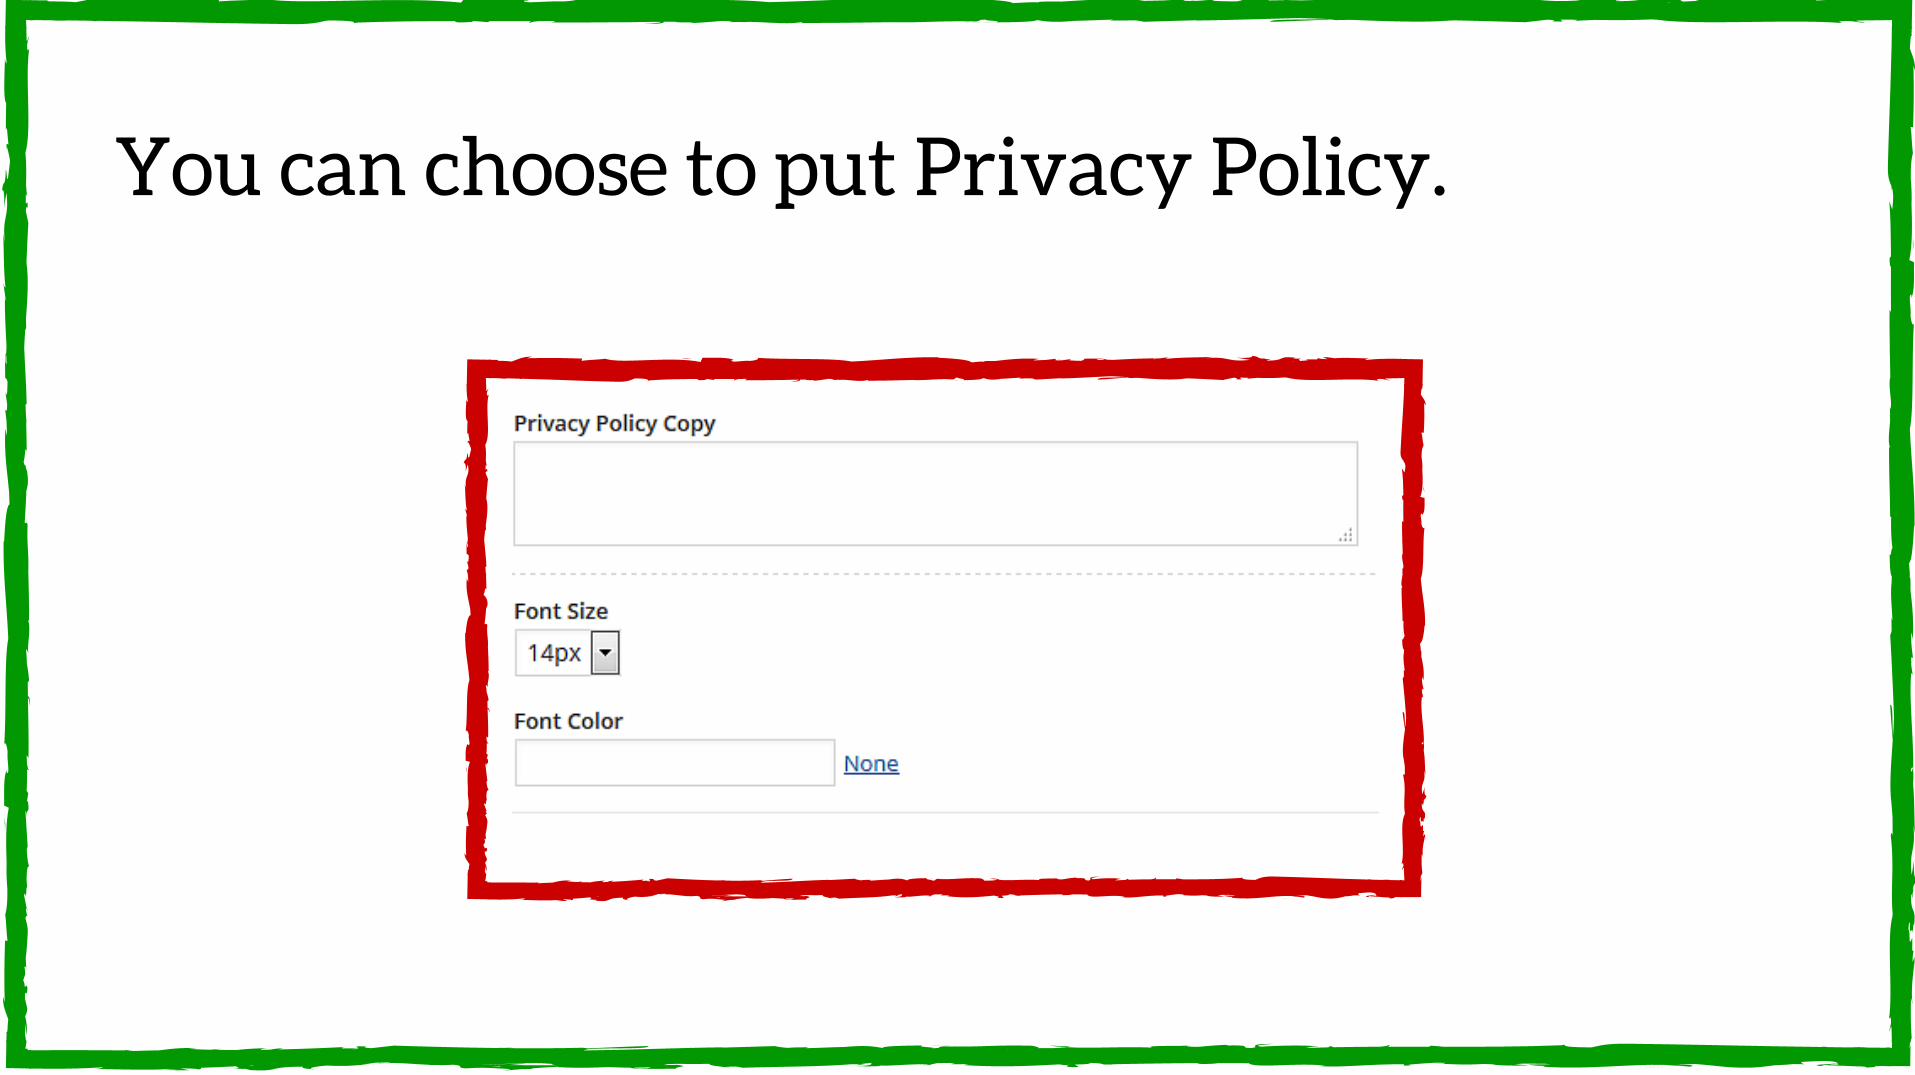
You can choose to put Privacy Policy.

Or leave it blank if you don't want.
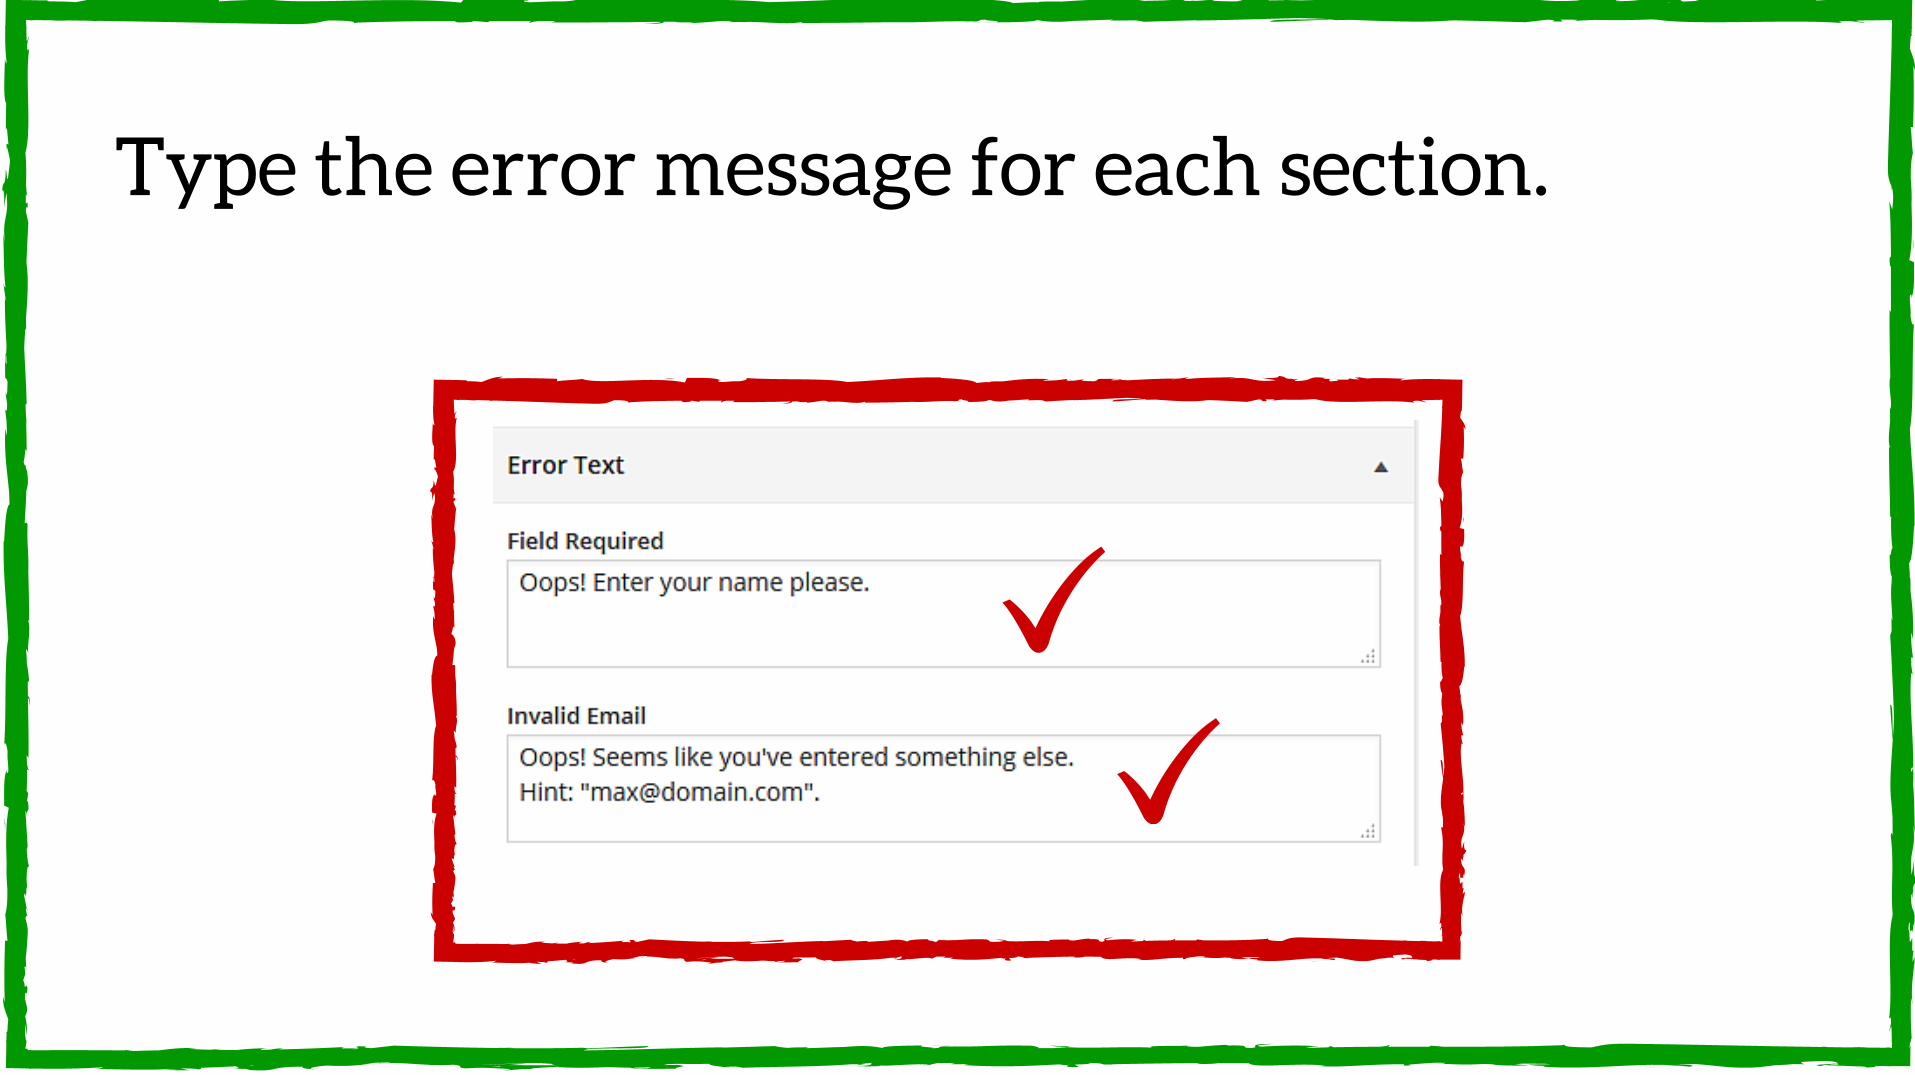
Type the error message for each section.
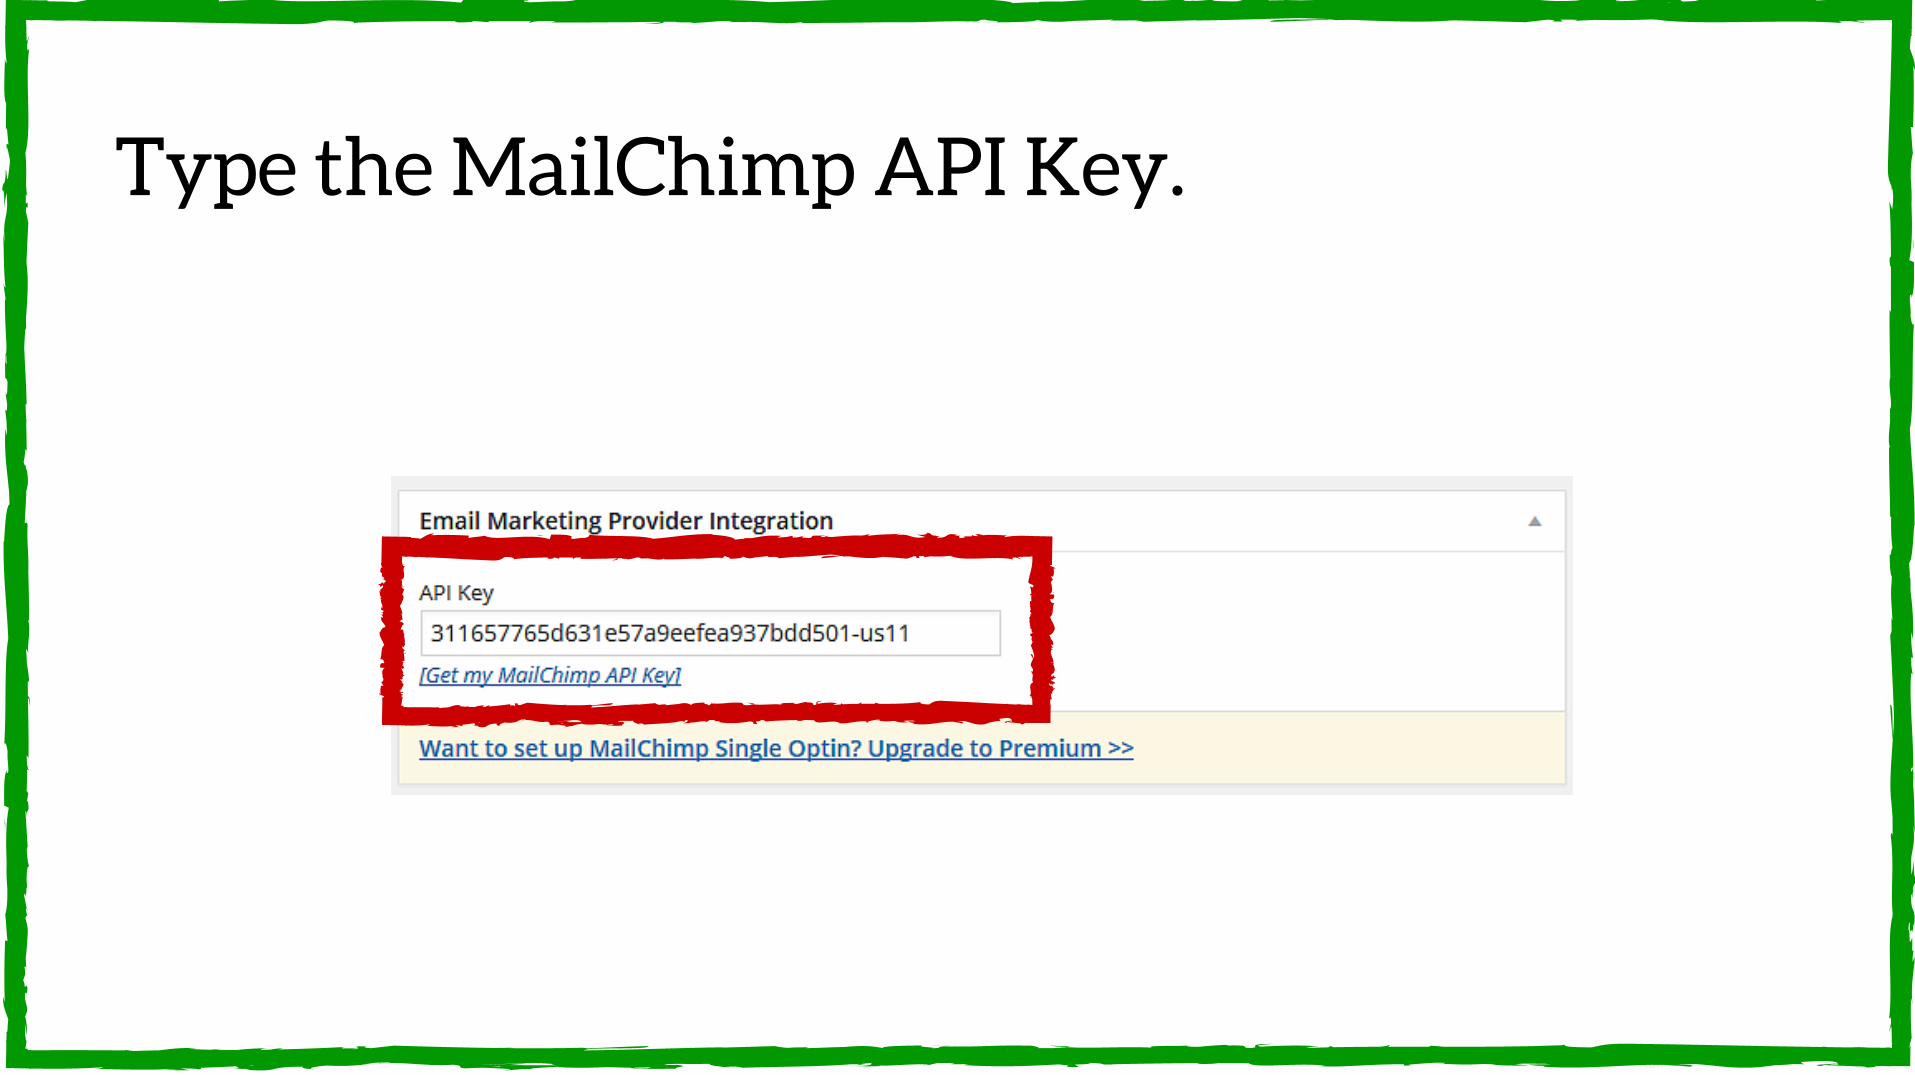
Type the MailChimp API Key.

To get your API key, go to the link.
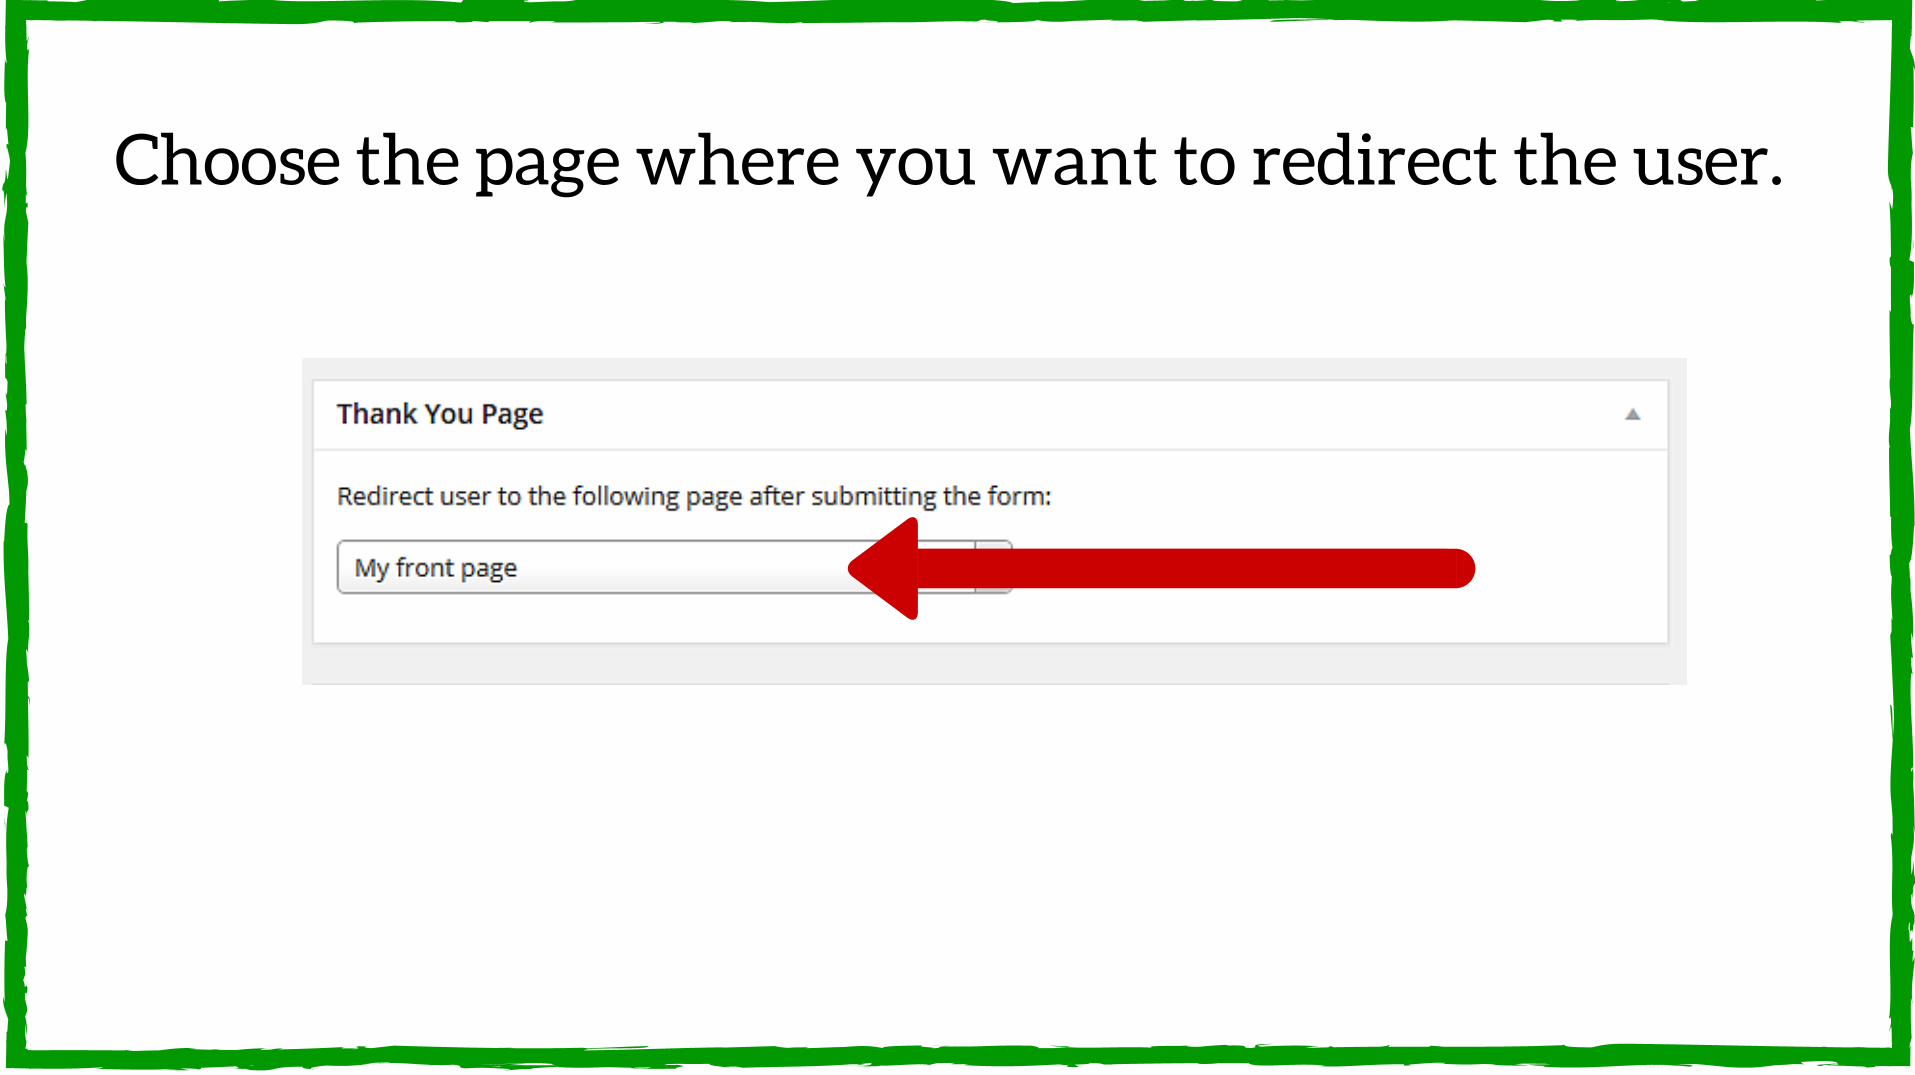
Choose the page where you want to redirect the user.
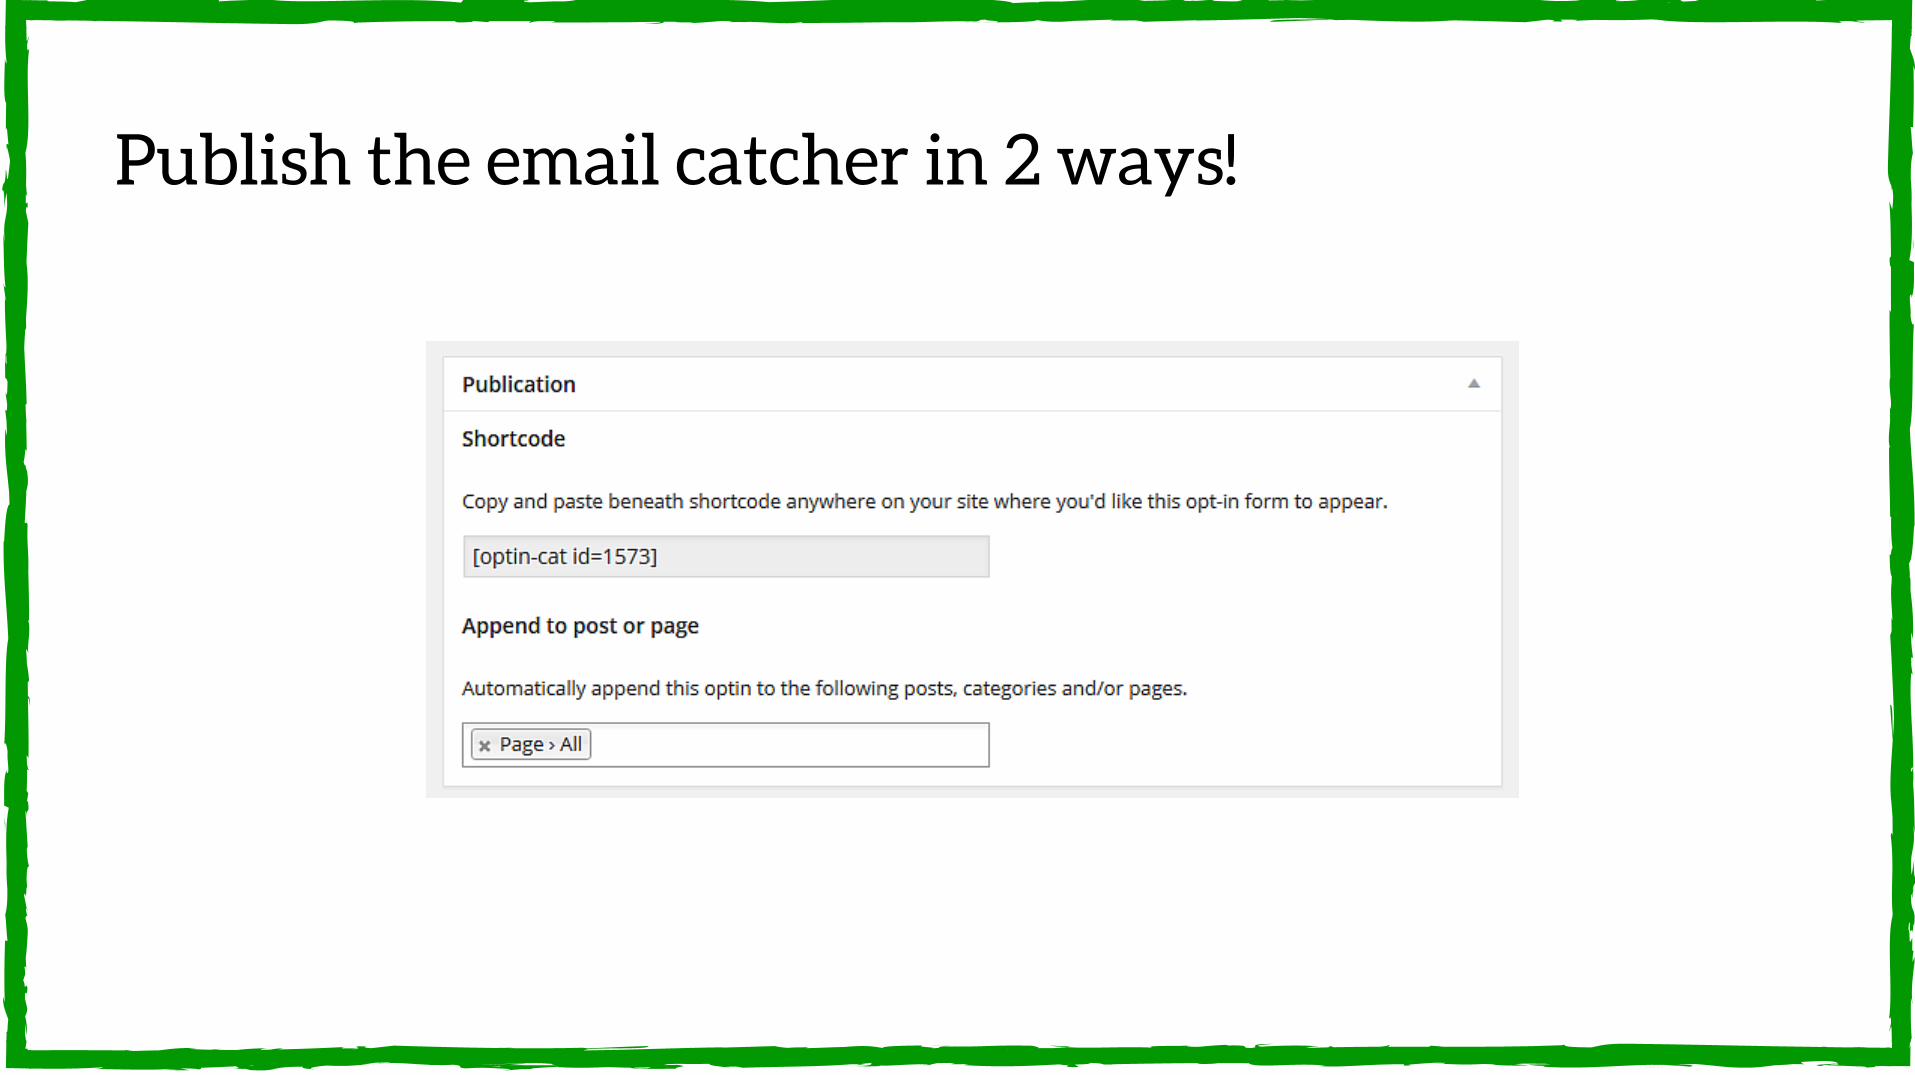
Publish the email catcher in 2 ways!

Copy and paste the code

Or append on posts or pages.
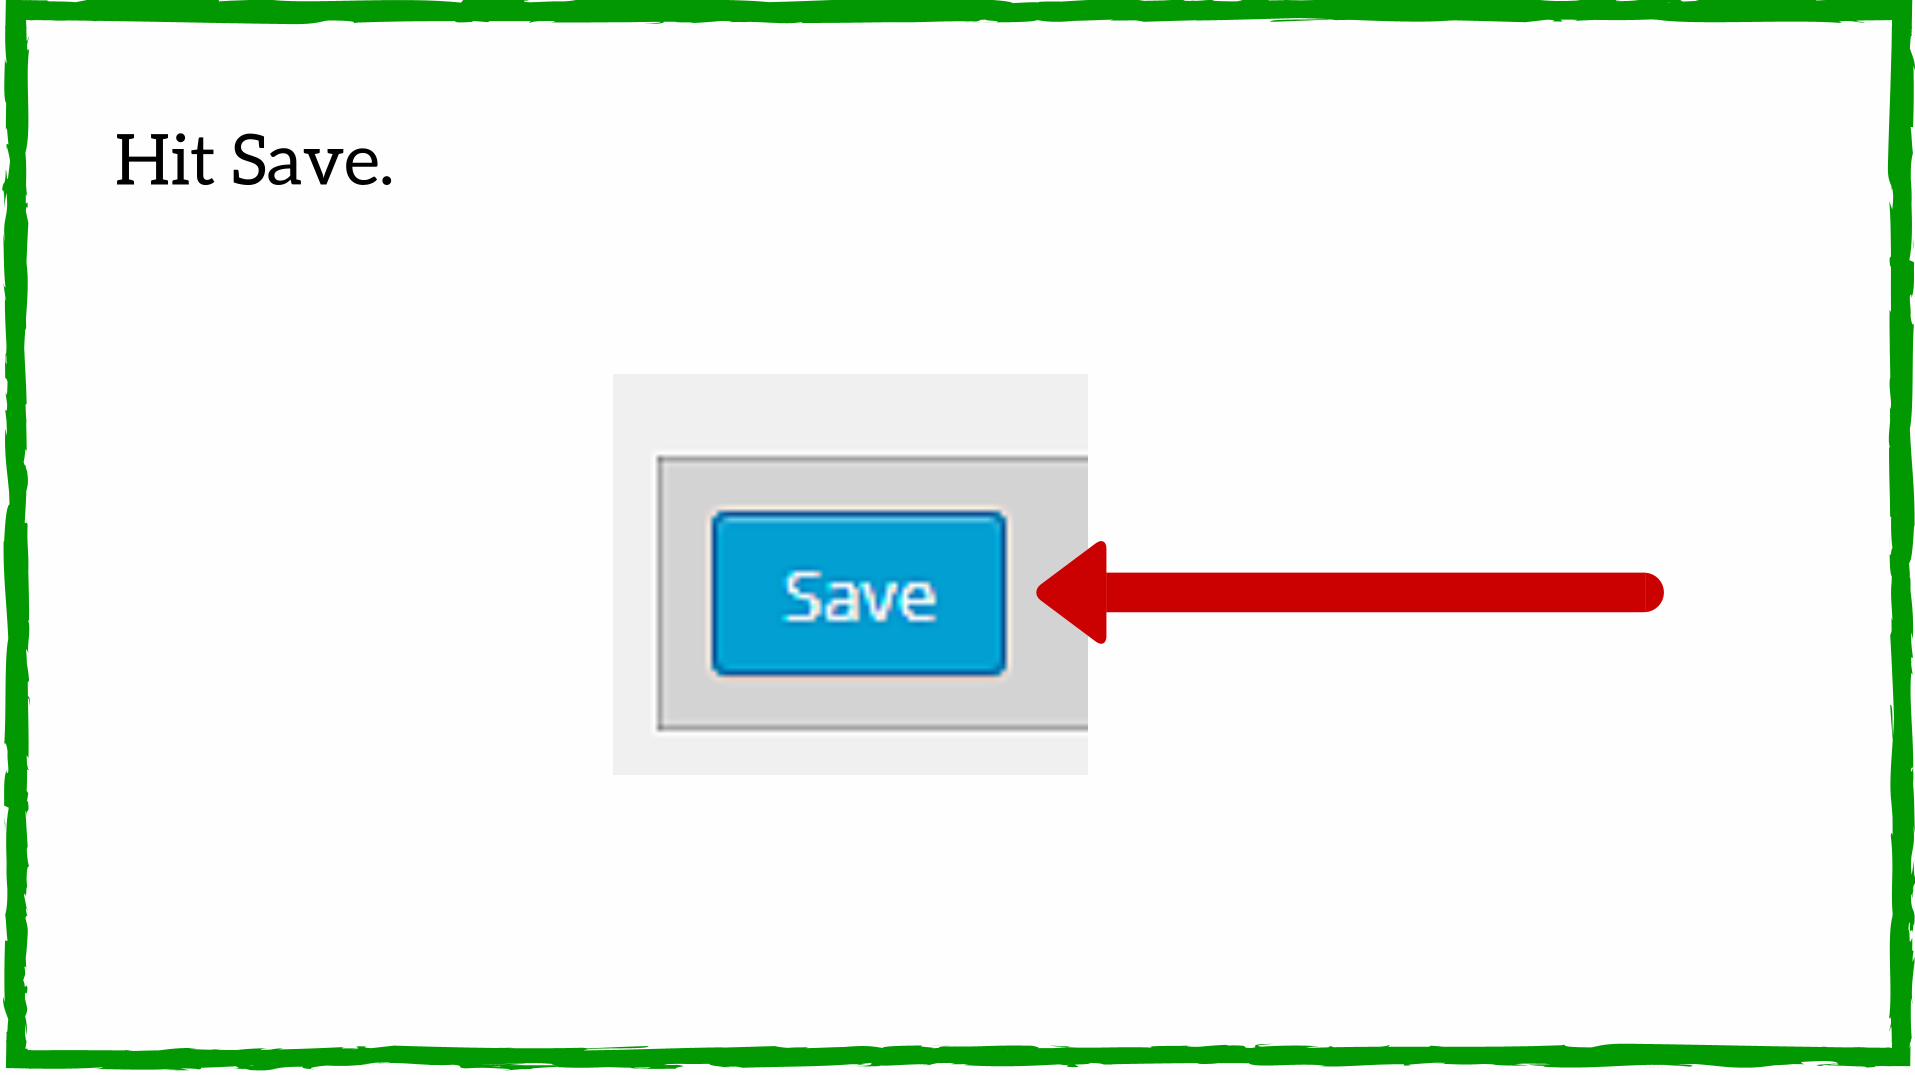
Hit Save.
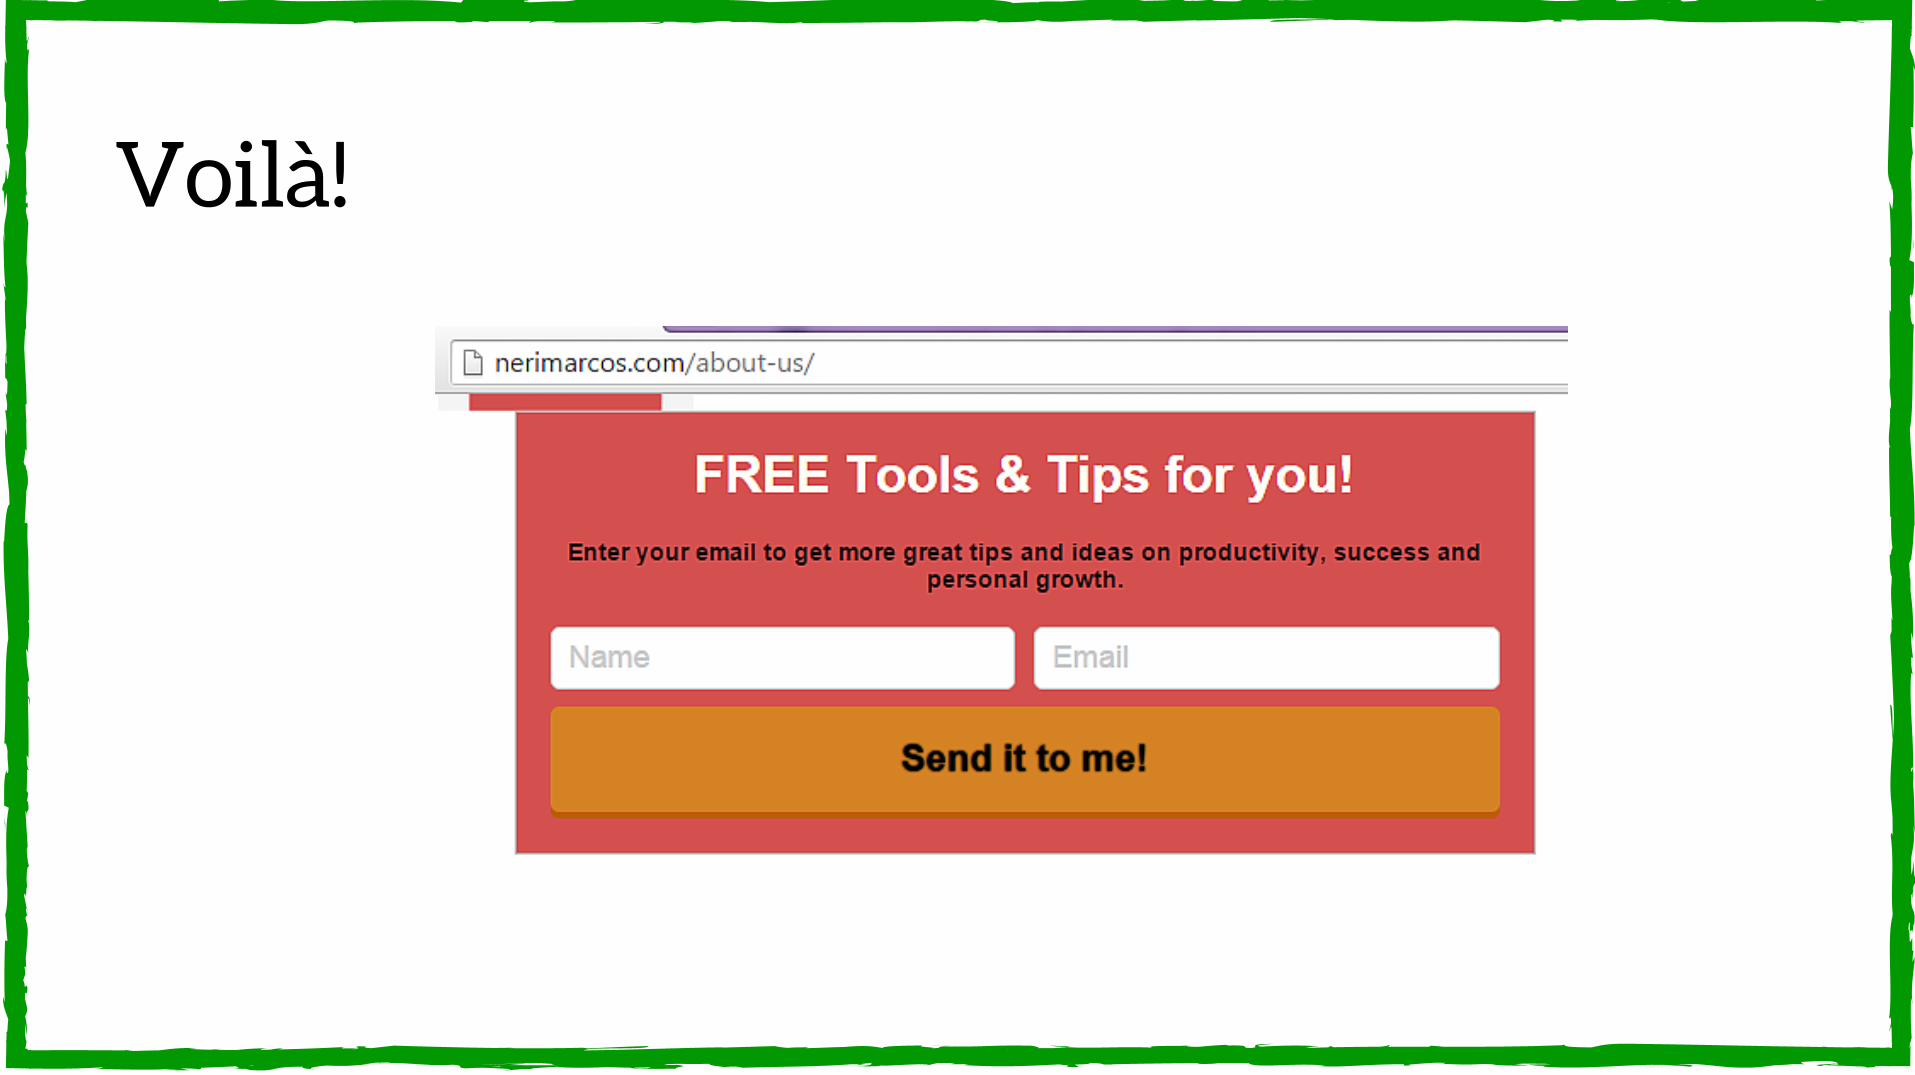
Voilà!

For more tips and tutorials, come on over at:
NeriMarcos.com


