16
Improve Efficiency: An Alternative to Cut-Back and Layering with IPS e.max Press Multi By: Rafael Choi, CDT Source from LMT’s May 2015 issue, www.LMTmag.com
| Date post: | 16-Aug-2015 |
| Category: |
Healthcare |
| Upload: | dr-ibrahem-soubt-dds-mba-csmp |
| View: | 205 times |
| Download: | 1 times |
Improve Efficiency: An Alternative to Cut-Back and Layering with IPS e.max Press Multi
By: Rafael Choi, CDT
Source from LMT’s May 2015 issue, www.LMTmag.com

Source from LMT’s May 2015 issue, www.LMTmag.com
As an alternative to conventional materials and pressing methods that use cut-back and layering, Ivoclar Vivadent’s IPS e.max Press Multi is a new material that provides a simple solution for fabricating esthetic and polychromatic restorations in a monolithic form.

Source from LMT’s May 2015 issue, www.LMTmag.com
The IPS e.max Press Multi ingot is the same high-strength (400 MPa) lithium disilicate material as IPS e.max Press but, due to its gradient layers, provides higher chroma and opacity in the cervical and dentin regions and increased translucency in the incisal areas. It eliminates the need for layering methods and produces strong, esthetic and lifelike anterior crowns in a predictable and efficient manner.
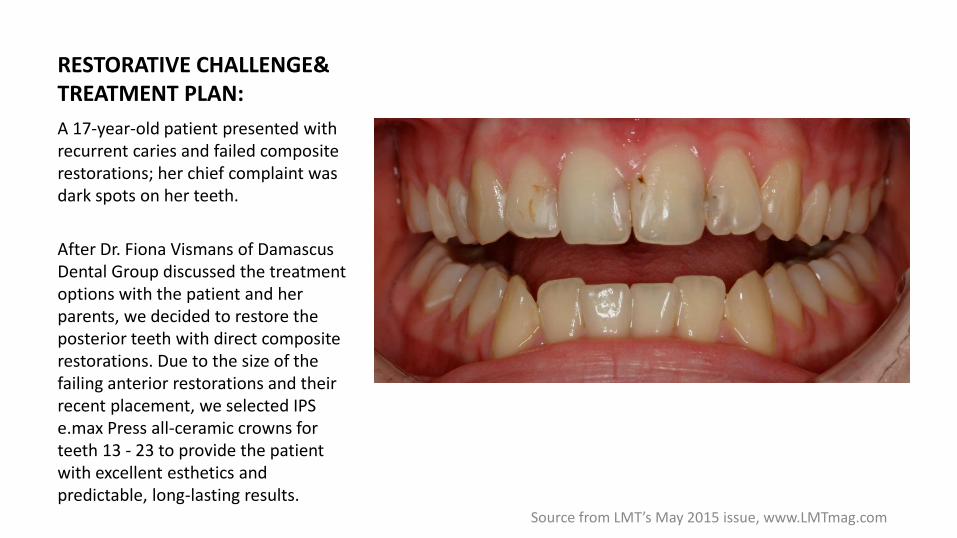
RESTORATIVE CHALLENGE& TREATMENT PLAN:
A 17-year-old patient presented with recurrent caries and failed composite restorations; her chief complaint was dark spots on her teeth.
After Dr. Fiona Vismans of Damascus Dental Group discussed the treatment options with the patient and her parents, we decided to restore the posterior teeth with direct composite restorations. Due to the size of the failing anterior restorations and their recent placement, we selected IPS e.max Press all-ceramic crowns for teeth 13 - 23 to provide the patient with excellent esthetics and predictable, long-lasting results.
Source from LMT’s May 2015 issue, www.LMTmag.com

Step 1
I created a diagnostic waxup to guide the clinical process and Dr. Vismans
prepared the teeth. Because the stump shade was ideal and without any discoloration, we decided the IPS e.max Press Multi ingot was appropriate for this case.
Source from LMT’s May 2015 issue, www.LMTmag.com
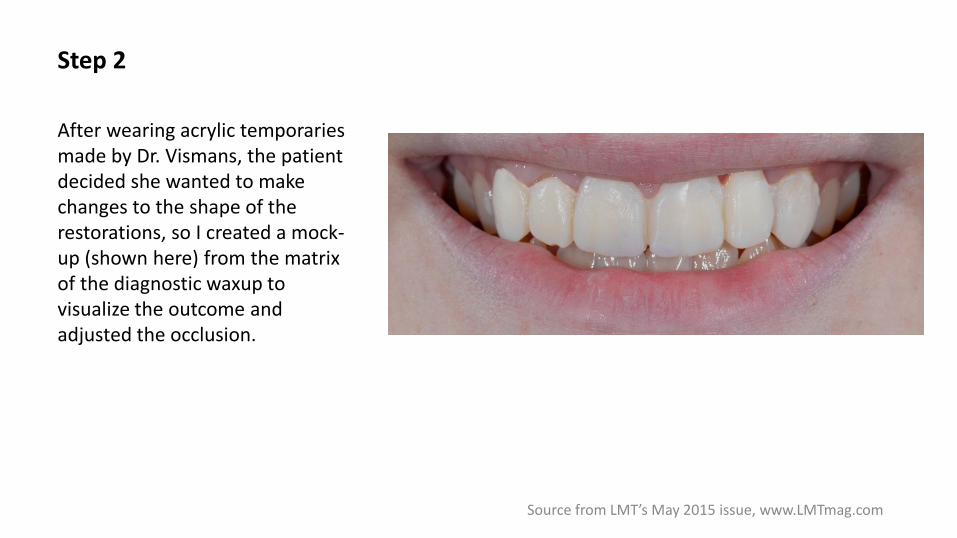
Step 2
After wearing acrylic temporaries made by Dr. Vismans, the patient decided she wanted to make changes to the shape of the restorations, so I created a mock-up (shown here) from the matrix of the diagnostic waxup to visualize the outcome and adjusted the occlusion.
Source from LMT’s May 2015 issue, www.LMTmag.com

Step 3
I scanned and designed the case using 3Shape’s D800 scanner and design software.
Source from LMT’s May 2015 issue, www.LMTmag.com

Step 4
Using virtual articulation, I verified the occlusion and anterior guidance.
Source from LMT’s May 2015 issue, www.LMTmag.com

Step 5.1
I milled the wax crowns using Roland’s DWX-50 and 3D BioCAD’s Press Wax block and re-burnished the margins. In order to control the flow of the molten ingot and maintain the gradient effect in the restoration, I followed Ivoclar Vivadent’s special spruing technique for the IPS e.max Press Multi.
I invested the restorations using BEGO’s Bellavest® SH investment and the IPS e.max Investment Ring System. Investment liquid was mixed in the vacuum for a full two minutes and applied to the occlusal surface and inside the crown, and I filled the investment ring.
Source from LMT’s May 2015 issue, www.LMTmag.com
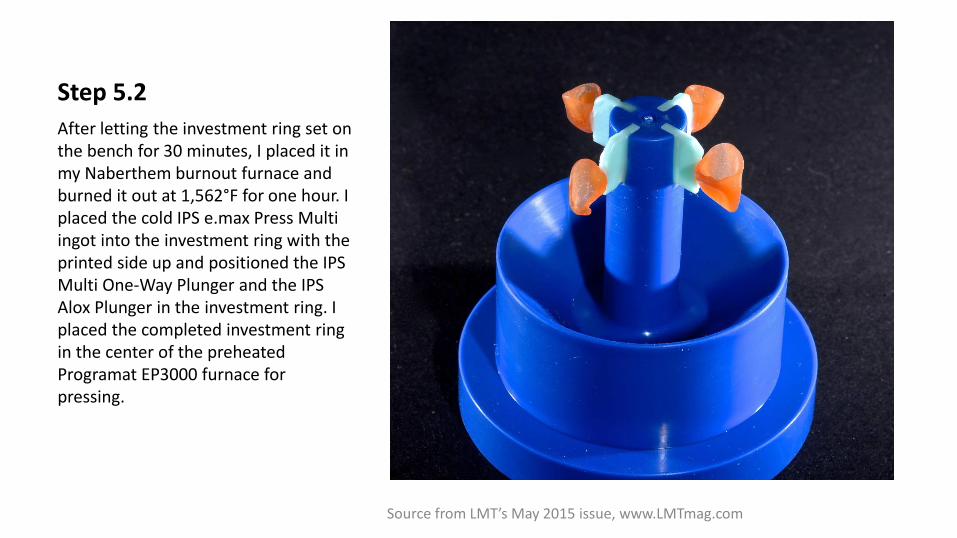
Step 5.2
After letting the investment ring set on the bench for 30 minutes, I placed it in my Naberthem burnout furnace and burned it out at 1,562°F for one hour. I placed the cold IPS e.max Press Multi ingot into the investment ring with the printed side up and positioned the IPS Multi One-Way Plunger and the IPS Alox Plunger in the investment ring. I placed the completed investment ring in the center of the preheated Programat EP3000 furnace for pressing.
Source from LMT’s May 2015 issue, www.LMTmag.com

Step 6
The finished press was allowed to cool.
Source from LMT’s May 2015 issue, www.LMTmag.com
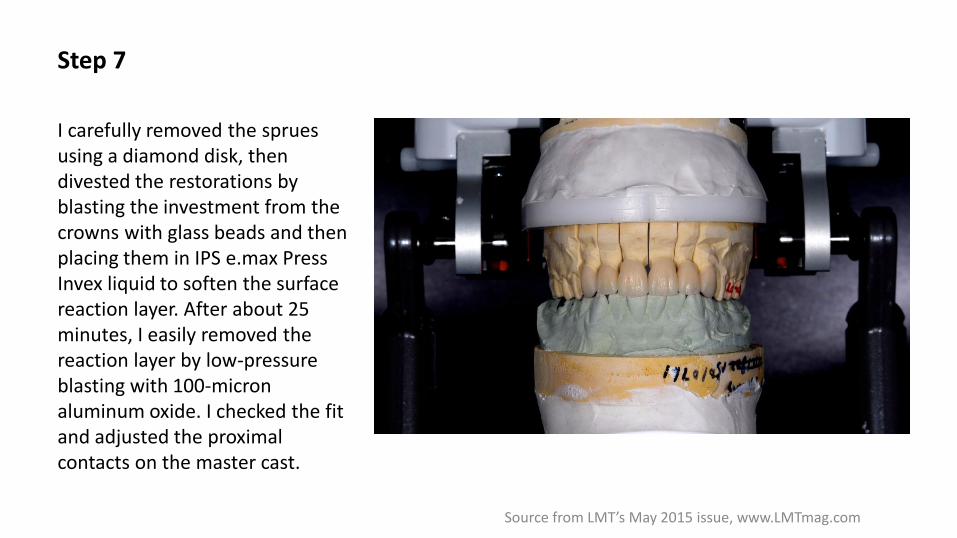
Step 7
I carefully removed the sprues using a diamond disk, then divested the restorations by blasting the investment from the crowns with glass beads and then placing them in IPS e.max Press Invex liquid to soften the surface reaction layer. After about 25 minutes, I easily removed the reaction layer by low-pressure blasting with 100-micron aluminum oxide. I checked the fit and adjusted the proximal contacts on the master cast.
Source from LMT’s May 2015 issue, www.LMTmag.com

Step 8
I adjusted the occlusion to ensure the ideal anterior guidance during both lateral and protrusive movements.
Source from LMT’s May 2015 issue, www.LMTmag.com

Step 9
I stained the crowns using four staining modifiers: IPS e.max Ceram Essence sunset (E04) for the cervical area; sunset and crème (E04 and E02) at a ratio of 1:1 for the mamelon effect; IPS e.max Ceram Shades Incisal 1 for the mesial and distal line angles; and Incisal 2 on one-third of the incisal. After achieving the desired shade and characterization, I fired the restorations.
Source from LMT’s May 2015 issue, www.LMTmag.com

The Final Result The crowns were seated, and the occlusion and esthetics verified. After two weeks, the patient returned and Dr. Vismans reevaluated the occlusion, appearance and function. The gums healed well and were adapting ideally to the restorations and the patient was very happy with her new smile.
Source from LMT’s May 2015 issue, www.LMTmag.com
Rafael Choi, CDT
Is the CEO of Confidental Studio, Gaithersburg, MD, which he opened in 2002. He holds a degree in Dental Technology, has been a technician for more than 25 years, and has trained with Dr. Peter Dawson.
For more information on Ivoclar Vivadent’s IPS e.max Press Multi, call
Tel: +423 235 35 35
E-mail: [email protected]
Website: www.ivoclarvivadent.com.
Source from LMT’s May 2015 issue, www.LMTmag.com


