64
Planning & Designing Green School Grounds in Pembina Trails School Division
Planning & Designing Green School Grounds in Pembina Trails School Division

2 | Pembina Trails School Division
06 1 Intent of Guidelines
07 2 Unique Aspects of School Ground Design
2.1 Time Spent Outdoors2.2 Intensive Use
2.2.1 Construction of New Landscapes2.2.2 After-Hours Use
08 3 Guiding Principles
3.1 Implement Evergreen Design Principles3.2 Take a Child-Centered Approach
3.2.1 Flexibility3.2.2 Playfulness3.2.3 Scale3.2.4 Diversity
3.3 Consider Environmental Impact when Choosing Materials3.3.1 Use Natural Materials 3.3.2 Reuse materials
09 3.4 Focus on Function3.4.1 Circulation3.4.2 Build a Strong Frame with Trees3.4.3 Create Sustainable Gardens3.4.4 Design for Multiple Uses3.4.5 Use Bold Shapes
10 3.5 Be Cognizant of Safe Schools3.5.1 Design Predictable Layouts 3.5.2 Keep Sight-lines Open 3.5.3 Space Out Seating 3.5.4 Leave Two Ways Out
3.6 Plan for Maintenance and Sustainability
11 4 The Site
4.1 Assess Existing Conditions4.1.1 Understand the Site from an Ecological Perspective
12 4.2 New Buildings and/or Additions4.2.1 Consider Building Orientation 4.2.2 Building Facades4.2.3 Entrances and Exits
Table Of Contents

GUIDELINES FOR SCHOOL GROUND GREENING—November 2011 | 3
13 5 Grading and Drainage Specifics for School Grounds
5.1 Link to Local Issues 5.2 Treat Water as a Resource not as Waste5.3 Reduce the Amount of Impervious Cover
5.3.1 Play Areas5.3.2 Drop-off and Pick-up Zones5.3.3 Parking Lots
14 5.4 Hard Surface Areas5.5 Soft Surface Areas
5.5.1 New or Renovated Sports Fields5.5.2 Low Points5.5.3 Slopes, Hills and Berms
15 5.5.4 Retaining5.6 Stormwater Runoff
5.6.1 Bio-Retention Swales5.6.2 Storage/Infiltration Trench 5.6.3 Parking Lot Stormwater Runoff
16 5.6.4 Permeable Surfacing
17 6 Trees, Shrubs and Vines: Selection, Planting and Care
6.1 Guiding Principles6.2 Design Considerations
6.2.1 Create Shade18 6.2.2 Create Groves of Trees
6.2.3 Avoid Salt Damage6.2.4 Tree Placement
19 6.2.5 Maintaining Visibility6.3 Tree and Shrub Selection
20 6.3.1 Tree Sizes6.3.2 Deciduous Trees6.3.3 Coniferous Trees6.3.4 Native Species Selection6.3.5 Non-native Species
21 Tree Selection and Placement22 6.4 Installation
6.4.1 Deciduous Trees6.4.2 Coniferous trees
6.5 Tree Protection6.5.1 Protecting Existing Trees Throughout Design and Construction
Table Of Contents

4 | Pembina Trails School Division
23 6.5.2 Protecting Roots 6.5.3 Grading 6.5.4 Transplanting Trees
24 6.5.5 Removal6.6 Site Maintenance and Management
6.6.1. Watering New Installations6.6.2 Protecting Newly Planted Trees
25 6.6.3 Warranty6.6.4. Mulch and Soils6.6.5 Shrubs and Vines
27 7 Hard Surface Areas
7.1 Surfacing Materials7.1.1 Asphalt7.1.2 Concrete7.1.3 Permeable Paving7.1.4 Other Materials
28 8 Soft Surface Areas
8.1 Hills and Berms8.2 Mulch8.3 Sand
29 9 Pathways9.1 Types of Pathways
9.1.1 Boardwalks 9.1.2 Bridges9.1.3 Garden Paths9.1.4 Nature Trails
30 9.2 Guidelines for Pathway Surface Materials9.3 Standard Dimensions for Accessible Paths
Table Of Contents

GUIDELINES FOR SCHOOL GROUND GREENING—November 2011 | 5
31 10 Site Amenities
10.1 Seating32 10.2 Types of Seating
10.2.1 Stones 10.2.2 Logs 10.2.3 Tires
33 10.2.4 Concrete10.2.5 Wood Benches
10.3 Classroom-Size Seating Areas 34 10.4 Surfacing Materials for Outdoor Classrooms
10.5 Artistic Elements10.6 Gardens
10.6.1 Habitat Gardens 10.6.2 Theme Gardens
35 10.7 Nature Study Areas (No Mows) 10.8 Shade Structures
10.8.1 Placement of Shade 10.8.2 Permanent Shade Structures
10.9 Signage36 10.10 Gates and Fences
10.11 Ponds and Water Features
37 11 Guidelines for Kindergarten Play Areas
11.1 Shade11.2 Play Elements
11.2.1 Sand 11.2.2 Water11.2.3 Loose Parts
38 11.3 Passive and Active Play Areas11.4 Nature
39 Figures—Table of Contents
56 Appendix—Table of Contents
Table Of Contents

6 | Pembina Trails School Division
1 Intent of GuidelinesThese guidelines are intended to help shape design concepts and details related to the creation of
sustainable, healthy, natural and creative outdoor spaces for children. They encompass design ideas,
construction details and site management practices to inspire architects, landscape architects and
school teams to incorporate innovation and long-term sustainability into the planning and design
of green school grounds. This edition captures Evergreen’s seventeen years of transforming Canadian
school grounds from asphalt and turf to diverse learning environments. This work continues to grow as
we research and pilot new ideas and sustainable ways to bring nature to our school grounds.
1 Intent of Guidelines
GUIDELINES FOR SCHOOL GROUND GREENING—November 2011 | 7
2 Unique Aspects of School Ground Design
These guidelines highlight the unique aspects of
the design and maintenance of school grounds
and include specific strategies for detailed
design of outdoor play spaces while addressing
challenges related to intensive use.
2.1 TIme SPenT OUTDOOrS
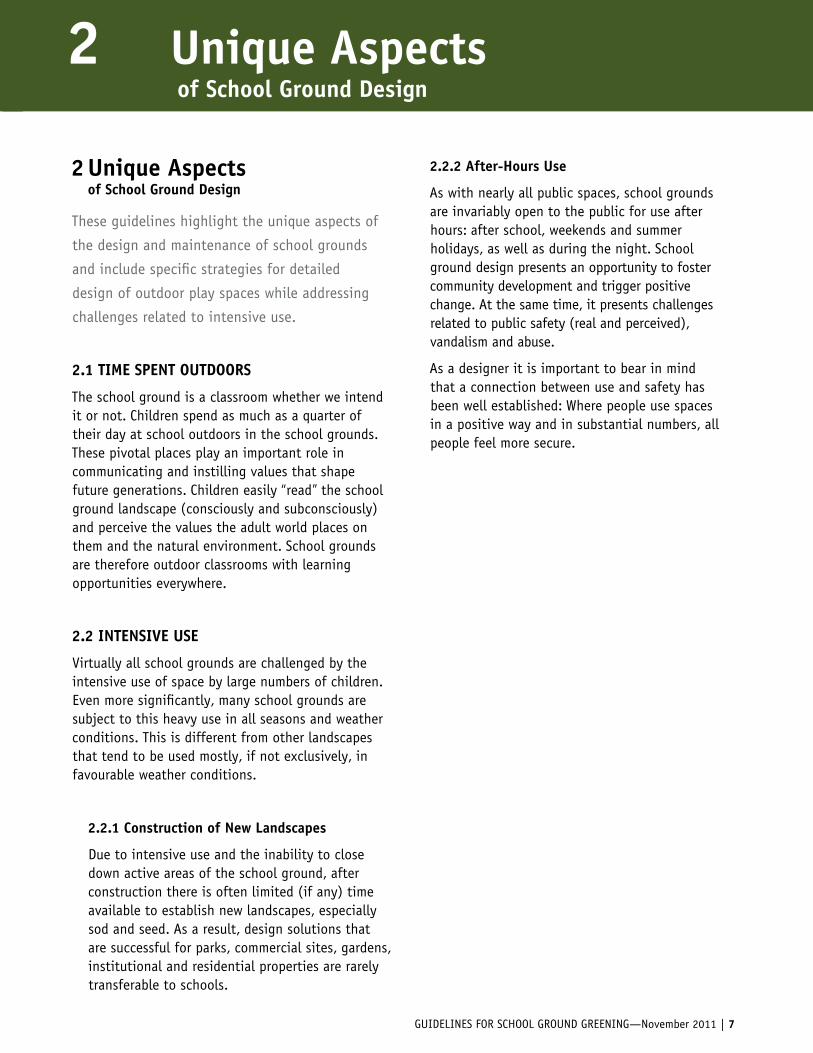
The school ground is a classroom whether we intend it or not. Children spend as much as a quarter of their day at school outdoors in the school grounds. These pivotal places play an important role in communicating and instilling values that shape future generations. Children easily “read” the school ground landscape (consciously and subconsciously) and perceive the values the adult world places on them and the natural environment. School grounds are therefore outdoor classrooms with learning opportunities everywhere.
2.2 InTenSIVe USe
Virtually all school grounds are challenged by the intensive use of space by large numbers of children. Even more significantly, many school grounds are subject to this heavy use in all seasons and weather conditions. This is different from other landscapes that tend to be used mostly, if not exclusively, in favourable weather conditions.
2.2.1 Construction of new Landscapes
Due to intensive use and the inability to close down active areas of the school ground, after construction there is often limited (if any) time available to establish new landscapes, especially sod and seed. As a result, design solutions that are successful for parks, commercial sites, gardens, institutional and residential properties are rarely transferable to schools.
2.2.2 After-Hours Use
As with nearly all public spaces, school grounds are invariably open to the public for use after hours: after school, weekends and summer holidays, as well as during the night. School ground design presents an opportunity to foster community development and trigger positive change. At the same time, it presents challenges related to public safety (real and perceived), vandalism and abuse.
As a designer it is important to bear in mind that a connection between use and safety has been well established: Where people use spaces in a positive way and in substantial numbers, all people feel more secure.
1 Intent of Guidelines 2 Unique Aspects of School Ground Design

8 | Pembina Trails School Division
3 Guiding PrinciplesThe following guiding principles will help you
to translate the values of ecological design and
group process into action. Use these principles as
an integral part of your design process to help to
create an ethic of stewardship to foster and sustain
your school ground project for years to come.
3.1 ImPLemenT eVerGreen DeSIGn PrInCIPLeS
These principles form the foundation for the participatory design process (for more details see Appendix A, Evergreen Design Principles, p. 57):
• Design to meet children’s developmental needs.
• Respond to local ecology and community.
• Incorporate green design principles.
• Adopt a participatory process.
• Facilitate outdoor learning opportunities.
3.2 TAKe A CHILD-CenTereD APPrOACH
Make design decisions with an understanding of children, children’s play, and the importance of play in learning and development. Consider the following factors when developing the design concept:
3.2.1 Flexibility Design spaces that are suggestive, not prescriptive. Ensure flexibility in use is possible when designing spaces for children’s play and learning.
3.2.2 PlayfulnessBuild in a sense of playfulness, aesthetics and creativity. Express this through both the overall design and in detail through the use of colour, pattern and texture.
3.2.3 ScaleScale spaces and design elements to be child-oriented and aim for a sense of intimacy. When determining locations of play areas, take advantage of the spatial quality, sense of place and shade created by existing trees.
3.2.4 DiversityEncourage diversity by creating different spaces and distinct places within the school ground. Create landmarks that function as distinct meeting and playing places for children. Avoid mass repetition of the same feature.
3.3 COnSIDer enVIrOnmenTAL ImPACT wHen CHOOSInG mATerIALS
Playgrounds take enormous abuse, and must be rigorously considered in terms of day-to-day maintenance and long-term viability. School ground projects must be designed for resilience to constant use and seasonal change by employing robust materials that can stand the impacts of their success. The following recommendations should guide decisions about project materials:
3.3.1 Use natural materials Whenever possible, use natural materials for their unique and interesting qualities and potential for learning.
3.3.2 reuse materials Try to reuse materials on site (e.g. balance cut and fill) and for design elements (e.g. make pathways of crushed brick or crushed concrete). Use old barrels, plastic pails, hollow logs and/or recycled wooden raised beds for container gardening.
3 Guiding Principles

GUIDELINES FOR SCHOOL GROUND GREENING—November 2011 | 9
3.4 FOCUS On FUnCTIOn
Aim to create a functional play space for children. Avoid an ornamental approach to the design of the landscape by considering the following points:
3.4.1 Circulation Pathways are an essential part of planning a highly functional space. They diversify the play environment allowing children to move between and through elements, helping them to orient themselves in space. Pathways can also be recreational and play facilities in and of themselves.
3.4.2 Build a Strong Frame with Trees Prioritize trees over ornamental shrub plantings and gardens. Channel the landscaping budget toward well-placed trees best suited to ensure the following:
• Sun safety and wind protection.
• Shade and cooling (urban heat island reduction).
• Energy conservation.
3.4.3 Create Sustainable Gardens When envisioning a teaching garden on school grounds be inclusive of school staff in the planning and design phase of the project and, as much as possible, embed the whole process, including the care and stewardship of the gardens, into the curriculum. Consider the following four points to ensure the success of your project:
• Design gardens to excite children’s senses (theme gardens), for discovery and for formal and informal learning experiences. (For more information see section 10.6 Gardens, p. 34).
• Use natural materials in the construction of raised beds and for edging gardens.
• Locate gardens in low-traffic areas (i.e. well away from meet-and-greet spaces, active play spaces, sports fields, student entrances/exits, line-up zones) and preferably in locations that are accessible to students at recess.
• Avoid ornamental flower gardens and shrub plantings intended to beautify the building and boundary fence lines, as they are difficult to maintain.
3.4.4 Design for multiple Uses Elements that can be used and interpreted in many ways are more practical and more challenging to a child’s imagination than single-purpose pieces. (e.g. A small hill or berm can be used for play, nature study, gatherings or surveying; musical instruments can be incorporated into a pathway or fencing design; a wall could be designed for ball games, climbing, painting or puppet theatre.)
3.4.5 Use Bold Shapes Create and shape spaces using bold gestures. Walls, ceilings, doors, windows and floors shape outdoor spaces just as they shape spaces within a building.
Ceilings: Generally, ceilings are very important in space-shaping school grounds. Canopy trees create ideal ceilings as they shape spaces and create shade.
Walls: Walls, particularly those within the school grounds, should be transparent wherever possible; solid walls are spatially/visually confining and create potential safety/security/surveillance problems.
Doors: Doors can function as entrances and social spaces. They can be made out of wood, metal or stone. An entrance can be an arch, tunnel or landform fitted out with seating that orients and introduces the users to the learning
3 Guiding Principles
10 | Pembina Trails School Division
garden or shaded seating space. For example, in the school ground use cedar poles to define the entrance to a garden space and use armour stone on either side as a meet-and-greet space for students, staff and the community.
Windows: Windows in the landscape can be openings that provide a view to a focal point in the landscape or a feature that helps to draw the user through the space. A window can take on many forms: an opening in a row of shrubs, a vine laden trellis with an opening at child height that accents a feature you want children to focus on, or a wooden frame that acts as a puppet theatre. Using tall shrubs at 3 metres apart in the form of an allée offers a safe, vegetated entrance and/or tunnel effect depending on the number of plants in the feature
Floors: The ground plane is something adults don’t often think about, but a child sees the ground differently due to their proximity to it. For example, a toddler who’s just learning to walk feels every bump and dip on a pathway. A variety of surfaces integrated into a dynamic topography offers children a context for creativity and a wonderful sensory experience, as well as a way for them to discover their agility and nurture their motor skills.
3.5 Be COGnIzAnT OF SAFe SCHOOLS
Ensure the school ground design contributes to a safe space by considering the following points:
3.5.1 Design Predictable Layouts
Enhance site legibility so the layout can be easily understood.
3.5.2 Keep Sight-lines Open
• Do not plant trees in locations that would compromise safety by blocking sight lines, security cameras and/or night lighting.
• Avoid planting low-growing shrubs and other dense plantings next to building walls, parking lots and along the edges of walkways. It is important for people to be able to see ahead along pathways.
• Similarly, do not locate waste and recycling dumpsters and/or precast concrete storage sheds (bunkers) near walkways.
3.5.3 Space Out Seating
Do not place benches or seating stones right at the edge of walkways. Path users may feel uncomfortable or unsafe to be forced to walk close to people sitting on or gathering at the bench.
3.5.4 Leave Two ways Out
Make sure there are two ways in and out of fenced areas. Avoid dead-end entrapment zones.
3.6 PLAn FOr mAInTenAnCe AnD SUSTAInABILITy
Choose durable, high-quality materials whenever possible. Consider maintenance, long-term sustainability and site-management issues in all design decisions.

GUIDELINES FOR SCHOOL GROUND GREENING—November 2011 | 11
4 The SiteThe site has its own unique location,
characteristics and particular neighbourhoods
and communities that are associated with
it. Understanding the site from a number of
perspectives—ecological, health and wellness,
energy conservation —is important because it
opens up opportunities to reveal these biophysical
and environmental relationships on site. These
insights can be used in the school’s overall energy
conservation and educational strategy.
4.1 ASSeSS exISTInG COnDITIOnS
Site analysis should occur at the same time that the design program is being prepared because each impacts the other with constraints and opportunities. The design process will need to respect the constant reconciliation between the identified site opportunities and constraints, and the intended program and affiliated budget.
4.1.1 Understand the Site from an ecological Perspective
From the earliest phase of a project, understand the biophysical interactions that impact the site and consider the experience of the user at a variety of scales. A thorough understanding and appreciation for these relationships can lead to a powerful, ecologically grounded design.
Vulnerable Features
• Meadows, groves, thickets and other identifiable vegetation communities.
• Wildlife dens, breeding areas and pathways, including seasonal ones.
• Streams, wetlands, ponds and lakes.
• Items or locations of personal or sentimental importance to users.
• Soils, erodible, fragile, especially fertile areas and geological formations.
• Cultural features.
• Connections, links and pathways between these features.
existing Features
Obtain a current topographic survey (and other documents as necessary) that show existing features such as:
Trees: Mark caliper, species, extent of drip-line, elevation at base of trunk, spot elevations at several points within drip-line and the drip-line of neighbouring trees overhanging school property including City trees on adjacent boulevards and parks.
Soil: Have existing soils tested for permeability (infiltration) and height (elevation) of water table at same time as bearing capacity testing.
Grading: Mark spot elevations at regular intervals, grading break points (top and bottom of slope, centre lines of swales/ditches), contour lines at 0.25m intervals and benchmark.
Water sources: Mark location of ground hydrants and hose bibs on existing buildings, field irrigation, etc.
Utilities: Mark underground services/utilities, overhead wires, catch basins and storm sewers including inverts and pipe sizes.
4 The Site
12 | Pembina Trails School Division
Existing building and site features: Mark fences including height, gates, flagpoles, benches, light standards, surfaces, boulders, stones, curbs, play equipment including wall-mounted equipment and pavement markings including line games.
Note: Include on the site plan and/or landscape plan whether these elements are “to remain” or
“to be removed.” All plans should show property lines, scale and a north arrow.
4.2 new BUILDInGS AnD/Or ADDITIOnS
4.2.1 Consider Building Orientation
When locating a new building, consider the sun/shade patterns and significant grade changes, which can have an impact on both the building’s energy efficiency and the outdoor play environment. (i.e. position new schools so that the front entrance faces north, so the active area of play will face south reducing winter salt usage.)
4.2.2 Building Facades
Facing play areas: Children spend a great deal of time playing close to the building. Be sensitive to the design and the aesthetics of the facades facing the playing area.
Playable walls: Keep in mind the play-ability of the walls facing the play area. These walls are potential play surfaces for wall ball, basketball and others. These games are impacted by fenestration, surface texture, wall angles etc.
4.2.3 entrances and exits
Lining up: Allow space for “lining up” outside building entrances. This activity takes place at the end of recess and may also be associated with dismissal time and bus line-ups. If possible, provide shade in these areas.
Meet and greet: Be aware of the “meet-and-greet” activity that takes place outside of kindergarten and primary exits at dismissal time. With sensitive design, these spaces can be animated to encourage positive social interaction and community building.
These waiting/gathering spaces for parents and caregivers are used during all seasons and all weather conditions. They should be designed to be comfortable by providing shade and wind protection, lots of seating and room for strollers and wagons.
Caregivers tend to set themselves apart/alone in a location visible to/from the exit doors. There is a great deal of spillover onto surrounding surfaces; these spaces should have hard surfacing or be mulched and/or have specific edges.
In general, meet-and-greet spaces need to be spacious, but this must be balanced with an intimacy of scale. Note that meet-and-greet areas for older students are usually located at school ground entrances rather than building entrances.

GUIDELINES FOR SCHOOL GROUND GREENING—November 2011 | 13
5 Grading and Drainage Specifics for School Grounds
Good grading and positive drainage are arguably
the most critical site management components of
sustainable school grounds, given the intensive
use the grounds are subject to in all seasons and
all weather conditions. Implement integrated
stormwater management design to minimize
stormwater runoff and store and re-circulate
rainwater for use in school gardens. Design to
reflect local municipal greening guidelines.
5.1 LInK TO LOCAL ISSUeS
Use the project as an opportunity to raise awareness of local watershed issues involving the local environment, climate change and/or urban planning, and make the solution visible and educational.
For example, when addressing surface runoff, an infiltration/drainage pit with a standard catch basin frame and grate appears on the surface to be no different from a conventional catch basin drain inlet that connects to a storm sewer. This is an opportunity to interpret the environmental solution of catching water and allowing it to infiltrate the groundwater table in a controlled way versus allowing it to run into the storm drain and out into the lake or river.
5.2 TreAT wATer AS A reSOUrCe nOT AS wASTe
Take a water balance (hydrologic cycle) approach that links each school property to its watershed. Understand that positive action at the site level realizes watershed-scale benefits. The goal is to reduce the quantity and to improve the quality of stormwater runoff through source control rather than conveyance of surface runoff to end-of-pipe solutions. This has become particularly important due to the increased frequency and intensity of rainfall events.
A water balance approach represents a fundamental shift in water management.
Drainage systems —> Ecosystems
Reactive (solving) —> Proactive (preventing)
Engineer driven —> Interdisciplinary
Pipe and convey —> Model natural systems
Peak-flow thinking —> Volume-based thinking
5.3 reDUCe THe AmOUnT OF ImPerVIOUS COVer
5.3.1 Play Areas
Consider options and provide alternatives to impervious hard surface (asphalt) play areas. Depending on the site, turf and/or a suitable mulch soft surface play area may be a viable option. At the very least, take measures to avoid or reduce large unbroken expanses of hard surface play area.
5.3.2 Drop-off and Pick-up zones
Consider and facilitate use of the existing street as a drop-off and pick-up zone rather than creating one on site.
5.3.3 Parking Lots
• Provide only the minimum required parking ratio for building use, particularly where public transit is available.
• Provide compact car spaces, minimum stall dimensions and efficient parking lanes.
• Prior to extending/adding additional parking stalls, re-evaluate and reconfigure the existing parking lot layout. Use these same criteria (compact car spaces, minimum stall dimensions and efficient parking lanes) to maximize parking in the existing parking lot(s).
5 Grading and Drainage Specifics for School Grounds
14 | Pembina Trails School Division
5.4 HArD SUrFACe AreAS
• Minimum slope 2% on impervious surfaces. This reduces the need for salt in high-traffic areas, an obvious environmental benefit.
5.5 SOFT SUrFACe AreAS
• Specify fill and topsoil that is low in clay and high in sand content.
• Create deliberate “soft” (not engineered) infiltration basins/trenches (constructed wetlands) in areas that are poorly drained (low points, wet areas). Plant appropriate trees (e.g. Acer rubrum) adjacent to aid water take-up. Consider making this a Nature Study Area.
• Use utility mulch (relatively inexpensive tub-grinder mulch) in heavily shaded, poorly drained and/or heavy-use areas where turf is not sustainable. Note that tub-grinder mulch is not the same as forestry-chipper mulch, which has long strands of wood that plug up catch basins and are a safety concern with children.
• Be aware that mulch migrates downhill: placing it on a berm next to a hard surface area is difficult to manage/maintain.
• Place mulch or other loose fill material away from drain inlets (catch basins).
• Finished grade of mulch areas should be flush with finished grade of hard surfaces.
5.5.1 new or renovated Sports Fields
Add sand and/or composted amendments to sports fields when aerating, over-seeding, top-dressing, rototilling or re-grading, and/or re-sodding to improve water infiltration.
5.5.2 Low Points
Place drainage low points (e.g. swales, catch basins) away from high-traffic pedestrian areas (e.g. walkways, play areas, line-up areas). Conversely, locate gates and openings in fences away from low points.
5.5.3 Slopes, Hills and Berms
When installing turf consider a minimum slope 1.5% to avoid areas becoming wet and unusable and/or becoming worn and muddy in high-traffic areas.
Contrasting topography is a powerful invitation to play. Where not already existing, it may be possible to shape hills and berms and other playful ground configurations. However, grassy berms are a major site management challenge and are generally not sustainable in areas of active play as they pose mowing problems and become worn and bare from high use within a few years.
If berms are being considered they should not be higher than about 600mm and side slopes should not exceed 3:1 (33%). These types of low berms, if mulched with tub-grinder mulch (that tends to knit together) or paved with poured-in-place rubber surfacing, have proven to be sustainable at schools.
Consider existing slopes as opportunities for increased play potential within a play space; it may not be necessary to build retaining walls or to make them “level,” even around new building additions. This could result in cost savings as well as a more interesting and natural school ground.
GUIDELINES FOR SCHOOL GROUND GREENING—November 2011 | 15
5.5.4 retaining
When using rock to construct retaining walls the following guidelines apply:
• The base course of a rock slope retention wall should be at the base of the grade, (not part way up the slope) to minimize erosion from under the stones. Multiple courses may be required.
• Filter cloth should be used behind and between the stones to prevent material from washing out between the stones. Screenings or asphalt can then be used to fill some of the gaps along the horizontal surface.
5.6 STOrmwATer rUnOFF
Reduce the rate and volume of stormwater runoff by keeping rainwater on site. Store it, delay runoff and make use of it to achieve other goals (e.g. watering trees, gardens, etc.). This can be achieved through the following absorbent landscaping solutions:
5.6.1 Bio-retention Swales
These are vegetated swales, grass swales with minimal slopes and/or rain gardens that offer the following functionality:
• Immediate above-ground and, in the case of bio-retention swales and rain gardens, below-ground storage capacity.
• Possible infiltration areas for groundwater recharge depending on the underlying soil type.
• When planted with wetland shrubs and trees (rain gardens) these “natural” drainage systems/riparian zones slow water flow and act as a sponge to soak up water and promote evapotranspiration.
• Improved water quality.
• Act as learning gardens for students.
• Produce shade to reduce the urban heat island.
5.6.2 Storage/Infiltration Trench
Runoff from both impervious surfaces and surfaces with low-infiltration capacities can be intercepted by an infiltration trench (see Fig. 1, Bio-Retention Infiltration Trench, p. 40). The temporary storage and eventual percolation of stormwater runoff into the soil is the primary purpose of an infiltration trench. The desired dimensions will depend upon the volume of direct runoff for which control is needed and the characteristics of the watershed and soils.
5.6.3 Parking Lot Stormwater runoff
• Wherever possible, use storage/infiltration trenches to address parking lot stormwater runoff. At the same time, slow the runoff down across the asphalt, keep it dispersed and flowing in a “sheet,” allowing the water to enter the perimeter trench or bio-retention swale from several points avoiding a single entry point. Be mindful of icing issues on asphalt pavement as sheet flow can create icy patches in shaded areas and where the slope is less than 2%.
• Provide “breaks” in curbs between “hard” paved surfaces and soft surfaces. Allow water to run from hard surfaces onto soft surfaces. Bio-retention swales, rain gardens or simply open mulched areas with tree plantings are very effective at intercepting runoff from areas of impervious paving.
• Avoid directing water from soft surfaces onto and over hard surfaces that need to be kept clear of snow/ice in winter.

16 | Pembina Trails School Division
5.6.4 Permeable Surfacing
Permeable concrete pavers, pervious concrete and limestone screenings should be considered for school grounds. Porous asphalt is also available, but as of yet, is not generally recommended for school parking lots or play surfaces as its porosity is impermanent in these situations.
The following are examples of the environmental benefits of permeable surfaces:
• Immediate below-ground storage capacity.
• May function as an infiltration area for groundwater recharge (depending on the underlying soil type).
• Research indicates that permeable surfaces can improve water quality by trapping/filtering most pollutants* (avoid intersection of granular base and water table) and reduce thermal pollution by reducing warmed surface runoff.
* Except chloride (salt). However, infiltration technologies distribute (release) chloride more evenly over the seasons than do impervious pavements. Asphalt paving results in high seasonal concentrations in the surrounding environment.
Currently, most permeable paving is significantly more expensive than standard asphalt paving. In some instances it may be a viable option for parking lot expansion or considered for use in combination with other types of paving. It becomes economically viable (in the short term) when its use precludes the necessity of constructing storm sewers and/or stormwater management ponds and structures.
For example, existing roof drains should ideally be separated from existing combined sewers; consider using permeable paving in parking lot reconstruction to partially balance (reduce) roof water currently being directed to storm sewers.
The following are ways to intercept and/or capture water that would otherwise be directed to storm sewers:
• GSPP systems: Grass Swale and Perforated (leaky) Pipe systems in place of curbs and conventional storm sewers.
• Tree canopy: Canopies intercept rainwater, altering the timing and distribution of precipitation.
• No-mow areas: Often called Nature Study Areas, these areas are more absorbent (have lower runoff rates and volumes) than turf.
• External downspouts: Downspouts, in combination with rain barrels and/or cisterns for rainwater storage, can provide an immediate and accessible water resource on site to help with the watering needs of natural school grounds.
• Green roofs: Green roofs reduce the amount of stormwater runoff and also delay the time at which runoff occurs, resulting in decreased stress on sewer systems at peak flow periods.
GUIDELINES FOR SCHOOL GROUND GREENING—November 2011 | 17
6 Trees, Shrubs and Vines Selection, Planting and Care
Native trees, shrubs, vines and wildflowers provide
a number of ecological, economic and health
benefits by:
• Providing shade from summer sun and shelter
from harsh winds.
• Absorbing water and replenishing the natural
water table.
• Reducing stormwater runoff.
• Preventing soil erosion.
• Reducing the amount of time, energy, water,
fertilizers and pesticides that are required
to maintain ornamental plants in the urban
environment.
6.1 GUIDInG PrInCIPLeS
• Consider shade and cooling when choosing locations for trees.
• Protect and increase biodiversity.
• Provide optimum growing conditions to support long-term plant survival and growth.
• If possible, create a source of water for tree management (repair existing hose bibs, install new hose bibs, design building with external roof leaders and cisterns or rain barrels, direct surface runoff toward planting areas). Where possible reduce the demand for potable water through greater efficiencies (grading and creating infiltration trenches).
• Choose good nursery stock. A primary goal is for healthy and structurally stable trees
• Protect planned and existing trees at the design phase and follow through to management practices (e.g. annual mulching).
6.2 DeSIGn COnSIDerATIOnS
There are a number of criteria and principles to consider when designing with trees, shrubs and vines. This section will highlight the importance of shade in the school ground, the recommended sizes of trees and shrubs, the role of native species and the necessity for providing optimum growing conditions, including the right location for plantings.
6.2.1 Create Shade
The Importance of Shade
The Canadian Dermatology Association estimates that one in seven children born today in Canada will develop skin cancer later in life because of over-exposure to ultraviolet radiation (UVR). In fact, one blistering sunburn during childhood can double the risk of getting cancer.
Children are at school during the highest risk period of the day – between 10am and 4pm. They spend a significant amount of this time outdoors (1–3 hours per day) for recess, lunch, physical education, field trips, outdoor education and extra-curricular activities. In most cases, they have little choice about exposure to the sun.
Make planning and designing for shade a priority. One of the most effective ways to protect students and staff from UVR is to plant shade trees where people congregate — for example, around playground equipment, benches and tables, in or next to hard surface play areas, and along sports fields to offer refuge for spectators, players and officials.
Shade by season
• Ensure that new shade initiatives do not intensify winter conditions at the site. Summer shade provision should minimize UVR
6 Trees, Shrubs and Vines Selection, Planting and Care

18 | Pembina Trails School Division
levels as well as reduce heat and light. Winter shade provision should minimize UVR levels, while allowing for transmission of sufficient levels of heat and light.
• Include as many trees as possible when designing school grounds. Strive to exceed the Toronto Green Standard goal of 20% canopy coverage of the entire property at maturity. Coverage of much more than this is easily achievable on virtually all school grounds, and results in so many positive outcomes.
• Decrease the demand for fossil fuels by shading buildings to reduce air conditioning use.
• Plant trees to increase positive effects on children’s health and behaviour and foster children’s awareness of their connection to the natural world.
6.2.2 Create Groves Of Trees
Create shade using trees rather than shade structures or gazebos. Trees are a long-term investment: they improve and enlarge as they age (rather than deteriorating), are less expensive at the outset and provide many environmental benefits.
Plan for groves comprised of diverse species of native canopy trees to create natural gazebos for shade and cooling. Ensure trees are located:
• Close to the school building (rather than lining the far edges of the school ground).
• Near sports field spectators.
• In areas between and around active play spaces.
Note: Avoid staking trees on school grounds.
6.2.3 Avoid Salt Damage
Anticipate areas that will be subject to salt runoff and if possible, avoid them. Apply the
following guidelines when it is necessary to plant in these areas.
• Be mindful of potential winter salt damage when locating trees in paved play areas. Determine drainage pattern/flow and avoid planting trees in areas subject to salt runoff (e.g. locate planting islands on the uphill side of salted areas or plant trees in large raised planters). (See Fig. 2, Timber Planter Box with Seating and New Planting, p. 41 and Fig. 2b, Timber Planter Box with Seating and New Planting Detail, p. 42.)
• Plant in a large box planter using small varieties such as Amelanchier arborea or Cornus alternifolia. (These will require more watering.)
• Determine if play surfaces are kept clear (plowed) in the winter and if salt is currently used. Encourage schools to generally stop plowing and salting paved play areas outside of building access routes.
• Refer to Evergreen’s Native Plant Database for salt tolerant trees and shrubs: evergreen.ca
6.2.4 Tree Placement
Location of tree plantings is essential to tree survival and long-term health. The following guiding principles will help you to realize a successful project.
Guiding principles:
• Shade requirements on school grounds should be a priority—look to extend existing shade on site with careful placement of trees.
• Do not plant trees on berms due to possible erosion, compaction and exposed roots.
• To provide shade, strong consideration should be given to planting trees in a grove with wood mulch versus the construction of a wooden shade structure that can be very costly and could be subject to vandalism.

GUIDELINES FOR SCHOOL GROUND GREENING—November 2011 | 19
• When planning tree placement be mindful of fire routes, snow clearing and storage locations, service access routes, portable move-in and move-out routes, student safety and security (sight lines), building envelope maintenance and construction access, and tree management (access to water source).
Tree planting distances from built objects
The following standards help ensure student safety, maintenance and emergency access, and healthy growing conditions for your tree plantings.
All distances are measured as a radius and are expressed as minimum distances.
• 2m from a bench, seating stone or rock
• 2m from a fence
• 2m from asphalt areas and walkways
• 5–7m from other trees (or appropriate to the selected species)
• 7m from a building
• 7m from a fence of an adjacent residential neighbour
• 7m from a running track (no trees planted inside track area)
• 6m from soccer and football boundary lines
• 6m from a fire hydrant
• 7m from a flag pole
• 3m from underground utilities
• 3m from aboveground utilities
Note: Do not plant trees on septic beds, within access routes or snow storage areas and avoid planting trees in areas of potential building expansion, portable installation or parking lot expansion.
6.2.5 maintaining Visibility
• Avoid blocking night lighting or interfering with security cameras.
• Remove low branches of large shrubs in areas where visibility is a concern.
• Adjust patterns of supervision and routine observations of school grounds to reflect the new plantings.
6.3 Tree AnD SHrUB SeLeCTIOn
Consider a number of factors when choosing trees and shrubs for the school ground. The following principles will help to ensure that the unique characteristics and features of your region and school ground are central to the plant selection process.
Guiding principles:
Select tree/shrub species with consideration of the following (see Fig. 3, Recommended Plant Lists, p. 43):
• Sun/shade requirements.
• Form (relative to the size of space and proximity to overhead wires).
• Wood strength (vandalism).
• Soil needs (type, porosity, characteristics, pH, compaction, etc.).
• Water requirements (drought tolerance and/or ability to tolerate poor drainage).
• Salt tolerance (in light of possible winter salting of paved areas).
• Leaf size (e.g. small leaves are best in courtyards).
• Consider species that do not have thorns, berries (unless edible) or other fruit and nuts to reduce debris, throwing objects, toxicity and allergies.
• Species should be low-pollinating, and should not be poisonous or a “noxious weed” (refer to the Native Plant Database at evergreen.ca for associated plant lists).
• Design for diversity and avoid monoculture plantings.
• Follow the Criteria for Acceptable Nursery Stock (Appendix B, p. 58)

20 | Pembina Trails School Division
6.3.1 Tree Sizes
Minimum size requirements should be met to protect against vandalism and to ensure the survival of the trees and success of the project especially in the following areas:
• Active play areas (asphalt areas, edges of sports fields, high-traffic or compacted-soil areas, near play structures).
• Meet-and-greet areas (drop-off and pick-up locations).
• Small and large seating areas (benches, outdoor classrooms and theatres).
6.3.2 Deciduous Trees
• Trees should be a minimum of 45mm in remote parts of the school ground where vandalism is not a concern and 60–70mm calliper in high activity and/or vandalism-prone areas.
• Prune tree to 2m from ground to the lowest branches to prevent children from swinging and tearing the branch away from the trunk and to allow good visual penetration when tree is mature.
• Smaller trees, whips and seedlings may be considered for Nature Study Areas where mowing is carefully managed and students can do the planting.
6.3.3 Coniferous Trees
• Trees should be 1.5m to 3m tall depending on their susceptibility to vandalism or location proximity to high-activity areas.
6.3.4 native Species Selection
Native species are recommended on schoolgrounds for a number of reasons:
• Planting native species of trees and shrubs can replace natural communities that have been destroyed in urban centers.
• Native species have adapted to local soil and climate conditions and will not require watering (once they are established) or chemical fertilizers and pesticides in order to thrive.
• These species have evolved with the local bird, mammal, butterfly and insect populations and therefore provide them with food and habitat.
• Growing native species improves biodiversity and creates a local seed source.
• Planting native species and connecting existing green spaces provides migration corridors for urban wildlife.
• Native plants can provide an educational resource on school grounds.
• Refer to Evergreen’s Native Plant Database for a comprehensive list of native species at evergreen.ca.
6.3.5 non-native Species
When non-native species must be used it is suggested that:
• Non-invasive non-natives are used to prevent spreading into nearby natural habitats (e.g. yellowood).
• Non-native plants are in a separate garden from native species.
• Columnar or dwarf cultivars of native species or non-invasive species are used in areas around buildings or access routes.

GUIDELINES FOR SCHOOL GROUND GREENING—November 2011 | 21
DO
• Design for diversity.
• Use native species wherever possible.
• Plant trees in hard surfaces to shade areas of active play.
• Reconfigure “out of bounds” areas to access existing shade.
• Plant mountain ash and hackberry (small leaved trees) in courtyards.
• Use tall shrubs such as alternate leaf dogwood, serviceberry or nannyberry for shading small spaces.
• Plant a variety of native tree and shrub species for teaching and learning purposes.
• Use annual vines on fences.
• Plan for planting that is manageable/sustainable.
• Specify deciduous trees more than 60-70mm caliper or coniferous trees more than 2m height in areas of active play.
• Determine drainage pattern/flow and avoid planting trees in areas subject to salt runoff (e.g. locate planting islands on the uphill side of salted areas or plant trees in large raised planters).
• Plant trees away from neighbours’ houses and/or gardens.
• Plant trees only if there’s a summer watering plan in place.
DOn’T
• Plant monocultures of tree species.
• Specify nut trees near school buildings where issues arise due to allergies and anaphylaxis.
• Specify plants with toxic parts – Refer to CAN/CSA-Z614-07 Table G.1. for plants to be avoided in children’s play spaces. Note that most vines have poisonous plant parts, a consideration relevant for creating “green/living walls” in schools.
• Specify invasive non-native species (e.g. Norway maple) or species vulnerable to insects and disease (e.g. American elm).
• Be overly influenced by requests from site-management sector for “non-messy” plantings. Small fruit, seed pods, leaves, small pine cones, etc. are natural materials with high play value and learning potential.
• Plant trees with large fruit which can attract wasps and which can be used as projectiles by children in the school.
• Plant trees with soft bark.
• Plant trees on the top of berms due to possible erosion, compaction and exposed roots.
• Plant trees in the middle of parking lots.
• Plant trees in areas of potential building expansion, portable installation or parking lot expansion.
Tree Selection and Placement

22 | Pembina Trails School Division
6.4 InSTALLATIOn
Proper location and installation of trees in school grounds is essential to their long-term health and survival. The following recommendations help to ensure a successful tree planting project:
• For a single tree planted in primarily hardscaped areas, provide a minimum of 30m3 of soil.
• For trees planted in groups of two or more in primarily hardscaped areas, provide a minimum volume of 15m3 of high quality soil per tree.
• For the best chance of survival, provide a minimum 3m x 3m opening for a single tree in hard surfacing.
• Dig the hole for the tree at least twice the width of the root ball and angle the sides to 45 degrees.
• Ensure granular base and rubble is removed with the asphalt.
6.4.1 Deciduous Trees
• Use deciduous trees on the south and west sides to shade the building and portables and to reduce reflectivity of paved surfaces and building walls. Plant large growing shade trees at the equivalent of 6–8m intervals (See Tree Planting Distances from Built Objects p. 19). Specify trees with a high branch height (2m clear stem).
• Plant trees in paved play areas to provide shade to reduce the urban heat island effect. (See Fig. 4, Deciduous Tree Planted in Hard Surface, p. 44). If a choice is necessary (i.e. where funds are limited), priority should be given to shading paved play areas rather than parking lots. (See Fig. 5, Deciduous Tree Planted in Soft Surface, p. 45, Fig. 2 and 2b, Timber Planter Box with Seating and New Planting Detail, p. 41 and 42, Fig. 6, Tree Planting in Poorly Drained Soils, p. 46.)
6.4.2 Coniferous Trees
• Use coniferous trees to provide effective shade, wind protection (i.e. windbreaks) and winter interest.
6.5 Tree PrOTeCTIOn
Consider the following tree protection goals in the early stages of planning and design to ensure new and existing trees are properly protected and cared for in the short- and long-term:
• Protect trees rather than repair injury.
• Limit tree root injury to a tolerable level.
• Eliminate the use of anti-desiccants, chemical fertilizers and pesticides/insecticides.
6.5.1 Protecting existing Trees Throughout Design and Construction
Throughout the planning, design and construction phases of the project, take every measure to protect existing natural areas and/or significant and healthy existing trees. Damage can occur during site servicing/utilities trenching, parking lot expansion and the creation of access lanes, drainage systems, hard surface play areas, etc.
evaluation of existing Trees
Each tree is to be evaluated according to factors such as species, age, health, vigour, size, form structure, drainage patterns, location and surrounding features. Accurate canopy dimensions and grades of trees are to be noted on base plans.
Protect all existing trees within or adjacent to the construction area before construction starts by creating a Tree Protection Zone (TPZ) with a Tree Protection Barrier (TPB) erected around its perimeter.

GUIDELINES FOR SCHOOL GROUND GREENING—November 2011 | 23
The minimum tree protection zone will be the drip line* of the tree.
The exception to the rule would be for columnar or pyramidal trees in which case the tree protection zone will be determined on site. This is why it is most important that the designer has accurate canopy dimensions shown on the drawings for all existing trees, as well as adjacent City or neighbouring trees whose canopies (and underground root systems) will impact on Board property and construction plans.
*The drip-line is a “line” on the ground corresponding to the outermost reaches of the branch tips and generally corresponds to the root zone of most trees. Pyramidal and columnar form trees have root zones larger than their drip-line and the TPZ and TPB should be adjusted outward accordingly.
Within the tree protection zone, there will be:
• No root cutting.
• No alteration or disturbance to existing grades of any kind.
• No changes to the grade by adding fill, excavating or scraping.
• No grading, trenching, excavating, or soil compaction.
• No storage of construction materials or equipment.
• No stockpiling of soil, debris or construction waste.
• No movement or storage of heavy vehicles or equipment.
6.5.2 Protecting roots
• Ninety percent of a tree’s roots are within the top 300mm of the surface. Specify directional boring for installation of all site servicing (utilities) within the TPZ of existing trees. Do not allow excavation or trenching within the TPZ of
existing trees. Tree roots should not be cut off to accommodate curbs, playgrounds, hard surface walkways or other landscape features. Cutting roots negatively affects the safety, stability and health of the tree. Transplanting existing trees up to 150mm caliper may be an option, depending on the species of the existing tree and time of transplanting.
• If it is necessary for heavy equipment to travel over root zones during construction, a minimum 9” layer of tub-grinder mulch is to be spread over roots (to be maintained over the duration of the job) and recycled/re-used on site upon completion of the work. Tree protection barriers must be erected before the construction project starts, maintained throughout the project and removed when final inspection and sign-offs are complete. They are to be included and priced as part of the project.
• Short term projects (2 months or less) – use standard T-bars and plastic safety fence.
• Longer term projects – use 10 gauge chain-link fence and standard T-bars spaced +/- 2m apart.
• Limit root damage impact when working in a TPZ by using specialized construction techniques such as low pressure hydro-vacuuming, air knifing, directional boring or tunnelling and arboricultural techniques such as root pruning, hand digging, shoot pruning, mulching, irrigating and fertilizing.
6.5.3 Grading
Do not change the grade (finished elevation) within the TPZ of existing trees.
6.5.4 Transplanting Trees
Consider transplanting trees that are in the way of construction rather than cutting them down.

24 | Pembina Trails School Division
6.5.5 removal
Where removal of existing trees is unavoidable, have the trees appraised by a certified arborist and obtain the necessary tree removal permits from your city or municipality. Replace the removed trees with trees of equal value; that is, the assessed value of the replacement trees must equal the assessed value of the removed trees.
6.6 SITe mAInTenAnCe AnD mAnAGemenT
It is necessary to consider the management and maintenance of the proposed design features throughout the planning and design process. A well planned and organized maintenance strategy will protect your investment of energy, resources, money and time.
6.6.1 watering new Installations
Newly planted trees will need summer watering until they become established (approx. 3 years).
From May to August each tree needs 30 gallons of water every week. From September to mid-October, each tree needs 30 gallons of water every two weeks. (See Appendix C, Watering Guidelines for Newly Planted Trees, p. 59.)
Steps to follow:
• Assure hose bibs are accessible or other water sources are available prior to planting.
• Soak the root ball of newly planted trees after planting.
• Establish watering schedules prior to installation and be prepared to deeply water newly planted trees throughout the summer for approximately three years.
• Water established trees during dry periods.
• Use innovative watering solutions such as alligator bags and watering pipes.
6.6.2 Protecting newly Planted Trees
Where there is concern for the life of the tree due to vandalism or damage to the bark, the tree trunk could be protected with the following methods:
Planting beds: Planting trees into planting beds will protect roots and bark from traffic and lawn maintenance equipment.
Wire caging: Use 10 gauge galvanized 5cm x 5cm wire-mesh caging or stucco wire (122cm–152cm wide) secured with 3 regular T-bars placed 30cm from the trunk of the tree. Caging is placed 30cm above the soil (15cm of wood mulch is on top of the soil). The tops of the T-bars are below the top of the mesh. Caging should be left on for 8–10 years. It is not necessary to cage trees if they are not at risk. (See Fig. 7, Wire Mesh Caging, p. 47.)
Snow fencing: Use orange or black plastic snow fencing wrapped loosely around the trunk and secured with clips. (See Fig. 8, Plastic Snow Fence, p. 48.) Using plastic snow fencing to protect the trunk of a tree is a cost-effective way of ensuring that your long-term investment in shade has a chance of surviving the rigours of children’s play.
Woven tree basket: This technique involves the students and a local artist in weaving a basket-like structure around the trees with different coloured twigs, willow branches and grape vines, creating a natural protective barrier around the tree. Add mulch both inside and around the basket to a depth of 10–15cm (See Fig. 9, Tree Protection Woven Basket, p. 49.)
Stones in a circle: Another way to protect tree roots is to use stones in a circle approximately 2m in diameter around the trunk and fill this area with daylilies, native grass or 10–15cm of mulch. Make sure the stones are placed on a solid base, and not on the mulch where they can roll or shift. (See Fig. 11. Tree Protection Rock Circle, p. 51.)

GUIDELINES FOR SCHOOL GROUND GREENING—November 2011 | 25
Tree guards: Use tree guards to protect tree bark from sting trimmers. Avoid using split weeping tile.
Rodent guards: For smaller trees (below 60mm) rodent guards should be used when planting in areas where mowing has been halted.
6.6.3 warranty
Include in the planting specifications a two-year maintenance and warranty period and stipulate that the contractor is to inspect the project, check and secure the tree cage and insure all dead and dying trees are replaced.
6.6.4 mulch and Soils
Mulch: Mulching has many benefits: It keeps roots cool, retains moisture, protects roots from foot traffic, reduces erosion and soil compaction, prevents runoff, reduces weeds and improves the organic content of the soil.
• Free forestry-chipper mulch can be used on trees that are far from the school building and catch basins (large wood chips plug up catch basins).
• Mulch supplies should be from local bark and wood sources.
• Tub-grinder mulch is preferable to wood chips. It has been ground down into a fine fibrous material that binds together.
• Do not use mulch that has been made from pressure treated wood.
Amount of mulch per tree:
• New tree – apply a minimum of half a cubic yard of wood mulch (approximately 3 wheelbarrow loads per tree) to a depth of 15cm (6”)
• Existing tree – mulch out to the drip-line from the trunk
• Top up the mulch in active play areas on an annual basis, less active areas can be topped up on a biannual basis
• To give trees a nutritional boost, pull back the mulch and top dress with 2.5cm (1”) compost or worm castings, then replace mulch to a depth of 15cm (6”) each year
• Plan for leaves to remain under the tree to break down into humus and naturally fertilize the tree
Depths of mulch:
• High-traffic areas – 15cm ( 6” ) deep
• Planting beds – 10cm ( 4” ) deep
• Over existing tree roots – 15cm ( 6” )
• Base of newly planted trees – 15cm ( 6” ) and up to 2m diameter
• Pathways – 15cm ( 6” )
(See Appendix D, The Importance of Mulch, p. 61.)
Soils and compostable amendments: When possible, reuse soil from the site for plantings. Soils can be amended with compost (mushroom, vermi, leaf mold, city) and sand sourced locally. If soil is required, it must be sourced locally. The soil should contain no manure, herbicides, pesticides or peat moss.
6.6.5 Shrubs and Vines
Shrubs and vines are higher maintenance and should be incorporated into beds for easier management and a better chance of survival. Consider the following factors when choosing species and locations for school ground projects:
• Shrub growth habit – taller shrubs such as alternate leaf dogwood, serviceberry and nannyberry naturally grow in a vase shape and are ideal choices when sight lines need to be respected. Carefully prune shrubs at the base to allow visibility under and through the shrub. Avoid shrubs whose tops need to be
26 | Pembina Trails School Division
pruned and clipped regularly, as this adds a maintenance burden.
• Perennial vines on fences create maintenance issues due to the need for annual removal of volunteer weed trees and shrubs that quickly become established along the fence line. Use annual vines that you can remove after one season.
• Consider vines for shade and habitat on high school auditorium walls. Note non-natives are needed for this function as the vines need to be self-clinging (Species such as Englemann ivy are mildly toxic to children and should be avoided in daycare play spaces.) Refer to Canadian Standards Association document – Table G.1 Plants to be Avoided in Children’s Play Spaces, for a list of toxic plants.
Minimum installation size requirements:
• Deciduous tall shrub (planted as singles or in groves) – 200—250cm ht.
• Deciduous small shrub (planted in a protected area) – 60cm ht.
• Coniferous shrub (planted in a protected

GUIDELINES FOR SCHOOL GROUND GREENING—November 2011 | 27
area) – 60cm ht.
7 Hard Surface AreasHard surface areas within the school grounds
include walkways, meet-and-greet areas, and open
space for games and sports.
Guiding principles:
• Provide shade cover t o at least 30% of all
hardscape, walkways and others.
• When designing large areas of hard surfacing,
plan to retain a minimum of 5mm of rainfall (all
runoff from small design rainfall events) on the
site through rainwater reuse, onsite infiltration
and evapotranspiration.
7.1 SUrFACInG mATerIALS
Both hard and soft surfaces are needed to support different types of play activity. The surfacing addressed in this section includes hard surfacing such as asphalt and concrete and soft surfacing such as mulch and sand.
7.1.1 Asphalt
When using asphalt as a surface in play spaces consider the following:
• Striking a balance between areas of hard and soft surfacing.
• Grinding or crushing the asphalt and re-using it on site.
• When planting trees, constructing planting beds or establishing areas of turf in asphalt, remember to remove all rubble and the granular base along with the asphalt to help plant roots penetrate and become established
in existing soils.
7.1.2 Concrete
When using concrete for walkways, consider using a colour or stain to reduce the sun’s glare and reflection. This will help to reduce UVA and UVB exposure.
7.1.3 Permeable Paving
Consider using permeable paving on walkways and in parking lots to reduce water runoff and increase ground percolation. The 100mm-thick (4-inch) Unilock Turfstone works well around trees that have been planted in asphalt areas. Unilock Ecostone could be considered as well.
7.1.4 Other materials
• Limestone screenings, crushed brick and interlocking brick could be used in a variety of ways within the school ground.
• Reuse materials for surfacing (e.g. tiling, mosaics of materials embedded in concrete, cob or rammed earth).
7 Hard Surface Areas

28 | Pembina Trails School Division
8 Soft Surface AreasBoth soft and hard surfaces are needed to support
different types of play activity. Often schools will
have enormous asphalt yards, which can, in part,
be transformed into useable green space.
8.1 HILLS AnD BermS
Consider the following guidelines when shaping the ground to make hills, berms and other playful ground configurations:
• Hills should not be too high and should have a gradual slope. Hills should not exceed 1:3 slope. High hills are difficult to maintain, run a high risk of wear, and pose mowing problems. Typically, turf cover on berms lasts only one to two years and has the potential to become mud hills.
• Consider effects that a berm could have on drainage.
• Berms must not contain any rubble.
• If steeper hills are required, design will need to avoid erosion. This may include terracing (timber or stone).
• Trees in association with berms in active play areas of the schools are best planted at the base of the slope where the mulch will stay in place and water has a better chance of infiltrating around tree roots, and roots will not be exposed through erosion or settling of the berm.
8.2 mULCH
• Consider using berms made of mulch. They must be replenished annually or biannually, but other than that require little maintenance.
• Use wood mulch that goes through a tub grinder or log peeler as it tends to mat together and stay in place.
• Avoid wood chips as they are a safety concern when thrown by lawnmowers and tend to float during heavy rainfalls, plugging up catch basins and causing flooded areas.
• Free forestry-chipper mulch should not be used unless it is a long way from the school and away from the catch basins—long strands of wood plug up catch basins and are a safety concern with children. Free forestry-chipper mulch can be used as a base, but should be covered with tub-grinder mulch.
• Mulches should be used in high-traffic areas (including pathways) at 15cm (6”) depth, rather than sod. Replenish mulch every year.
• All perimeter containment installed around play equipment should be designed and constructed to maintain a level surface for the mulch and to reduce migration of the material.
8.3 SAnD
Sand is considered highly valuable for manipulative play, especially when access to water (faucet or water element) is also provided. For more details about sand, see section 11, Guidelines for Kindergarten Play Areas, p. 37.
Note: Other soft surface materials include grass, groundcovers and pine needles.
8 Soft Surface Areas
GUIDELINES FOR SCHOOL GROUND GREENING—November 2011 | 29
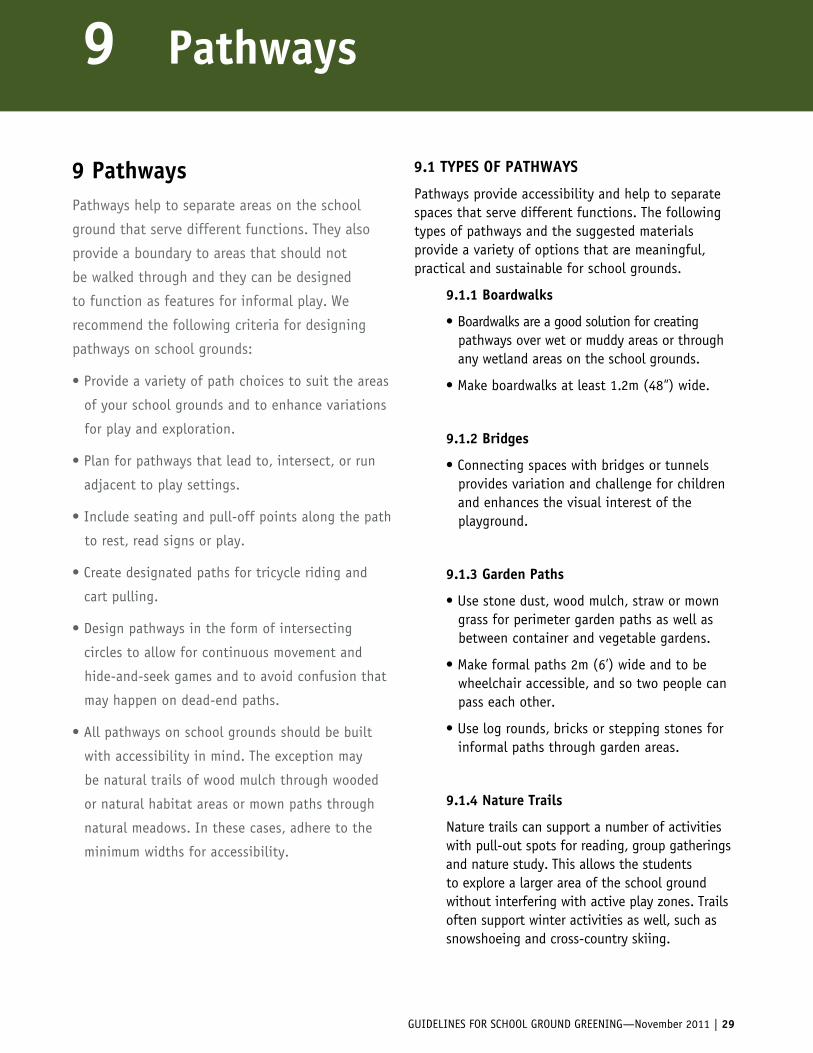
9 PathwaysPathways help to separate areas on the school
ground that serve different functions. They also
provide a boundary to areas that should not
be walked through and they can be designed
to function as features for informal play. We
recommend the following criteria for designing
pathways on school grounds:
• Provide a variety of path choices to suit the areas
of your school grounds and to enhance variations
for play and exploration.
• Plan for pathways that lead to, intersect, or run
adjacent to play settings.
• Include seating and pull-off points along the path
to rest, read signs or play.
• Create designated paths for tricycle riding and
cart pulling.
• Design pathways in the form of intersecting
circles to allow for continuous movement and
hide-and-seek games and to avoid confusion that
may happen on dead-end paths.
• All pathways on school grounds should be built
with accessibility in mind. The exception may
be natural trails of wood mulch through wooded
or natural habitat areas or mown paths through
natural meadows. In these cases, adhere to the
minimum widths for accessibility.
9.1 TyPeS OF PATHwAyS
Pathways provide accessibility and help to separate spaces that serve different functions. The following types of pathways and the suggested materials provide a variety of options that are meaningful, practical and sustainable for school grounds.
9.1.1 Boardwalks
• Boardwalks are a good solution for creating pathways over wet or muddy areas or through any wetland areas on the school grounds.
• Make boardwalks at least 1.2m (48”) wide.
9.1.2 Bridges
• Connecting spaces with bridges or tunnels provides variation and challenge for children and enhances the visual interest of the playground.
9.1.3 Garden Paths
• Use stone dust, wood mulch, straw or mown grass for perimeter garden paths as well as between container and vegetable gardens.
• Make formal paths 2m (6’) wide and to be wheelchair accessible, and so two people can pass each other.
• Use log rounds, bricks or stepping stones for informal paths through garden areas.
9.1.4 nature Trails
Nature trails can support a number of activities with pull-out spots for reading, group gatherings and nature study. This allows the students to explore a larger area of the school ground without interfering with active play zones. Trails often support winter activities as well, such as snowshoeing and cross-country skiing.
9 Pathways 8 Soft Surface Areas

30 | Pembina Trails School Division
• Use wood mulch or mown paths that will not require heavy labour to install, possibly disrupting the ecology of the site. To provide a firm walking surface lay down 10–15cm (4–6”) of wood mulch.
• If wheelchair accessibility is desired, use limestone screenings. (See Fig. 12, Limestone Screening Walkway, p. 52 for details.)
9.2 GUIDeLIneS FOr PATHwAy SUrFACe mATerIALS
Follow these recommendations to ensure safety, sustainability and practicality:
• Materials should be non-slip asphalt, concrete, unit pavers, turf-stone or stone dust.
• Wood mulch (preferably fine or shredded) provides easy mobility on nature trails or garden paths.
• Pressure-treated wood should not be used on any surface with which children or adults could come into contact on a school ground. (See Appendix E, Evergreen’s Rationale for Avoiding ACQ Lumber, p. 62.)
• Cedar is an excellent choice of wood as it is not treated and has a natural resistance to rot.
9.3 STAnDArD DImenSIOnS FOr ACCeSSIBLe PATHS
• Minimum width of 110cm (44”) for single use, to 220cm (88”) for two wheelchairs to pass.
• No changes in level that exceed 60mm (1/4 inch).
• Maximum slope of 5% (1:20), although 1–2% is ideal.
• Surfacing must be of non-slip materials (e.g. asphalt, stone dust).
• A 185cm (74”) wide “passing space” must be provided every 30m (100’).
• Headroom of at least 200cm (80”) must be provided along the entire length and width of the path.
GUIDELINES FOR SCHOOL GROUND GREENING—November 2011 | 31
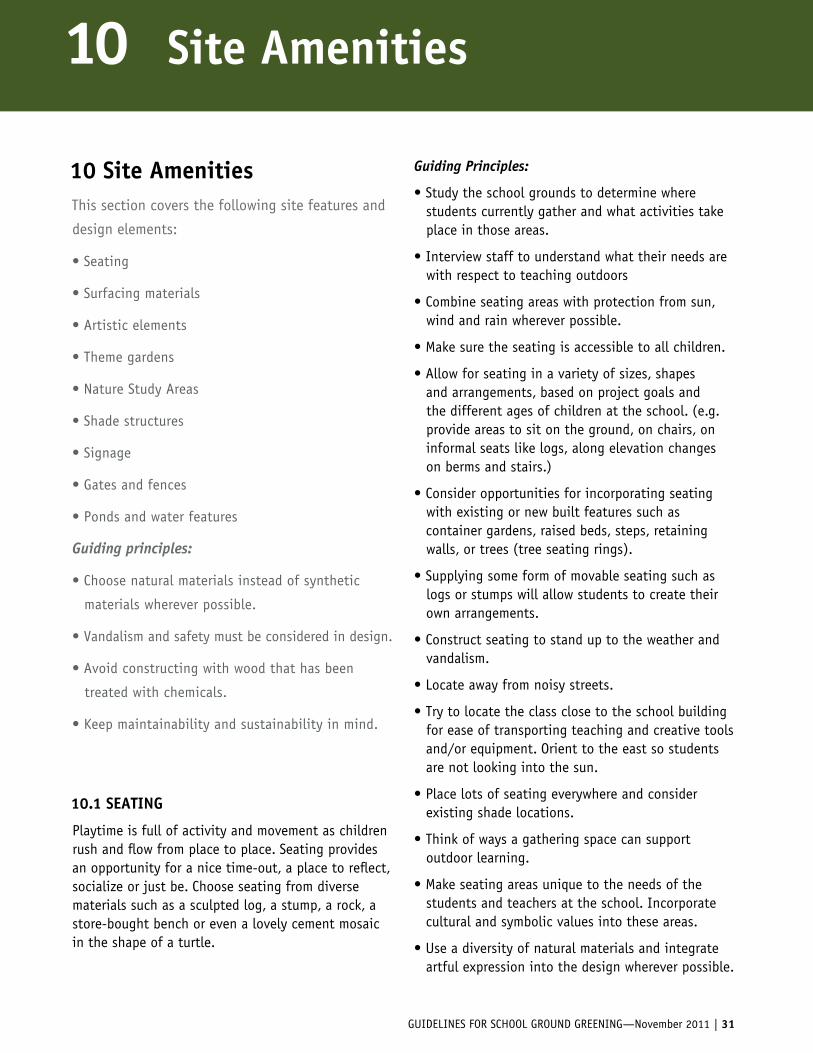
10 Site AmenitiesThis section covers the following site features and
design elements:
• Seating
• Surfacing materials
• Artistic elements
• Theme gardens
• Nature Study Areas
• Shade structures
• Signage
• Gates and fences
• Ponds and water features
Guiding principles:
• Choose natural materials instead of synthetic
materials wherever possible.
• Vandalism and safety must be considered in design.
• Avoid constructing with wood that has been
treated with chemicals.
• Keep maintainability and sustainability in mind.
10.1 SeATInG
Playtime is full of activity and movement as children rush and flow from place to place. Seating provides an opportunity for a nice time-out, a place to reflect, socialize or just be. Choose seating from diverse materials such as a sculpted log, a stump, a rock, a store-bought bench or even a lovely cement mosaic in the shape of a turtle.
Guiding Principles:
• Study the school grounds to determine where students currently gather and what activities take place in those areas.
• Interview staff to understand what their needs are with respect to teaching outdoors
• Combine seating areas with protection from sun, wind and rain wherever possible.
• Make sure the seating is accessible to all children.
• Allow for seating in a variety of sizes, shapes and arrangements, based on project goals and the different ages of children at the school. (e.g. provide areas to sit on the ground, on chairs, on informal seats like logs, along elevation changes on berms and stairs.)
• Consider opportunities for incorporating seating with existing or new built features such as container gardens, raised beds, steps, retaining walls, or trees (tree seating rings).
• Supplying some form of movable seating such as logs or stumps will allow students to create their own arrangements.
• Construct seating to stand up to the weather and vandalism.
• Locate away from noisy streets.
• Try to locate the class close to the school building for ease of transporting teaching and creative tools and/or equipment. Orient to the east so students are not looking into the sun.
• Place lots of seating everywhere and consider existing shade locations.
• Think of ways a gathering space can support outdoor learning.
• Make seating areas unique to the needs of the students and teachers at the school. Incorporate cultural and symbolic values into these areas.
• Use a diversity of natural materials and integrate artful expression into the design wherever possible.
10 Site Amenities

32 | Pembina Trails School Division
Amphitheatre seating can be created formally using hand-made wood benches or mini-bleachers or with natural materials such as armour stone, limestone rock or gabion weirs terraced into a slope. Look for opportunities to use the existing grading for informal seating (e.g. grassy slopes, low retaining walls). Incorporate different levels of seating if possible and provide a natural place for an instructor to sit or stand in clear view of all seats.
10.2 TyPeS OF SeATInG
Seating that is either permanent or moveable is essential in the children’s play environment. Stone, wood and logs are the most popular materials used for seating in these spaces. This section outlines a number of considerations with respect to design, sustainability and scale to help you determine the best solutions for a particular site and user.
10.2.1 Stones
Flat-topped, block-shaped rocks provide a long-term seating solution. Rounded boulders are not easy to use as seats or tables and their sloped sides tend to be slippery, especially when wet or covered with frost or ice. Limestone blocks are generally the best seating stones as they are layered/angular, blockshaped and often contain fossils and crystals. The following are guidelines for placement:
• Place with tops horizontal/level so they are comfortable as seats and can be used as tables (card games, chess boards can be etched on to surface).
• Place either tight together or minimum 1.8m apart to discourage jumping from rock to rock.
• Optimum “seat to feet” height range (related to the top of the mulch) (See Fig. 10, Limestone Seating–Single Stones, p. 50):
• JK/SK: 250 to 350mm
• Primary: 300 to 400mm
• Junior: 400 to 500mm
• Provide a surface such as mulch around the base of all seating stones or paving (not grass) for distance.
10.2.2 Logs
Logs are versatile, however, there are some things you should be aware of when using logs:
• Do not use logs from old or sick trees that have been felled. These logs attract wasps, rot quickly, and can spread disease to other trees on the school ground.
• Logs should be solid hardwood.
• Logs can be sculpted and sealed to protect their longevity.
When used as seating it is suggested that:
• Logs be leveled on one side or set in the ground to prevent rolling.
• Fasten or trench any large logs that could pose a risk to student safety.
• Logs can be used in loose parts play – children will move and use log discs in a variety of imaginative ways.
10.2.3 Tires
Tires can be used singly or in combination on the ground to create play equipment that can be jumped through and over.
Note the following:
• Tires can become hot when placed in a sunny location. Be sure to place tires in a shady place on the playground.
• Ensure that the tires will not trap water and allow standing water, dirt and debris to

GUIDELINES FOR SCHOOL GROUND GREENING—November 2011 | 33
accumulate.
• Avoid, if possible, steel-belted tires or check them regularly for possible protrusions and sharp edges.
• Ensure that the tire material does not have any chemical residue that could rub off on children’s hands or clothing.
Climbing Structures
• If creating climbing structures with tires, ensure that the structure is anchored at both ends and join each tire with flexible rope or cables that will not cause friction or wear. Ensure that the tires cannot swing together and pinch fingers or hands.
Containers for Planting
• Tires can be used as containers to grow flowers, but not vegetables, due to potentially toxic chemicals leaching into the soil over time. Tires can be used as a protective barrier around a pot or barrel in which edible plant material is growing.
• Be aware that tires used as raised planting beds dry out quickly and will need more water than planting beds at grade.
10.2.4 Concrete
Concrete can be formed into a variety of shapes and with coloured tiles added to tell stories, stir the imagination and provide aesthetic interest.
Other Materials
• Wood – avoid constructing seating with pressure treated wood. (See Appendix E Evergreen’s Rationale for Avoiding ACQ Lumber, p. 62.)
Cedar is a good choice because it is not treated and is durable.
• Mosaics
• Cob
• Straw bales
• Rammed Earth
10.2.5 wood Benches
In some locations, benches may be preferred over seating stones. The “Boston Bench” by Henderson Recreation has proven to be durable in school grounds and easy to repair when needed. Square (or appropriately shaped) wood and metal frame benches placed around trees and “floating” on grade help to protect new and existing trees and provide a shady spot for socializing, play and learning. (See Fig. 13, Wood Bench Surrounding Tree, p.53.)
10.3 CLASSrOOm-SIze SeATInG AreAS
The goal of providing a class-size seating area is to create a space for an entire class to gather at the start and end of an activity or for music, art or drama classes. We recommend the following criteria when designing your outdoor classroom seating area:
Provide protection from sun, wind and rain by planting trees, installing awnings or building shade structures over the seating area.
• Assume a maximum hearing range in an outdoor environment of approximately 6–8m (20–26 feet). This distance is critical in designing the size of the outdoor seating spaces.
• Provide enough space to accommodate the maximum number of children who might be involved in outdoor classes i.e. 30 spaces.
• Provide enough open space for instructors to display items and for children to make presentations or engage in passive, creative play. (For an example of amphitheatre style seating see Fig. 14, Limestone Seating and Retaining Wall, p. 54.)

34 | Pembina Trails School Division
10.4 SUrFACInG mATerIALS FOr OUTDOOr CLASSrOOmS
Limestone screening, pine needles, sand or tub ground mulch are good surfacing materials for outdoor class-rooms. Mulch tends to provide a cooler microclimate, is generally better for the trees and drainage and will help to reduce indirect UVR exposure.
10.5 ArTISTIC eLemenTS
Artwork can make the school ground come alive and can allow the creative abilities of the students, teachers and community to find an outlet within the outdoor environment of the school.
• Artwork can be attached to fences.
• Consider murals on pavement or walls.
• Other artwork such as painted tiles, hand-made stepping stones, figures, statues, decorative benches etc. can become focal points and make each school ground unique and different.
• Artwork related to the weather elements (sun, wind, rain) can draw attention to the microclimate within the school ground and can be tied to curriculum investigations of local weather systems.
• Painting on asphalt (e.g. murals, maps, mazes and paw prints).
10.6 GArDenS
Garden areas for teaching and learning need to be located in a quiet area of the yard and structurally separated from active play areas by fencing, raised beds or borders of rocks. Avoid locating planting beds against old school foundations—this can lead to wet basements. Otherwise, grade for positive drainage away from building.
10.6.1 Habitat Gardens
• Natural habitat communities on school grounds provide excellent educational models for exploring plant-animal interactions and life and energy cycles.
• Natural habitat communities vary by region. Consult local experts to help select plant species and to learn how to plant in naturally occurring communities similar to those once found in the region where the school is located.
• Consult the Native Plant Database at evergreen.ca and research natural habitat communities and gardens using the Advanced Search Function.
Some examples of natural habitat communities and habitat gardens are:
natural Habitats Habitat GardensPrairie Butterfly garden
Meadow Meadow – wet/dry
Woodland Bird garden
Forest edge Woodland, hedgerow
Riparian Pond garden
Marsh, bog/fen Stormwater retention garden
Alvar Xeriscape garden
10.6.2 Theme Gardens
Some examples of theme gardens that could be created to provide interest and variety on a school ground are as follows:
• spiral gardens
• music gardens
• peace gardens
• storybook gardens
• rainbow gardens
• pizza-shaped gardens
• sensory gardens etc.
For more information about theme gardens, refer to Evergreen website: evergreen.ca/e/lgresources

GUIDELINES FOR SCHOOL GROUND GREENING—November 2011 | 35
10.7 nATUre STUDy AreAS (nO mOwS)
• Areas of the school ground that are left to naturalize allow children to discover what seed sources are in the area and to view first-hand the ecological principle of succession.
• Provide mown pathways, mazes, labyrinths or mulched pathways throughout the no-mow area for exploration.
• Whips, seedling trees, shrubs and native wildflowers can be planted by students in this area. Spacing should allow for annual mowing of woody invasives.
10.8 SHADe STrUCTUreS
With the growing concern about the harmful effects of the sun’s rays, the need to provide shade on school grounds is at the forefront of designing safe play environments. Be aware that built shade is more costly than natural shade (trees, shrubs, vines) and can attract vandalism.
10.8.1 Placement of Shade
• Place shade structures where shelter from the sun is most needed on the school grounds. Consider meet-and-greet areas, spectator areas, areas where students may wait or gather before and after school, and where they spend recess and lunch.
• Provide a variety of shade features in a number of areas on the school ground if possible. This is especially important around asphalt and sand surfaces, which reflect much more UVR than grass.
• Design shelters for multiple functions—as outdoor classrooms, social gathering spaces, areas for eating, reading and writing or quiet reflection.
• Consider adding elements to existing structures to provide shade and shelter (e.g. an awning or pergola off a school or portable wall).
10.8.2 Permanent Shade Structures
Examples of permanent structures built as protection from sun, wind and rain include:
• Pergolas, trellises, arbours—often used as an entrance to a garden or school building or as shelter in the school grounds (Be aware that locating these structures next to buildings could allow access to the roof, resulting in vandalism issues). Vines can be planted on the structure to provide seasonal shade cover.
• Gazebos and pavilions can be built in a variety of shapes and sizes accommodating different class sizes and numbers of students. They can have open walls or be fully enclosed. Care must be taken to ensure that roof pitch and height from ground provides the maximum amount of shade. Take into account water runoff from the roof and sun angles for shade.
10.9 SIGnAGe
Signs provide information and define spaces. They are also a way to build support and recognition for a school ground project as well as thank those who have contributed to the project.
• Provide signs at the entrance to special areas on the school ground and at decision points along pathways.
• Use interpretive signs to educate people about the plants and habitats they may experience in naturalized spaces.
• Place signs at a comfortable height for people to read or touch. The standard mounting height for students is 120cm (48”) or lower depending on their age. The standard height for adults is 150cm (60”).
• Involve teachers and students in making signs.
• Engraved rocks provide vandal-proof long-term options.

36 | Pembina Trails School Division
10.10 GATeS AnD FenCeS
• Gates must be wide enough for wheelchair access.
• Take care not to create climbing structures out of fences and gates. Use single rail fences, do not stagger fence rails like steps and do not provide access to fences around trees where students could climb from one to the other.
• Include colours, varied textures, peepholes, murals and mosaics to make gates and fences attractive play settings.
• Modify the fence line and height to make it more interesting. Include nooks and crannies by zigzagging the fence line.
Different types of fencing often used in school grounds include:
• Vinyl-coated mesh or chain-link
• Wood
• Split rail
• Cedar post (See Fig. 15, Wood Rail Fence, p. 55.)
• Temporary snow fence
• Use galvanized brackets and screws. Do not use nails to secure fence or gate structures.
10.11 POnDS AnD wATer FeATUreS
Ponds and wetland habitat provide many benefits on school grounds including:
• Creation of habitat and food sources for local wildlife.
• Creation of a unique resource for a variety of curriculum-based activities.
• Improved retention and infiltration of runoff from precipitation.
• Increased access to wildlife for observation.
• Standing water is to be avoided. Use of solar water pumps and/or waterfalls in water features will provide constant movement in the water.
• Fencing or otherwise providing restricted supervised access to ponds can alleviate student safety concerns. Courtyards provide great opportunities for restricted access.
• Bog, downspout or wetland gardens may be viable solutions to wet area problems on certain school grounds. These would allow the propagation of wetland plant species and the creation of wildlife habitats.
• Be sure that water levels are below 46cm (18”) otherwise there must be a grate over top of the water surface and/or a fence with a locked gate around the water feature.

GUIDELINES FOR SCHOOL GROUND GREENING—November 2011 | 37
11 Guidelines for Kindergarten Play Areas
Kindergarten children are often segregated from the
rest of the students during recess and generally play
in a fenced off area. It is critical that these areas
be designed in ways that encourage creative play,
provide access to nature and allow opportunities for
both active and passive play.
11.1 SHADe
Provide protection from sun, wind and rain by planting trees, installing awnings and/or building shade structures, such as trellises, pergolas, arbours, play houses (using appropriate scale for kindergarten-aged children).
11.2 PLAy eLemenTS
Play elements such as sand, water and natural material loose parts are essential in the play setting. They help children manipulate their environment to stimulate imaginary play. This section will discuss the merits and the use of these elements in the school ground.
11.2.1 Sand
• Sand is one of the best play materials available.
• Providing a box or container for the sand helps to set boundaries for play and prevents sand from dispersing onto grass or asphalt where it can create slippery surfaces.
• Make the sand area deep enough for children to dig, 20–45cm (8–18”) is recommended.
• Use a mix of fine to coarse (maximum 1.5mm) sand that is well-washed, packs easily and is free of dirt, clay and other contaminants.
• Playground sand should be granitic sand rather than brick or concrete sand.
• Provide adequate drainage – this will vary based on conditions, but can typically be provided by having gravel beneath the sand area.
• A general guideline for size of sand play area is a 2m X 2m (40-square-foot) space for groups of up to 10 children.
• Provide a variety of sand play opportunities for different age groups and capabilities. Shallow sand tables or benches are excellent for toddlers to stand at and play while the sand areas for older children can be at ground level. Provide accessibility for children in wheelchairs by creating multi-level or elevated sand areas.
• When not in use, a sand play area can be covered by a lid (made from non pressure treated wood), nylon netting (which allows sun and rain to clean and purify the sand, while keeping animals and debris out), landscape fabric that can be rolled on and off the sandbox or a wire mesh screen that is bordered by a wood frame and fastened with latches and a bolt.
11.2.2 water
• Locate a water source and try to provide opportunities for play. (i.e. filling a barrel with water from a hose and placing it near the sand area.)
11.2.3 Loose Parts
• Found objects such as balls, hoops, wooden blocks, costumes, logs, large stumps, sand, and leaves provide opportunity for more kinds of play than occurs with standard play equipment.
11 Guidelines for Kindergarten Play Areas

38 | Pembina Trails School Division
11.3 PASSIVe AnD ACTIVe PLAy AreAS
Provide seating areas which are child-sized in scale using rocks, logs, stumps or benches in combination with mulch or limestone screening surfacing to encourage passive play. Passive areas should be sheltered off to the side and safe from the play area. Provide open, hard surface areas to encourage active play.
11.4 nATUre
Children prize natural spaces and have the opportunity to learn from the growth and change. Plant a variety of flowers, shrubs and trees in and around the kindergarten area that will encourage butterflies and birds to visit. Also, consider planting food gardens in containers or raised beds.

GUIDELINES FOR SCHOOL GROUND GREENING—November 2011 | 39
page figure
40 1 Bio-Retention Infiltration Trench
41 2 Timber Planter Box with Seating and New Planting
42 2b Timber Planter Box with Seating and New Planting Detail
43 3 Recommended Plant Lists
44 4 Deciduous Tree Planted in Hard Surface
45 5 Deciduous Tree Planted in Soft Surface
46 6 Tree Planting in Poorly Drained Soils
47 7 Wire Mesh Caging
48 8 Plastic Snow Fence
49 9 Tree Protection Woven Basket
50 10 Limestone Seating—Single Stones
51 11 Tree Protection Rock Circle
52 12 Limestone Screening Walkway
53 13 Wood Bench Surrounding Tree
54 14 Limestone block Seating and Retaining Wall
55 15 Wood Rail Fence
FIGURES Table of Contents

Figu
re 2
Bio
-Ret
enti
on/I
nfilt
rati
on T
renc
hSe
ctio
n -
Not
to S
cale
To
ront
o Ca
thol
ic D
istr
ict
Scho
ol B
oard
Plan
ning
and
Des
igni
ng G
reen
Sch
ool G
roun
ds –
Pre
pare
d by
Eve
rgre
en f
or t
he T
oron
to C
atho
lic D
istr
ict
Scho
ol B
oard
– F
ebru
ary,
200
9
MIN
IMU
M 4
/5 W
IDTH
AT
TOP
OF T
RENC
H
800mm
1500MM TYPICAL - BUT MAY VARY
AS R
EQU
IRED
OPTI
ONAL
:TH
REE
375M
M D
IA. B
IG ‘O
’ OR
EQU
AL S
TORM
SEW
ER P
IPE
C/W
END
CAP
S. D
RILL
25M
M D
IA. H
OLES
AT 50
0MM
O.C
. TH
ROU
GHOU
T LE
NGTH
AND
ON
ALL
SIDE
S OF
PIP
E. P
LACE
SIDE
-BY-
SIDE
IN
BOTT
OM O
F PI
T AS
SH
OWN.
LEN
GTH
OF
PIPE
TO B
E 50
0MM
SH
ORTE
R TH
AN L
ENGT
H O
F PI
T.
FINI
SHED
GRA
DE. R
E-GR
ADE
SURR
OUND
ING
AREA
TO S
LOPE
TOW
ARD
DRAI
NAGE
PIT
AT
MIN
. 2%
100
TO 1
50 M
M D
IA. C
LEAR
CRU
SHED
STO
NE
OVER
LAP
TERR
AFIX
270
R (O
R AP
PROV
ED
EQU
AL)
FILT
ER C
LOTH
PAS
T TH
E M
ID-P
OINT
OF T
RENC
H W
IDTH
APP
ROXI
MAT
ELY
300M
MCE
NTER
LIN
E OF
BIO
-RET
ENTI
ON P
IT T
O BE
LEV
EL O
R
SLIG
HTL
Y LO
WER
TH
AN P
ERIM
ETER
, AVO
ID C
ROW
NING
OF
COVE
R M
ATER
IAL
(I.E
. FIB
AR)
300mm
SCAR
IFY
INSI
DE S
URF
ACES
OF
DRAI
NAGE
PIT
EX
CAVA
TION
BEF
ORE
BACK
FILL
ING
WIT
H C
LEAR
ST
ONE
TO M
AXIM
IZE
PERM
EABI
LITY
CANN
OT G
ROW
ON
TOP
OF T
HIS
BU
T CA
N PL
ANT
ON S
IDES
TERR
AFIX
270
R (O
R AP
PROV
ED E
QUAL
) FI
LTER
CLOT
H L
ININ
G TO
P. S
IDES
AND
BOT
TOM
OF
DRAI
NAGE
PIT
OVE
RLAP
ALL
JOI
NTS.
50 M
M D
IA. C
LEAR
CRU
SHED
STO
NE
FIBA
R. N
OTE:
SPE
CIFI
ED D
EPTH
IS
DEPT
H A
FTER
SET
TLEM
ENT.
FIBA
R PR
OVID
ES I
NSU
LATI
NG Q
UAL
ITIE
S AN
D YE
AR R
OUND
DRAI
NAGE
.
TOPS
OIL
AND
SOD
400mm
SUBS
OIL
40 | Pembina Trails School Division
Figu
re 1
Bi
o-re
tent
ion
Infil
trat
ion
Tren
ch

GUIDELINES FOR SCHOOL GROUND GREENING—November 2011 | 41
To
ront
o Ca
thol
ic D
istr
ict
Scho
ol B
oard
Plan
ning
and
Des
igni
ng G
reen
Sch
ool G
roun
ds –
Pre
pare
d by
Eve
rgre
en f
or t
he T
oron
to C
atho
lic D
istr
ict
Scho
ol B
oard
– F
ebru
ary,
200
9
Figu
re 6
a T
imbe
r Pl
ante
r Bo
x w
ith
Seat
ing
and
New
Pla
ntin
g
WOO
D TI
MBE
R BA
SE: R
EFER
TO
FIGU
RE 6
B T
IMBE
R SE
ATIN
G BA
SE D
ETAI
L FO
R IN
STAL
LATI
ON D
ETAI
LS
SET RO
OT B
ALL
ON F
IRM
LY P
ACKE
D SO
IL T
O PR
EVEN
T SE
TTLI
NG
BEND
BAC
K W
IRE
BASK
ET A
ND R
EMOV
E BU
RLAP
, ROP
E
AND /
OR N
YLON
TIE
S FR
OM T
OP 1
/3 O
F RO
OT B
ALL.
DO
NOT
DIST
URB
ROO
T BA
LL.
SUBS
OIL
ASPH
ALT
COM
PACT
ED 3
/4” C
RUSH
ER R
UN
LIM
ESTO
NE
BACK
FILL
WIT
H S
OIL
MIX
150M
M D
EPTH
OF TU
B-GR
OUND
MU
LCH
OVE
R SO
IL M
IX
NOT
ES:
1.PR
UNE
DEA
D OR
DAM
AGED
BRA
NCH
ES B
EFOR
E PL
ANTI
NG2.
REM
OVE
ALL
NURS
ERY
TAGS
AND
TIE
S FR
OM T
HE
CANO
PY3.
REM
OVE
ALL
ROPE
S AN
D TI
ES F
ROM
TH
E BA
SE O
F TH
E TR
EE4.
FOLL
OW F
IGU
RE 5
DEC
IDU
OUS
TREE
PLA
NTE
D IN
SO
FT S
URF
ACE
FROM
E T
HRO
UGH
F5.
BEGI
N TO
FIL
L TH
E PL
ANTE
R BO
X IN
ARO
UND
TH
E TR
EE
WIT
H T
RIPL
E M
IX6.
FOLL
OW F
IGU
RE 5
DEC
IDU
OUS
TREE
PLA
NTE
D IN
SOFT
SU
RFAC
E FR
OM H
TH
ROU
GH L
Sect
ion
– No
t to
Sca
le
Figu
re 2
Ti
mbe
r Pl
ante
r Bo
x w
ith
Seat
ing
and
new
Pla
ntin
g

Figu
re 2
b Ti
mbe
r Pl
ante
r Bo
x w
ith
Seat
ing
and
new
Pla
ntin
g De
tail
Figu
re 6
b T
imbe
r Pl
ante
r Bo
x w
ith
Seat
ing
Deta
ilSe
ctio
n –
Not
to S
cale
To
ront
o Ca
thol
ic D
istr
ict
Scho
ol B
oard
Plan
ning
and
Des
igni
ng G
reen
Sch
ool G
roun
ds –
Pre
pare
d by
Eve
rgre
en f
or t
he T
oron
to C
atho
lic D
istr
ict
Scho
ol B
oard
– F
ebru
ary,
200
9
NOT
ES:
1.U
SE 2
” X 1
0” C
EDAR
CAP
FOR
TH
E SE
ATIN
G PL
ANK
2.TH
E EL
EVAT
ION
OF T
HE
TOP
PERI
MET
ER T
IMBE
R
SHOU
LD R
EMAI
N CO
NSTA
NT (
LEVE
L)3.
T HE
TOP
TWO
CORN
ERS
OF T
HE
CEDA
R SE
ATIN
G PL
ANK
SHOU
LD B
E CH
AMFE
RED
4.CR
OSS
LAP
OR O
VERL
AP T
HE
TIM
BERS
ON
ALL
CORN
ERS
250M
M
[10”
]
150M
M
[6”]
8200
MM
[27’
]
LINE
OF
BASE
BEY
OND
150M
M T
UB
GROU
ND M
ULC
H
BACK
FILL
OF
EXCA
VATE
D SO
IL
PRES
SURE
TRE
ATED
TIM
BERS
- 15
0MM
X 1
50M
M [6
” X 6
”]
ASPH
ALT
400MM50
MM
[2”
]
GEOT
EXTI
LE B
ARRI
ER T
O BE
STA
PLED
ONT
O TH
E IN
SIDE
OF T
HE
6”X
6” T
IMBE
R W
ALLS
TO
PREV
ENT
SOIL
FRO
M
LEAK
ING
OUT .
IT
IS N
OT T
O BE
USE
D ON
TH
E BA
SE O
F
THE
PIT –
THIS
WOU
LD R
ESTR
ICT
ROOT
DEV
ELOP
MEN
T
AND
COM
PROM
ISE
TREE
STA
BILI
TY.
COM
PACT
ED O
R U
NDIS
TURB
ED S
UBS
OIL (B
ASED
ON
SITE
CON
DITI
ONS)
USE
12M
M R
EBAR
TO
SECU
RE L
OWER
WOO
D
TIM
BER
IN P
LACE
DEP
TH O
F RE
BAR,
TO
BE A
S RE
QUIR
ED P
ER S
ITE
COND
ITIO
N
NOT
E: T
HIS
STY
LE O
F W
OOD
PLAN
TER
IS A
LSO
SUIT
ABLE
FOR
INDI
VIDU
AL T
REES
IN
BOXE
S (8
’ X 8
’ OR
10’ X
10’
)
COM
PACT
ED 3
/4” C
RUSH
ER R
UN
LIM
ESTO
NE
[16”] MAXIMUM
42 | Pembina Trails School Division

GUIDELINES FOR SCHOOL GROUND GREENING—November 2011 | 43
Figure 3 recommended Plant Lists
Deciduous Trees in Hard Surfaces (75mm caliper)
• Silver Maple (Acer saccharinum)• Hackberry (Celtis occidenetalis)
Coniferous Trees in Hard Surfaces (250—300cm tall)
• White Spruce (Picea glauca)• Austrian Pine (Pinus nigra) – (an acceptable non-native species)
Deciduous Trees in Soft Surfaces (75 mm caliper)
• Silver Maple* (Acer saccharinum)• Manitoba Maple* (Acer negundo)• Sugar Maple* (Acer saccharum)• Hackberry (Celtis occidentalis)• Basswood (Tilia americana)• Green Ash (Fraxinus pennsylvanica)
Deciduous Trees in Groves in Soft Surfaces Use a variety of trees to improve biodiversity and to integrate with curriculum goals. For example, you can plant 8 trees in a circle with armour stone seating to form a shaded outdoor classroom. Same list as Deciduous Trees in Soft Surfaces (75mm caliper) (See above).
Coniferous Trees in Groves in Soft Surfaces (250—300cm tall) (plant 3, 6, or 8 of the same species—space them at 3–4m apart)
• White Spruce (Picea glauca)• White Cedar (Thuja occidentalis)• White Pine (Pinus strobus)
Large Shrubs Planted as Singles or in Groves (200—250cm tall)
• Pincherry (Pronos pensylvanica)• Saskatoon Serviceberry (Amelanchier alnifolia)• Nannyberry (Viburnum lentago)• Elderberry (Sambucus canadensis)• Pagoda Dogwood (Cornus alternifolia)• Highbush Cranberry (Viburnum trilobum)• Red Osier Dogwood (Cornus stolonifera)
*Best Shade Trees – refers to sun-blocking ability of the tree

Figure 4 Deciduous Tree Planted in Hard Surface
Figure 4 Deciduous Tree in Hard SurfacePlanting trees to provide shade where children play often means putting them in asphalt.The following is a technique that’s proven successful in school grounds.
Toronto Catholic District School Board
Planning and Designing Green School Grounds – Prepared by Evergreen for the Toronto Catholic District School Board – February, 2009
!
!
!
TURF STONE
SAND
ROOT BALL
FOLD BACK BURLAP AND BEND BACK
1/3 OF THE WIRE BASKET
DETAIL OF TURF STONE
600MM X 600MM
A. Make a square cut into the asphalt (minimum 1850 X 1850mm) – (maximum 3050 X 3050mm) Follow these dimensions to avoid extra cutting of porous pavers (turf stone).
B. Remove asphalt leaving a 10cm ledge of granular base around the inside perimeter of the asphalt cut to allow for a firm base for the turf stone to sit on.
C. Excavate all gravel and soil to a depth of the root ball plus 10cm to accommodate the sand layer and turf stone (turf stone must be laid on a bed of sand). Scarify edges of hole to avoid smooth surfaces.
D. Prune dead or damaged branches before planting.
E. Place tree in the hole. Be sure that the root ball rests on solid ground and the tree is straight before backfilling. Begin backfilling with 2/3 local soil and 1/3 composted soil amendments up to 1/3 of the root ball. Tamp with feet to stabilize and prevent air pockets. Thoroughly soak.
F. Place a 2” x 4” board across the hole and continue to backfill to 10cm below the board – this is to ensure that there is enough space for the sand and for the turf stone layer to be laid flush with the surrounding asphalt surfacing.
G. Never lay turf stone at the time of planting. Trees must be watered for several weeks to let soil and sand materials settle.
H. Top up with sand as necessary before laying stone.
I. Three weeks after planting lay turf stone. See illustration below.
J. Backfill spaces in turf stone with sand or use a soil mix for growing grass seed.
K. Using a standard 5/8” hose, set water flow on low and soak the area for approximately 15 minutes.
1850 –3050MM
(SQUARE)
44 | Pembina Trails School Division

GUIDELINES FOR SCHOOL GROUND GREENING—November 2011 | 45
Figure 5 Deciduous Tree Planted in Soft Surface
Figure 5 Deciduous Tree Planted in Soft Surface
Toronto Catholic District School Board
Planning and Designing Green School Grounds – Prepared by Evergreen for the Toronto Catholic District School Board – February, 2009
!
!
150mm layer of tub ground mulch
Saucer of soil
Root ball
Bend back top 1/3 of wire basket
Fold back burlap
Dig hole at 45 degree angle. Scarify - when digging the hole for the tree make sure the sides of the hole are rough not smooth
Remove all nursery tags and ties
Remove all ropes and ties
G. Begin to fill the hole in around the tree with a blend of ⅔
H. Backfill to ⅓ the root ball
I. Continue to backfill to the top of the root ball. Mound backfill slightly to make a saucer of soil around the tree.
J. Water the entire backfill area until saturated. Add more soil to compensate for settling if needed.
K. Apply 150mm of tub-ground mulch to a diameter of 2m (no less that ½ a cubic yard per
L. Subsequent watering – 32 gallons/week for the first two years throughout the months of May – October.
A. Dig a hole at least twice the width of the root ball and angle the sides to 45 degrees.
B. Be sure that the sides of the hole are scarified to help roots penetrate surrounding soil and to increase drainage.
C. Prune dead or damaged branches before planting.
D. Set the tree slightly higher (approximately 50mm) than adjacent finished grade to allow for settlement.
E. Be sure that the root ball rests on solid ground and the tree is straight before backfilling. Use a 2” x 10” plank alongside the rootball to straighten.
F. Bend back the wire basket and remove rope and burlap from the top ⅓ of root ball before backfilling with soil.
local soil and ⅓ composted soil amendments.
depth and tamp with feet to stabilize root ball and prevent air pockets.
tree). Take mulch to edge of excavation. Keep mulch weeded and replace annually.

46 | Pembina Trails School Division
metal T-bar
soil saucer
mulch
rootball
remove 1/3 of wire metal basketfold back burlap
grade (surface)
Figure 6 Tree Planting in Poorly Drained Soils
Planting in poorly drained soilsMany schools have poorly drained, heavy clay soil that retains water for long periods of time. By raising the tree’s rootballslightly out of the ground and amending with sharp sand that drains well, you can improve the tree’s chances of survival.
a) Dig a wide, shallow hole that is twice the width of the rootball and only 1/2 as deep.
b) Be sure that the rootball rests on solid ground.
c) Begin to fill in the hole around the tree with a blend of 3/4 local soil and 1/4 sharp sand.
d) Backfill to 1/3 the rootball depth and tamp to stabilize rootball and prevent air pockets.
e) Continue to backfill until the rootball is covered. Mound backfill slightly to make a saucer of soil around the tree—see illustration below.
f ) Water the entire backfill area until saturated. Add more soil to compensate for settling if needed.
g) Mulch over soil with 10 —15cm of tub grinder wood mulch to a diameter of 2m (no less than 1/2 a cubic yard per tree). Keep mulch weeded and replace annually.
h) Modify watering schedule to suit the drainage conditions — watering heavy clay soils too much will drown your tree.
i) To stabilize the tree use three T-bars with hose and wire supports, be sure to check these on a yearly basis to reduce risk of injuring to the tree.
j) Use caging or other tree protection methods to protect the bark, i.e., snow fencing, stones in a circle or wire caging.
Note:If you are planting a grove of trees in a wet area, plant everything 10—15 cm above grade to raise the whole planting area.
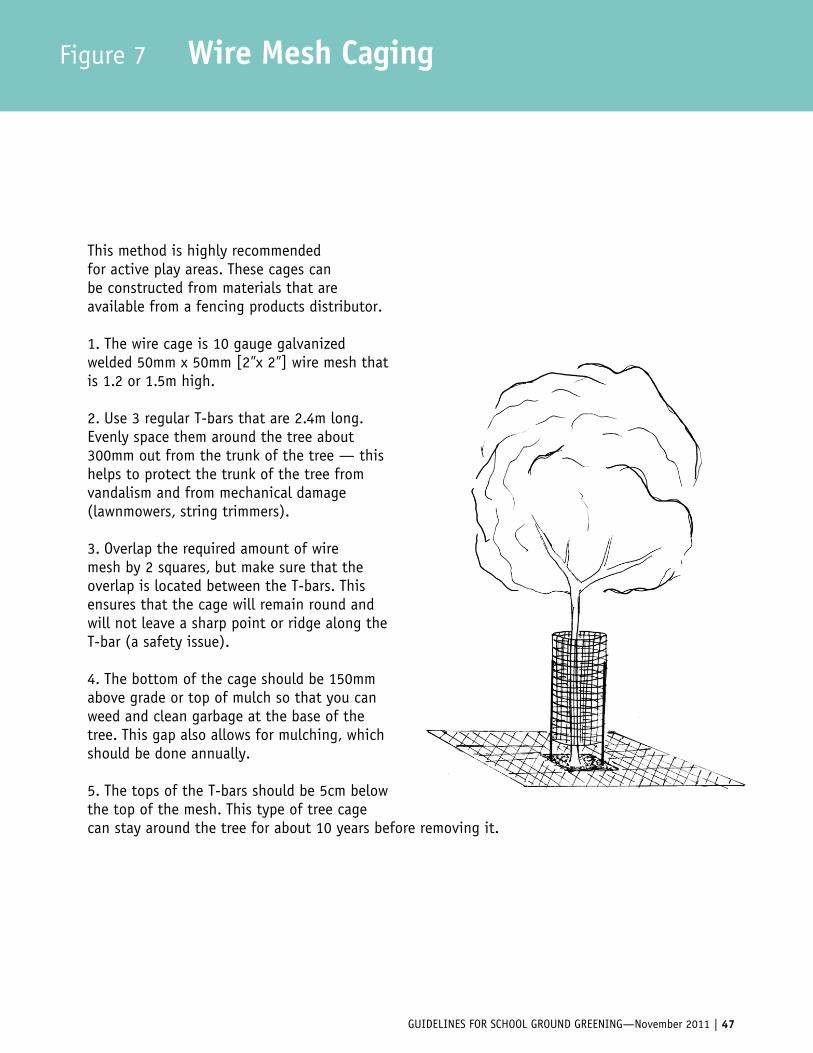
GUIDELINES FOR SCHOOL GROUND GREENING—November 2011 | 47
Figure 7 wire mesh Caging
Figure 7 Wire Mesh Caging
This method is highly recommendedfor active play areas. These cages canbe constructed from materials that areavailable from a fencing products distributor.
1. The wire cage is 10 gauge galvanizedwelded 50mm x 50mm [2”x 2”] wire mesh that is 1.2 or 1.5m high.
2. Use 3 regular T-bars that are 2.4m long. Evenly space them around the tree about 300mm out from the trunk of the tree — this helps to protect the trunk of the tree from vandalism and from mechanical damage (lawnmowers, string trimmers).
3. Overlap the required amount of wiremesh by 2 squares, but make sure that the overlap is located between the T-bars. This ensures that the cage will remain round and will not leave a sharp point or ridge along the T-bar (a safety issue).
4. The bottom of the cage should be 150mm above grade or top of mulch so that you can weed and clean garbage at the base of the tree. This gap also allows for mulching, which should be done annually.
5. The tops of the T-bars should be 5cm below the top of the mesh. This type of tree cage can stay around the tree for about 10 years before removing it.
Toronto Catholic District School Board
Planning and Designing Green School Grounds – Prepared by Evergreen for the Toronto Catholic District School Board – February, 2009

48 | Pembina Trails School Division
Figure 8 Plastic Snow Fence
Protect your trees with burlap…a single overlapping layer of natural burlap, not synthetic fi-bre burlap, should be used on all trees. This technique will protect the bark from both vandalism and frost cracking.
Plastic snow fencingUsing plastic snow fencing to protect the trunk of a tree is a cost-effective way of ensuring that your long-term investment in shade has a chance of surviving the rigours of children’s play. It is much less expensive than the wire mesh cage. All trees should be wrapped with biodegradable burlap (no nylon in it) to the first set of branches. Apply the 1.2m high wide-banded plastic snow fence (green, brown or black) in 60cm wide strips over the top of the burlap so that it is tied together, but is slightly loose around the trunk. The excess fencing can be adjusted for trunk expansion in three years.
natural burlap
wide banded plastic snow
fencing

GUIDELINES FOR SCHOOL GROUND GREENING—November 2011 | 49
Figure 9 Tree Protection woven Basket
Woven tree basketThis technique involves the students and a local artist in weaving a basket-like structure around the trees with different coloured twigs, willow branches and grape vines, creating a natural protective barrier around the tree. Add mulch both inside and around the basket to a depth of 10—15cm.

Figu
re 1
0 Li
mes
tone
Blo
ck S
eati
ng—
Sing
le S
tone
s
Figu
re 8
Arm
our
Ston
e Se
atin
g –
Sing
le S
tone
sSe
ctio
n –
Not
to S
cale
NOT
ES:
1.
WH
EN P
LACI
NG G
ROU
PS O
F ST
ONES
TH
E SP
ACIN
G BE
TWEE
N TH
EM S
HOU
LD B
E 2M
MIN
IMU
M. (
FOR
EXAM
PLE,
OU
TDOO
R CL
ASSR
OOM.)
FOR
NAT
URA
L AR
MOU
R ST
ONES
TH
AT A
RE F
ITTE
D TO
GETH
ER F
OLLO
W T
HE
SAM
E PR
INCI
PLES
AS
SHOW
N IN
THE
DETA
IL A
BOVE
; HOW
EVER
TH
E GA
PS B
ETW
EEN
THE
STON
ES M
UST
BE
NO L
ARGE
R TH
AN 5
0MM
AND
ALL
STO
NES
SHOU
LD B
E AT
A C
ONST
ANT
ELEV
ATIO
N.2.
FOR
CHIL
DREN
FRO
M 4
– 6
YEA
RS O
F AG
E TH
E SE
AT-T
O-FE
ET H
EIGH
T M
AY N
EED
TO B
E RE
DUCE
D TO
BET
WEE
N 25
0MM
– 3
50M
M.
3.
PRIO
R TO
PRO
JECT
COM
PLET
ION
ENSU
RE T
HAT
ALL
SH
ARP
CORN
ERS
AND
EDGE
S ON
EXP
OSED
SID
ES O
F ST
ONES
ARE
ELI
MIN
ATED
(RO
UND
ED)
BY B
USH
-HAM
MER
ING
OR O
THER
SIM
ILAR
MEA
NS T
O SA
TISF
ACTI
ON O
F LA
NDSC
APE
ARCH
ITEC
T.4.
ENSU
RE T
HAT
ALL
ARM
OUR
STON
ES A
RE I
NSTA
LLED
WIT
H S
EATI
NG S
URF
ACE
LEVE
L.
Toro
nto
Cath
olic
Dis
tric
t Sc
hool
Boa
rd
Plan
ning
and
Des
igni
ng G
reen
Sch
ool G
roun
ds –
Pre
pare
d by
Eve
rgre
en f
or t
he T
oron
to C
atho
lic D
istr
ict
Scho
ol B
oard
– F
ebru
ary,
200
9
WID
TH 6
00M
M T
O 90
0MM
LENG
TH: 1
200M
M T
O 15
00M
M
SKIN
SOD
WIT
H S
OD C
UTT
ER A
ND R
EMOV
E 25
MM
DEP
TH
OF T
OPSO
IL I
N AR
EA O
F NE
W S
TONE
. PLA
CE S
TONE
DI
RECT
LY O
N RE
MAI
NING
TOP
SOIL
STON
E IN
MU
LCH
150M
M D
EPTH
OF
TUB-
GROU
ND M
ULC
H
OVER
EXI
STIN
G TO
PSOI
L
NEW
FIN
ISH
ED G
RADE
OF
MU
LCH
IN
900M
M W
IDE
AREA
ARO
UND
ALL
ST
ONES
INS
TALL
ED I
N GR
ASS
400 - 450MM
FLAT
-TOP
PED
ARM
OUR
STON
E. E
NSU
RE A
RMOU
R ST
ONE
IS
STAB
LE A
ND F
REE
FROM
ALL
MOV
EMEN
T
NEW
FIN
ISH
ED G
RADE
OF
MU
LCH
150M
M D
EPTH
OF
TUB-
GROU
ND
MU
LCH
OVE
R EX
ISTI
NG T
OPSO
IL
PREV
IOU
S FI
NISH
ED G
RADE
EXIS
TING
TOP
SOIL
UND
ISTU
RBED
SU
BSOI
L
!
SOD
OVER
MIN
. 150
MM
DEPT
H O
F TO
PSOI
L
FINI
SHED
GRA
DE B
EYON
D
900M
M W
IDE
AREA
OF
MU
LCH
900M
M T
YPIC
AL STON
E IN
GRA
SS
Flat
-top
ped
ston
e. en
sure
sto
ne is
sta
ble
and
Free
Fro
m a
ll m
ovem
ent.
150m
m d
epth
oF
mu
lch
over
exi
stin
g to
psoi
l
150m
m d
epth
oF
mu
lch
over
exi
stin
g to
psoi
l
50 | Pembina Trails School Division

GUIDELINES FOR SCHOOL GROUND GREENING—November 2011 | 51
Figure 11 Tree Protection rock Circle
Stones in a circleAnother way to protect tree roots is to use stones in a circle approximately 2min diameter around the trunk and fill this area with daylilies, native grasses or 10—15cm of mulch. Make sure the stones are placed on a solid base, not on the mulch where they can roll or shift.
10—15cm of mulch
Stones are 60cm x 60cm (minimum) in a 2m circumference around tree
FIGURES—GUIDELINES FOR SCHOOL GROUND GREENING—November 2009 | 51

Figu
re 1
2 Li
mes
tone
Scr
eeni
ng w
alkw
ay
Figu
re 3
Lim
esto
ne S
cree
ning
s W
alkw
aySe
ctio
n -
Not
to S
cale
To
ront
o Ca
thol
ic D
istr
ict
Scho
ol B
oard
Plan
ning
and
Des
igni
ng G
reen
Sch
ool G
roun
ds –
Pre
pare
d by
Eve
rgre
en f
or t
he T
oron
to C
atho
lic D
istr
ict
Scho
ol B
oard
– F
ebru
ary,
200
9
NOT
E: L
IMES
TONE
SCR
EENI
NGS
TO B
E A
FINE
CRU
SHED
LIM
ESTO
NE P
RODU
CT C
OMPO
SED
OF 5
0% L
IMES
TONE
DU
ST
AND
THE
BALA
NCE
COM
POSE
D OF
AN
EVEN
SPR
EAD
OF
PART
ICLE
S U
P TO
3M
M S
IZE
150mm
VARI
ABLE
– R
EFER
TO
LAYO
UT
PLAN
SUBG
RADE
COM
PACT
ED T
O 95
% S
.P.D
.
TOPS
OIL
FINI
SHED
GRA
DE
LIM
ESTO
NE S
CREE
NING
S: I
N AL
L LO
CATI
ONS
WH
ERE
THE
LONG
ITU
DINA
L OR
CRO
SS S
LOPE
EXC
EEDS
2%
, SCR
EENI
NGS
ARE
TO
BE P
RE-M
IXED
WIT
H S
TABI
LIZE
R (I
.E.,
ENVI
ROBO
ND –
1-86
6-63
6-84
76. 1
0LBS
OF
STAB
ILIZ
ER P
ER T
ONNE
OF
LIM
ESTO
NE S
CREE
NING
S), O
R M
IX O
N SI
TE B
ASED
ON
QUAN
TITI
ES
POSS
IBLE
USE
S: T
RAIL
S, M
EET
AND
GREE
T AR
EAS,
SOC
CER
GOAL
IE Z
ONES
, BAS
EBAL
L IN
FIEL
DS
52 | Pembina Trails School Division

GUIDELINES FOR SCHOOL GROUND GREENING—November 2011 | 53
Figure 13 wood Bench Surrounding Tree
Figure 9 Wood Bench Surrounding TreeNot to Scale
Toronto Catholic District School Board
Planning and Designing Green School Grounds – Prepared by Evergreen for the Toronto Catholic District School Board – February, 2009
CEDAR PLANKS, EDGES EASED
CEDAR PLANKS

Figu
re 1
0 A
rmou
r St
one
Seat
ing
and
Reta
inin
g W
all
Sect
ion
– No
t to
Sca
le
Toro
nto
Cath
olic
Dis
tric
t Sc
hool
Boa
rd
Plan
ning
and
Des
igni
ng G
reen
Sch
ool G
roun
ds –
Pre
pare
d by
Eve
rgre
en f
or t
he T
oron
to C
atho
lic D
istr
ict
Scho
ol B
oard
– F
ebru
ary,
200
9
300 - 600MM TYP.
FLAT
-TOP
PED
ARM
OUR
STON
E AP
PROX
IMAT
E SI
ZES
900M
M –
105
0MM
WID
E, 1
200M
M –
150
0MM
LONG
, 450
MM
– 6
00M
M H
IGH. I
NSTA
LL A
MIN
IMU
M
OF 1
00M
M B
ELOW
GRA
DE.
TOPS
OIL
AND
SOD
OR S
EED
PER
LAYO
UT
PLAN
TERR
AFIX
270
R (O
R AP
PROV
ED
EQU
IVAL
ENT)
FIL
TER
CLOT
H
OVER
LAPP
ING
ALL
JOIN
TS B
Y 30
0MM
MIN
IMU
M 2
50M
M D
EPTH
19M
M C
RUSH
ER
RUN
LIM
ESTO
NE C
OMPA
CTED
TO
100%
S.P.
D. B
ENEA
TH B
OTTO
M C
OURS
E OF
RE
TAIN
ING
WAL
L
900
- 105
0MM
TYP
ICAL
MIN
IMU
M 2
50M
M D
EPTH
AND
WID
TH
(19M
M C
LEAR
CRU
SHED
STO
NE)
UND
ISTU
RBED
SU
BSOI
L
FINI
SHED
GRA
DE W
ITH
SU
RFAC
E TR
EATM
ENT
PER
LAYO
UT
PLAN
NOT
ES:
1.VE
RTIC
AL H
EIGH
TS W
ILL
VARY
DEP
ENDI
NG O
N SI
TE
COND
ITIO
NS, I
.E.,
GRAD
E CH
ANGE
S.2.
BE A
WAR
E OF
CSA
STA
NDAR
DS W
ITH
REG
ARDS
TO
MAX
IMU
M H
EIGH
T OF
STO
NE
3.EN
SURE
TH
AT A
LL A
RMOU
R ST
ONE
ARE
INST
ALLE
D W
ITH
SEA
TING
SU
RFAC
E LE
VEL
300 - 600MM
400M
M M
IN. T
YP.
Figu
re 1
4 Li
mes
tone
Blo
ck S
eati
ng a
nd r
etai
ning
wal
l
Flat
-top
ped
ston
e ap
prox
imat
e si
zes
ensu
re t
hat
sto
ne is
inst
alle
d w
ith s
eati
ng
surF
ace
leve
l
54 | Pembina Trails School Division

GUIDELINES FOR SCHOOL GROUND GREENING—November 2011 | 55
Figu
re 1
5 w
ood
rail
Fenc
e
Figu
re 1
Woo
d Ra
il Fe
nce
Not
to S
cale
To
ront
o Ca
thol
ic D
istr
ict
Scho
ol B
oard
Plan
ning
and
Des
igni
ng G
reen
Sch
ool G
roun
ds –
Pre
pare
d by
Eve
rgre
en f
or t
he T
oron
to C
atho
lic D
istr
ict
Scho
ol B
oard
– F
ebru
ary,
200
9
TREA
T BE
LOW-G
RADE
POR
TION
OF
ALL
POST
S W
ITH
TW
O CO
ATS
APPR
OVED
CLE
AR A
ND
PENE
TRAT
ING
WOO
D PR
ESER
VATI
VE
PRIO
R TO
INS
TALL
ATIO
N
NOT
ES:
1.S T
EP F
ENCE
AT
POST
S, A
S RE
QUIR
ED T
O SU
IT
NEW
FIN
ISH
ED G
RADE
S (R
ESPO
ND T
O SI
TE
SPEC
IFIC
CON
DITI
ONS)
.2.
A LL
WOO
D TO
BE
WH
ITE
CEDA
R, R
OUND
POS
TS
AND
RAIL
S, B
ARK
REM
OVED
AND
SKI
NNED
/TU
RNED
TO
REM
OVE
IRRE
GULA
RITI
ES (
SUCH
AS
BRAN
CH S
TUBS
), F
REE
FROM
WAR
PS, C
HEC
KS
AND
CRAC
KS. A
VAIL
ABLE
TH
ROU
GH B
UTT
ON
FENC
E 70
5-45
8-95
063.
A LL
BOLT
S, N
AILS
AND
OTH
ER F
ASTE
NERS
TO
BE
GALV
ANIZ
ED
SECT
IONA
L EL
EVAT
ION
45M
M
FINI
SHED
GRA
DE
SURF
ACE
TREA
TMEN
T AS
PER
PLA
NS
2400
MM
[8’]
3000
MM
[10’
]
1200MM1200MM
2400MM
TYPI
CAL
SECT
ION
300M
M [
10”]
225MM[9’’]
COM
PACT
ED O
R U
NDIS
TURB
ED S
UBS
OIL
MIN
IMU
M 1
50 (
ON A
LL
SIDE
S) L
IMES
TONE
SC
REEN
INGS
COM
PACT
ED I
N
150M
M D
EPTH
LIF
TS
‘ROU
GHLY
’ NOT
CH P
OST
TO
RECE
IVE
RAIL
S AS
SH
OWN
MIN
. 100
MM
(4”
) Ø
X
3000
MM
(10
’) LO
NG W
OOD
RAIL
FAS
TENE
D O.
C. T
O PO
STS
IN S
TAGG
ERED
M
ANNE
R AS
SH
OWN
MIN
. 150
MM
(6”
) Ø
WOO
D
POST
SPA
CED
AT 2
400M
M
(8’)
O.C.
AS
SHOW
N
CHAM
FER
OR R
OUTE
R TO
P OF
POS
TS
75MM
13 Ø
X C
ARRI
AGE
BOLT
250
OR
300
LONG
(AS
REQ
UIR
ED T
O SU
IT T
HIC
KNES
S OF
POS
T/RA
IL C
OMBI
NATI
ON)
C/W
FLA
T W
ASH
ER O
N NU
T EN
D. P
RE-D
RILL
HOL
ES T
HRO
UGH
POS
TS
AND
RAIL
S AN
D CO
UNT
ER-S
INK
NUT
END
AT P
OST
AS S
HOW
N. E
ND O
F CA
RRIA
GE B
OLT
MU
ST
NOT
PROT
RUDE
BEY
OND
FACE
OF
POST
.

56 | Pembina Trails School Division
APPENDIX Table of Contents
page figure
57 A Evergreen Design Principles
58 B Criteria for Acceptable Nursery Stock
59 C Watering Guidelines for Newly Planted Trees
61 D The Importance of Mulch
62 e Evergreen's Rationale for Avoiding ACQ Lumber

GUIDELINES FOR SCHOOL GROUND GREENING—November 2011 | 57
evergreen
Evergreen helps schools create outdoor classrooms to provide students with a healthy place to play, learn and develop a genuine respect for nature.
Design PrinciplesDeSIGn TO meeT CHILDren'S DeVeLOPmenTAL neeDS Drawing on research in child development and the impact of landscapes on children, we strive to design landscapes that serve student needs for active and passive play, intellectual development, social development and health considerations such as shade. All of this is organized into an aesthetically pleasing landscape that is appealing to students, encourages exploration and stimulates a sense of wonder.
reSPOnD TO LOCAL eCOLOGy AnD COmmUnITyWe design to suit a site's ecological setting as well as the particular uses and characteristics of the school community.
InCOrPOrATe Green DeSIGn PrInCIPLeSWe promote better environmental sustainability in the design of school grounds with the expectation that design solutions will help improve air and water quality, reduce greenhouse gas emissions and enhance the natural environment.
ADOPT A PArTICIPATOry PrOCeSSWe invite those who have an interest in or may be affected by changes to the school ground to participate in the process. Depending on the site, this typically includes teachers, students, caretakers, facility managers, school administrators and neighbours. We work toward creating a collective vision, clearly articulating the decision-making process and sticking to the set timeline.
DeSIGnInG OUTDOOr CLASSrOOmSWe pay particular attention to existing instructional uses of the site and we work with staff to create a landscape that will expand the learning opportunities outdoors. We work with teachers and supervisors to create an environment that harnesses the tremendous power of hands-on experiential learning.
To find out more about evergreen and Learning Grounds visit our website:
evergreen.ca
Here are some other related links:
http://naturalearning.org/aboutus/aboutus.htm
http://www.cccf-fcsge.ca/practice/policy/safety_en.html
http://www.planetearthplayscapes.com/home.html
http://www.cnaturenet.org/
A evergreen Design Principles APPENDIX Table of Contents

58 | Pembina Trails School Division
B Criteria for Acceptable nursery Stock
General
(a) Trees shall be the size and variety noted on the Plant List. Plant material that does not have the specified root ball diameter as mentioned in plant list will be rejected.
(b) All nursery stock supplied shall be Canadian nursery grown, of the species and sizes indicated on the drawings. Quality shall be in accordance with the latest “Guide Specification for Nursery Stock" of the Canadian Nursery Landscape Association.
(c) Any nursery stock dug from native stands, wood lots, orchards or neglected nurseries and which have not received proper cultural maintenance as advocated by the Canadian Nursery Landscape Association shall be designated as “collected plants.” The use of “collected plants” will not be permitted unless approved by the Contract Administrator.
(d) The Contract Administrator reserves the right to inspect the plant material at their original source, and to instruct the supplier on root and branch pruning requirements.
(e) Nomenclature of specified nursery stock shall conform to the International Code of Nomenclature for Cultivated Plants and shall be in accordance with the approved scientific names given in the latest edition of Standardized Plant Names. The names of varieties not named therein are generally in conformity with the names accepted in the nursery trades.
(f) Plants larger than specified may be used if approved by the Contract Administrator. The use of such plants shall not increase the Contract price.
(g) All nursery stock shall be measured when the branches are in their normal position. Height and spread dimensions specified refer to the main body of the plant and not from branch tip.
(h) Where trees are measured by calliper (cal.), reference is made to the diameter of the trunk measured 300 mm above ground as the tree stands in the nursery.
(i) All nursery stock shall be well branched, true to type, structurally sound, possess a well developed, undamaged root system and shall be free of disease, insect infestations, rodent damage, sunscald, frost cracks and other abrasion or scare to the bark. All parts of the nursery stock shall be moist and show live, green cambium when cut.
(j) All trees shall have one only, sturdy, reasonably straight and vertical trunk and a well balanced crown with fully developed leader. All evergreens shall be symmetrically grown and branched from ground level up, and must be balled and burlapped unless noted otherwise on the plant list. At least one plant of each variety supplied shall bear a tag showing both the botanical and common name of the plant
(k) Protection of Stock
(i) All nursery stock shall be well protected from damage and drying out from the time of digging until the time of planting on site. All roots shall be cleanly cut; split roots are not acceptable.
(ii) Nursery stock shall be transplanted with care to prevent damage. Points of contact with equipment shall be padded. All nursery stock, which cannot be planted immediately upon arrival at the site, shall be well protected to prevent drying out and shall be kept moist until commencement of planting.
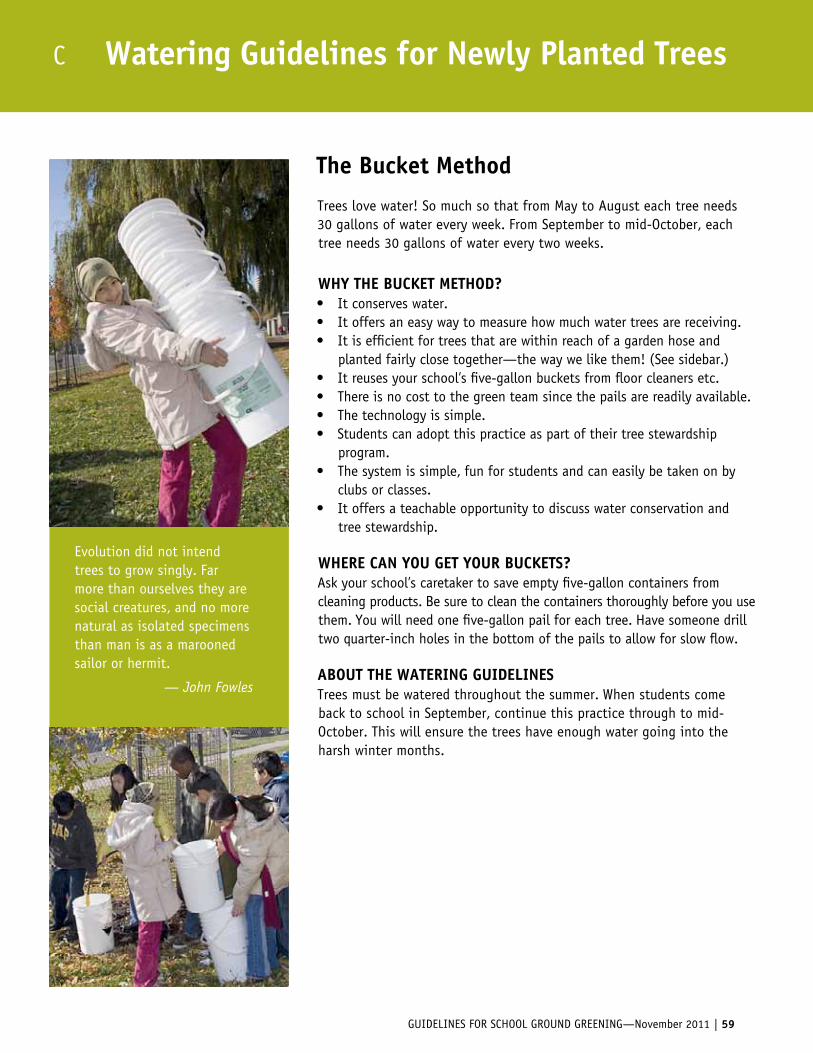
GUIDELINES FOR SCHOOL GROUND GREENING—November 2011 | 59
C watering Guidelines for newly Planted Trees
The Bucket method
Trees love water! So much so that from May to August each tree needs 30 gallons of water every week. From September to mid-October, each tree needs 30 gallons of water every two weeks.
wHy THe BUCKeT meTHOD? • It conserves water.• It offers an easy way to measure how much water trees are receiving.• It is efficient for trees that are within reach of a garden hose and
planted fairly close together—the way we like them! (See sidebar.)• It reuses your school’s five-gallon buckets from floor cleaners etc.• There is no cost to the green team since the pails are readily available.• The technology is simple.• Students can adopt this practice as part of their tree stewardship
program.• The system is simple, fun for students and can easily be taken on by
clubs or classes.• It offers a teachable opportunity to discuss water conservation and
tree stewardship.
wHere CAn yOU GeT yOUr BUCKeTS?Ask your school’s caretaker to save empty five-gallon containers from cleaning products. Be sure to clean the containers thoroughly before you use them. You will need one five-gallon pail for each tree. Have someone drill two quarter-inch holes in the bottom of the pails to allow for slow flow.
ABOUT THe wATerInG GUIDeLIneSTrees must be watered throughout the summer. When students come back to school in September, continue this practice through to mid-October. This will ensure the trees have enough water going into the harsh winter months.
Evolution did not intend trees to grow singly. Far more than ourselves they are social creatures, and no more natural as isolated specimens than man is as a marooned sailor or hermit.
— John Fowles

60 | Pembina Trails School Division
C watering Guidelines for newly Planted Trees
HOw DOeS THe BUCKeT meTHOD wOrK?
1. For a grove of six trees, start with six buckets.
2. Place one bucket at the drip line of each tree.
3. Fill each pail with water using a hose. It will take about four minutes to fill the pail with a regular garden hose (water will leak out the bottom as the pail is filling up).
4. It takes three minutes for the pail to empty, so over the course of seven minutes (four minutes to fill plus three to empty) ten to eleven gallons of water percolates slowly into the soil (there should be very little runoff).
5. Continue to fill all the buckets one at a time.
6. When you have finished filling the last bucket, return to the first tree and move the first pail one-third of the way around the same tree and fill it up again. Repeat with the other buckets and the other trees.
7. Repeat the process for a third time, moving the pails another one-third of the way around the trees and filling them up one final time. You should fill each tree’s pail three times in total so that the tree will receive approximately 30 gallons of water.
8. If water starts to run all over the ground rather than sinking in, you know the soil is saturated and you are done.
9. Do this weekly from May to August and every two weeks from September to mid-October.
Someone's sitting in the shade today because someone planted a treea long time ago.
— Warren Buffett

GUIDELINES FOR SCHOOL GROUND GREENING—November 2011 | 61
D The Importance of mulch
HOw DOeS mULCH HeLP OUr TreeS, SHrUBS AnD PLAnTS? • keeps roots cool• retains moisture • protects roots from foot traffic• protects trunk from lawn care equipment• reduces erosion and soil compaction • prevents water runoff• improves the organic content of the soil• absorbs excess moisture in spring and fall and extends the mud-free
pavement zone, giving students more room to play• keeps weeds down
HOw mUCH mULCH DO I neeD?Use the table below to calculate how much mulch you need.
Mulch is ordered in cubic yards. (Note: the landscape and construction industry does not use metric).
The formula for volume is: V = Length x Width x Depth.
If you measure and calculate volume in feet, divide your result by 27 to determine the number of cubic yards, since there are 27 cubic feet in one cubic yard (27 ft3 = 1 yd3).
If you measure and calculate volume in metres, multiply your result by 1.3 to determine the number of cubic yards, since there are 1.3 cubic yards in 1 cubic metre (1 m3 = 1.3 yd3).
TreeS AnD SHrUBS: reCOmmenDeD DePTH (spread mulch 6” (15 cm) deep).
Volume of mulch notesnewly planted trees
½ cubic yard (about 13 milk crates)
Spread approximately 1 m out from the base
existing trees 1–4 cubic yards (depend-ing on size and # of trees)
Spread to the drip line to ensure you are protecting the tree’s root system (see diagram on reverse)
Trees in planter boxes
½–1 cubic yard Depending on depth of box (mulch to the top edge of box)
Shrubs ¼ cubic yard each (about 6.5 milk crates)
Spread approximately 1 m out from the base
Pathways, outdoor class-rooms, muddy areas
1 cubic yardThis will cover about 54 square feet of area (3 ft x 18 ft, or 2 ft x 27 ft)
* For Garden beds, spread mulch to a depth of 4” or 10 cm.
why do we mulch?Spreading mulch around the base of trees and in gardens offers students a hands-on opportunity to learn about, and participate in, caring for trees, shrubs and other plants.
Students and stewardshipFor many years, students have been planting gardens on their school grounds and in local parks. While new projects are exciting, students can learn a lot about environmental stewardship by caring for existing trees and gardens.
Allergy Alert!Make sure that parents of students allergic to dust and mould are aware of the activity and take the precautions they recommend.
Mulch moves...have students help tidy mulch regularly

62 | Pembina Trails School Division
E evergreen's rationale for Avoiding ACQ Lumber
SUmmAryAlkaline copper quaternary (ACQ) is a chemical compound for pressure treating wood which has replaced chromated copper arsenate (CCA) in Canada. CCA wood is dangerous because it contains inorganic arsenic, among other toxins, which can be transferred to children’s skin and mouths. ACQ wood boasts the 40-year lifespan of CCA lumber. Although ACQ treated lumber is a chromium- and arsenic-free alternative to CCA, concerns are still raised about the chemicals that will leach from it into surrounding soil, groundwater and air. Alternatives should be considered when building picnic tables, playground equipment fences, and school ground gardens.
COnCernSWhen ACQ pressure treated lumber is freshly processed, emissions of ammonia will escape into the environment. Subjected to rain, unprotected wood will leach small amounts of chemicals into the soil. Its very high copper content acts as a fungicide. Studies have shown that ACQ leaches slightly greater quantities of chemical preservatives than CCA treated wood. Most notably it leaches roughly three times more copper than CCA lumber, counteracting the benefit of containing no chromium or arsenic. Although copper is not very toxic to mammals, it is to fungi (thus its fungicidal properties) and aquatic life. The damage to aquatic habitats is a notable concern.
Because of its chemical content, ACQ lumber should never be burnt, or chipped up and used for mulch. Proper disposal for this wood is in a lined, non-hazardous material landfill. However, this is not an ideal solution. It will continue to contaminate nearby soil and water unless perfectly contained.
ALTernATIVeSEvergreen recommends using untreated hardwood, such as cedar for use in school ground equipment. Cedar and redwood are naturally rot-resistant, but will have to be replaced approximately every 20 years. The heartwood of many local tree species contains rot-resistant compounds. Consider oak or maple. Do not use sapwood, because this will only last a few years outdoors. Also, check out your local re-use center for materials.
Plastic lumber is also a good alternative. Be careful to choose an environmentally friendly type of plastic lumber.
For a list of lumber product ratings visit: http://www.healthybuilding.net/pdf/gtpl/gtpl_product_ratings.pdf.
POLICy STATemenTBecause limited information is available, Evergreen is taking a precautionary approach on this issue. We will not fund the use of ACQ lumber in school ground projects. When more is understood about the environmental impact of this chemical treating process, Evergreen may revise its position.
“The safest alternative to CCA treated wood is natural and rot-resistant wood which has been sustainably harvested”
Beyond Pesticides


64 | Durham District School Board
evergreen.ca
writing: Heidi Campbell, Karen Dobrucki, Margaret MacKenzie, Wendy Simonson, Evergreen
reviewed by: Debby Morton, Evergreen
editing: Erin Elliott, Evergreen
Graphic Design: Angela Noussis for Evergreen
Project manager: Janice Bearg, Evergreen
Figures: Figures 1, 2, 2b, 10, 12, 14 and 15 Heidi Campbell, Evergreen Figures 4, 5, 6, 7, 8, 9, and 11 Toronto District School Board (Illustration: Samara Newman, Evergreen) Figure 13 Northwood Associates Landscape Architects Ltd.
Much of the material in these guidelines has been sourced from Evergreen publications:All Hands in the Dirt: A Guide to Designing and Creating Natural School Grounds, Nature Nurtures: Investigating the Potential of School Grounds, School Ground Greening: A Policy and Planning Guidebook as well as from the City of Toronto’s Toronto Green Standard.
In addition, thanks are due to the Design Group at the Toronto District School Board where much of this material was refined.


