1 | Page InSite Provider Application User Guide Simplify your center management with Cirrus Group LLC’s InSite Provider edition for iPad. This app is designed for a streamlined, quick and easy way for your administrators and staff to access the important features of the Provider Editions of DayCare Works, SchoolCare Works and RecCare Works at your points of service, or wherever you need. Information is automatically linked to your Cirrus Group LLC hosted applications with real-time information updates and reporting capabilities Logging In To Login to the application enter the username and password used to sign in to DayCare, SchoolCare or RecCare works then select Login. Using the Application Home/Summary The Home/Summary page displays several important metrics, staff will be able to see any daily tasks that must be completed, see live rations for children to staff and will have access to various charts. View only view of current classroom ratios: Red- Not enough Teachers White- In Balance Green- Surplus of Teachers Menu Bar Driven by checklists made available to staff The charts area visually displays data for the day including: Sched/Here-view number of students scheduled vs. present Daily To-Do- view changes/registrations that need to be processed for the day Birthdays Meals- Number of meals
Transcript
1 | P a g e
InSite Provider Application User Guide
Simplify your center management with Cirrus Group LLC’s InSite Provider edition for iPad. This app is
designed for a streamlined, quick and easy way for your administrators and staff to access the important
features of the Provider Editions of DayCare Works, SchoolCare Works and RecCare Works at your
points of service, or wherever you need. Information is automatically linked to your Cirrus Group LLC
hosted applications with real-time information updates and reporting capabilities
Logging In To Login to the application enter the username and password used to sign in to DayCare, SchoolCare or
RecCare works then select Login.
Using the Application
Home/Summary The Home/Summary page displays several important metrics, staff will be able to see any daily tasks
that must be completed, see live rations for children to staff and will have access to various charts.
View only view of current
classroom ratios:
Red- Not enough
Teachers
White- In Balance
Green- Surplus of
Teachers
Menu Bar
Driven by checklists made
available to staff
The charts area visually displays
data for the day including:
Sched/Here-view number of
students scheduled vs.
present
Daily To-Do- view
changes/registrations that
need to be processed for the
day
Birthdays
Meals- Number of meals
served
2 | P a g e
Click on the Menu bar to navigate to the Attendance, Meals, Directory or Daily InSite screens.
Attendance To navigate to the attendance screen from the home screen select the menu bar located on the top left
side of the application.
Once the toolbar has expanded, select the Attendance option.
3 | P a g e
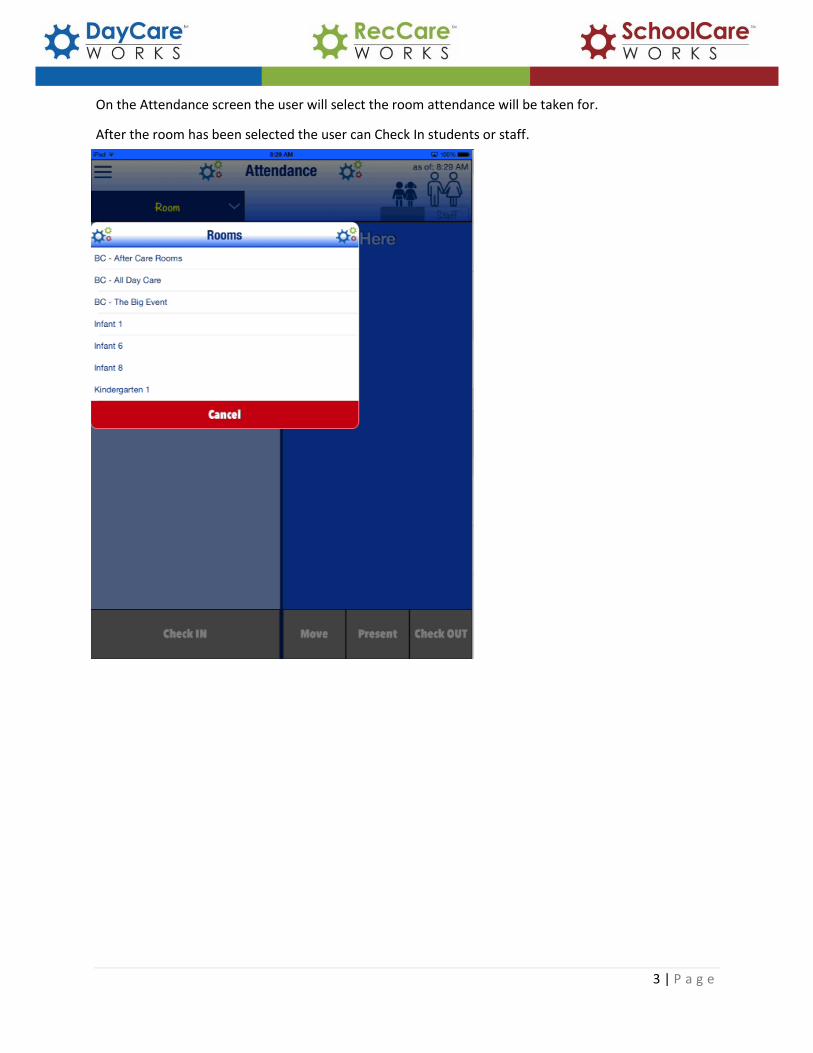
On the Attendance screen the user will select the room attendance will be taken for.
After the room has been selected the user can Check In students or staff.
4 | P a g e
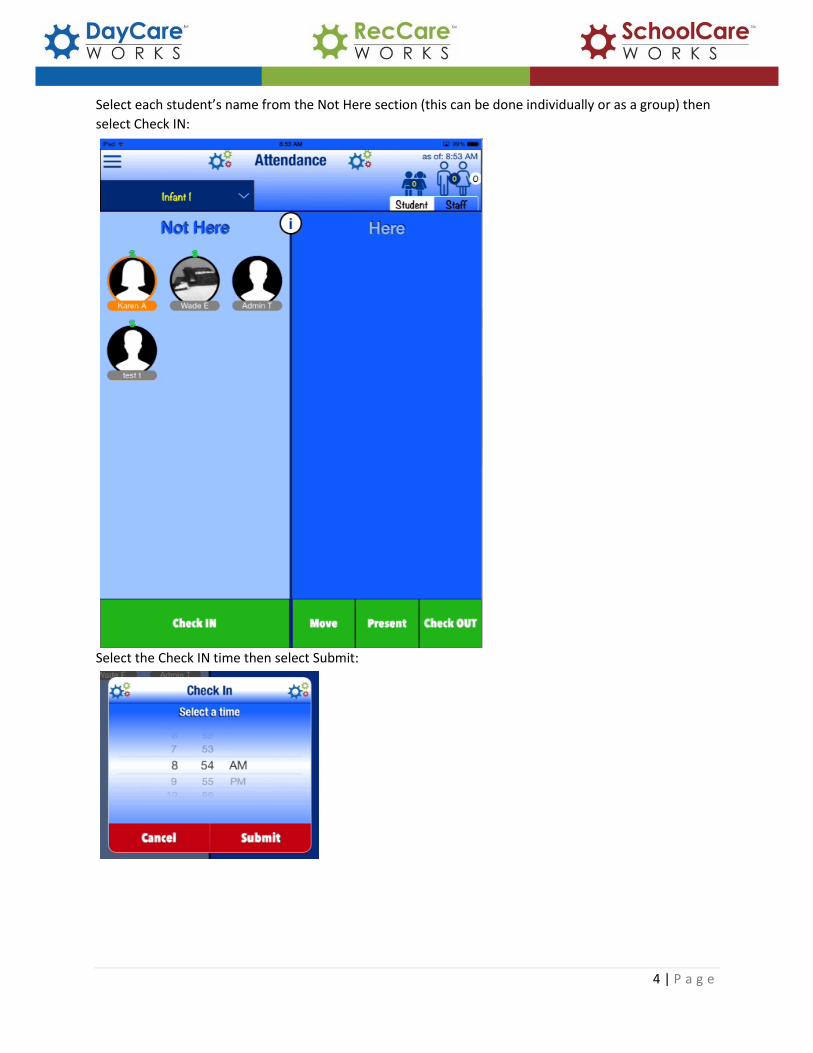
Select each student’s name from the Not Here section (this can be done individually or as a group) then
select Check IN:
Select the Check IN time then select Submit:
5 | P a g e
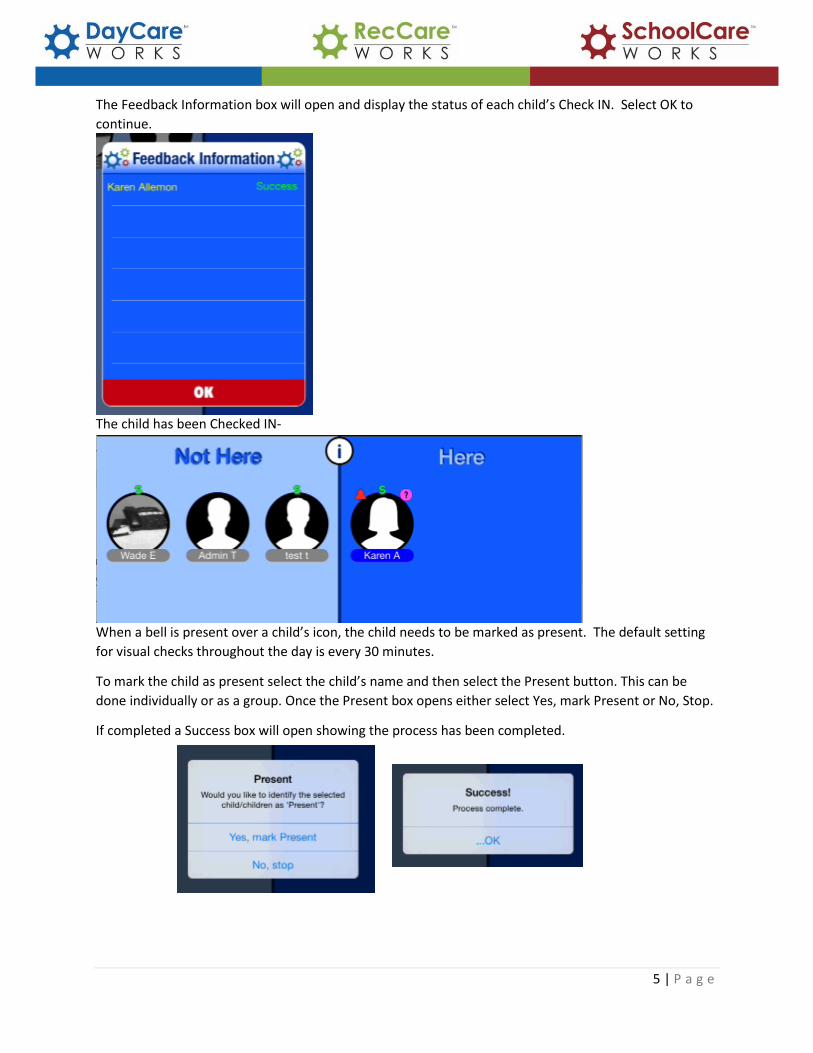
The Feedback Information box will open and display the status of each child’s Check IN. Select OK to
continue.
The child has been Checked IN-
When a bell is present over a child’s icon, the child needs to be marked as present. The default setting
for visual checks throughout the day is every 30 minutes.
To mark the child as present select the child’s name and then select the Present button. This can be
done individually or as a group. Once the Present box opens either select Yes, mark Present or No, Stop.
If completed a Success box will open showing the process has been completed.
6 | P a g e
To Check In staff select the Staff icon on the top right of the screen, the process for checking staff into
the classroom will be the same as checking in students. Staff will not need to be marked present.
To move students or staff between rooms select the name of the students or staff that need to be
moved, then select Move.
7 | P a g e
To toggle between classrooms, select the name of the classroom located on the top left of the screen.
The room box will open, to scroll through the names of the classroom swipe up or down in the box.
Select the name of the next classroom attendance will be taken for.
8 | P a g e
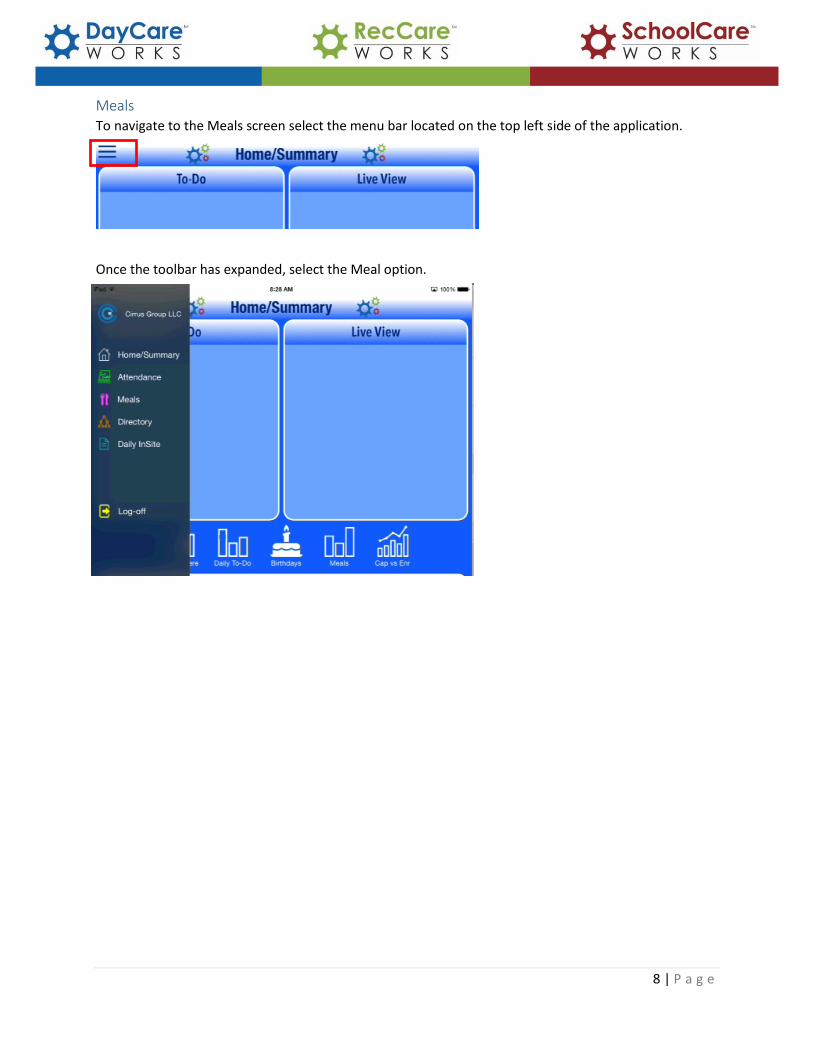
Meals To navigate to the Meals screen select the menu bar located on the top left side of the application.
Once the toolbar has expanded, select the Meal option.
9 | P a g e
The first step will be to select the name of the room meals will be served in.
Next, select the meal that will be served.
The names of the children currently checked into the selected classroom will appear on the page.
10 | P a g e
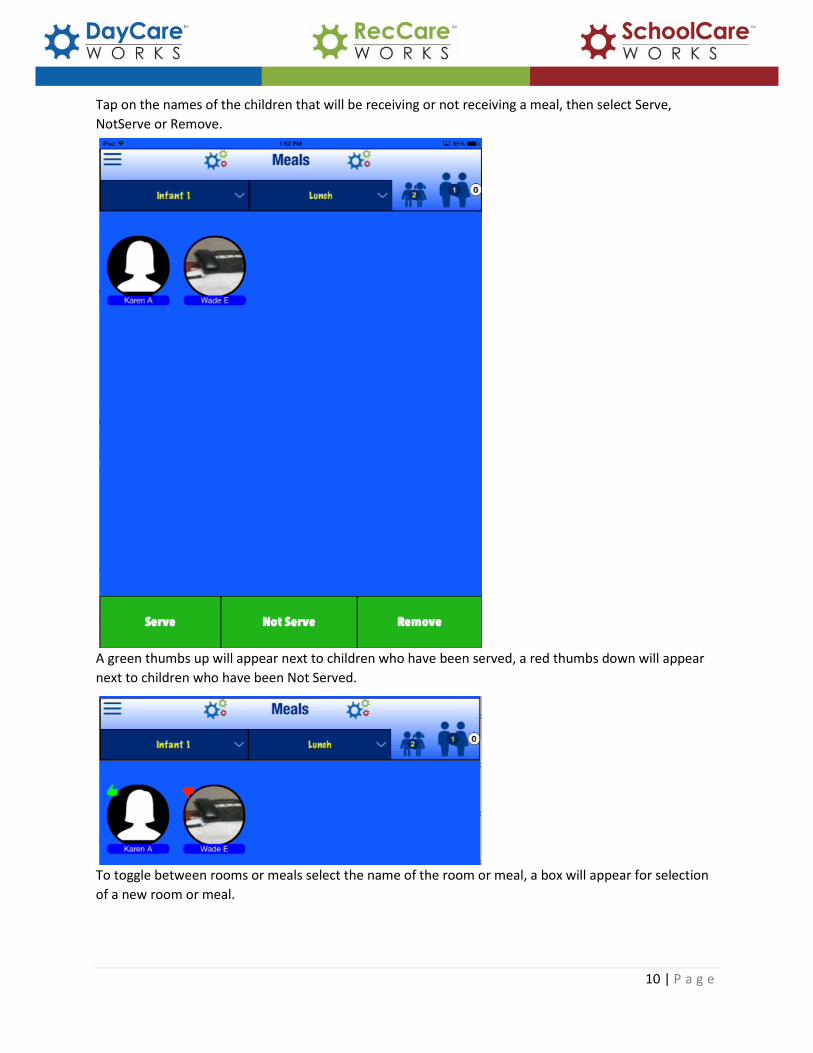
Tap on the names of the children that will be receiving or not receiving a meal, then select Serve,
NotServe or Remove.
A green thumbs up will appear next to children who have been served, a red thumbs down will appear
next to children who have been Not Served.
To toggle between rooms or meals select the name of the room or meal, a box will appear for selection
of a new room or meal.
11 | P a g e
Directory To navigate to the Directory screen select the menu bar located on the top left side of the application.
Once the toolbar has expanded, select the Directory option.
12 | P a g e
Select a Room from the Rooms screen.
The names of the children associated with the room will appear, click on the name of a child to view
their directory information.
13 | P a g e
On this screen the Daily InSites, Guardian and Contact information can be viewed.
14 | P a g e
Select View Daily InSite button to see the related detail for a child, the information available is tied to
setup completed on the desktop site during configuration.
To toggle between categories select the top left square, swipe up and down to view all category options.
When finished viewing Daily InSites, select the Back option located in the top left corner.
15 | P a g e
Daily InSite To navigate to the Daily Insite screen select the menu bar located on the top left side of the application.
Once the toolbar has expanded, select the Daily Insite option.
Select the room InSites will be recorded for.
16 | P a g e
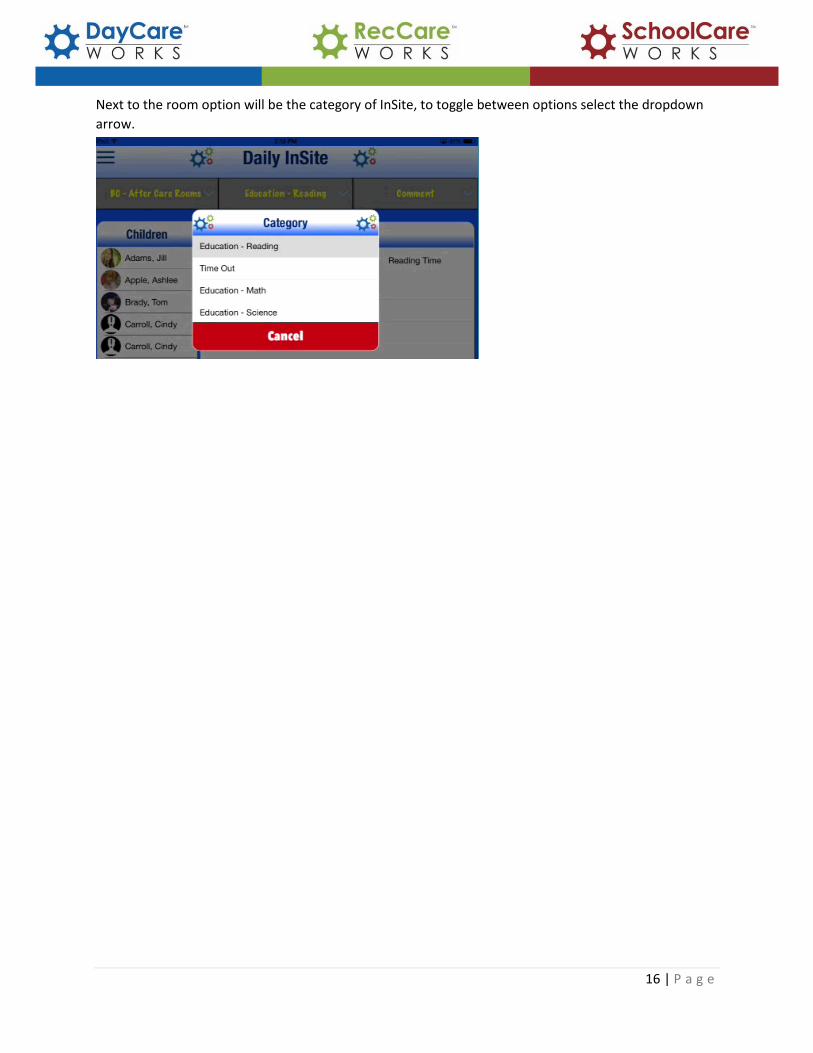
Next to the room option will be the category of InSite, to toggle between options select the dropdown
arrow.
17 | P a g e
InSites can be recorded for individual or groups of children, select the names of each of the children
then select Add Attribute.
Enter a description of the attribute, when finished select Add.
18 | P a g e
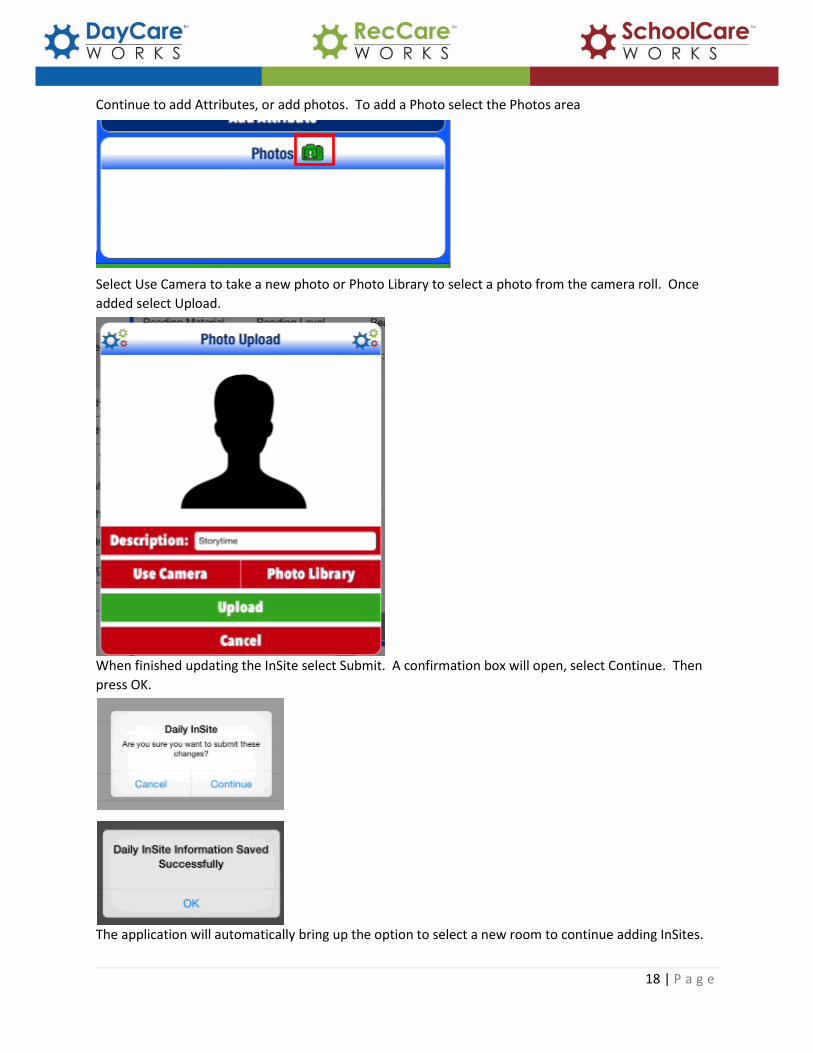
Continue to add Attributes, or add photos. To add a Photo select the Photos area
Select Use Camera to take a new photo or Photo Library to select a photo from the camera roll. Once
added select Upload.
When finished updating the InSite select Submit. A confirmation box will open, select Continue. Then
press OK.
The application will automatically bring up the option to select a new room to continue adding InSites.