21
1 inspira 9.2 ePerformance User Guide July 2019

1
inspira 9.2
ePerformance
User Guide
July 2019
2
Contents
GETTING STARTED ........................................................................................................... 3
PROCESS OVERVIEW ...................................................................................................... 4
PHASE 1: WORKPLAN ..................................................................................................... 5
PHASE 2: MID-POINT REVIEW ....................................................................................... 13
PHASE 3: END-OF-CYCLE EVALUATION ...................................................................... 16
3
Getting started
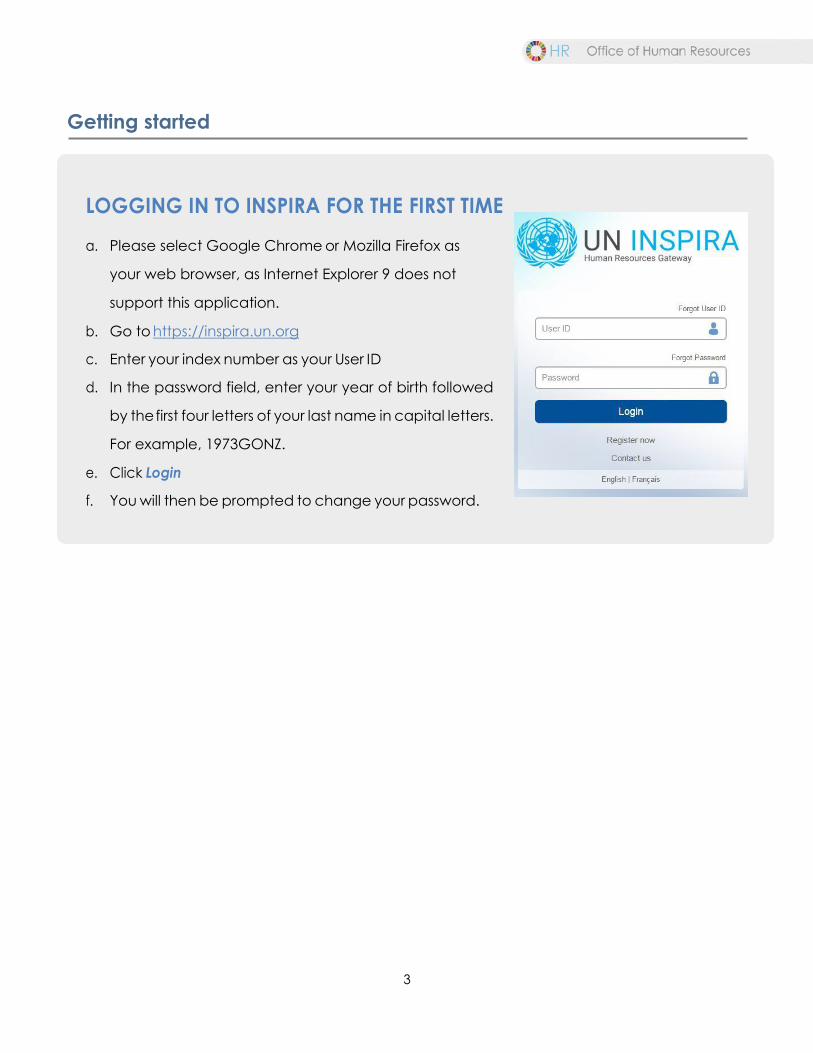
LOGGING IN TO INSPIRA FOR THE FIRST TIME
a. Please select Google Chrome or Mozilla Firefox as
your web browser, as Internet Explorer 9 does not
support this application.
b. Go to https://inspira.un.org
c. Enter your index number as your User ID
d. In the password field, enter your year of birth followed
by the first four letters of your last name in capital letters.
For example, 1973GONZ.
e. Click Login
f. You will then be prompted to change your password.
4
Process Overview
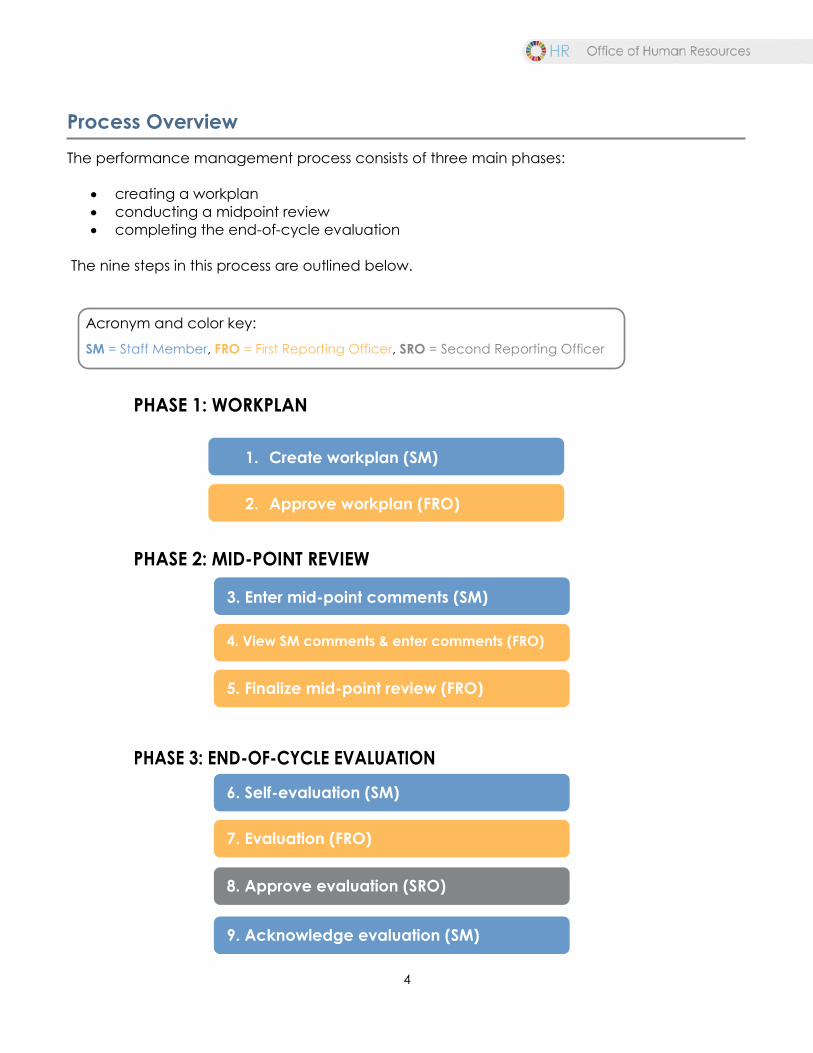
The performance management process consists of three main phases:
• creating a workplan
• conducting a midpoint review
• completing the end-of-cycle evaluation
The nine steps in this process are outlined below.
Acronym and color key:
SM = Staff Member, FRO = First Reporting Officer, SRO = Second Reporting Officer
PHASE 1: WORKPLAN
PHASE 2: MID-POINT REVIEW
PHASE 3: END-OF-CYCLE EVALUATION
2. Approve workplan (FRO)
3. Enter mid-point comments (SM)
4. View SM comments & enter comments (FRO)
5. Finalize mid-point review (FRO)
6. Self-evaluation (SM)
7. Evaluation (FRO)
8. Approve evaluation (SRO)
1. Create workplan (SM)
9. Acknowledge evaluation (SM)
5
Phase 1: Workplan
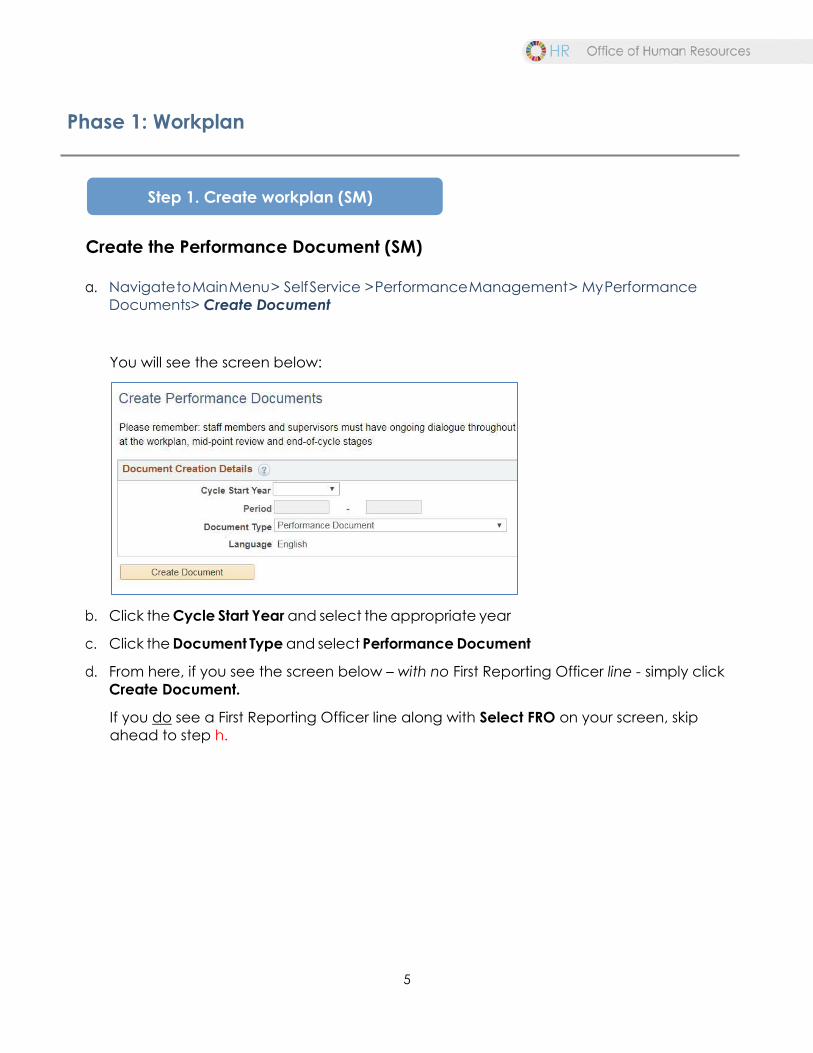
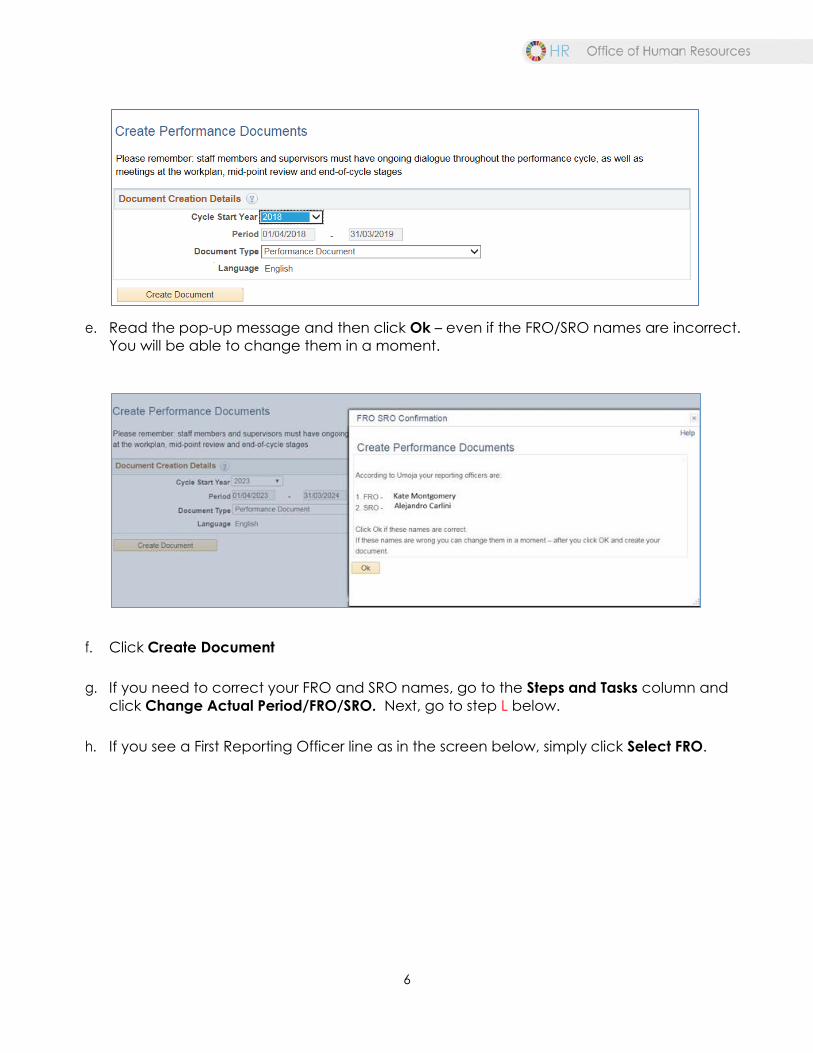
Create the Performance Document (SM)
a. Navigate to Main Menu > Self Service > Performance Management > My Performance
Documents> Create Document
You will see the screen below:
b. Click the Cycle Start Year and select the appropriate year
c. Click the Document Type and select Performance Document
d. From here, if you see the screen below – with no First Reporting Officer line - simply click
Create Document.
If you do see a First Reporting Officer line along with Select FRO on your screen, skip
ahead to step h.
Step 1. Create workplan (SM)
6
e. Read the pop-up message and then click Ok – even if the FRO/SRO names are incorrect.
You will be able to change them in a moment.
f. Click Create Document
g. If you need to correct your FRO and SRO names, go to the Steps and Tasks column and
click Change Actual Period/FRO/SRO. Next, go to step L below.
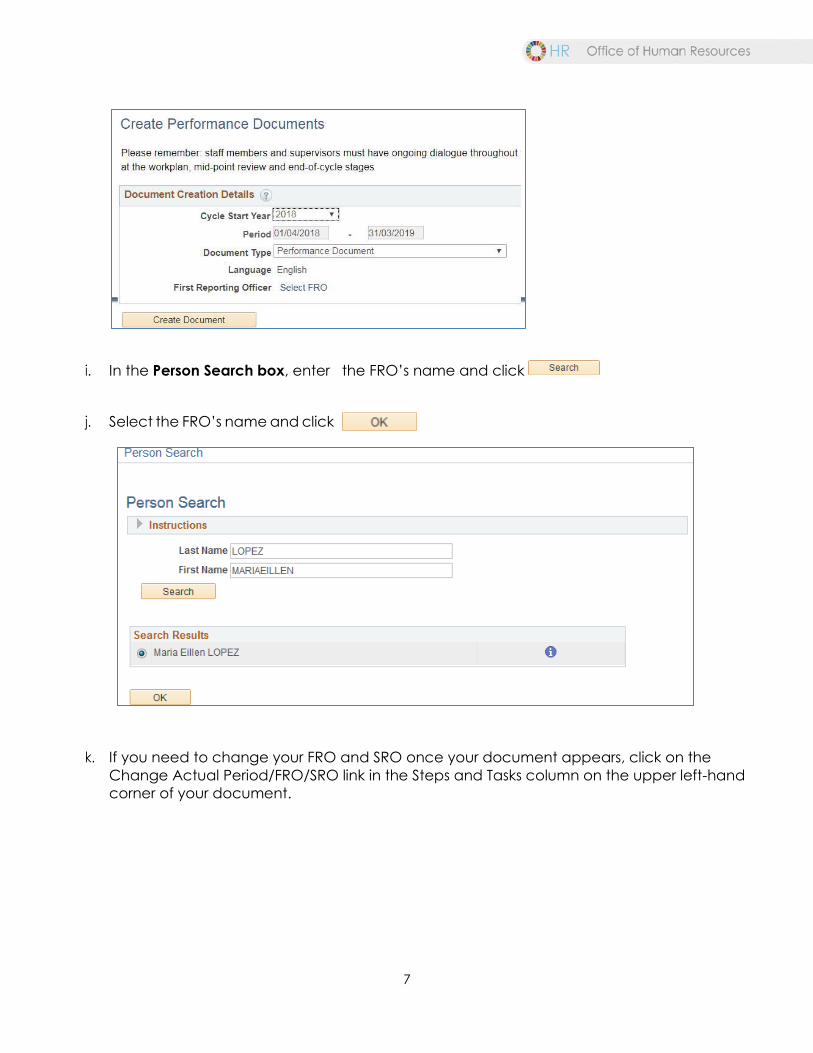
h. If you see a First Reporting Officer line as in the screen below, simply click Select FRO.
7
i. In the Person Search box, enter the FRO’s name and click
j. Select the FRO’s name and click
k. If you need to change your FRO and SRO once your document appears, click on the
Change Actual Period/FRO/SRO link in the Steps and Tasks column on the upper left-hand
corner of your document.
8
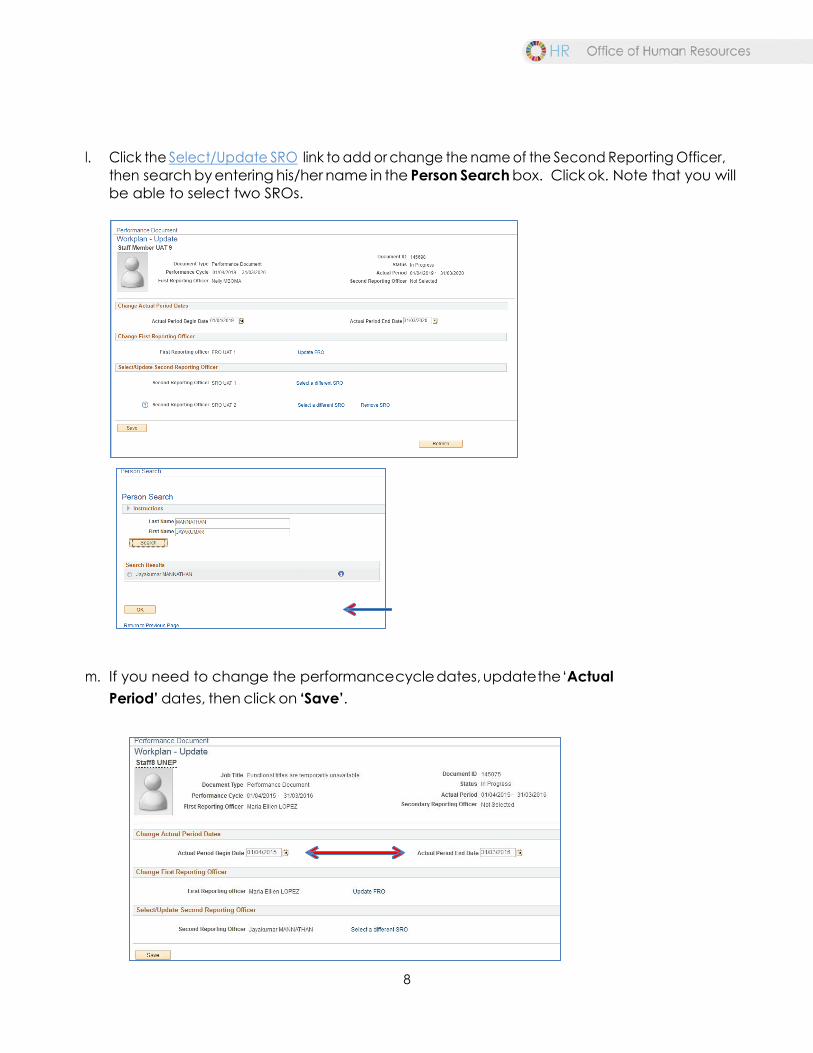
l. Click the Select/Update SRO link to add or change the name of the Second Reporting Officer,
then search by entering his/her name in the Person Search box. Click ok. Note that you will
be able to select two SROs.
m. If you need to change the performance cycle dates, update the ‘Actual
Period’ dates, then click on ‘Save’.
9
Entering the Workplan
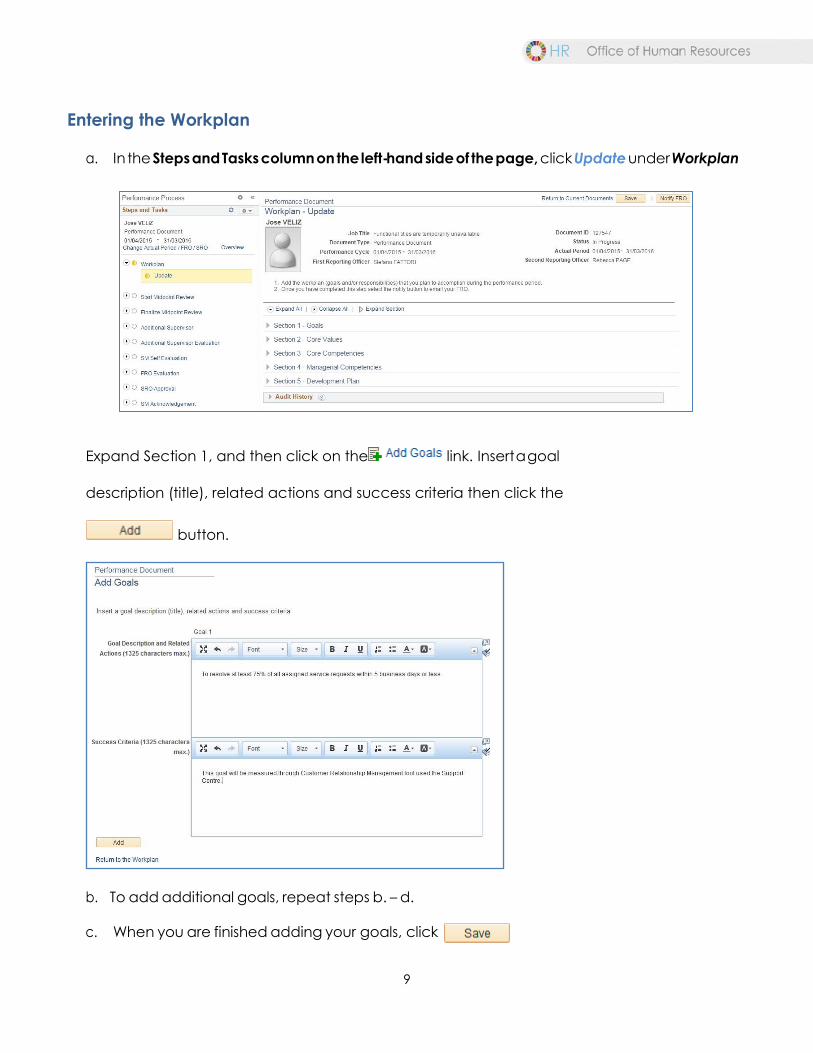
a. In the Steps and Tasks column on the left-hand side of the page, click Update under Workplan
Expand Section 1, and then click on the link. Insert a goal
description (title), related actions and success criteria then click the
button.
b. To add additional goals, repeat steps b. – d.
c. When you are finished adding your goals, click
10
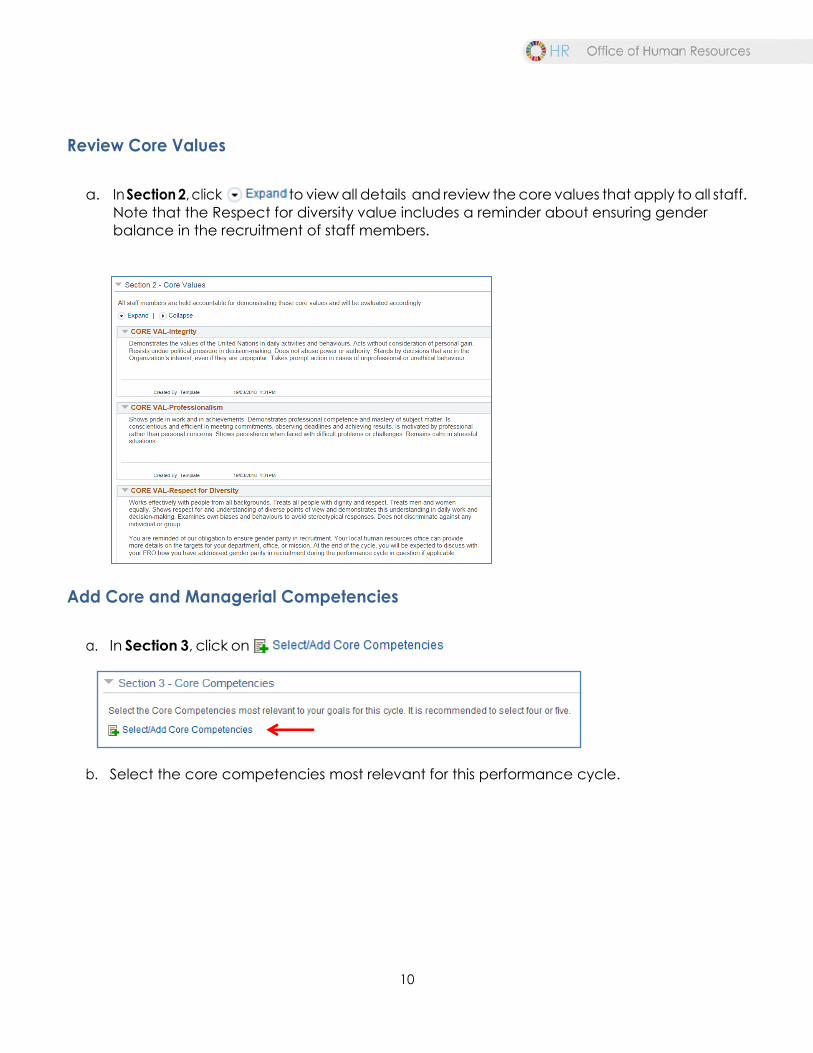
Review Core Values
a. In Section 2, click to view all details and review the core values that apply to all staff.
Note that the Respect for diversity value includes a reminder about ensuring gender
balance in the recruitment of staff members.
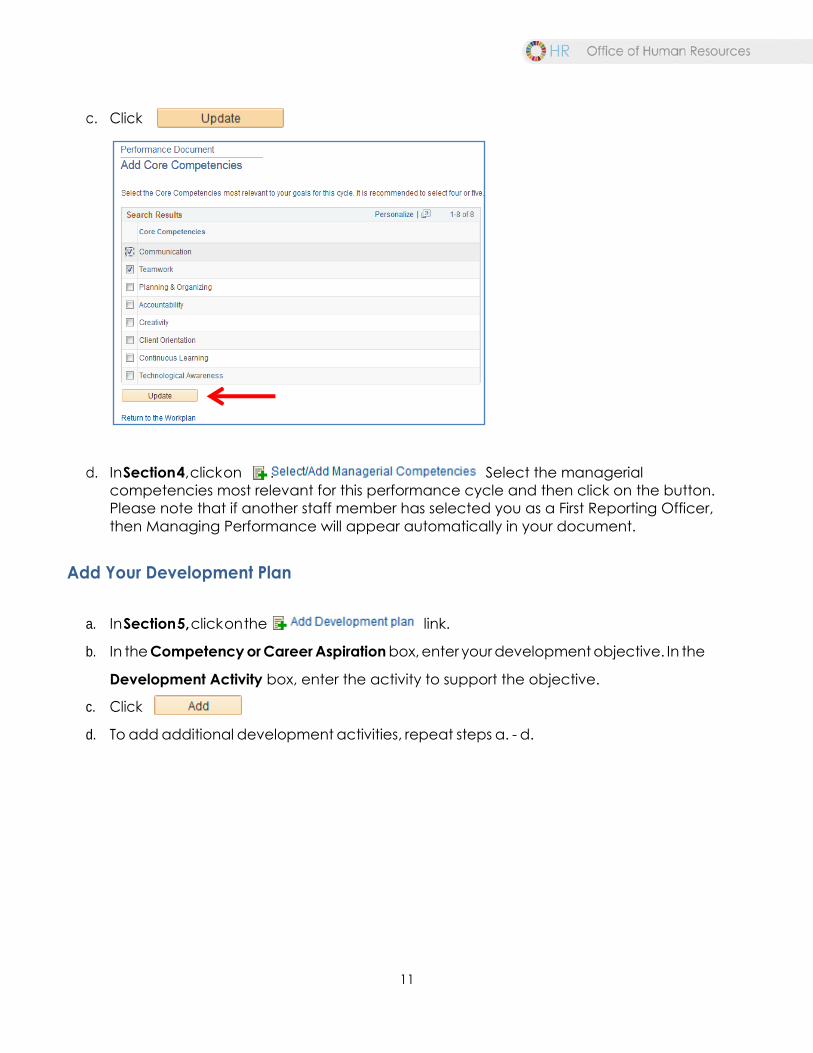
Add Core and Managerial Competencies
a. In Section 3, click on
b. Select the core competencies most relevant for this performance cycle.
11
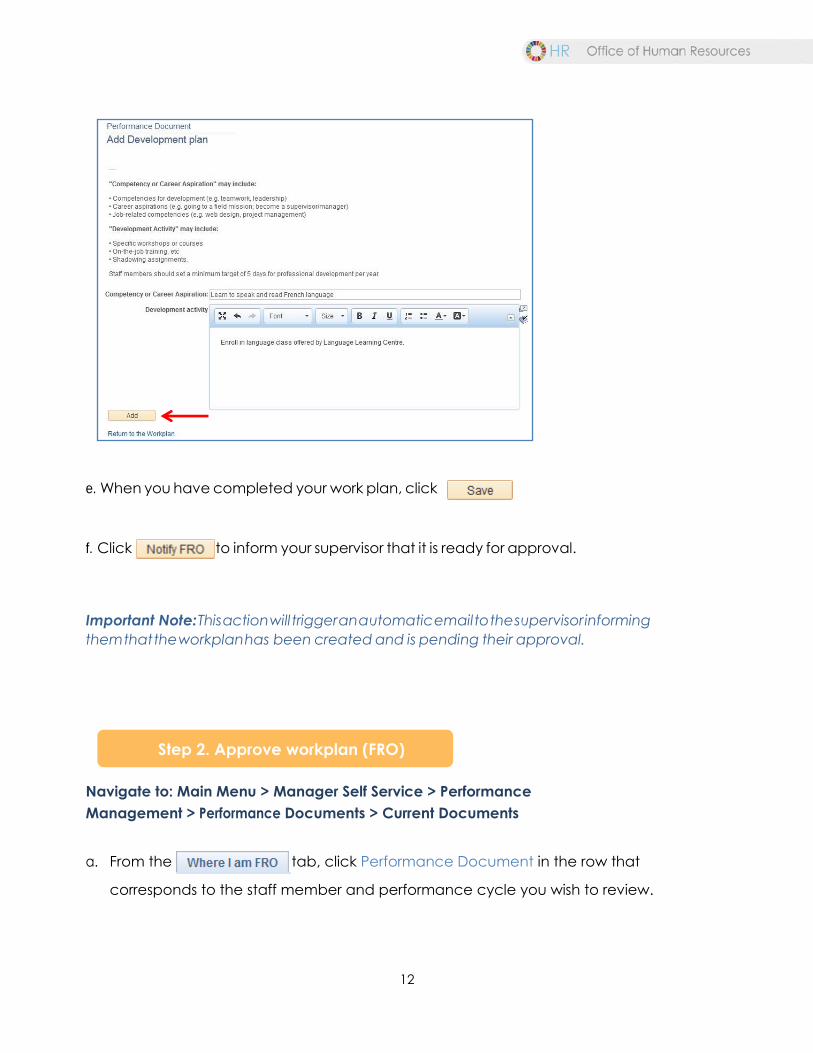
c. Click
d. In Section 4, click on . Select the managerial
competencies most relevant for this performance cycle and then click on the button.
Please note that if another staff member has selected you as a First Reporting Officer,
then Managing Performance will appear automatically in your document.
Add Your Development Plan
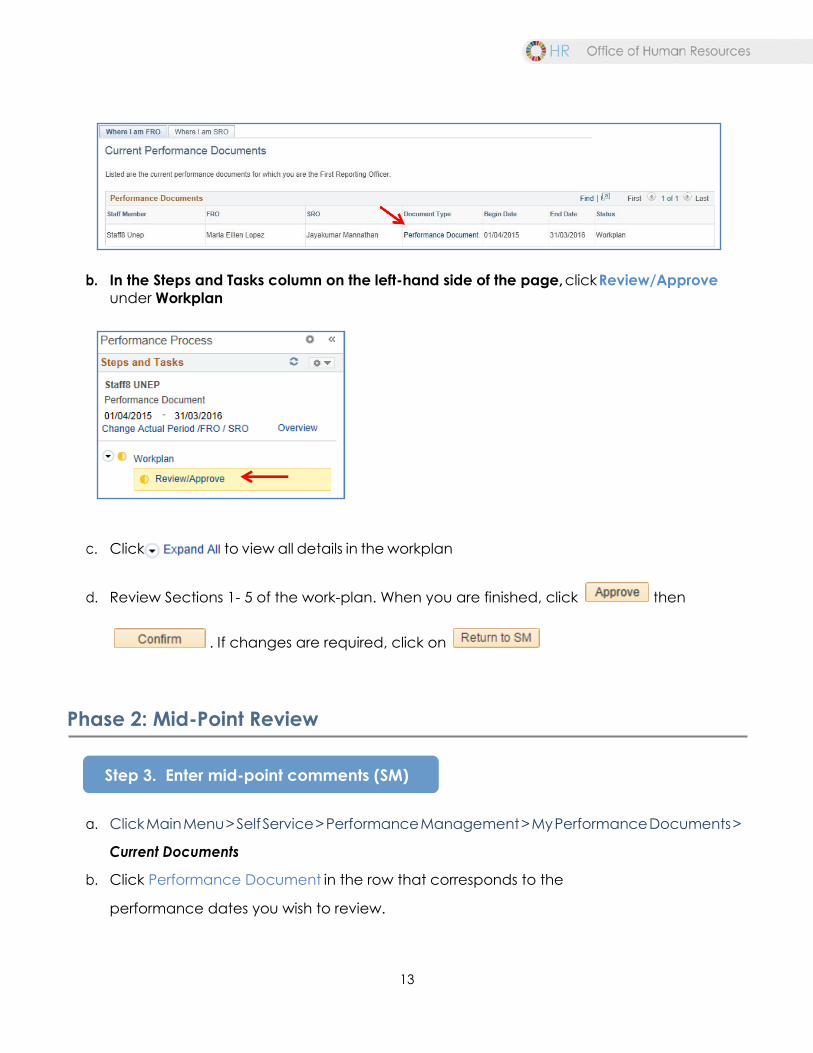
a. In Section 5, click on the link.
b. In the Competency or Career Aspiration box, enter your development objective. In the
Development Activity box, enter the activity to support the objective.
c. Click
d. To add additional development activities, repeat steps a. - d.
12
e. When you have completed your work plan, click
f. Click to inform your supervisor that it is ready for approval.
Important Note: This action will trigger an automatic email to the supervisor informing
them that the workplan has been created and is pending their approval.
Navigate to: Main Menu > Manager Self Service > Performance
Management > Performance Documents > Current Documents
a. From the tab, click Performance Document in the row that
corresponds to the staff member and performance cycle you wish to review.
Step 2. Approve workplan (FRO)
13
b. In the Steps and Tasks column on the left-hand side of the page, click Review/Approve
under Workplan
c. Click to view all details in the workplan
d. Review Sections 1- 5 of the work-plan. When you are finished, click then
. If changes are required, click on
Phase 2: Mid-Point Review
a. Click Main Menu > Self Service > Performance Management > My Performance Documents >
Current Documents
b. Click Performance Document in the row that corresponds to the
performance dates you wish to review.
Step 3. Enter mid-point comments (SM)
14
c. Scroll down to Section 6 – Mid-Point Comments and enter your comments in
the ‘Staff Member Comments’ box
When you are finished entering your comments, click on
d. Click on to submit the comments to your FRO.
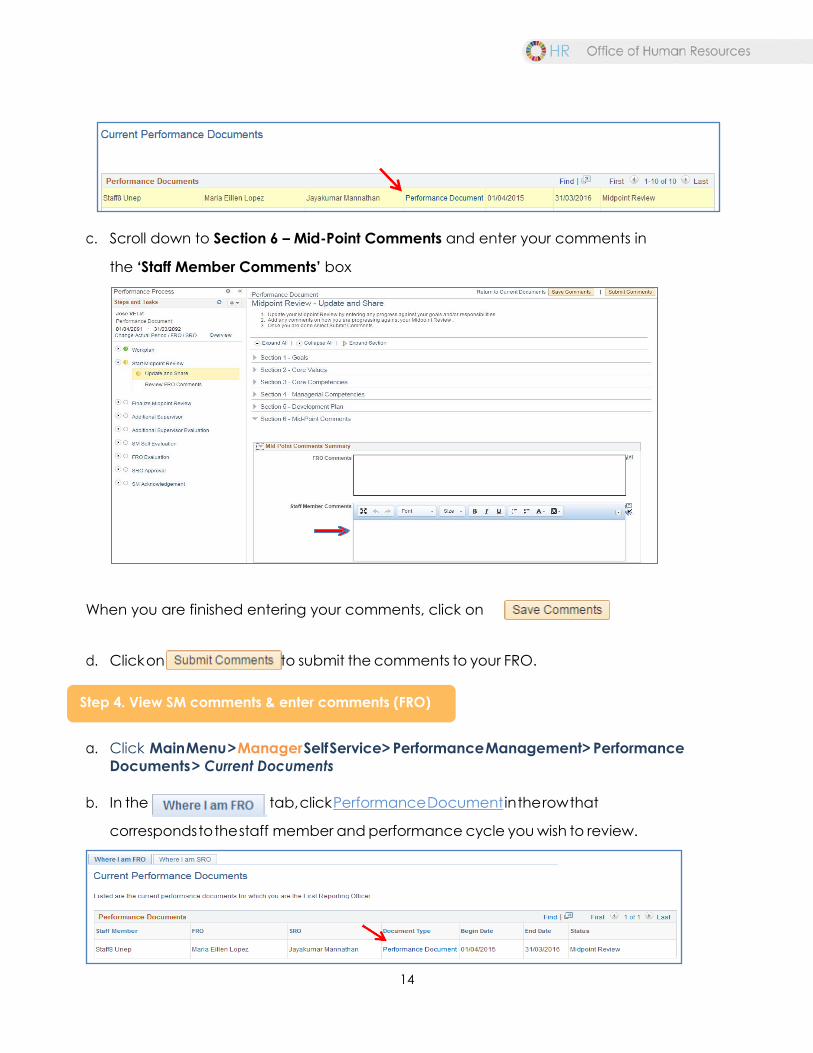
a. Click Main Menu > Manager Self Service> Performance Management> Performance
Documents > Current Documents
b. In the tab, click Performance Document in the row that
corresponds to the staff member and performance cycle you wish to review.
Step 4. View SM comments & enter comments (FRO)
15
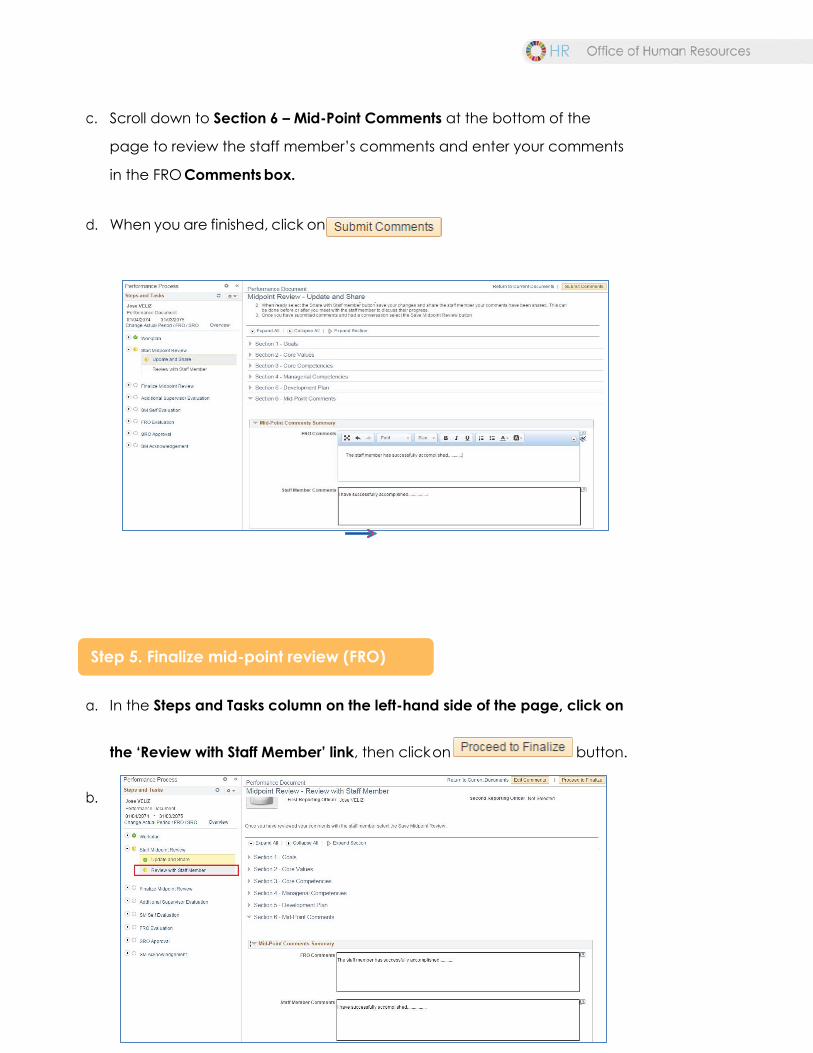
c. Scroll down to Section 6 – Mid-Point Comments at the bottom of the
page to review the staff member’s comments and enter your comments
in the FRO Comments box.
d. When you are finished, click on
a. In the Steps and Tasks column on the left-hand side of the page, click on
the ‘Review with Staff Member’ link, then click on button.
b.
Step 5. Finalize mid-point review (FRO)
16
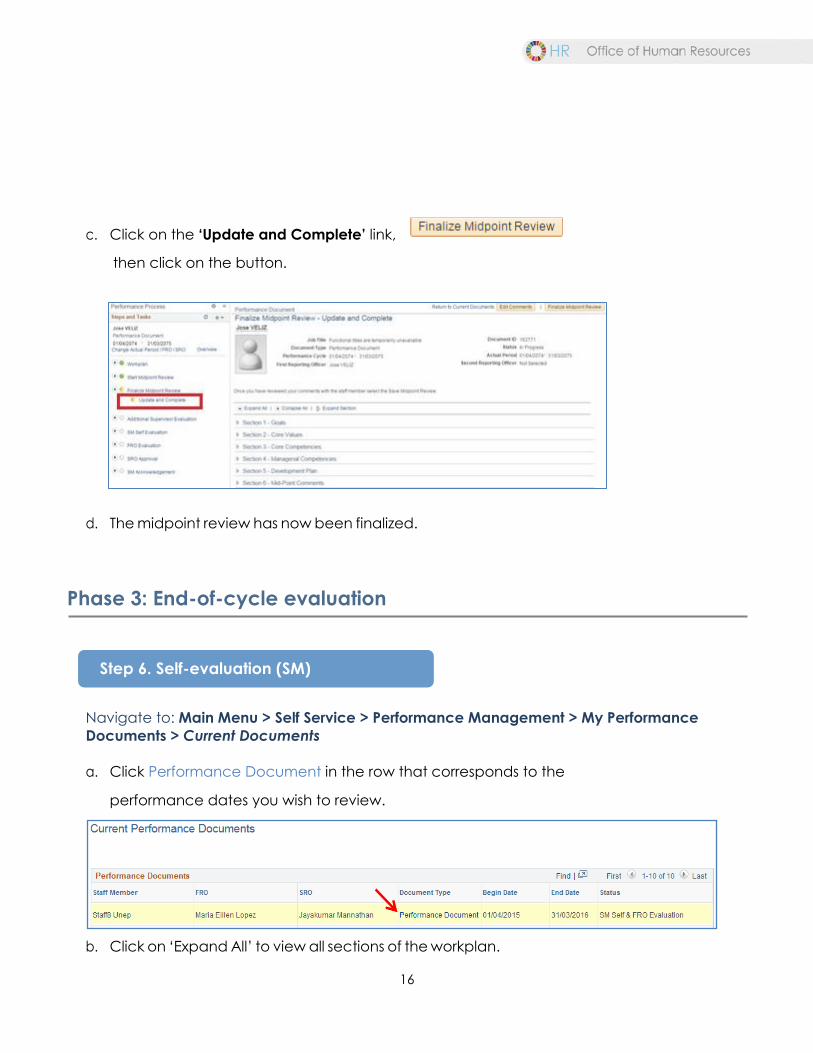
c. Click on the ‘Update and Complete’ link,
then click on the button.
d. The midpoint review has now been finalized.
Phase 3: End-of-cycle evaluation
Navigate to: Main Menu > Self Service > Performance Management > My Performance
Documents > Current Documents
a. Click Performance Document in the row that corresponds to the
performance dates you wish to review.
b. Click on ‘Expand All’ to view all sections of the workplan.
Step 6. Self-evaluation (SM)
17
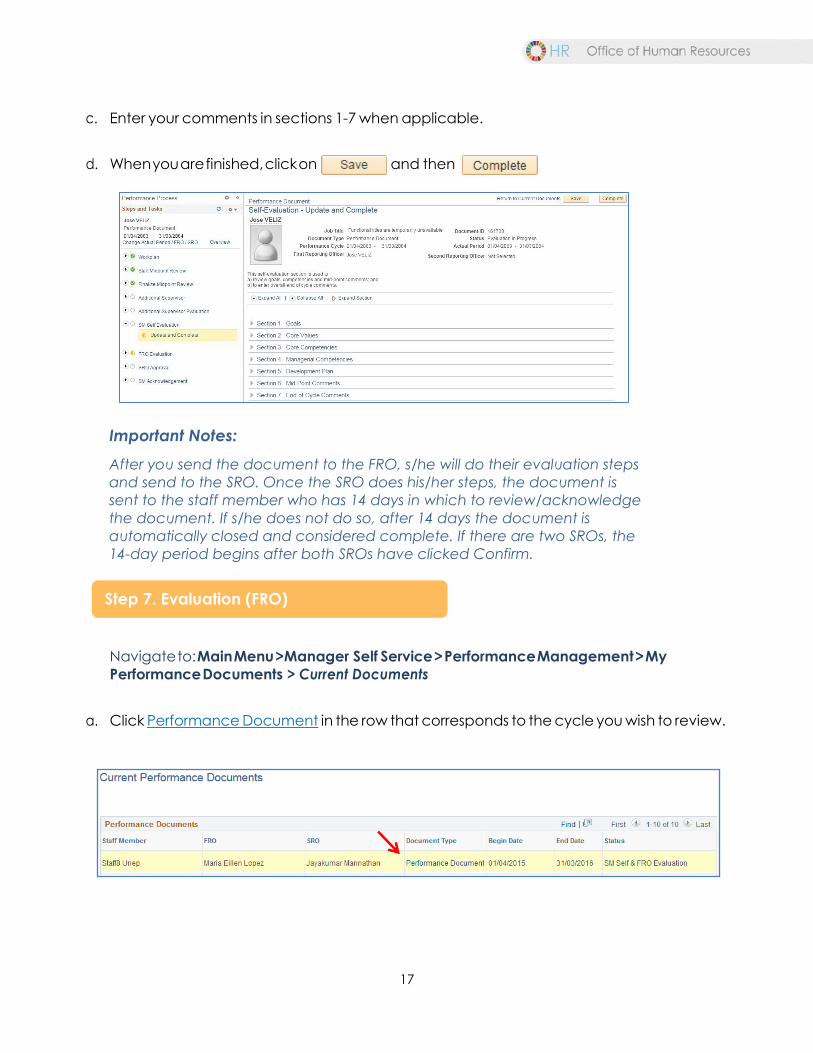
c. Enter your comments in sections 1-7 when applicable.
d. When you are finished, click on and then
Important Notes:
After you send the document to the FRO, s/he will do their evaluation steps
and send to the SRO. Once the SRO does his/her steps, the document is
sent to the staff member who has 14 days in which to review/acknowledge
the document. If s/he does not do so, after 14 days the document is
automatically closed and considered complete. If there are two SROs, the
14-day period begins after both SROs have clicked Confirm.
Navigate to: Main Menu >Manager Self Service > Performance Management > My
Performance Documents > Current Documents
a. Click Performance Document in the row that corresponds to the cycle you wish to review.
Step 7. Evaluation (FRO)
18
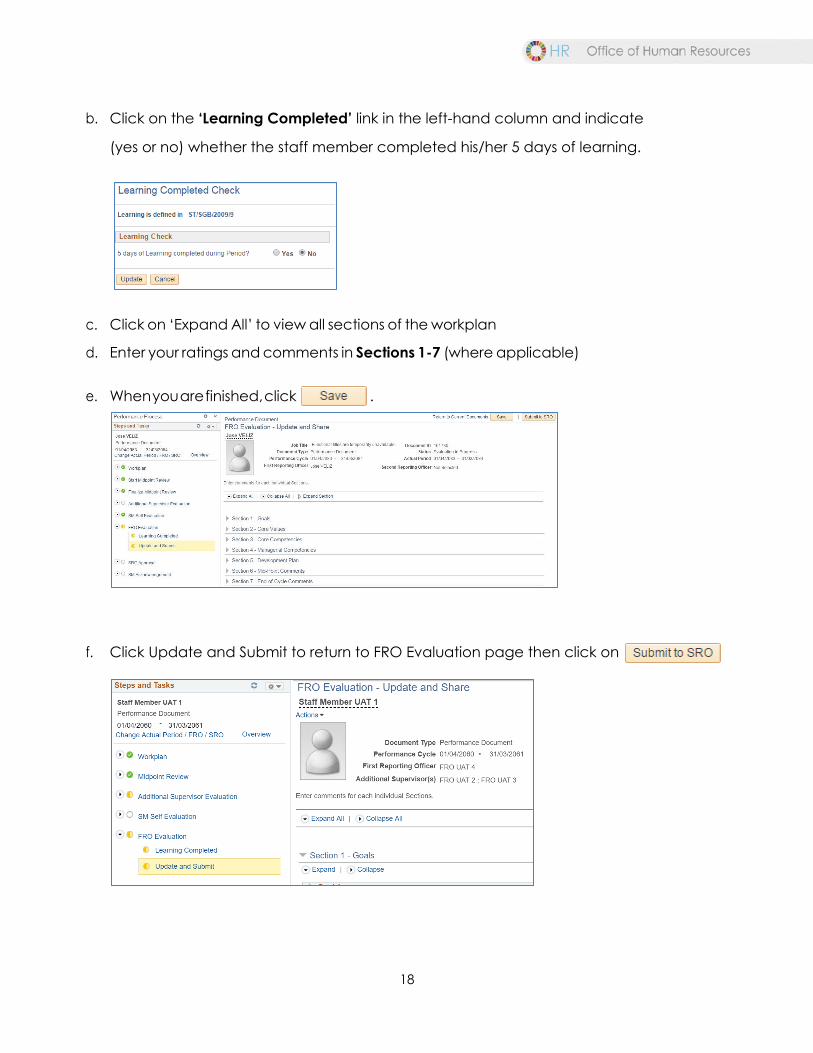
b. Click on the ‘Learning Completed’ link in the left-hand column and indicate
(yes or no) whether the staff member completed his/her 5 days of learning.
c. Click on ‘Expand All’ to view all sections of the workplan
d. Enter your ratings and comments in Sections 1-7 (where applicable)
e. When you are finished, click .
f. Click Update and Submit to return to FRO Evaluation page then click on
19
Important Note:
If you have two SROs, the process is the same: click and the document will
be sent to both SROs at once.
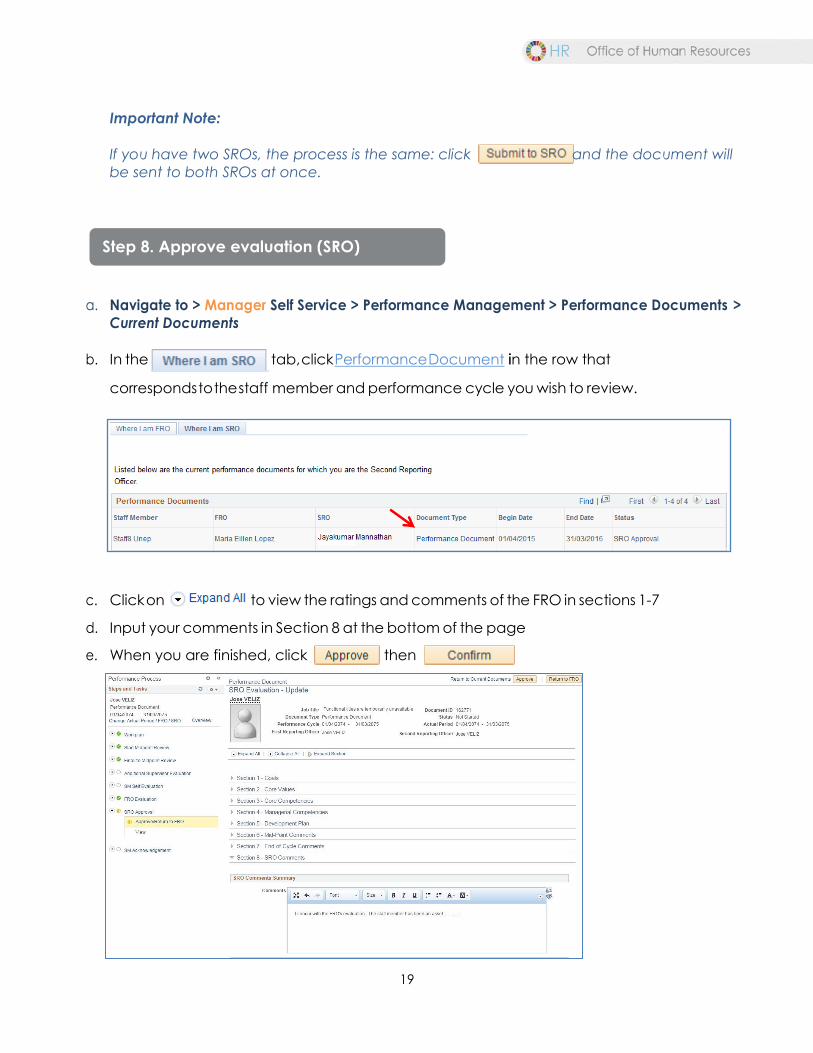
a. Navigate to > Manager Self Service > Performance Management > Performance Documents >
Current Documents
b. In the tab, click Performance Document iin the row that
corresponds to the staff member and performance cycle you wish to review.
c. Click on to view the ratings and comments of the FRO in sections 1-7
d. Input your comments in Section 8 at the bottom of the page
e. When you are finished, click then
Step 8. Approve evaluation (SRO)
20
Important Notes:
1. If you want the FRO to make changes to the end-of-cycle evaluation, you need to roll-back the
document to the FRO. See the Roll-back Guide for assistance.
2. If there are two SROs, the above process is the same. Each SRO needs to review the FRO
evaluation, enter comments and then, click then
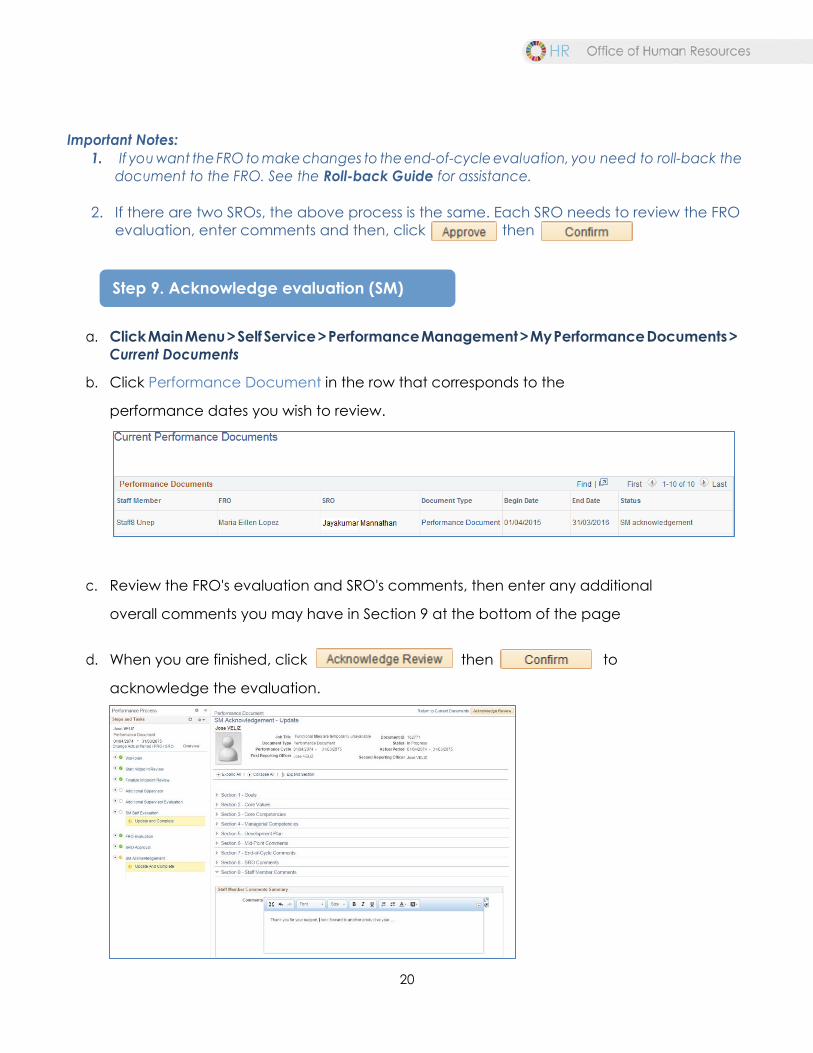
a. Click Main Menu > Self Service > Performance Management > My Performance Documents >
Current Documents
b. Click Performance Document in the row that corresponds to the
performance dates you wish to review.
c. Review the FRO's evaluation and SRO's comments, then enter any additional
overall comments you may have in Section 9 at the bottom of the page
d. When you are finished, click then to
acknowledge the evaluation.
Step 9. Acknowledge evaluation (SM)
21
Important Notes:
a. From the SM Acknowledgement page you will be able to create a PDF
version of your document and save it to your computer. To create a PDF click
on on the top right-hand section of your screen. Remember to disable
your browser’s pop-up blocker.
b. Please note that staff members do not need to print their ePerformance
documents and forward them to FROs, SROs. As of the 2018-19 cycle, the
physical signature lines have been removed from printed documents to help
streamline this performance management process.


