59
Introduction to Employee Self Service All SHARE Users
Introduction to Employee Self ServiceAll SHARE Users
Agenda
2
Intr
oduc
tion
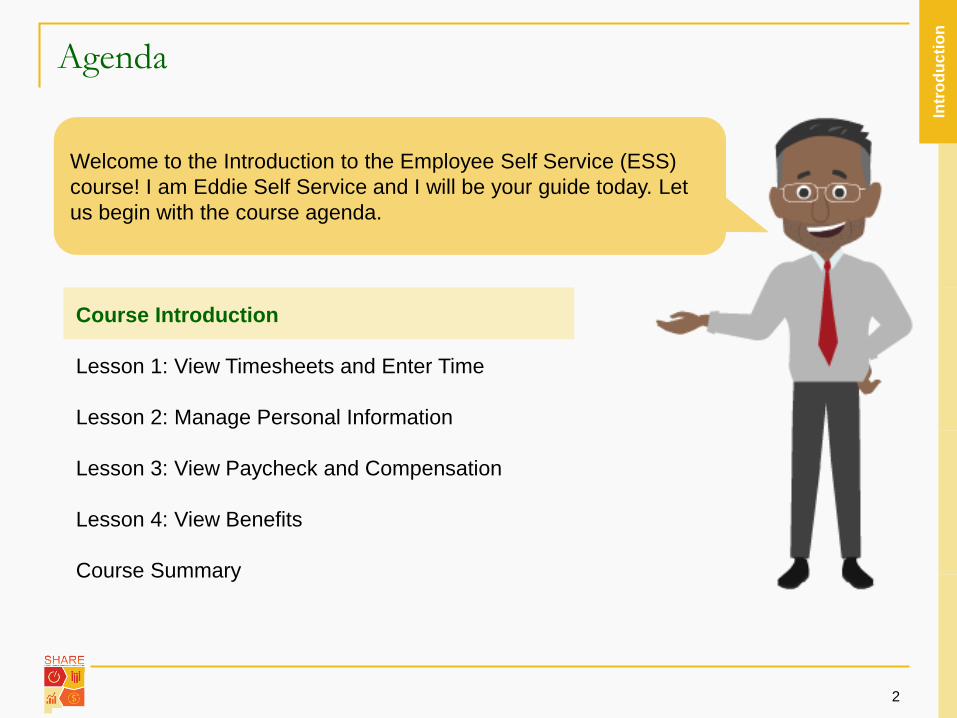
Course Introduction
Lesson 1: View Timesheets and Enter Time
Lesson 2: Manage Personal Information
Lesson 3: View Paycheck and Compensation
Lesson 4: View Benefits
Course Summary
Welcome to the Introduction to the Employee Self Service (ESS) course! I am Eddie Self Service and I will be your guide today. Let us begin with the course agenda.
Course Introduction
3
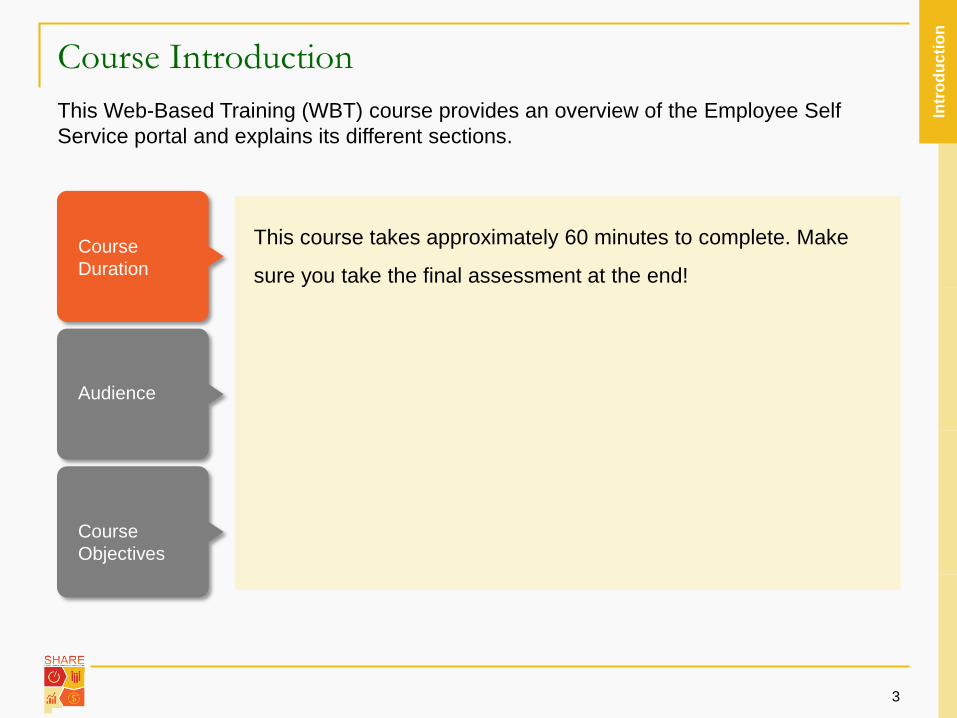
This Web-Based Training (WBT) course provides an overview of the Employee Self Service portal and explains its different sections.
Intr
oduc
tion
This course takes approximately 60 minutes to complete. Make
sure you take the final assessment at the end! Course Duration
Audience
Course Objectives
Course Introduction
4
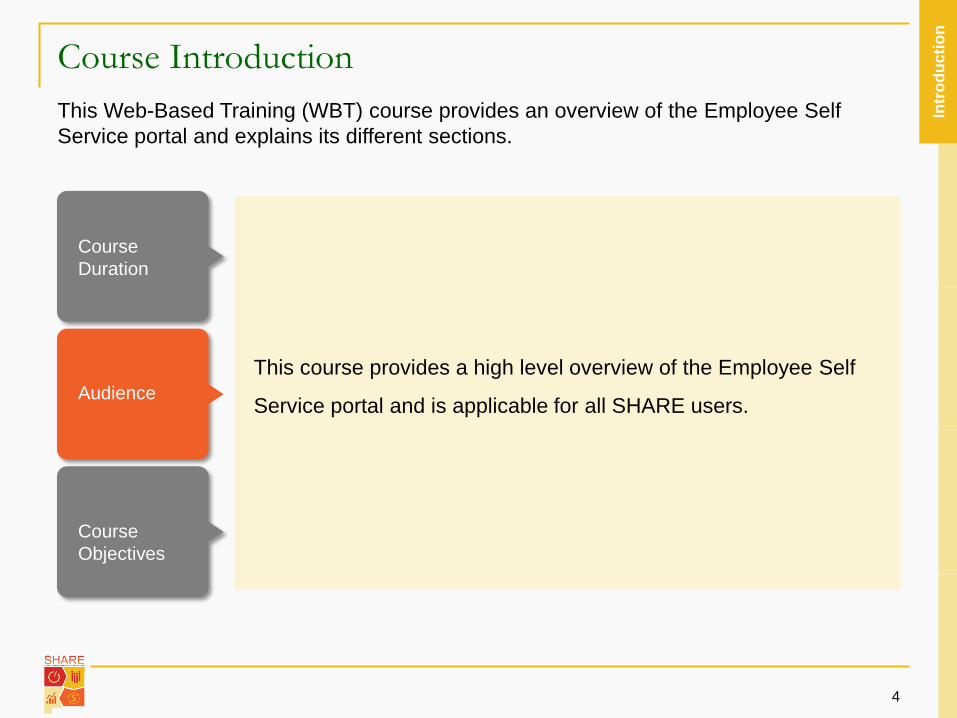
This Web-Based Training (WBT) course provides an overview of the Employee Self Service portal and explains its different sections.
Intr
oduc
tion
This course provides a high level overview of the Employee Self
Service portal and is applicable for all SHARE users.
Course Duration
Audience
Course Objectives
Course Introduction
5
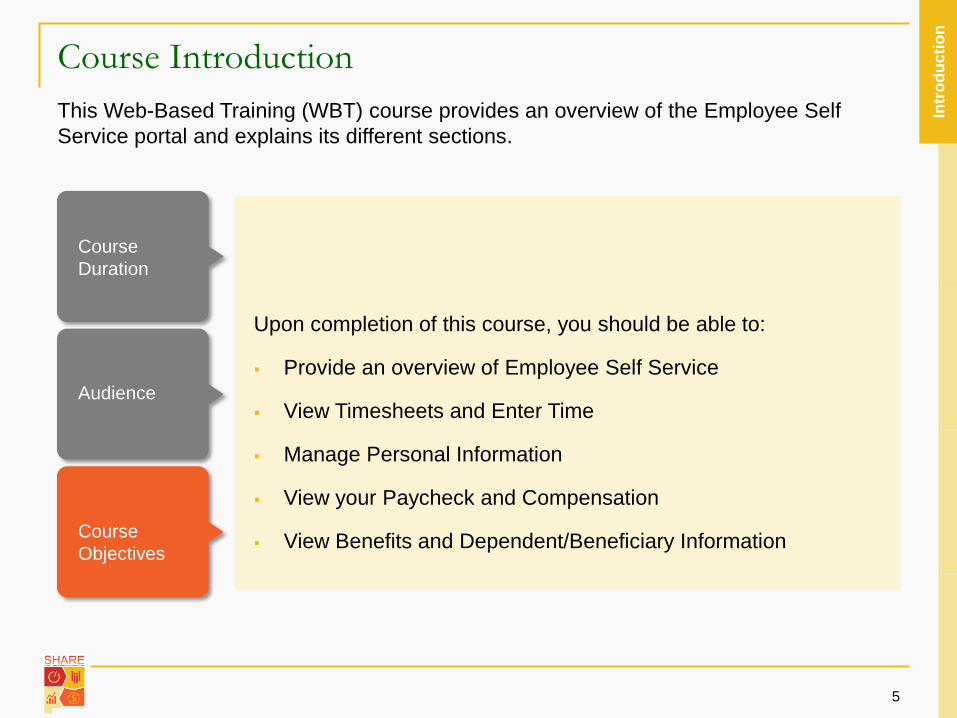
This Web-Based Training (WBT) course provides an overview of the Employee Self Service portal and explains its different sections.
Intr
oduc
tion
Upon completion of this course, you should be able to:
Provide an overview of Employee Self Service
View Timesheets and Enter Time
Manage Personal Information
View your Paycheck and Compensation
View Benefits and Dependent/Beneficiary Information
Course Duration
Audience
Course Objectives
6
Agenda
Less
on 1Course Introduction
Lesson 1: View Timesheets and Enter Time
Lesson 2: Manage Personal Information
Lesson 3: View Paycheck and Compensation
Lesson 4: View Benefits
Course Summary
View Timesheets and Enter Time
7
By the end of this lesson, you will be able to:
Provide an overview of the Employee Self Service(ESS) portal
Access your timesheet
Enter your time
Review your Reported Time
Less
on 1
Highlights of This Section
8
Here are the new and exciting features of Time Reporting!
Positive Time Reporting: employees enter all of theirhours worked, vacation, and leave time into SHAREevery week.
Streamlined timesheets: your timesheets are nowmuch easier to navigate and will only have thecolumns you need.
Reorganized Time Reporting Codes (TRCs): TRCswill now display in order of most to least commonlyused to make time reporting easier for you!
Less
on 1

Key Terms
9
Take a moment to familiarize yourself with the key terms used through the course.
Less
on 1
Time you enter and submit in your timesheet. The time you submit
has to be approved by your supervisor and run through the Time
Administration process to turn into Payable Time.
Reported Time
Payable Time
TRCs
Time Period
Key Terms
10
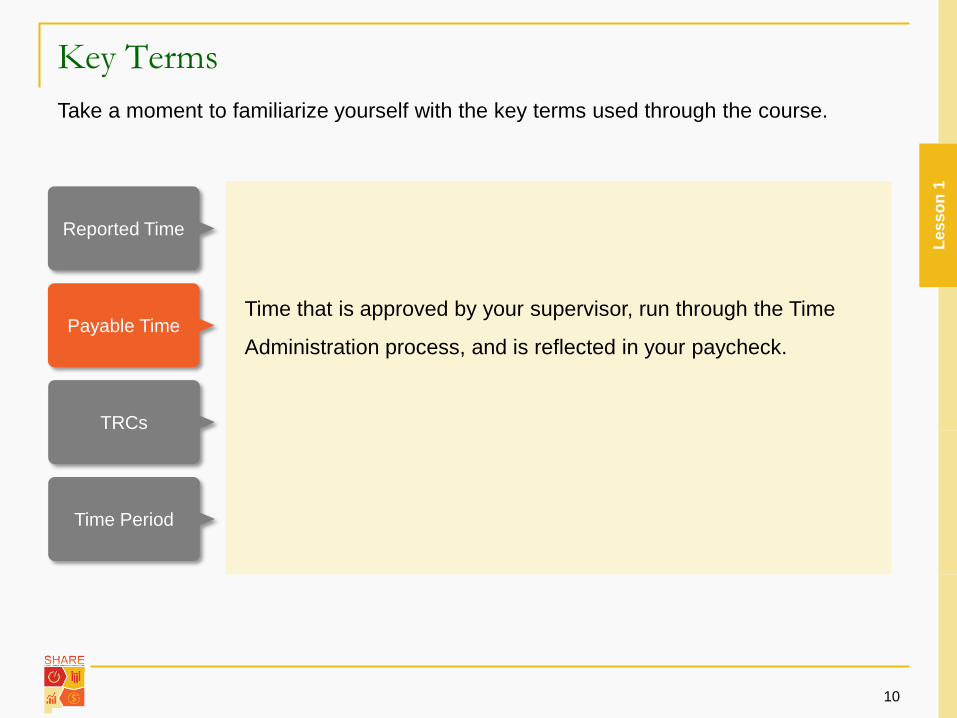
Take a moment to familiarize yourself with the key terms used through the course.
Less
on 1
Time that is approved by your supervisor, run through the Time
Administration process, and is reflected in your paycheck.
Reported Time
Payable Time
TRCs
Time Period
Key Terms
11
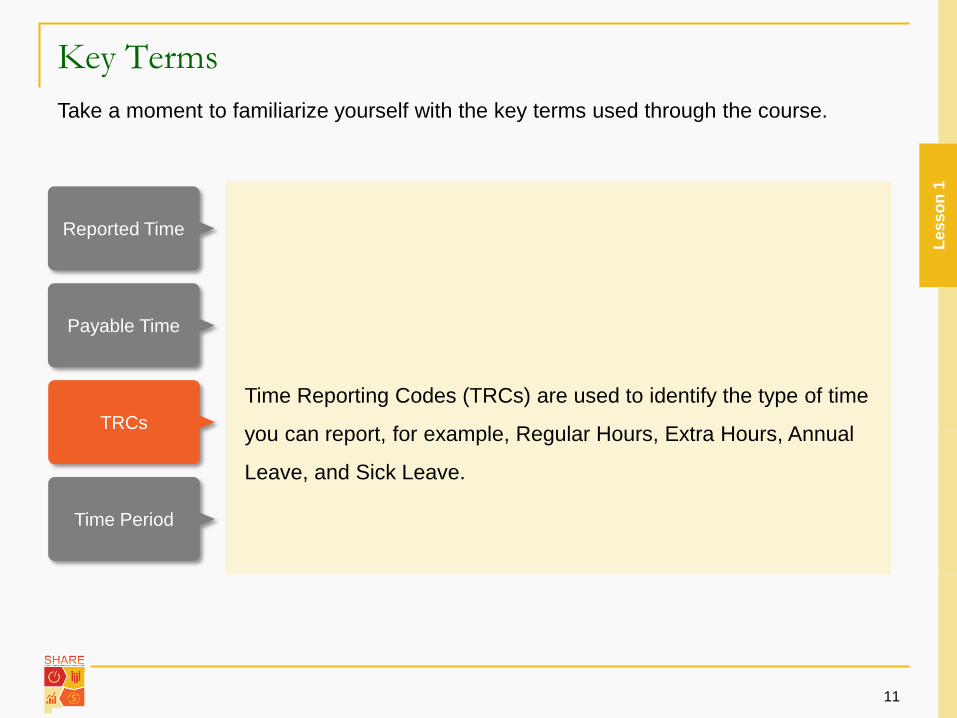
Take a moment to familiarize yourself with the key terms used through the course.
Less
on 1
Time Reporting Codes (TRCs) are used to identify the type of time
you can report, for example, Regular Hours, Extra Hours, Annual
Leave, and Sick Leave.
Reported Time
Payable Time
TRCs
Time Period
Key Terms
12
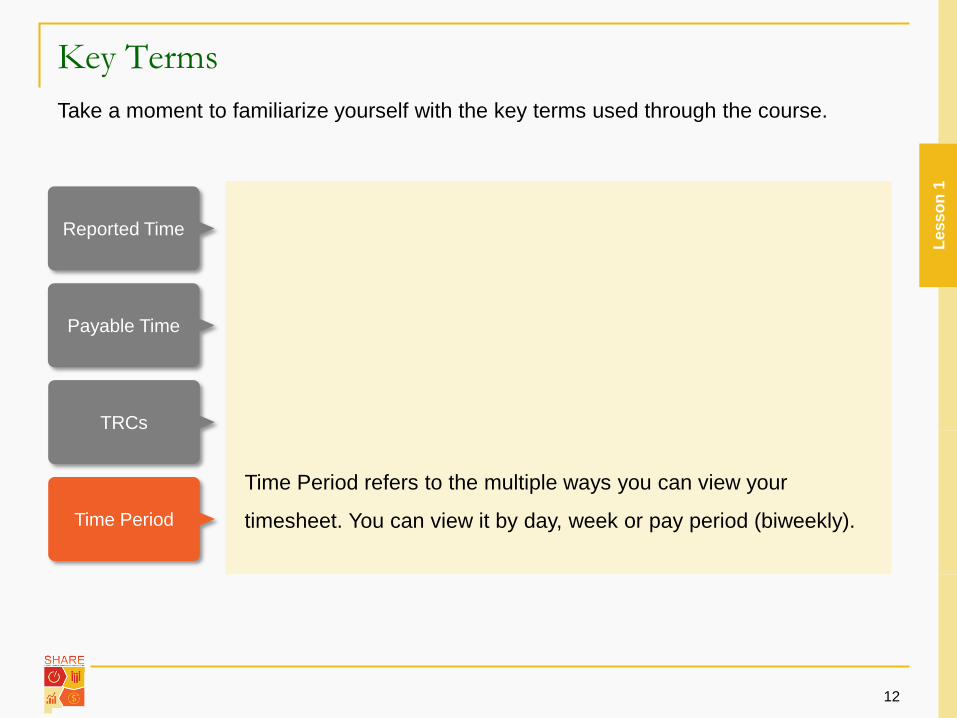
Take a moment to familiarize yourself with the key terms used through the course.
Less
on 1
Time Period refers to the multiple ways you can view your
timesheet. You can view it by day, week or pay period (biweekly).
Reported Time
Payable Time
TRCs
Time Period
Key Terms
13
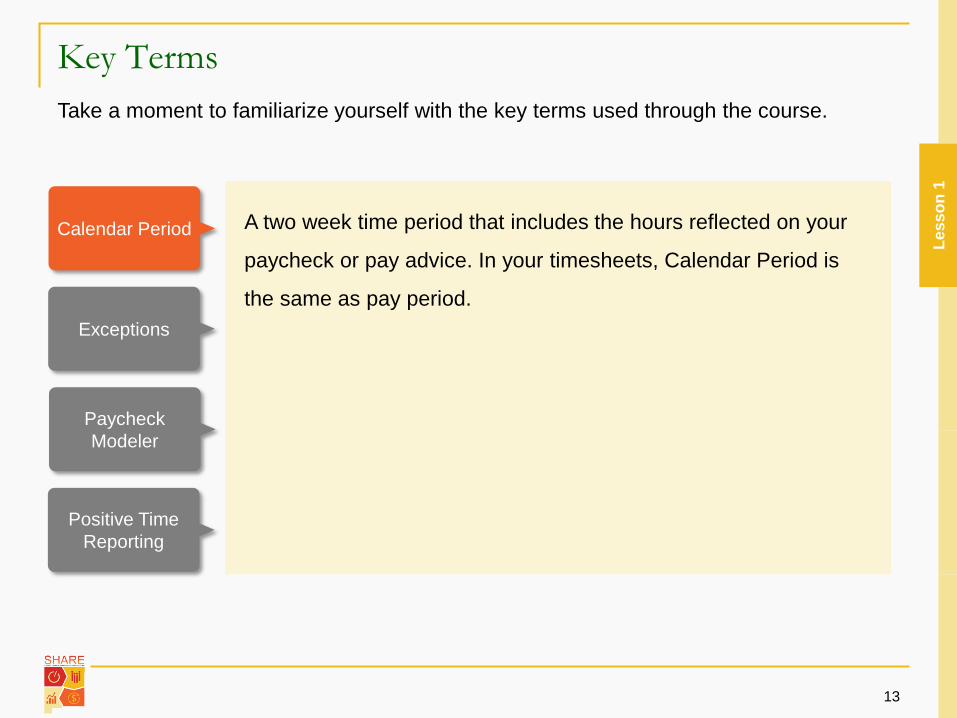
Take a moment to familiarize yourself with the key terms used through the course.
Less
on 1
A two week time period that includes the hours reflected on your
paycheck or pay advice. In your timesheets, Calendar Period is
the same as pay period. Exceptions
Paycheck Modeler
Positive Time Reporting
Calendar Period
Key Terms
14
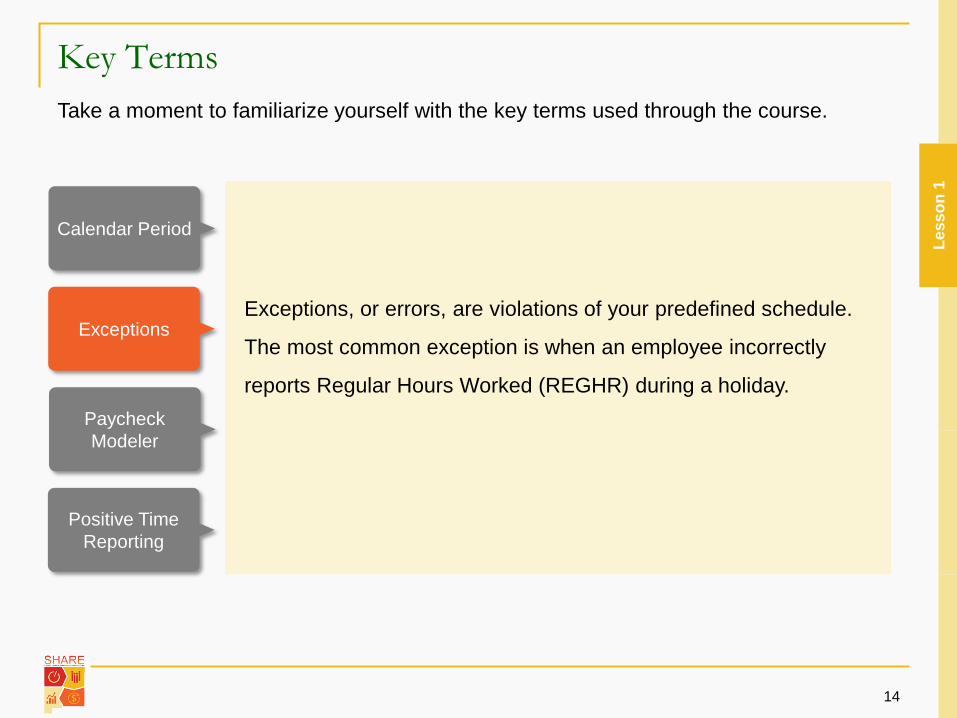
Take a moment to familiarize yourself with the key terms used through the course.
Less
on 1
Exceptions, or errors, are violations of your predefined schedule.
The most common exception is when an employee incorrectly
reports Regular Hours Worked (REGHR) during a holiday.
Exceptions
Paycheck Modeler
Positive Time Reporting
Calendar Period
Key Terms
15
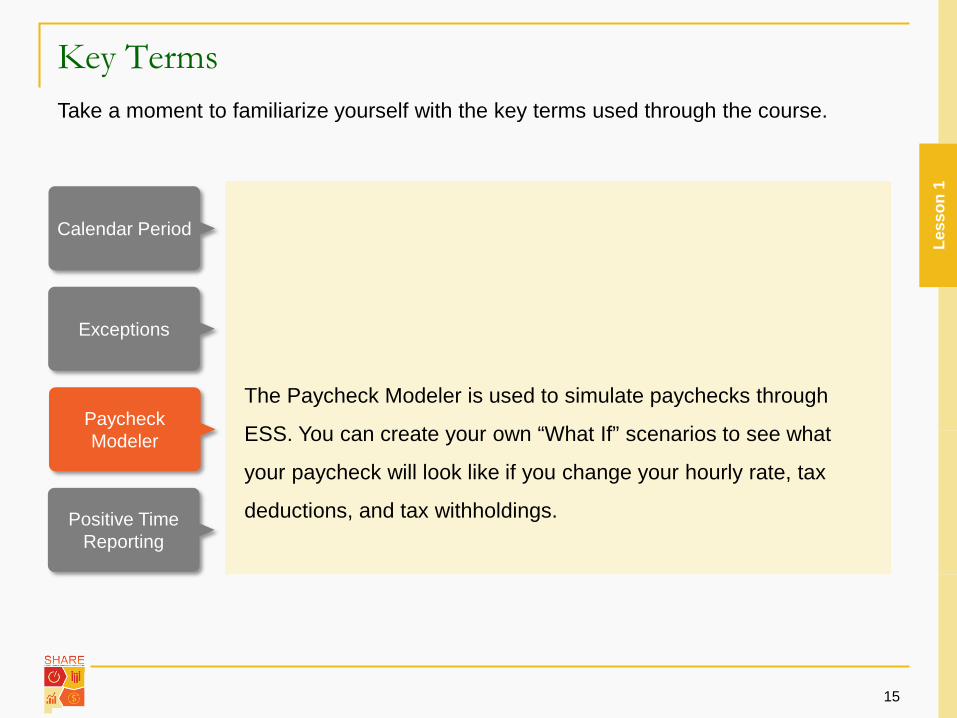
Take a moment to familiarize yourself with the key terms used through the course.
Less
on 1
The Paycheck Modeler is used to simulate paychecks through
ESS. You can create your own “What If” scenarios to see what
your paycheck will look like if you change your hourly rate, tax
deductions, and tax withholdings.
Exceptions
Paycheck Modeler
Positive Time Reporting
Calendar Period
Key Terms
16
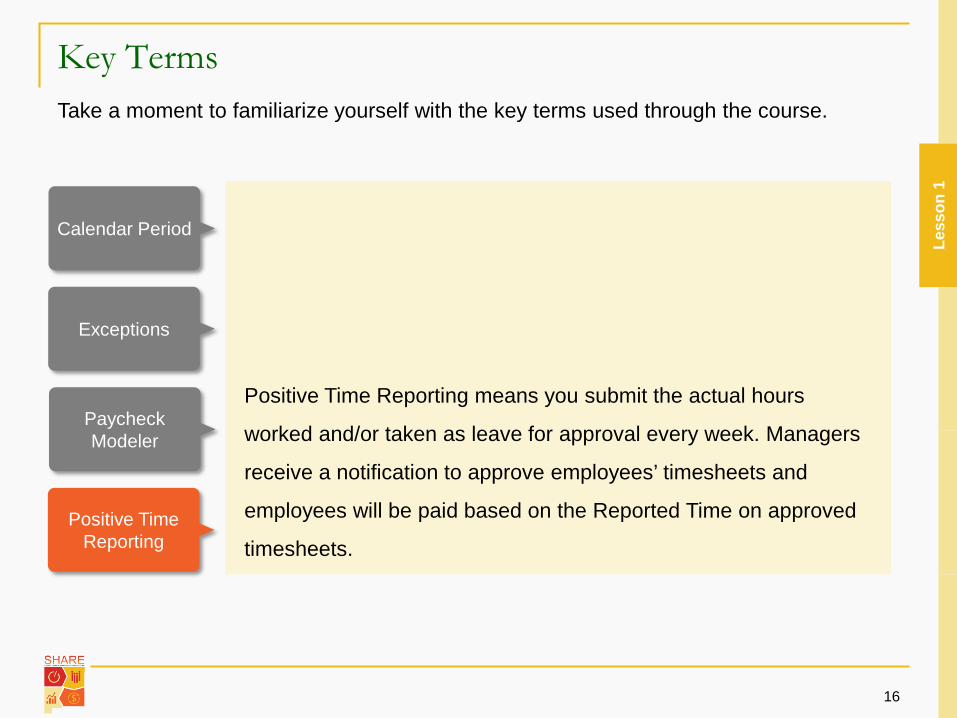
Take a moment to familiarize yourself with the key terms used through the course.
Less
on 1
Positive Time Reporting means you submit the actual hours
worked and/or taken as leave for approval every week. Managers
receive a notification to approve employees’ timesheets and
employees will be paid based on the Reported Time on approved
timesheets.
Exceptions
Paycheck Modeler
Positive Time Reporting
Calendar Period
Introduction to Employee Self Service Portal
17
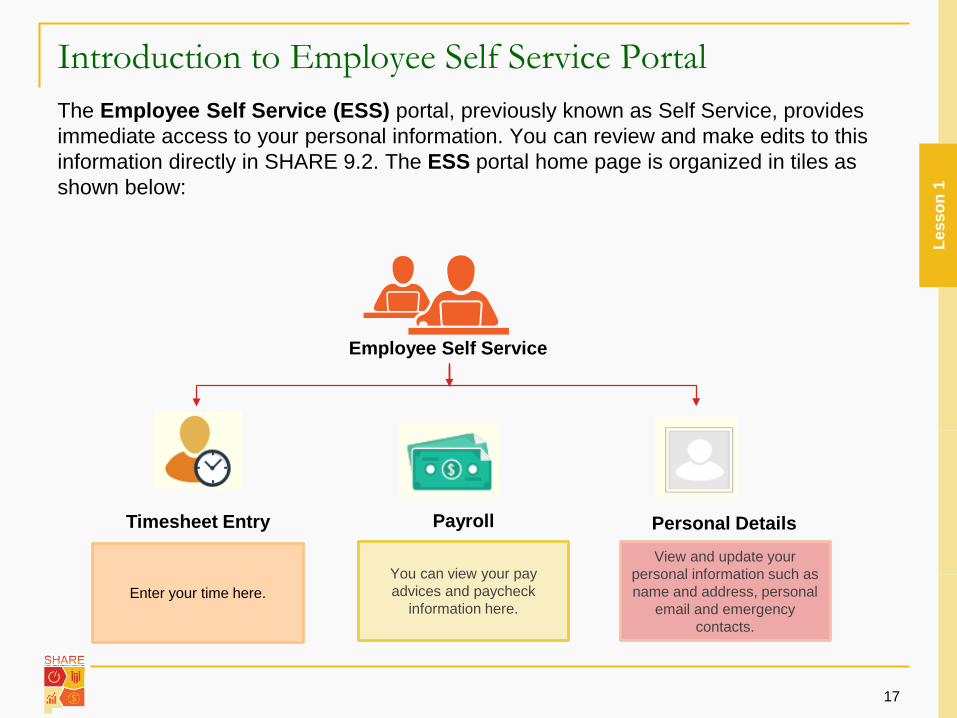
The Employee Self Service (ESS) portal, previously known as Self Service, provides immediate access to your personal information. You can review and make edits to this information directly in SHARE 9.2. The ESS portal home page is organized in tiles as shown below:
Employee Self Service
Timesheet Entry
View and update your personal information such as name and address, personal
email and emergency contacts.
You can view your pay advices and paycheck
information here.Enter your time here.
Payroll Personal Details
Less
on 1
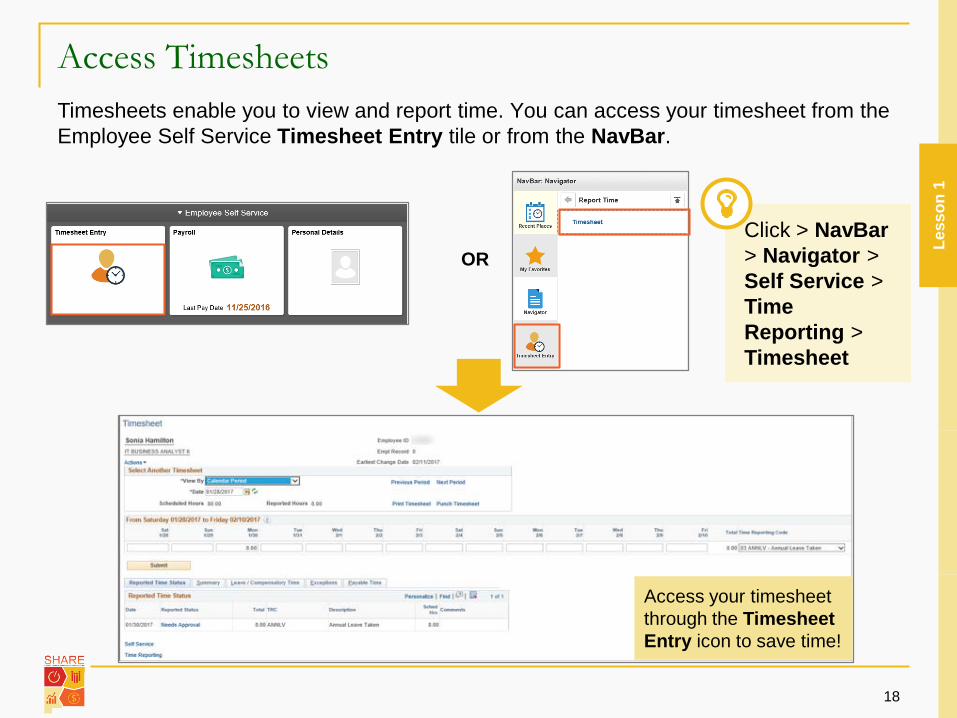
Access Timesheets
18
Timesheets enable you to view and report time. You can access your timesheet from the Employee Self Service Timesheet Entry tile or from the NavBar.
Less
on 1
Access your timesheet through the Timesheet Entry icon to save time!
ORClick > NavBar> Navigator > Self Service > Time Reporting >Timesheet
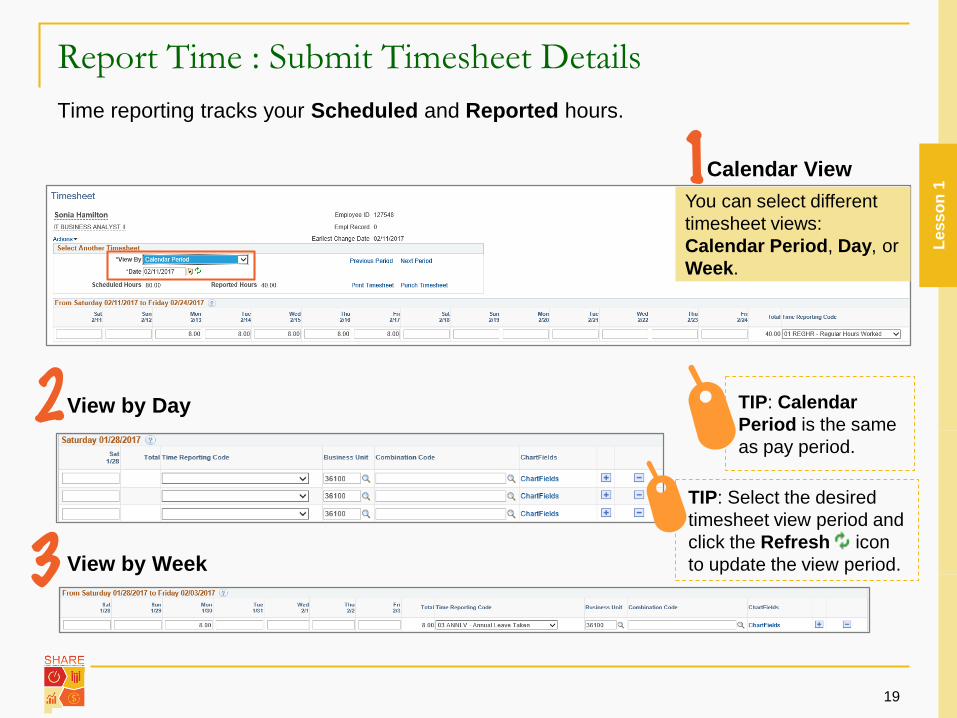
Report Time : Submit Timesheet Details
19
Time reporting tracks your Scheduled and Reported hours.
Less
on 1
TIP: Calendar Period is the same as pay period.
Calendar View
View by Day
View by Week
You can select different timesheet views: Calendar Period, Day, or Week.
TIP: Select the desired timesheet view period and click the Refresh icon to update the view period.

1 2
34
Report Time : Submit Timesheet Details (Cont.)
20
Time reporting tracks your Scheduled and Reported hours.
Less
on 1
Specify the Date.
You can view your Scheduled Hours and Reported Hours for the selected date.
2
1
Enter your Time and TRC here. Click Submit after entering your time. Report your hours under REGHRTRC or another TRC.
3View your: Reported Time Status, Summary, Leave/ Compensatory Time Details, Exceptions, and Payable Time.
4
TIP: Add more rows to report time under two or more different TRC’s.
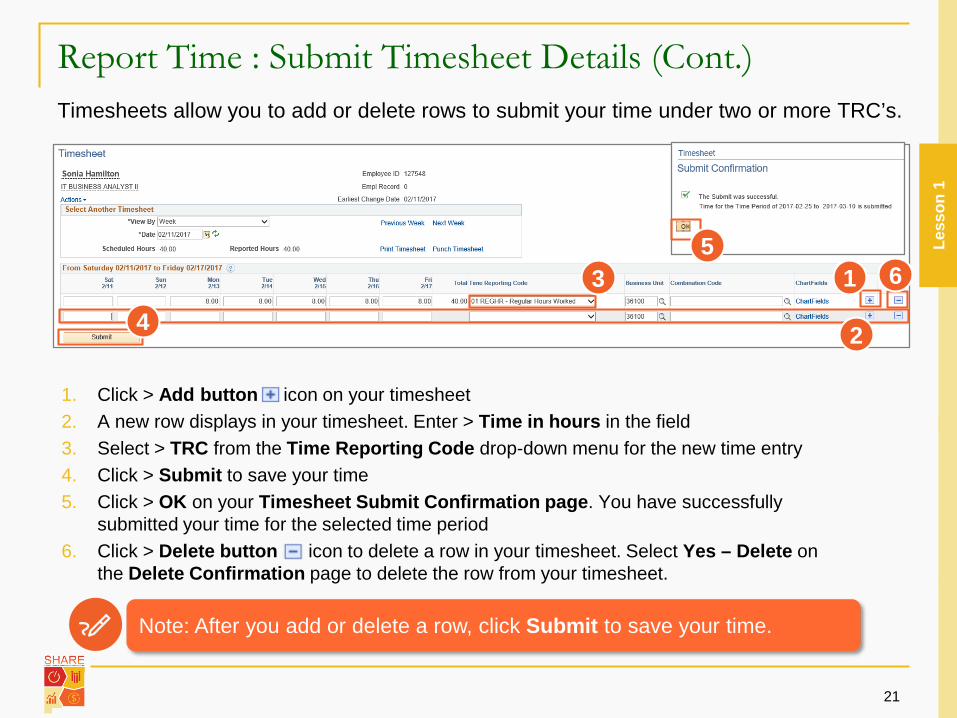
Report Time : Submit Timesheet Details (Cont.)
21
Timesheets allow you to add or delete rows to submit your time under two or more TRC’s.
Less
on 1
1. Click > Add button icon on your timesheet2. A new row displays in your timesheet. Enter > Time in hours in the field3. Select > TRC from the Time Reporting Code drop-down menu for the new time entry4. Click > Submit to save your time5. Click > OK on your Timesheet Submit Confirmation page. You have successfully
submitted your time for the selected time period6. Click > Delete button icon to delete a row in your timesheet. Select Yes – Delete on
the Delete Confirmation page to delete the row from your timesheet.
Note: After you add or delete a row, click Submit to save your time.
1
2
3
4
56
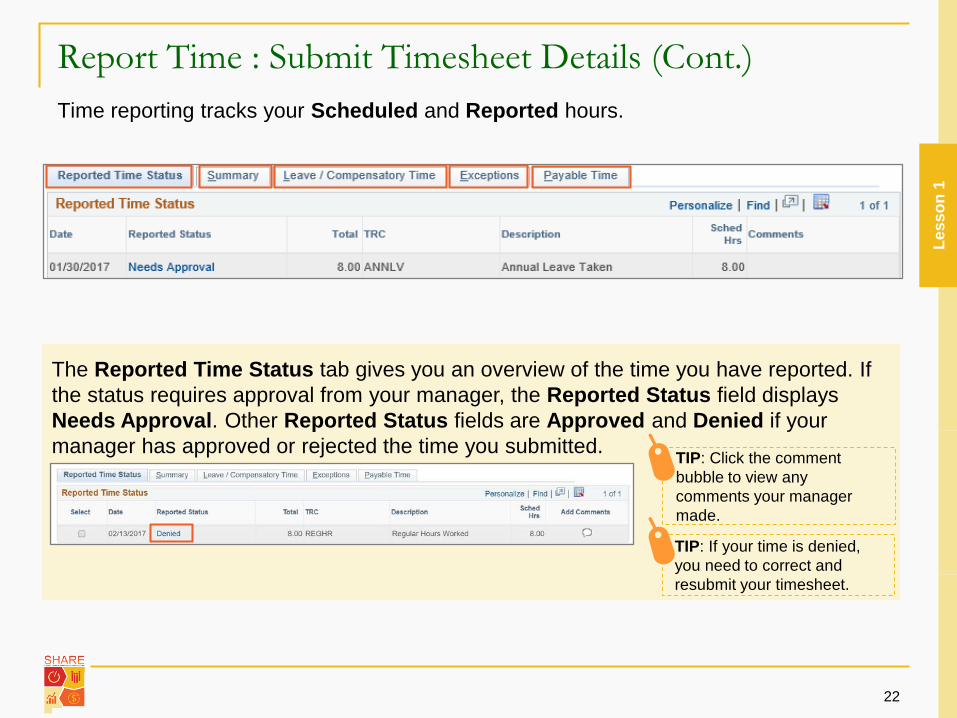
Report Time : Submit Timesheet Details (Cont.)
22
Time reporting tracks your Scheduled and Reported hours.
Less
on 1
The Reported Time Status tab gives you an overview of the time you have reported. If the status requires approval from your manager, the Reported Status field displays Needs Approval. Other Reported Status fields are Approved and Denied if your manager has approved or rejected the time you submitted.
TIP: If your time is denied, you need to correct and resubmit your timesheet.
TIP: Click the comment bubble to view any comments your manager made.
Report Time : Submit Timesheet Details (Cont.)
23
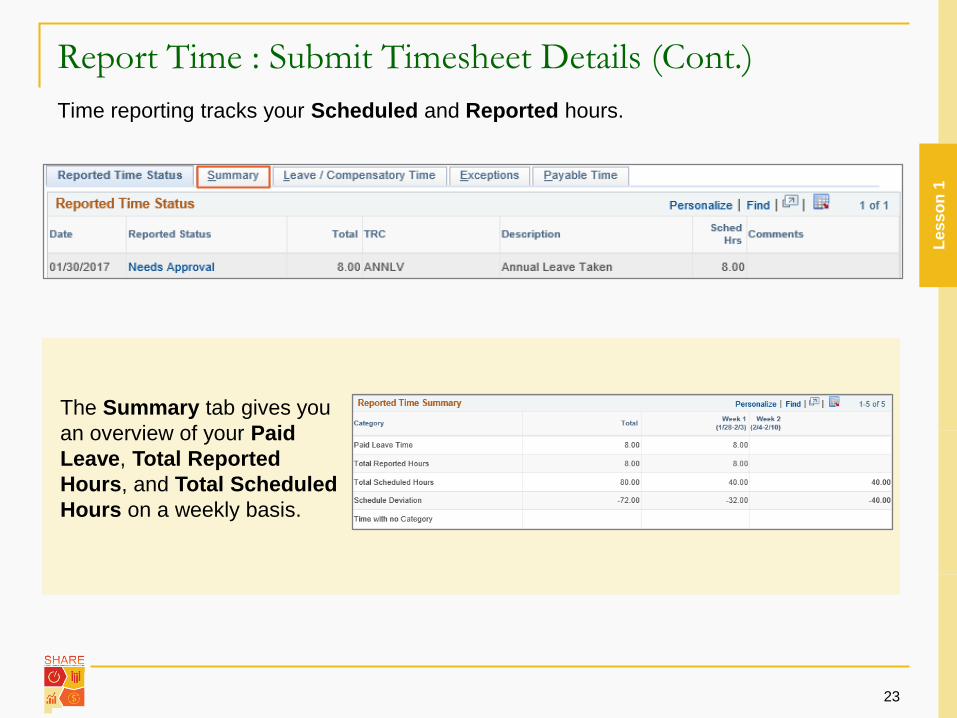
Time reporting tracks your Scheduled and Reported hours.
The Summary tab gives you an overview of your Paid Leave, Total Reported Hours, and Total Scheduled Hours on a weekly basis.
Less
on 1
Report Time : Submit Timesheet Details (Cont.)
24
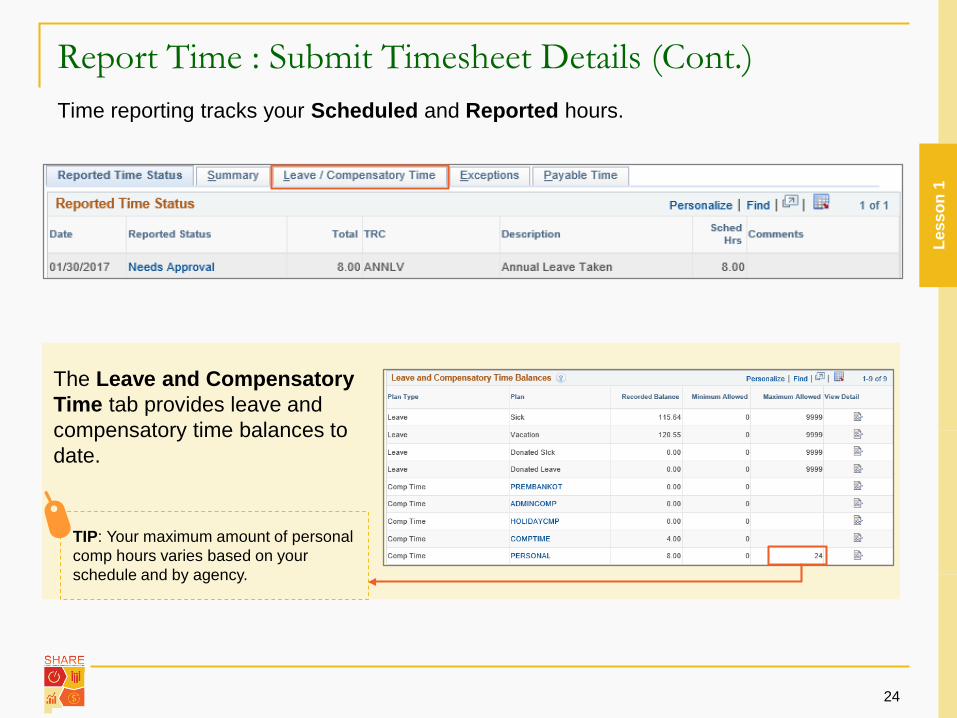
Time reporting tracks your Scheduled and Reported hours.
Less
on 1
The Leave and Compensatory Time tab provides leave and compensatory time balances to date.
TIP: Your maximum amount of personal comp hours varies based on your schedule and by agency.
Report Time : Submit Timesheet Details (Cont.)
25
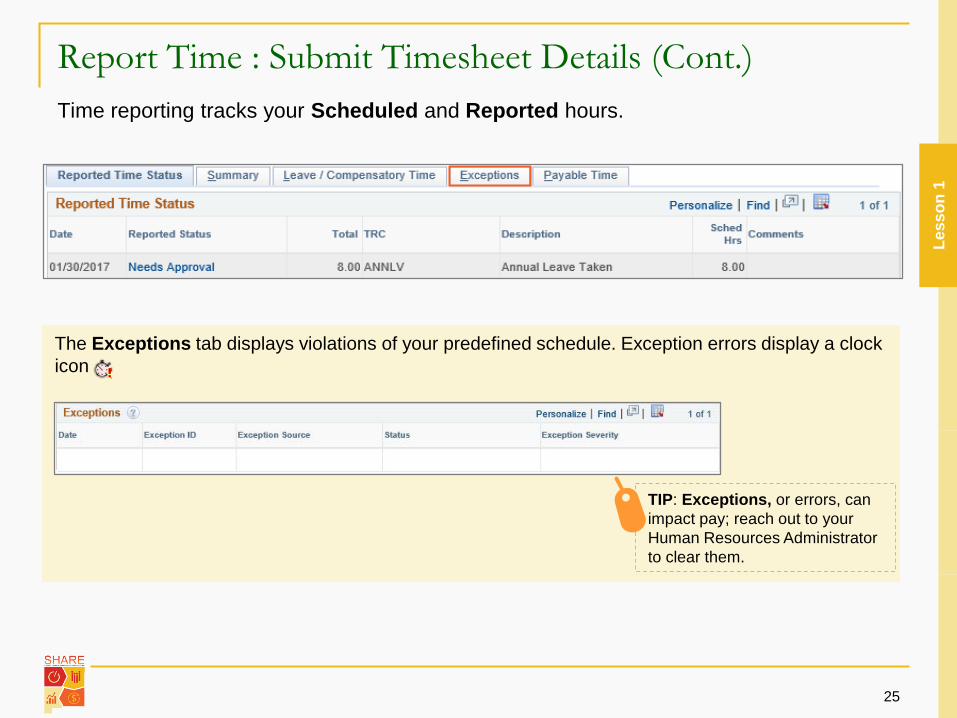
Time reporting tracks your Scheduled and Reported hours.
Less
on 1
The Exceptions tab displays violations of your predefined schedule. Exception errors display a clock icon
TIP: Exceptions, or errors, can impact pay; reach out to your Human Resources Administrator to clear them.
Report Time : Submit Timesheet Details (Cont.)
26
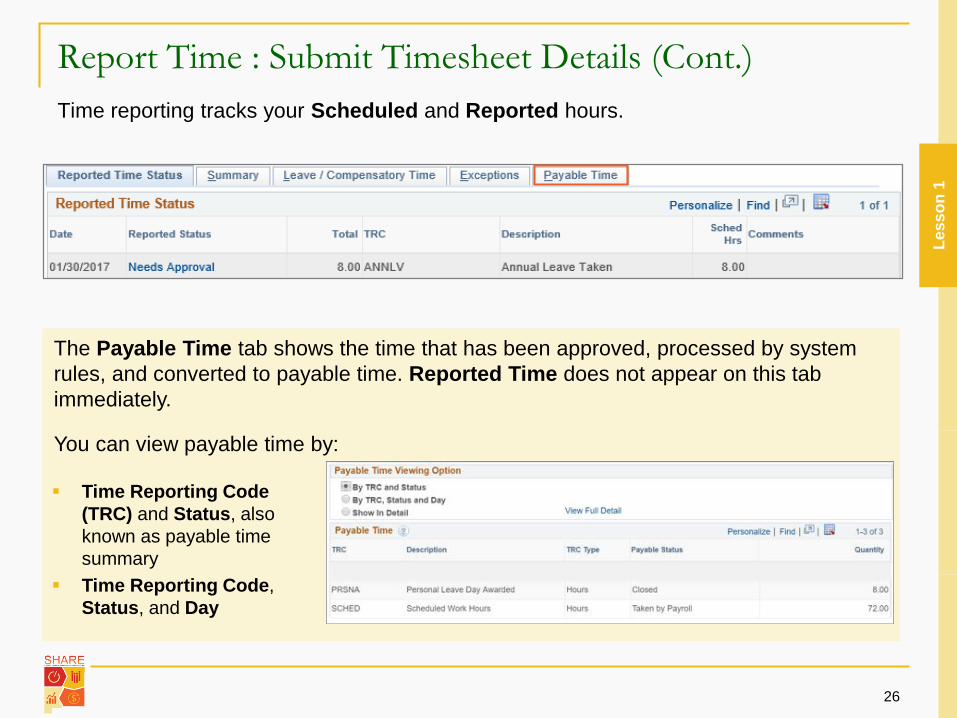
Time reporting tracks your Scheduled and Reported hours.
Less
on 1
The Payable Time tab shows the time that has been approved, processed by system rules, and converted to payable time. Reported Time does not appear on this tab immediately.
You can view payable time by:
Time Reporting Code(TRC) and Status, alsoknown as payable timesummary
Time Reporting Code,Status, and Day
Submit Timesheet Details: Key Points
27
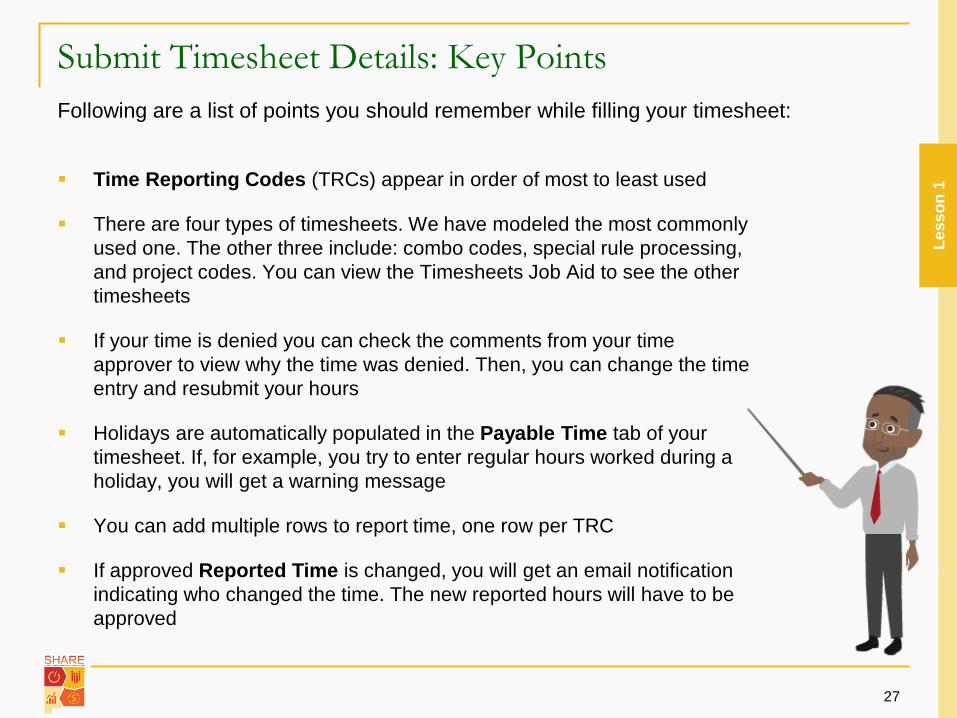
Following are a list of points you should remember while filling your timesheet:
Time Reporting Codes (TRCs) appear in order of most to least used
There are four types of timesheets. We have modeled the most commonlyused one. The other three include: combo codes, special rule processing,and project codes. You can view the Timesheets Job Aid to see the othertimesheets
If your time is denied you can check the comments from your timeapprover to view why the time was denied. Then, you can change the timeentry and resubmit your hours
Holidays are automatically populated in the Payable Time tab of yourtimesheet. If, for example, you try to enter regular hours worked during aholiday, you will get a warning message
You can add multiple rows to report time, one row per TRC
If approved Reported Time is changed, you will get an email notificationindicating who changed the time. The new reported hours will have to beapproved
Less
on 1
View Time
28
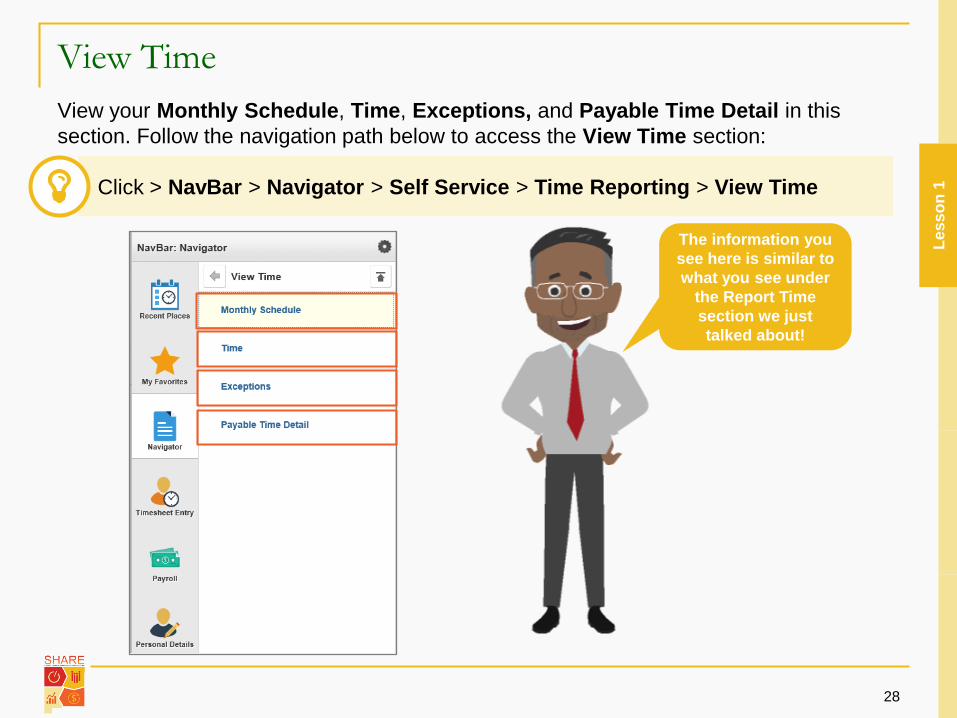
View your Monthly Schedule, Time, Exceptions, and Payable Time Detail in this section. Follow the navigation path below to access the View Time section:
The information you see here is similar to what you see under
the Report Time section we just talked about!
Less
on 1Click > NavBar > Navigator > Self Service > Time Reporting > View Time
View Timesheets and Enter Time Summary
29
In this lesson we learned:
How to navigate to the Employee Self Serviceportal and its specific functions
How to enter you time using the Time ReportingCodes and submit for approval
Timesheets give you an overview of ReportedTime Status, Summary, Leave/CompensatoryTime details, Exceptions and Payable Status
Timesheets allow you to change the view toCalendar, Day, and Week
The View Time menu allows you to view yourtime reported and Payable Time Detail
Less
on 1
Course Introduction
Lesson 1: View Timesheets and Enter Time
Lesson 2: Manage Personal Information
Lesson 3: View Paycheck and Compensation
Lesson 4: View Benefits
Course Summary
30
Agenda
Less
on 2
Manage Personal Information
31
By the end of this lesson, you will be able to:
Access the Personal Information section
Modify your personal details: Address, Contact Details,Ethnic Group and Emergency Contacts
Submit a request to your Human Resources (HR)Administrator to modify your Name and/or MaritalStatus
Less
on 2
Highlights of This Section
32
Here are the new and exciting features of Personal Information!
Quick access to personal information and benefits:you can view your address, contact information,emergency contact, as well as your benefits anddependents’ information with just one click.
Edit personal information: in SHARE 9.2 you canedit some personal information including your address,contact details, personal email, emergency contact,and more! You can also request a name and maritalstatus change, but need to submit the properdocumentation to your HR Administrator.
Less
on 2
Access: Personal Information
33
OR
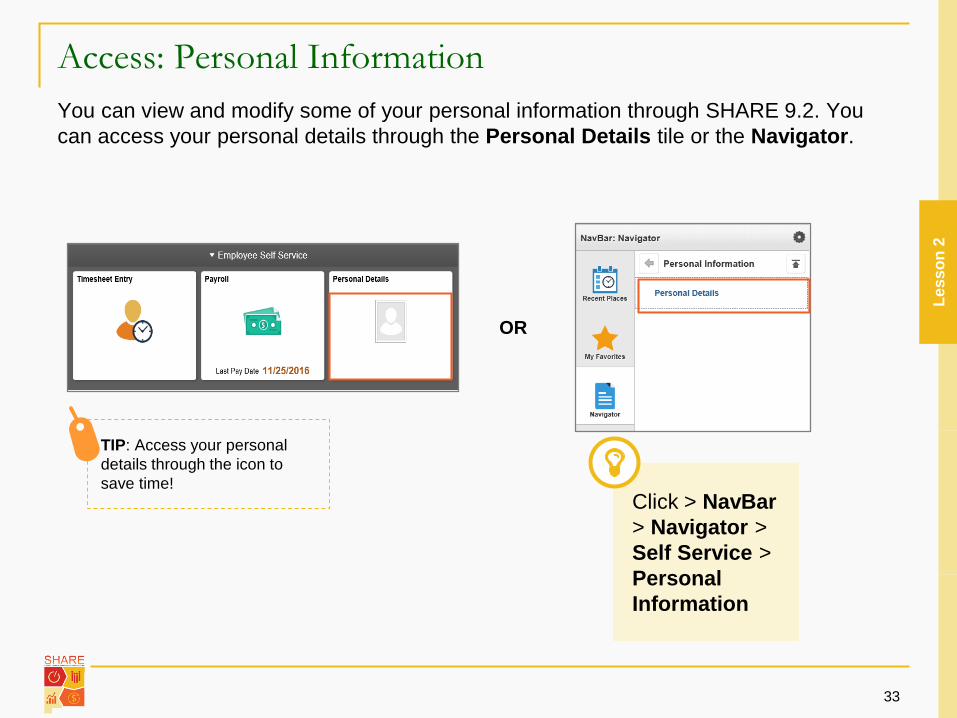
You can view and modify some of your personal information through SHARE 9.2. You can access your personal details through the Personal Details tile or the Navigator.
Less
on 2
TIP: Access your personal details through the icon to save time!
Click > NavBar> Navigator > Self Service > Personal Information
Manage Personal Information: Address
34
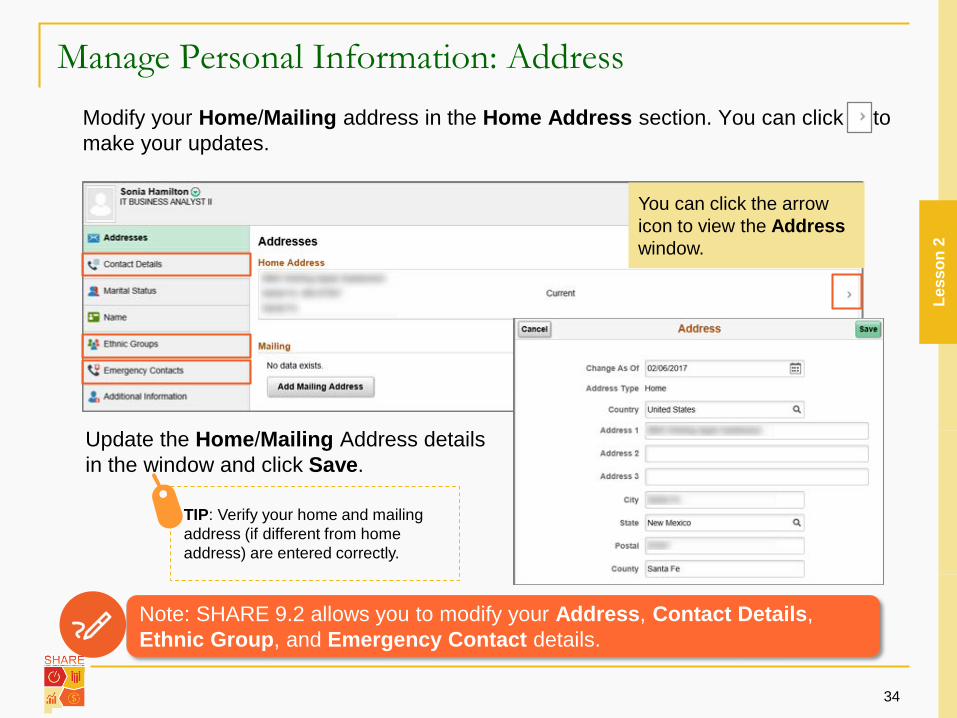
Modify your Home/Mailing address in the Home Address section. You can click to make your updates.
Update the Home/Mailing Address details in the window and click Save.
You can click the arrow icon to view the Addresswindow.
Note: SHARE 9.2 allows you to modify your Address, Contact Details, Ethnic Group, and Emergency Contact details.
Less
on 2
TIP: Verify your home and mailing address (if different from home address) are entered correctly.
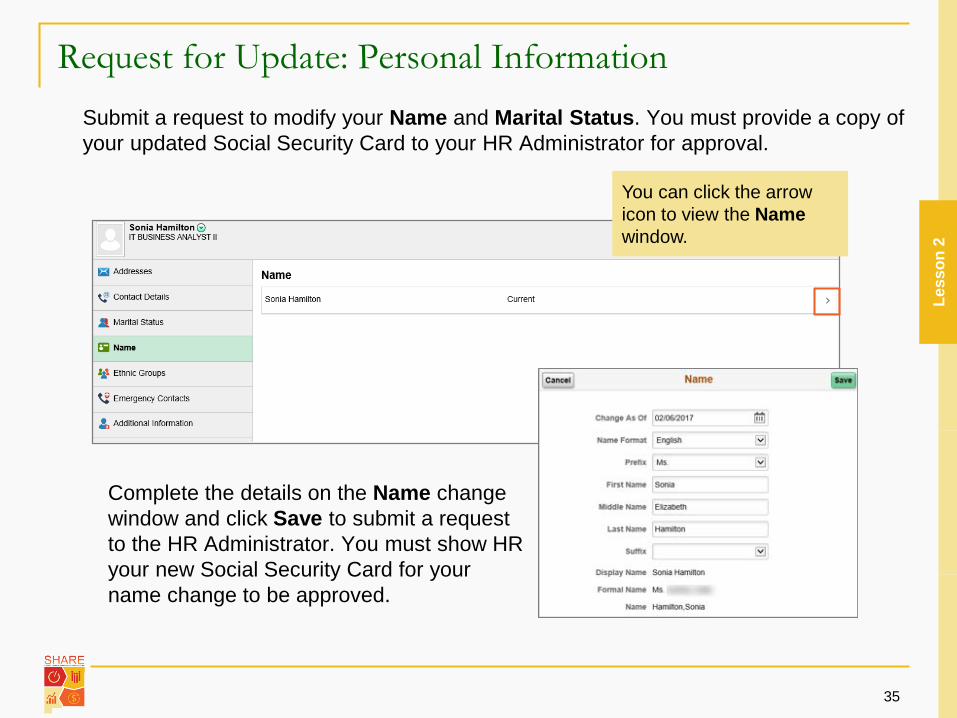
Request for Update: Personal Information
35
Submit a request to modify your Name and Marital Status. You must provide a copy of your updated Social Security Card to your HR Administrator for approval.
Complete the details on the Name change window and click Save to submit a request to the HR Administrator. You must show HR your new Social Security Card for your name change to be approved.
You can click the arrow icon to view the Namewindow.
Less
on 2
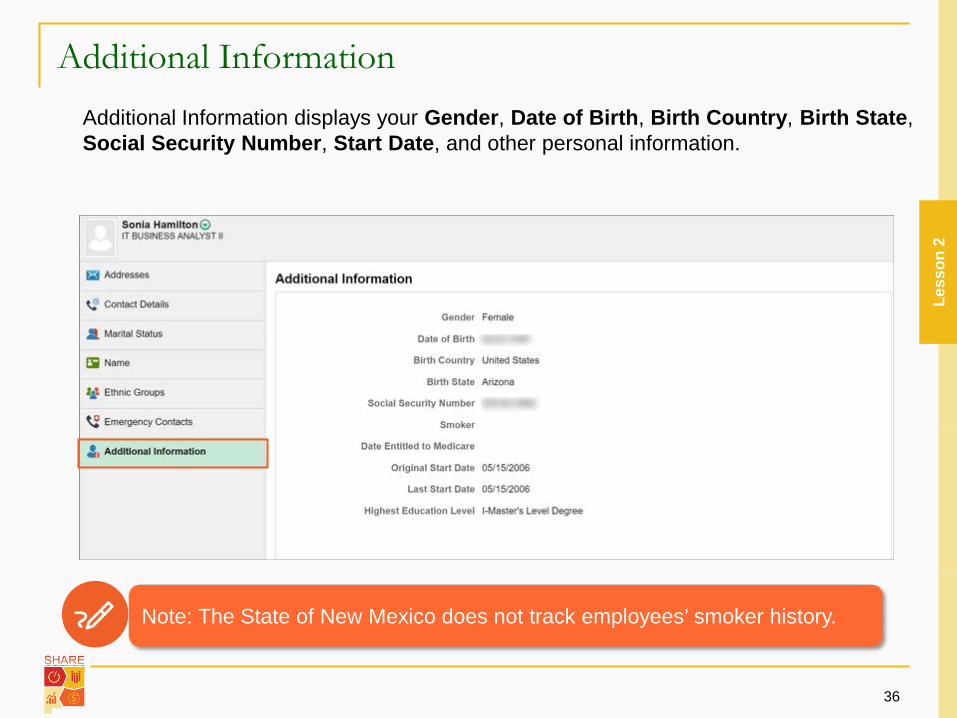
Additional Information
36
Additional Information displays your Gender, Date of Birth, Birth Country, Birth State, Social Security Number, Start Date, and other personal information.
Less
on 2
Note: The State of New Mexico does not track employees’ smoker history.
Manage Personal Information Summary
37
In this lesson we learned:
SHARE 9.2 allows you to modify your Address,Contact Details, Ethnic Group, and EmergencyContact Details
SHARE 9.2 allows you to submit a request forName change and Marital Status change
Less
on 2
Course Introduction
Lesson 1: View Timesheets and Enter Time
Lesson 2: Manage Personal Information
Lesson 3: View Paycheck and Compensation
Lesson 4: View Benefits
Course Summary
38
Agenda
Less
on 3
View Paycheck and Compensation
39
By the end of this lesson, you will be able to:
Access the Payroll and Compensation section
View your Pay Advice
Use the Paycheck Modeler
Manage W-2/W-2c forms
Less
on 3
Highlights of This Section
40
Here are the new and exciting features of Paycheck and Compensation!
Paycheck Modeler: in Employee Self Service (ESS)you can create “What If” scenarios to see what yourpaycheck would look like if your salary changed or youmodified your deductions or tax withholdings.
W-2 form: now you can see your W2 in ESS, requestto receive your W-2 form electronically, and ask toreissue your W-2 – with just one click!
Less
on 3
Access: Paycheck and Compensation
41
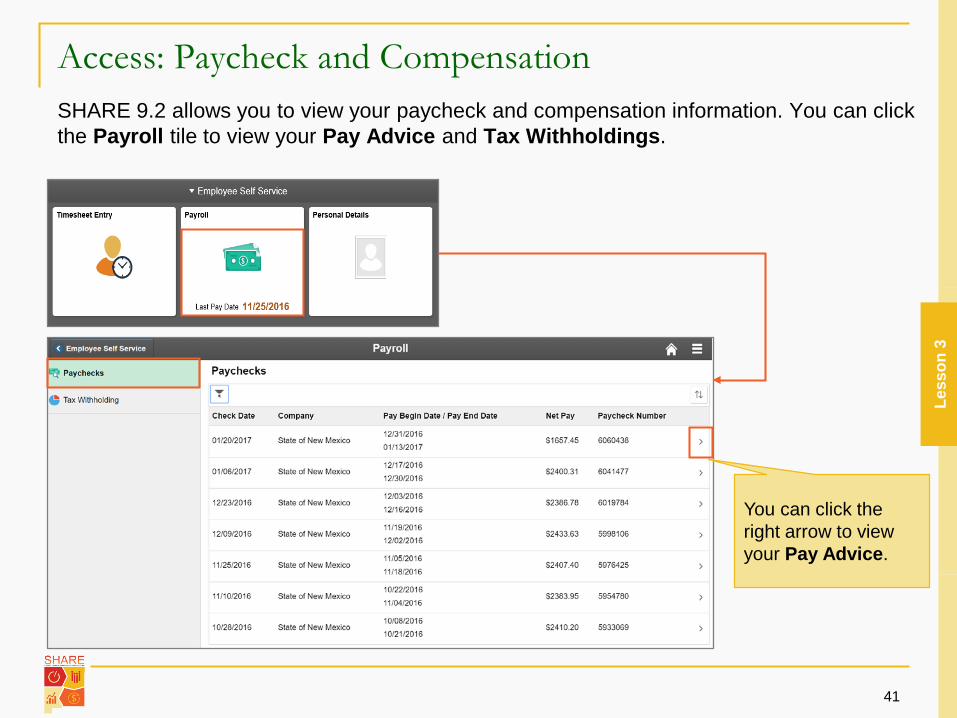
SHARE 9.2 allows you to view your paycheck and compensation information. You can click the Payroll tile to view your Pay Advice and Tax Withholdings.
Less
on 3
You can click the right arrow to view your Pay Advice.
View your Pay Advice
42
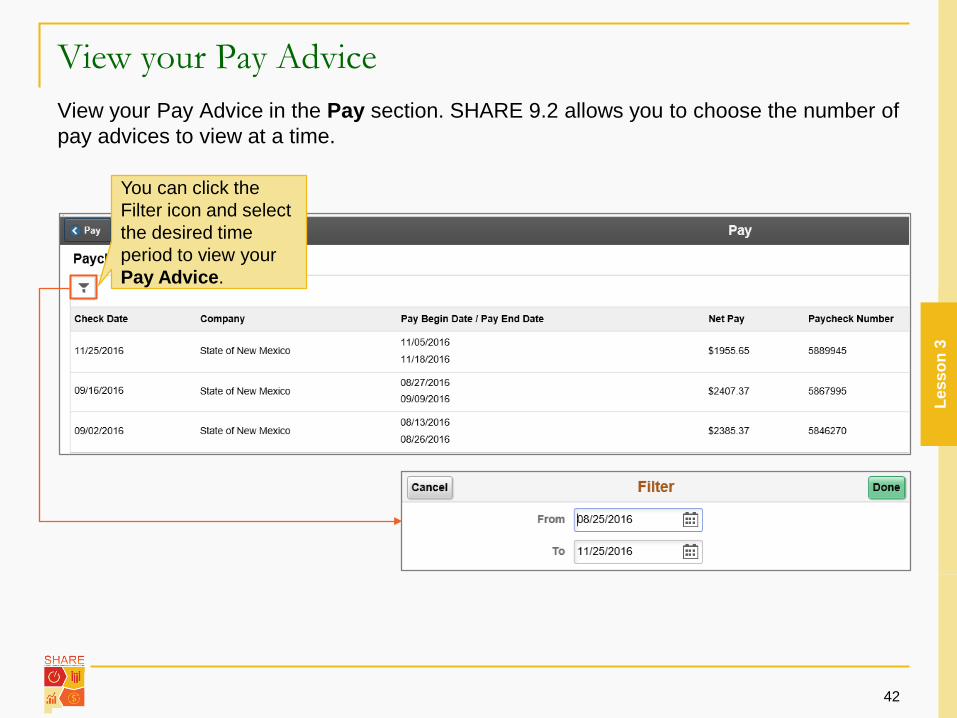
View your Pay Advice in the Pay section. SHARE 9.2 allows you to choose the number of pay advices to view at a time.
You can click the Filter icon and select the desired time period to view your Pay Advice.
Less
on 3
Access: Paycheck and Compensation
43
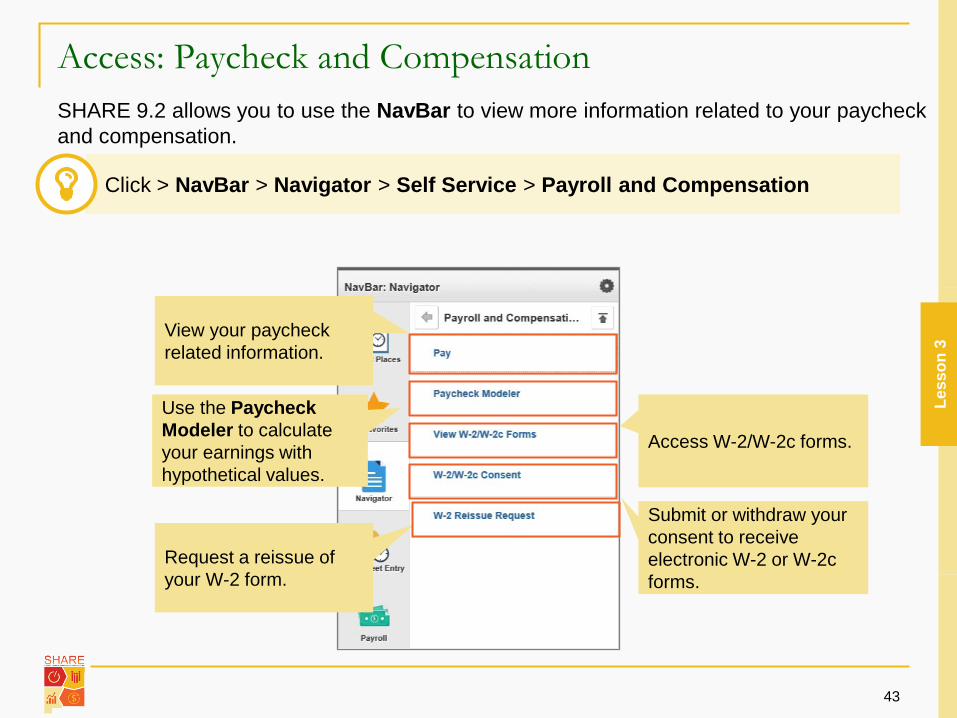
SHARE 9.2 allows you to use the NavBar to view more information related to your paycheck and compensation.
View your paycheck related information.
Use the Paycheck Modeler to calculate your earnings with hypothetical values.
Access W-2/W-2c forms.
Request a reissue of your W-2 form.
Submit or withdraw your consent to receive electronic W-2 or W-2c forms.
Less
on 3
Click > NavBar > Navigator > Self Service > Payroll and Compensation
Use the Paycheck Modeler
44
Use the Paycheck Modeler to view what your paycheck could be if you changed your earnings, deductions, and/or tax withholding status. The Paycheck Modeler starts with your current paycheck and allows you to perform “What If” scenarios.
The following “What If” scenarios are examples you can create via the Paycheck Modeler:
You got a promotion and your hourly pay will increase by a certain number of dollars
You want to add health coverage for a new dependent, which affects your healthcarecontribution amounts, taxes, and net pay
You just got married and want to see the effect of changing your tax withholdingstatus on your net pay
Less
on 3
Note: The Paycheck Modeler provides an estimate of your paycheck. It does not represent your actual paycheck.
View W-2/W-2c Forms
45
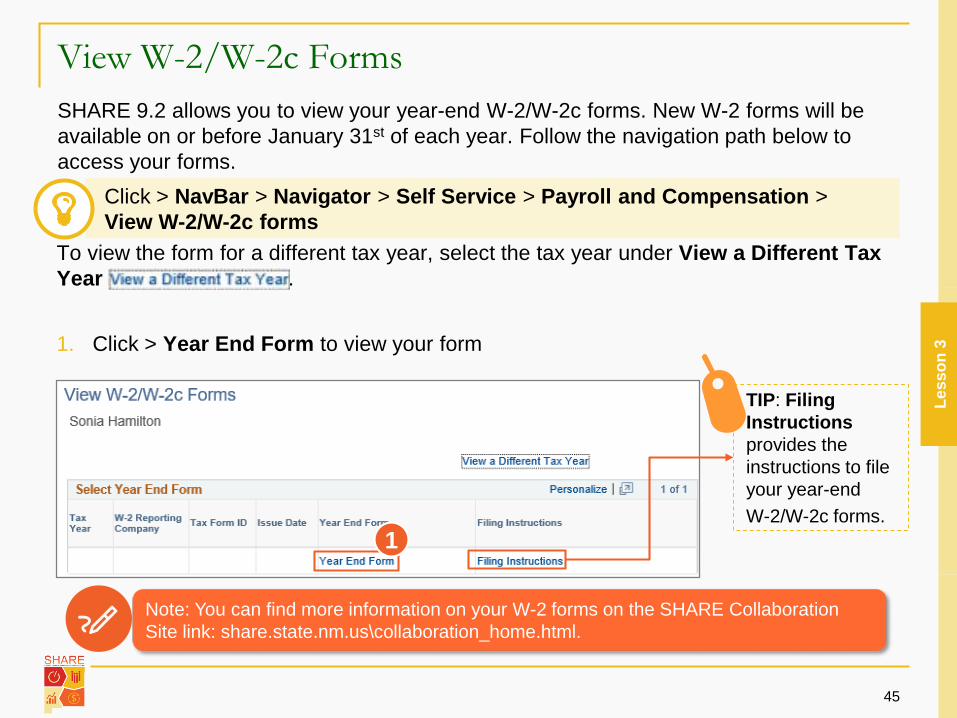
SHARE 9.2 allows you to view your year-end W-2/W-2c forms. New W-2 forms will be available on or before January 31st of each year. Follow the navigation path below to access your forms.
To view the form for a different tax year, select the tax year under View a Different Tax Year .
1. Click > Year End Form to view your form
TIP: Filing Instructions provides the instructions to file your year-end W-2/W-2c forms.
Less
on 3
1
Note: You can find more information on your W-2 forms on the SHARE Collaboration Site link: share.state.nm.us\collaboration_home.html.
Click > NavBar > Navigator > Self Service > Payroll and Compensation > View W-2/W-2c forms
Submit Consent to Receive W-2/W-2c Forms
46
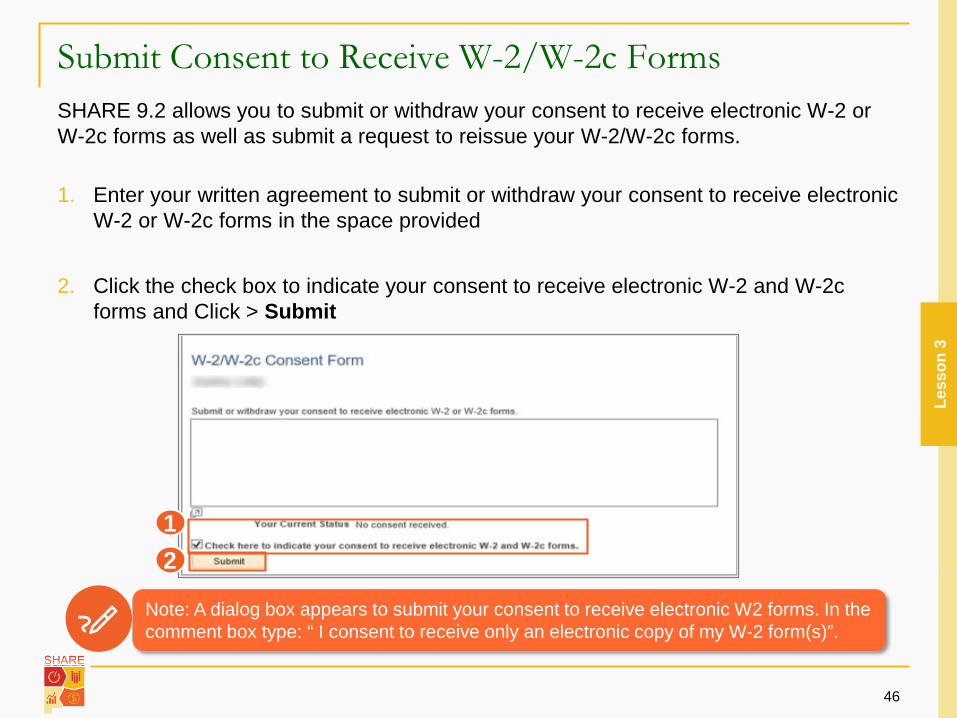
SHARE 9.2 allows you to submit or withdraw your consent to receive electronic W-2 or W-2c forms as well as submit a request to reissue your W-2/W-2c forms.
1. Enter your written agreement to submit or withdraw your consent to receive electronicW-2 or W-2c forms in the space provided
2. Click the check box to indicate your consent to receive electronic W-2 and W-2cforms and Click > Submit
12
Less
on 3
Note: A dialog box appears to submit your consent to receive electronic W2 forms. In the comment box type: “ I consent to receive only an electronic copy of my W-2 form(s)”.
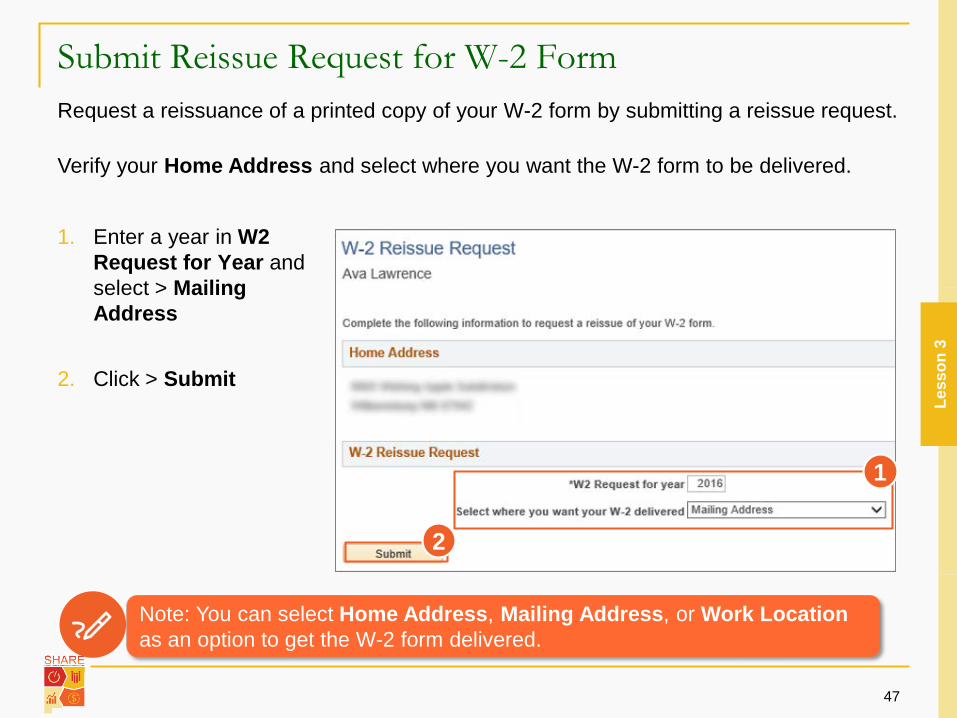
Submit Reissue Request for W-2 Form
47
Request a reissuance of a printed copy of your W-2 form by submitting a reissue request.
1. Enter a year in W2Request for Year andselect > MailingAddress
2. Click > Submit
Verify your Home Address and select where you want the W-2 form to be delivered.
1
2
Note: You can select Home Address, Mailing Address, or Work Location as an option to get the W-2 form delivered.
Less
on 3
View Paycheck and Compensation Summary
48
In this lesson we learned:
How to navigate to the Payroll and Compensationsection and its components
Paycheck Modeler allows you to view ahypothetical paycheck with changed earnings,deductions, and/or tax withholding status
SHARE 9.2 allows you to view your W-2/W-2cforms and submit a request to reissue your W-2form
Less
on 3
Course Introduction
Lesson 1: View Timesheets and Enter Time
Lesson 2: Manage Personal Information
Lesson 3: View Paycheck and Compensation
Lesson 4: View Benefits
Course Summary
49
Agenda
Less
on 4
View Benefits
50
By the end of this lesson, you will be able to:
Access the Benefits section
Review Flexible Spending Accounts Activity
View your Benefits Summary
View your Dependent/Beneficiary Information
Less
on 4
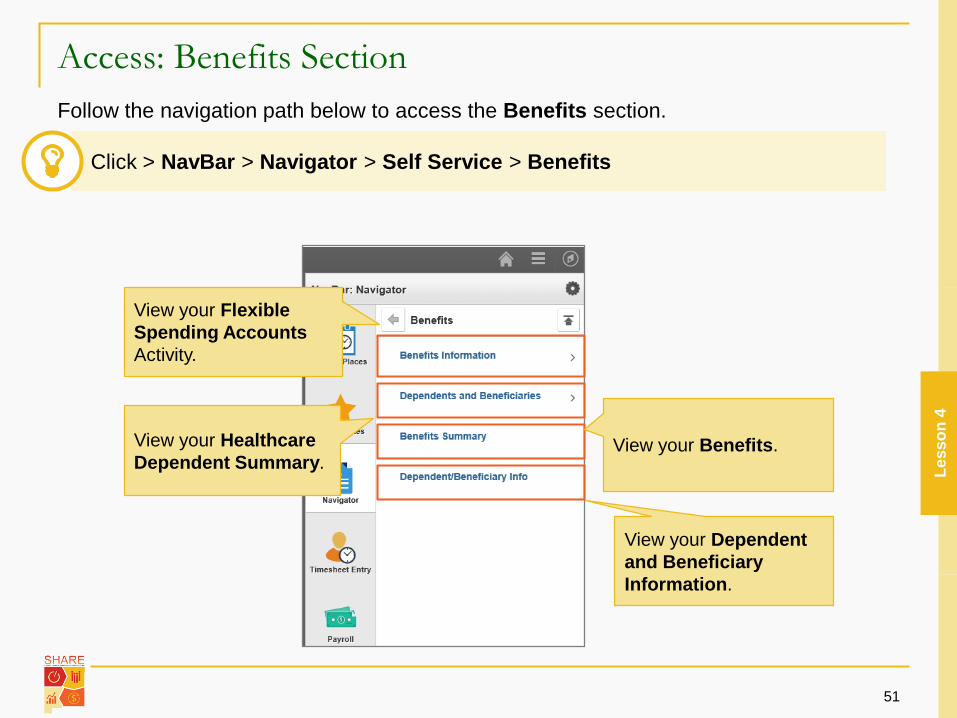
Access: Benefits Section
51
Follow the navigation path below to access the Benefits section.
View your Flexible Spending AccountsActivity.
View your Healthcare Dependent Summary.
View your Benefits.
View your Dependent and Beneficiary Information.
Less
on 4
Click > NavBar > Navigator > Self Service > Benefits
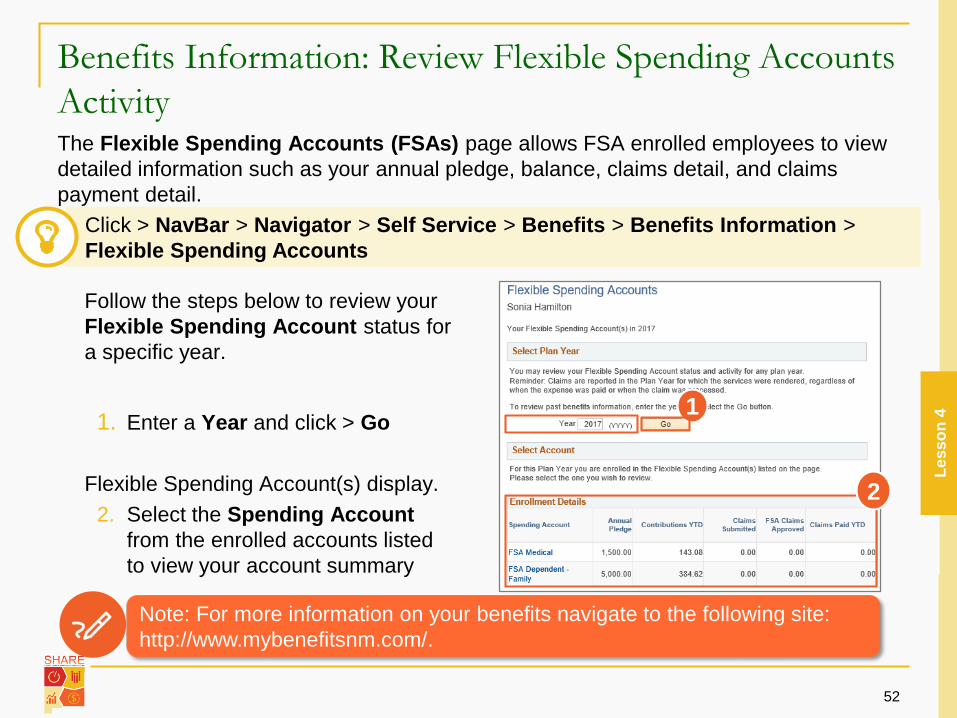
Benefits Information: Review Flexible Spending Accounts Activity
52
The Flexible Spending Accounts (FSAs) page allows FSA enrolled employees to view detailed information such as your annual pledge, balance, claims detail, and claims payment detail.
Follow the steps below to review your Flexible Spending Account status for a specific year.
1. Enter a Year and click > Go
Flexible Spending Account(s) display. 2. Select the Spending Account
from the enrolled accounts listedto view your account summary
1
Note: For more information on your benefits navigate to the following site:http://www.mybenefitsnm.com/.
Less
on 4
2
Click > NavBar > Navigator > Self Service > Benefits > Benefits Information > Flexible Spending Accounts
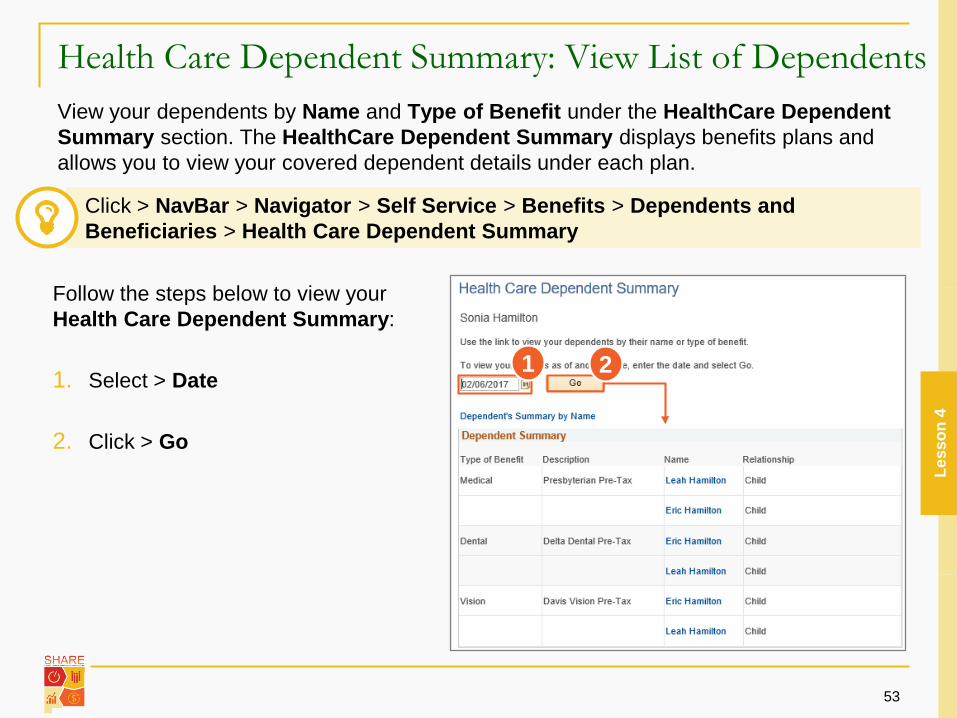
Health Care Dependent Summary: View List of Dependents
53
View your dependents by Name and Type of Benefit under the HealthCare Dependent Summary section. The HealthCare Dependent Summary displays benefits plans and allows you to view your covered dependent details under each plan.
Follow the steps below to view your Health Care Dependent Summary:
1. Select > Date
2. Click > Go
1 2
Less
on 4
Click > NavBar > Navigator > Self Service > Benefits > Dependents and Beneficiaries > Health Care Dependent Summary
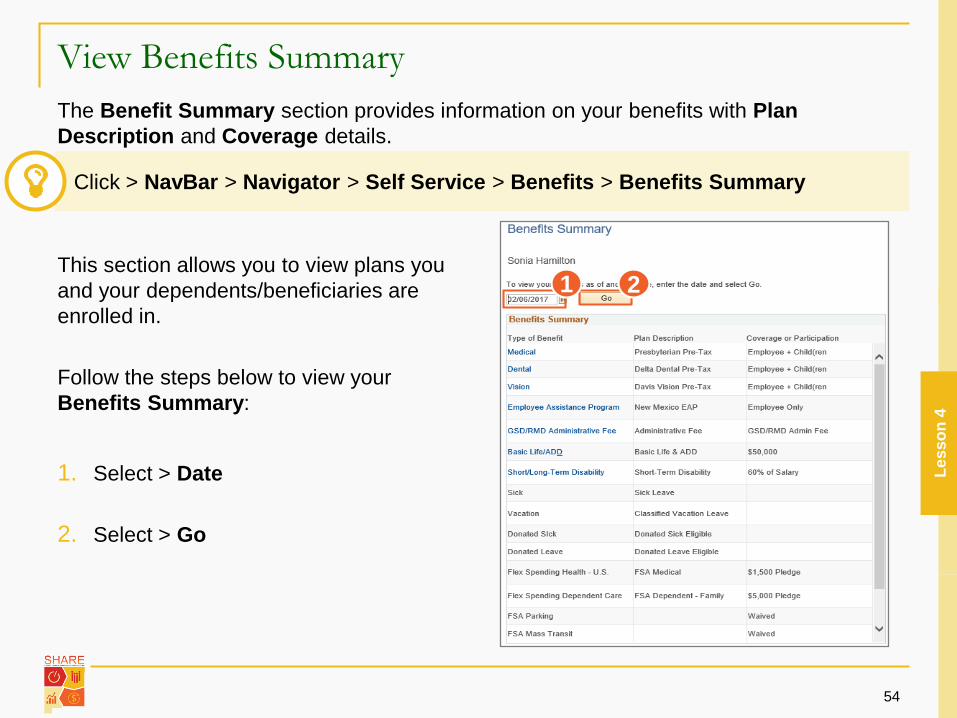
View Benefits Summary
54
The Benefit Summary section provides information on your benefits with Plan Description and Coverage details.
This section allows you to view plans you and your dependents/beneficiaries are enrolled in.
Follow the steps below to view your Benefits Summary:
1. Select > Date
2. Select > Go
1 2
Less
on 4
Click > NavBar > Navigator > Self Service > Benefits > Benefits Summary
View Dependent/Beneficiary Information
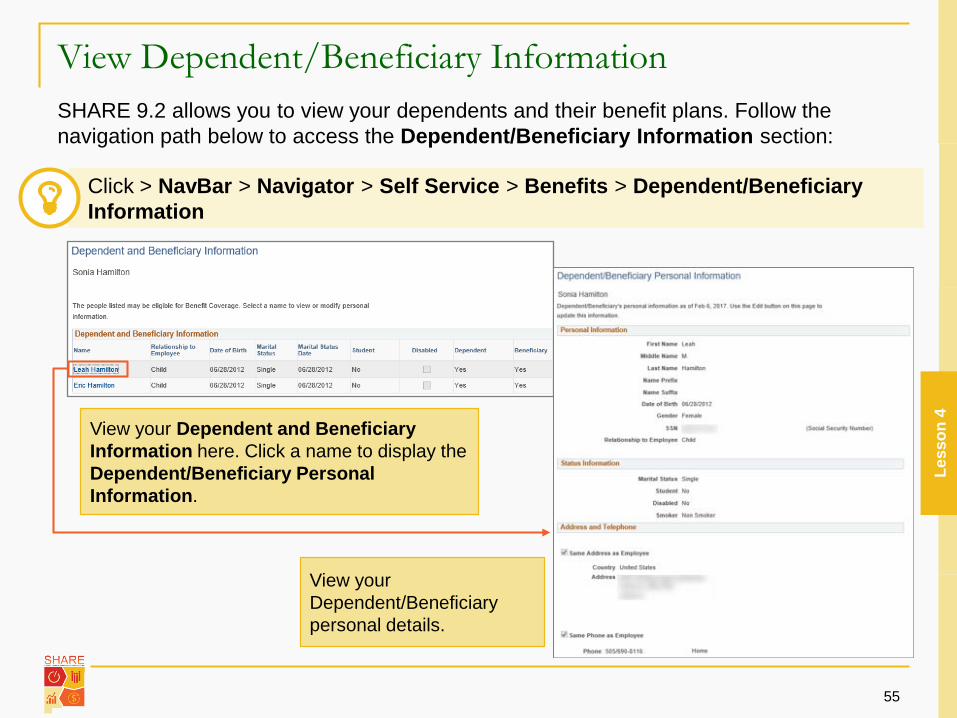
55
SHARE 9.2 allows you to view your dependents and their benefit plans. Follow the navigation path below to access the Dependent/Beneficiary Information section:
View your Dependent and Beneficiary Information here. Click a name to display the Dependent/Beneficiary Personal Information.
View your Dependent/Beneficiary personal details.
Less
on 4
Click > NavBar > Navigator > Self Service > Benefits > Dependent/Beneficiary Information
View Benefits Summary
56
In this lesson we learned:
How to navigate to the Benefits Section and itscomponents
The Flexible Spending Accounts section allowsFSA enrolled employees to view detailedinformation such as annual pledge, balance,claims detail, and claims payment detail
The HealthCare Dependent Summary displaysbenefits plans and allows you to view your covereddependent details under each plan
The Benefits Summary section allows you to viewplans you and your dependents/beneficiaries areenrolled in
Less
on 4
Course Introduction
Lesson 1: View Timesheets and Enter Time
Lesson 2: Manage Personal Information
Lesson 3: View Paycheck and Compensation
Lesson 4: View Benefits
Course Summary
57
Agenda
Less
on 4
Course Summary
58
In this course we learned:
Timesheets allows you to enter your time and viewReported Time, Summary, Leave/Compensatory Time,Exceptions, and Payable Time Details
SHARE 9.2 allows you to modify your Address, ContactDetails, Ethnic Group, and Emergency Contacts andsubmit a request to your HR Admin to modify your Nameand/or Marital Status
SHARE 9.2 allows you to view your paycheck relatedinformation in the Pay section. Paycheck Modeler allowsyou to perform “What If” scenarios
The Benefit section provides information on yourbenefits, with Plan Description and Coverage details.SHARE 9.2 allows you to view your FSA and Health CareDependent Summary
Sum
mar
y
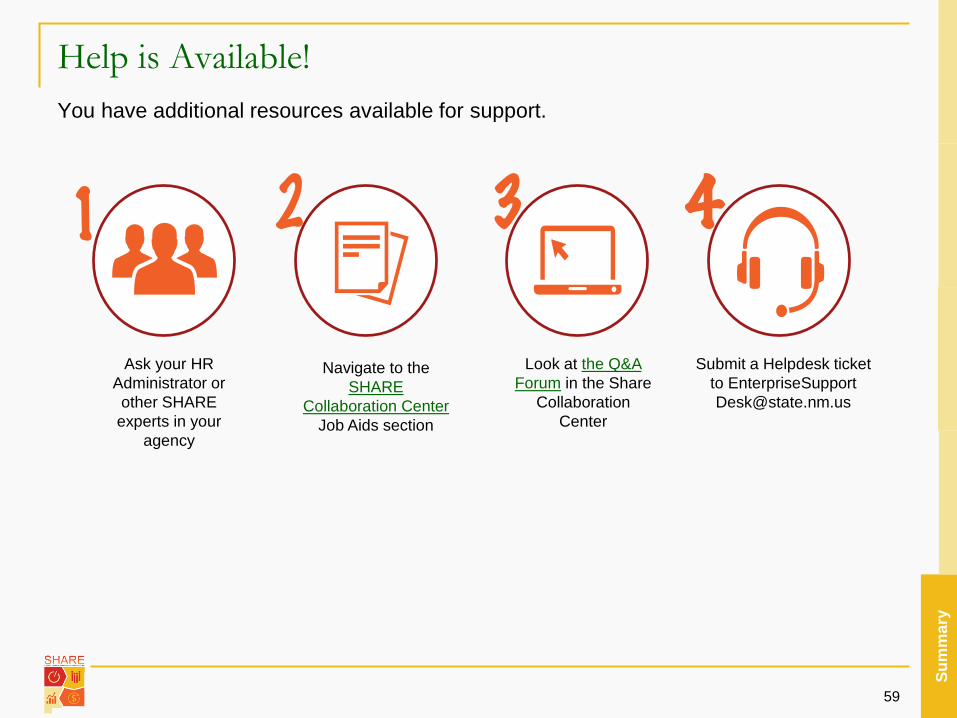
Help is Available!
59
You have additional resources available for support.
Ask your HR Administrator or other SHARE experts in your
agency
Look at the Q&A Forum in the Share
Collaboration Center
Navigate to the SHARE
Collaboration CenterJob Aids section
Submit a Helpdesk ticket to EnterpriseSupport [email protected]
Sum
mar
y


