96
user guide MACH 6 Coin Sorter and Counter W / MICS Control & RS232 Interface
| Date post: | 28-Jun-2018 |
| Category: |
Documents |
| Upload: | nguyenhanh |
| View: | 216 times |
| Download: | 0 times |

uuuusssseeeerrrr gggguuuuiiiiddddeeee
MACH 6Coin Sorter and CounterW / MICS Control & RS232 Interface


i
DE LA RUECASH SYSTEMS INC.
Box 200705 S. 12th StreetWatertown, WI 53094 USA
Tel: ( 920 ) 262--3300 ( Sales )( 800 ) 527--2638 ( Supplies )
Fax: ( 920 ) 261--1783 ( Sales )( 920 ) 262--3374 ( Supplies )
Web: http://www.delarue.com
Dear Customer,
Thank you for purchasing the Model 6950 Coin Sorter / Counter from De La Rue. This product isyet another step to fulfilling our mission:
To enable the secure and cost effective availability of cashwhen and where people need it.
This innovative product incorporates the very latest technology for you to process coins faster andmore accurately than ever before. It contains De La Rue designed and patented components whichmake this product unique.
Additional benefits of the Model 6950 are:
* Depending on coin mix.
With over 100 years� experience in the design, development and manufacture of world class coinprocessors, De La Rue supplies more products world-wide than any other manufacturer. Quality isparamount in our manufacturing process and we are proud to hold certificates for European qualitydirectives for both safety and electromagnetic standards. In addition to this, manufacturing siteshave been awarded ISO9001 quality certificates.
To ensure maximum life from your Sorter, we recommend that it is regularly serviced. To assistyou, we provide worldwide service and support through our network of branch offices andauthorized distributors. Please contact them for the location of your nearest service office.
We wish you many years of carefree use.
De La RueCash Systems Inc.
De La RueCash Systems Inc.a division ofDe La Rue International Ltd.Registered OfficeBox 200705 S. 12th StreetWatertown, WI 53094 USA
S Compact size
S 3000 coins per minute *
S Quiet operation
S Tabletop or stand--alone operation
S Lockout security
S Battery backup
S Sorts up to 8 different denominations
S Three levels of memory
S Manual (Media) entry of checks, currency, etc.
S Large capacity Tilting Inspection Pan
S Fully programable bagstops and ID numbers
S Auto-ranging power supply for world-wide voltages
S Lockout security to protect operating information
S High speed Printer
S Remote Display
S Currency Counter Interface
ii
FCC Interference StatementWarning
This equipment generates, uses and can radiate radio frequency energy and if not installed and used inaccordance with the instruction manual may cause interference to radio and television reception. It hasbeen tested and found to comply with the limits for a Class A or Class B computing device pursuant toSubpart J of Part 15 of FCC Rules which are designed to provide reasonable protection against suchinterference in a residential installation. However, there is no guarantee that interference will not occurin a particular installation. If this equipment does cause interference with radio or television reception,which can be determined by turning the equipment off and on, the user is encouraged to try to correctthe interference by taking one or more of the following measures:
n Reorient the receiving (radio/TV) antenna
n Move the Sorter to the right or left with respect to the receiver
n Move the Sorter away from the receiver
n Plug the Sorter into a different outlet so that the Sorter and receiver are on different branch circuits.
Warning: Only equipment certified to comply with the Class A or Class B limits may be attached tothis currency counter. Operation with noncertified equipment is likely to cause radio and TV recep-tion interference.
Peripherals should be interfaced using only shielded cables to maintain FCC Class A or Class B certifi-cation and to reduce the possibility of interference with radio and television reception.
Reference material
If this equipment does cause reception interference, the user should contact an authorized sales orservice representative for suggestions. Two booklets, the CIB Interference Handbook and the CIB Tele-phone Interference Booklet are provided by the Compliance and Information Bureau of the FederalCommunications Commission. To obtain copies, call the Bureau at (202) 418-1100 or on the Internet athttp://www.fcc.gov/cib.
De La Rue International Limited is pleased to give detailed specifications of its products in this manualbut expressly reserves the right to vary these at its discretion at any time without notice. As the Compa-ny�s products and services are continuously being developed it is important for customers to check thatthe information herein includes the latest particulars. This manual is for general guidance only and maycontain inappropriate information under particular conditions of use. All recommendations and sugges-tions issued by or on behalf of the Company in whatever form, are subject to the Company�s terms andconditions of sale, of which a copy will be supplied on request. This document is not part of a contractor license, save insofar as may be expressly agreed.
E De La Rue International Limited 1997All items of technical information, advice, knowhow, drawings, designs, specifications and other itemscommunicated in this document are confidential and remain the property of De La Rue InternationalLimited and shall not be disclosed to a third party without written consent of De La Rue InternationalLimited.
The above duty of confidence also entails a prohibition of reproduction of this text without authority, inwriting from De La Rue International Limited.

iii
user guide
Model 6950Coin Sorter / CounterW / MICS Control& RS232 Interface
The information contained herein is proprietaryand is not to be used for purposes other thanas an aid in the operation and/or maintenanceof the equipment described herein and is fur-ther not to be released or reproduced by any-one without the written permission of:
DE LA RUECASH SYSTEMS INC.
BOX 200705 SOUTH 12TH STREET
WATERTOWN, WISCONSIN 53094USA
#0000408 COPYRIGHT 2002 PrintedREV 01 ALL RIGHTS RESERVED in USA
SAFE OPERATION OF THIS PRODUCT IS DEPENDENT UPON PROPERINSTALLATIONWITH COMPATIBLE EQUIPMENT ANDBYANAUTHORIZEDSALESOR SERVICE REPRESENTATIVE. INCOMPLETE OR INCORRECT INSTALLATIONMAY RESULT IN DAMAGE TO THE EQUIPMENT OR PERSONAL INJURY.ACCIDENTS AND COUNTING INACCURACIES CAN BE AVOIDED IF THEOPERATOR IS COMPLETELY FAMILIAR WITH THIS PRODUCT AND ITSOPERATION. ONLY COINS / TOKENS WITHIN THE RANGES DESCRIBED IN THESPECIFICATIONS SECTION OF THIS GUIDE SHOULD BE PROCESSED. ANY / ALLOTHER OBJECTS SHOULD BE REMOVED FROM THE COIN MIX BEFOREPROCESSING. NEVER ALLOW TOOLS, FINGERS, HAIR OR LOOSE CLOTHINGNEARMOVING PARTS. NO ATTEMPT SHOULD BE MADE TO DISASSEMBLE THISPRODUCT. IF SERVICE IS REQUIRED, CONTACT YOUR AUTHORIZED SERVICEREPRESENTATIVE.
THIS IS NOT ASELF--SERVICE PRODUCT.
OPERATION OF THIS PRODUCTSHOULD BE PERFORMED ONLY
BY PROPERLY TRAINEDPERSONS.
DELARUE ACCEPTS NO LIABILITY FORANY LOSS OR DAMAGE ARISING OUT OFTHEUNAUTHORIZEDUSE,MODIFICATIONOR ADJUSTMENT OF THE PRODUCT ORRELATED EQUIPMENT DESCRIBED ORREFERRED TO IN THIS DOCUMENT.

iv
Declaration of conformityManufacturer Details of product
DE LA RUE Coin Sorter / CounterCASH SYSTEMS INC.Box 200705 S. 12th Street Model typesWatertown, WI 53094 USATelephone: (920) 262 - 3300 6950000 -- 6950999 (230V)Fax: (920) 261 - 1783
This product conforms to the essential requirements of
Directive 89 / 336 / EEC Electromagnetic compatibility
Directive 73 / 23 / EEC Low voltage electrical equipment (safety)
and conformity has been demonstrated by meeting the applicable requirements of thefollowing standards:
EN 60 950 Safety of Information Technology Equipment including ElectricalBusiness Equipment
EN 55014 Limits & Methods of Measurement of Radio Interference of InformationTechnology Equipment
EN 50082--1 Electromagnetic Compatibility Generic Immunity
IEC 801--2 Electrostatic Discharge Requirements
IEC 801--3 Radiated Electromagnetic Field Requirements
IED 801--4 Electrical Fast Transient/Burst Requirements
user guide

v
contents
INTRODUCTION 1
MODEL IDENTIFICATION 2
SPECIFICATIONS 3
OPTIONS 4
INSTALLATION
UNPACK 5
CHECK FOR SHIPPING DAMAGE 6
CHECK FOR MISSING PARTS 6
SECURE THE SORTER 6
INSTALL THE OPTIONS(IF ORDERED) 7
INSTALL COIN BAGS /COIN DRAWERS 8
THE POWER CORD / SWITCH 9
THE INSPECTION PAN / SHIELD 10
OPERATING THE SORTER
DETERMINE SORTING STATIONS 11
THE KEYSWITCH 12
THE CONTROL 13
THE �FEE� FUNCTION 16
DISPLAYING QUANTITIES AND /OR TOTALS 19
ACCEPTING QUANTITIES AND /OR TOTALS 20
CLEARING QUANTITIES AND /OR TOTALS 21
PROCESSING COIN 24
WHEN YOU REACH A BAGSTOP 25
CHANGING THE BAGSTOPQUANTITY 26

vi

vii
contents
OPERATING THE SORTER (CONT�D)
OPERATOR DATA ENTRY
THE BATCH ID 27
THE SUB ID 27
THE GRAND ID 27
PRODUCT (ID NUMBER)TOTALS 28
IDENTIFICATION NUMBEREXAMPLE 29
ENTERING PARTIALBAG COUNTS 34
MEDIA (MANUAL) ENTRIES 35
MEDIA ENTRY ERROR 36
THE CURRENCY INPUTFUNCTION 37
OPERATOR DISPLAY MESSAGES
INTRODUCTION 41
RAM ERROR 41
KEY SEQUENCE 41
CLEAN SENSOR 42
LOW BATTERY 42
COIN BACKUP 42
TOTAL NOT ZERO 42
SUB NOT ZERO 42
RUN NO ACCEPT 43
PRINTER BUSY 43
OVERFLOW 43
COMMUNICATIONS ERROR 43
INTERLOCK 43

viii

ix
contents
PROGRAMMING
DEFAULT SETTINGS 44
INITIALIZING CONTROL FORPRINTER OPERATION 47
INITIALIZING CONTROL FORREMOTE DISPLAY OPERATION 48
PROGRAMMING KEY SEQUENCES
1. SUPERVISOR CONTROL KEYS 49
2. SET THE TIME / DATE 50
3. DECIMAL PT / COMMASELECTION /DISPLAY LOCATION 51
4. BATCH PRINT LENGTH /NUMBER OF COPIES 53
5. SUB PRINT LENGTH /NUMBER OF COPIES 55
6. GRAND PRINT LENGTH /NUMBER OF COPIES 57
7. RS232 COMMUNICATION PORTPARAMETERS
7.0 SELECT BAUD RATE 59
7.1 SELECT PARITY 61
7.2 SELECT DATA BITS 627.3 SELECT FORMATS 63
7.4 SELECT ACK / NAKENABLE 66
7.5 SELECT DTR / DSRENABLE 67
7.6 SELECT RTS / CTSENABLE 68
8. SELECT PRINT ORDER(VALUE / SIZE) 69
9. SELECT IF BAG STOPS AREACTIVE / DISABLED 69
10. SELECT RUN CONTINUOUSLY /7--SECOND STOP 70
11. SELECT UNIT OR DOLLARDISPLAY 70

x
xi
contents
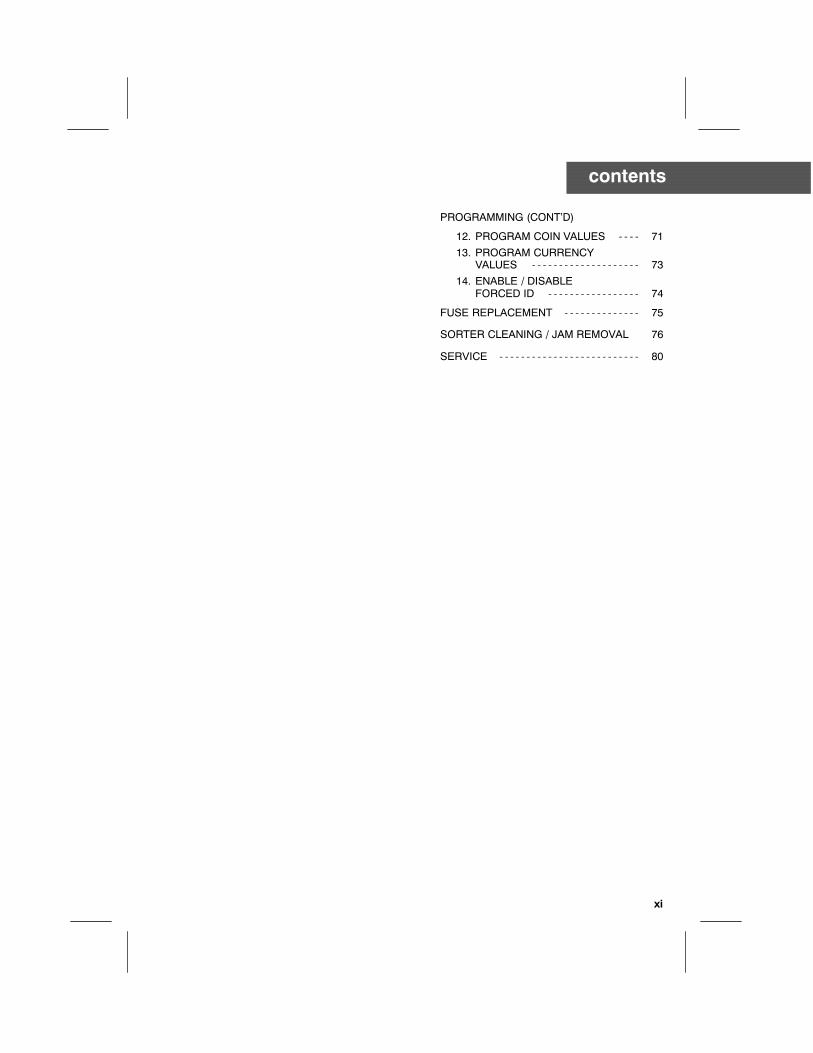
PROGRAMMING (CONT�D)
12. PROGRAM COIN VALUES 71
13. PROGRAM CURRENCYVALUES 73
14. ENABLE / DISABLEFORCED ID 74
FUSE REPLACEMENT 75
SORTER CLEANING / JAM REMOVAL 76
SERVICE 80

xii

1
introduction
Introduction
The Mach 6 Coin Sorter and Counter isdesigned for ease of operation. Coins are sortedand counted at a rate of up to 3,000 dimes perminute (depending on the coin mix). Thedenomination and quantity totals are registeredwithin the Control Module, and are selected fordisplay at the Control Panel located on the frontof the Module.
1. Inspection PanAllows inspection of coin mix so thatunwanted objects may be removed beforecoins enter the Sorting Area.
2. Power SwitchTurns Main Power to Sorter on and off.
3. DisplayVisual communications link between theSorter and the Operator.
4. Control AssemblyCommunications link between the Sorterand the Operator. All Sorter operation isdone here.
5. KeylockAllows access to programming mode.
FIGURE #1SORTER DESCRIPTION
5
42
1
3
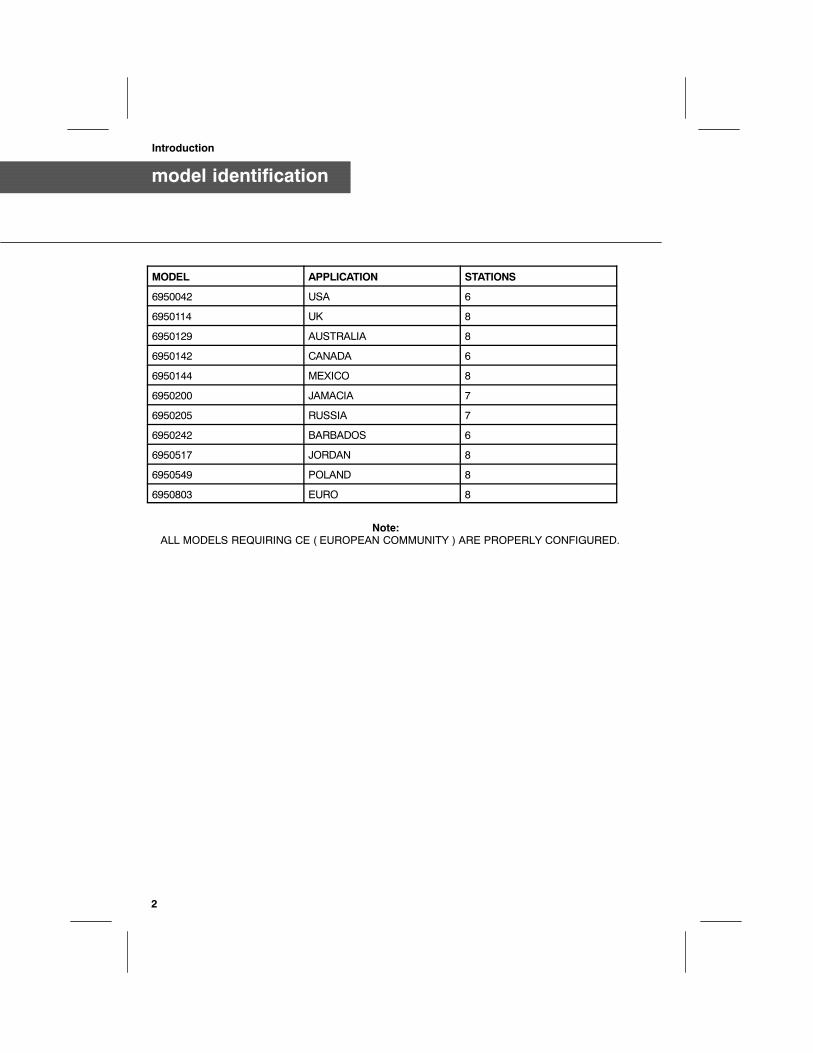
model identification
Introduction
Note:ALL MODELS REQUIRING CE ( EUROPEAN COMMUNITY ) ARE PROPERLY CONFIGURED.
2
MODEL APPLICATION STATIONS
6950042 USA 6
6950114 UK 8
6950129 AUSTRALIA 8
6950142 CANADA 6
6950144 MEXICO 8
6950200 JAMACIA 7
6950205 RUSSIA 7
6950242 BARBADOS 6
6950517 JORDAN 8
6950549 POLAND 8
6950803 EURO 8
3
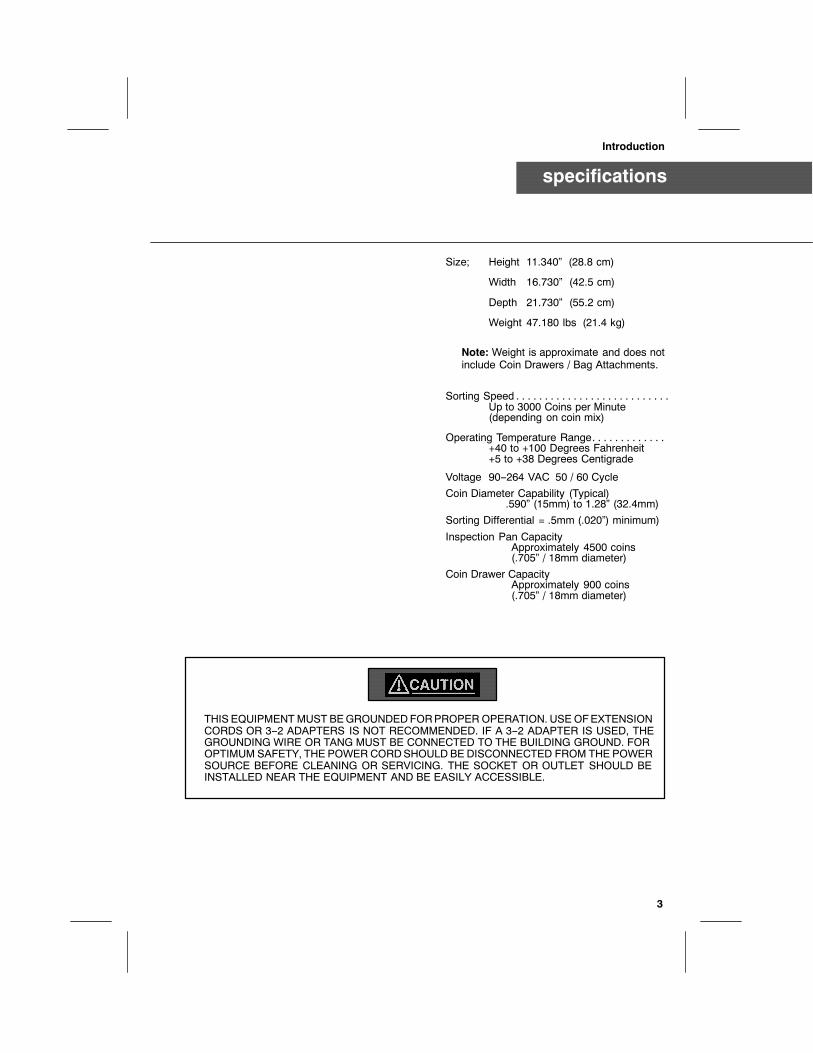
specifications
Introduction
Size; Height 11.340� (28.8 cm)
Width 16.730� (42.5 cm)
Depth 21.730� (55.2 cm)
Weight 47.180 lbs (21.4 kg)
Note: Weight is approximate and does notinclude Coin Drawers / Bag Attachments.
Sorting Speed . . . . . . . . . . . . . . . . . . . . . . . . . . .Up to 3000 Coins per Minute(depending on coin mix)
Operating Temperature Range. . . . . . . . . . . . .+40 to +100 Degrees Fahrenheit+5 to +38 Degrees Centigrade
Voltage 90--264 VAC 50 / 60 Cycle
Coin Diameter Capability (Typical).590� (15mm) to 1.28� (32.4mm)
Sorting Differential = .5mm (.020�) minimum)
Inspection Pan CapacityApproximately 4500 coins(.705� / 18mm diameter)
Coin Drawer CapacityApproximately 900 coins(.705� / 18mm diameter)
THIS EQUIPMENT MUST BEGROUNDEDFORPROPEROPERATION. USEOFEXTENSIONCORDS OR 3--2 ADAPTERS IS NOT RECOMMENDED. IF A 3--2 ADAPTER IS USED, THEGROUNDING WIRE OR TANG MUST BE CONNECTED TO THE BUILDING GROUND. FOROPTIMUM SAFETY, THE POWERCORDSHOULD BE DISCONNECTED FROM THE POWERSOURCE BEFORE CLEANING OR SERVICING. THE SOCKET OR OUTLET SHOULD BEINSTALLED NEAR THE EQUIPMENT AND BE EASILY ACCESSIBLE.

4
options
Introduction
There are seven (7) options available. Eachoption is packaged separately, complete withInstallation Instructions.
1. SORTER STAND ---- Secures Sorter andBag Ring / Spout in proper configuration forbagging coin.
2. COIN DRAWERS ---- Receive sorted coins.
3. BAG CHUTE / SPOUT / RING ----For bagging large coin quantities. Chutereplaces Coin Drawer. The Spout / Ringattach to Sorter Stand.
4. MAGNET ---- Attaches to Inspection Pan toprevent unwanted metallic objects fromentering the Sorting Area.
5. REMOTE BATCH DISPLAY ---- Allows thecustomer to observe the total as coins aresorted / counted.
Note: The Control must be �told� that aRemote Batch Display is connected. Theprocedure is discussed in the ProgrammingSection later in this Guide.
6. PRINTER ---- Provides a permanent record(audit trail) of all transactions.
Note: The Control must be �told� that aPrinter is connected. The procedure isdiscussed in the Programming Section laterin this Guide.
7. SECURITY STAND ---- Similar to Item #1(above), but encloses Coin Bags forsecurity.

5
installation
Introduction
UNPACK (See Figure #2)The internal packaging is designed not only forprotection during shipment but to allow an easymeans of removal from the shipping container.
FIGURE #2PACKAGING
THE SORTER WEIGHS 47.18 POUNDS(21.4 KG). USE PROPER LIFTINGTECHNIQUES OR USE A HELPER WHENREMOVING THE SORTER FROM THESHIPPING CARTON.
LIFTHERE
LIFTHERE

6
installation
Introduction
CHECK FOR SHIPPING DAMAGEThe Sorter and all options were thoroughlytested after they were manufactured andcarefully packaged when they left the factory.
ANY DAMAGE THAT MAY HAVE BEENDONE IN SHIPMENT SHOULD BEREPORTED TO THE CARRIERIMMEDIATELY, AND THE SHIPPINGCARTON(S) AND PACKAGING RETAINEDFOR INSPECTION, IF NECESSARY.
CHECK FOR MISSING PARTSCompare the items received against the originalorder. Notify your Authorized Sales / ServiceRepresentative of any discrepancies.
SECURE THE SORTER(IF DESIRED)The Sorter will sit on a countertop or tabletop. Itmay be attached for security. A drilling guide isshown in Figure #3
Note: The distance from the front edge ofthe countertop to the Sorter to bedetermined at installation. Allow sufficientclearance at the rear and right side of theSorter to allow the Inspection Pan room tomove freely throughout its travel range.Screw length should be 3/4� (maximum) plusthe thickness of the countertop.
If bagging coin is desired, the Sorter must beattached to its own stand as shown inFigure #4.
Note: A Security Stand, utilizing a slidingdrawer configuration to protect the coins isalso available.Contact your Authorized SalesRepresentative for additional information.
FIGURE #3COUNTERTOP INSTALLATION
FIGURE #4STAND INSTALLATION
(2)1/4� / 6.35MM
HOLES
1-5/8� / 41.3MM15-1/8� / 384.2MM
1� / 39.4MM

7
installation
Introduction
INSTALL THE OPTION(S)(IF ORDERED)Install each option in accordance with theInstallation Instructions provided with each kit.Cable connections are shown in Figure #5.
Note: The Printer must be connected to port#4 and the Remote Batch Display must beconnected to port #3.
Note: The Control must be �told� that aPrinter or Remote Display is connected. Thesetup procedure is discussed in theProgramming section later in this Guide.
Note: Referring to the example shownbelow, the Printer Tape reflects theconfiguration received when the Printer isconnected to port #4 (including unit counts).If this portion of the printout is not desired,reprogram the Sorter so that the printinformation is sent to ports #1 -- #3.Instructions are included in the ProgrammingSection later in this Guide.If the unit counts are to be displayed on aPC, the PC must be connected to port #4.
FIGURE #5OPTION CABLE CONNECTIONS
RS232 CONNECTIONS
PORT 1 PORT 4PORT 3PORT 2
B A T C H A C C E P TTIME 09:15 09/21/02BATCH 1503--01SUB 111GRAND 09/21/02
.01 200 2.00
.05 260 13.00
.10 360 36.00
.25 1100 275.00
.50 76 38.001.00 50 50.00
TOTAL COIN 414.00-- -- -- -- --
TOTAL 414.00
UNIT COUNTS

8
installation
Introduction
INSTALL COIN BAGS / COINDRAWERSUnpack the Coin Drawers (if ordered) and slidethem into position. All Coin Drawers areidentical in size and shape. If you are baggingcoin, replace the Coin Drawers at thoselocations with the Chute / Spout configuration.To install a Coin Bag, lift the appropriate Ringand slip the Bag over the Spout. Slide the Ringdown over the Bag to secure it in position withthe slot in the Ring facing forward.
Note: Depending on the length andcondition of the Coin Bag, folding the topover to provide a double fabric thicknessmay increase the holding capability of thering.
Rest the Coin Bag on the Stand Shelf to supportthe weight of the coin.
FIGURE #6COIN BAG INSTALLATION
SPOUT
RING
COIN BAG
RECOMMENDEDCOIN DRAWERCAPACITIES
10¢ -- 1000 Units $100.001¢ -- 750 Units $7.505¢ -- 500 Units $25.0025¢ -- 400 Units $100.001.00 -- 300 Units $300.0050¢ -- 250 Units $125.00

9
installation
Introduction
THE POWER CORD / SWITCHCheck the Power Cord supplied with the Sorterto ensure compatibility with local requirements.If a different plug connection is required, obtainthe correct Power Cord assembly locally.
Be sure the Power Switch (See FIGURE #7) isin the �OFF� position, and then connect theSorter end of the Power Cord as shown inFIGURE #8, and the opposite end to a properlygrounded AC outlet of the appropriate voltage.
FIGURE #7POWER SWITCH
FIGURE #8POWER CORD CONNECTION
POWERSWITCH
POWERCORD
10
installation
Introduction
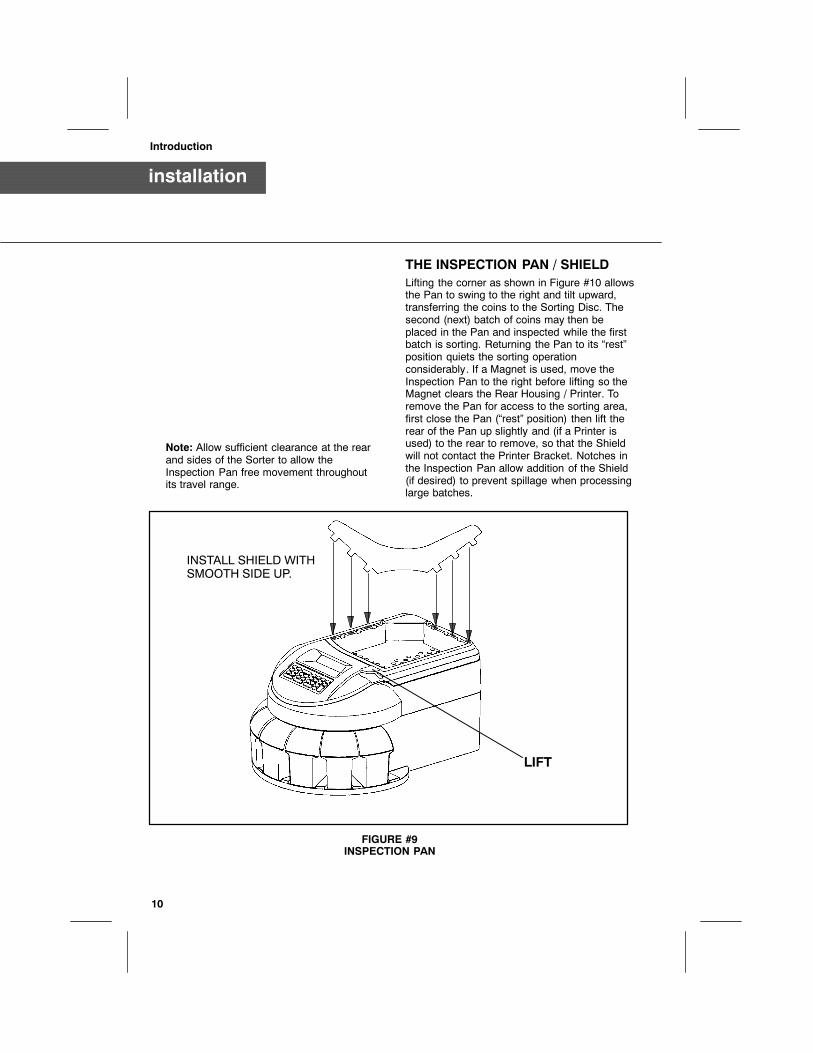
THE INSPECTION PAN / SHIELDLifting the corner as shown in Figure #10 allowsthe Pan to swing to the right and tilt upward,transferring the coins to the Sorting Disc. Thesecond (next) batch of coins may then beplaced in the Pan and inspected while the firstbatch is sorting. Returning the Pan to its �rest�position quiets the sorting operationconsiderably. If a Magnet is used, move theInspection Pan to the right before lifting so theMagnet clears the Rear Housing / Printer. Toremove the Pan for access to the sorting area,first close the Pan (�rest� position) then lift therear of the Pan up slightly and (if a Printer isused) to the rear to remove, so that the Shieldwill not contact the Printer Bracket. Notches inthe Inspection Pan allow addition of the Shield(if desired) to prevent spillage when processinglarge batches.
FIGURE #9INSPECTION PAN
LIFT
INSTALL SHIELD WITHSMOOTH SIDE UP.
Note: Allow sufficient clearance at the rearand sides of the Sorter to allow theInspection Pan free movement throughoutits travel range.

11
sorting stations
Operation
The Sorter has eight (8) Sorting Stations. Theyare numbered as shown in FIGURE #10. Insome applications, not every Sorting Stationwould be used. The Coin Drawers for theseStations may be secured in position, if desired,by a single screw inserted in the bottom of theDrawer through the Baseplate.
A small label intended to remind the operator toexamine the coin mix and remove objects thatcould cause damage is included with the Sorter.Usage is optional. A suggested location isshown in FIGURE #10.
FIGURE #10SORTING STATIONS
4
2 13
5--8
WARNING LABEL
DUMMY

12
the keyswitch
Operation
The Keyswitch, located to the left of the Control,performs three functions:
1. Locks / unlocks all Control Keys selected inthe Programming Mode.
2. Allows entry into the programming mode byturning the Keyswitch to the vertical positionand holding the Batch Key down atpower--up.
3. Allows exit of the programming mode byturning the Keyswitch to the horizontalposition.
Complete programming instructions arediscussed later in this Guide.
FIGURE #11KEYSWITCH
LOCKED = HORIZONTALUNLOCKED = VERTICAL
KEYSWITCH
KEY
13
the control
Operation
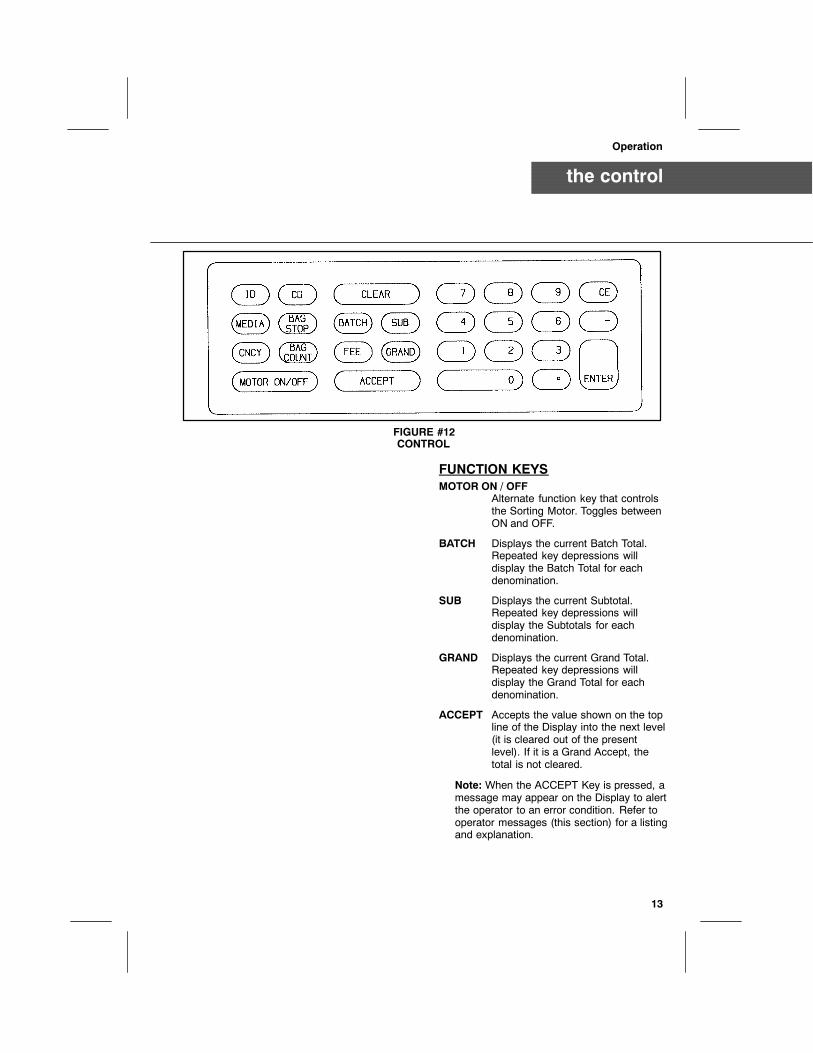
FUNCTION KEYSMOTOR ON / OFF
Alternate function key that controlsthe Sorting Motor. Toggles betweenON and OFF.
BATCH Displays the current Batch Total.Repeated key depressions willdisplay the Batch Total for eachdenomination.
SUB Displays the current Subtotal.Repeated key depressions willdisplay the Subtotals for eachdenomination.
GRAND Displays the current Grand Total.Repeated key depressions willdisplay the Grand Total for eachdenomination.
ACCEPT Accepts the value shown on the topline of the Display into the next level(it is cleared out of the presentlevel). If it is a Grand Accept, thetotal is not cleared.
Note: When the ACCEPT Key is pressed, amessage may appear on the Display to alertthe operator to an error condition. Refer tooperator messages (this section) for a listingand explanation.
FIGURE #12CONTROL

14
the control
Operation
CLEAR Clears the value shown on theDisplay. The exception to this rule isthe �GRAND-- CLEAR -- ACCEPT�sequence, in which case theGRAND is cleared after theACCEPT Key is pressed. If a Printeris connected, the output is sent tothe Printer. If a Serial Port isconfigured for data output, it will besent to that Port.
Note: The Sorter incorporates a power--upreset (clear) feature to clear all totals storedin batch, sub and grand memory, as well asall bag count totals.
To ensure the Control is clear (Display at�.00�), hold the CLEAR Key on the Controldown, and while holding, move the mainPower Switch at the rear of the Sorter to on.The Control will cycle through a �self--check�sequence and then display:
For two (2) seconds, then return to displaybatch total.
BAG COUNT Displays the partial Bag Counts.
BAG STOP Displays current bagstop settingby denomination.
NUMERIC KEYPADEnters numeric data into the Control.Examples: ID Numbers, Currency,and Media Entry.
ALL TOTALS CLEAR

15
the control
Operation
ID Cycles between Batch, Sub, andGrand and allows a 15--digit code tobe entered (using the NumericKeypad) for that total.
If a �--� is used at the end of theBatch ID field, the 2 to 4 digits thatfollow the �--� are designated asproduct / teller totals. These totalsare carried down to the Sub andGrand Totals.
Note: Product / Teller ID�s available are 01through 9999. The ID memory will store 100different ID�s. Which ID�s are stored isselected by the operator.
* CD Turns the CD (coin detection)feature on / off.
CURRENCY (CNCY)Enters currency values into thecurrent Batch total.If a Currency Counter is connected,transfers counts from the CurrencyCounter to the Batch Total.
MEDIA Enters the value of items (checks,food stamps, etc.) that cannot beprocessed through the Sorter.
ENTER Ends a data field. Example: To enteran ID number of 123 into the BatchID, Press �ID�, Press �123�, Press�ENTER�. The Batch ID is now 123.
�--� Key Subtracts values or addshyphenation into the ID data field.
CLEAR ENTRY (CE)Clears the value shown on theDisplay.
FEE This function provides the operatorwith the capability of assessing a feefor processing a transaction.
* This function is not used on Model6950 Sorters.

the �FEE� function
Operation
This function provides the Operator with thecapability of assessing a fee for processing atransaction.
Three options are available:
This fee may be in the form of a percentage ofthe total, or a flat fee per transaction, or both.
Option #1 -- Percentage of Total
A. In the batch mode, press the FEE Key.
B. The Display will show:
C. Using the Keypad, enter the chosenprocessing fee (5.00 = 5% for this example)
Note: 9.99 maximum
D. Press the ENTER Key twice.
E. The Display will return to the batch mode.
F. Process the coins ($414.00 for thisexample).
G. When sorting is complete, press theACCEPT Key.
H. The printout will show:
I. The total amount of coins processed isadded to the sub total register.
J. The processing fee is added to the subprocessing fee register.
FEE % .00
FLAT FEE .00
FEE KEY
FIGURE #13THE FEE KEY
FIGURE #14BATCH TOTAL PRINTOUT
B A T C H A C C E P TTIME 09:15 09/21/02BATCH 1503--01SUB 111GRAND 09/21/02
.01 200 2.00
.05 260 13.00
.10 360 36.00
.25 1100 275.00
.50 76 38.001.00 50 50.00
TOTAL COIN 414.00PROCESS FEE 20.70CUST. TOTAL 393.30
16

17
the �FEE� function
Operation
Option #2 -- Flat fee
A. In the batch mode, press the FEE Key.
B. The Display will show:
C. Press the ENTER Key once.
D. Using the Numeric Keypad, enter thechosen processing fee ($1.00 for thisexample)
Note: $19.99 maximum.
E. Press the ENTER Key once.
F. The Display will return to the batch mode.
G. Process the coins ($414.00 for thisexample).
H. When sorting is complete, press theACCEPT Key.
I. The printout will show:
J. The total amount of coins processed isadded to the sub total register.
K. The processing fee is added to the subprocessing fee register.
FEE % .00
FLAT FEE .00
FIGURE #15THE FEE KEY
FIGURE #16BATCH TOTAL PRINTOUT
FEE KEY
B A T C H A C C E P TTIME 09:15 09/21/02BATCH 1503--01SUB 111GRAND 09/21/02
.01 200 2.00
.05 260 13.00
.10 360 36.00
.25 1100 275.00
.50 76 38.001.00 50 50.00
TOTAL COIN 414.00PROCESS FEE 1.00CUST. TOTAL 413.00

18
the �FEE� function
Operation
Option #3 -- Flat fee / Percentage of total
A. In the batch mode, press the FEE Key.
B. The Display will show:
C. Using the Numeric Keypad, enter thechosen processing fee (5.00 = 5% for thisexample)
Note: 9.99 maximum.
D. Press the ENTER Key once.
E. Using the Numeric Keypad, enter thechosen processing fee ($1.00 for thisexample)
Note: $19.99 maximum.
F. Press the ENTER Key once.
G. The Display will return to the batch mode.
H. Process the coins ($414.00 for thisexample).
I. When sorting is complete, press theACCEPT Key.
J. The Display returns to the Batch Mode.
K. The printout will show:
L. The total amount of coins processed isadded to the sub total register.
M. The processing fee is added to the subprocessing fee register.
FEE % .00
FLAT FEE .00
FIGURE #17THE FEE KEY
FIGURE #18BATCH TOTAL PRINTOUT
FEE KEY
B A T C H A C C E P TTIME 09:15 09/21/02BATCH 1503--01SUB 111GRAND 09/21/02
.01 200 2.00
.05 260 13.00
.10 360 36.00
.25 1100 275.00
.50 76 38.001.00 50 50.00
TOTAL COIN 414.00PROCESS FEE 21.70CUST. TOTAL 392.30
19
displaying quantities and / or totals
Operation
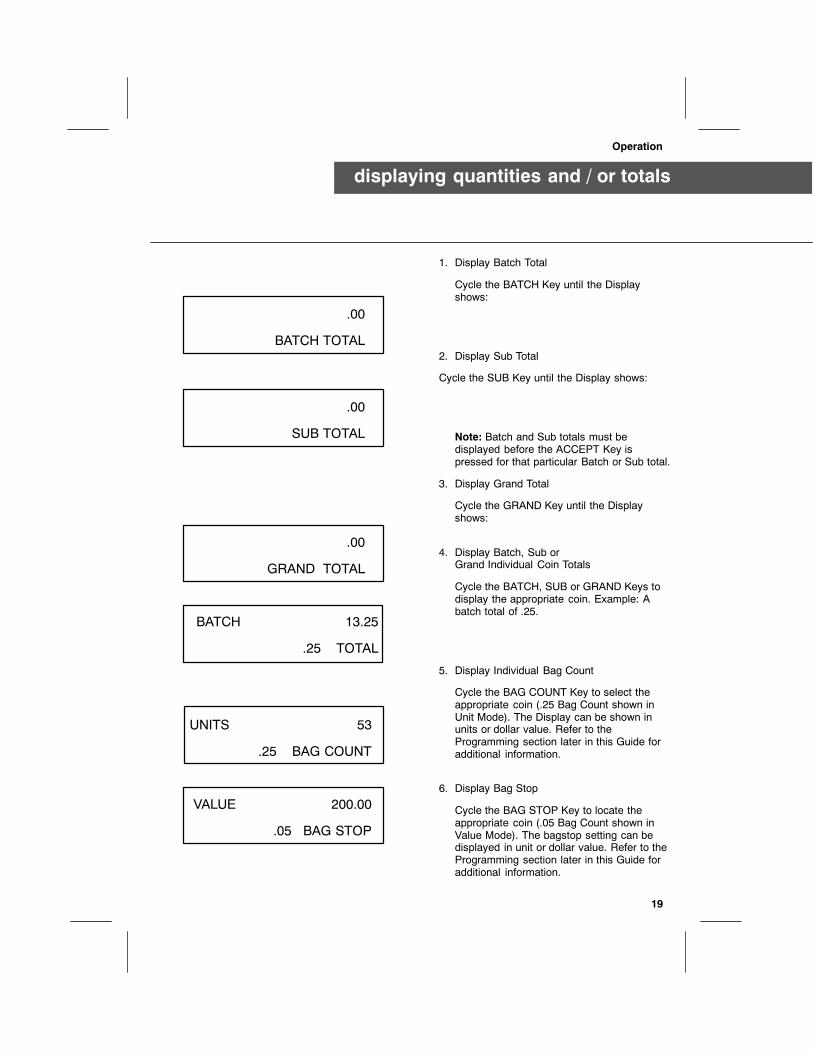
1. Display Batch Total
Cycle the BATCH Key until the Displayshows:
2. Display Sub Total
Cycle the SUB Key until the Display shows:
Note: Batch and Sub totals must bedisplayed before the ACCEPT Key ispressed for that particular Batch or Sub total.
3. Display Grand Total
Cycle the GRAND Key until the Displayshows:
4. Display Batch, Sub orGrand Individual Coin Totals
Cycle the BATCH, SUB or GRAND Keys todisplay the appropriate coin. Example: Abatch total of .25.
5. Display Individual Bag Count
Cycle the BAG COUNT Key to select theappropriate coin (.25 Bag Count shown inUnit Mode). The Display can be shown inunits or dollar value. Refer to theProgramming section later in this Guide foradditional information.
6. Display Bag Stop
Cycle the BAG STOP Key to locate theappropriate coin (.05 Bag Count shown inValue Mode). The bagstop setting can bedisplayed in unit or dollar value. Refer to theProgramming section later in this Guide foradditional information.
.00
BATCH TOTAL
.00
SUB TOTAL
.00
GRAND TOTAL
BATCH 13.25
.25 TOTAL
UNITS 53
.25 BAG COUNT
VALUE 200.00
.05 BAG STOP

20
accepting quantities and / or totals
Operation
Note: Each time a Batch, Sub, or Grandtotal is accepted, an audit trail will print if theprinter option is utilized.
1. Batch ACCEPT
With the Display in the BATCH TOTALmode, press the ACCEPT Key once. TheBATCH TOTAL is cleared, and the Controlremains in the BATCH mode. The BATCHTOTAL is added to the SUB and GRANDTOTALS.
2. Sub ACCEPT
With the Display in the SUB TOTAL mode,press the ACCEPT Key once. The SUBTOTAL is cleared and the Control remains inthe SUB mode.
3. Grand ACCEPT (All Grand Totals remain)
With the Display in the GRAND TOTALmode, press the ACCEPT Key once. TheGRAND TOTAL remains on the Display. Toclear the Display, refer to �ClearingQuantities and / or Totals� on the followingpages. The GRAND TOTAL can beaccepted only if the BATCH TOTAL is zero.
Note: The Printer must be allowed to finishthe print cycle before attempting to accept acoin total or an operator message willappear. Refer to �Operator Messages� laterin this Guide for additional information.
Note: If a batch, sub, or grand total isaccepted and the Printer is off--line (sel light�off�), the tape will not advance far enoughfor proper tear--off. Turn the Printer PowerSwitch off, wait a few seconds, then onagain. Press the �sel� key and continueoperation.

21
clearing quantities and / or totals
Operation
The CLEAR function is used to removeinformation from memory.
1. Clear Batch Total
a. Press the BATCH Key (displays batchtotal).
b. Press the CLEAR Key once (the DisplayMUST be allowed to flash for twoseconds).
c. Press the CLEAR Key again (the Displayresets to zero, resets all batch totals).
Note: If a batch total is cleared rather thanaccepted, the dollar amounts are nottransferred to sub and grand totals.
2. Clear Sub Total
a. Press the SUB Key (displays sub total).
b. Press the CLEAR Key once (the DisplayMUST be allowed to flash for twoseconds).
c. Press the CLEAR Key again (the Displayresets to zero).
Note: The sub total cannot be cleared if anamount remains in the batch total. If a subtotal is cleared rather than accepted, thedollar amounts of the sub total are notremoved from the grand total.
3A. Clear Grand Total (without AuditTrail Printout)
a. Press the GRAND Key (displays grandtotal).
b. Press the CLEAR Key once (the DisplayMUST be allowed to flash for twoseconds).
c. Press the CLEAR Key again (the Displayresets to zero, resets all grand totals).
ALWAYS DOUBLE--CHECK YOUR NEEDTO CLEAR. QUANTITIES CANNOT BERECALLED!
22
clearing quantities and / or totals
Operation
3B. Clear Grand Total (with AuditTrail Printout)
a. Press the GRAND Key (displays grandtotal).
b. Press the CLEAR Key once (the DisplayMUST be allowed to flash for twoseconds). The Display must read�GRAND TOTAL�.
c. Press the ACCEPT Key (the Displayresets to zero, resets all grand totals andprinter prints an audit trail).
3C. Clear Individual Grand Total
a. Clear (or accept) the Batch Total (SubTotal does not need to be cleared).
b. Cycle the GRAND Key to the coindesired.
c. Press the CLEAR Key once (the DisplayMUST be allowed to flash for twoseconds).
d. Press the CLEAR Key again (theindividual Grand Total clears).
Note: Clearing a grand denomination totalalso clears the corresponding bag counttotal.
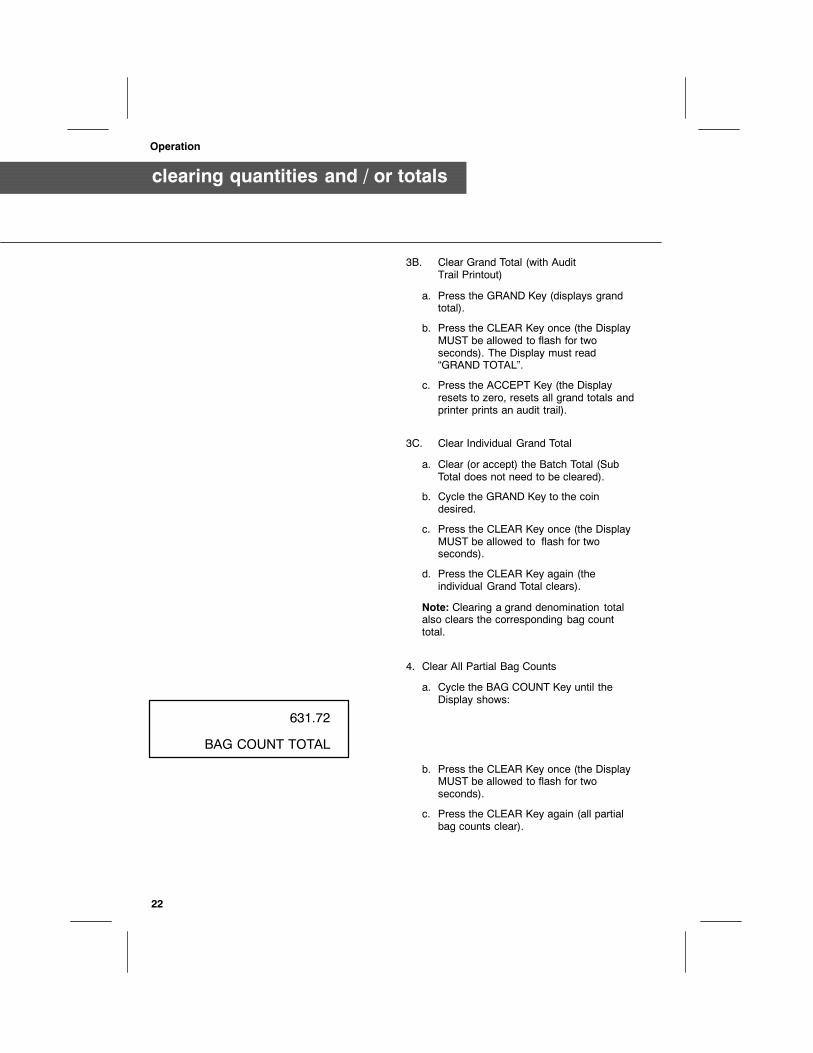
4. Clear All Partial Bag Counts
a. Cycle the BAG COUNT Key until theDisplay shows:
b. Press the CLEAR Key once (the DisplayMUST be allowed to flash for twoseconds).
c. Press the CLEAR Key again (all partialbag counts clear).
631.72
BAG COUNT TOTAL

23
clearing quantities and / or totals
Operation
5. Clear Individual Bag Counts
a. Cycle the BAG COUNT Key until theCursor shows the coin to be cleared.
b. Press the CLEAR Key once (the DisplayMUST be allowed to flash for twoseconds).
c. Press the CLEAR Key again (theindividual total clears).
6. Clear Media Totals
a. Press the BATCH Key (if not in theBATCH mode).
b. Press the MEDIA Key.
c. Enter amount to be cleared using theNumeric Keypad.
d. Press the �--� Key to subtract the amount.

24
processing coin
Operation
1. Place the coins for the first batch in theInspection Pan and remove any unwantedobjects.
2. Press the MOTOR ON / OFF Key on theControl to start the Sorting Motor.
3. Lift and tilt the Inspection Pan to transfer thecoins into the Sorting Area.
4. When the sorting is complete, press theMOTOR ON / OFF Key on the Control tostop the Sorting Motor. (The Sorting Motorstops automatically approximately seven (7)seconds after the last coin has beenprocessed if left unattended.)
Note: The Sorter can be programmed to runcontinuously if desired. Refer to theprogramming section later in this Guide toactivate this feature.
5. The total batch amount for the coins sortedwill appear on the Display. Press theACCEPT Key on the Control to transfer thebatch total to the Sub and Grand Total. Anaudit trail (printout) will print the Batchinformation if a Printer is properly connected.
Note: If the batch total does not printproperly, or does not space (advance) thetape properly after printing, the Printer maynot be properly initialized. Refer to theProgramming section later in this Guide toinitialize the Control.
6. Repeat Steps #1 through #5 for the secondand all subsequent batches.
7. When all Batch Totals have been processed,press the SUB--ACCEPT Keys to displaythe Sub Total of all coins processed.
8. When all Sub Totals have been processed,press the GRAND--ACCEPT Keys to displaythe Grand Total of all coins processed.
Note: If it is desired to print and clear thegrand total information, press GRAND, thenpress CLEAR, then press ACCEPT.
FIGURE #19INSPECTION PAN
LIFT
REMOVE ANY DAMAGED COIN ORFOREIGN OBJECTS. FAILURE TO DOSOMAY DAMAGE THE ELASTIC DRIVEDISC, WHICH MAY NOT BE COVEREDUNDER WARRANTY OR M/ACONTRACT.
THE (OPTIONAL) MAGNET WILLCATCH METAL ITEMS SUCH ASMETALLIC COIN SLUGS, WASHERS,PAPER CLIPS, ETC., THAT SHOULDNOT ENTER THE SORTER.
IF A MAGNET IS USED, MOVE THEINSPECTION PAN TO THE RIGHTBEFORE LIFTING SO THE MAGNETCLEARS THE REAR HOUSING /PRINTER.
25
bagstop
Operation
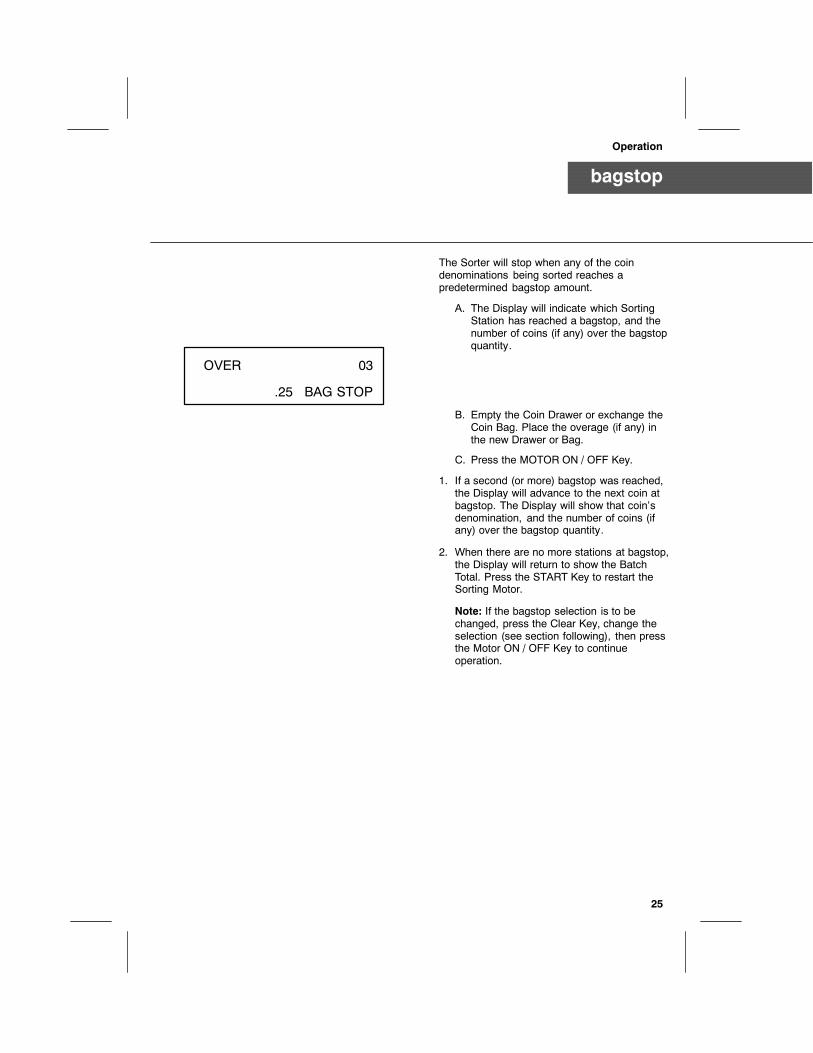
The Sorter will stop when any of the coindenominations being sorted reaches apredetermined bagstop amount.
A. The Display will indicate which SortingStation has reached a bagstop, and thenumber of coins (if any) over the bagstopquantity.
B. Empty the Coin Drawer or exchange theCoin Bag. Place the overage (if any) inthe new Drawer or Bag.
C. Press the MOTOR ON / OFF Key.
1. If a second (or more) bagstop was reached,the Display will advance to the next coin atbagstop. The Display will show that coin�sdenomination, and the number of coins (ifany) over the bagstop quantity.
2. When there are no more stations at bagstop,the Display will return to show the BatchTotal. Press the START Key to restart theSorting Motor.
Note: If the bagstop selection is to bechanged, press the Clear Key, change theselection (see section following), then pressthe Motor ON / OFF Key to continueoperation.
OVER 03
.25 BAG STOP

Operation
bagstop quantities
CHANGING THE BAGSTOPQUANTITY
Note: Bagstop quantities may be set (reset)at any time the Sorter is at rest (no counting/ sorting). If quantities are changed duringcoin processing, it is important that thenumber of coins currently in the Coin Bagmust be less than the new bagstop quantity.Check (and clear if necessary) the bagcount quantity of the selected coin beforeselecting the new bagstop setting, thenproceed as follows:
To change a bagstop quantity on the Control,press the �BAG STOP� Key until the desiredstation is displayed. Using the Numeric Keypad,enter the desired bagstop value. Press the�ENTER� Key to enter the new bagstop. Pressthe �BATCH� Key to exit the bagstop mode.
Note: To avoid miscounting and / or drawerspills, select a drawer stop quantity thatdoes not fill the Drawer above 3/4 full.
26
27
batch / sub / grand id
Operation
The Control allows entry of data pertaining tothe coins being processed. This may include IDnumbers, bagstop values, media, etc.
Note: The Sorter can be programmed torequire the operator to enter a batch idnumber (batch total cannot be accepted untilbatch id number is entered). Refer to theProgramming section later in this Guide foradditional information.
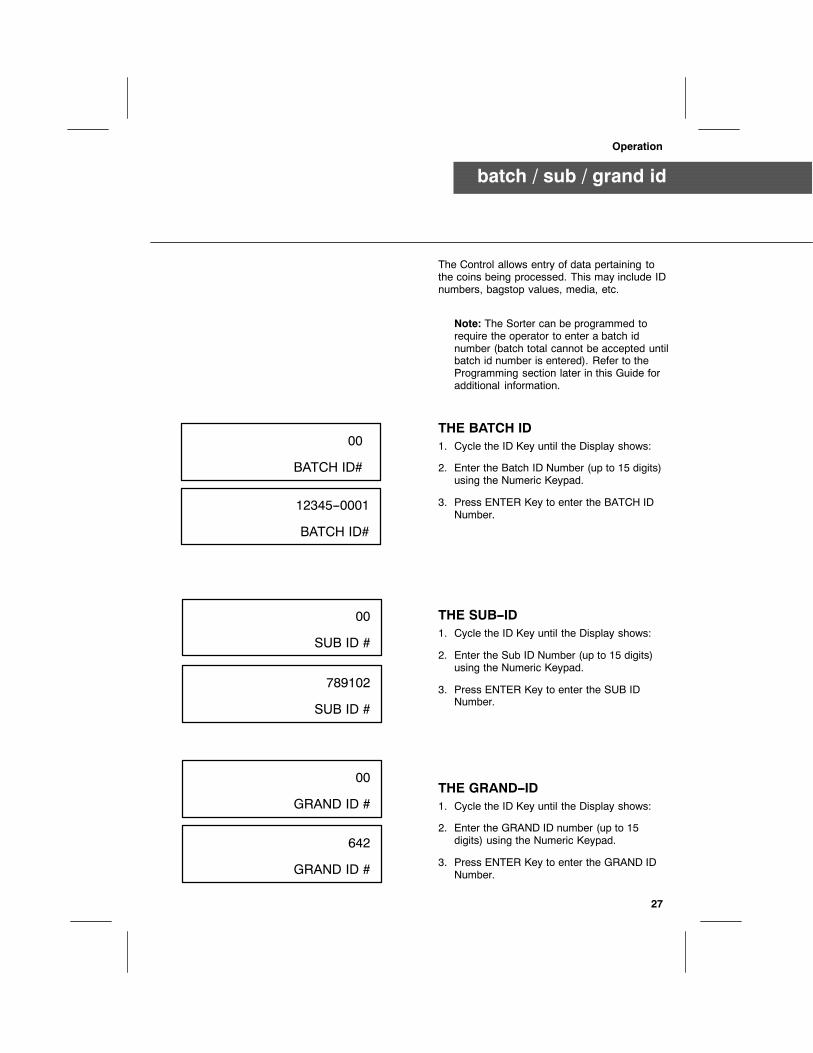
THE BATCH ID1. Cycle the ID Key until the Display shows:
2. Enter the Batch ID Number (up to 15 digits)using the Numeric Keypad.
3. Press ENTER Key to enter the BATCH IDNumber.
THE SUB--ID1. Cycle the ID Key until the Display shows:
2. Enter the Sub ID Number (up to 15 digits)using the Numeric Keypad.
3. Press ENTER Key to enter the SUB IDNumber.
THE GRAND--ID1. Cycle the ID Key until the Display shows:
2. Enter the GRAND ID number (up to 15digits) using the Numeric Keypad.
3. Press ENTER Key to enter the GRAND IDNumber.
00
SUB ID #
789102
SUB ID #
00
GRAND ID #
642
GRAND ID #
00
BATCH ID#
12345--0001
BATCH ID#

28
product id
Operation
PRODUCT (IDENTIFICATIONNUMBER) TOTALSThis feature allows the operator to �single out�and accumulate totals of individual items in theBatch mode. In addition, numbers may beentered as part of the Grand Total identifier.
An example of this function is the ability of avendor to keep track of how much of the totalamount came from a particular type of machine,such as coffee.
There are three rules that must be observed:
1. The ID (IDENTIFICATION) number must beno more than 15 digits long.
2. The last 2--4 digits are the control numberand must be preceded by a dash.
Note: ID #--0022 and #--22 will be treatedas the same id number.
3. The maximum number of ID�S available is200.
An example of an ID number might be12345--01. Since the Display has eight digits, allentries would be displayed in this example.However, if 123456789--01 were entered, alldigits would be printed but the first four digitentries (1, 2, 3 and 4) would be shifted off of theleft of the Display. As a result, the operatorwould see 56789--01 on the Display but actuallyhave 123456789--01 in memory with the 01 asthe controller.
In a banking application, these ID�s could beused to identify up to 100 tellers, or in thevending industry up to 100 different products.

29
product id
Operation
IDENTIFICATION NUMBEREXAMPLEAn example of how the ID feature could be usedis as follows:
It is assumed that:
a. Sorter is operational.
b. Bagstops have been selected/set.
1. A vending company has five routes, andeach route goes to a different city. Tominimize explanations, we will discuss onlythe first two routes.
2. Route #1 has five machines.
3. Route #2 has four machines.
4. The drivers have run their routes andreturned with several small bags of coin, onefor each machine.
Route Machine# # Product ID # $
111 1503 Coffee 01 $68.30111 1607 Soda 02 25.50111 1804 Candy 03 19.30111 1212 Cigarettes 04 66.50111 1745 Sandwich 05 47.85
Route Machine# # Product ID # $
222 2845 Soda 02 $42.75222 2934 Coffee 01 31.00222 2440 Soda 02 12.60222 2796 Cigarettes 04 96.60

30
product id
Operation
5. It is now the operator �s job to process thebags of money and retrieve a printed audittrail of all transactions.
6. One of two conditions may exist:
a. The operator may wish to start with aSorter that has been completely clearedof all information; or,
b. The operator may wish to resumeoperation from the previous day, with theSorter having partially filled coin bags.
Note: In this example, we will discusscondition �A�.
7. Enter GRAND ID #.
a. Cycle the ID Key until the Display showsGRAND ID.
b. Enter the ID Number using the NumericKeypad.
c. Press the ENTER Key.
8. Enter first route number.
a. Cycle the ID Key until the Display showsSUB ID #.
b. Enter the route number using theNumeric Keypad.
c. Press the ENTER Key.
Example: In this case, route #1 is #111.
9. Enter the first Machine # / Product I.D.
a. Cycle the ID Key until the Display showsBATCH ID #.
b. Enter the Machine # / Product ID usingthe Numeric Keypad.
c. Press the ENTER Key.
10.Press the MOTOR ON / OFF Key to begincoin processing.
EXAMPLE:
1503--01
31
product id
Operation
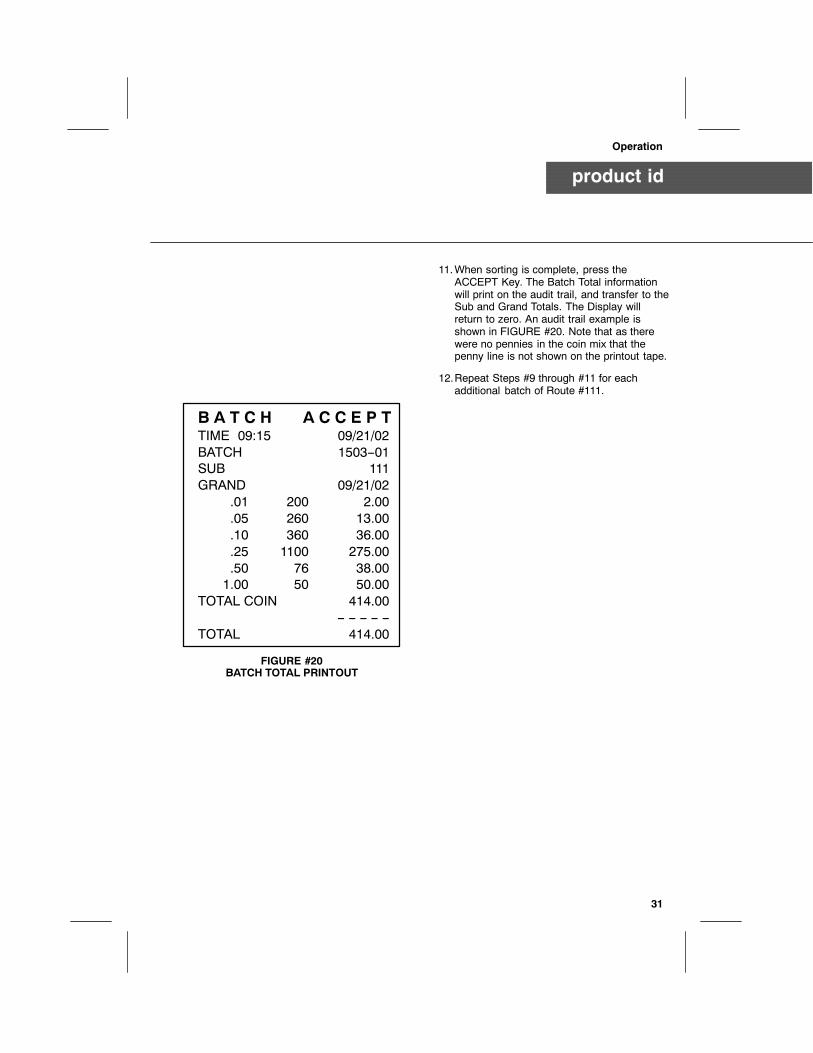
11.When sorting is complete, press theACCEPT Key. The Batch Total informationwill print on the audit trail, and transfer to theSub and Grand Totals. The Display willreturn to zero. An audit trail example isshown in FIGURE #20. Note that as therewere no pennies in the coin mix that thepenny line is not shown on the printout tape.
12.Repeat Steps #9 through #11 for eachadditional batch of Route #111.
FIGURE #20BATCH TOTAL PRINTOUT
B A T C H A C C E P TTIME 09:15 09/21/02BATCH 1503--01SUB 111GRAND 09/21/02
.01 200 2.00
.05 260 13.00
.10 360 36.00
.25 1100 275.00
.50 76 38.001.00 50 50.00
TOTAL COIN 414.00-- -- -- -- --
TOTAL 414.00
32
product id
Operation
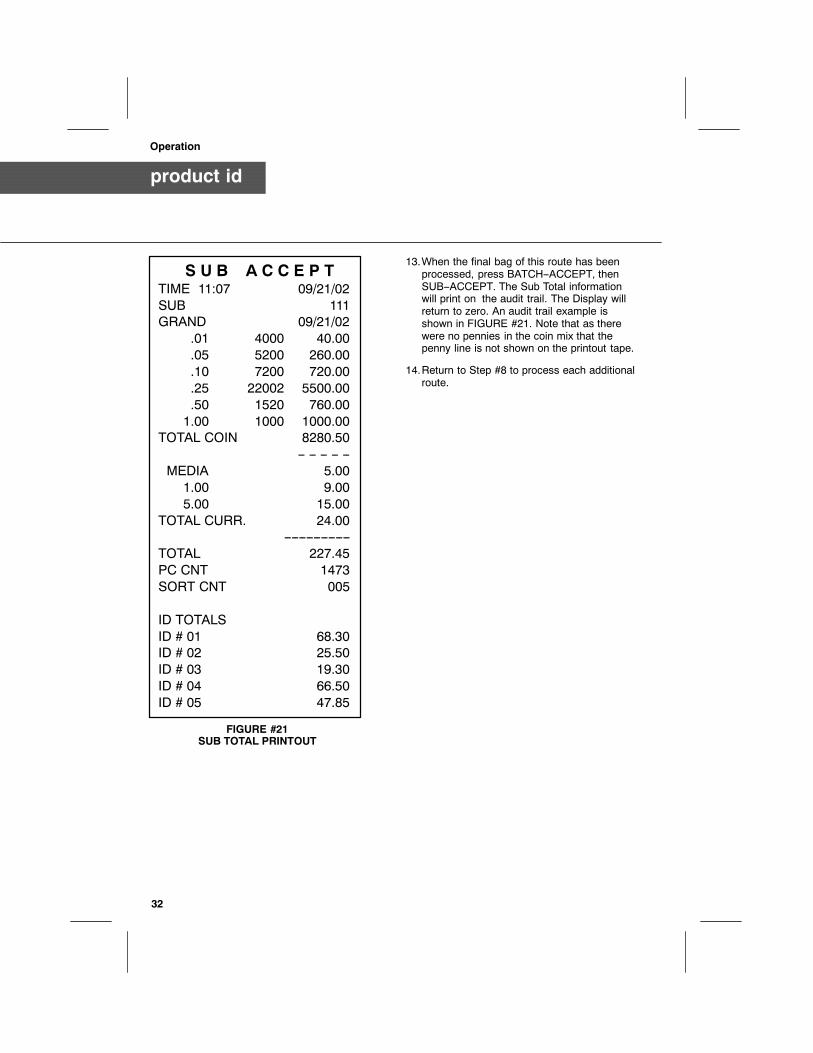
13.When the final bag of this route has beenprocessed, press BATCH--ACCEPT, thenSUB--ACCEPT. The Sub Total informationwill print on the audit trail. The Display willreturn to zero. An audit trail example isshown in FIGURE #21. Note that as therewere no pennies in the coin mix that thepenny line is not shown on the printout tape.
14.Return to Step #8 to process each additionalroute.
FIGURE #21SUB TOTAL PRINTOUT
S U B A C C E P TTIME 11:07 09/21/02SUB 111GRAND 09/21/02
.01 4000 40.00
.05 5200 260.00
.10 7200 720.00
.25 22002 5500.00
.50 1520 760.001.00 1000 1000.00
TOTAL COIN 8280.50-- -- -- -- --
MEDIA 5.001.00 9.005.00 15.00
TOTAL CURR. 24.00------------------
TOTAL 227.45PC CNT 1473SORT CNT 005
ID TOTALSID # 01 68.30ID # 02 25.50ID # 03 19.30ID # 04 66.50ID # 05 47.85
33
product id
Operation
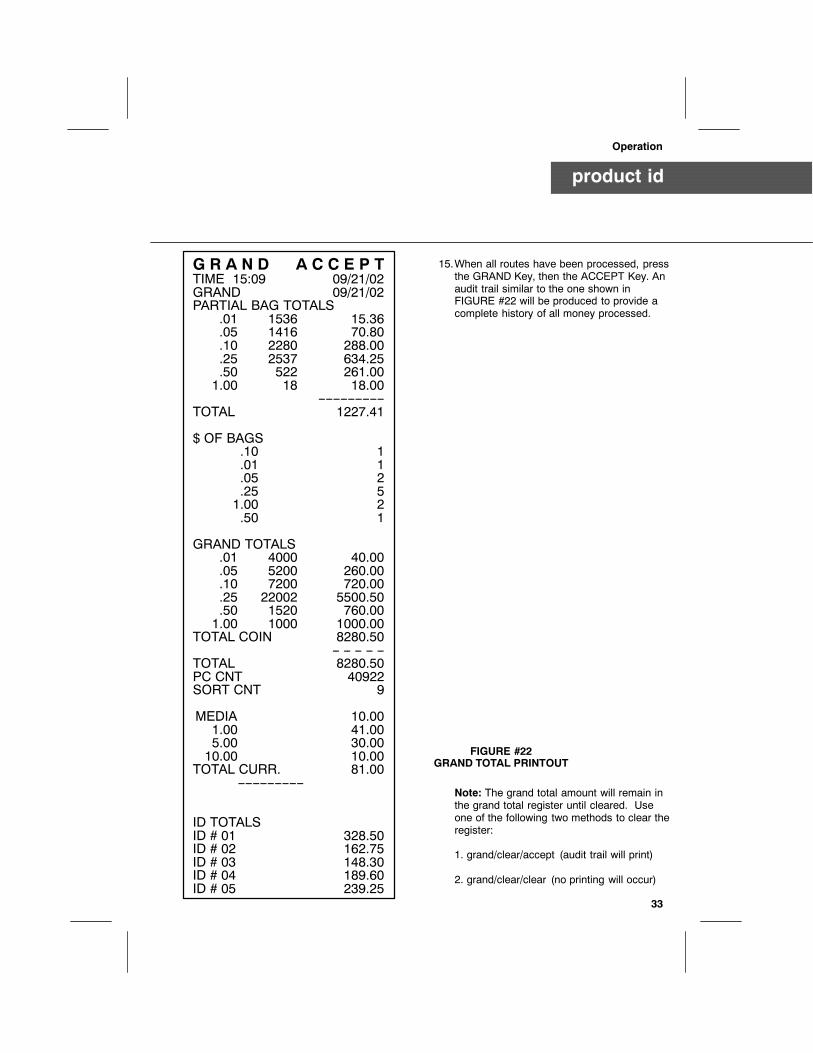
15.When all routes have been processed, pressthe GRAND Key, then the ACCEPT Key. Anaudit trail similar to the one shown inFIGURE #22 will be produced to provide acomplete history of all money processed.
Note: The grand total amount will remain inthe grand total register until cleared. Useone of the following two methods to clear theregister:
1. grand/clear/accept (audit trail will print)
2. grand/clear/clear (no printing will occur)
FIGURE #22GRAND TOTAL PRINTOUT
G R A N D A C C E P TTIME 15:09 09/21/02GRAND 09/21/02PARTIAL BAG TOTALS
.01 1536 15.36
.05 1416 70.80
.10 2280 288.00
.25 2537 634.25
.50 522 261.001.00 18 18.00
------------------TOTAL 1227.41
$ OF BAGS.10 1.01 1.05 2.25 51.00 2.50 1
GRAND TOTALS.01 4000 40.00.05 5200 260.00.10 7200 720.00.25 22002 5500.50.50 1520 760.001.00 1000 1000.00
TOTAL COIN 8280.50-- -- -- -- --
TOTAL 8280.50PC CNT 40922SORT CNT 9
MEDIA 10.001.00 41.005.00 30.0010.00 10.00
TOTAL CURR. 81.00------------------
ID TOTALSID # 01 328.50ID # 02 162.75ID # 03 148.30ID # 04 189.60ID # 05 239.25

34
partial bag counts
Operation
ENTERING PARTIAL BAGCOUNTS
Note: All programmed and counted valuesare retained if the Sorter remains underpower. The battery backup feature retainsthe Control memory in the event of a powerinterruption or loss.
This feature allows the operator to input partialbag counts into the Bag Count memory. Thenumber of coins, or the dollar value is enteredinto the Bag Count memory and the countingwill continue from that point to thepre--programmed bagstop quantity.
1. Cycle the Bag Count Key to the desireddenomination.
2. Using the Numeric Keypad, key--in the unit /dollar value of the coins.
3. Press the ENTER Key to add, or the �--� Keyto subtract the value from the Bag CountTotal.
4. Be sure the Bagstop Setting exceeds thenew Bag Count Total generated in Item #3.
Note: If the bag count quantity enteredexceeds the bagstop quantity, the Sorter willstop when the first coin is counted. Add thecurrent bagstop as a partial count entry andreset the bagstop to a higher value.

35
media entries
Operation
MEDIA (MANUAL) ENTRIESItems that cannot be processed through theSorter, such as rolled coin, checks, etc., mayhave their amounts entered into the Batch Totalusing the Media function. These entries may bemade before, during or after coin processing,but must be made BEFORE the ACCEPT Keyis pressed for that batch.
1. Press the BATCH Key (if not in Batchmode). The Display will show:
2. Press the MEDIA Key. The Display willshow:
3. Enter the value desired (up to seven digits)using the Numeric Keypad. (The maximumentry is $99999.99).
4. Press the ENTER Key.
Note: The total dollar value of all rolled coin,checks, etc., may be added together and thetotal amount keyed in as a single entry, oramounts may be entered individually and willadd automatically to the batch total as longas the accept key has not been pressed forthat batch.
00
BATCH TOTAL
BATCH .00
MEDIA TOTAL

36
media entries
Operation
MEDIA ENTRY ERRORIf an error is made during MEDIA entry, one ofthese conditions may exist:
Condition #1An incorrect amount is entered, but theENTER Key has not been pressed;
a. Press the CE Key to clear the Display.
b. Enter proper amount using the NumericKeypad.
c. Press ENTER to enter the properamount.
Condition #2An incorrect amount is entered, but theENTER Key has been pressed;
a. Select the same amount and press the�--� Key.
b. Select the correct amount and press theENTER Key.
Condition #3All the checks have been entered usingthe proper procedure. Later (in the samebatch) an additional check is found.Enter the additional check in the normalmanner. The quantity will automaticallyenter into the batch total as long as theACCEPT Key has not been pressed forthat batch.
37
currency input
Operation
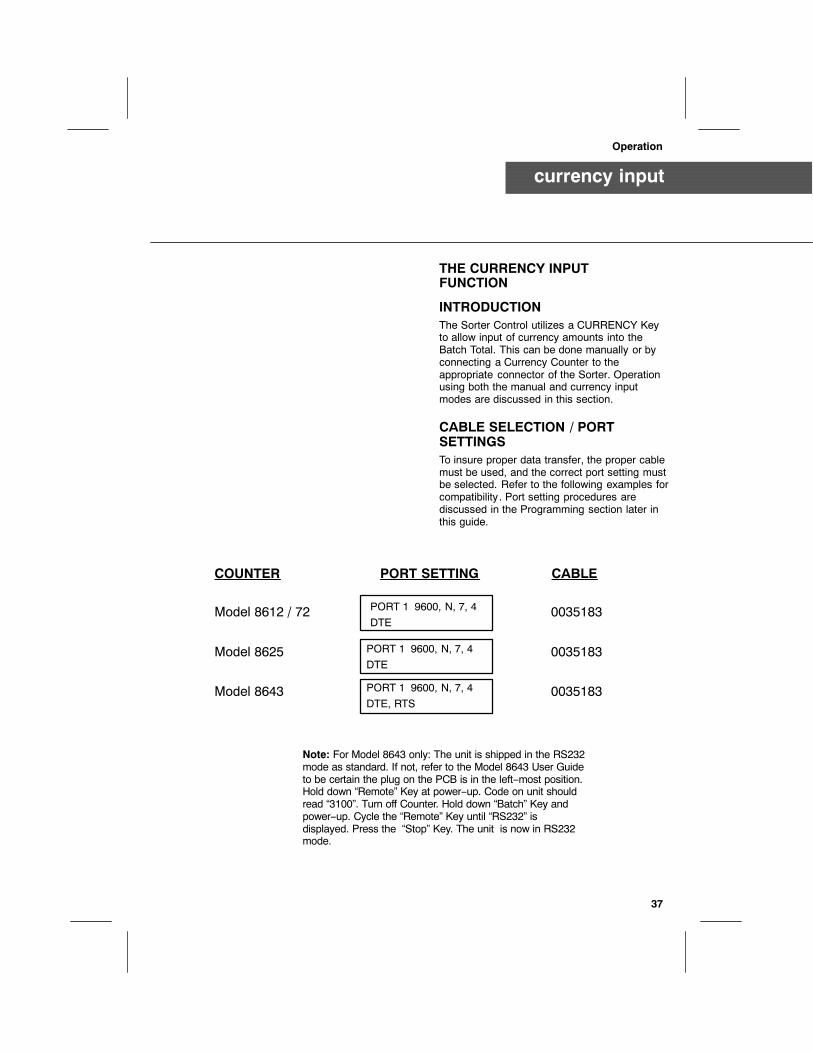
THE CURRENCY INPUTFUNCTION
INTRODUCTIONThe Sorter Control utilizes a CURRENCY Keyto allow input of currency amounts into theBatch Total. This can be done manually or byconnecting a Currency Counter to theappropriate connector of the Sorter. Operationusing both the manual and currency inputmodes are discussed in this section.
CABLE SELECTION / PORTSETTINGSTo insure proper data transfer, the proper cablemust be used, and the correct port setting mustbe selected. Refer to the following examples forcompatibility. Port setting procedures arediscussed in the Programming section later inthis guide.
COUNTER PORT SETTING CABLE
Model 8612 / 72 0035183
Model 8625 0035183
Model 8643 0035183
PORT 1 9600, N, 7, 4DTE
PORT 1 9600, N, 7, 4DTE
PORT 1 9600, N, 7, 4DTE, RTS
Note: For Model 8643 only: The unit is shipped in the RS232mode as standard. If not, refer to the Model 8643 User Guideto be certain the plug on the PCB is in the left--most position.Hold down �Remote� Key at power--up. Code on unit shouldread �3100�. Turn off Counter. Hold down �Batch� Key andpower--up. Cycle the �Remote� Key until �RS232� isdisplayed. Press the �Stop� Key. The unit is now in RS232mode.

38
currency input
Operation
OPERATION(W / CURRENCY COUNTER INPUT)The Sorter has four (4) RS232 �ports�(connectors) to access signals from acompatibly interfaced Currency Counter (i.e.,Model #8643). Contact your Authorized SalesRepresentative for product options.
1. Press the BATCH Key (if not in the BATCHmode).
2. Cycle the CURRENCY Key until the Displayshows the following:
3. The coins to be sorted may now be placed inHopper and the Sorter Motor started. (Coinsmay also be counted separately, eitherbefore or after the currency, if desired.)
4. While the coins are being sorted/counted,the currency may be processed. Place thedocuments in the Currency Counter andstart the Counting Motor.
5. When the Currency Counter stops, pressthe ENTER Key on the Sorter Control.
The number of documents processed will bemultiplied by the denomination selected and theamount placed in the Batch Total. The SorterControl Display will remain in the currencymode and show the dollar total for the numberof documents counted. If more documents areto be processed, return to step #4. Change thedenomination if necessary.
6. When the counting is complete, press theBATCH Key to exit the currency mode.
FIGURE #23CURRENCY INPUT
BATCH .00
5.00 CURRENCY
Note: Do not press the Enter Keyon the Sorter until the CurrencyCounter Motor has stopped and thecount shown on the Sorter Displaymatches the count shown on theCurrency Counter Display.
BATCH KEYCURRENCY KEY

39
currency input
Operation
OPERATING THE CURRENCYCOUNTER IN THE BATCH MODE1. Press the BATCH Key (if not in BATCH
mode).
2. Press the CURRENCY Key to selectdenomination.
3. Process documents. The Counter will stopwhen it reaches the batch amount that hasbeen programmed into the CurrencyCounter. The Counter will run until a batchhas occurred.
4. Press the ENTER Key on the SorterBEFORE you remove the currency from theCounter.
5. Remove the currency. The Counter willautomatically start to process the next batch.The documents from the preceding batchmay be wrapped with a bill strap.
6. Repeat steps #3 through #5 until alldocuments have been processed.
7. Select another denomination or press theBATCH Key to exit the currency mode.
ERRORS / BAGSTOPSIf an error or bagstop occurs in the Sorter whileprocessing currency, the Sorter Control will exitthe currency mode and display that error orbagstop. When this happens, manually clear theerror or exchange the Coin Bag at the stationthat has reached its bagstop. When it is cleared,the Control will return to the currency mode andthe correct currency count will be shown on theDisplay. Continue operation.

40
currency input
Operation
OPERATION (MANUAL INPUT)If the Currency Counter does not have provisionto connect to the Sorter, the process may bedone manually while coins are sorting if desired.
1. Press the BATCH Key (if not in the BATCHmode).
2. Cycle the CURRENCY Key until the Displayshows the currency denomination you wishto process.
3. Enter the number of documents countedusing the Numeric Keypad.
4. Press the ENTER Key. The number ofdocuments will be multiplied by thedenomination selected and the amountplaced in the Batch Total.
5. Press the BATCH Key to exit the currencymode.
6. Process the coins in the normal manner.
7. When the counting is complete, press theACCEPT Key to transfer the batch quantityto the SUB Total or GRAND Total register.The Display will return to .00 and the nextbatch may be processed.
41
display messages
Operation
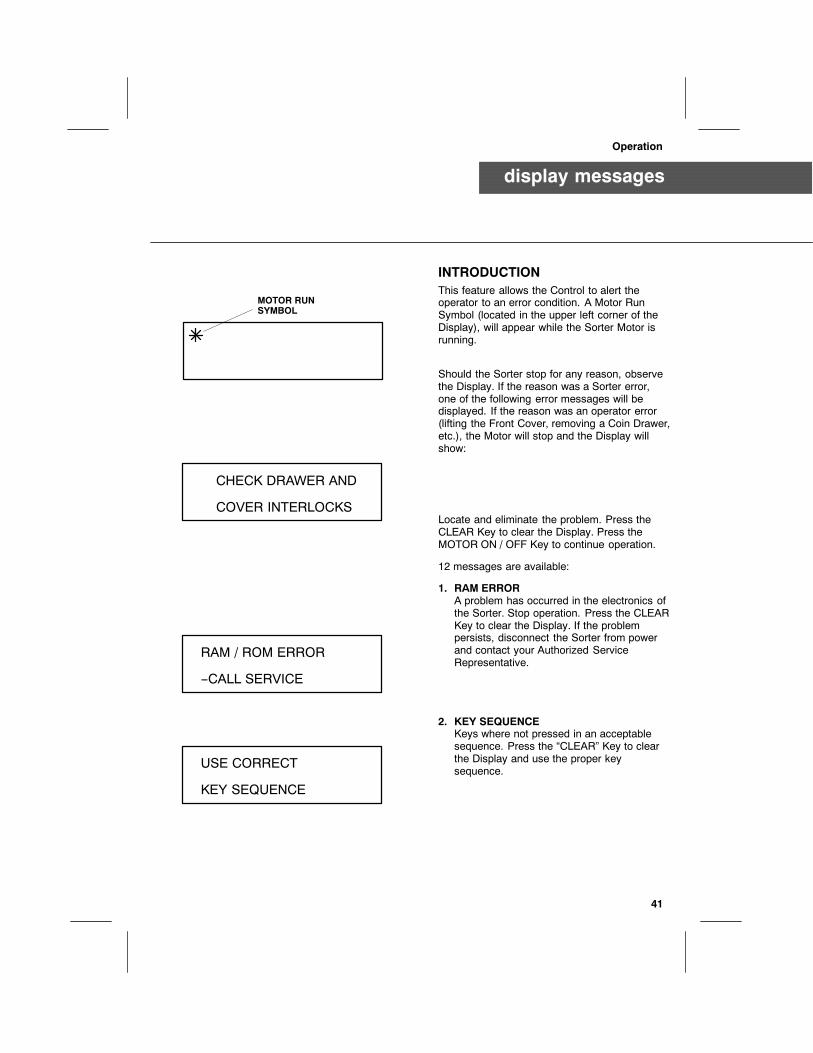
INTRODUCTIONThis feature allows the Control to alert theoperator to an error condition. A Motor RunSymbol (located in the upper left corner of theDisplay), will appear while the Sorter Motor isrunning.
Should the Sorter stop for any reason, observethe Display. If the reason was a Sorter error,one of the following error messages will bedisplayed. If the reason was an operator error(lifting the Front Cover, removing a Coin Drawer,etc.), the Motor will stop and the Display willshow:
Locate and eliminate the problem. Press theCLEAR Key to clear the Display. Press theMOTOR ON / OFF Key to continue operation.
12 messages are available:
1. RAM ERRORA problem has occurred in the electronics ofthe Sorter. Stop operation. Press the CLEARKey to clear the Display. If the problempersists, disconnect the Sorter from powerand contact your Authorized ServiceRepresentative.
2. KEY SEQUENCEKeys where not pressed in an acceptablesequence. Press the �CLEAR� Key to clearthe Display and use the proper keysequence.
MOTOR RUNSYMBOL
CHECK DRAWER AND
COVER INTERLOCKS
RAM / ROM ERROR
--CALL SERVICE
USE CORRECT
KEY SEQUENCE

42
display messages
Operation
3. CLEAN SENSORAn object has blocked a Coin Sensor.Disconnect the Sorter from power, locateand clean the dirty Sensor, reconnect theSorter to power, then press the MOTOR ON/ OFF Key to resume operation.
Note: When the Clean Sensor Error hasbeen corrected, the coin quantity for thatstation should be re--run to verify itsaccuracy.
Note: Proper cleaning procedures arediscussed later in this Guide.
4. LOW BATTERYThe Battery in the Control has become toolow to sustain totals in the event of a powerloss. Contact your Authorized ServiceRepresentative for replacement.
5. COIN BACK--UPCoins have backed up in a Coin Drawer orBag. Straighten the Coin Bag and / or shakethe Coin Chute slightly to eliminate the coinjam. Change the Bag or empty the Drawerthen press the MOTOR ON / OFF Key toresume operation.
6. TOTAL NOT ZEROThis message will be displayed if the totalsare not accepted in order. Clear the BATCHtotal before clearing a SUB or GRAND total.
7. SUB NOT ZEROThe SUB total must be cleared before theGRAND total can be cleared.
CLEAN
.25 SENSOR
LOW BATTERY
--CALL SERVICE
CLEAR
COIN--BACKUP
CLEAR
BATCH TOTAL
CLEAR
SUB TOTAL
43
display messages
Operation
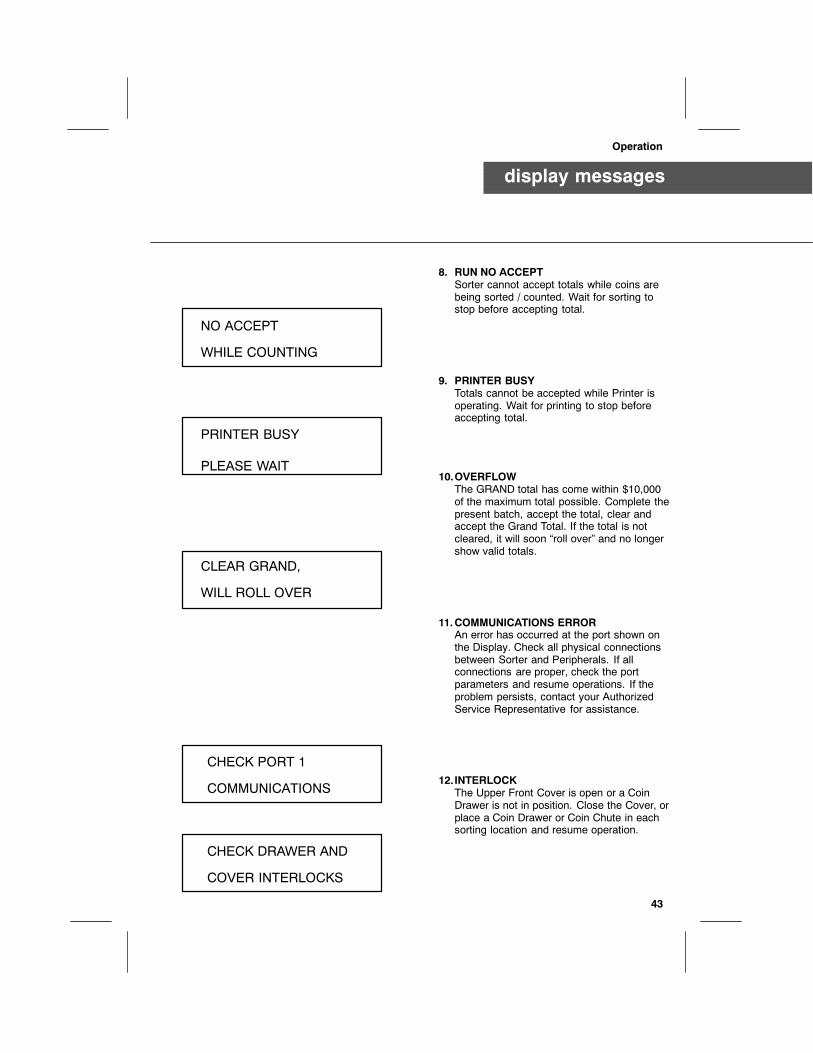
8. RUN NO ACCEPTSorter cannot accept totals while coins arebeing sorted / counted. Wait for sorting tostop before accepting total.
9. PRINTER BUSYTotals cannot be accepted while Printer isoperating. Wait for printing to stop beforeaccepting total.
10.OVERFLOWThe GRAND total has come within $10,000of the maximum total possible. Complete thepresent batch, accept the total, clear andaccept the Grand Total. If the total is notcleared, it will soon �roll over� and no longershow valid totals.
11.COMMUNICATIONS ERRORAn error has occurred at the port shown onthe Display. Check all physical connectionsbetween Sorter and Peripherals. If allconnections are proper, check the portparameters and resume operations. If theproblem persists, contact your AuthorizedService Representative for assistance.
12. INTERLOCKThe Upper Front Cover is open or a CoinDrawer is not in position. Close the Cover, orplace a Coin Drawer or Coin Chute in eachsorting location and resume operation.
NO ACCEPT
WHILE COUNTING
PRINTER BUSY
PLEASE WAIT
CLEAR GRAND,
WILL ROLL OVER
CHECK PORT 1
COMMUNICATIONS
CHECK DRAWER AND
COVER INTERLOCKS
44
default settings
Programming
The Sorter is set when manufactured to thefollowing default parameters. Each of theparameters may be changed to fit your specificapplication. Refer to the following section for theseinstructions. To enter the Programming Mode: 1)turn Keyswitch to vertical, 2) hold Batch Key downat power--up.
Press the �MOTOR ON / OFF � Key to cyclethrough the programming mode, following theinstructions to change the default settings. Oncecompleted, press �BATCH� Key and then turn theKeyswitch to horizontal.
DEFAULT SETTINGSNote: The settings described here arestandard defaults. Settings for specificcountries or applications may be diifferent, andare selectable by the operator.If the display shows a RAM--ROM condition,the Sorter will revert to these standard values.
1. SUPERVISOR CONTROL KEYSDefault = All keys are active.
2. SET TIME AND DATEDefault = Day / Month / Year
3. DISPLAY DECIMAL POINT / COMMA(CHOICE AND LOCATION)Default = Decimal point in position .00
4. BATCH PRINT LENGTH / NUMBER OFCOPIESDefault = Long printout with 1 copy
5. SUB PRINT LENGTH / NUMBER OF COPIESDefault = Long printout with 1 copy
6. GRAND PRINT LENGTH / NUMBER OFCOPIESDefault = Long printout with 1 copy
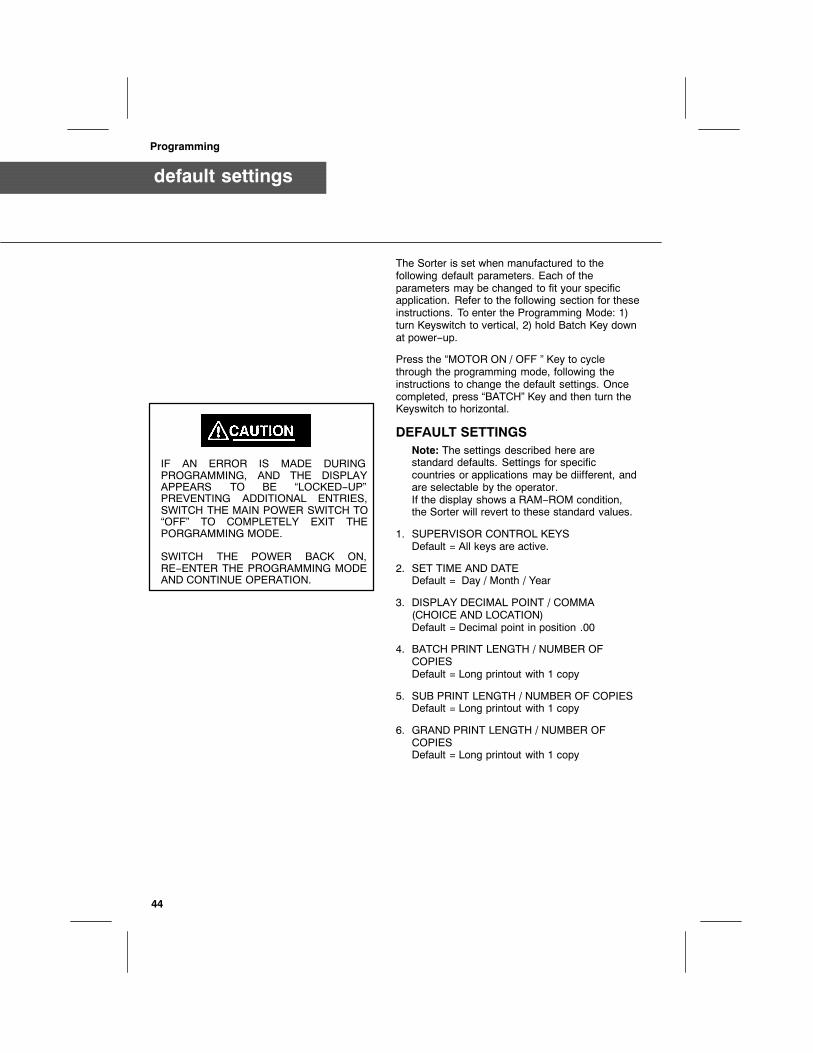
IF AN ERROR IS MADE DURINGPROGRAMMING, AND THE DISPLAYAPPEARS TO BE �LOCKED--UP�PREVENTING ADDITIONAL ENTRIES,SWITCH THE MAIN POWER SWITCH TO�OFF� TO COMPLETELY EXIT THEPORGRAMMING MODE.
SWITCH THE POWER BACK ON,RE--ENTER THE PROGRAMMING MODEAND CONTINUE OPERATION.

45
default settings
Programming
7. RS232 COMMUNICATION PORTPARAMETERS
Port #1 Default =9600 Baud / No Parity / 7 Data Bits / 1/ DTE / No Handshaking / No ACK NAK
Port #2 Default =Same as Port #1
Port #3 Default =Same as Port #1
Note: If display = yes is initialized, theinformation will be sent to Port #4. Connectthe Remote Batch Display to this port.
Port #4 Default =Same as Port #1
Note: If print = yes is initialized, theinformation will be sent to Port #3. Connectthe Remote Printer to this port.
8. PRINT ORDER (VALUE / SIZE)Default = Value
9. BAGSTOPS (Enable / Disabled)Default = Enable
10.RUN / AUTO--STOPDefault = Stop after 7 seconds
11.BAGSTOP DISPLAY (units or dollars)Default = Dollars
12.COIN VALUESas shown in FIGURE #24
13.CURRENCY VALUESas shown in FIGURE #25
14.FORCED IDDefault = Disabled

46
default settings
Programming
COIN DOLLARVALUE UNITS VALUE
$.10 10000 1000.00
$.01 5000 50.00
$.05 4000 200.00
$.25 4000 1000.00
$1 2000 2000.00
$.50 2000 1000.00
DISABLED ------ ------
DISABLED ------ ------
Programmed to specific values / quantities ifspecified. If none are specified the values /quantities will be as shown in the followingchart:
FIGURE #24COIN VALUE / BAGSTOP DEFAULT SETTINGS
CURRENCY VALUE
1 $1.002 $2.003 $5.004 $10.005 $20.006 $50.007 $100.00
FIGURE #25CURRENCY DEFAULT SETTINGS
47
printer initialization
Programming
INITIALIZING THE CONTROL FORPRINTER OPERATIONThe Sorter must be �told� that a Printer isconnected, so that the proper communicationlink can be established.
A. Connect Printer to port #4 at the rear ofthe Sorter.
B. Turn Keyswitch to vertical position, holdBatch Key on Control down, and switchthe Sorter Power Switch (seeFIGURE #7) to ON.
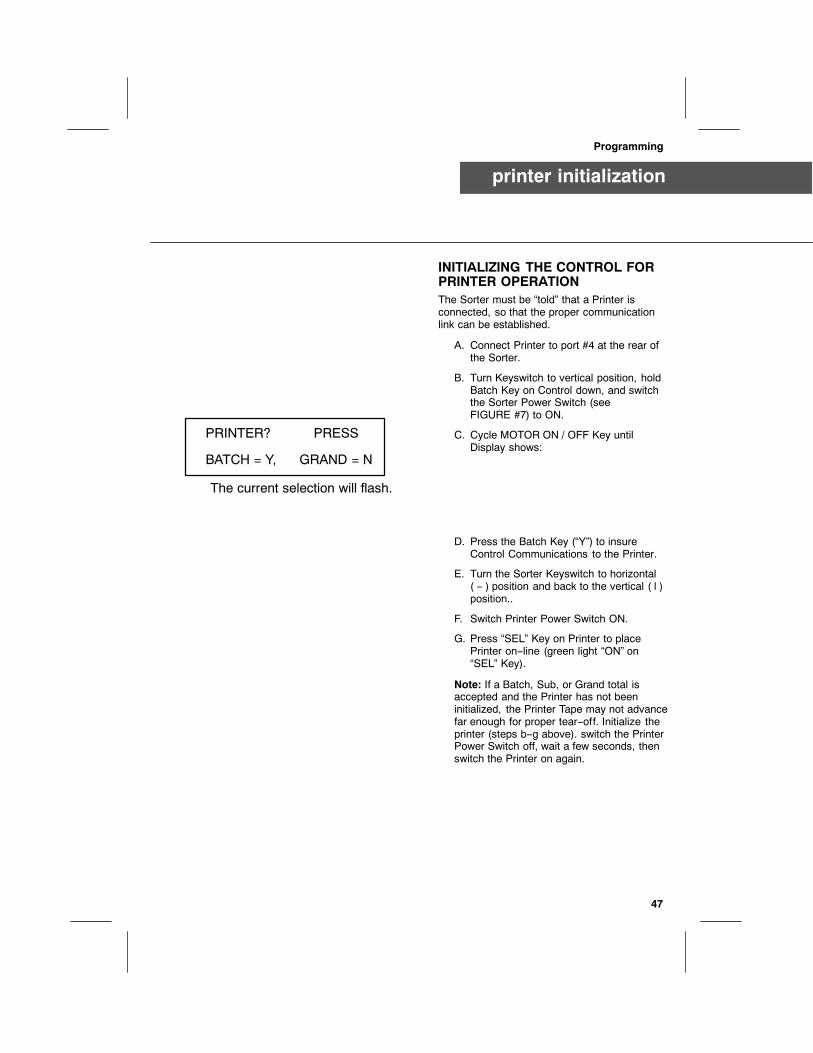
C. Cycle MOTOR ON / OFF Key untilDisplay shows:
D. Press the Batch Key (�Y�) to insureControl Communications to the Printer.
E. Turn the Sorter Keyswitch to horizontal( -- ) position and back to the vertical ( l )position..
F. Switch Printer Power Switch ON.
G. Press �SEL� Key on Printer to placePrinter on--line (green light �ON� on�SEL� Key).
Note: If a Batch, Sub, or Grand total isaccepted and the Printer has not beeninitialized, the Printer Tape may not advancefar enough for proper tear--off. Initialize theprinter (steps b--g above). switch the PrinterPower Switch off, wait a few seconds, thenswitch the Printer on again.
PRINTER? PRESS
BATCH = Y, GRAND = N
The current selection will flash.
48
remote display initialization
Programming
INITIALIZING THE CONTROL FORREMOTE DISPLAY OPERATIONThe Sorter must be �told� that a Remote Displayis connected, so that the proper communicationlink can be established.
A. Connect Remote Display to port #3 atthe rear of the Sorter.
B. Turn Keyswitch to vertical position, holdBatch Key on Control down, and switchthe Sorter Power Switch (seeFIGURE #7) to ON.
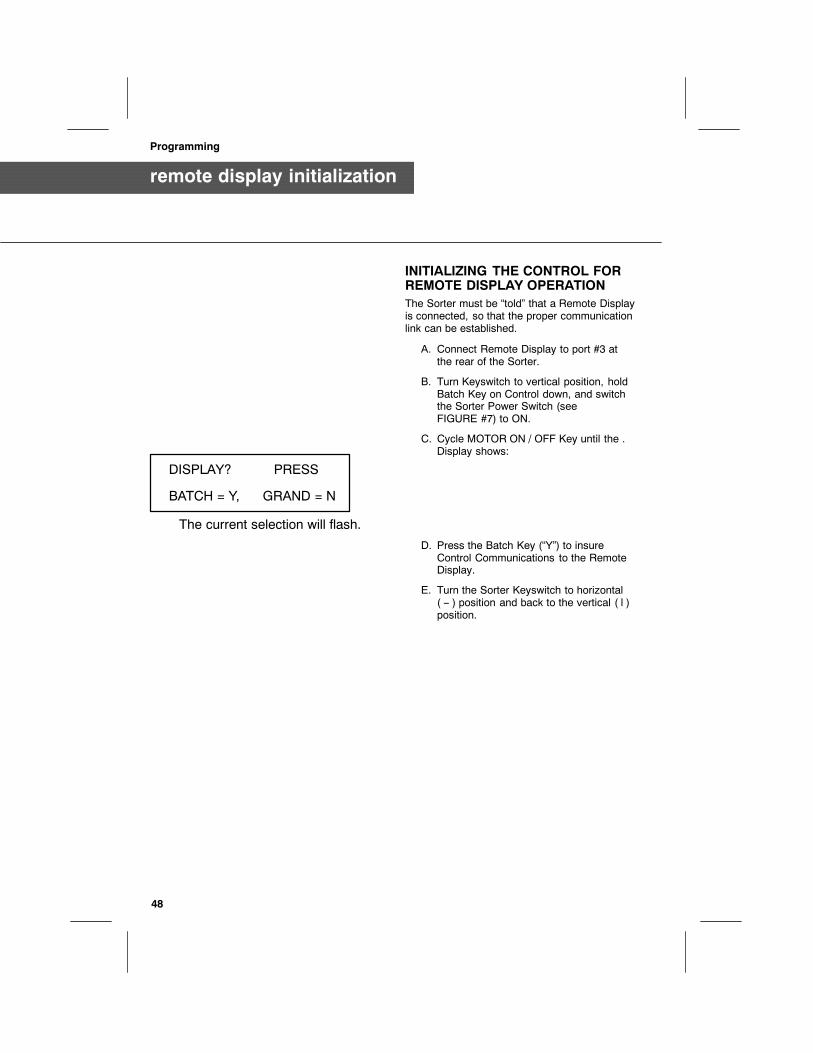
C. Cycle MOTOR ON / OFF Key until the .Display shows:
D. Press the Batch Key (�Y�) to insureControl Communications to the RemoteDisplay.
E. Turn the Sorter Keyswitch to horizontal( -- ) position and back to the vertical ( l )position.
DISPLAY? PRESS
BATCH = Y, GRAND = N
The current selection will flash.

49
remote display initialization
Programming
PROGRAMMING KEYSEQUENCESThe following pages explain in detail all thesteps necessary to properly program thefeatures of the Sorter.
1. SUPERVISOR CONTROL KEYS
A. Turn Keyswitch to vertical position, holdBatch Key on Control down, and switchthe Sorter Power Switch (seeFIGURE #7) to ON.
B. Cycle MOTOR ON / OFF Key untilDisplay shows:
C. Any / all keys that are presentlylocked--out (inactive) will be shown.Repeatedly pressing each key willactivate / deactivate that function.
Control Keys (Selectable)Sub (S)Currency (CNCY)Grand (G)Bag Stop (BS)IDBag Count (BC)Media (M)
D. When the Display shows the location yourequire, exit using one of the following:
Press the MOTOR ON / OFF Key toselect the next parameter.
OR
Turn the Keyswitch to horizontal, thenback to vertical to exit the programmingmode.
PRESS KEY CHOICE
TO LOCK / UNLOCK
KEYS LOCKED: S G
ID M CNCY BS BC
50
time / date
Programming
2. SET TIME / DATE
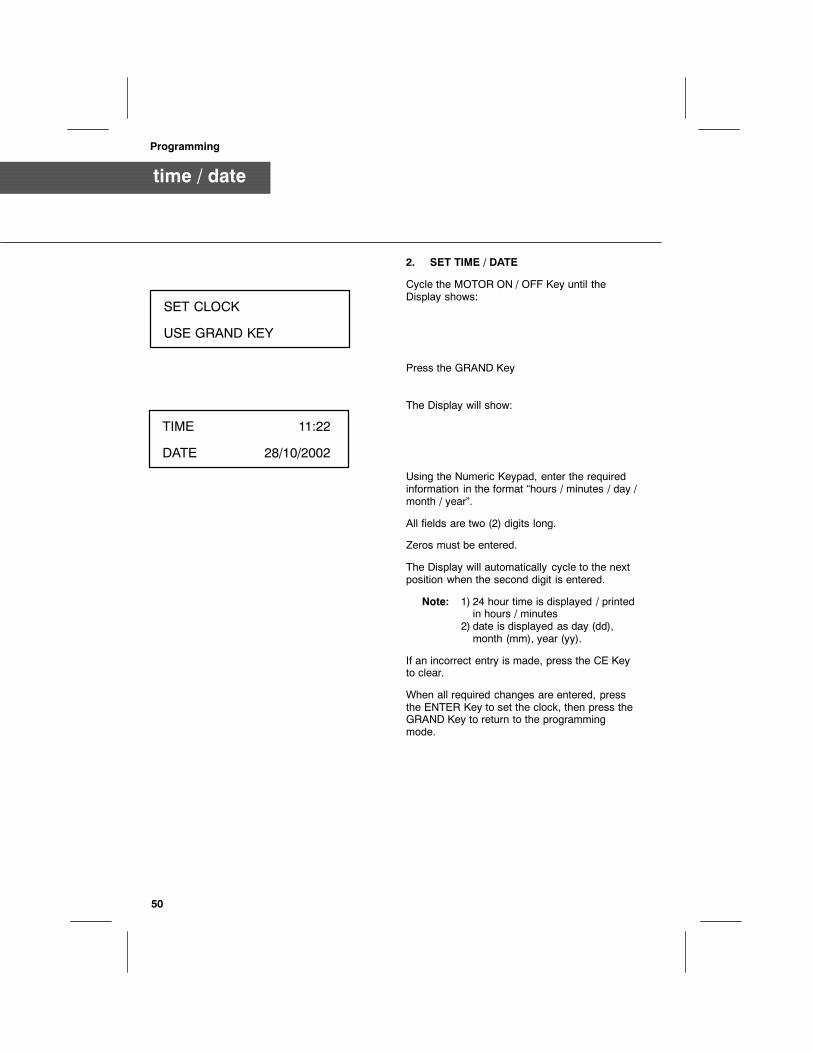
Cycle the MOTOR ON / OFF Key until theDisplay shows:
Press the GRAND Key
The Display will show:
Using the Numeric Keypad, enter the requiredinformation in the format �hours / minutes / day /month / year�.
All fields are two (2) digits long.
Zeros must be entered.
The Display will automatically cycle to the nextposition when the second digit is entered.
Note: 1) 24 hour time is displayed / printedin hours / minutes
2) date is displayed as day (dd),month (mm), year (yy).
If an incorrect entry is made, press the CE Keyto clear.
When all required changes are entered, pressthe ENTER Key to set the clock, then press theGRAND Key to return to the programmingmode.
SET CLOCK
USE GRAND KEY
TIME 11:22
DATE 28/10/2002
51
decimal point / comma
Programming
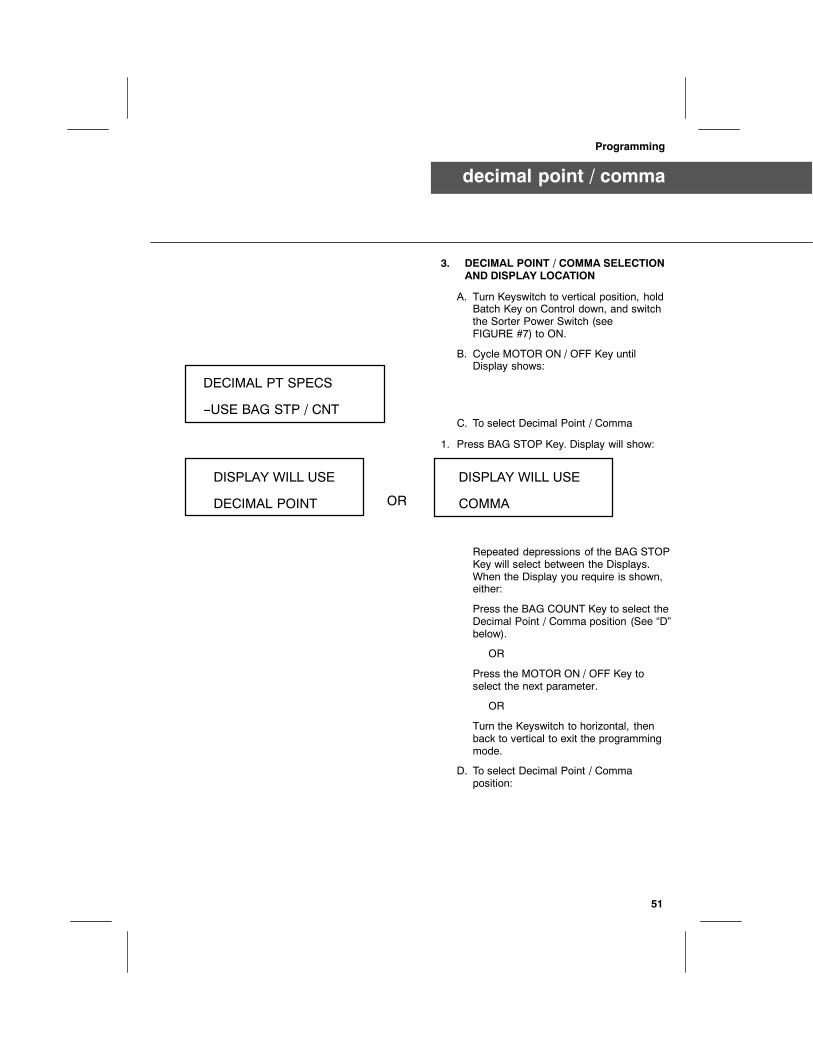
3. DECIMAL POINT / COMMA SELECTIONAND DISPLAY LOCATION
A. Turn Keyswitch to vertical position, holdBatch Key on Control down, and switchthe Sorter Power Switch (seeFIGURE #7) to ON.
B. Cycle MOTOR ON / OFF Key untilDisplay shows:
C. To select Decimal Point / Comma
1. Press BAG STOP Key. Display will show:
Repeated depressions of the BAG STOPKey will select between the Displays.When the Display you require is shown,either:
Press the BAG COUNT Key to select theDecimal Point / Comma position (See �D�below).
OR
Press the MOTOR ON / OFF Key toselect the next parameter.
OR
Turn the Keyswitch to horizontal, thenback to vertical to exit the programmingmode.
D. To select Decimal Point / Commaposition:
DECIMAL PT SPECS
--USE BAG STP / CNT
DISPLAY WILL USE
DECIMAL POINT
DISPLAY WILL USE
COMMAOR

52
decimal point / comma
Programming
1. Press BAG COUNT Key. Display will showone of the following:
E. When the Display shows the location yourequire, exit using one of the following:
Press the MOTOR ON / OFF Key toselect the next parameter.
OR
Turn the Keyswitch to horizontal, thenback to vertical to exit the programmingmode.
.00
POINT LOCATION
0
NO DECIMAL POINTOR
0.
POINT LOCATION
.0
POINT LOCATIONOR
.000
POINT LOCATIONOR
53
batch print length / # copies
Programming
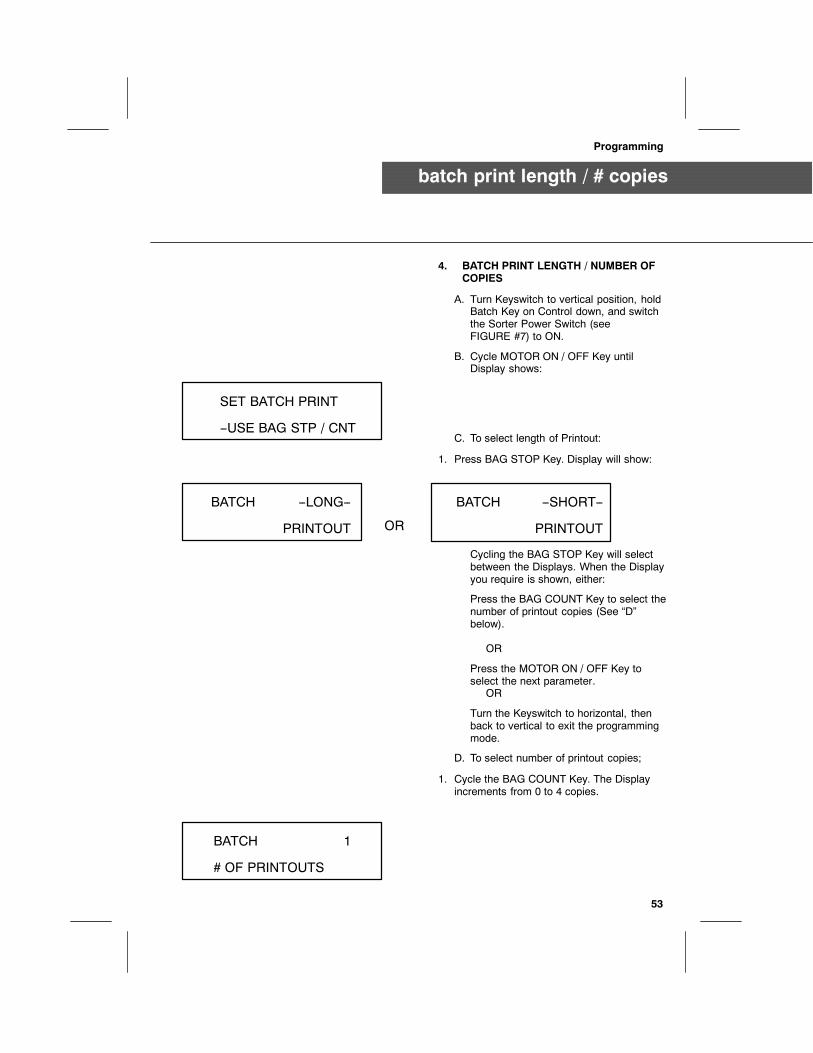
4. BATCH PRINT LENGTH / NUMBER OFCOPIES
A. Turn Keyswitch to vertical position, holdBatch Key on Control down, and switchthe Sorter Power Switch (seeFIGURE #7) to ON.
B. Cycle MOTOR ON / OFF Key untilDisplay shows:
C. To select length of Printout:
1. Press BAG STOP Key. Display will show:
Cycling the BAG STOP Key will selectbetween the Displays. When the Displayyou require is shown, either:
Press the BAG COUNT Key to select thenumber of printout copies (See �D�below).
OR
Press the MOTOR ON / OFF Key toselect the next parameter.
OR
Turn the Keyswitch to horizontal, thenback to vertical to exit the programmingmode.
D. To select number of printout copies;
1. Cycle the BAG COUNT Key. The Displayincrements from 0 to 4 copies.
SET BATCH PRINT
--USE BAG STP / CNT
BATCH --LONG--
PRINTOUT
BATCH --SHORT--
PRINTOUTOR
BATCH 1
# OF PRINTOUTS
54
batch print length / # copies
Programming
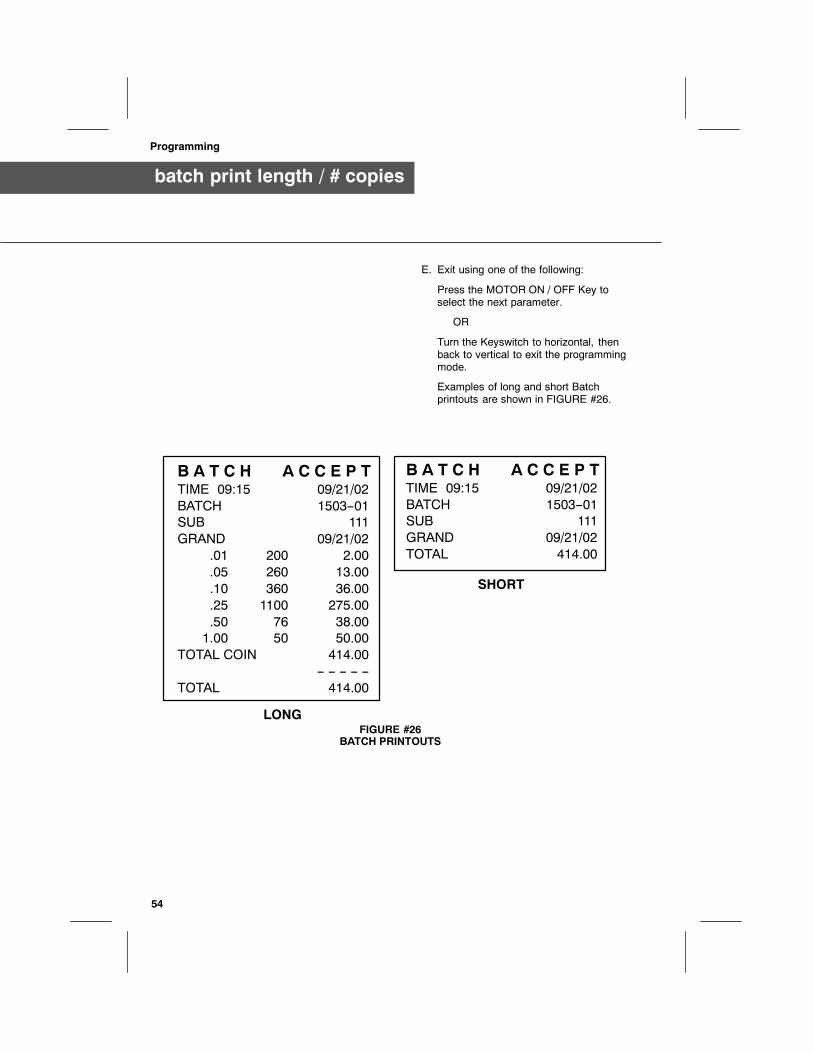
E. Exit using one of the following:
Press the MOTOR ON / OFF Key toselect the next parameter.
OR
Turn the Keyswitch to horizontal, thenback to vertical to exit the programmingmode.
Examples of long and short Batchprintouts are shown in FIGURE #26.
FIGURE #26BATCH PRINTOUTS
LONG
SHORT
B A T C H A C C E P TTIME 09:15 09/21/02BATCH 1503--01SUB 111GRAND 09/21/02
.01 200 2.00
.05 260 13.00
.10 360 36.00
.25 1100 275.00
.50 76 38.001.00 50 50.00
TOTAL COIN 414.00-- -- -- -- --
TOTAL 414.00
B A T C H A C C E P TTIME 09:15 09/21/02BATCH 1503--01SUB 111GRAND 09/21/02TOTAL 414.00

55
sub print length / # copies
Programming
5. SUB PRINT LENGTH / NUMBER OFCOPIES
A. Turn Keyswitch to vertical position, holdBatch Key on Control down, and switchthe Sorter Power Switch (seeFIGURE #7) to ON.
B. Cycle MOTOR ON / OFF Key untilDisplay shows:
C. To select length of Printout:
1. Press BAG STOP Key. Display will show:
Cycling the BAG STOP Key will selectbetween the Displays. When the Displayyou require is shown, either:
Press the BAG COUNT Key to select thenumber of printout copies (See �D�below).
OR
Press MOTOR ON / OFF Key to selectnext parameter.
OR
Turn the Keyswitch to horizontal, thenback to vertical to exit the programmingmode.
D. To select number of printout copies;
1. Cycle the BAG COUNT Key. The Displayincrements from 0 to 4 copies.
SET SUB PRINT
--USE BAG STP / CNT
SUB --LONG--
PRINTOUT
SUB --SHORT--
PRINTOUTOR
SUB 1
# OF PRINTOUTS

56
sub print length / # copies
Programming
E. Exit using one of the following:
Press MOTOR ON / OFF Key to selectnext parameter.
OR
Turn the Keyswitch to horizontal, thenback to vertical to exit the programmingmode.
Examples of long and short Sub printoutsare shown in FIGURE #27.
FIGURE #27SUB PRINTOUTS
LONG
SHORT
S U B A C C E P TTIME 11:07 09/21/02SUB 111GRAND 09/21/02
.01 4000 40.00
.05 5200 260.00
.10 7200 720.00
.25 22002 5500.00
.50 1520 760.001.00 1000 1000.00
TOTAL COIN 8280.50-- -- -- -- --
MEDIA 5.001.00 9.005.00 15.00
TOTAL CURR. 24.00------------------
TOTAL 227.45PC CNT 1473SORT CNT 005
ID TOTALSID # 01 68.30ID # 02 25.50ID # 03 19.30ID # 04 66.50ID # 05 47.85
S U B A C C E P TTIME 11:07 09/21/02SUB 111GRAND 09/21/02TOTAL 8280.50
57
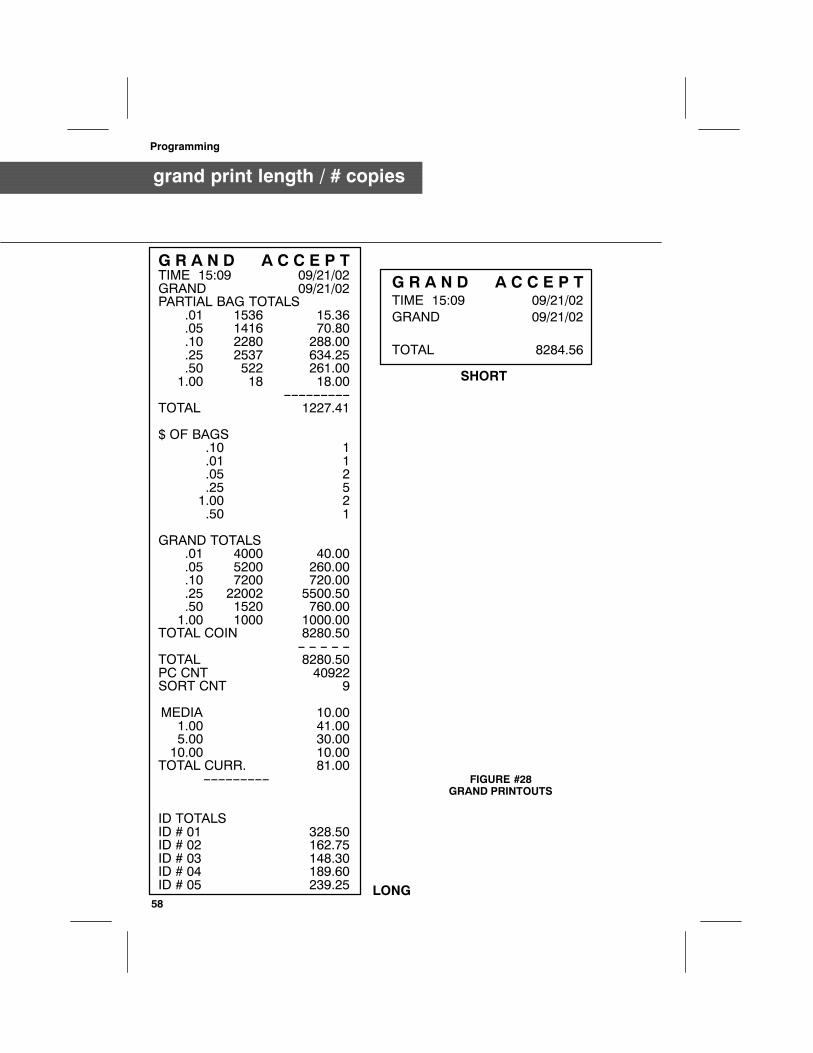
grand print length / # copies
Programming
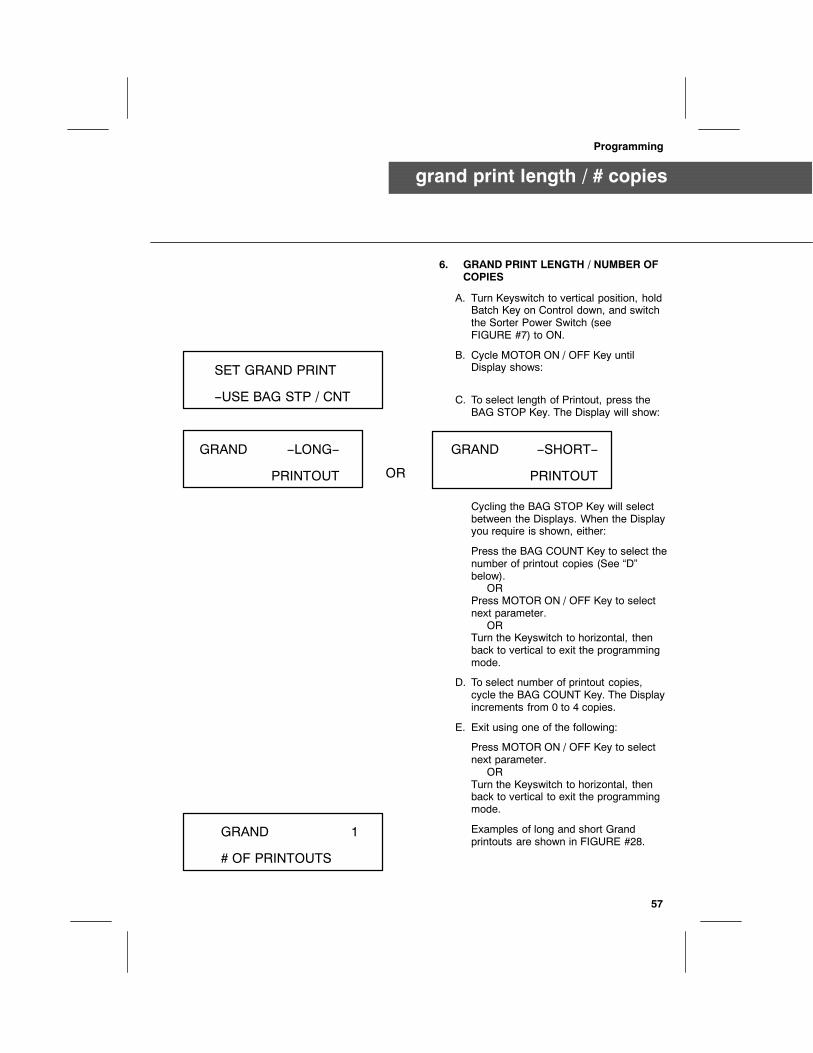
6. GRAND PRINT LENGTH / NUMBER OFCOPIES
A. Turn Keyswitch to vertical position, holdBatch Key on Control down, and switchthe Sorter Power Switch (seeFIGURE #7) to ON.
B. Cycle MOTOR ON / OFF Key untilDisplay shows:
C. To select length of Printout, press theBAG STOP Key. The Display will show:
Cycling the BAG STOP Key will selectbetween the Displays. When the Displayyou require is shown, either:
Press the BAG COUNT Key to select thenumber of printout copies (See �D�below).
ORPress MOTOR ON / OFF Key to selectnext parameter.
ORTurn the Keyswitch to horizontal, thenback to vertical to exit the programmingmode.
D. To select number of printout copies,cycle the BAG COUNT Key. The Displayincrements from 0 to 4 copies.
E. Exit using one of the following:
Press MOTOR ON / OFF Key to selectnext parameter.
ORTurn the Keyswitch to horizontal, thenback to vertical to exit the programmingmode.
Examples of long and short Grandprintouts are shown in FIGURE #28.
SET GRAND PRINT
--USE BAG STP / CNT
GRAND --LONG--
PRINTOUT
GRAND --SHORT--
PRINTOUTOR
GRAND 1
# OF PRINTOUTS
58
grand print length / # copies
Programming
FIGURE #28GRAND PRINTOUTS
LONG
SHORT
G R A N D A C C E P TTIME 15:09 09/21/02GRAND 09/21/02PARTIAL BAG TOTALS
.01 1536 15.36
.05 1416 70.80
.10 2280 288.00
.25 2537 634.25
.50 522 261.001.00 18 18.00
------------------TOTAL 1227.41
$ OF BAGS.10 1.01 1.05 2.25 51.00 2.50 1
GRAND TOTALS.01 4000 40.00.05 5200 260.00.10 7200 720.00.25 22002 5500.50.50 1520 760.001.00 1000 1000.00
TOTAL COIN 8280.50-- -- -- -- --
TOTAL 8280.50PC CNT 40922SORT CNT 9
MEDIA 10.001.00 41.005.00 30.0010.00 10.00
TOTAL CURR. 81.00------------------
ID TOTALSID # 01 328.50ID # 02 162.75ID # 03 148.30ID # 04 189.60ID # 05 239.25
G R A N D A C C E P TTIME 15:09 09/21/02GRAND 09/21/02
TOTAL 8284.56

59
Model Display InterfaceCable
BaudRate
DataBits Parity DTR
/ DSRRTS/ CTS Port(s) Format
Selection Comments
8643 4 0035183 9600 8 NONE -- -- -- RTS 1--2--3--4 CURR 3 8643 SETUP CODE = 3100
8625100/101 4 0035183 9600 7 NONE -- -- -- -- -- -- 1--2--3--4 CURR 3 -- -- --
8625150 4 0035183 9600 7 NONE -- -- -- -- -- -- 1--2--3--4 CURR 3 -- -- --
8672 4 0035183 9600 8 NONE -- -- -- -- -- -- 1--2--3--4 CURR 3 CURRENCY MODEON CONTROL
2620 2 0035244 9600 8 NONE -- -- -- -- -- -- 1--2--3--4 CURR 1 CURRENCY MODEON CONTROL
2620 ‘3D’ 9 0035244 1200 8 NONE -- -- -- RTS 1--2--3--4 OPTION 2 CURRENCY MODEON CONTROL
JETSCAN 4060 C 0022188 9600 8 NONE -- -- -- -- -- -- 1--2--3--4 OPTION 6 USE CISS + ST ON JETSCAN
2800 3 0035183 1200 8 NONE -- -- -- RTS 1--2--3--4 CURR 2 2600 SETUP CODE = 0100
BAR CD RDR 5 -- -- -- ANY ANY NONE DTR RTS 1--2--3--4 ENHANCED MUST SEND STX AND ETX
4810 7 D300847 1200 7 NONE -- -- -- -- -- -- 1--2--3--4 -- -- -- COIN = COMM PORT 6
M5 / M7 OUTPUTFORMAT 7 -- -- -- -- -- -- -- -- -- -- -- -- -- -- -- -- -- -- 1--2--3--4 OPTION 4 OLD PRINTER
OUTPUT FORMAT
0036886 6 -- -- -- 19.2K 8 NONE -- -- -- -- -- -- 3 -- -- -- -- -- --
0036888 1 0033131 9600 8 NONE -- -- -- RTS 1--2--3--4 -- -- -- PORT 4
M3540 / 3550CTZN PNTR A 0035561 9600 8 NONE -- -- -- RTS 1--2--3--4 OPTION 3 PORT 4
2650 ( EII--EIII ) 3 0035244 9600 7 EVEN -- -- -- -- -- -- 1--2--3--4 CURR 2 -- -- --
HONEYFRAME E -- -- -- -- -- -- -- -- -- -- -- -- -- -- -- -- -- -- 1--2--3 OPTION 8 HONEYFRAMESOFTWARE ( UK )
2650 (CDCMS) 8 0035244 9600 8 NONE -- -- -- -- -- -- 1 OPTION 1 UK ONLY
baud rate
Programming
7.0 SELECT BAUD RATE
A. Turn Keyswitch to vertical position, holdBatch Key on Control down, and switchthe Sorter Power Switch (seeFIGURE #7) to ON.
B. Cycle MOTOR ON / OFF Key untilDisplay shows:
C. Press BAG STOP Key. The Display willshow:
D. Cycle the BAG COUNT Key until theDisplay shows the port you wish tochange.
PROGRAM PORTS
USE BAG STOP KEY
SELECT PORT NO.,
USE BG COUNT KEY
7. RS232 COMMUNICATION PORTPARAMETERS
INTERFACE CHART

60
parity
Programming
E. Cycle the BAG STOP Key until theDisplay shows:
F. Cycle the BAG COUNT Key until theDisplay shows the desired baud rate.
Note: BAUD RATES AVAILABLE:
300 / 1200 / 2400 / 9600 / 19,200
G. Cycle the Bag Count Key to display theBaud Rate you require.
H. Exit using one of the following:
Press BAG STOP Key to select the nextcommunications parameter
OR
Press MOTOR ON / OFF Key to selectthe next programming parameter
OR
Turn the Keyswitch to horizontal, thenback to vertical to exit the programmingmode.
9600
PORT 1 BAUD RATE
BE SURE DISPLAY SHOWS CORRECTPORT NUMBER
(TO CHANGE, SEE ITEM �D�)
EXAMPLE:
SELECT BAUD RATE
USE BG COUNT KEY
THE BAUD RATE THAT YOU SELECTWILL APPLY ONLY TO THE PORT YOUHAVE SELECTED IN ITEM �D� ABOVE.
PORT 1; 9600, N, 7, 1
DTE
EXAMPLE: PORT #1

61
parity
Programming
7.1 SELECT PARITY
A. Turn Keyswitch to vertical position, holdBatch Key on Control down, and switchthe Sorter Power Switch (seeFIGURE #7) to ON.
B. Cycle MOTOR ON / OFF Key untilDisplay shows:
C. Press BAG STOP Key. The Display willshow:
D. Cycle the BAG COUNT Key until theDisplay shows the port you wish tochange.
E. Cycle the BAG STOP Key until theDisplay shows:
F. Cycle the BAG COUNT Key to displaythe parity you require (none, even, orodd).
G. Exit using one of the following:
Press BAG STOP Key to select the nextcommunications parameter
OR
Press MOTOR ON / OFF Key to selectthe next programming parameter
OR
Turn the Keyswitch to horizontal, thenback to vertical to exit the programmingmode.
SELECT PORT NO.,
USE BG COUNT KEY
PORT 1; 9600, N, 7, 1
DTE
THE BAUD RATE THAT YOU SELECTWILL APPLY ONLY TO THE PORT YOUHAVE SELECTED IN ITEM �D� ABOVE.
SELECT PARITY
USE BG COUNT KEY
NONE
PORT 1 PARITY
BE SURE DISPLAY SHOWSCORRECT PORT NUMBER(TO CHANGE, SEE ITEM �D�)
EXAMPLE: PORT #1
EXAMPLE:
PROGRAM PORTS
USE BAG STOP KEY

62
data bits
Programming
7.2 SELECT DATA BITS
A. Turn Keyswitch to vertical position, holdBatch Key on Control down, and switchthe Sorter Power Switch (seeFIGURE #7) to ON.
B. Cycle MOTOR ON / OFF Key untilDisplay shows:
C. Press BAG STOP Key. The Display willshow:
D. Cycle the BAG COUNT Key until theDisplay shows the port you wish tochange.
E. Cycle the BAG STOP Key until theDisplay shows:
F. Cycle the BAG COUNT Key to displaythe data bits you require (7 or 8).
G. Exit using one of the following:
Press BAG STOP Key to select the nextcommunications parameter
OR
Press MOTOR ON / OFF Key to selectthe next programming parameter
OR
Turn the Keyswitch to horizontal, thenback to vertical to exit the programmingmode.
PROGRAM PORTS
USE BAG STOP KEY
SELECT PORT NO.,
USE BG COUNT KEY
PORT 1; 9600, N, 7, 1
DTE
THE DATA BITS THAT YOU SELECT WILLAPPLY ONLY TO THE PORT YOU HAVESELECTED IN ITEM �D�.
EXAMPLE: PORT #1
SELECT DATA BITS
USE BG COUNT KEY
7
PORT 1 DATA BITS
BE SURE DISPLAY SHOWS CORRECTPORT NUMBER
(TO CHANGE, SEE ITEM �D�)
EXAMPLE:

63
formats
Programming
7.3 SELECT FORMATS
A. Turn Keyswitch to vertical position, holdBatch Key on Control down, and switchthe Sorter Power Switch (seeFIGURE #7) to ON.
B. Cycle MOTOR ON / OFF Key untilDisplay shows:
C. Press BAG STOP Key. The Display willshow:
D. Cycle the BAG COUNT Key until theDisplay shows the port you wish tochange.
E. Cycle the BAG STOP Key until theDisplay shows:
PROGRAM PORTS
USE BAG STOP KEY
SELECT PORT NO.,
USE BG COUNT KEY
PORT 1; 9600, N, 7, 1
DTE
THE FORMAT THAT YOU SELECT WILLAPPLY ONLY TO THE PORT YOU HAVESELECTED IN ITEM �D�.
SELECT FORMAT,
USE BG COUNT KEY
EXAMPLE: PORT #1

64
formats
Programming
F. Cycle the BAG COUNT Key to selectone of the following five formats:
Note: Be sure that Display shows correctport #
DISPLAY FORMAT WHERE USED
1 Prn Sends Printer Format
2 Cur 1 2620
3 Cur 2 2650, 2800
4 Cur 3 8643, 8625, 8672
5 Enhanced Bar Code Reader/Computer Control
6 Display Remote Display
7 Opt 4 Mach 5/7 Printer Format
8 Opt 1 Not Used
9 Opt 2 2620 3D
A Opt 3 Printer Citizen HD
B Opt 5 Not Used
C Opt 6 Jet Scan
EXAMPLES
PORT 1; 9600, N, 8, 2
DTE
PORT 4; 9600, N, 8, 1
DTE
PORT 3; 9600, N, 8, 6
DTE
PORT 2; 9600, N, 8, 3
DTE
SENDS PRINTER FORMAT TO PORT #4
SENDS REMOTE DISPLAY FORMAT TO PORT #3
SENDS CURRENCY 2 FORMAT TO PORT #2
SENDS CURRENCY 1 FORMAT TO PORT #1

65
formats
Programming
1. Printer Format
A typical print format is shown inFIGURE #29. It contains a header, fixed andvariable fields.
FIGURE #29PRINT FORMAT
FORMAT PRN
PORT 3 FORMAT
FIXEDFIELDS
VARIABLEFIELDS
2. Currency Counter Format
Sets the Port output format for compatibilitywith Currency Counters.
3. Enhanced Mode Format
Allows external (remote) commands tocontrol all Sorter functions.
CURRENCY COUNTER
PORT 1 FORMAT
ENHANCED MODE
PORT 1 FORMAT
B A T C H A C C E P TTIME 09:15 09/21/02BATCH 1503--01SUB 111GRAND 09/21/02
.01 200 2.00
.05 260 13.00
.10 360 36.00
.25 1100 275.00
.50 76 38.001.00 50 50.00
TOTAL COIN 414.00-- -- -- -- --
TOTAL 414.00

66
ack / nak
Programming
7.4 SELECT ACK / NAK ENABLE
A. Turn Keyswitch to vertical position, holdBatch Key on Control down, and switchthe Sorter Power Switch (seeFIGURE #7) to ON.
B. Cycle MOTOR ON / OFF Key untilDisplay shows:
C. Press BAG STOP Key. The Display willshow:
D. Cycle the BAG COUNT Key until theDisplay shows the port you wish tochange.
E. Cycle the BAG STOP Key until theDisplay shows:
F. Cycle the BAG COUNT Key to enable ordisable ACK / NAK.
G. Exit using one of the following:
Press BAG STOP Key to select the nextcommunications parameter
OR
Press MOTOR ON / OFF Key to selectthe next programming parameter
OR
Turn the Keyswitch to horizontal, thenback to vertical to exit the programmingmode.
PROGRAM PORTS
USE BAG STOP KEY
SELECT PORT NO.,
USE BG COUNT KEY
PORT 1; 9600, N, 7, 1
DTE
THE ACK / NAK THAT YOU SELECT WILLAPPLY ONLY TO THE PORT YOU HAVESELECTED IN ITEM �D�.
ENABLE ACK / NAK ?
USE BG COUNT KEY
DISABLED
PORT 1 ACK / NAK
BE SURE DISPLAY SHOWSCORRECT PORT NUMBER(TO CHANGE, SEE ITEM �D�)
EXAMPLE: PORT #1
EXAMPLE:

67
dtr / dsr
Programming
7.5 SELECT DTR / DSR ENABLE(NOT AVAILABLE ON PORT #3 or #4)
A. Turn Keyswitch to vertical position, holdBatch Key on Control down, and switchthe Sorter Power Switch (seeFIGURE #7) to ON.
B. Cycle MOTOR ON / OFF Key untilDisplay shows:
C. Press BAG STOP Key. The Display willshow:
D. Cycle the BAG COUNT Key until theDisplay shows the port you wish tochange.
E. Cycle the BAG STOP Key until theDisplay shows:
F. Cycle the BAG COUNT Key to enable ordisable DTR / DSR.
G. Exit using one of the following:
Press BAG STOP Key to select the nextcommunications parameter
OR
Press MOTOR ON / OFF Key to selectthe next programming parameter
OR
Turn the Keyswitch to horizontal, thenback to vertical to exit the programmingmode.
PROGRAM PORTS
USE BAG STOP KEY
SELECT PORT NO.,
USE BG COUNT KEY
PORT 1; 9600, N, 7, 1
DTE THE DTR / DCR THAT YOU SELECT WILLAPPLY ONLY TO THE PORT YOU HAVESELECTED IN ITEM �D�.
EXAMPLE: PORT #1
ENABLE DTR / DSR
USE BG COUNT KEY
ENABLED
PORT 1 DTR / DSR
BE SURE DISPLAY SHOWS CORRECTPORT NUMBER
(TO CHANGE, SEE ITEM �D�)
EXAMPLE:

68
rts / cts
Programming
7.6 SELECT RTS / CTS ENABLE
A. Turn Keyswitch to vertical position, holdBatch Key on Control down, and switchthe Sorter Power Switch (seeFIGURE #7) to ON.
B. Cycle MOTOR ON / OFF Key untilDisplay shows:
C. Press BAG STOP Key. The Display willshow:
D. Cycle the BAG COUNT Key until theDisplay shows the port you wish tochange.
E. Cycle the BAG STOP Key until theDisplay shows:
F. Cycle the BAG COUNT Key to enable ordisable RTS / CTS.
G. Exit using one of the following:
Press BAG STOP Key to select the nextcommunications parameter
OR
Press MOTOR ON / OFF Key to selectthe next programming parameter
OR
Turn the Keyswitch to horizontal, thenback to vertical to exit the programmingmode.
PROGRAM PORTS
USE BAG STOP KEY
SELECT PORT NO.,
USE BG COUNT KEY
PORT 1; 9600, N, 7, 1
DTE
THE RTS / CTS THAT YOU SELECT WILLAPPLY ONLY TO THE PORT YOU HAVESELECTED IN ITEM �D�.
ENABLE RTS / CTS
USE BG COUNT KEY
DISABLED
PORT 1 RTS / CTS
BE SURE DISPLAY SHOWS CORRECTPORT NUMBER
(TO CHANGE, SEE ITEM �D�)
EXAMPLE: PORT #1
EXAMPLE:

Programming
print order / bagstops
8. SELECT PRINT ORDER BY VALUE /SIZE.
A. Turn Keyswitch to vertical position, holdBatch Key on Control down, and switchthe Sorter Power Switch (seeFIGURE #7) to ON.
B. Cycle MOTOR ON / OFF Key untilDisplay shows:
C. Cycle BAG STOP Key to select either ofthe following choices:
D. When the Display shows the choice, exitby pressing the MOTOR ON / OFF Keyto advance to the next programmingselection or by turning the Keyswitch tohorizontal, then back to vertical to exitthe programming mode.
9. SELECT IF BAG STOPS ARE ACTIVEOR DISABLED.
A. Turn Keyswitch to vertical position, holdBatch Key on Control down, and switchthe Sorter Power Switch (seeFIGURE #7) to ON.
B. Cycle MOTOR ON / OFF Key untilDisplay shows:
C. Cycle BAG STOP Key to select either ofthe following choices:
D. When the Display shows the choice, exitby pressing the MOTOR ON / OFF Keyto advance to the next programmingselection or by turning the Keyswitch tohorizontal, then back to vertical to exitthe programming mode.
SET PRINT ORDER
USE BAG STOP KEY
PRINT COINS IN
ORDER OF VALUE
PRINT COINS IN
ORDER OF SIZEOR
BAG STOPS ACTIVE?
USE BAG STOP KEY
BAG STOPS ARE
ACTIVE
BAG STOPS ARE
DISABLEDOR
69

70
7--second / unit--dollar display
Programming
10. SELECT RUN CONTINUOUSLY OR7--SECOND AUTO STOP.
A. Turn Keyswitch to vertical position, holdBatch Key on Control down, and switchthe Sorter Power Switch (seeFIGURE #7) to ON.
B. Cycle MOTOR ON / OFF Key untilDisplay shows:
C. Cycle BAG STOP Key to select either ofthe following choices:
D. When the Display shows the choice, exitby pressing the MOTOR ON / OFF Keyto advance to the next programmingselection or by turning the Keyswitch tohorizontal, then back to vertical to exitthe programming mode.
11. SELECT UNIT OR DOLLAR (VALUE)DISPLAY FOR BAG STOP AND COUNT.
A. Turn Keyswitch to vertical position, holdBatch Key on Control down, and switchthe Sorter Power Switch (seeFIGURE #7) to ON.
B. Cycle MOTOR ON / OFF Key untilDisplay shows:
C. Cycle BAG STOP Key to select either ofthe following choices:
D. When the Display shows the choice, exitby pressing the MOTOR ON / OFF Keyto advance to the next programmingselection or by turning the Keyswitch tohorizontal, then back to vertical to exitthe programming mode.
SET RUN / AUTOSTOP
USE BAG STOP KEY
SORTER STOPS
AFTER 7 SECONDS
SORTER RUNS
CONTINUOUSLYOR
UNIT OR VALUE?
USE BAG STOP KEY
BAG COUNTS / STOPS
ARE DOLLAR VALUE
BAG COUNTS / STOPS
ARE UNIT VALUEOR

71
coin values
Programming
12. PROGRAM COIN VALUES.
A. Turn Keyswitch to vertical position, holdBatch Key on Control down, and switchthe Sorter Power Switch (seeFIGURE #7) to ON.
B. Cycle MOTOR ON / OFF Key untilDisplay shows:
C. Cycle BATCH Key to display the stationto be changed. The existing informationfor that coin will be displayed. Refer toFIGURE #10 for coin locations.
D. If you wish to change the existing coinvalue, proceed to Step �E�. If the coin isto be disabled (no count), programmedfor a token count (unit count -- does notadd to totals), or changed to a coin type(denomination value -- adds to total),
E. Cycle the ACCEPT Key until the Displayrequired is shown.
SET COIN SPECS
--USE BATCH KEY
DISABLED
COIN 3 VALUE
UNIT TOKEN TYPE
COIN 3 VALUEOR
COIN TYPE
COIN 3 VALUEOR
TOKEN W / VALUE
COIN 3 VALUE
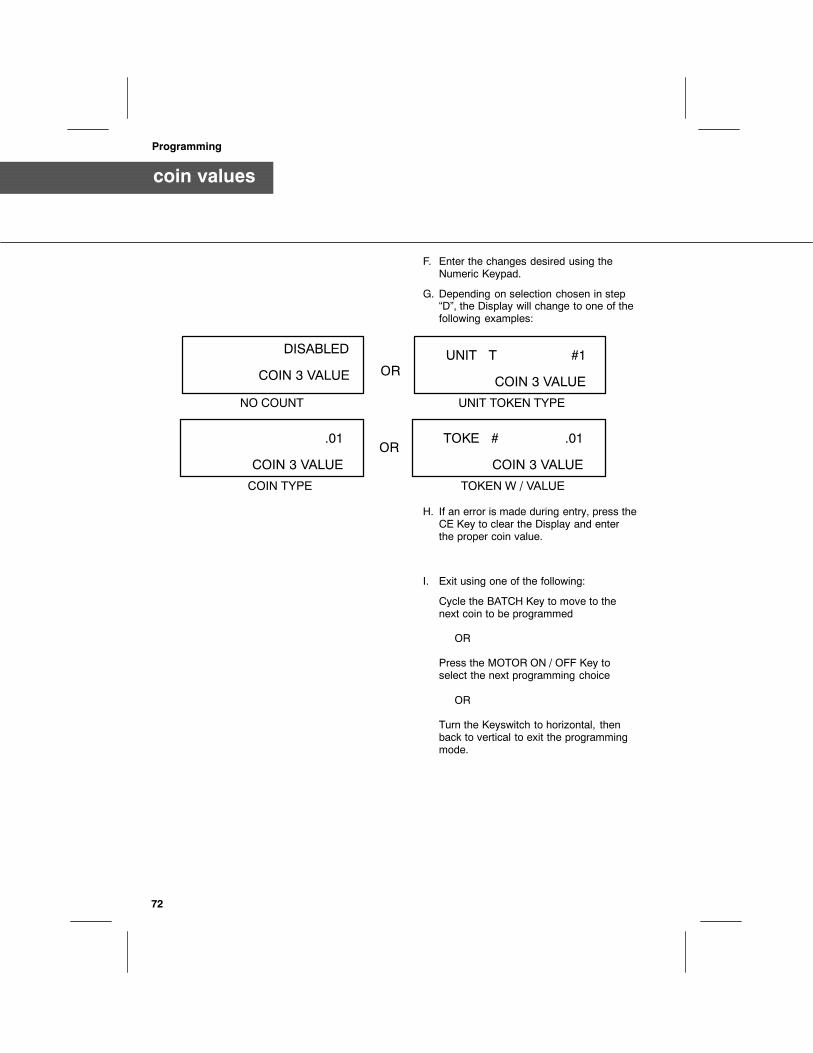
72
coin values
Programming
F. Enter the changes desired using theNumeric Keypad.
G. Depending on selection chosen in step�D�, the Display will change to one of thefollowing examples:
H. If an error is made during entry, press theCE Key to clear the Display and enterthe proper coin value.
I. Exit using one of the following:
Cycle the BATCH Key to move to thenext coin to be programmed
OR
Press the MOTOR ON / OFF Key toselect the next programming choice
OR
Turn the Keyswitch to horizontal, thenback to vertical to exit the programmingmode.
UNIT T #1
COIN 3 VALUEOR
.01
COIN 3 VALUEOR
NO COUNT UNIT TOKEN TYPE
COIN TYPE
DISABLED
COIN 3 VALUE
TOKE # .01
COIN 3 VALUE
TOKEN W / VALUE

73
currency values
Programming
13. PROGRAM CURRENCY VALUES.
A. Turn Keyswitch to vertical position, holdBatch Key on Control down, and switchthe Sorter Power Switch (seeFIGURE #7) to ON.
B. Cycle MOTOR ON / OFF Key untilDisplay shows:
C. Cycle BATCH Key to display thecurrency value to be changed (i.e.Currency #1). The existing informationfor that denomination will be displayed.
EXAMPLE: Currency denomination #1($1.00) shown.
D. To change the currency value, enter thenew value using the Numeric Keypad. Ifan error is made during entry, press theCE Key to clear the Display and enterthe proper coin value.
F. Exit using one of the following:
Cycle the BATCH Key to move to thenext coin to be programmed
OR
Press the MOTOR ON / OFF Key toselect the next programming choice
OR
Turn the Keyswitch to horizontal, thenback to vertical to exit the programmingmode.
CURRENCY SPECS
--USE BATCH KEY
1.00
CURRENCY 1 VALUE
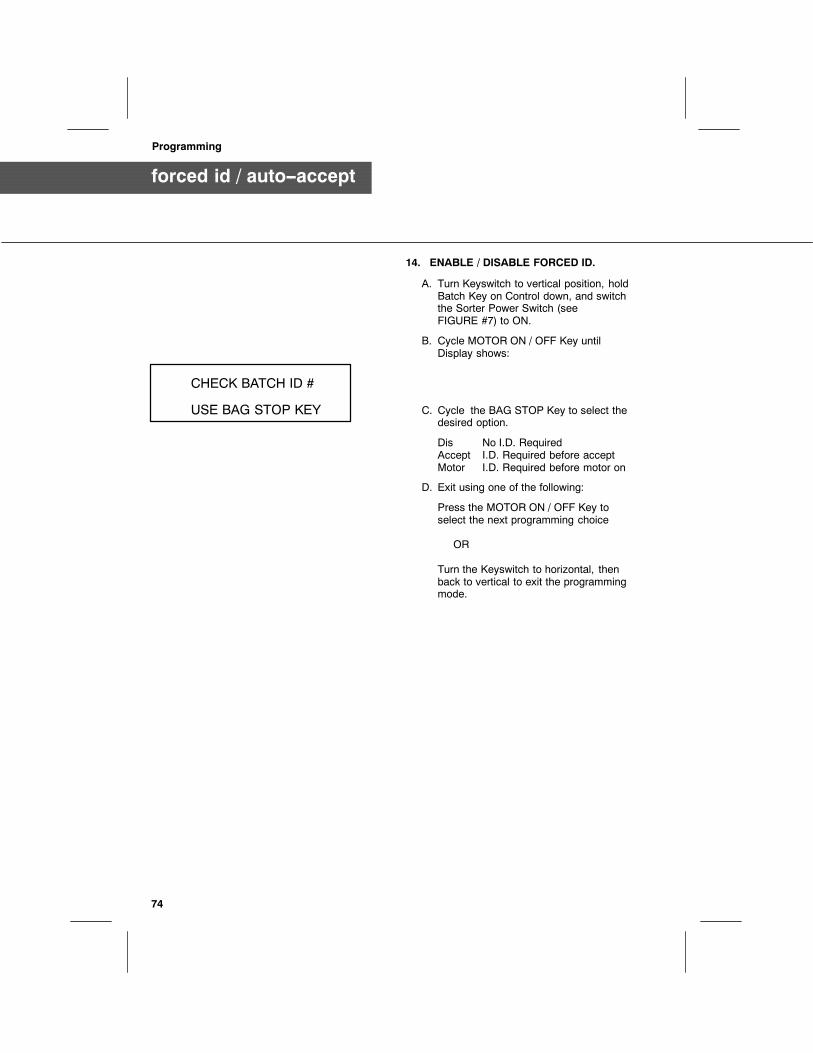
74
forced id / auto--accept
Programming
14. ENABLE / DISABLE FORCED ID.
A. Turn Keyswitch to vertical position, holdBatch Key on Control down, and switchthe Sorter Power Switch (seeFIGURE #7) to ON.
B. Cycle MOTOR ON / OFF Key untilDisplay shows:
C. Cycle the BAG STOP Key to select thedesired option.
Dis No I.D. RequiredAccept I.D. Required before acceptMotor I.D. Required before motor on
D. Exit using one of the following:
Press the MOTOR ON / OFF Key toselect the next programming choice
OR
Turn the Keyswitch to horizontal, thenback to vertical to exit the programmingmode.
CHECK BATCH ID #
USE BAG STOP KEY

75
fuse replacement
Circuit Protection
The Sorter employs one Fuse in each leg of theincoming AC line. If either Fuse becomesinoperative, the Sorter will stop.
If you are unsure of the size / type ofreplacement fuse, or require assistance inreplacing the fuse, contact your AuthorizedService Representative.
FIGURE #30FUSE LOCATION
DISCONNECT SORTER FROM POWERBEFORE EXAMINING OR REPLACINGFUSES. ALWAYS REPLACE THE FUSEWITH THE CORRECT SIZE AND TYPE
FOR CONTINUED CIRCUITPROTECTION.
FUSES

76
sorter cleaning / jam removal
Operator Maintenance
Many cleaning--related accidents arecaused by failure to follow basic safetyrules or written precautions. Accidentscan be avoided if the operator iscompletely familiar with the Sorter and itsoperation.
Improper or inadequate maintenance orcare of the Sorter can be dangerous andcould result in damage to the Sorter orpersonal injury or death to you or otherpersons.
The frequency of any cleaning program must bedetermined by the operator, and will ultimatelybe controlled by operational environment(condition of coin, frequency of use, etc.). ThePower Cord should always be disconnectedbefore cleaning.
DISCONNECT THE POWER CORDFROMTHE POWER SOURCE BEFORECLEANING OR REMOVING A JAMMEDCOIN OR OTHER OBJECT. THE COINTOTALS AND BAGSTOP QUANTITIESWILL BE RETAINED BY THE BATTERYBACKUP CIRCUITRYWHEN THE POWERCORD IS DISCONNECTED.
NEVER ATTEMPT CLEANING WHEN THESORTER IS CONNECTED TO POWER.
NEVER ALLOW TOOLS, FINGERS, HAIR,OR CLOTHING TO COME NEAR MOVINGPARTS.
!!! IMPORTANT SAFETY INFORMATION !!!
77
sorter cleaning / jam removal
Operator Maintenance
1. General Cleaning
The Sorter should be kept clean and freefrom dirt and dust. Clean the outside with asoft cloth and a mild soap. NEVER usealcohol, Ketone, or any harsh chemicals onthe outside surfaces. NEVER spray anyliquid directly onto the Control or inside theSorter. A small portable vacuum is handy forremoving coin dust buildups from surfacesinside the Sorter.
2. Cleaning Coin Sensors / Clearing Jams inSorting Area
Should a badly bent or mutilated coin orother object enter the sorting area, it couldbecome jammed and must be removedbefore further operation.
The Coin Sensors, located at the coin exitpoints, control the counting and must bekept clean and free of dirt buildups, coindust, bag strings, etc., at all times.
Should either situation arise, proceed asfollows:
a. Disconnect the Sorter from Power.
b. Close the Inspection Pan completely andthen lift straight up to remove.
c. Lift the Upper Front Cover for access tothe finned Elastic Sorting Disc.
Note: A short metal rod, attached to theUpper Front Cover will drop down when theCover is raised to support the Cover in theupright (open) position.
d. Remove the Disc by removing theElastomeric (O--Ring) Retainer andunscrewing the large knob in the middleof the Disc.
e. CAREFULLY clean each Count Sensorwith a cotton--tipped swab.
f. Reverse the process to replace the Disc.

78
sorter cleaning / jam removal
Operator Maintenance
g. Close the Upper Front Cover and replacethe Inspection Pan. Connect the Sorterto Power, and, if desired, test for properoperation with coin as follows:
FIGURE #31COUNT SENSOR CLEANING

79
sorter cleaning / jam removal
Operator Maintenance
TESTING WITH COIN AFTERCLEANING (OPTIONAL)
a. Record all Batch and Bag/Countquantities.
b. Press BATCH Key.
c. Press CLEAR Key twice to clear theBatch Total Display.
d. Press BAG COUNT Key.
e. Press CLEAR Key twice to clear BagCount quantities.
f. Test as required.
g. Press BATCH Key.
h. Press CLEAR Key twice.
i. Press BAG COUNT Key.
j. Press CLEAR Key twice.
k. Enter Partial Bag counts and resumeoperation.
4. Clearing jams in the Receiving Area.
Should a Coin Drawer or Bag become overfilled,a Sensor will stop the Sorting Motor.
The likely causes for this condition are:
a. Incorrect bagstop setting for size ofDrawer or Bag.
b. Failure to empty Drawer or Bag atbagstop.
c. Improperly installed or folded Coin Bag.
If a Coin Drawer is overfilled, remove theDrawer slowly so that coins are not spilled.
If a Coin Bag is overfilled, the coins may alsoback--up inside the Coin Chute. Straighten theBag and / or shake the Chute to allow the coinsto fall / settle.
If the jam persists, carefully remove the Chute(place your hand under the Chute to retain thecoins), empty the Chute into the Coin Bag,replace the Chute and resume operation.

80
service
Support
SERVICEA worldwide network of factory--trained servicespecialists are available either on call or forexecution of preventative maintenanceprograms scheduled through formal servicecontracts.
Our policy is to continually improve products.We reserve the right to change specificationsand / or designs without notice.


Reference: 0000408
De La Rue
DDDDEEEE LLLLAAAA RRRRUUUUEEEECCCCAAAASSSSHHHH SSSSYYYYSSSSTTTTEEEEMMMMSSSS IIIINNNNCCCC....Box 200705 S. 12th StreetWatertown, WI 53094USATel: (920) 262-3300Fax: (920) 261-1783
DDDDEEEE LLLLAAAA RRRRUUUUEEEECCCCAAAASSSSHHHH SSSSYYYYSSSSTTTTEEEEMMMMSSSSWalton RoadFarlington, PortsmouthHampshire PO6 1TJEnglandTel: +44 (0) 1705 383161Fax: +44 (0) 1705 325822
Web: http://www.delarue.com


![[Presenticcon Pilot] Rang Mudo Nak Singkarak](https://static.documents.pub/doc/80x56/55b1d3a6bb61eb6a368b46cf/presenticcon-pilot-rang-mudo-nak-singkarak.jpg)


