Toolpaths for Cat HullRough Pocket and Finish Blend
A. Stock Setup.Step 1. Click Machine Type Menu > Mill > Default.
Step 2. If necessary, display Operations Manager. Use Alt-O
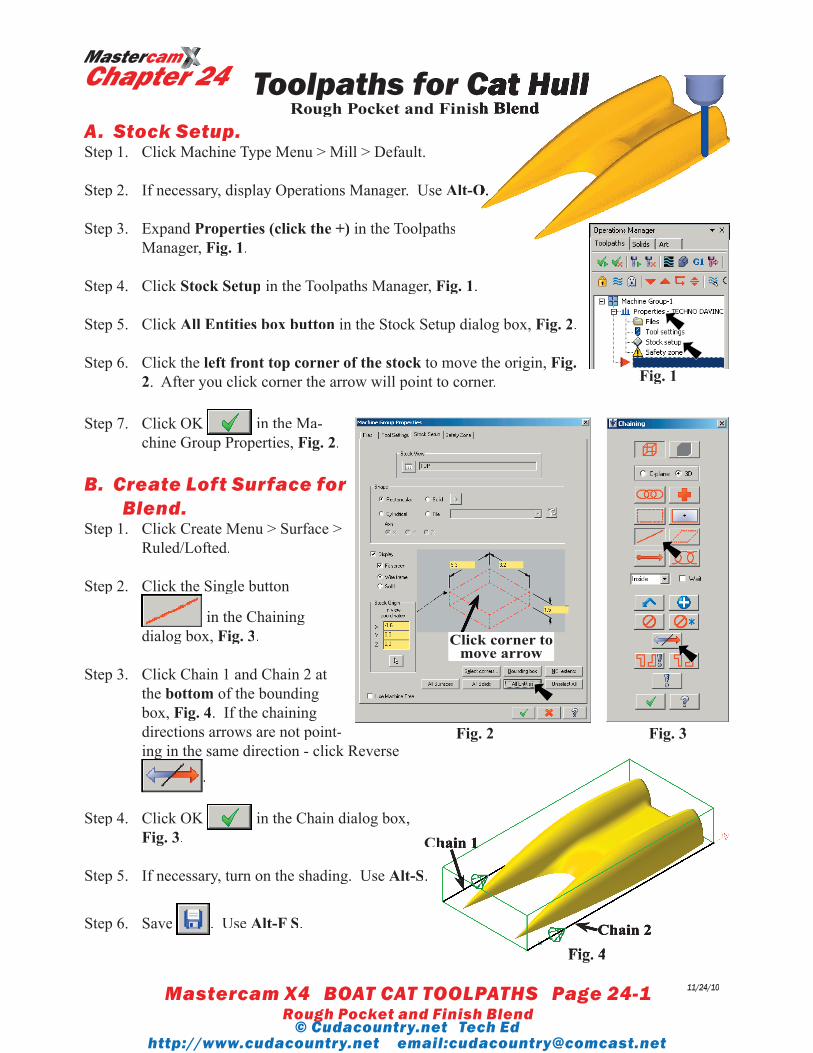
Step 3. Expand Properties (click the +) in the ToolpathsManager, Fig. 1.
Step 4. Click Stock Setup in the Toolpaths Manager, Fig. 1.
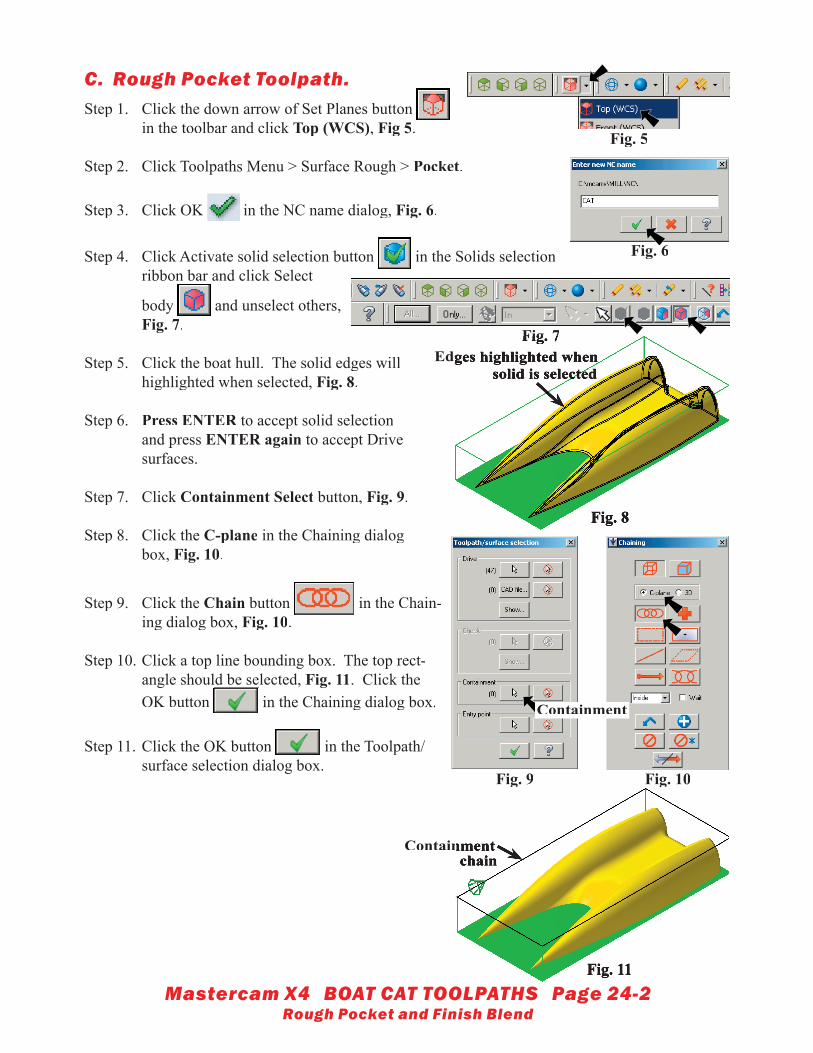
Step 5. Click All Entities box button in the Stock Setup dialog box, Fig. 2.
Step 6. Click the left front top corner of the stock to move the origin, left front top corner of the stock to move the origin, left front top corner of the stock Fig. 2. After you click corner the arrow will point to corner.
Step 7. Click OK in the Ma-chine Group Properties, Fig. 2.
B. Create Loft Surface for Blend.
Step 1. Click Create Menu > Surface > Ruled/Lofted.
Step 2. Click the Single button Step 2. Click the Single button
in the Chaining dialog box, Fig. 3.
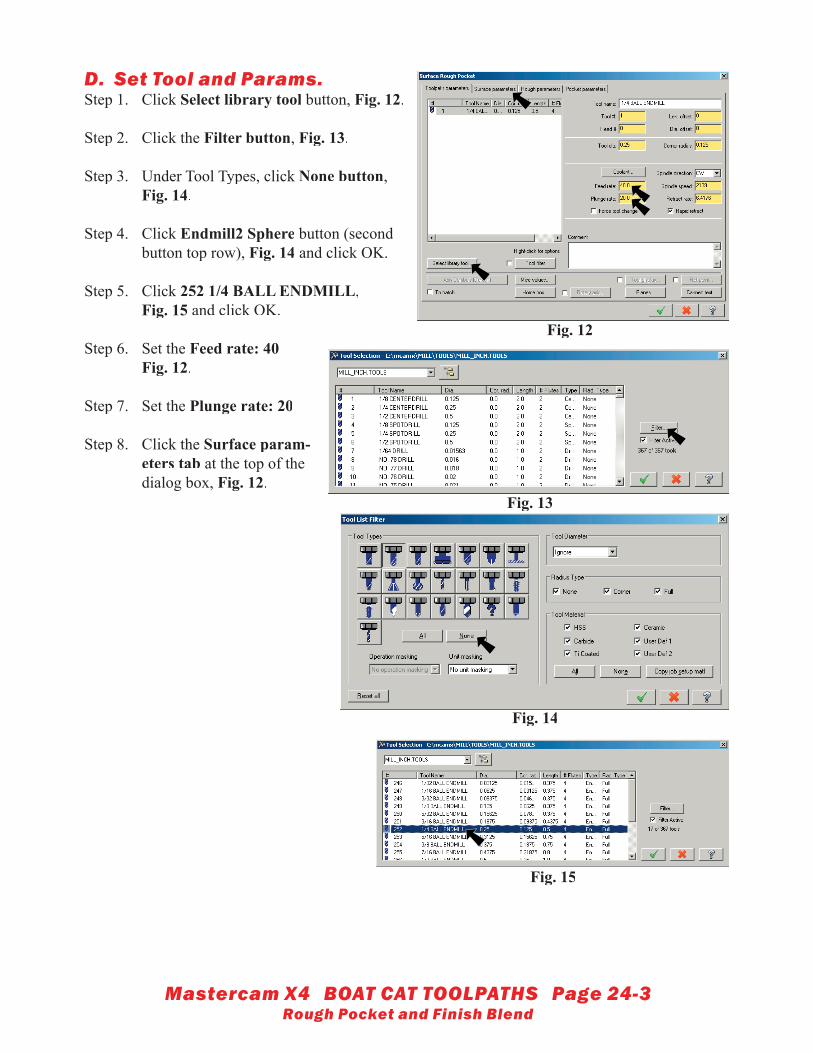
Step 3. Click Chain 1 and Chain 2 at the bottom of the bounding box, Fig. 4. If the chaining directions arrows are not point-ing in the same direction - click Reverse ing in the same direction - click Reverse
.
Step 4. Click OK in the Chain dialog box, Fig. 3.
Step 5. If necessary, turn on the shading. Use Alt-S.
Step 6. Save . Use Alt-F S.
Fig. 1
Fig. 2 Fig. 3
Fig. 4Fig. 4
Chain 1Chain 1
Chain 2
Toolpaths for Cat HullRough Pocket and Finish Blend
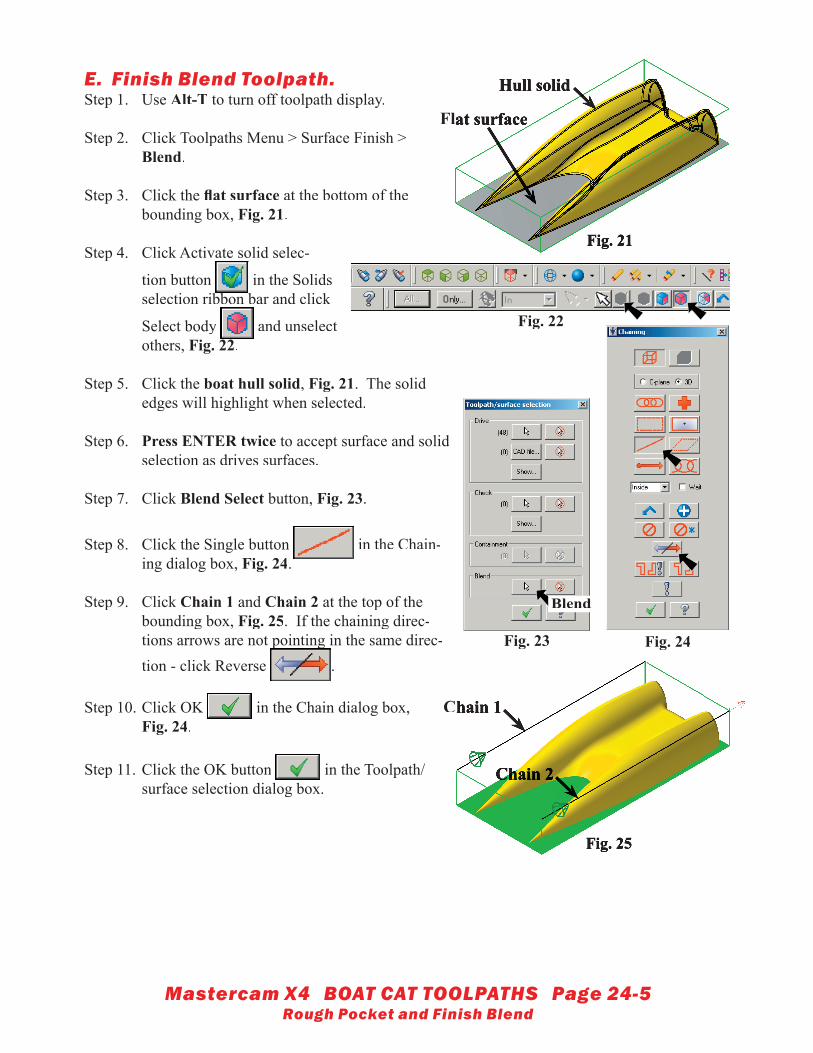
E. Finish Blend Toolpath.Step 1. Use Alt-T to turn off toolpath display.
Step 2. Click Toolpaths Menu > Surface Finish > Blend.
Step 3. Click the fl at surface at the bottom of the bounding box, Fig. 21.
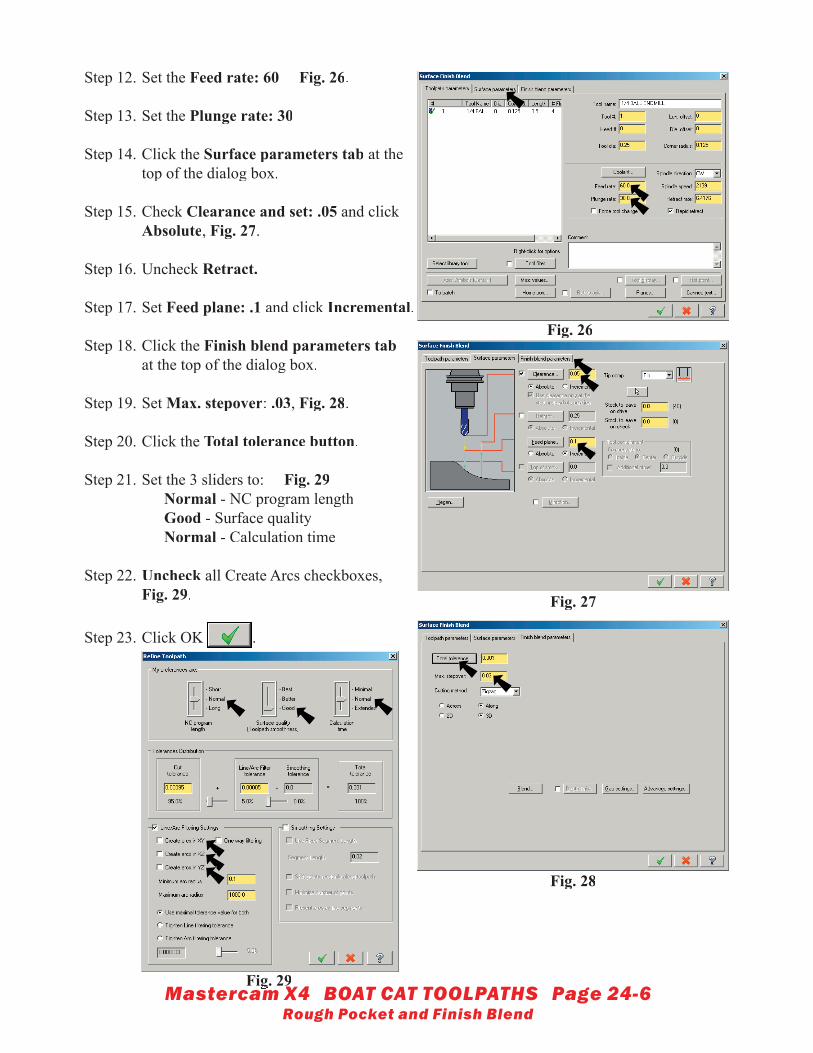
Step 4. Click Activate solid selec-
tion button
Step 4. Click Activate solid selec-
in the Solids selection ribbon bar and click
Select body and unselect others, Fig. 22.
Step 5. Click the boat hull solid, Fig. 21. The solid edges will highlight when selected.
Step 6. Press ENTER twice to accept surface and solid selection as drives surfaces.
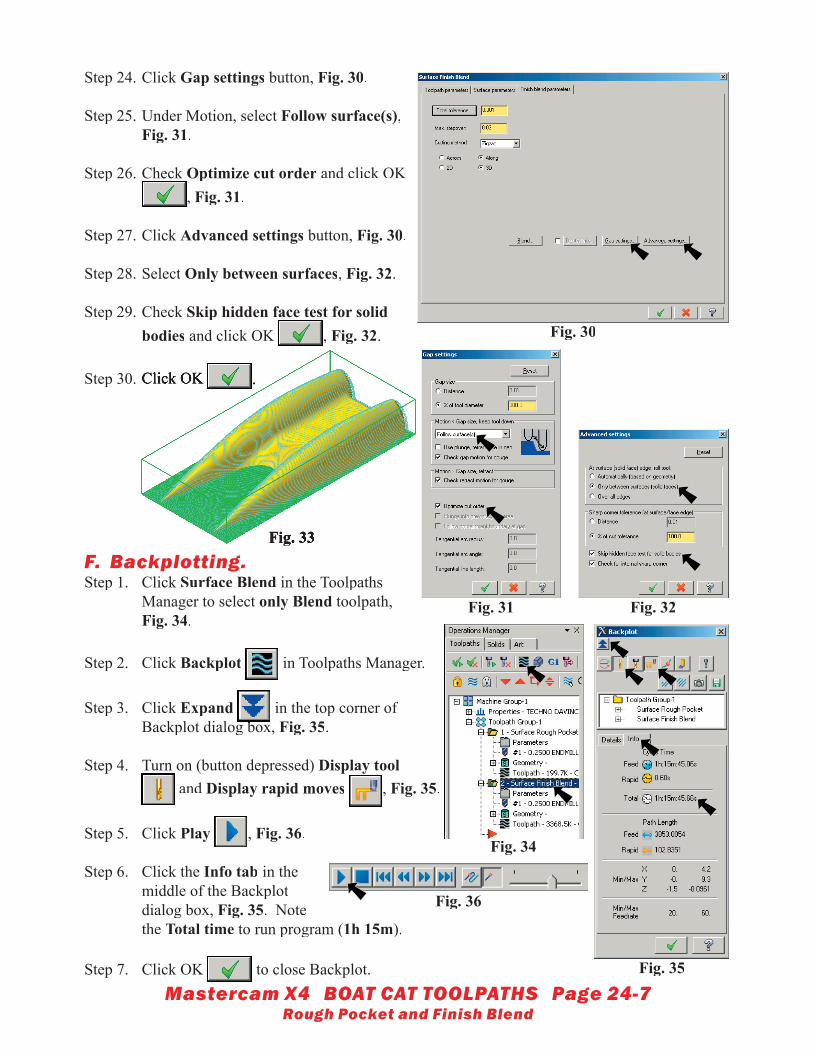
Step 7. Click Blend Select button, Fig. 23.
Step 8. Click the Single button in the Chain-ing dialog box, Fig. 24.
Step 9. Click Chain 1 and Chain 2 at the top of the bounding box, Fig. 25. If the chaining direc-tions arrows are not pointing in the same direc-tion - click Reverse tions arrows are not pointing in the same direc-
.
Step 10. Click OK in the Chain dialog box, Fig. 24.
Step 11. Click the OK button in the Toolpath/surface selection dialog box.