- 1 - Might & Magic Might & Magic Might & Magic Might & Magic III III III III – Cartes et plans Cartes et plans Cartes et plans Cartes et plans Les Iles de Terra La découpe du monde est faite en tranches verticales Ce document est incomplet il manque certaines zones
Transcript
- 1 -
Might & Magic Might & Magic Might & Magic Might & Magic IIIIIIIIIIII –––– Cartes et plansCartes et plansCartes et plansCartes et plans
Les Iles de Terra La découpe du monde est faite en tranches verticales Ce document est incomplet il manque certaines zones
- 2 -
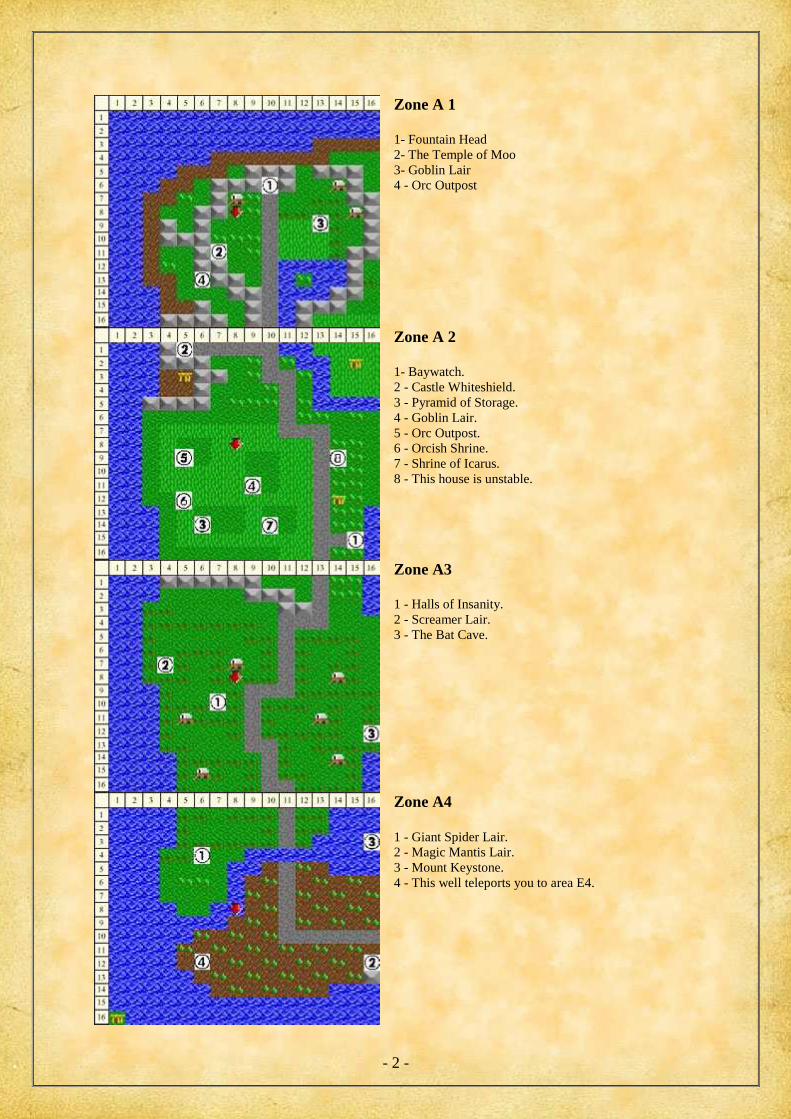
Zone A 1 1- Fountain Head 2- The Temple of Moo 3- Goblin Lair 4 - Orc Outpost
Zone A 2 1- Baywatch. 2 - Castle Whiteshield. 3 - Pyramid of Storage. 4 - Goblin Lair. 5 - Orc Outpost. 6 - Orcish Shrine. 7 - Shrine of Icarus. 8 - This house is unstable.
Zone A3 1 - Halls of Insanity. 2 - Screamer Lair. 3 - The Bat Cave.
Zone A4
1 - Giant Spider Lair. 2 - Magic Mantis Lair. 3 - Mount Keystone. 4 - This well teleports you to area E4.
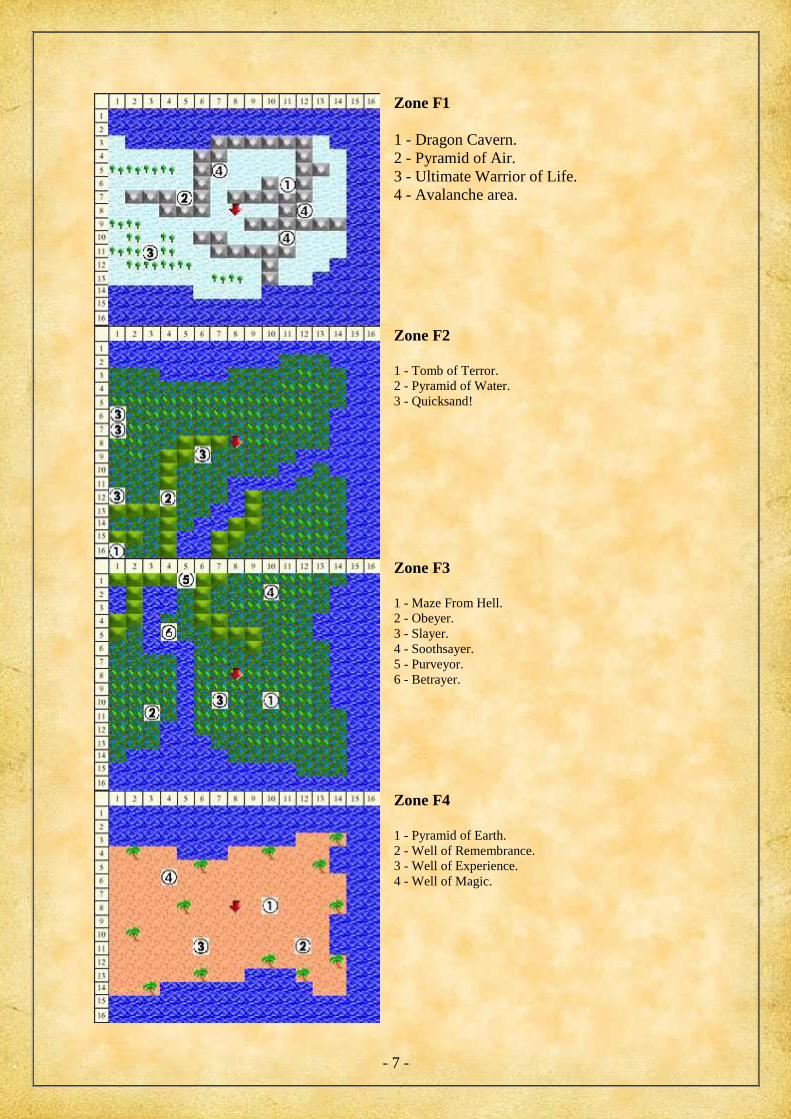
1 - Pyramid of Earth. 2 - Well of Remembrance. 3 - Well of Experience. 4 - Well of Magic.
- 8 -
Castle Whiteshield
1 - Entrance/Exit. 2 - King Zealot. 3 - Praythos. 4 - Entrance to the Whiteshield Dungeon. You'll need the password to get in.
Whiteshield Dungeon 1 - Entrance/Exit
Castle Blood Reign
1 - Entrance/Exit. 2 - King Tumult. 3 - Chathos. 4 - Entrance to the Blood Reign Dungeon. You'll need the password to get in.
Blood Reign Dungeon 1 - Entrance/Exit. 2 - The Prison.
- 9 -
Castle Dragontooth
1 - Entrance/Exit. 2 - King Malefactor. 3 - Pathos. 4 - Entrance to the Dragontooth Dungeon. You'll need the password to get in.
Dragontooth Dungeon
1 - Entrance/Exit. 2 - The Brewery.
Fountain Head Town
1 - The Inn. 2 - The Blacksmith's Shop. 3 - The Training Center. 4 - The Tavern. 5 - Raven's Guild. 6 - The Temple. 7 - The Bank. 8 - The Magic Mirror.
Fountain Head Cavern
1 - Entrance. 2 - Here's another exit.
- 10 -
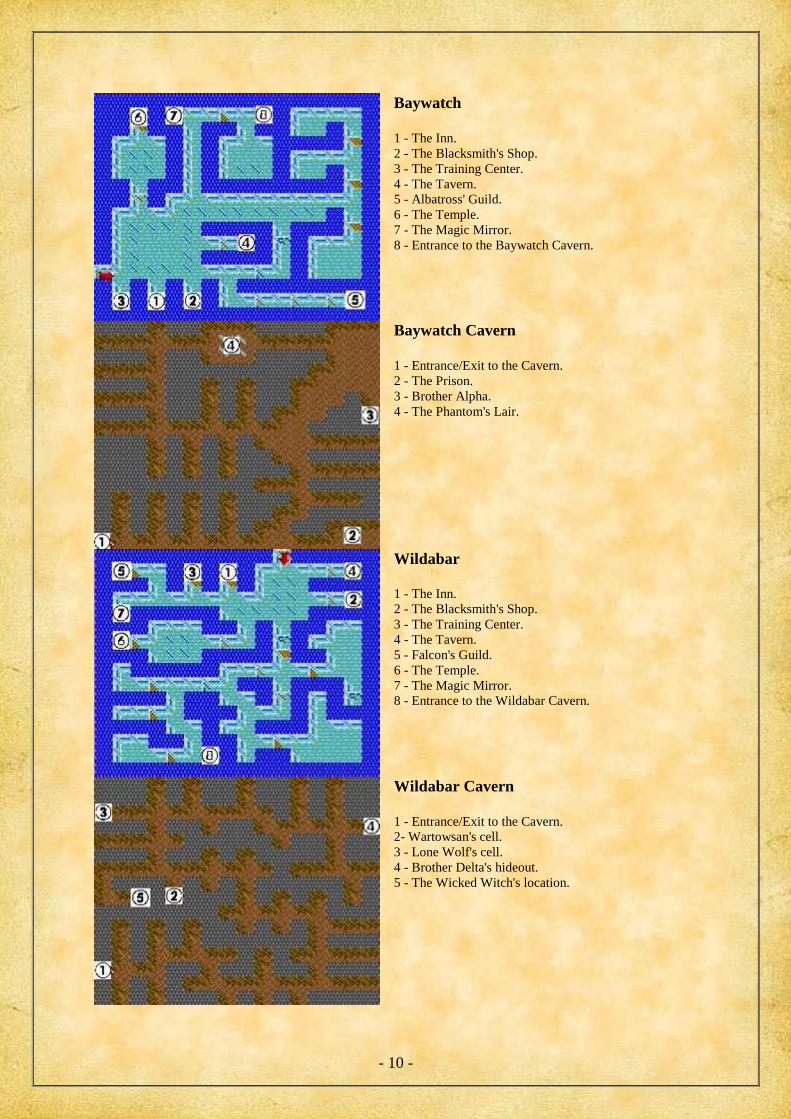
Baywatch
1 - The Inn. 2 - The Blacksmith's Shop. 3 - The Training Center. 4 - The Tavern. 5 - Albatross' Guild. 6 - The Temple. 7 - The Magic Mirror. 8 - Entrance to the Baywatch Cavern.
Baywatch Cavern
1 - Entrance/Exit to the Cavern. 2 - The Prison. 3 - Brother Alpha. 4 - The Phantom's Lair.
Wildabar 1 - The Inn. 2 - The Blacksmith's Shop. 3 - The Training Center. 4 - The Tavern. 5 - Falcon's Guild. 6 - The Temple. 7 - The Magic Mirror. 8 - Entrance to the Wildabar Cavern.
Wildabar Cavern
1 - Entrance/Exit to the Cavern. 2- Wartowsan's cell. 3 - Lone Wolf's cell. 4 - Brother Delta's hideout. 5 - The Wicked Witch's location.
- 11 -
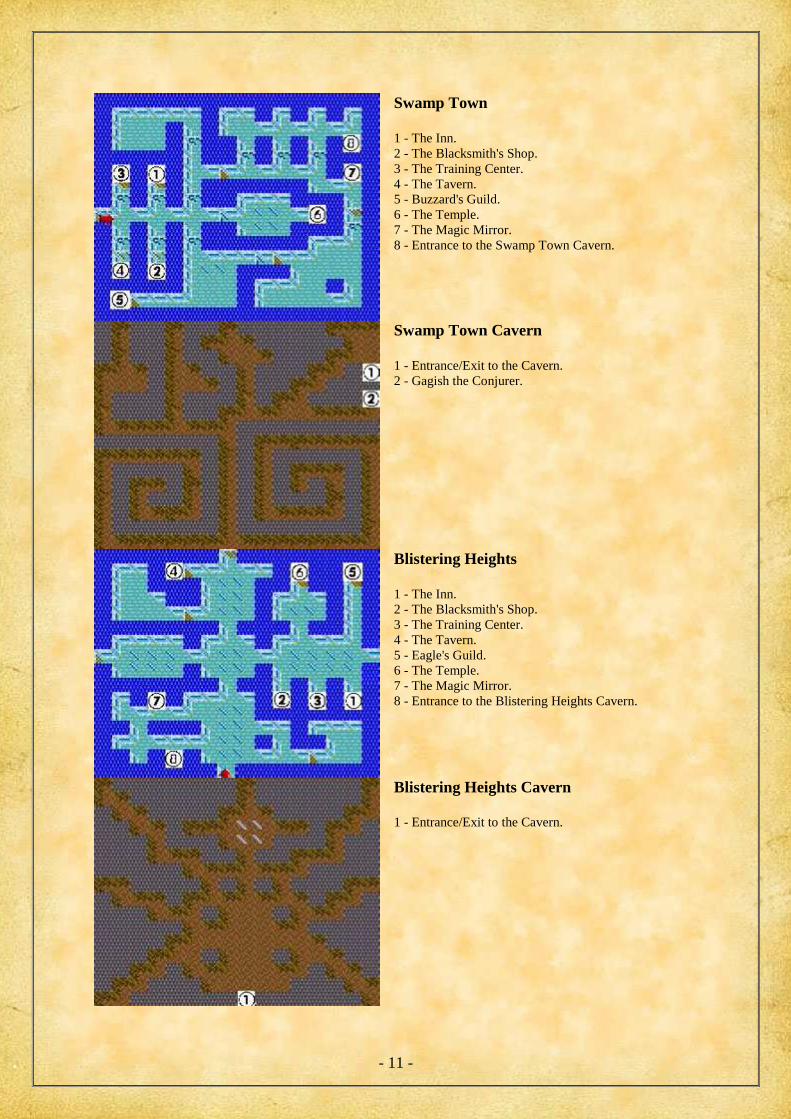
Swamp Town
1 - The Inn. 2 - The Blacksmith's Shop. 3 - The Training Center. 4 - The Tavern. 5 - Buzzard's Guild. 6 - The Temple. 7 - The Magic Mirror. 8 - Entrance to the Swamp Town Cavern.
Swamp Town Cavern
1 - Entrance/Exit to the Cavern. 2 - Gagish the Conjurer.
Blistering Heights
1 - The Inn. 2 - The Blacksmith's Shop. 3 - The Training Center. 4 - The Tavern. 5 - Eagle's Guild. 6 - The Temple. 7 - The Magic Mirror. 8 - Entrance to the Blistering Heights Cavern.
Blistering Heights Cavern 1 - Entrance/Exit to the Cavern.
- 12 -
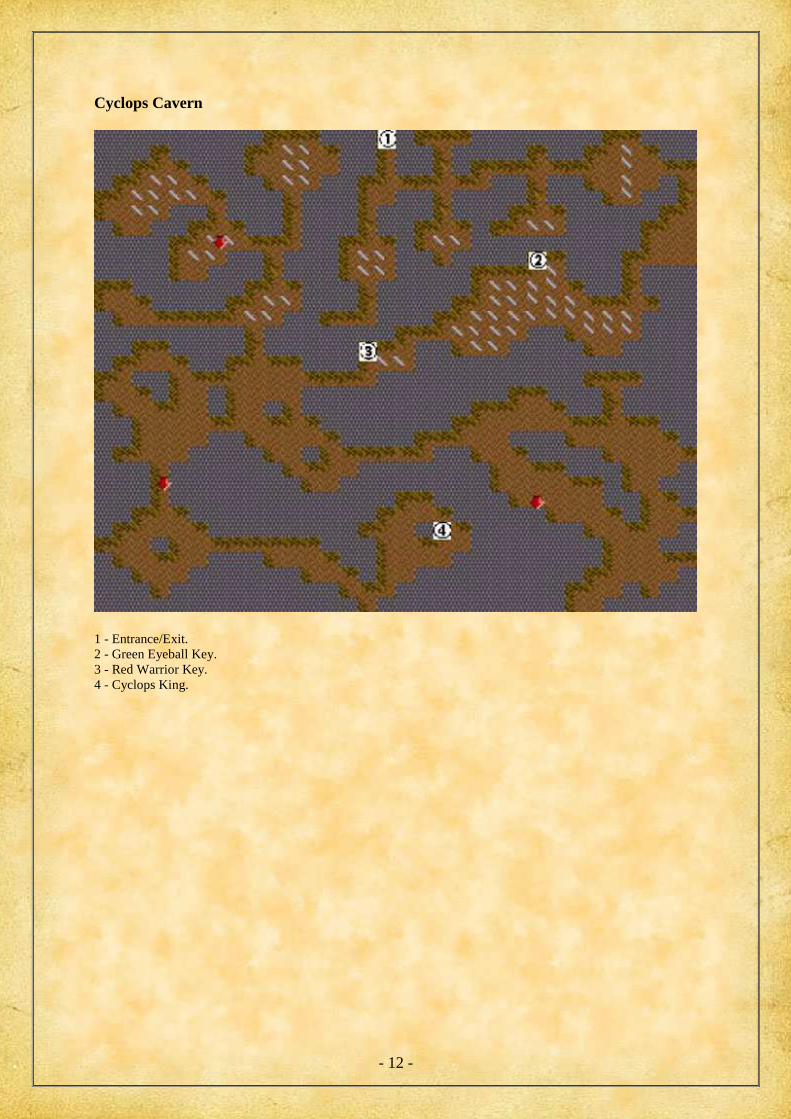
Cyclops Cavern
1 - Entrance/Exit. 2 - Green Eyeball Key. 3 - Red Warrior Key. 4 - Cyclops King.


![Might and Magic - Book I [Cluebook]](https://static.documents.pub/doc/80x56/577cc9891a28aba711a40290/might-and-magic-book-i-cluebook.jpg)


